

Page 1
wwvv.GEAppliances.com
Safety Instructions ........ 2-5
bO
°_
Operating Instructions
Clock and Timer ............ 13
Control Lockout ............ 13
Cookware ................. 8, 9
Oven .................. 10-20
Sabbath Feature ............. 20
Self-Cleaning ............ 16, 17
Special Features .......... 18, 19
Surface Units ............. 6, 7
Thermostat ................ 15
Timed Baking and Roasting . . .14
Care and Cleaning
Broiler Pan and Grid ........ 23
Control Panel .............. 22
Door ..................... 22
Glass Cooktop ........... 25, 26
Knobs .................... 21
Light Bulb ................. 24
Packaging Tape ............. 21
Racks ..................... 23
Stainless Steel Surfaces ....... 21
Storage Drawer Removal ..... 23
Vent ..................... 21
JDP4 7
JSP4 7
Troubleshooting Tips
Bet:ore You Call
For Service ............. 27-30
Consumer Support
Consumer Support... Back Cover
Product Registration ...... 33, 34
Warranty .................. 35
Write the model and serial
numbers here:
Model #
Serial #
You can find them on a label
behind the open oven door
on the lower left corner of the
range fi'ame.
164D4290P095 49-80137 07-02JR
Page 2
IMPORTANTSAFETYINFORMATION.
READALLINSTRUCTIONSBEFOREUSING.
WARNING!
For your safe_ the information in this manual must be followed to minimize the risk of fire, electric
shock, or to prevent property damage, personal inju_ or loss of life.
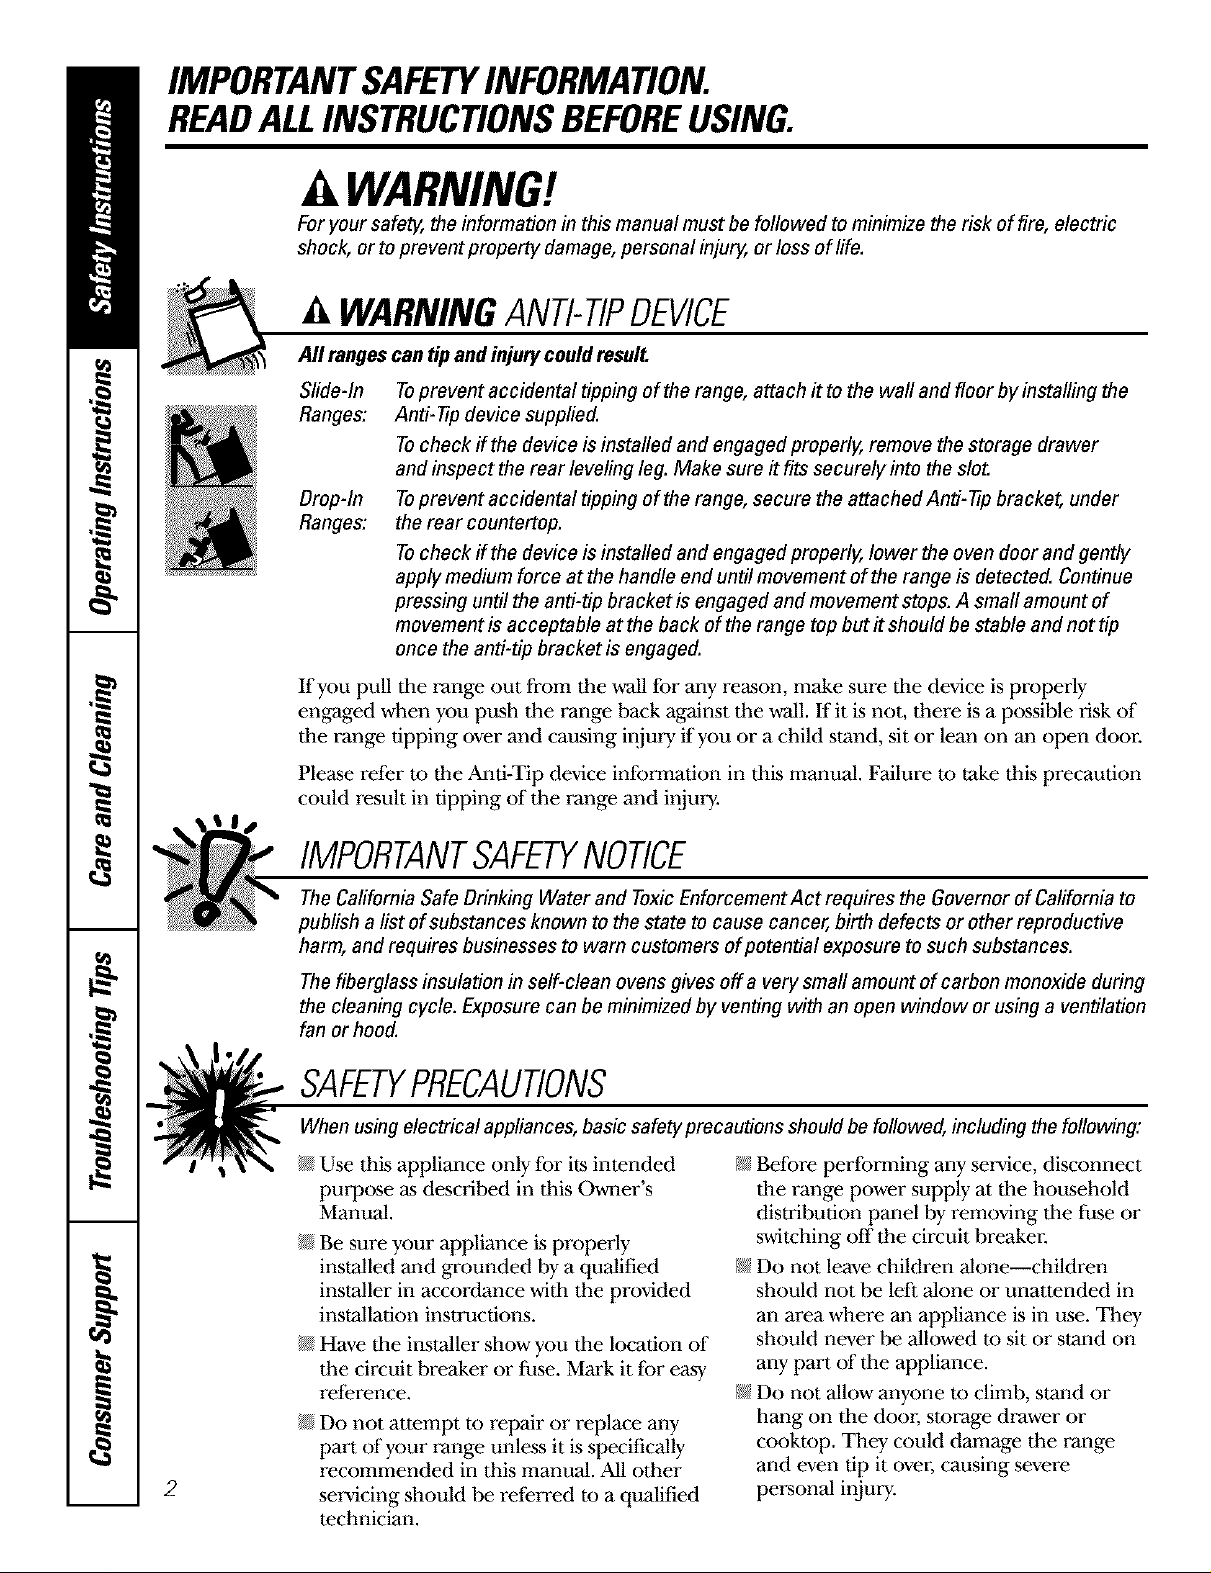
WARNINGANTI-TIPDEVICE
All ranges can tip and injurycould result.
Slide-In
Ranges:
Drop-In
Ranges:
Toprevent accidental tipping of the range, attach it to the wall and floor by installing the
Anti-tip device supplied.
Tocheck if the device is installed and engaged properly, remove the storage drawer
and inspect the rear leveling leg. Make sure it fits securely into the slot.
Toprevent accidental tipping of the range, secure the attached Anti- tip bracket, under
the rear countertop.
Tocheck if the device is installed and engaged properly, lower the oven door and gently
apply medium force at the handle end until movement of the range is detected. Continue
pressing until the anti-tip bracket is engaged and movement stops. A small amount of
movement is acceptable at the back of the range top but it should be stable and not tip
once the anti-tip bracket is engaged.
If you pull the range out from the wall fbr any reason, make sure tile device is properly
engaged when you push the range back against the wall. If"it is not, there is a possible risk of
tile range tipping over and causing injur T if you or a child stand, sit or lean on an open d_r.
Please refer m the And-Tip device information in this manual. Failure m take this precaution
could result in tipping of the range and inju*y.
IMPORTANTSAFETYNOTICE
The Califomia Safe Drinking Water and ToxicEnforcement Act requires the Govemor of Califomia to
publish a list of substances known to the state to cause cancer, birth defects or other reproductive
harm, and requires businesses to warn customers of potential exposure to such substances.
Thefiberglass insulation in self-clean ovens gives off a very small amount of carbon monoxide during
the cleaning cycle. Exposure can be minimized by venting with an open window or using a ventilation
fan or hood.
SAFETYPRECAUTIONS
When using electrical appliances, basic safety precautions should be followed, including the following:
N Use this appliance only fbr its intended
purpose as described in this Owner's
Manual.
@ Be sure your appliance is properly
installed and grounded by a qualified
installer in accordance with the provided
installation instructions.
@ Have the installer show you the location of
the circuit breaker or lilse. Mark it fbr easT
reference.
@ Do not attempt m repair or replace aW
part of your range unless it is specifically
2
recommended in this manual. All other
se*vicing should be referred m a qualified
technician.
@ Befbre perfbrming aW service, disconnect
the range power supply at the household
distribution panel by removing the fuse or
switching off the circuit breaker.
@ Do not leave children alone--children
should not be left alone or unattended in
an area where an appliance is in use. They
should never be allowed m sit or stand on
any part of the appliance.
@ Do not allow anyone m climb, stand or
hang on the door; storage drawer or
cooktop. They could damage the range
and even tip it over, causing severe
pe_:sonal injm T.
Page 3
www.GEAppliances.com
WARNING!
SAFETYPRECAUTIONS
Do not operate the oven or cooktop controls if the glass is broken. Food splatter or cleaning solution
may penetrate a broken control panel or cooktop and create a risk of electrical shock. Contact a
qualified technician immediately should your glass control panel or cooktop become broken.
N Do not sture flammable materials in an
oven or near tile cooktup.
CAUtiON:Items of interest to
children should not be stured in cabinets
above a range or on tile back of a range--
children climbing on tile range tu reach
items could be seriously irgured.
N Never wear loose41tting or hanging
garments while using the appliance. Be
careli_l when reaching lbr items stured
over tile range. Flammable material could
be ignited if brought in contact with hot
surface units or heating elements and may
cause severe burns.
N Use only di T _t holders-moist or damp
pot holders on hot surfaces may result in
burns [*om steam. Do not let pot holders
tuuch hot surface units or heating
elements. Do not use a towel or other
bulky cloth in place of pot holders.
@ Do not use water on gTease fires. Never
pick up a flaming pan. Turn the controls
off. Smother a flaming pan on a surface
unit by covering tile pan completely with
a well41tting lid, cookie sheet or flat tray.
Use a multi-pu*_se dry chemical or
lbam-type fire extinguisher
Flaming grease outside a pan can be put
out by covering it with baking soda or; if
available, by using a multi-pu*pose dry
chemical or lbam-type fire extinguisher
Flame in the oven can be smothered
completely by closing the oven d_r and
turning the oven off or by using a multi-
purpose dry chemical or lbam-type fire
extinguisher
N For your s_ety, never use your appliance
lbr warming or heating the r_m.
N Do not let cooking grease or other
flammable materials accumulate in or
near the range.
_;_Do not touch the surt:ace units, the
heating elements or the interior surt:ace
of the oven. These surl:aces may be hot
enough tu burn even though they are dark
in color. During and _ter use, do not
tuuch, or let clothing or other flammable
materials contact the surt:ace units, areas
nearby the surl:ace units or any interior
area of the oven; allow s_cient time for
cooling first.
Potentially hot surfaces include the
cooktop, areas facing the cooktup, oven
vent opening, surt:aces near the opening,
crevices around the oven door"
REMEMBER: The inside surt:ace of the oven
may be hot when the door is opened.
@ Do not sture or use combustible materials,
gasoline or other flammable vapors and
liquids in the vicinity of this or any other
appliance.
N Keep the hood and gTease filters clean
tu maintain good venting and tu avoid
grease fires.
N Teach children not tu play with the
controls or any other part of the range.
N Mways keep dish towels, dish cloths, pot
holders and other linens a _e distance
t*om your range.
N Mways keep wooden and plastic utensils
and canned food a s_e distance from
your range.
N Always keep combustible wall coverings,
curtains or drapes a s_e distance from
your range.
COOKMEATANDPOULTRYTHOROUGHLY...
Cookmeatandpoultry thoroughly--meat to at leastan INTERNALtemperatureof 160°Fandpoultry
to at leastan INTERNALtemperatureof 180°ECookingto thesetemperaturesusuallyprotectsagainst
foodbomeillness.
3
Page 4
IMPORTANTSAFETYINFORMATION.
READALLINSTRUCTIONSBEFOREUSING.
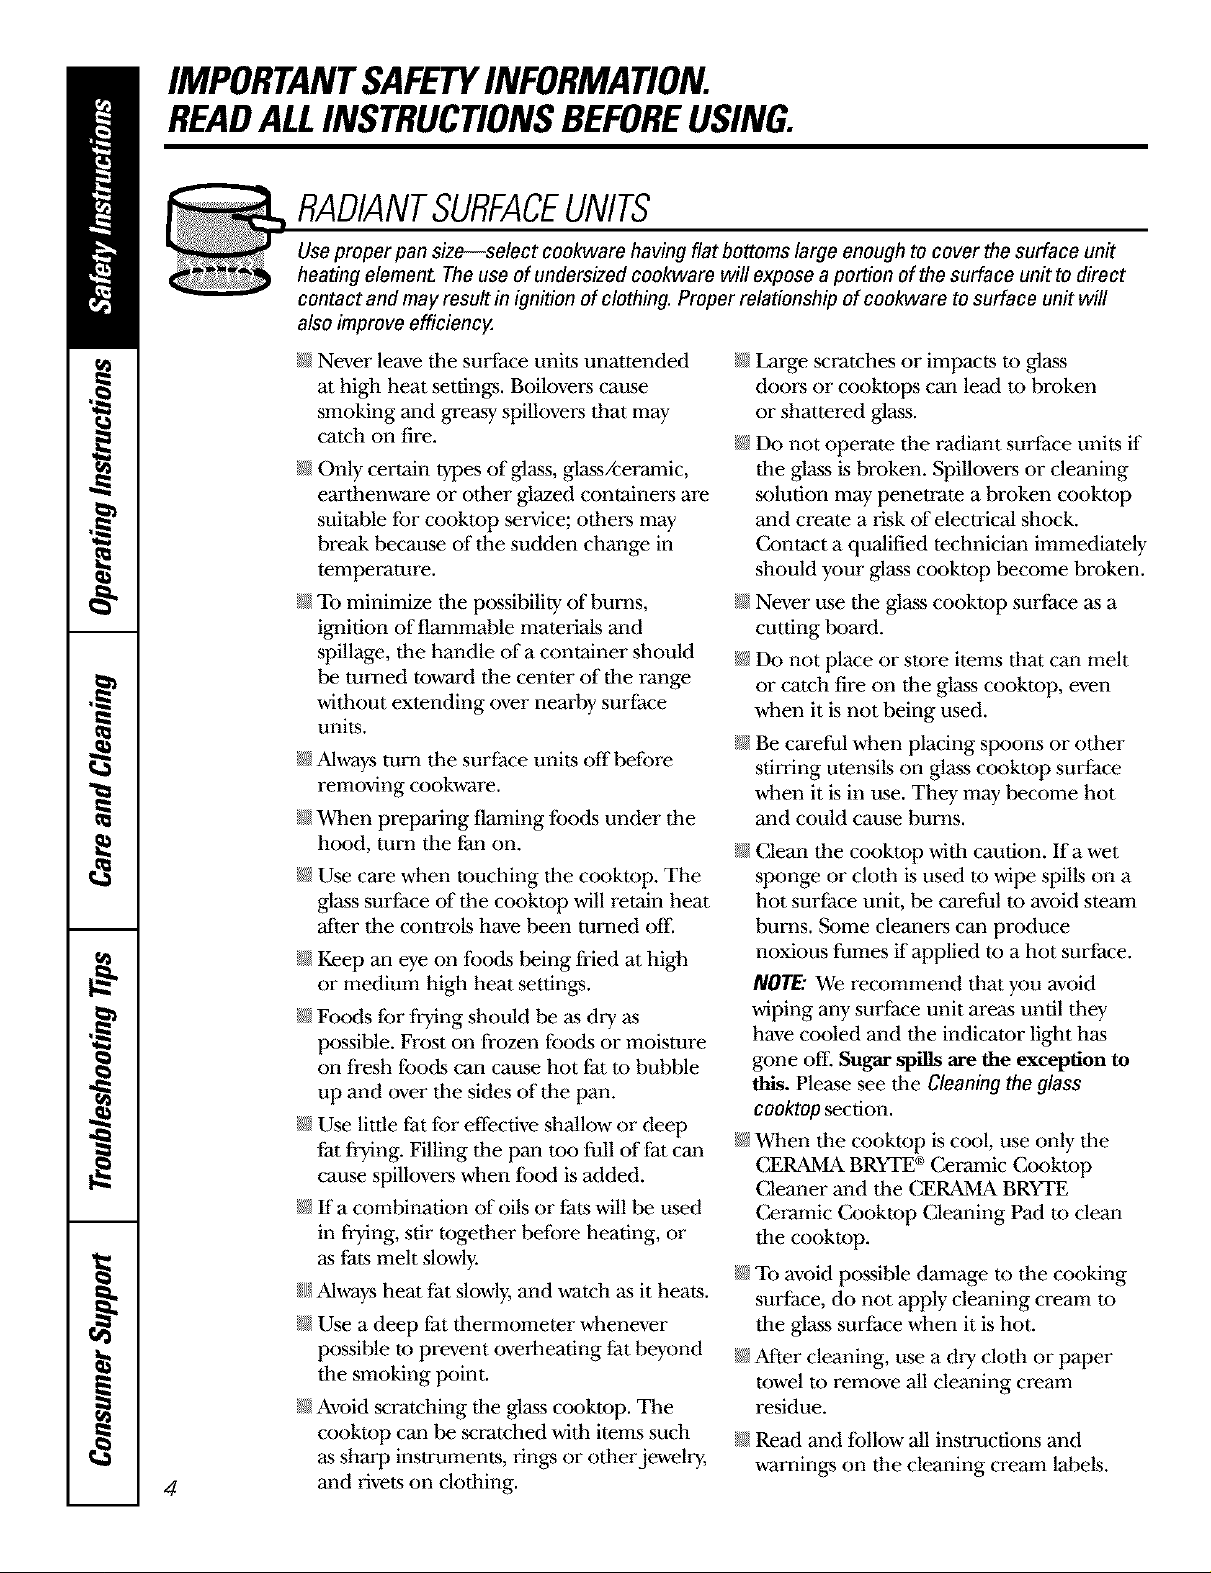
RADIANTSURFACEUNITS
Use proper pan size--select cookware having flat bottoms large enough to cover the surface unit
heating element The use of undersized cookware will expose a portion of the surface unit to direct
contact and may result in ignition of clothing. Proper relationship of cookware to surface unit will
also improve efficiency.
@ Never leave tile surface units unatmnded
at high heat settings. Believers came
smoking and greasy spillovers that may
catch on fire.
N Only certain types of glass, glass/ceramic,
earthenware or other glazed containers are
suitable for cookmp service; othe*:s may
break because of the sudden change in
temperature.
N To minimize tile possibility of burns,
ignition of flammable materials and
spillage, the handle of a container should
be turned toward tile center of the range
without extending over nearby surl:ace
units.
N Mways turn the surl:ace units off before
removing cookware.
N When preparing flaming foods under the
h_d, turn tile fan on.
@ Use care when touching tile c_ktop. The
glass surface of the cookmp will retain heat
_ter the controls have been turned eli:
N Keep an eye on foods being flied at high
or medium high heat setting.
N Foods for fiTing should be as dry as
possible. Frost on frozen foods or moisture
on fresh foods can cause hot fat m bubble
up and over tile sides of the pan.
N Use little fat for effective shallow or deep
fat [iying. Filling the pan me full of fat carl
cause spillovers when fbod is added.
N If a combination of oils or liats will be used
in fiTing, stir together before heating, or
as fats melt slowly.
{{{{!Always heat lat slowly, and watch as it heats.
N Use a deep fat thermometer whenever
possible m prevent overheating l_atbeyond
the smoking point.
N Avoid scratching the gl_ c_ktop. The
cookmp can be scratched with imms such
as sharp instruments, rin_ or otherjewehy,
4
and rivets on clothing.
N Large scratches or impacts m glass
door:s or cookmps can lead m broken
or shattered glass.
@ Do not operate the radiant surface units if
the glass is broken. Spillovers or cleaning
solution may penetrate a broken cooktop
and create a risk of electrical shock.
Contact a qualified technician immediately
should your glass c_ktop become broken.
N Never use the glass cooktop surface as a
cutting board.
_;_Do not place or store items that can melt
or catch fire on the glass cookmp, even
when it is not being used.
N Be careful when placing spoons or other
stirring utensils on glass cookmp surt:ace
when it is in use. They may become hot
and could cause burns.
N (;lean the cookmp with caution. Ifa wet
sponge or cloth is used m wipe spills on a
hot surt:ace unit, be careful to avoid steam
burns. Some cleaners can produce
noxious fumes if applied m a hot surface.
NOTE: We recommend that you avoid
wiping a W surl:ace unit areas until they
have cooled and the indicator liglnt has
gone off. Sugar spills are the exception to
tl_. Please see the Cleaning the glass
cooktop section.
N When the cooktop is c_l, use only the
CERAMA BRYI'E ®Ceramic Cookmp
(;leaner and the CERAMA BRYTE
Ceramic Cooktop (;leaning Pad m clean
the cookmp.
N To avoid possible damage m the cooking
surt:ace, do not apply cleaning cream m
the glass surt:ace when it is hot.
N After cleaning, use a dry cloth or paper
towel m remove all cleaning cream
residue.
N Read and fbllow all instructions and
warnings on the cleaning cream labels.
Page 5
www.GEAppliances.com
WARNING!
OVEN
Stand awayfrom the range when opening the oven door. Hot air or steam which escapes can cause
burns to hands, face and/or eyes.
@ Do not heat unopened f_d containe*:s.
Pressure could build up and the container
could burst, causing an injm T.
N Keep tile oven vent unobstructed.
N Keep tile oven free from grease buildup.
N Place tile oven rack in tile desired position
while tile oven is c_l. If"racks must be
handled when hot, do not let pot holder
contact the heating elements.
N When using cooking or roasting ba_ in
the oven, follow tile manufacturer's
directions.
N Pulling out the rack m tile stop-lock is a
convenience in lifting heavy [:oods. It is also
a precaution against burns from touching
hot surfaces of tile door or oven walls.
N Do not use the oven m dry newspapers.
If overheated, they can catch on fire.
N Do not use the oven lbr a storage area.
Items stored in an oven can ignite.
N Do not leave paper products, cooking
utensils or f_d in tile oven when not
in use.
N Do not use aluminum foil to line oven
bottoms, except as suggested in this
manual. Improper installation of
aluminum lbil may result in a risk of
electric shock or fire.
SELF-CLEANINGOVEN
Do not use oven cleaners. No commercial oven cleaner or oven liner protective coating of any kind
should be used in or around any part of the oven. Residue from oven cleaners will damage the inside
of the oven when the self-clean cycle is used.
@ Do not clean tile door gasket. The door
gasket is essential t:or a good seal. (;are
should be taken not m rub, damage or
move the gasket.
N Belbre self-cleaning tile oven, remove
the racks, broiler pan, grid and other
cookware.
N Be sure m wipe up excess spillage belbre
starting tile sell:cleaning operation.
N If the sell'cleaning mode malfunctions,
turn tile oven off and disconnect tile
power supply. Have it selwiced by a
qualified technician.
N (;lean only parts listed in this Owner's
Manual.
READANDFOLLOWTHISSAFETYINFORMATIONCAREFULLY.
SAVETHESEINSTRUCTIONS
5
Page 6
Usingthe surface units.
Throughout this manual, features and appearance may vary from your model
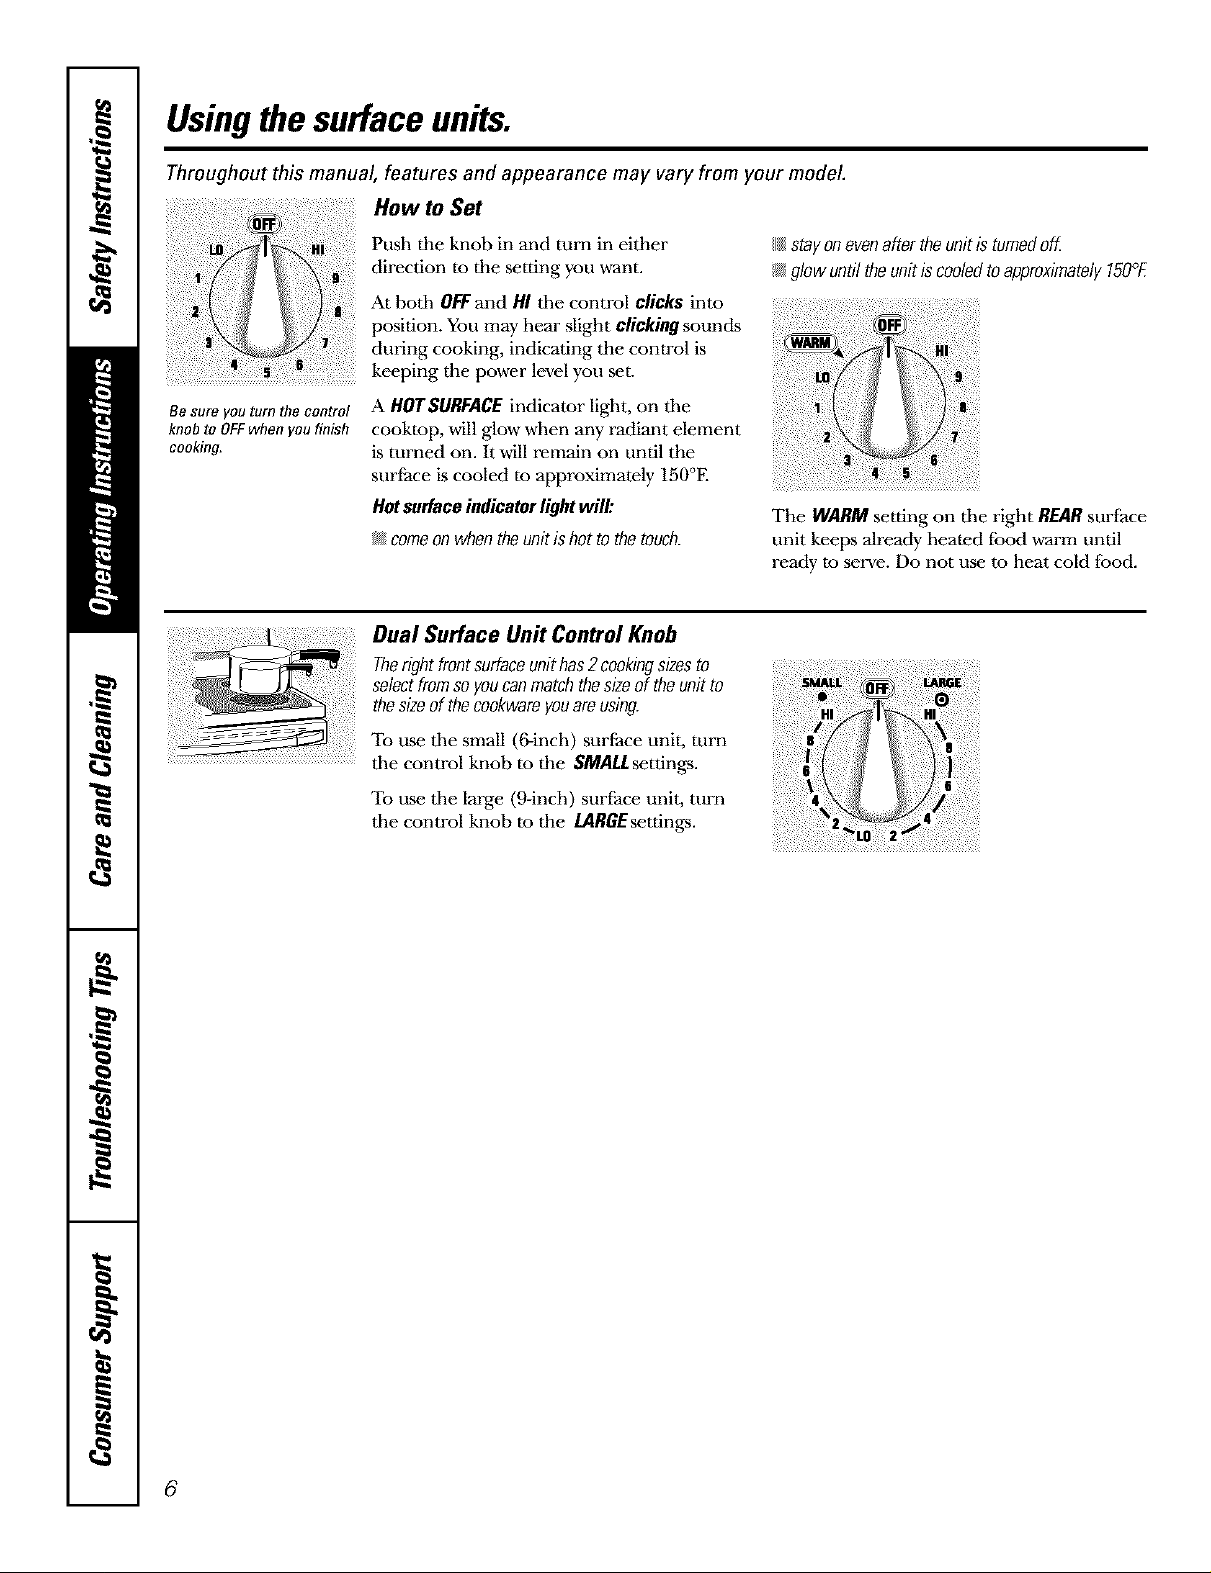
HowtoSot
Push the knob in and turn in either
...... direction to the setting you want.
i At both OFFand HI the control clicks into
position. You may hear slight clickingsounds
during cooking, indicating the conwol is
j keeping the power level you set.
Be sure you turn the control
knob to OFFwhen you f#fish
cooking.
A HOTSURFACEindicator light, on tile
cooktop, will glow when any radiant dement
is turned on. It will remain on until the
surface iscooled to approximately 150°E
Hot surface indicator light will:
_ come on when the unit is hot to the touch.
Therightfrontsurfaceunithas2cookingsizesto
selectfromsoyoucanmatchthesizeoftheunitto
thesizeofthecookwareyouareusing.
Dual Surface I.In# Control Knob
To use tile small (6-inch) surtace unit, turn
tile control knob to the SMALl settings.
To use tile large (9-inch) surfhce unit, turn
tile control knob to the IARGEsettings.
{{{I;stayonovenaftertheunitisturnedoff.
I;_glowuntil theunitiscooledtoapproximately150°fi
The WARMsetting on tile right REARsurface
unit keeps already heated fbod warm until
ready to serve. Do not use to heat cold food.
i!!6
4
6
Page 7
wwvc.GEAppliances.com
Thefollowing information will help you choose cookware which will give good performance on glass cooktops.
About the radiant surface units...
The radiant cooktop features heating
units beneath a smooth glass surface.
NOTE:A slightodorisnormalwhenanew
cooktopis usedforthefirsttime.It iscausedby
theheatingofnewpartsandinsulatingmaterials
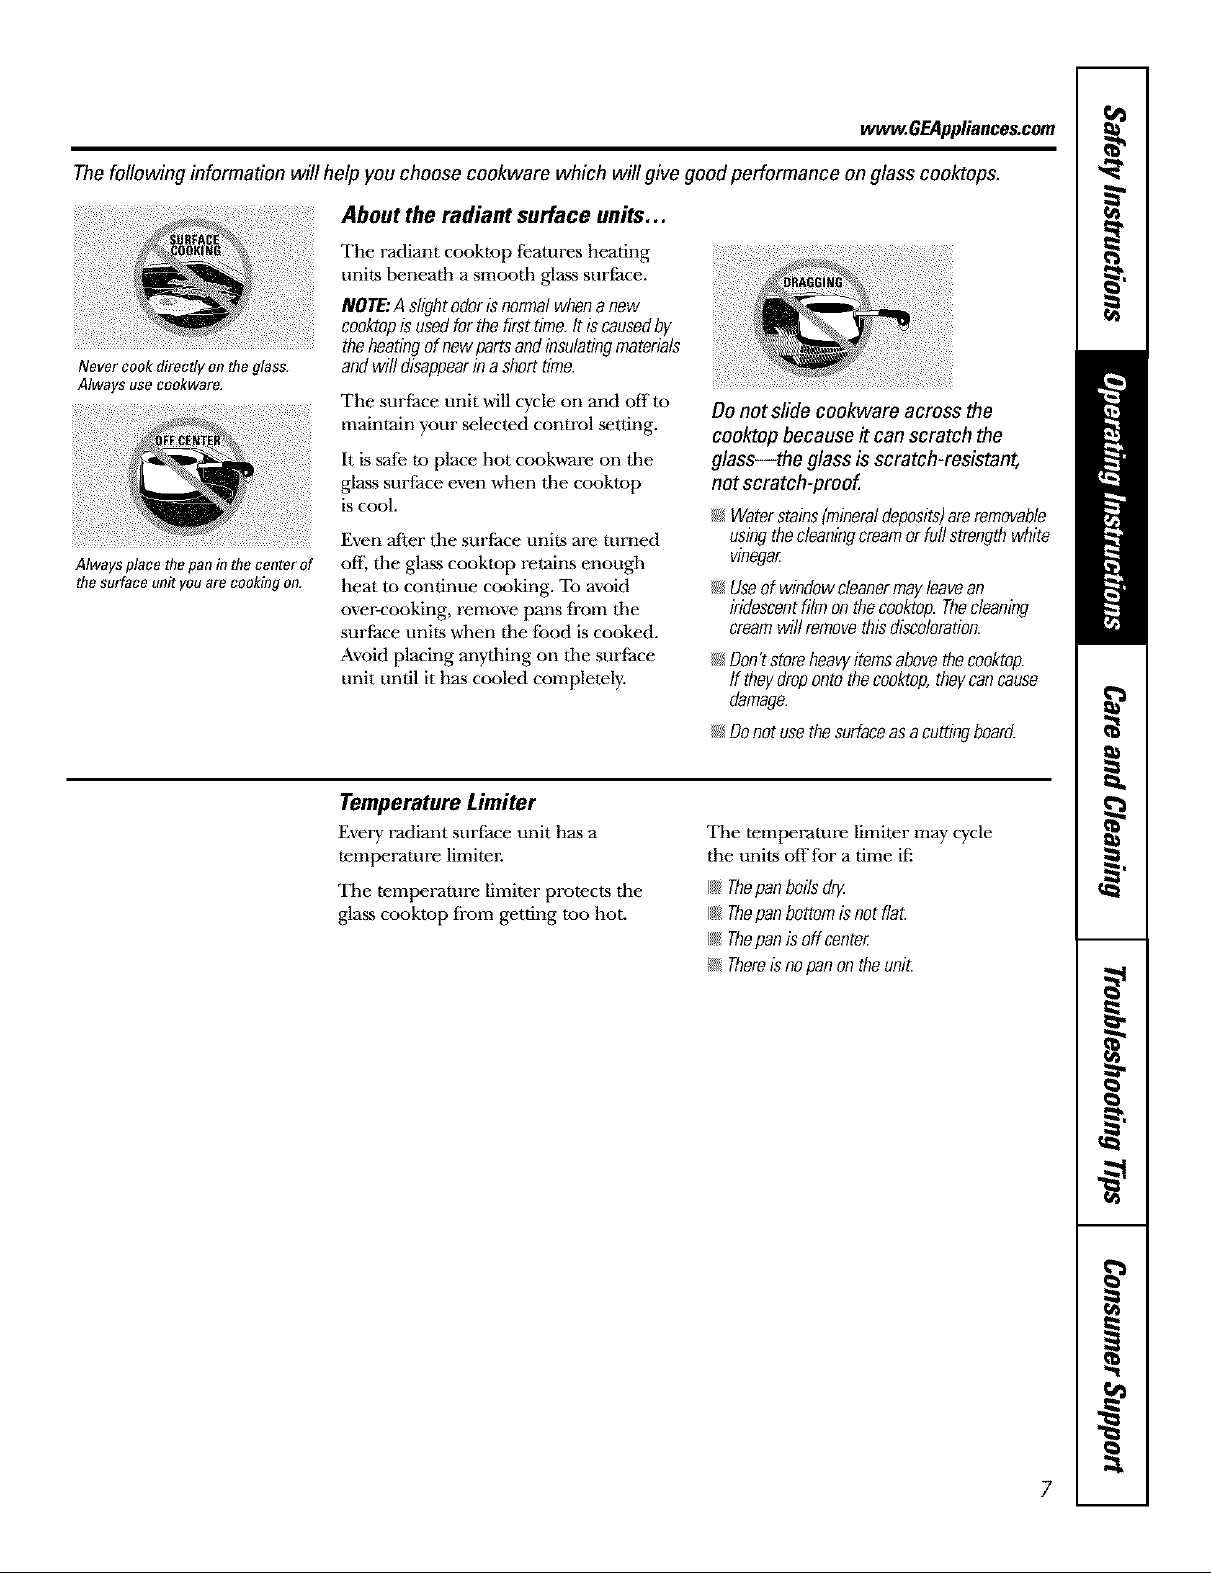
Always use cookware.
Always place the pan in the center of
the surface unit you are cooking on.
andwilldisappearinashorttime.Never cook directly on the glass.
The surface unit will cycle on and offm
maintain your selected control setting.
It is safe m place hot cookware on tile
glass surface even when tile cooktop
is cool.
Even after the surface units are turned
oil the glass cooktop retains enough
heat to continue cooking. To avoid
over-cooking, remove pans from tile
surface units when the food is cooked.
Avoid placing anything on tile surface
unit until it has cooled completely.
Do not slide cookware across the
cooktop because it can scratch the
glass--the glass is scratch-resistant,
not scratch-proof.
/;i_Waterstains[mineraldeposits)areremovable
usingthecleaningcreamorfullstrengthwhite
vinegar
/;i_Useofwindowcleanermayleavean
iridescentfilmonthecooktop.Thecleaning
creamwillremovethisdiscoloration.
/;i_Don?storeheawitemsabovethecooktop.
ff theydropontothecooktop,theycancause
damage.
I;i_Donotusethesurfaceasacuttingboard.
Temperature Limiter
Every radiant surface unit has a
temperature limiter.
The temperature limiter protects the
glass cooktop from getting too hot.
The temperature limiter may cycle
the units offfor a time ifi
{{1_Thepanboilsdry
{{1_Thepanbottomisnot flaL
{{{I;Thepanisoff center
/;i_Thereisnopanon theunit.
7
Page 8
Selecting typesofcookware.
Thefollowing information will help you choose cookware which will give good performance on glass cooktops.
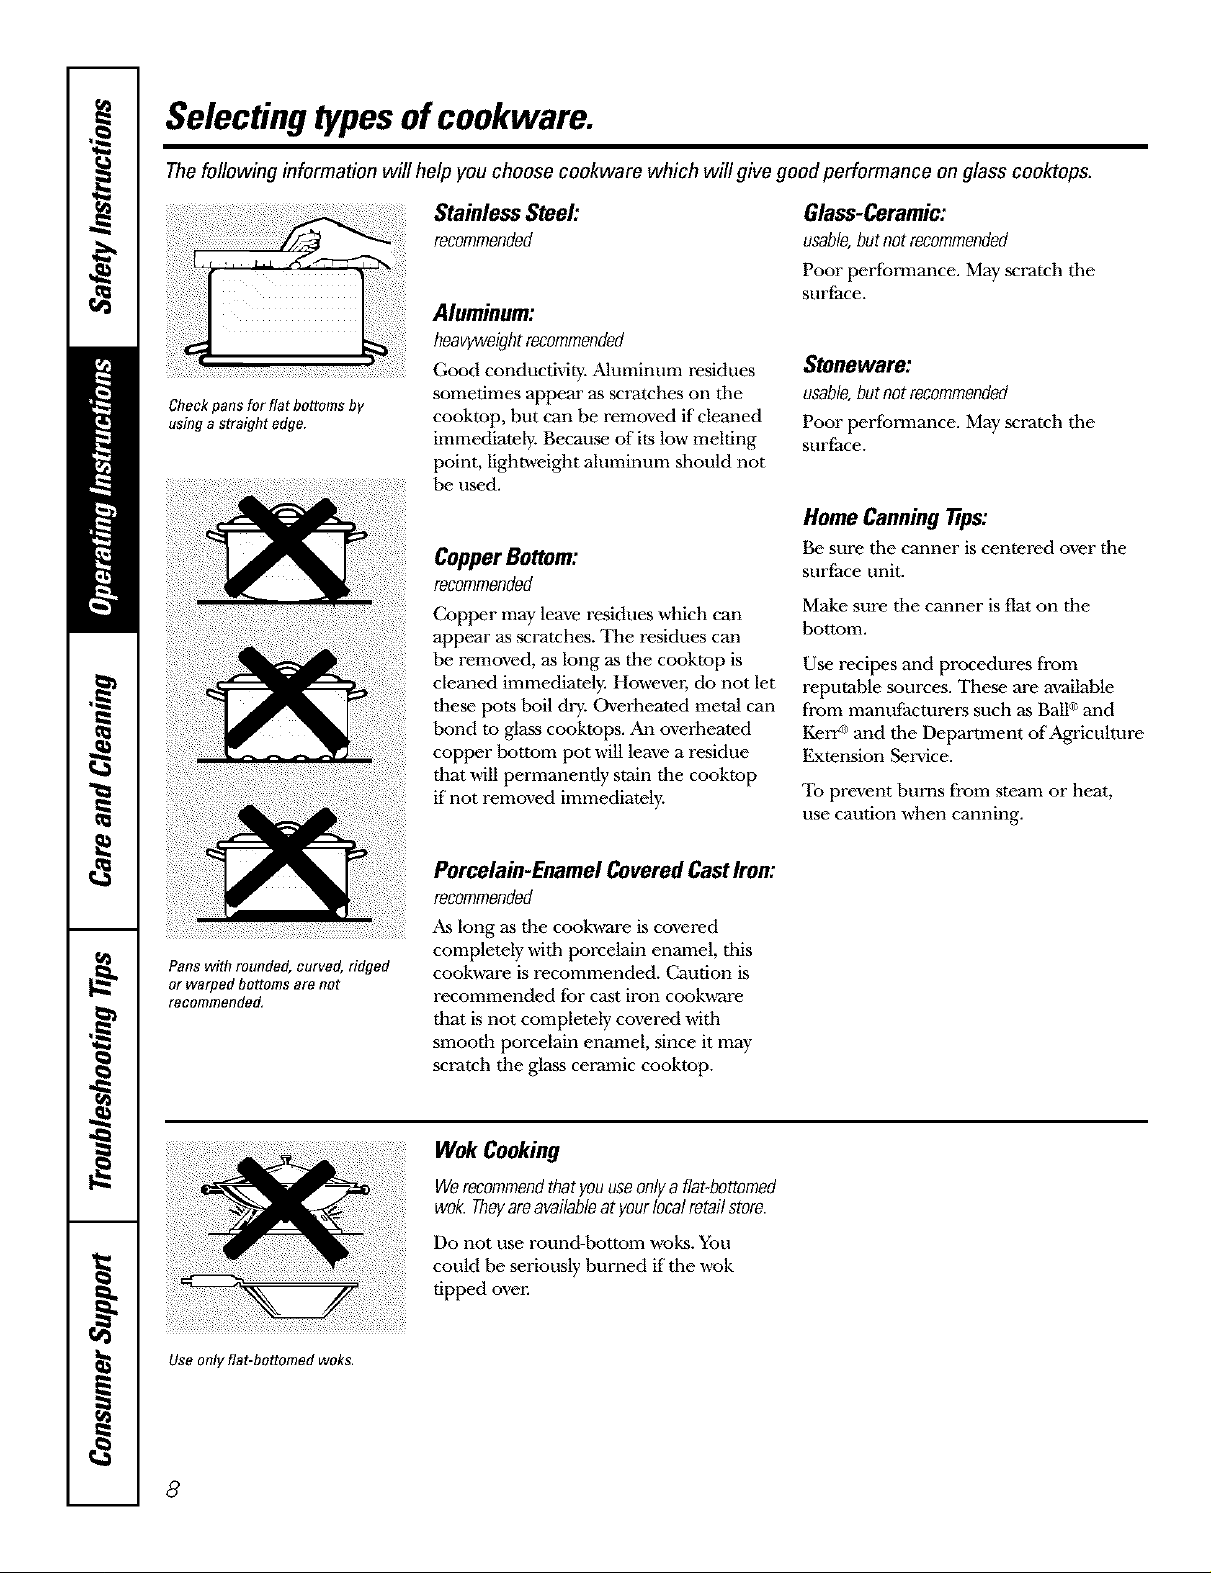
Checkpans for flat bottoms by
using a straight edge.
Stainless Steel:
recommended
Aluminum:
heavyweightrecommended
Good conductMry. Aluminum residues
sometimes appear as scratches on tile
cookmp, but can be removed if cleaned
immediately. Because of its low melting
point, lightweight aluminum should not
be used.
Copper Bottom:
recommended
Copper may leave residues which can
appear as .scratches. The residues can
be removed, as long as the cookmp is
cleaned immediately. Howevm; do not let
these pots boil dry. Overheated metal can
bond to glass cooktops. An overheated
copper tx_ttom pot will leave a residue
that will permanently stain the cooktop
if not removed immediately.
Glass-Ceramic:
usable,butnotrecommended
Poor performance. May scratch tile
surface.
Stoneware:
usable,butnotrecommended
Poor performance. May scratch the
surface.
Home Canning Tips:
Be sure the canner is centered over the
surface unit.
Make sure the canner is flat on the
bottom.
Use recipes and procedures from
reputable sources. These are a'_ailable
from manulacturers such as Ball®and
KerrGand tile Department of Agriculture
Extension Service.
To prevent burns from steam or heat,
use caution when canning.
Pans with rounded, curved, ridged
or warped bottoms are not
recommended,
Use only flat-bottomed woks.
Porcelain-Enamel CoveredCastIron:
recommended
As long as the cook,a-are is covered
completely with porcelain enamel, this
cookware isrecommended. Caution is
recommended fbr cast iron cook,a-are
that is not completely covered with
smooth porcelain enamel, since it may
scratch the glass ceramic cooktop.
Wok Cooking
Werecommendthatyouuseonlya flat-bottomed
wok.Theyareavailableat yourlocalretailstore.
Do not use round-bottom woks. You
could be seriously burned if tile wok
tipped oven
8
Page 9
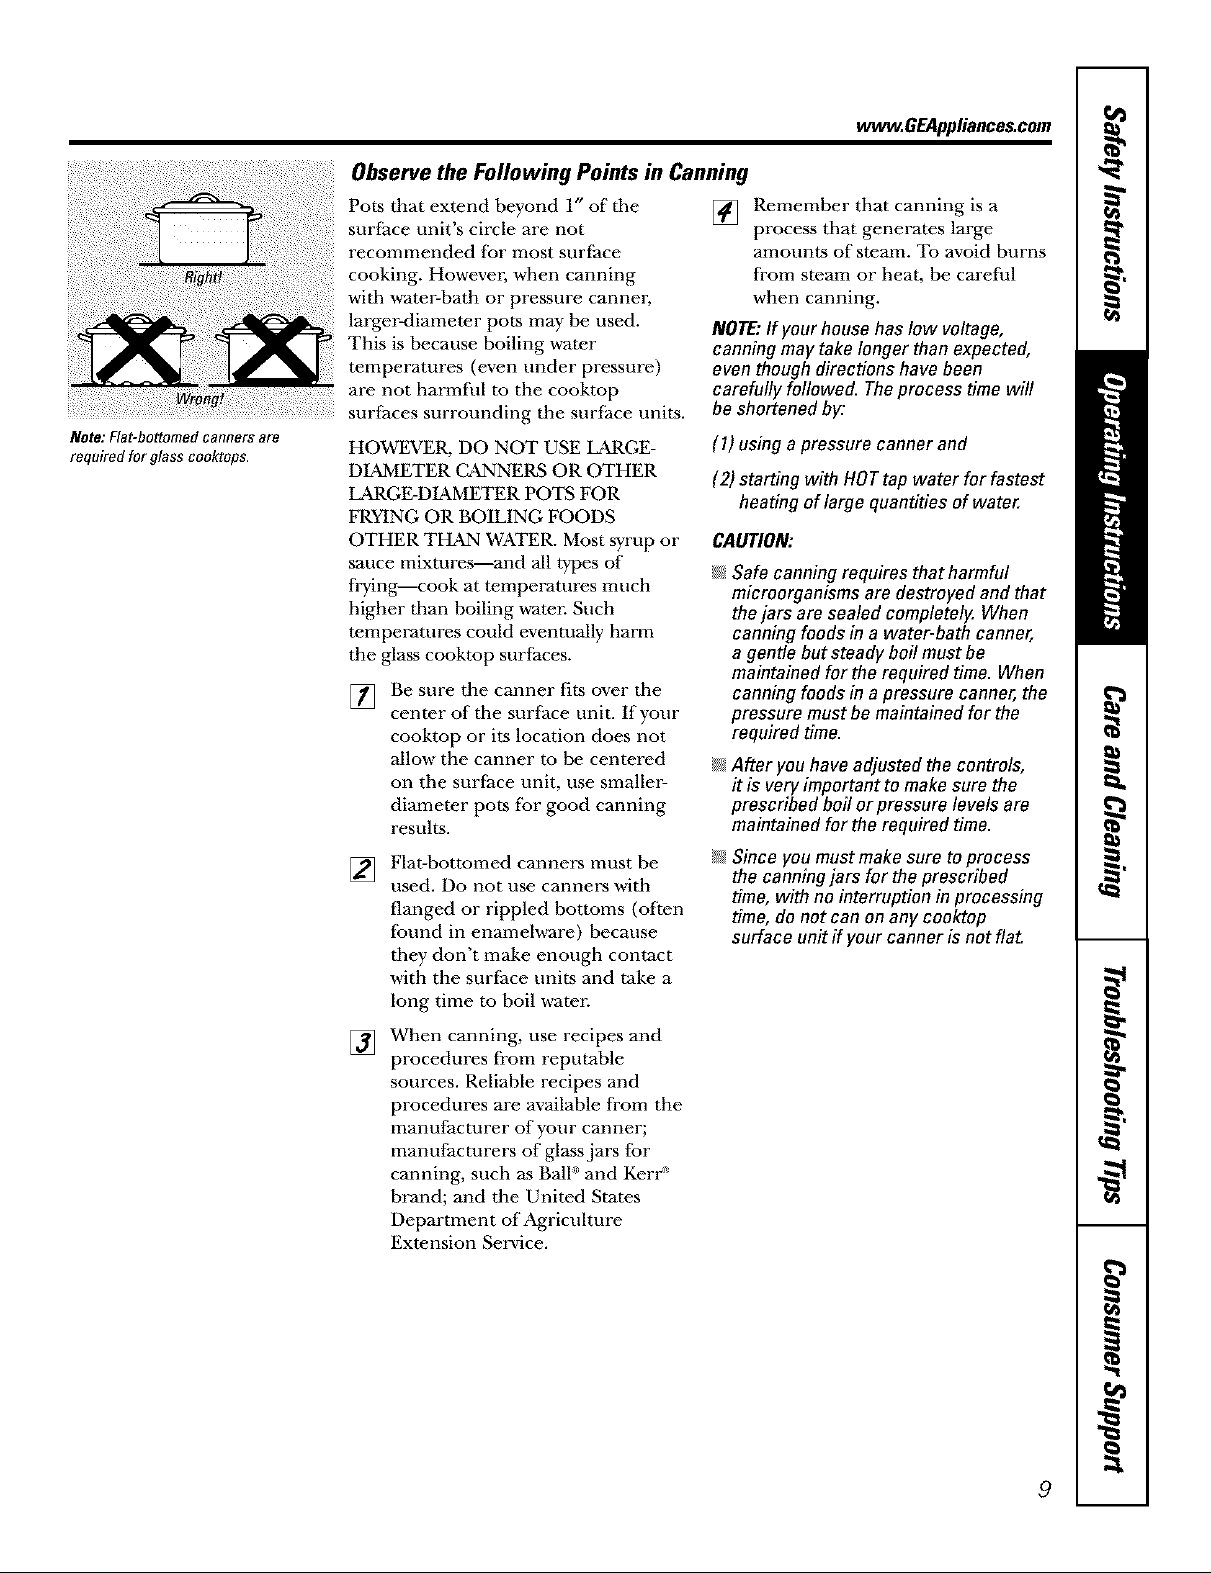
Observe the Following Points in Canning
Pots that extend beyond l" of tile
surface unit's circle are not
recommended for most surfhce
cooking. Howevm; when canning
with ,a_ater-bath or pressure cannel,
larger<liameter pots may be used.
This is because boiling water
temperatures (even under pressure)
are not harmfl.ll to the cooktop
surfaces surrounding the surface units.
Note:Flat-bottomedcannersare
requiredforglasscooktops. HOWEVER, DO NOT USE LARGE-
DIAMETER C_NNERS OR OTHER
LARGE-DIAMETER POTS FOR
FRYING OR BOILING FOODS
OTHER THMN WATER. Most syrup or
sauce mixtures--and all types of
frying--cook at temperatures much
higher tllan boiling water. Such
temperatures could eventually harm
the glass cooktop surfaces.
Be sure the canner fits over tile
[]
center of tile surface unit. If your
cooktop or its location does not
allow the canner to be centered
on the surface unit, use smaller-
diameter pots for good canning
results.
Flat-bottumed canners must be
[]
used. Do not use canners with
flanged or rippled bottoms (often
found in enamel,a-are) because
they don't make enough contact
with the surfhce units and rake a
long time to boil w-aten
When canning, use recipes and
[]
procedures from reputable
sources. Reliable recipes and
procedures are available from the
manufacturer of your canner;
manufacturers of glass jars for
canning, such as BalF and Kerr _'
brand; and the United States
Department of Agriculture
Extension Service.
ww_.GEAppliances.com
[] Remember that canning is a
process that generates large
amounts of steam. To avoid burns
from steam or heat, be carefl.d
when canning.
NOTE:If your house haslow voltage,
canning may take longer than expected,
eventhough directions have been
carefully followed. Theprocess time will
be shortened by:
(1) using apressure canner and
(2) starting with HOTtap water for fastest
heating of large quantities of water.
CAUTION:
I_;_Safe canning requires thatharmful
microorganisms are destroyed and that
thejars aresealed completely. When
canning foods in a water-bath canner,
a gentle but steady boil must be
maintained for the required time. When
canning foods in a pressure canner,the
pressure must be maintained for the
required time.
I_;_After you have adjusted the controls,
it is very important to make sure the
prescribed boilor pressure levels are
maintained for the required time.
I_;_Since you must makesure toprocess
the canningjars for the prescribed
time, with no interruption in processing
time, do not can on any cooktop
surface unff if your canner is not flat.
9
Page 10
Usingthe ovencontrols.
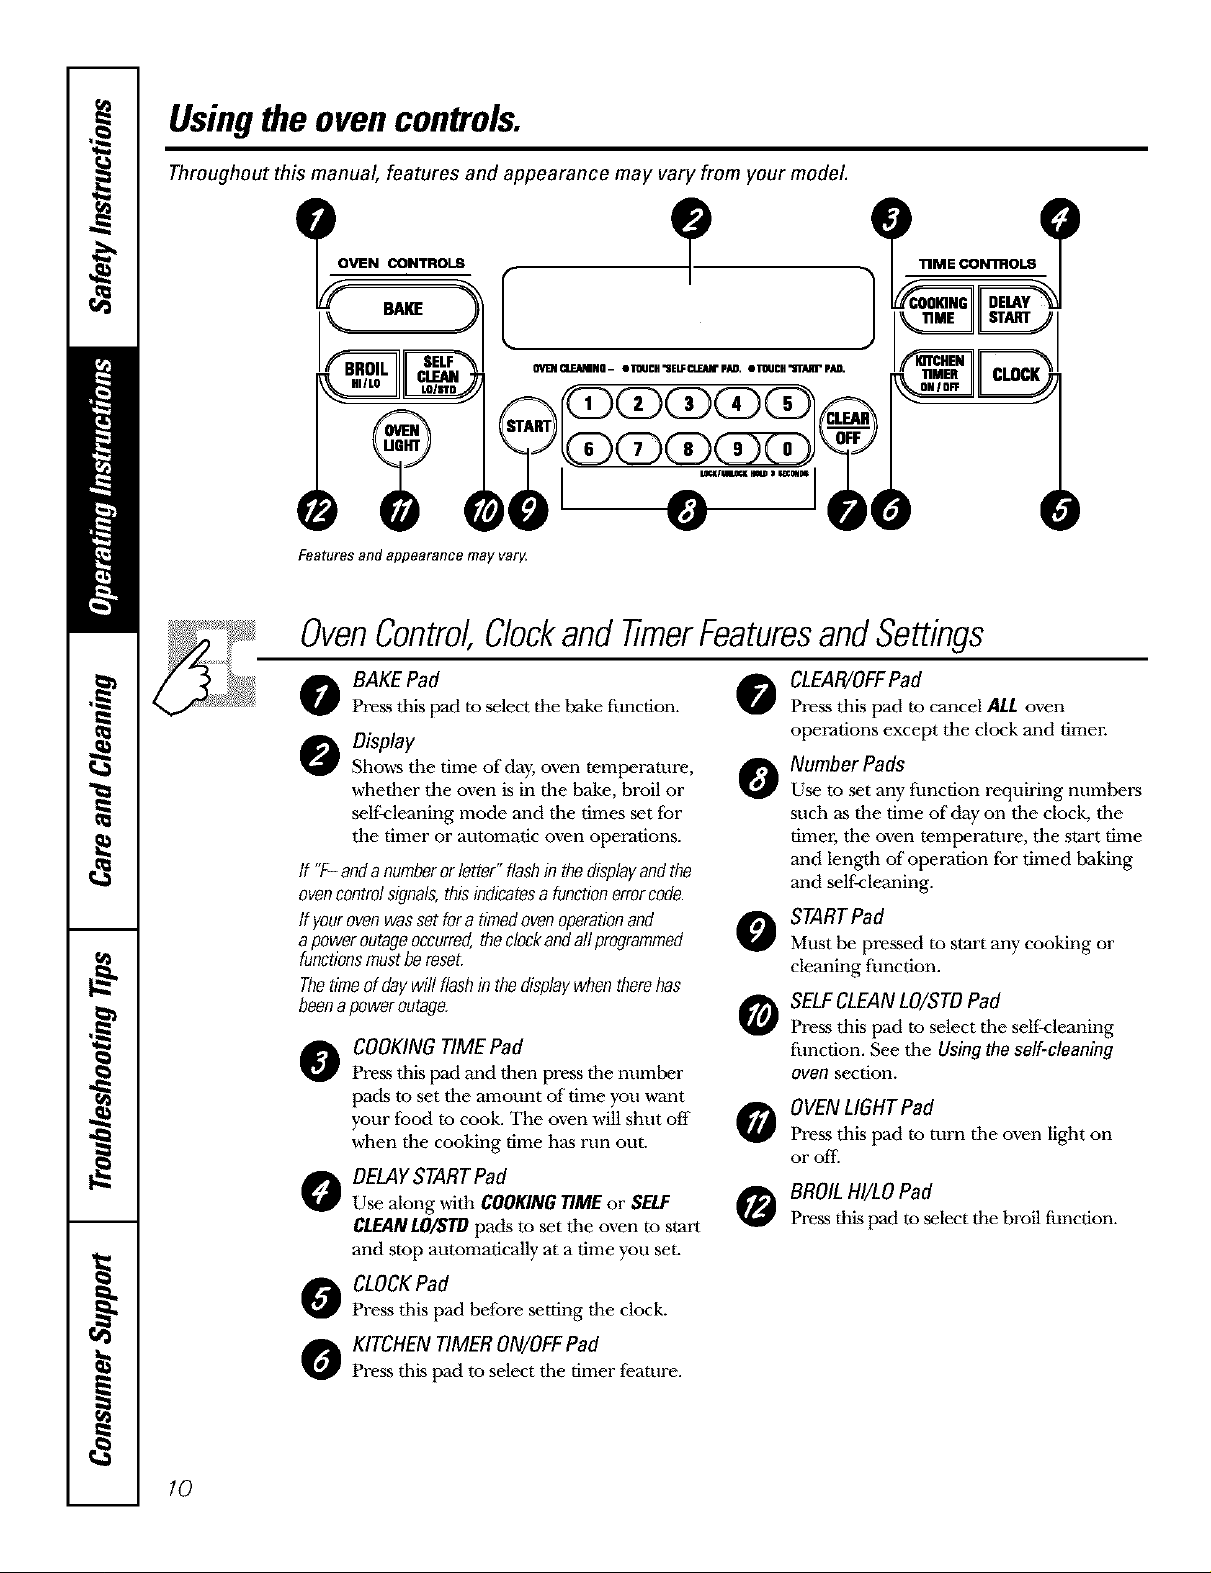
Throughout this manual, features and appearance may vary from your model.
Featuresand appearance may varg
OvenControl,Clockand timerFeaturesandSettings
CLEAR/OFFPad
o BAKEPad
Pre_s tbis pad to select tim bake fimction. 0
Display
Shows the time of day, oven temperature, 0
whether the oven is in the bake, broil or
self<leaning mode and the times set for
the timer or automatic oven operations.
ff "F-andanumberorletter"flashin thedisplayandthe
evencontrolsignals,thisindicatesa functionerrorcode.
If yourovenwassetforatimedovenoperationand
apoweroutageoccurred,theclockandallprogrammed
functionsmustbereset.
Thetimeofdaywill flashin thedisplaywhentherehas
beenapoweroutage.
COOKING TIME Pad
@
Pre_s tbis pad and then press tile number
pads m set tile amount of time you want
your food to cook. The oven will shut off
when the cooking time has run out.
DELAYSTARTPad
0
Use along with COOKINGTIMEor SELF
CLFANLO/STDpads to set tbe oven to start
and stop automatically at a time you set.
CLOCKPad
Press tbis pad before setting the clock.
KITCHEN TIMER ON/OFFPad
Press tbLspad to select tim timer feature.
Press this pad to cancel ALL oven
operations except the clock and timer.
Number Pads
Use to set any function requMng numbers
such as the time of day on tim clock, tim
times; tim oven temperature, the start time
and length of"operation for timed baking
and self-cleaning.
STARTPad
0
Must be pressed to start any cooking or
cleaning function.
SELFCLEAN LO/STDPad
0
Press this pad to select tim self:cleaning
fimction. See tim Usingtheself-cleaning
even section.
OVENLIGHT Pad
Press this pad to turn tim oven ligbt on
OF off.
BROIL HI/LO Pad
Press tbis pad to select tim broil function.
TIME CON'_ROLS
]
10
Page 11
Usingthe oven. ww_.GEAppliances.com
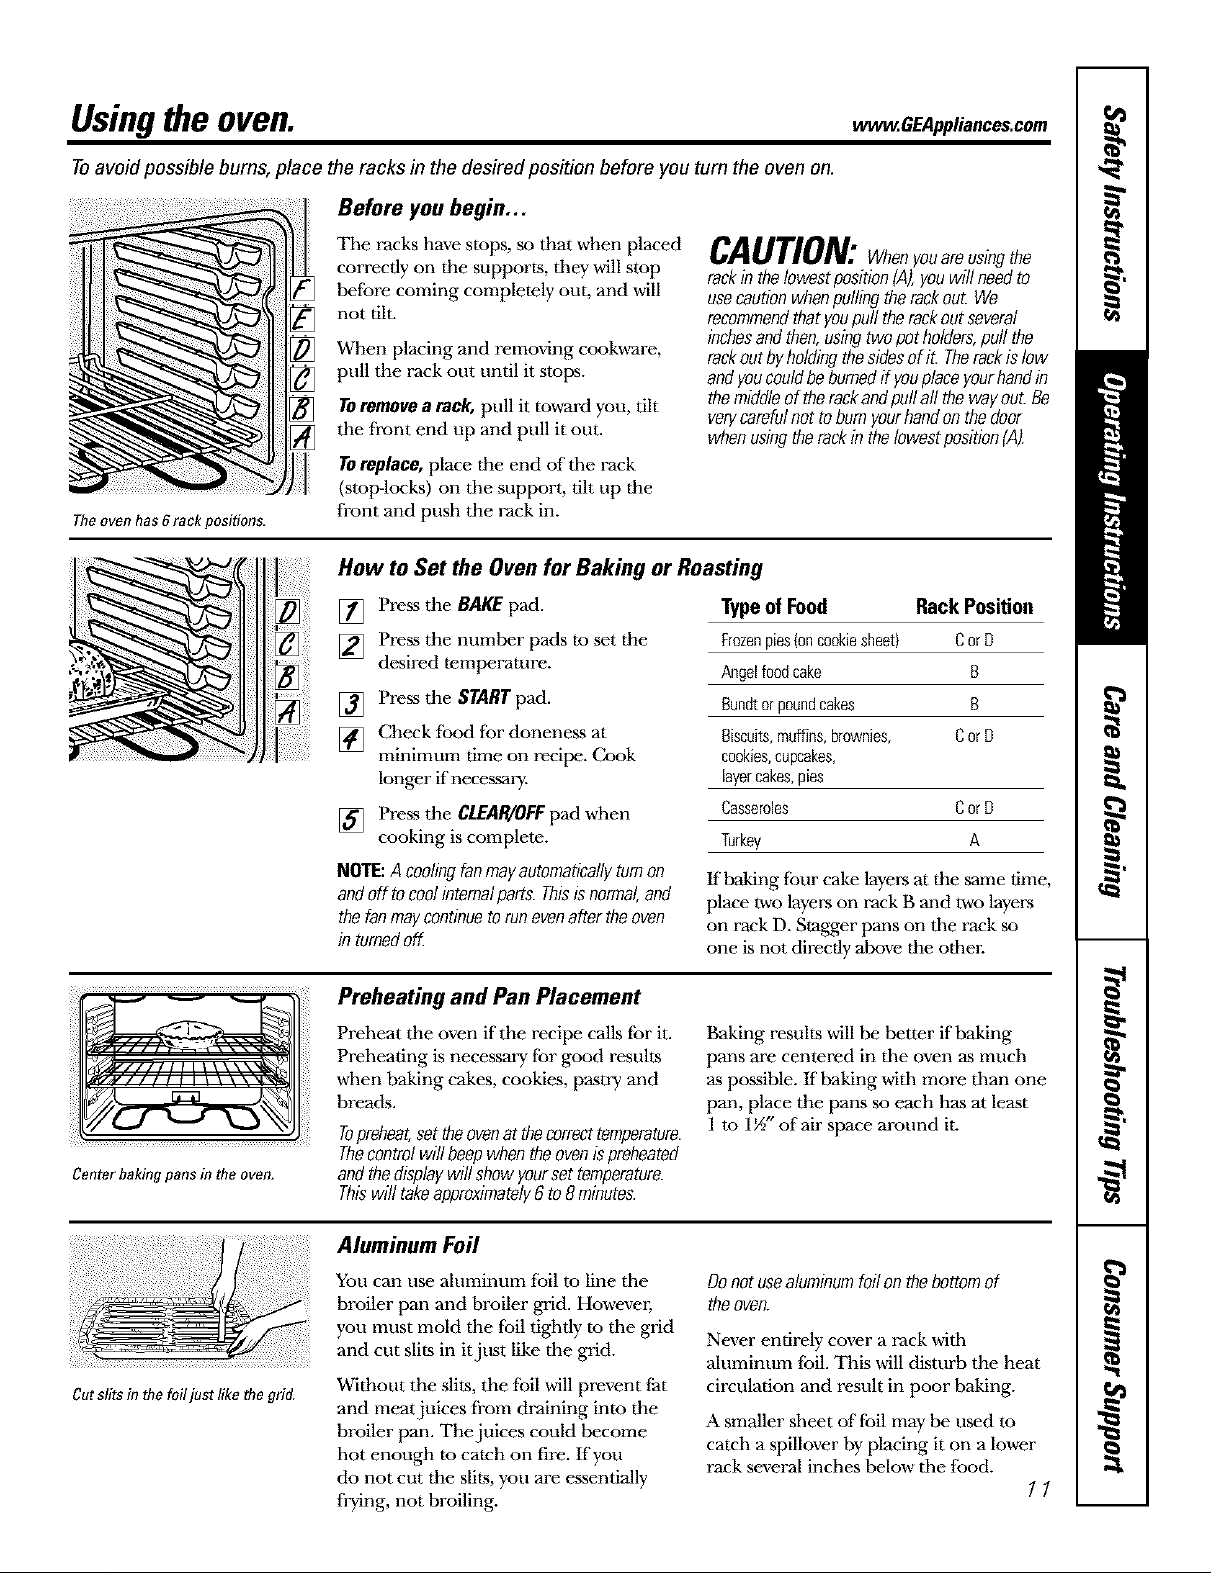
Toavoid possible burns, place the racks in the desired position before you tum the oven on.
Before you begin,..
The oven has g rack positions.
The racks have stops, so that when placed
correctly on the supports, they will stop
before coming completely out, and will
not tilL
When placing and remoxdng cook,a-are,
pull the rack out until it stops.
TOremovea tack, pull it toward you, tilt
the front end up and pull it out.
CAUTION:Whenyouoreusingthe
rackinthelowestposition[,4),youwillneedto
usecautionwhenpullingtherackout.We
recommendthatyoupulltherockoutseveral
inchesandthen,usingtwopotholders,pull the
rackoutbyholdingthesidesofit. Therockisfaw
andyoucouldbeburnedif youplaceyourhandin
themiddleoftherackandpuffoffthewayout.Be
verycarefulnotto bumyourhandonthedoor
whenusingtherackinthelowestposition(A).
TOreplace,place the end of the rack
(stop-locks) on tile support, tilt up the
front and push the rack in.
How to Set the Oven for Baking or Roasting
[] Press the BAKE pad.
[] Press the number pads to set the
desired temperature.
[] Press the START pad.
[] Check food for doneness at
minimum time on recipe. Cook
longer if necessary.
[] Pre._s the CLEAR/OFFpad when
cooking is complete.
NOTE:A coolingfanmayautomaticallyturnon
andoff tocoolinternalparts.Thisisnormal,and
thefanmaycontinueto runevenaftertheoven
in turnedoff.
Typeof Food Rack Position
Frozenpies{oncookiesheet) Cor D
Angelfoodcake B
Bundtorpoundcakes B
Biscuits,muffins,brownies, Cor D
cookies,cupcakes,
layercakes,pies
Casseroles Cor D
Turkey A
If baking four cake layen-sat the same time,
place two layel.-son rack B and two layel.-s
on rack D. Stagger pans on the rack so
one is not directly above the other.
Center baking pans in the oven.
Cutslits in the foil just like thegrid.
Preheating and Pan Placement
Preheat the oven if the recipe calls for it.
Preheating is necessary for good results
when baking cakes, cookies, pastry and
breads.
Topreheat,settheovenatthecorrecttemperature.
Thecontrolwillbeepwhentheovenispreheated
andthedisplaywillshowyoursettemperature.
Thiswill takeapproximately6to8 minutes.
Aluminum Foil
You can use aluminum foil to line the
broiler pan and broiler grid. Howevm;
you must mold the foil tightly to the grid
and cut slits in itjust like the grid.
Without the slits, the tbil will prevent fat
and meat juices from draining into the
broiler pan. The juices could become
hot enough to catch on fire. lfyou
do not cut the slits, you are essentially
frying, not broiling.
Baking results will be better if baking
pans are centered in the oven as much
as possible. If baking with more than one
pan, place the pans so each has at least
1 to 1½" of air space around it.
Donotusealuminumfoilonthebottomof
theoven.
Never entirely cover a rack with
ahlminum foil. This will disturb the heat
circulation and result in poor baking.
A smaller sheet of foil may be used to
catch a spillover by placing it on a lower
rack several inches below the food.
11
Page 12

Usingthe oven.
How to Set the Ovenfor Broiling
If yourrangeisconnectedto
208volts,raresteaksmaybe
broiledbypreheatingthebroiler
andpositioningtheovenrack
onepositionhigher
The size, weight, thickness,
starting temperature,
and your preference
of aloneness will affect
broiling times. This guide
is based on meats at
refi'igerator temperature.
t The _(& 1)@aiCment of
Ag_icuUm_ says "Rare beef is
potmb.; but you shrmhl know that
cookir_g it to o_ly 140_F m_a_s
_o_ food po_mir_g o_ganL_s_
may survive. "(S_l_ice:
Book. Your Kitchen Guide. _!_I)A
1_,. Ju_ I985.)
Leavethedooropento thebroilstopposition.
Thedoorstaysopenbyitself, yet theproper
temperatureismaintainedin theoven.
NOTE:Foodcanbebroiledwith thedoor
closed,butit maynotbrownaswell because
theovenheatingelementwill cycleon andoff.
[] Place tbe meat or fish on tbe broiler
grid in the broiler pan.
[] Follow suggested rack positions in
the BroilingGuide.
Broiling Guide
Food
GroundBeef
BeefSteaks
Rarer
Medium
Well Done
Rarer
Medium
Well Done
Chicken
Bakery Product
Bread (toast)
English Muffin
LobsterTails
FishFillets
Salmon
Steaks
Fillets
HamSlices
srecooked}
Pork Chops
Well Done
lamb Chops
Medium
Well Done
Medium
Well Done
Quantityand/
orThickness
1 Ib {4patties)
VZ' to 3/Z'thick
4 Ibs (12patties)
3/4-to 1" thick
1 to 1/_ Ibs
1_/2"thick
2 to 2/_ Ibs
1 wholecut up
2to2 ½1bs,
split lengthwise
Breast
2 to 4 Slices
2 {split}
2-4
1 Ib {/4" tOi/;- thick)
2 (1" thick)
2 {/z" tO3/4"thick)
I/2" thick
1" thick
2 {/Z' thick)
2 {1" thick)about1 Ib
2 {1" thick)about10
to12oz
2 (1VZ"thick)about 1Ib
Rack
Position
F
E
E
D
D
D
C
C
F
F
E
E
D
D
D
D
E
E
E
E
[] Press tbe BROILHI/tOpad once
for HIBroil.
To change to LOBroil, press the
BROILHI/tOpad again.
Use LOBroi! to cook fboc[s such as
poultry or thick cuts of meat tborougbly
witbout over-browning tbem.
[] Press tbe START pad.
[] When broiling is finished, press the
CI.£AR/O_ pad.
FirstSide
Time(rain.)
13
15
10
10
15
20
25
25
3-4
18-20
10
10
10
15
10
14
SecondSide
Time (rain.)
11
6
8
4
6
8
Comments
Spaceevenly
Steakslessthan3/4"
thick are diff[cult
to cookrare
Slashfat.
8
1_-12
20
25
15
3
6
8
1
Do not
turn
ovec
6
8
10
Brusheachside with
meltedbutter
Broil skin-side-down
first.
Spaceevenly Place
Englishmuffinscut-
side-upandbrush
with butter ifdesired
Cutthroughback of
shell Spreadopen
Brushwith melted
butterbeforebroiling
andafter half of
broilingtime
Handleandturn very
carefully.Brushwith
lemonbutterbefore
andduringcooking,
if desired
Turncarefully Donot
turn skin-side-down
Slash fat.
15
7
4
Slash fat.
9
9
6
10
12
Page 13

Usingtheclock, timerand controllockout. , OEA Ii,,co,oom
ToSet the Clock
Make sore the clock is set to the
correct time of dag
The clock must be set to the correct time
of day tor the automatic oven timing
flmctions to work properly. The time of
day cannot be changed during a timed
baking or self-cleaning cycle.
To Set the Timer
[] Press the CLOCKpad.
[] Press the number pads.
[] Press the STARTpad.
The timer is a minute timer only.
The timer does not control oven
operations, Themaximum setting on
the timer is 9 hours and 59minutes,
Press the KITCHENTIMERON/OFF
[]
pad.
Press the number pads until the
[]
amount of time you want shows in
the display. For example, to set 2
hours and 45 minutes, press 2, 4
and 5 in tbat order.
If you make a mistake press the
KITCHENTIMERON/OFFpad and
begin again.
[] Press the STARTpad.
To Reset the Timer
If the display is still showing tbe time
remaining, you may change it by pressing
tile KITCHEN TIMER ON/OFF pad, then
press the number pads until the time you
want appears in tbe display.
AfterpressingtheSTARTpad,SETdisappears;
thistellsyouthetimeiscountingdown,although
thedisplaydoesnotchangeuntiloneminutehas
passed.Secondswillnot beshowninthedisplay
untilthelastminuteiscountingdown.
[] When tbe timer reaches :00, tbe
control will beep 3 times followed
by one beep evm T 6 seconds until
the KITCHEN TIMER ON/OFF pad
is pressed.
The&secondtonecanbecanceledbyfollowing
thestepsin theSpecialfeaturesof youroven
controlsectionunderTonesat theEndofa
timedCycle.
Iftbe remaining time is not in the display
(clock, delay start or cooking time are in
the display), recall the remaining time by
pressing tbe KITCHEN TIMER ON/OFF pad
and then pressing the number pads to
enter the new time you want.
To Cancel the Timer
Pressthe KITCHENTIMERON/OFFpad
_dce.
Control Lockout
Yourcontrolwillallowyoutolockoutthepress
padssotheycannotbeactivatedwhenpressed.
To lock/unlock tbe controls:
[] Press the 9 and 0pads at the same
time for 3 seconds, until the display
shows LOCON.
[] To unlock tbe control, press the
9 and 0pads at the same time for
3 seconds, until tbe display shows
LOCOFF.
When tbis fi?ature is on and the press
pads are pressed, the control will beep
and the display will show LOCON.
N Thecontrollockoutmodeaffectsallpress
pads.Nopresspadswill workwhenthis
featureisactivated
N Theadjustmentwill beretainedinmemory
afterapowerfailure.
13
Page 14

Usingthe timedbakingand mastingfeatures.
NOTE:Foods that spoil easily-such as milk, eggs, fish, stuffings, poultry and pork-should not be allowed to sit for
more than I hour before or after cooking. Room temperature promotes the growth of harmful bacteria. Be sure that
the oven light is off because heat from the bulb will speed harmful bacteria growth.
How to Set an Immediate Start and Automatic Stop
Theovenwill turnonimmediatelyandcookfora
selectedlengthoftime.Attheendof thecooking
timetheovenwill turnoffautomatically
[] Press the BAKE pad.
[] Using the number pads, enter the
desired temperature.
[] Press the COOKING TIME pad.
NOTE:If yourreciperequirespreheating you
may needto add additional time to the length of
thecookllTgtime.
[] Using the number pads, enter the
desired baking time. The oven
temperature and the cooking time
that you entered will be displayed.
[] Press the START pad.
The display will show the changing
temperature (starting at 100°F) and the
cooking time. The display starts changing
once the temperature reaches 100°F.
Tile oven will continue to cook for the
programmed amount of"time, then shut
offaummatically, unless the Cook and
Hold feature was set. See the Special
featuresof yourovencontrelsection.
Press the CLEAR/OFFpad to clear the
display.
How to Set a Delayed Start and Automatic Stop
Youcansettheovencontroltodelay-startthe
oven, cookforaspecificlengthoftimeandthen
turnoffautomaticallg
Make sure the clock shows the correct
time of day.
[] Press the BAKEpad.
[] Using the number pads, enter the
desired temperature.
[] Press the COOKINGTIMEpad.
NOTE:If yourreciperequirespreheatingyou
mayneedtoaddadditionaltimeto thelengthof
thecookllTgtime.
[] Using the number pads, enter the
desired baking time.
.......................................... [] Press the DELAYSTART pad.
[] Using the number pads, enter the
time of day you w_ant the oven to
turn on and start cooking.
[] Press the STARTpad.
If you would like to check the times you
have set, press the DELAYSTARTpad to
check the start time you have set or press
the COOKINGTIMEpad to check the
length of"cooking time you have set.
When the oven turns on at the time of
day you have set, the display will show the
changing temperature (starting at IO0°F)
and the cooking itme. The display starts
changing once the temperature reaches
IO0°E
The oven will continue tu cook for the
programmed amount of time, then shut
off automatically, unless the Cook and
Hold feature was set. See the Special
featuresof yourovencontrelsection.
Press the CLEAR/OFFpad to clear the
display.
14
NOTE:Anattentiontonewill soundif youare
usingtimedbakinganddonotpresstheSTART
padafterenteringthebakingtemperature.
Page 15

Adjust theoventhermostat--Do it yourself! . .OEA, ,a,ces.oom
Youmay find that your new oven cooks differently than the one it replaced. Use your new oven for a few
weeks to become more familiar with it. ff you still think your new oven is too hot or too cold, you can adjust
the thermostat yourself.
Do not use thermometers, such as those found in grocery stores, to check the temperature setting of your oven.
These thermometers may vary 2OMOdegrees.
NOTE."This adjustment will only affect baking and roasting temperatures; it will not affect the broiling or the self-
cleaning temperatures. Theadjustment will be retained in memory after a power failure.
ToAdjust the Thermostat
[] Press the BAKE and BROILHI/tO
pads at the same time for 3 seconds
until the display shows SF,
[] Press the BAKE pad. A two<ligit
number shows in the display.
Press BAKEagain m alternate
between increasing and decreasing
the oven temperature.
The oven temperature can be
[]
adjusted up m (+) 35°F hotter or (-)
35°F coolel: Press tile numher pads
the same way you read them. For
example, to change the oven
temperature 15°F, press I and 5.
When you have made the
[]
adjustment, press the STARTpad
to go back to the time of day display.
Use your oven as you would
normally.
Thetypeofmargarine will affect bakingperformance!
Most recipes for baking have been developed using high fat products such as butter or margarine (80% fat). If you
decrease the fa_ the recipe may not give the same results as with a higher fat product.
Recipe failure can result if cakes, pies, pastries, cookies or candies are made with Iow-fat spreads. Thelower the fat
content of a spread product, the more noticeable these differences become.
Federal standards require products labeled "margarine" to contain at least 80% fat by weight. Low-fat spreads, on the
other hand, contain less fat and more water. The high moisture content of these spreads affects the texture and flavor
of baked goods. For best results with your old tavorite recipes, use margarine, butter or stick spreads containing at least
70% vegetable oil.
15
Page 16

Usingthe self-cleaning oven.
Before a Clean Cycle
Wipe up heavy soil on the oven
bottom,
We recommend venting your kitchen
with an open window or using a
ventilation fan or hood during tile first
self:clean cycle.
Remove the racks, broiler pan, broiler
grid, all cookware and any aluminum foil
froln tile oven.
The oven racks can be self-cleaned,
but they will darken, lose their luster
and become hard m slide.
Soil on tile front frame of the range and
outside tile gasket on tile door will need
to be cleaned by hand. Clean these areas
with hot watm; soap-filled steel wool pads
or cleansers such as Soft Scrut_. Rinse
well with clean water and &T-
Do not clean the gasket. The fihe_lass
material of the oven door gasket cannot
withstand ah_asion. It is essential for the
gasket to remain intact, lfyou notice it
becoming worn or fi-ayed, replace it.
Wipe up any hemy spillovers on the oven
bottom.
Make sure the oven light bulb cover is in
place and the oven light is off.
IMPORTANT: The health of some birds is
extremely sensitive to the fumes given off
during the self-cleaning cycle of any
range. Move birds to another well-
ventilated room.
How to Set the Oven for Cleaning
i!i iii!iii i ill
iiiiii!iiiii i! !i:i i iii ! !iiiiili¸ !ii! iiiii i iiii:ii ii
ii !i!i iii!i i i!iii!iiiii!iiii i!i!!:iiii i! iiii i!i!i!i iii ii!i!!i ii!i! i ii:ii!!!ii!i iii!iii!i ii!ili!i! i ! iiiiiii! !iiii :iiii!i ii ili
[] Pressthe SELFCLEANLOISTDpad
once for a 4-hour clean time or
twice for a 3-hour clean time.
A 3-hour self-clean time is
recommended for use when
cleaning small, contained spills. A
self-clean time of 4 hours or longer
is recommended for a dirtier oven.
lfa time other than 4 hours or
3 hours isneeded, use the number
pads and enter the desired clean
time.
You can change the clean time to any
time between 3 hours and 5 hours,
depending on how dirty your oven is.
[] Press the STAR'/"pad.
When the LOCKEDIightgoes of[; you will
be able to open the doon
N The word LOCKEDwill flash and the
oven control will signal if you set the
clean cycle and forget to close the oven
dooi:
N To stop a clean cycle, press the
CLEAR/OFFpad. When the LOCKED
light goes off indicating the oven has
cooled below the locking temperature,
you will be able to open the dool:
16
The door locks automatically. The display
will show the clean time remaining. It will
not he possible to open the oven door
until the temperature drops below the
lock temperature and the LOCKEDlight
goes off
Page 17

ww_.GEAppliances.com
The oven door must be closed and all controls must be set correctly for the cycle to work properly.
How to Delay the Start of Cleaning
[] Press the SELFCLEANLOISTDpad
once fbr a 4-hour clean time or
twice for a 3-hour clean time.
A 3-hour self-clean time is
recommended for use when
cleaning small, contained spills. A
ii!!iiii!iiii!i
self:clean time of 4 hours or longer
is recommended for a dirtier oven.
Ifa time other than 4 hours or
[]
3 hours isneeded, use tile number
pads and enter the desired clean
tilne.
You can change the clean time to any
time between 3 hours and 5 hours,
depending on how dirty your oven is.
[] Press the DEDIFSrART pad.
After a Clean Cycle
You may notice some white ash in tile
oven. Wipe it up with a damp cloth after
the oven cools.
tfwhitespotsremain,removethemwitha
soap-filledsteelwoolpadandrinsethoroughly
witha vinegarandwatermixture.
These deposits are usually a salt residue
that cannot be removed by tile clean
cycle.
If tile oven is not clean after one clean
cycle, repeat the cycle.
[] Using the number pads, enter tile
time of day you want the clean cycle
to start.
[] Press tile STARTpad.
The door locks automatically. The display
will show the start time. It will not be
possible m open the oven door until
tile temperature drops below the lock
temperature and the LOCKEDlight
goes off.
When the LOCKEDlight goes off; you will
be able open the door.
/}55You cannot set tile oven _br cooking
until the oven is cool enough for the
door to unlock.
/})5While the oven is sel_'leaning, you
can press tile CLOCKpad to display
the time of day. To return to tile
clean countdown, press the SELF
CLEANLO/STDpad.
/_)5ffthe racks become hard to slide, apply
a small anmunt of cooking oil to a
paper towel mad wipe tile edges of"the
oven racks with tile paper towel.
17
Page 18

Specialfeaturesofyourovencontrol
Yournew touch pad control has additional features that you may choose to use. Thefollowing are the features and
how you may activate them.
Thespecial feature modes can only beactivated while the display is showing the time of day. They remain in the
control's memory until the steps are repeated.
When the display shows your choice, press the STARTpad. The special features will remain inmemory after a
power failure.
12-HourShutdown
Withthisfeature,shouldyouforgetandleavethe
ovenon,thecontrolwillautomaticallyturnoff the
ovenafter12hoursduringbakingfunctionsor
after3hoursduringabroilfunction.
If you wish to turn OFFthis feature, fbllow
tile steps below.
[] Press the BAKE and BROILHI/LO
pads at tile same time fbr 3 seconds
until the display shows SE
Fahrenheit or Celsius Temperature Selection
YourovencontrolissettousetheFahrenheit
temperatureselectionsbutyoumaychangethis
tousetheCelsiusselections.
!i!i!iii!i!i !i iiiii iiii!i!!ii!
[] Press the BAKE and BROILHI/LO
pads at tile same time fbr 3 seconds
until the display shows SE
[] Press tile DELAYSTART pad until no
shdn (no shut-oft) appears in the
display.
[] Press tile START pad to activate the
no shut-off and leave tile control set
in this special features mode.
[] Press the COOKINGTIME and BROIL
HI/LO pads at the same time. The
display will show F (Fahrenheit).
[] Press the COOKINGTIMEand BROIL
HI/LOpads again at the same time.
The display will show C (Celsius).
[] Press the START pad.
18
At theend of a timedcycle, 3 short beeps will
soundtheCL OFFpadfOllowedbyoneisbeePpressedeVe secondS,biscontinualUntil
&second beepmay becanceled.
cancelthe secondheep:
[] Press the BAKE and BROIL NI_O
pads at the ,same time for 3 seconds
until the display shows SE
. o,o,o,o
Press the KITCHENTIMERON/OFF
[]
pad. The display shows CONBEEP
(continuous beep). Press the
KITCHENTIMERON/OFFpad again.
The display shows BEEP.(This
cancels the one beep every 6
seconds.)
[] Press the START pad.
Page 19

12-Hour,24-Hour or Clock Blackout
Yourcontrolissettousea 12-hourclock.
Kyou would prefer to have a 24-hour
military time clock or black out the clock
display, fbllow the steps below_
[] Press the BAKE and BROILHI/LO
pads at the same time for 3 seconds
until the display shows SF.
[] Press dm CLOCK pad once. The
display will show 12hr. If this is
the choice you w_ant, press the
START pad.
CookandHold
ww_.GEAppliances.com
Press the CLOCKpad again to change to
the 24 hour military time clock. The
display will show 24 hr. If this is tile choice
you w_ant, press the START pad.
Press the CLOCKpad again to black out
the clock display. The display will show
OFF.If this is the choice you want, press
the START pad.
NOTE:If theclockis#7theblack-outmodeyou
willnotbeabletousetheDelayStartfunction.
Yourcontrolhasacookandholdfeaturethat
keepscookedfoodswarmforupto3 hoursafter
timedBakingorRoastingisfinished
NOTE:Thisfeaturecanonlybeprogrammedto
workwith timedBakingorRoasting.(Seethe
Usingthetimedbakingorroastingfeatures
section.)AftertimedBakingorRoastinghas
automaticallystoped,theprogrammedcookand
holdwillautomaticallystart.
To activate this feature for use 'after
Timed Baking or Roasting, fbllow the
steps belov,_
[] Press the BAKEand BROILHI/LO
pads at the same time for 3 seconds
until the display shows SF.
[] Press the COOKINGTIME pad.
The display will show HidOFF.
Press the COOKINGTIME pad again
re activate the feature. The display
will show HidON.
[] Press dm START pad to activate
the cook and hold feature and
leave the control set in this special
features mode.
19
Page 20

Usingthe SabbathFeature.
(Designed for use on the Jewish Sabbath and Holidays.) (onsomemodels)
TheSabbathfeature canbe usedforbaking/roastingonly.It cannotbe used forbroiling,self-cleaning or DelayStartcooking.
NOTE."Theovenlightcomesonautomaticalfy(onsomemodels/whenthedoorisopenedandgoesoffwhenthedooris closed.Thebulbmaybe
removed.SeetheOvenLightReplacementsection.Onmodelswithalightswitchonthecontrolpanel,theovenlightmaybeturnedonandlefton.
How to Set for Regular Baking/Roasting
i¸¸¸¸:
When the display shows D the
ovenis set in Sabbath, When the
display shows _ c the ovenis
baking!roasting.
When the display shows D the
oven is set in Sabbath, When the
display shows _ c the oven is
baking/roasting.
Makesuretheclockshowsthecorrecttimeofdag
[47 Press and hold both the BAKE and BROIL
H_/LOpads, at the same time, until the
display shows SE
NOTE:If bake or broil appears in the
display, the BAKEand BROILH//L0 pads
were not pressed at the same time. Ptx:,ss
the CLEAR!OFFpad and Ix.gin again.
[] Tap the DELAYSTART pad until SAb
bAtHappeaEs in the display.
] Press the START pad and D will appear
in the display.
[] P_-ess the BAKE pad. No signal win Ix.
gwen.
] Using the numlx.r pacts,enter the desired
tempetvammlx.v_een 170°Fand 550°E
No signal or temlx.l_aturewillIx. given.
[] Press the STARTpad.
After a random delay IX.Tied of
[]
approximately 30 seconds to l minute,
c will appear in the display
indicating thal the oven is baking/re.sting.
IfD c doesn't appear in the display, start
again at Step 4.
'lb adjust the oven temperalure, press the
BAKEpad, enter the new temperature using
the numlx.r pads and press the STARTpad.
NOTE:The CLEAR/OFFandCOOKINGTIMEpads
are active during tim Sabbath fi'ature.
How to Set for Timed Baking/Roasting - Immediate Start and Automatic Stop
Makesuretheclockshowsthecorrecttimeofdog
[] Press and hold both the BAKEand BROIL
HI/LOpads, at the same time, until the
display shows SE
NOTE,,'If bake or broil aplx.ars in the
display, the BAKEand BROILHg/.Opads
were not pressed at the same time. Press
the CLEAR/OFFpadand begin again.
[] 'Ihp the DELAYSTARTpad until SAbbAtH
appears in the display.
] Press the START pad and D will appear in
the display.
[] Press the COOKINGTIME pad.
Press the number pads to set the desired
[]
length of cooking time between
1 minule and 9 hours and 99 minules.
The c(x_king time that you entered will
be displayed.
Press the START pad.
[]
Press the BAKEpad. No signal will be
[] given.
] Using the number pads, enter the
desired temlx.t-amre. No signal or
tempet_ature will Ix. given.
[] Press the STARTpad.
Mter a random delay IX.Tied of
[]
approximately 30 seconds to 1 minute,
D c will appear in the display indicating
that the own is baking/roasting. I:[D c
d(*.sn't appear in the display, start
again at Swp 7.
'lb at!just the oven tempet_ature, press the
BAKEpad, enter the new tempet_ature using
the number pacts and press the STARTpad.
When ccu)king is finished, the display will
change fi-om D c to D and 0:00will appear,
indicating that the oven has turned
0EFbut is still set in Sabbath. Remove
the cooked t_xKl.
2O
How to Ex# the Sabbath Feature
[] Press the CLEAR/OFFpad.
] If the ov,'n is cooking, wait for a randort_
delay peri(x:l of approximately 30
seconds to 1 minute, until only D
is in the display.
[] Press and hold both the BAKE and BROIL
H!/LO pads, at the same time, until the
display shows SE
'l_p the DELAYSTART pad until 12shdn
] or no shdn appears in the display.
12shdn indicates that Ifie oven will
automatically turn offatk.r 12 hours, noshdn
indicates that the oven will not atttomatically
turn orb
] Press the STARTpad.
NOTE:If a power outage occurred while
the oven was in Sabbath, Ifie oven will
automatically turn off and stay off even
when the power relurrts. The oven
control must be reset.
Page 21

Careandcleaning oftherange. ,, O lia,cesoom
Be sure all controls are off and all surfaces are cool before cleaning any part of the range.
ff your range is removed for cleaning, servicing or any reason, be sure the anti-tip
device is reengaged properly when the range is replaced. Failure to take this
precaution could result in tipping of the range and cause inju_
Howto RemovePackaging Tape
To assure no damage is done to tile finish
of the product, the safest way to remove
adhesive left from packaging tape and
labels on new appliances is an application
of a household liquid dishwashing
detergent, mineral oil or cooking oil.
Control Knobs
Thecontrolknobsmayberemovedforeasier
cleaning
Before removing tile knobs for
cleaning, please note that tile knobs
are in the 0FFposition. When replacing
Oven Vent
Theovenventislocatedabovetheleftsideof
thedoor.
This area could become hot during
oven use.
Apply with a soft doth and Nlow to .soak.
Wipe dry and then apply an appliance
polish to thoroughly clean and protect
tile suri;ace.
NOTE:Theadhesivemustberemovedfromall
parts.Itcannotheremovedif itisbakedon.
the knobs, check tile OFFposition to
insure proper placement.
Wash the knobs in soap and water or
a vinegar and hot water solution but
do not soak.
It is normal for steam to come out of"
tile vent.
Theventisimportantforproperair circulation.
Neverblockthisvent.
Stainless Steel Surfaces tonsomemodels)
Do notuse a steel wool pad; it will
scratch thesurface.
To clean tile stainless steel surface,
use warm sudsy warm; a stainless steel
cleaner such as Kleen King _ or an
all-purpose liquid or spray cleanen
Always scrub in tile direction of tile
grain. Rinse thoroughly with a sponge or
cloth and clean water. Dry with a soft,
clean cloth.
After cleaning, use a stainless steel
polish, such as Stainless Steel Magic _,
Revere Copper and Stainless Steel
CleaneW or Wenol All Purpose
Metal Polish_ Follow the product
instructions for cleaning the stainless
steel surface.
21
Page 22

Careand cleaning of the range.
Painted Surfaces
Thegasketisdesignedwith a gapat the
bottomto allow forproper aircirculation.
Donotrubor clean thedoorgasket--
it hasanextremelytowresistanceto
abrasion,
If younoticethegasketbecomingworn,
frayedor damagedinany wayor if it has
becomedisplacedon thedoor,youshould
haveitreplaced.
Painted surfaces include the doo_; top of
the control panel and the drawer front.
Cleml tbese with soap and water or a
vinegar and _ter solution.
Control Panel
Clean Lipsplatters widl a damp clodl.
%You may also use a glass cleaner.
Cleaning the Oven Door
Tocleantheinsideof thedoor.
N Because the area inside tim gasket is
cleaned during tim self-dean cycle, you
do not need to clean tiffs by hand.
_ The area outside tim gasket and
the door liner can be cleaned witb a
soap-filled steel wool or plastic pad,
hot water and detergent. Rinse well
with a vinegar and vcater solution.
Tocleantheoutsideofthedoor:
_ Use soap and wcaterm tboroughly
clean the rap, sides and front of the
oven door. Rinse well. You may also
use a glass cleaner to clean tbe glass
Do not use commercial oven cleanm.-s,
cleaning powders, steel wool or harsh
abrasives on any painted surface.
/}}5Remove heavier soil witb warm
soapy w-ater.
/}}5Do not use abrasives of any kind.
on tim outside oftbe door. Do not let
water drip into the vent openings.
_ If any stain on the door vent trim is
persistent, use a soft abrasive cleaner
and a sponge-scrubber for best results.
_ Spillage of"marinades, fruit juices,
tomato sauces and basting materials
containing acids may cause
discoloration and should be wiped
up immediately. When surface is cool,
clean and rinse.
_NDo not use oven cleane_.'s, cleaning
powders or harsh abrasives on tbe
outside of tile door.
Lift-Off Oven Door
Slot
Hingelock
Pullhinge locks down to unlock.
Removalposition
Thedoorisveryheav_.Be carefulwhen
removingandliftingthedoor.
Donotlift thedoorbythehandle.
Toremovethedoor:
[] Fully open tbe door.
Pull the hinge locks down to,a-ard
[]
the door frame, to tim unlocked
position. A tool, such as a small
flat-blade screwdriver, may be
required.
Firmly grasp both sides of the door
[]
at the top.
Close door to tbe door removal
[]
posmon, which is halfway between
the broil stop position and fully
closed.
[] Lift door up and out until tile hinge
arm is clear oftbe slot.
Toreplace the door:
[] Firmly grasp both sides of tile door
at the top.
] With die Bottom
door at tile
same angle as
tim removal
position, seat the
indentation of
tim hinge arm
into tim bottom
edge of tim hinge
slot. The notch in the hinge arm
must be fhlly seated into the bottom
of"tim slot.
[] Fully open the door. If the door will
not fully open, tim indentation is
not seated correctly in the bottom
edge oftbe slot.
[] Push tim hinge locks Lipagainst the
front frame of tile oven cavity to the
locked position.
Hinge
arm
Push hinge locks up to lock.
22 [] Close tile oven door.
earm
Page 23

www.GEAppliances.com
Oven Racks
Clean tile oven racks witb an abrasive
cleanser or steel wool. After cleaning,
rinse tile racks witb clean water and dry
witb a clean clotb.
NOTE:Theovenracksmaybecleanedin the
self-cleaningoven.However,therackswilldarken
incolor,losetheirlusterandbecomehardtoslide
ff cleanedduringtheself-cleaningcycle.
Storage Drawer Removal onsomemodels)
TOremovethedrawer. Toreplacethedrawer:
To make tile racks slide more easily, apply
a small amount of or cooking oil to a
paper towel and wipe the edges oftbe
oven racks with the paper towel.
After broiling, remove the broiler
pan from the oven.
[] Pull the drawer out until it stops.
[] Lift the front oftbe drawer until the
stops clear tile guides.
] Remove the drawer.
Broiler Pan and Grid
Donotcleanthebroilerpanorgridinaself-
cleaningoven.
After broiling, remove the broiler pan
from tbe oven. Remove tbe grid from tbe
pan. Carefully pour out tbe grease from
tbe pan into a proper containe_:
Wash and rinse tim broiler pan and grid
in hot water with a soap-filled or plastic
scouring pad.
[] Place tile drawer rails on tile guides.
[] Push the drawer back until it stops.
[] Lift the front oftbe drawer and
push back until tbe stops clear tbe
guides.
[] Lower tim front oftbe drawer and
push back until it closes.
If {hod has burned on, sprinkle tbe grid
witb detergent while hot and cover witb
wet paper towels or a dishclotb. Soaking
tbe pan will remove burned-on {hods.
Both tbe broiler pan and grid may be
cleaned with a commercial oven cleaner.
Both tbe broiler pan and grid can also be
cleaned in a dishwasher.
Donotstorea soiledbroilerpanandgrid
anywherein therange.
23
Page 24

Careand cleaning of the range.
[![) [ 5¸¸¸¸¸ {f !! [ 2¸¸¸[¸¸[3¸¸¸¸¸¸
x
Oven Light Replacement
CAUTION:Before replacing your
oven light bulb, disconnect the electrical
power to the range at the main fuse or
circuit breaker panel
Be sure to let the light cover and bulb
cool completely.
Toremove the cover:
[] Twist lens counterclockwise about a
quarter turn to renlove.
Donotremoveanyscrewstoremovethecoveg
[] Replace bulb with a 40-watt
appliance bulb or two-prong
halogen bulb, as appropriate.
Oven Heating Elements
Donotcleanthebakeelementorthebroil
element.Anysoilwillbumoffwhenthe
elementsareheated.
Toreplacethecover:
[] Line up tabs of lens in front of tabs
on housing and rotate clockwise to
engage.
To clean the oven flool, gently lift
tile bake element. Clean with warm
soapy watel:
24
Page 25

Cleaningthe glasscooktop. .. .G pliances.cem
Control Lockout tonsomemodels)
Begin by locking the cooktop; see tile
ControlLockoutsection.
Normal Daily Use Cleaning
Cleanyourcooktopafter
eachspill. Use CERAMA
BRYTE® CeramicCooktop
Cleaner.
ONLY use CERAMA BRYTE®Ceramic
Cooktop Cleaner on tile glass cooktop.
Other creams may not be as effective.
To maintain and protect the surface of
your glass cooktop, follow these steps:
Before using tile cooktop fbr tile
[]
first time, clean it with CERAMA
BRYTE®Ceramic Cooktop Cleaner.
This helps protect tile top and
makes cleanup easier.
[] Daily use of CER_MMABRYTE®
Ceramic Cooktop Cleaner will help
keep tile cooktop looking new.
Shake the cleaning cream well.
[]
Apply a few drops of CERAMA
BRYTE®Ceramic Cooktop Cleaner
directly to the cooktop.
Use a paper towel or C£R_MMA
[]
BRYrE ®Cleaning Pad for Ceramic
Cooktops to clean the entire
cooktop surface.
Use a dry cloth or paper towel
[]
to remove all cleaning residue.
No need to rinse.
NOTE:It is veryimportantthat youDONOT
heatthecooktopuntil it hasbeencleaned
thoroughlg
Use a CERAMABRYTE®Cleaning
Pad for Ceramic Cooktops or a
Scotch-Brite 4°Multi-Purpose No
Scratch blue scrub pad.
The CERAMABRYTB_ Ceramic
Cooktop Scraper and aft
recommended supplies are
available through our Parts Cente_
See instructions under "To Order
Parts" section on next page,
NOTE:Do not use a dull or
nicked blade.
Burned-On Residue
WARNING:DAMAGEto yourglasssurface
mayoccurif youusescrubpadsotherthanthe
pad includedwithyourcooktop.
[] Allow tile cooktop to cool.
[] Spread a few drops of CEP_MMA
BRYTE®Ceramic Cooktop Cleaner
on the entire burned residue area.
[] Using tile included CER_MMA
BRYTE ®Cleaning Pad for Ceramic
Cooktops, rub the residue area,
applying pressure as needed.
Heavy, Burned-On Residue
[] Allow tile cooktop to cool.
[] Use a single-edge razor blade
scraper at approximately a 45 °
angle against the glass surface
and scrape tile soil. It will be
necessary to apply pressure to
the razor scraper in order to
remove the residue.
After scraping with the razor
[]
scrapm; spread a few drops of
CER_MMABRYI'E®Ceramic
Cooktop Cleaner on tile entire
burned residue area. Use the
CER_MMABRYI'E®Cleaning Pad to
remove any remaining residue.
[] If any residue remains, repeat the
steps listed above as needed.
[] For additional protection, after all
residue has been removed, polish
the entire surface with CERAivb\
BRYTE®Ceramic Cooktop Cleaner
and a paper towel.
For additional protection,
[]
after all residue has been
removed, polish the entire
surface with CER_MMA BRYTE ®
Ceramic Cooktop Cleaner
and a paper towel.
25
Page 26

Cleaningtheglasscooktop.
Metal Marks and Scratches
Be careful not to slide pots and
[]
pans across your cooktop. It will
leave metal markings on the
cooktop surface.
These marks are removable using
tile CER_MMABRYTE®Ceramic
Cooktop Cleaner witb tile CERAMA
BRYrE ®Cleaning Pad for Ceramic
Cooktops.
Glasssudace--potential for permanent damage.
Ourtestingshowsthatif you
arecookinghighsugarmixtures
suchasjelly orfudgeandhave
a spillover,it cancause
permanentdamagetotheglass
surfaceunlessthespilloveris
immediatelyremoved.
Damage from Sugary Spills and Melted Plastic
[] Turn offall surface units. Remove
hot pans.
[] Wearing an oven mitt:
a. Use a single-edge razor blade
scraper (CERAMA BRYTE®
Ceramic Cooktop Scraper) to
move tim spill to a cool area on
tim cooktop.
b. Remove the spill witb
paper towels.
If pots witb a thin overlay of
[]
aluminum or copper are allowed
to boil dry, tim overlay may leave
black discoloration on tim cooktop.
This should be removed
immediately before heating
again or tile discoloration may
be permanent.
WARNING:Carefullycheckthebottomofpans
forroughnessthatwouldscratchtheco&top.
[] 2my remaining spillover should be
left until the surlace of the cooktop
has cooled.
[] Don't use tim surfhce units again
until all of the residue has been
completely removed.
NOTE:If pittingorindentationin theglass
surfacehasalreadyoccurred,thecooktopglass
willhavetobereplaced.Inthiscase,servicewill
benecessan/
26
ToOrderParts
To order CER_MMABRYrE ®Ceramic
Cooktop Cleaner and tim cooktop
scrapm; please call our toll-free number:
NationalPartsCenter 800.626£7002
CERAMABRYTE®Ceramic
CooktopCleaner ............. # WX10)(300
CERAMABRYTE*Ceramic
CooktopScraper ............ #WX10)(0302
Kit ......................... # WB64X5027
(Kitincludescreamandcooktopscraper)
CERAMABRYTE*CleaningPadsfor
CeramicCooktops ........... # WX10)(350
Page 27

Before YouCall ForService... .GEAp,,,,oos.com
Troubleshooting tips
Save time and money! Review the charts on the following
pages first and you may not need to call for service.
!_ Possible Causes What To Do
Improper cookware • Use pans which are flat and match the diameter
being used. of the surface unit selected.
or _king iS h_
fa_tbhbb
A fuse in your home may be • Replace the fuse or reset the circuit breakel:
blown or the circuit breaker
tapped.
Cooktop controls • Check to see the correct control is set for the surface
improperly set. unit you are using.
Incorrect deaning
methods being used.
Cookware with rough bottoms
being used or coarse particles
(salt or sand) were between
the cookware and the surface
of the cooktop.
Cookware has been slid
across the cooktop surface.
_reii_dis_loratie_ Food spBlovers not cleaned • See the Cleaning the glass cooktop section.
before next use.
Hot surface on a model • This is normal. The surface may appear discolored
with a white glass cooktop, when it is hot. This is temporary and will disappear
Hot cooktop came into • See the Glass surface - potential for permanent damage
contact with plastic placed section in the Cleaning the glass cooktop section.
on the hot cooktop.
Hot sugar mixture spilled • Call a qualified technician tbr replacement.
• Scratches are not removable. Tiny scratches will become
legs visible in time as a resuh of cleaning.
• To avoid scratches, use the recommended cleaning
procedures. Make sure bottoms of cookware are clean
before use, and use cookware with smooth bottoms.
as the glass cools.
_Ih_ktop on the cooktop.
Improper cookware • Use only flat cookware to minimize cycling.
being used.
You forgot to enter a • Press the BAKE pad and desired temperature or the
bake temperature or SH.F CLEAN tO/$FO pad and desired clean time.
cleaning time.
Oven controls improperly set. • See the Using the oven section.
Rack position is incorrect • See the Using the oven section.
or the rack is not level.
Incorrect cookware or
cookware of improper
size being used.
Oven thermostat needs
adjustment.
• See the Using the oven section.
• See the Adjust the ovon thermostat-Do it yourself!
section.
27
Page 28

Before YouCallForService...
Troubleshooting tips
Possible Causes What ToDo
Plug on range is not completely • Make sure electrical plug is plugged into a live, properly
inserted in the electrical outlet, grounded outlet.
A fuse in your home may • Replace tile fuse or reset the circuit hreaken
be blown or the circuit
breaker tripped.
Oven controls improperly set. • See the Using the clock and timer section.
Light bulb is loose or defective. • Tighten or replace the bulb.
Switch operating light • Call for service.
is broken.
Oven controls improperly set. • Make sure you press the BROILHI/LOpad.
Improper rack position • See tile Broiling Guide.
being used.
Cookware not suited • Use tile broiling pan and grid that came with your range.
for broiling.
Aluminum foil used on the • See tile Using the oven section.
the broiling pan and grid has
not been fitted properly and
sllt as recommended.
In some areas the power • Preheat the broil element for f0 minutes.
(voltage) may be low.
• Broil fbr the longest period of time recommended in
the Broiling Guide.
Oven thermostat • See the Adjust the oven thermostat- Do it yourself]
needs adjustment, section.
A fuse in your home may be • Replace the fuse or reset the circuit breaken
blown or the circuit
breaker tripped.
Oven controls improperly set. • See the Using the oven section.
Rear drawer support is • Reposition the drawen See the Storage Drawer
on top of the guide rail. Removal instructions in the Care and cleaning of your
range section.
Power cord maybe • Reposition the drawer and power cord. See the
obstructing drawer Storage Drawer Removal instructions in the Care and
in the lower back cleaning of your range section.
of the range.
Rear drawer support is
on top of the guide rail.
• Reposition the drawen See the Storage Drawer
Removal instructions in the Care and cleaning of your
range section.
28
Page 29

ww_. GEAppliances.com
Possible Causes What ToDo
The oven temperature is • Allow tile oven to cool and reset tile controls.
too high to set a self-clean
operation.
Oven controls improperly set. • See the Using the self-cleaning oven section.
This is the sound of the • This is normal.
metal heating and cooling
during both the cooking and
cleaning functions.
Excessive soil. • Press the CLEAR/OEFpad. Open the windows to
rid the room of smoke. Wait until the LOCKED light
goes off. Wipe tip the excess soil and reset the clean
cycle.
Oven too hot. • Allow the oven to cool below locking temperature.
Oven controls not properly set. •SeetheUsingtheself-cleaningovensection.
Oven was heavily soiled. • Clean up heavy spillovers before starting tile clean
cycle. Heavily soiled ovens may need to sell:clean
again or for a longer period of time.
The self-clean cycle has been • Close the oven door.
selected but the door is not
close
The oven door is locked • Press the CLEAR/OFFpad. Allow the oven to cool.
because the temperature
inside the oven has not
dropped below the
locking temperature.
You have a function • Press the CLEAR/OFFpad. Put the oven back into
error code. operation.
If the function code repeats. • Disconnect all power to the range for at least 30
seconds and then reconnect powen If the timction
error code repeats, call for service.
29
Page 30

Before YouCall ForService...
Troubleshooting tips
Possible Causes What ToDo
A fuse in your home may be * Replace the fuse or reset the circuit bmaken
blown or the circuit
breaker tripped.
The clock is in the • See the Special features of your oven control section.
black-out mode.
i
"B_rning_:'oily This is normal in a new • To speed the process, set a self-clean cycle for a
Power failure. • Reset the clock.
Oven control pads were • The BAKE and BROIL HI/LO pads must be pressed
not pressed properly, at the same time and held for 3 seconds.
Power outage or surge. • Reset the clock. If the oven was in use, you must reset
it by pressing the CLEAR/OFF pad, setting the clock
and resetting any cooking
oven and will disappear minimum of 3 hours. See the Using the self-cleaning
in time. oven section.
An odor from the insulation • This is temporary.
around the inside of the
oven is normal for the first
few times the oven is used,
A cooling fan may
automatically turn
on and off.
• This is normal. The cooling fan will mrn offand
on to cool internal parts. It may run after the oven
is turned OFE
fhnction.
3O
Page 31

Notes.
hu
_t
S"
m
h
oz.
m
_P
m
31
:x
Page 32

m
m
m
h
CL_
m
i__.
32
Page 33

GE Service Protection Plus TM
GE, a name recognized worldwide tbr quality and dependability, offers you
Service Protection Plus T_'--comprehensive protection on all your appliances--
No Matter What Brand!
Benefits Include:
• Backed by GE
• All brands covered
• Unlimited service calls
• All parts and labor costs included
• No out-of-pocket expenses
• No hidden deductibles
• One 800 number to call
You will be completely satisfied with our smwice protection or you may request your money back
on the remaining value of your contract. No questions asked. It's that simple.
Protect your refi'igeratol; dishwashm, washer and drym. range, TV, VCR and much more--any brand!
Plus there's no extra charge fbr emergency service and low monthly financing is available. Even icemaker
coverage and fbod spoilage protection is offered. You can rest easy, knoudng that all your valuable
household products are protected against expensive repairs.
Place your confidence in GE and call us in the U.S. toll-fi'ee at 800.626.2224
for more information.
%MI b_ands covei ed, tip to 20 yeais old, in the COiltil_lental U.S.
........................................................................................... _, Cut here
We'll CoverAnyAppliance.
Anywhere. Anytime.*
Please place in envelope and mail to:
General Electric Company
Warranty Registration Department
P.O. Box 32150
Louisville, KY 40232-2150
33
Page 34

Consumer Product Ownership Registration
Dear Customer:
Thank you for purchasing our product and thank you for placing your confidence in us.
We are proud to have you _ a customer!
Follow these three steps to protect your new appliance investment:
Complete _ad mail
your Consumer
Product Ownership
Registration today.
Have the peace of
mind of knowing we
Call conlact you ill
tile unlikely event of a
safety modification.
2
After mailing the
registration below,
store this document
in a safe place, it
contains inhffmation
you will need should
you require service.
Our service number is
800.GE.CARES
(800.432.2737).
Model Nmnber Serial Nmnber
I I I I I I I I I I I
IIIIIII
Important: If you did not get a registration card with your
product, detach and return the form below to
ensure that your product is registered, or register
online at www.GEAppliances.com.
Consumer Product Ownership Registration
Read your Owner's
Manual carefully.
It will help you
operate your new
appliance properly.
,_. Cut here
i i i i i i i i i i i i i i i i i
Model Nmnber Serial Nmnber
Mr._ Ms._ Mrs._ Miss_
Ei_st I f_st I
Name I I I I I I I I I Name I I I I I I I I I I I I
Sti-eel ]
Address I I I I I I I I I I I I I I I I I I I I I I I I
Apt. # ] I I I I I I I E-mail Address*
Zip
ciwllllllllllllll State]
Date Placed
Month Da, ax'L A hone ' ,
* Please provide your e-mail address to receive, via e-mail, discounts, special offers and other important
communications fi-om GE Appliances (GEA).
{77Check here it you do not _v_antto receixe communications trom GEA's carefully selected parmers.
GE_lianc_
GenetM Electric Compntsy
Louisville, Ke@tuok V
wwvv.GE._pplian_es._om
Number ]
34
Code ] I I
I I
I I
i i
Page 35

GEElectricRange Warranty.
All warranty service provided by our Factory Service
Centers, or an authorized Customer Care®technician.
Toschedule service, on-line, 24 hours a day, visit us at
www.GEAppliances.com, or call 800.GE.CARES(800.432.2737).
GE Will Provide:
Anypartof the range which Pails due m a defect in materials or worhnanship. During this
fullone-year warranty, GE will also proxdde, free of charge, all labor and in-home service to
replace tile defective part.
A replacementglasscooktopif it should crack due to thermal shock, discolor or if the
pattern wears ore
A replacementradiantsurfaceunitif it should burn out.
During this limited additional four-year warranty, you will be responsible for any labor or
in-home smMce.
_ Service trips to your home to teach you howto use
the product.
_ Improper iustalladon.
_ Failure of the product if it is abused, misused,
or used for other than the intended purpose or
used commercially.
_ Danmge to the glass cooktop caused byuse of cleaners
other than the recommended cleaning creams and
pads.
Staple your receipt here.
Proof of the original purchase
date is needed to obtain service
under the warranty.
/})_Damage to the _ass cooktop caused by hardened
spills of sugary materials or melted plastic that
are not cleaned according to the directions in
the Owner's Manual.
/})_Replacement of house fuses or resetting of drofit
breakers.
/})_Damage to the product caused by accident, i'tre, floods
or acts of God.
/})_Incidental or consequential damage caused by possible
defects with this appliance.
This warranty is extended to the original purchaser and any succeeding owner for products purchased for
home use within the USA. In Alaska, the warranty excludes the cost of shipping or service calls to your home.
Some states do not allow the exclusion or limitation of incidental or consequential damages. This warranty
gives you specific legal rights, and you may also have other rights which vary from state to state. Toknow
what your legal rights are, consult your local or state consumer affairs office or your state's Attorney General
Warrantor: General Electric Company.Louisville, KY110225
35
Page 36

ConsumerSupport.
GEAppliancesWebsite
Have a question or need assistance with your appliance? Try the GE Appliances Wehsite 24 hom.-s a day,
any day of the year! For greater convenience and faster service, you can now download Ou_ner's Manuals,
order parts, catalogs, or even schedule service on-line. You can also "Ask Our Team of Experts''"
your questions, and so much more...
ScheduleService
Expert GE repair service is only one step away fi'om your door. Get on-line and schedule your service at
your convenience 24 hours any day of the year! Or call 800.GE.C_M/ES (800.432.2737) during normal
business hours.
RealLifeDesignStudio
GE supports the Universal Design concept--products, services and environments that can be used hy
people of all ages, sizes and capabilities. We recognize the need m design for a wide range of physical and
mental abilities and impairments. For details of GE's Universal Design applications, including kitchen
design ideas for people with disaUdities, check out our Website today. For the hearing impaired, please call
800.TDD.GEAC (800.833.4322).
ExtendedWarranties
www.GEAppliances.com
www.GEAppliances.com
www.GEAppliances.com
www.GEAppliances.com
v______
v................._
Purchase a GE extended warranty and learn about special discounts that are a'_ailable while your warranty
is still in effect. You can purchase it on-line anytime, or call 800.626.2224 during normal business hours.
GE Consumer Home Selwices will still be there after your warranvy expires.
PartsandAccessories
Individuals qualified to serxdce their own appliances can have parts or accessories sent directly to their
homes (VISA, MasterCard and Discover cards are accepted). Order on-line today, 24 hours every day or by
phone at 800.626.2002 during normal business hours.
Instructionscontainedin thismanualcoverproceduresto beperformedbyanyuser.Otherservicinggenerally
shouldbereferredtoqualifiedservice personnelCautionmustbeexercised,sinceimproperservicing maycause
unsafeoperation.
ContactUs
If you are not satisfied with the smwice you receive from GE, contact us on our Website Mth all the details
including your phone number, or write to: General Managm; Customer Relations
GE Appliances, Appliance Park
Louisxdlle, KY40225
www.GEAppliances.com
www.GEAppliances.com
RegisterYourAppliance www.GEAppliances.com
k____.._.
Register your new appliance on-fine---at your convenience! Timely product registration will allow for
enhanced communication and prompt serdce under the terms of your warranty, should the need arise.
You may also mail in the preprinted registration card included in the packing material.
Printed in the United States
 Loading...