

GE JSP46WD2WW, JSP46CN1CC, JSP46BN1BB, JSP46WN1WW Owner’s Manual
www.GEAppliances.com
Safety Information
Anti-Tip Device .............. 2
Oven ....................... 5
Radiant Surface Units ........ 4
Safety Precautions ......... 2, 3
JI)P46
jsP46
°e,,,q
Operating Instructions
Clock and Timer ............ 13
Oven ................... 10-20
Oven Thermostat ........... 15
Sabbath Feature ............. 20
Self-Cleaning ............ 16, 17
Surface Units .............. 6, 7
Timed Baking & Roasting .... 14
Care and Cleaning
Broiler Pan & Grid .......... 23
Control Knobs ............. 21
Control Panel .............. 22
Glass Cooktop ........... 25-26
Lift-Off Oven Door .......... 22
Oven Light ................. 24
Oven Shelves ............... 23
Oven Vent ................. 21
Stainless Steel Surfaces ....... 21
Storage Drawer Removal ..... 23
Troubleshooting Tips
Before You (;all
For Service 27-. 0
Consumer Support
Consumer Support.. Back Cover
Product Registration ..... 33, 34
Warranty .................. 35
Write the model and serial
numbers here:
Model #
Serial #
You can find them on a label
behind the open oven door
on the lower left corner of the
range fi'ame.
164D4290P018 49-80052 12-00JR
IMPORTANTSAFETYINFORMATION.
READALLINSTRUCTIONSBEFOREUSING.
WARNING!
For your safety, the information in this manual must be followed to minimize the risk of fire, electric
shock, or to prevent property damage, personal injury, or loss of life.
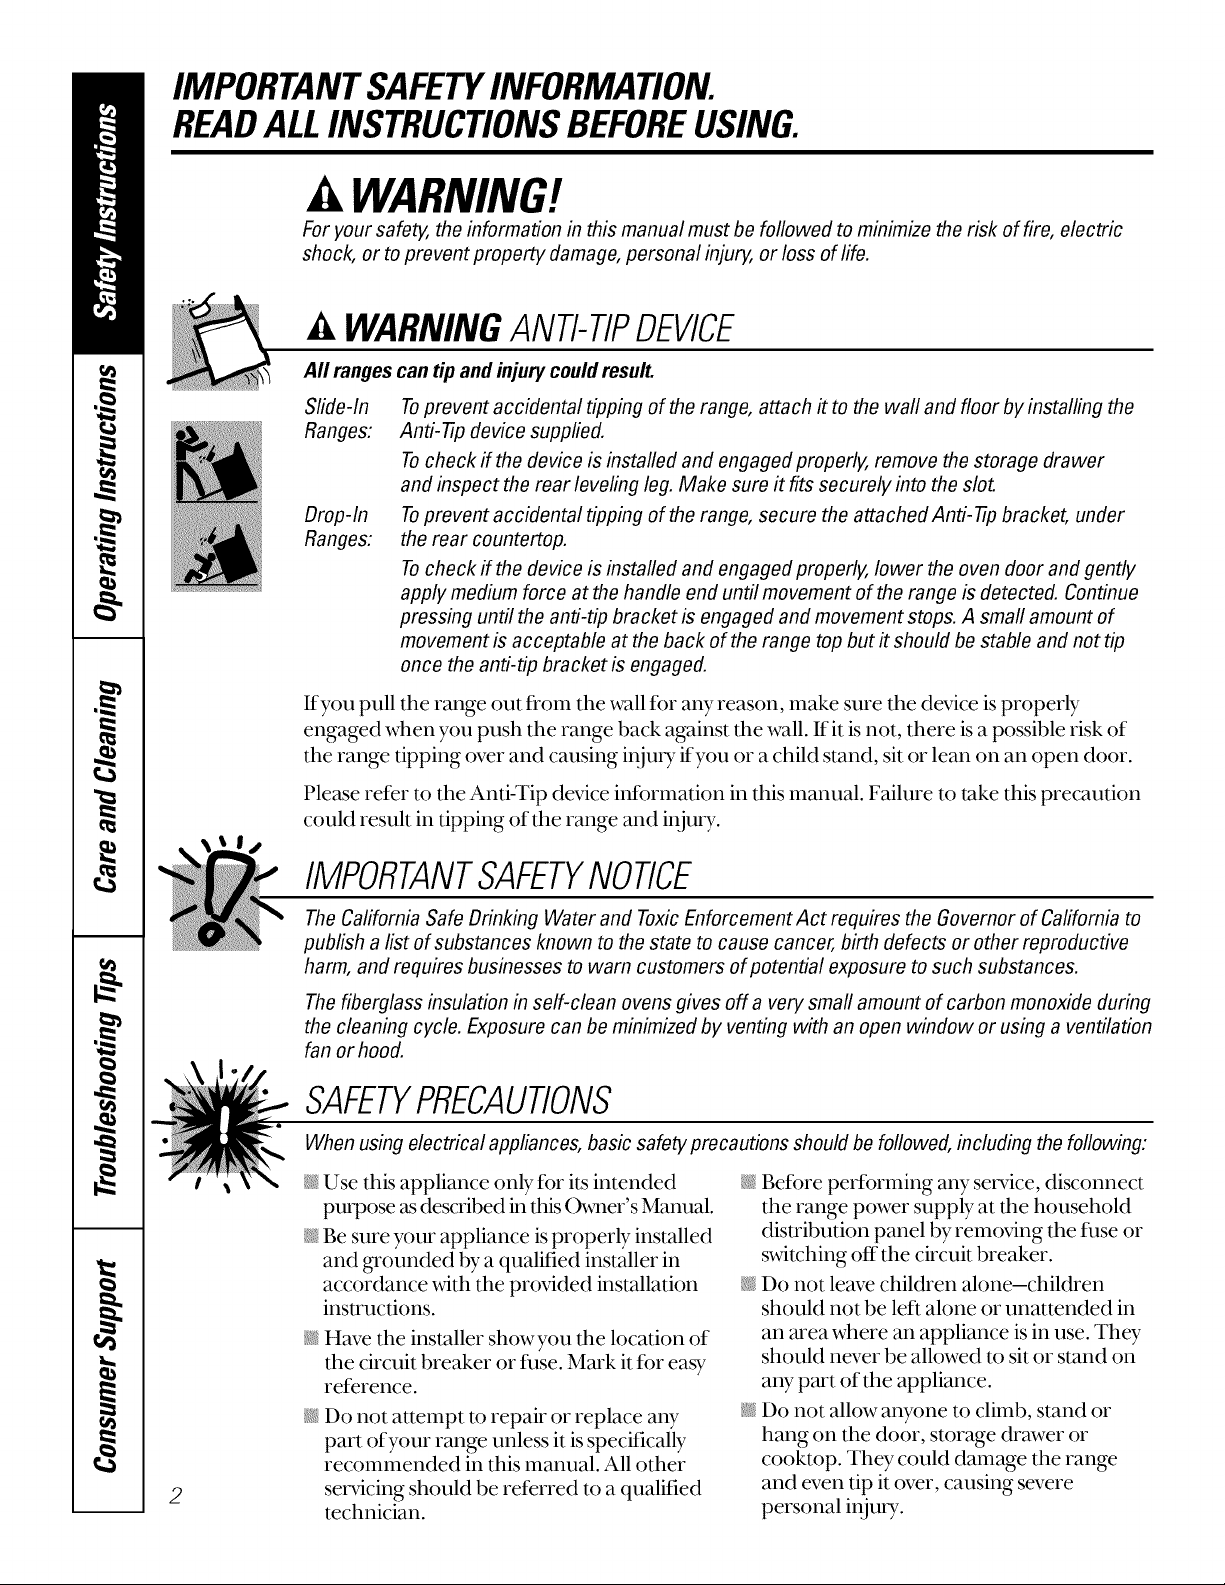
WARNINGANti-TIPDEVICE
Aft ranges
Slide-In
Ranges:
Drop-In
Ranges:
If you pull the range out from the wall for any reason, make sure the device is properly
engaged when you push the range back against tl_e wall. Ifit is not, there is a possible risk of
the range tipping over and causing inju U ityou or a child stand, sit or lean on an open door.
Please refer to the Anti-Tip device hfformation in this manual. Failure to take this precaution
could result in tipping of the range and h_jury.
can tipand injury could result.
Toprevent accidental tipping of the range, attach it to the waft and floor by installing the
Anti-tip device supplied.
Tocheck if the device is installed and engaged properly, remove the storage drawer
and inspect the rear leveling leg. Make sure it fits securely into the slot.
Toprevent accidental tipping of the range, secure the attached Anti-tip bracket, under
the rear countertop.
Tocheck if the device is installed and engaged properly, lower the oven door and gently
apply medium force at the handle end until movement of the range is detected. Continue
pressing until the anti-tip bracket is engaged and movement stops. A small amount of
movement is acceptable at the back of the range top but it should be stable and not tip
once the anti-tip bracket is engaged.
IMPORTANTSAFETYNOtiCE
The California Safe Drinking Water and Toxic Enforcement Act requires the Governor of California to
publish a list of substances known to the state to cause cancer, birth defects or other reproductive
harm, and requires businesses to warn customers of potential exposure to such substances.
The fiberglass insulation in self-clean ovens gives off a very small amount of carbon monoxide during
the cleaning cycle. Exposure can be minimized by venting with an open window or using a ventilation
fan or hood.
SAFETYPRECAUtiONS
When using electrical appliances, basic safety precautions should be followed, including the following:
Use this appliance only for its intended
pulpose as described in dds O_mer's Manual.
Be sure your appliance isproperly installed
and _ounded by a qualified installer in
accordance with the provided installation
instructions.
@
Have the installer showyou dm location of
the circuit breaker or fuse. Mark it for easy
reference.
@
Do not attempt to repair or replace any
part ofyour range unless it is specitically
recommended in this manual. All other
2
servicing should be referred to a qualified
technician.
Betbre performing any service, disconnect
the range power supply at file household
distribution panel by removing the fllse or
switching off the circuit breaker.
_ Do not leave children alone-children
should not be left alone or unattended in
an area where an appliance is in use. They
should never be allowed to sit or stand on
any part of the appliance.
@Do not allow anyone to climb, stand or
hang on the door, storage drawer or
cooktop. They could damage the range
and even tip it over, causing severe
personal injury.
wvvw.GEAppliances.com
A WARNING'!
SAFETYPRECAUTIONS
Do not operate the oven or cooktop controls if the glass is broken. Foodsplatter or cleaning solution
may penetrate a broken control panel or cooktop and create a risk of electrical shock. Contact a
qualified technician immediately should your glass control panel or cooktop become broken.
_ Do not store flammable materials in an
oven or near the cooktop.
CAUTION:Itemsofinterestto
children should not be stored in cabinets
above a range or on the back of a range-
children climbing on the range to reach
items could be seriously ir_jured.
@Never wear loose-fitting or hanging
garments while using tile appliance. Be
careful when reaching for items stored over
the range. Flammable material could be
ignited if brought in contact with hot
surface units or heating elements and may
cause severe burns.
@ Use only" dry pot holders--moist or damp
pot holders on hot surfaces may result in
burns from steam. Do not let pot holders
touch hot sur[hce units or heating elements.
Do not use a towel or other bulky cloth in
place of pot holders.
Do not use water on _-ease fires. Never
pick up aflaming pan. Turn the controls
ofL Smother a flaming pan on a surface
unit by covering the pan completely with a
well-fitting lid, cookie sheet or flat tray. Use
a nmlti-purpose dry chemical or foam-type _0_
fire extinguisher.
Flaming _-ease outside a pan can be put
out by covering it with baking soda or, if
available, by using a multi-purpose dry
chemical or foam-type fire extinguisher.
Flame in the oven can be smothered
completely by closing the oven door and
turning the oven off or by using a multi-
purpose dry chemical or foam-type fire
extinguisher.
@For your safety, never use your appliance
for warming or heating the room.
N
Do not let cooking _ease or other
flammable materials accumulate in or
near the range.
@
Do not touch the sm{hce units, tire heaung
elements or tire interior surfhce of the
oven. These surfhces may be hot enough to
burn even though they are dark in color.
During and after use, do not touch, or let
clothing or other flanlmable materials
contact the sm{hce units, areas nearby the
surfhce units or any interior area of the
oven; allow sufficient time for cooling first.
Potentially hot surfaces include the
cooktop, areas facing the cooktop, oven
vent opening, surfaces near the opening,
crevices around the oven door.
REMEMBER:The inside sur/hce of the oven
may be hot when tile door is opened.
@
Do not store or use combustible materials,
gasoline or other flammable vapors and
liquids in the vicinity of this or any other
appliance.
Keep the hood and _ease filters clean
to maintain good venting and to avoid
grease fires.
Teach children not to play with the
controls or any other part of the range.
@
Always keep dish towels, dish cloths, pot
holders and other linens a safe distance
from your range.
N
Ahvays keep wooden and plastic utensils
and canned food a safe distance from
your range.
@
Ahvays keep combustible wall coverings,
curtains or drapes a safe distance from
your range.
COOKMEATANDPOULTRYTHOROUGHLY...
Cookmeat andpoultry thoroughly--meat to at leastanINTERNALtemperatureof 160°Eandpoultry
toat least anINTERNALtemperatureof 180°ECookingto thesetemperaturesusuallyprotectsagainst
foodbomeillness.
3
IMPORTANTSAFETYINFORMATION.
READALLINSTRUCTIONSBEFOREUSING.
RADIANTSURFACEUNITS
Use proper pan size--select cookware having flat bottoms large enough to cover the surface unit
heating element. Theuse of undersized cookware will expose a portion of the surface unit to direct
contact and may result in ignition of clothing. Proper relationship of cookware to surface unit will
also improve efficiency.
Never leave the surface units unattended at
high heat settings. Boilovers cause smoking
and _easy spillovers that may catch on fire.
_ Only certain types of glass, glass/ceramic,
earthenware or other glazed containers are
suitable for cooktop service; others may
break because of the sudden change in
temperature.
@To minimize the possibility of burns,
ignition of flammable materials and
spillage, the handle of a container should
be turned toward the center of the range
without extending over nearby surface units.
Ahvays turn the surface units off before
removing cookware.
@When preparing flaming foods under the
hood, turn the fan on.
@ Use care when touching the cooktop. The
glass surface of the cookmp _411retain heat
after the controls have been turned off.
@ Keep an eye on foods being flied at high or
medium high heat settings.
N Foods tor fiTing should be as &T as
possible. Frost on fiozen toods or moisture
on fi-esh foods can cause hot fat to bubble
up and over the sides of the pan.
N Use little fat tor effective shallow or deep
fat flying. Filling the pan too fldl of fat can
cause spillovers when food is added.
@ ff a combination of oils or fats will be used
in flying, stir together before heating, or as
fats melt slowly.
@ Ahvays heat fat slowly, and watch as it heats.
@ Use a deep fat thermometer whenever
possible to prevent overheating fat beyond
the smoking point.
Do not operate the radiant sur[ace units if
the glass is broken. Spillovers or cleaning
solution may penetrate a broken cooktop
and create a risk of electrical shock.
Contact a qualified technician immediately
should your glass cooktop become broken.
N Never use the glass cooktop surface as a
cutting board.
@ Do not place or store items that can melt or
catch fire on the glass cooktop, even when
it is not being used.
N Be carefld when placing spoons or other
stirring utensils on glass cooktop surface
when it is in use. They may become hot and
could cause burns.
@ Clean the cooktop with caution. Ifa wet
sponge or cloth is used to wipe spills on a
hot sm{hce unit, be carefifl m avoid steam
burns. Some cleaners can produce noxious
fimms if applied m a hot surface.
NOTE: We recommend thatyou avoid
wiping aW surface unit areas until they
have cooled and the indicator light has
gone off. Sugar spills are the exception to
this. Please see the Cleaning the glass
cooktop section.
N When the cooktop is cool, use only the
recommended cleaning cream to clean
the cooktop.
@ To aw)id possible damage to the cooking
surface, do not apply cleaning cream to
the glass surface when it is hot.
@Alter cleaning, use a &Y cloth or paper
towel to remove all cleaning cream residue.
N Read and follow all instructions and
warnings on the cleaning cream labels.
N Avoid scratching the glass cooktop. The
cooktop can be scratched with items such
as sharp instruments, rings or other
4
jewelry, and rivets on clothing.
wvvw.GEAppliances.com
WARNING'!
OVEN
Stand away from the range when opening the oven door. Hot air or steam which escapes can cause
bums to hands, face and/or eyes.
Do not heat unopened food containers.
Pressure could build up and the container
could burst, causing an i,{juU.
N
Keep the oven vent unobstructed.
@
Keep the oven fl_ee fl_om grease buildup.
N
Place the oven shelf in the deshed position
while the oven is cool. If shelves must be
handled when hot, do not let pot holder
contact the heating elements.
N
When using cooking or roasting bags in the
oven, follow the manufacturer's directions.
@
Pulling out the shelf to the stop-lock is a
convenience in lifting heavy foods. It is also
a precaution against burns fl_om touching
hot surfaces of the door or oven walls.
Do not use the (wen to dry newspapers.
If overheated, they can catch on fire.
N
Do not use the oven for a storage area.
Items stored in an oven can i_dte.
@
Do not leave paper products, cooking
utensils or food in the (wen when not
in use.
@
Do not use aluminum fl_il to line oven
bottoms, except as suggested in this
manual. Improper installation of
aluminum foil may result in a risk of
electric shock or fire.
SELF-CLEANINGOVEN
Do not use oven cleaners. No commercial oven cleaner or oven liner protective coating of any kind
should be used in or around any part of the oven. Residue from oven cleaners will damage the inside
of the oven when the self-clean cycle is used.
N Do not clean the door gasket. The door
gasket is essential for a good seal. Care
should be taken not to rub, damage or
move the gasket.
N Before sell:cleaning the oven, remove
the racks, broiler pan, _id and other
cookware. See page 20.
@ Be sure to wipe up excess spillage befbre
starting the self:cleaning operation.
N If the sell:cleaning mode malfunctions,
turn the oven offand disconnect the
power supply. Have it serviced by a
qualified technician.
N Clean only parts listed in this Owner's
Manual.
READANDFOLLOWTHISSAFETYINFORMATIONCAREFULLY.
SAVETHESEINSTRUCTIONS
5
Usingthesurfaceunits.
Throughout this manual, features and appearance may vary from your model
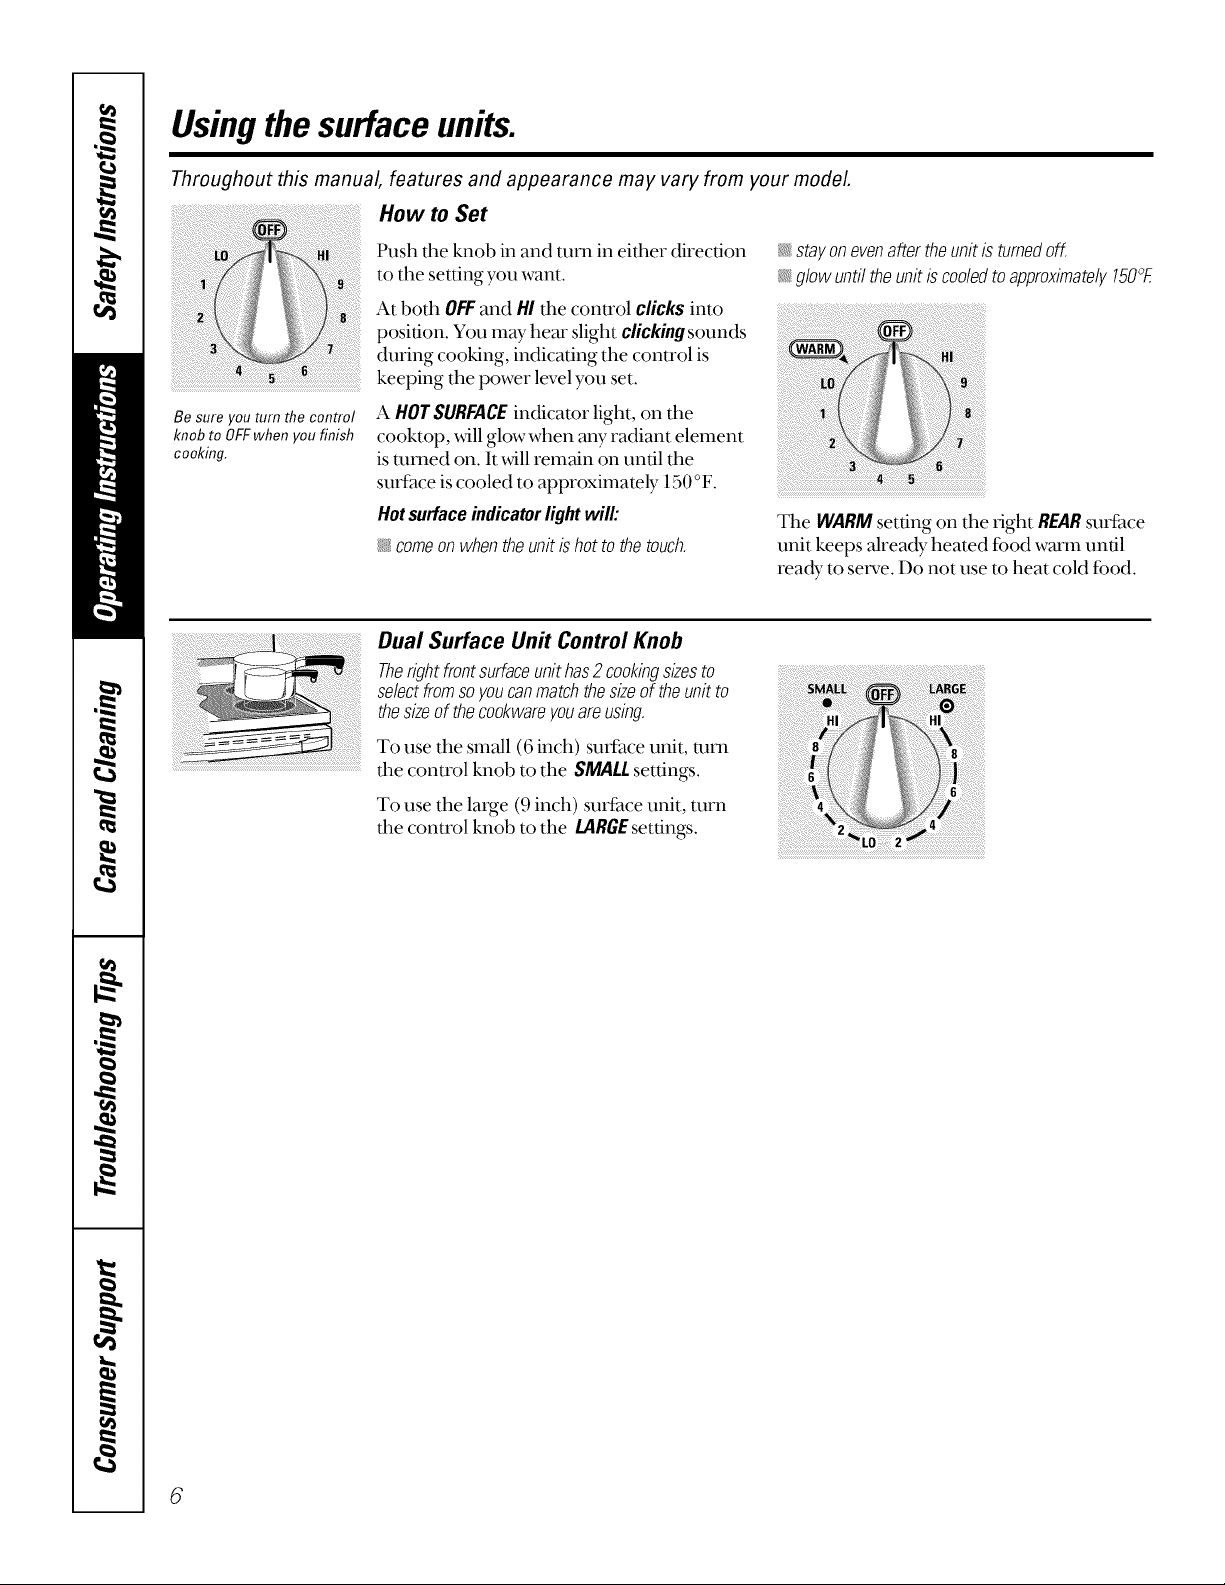
How to Set
!i!i_i¸i!i!i!i!!ii_iiiiiiii_!i_i_!ili!i!_!i_iii!i!i_g_!iii!;i:i, i! _'_iiiiiiiii!_:_i;i;_iii_i_ii!i!i!!iiii!i!iii¸i_iiii_iii!!i_i_!i¸ii!i_!!i:i!i!!iiii!_ii_!ii_i,li!il;i
i!!1%!!i_i:!i: _iii!!_!i_iii_ili!ii!i_!ii!ii!i!_¸¸;!;!_iiiii!i!i!i!i_i!i!i!IJ_!!!i
Be sure you turn the control
knob to OFFwhen you finish
cooking.
Push tile knob in and turn in either direction
to the setting you want.
At both OFFand HI the conu'ol clicks into
position. You may hem" slight clicking sounds
during cooking, indicating the conu'ol is
keeping the power level you set.
A HOTSURFACEindicator light, on the
cooktop, will glow when any radiant element
is mined on. It will remain on until the
surface is cooled to approximately 150 °F.
Hotsurfaceindicatorlightwill:
_ comeon when the unit is hot to the touch.
Dual Surface Unit Control Knob
Therightfrontsurfaceunithas2cookingsizesto
selectfromsoyoucanmatchthesizeof theunitto
thesizeof theco&wareyouareusing
To use the small (6 inch) sudhce unit, mm
the control knob to the SMALL settings.
To use the large (9 inch) surface unit, turn
the control knob to the LARGEsettings.
stayonevenaftertheunitisturnedoff.
glowuntiltheunitis cooledto approximately150°E
The WARM setting on the fight REARsurface
unit keeps already heated food warm until
ready to set_,e. Do not use m heat cold food.
6
wvvw.GEAppliances.com
The following information will help you choose cookware which will give good performance on glass cooktops.
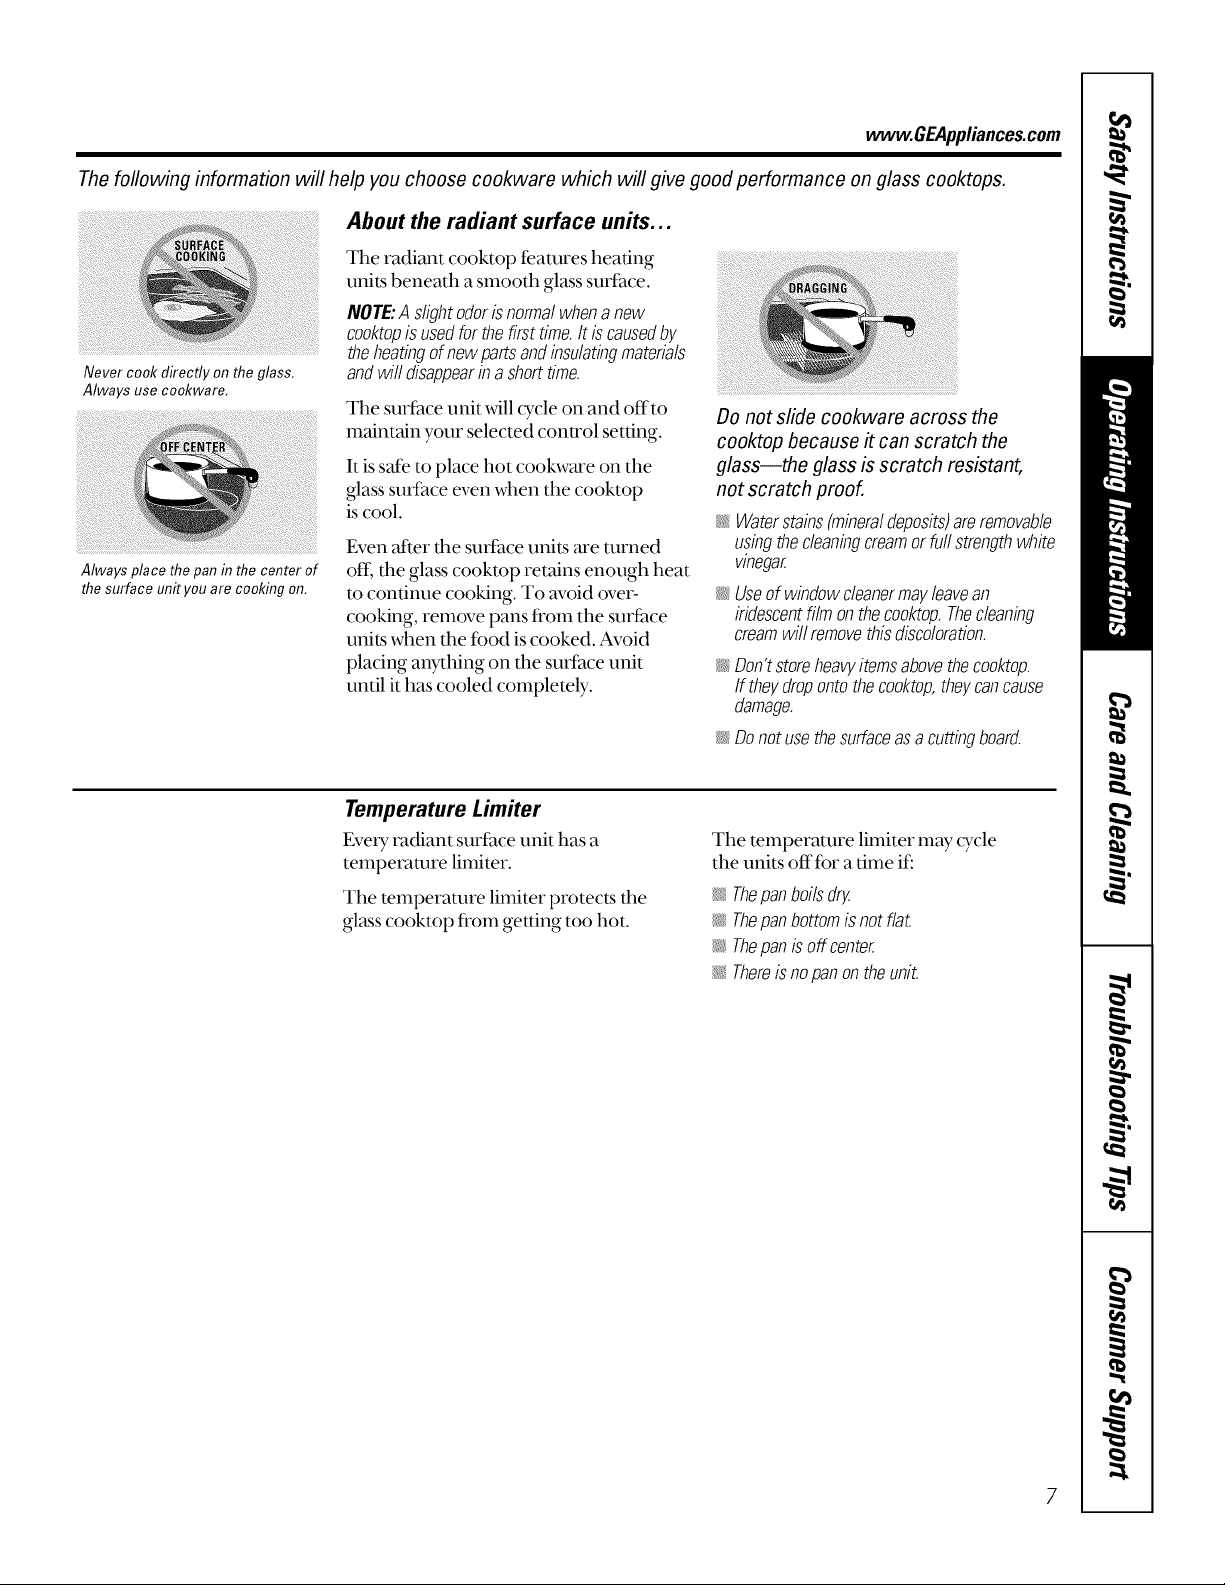
About the radiant surface units...
The radiant cooktop teamres heating
units beneath a smooth glass suri_lce.
NOTE:A slightodorisnormalwhenanew
cooktopis usedforthefirsttime.Itis causedby
theheatingofnewpartsandinsulatingmaterials
Never cook directly on the glass,
Always use cookware,
Always place the pan in the center of
the surface unityou are cooking on.
andwifl disappearinashorttime.
The surface unit _,_4llcycle on and off'to
maintain your selected control setting.
It is sale to place hot cookware on the
glass smihce even when the cooktop
is cool.
Even atter tlle surface units are turned
oft, the glass cooktop retains enough heat
m continue cooking. To avoid over-
cooking, remove pans fl'om the surt_ace
units when the food is cooked. Avoid
placing awthing on the surface unit
until it has cooled completely.
Do not slide cookware across the
cooktop because it can scratch the
glass--the glass is scratch resistant,
not scratch proof.
_ Waterstains(mineraldeposits)areremovable
usingthecleaningcreamorfurlstrengthwhite
vinegar.
_'_;Useof windowcleanermayleavean
iridescentfilm ontheco&top.Thecleaning
creamwi//removethisdiscoloration.
_ Don'tstoreheavyitemsabovethecooktop.
ff theydropontotheco&top,theycancause
damage.
_ Donotusethesurfaceasacuttingboard.
Temperature Limiter
EvmT t_ldiant suriace unit has a
temperature limiter.
The mmperamre limiter protects the
glass cooktop from getting too hot.
The temperature limiter may cTcle
the units offfor a time if:
_ Thepanboilsdry.
_: Thepanbottomisnotflat.
_ Thepanisoffcenter.
Thereis nopanontheunit.
Selectingtypesof cookware.
The following information will help you choose cookware which will give good performance on glass cooktops.
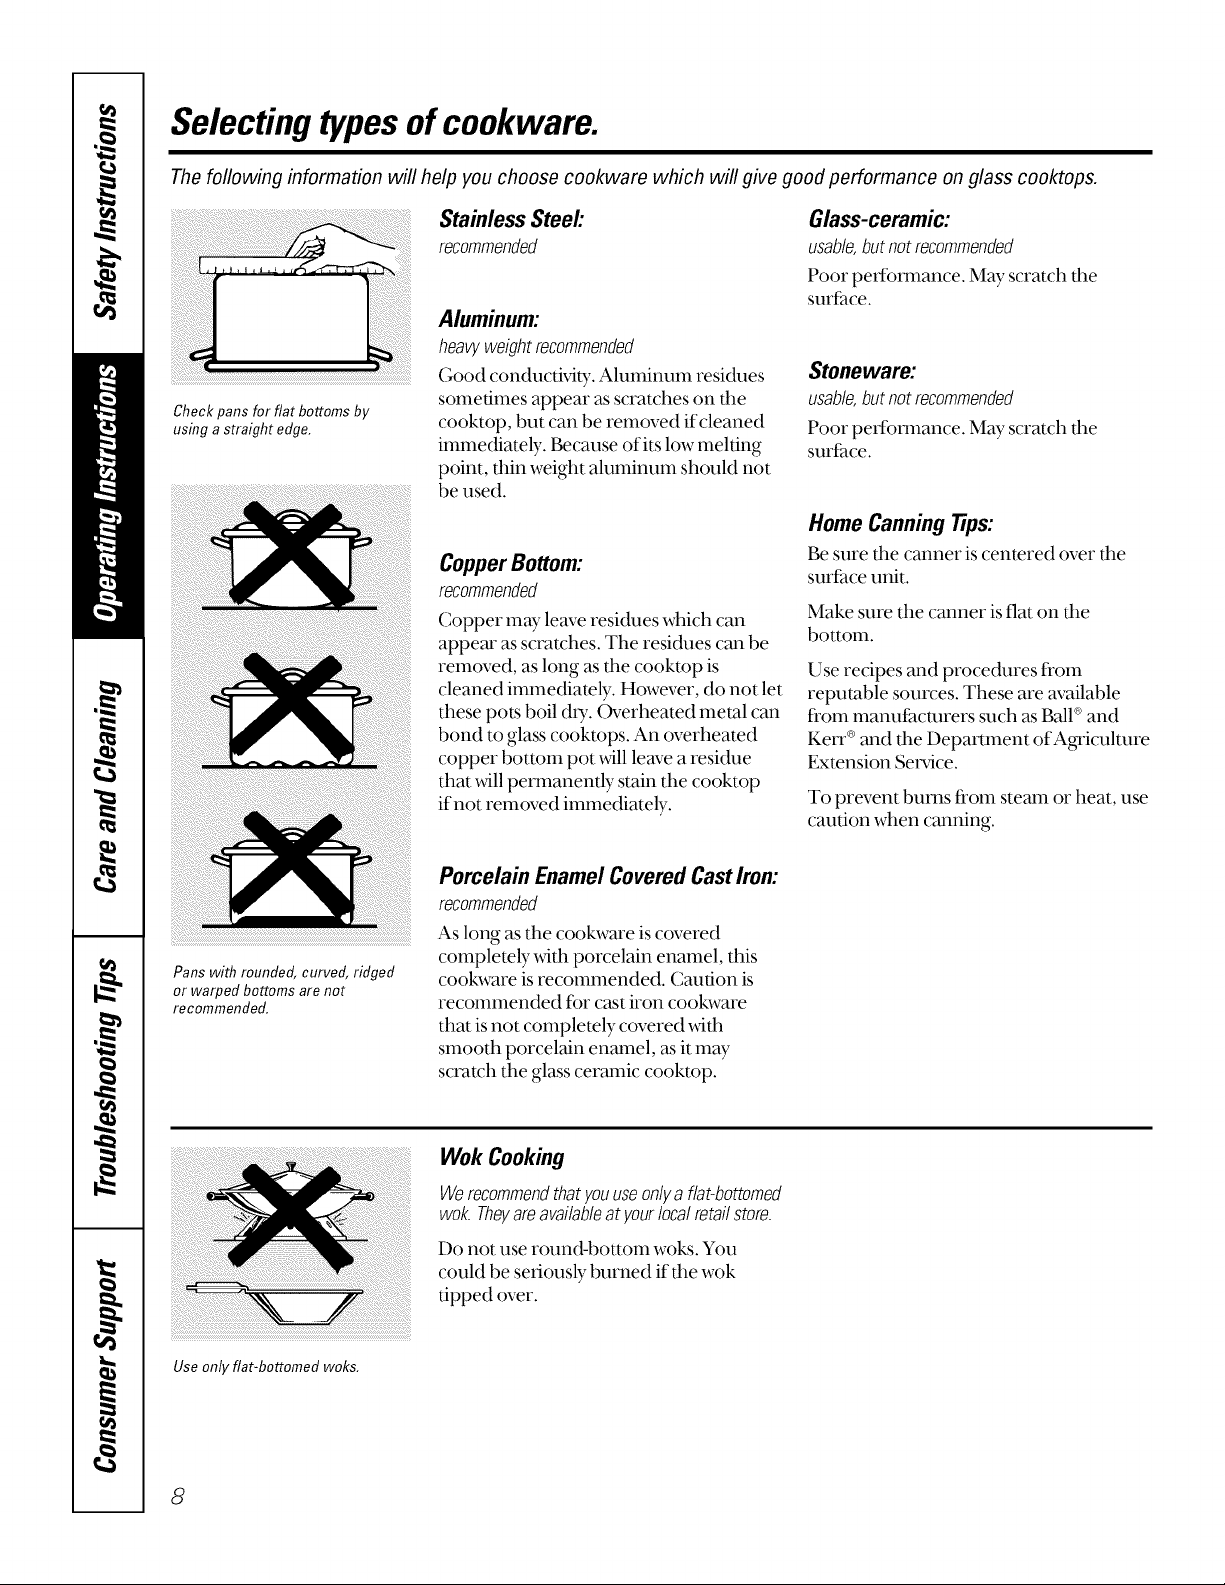
Check pans for flat bottoms by
using a straight edge.
Stainless Steel:
recommended
Aluminum:
heavyweight recommended
Good conductMty. Aluminum residues
sometimes appear as scratches on the
cooktop, but can be removed if cleaned
immediately. Because of its low melting
point, thin weight aluminum should not
be used.
CopperBottom:
recommended
Copper may leave residues which can
appem" as scratches. The residues can be
removed, as long as the cooktop is
cleaned immediamly. However, do not let
these pots boil d U. Overheated metal can
bond to glass cookmps. An overheated
copper bottom pot will leave a residue
that will permanently stain the cooktop
if not removed immediately.
Glass-ceramic:
usable,butnotrecommended
Poor perfbmlance. May scratch the
surfhce.
Stoneware:
usable,butnotrecommended
Poor peffommnce. May scratch dm
surthce.
Home Canning Tips:
Be sure the canner is centered over the
suriace unit.
Make sure the canner is flat on tim
bottom.
Use recipes and procedures ii'om
reputable sources. These are available
ii'om manuiacmrers such as Ball®and
Ken `®and the DeparUnent of Agriculture
Exmnsion Service.
To prevent bums from steam or heat, use
caution when canning.
Pans with rounded, curved, ridged
or warped bottoms are not
recommended.
Use only fiat-bottomed woks.
Porcelain EnamelCoveredCastIron:
recommended
As long as the cookware is covered
completely _4th porcelain enamel, this
cookware is recommended. Caution is
recommended for cast iron cookware
that is not complemly covered _4th
smooth porcelain enamel, as it may
scratch the glass ceramic cookmp.
Wok Cooking
Werecommendthatyouuseonlyaflat-bottomed
wok.Theyareavailableat yourlocalretailstore.
Do not use round-bottonl woks. You
could be seriously burned if the wok
tipped over.
8
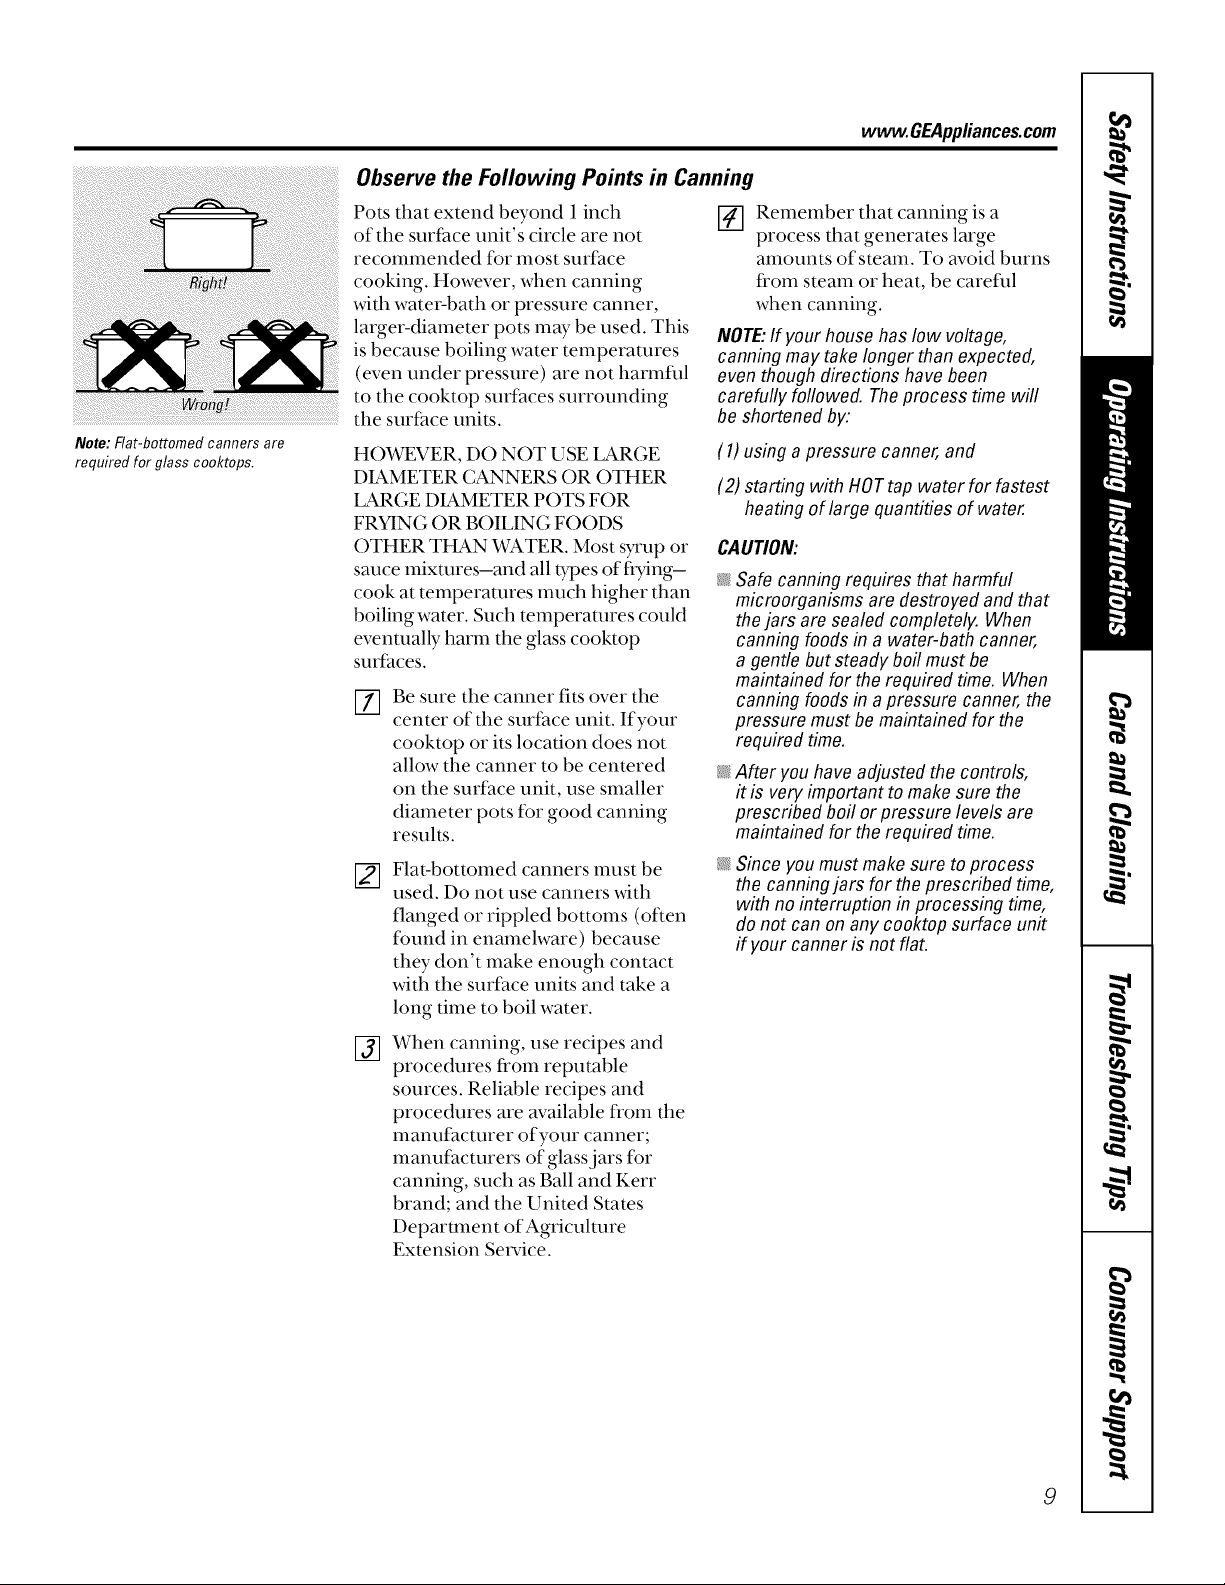
Note: Flat-bottomed canners are
required for glass cooktops.
Observe the Following Points in Canning
Pots that extend beyond i inch
of the surface unit's circle are not
recommended for most surface
cooking. However, when canning
with water-bath or pressure canner,
larger-diameter pots may be used. This
is because boiling water temperatures
(even under pressure) are not harmflll
to the cooktop surfhces surrounding
the surface units.
HO_gEVER, DO NOT USE LARGE
DIAMETER CANNERS OR OTHER
LARGE DIAMETER POTS FOR
FRYING OR BOILING FOODS
OTHER THAN WATER. Most syrup or
sauce mixtures-and all t}_oesof flTing-
cook at temperatures much higher than
boiling water. Such temperatures could
eventually harm the glass cooktop
surfaces.
Be sure the canner fits over the
[]
center of the surface unit. If your
cooktop or its location does not
allow the canner to be centered
on the surface unit, use smaller
diameter pots fBr good canning
results.
Flat-bottomed canners nmst be
used. Do not use canners _4th
flanged or rippled bottoms (often
found in enamelware) because
they don't make enough contact
with the surface units and take a
long time to boil water.
[] Remember that canning is a
NOTE:If your househas low voltage,
canning maytake longer than expected,
even though directions have been
carefully followed. Theprocess time will
be shortened by:
(1) using a pressure canner, and
(2) starting with HOTtap water for fastest
CAUTION:
@
@
@
www.GEAppliances.com
process that generates large
amounts of steam. To avoid burns
fi'om steam or heat, be carefld
when canning.
heating of large quantities of water.
Safe canning requires that harmful
microorganisms are destroyed and that
thejars are sealed completely. When
canning foodsin a water-bath canner,
a gentle but steady boil must be
maintained for the required time. When
canning foods in apressure canner, the
pressure must be maintained for the
required time.
After you have adjusted the controls,
it is very important to make sure the
prescribed boil orpressure levels are
maintained for the required time.
Since you must makesure to process
the canningjars for the prescribed time,
with no interruption in processing time,
do not can on any cooktop surface unit
if your canner is not flat.
When canning, use recipes and
@
procedures from reputable
sources. Reliable recipes and
procedures are available from the
manuf_mturer of your canner;
manufacturers of glass jars for
canning, such as Ball and Kerr
brand; and the United States
Department of Agriculture
Extension Set_,ice.
9
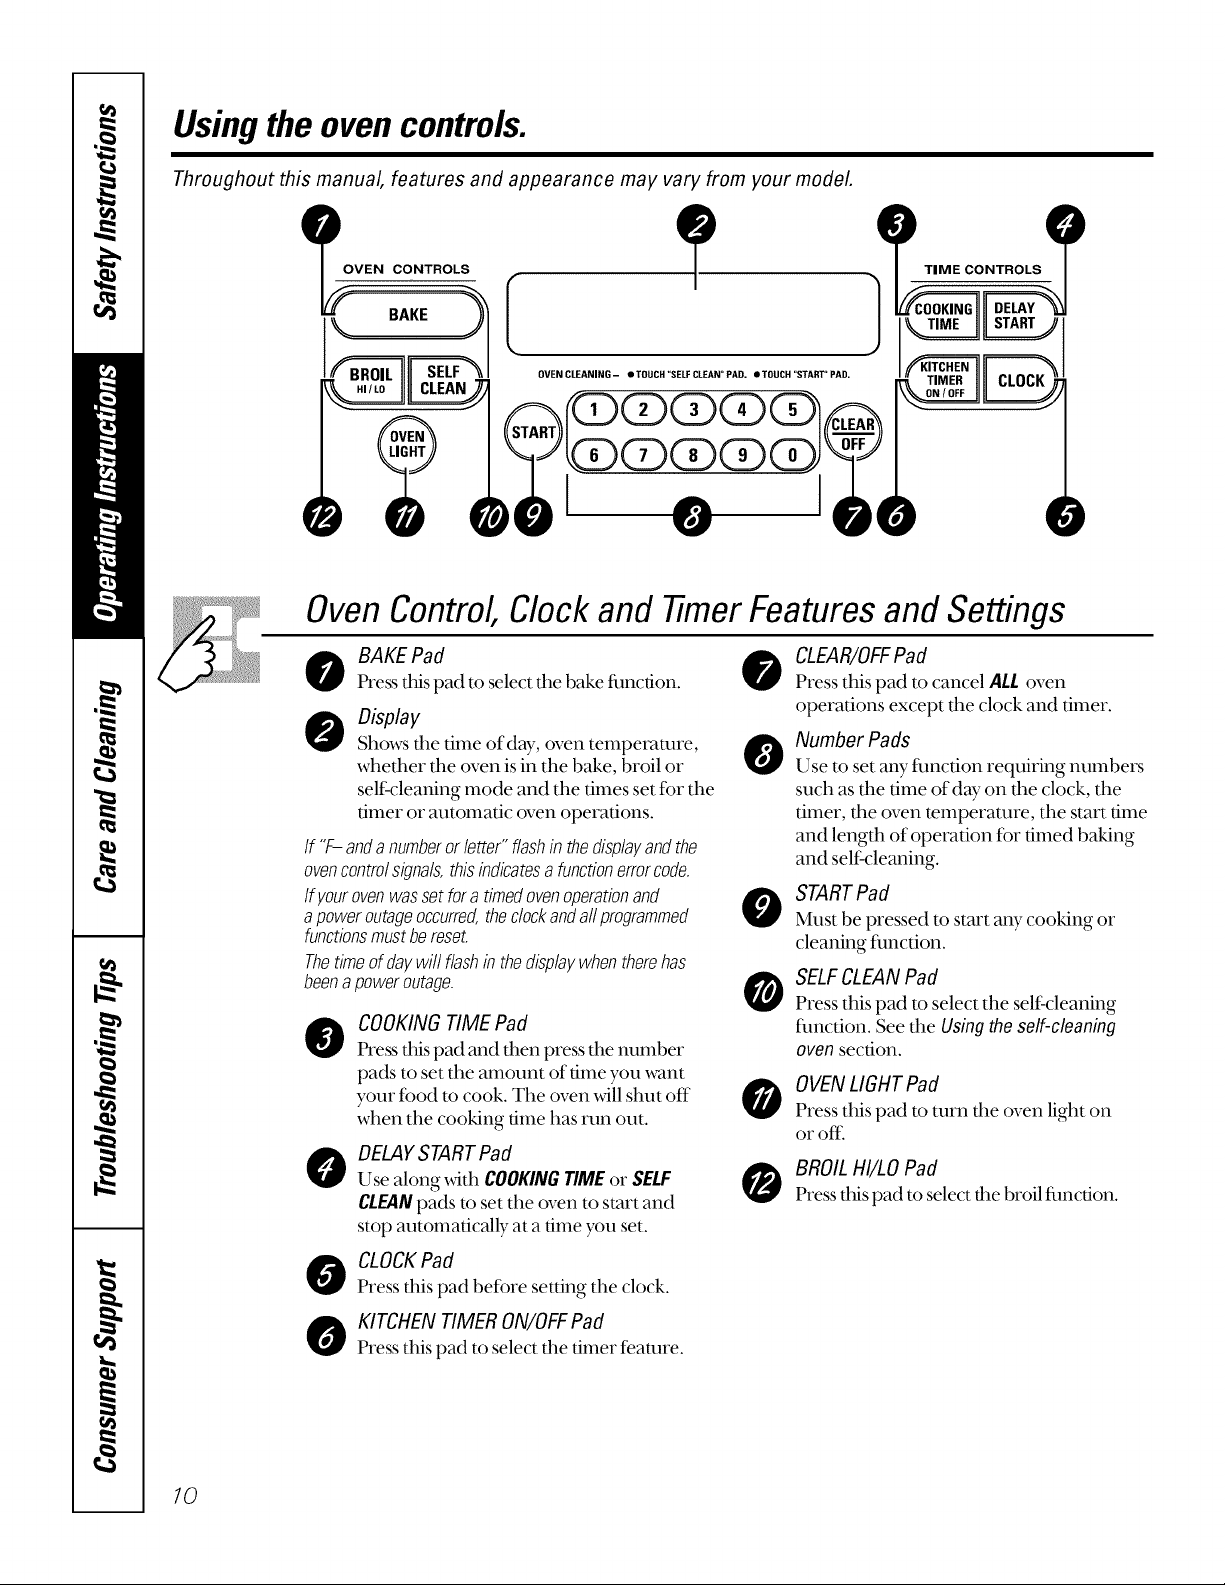
Usingtheovencontrols.
Throughout this manual, features and appearance may vary from your model
__ VEN CONTROLS
0VENCLEANING- OTOUCH"SELFCLEAN°PAD, eTOUCH"START"PAD,
TIME CONTROLS
OvenControl,Clockand timer FeaturesandSettings
CLEAR/OFFPad
BAKE Pad 0
Press tlds pad to select tile bake fimcfion.
Display
Shows tile time of day, oven temperature, A
whether the oven isin the bake, broil or
self:cleaning mode and the times set for the
timer or automatic oven operations.
If "F-andanumberorletter"flashin thedisplayandthe
ovencontrolsignals,thisindicatesafunctionerrorcode.
Ifyourovenwassetfora timedovenoperationand
apoweroutageoccurred,theclockandaftprogrammed
functionsmustbereset.
Thetimeofdaywillflashin thedisplaywhentherehas
beenapoweroutage.
COOKING TIME Pad
@
Press this pad and then press the number
pads to set the amount of time you want
your fbod m cook. The oven will shut off
when the cooking time has run out.
DELAYSTARTPad
0
Use along with COOKINGTIMEor SELF
CLEANpads to set the oven to start and
stop automatically at a time you set.
CLOCKPad
Press this pad befbre setting the clock.
KITCHENTIMERON/OFFPad
Press this pad to select the timer feature.
Press this pad to cancel ALLoven
operations except the clock and timer.
Number Pads
Use to set any flmcdon requiring numbers
such as the time old W on the clock, the
timer, the oven temperature, the start time
and length of operation tbr timed baking
and self:cleaning.
STARTPad
0
Must be pressed to start any cooking or
cleaning flmction.
SELFCLEANPad
@
Press this pad to select the self:cleaning
flmction. See the Usingthe self-cleaning
ovensection.
OVENLIGHTPad
0
Press this pad to turn the oven light on
or off:
BROIL HI/LOPad
0
Press this pad to select the broil fimcdon.
10

Usingtheoven. www.GEAppliances.com
Toavoid possible bums, place the shelves in the desired position before you turn the oven on.
Before you begin...
CAUTION:Whenyouareusingtheshelfin the
/owestposition(A),youwiflneedto usecaution
whenpuffingtheshelfout.Werecommendthat
youpull theshelfoutseveralinchesandthen,
usingtwopotholders,pulltheshelfoutby
holdingthesidesofit. Theshelfis lowandyou
couldbeburnedif youplaceyourhandinthe
middleoftheshe/fandpu//aftthewayout.Be
verycarefulnotto burnyourhandonthedoor
whenusingtheshelfinthelowestposition(A).
Theoven has 6 sheff positions.
The shelves have stops, so that when
placed con'ectly on the supports, they _411
stop betbre coming completely out, and
will not tilt.
%lien placing and removing cookware,
pull the shelf out until it stops.
Toremoveashelf,pull it toward you, tilt
the fi'ont end up and pull it out.
Toreplace,place the end of the shelf
(stop-locks) on the support, tilt up the
fi'ont and push the shelf in.
How to Set the Oven for Baking or Roasting
v//! ! ! ! !
_VIII I I I I \ \\"4L'%'_
Center baking pans in the oven.
[Z] Press tile BAKEpad.
[] Press the number pads to set the
desired temperature.
f-j] Press the STARTpad.
[] Check food for doneness at
minimum time on recipe. Cook
longer ifnecessary..
[_] Press the CLEAR/OFFpad when
cooking is complete.
Preheating and Pan Placement
Preheat the oven if the recipe calls for it.
Preheating is necessa U ior good results
when baking cakes, cookies, pasuTyand
breads.
Topreheat,settheovenat thecorrecttemperature.
Thecontrolwillbeepwhentheovenispreheated
andthedisplaywifishowyoursettemperature.
Thiswilltakeapproximately6 to8minutes.
Type of Food Shelf Position
Frozenpies(oncookiesheet) D
Angelfoodcake A
Bundtorpoundcakes BorC
Biscuits,muffins,brownies, CorD
cookies,cupcakes,
layercakes,pies
Casseroles CorD
Turkey A
If baking ibur cake layers at the same
time, place two layers on shelfB and two
1wers on shelfD. Stagger pans on the
shelf so one is not directly above the
other.
Baking results will be better if baking
pans are centered in the oven asmuch
as possible. If baking _4th more than one
pan, place the pans so each has at least
1to 1'/2"of air space around it.
Cut slits in the foiliust like the grid.
Aluminum Foil
You can use aluminum fbil to line tile
broiler pan and broiler grid. However,
you must mold the foil tightly to the grid
and cut slits in itjust like the grid.
Without the slit.s,the foil will prevent fat
and meat juices fi'om draining into the
broiler pan. The juices could become
hot enough to catch on fire. If you
do not cut the slits, you are essentially
flying, not broiling.
Donotusealuminumfoilonthebottomof
theoven.
Never entirely- cover a shelf_4th
aluminum fail. This _._4lldisturb the heat
circulation and result in poor baking.
A smaller sheet of ff)ilmay be used to
catch a spillover by placing it on a lower
shelf several inches below the tbod.
11
 Loading...