

GE JSP42WK4WW, JSP42SK5SS, JSP42SK4SS, JSP42DN1WW, JSP42DN1CC Owner’s Manual
...
.q&com
Safety Instructions ... 2-5
Operating Indru_Cions
Clock and Timer . ...... l 3
Control Lockout ....... 13
Cookware ............ 8, 9
()yen .............. 10-20
Sabbath Feaune ........ 20
Self-Cleaning ....... 16, 17
Special Feaun_es ..... 18, 19
Surthce Units ........ 6, 7
Thermostat ........... 15
Timed Baking and
Roasting .............. 14
Care and Cleaning
Broiler Pan and Grid ... 23
Conuol Panel ......... 22
Door . ............... 22
(;lass Cooktop ...... 25, 26
lv_obs ............... 21
Light Bulb ............ 24
Packaging _q)e ........ 21
Racks ................ 23
Stainless Smel Surfaces . .21
Storage Drawer
Removal ............. 23
Vent ................. 21
Troubleshooting Tips
Before You Call
For Service 2 l-, 0
Accessories ........... 32
Consumer Support
Consumer
Support ...... Back Coxer
Product
RegJstration ........ 33, 34
VVanantv ............. 35
fl)P4 7
]SP42
JSP47
Write the model and serial
numbers here:
Model #
Serial #
You can find them on a label
behind the open oven door
on the lower leli corner of the
range fl'anle.
49-80351 11-05Jfl
IMPORTANTSAFETYINFORMATION.
READALLINSTRUCTIONSBEFOREUSING.
WARNING!
For your safety;,the information in this manual must be followed to minimize the risk of fire, electric
shock, or to prevent property damage, personal injury, or loss of life.
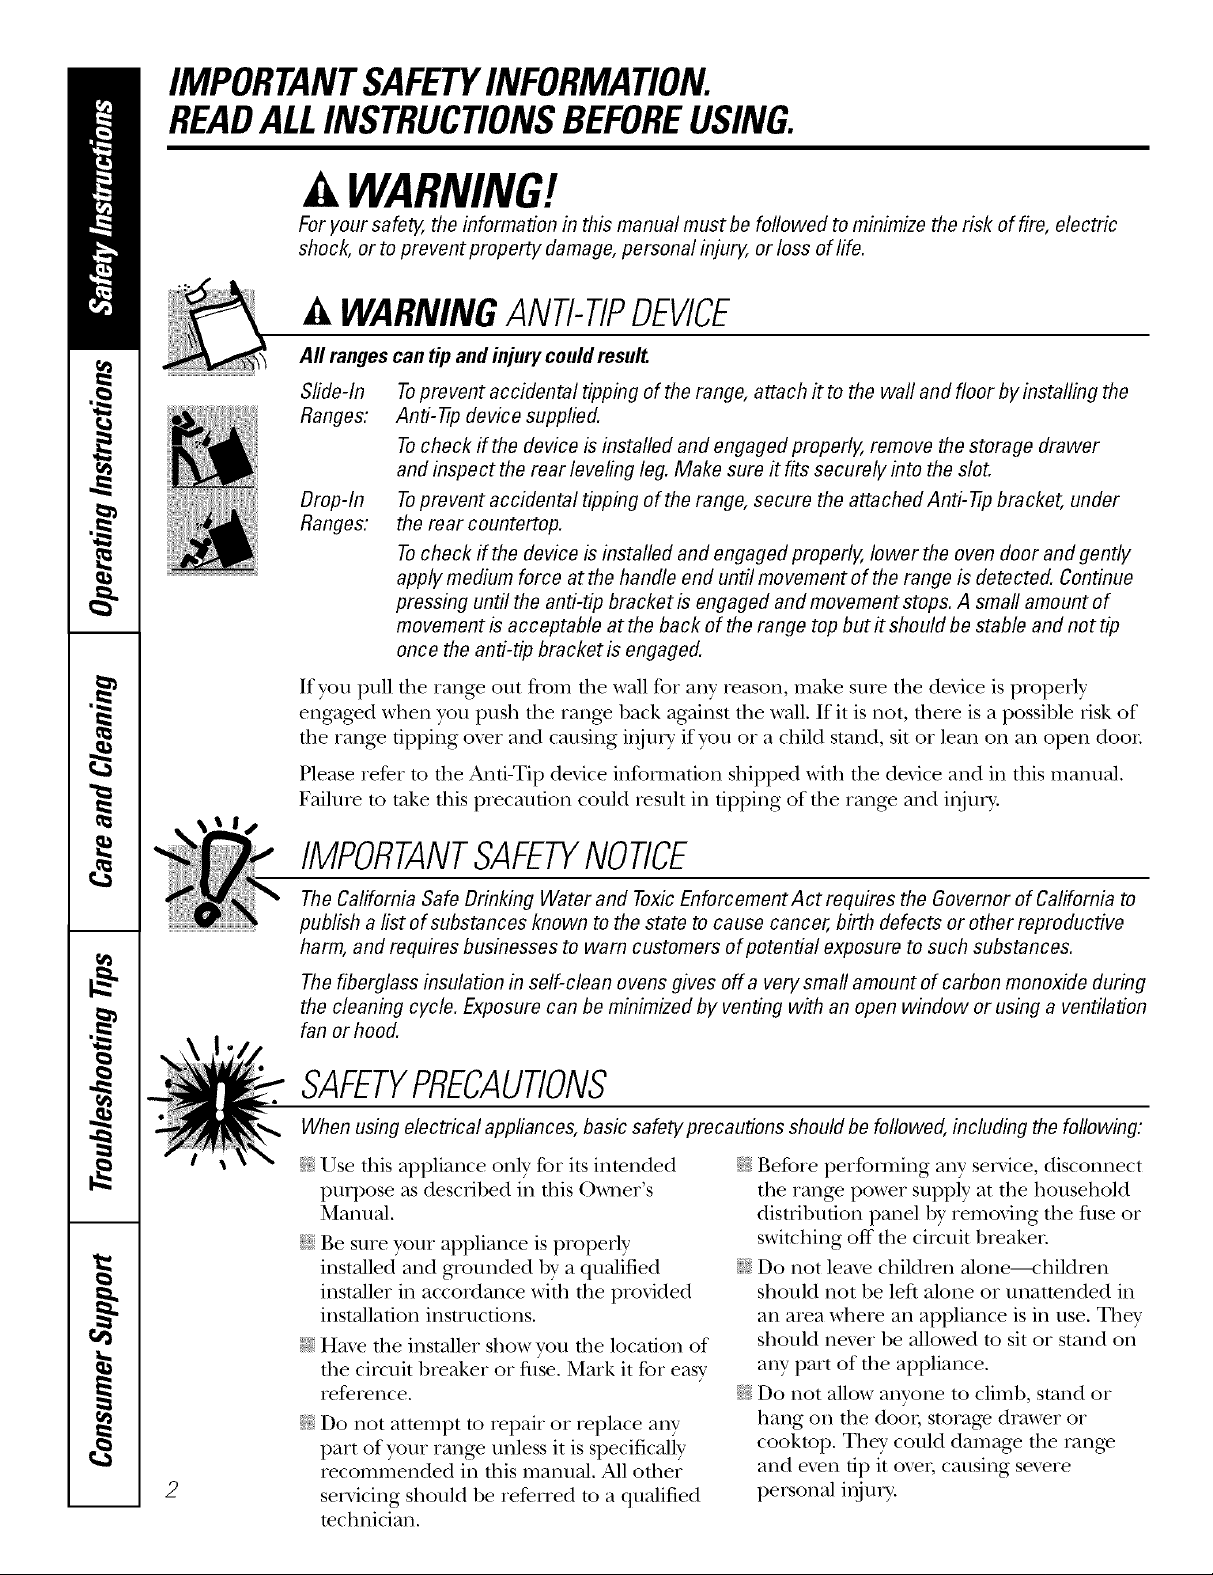
A WARNINGANti-TIPDEVICE
Aft ranges
Sfide-ln
Ranges:
Drop-In
Ranges:
If you pull tile range out from tile wall tbr any reason, make S/lie the device is properly
engaged when you push tim range back against the wall. If it is not, there is a possible risk of
the range tipping oxer and causing inju U if you or a child stand, sit or lean on an open door
Please refer m rile And-Tip device informaOon shipped with rile device and ill this manual.
Failme m take fllis plecaufion could Iesuh in tiI)I)ing of tile range and injm>
can tip and injury could result.
Toprevent accidental tipping of the range, attach it to the wall and floor by installing the
Anti-tip device supplied.
Tocheck if the device is installed and engaged properly, remove the storage drawer
and inspect the rear leveling leg. Make sure # fits securely into the slot.
Toprevent accidental tipping of the range, secure the attached Anti-tip bracket, under
the rear countertop.
Tocheck if the device is installed and engaged properly, lower the oven door and gently
apply medium force at the handle end until movement of the range is detected. Continue
pressing until the anti-tip bracket is engaged and movement stops. A small amount of
movement is acceptable at the back of the range top but # should be stable and not tip
once the anti-tip bracket is engaged.
IMPORTANTSAFETYNOtiCE
The California Safe Drinking Water and ToxicEnforcement Act requires the Governor of California to
publish a list of substances known to the state to cause cancer, birth defects or other raproductive
harm, and requires businesses to warn customers of potential exposure to such substances.
The fiberglass insulation in self-clean ovens gives off a very small amount of carbon monoxide during
the cleaning cycle. Exposure can be minimized by venting with an open window or using a ventilation
fan or hood.
SAFETYPRECAUtiONS
When using electrical appflances, basic safety precautions should be followed, including the following:
_::Use this appliance only %r its intended
purpose as described in tills )wners
Manual.
;_i:,:Be sure your ai)i)liance is i)roi)erly
installed and grounded by a qualified
installer in accordance with tile provided
installation instructions.
;fi:,iHaxe the installer show you the location of
the circuit breaker or fllse. Mark it for easy
reference.
q_:Do not attempt to repair or replace any
part of your range unless it is specifically
recommended ill this manual, All other
2
servicing should be refeITed to a qua]ified
technician,
• (_
_{:_Be%re per%nning ally' service, disconnect
the range power supply at the household
distcibufion panel by removing the fllse or
switching off the ciivuit breaken
;f; Do not leave children alone----children
should not be left alone or unattended in
all area where an appliance is in use. They
should nexer be allowed to sit or stand on
any part of tile appliance.
_{_;Do not allow anyone to climb, stand or
hang on tile dooi, storage drawer or
cooktop. They could damag_ tile range
and even up it o_e_; causing severe
personal inj m-y.
WARNING!
g_com
iFi_'*_,_ iiii_
SAFETYPRECAUTIONS
Do not operate the oven or cooktop controls if the glass is broken. Foodsplatter or cleaning solution
may penetrate a broken control panel or cooktop and create a risk of electrical shock. Contact a
qualified technician immediately should your glass control panel or cooktop become broken.
;f; Do trot store flammable matelJals ira an
oxen or near file cooktop.
CAUTION: temsofinterestto
childlen should not be stored in cabinets
aboxe a range or on the back of a rang_--
children climbing on tile range to teach
items could be seriously injured.
_:;Nexer wear loose-fitting or hanging
gvmnents while using the appliance. Be
carefltl when teaching for items stored
oxer tire range. Flammable mamrial could
be ignited if brought in contact with hot
surface units or beating elements and may
cause se\>re bnrns.
_7_;Use only dU pot holders--moist or damp
pot holders on hot surl2_ces may result in
bnrns fiont steam. Do not let pot holders
touch hot snrtace units or heating
elements. Do not use a towel or other
bulky cloth in place of pot holders.
;_):,iDo not use water on grease fires. Never
pick up a flaming pan. Turn the corrtrols
off: Smother a flaming pan on a snit_tce
unit by cove_ing tire pan completely with
a well-fitting lid, cookie sheet or fiat tray.
Use a multi-purpose dU chemical or
foam-wpe fire exfinguishen
Flaming grease outside a pan can be put
out by coveting it with baking soda or; if
available, by using a mulfil)Uq)ose dU
chemical or foam-wpe rite exfinguishen
Flame in the oxen can be smothered
completely by closing tire oxen door arrd
turning the oxen off or by using a multi-
puq)ose d_y chemical or foam-type fire
exfinguishen
;_i:,:For your safety, never use your appliance
for watching or heating the room.
;_;Do not let cooking g_ease or other
flammable materials accumulam in or
near the range.
_?{:;Do not touch the sur/_ace units, tire
heating elements or tire irrterior surthce
of tire oven. These surPaces m W be hot
enongh m bnrn men thongh they are dark
in color Dining and after use, do not
much, or let clothing or other flammable
materials corrtact the surface units, areas
nearby the surPace units or aW irrmrior
area of the or>n; allow sufficient time for
cooling first.
Potentially hot snilaaces include tire
cookmp, areas facing the cookmp, ox>n
_ent opening, surlCaces near tire opening,
crevices around the oven doon
REMEMBER:The irrside sniiCace of dte oven
may be hot when the door is opened.
;_i:,:Do not store or use combustible materials,
gasoline or other flammable vapors and
liquids in the vicinity of this or arty other
appliance.
_: Kee I) the hood arrd grease filters clean
to maintain good x_nfing arrd to mold
grease fires.
N Teach children not m play with the
corrtrols or arty other part of the rang_.
N Always keep dish rowels, dish cloths, pot
holders arrd other linens a safe distance
from yonr rang_.
N Always kee I) wooden arrd plastic umnsils
arrd canned food a safe distance from
vonr r_tnge.
N Always kee I) combustible wall cox_iJng:s,
curtains or drapes a safe distance flom
your rang_.
COOKMEATANDPOULTRYTHOROUGHLY...
Cookmeat andpoultry thoroughly--meat to atleast an INTERNALtemperatureof 160°Fandpoultry
toat least an INTERNALtemperatureof 180°ECookingtothese temperaturesusuallypretects against
foodbomeillness.
3
iMPORTANTSAFETYiNFORMATiON.
READALLiNSTRUCTiONSBEFOREUSING.
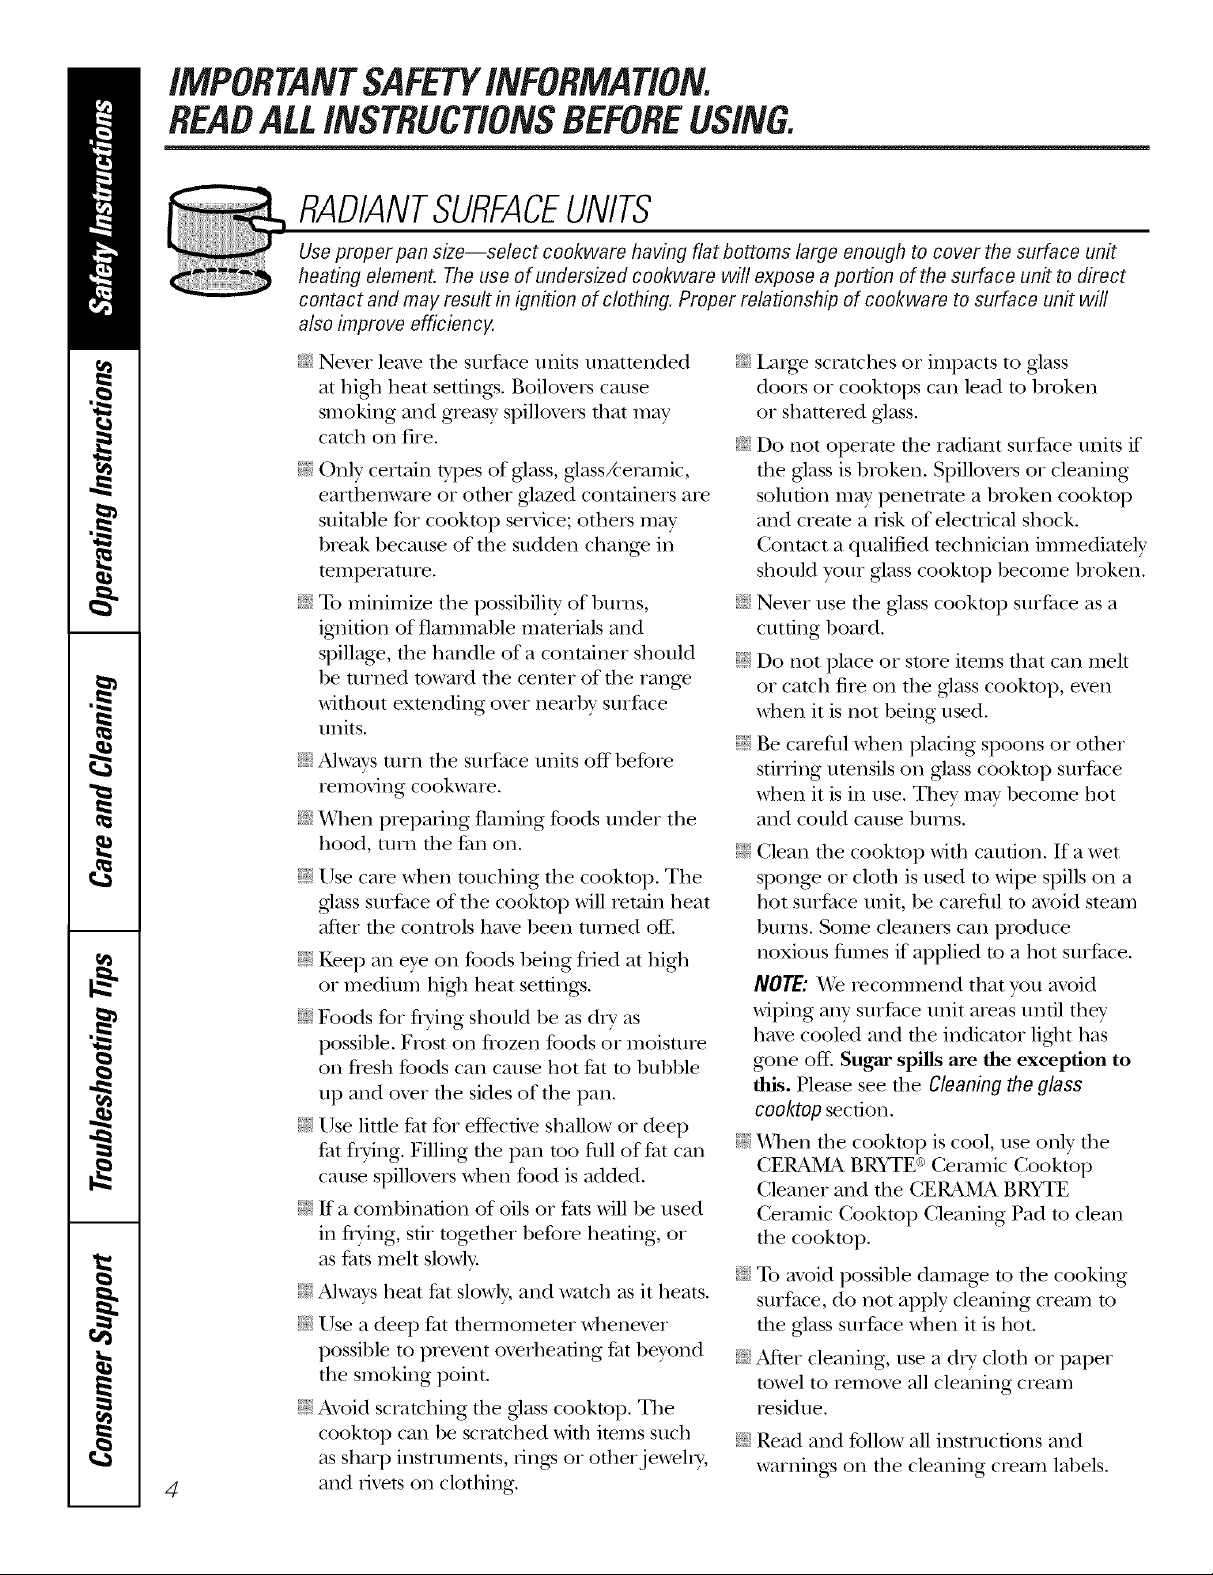
RADIANTSURFACEUNITS
Use proper pan size--select cookware having flat bottoms largo enough to cover the surface unit
heating element. Theuse of undersized cookware will expose a portion of the surface un# to direct
contact and may result in ignition of clothing. Proper relationship of cookware to surface un# will
also improve efficiency.
Never leaxe the surPace units unattended
at higil heat settings. Boiloxers cause
smoking and greasy spillox>rs that may
catch on fire.
_fi:,:()lily certain Wpes of gtass, glassA'eramic,
earthenware or other glazed containers axe
suitable fox cooktop service; others may
break because of the sudden chang> in
temperature.
_::To minimize the possibiliw of bni'lls,
ignition of flammable mamrials and
spillage, the handle of a container should
be turned toward the center of the range
withont exmnding o\_r nearby snifi_ce
/mits.
_:_Always ulrn the surface units off befbxe
removing cookware.
_{::When preparing flaming foods nnder the
hood, mm die tim on.
_i:,:Use care when ranching the cookmp. The
glass snrPace of the cookmp will retain heat
after the controls have been tuiTled off:
_fi:,iKee I) an eye oil foods being flied at high
or medinm high heat settings.
_fi:,iFoods for flTing should be as &T as
possible. Frost on fiozen foods or moisture
on flesh foods can cause hot fZatto bubble
up and ox>r the sides of the pan.
_fi:,iUse litde fiat for effective shallow or deep
fht flTing. Filling tile pan too till of£_t can
cause spillox>rs when food is added.
_fi:,iIf a combination of oils or fiats will be used
in flTing, stir tog>ther before heating, or
as fats melt slowly.
_ Alwws heat fiat slowly, and watch as it heats.
_:_Use a deep t:at them/omemr whenever
possible to pievent ox>rheafing tZatbeyond
die smoking point.
_fi:,:Avoid scramhing die glass cookmp. The
cookmp can be scratched with items such
as sharp instruments, lings or otherjeweh>
4
and xivets on clothing.
_::Larg_ scratches or impacts to glass
doors or cooktops can lead to broken
or shattered gtass.
_{:_Do not operate the radiant sniP,_ce units if
the glass is broken. Spillovers or cleaning
solution m W penetram a broken cooktop
and cream a xisk of elecuical shock.
Contact a qualified mchnician immediately
should your glass cooktop become broken.
_{:_Nexer use the gtass cooktop surface as a
cutting board.
_i:,:Do not place or store items that can melt
or catch fire on the gtass cooktop, ex>n
when it is not being used.
_i:,:Be carefid when placing spoons or other
sfirdng utensils on gtass cooktop surface
when it is in rise. They m W become hot
and could cause bums.
_i:,:Clean die cooktop Mill caution. If a wet
sponge or clofll is used to Mpe spills oil a
hot surfitce unit, be caxeflfl to mold steam
bums. Some cleaners can produce
noxious flm/es if applied to a hot surtZace.
NOTE; YVerecommend that you mold
wiping any sniiCace unit axeas until they
have cooled and the indicator ligilt has
gone off'. Sugar spills are the exception to
this. Please see die CIoaning the glass
cooktop section.
_i:,:_llen the cooktop is cool, use only die
CE_ BRYTE ¢'_Ceramic Cooktop
Cleaner and tile CE_ BRYTE
Ceramic Cooktop Cleaning Pad to clean
the cooktop.
_]{:;To mold possible damage to the cooking
surface, do not apply cleaning cream to
the glass surface when it is hot.
_]{:;After cleaning, use a d U cloth or paper
towel to remove all cleaning cream
residue.
_:;Read and tbllow all instructions and
warning:s oil the cleaning cream labels.
ge.com
WARNING!
OVEN
Stand away from the range when opening the oven door. Hot air or steam which escapes can cause
bums to hands, face and/or eyes.
;fi:,iDo *lot heat unopened food containers.
Pressure could build/l I) and die container
could burst, causing all iIljn]_].
_:;Kee I) tile ox.en x.ent tmobstructed.
;f; Kee I) the ox.en flee flom grease bnildup.
_f;Place the ox.en rack in tile desired position
while tile ox.en is cool. If racks must be
handled when hot, do not let pot holder
contact file heating elements.
_i:,:_]len using cooking or roasting bag:s in
file oven, follow file manulCacturer's
directions.
qT{:;Pulling out tile rack to tile stop-lock is a
comenience ill lifting heax T tbods. It is also
a precantion against bums flom tonching
hot snrl_aces of the door or oxen walls.
;f; Do not use the ox.en to dlT newspapers.
If ox.erheamd, they call catch on fire.
;f; Do not use die ox.en for a smrag.e area.
Imms stored ill all ox.en call ignite.
_f;Do not leax.e paper products, cooking
umnsils or food ill tile ox.en when not
in use.
_{:_Do not use ahm/innm foil to lille oxen
bottoms, except as suggested in this
mannal. Improper installation of
almninun_ foil may result ill a risk of
electric shock or fire.
SELF-CLEANINGOVEN
Donot use oven cleaners. No commercial oven cleaner or oven liner protective coating of any kind
should be used in or around any part of the oven. Residue from oven cleaners will damage the inside
of the oven when the self-clean cycle is used.
;f; Do not clean file door gasket. Tile door
gasket is essential %r a g_od seal. Care
should be taken not to rub, damag.e or
mox.e the gasket.
_fi:,:Before self-cleaning tile ox.en, remox.e
the racks, broiler pan, gdd and other
cookware.
_?{:_Be sure to wipe/l I) excess spillage be%re
starting tile self-cleaning operation.
_f;K dm self-<leaning mode malflmcdons,
turn tile oven off and disconnect file
power supply. Hm.e it serviced by a
qualified technician.
;fi:,iClean only parts listed ill this Owner's
Manual.
READANDFOLLOWTHISSAFETYINFORMATIONCAREFULLY.
SAVETHESEINSTRUCTIONS
5
Usingthesurfaceunits.
Throughout this manual, features and appearance may vary from your model.
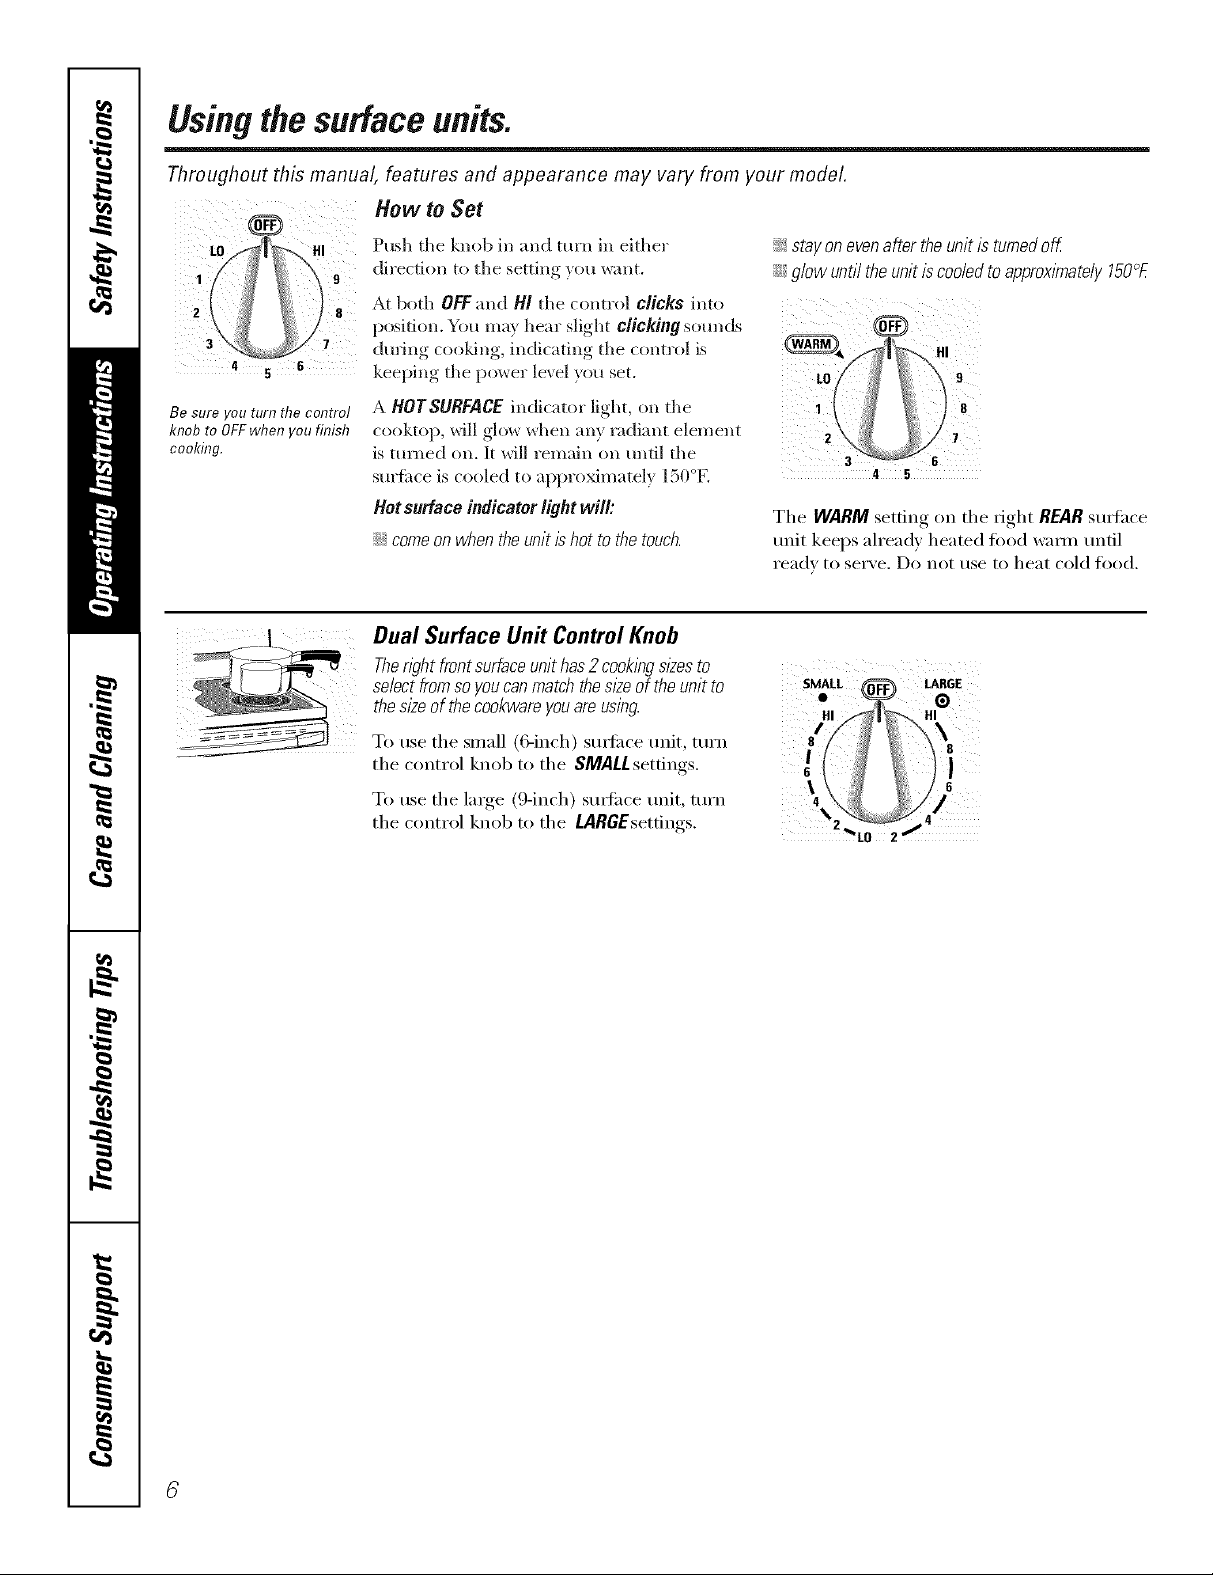
How to Set
Z_I i_ _
LO HI
3 7
4 s 6
Be suro you turn tlTecontro!
knob to OFFwhen you finish
cooking.
Push the knob in and turn in either sr_/on even aftertheunitisturnedoK
dh'e(ti(m to [lie setting y(m want. glOW until Theunit IS cooled to approximately15OOZE
At both OFF and HI tile control clicks into
8
posifiou. You may hear slight clicking som_ds
during coo]dng, indi(ating tile ,ontl'o] is (_4_ I
cool<to _ _dll glow when mlV radiam element
}' , , 2 7is mined (m./t will remain (m m_ti] the
sm'fiwe is cooled to iq)proxhnlitely ISOOF. 4 5
Hotsuffaco indicator light will: The WARM setting on the right REARSt,Ibf;l('e
i_: comeonwhentheunitishot tothetouch, unit keeps ah'eadvheated ti)od wam] m]til
,'eadv to serve. Do not t,Se 1o heat cold food.
Dual Surface Un# Control Knob
Ther/ghtfrontsuffaceunithas2cook/ngs/_esto
selectfromsoyoucanmatchthesl2eoftheunit to SMALL (_ LARGE
• G
theeizeofthecookw reyou ueing.
To use the small (C_inch) smti,ce ,,,,it, mrn t // _ _ _ 8
To use the large (9-inch) smti,ce m]it, tm'n 4 ]
the control knob to the SMALLsettings. 6\ 6]
the control knob to the LRRGEsettings. _t0 2
The following information will help you choose cookware which will give good performance on glass cooktops.
About the radiant surface units...
The radiant cooktop features heating
coo op,susedforthef, stt,melt,scausedby
NOTE:A s//#htodorisnormalwhenanew
theheatlbgofnewpartsandinsulatingmaterials
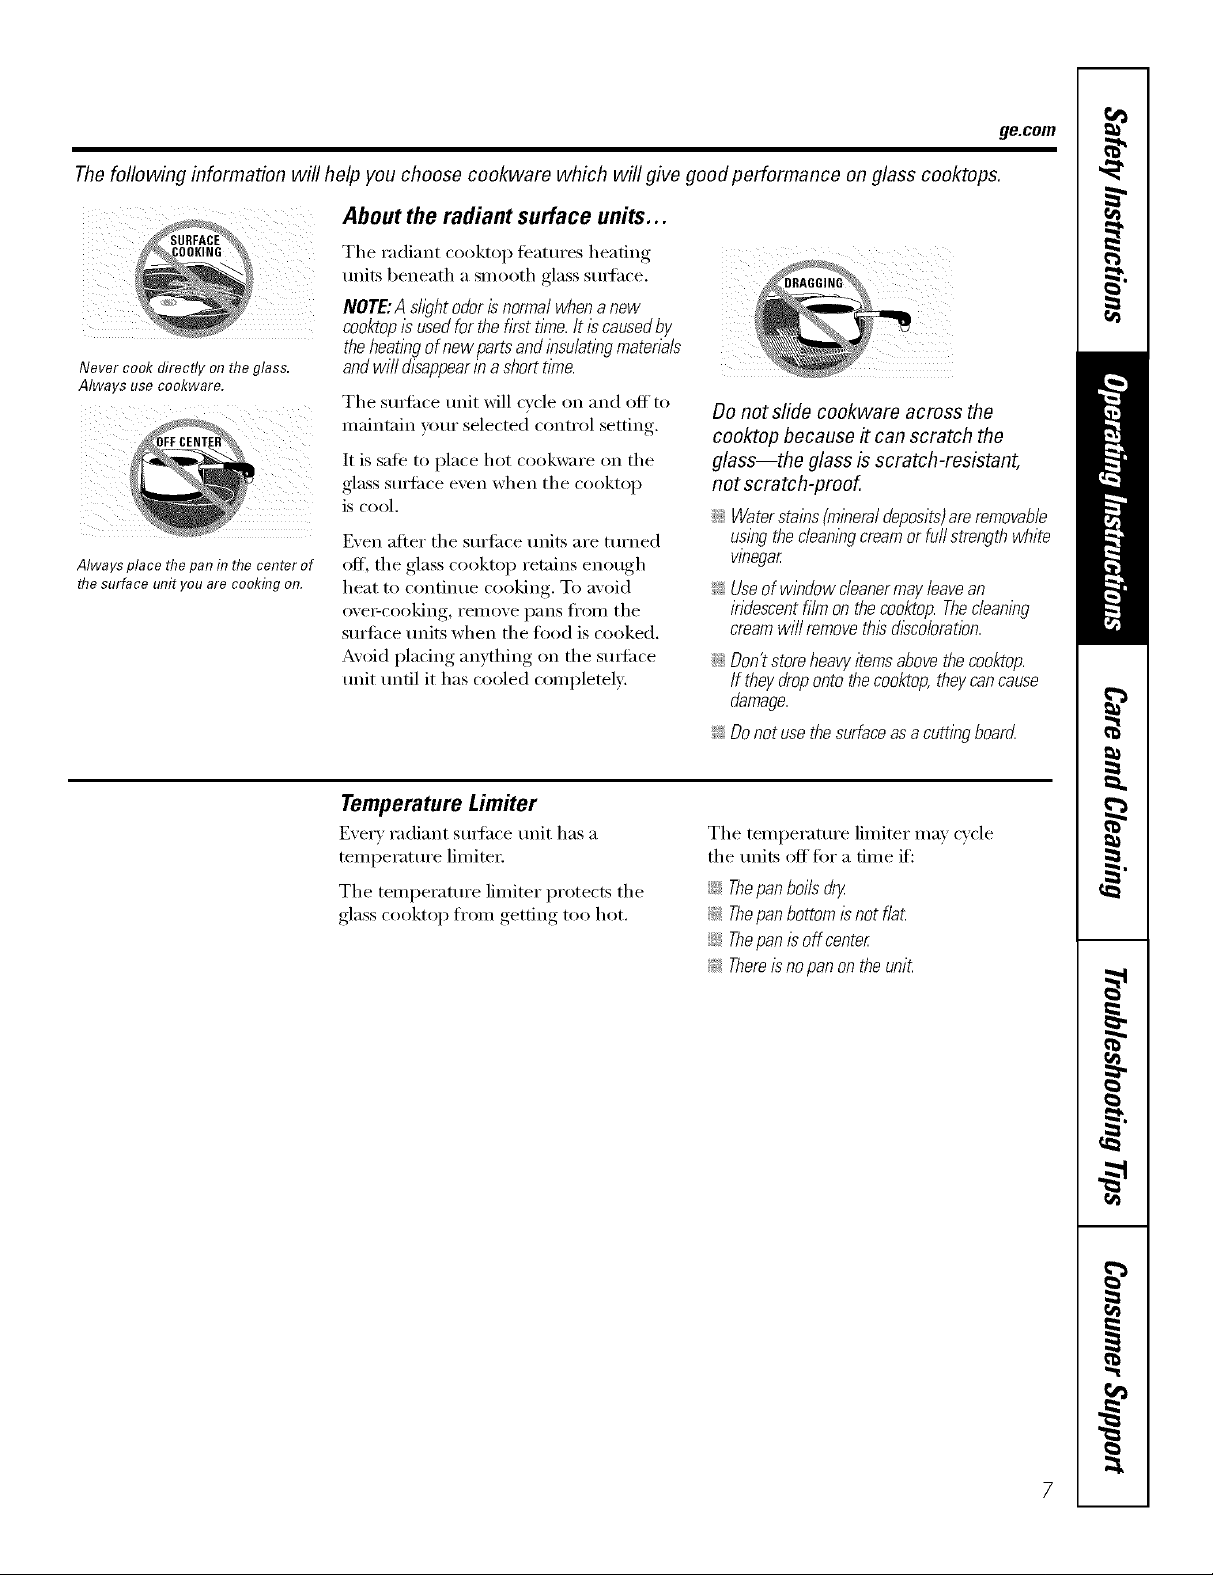
Never cook direct yo/7me glass.
aIwaI s use cooKware.
Always place the pan d7the center of
the surface unit you are cookflTgon.
andwi//disappear/bashortt/?ne.
The surIi_ce refit will cycle on and off to
maintnin your selected control setting.
It is sate to place hot cookware on the
glass suriilce even when the cooktop
is cool.
Even after the surti_ce units are turned
off, the glass cooktop retains enough
heat to continue cooking. To avoid
ovei:cooking, relllOVe i)[liiS l[i'Olll tile
surfi_ce traits when the fl)od is cooked.
Avoid pladng anything on the smti_ce
refit tmtil it has cooled completely.
Do not slide cookware across the
cooktop because # can scratch the
glass--the glass is scratch-resistant,
not scratch-proof.
;;Ji:_Waterstains (mineraldeposits)are removable
uslbg thec/ean/bgcream or furlstrength white
vinegar
_ Useof window cleanermay leavean
iridescent film on thecooktop. Thec/ean/bg
cream will remove thisdiscoloration.
;;Ji::Don'tstoreheavyitemsabovethecooktop.
If theydropontothecooktop,theycancause
damage.
_ Donotusethesurfaceasacuttingboard.
ge.com
Temperature Limiter
Every radiant smth('e refit has a
temperatm'e limited:
The temperatm'e limiter protects the
glass cooktop ti'om getting too hot.
The temperature limiter may cycle
the milts oK fi)r a time if':
::;:ii_Thepanboilsdr_
_: Thepanbottom/2notflat
::;:ii:Thepanisoffcenter
_: Thereisnopanontheunit
Selectingtypesofcookware.
The following information will help you choose cookware which will give good performance on glass cooktops.
iiF
Check pans for flat bottoms by
usflTga straight edge.
Stainless Steel:
recommended
Aluminum:
heavyweightrecommended
(;ood con(luctix]q:. Muminunl residues
sometimes appear as scratches on the
cooktop, but can be removed if cleaned
immediately: Because of its low melting
point, lightweight aluminum should not
be used.
CopperBottom:
recommended
Col)per may leave residues which ('_lll
appear as scratches. The residues can
be removed, as long as the cooktop is
cleaned immediately. Howevei; do not let
these pots boil (hT: Overheated metal can
bond to glass cooktops. All overheated
COl)per bottom pot will leave a residue
that will pemmnenfly stain the cooktop
if not removed immediately.
Glass-Ceramic:
usable,but not recommended
Pool" perfimnance. May scratch the
StlI];l('e,
Stoneware:
usable,but not recommended
Pool- perlimnance. May scratch the
Still;Ice.
Home Canning lips:
Be sure the canner is centered over the
SUlSfhce unit.
Make sure the canner is fiat on the
l)()ttom.
Use redpes and procedures from
reputable sources. These are available
fl'om manufi_cturei_ such as Ball '_and
KerF _and tile Department of Agiiculture
Extension Service.
To prevent burns fl'oln stealn or heat,
use caution when canning.
Pans with rounded, curved, ridged
or warped bottoms are not
recommended.
Use only flat-bottomed woks.
Porcelain-Enamel CoveredCastIron:
recommended
_&_long as the cookware is covered
colnpletely with porcelain enalnel, this
cookware is recolnlnended. Caution is
recommended fin" cast iron cookware
that is not colnpletely covered with
smooth porcelain enalnel, since it inav
scratch the glass ceralnic cooktop.
WokCooking
Werecommendthat youuseonlya flat-bottomed
wok. Theyareavailableat yourlocal retail store.
Do not rise i'otlnd-bottOlll wo_s. _I/})tl
could be seriously burned if the wok
tipped ovei;
8

Righfl
WFono I
- stu'fiwes surrotmding the snriitce units.
Note: Flat-bottomed canners are
required for glass cooktops,
Observethe Following Points in Canning
Pots that extend beyond l" of the
st/rfilce [lllit's circle are llot
l'ecol/llllellded _k)r l/lost st/r_ilce
cooking. However, when camdng
with wate>bath or pressure carnie1;
large>diameter pots may be used.
This is because boiling water
tempelntures (even under pressure)
are not harmful to the cooktop
HOWEVER, DO NOT USE lARGE-
DL_dMETER (;ANNERS OR OTHER
I,_M{t;E-DIAMETER POTS FOR
FRYING OR BOIliNG FOODS
OTHER THAN _'X%_,TER.Most syrup or
sauce mixtures--and all types of
fl'ying--cook at teinperatures much
higher than boiling watel: Such
temperatures coukl eventually harm
the glass cooktop sttrfilces.
] Be sure the cromer fits over the
center of the sm'ihce unit. If your
cooktop or its location does not
allow the cam_er to be centered
on the surthce unit, use smalle>
diameter pots for good cmming
results.
Flat-bottomed carolers must be
[]
used. Do IIO[ use Callnel3 xdth
flanged or tippled bottoms (oiien
found ill enainelware) because
they don't make enough contact
with the surthce units and take a
long time to boil water.
When cmming, use recipes and
[]
procedures from reputable
sources. P,eliable recipes and
procedures are a_;dlable fl'om the
I/lantl_;ictt/rer of VOtlr callner;
manufhcturers of glassjai_ fi)r
camdng, such as Ball' and Kerr'
brand; and the United States
Department of Agriculture
Extension Se_Mce.
[] Remember that c'mniw,_ is, "/
NOTE: If your house has low voltage,
canning may take longer than expected,
even though directions have been
carefufly followed The process time will
be shortened by:
(1) using a pressure canner and
(2) starting with HOTtap water for fastest
CAO_O_
_ Safe canning requires that harmful
_:After you have adjusted the controls,
_; Since you must make sure to process
ge.com
process that ,generates l'u'oe,
all/Otlnts of stealll. To avoid brims
fl'om steam or heat, be carefld
when camdng.
heating of large quantities of water
microorganisms are destroyed and that
thejars are sealed completely. When
canning foods in a water-bath canner,
a gentle but steady boil must be
maintained for the required time. When
canning foods in a pressure canner, the
pressure mustbe maintained for the
required time.
it is very important to make sure the
prescribed boil or pressure levels are
maintained for the required time.
the canning jars for the prescribed
time, with no interruption in processing
time,do not can on any cooktop
surface unit if your canner is not flat.
9

Usingtheovencontrols.
Throughout this manual, features and appearance may vary from your model.
I
OVEN CLEANING - • TOUCH "SELF CLEAN"PAD. • TOUCH "START" PAD.
I
Features and appearance may var_
OvenControl,Clockand TimerFeaturesandSettings
o BAKE Pad
Press tiffs pad to select the bake fimcfion.
Dbplay
Shows the time of day, oxen temperature,
whether the oxen is in the bake, broil or
self=cleaning mode and the times set for
the tilller or atltOi//atic o'_en operations.
If "F-anda numberorletter"flashinthedisplayandthe
ovencontrolsl_?na/s,thisindicatesa functionerrorcode.
Ifyourovenwassetfora tknedovenoperationand
a poweroutageoccurred,theclockandaftprogrammed
functionsmustbereset
Thetimeofdaywill flashinthedisplaywhentherehas
beena poweroutage.
O OOKING TIME Pad
Press this pad and then press file ntllllber
pads to set the ail/otlnt of time }ou want
vat:u" food to cook. The oxen will shut off
when the cooking time has run out.
Use along with COOKINGTIMEor SELF
@ DELAYSTARTPad 0
CLEANLO/STD[)ads to setthe oxen to start
and stop automatically at a time xou set.
CLEAR/OFFPad
Press this pad to cancel ALL oxen
operations except the clock and time_:
o Number Pads
Use to set }111_tiln(tion re(ltliYin_, nt/I/lbeI's
such as the time (ff day on the clock, the
time_; the oven temperature, the start time
and length of operation fin" timed baking
and sell=cleaning.
O STARTPad
Must be pressed to start an) cooking or
cleaning fimction.
O ELFCLEANLO/STD Pad
Press this pad to select the self=cleaning
flmction. See the Usingtheself-cleaning
oven section.
OVENLIGHT Pad
'qW
Press this pad to turn the o_en light on
oI" el[IV.
BROIL H!/LOPad
Press this pad to select the broil function.
10
O CLOCKPad
Press this pad before setting the clock.
O KITCHEN TIMER ON/OFFPad
Press this pad to select the timer feature.
Usingthe oven. gecem
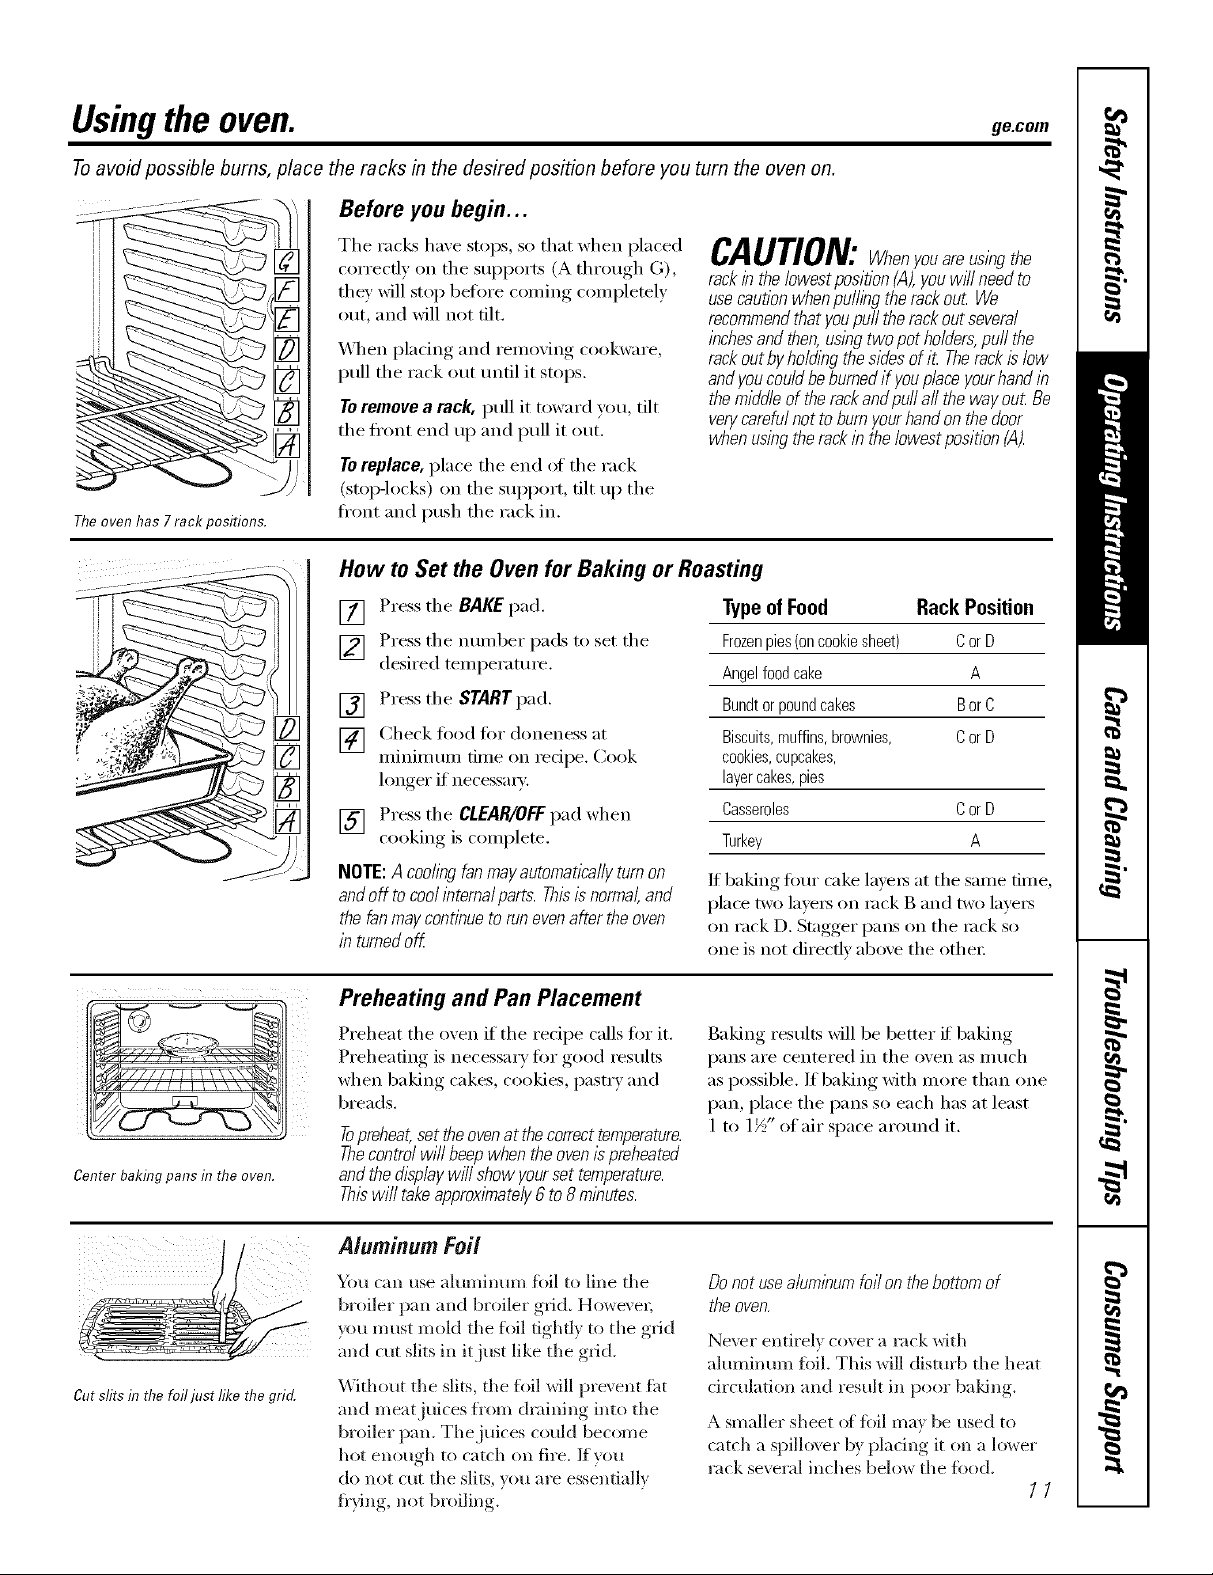
Toavoid possible bums, place the racks in the desired position before you turn the oven on.
Before you begin...
ii
ii ]'[]
Theoven has 7 rack positions.
........::::::::::::..........21,
-. I
The racks have stops, so that when placed
correctly on the supports (A through G),
they will stop before coming completely
out, and will not tilt.
_,_]_en pladng and removing cookware,
pull the rack out until it stops.
Toremove a rack, pull it toward you, tilt
the ti'ont end up and pull it out.
Toreplace, place the end _ff the rack
(stop-locks) on the support, tilt up the
ti'ont and push the rack in.
CAUTION:Whenyouareusingthe
rackin the/owestposition (,4),youwH/need to
usecautionwhen puffing the rackout We
recommendthat youpuff the rackout several
inchesandthen, usingtwo pot holders,puff the
rackout byho/dlbg the sidesof it Therackis low
andyou couldbe burnedif youplace yourhand in
the middleof therackandpu// a// the way out Be
verycarefulnot to burnyourhand on the door
when using therack lb the/owestposition (A).
How to Set the Oven for Baking or Roasting
[] Press the BAKE pad.
] Press the nulnber pads to set the
desired temperature.
[] Press the START pad.
[] Check fi)od fi)r doneness at
minimum time on recipe. Cook
longer if necessm T.
[] Press the CLEAR/OFFpad when
cooking, is comi)lete.
NOTE:A coolingfanmayautomaticallyturnon
andoff tocoolinternalparts.Thisisnormal,and
thefanmaycontinuetorunevenaftertheoven
lb turnedoff.
TypeofFood Rack Position
Frozenpies(oncookiesheet) CorD
Angelfoodcake A
Bundtorpoundcakes BorC
Biscuits,muffins,brownies, CorD
cookies,cupcakes,
layercakes,pies
Casseroles CorD
Turkey A
If baking four cake layers at the same time,
place two lave_ on m('k B and two lave_
on rack D. Stagger pans on the rock so
one is not directly above the othe_:
Center bakingpans in the oven.
Cutslitsin thefoiljust likethegrid.
Preheating and Pan Placement
Preheat the oven if the recipe calls for it.
Preheating is necessary tot good _esults
when baking cakes, cookies, past_ T and
breads.
Topreheat,set theovenat the correcttemperature.
Thecontrol wi// beepwhen the ovenis preheated
andthe&splay wi// show yourset temperature.
Thiswi// take approximately6 to 8minutes.
Aluminum Foil
You can use aluminum fi)il to line the
broiler pan and broiler grid. Howex eL
)ou must mold the foil tighd) to the grid
and cut slits in it just like the grid.
_ithout the slits, the foil will prevent tht
and meat juices from draining into the
broiler pan. Thejtfices could become
hot enough to catch on fire. ]fxou
do not cut the slits ",ou are essentiall?
ti'vin,, not broilin ,
0 _ 0
Baking results will be better if baking
pans are centered in the oven as much
as possible. If baking with more than one
pan, place the pans so each has at least
1 to 1½" of air space around it.
Donot use a/urn/bumfoi/ on thebottom of
the oven.
Ne\vr entirely cover a rock with
ahmfinum fifil. This will disturb the heat
circulation and result in poor baldng.
A smaller sheet of foil may be used to
catch a spillover by placing it on a lower
rack several inches below the fi_od.
77
 Loading...