

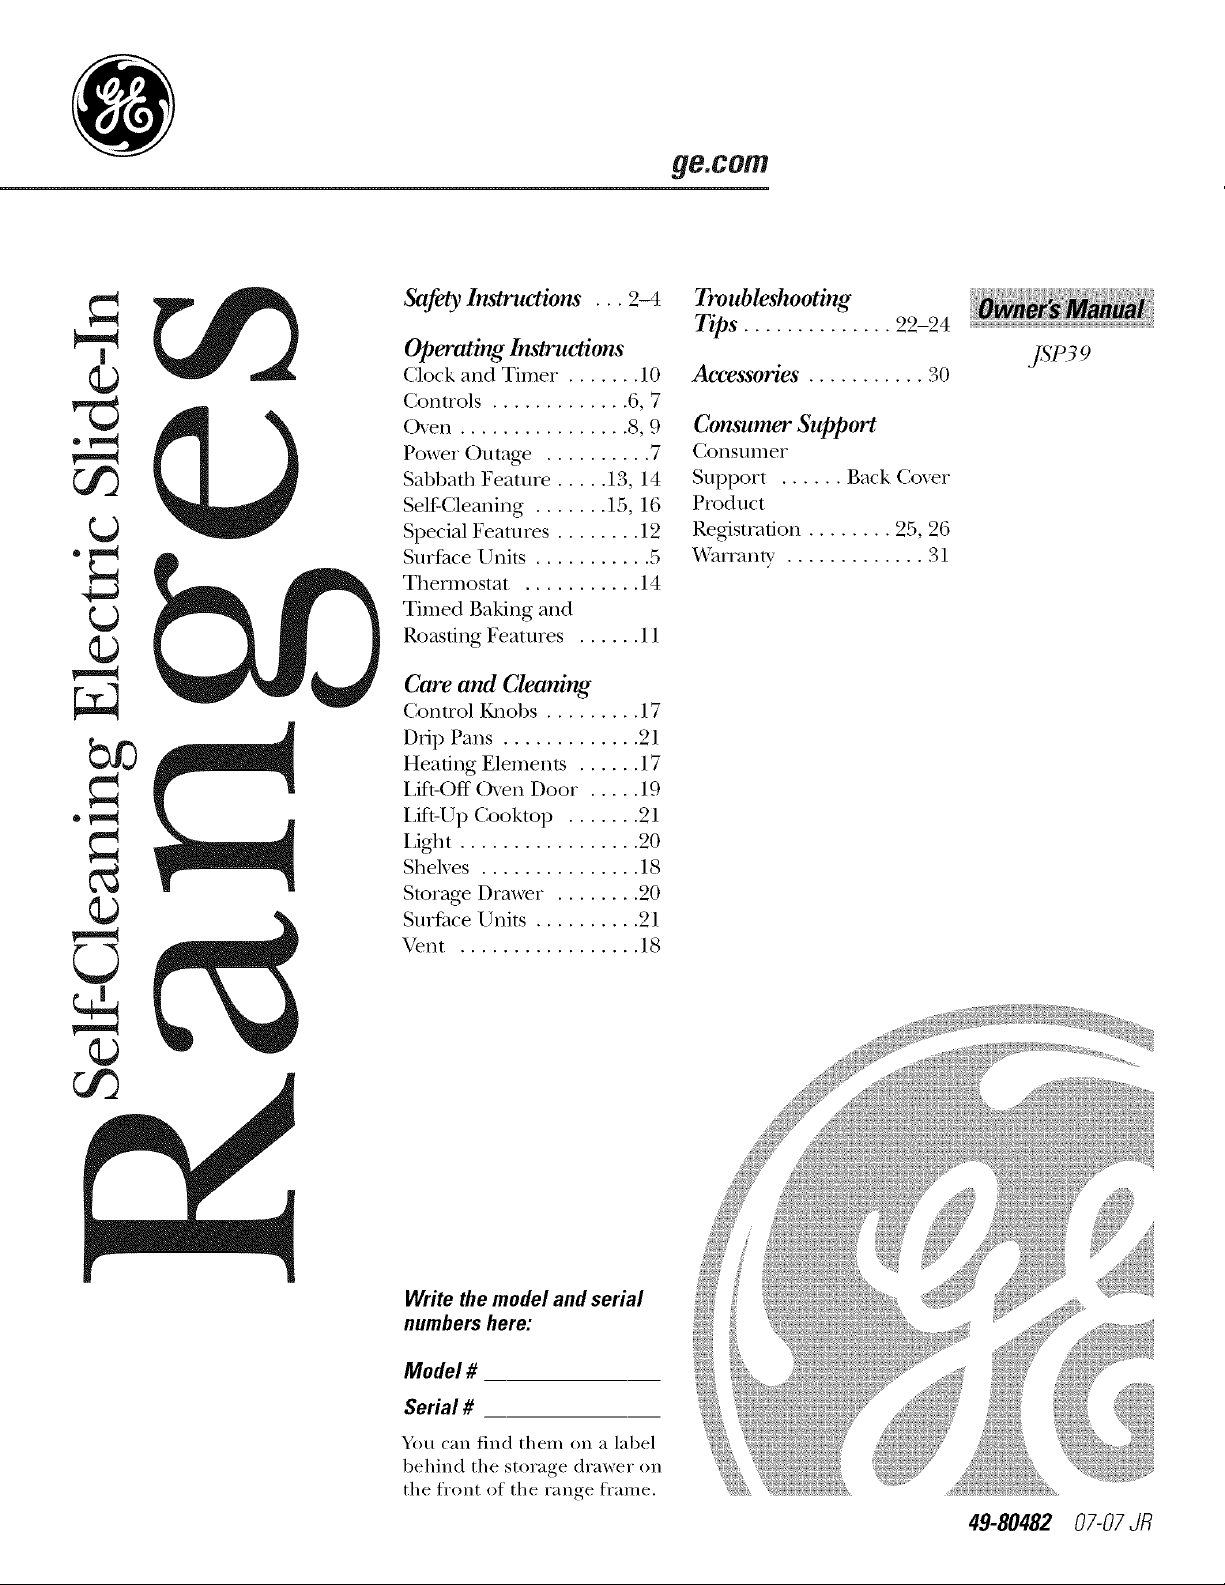
GE JSP39WK5WW, JSP39WK4WW, JSP39SN1SS, JSP39SK5SS, JSP39SK4SS Owner’s Manual
...
ge.com
"e"4
c]3
r,,.o
Safety Instru_tions ... 9-4
Operating In_lru_ions
Clock and Timer . ...... ] 0
Conuols ............. 6, 7
()yen ................ 8, 9
Power Outage .......... 7
Sabbath Feaune ..... 13, 14
Self-Cleaning ....... 15, 16
Special Feaun_es ........ 19
SurPace Units ........... 5
Thermostat ........... ] 4
Timed Baking and
Roasting Features ...... 11
Care and Cleaning
Control I{a_obs ......... 17
Drip Pans ............. 91
Heating Elements ...... 17
I,ift-Off Oven Door ..... 19
Lift-Up Cooktop ....... 21
LiOlt ................. 20
Shelves ............... 18
Storag_ Drawer . ....... 20
Surface Units .......... 21
Vent ................. 18
Troubleshooting
Tips .............. 22-24
Accessories ........... 30
Consumer Support
Consumer
Support ...... Back Coxer
Product
Registration ........ 95, 96
Wanantv ............. 31
ysPs9
Write the model and serial
numbers here:
Model #
Serial #
You can find them on a label
behind the storage drawer on
the fl'ont of the range fl'ame.
49-80482 07-07JR
iMPORTANTSAFETYiNFORMATiON.
READALLiNSTRUCTiONSBEFOREUSING.
Foryour safety,theinformationinthis manualmustbefollowed tominimizetherisk of fire,electric shock,or to
preventpropertydamage,personalinjury,orlossoflife.
A WARNINGANti-TIPDEVICE
All rangescantip andinjurycouldresult
Topreventaccidental tippingoftherange, attachitto thewaftandfloor by installingtheAnti-tip devicesupplied.
If theAnti-tip device suppliedwiththerangedoesnotfit this application,usethe universa/Anti-Tipdevice
WB2X7909.
Tocheck ifthe deviceisinstalledand engagedproperly,removethestoragedrawer andinspecttherear
levelingleg. Makesureit fitssecurely into theslot.
Ifyou pull tile range out from tile wall for any reason, make suie tile defice is properly engaged when
you push the range back against the wall. If it is not, theie is a possible risk of tile range tipping over
and causing injuU if you or a child stand, sit or lean oil an open door.
Please *efer m the Ami-Tip defice infbmlation shipped with the device and in this manual. Failme to
rake this precaution could result in tipping of tile range and inj/n>
IMPORTANTSAFETYNOtiCE
TheCaliforniaSafeDrinkingWaterand ToxicEnforcementAct requiresthe GovernorofCaliforniatopublisha
fistofsubstancesknownto the stateto cause cancer,birth defectsor otherreproductiveharm,andrequires
businessesto warn customersofpotentialexposureto suchsubstances.
Thefiberglassinsulationinself-cleanovensgives off a verysmallamountofcarbonmonoxideduringthe
cleaningcycle. Exposurecanbeminimizedbyventingwithan openwindow or using a ventilationfan or hood.
SAFETYPRECAUtiONS
Whenusing electricalappliances,basicsafeS/precautionsshouldbe followed,includingthefollowing:
!?:Use this appliance only %r its intended propose
asdesc,ibed in this O_vner's Manual.
!?:Be sure your appliance is prope,t)installed and
grounded b} a qualified installer in accordance
with tile provided installation instructions.
iJi;:iHm_etile installer show xou tile location
of the circuit breaker or fllse. Mark it for easx
ief_Tence.
Do not attempt to repair or replace any
part of)our range/mless it is specificall_
recommended in this manual. All other
servicing should be referred to a qualified
technician.
iJii:iBefore perfmming any serfice, disconnect
the range power supply at the household
distribution panel by removing the fuse or
switching off the ci,vuit breaker
_: Do not leave children alone---children should
not be left alone or unattended in an area
where an appliance is in use. They should never
be allowed to sit or stand oil any part of tile
appliance.
2
iJii:iDo not allow anyone to climb, stand or hang
oil tile dooI; storage drawer or cooktop. They
could damage tile i('angeand even tip it oveI,
causing severe pe,._onal injur>
_: [aige scratches or impacts to glass doo,5 can
lead to broken or shattered glass.
;_:Do not store flammable materials in an oven or
near tile cooktop.
_ CAUTION:[[eIl]S Of in[eies[ [o chi](lien
should not be stored in cabinets above a range
or oil the backsplash of a range--children
climbing oil the range to reach items could be
seiiously injured.
iJii:iNever wear loose-fitting or hanging garments
while using the appliance. Be carefid when
reaching fbr items stored over tile ,vmge.
Flammable mateiial could be ignited if brought
in contact with hot surfilce units or heating
eleinents and inav cause severe btlIns.
_: Use only dU pot holde*._--moist or damp pot
holdeIs oil hot surfi/ces may result in burns
flom steam. Do not let pot holdei._ touch hot
surfilce units or heating dements. Do not use
a towel or other bulky cloth in place of pot
holde,s.
A WARNING!
SAFETYPRECAUTIONS
ge.com
_: For your safety, never use your appliance %r
wa,ming or heating the morn.
_: Teach children not to play with the controls or
any other part of the range.
_: .MwayskeeI) dish towels, dish cloths, pot holde*s
and other linens asafe distance flom your
i'ange.
iJii:i.MwayskeeI) wooden and plastic utensils and
canned fbod a safe distance fiom
yO/lI" I_]Ilge.
iJii:i_MwayskeeI) combustible wall coxerings,
cu**ains or drapes a safe distance fiom your
i'ange.
_: Do not let cooking grease or other flammable
mateiials accumulate in or ileal the iange.
_: Keep the hood and grease filte,s clean to
maintain good venting and to avoid grease fires.
_: Do not use water oil grease fires. Never pick up
a flaming pan. Turn the controls ofi_ Smother a
flaming pan oil a surfilce unit by cove,ing tile
pail completely with a well-fitting lid, cookie
sheet or flat u'a> Use a multi-pu,pose d,w
chemical or fbam-rype fire extinguisher
Flaming g,ease outside a pan can be put out by
cove,ing it with baking soda o*, if available, by
using a muld-puipose dU chemical or fioain-
type fire extinguisher
Flame in the oven can be smothe,ed completely
by closing the oven door and turning the oven
off or by using a multi-pu,pose dU chendcal or
fbamWpe fire extinguisher.
iJii:iDo not touch tile surfi/ce units, tile heating
dements or tile inteiior surfilce of tile oven.
These surfilces may be hot enough to burn
even though they are dark in color Du,ing and
after use, do not touch, or let clothing or other
flammable materials contact tile surfilce units,
areas nearby the surfilce units or am' inte,ior
area of tile oven; allow sufficient time fbr
cooling fi,st.
Potentially hot surfilces include the cooktop,
areas fi_cing tile cooktop, oven vent opening,
surfilces near the opening, crevices around the
oven door
REMEMBER:Tile inside surfi_ce of tile oven may
be hot when the door is opened.
_: Do not store or use combustible materials,
gasoline or other flammable vapois and liquids
in tile vicinity of this or aW other appliance.
COOKMEATANDPOULTRYTHOROUGHLY...
Cookmeatandpoultrythoroughly--meattoat/eastanINTERNALtemperatureof 160°Fandpoultrytoat/eastan
INTERNALtemperatureof I80°ECookingtothesetemperaturesusua//yprotectsagainstfoodbomei//ness.
SURFACECOOKINGUNITS
Useproperpansize--select cookwarehavingflatbottomslargeenoughtocoverthe surfaceunitheating
element.Theuseofundersizedcookwarewill exposea portionofthe surfaceunitto direct contact andmay
resultinignitionof clothing.Properrelationshipof co&ware to surfaceunitwill alsoimproveefficiency.
iJii:iNever leave tile surfi/ce units unattended
at high heat settings. Boilove,s cause smoking
and gieasy spillove,s that may catch oil fire.
_: Do not use alundnum fbil to line the &ip pails
or anywhere in the oven, except as desc*ibed in
this manual. Misuse could result in a shock, file
hazard or damage to the ,'ange.
iJi;:iBe sure the &ip pans and the vent duct are not
coxered and are in place. Their absence du,ing
cooking could damage ,'ange parts and wi,ing.
iJii:iOnly ce,min t}pes of glass, glass/ce,amic,
earthenware or other glazed containe,s are
suitable fbr cooktop service; otheis may break
because of the sudden change in temperature.
_: To minimize the possibility of burns, ignition of
flmnmable materials and spillage, the handle of
a container should be turned toward tile center
of the ,'ange without extending over nearby
surfi/ce units.
iJii:i.Mwaysturn tile surfi/ce units off befbre
removing cookware.
3
IMPORTANTSAFETYINFORMATION.
READALLINSTRUCTIONSBEFOREUSING.
SURFACECOOKINGUNITS(cont.)
iJii:iDo not imme,se or soak the removable suifi]ce
units. Do not put them in a dishwasher. Do not
self clean the surfi, ce units in the oven.
iJii:iWhen preparing flaming foods under the hood,
tuin the rim on.
To axoid the possibility of a burn or electric
shock, always be certain that the controls fbr all
surfi,ce units are at the OFFposition and all coils
are cool befbre attempting to lift or remove
a unit.
iJii:iClean the cooktop with caution. If a wet sponge
is used to wipe spills on a hot cooktop, be
carefld to avoid steam burns.
iJii:iKeeI) an eye on foods being fl_Jedat high or
medium high heat settings.
iJii:iFoods f_orflying should be as dU as possible.
Frost on flozen fbods or moisture on flesh
foods can cm,se hot fi,t to bubble up and over
the sides of the pan.
iJii:iUse little fi*tfar effective shallow or deep fi*t
flying. Filling the pan too fldl of lilt can cause
spilloveL_when food is added.
_: If a combination of oils or fi_tswill be used in
flTing, stir together befbre heating, or as fi)ts
m elt slowl_'.
i_ii"Always heat fi,t slowly, and watch as it heats.
iJii:iUse a deep fi)t them_ometer whenever possible
to prevent overheating fi*tbeyond the smoking
point.
A WARNING!
OVEN
Standawayfromthe range whenopeningtheovendoor.Hotairor steamwhich escapescancauseburnsto
hands,faceand/oreyes.
_: Do not heat unopened fbod containers.
Pressure could build up and the container
could buL_t, causing an inju,>
iJii:iKeeI) the oven vent unobstructed.
_: KeeI) the oven flee flom grease buildup.
_: Place the oven shelf in the desired posi6on
while the oven is cool. If shelxvs must be
handled when hot, do not let pot holder
contact the heating elements.
_: Pulling out the shelf to the stop-lock is a
convenience in lifting heaw fbods. It is also a
precaution against burns flom touching hot
surfi)ces of the door or oven walls.
_: When using cooking or roasdng bags in the
oven, fiollowthe manufi)cturer's directions.
iJii:iDo not use the oven to dU newspape,s.
If overheated, they can catch on fire.
_: Do not use the oven fbr a storage area. Items
sto,ed in an oven can ignite.
_: Do not leave paper products, cooking utensils
or fbod in the oven when not in use.
_fi:.:Do not use aluminum fbil to line oven bottoms.
hnproper installation of aluminum fbil ma,
result in a risk of electric shock or fire.
SELF-CLEANINGOVEN
Donot useovencleaners.No commercialovencleaneror ovenlinerprotective coatingof anykind shouldbe
usedin or aroundanypart ofthe oven.Residuefromovencleanerswill damagethe insideof theoven when the
self-cleancycleis used.
iJii:iDo not clean the door gasket. The door gasket
is essential far a good seal. Care should be
token not to rub, damage or move the gasket.
_: Befb,e self cleaning the oxen, remove shiny,
silxer-colored oven shelves (on some inodels)
and all other cookwa,e.
iJii:iBe sure to wipe up excess spillage befbre
sta,ting the self cleaning operation.
iJii:iIf the self cleaning mode malflmctions, mrn the
oven off and disconnect the power supply Have
it serficed by a qualified technician.
_: Clean only parts listed in this Owner's Manual.
READANDFOLLOWTHISSAFETYINFORMATIONCAREFULLY.
SAVETHESEINSTRUCTIONS
4
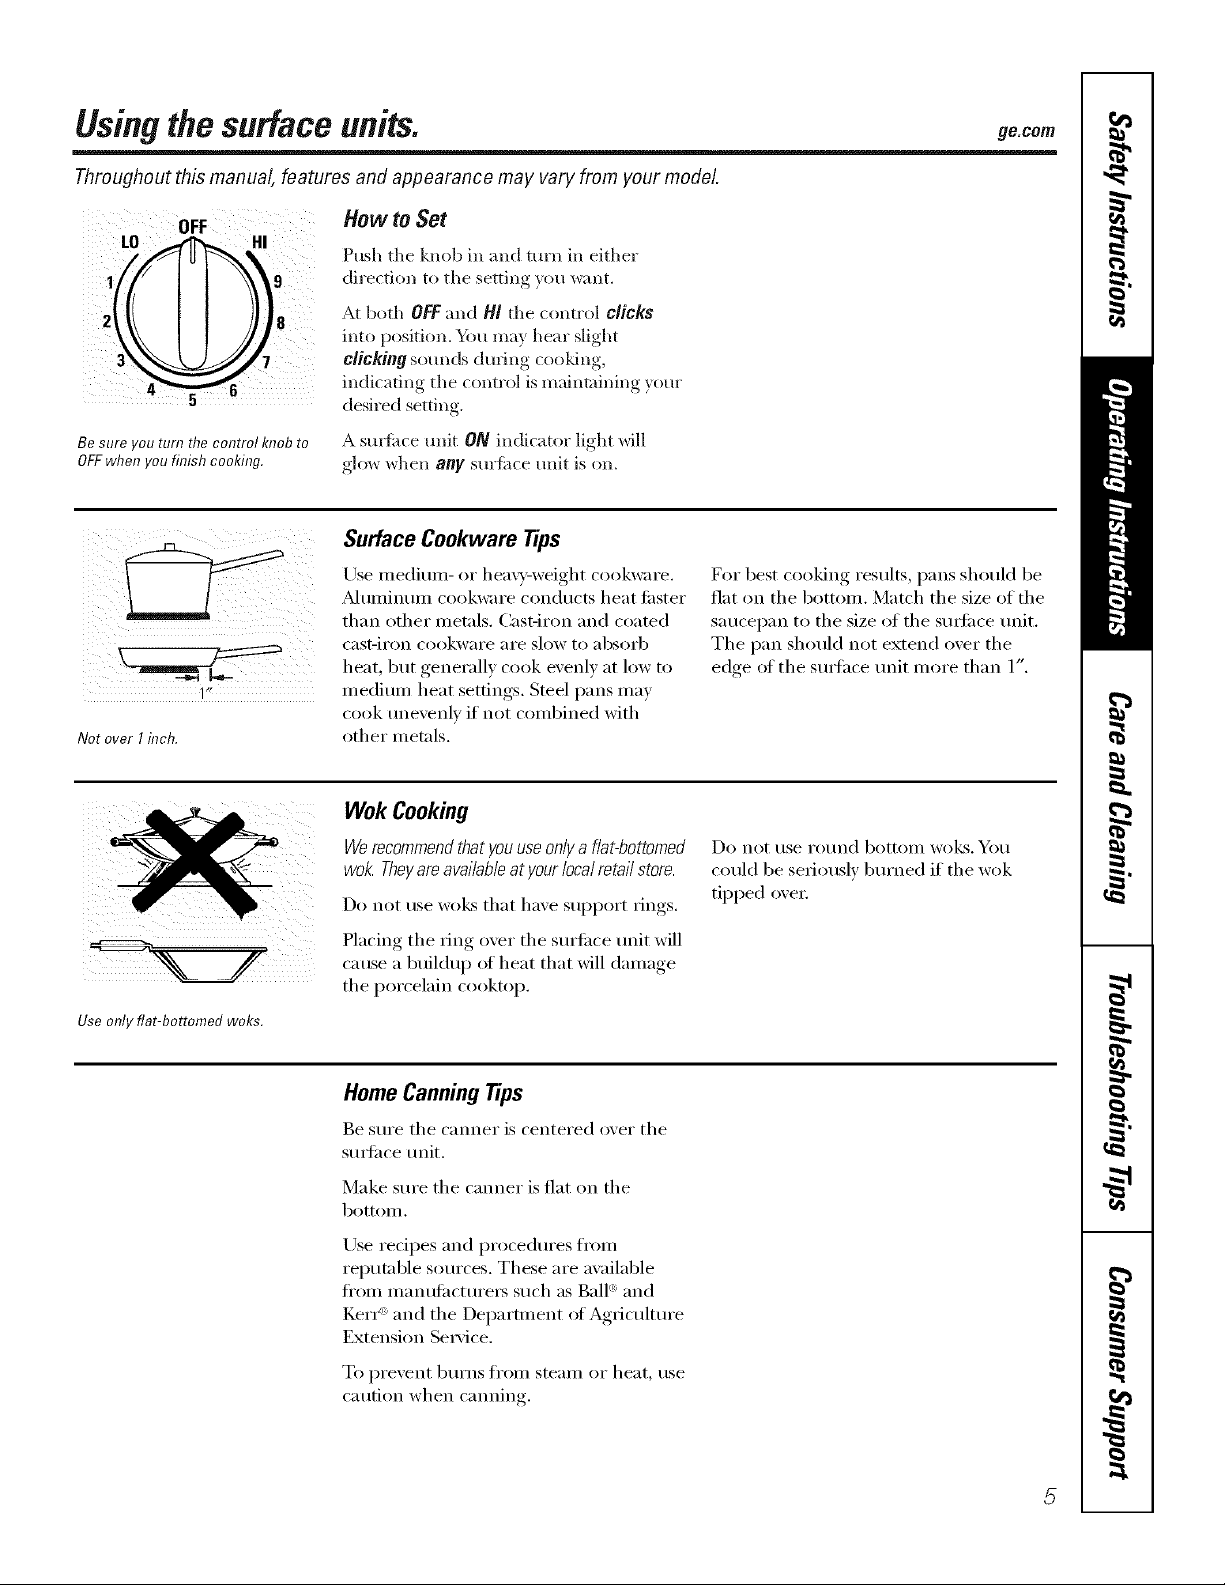
Usingthe surface units, ge.com
Throughout this manual, features and appearance may vary from your model.
How to Set
Push the knob in and turn in either
direction to the setting you want.
At both OFF and H! the control clicks
into position. _tl may hear slight
clicking som_ds during cooking,
3
indicating the control is maintaining yore"
desired setting.
Be sure you turn the control knob to
OFFwhen you finish cooking.
1"*
Notover I inch.
I
Use only flat-bottomed woks.
A sm_time refit ON indicator light will
glow when any surtime unit is on,
Surface Cookware tips
Use medimn- or hea\_v-weight cookware.
_kdtlIllintlIll cookware condtlcts heat fi_ster
than other metals. Cast-iron and coated
cast-iI'on cookwai'e aI'e slow to _lbsoi'b
heat, but generally cook evenly at low to
medium heat settings. Steel pans may
cook tmevenlv if not combined with
other metals.
Wok Cooking
Werecommendthat youuseonlya flat-bottomed
wok. Theyareavailableatyour localretail store.
Do not rise WO]CSthat have support rings.
Placing the ring over the surtilce unit will
cause a buildu I) of heat that will damage
the porcelain cooktop.
For best cooking results, pans shouM be
fiat on the bottom. Match the size of the
saucei)an to the size of the sm_i_ce trait.
The pan should not extend over the
edge ot the sm_hce trait more than 1".
Do not t/se I'ot/nd bottolll Wo]cs. Yell
could be seriously bm'ned if the wok
tipped oxer.
Home CanningTips
Be sm'e the canner is centered o_er the
sm_i_ce trait.
Make sure the canner is fiat on the
bottom.
Use redpes and procedm'es fl'om
reputable sources. These are awfilable
fl'om manufi_cture_ such as Ball '_and
IZerI_'_and the Department ot Agricultm'e
Extension Service.
To pi'e'_ent btli'ns fi'Olll steaill or heat, rise
caution when camfing.
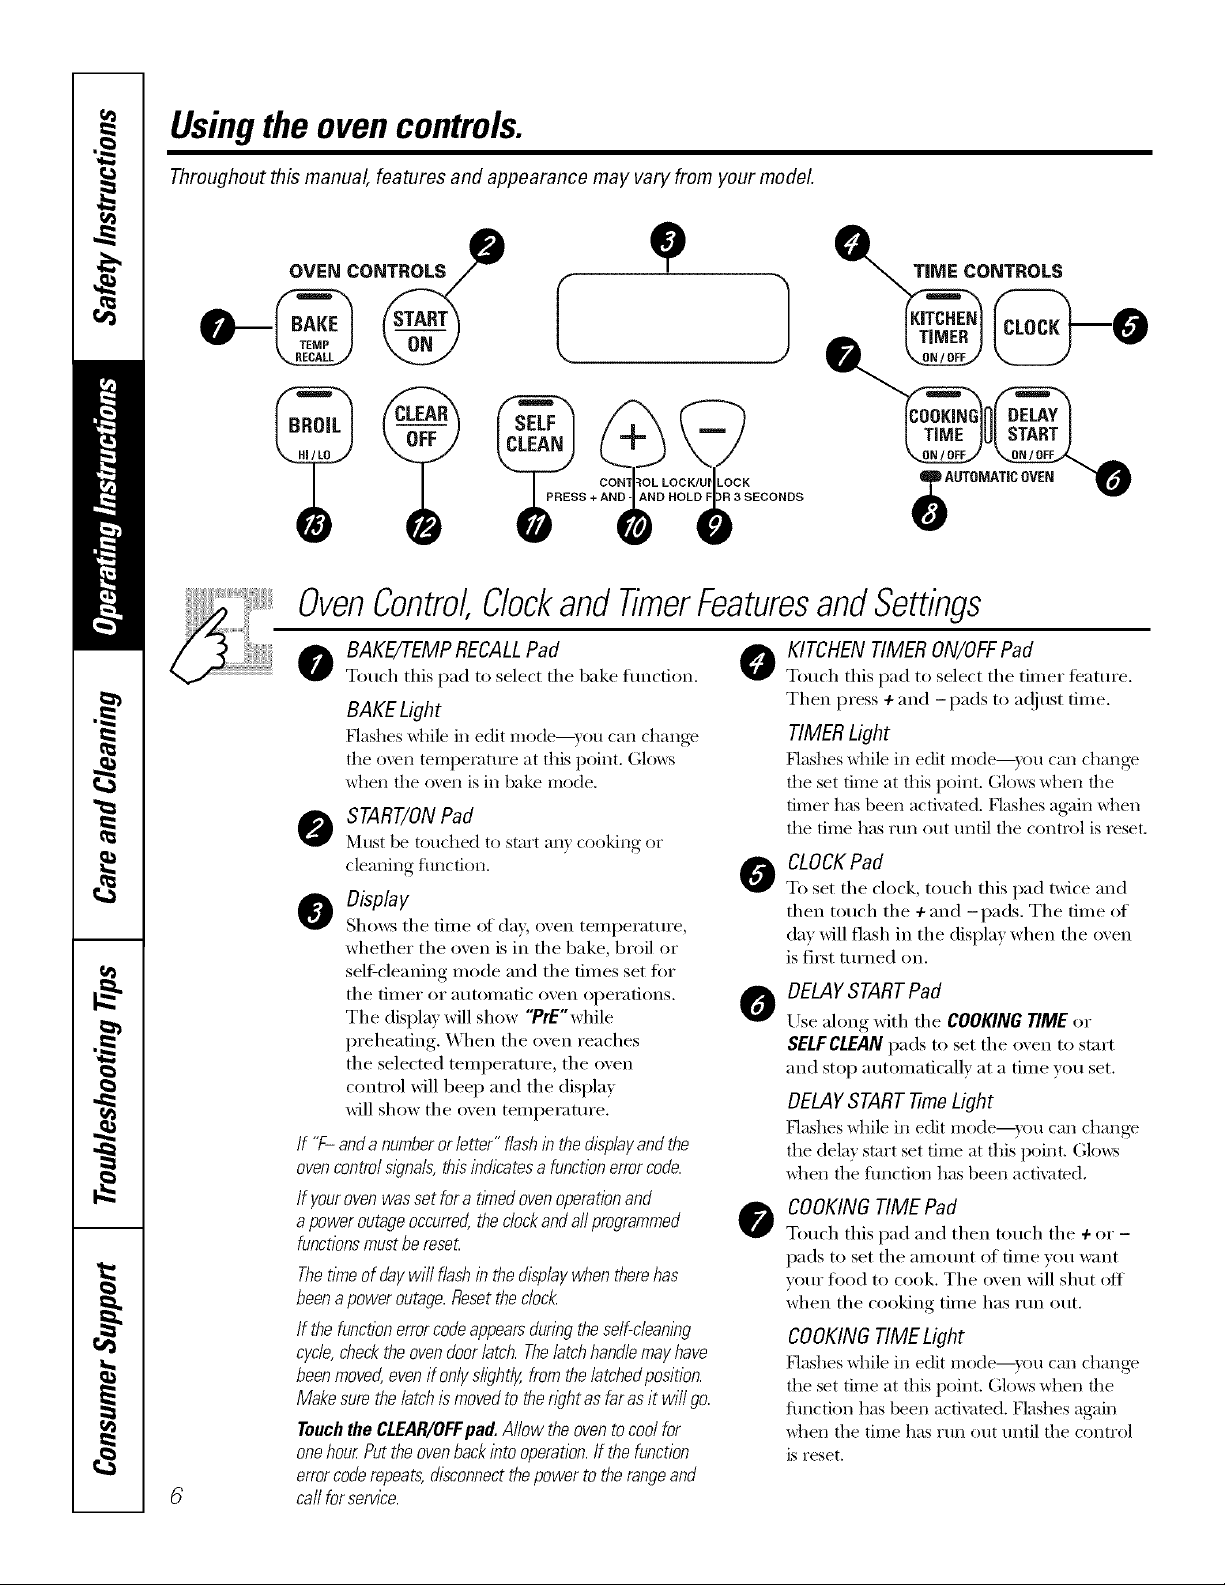
Usingthe ovencontrols.
Throughout this manual, features and appearance may vary from your model.
e
CON'[ :_OL LOCK/U_ LOC_%
S + @ H ECONDS
TIME CONTROLS
OvenControl,Clockand TimerFeaturesandSettings
o BAKE/7-EMPRECALLPad 0
Touch tiffs pad to select tile bake flmcfion.
BAKE Light
Flashes while in edit mode--)ou can chang_
tile o\re[] temperatm'e at this point. Glo_s
when the o\en is in bake mode.
O START/ONPad
Nltlst be touched to start aI]} cooking or
cleaning function,
O Display
Shows the tiI]le of day, oven tei]lpei'attli'e,
whether the oven is in the bake, broil or
self:cleaning mode and the times set for
the tii]ler or atltoi]/atic oven ol)ei'atioi]s.
The display will show "PrE'while
preheating. When the oven reaches
the selected temperature, the oven
control will beep and tile display
will show tile oven mmperamre.
/f '7- and anumberor/otter" f/ashin the displayandthe
ovencontro/ signals, thisindicatesa functionerrorcode.
If yourovenwas set fora timedovenoperationand
apower outage occurred,the dock and a//programmed
functionsmustbe reset
Thetime of day wi// f/ash in the dlsp/aywhen therehas
beenapower outage.Resetthe c/oc/_
If the function errorcodeappears during the se/f-c/eanlbg
cyc/e,checkthe oven door/atch. The/atchhand/e mayhave
beenmoved,evenif on/ys/lght/y,from the/atchedposition.
Makesure the/atch ismoved to thewht as far asit wi// go.
Touch the CLEAR/OFFpad. A//ow theoven tocoo/for
onehour Put the ovenback into operation.If the function
errorcoderepeats, disconnectthepower to the rangeand
ca//for service.
KITCHEN TIMER ON/OFFPad
Touch this pad to select tile timer teatm'e.
Then press 4-and -pads to at!just time.
TIMERLight
Hashes _dfile in edit mode--y_)u can changv
the set time at this point. Glows when the
timer has been activated, Flashes again _dlen
the time has run out until the control is reset.
CLOCK Pad
0
To set tile clock, tOtlcb tiffs pad twice aI]d
then touch the + and -pads. The time of
day will flash in the display when the oven
is fi_t turned on.
DELAYSTARTPad
0
Use ahmg with tile COOKING TIME or
SELFCLEAN pads to set the oven to start
and stop automatically at a time wm set.
DELAYSTART -timeLight
Hashes _dfile in edit mode--you can changv
the delay start set time at this Ix)int. Glo_vs
when the flmction has beet] acti\ramd,
COOKINGTIME Pad
0
Touch tiffs pad and then touch tile 4-or -
pads to set tile aillOtli]t of time you want
wmr fl)od to cook. The oven will shut off
when the cooking time has run out.
COOKINGTIME Light
Hashes _dfile in edit mode--y_)u can changv
the set time at this point. Glows when the
flmction has been activated. Flashes again
when the time has run ()hit tmtil the control
is reset.
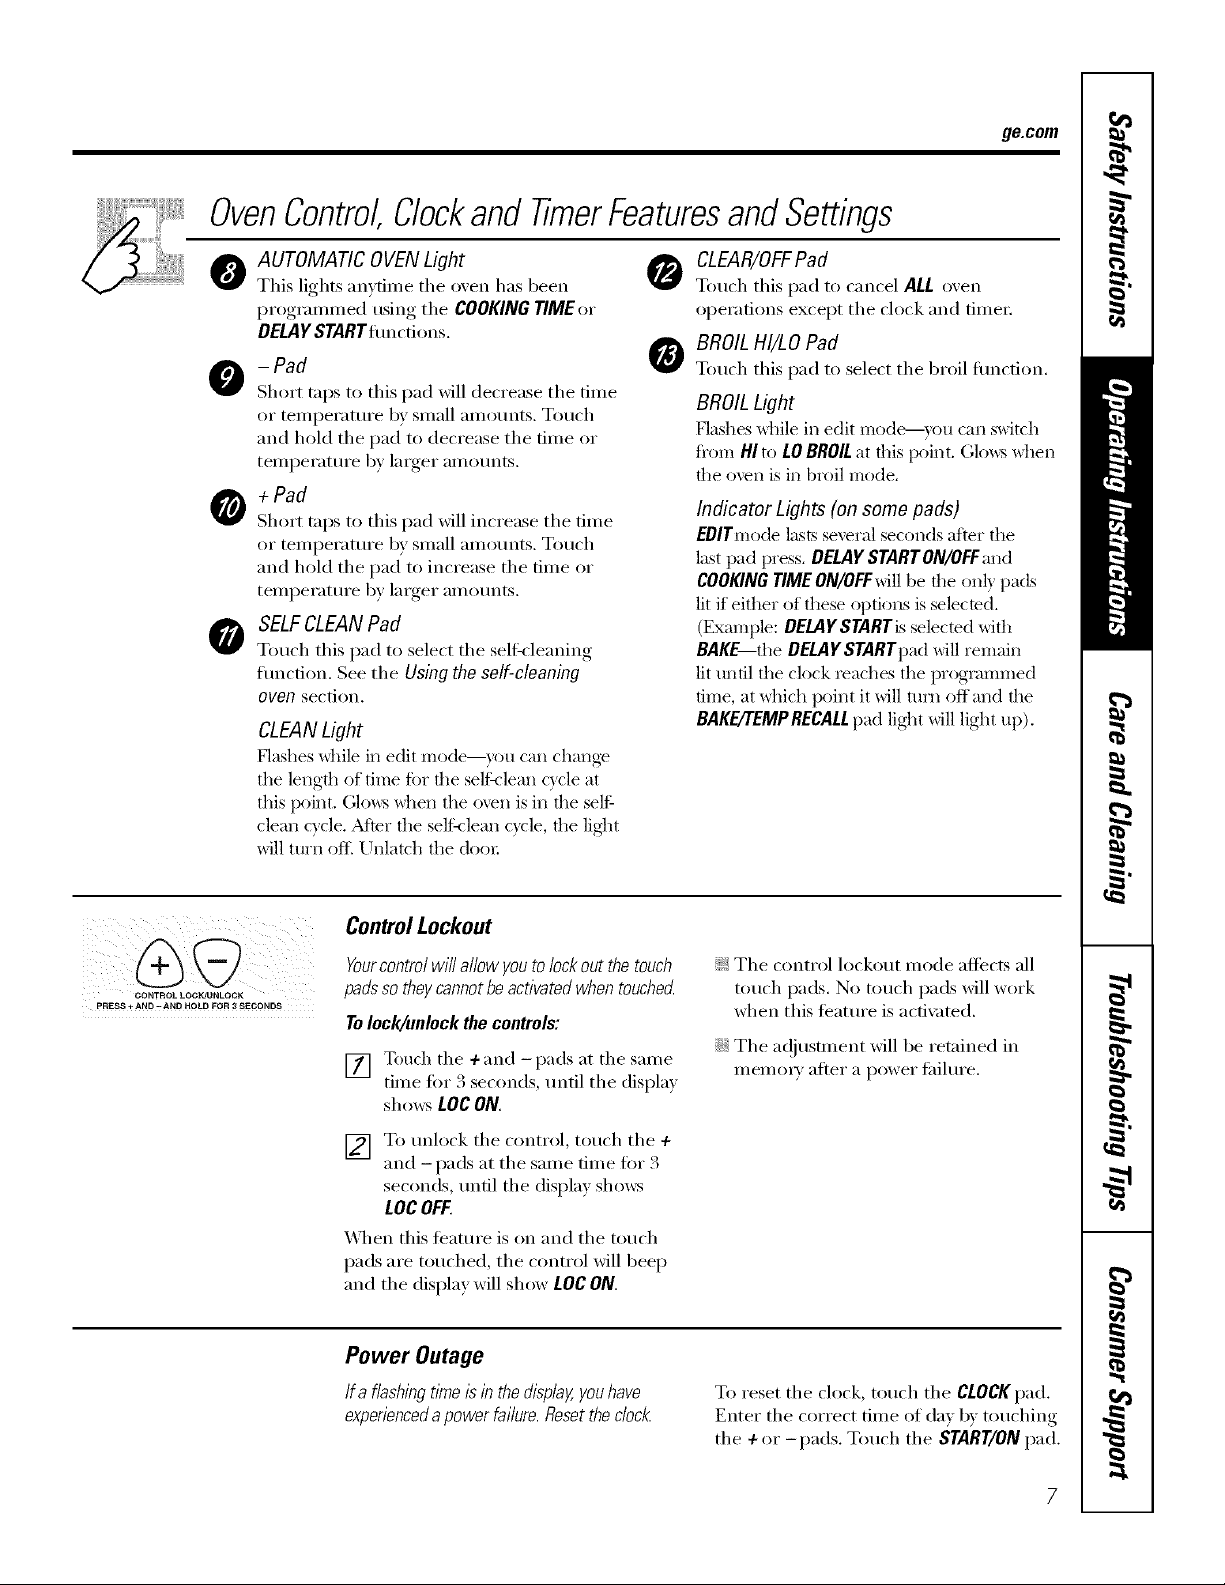
OvenControl,Clockand TimerFeaturesandSettings
ge.com
AUTOMATIC OVENLight
O
This lights anytime the oven has been
programn_ed using the COOKING TIME or
DELAYSTARTfimcdons.
- Pad
Short raps to this pad _dll decrease the time
or teinperature by small amotmts. Touch
and hold the pad to decrease the time or
teinl)erature by larger ainounts.
+ Pad
Short trips to this pad will increase the time
or temperature 1U small amo/mts. Touch
and hold the pad to increase the time or
temperatm'e by linger amotmts.
O SELFCLEANPad
Touch this pad to select tile selfMeaning
traction. See the Using the self-cleaning
oven section.
CLEANLight
Flashes _ddle in edit mode--)ou can change
tile length of time fbr the self,lean c) cle at
this ix>int. (;lows when tile oven is in the self=
dean c)cle. After the selfq lean cycle, the lig]lt
will ttlrI1 ofI_Unlatch the docn:
CLEAR/OFF Pad
Touch this pad to cancel ALL oven
operations except tile clock and time_:
BROILHI/LO Pad
Touch this pad to select the broil traction.
BROILLight
Flashes while in edit mode---you can switch
fl'om HI to tO BROILat this point. Glows when
the ()veil iS iI1 broil mode.
Indicator Lights (on some pads)
EBITmode lastsseveral seconds after the
last pad press, BELAY START ON/OFFand
COOKINGTIME ON/OFFwill be the only pads
lit if either of these options is selected.
(Example: OELAYSTARTis selected with
BAKE tile DELAYSTARTpad will remain
lit until the clock reaches the programmed
time, at which point it will mm off and the
BAKE/TEMPRECALLpad lig_lt will light up),
Control Lockout
t Yourcontrol will allow youto lock out the touch
CONTROL LOCI'UU N LOCK
PRESS + AND -AND HOLD FOR 3 SECONDS
padsso theycannot beactivated when touched
Tolock/unlock the controls:
[] Touch the +and -pads at the same
time fin" 3 seconds, tmtil tile (lispla,_
sho_s LOgON.
] To mflock the control, touch the +
and -pads at tile same time for 3
seconds, tmtil the displa) shows
LOCOFF.
"X_/en this teatm'e is on and the touch
pads are touched, the control will beep
and tile display will show LOCON.
Power Outage
Ifa flashing tl_neIsin the display,youhave
experiencedapower failure. Resetthe clod<
};?:Tile control h)ckout mode affects all
touch pads. No touch pads will work
when this teatm'e is actix _ted.
iJi::Tile a(!iusnnent _dll be retained in
memoi T after a power fifilure.
To reset the ch)ck, touch the CLOCKpad.
Enter the correct time of (la) b) touching
the + or-pads. Touch the START/ONpad.
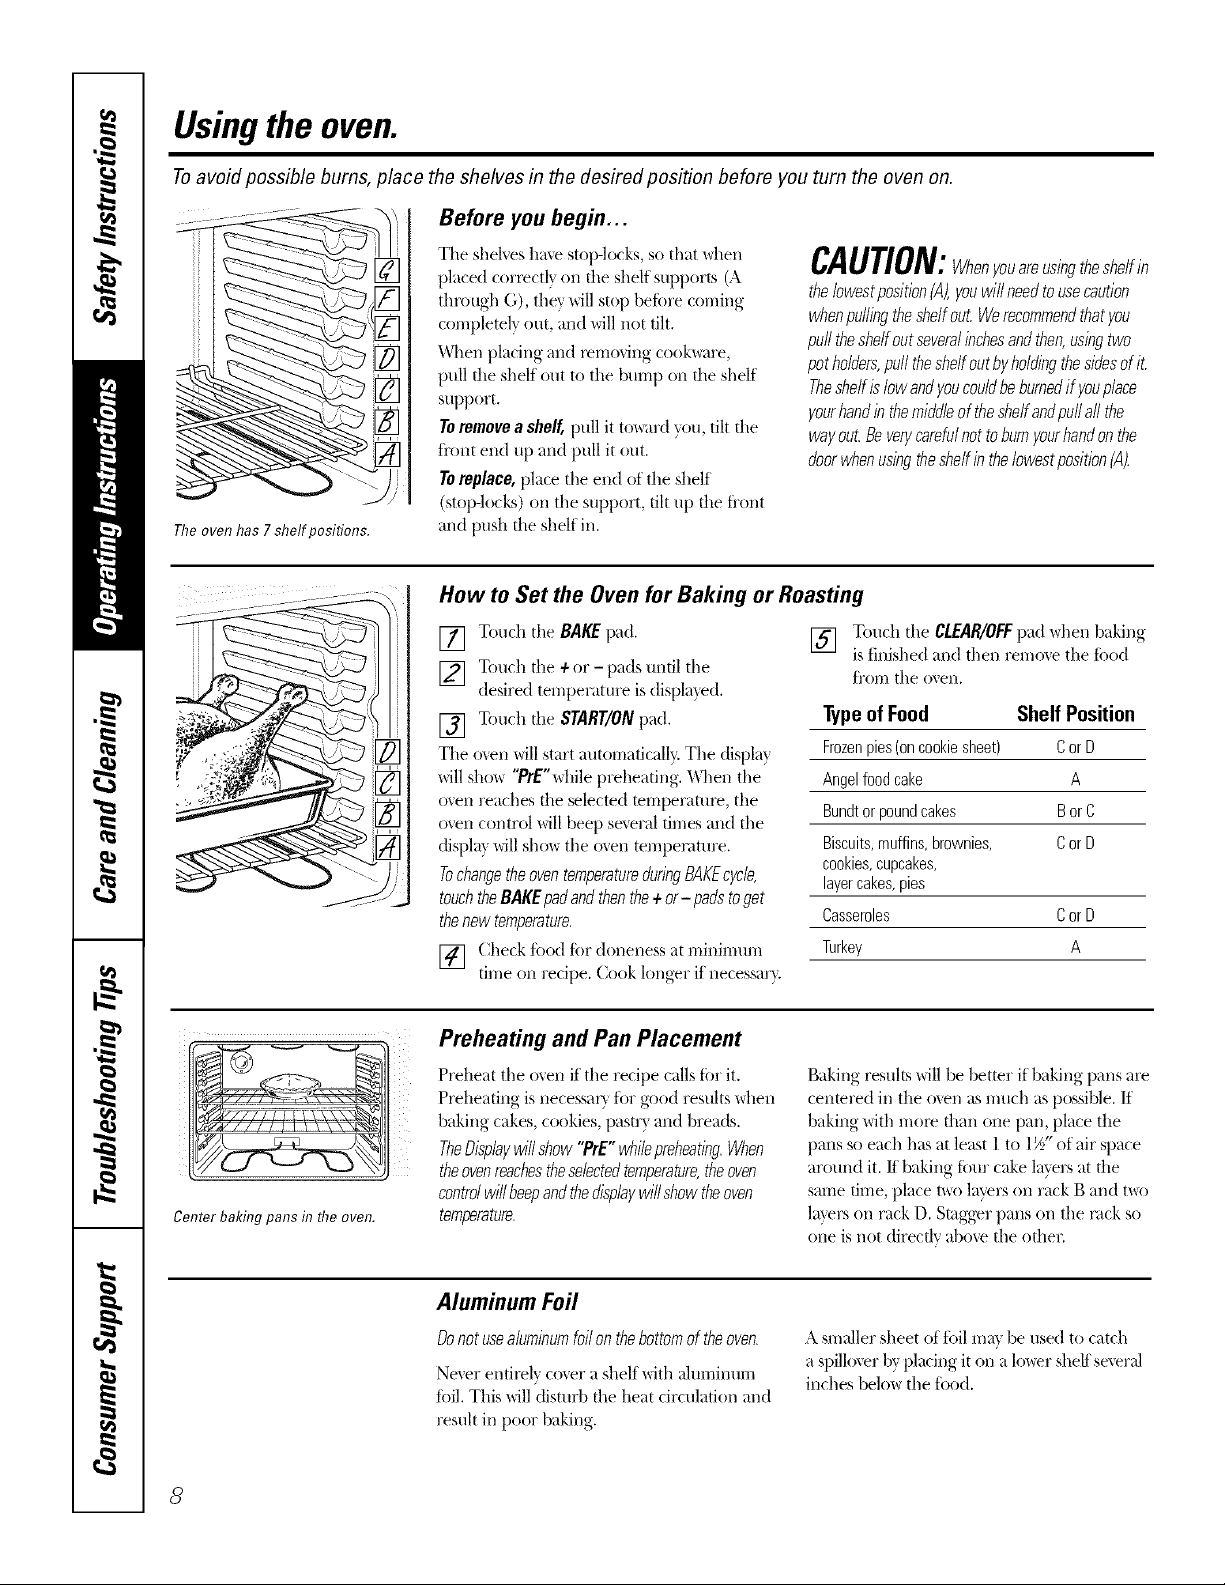
Usingthe oven.
Toavoid possible bums, place the shelves in the desired posifion before you turn the oven on.
Before you begin...
The oven has7 shelf positions.
T]le shelves ha\'e stop-locks, so that \dlen
pla.ced corx_ctl) on file shelf supports (A
through G), they will stop before coming
completely out, and will not tilt.
When placing and removing cook\_are,
pull file shelf ()tit to the N*mp on file shelf
support.
Toremovea shelf,pull it tox_mdyou, tilt file
fi'ont end up and pull it out.
Toreplace,place the end o_the shelf
(stop-lo(ks) (m the support, tilt up die fi'ont
and push the shelf in.
CAUTION:Whenyouareus/ngtheshelfin
thelowestposition(A),youwillneedtousecaution
whenpullingtheshelfout.Werecommendthatyou
pulltheshelfoutseveralinchesandthen,usingtwo
potholders,pull theshelfoutbyholdingthesidesofit.
Theshelfislowandyoucouldbeburnedif youplace
yourhandinthemiddleof theshelfandpullall the
wayout.Beverycarefulnottoburnyourhandonthe
doorwhenusingtheshelfin the/owestposition(A).
How to Set the Oven for Baking or Roasting
[] Touch the BAKEpad.
] Touch tile +or- pads until the
desired temperature isdispla_ed.
[] Touch the START/ONpad.
The o_en willstart atttomaticallv The displa_
willsho_ '`prE"\Jdle preheating. _Altenthe
oxen reaches file selected mmperature, the
oven control willbeep several times and the
(tispl_gwillsho_ the oven temperature.
TochangetheoventemperatureduringBAKEcycle,
touchtheBAKEpadandthenthe+or- padstoget
thenewtemperature.
[] (.:heckfood for doneness a.tminimum
nine on recipe. Cook longer if necessat>
[] Touch the CLEAR/OFFpad when baking
TypeofFood Shelf Position
Frozenpies(oncookiesheet) CorD
Angelfoodcake A
Bundtorpoundcakes BorC
Biscuits,muffins,brownies, CorD
cookies,cupcakes,
layercakes,pies
Casseroles CorD
Turkey A
is finished and then remo_e tile _i_od
from the oven.
Center baking pans in flTeoven.
8
Preheating and Pan Placement
Preheat the oven it the recipe calls for it.
Preheating is necessa U tbr good results \dmn
baking cakes, cookies, pastrx and breads.
TheDisplaywillshow",°rE"whilepreheating.When
theovenreachestheselectedtemperature,theoven
controlwillbeepandthedisplaywillshowtheoven
temperature.
Aluminum Foil
Donotusealuminumfoilonthebottomoftheoven.
Ne_er entirely (o_er a shelf with alumimm-i
toil. This will (fisturb file heat circulation attd
result in poor baking.
Baking resuhs willbe better if baking pans are
cenmred in tile o_en as much as possiNe. If
baking with more than one pan, place tile
pans so each has at least 1 to 1½"of air space
around it./f baking fi_urcake 1wers at the
same time,place t\_olavecs on rack B att(t t\_o
lmecs on rack D. Smgger pans on the rock so
one isnot direc0v above the oflmc
A smaller sheet of toil may be used to catch
a spilloxer by placing it on a lower shel_'sexeral
inches below the tood.
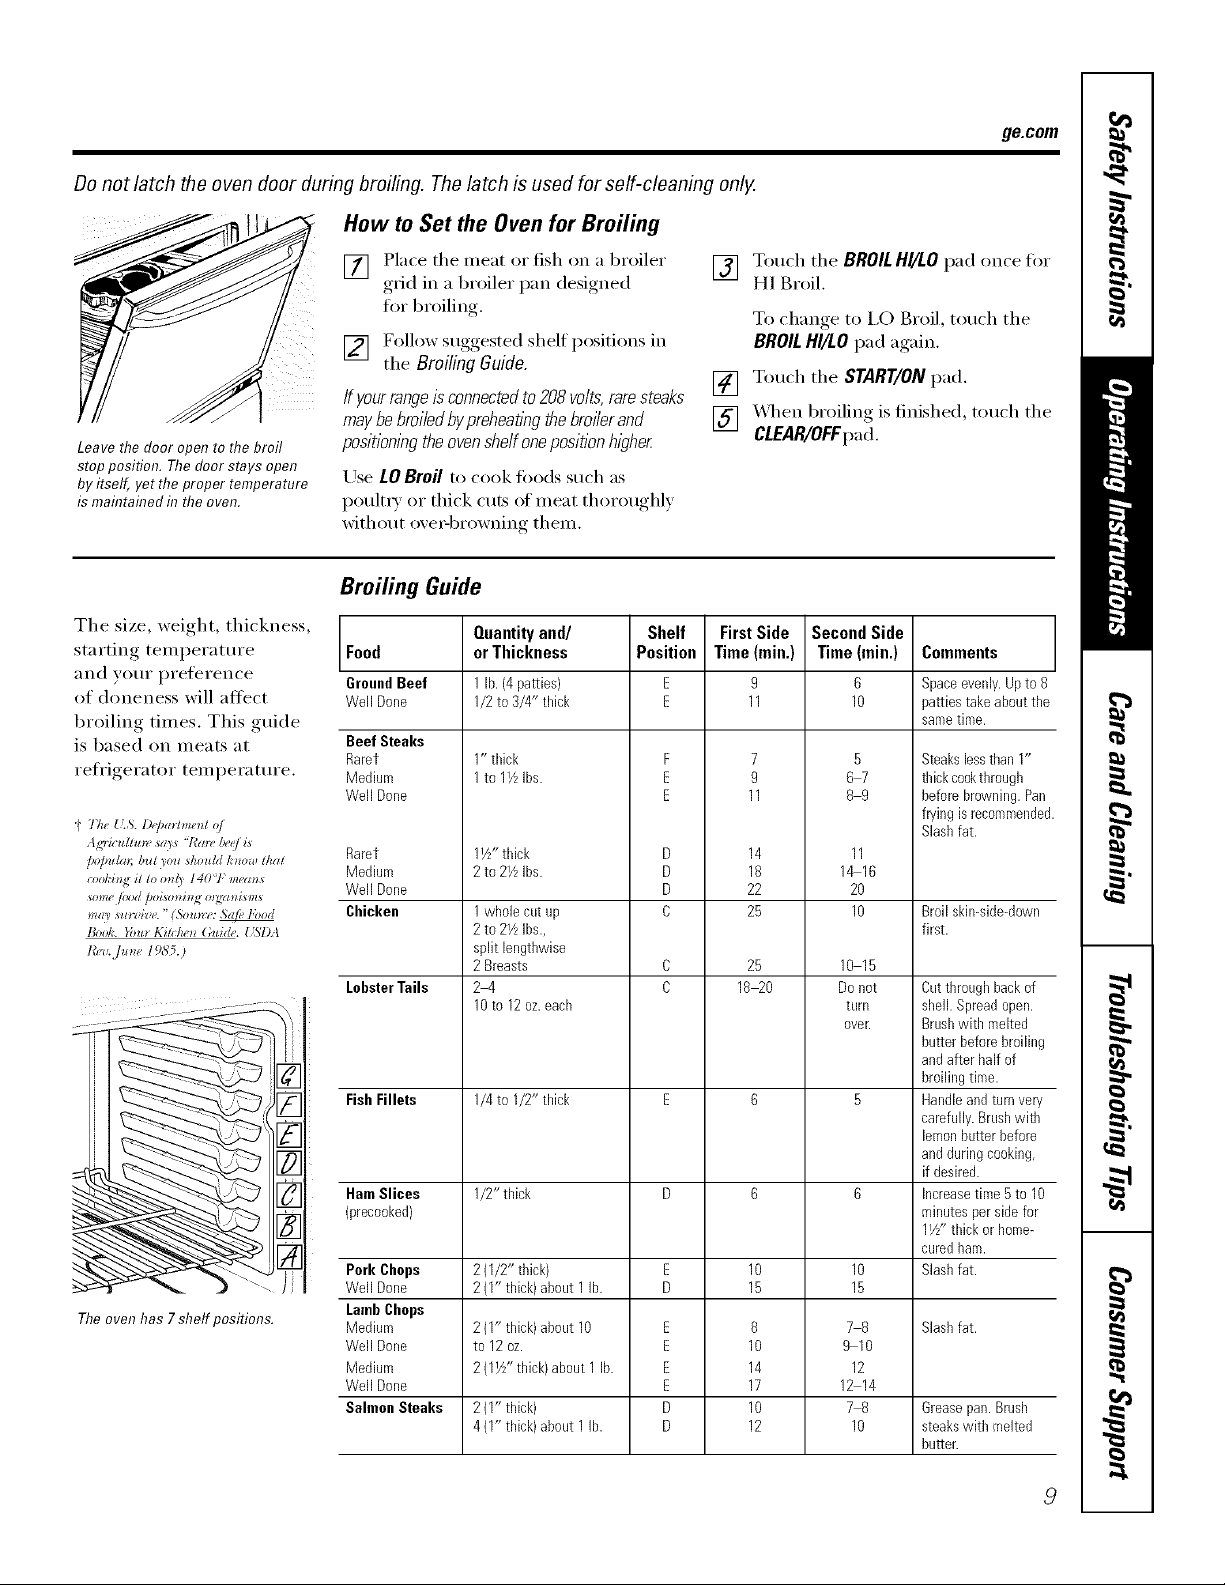
Donot latch the oven door during broiling. The latch is used for self-cleaning only.
How to Set the Oven for Broiling
ge.com
[] Place tile meat or fish on a broiler
,grid in a broiler I)an designed,
for broiling.
[] Follow suogested shelf )ositions in
tile BroilingGuide.
If your range is connected to 208 voits, rare steaks
may be broiied bypreheat/)_gthe broiier and
Leave the door open to the broil
stop position. The door stays open
by itself, yet the proper temperature
is maintained in the even.
positionl)_gthe oven shelf one positionhigher
Use LOBroil to cook foods such as
poult_ 7 or thick cuts of meat thoroughly
without ove_q)rowning them.
Broiling Guide
Tile size, weight, thickness,
starting temperature Food
aild VO/li" prelereIlce GroundBeef
of doneness will altect Well Done
broiling times, This guide
is based on Illeats at Beef Steaks
reti'igerator temperature. Medium
(' The {LS.i)(J_a*/me_¢o/
Agriculhm, sa)_ "/'a_, &e/i*
/_l)lm/m;b*zt_o_zsko*t/d/,'_*o,l!tkat
_>ol,'i_git to o_*{_I40<1,`m_'m_s
_ome /ood hoiso_*kN o_;gzmism*
m_U s*lrzize." ('_o*mw _e lbod
1_oo1,'.}'o_t_l_ih:lw)_Guid('.{_ST)A
t',_,,./._** 1985.)
Theovenhas 7shelf positions.
Rarer
Well Done
Rarer
Medium
Well Done
Chicken
LobsterTails
FishFillets
HamSlices
(precooked)
Pork Chops
Well Done
LambChops
Medium
Well Done
Medium
Well Done
Salmon Steaks
Quantityand/
orThickness
1lb.(4patties)
1/2to 3/4" thick
1" thick
1to 11/,Ibs.
1VZ'thick
2to 2YLIbs.
1whole cut up
2to 2VLIbs.,
split lengthwise
2 Breasts
2-4
10to 12oz.each
1/4to I/2" thick
1/2"thick
2(1/2" thick)
2(I" thick) about 1 lb.
2(1" thick)about 10
to 12oz.
1
2(I YZ'thick)about1 lb.
2(1" thick)
4(I" thick) about 1 lb.
Shelf
Position
F
E
E
D
D
D
C
E
E
E
E
D
D
[] Touch tile BROIL HI/LO pad once fi)r
HI Broil.
To change, to 1,0 Broil, touch tile
BROILHI/tO pad again.
[] Touch tile START/ON pad.
[] X._q/en broiling is finished, touch tile
CLEAR/OFFpad.
FirstSide
Time(min,)
11
11
14
18
22
25
25
18 20
10
14
17
10
12
Second Side
Time (rain.)
9
7
9
8
6
10
5
67
89
11
1_16
20
10
10 15
Donot
turll
ovelt
10
15
78
9 10
12
12 14
78
10
Comments
Spaceevenly.Upto 8
pattiestakeaboutthe
sametime.
Steakslessthan 1"
thickcookthrough
beforebrowning.Pan
fryingis recommended.
Slashfat.
Broil skin-side-down
first.
Cutthroughbackof
shell. Spreadopen.
Brushwith melted
butter beforebroiling
andafter half of
broilingtime.
Handleandturnvery
carefully.Brushwith
lemonbutterbefore
andduringcooking,
if desired.
Increasetime5 to 10
minutesper sidefor
11/z"thick orhome-
curedham.
Slashfat.
Slashfat.
Grease pan. Brush
steaks witll melted
butter.
Usingthe clock and timer.
Not all features are on all models.
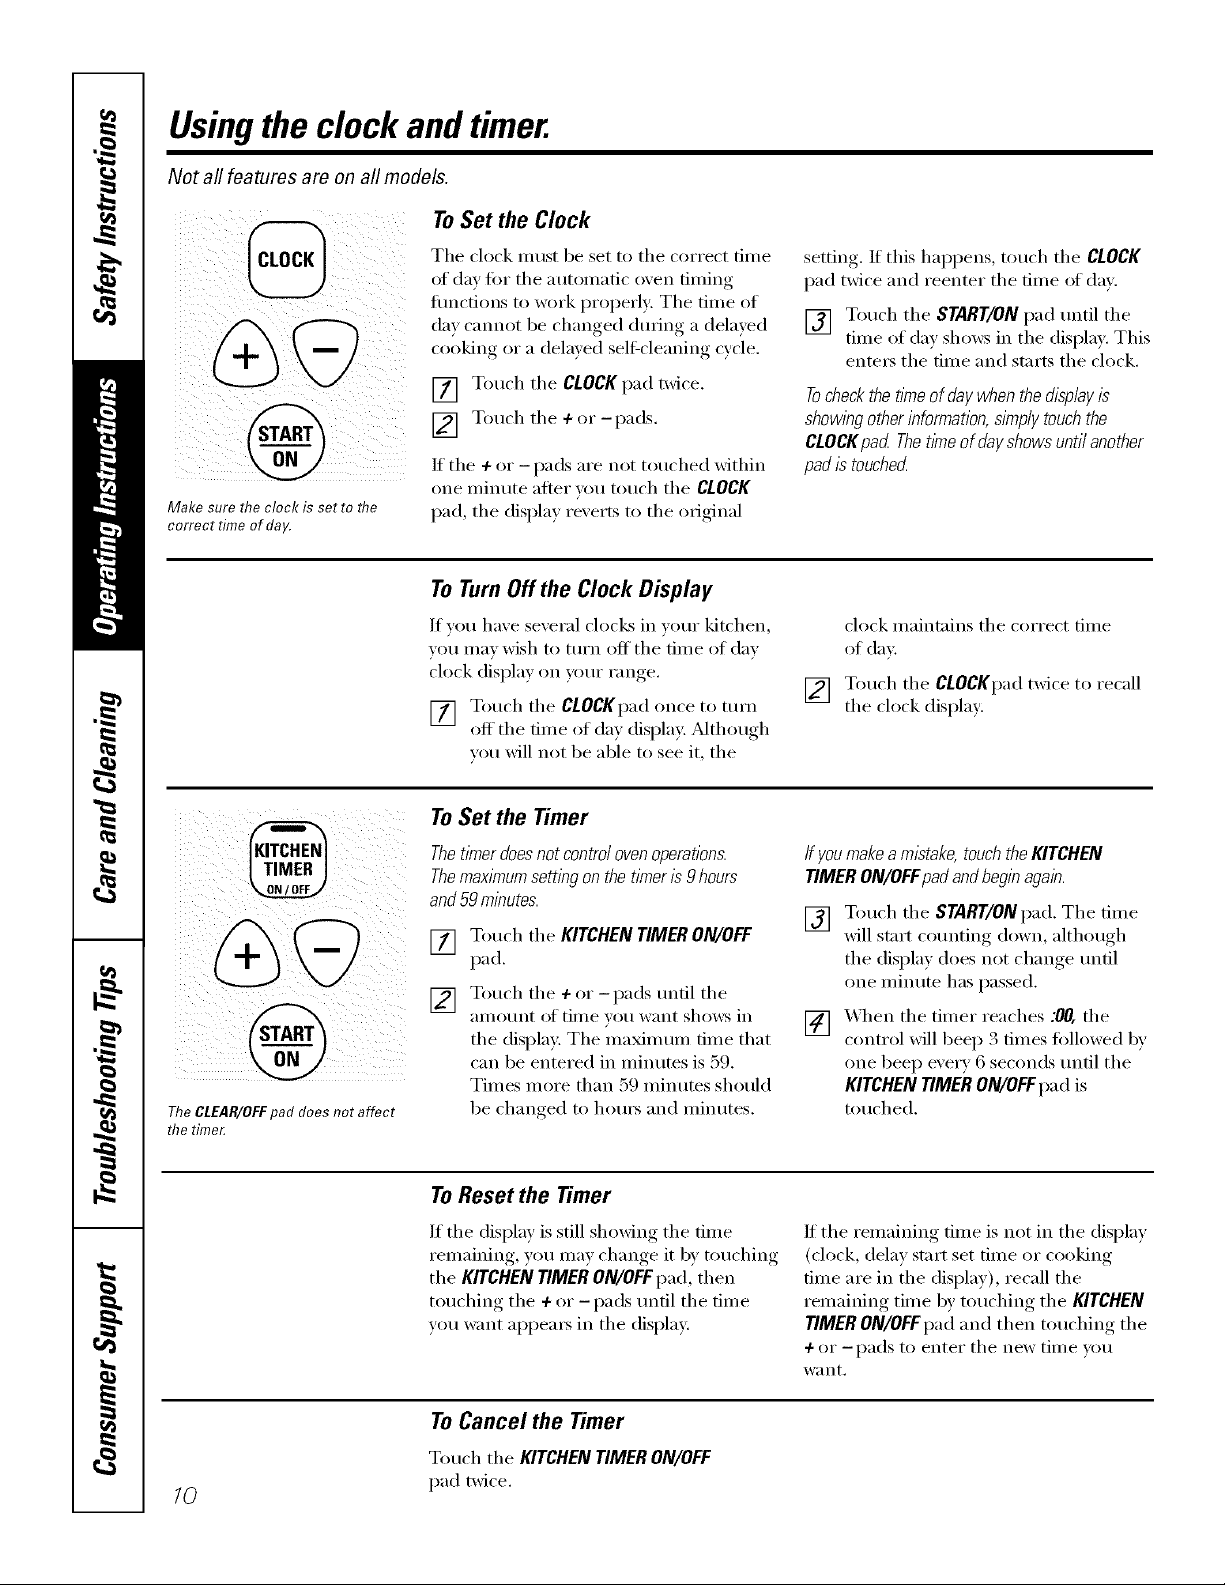
To Set the Clock
Make sure the clock is set to flTe
correct time of day.
The clock must be set to the correct time
of day fin" the atmnnatic oxen tinting
flmcfions to work properly: The time of
da} cmmot be changed dm_ing a dela}ed
cooking or a delmed seltXcleaning cycle,
[] Touch the CLOCKpad twice,
[] T°uch the + °r -IXMS"
If the 4- or - pads are not touched within
one minute after xou touch the CLOCK
pad, the displa) rexerts to the original
ToTurn Offthe Clock Display
If you have several clocks in yore" kitchen,
you may wish to mrn off the time of day
clock display on yore" range.
[] Touch the CLOCKpad once to turn
off the time of da) display. Mthough
wm will not be able to see it, the
To Set the Timer
setting, If this hal)pens, touch the CLOCK
pad twice and reenter the time of din.
[] Touch the START/ON pad until the
time of day shm_s in the display. This
ente_ the time and starts the clock.
Tocheckthetkneofdaywhenthedisplayis
showlbgotherinformation,simplytouchthe
CLOCKpad Thet/meofdayshowsuntilanother
padistouched
clock maintains the correct time
of day.
Touch the CLOCKpad twice to recall
[]
the clock display:
TheCLEAR/OFFpad does not affect
the time£
Thet/Ynerdoes not contro/ ovenoperations.
ThemaxlYnumsetting on the timeris 9 hours
and59 minutes
Touch the KITCHEN TIMER ON/OFF
[]
I)ad.
Touch the + or-pads tmtil the
[]
_ll//ot/n[ ()l_ ti/ue VOt/W}lllt shows ill
the display. The maxim um time that
can be entered ill minutes is 59.
Times more than 59 minutes should
be changed to hem5 and minutes.
To Reset the Timer
If the display is still showing the time
remaining, you may change it by touching
the KITCHENTIMERON/OFFpad, then
touching the + or -pads tmtil the time
you _mlt al)l)ea_ in the display.
ToCancel the Timer
ffyoumakea mistake, touch the KITCHEN
TIMER ON/OFFpadandbeginagain.
[] Tou('h the START/ON pad. The time
will start ('otmting down, althotwh
the display does not change tmtil
one minute has passed.
[] _4qmn the timer reaches :00, the
control will beep 3 times followed by
one beep every 6 seconds tmtil the
KITCHEN TIMER ON/OFFpad is
touched.
If the remaining time is not in the display
(clock, delay start set time or cooking
time are in the display), recall the
remaining time by touching the KITCHEN
TIMER ON/OFFpad and then touching the
+or -pads to enter the new tim e you
want,
( 0
Touch the KITCHEN TIMER ON/OFF
/0
pad twice.
 Loading...