

GE JS905TK4WW, JS905SK5SS, JS905BK4BB Owner’s Manual
ge.com
c,,j
Safety Im/ructions ... ')-5
Operating In#ructions
Clock and Timer ....... 13
Control i,ockout ....... 13
Cookware ............ 8, 9
Oven .............. 10-20
Sabbath Feature ........ 20
Self Cleaning ....... 16, 17
Special Features ..... 18, 19
Surface Units ........ 6, 7
Thermostat ........... 15
Timed Baking and
Roasting .............. 14
Care and Cleaning
Control Panel ......... 92
Door ................ 22
(;lass Cookmp ...... 25, 26
Knobs ............... 21
Light Bulb ............ 24
Packa_ng Tape ........ 21
Racks ................ 23
Stainless Smel Surfaces . .21
Storage Drawer
Removal ............. 23
Vent ................. 21
Troubleshooting Tips
Befbre You Call
For Ser\,ice ........ 27-30
Accessories. .......... 33
Combiner Support
(_onsulller
Support ...... Back Cover
Product
Re_stration ....... 31, 39
Warranty ............. 35
Is9o5
Write the model and serial
numbers here:
Mo_l#
Serial #
You can find them on a label
behind the open oven door
on the lower left corner of the
range flame.
49-80501 07-07 JR

IMPORTANTSAFETYINFORMATION.
READALLINSTRUCTIONSBEFOREUSING.
WARNING!
For your safety, the information in this manual must be followed to minimize the risk of fire, electric
shock, or to prevent property damage, personal injury, or loss of life.
WARNINGANti-TIPDEVICE
All ranges
Slide@
Ranges:
Drop-In
Ranges:
If you pull the range out flom the wall for any reason, make sure the dex,ice is properly
engaged when you push the range back against the wall. It it is not, there is a possible risk of
the range tipping over and causing in,ju U if you or a child stand, sit or lean on an open door.
Please refer to the Anti-Tip dex,ice information shipped xdth the device and in this manual.
Failure to take this precaution could result in tipping of the range and injm T.
can tip andinjury could result.
Toprevent accidental tipping of the range, attach it to the wall and floor by installing the
Anti--tip device supplied.
Tocheck if the device is installed and engaged properly, remove the storage drawer
and inspect the rear leveling leg. Make sure it fits securely into the slot.
Toprevent accidental tipping of the range, secure the attached Anti--tip bracket, under
the rear countertop.
Tocheck if the device is installed and engaged properly, lower the oven door and gently
apply medium force at the handle end until movement of the range is detected. Continue
pressing until the anti-tip bracket is engaged and movement stops. A small amount of
movement is acceptable at the back of the range top but it should be stable and not tip
once the anti-tip bracket is engaged.
IMPORTANTSAFETYNOtiCE
The California Safe Drinking Water and Toxic Enforcement Act requires the Governor of California to
publish a list of substances known to the state to cause cancer, birth defects or other reproductive
harm, and requires businesses to warn customers of potential exposure to such substances.
The fiberglass insulation in self-clean ovens gives off a very small amount of carbon monoxide during
the cleaning cycle. Exposure can be minimized by venting with an open window or using a ventilation
fan or hood.
SAFETYPRECAUtiONS
When using electrical appliances, basic safety precautions should be followed, including the following:
Use this appliance only for its intended
purpose as described in this Owner's
Manual.
Be sure your appliance is properly
installed and _ounded by a qualified
installer in accordance xdth the prox,ided
installation instructions.
Have the installer show you the location of
the circuit breaker or fuse. Mark it for easy
reference.
Do not attempt to repair or replace any
part of your range unless it is specifically
recommended in this manual. All other
2
ser\,icing should be referred to a qualified
technician.
Before performing any ser\,ice, disconnect
the range power supply at the household
distribution panel by remox,ing the fuse or
sxdtching off the circuit breaker:
{ Do not leave children alone---children
should not be left alone or unattended in
an area where an appliance is in use. They
should never be allowed to sit or stand on
any part of the appliance.
{ Do not allow anyone to climb, stand or
hang on the door, storage drawer or
cooktop. They could damage the range
and even tip it over; causing severe
persorral iqjmT.
ii!i!i_¸'iiiii'_'¸',,_'_'¸¸'!i_
A WARNING'I
SAFETYPRECAUTI"ONS
o
Do not operate the oven or cooktop controls if the glass is broken. Foodsplatter or cleaning solution
may penetrate a broken control panel or cooktop and create a risk of electrical shock. Contact a
qualified technician immediately should your glass control panel or cooktop become broken.
Do not store flammable materials in an
oven or near the cooktop.
CAUTION: temsofi.terestto
children should riot be stored in cabinets
above a range or on the back of a range--
children climbing on the range to reach
items could be seriously injured.
Never wear loose-fitting or han_ng
garments while using the appliance. Be
careful when reaching for items stored
over the range. Flammable material could
be ignited if brought in contact with hot
surface urdts or heating elements arid may
cause severe burns.
Use only dU pot holdersimoist or damp
pot holders on hot surfaces may result in
burns flom steam. Do not let pot holders
touch hot surface urdts or heating
elements. Do riot use a towel or other
bulky cloth in place of pot holders.
{{{{Do riot use water on grease fires. Never
pick up a flaming pan. Turn the controls
oil Smother a flaming pan on a surface
uriit by covering the pan completely xdth
a well-fitting lid, cookie sheet or flat tray.
Use a multi-propose d U chemical or
foam-type fire exfinguishen
Flaming grease outside a pan can be put
out by coveting it with baking soda or; if
available, by using a multi-purpose dU
chemical or foam-type fire extinguisher.
Flame in the oven can be smothered
completely by closing the oven door arid
turning the oven off or by using a multi-
purpose dU chemical or foam-type fire
extinguisher.
For your saIety, never use your appliance
for warming or heating the room.
Do riot let cooking grease or other
flammable materials accumulate in or
near the range.
Do riot touch the surface urdts, the
heating elements or the interior surface
of the oven. These surfaces may be hot
enough m burn even though they are dark
in color: During arid 'after use, do riot
much, or let clothing or other flammable
materials contact the surface urdts, areas
nearby the surface urdts or any interior
area of the oven; allow sufficient time for
cooling first.
Potentially hot surfaces include the
cooktop, areas facing the cooktop, oven
vent opening, surfaces near the opening,
crex,icesaround the oven door.
REMEMBER:The inside surface of the oven
may be hot when the door is opened.
Do riot store or use combustible materials,
gasoline or other flammable vapors arid
liquids in the x,icinity of this or any other
appliance.
iiiiiiiiiiiii!
Keep the hood and grease filters clean
m maintain good venting arid to avoid
grease fires.
Teach children riot to play with the
controls or any other part of the range.
iiiiiiiiiiiii!
Always keep dish towels, dish cloths, pot
holders arid other linens a sa{e distance
flom your range.
Always keep wooden and plastic utensils
arid canned food a safe distance flom
your range.
Always keep combustible wall coverings,
curtains or drapes a s'ate distance flom
your range.
ge.com
COOKMEATANDPOULTRYTHOROUGHLK ..
Cookmeat andpoultry thomughlyImeat toat leastan INTERNALtemperatureof 160°F(71°C)andpoultry
toat least an INTERNALtemperatureof 180°F(82°C).Cookingto thesetemperaturesusuallyprotectsagainst
foodbomeillness. 3
iMPORTANTSAFETYiNFORMATiON.
READALLiNSTRUCTiONSBEFOREUSING.
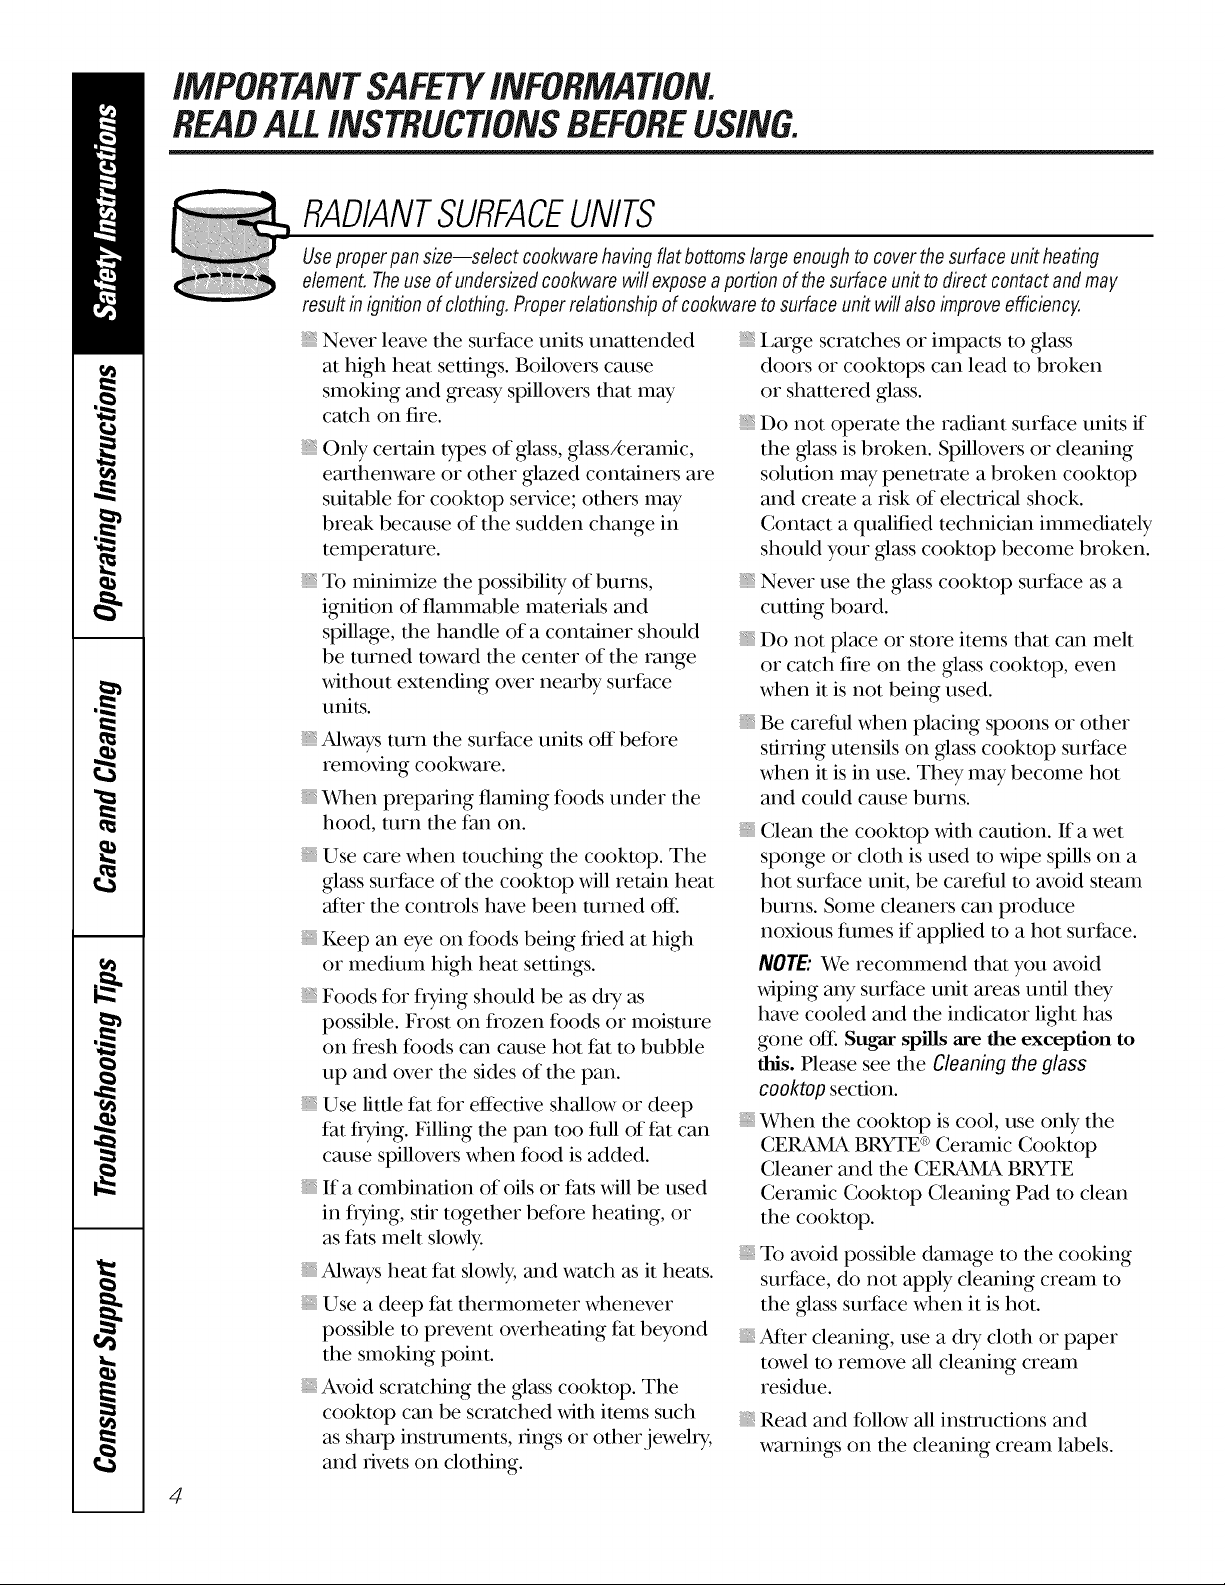
RADIANTSURFACEUNITS
Useproperpan size--select cookwarehavingfiat bottomslargeenoughto coverthe surfaceunit heating
element.Theuseof undersizedcookware will exposeaportionof thesurfaceunitto direct contactandmay
result in ignitionof clothing.Properrelationshipof co&ware tosurface un# willalsoimproveefficiency.
Never leave the surface units unattended
at high heat settings. Boilovers cause
smoking and _easy spillovers that may
catch on fire.
Only certain types of glass, glass/ceramic,
earthenware or other glazed containers are
suitable fk)r cooktop serx,ice; others may
break because of the sudden change in
temperature.
To minimize the possibility of burns,
ignition of flammable materials and
spillage, the handle of a container should
be turned toward the center of the range
_dthout extending over nearby surface
units.
Always turn the surface units off befk_re
remox,ing cookware.
When preparing flaming foods under the
hood, turn the fan on.
Use care when touching the cooktop. The
glass surface of the cooktop xdll retain heat
•after the controls have been turned otE
Keep an eye on foods being flied at high
or medium high heat settings.
Foods for flTing should be as d U as
possible. Frost on flozen foods or moisture
on flesh fk_ods can cause hot fat to bubble
up and over the sides of the pan.
Use little fat fk_reffective shallow or deep
fat flTing. Filling the pan too full of fat can
cause spillovers when fk_od is added.
If a combination of oils or fats xdll be used
in flTing, stir together before heating, or
as fats melt slowly.
Always heat fat slowly, and watch as it heats.
Use a deep fat thermometer whenever
possible to prevent overheating fat beyond
the smoking point.
Avoid scratching the glass cooktop. The
cooktop can be scratched xdth items such
as sharp instruments, rings or other,jeweh T,
and rivets on clothing.
4
i,arge scratches or impacts m glass
doors or cookmps can lead m broken
or shatmred glass.
Do not operate the radiant surface units if
the glass is broken. Spillovers or cleaning
solution may penetrate a broken cooktop
and create a risk of electrical shock.
Contact a qualified technician immediately
should your glass cookmp become broken.
Never use the glass cooktop surface as a
cutting board.
Do not place or store items that can melt
or catch fire on the glass cooktop, even
when it is not being used.
Be careful when placing spoons or other
stirring umnsils on glass cookmp surface
when it is in use. They may become hot
and could cause burns.
Clean the cooktop xdth caution, ff a wet
sponge or cloth is used to xdpe spills on a
hot surface unit, be careful to avoid steam
burns. Some cleaners can produce
noxious fumes if applied to a hot surface.
NOTE: We recommend that you avoid
xdping any surface unit areas until they
have cooled and the indicator light has
gone ore Sugar spills are the exception to
this. Please see the Cleaning the glass
cooktop section.
When the cooktop is cool, use only the
CEI_dVtA BRYTE _>Ceramic Cooktop
Cleaner and the CERAMA BRYTE
Ceramic Cooktop Cleaning Pad to clean
the cooktop.
To avoid possible damage to the cooking
surface, do not apply cleaning cream to
the glass surface when it is hot.
After cleaning, use a d U cloth or paper
towel m remove all cleaning cream
residue.
Read and fk_llowall instructions and
warnings on the cleaning cream labels.

ge.com
WARNING'!
OVEN
Stand away from the range when opening the oven door. Hot air or steam which escapes can cause
bums to hands, face and/or eyes.
Do not heat unopened food containers.
Pressure could build up and the container
could burst, causing an in,ju_T.
Keep the oven vent unobstructed.
Keep the oven flee from #ease buildup.
Place the oven rack in the desired position
while the oven is cool. If racks must be
handled when hot, do not let pot holder
contact the heating elements.
When using cooking or roasting bags in
the oven, follow the manufacturer's
directions.
Pulling out the rack to the stop-lock is a
convenience in lifting heax y foods. It is also
a precaution against burns flom touching
hot surfaces of the door or oven walls.
Do not use the oven to d_T newspapers.
If overheated, they can catch on fire.
Do not use the oven for a storage area.
Items stored in an oven can ignite.
Do not leave paper products, cooking
utensils or food in the oven when not
in use.
Do not use aluminum foil to line
oven bottoms. Improper installation
of aluminum foil may result in a risk
of electric shock or fire.
SELF-CLEANINGOVEN
Do not use oven cleaners. No commercial oven cleaner or oven liner protective coating of any kind
should be used in or around any part of the oven. Residue from oven cleaners will damage the inside
of the oven when the self-clean cycle is used.
Do not clean the door gasket. The door
gasket is essential for a good seal. Care
should be taken not to rob, damage or
move the gasket.
Before self cleaning the oven, remove
shiny, silver-colored oven racks (on some
models) and 'all other cookware.
ff the self cleaning mode malfunctions,
turn the oven off{and disconnect the
power supply. Have it serx,iced by a
qualified technician.
Clean only parts listed in this Owner's
Manual.
Be sure to xdpe up excess spillage before
starting the serf{cleaning operation.
READANDFOLLOWTHISSAFETYINFORMATIONCAREFULLY.
SAVETHESEINSTRUCTIONS
5
Usingthesurfaceunits.
Throughout this manual, features and appearance may vary from your model
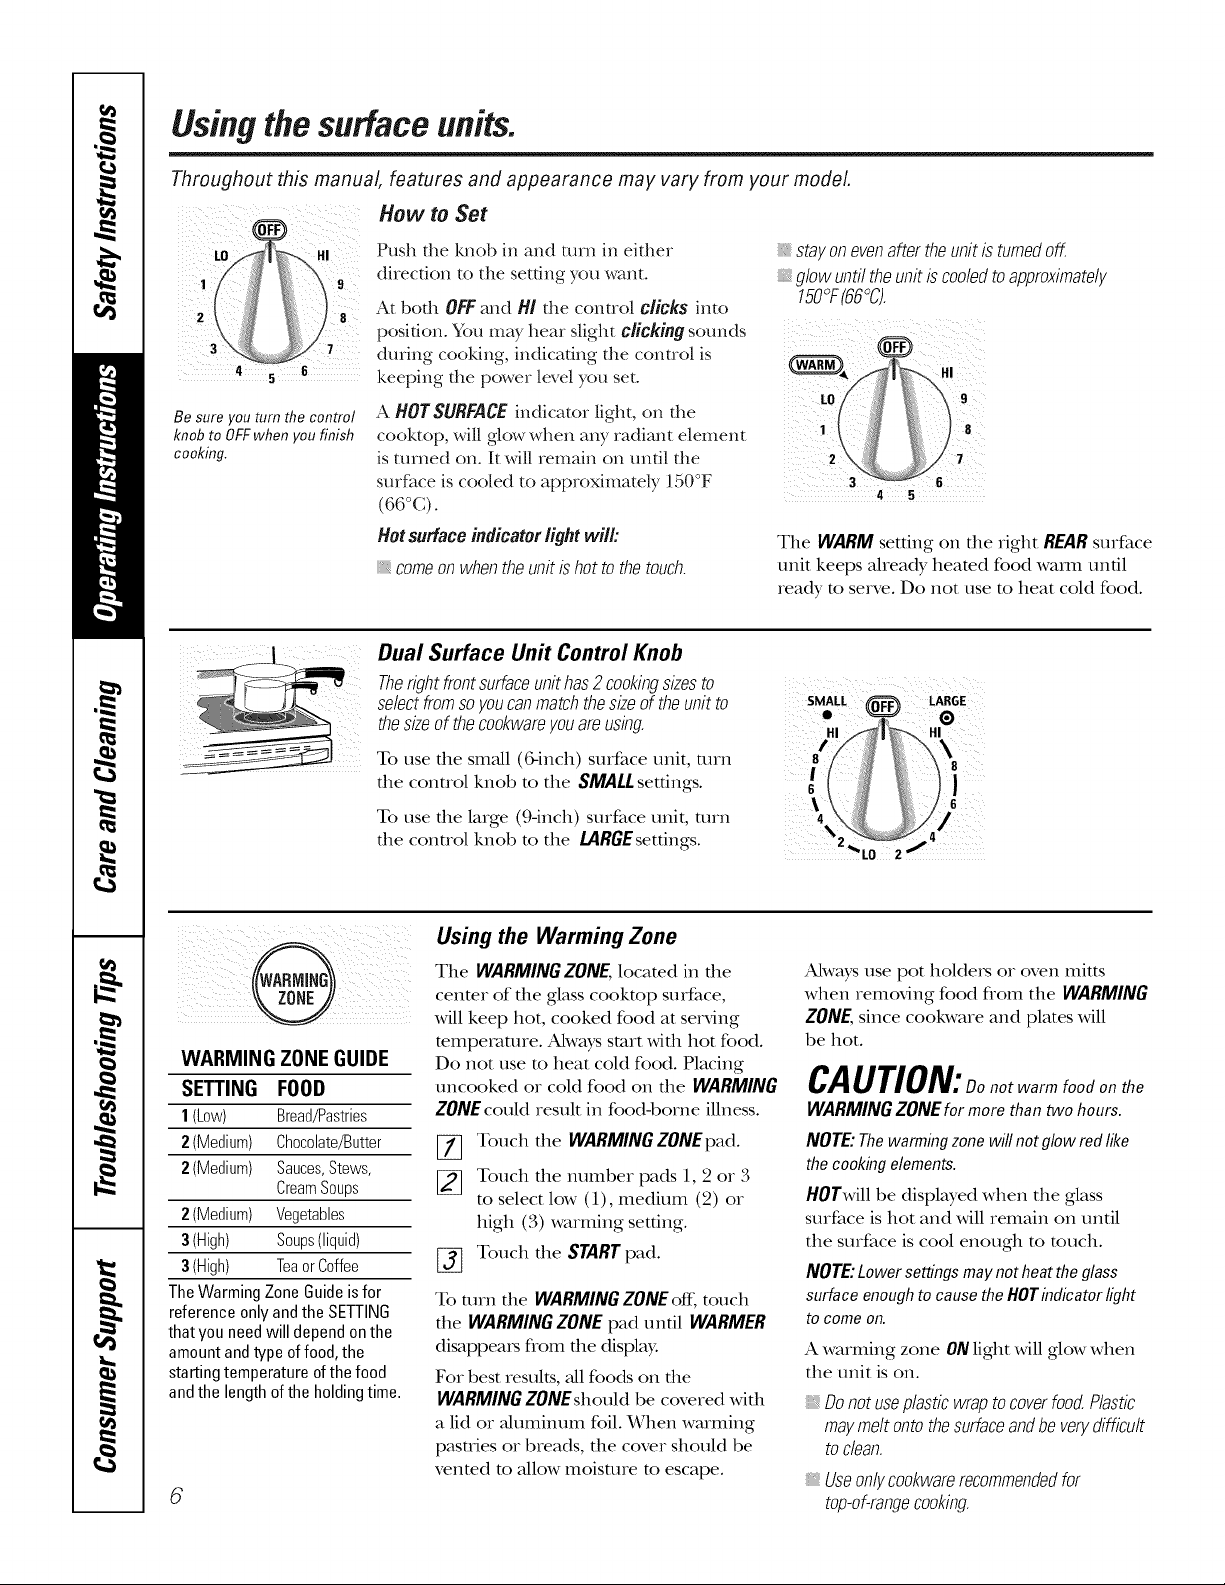
How to Set
LO HI
Be sure you turn the control
knob to OFFwhen you finish
cooking.
Push die l_ob in and mrn in eidler
direction to tile setting you want.
At bodl OFF and/4/tile control clicks into
position° You nlay hear slight clicking sounds
during cooldng, indicating the control is
keeping the power level you set.
A HOTSURFACE indicator light, on the
cooktop, will glow when any radiant eleInent
is turned on. It will renlain on until the
surfitce is cooled to approximately 150°F
(66°C).
Hotsurfaceindicator lightwill:
comeonwhentheunitishottothetouch.
Dual Surface Unit Control Knob
Theright front surface unit has2cookingsizesto
select from soyoucanmatch thesizeof the unit to
thesize of the cookwareyouare using.
To use tile snlall (G-inch) surface unit, t/lIII
tile control knob to tile SMALl.settings.
To use die large (9-inch) surface unit, mrn
tile control knob to tile LARGEsettings.
stayonevenaftertheunitis turnedoff.
glowuntiltheunitis codedtoapproximately
150°F(66°C).
4 ¸¸ 5 ¸
Tile WARM setting on tile right REAR surtZace
unit keeps aheady heated food waml until
ready to serve. Do not use to heat cold food.
SMALL _ LARGE
\
tO
WARMING ZONE GUIDE
SETTING FOOD
1(Low) Bread/Pastries
2(Medium) Chocolate/Butter
2(Medium) Sauces,Stews,
CreamSoups
2(Medium) Vegetables
3(High) Soups(liquid)
3(High) TeaorCoffee
TheWarmingZone Guideisfor
reference onlyandthe SETTING
thatyou needwill dependonthe
amountandtype offood,the
startingtemperature ofthe food
andthe lengthof the holdingtime.
6
Using the Warming Zone
Tile WARMING ZONE, located in tile
center of tile glass cooktop surface,
will keep hot, cooked food at serving
temperature. Ahvays start widl hot food.
Do not use m heat cold food. Placing
uncooked or cold food on tile WARMING
ZONE could result in food-borne illness.
Touch tile WARMINGZONEpad.
%
Touch tile number pads 1, 2 or 3
to select low (1), medium (2) or
high (3) warming setting.
Touch tile STARTpad.
%
To mrn die WARMINGZONEoff, much
die WARMINGZONEpad until WARMER
di_ppeaxs from the display.
For best results, all foods on tile
WARMINGZONEshould be covered widl
a lid or ahmlinum foil. When warming
pasuies or breads, tile cover should be
venmd m allow moisture m escape.
Always use pot holders or oven mitts
when removing food flom tile WARMING
ZONE, since cookware and plates will
be hot.
CAUTION; Donotwarm food on the
WARMING ZONE for more than two hours.
NOTE: Thewarming zone will notglow rod like
the cooking elements.
HOTwill be displayed when tile glass
surface is hot and will remain on until
tile surface is cool enougll to touch.
NOTE: Lower settings may not heat the glass
surface enough to cause the HOTindicator light
to come on,
A warming zone ONlight will glow when
tile unit is on.
Donotuseplasticwraptocoverfood.Plastic
maymeltontothesurfaceandbeverydifficult
toclean.
Useonlycookwarerecommendedfor
top-of-rangecooking.
ge.com
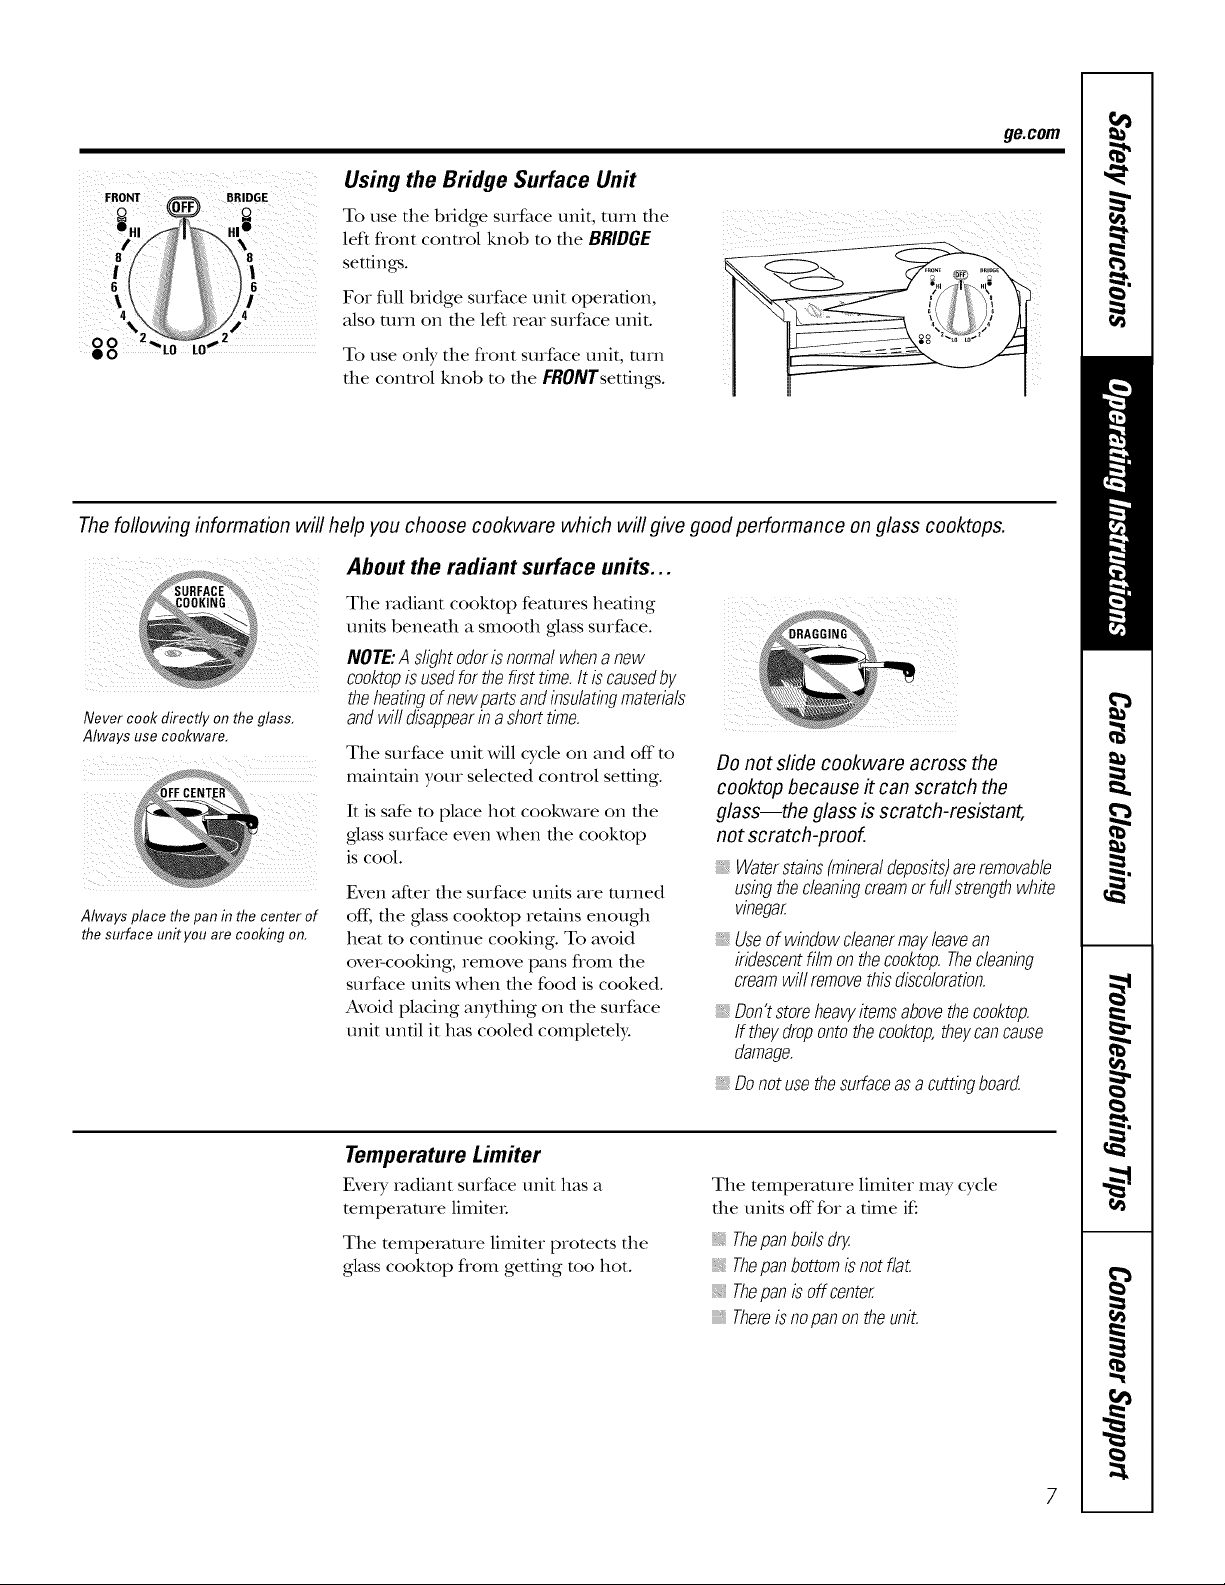
FRONT BRIDGE
Using the Bridge Surface Unit
To use the bridge surface unit, turn the
z
8
I |
left flont conuol knob to the BRIDGE
settings.
For dill bddge surface unit operation,
also ulrn on the left rear surface unit.
To use only the flont surface unit, turn
the control knob to the FRONTsetfings.
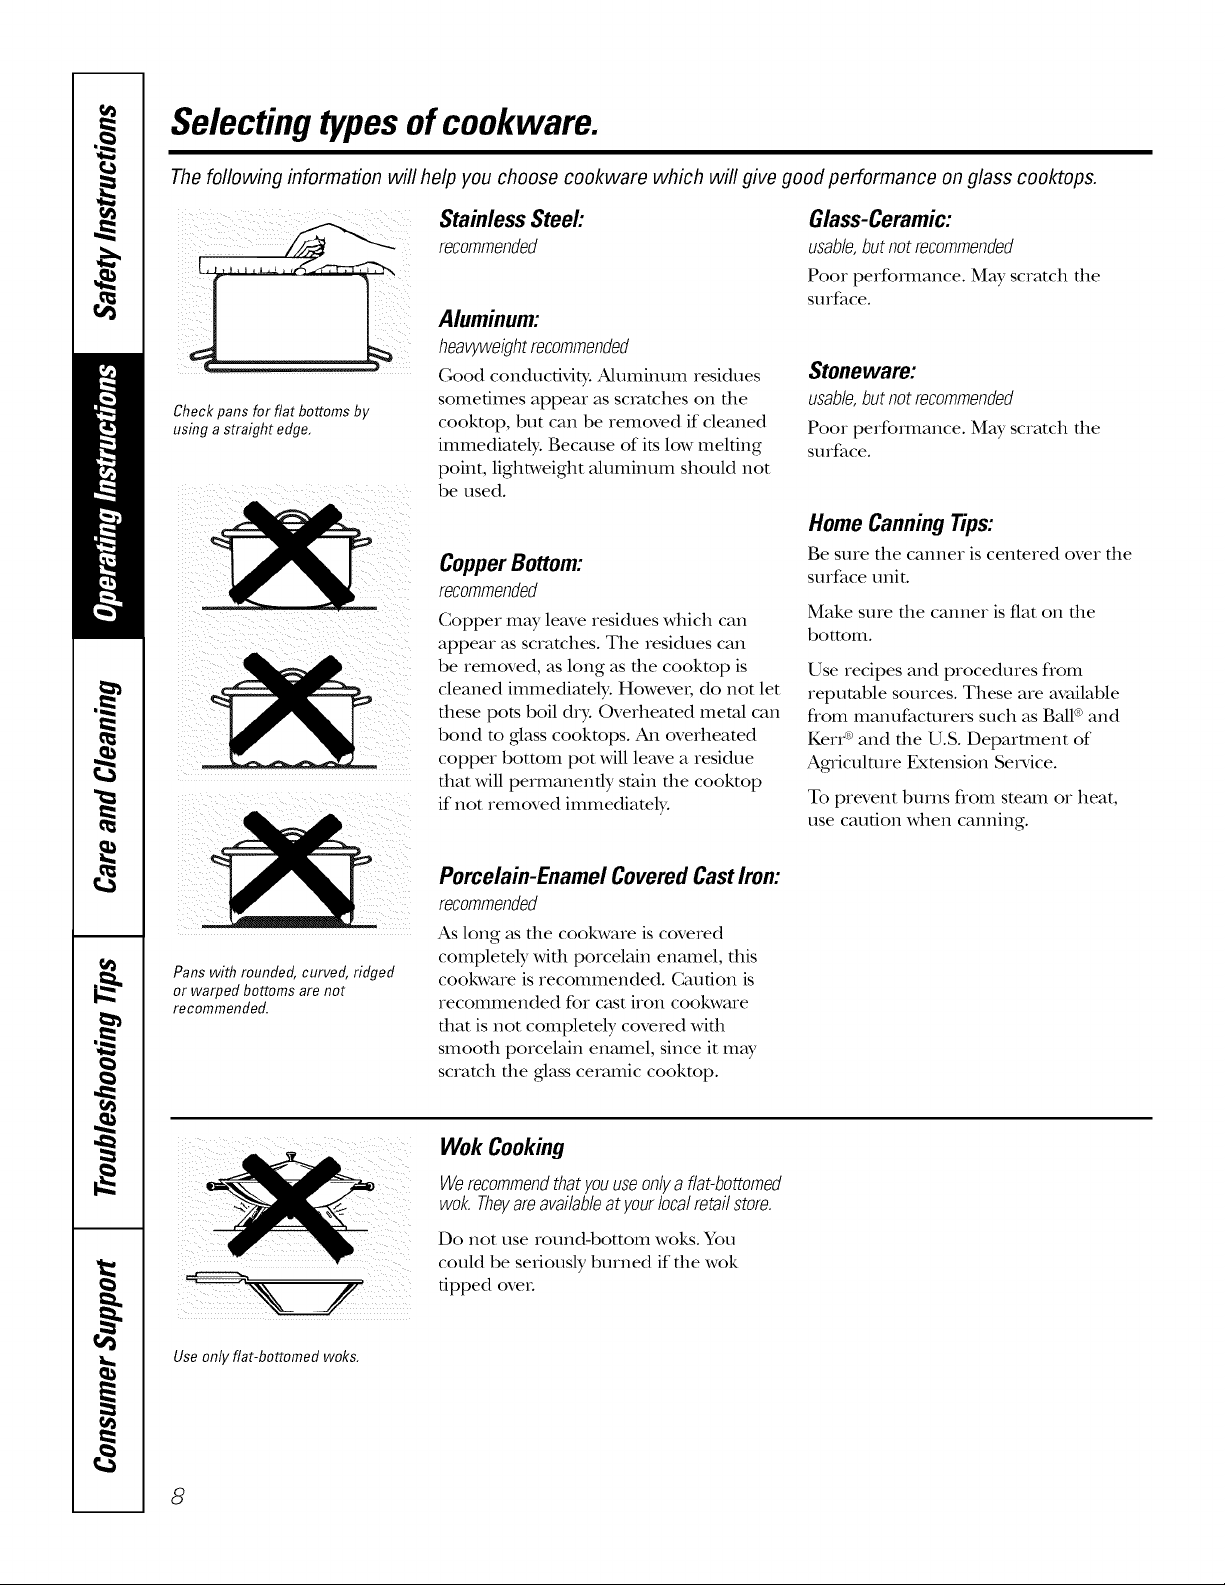
The following information will help you choose cookware which will give good performance on glass cooktops.
About the radiant surface units...
The radiant cooktop features heating
units beneath a smooth ,glass surface. GGING_}&>
theheatingofnewpa sandinsulatingmate,als
cooktopis usedforthefirst time.lt iscausedby.
NOTE:A slightodorisnormalwhenanew
Never cook directly on the glass,
Always use cookware.
Always place the pan in the center of
the surface unityou are cooking on.
andwill disappearinashorttime.
The surface unit will cycle on and off to
maintain your selected control setting.
It is safe to place hot cookware on the
,glasssurface even when the cooktop
is cool.
Even after file surface units are turned
off, the glass cooktop retains enough
heat to continue cooking. To avoid
over-cooking, remove pans flom the
surface units when file food is cooked.
Avoid placing anything on the surface
unit until it has cooled completely.
Do not slide cookware across the
cooktop because it can scratch the
glass--the glass is scratch-resistant,
not scratch-proof.
Waterstains(mineraldeposits)areremovable
usingthecleaningcreamorfullstrengthwhite
vinegar.
_,Useof windowcleanermay.leavean
iridescentfilm onthecooktop.Thecleaning
creamwill removethisdiscoloration.
_,Don'tstoreheavyitemsabovethecooktop.
If they.dropontotheco&top,they.cancause
damage.
_,Donotusethesurfaceasacuttingboard.
Temperature Limiter
EveD,radiant surface unit has a
temperature limited.
The temperature limiter protects the
glass cooktop flom getting too hot.
The mmperamre limimr may cycle
die units off for a time if."
Thepanboilsdry.
Thepanbottomis not flat.
:: Thepanisoffcenter
Thereis nopanontheunit.
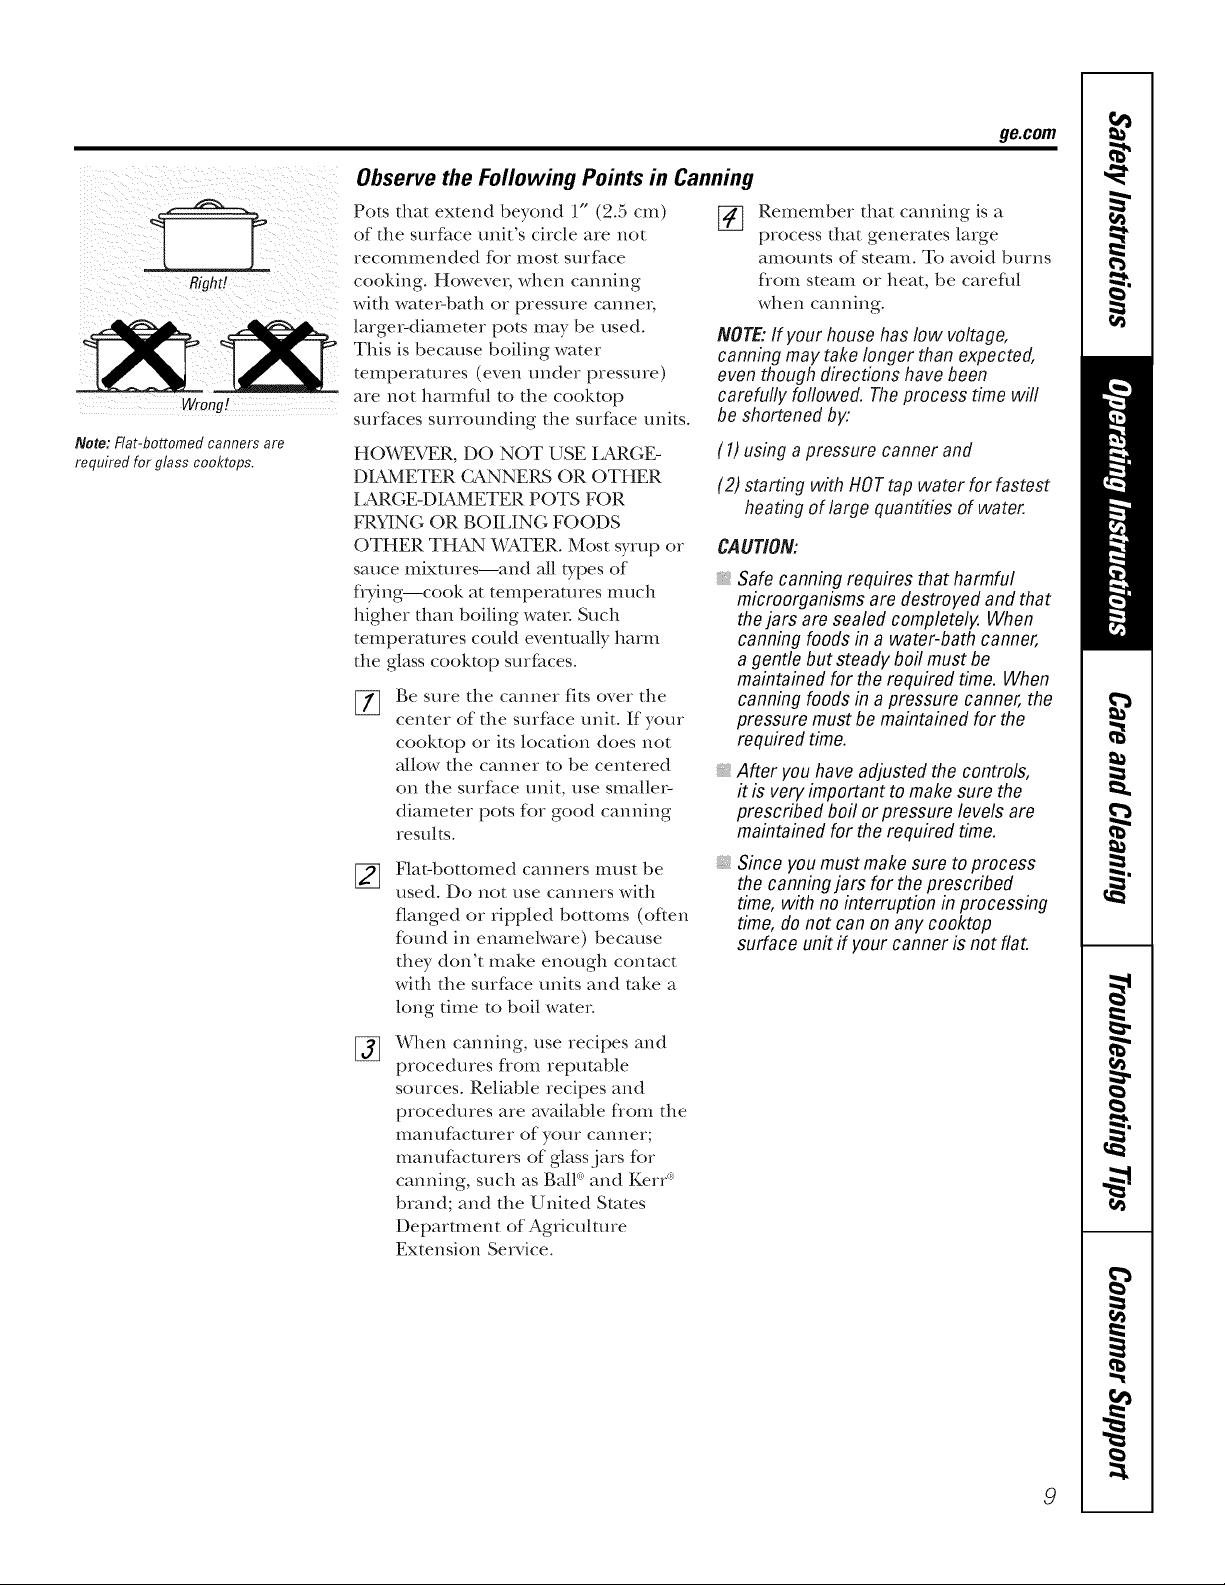
Selectingtypesofcookware.
The following information will help you choose cookware which will give good performance on glass cooktops.
Check pans for flat bottoms by
using astraight edge,
Stainless Steel'.
recommended
Aluminum:
heavyweightrecommended
Good conducfivit T. Aluminum residues
sometimes appear as scratches on the
cooktop, but can be removed if cleaned
immediately: Because of its low melting
point, lightweight Muminum should not
be used.
CopperBottom:
recommended
Copper may leave residues which can
appear as scratches. The residues can
be removed, as long as the cooktop is
cleaned immediately. Howevei, do not let
these pots boil dry. Overheated metal can
bond m _ass cookmps. An overheated
copper bottom pot will leave a residue
flint will permanently stain file cooktop
if not removed immediamly:
Glass-Ceramic:
usable,butnotrecommended
Pool perfommnce. May scratch file
surface.
Stone ware:
usable,butnotrecommended
Pool perfommnce. May scratch file
StlIface.
Home Canning lips:
Be sure the canner is centered over the
surface unit.
Make sure die canner is fiat on die
bottom.
Use recipes and procedures flom
reputable sources. These are available
fiom manufacturers such as Ball®and
Kerr®and the U.S. Department of
Agriculture Exmnsion SeiMce.
To prevent burns flom smam or heat,
use caution when canning.
Pans with rounded, curved, ridged
or warped bottoms are not
recommended.
Use only flat-bottomed woks.
Porcelain-Enamel CoveredCastIron:
recommended
As long as file cookware is covered
complemly Mill porcelain enamel, this
cookware is recommended. Caution is
recommended for cast iron cookware
that is not completely covered with
smooth porcelain enamel, since it m W
scratch the glass ceramic cookmp.
WokCooking
Werecommendthatyouuseonlyaflat-bottomed
wok.Theyareavailableatyourlocalretailstore.
Do not use round-bottom woks. You
could be seriously burned if the wok
tipped oveL
8
Righd
Wrong!
Note: Flat-bottomed canners are
required for glass cooktops.
Observe the Following Points in Canning
Pots that extend beyond 1" (2.5 cm)
of the surf_ce unit's circle are not
recommended for most smf_tce
cooking. Howevm, when canning
with water-bath or pressure cannel
larger-diameter pots may be used.
This is because boiling water
temperatures (even under pressme)
are not lmrmfhl to the cool<top
smf_ces smTounding the surf_ce units.
HOWEVER, DO NOT USE LAR(;E-
DIAMETER CANNERS OR OTHER
LARGE-DIAMETER POTS FOR
FRYING OR BOILING FOODS
OTHER THAN _ATER. Most syrup or
sauce mixtures--and all types of
fi)dng--cook at temperatures much
higher than boiling wamr Such
temperatures could eventually harm
the glass cool<top surfaces.
Be sure the canner fits ()vet the
%
center of the surfi_ce unit. If your
cooktop or its location does not
allow the canner to be centered
on the surf_ce unit, use smaller-
diameter pots for good canning
results.
Flat-bottomed canners must be
[]
used. Do not use canners with
flanged or rippled bottoms (often
found in enamelware) because
they don't make enough contact
with the surf_ce units and rake a
long time to boil water
When canning, use recipes and
%
procedures flom reputable
sources. Reliable recipes and
procedures are available fiom the
manufimmrer of yore canner;
manuf_mmrers of glass jars for
canning, such as Ball _':and Kerr <':
brand; and the United States
Department of Agriculture
Extension Service.
NOTE:If your househas low voltage,
canning may take longer than expected,
even though directions have been
carefufly foflowed. Theprocess time will
be shortened bF
(1) using a pressure canner and
(2) starting with HOTtap water for fastest
CAUTION:
ge.com
Remember that canning is a
process that generates large
amounts of steam. To avoid bmns
fiom steam or heat, be careflfl
when canning.
heating of large quantities of water.
Safe canning requires that harmful
microorganisms are destroyed and that
thejars are sealed completely. When
canning foods in a water-bath canner,
a gentle but steady boil must be
maintained for the required time. When
canning foods in a pressure canner, the
pressure must be maintained for the
required time.
After you have adjusted the controls,
it is very important to make sure the
prescribed boil or pressure levels are
maintained for the required time.
Since youmust make sure to process
the canningjars for the prescribed
time, with no interruption in processing
time, do not can on anycooktop
surface unit ff your canner is not flat.
9

Usingtheovencontrols.
Throughout this manual, features and appearance may vary from your model
)
OVEN CONTROLS
Features and appearance may vary.
OvenControl,ClockandTimerFeaturesandSettings
o BAKEPad 0
Press dfis pad to select the t)ake fimcfion.
@ Display
Shows the time of day, oven temperature,
whether the oven is in the bake, broil or
self-cleaning mode and the times set for
the timer or automatic oven operations.
If "F- anda numberorletter"flashin thedisplayandthe
ovencontrolsignals,thisindicatesafunctionerrorcode.
Ifyourovenwassetfora timedovenoperationand
apoweroutageoccurred,thedockanda//programmed
functionsmustbereset.
Thetimeofdaywill flashin thedisplaywhentherehas
beenapoweroutage.
COOKINGTIME Pad
@
Press this pad and dlen press file number
pads to set the amount of time you want
your food to cook. The oven will shut off"
when the cooking time h_tsrun out.
DELAYSTARTPad 0
0
Use along with COOKINGTIME or SELF
CLEANLO/STDpads to set the oven to start
HIld
stop automatically at a time you set.
CLOCKPad
Press tiffs pad before setdng the clock.
KITCHENTIMER ON/OFFPad
Press this pad to select the timer feature.
CLEAR/OFFPad
Press this pad to cancel ALL oven
operations except the clock and fimeL
Number Pads
Use to set any fimcfion requi_ing numbei_
such as the time of day on the clock, file
fime_; the oven temperature, the start time
and lengfll of operation for timed baking
and self-cleaning.
SrARr Pad
Must be pressed to start any cooking or
cleaning fimcfion.
SELFCLEANLO/STD Pad
Press this pad to select die self-cleaning
flmcfion. See the Using the self-cleaning
ovensecdon.
0 YEN LIGHT Pad
Press this pad to turn the oven light on
OI" of J_:
BROIL HI/LO Pad
Press dfis pad to select file broil function.
WARMING ZONE Pad
Touch dfis pad when using the center
surface unit m keep food warm until ready
to serve.
Control Lockout
Gonuol I,ockout is operated by the
9 and 0 number pads. Touch and hold the
9 and 0 number pads at the same time for
3 seconds.
10
Usingtheoven. gecom
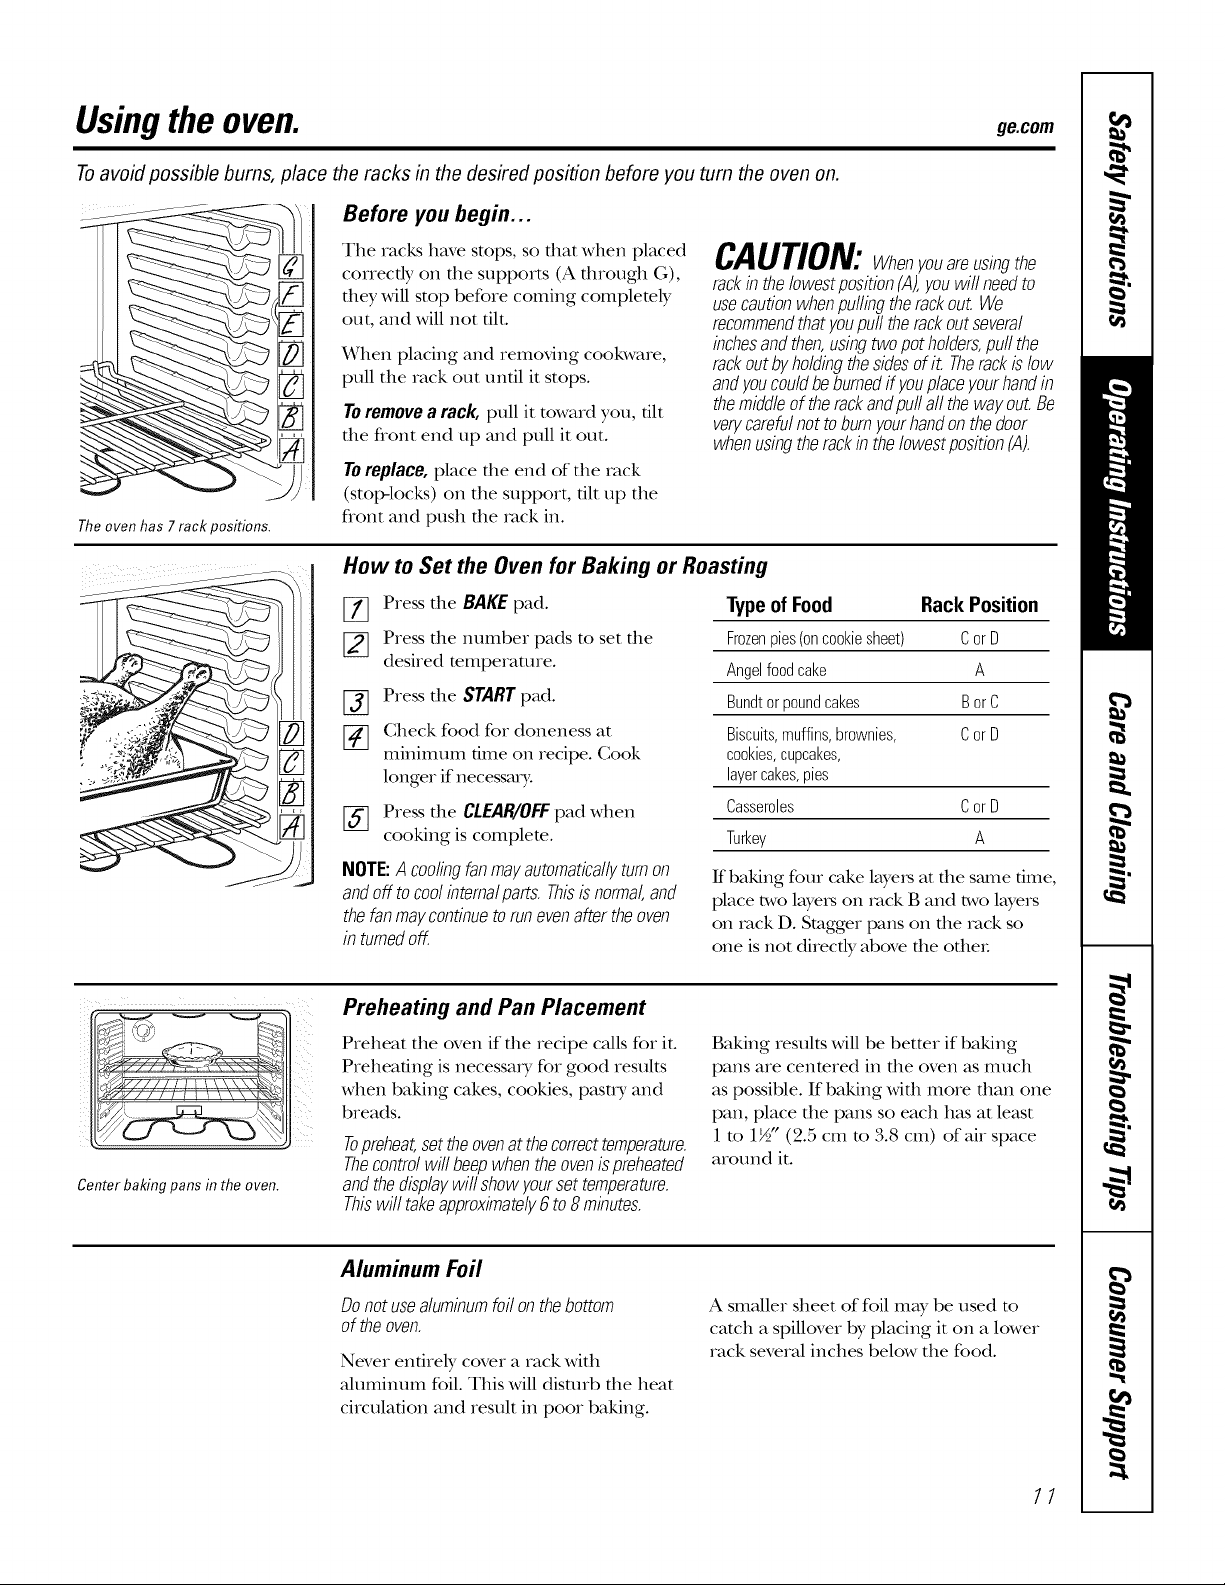
Toavoid possible bums, place the racks in the desired position before you turn the oven on.
Before you begin...
Theoven has 7 rack positions.
The racks have stops, so fllat when placed
correctly on the supports (A through G),
they will stop before coming complemly
out, and will not flit.
When placing and removing cookware,
pull the rack out unfll it stops.
Toremovea rack, pull it toward you, flit
the flont end up and pull it out.
Toreplace,place the end of the rack
(Stol>locks) on the support, flit up the
flont and push the rock in.
How to Set the Oven for Baking or Roasting
[_ Press the BAKE pad.
[_ Press the number pads to set the
desired temperature.
[] Press the START pad.
[] Check food for doneness at
minimum flme on recipe. Cook
longer if neces_uT:
[] Press the gLEAN/OFFpad when
cooking is complete.
NOTE:Acodingfanmayautomaticallyturnon
andoff tocoolintemalparts.Thisisnormal,and
thefanmaycontinuetorunevenaftertheoven
in turnedoff.
CAUTION:Whenyouareusingthe
rackin theIowestposition(A),youwiflneedto
usecautionwhenpuffingtherackout.We
recommendthatyoupufftherackoutseveral
inchesandthen,usingtwopotholders,puffthe
rackoutbyholdingthesidesofit. Therackis low
andyoucouldbeburnedif youplaceyourhandin
themiddleof therackandpuffall thewayout.Be
verycarefulnotto burnyourhandonthedoor
whenusingtherackinthelowestposition(A).
Type of Food Rack Position
Frozenpies(oncookiesheet) CorD
Angelfoodcake A
Bundtorpoundcakes BorC
Biscuits,muffins,brownies, CorD
cookies,cupcakes,
layercakes,pies
Casseroles CorD
Turkey A
If baking four cake laye_ at file same time,
place two layet_ on rock B and two layers
on rack D. Stagger pans on the rock so
one is not directly above the otbeL
A / , -va
i
>c7<5-v5
Center baking pans in the oven.
Preheating and Pan Placement
Preheat the oven if die recipe cMls for it.
Preheating is necessary for good results
when baking cakes, cookies, pastry and
breads.
Topreheat,settheovenat thecorrecttemperature.
Thecontrolwillbeepwhentheovenis preheated
andthedisplaywillshowyourset temperature.
Thiswilltakeapproximately6 to 8minutes.
Aluminum Foil
Donotusealuminumfoilonthebottom
of theoven.
Never enflrely cover a rack with
ahllIlintllI1 foil. This will disturb the heat
circulaflon and result in poor baking.
Baking results will be better if baking
pans are cenmred in die oven as much
as possible. If baking with more than one
pan, place the pans so each has at least
1 m 1½" (2.5 cmm 3.8 cm) of air space
around it.
A smaller sheet of foil may be used to
catch a spillover by placing it on a lower
rack several inches below the food.
11
Usingtheoven.
If yourrangeisconnectedto
208volts,raresteaksmaybe
broiledbypreheatingthebroiler
andpositioningtheovenrack
onepositionhigher.
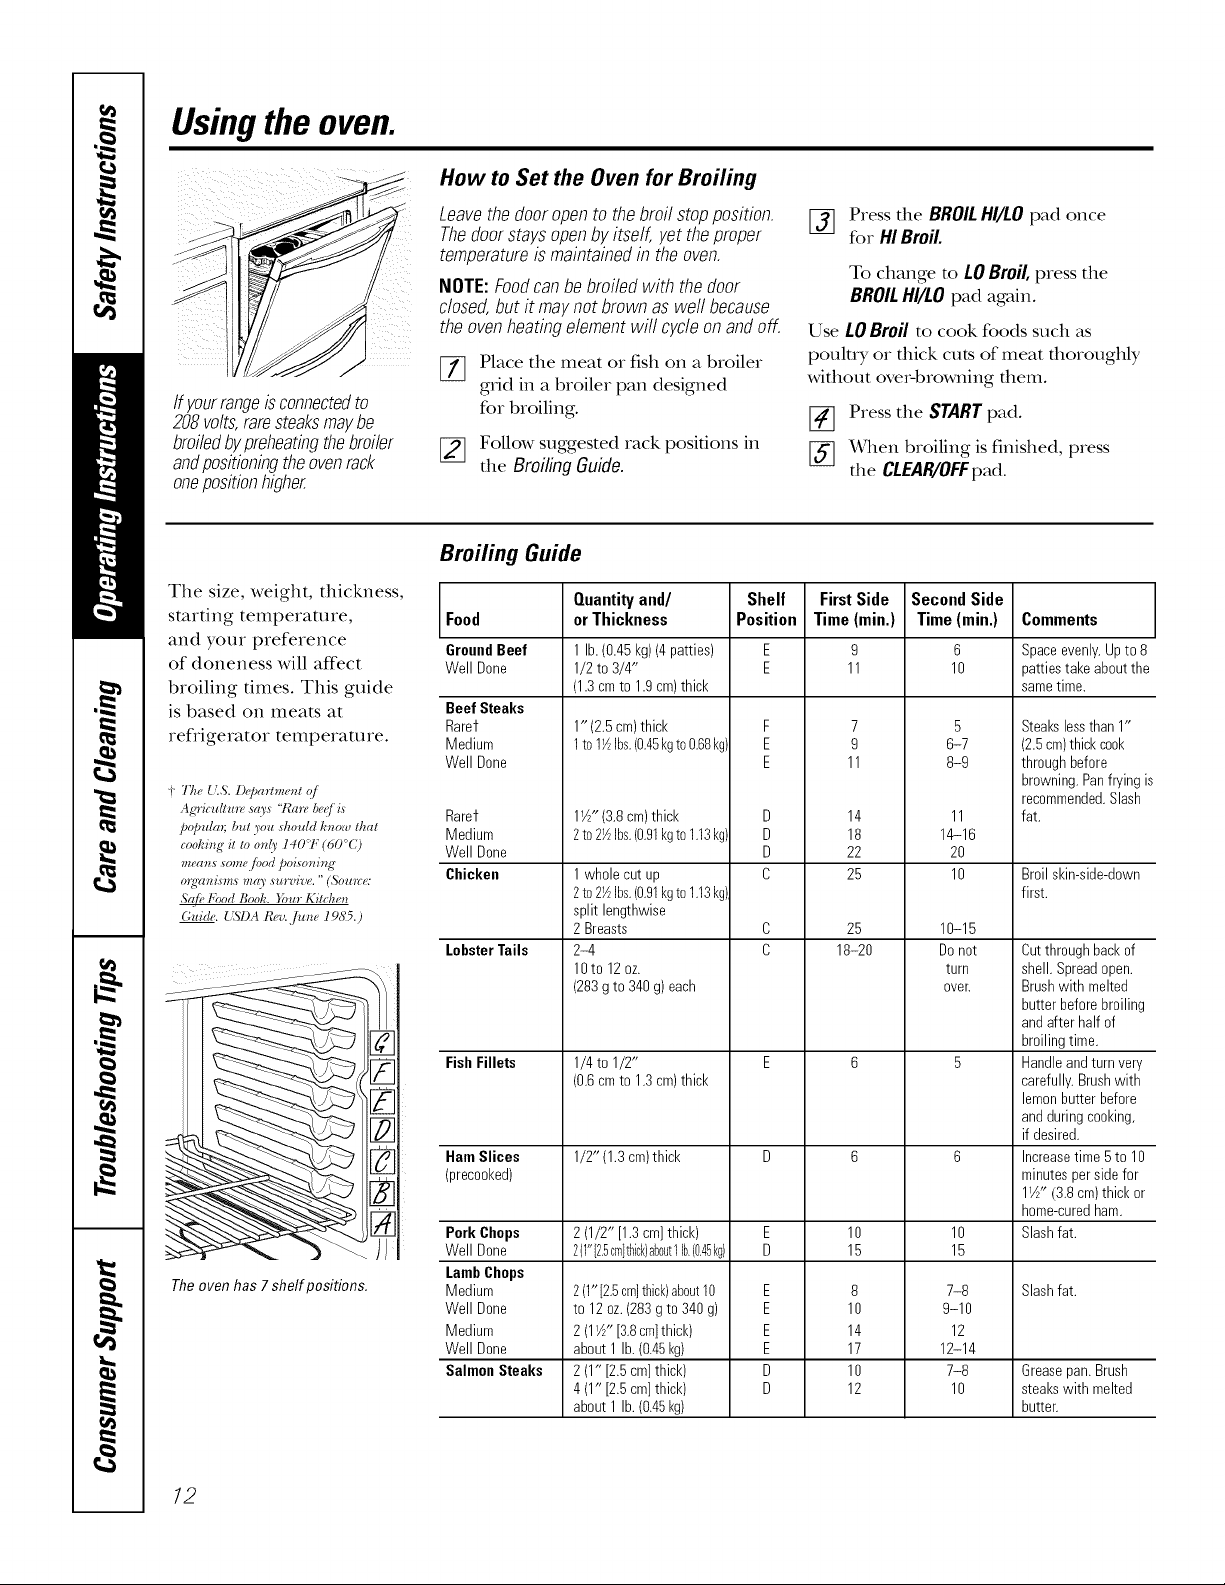
How to Set the Oven for Broiling
Leavethedooropento thebroil stopposition.
Thedoorstaysopenby itself, yet theproper
temperatureis maintainedintheoven.
NOTE:Foodcanbebroiledwith the door
closed,but it maynot brownas wellbecause
theovenheatingelementwill cycleonandoff.
[_ Place the meat or fish on a broiler
grid in a broiler pan designed
for broiling.
[_ Follow suggested rack positions in
the Broiling Guide.
Broiling Guide
_] Press the BROILHI/LOpad once
for 141Broil.
To change to LOBroil,press the
BROILHI/LOpad again.
Use LOBroil to cook foods such as
poultry or thick cuts of meat tlloroughly
without ove_q)rowning them.
[_ Press the STARTpad.
[_] _qlen broiling is finished, press
the CLEAR/OFFpad.
The size, weight, thickness,
starting temperature,
and your preference
of doneness will aft>ct
broiling times. This guide
is based on meats at
refrigerator temperature.
t The {LS. I)('partme)_tq/
Ag'ricultun,,_ays"Han_beq/is
populm; but you shouhl k_ow that
cooki_g it to only' 140'1" (60°C)
mea_ts some /bod poi_o_fing
S({fi_14>odBook. }bur Kitche_
Guide. { _SI)AI,e_z.flzne1985.)
The oven has 7 shelf positions.
Food
GroundBeef
Well Done
Beef Steaks
Rarer
Medium
Well Done
Rarer
Medium
Well Done
Chicken
LobsterTails
Fish Fillets
Ham Slices
(precooked)
Pork Chops
Well Done
LambChops
Medium
Well Done
Medium
Well Done
Salmon Steaks
Quantityand/
orThickness
1lb.(0.45kg)(4 patties)
1/2to 3/4"
(1.3cmto 1.9 cm)thick
1" (2.5cm)thick
I to 1½Ibs.(0.46kgto0.68kg',
1W"(3.8cm)thick
2to2½Ibs.(0.91kgto1.13kg',
1wholecut up
2to2½Ibs.(0.91kgto1.13kg',
split lengthwise
2 Breasts
2-4
lOto 12oz.
(283g to 340g) each
1/4to 1/2"
(0.6cmto 1.3 cm)thick
1/2" (1.3cm)thick
2 (1/2" [1.3cm]thick)
2(1"{2.5cm}thick)aboutI lb.(0.45kg)
2(1"[2.5cm]thick)about10
to 12 oz.(283gto 340g)
2 (11½-[3,8cm]thick)
about 1 lb. (0,45kg)
2 (1" [2.5 cm]thick)
4 (1" [2.5 cm]thick)
about 1 lb. (0,45kg)
Shelf
Position
E
E
F
E
E
D
D
D
C
C
C
E
U
E
E
E
E
D
D
First Side
Time(rain.)
9
11
7
9
11
14
18
22
25
25
18-20
10
15
8
10
14
17
10
12
SecondSide
Time(rain.)
6
10
5
6-7
8-9
11
14-16
20
10
10-15
Donot
turn
OVeE
10
15
7-8
9-10
12
12-14
7-8
10
Comments
Spaceevenly.Upto 8
pattiestakeaboutthe
sametime.
Steakslessthan1"
(2.5cm)thickcook
throughbefore
browning.Panfrying
recommended.Slash
fat.
Broilskin-side-down
first.
Cutthroughbackof
shell. Spreadopen.
Brushwith melted
butterbeforebroiling
andafter half of
broilingtime.
Handleandturnvery
carefully.Brushwith
lemonbutterbefore
andduringcooking,
if desired.
Increasetime 5 to 10
minutesperside for
11½,,(3.8 cm) thick or
home-curedham.
Slashfat.
Slashfat.
Grease pan. Brush
steaks with melted
butteL
12
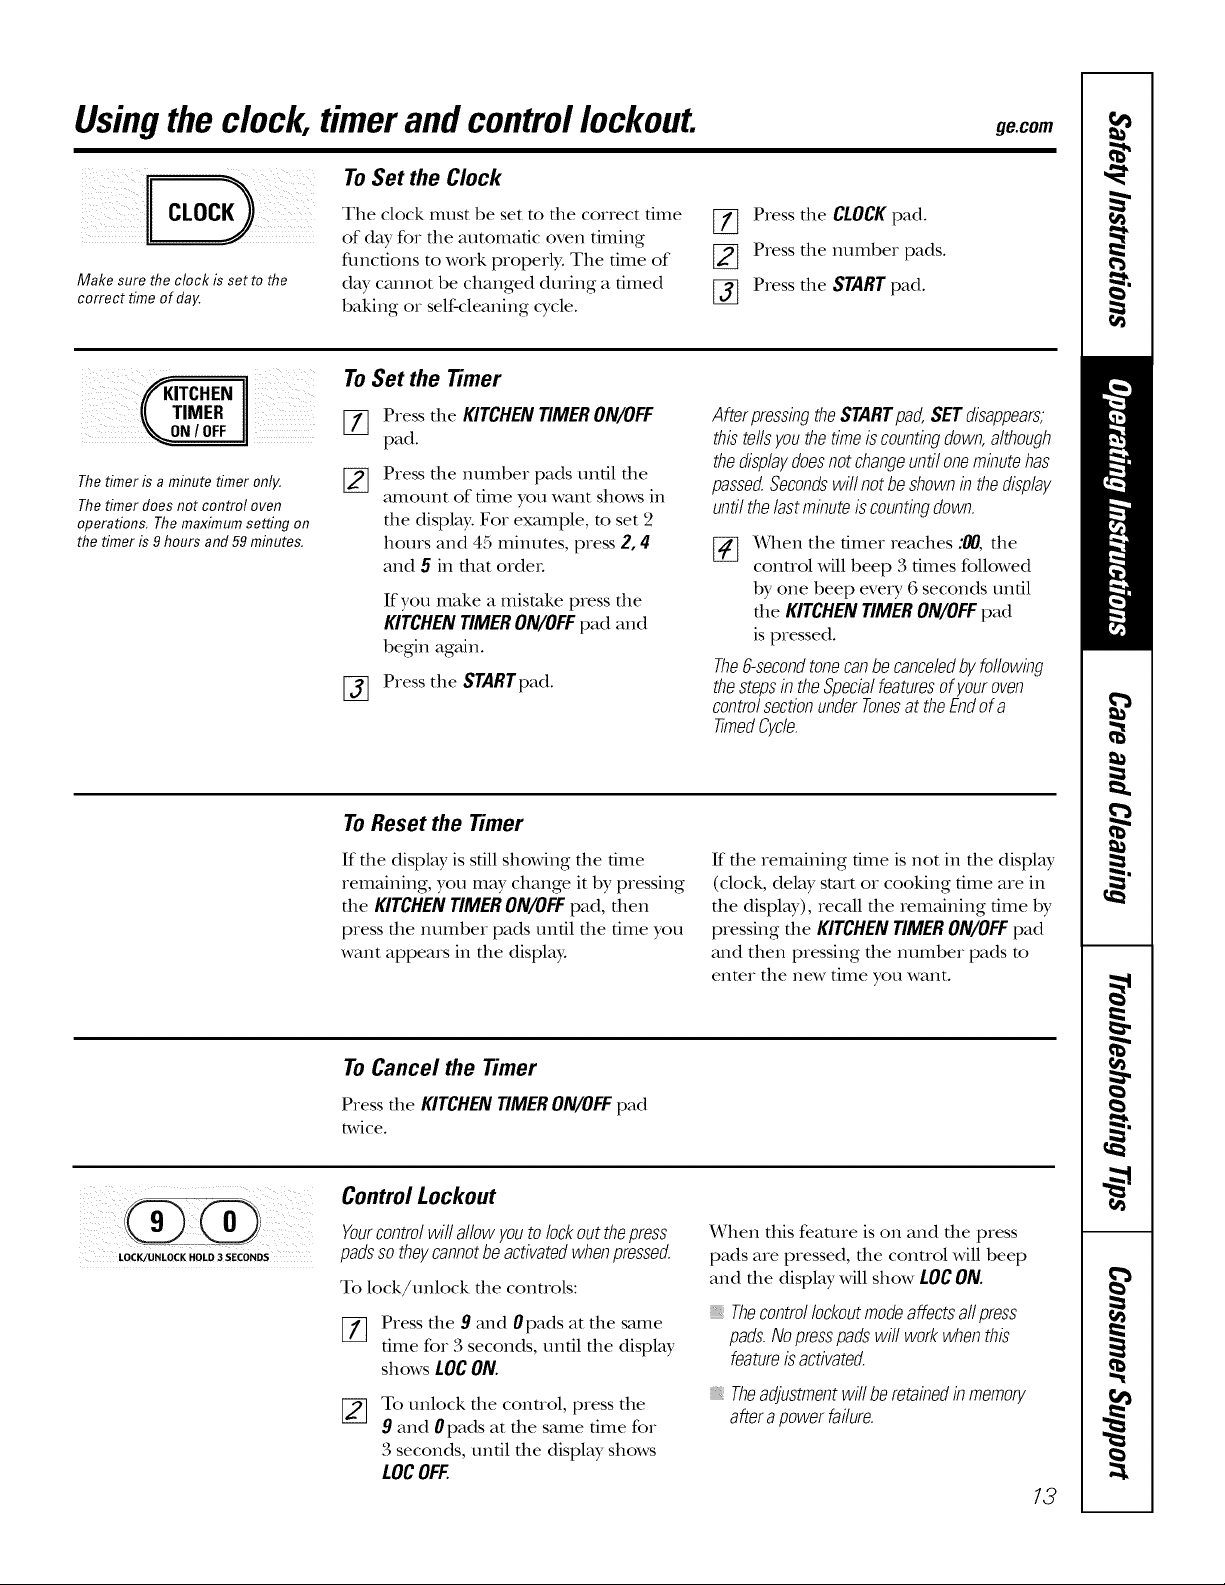
Usingthe clock, timerand controllockout, geoom
To Set the Clock
Makesure theclockissetto the
correcttimeof day.
_,_ TIMER_ITCHEN
Thetimer is a minute timer only.
Thetimer does not control oven
operations. Themaximum setting on
the timer is 9 hours and 59 minutes.
The clock must be set to tile correct time
of day for tile automatic oven timing
tractions to work properly. The time of
day cannot be changed during a timed
baking or self-cleaning cycle.
To Set the timer
_] Press tile KITCHEN TIMER ON/OFF
pad.
Press die number pads until die
amount of time you want shows in
die display. For example, to set 2
hours and 45 minutes, press 2, 4[
and 5 in that ordeL
If you make a mistake press die
KITCHENTIMERON/OFFpadand
begin again.
[_ Press the STARTpad.
[77 Press the CLOCK pad.
[] Press tile number pads.
[_] Press the START pad.
AfterpressingtheSTARTpad,SETdisappears,
thistellsyouthetimeiscountingdown,although
thedisplaydoesnotchangeuntiloneminutehas
passed.Secondswillnotbeshownin thedisplay
untilthelastminuteiscountingdown.
[_ x4qien the timer reaches :00, die
control will beep 3 times followed
by one beep every 6 seconds until
the KITCHEN TIMER ON/OFF pad
is pressed.
The6-secondtone canbe canceledby following
the steps inthe Specialfeatures of youroven
controlsection under Tonesat the Endof a
timed Cycle.
LOCK/UNLOCK HOLD 3 SECONDS
To Reset the timer
If die display is sdll showing die dine
remaining, you may change it by pressing
the KITCHENTIMERON/OFFpad, then
press die number pads until die dine you
want appears in die display.
To Cancel the timer
Pressthe KITCHENTIMERON/OFFpad
twice.
Control Lockout
Yourcontrolwit allowyoutolockoutthepress
padssotheycannotbeactivatedwhenpressed.
To lock/unlock die conuols:
[77 Press die 9 and 0pads at die same
dine for 3 seconds, until die display
shows LOCON.
To unlock die control, press die
9 and 0 pads at die same time for
3 seconds, until die display shows
LOCOFF
If die remaining time is not in die display
(clock, delay start or cooking time are in
die display), recall die remaining dine by
pressing die KITCHEN TIMERON/OFFpad
and then pressing die number pads m
enmr die new dine you want.
X_qien this feature is on and die press
pads are pressed, die control will beep
and die display will show LOC ON.
Thecontrollockoutmodeaffectsallpress
pads.Nopresspadswillworkwhenthis
featureisactivated.
Theadjustmentwill beretainedinmemory
afterapowerfailure.
73
Usingthe timedbakingand mastingfeatures.
NOTE:Foods that spoil easily-such as milk, eggs, fish, stuffings, poultry and pork-should not be allowed to sit for
more than 1hour before or after cooking. Room temperature promotes the growth of harmful bacteria. Be sure that
the oven light is off because heat from the bulb will speed harmful bacteria growth.
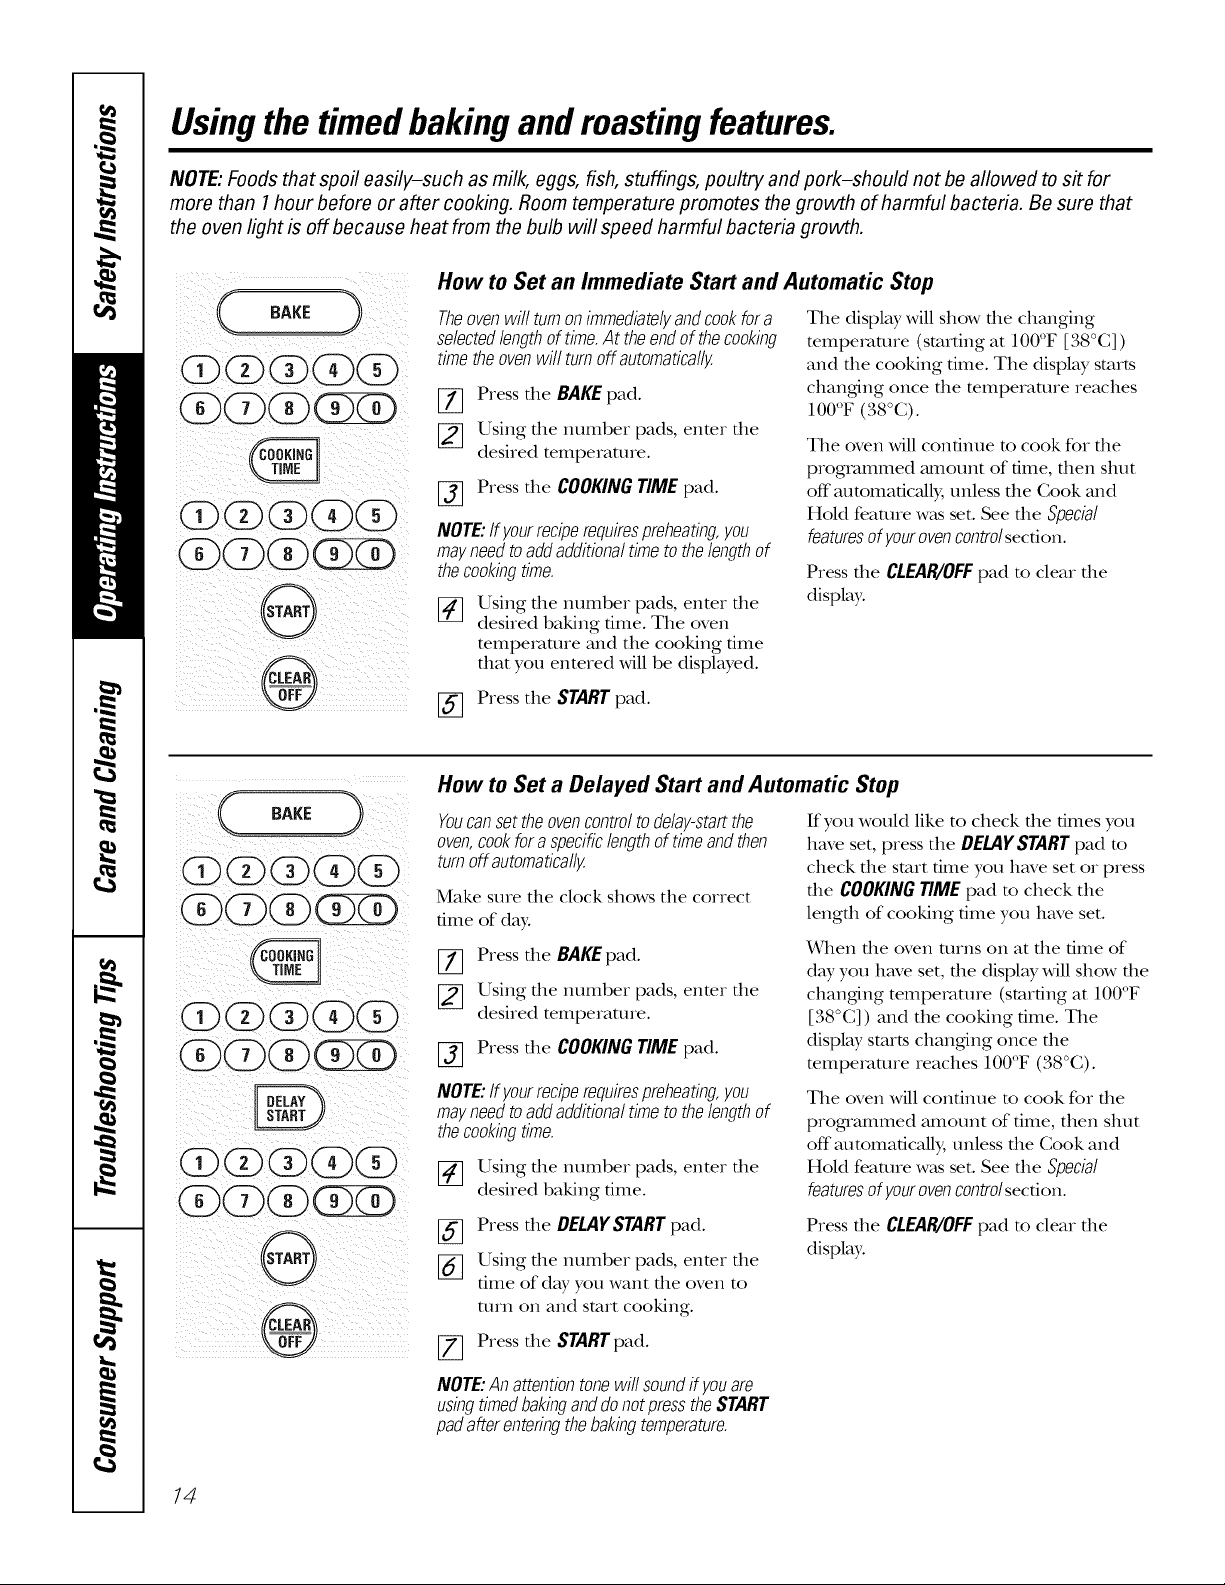
How to Set an Immediate Start and Automatic Stop
BARE
Theovenwillturnonimmediatelyandcookfora
selectedlengthoftime.At theendof thecooking
timetheovenwillturnoffautomatically.
[_ Press tile BAKEpad.
[_ Using tile number pads, enter tile
desired temperaune.
[_ Press tile COOKINGTIMEpad.
NOTE:Ifyourreciperequirespreheating,you
mayneedtoaddadditionaltimeto thelengthof
thecookingtime.
Using tile number pads, enter tile
[]
desired baking time. The oven
tempen_une and tile cooking time
that you entered will be displayed.
[_] Press the STARTpad.
The display will show file changing
temperature (stuffing at 100°F [38°G])
and the cooking time. The displ W starts
changing once the mmperamre reaches
100°F (,%°C).
The oven will continue m cook for file
programmed amount of time, fllen shut
off"automatically, unless the Cook and
Hold feature x,v_tsset. See the Special
featuresof yourovencontrolsecdon.
Press tlle CLEAR/OFFpad to clear tile
display.
BAKE )
®
@
How to Set a Delayed Start and Automatic Stop
Youcansettheovencontroltodelay-startthe
oven,cookfora specificlengthoftimeandthen
turnoffautomatically.
Make sure the clock shows the correct
time of day:
[7] Press tile BAKEpad.
_] Using the number pads, enter the
desired temperature.
[-_ Press tile COOKINGTIME pad.
NOTE:Ifyourreciperequirespreheating,you
mayneedtoaddadditionaltimeto thelengthof
thecookingtime.
[_] Using tile number pads, enter tile
desired baking dine.
[_ Press tile DELAYSTARTpad.
[_ Using the number pads, enter the
time of day you want tile oven to
mrn on and start cooking.
[_ Press tile STARTpad.
If you would like to check die dines you
have set, press the DELAYSTART pad m
check the start time you have set or press
theCOOKINGTIMEpad m check the
length of cooking time you have set.
X&qlendie oven turns on at die time of
dW you have set, the displ Wwill show the
changing temperature (stuffing at 100°F
[38°C]) and the cooking time. The
displW starts changing once the
temperature reaches 100°F (38°(0.
The oven will continue m cook for file
proguammed amount of time, then shut
off"automatically, unless the Cook and
Hold feature x,v_tsset. See the Special
featuresof yourovencontrolsecfion.
Press tlle CLEAR/OFFpad to clear tile
display.
14
NOTE:Anattentiontonewillsoundif youare
usingtimedbakinganddonotpresstheSTART
padafterenteringthebakingtemperature.

Adjustthe oventhermostat--Do it yourself! ge.oom
Youmay find that your new oven cooks differently than the one it replaced. Use your new oven for a few
weeks to become more familiar with it. If you still think your new oven is too hot or too cold, you can adjust
the thermostat yourself.
Do not use thermometers, such as those found in grocery stores, to check the temperature setting of your oven.
These thermometers may vary 20-40 degrees F (11-22 degrees C).
NOTE: This adjustment will only affect baking and roasting temperatures; # will not affect the broiling or the self-
cleaning temperatures. Theadjustment will be retained in memory after a power failure.
To Adjust the Thermostat
( BAKE ),+@
(DGOO(Z)
GOG
®
[77 Press the BAKE and BROILHI/LO _-]
pads at the same time for 3 seconds
unO1 the display shows SF.
[_ Press the BAKEpad. A two<ligfit
number shows in the display:
Press BAKE ag_finto alternate
between increasing and decre_ksing
the oven temperature. [_
The oven temperature can be
adjusted up to (+) , a r
houer or (-) 35°F (19°(;) cooleL
Press the number pads the same way
you read them. Fox example, m
change the oven mmperamre 15°F
(8°C), press I and 5.
x_qlen you have made the
adjusmlent, press the STARTpad
to go back to the 0me of day display.
Use your oven as you would
normalb,:
3.... (19oc)
Thetypeofmargarine will affect bakingperformance!
Most recipes for baking have been developed using high fat products such as butter or margarine (80% fat). If you
decrease the fat, the recipe may not give the same results as with a higher fat product.
Recipe failure can result if cakes, pies, pastries, cookies or candies are made with low-fat spreads. Thelower the fat
content of a spread product, the more noticeable these differences become.
U.S. federal standards require products labeled "margarine" m contain at least 80% fat by weight. I,ow-fat spreads, on
the other hand, contain less fat and more WamL The high moisture conmnt of these spreads affects the mxture and
flavor of baked goods. Fox best results with your old favorite recipes, use margarine, butter or stick spreads containing
at least 70% vegetable oil.
15

Usingtheself-cleaning oven.
Before a Clean Cycle
Wipe up heavy soil on the oven
bottom.
(3)(3)(3)(3)(3)
(START'
We recommend venting your kitchen
with an open window or using a
ventilation fan or hood during tile fi_st
self-clean cycle.
Remove racks, broiler pan, broiler grid,
all cookware and any aluminum foil flom
the oven.
The shiny, siNe>colored oven racks
(on some models) can be self<:leaned,
but flley Mll darken, lose flleir luster
and become hard to slide.
Soil on file flont flame of file range and
outside the gasket on tile door will need
to be cleaned by hand. Glean these areas
with hot wam_, soap-filled steel wool pads
or cleanseps such as Soft Scrub ®. Rinse
well wifll clean water and dry.
How to Set the Oven for Cleaning
[_ Press tile SELFCLEANLO/SrD pad
once for a 4-hour clean time or
twice for a ,%hour clean time.
A 3-hour self4:lean time is
recommended for use when
cleaning small, contained spills. A
self-clean time of 4 hours or longer
is recommended for a dirtier oven.
If a time other dlan 4 hours or
3 horns is needed, use tile number
pads and enter tile desired clean
time.
You can change tile clean time to any
time between 3 hours and 5 horns,
depending on how dirty your oven is.
Do not clean file gasket. The fiberglass
mamxiM of file oven door gasket cannot
withstand abrasion. It is essential for the
gasket m remain intact. If you notice it
becoming worn or flayed, replace it.
Wipe up any heax T spillovers on tile oven
bottom.
Make sure tlle oven light bulb cover is in
place and tile oven light is off:
IMPORTANT'. The healdl of some birds is
exuemely sensitive m file flmles given off
during file self-cleaning cycle of any
range. Move birds to anofller well-
ventilated room.
When the LOCKEDlight goes off; you will
be able to open tile dooL
:_ The word LOCKEDwill flash and file
oven conuol will signM if you set file
clean cycle and forget to close file oven
dooL
To stop a clean cycle, press die
CLEAR/OFFpad. When the LOCKED
light goes off'indicating the oven has
cooled below the locking temperature,
you will be able m open tile dooL
16
f_ Press tile START pad.
The door locks automatically: The display
Mll show die clean time remaining. It Mll
not be possible to open the oven door
until the temperature drops below file
lock temperature and file LOCKEDlight
goes off:
The oven door must be closed and all controls must be set correctly for the cycle to work properly.
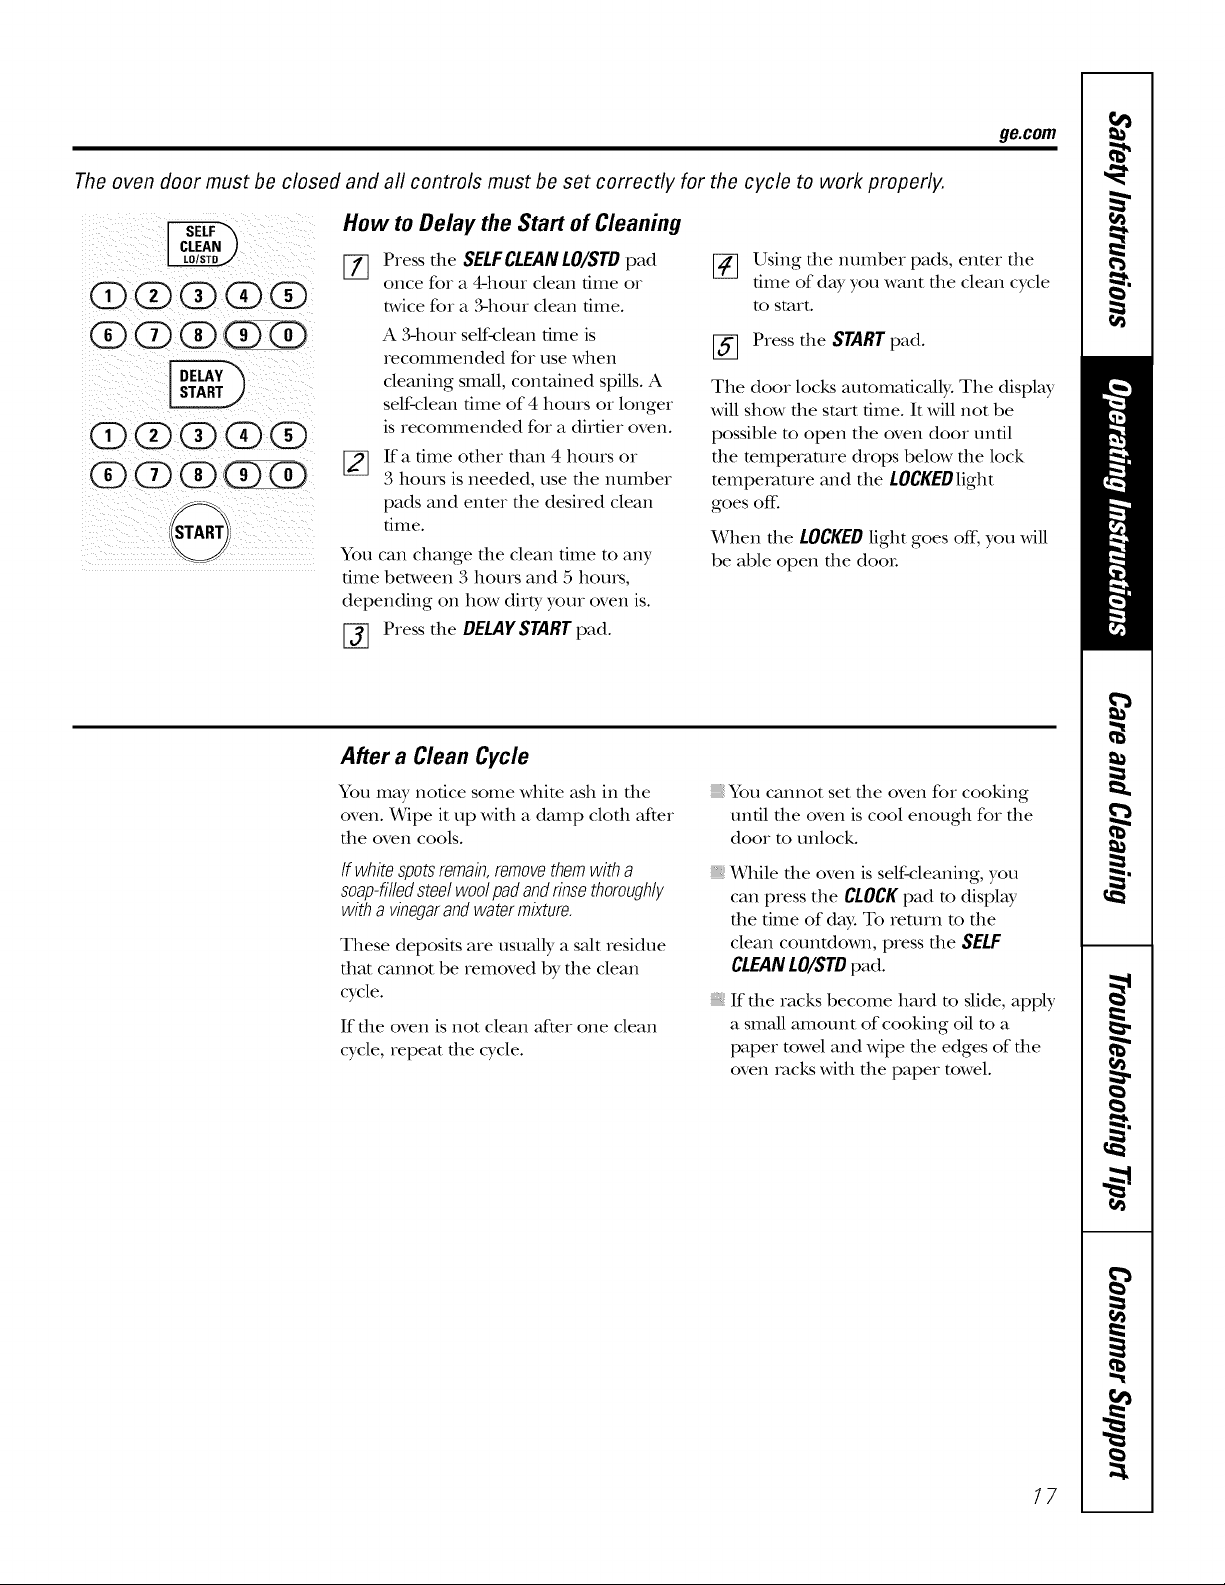
How to Delay the Start of Cleaning
ge.com
(Z)(X)(Z)(3)(Z)
(X)G(X)OQ
QOO(Z)(Z)
(Z)O O (Z)(Z)
f
STARTj
[77 Press the SELFCLEANLO/STDpad
once fo_ a 4-hour clean time o_
twice fo_ a ,%horn clean 6me.
A 3-hour self-clean time is
_ecommended fo_ use when
cleaning small, contained spills. A
self-clean time of 4 hours oI longer
is recommended fox a dirtie_ oven.
If a time otheI than 4 houIs oi
[]
3 hours is needed, use the numbe_
pads and enter the desired clean
time.
You can change the clean time to any
time between 3 hours and 5 hours,
depending on how dirty you_ oven is.
[_ Press the DELAYSTARTpad.
After a Clean Cycle
You may notice some white ash in the
oven. _qpe it up with a damp cloth after
the oven cools.
[_ Using the numbex pads, entex the
time of day you want the clean cycle
to staxt.
[_ Press the STARTpad.
The doo_ locks automatically. The display
will show file stalt time. It will not be
possible m open the oven door until
the mmpeIatme dIops below the lock
mmpe_mlre and the LOCKEDlight
goes off:
When the LOCKEDlight goes off; you will
be able open the d00L
You cannot set the oven for cooking
until the oven is cool enough fo_ the
doo_ to unlock.
If whitespotsremain,removethemwitha
soap-filledsteelwoolpadandrinsethoroughly
witha vinegarandwatermixture.
These deposits are usually a salt _esidue
that cannot be _emoved by the clean
cycle.
If the oven is not clean mCte_one clean
cycle, _epeat the cycle.
While die oven is self-cleaning, you
can piess the CLOCKpad m display
the time of day. To _etum m the
clean countdown, p_ess the SELF
CLEANLO/STDpad.
If die Iacks become hard m slide, apply
a smaU amount of cooking oil m a
paper towel and wipe the edges of the
oven _vmkswith the paper towel.
17
Special features ofyouroven control
Yournew touch pad control has additional features that you may choose to use. The following are the features and
how you may activate them.
Thespecial feature modes can only be activated while the display is showing the time of day. They remain in the
control's memory until the steps are repeated.
When the display shows your choice, press the STARTpad. Thespecial features will remain in memory after a
power failure.
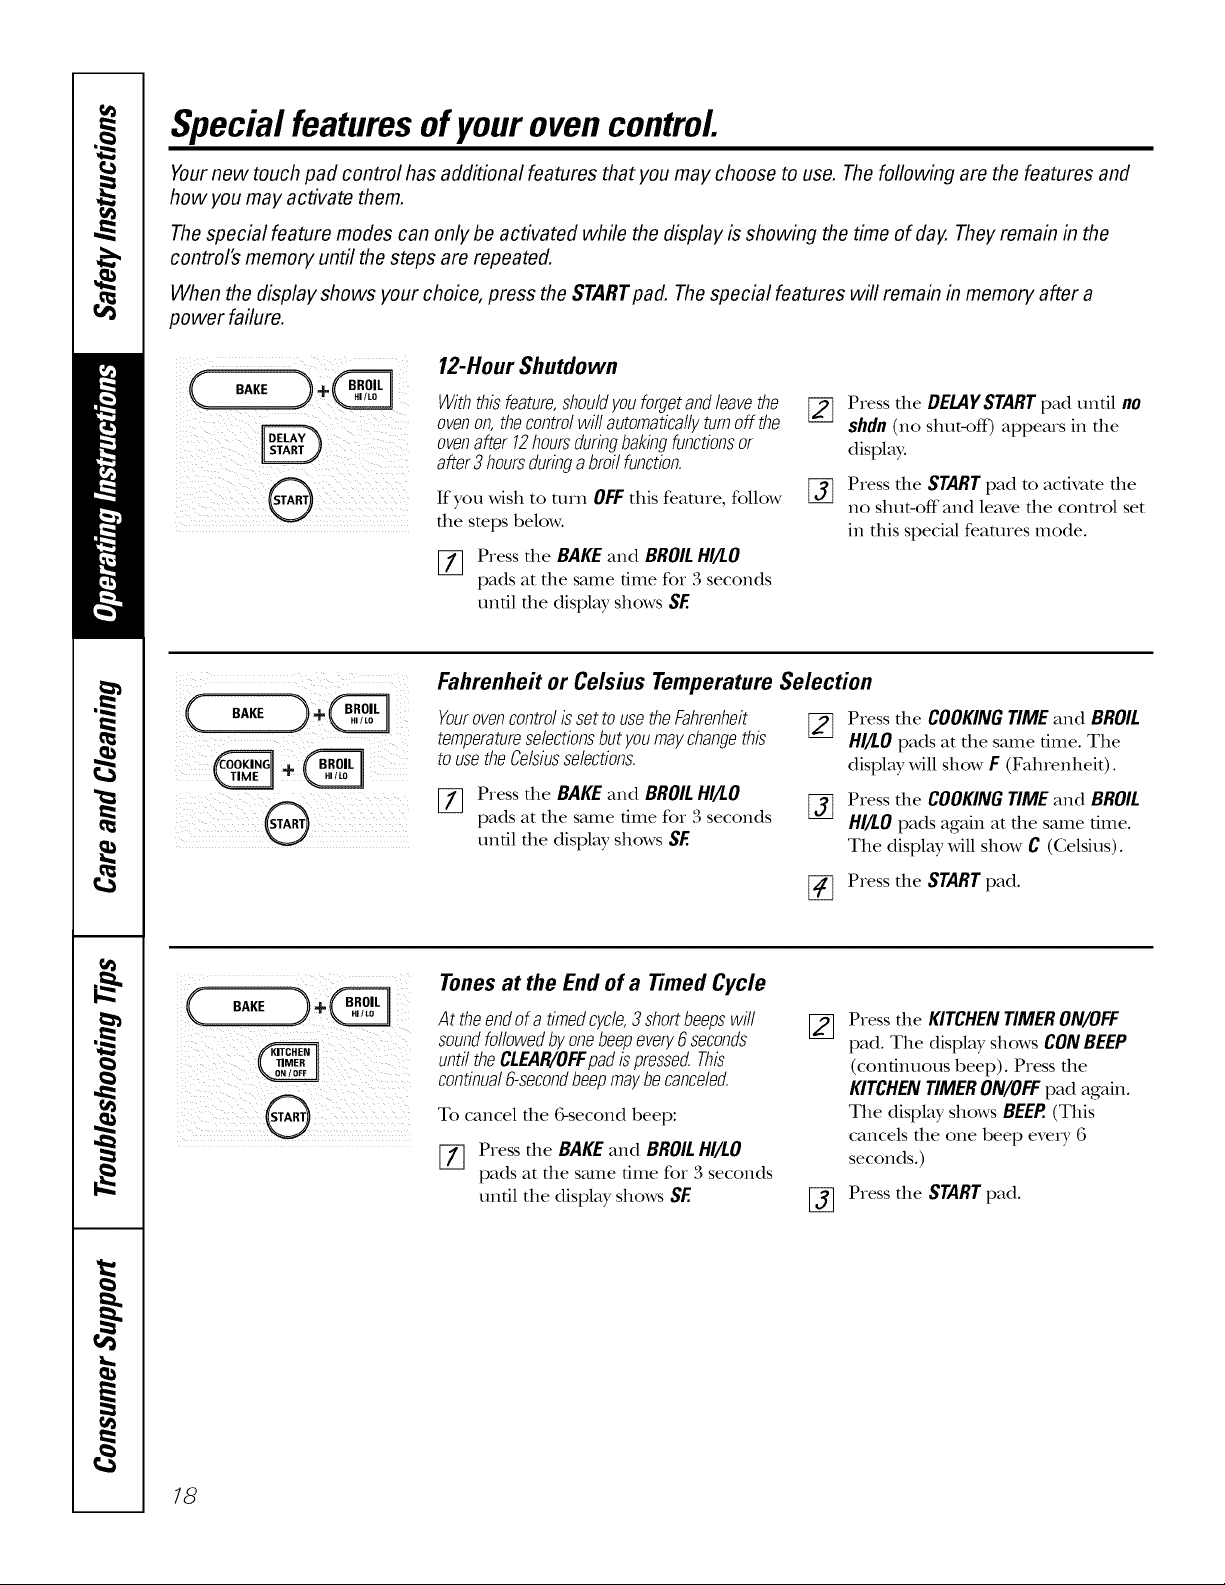
12-Hour Shutdown
(.,,,
@
With this feature, shouldyou forgetandleavethe
ovenon, thecontrol will automatically turn off the
ovenafter 12hours duringbaking functions or
after3 hoursduring a broil function.
If you wish to turn OFFthis feature, follow
the steps below.
[] Press the BAKE and BROILHI/LO
pads at the _mle time for 3 seconds
until the display shows SE
Fahrenheit or Celsius Temperature Selection
YourovencontrolissettousetheFahrenheit
temperatureselectionsbutyoumaychangethis
tousetheCelsiusselections.
[_ Press the BAKE and BROILHI/LO
pads at the _mle time for ,'3seconds
until the display shows SF.
[]
%
%
[_ Press the STARTpad.
Press the DELAYSTART pad until no
shdn (no shut-off) appears in the
display:
Press the START pad to activate the
no shut-off and leave the control set
in this special features mode.
Press the COOKING TIME and BROIL
HI/LO pads at the same time. The
display will show F (Fahrenheit).
Press the COOKING TIME and BROIL
HI/LO pads again at the same time.
The display will show C (Celsius).
18
Tones at the End of a Timed Cycle
At the end of a timed cycle,3 shortbeeps will
soundfollowed by one beepevery6 seconds
until the CLEAR/OFFpad is pressed.This
continual6-secondbeep maybe canceled.
To cancel file 6-second beep:
[_ Press the BAKE and BROILHI/LO
pads at the same time for ,'3seconds
until the display shows SF.
Press the KITCHENTIMERON/OFF
pad. The display shows CON BEEP
(continuous beep). Press the
KITCHEN TIMER ON/OFF pad again.
The display shows BEEP.(This
cancels the one beep eve_T 6
seconds.)
[_ Press the STARTpad.

BAKE " +
®
12-Hour, 24-Hour or Clock Blackout
Yourcontrolissettousea 12-hourdock.
If you would prefer to have a 24-hour
milim D, dine clock or black out the clock
display, follow the steps below.
[_ Press the BAKE and BROILHI/LO
pads at the same time for 3 seconds
until the display shows SF.
Press the CLOCKpad once. The
[]
display will show 12hr. If tiffs is
the choice you want, press the
STARTpad.
Cook and Hold
YourcontrolhasacookandhoUfeaturethat
keepscookedfoodswarmforupto 3hoursafter
TimedBakingorRoastingis finished
NOTE:Thisfeaturecanonlybeprogrammedto
workwithTimedBakingorRoasting.(Seethe
Usingthetimedbakingorroastingfeatures
section.)After TimedBakingorRoastinghas
automaticallystopped,theprogrammedcook
andholdwillautomaticallystart.
To activate tiffs feature for use _ffter
Timed Baking or Roasting, follow the
steps below.
ge.com
Press file CLOCK pad again m change m
file 24 hour military time clock. The
display will show 24 hr. If tiffs is the choice
you want, press the STARTpad.
Press the CLOCKpad again to black out
file clock display: The display will show
OFF.If tiffs is the choice you want, press
the STARTpad.
NOTE:Iftheclockisintheblack-outmodeyou
will notbeabletousetheDelayStartfunction.
[_ Press the COOKINGTIMEpad.
The display will show HidOFF.
Press the COOKINGTIMEpad again
to activate the feature. The display
will show HidON.
Press the STARTpad to activate
%
the cook and hold feature and
leave the control set in this special
features mode.
Press the BAKE and BROILHI/LO
pads at the same time for 3 seconds
until the display shows SF.
/9
UsingtheSabbathFeature.
(Designed for useon the Jewish Sabbath and Holidays.)(on some models)
TheSabbathfeature can be usedforbaking/roastingonly.It cannotbe usedfor broiling,self-cleaning or DelayStart cooking.
NOTE:Theovenlightcomesonautomaticallywhenthedoorisopenedandgoesoffwhenthedoorisclosed.Thebulbmayberemoved.SeetheOven
LightReplacementsection.Onmodelswithalightswitchonthecontrolpanel,theovenlightmaybeturnedonandlefton.
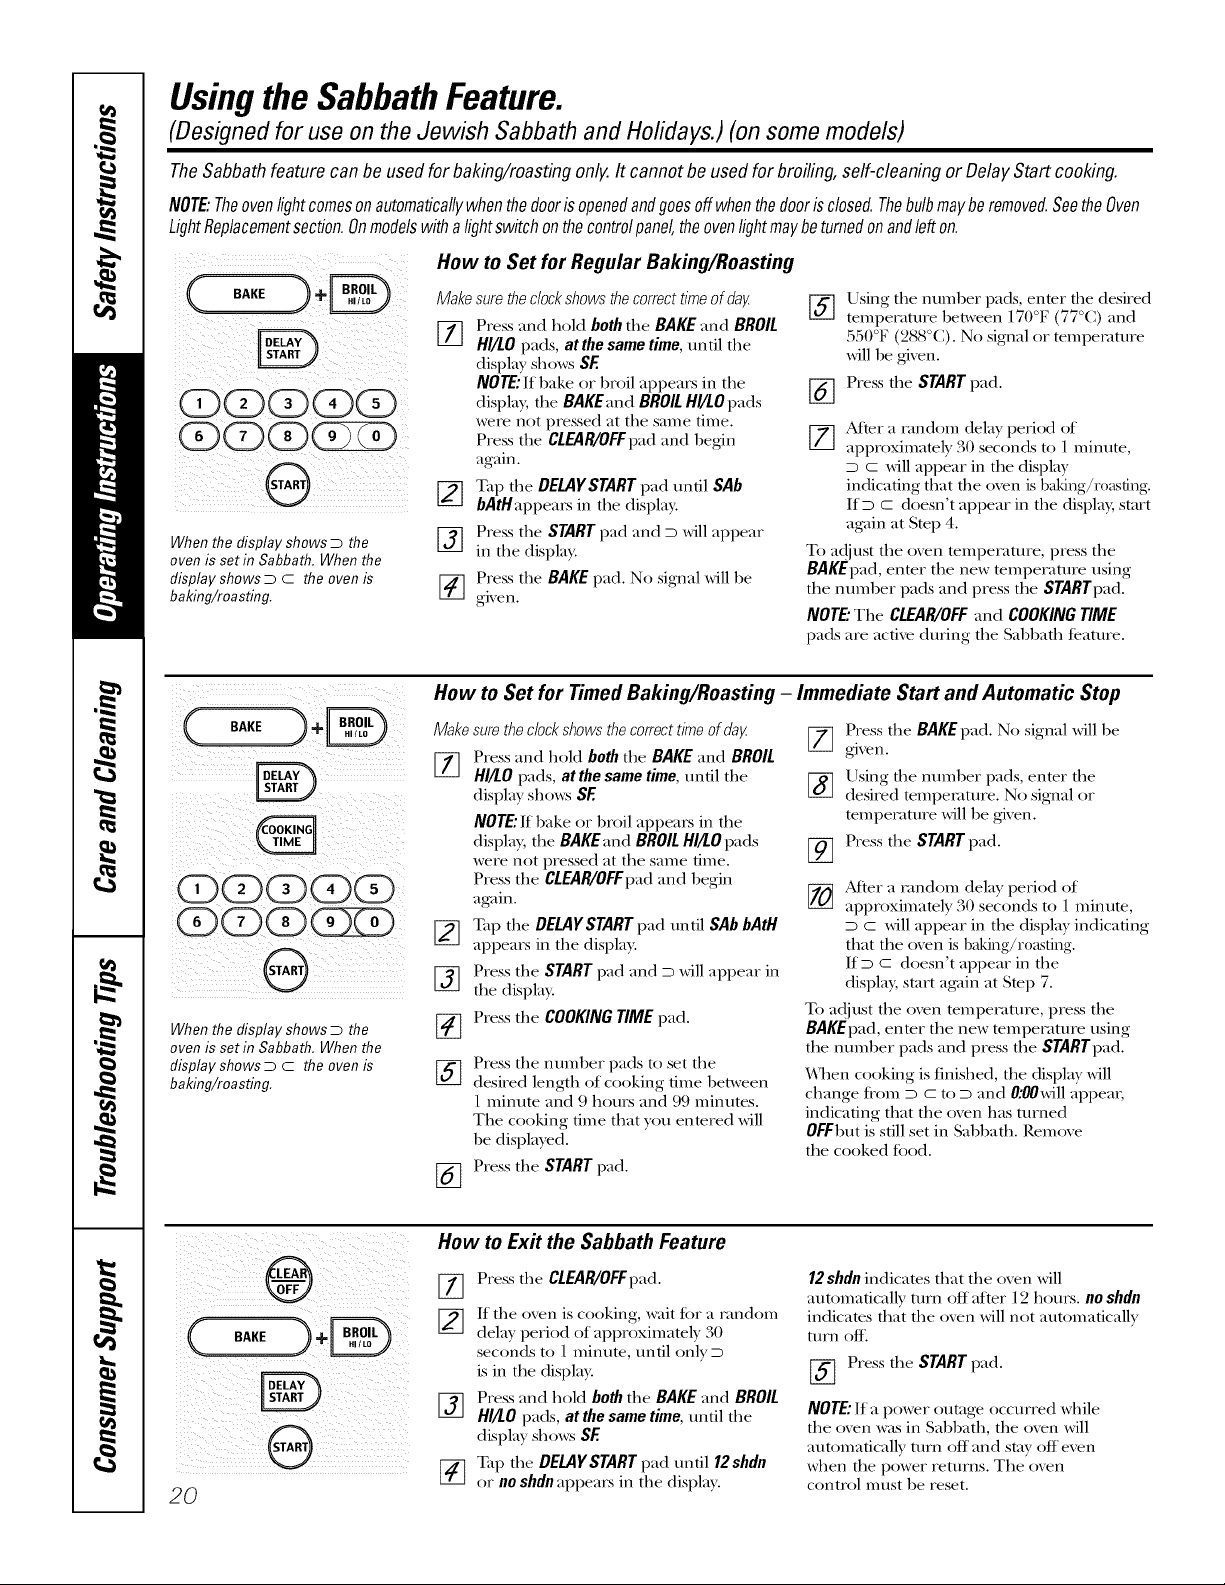
How to Set for Regular Baking/Roasting
When the display shows D the
oven is set in Sabbath. When the
display shows D C the oven is
baking/roasting.
Make sure the clock shows the correct time of day
[77 Press and hold both the BAKE and BROIL
HI!tO pads, atthe same time, until the
display shows SE
NOTE"If bake or broil appears in the
displa}; the BAKEand BROIL HI!tO pads
were not pressed at the same time.
Press the CLEAR/OFFpad and begin
again.
[_ Tap the DELAYSTART pad until SAb
bAtH appears in the display.
[_] Press the START pad and D will appear
in the display.
[_] ress the BAKE pad. No signal will be
gixen.
Using the number pads, enter the desired
%
temperature between 170°F (77°C) and
:5:5()°F(288°(?0. No signal or temperature
will lxegixen.
Press the STARTpad.
%
[_ After a random delay perk_t of
approximately 30 seconds to 1 minute,
D C will appear in the display
indicating that fl-le oxen is baking/r0asting.
IfD C doesn't appearin the displa), start
again at Step 4.
To at!lust the oven temperature, press the
BAKEpad, enter the new temperature using
the number pads and press the SrARrpad.
NOTE"The CLEAR/OFF and COOKING TIME
pads are active during the SabbatlJ feature.
( o',')÷
When the display shows D the
oven is set in Sabbath. When the
display shows D C the oven is
baking/roasting.
D
2O
How to Set for Timed Baking/Roasting - Immediate Start and Automatic Stop
Make
surethe cbck shows thecorrect time of day
Press and hold both the BAKE and BROIL
%
HI!tOpads, at the same time, until the
display sho_vs SE
NOTE"If bake or broil appears in the
displa), the BAKE and BROIL HI!tO pads
were not pressed at the same time.
Press the CLEAR/OFFpad and begin
again.
Tap the DELAYSTART pad until SAb bAtH
appears in the display.
Press the START pad and D will appear in
%
the display.
Press the COOKING TIME pad.
Press the number pads to set the
%
desired length of cooking time between
1 minute and 9 hours and 99 minutes.
The cooking time that }ou entered will
be displayed.
Press the START pad.
%
[_ Press the BAKEpad. No signal will be
_JVUII.
[_ Using the number pads, enter the
desired temperature. No signal or
temperature will be g_xen.
Press the START pad.
_ After a landom delay period of
approximately 30 seconds to 1 minute,
D C will appear in the display indicating
that the oven is baking/r0asting.
IfD C doesn't appear in the
displa), start again at Step 7.
To adjust the oven tempelature, press the
BAKEpad,enter the new tempecamre using
the nmnber pads and press the STARTpad.
¥\laen cooking is finished, the display will
change tiom D C to D and 0:00will appea_;
indicating that the oven has turned
0FFbut is still set in SabbatlJ. Remove
the cooked tood.
How to Exit the Sabbath Feature
Press the CLEAR/0FFpad.
If the oven is cooking, wait tot a lamdom
dela} period of approximatel} 30
m
seconds to 1 minute, until onl} D
is in the display.
Press and hold both the BAKE and BROIL
%
HI/tO pads, at the same time, until the
displa} sho_vs SE
Tap the DELAYSTART pad until 12shdn
or noshdn appears in the displa}.
12shdnindicates that the oxen will
automatically turn off after 12 hours, no shdn
indicates that the oxen will not automaticall}
turn ott:
_-] Press the START pad.
NOTE"If a power outage occurred while
the oven was in Sabbath, the oven will
automatically turn off and stay off even
when the power returns. The oven
control must be reset.
Careandcleaningoftherange. ,e.co
Be sure aft controls are off and aft surfaces are cool before cleaning any part of the range.
If your range is removed for cleaning, servicing or any reason, be sure the anti-tip
device is reengaged properly when the range is replaced. Failure to take this
precaution could result in tipping of the range and cause injury.
How to Remove Protective Shipping Film and Packaging Tape
Careflllly grasp a corner of file protective
shipping fihn with your finge_s and slowly
peel it from dxe appliance surface. Do
not use any sharp items to remove file
fihn. Remove aU of the film before using
the appliance for the fi_st time.
To assure no damage is done to the
finish of file product, the safest way to
remove the adhesive flom packaging
tape on new appliances is an application
of a household liquid dishwashing
detergent. Apply with a soft cloth and
allow m soak.
NOTE:Theadhesivemustberemovedfromaft
parts.Itcannotberemovedif it isbakedon.
Control Knobs
Thecontrolknobs maybe removedfor easier
cleaning
Make sure die knobs are in die OFF
positions and pull them straight off the
smms for cleaning.
¸¸¸¸7
Oven Vent
Theovenventislocatedabovetheleftsideof
thedoor.
This area could become hot du_-ing
oven use.
The knobs can be cleaned in a
dishwasher or flley may also be washed
with soap and water. Make sure the insides
of the lmobs are d_y before replacing.
Replace the knobs in the OFFposition
m ensure proper placement.
It is nomlM for smam to come out of
file vent.
Theventisimportantforproperaircirculation.
Neverb/ockthisvent.
Stainless Steel Surfaces (onsomemodels)
Donotusea steel woolpad;# will scratch
thesurface.
To clean file stainless steel surface,
use warm sudsy water or a stainless smel
cleaner or polish. Ahvays wipe the surface
in the direction of the grain. Follow the
cleaner insnucfions for cleaning the
stainless steel surface.
To inquire about purchasing stainless
smel appliance cleaner or polish, or m
find the location of a dealer nearest you,
please call our mll-fiee number:
NationalPartsCenter
1.800.626.2002
ge.com
21
Careand cleaningof therange.
Painted Surfaces
Donotrub or cleanthe doorgasket--
it hasan extremelylowresistance to
abrasion.
If younotice thegasketbecomingworn,
frayedor damagedin any wayor if it has
becomedisplacedonthedoor,youshould
haveit replaced,
Painmd surfaces include the dooI; top of
file control panel and the drawer front.
Clean these with soap and wamr or a
vinegar and wamr solution.
Control Panel
Clean up splattex_ with a damp clodl.
You may also use a glass cleaneL
Cleaning the Oven Door
Tocleantheinsideofthedoor:
Because die area inside die g_tsket is
cleaned during die self-clean cycle, you
do not need m clean this by hand.
The area outside die gasket and
die door liner can be cleaned with a
seal>filled smel wool or pl_tsdc pad,
hot wamr and dem_gent. Rinse well
with a vinegar and wamr solution.
Tocleantheoutsideofthedoor:
Use soap and water to ttloroughly
clean file rap, sides and front of die
oven dooL Rinse well. You m W also
use a glass cleaner to clean file glass
Do IIOt tlse comnlercial oveil cleaners,
cleaning powders, steel wool or hmMl
abrasives on any painted surface.
Remove heavier soil with waml
soap), wateL
Do not use abrasives of any kind.
on die outside of die dooi. Do not let
wamr drip into file vent openings.
If any stain on the door vent uim is
peisismnt, use a soft abrasive cleaner
aim a sponge-scrubber for best results.
Spillage of marinades, fluitj uices,
mmam sauces and basting mamlials
containing acids may cause
discoloration aim should be wiped
up immediately. When surface is cool,
clean and rinse.
Do not use oven cleanets, cleaning
powders or hmMl abr_tsives on die
outside of die dooL
Slot
Hingelock
Pull hinge locks clown to unlock,
Removalposition
22
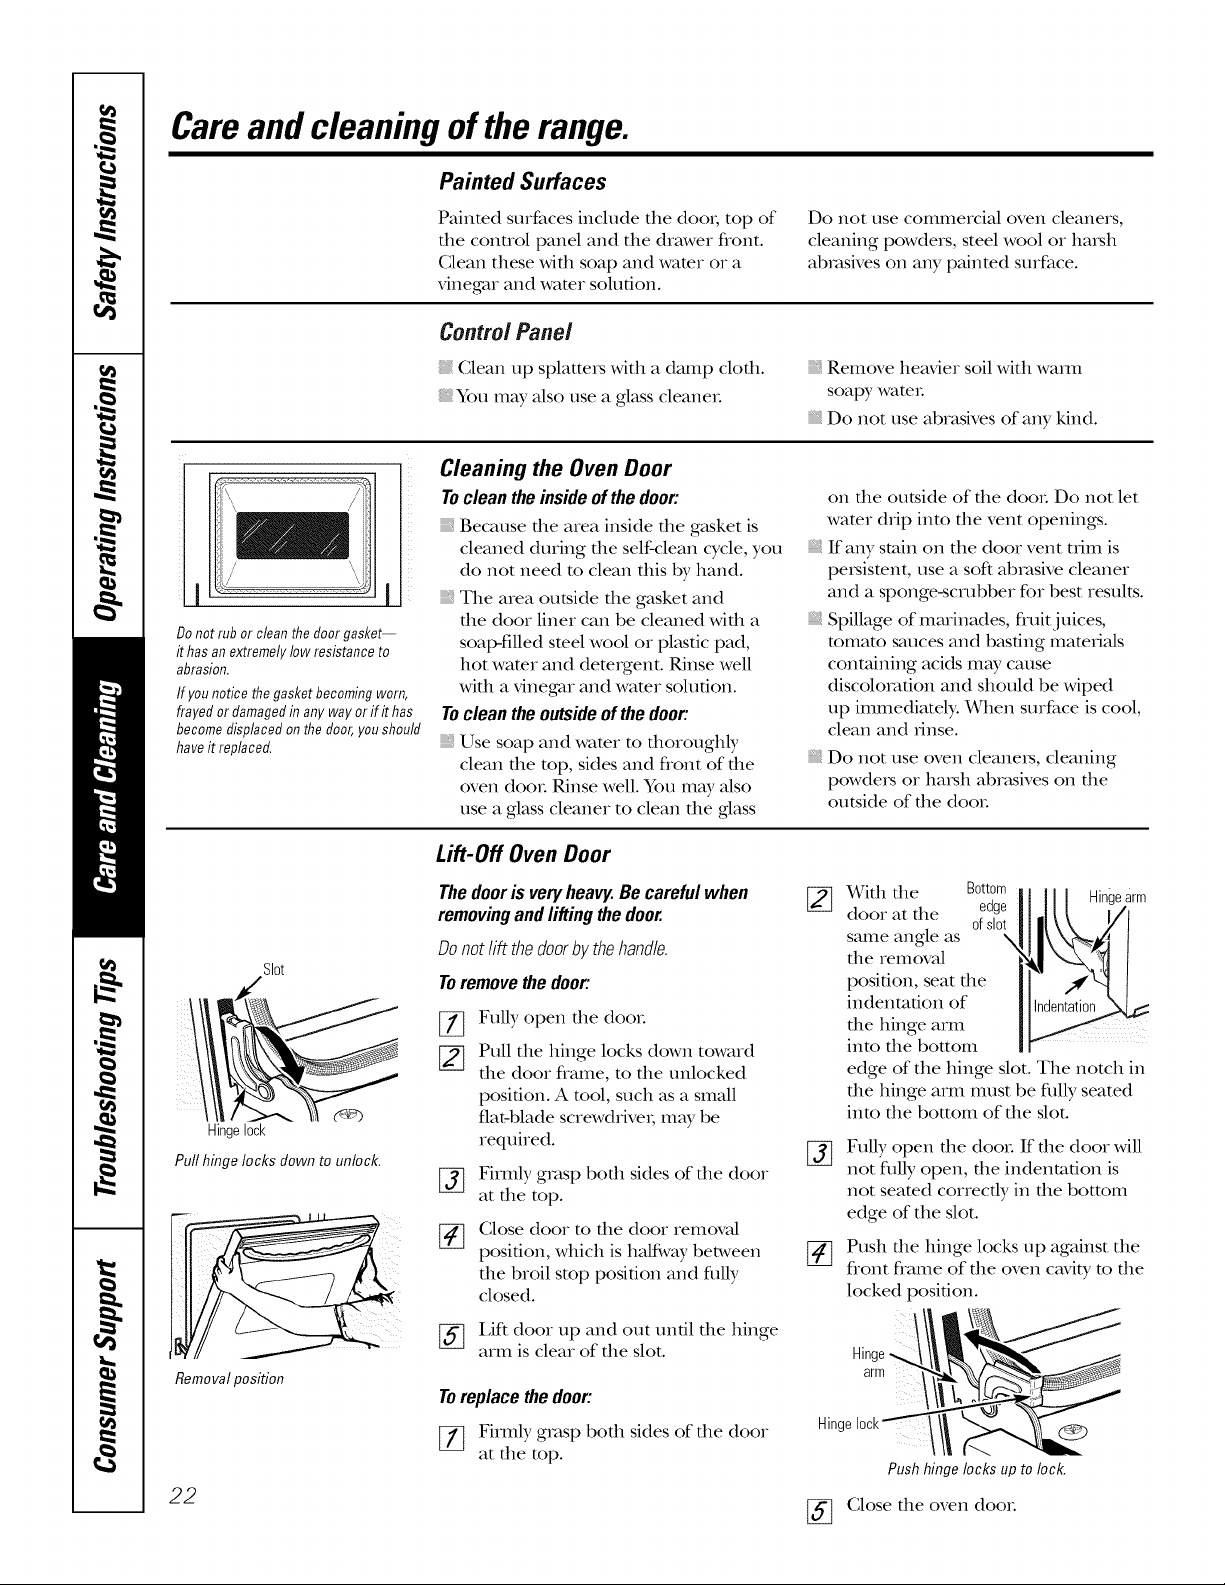
Lift-Off Oven Door
Thedoorisveryheavy.Becarefulwhen
removingandliftingthedoor.
Donot lift thedoorbythehandle.
Toremovethedoor:
Fully open die dooL
%
Pull die hinge locks down toward
die door flame, to die unlocked
position. A tool, such as a small
fiat-blade screwdriver; may be
required.
Firmly grasp bodl sides of die door
%
at die top.
(;lose door to die door removal
position, which is hMg,vay between
die broil stop position and fiflly
closed.
[_ I,iff door up and out until die hinge
arm is clear of die slot.
Toreplace the door:
[77 Firmly grasp bodl sides of die door
at die top.
_(A/idldie Bottom Hingearm
door at die edge
same angle as \
die removal
position, seat die
indentation of
die hinge arm
into die bottom
edge of the binge slot. The notch in
die hinge arm must be dilly seated
into die bottom of die dot.
Fully open die dooL If die door will
%
not dilly open, die indentation is
not seated correcdy in die bottom
edge of die slot.
[_ Push die hinge locks up against die
flont flame of die oven cavib, to die
locked position.
Hinge
arm
Hinge10ck_
Pushhingelocksup to lock.
[_ (;lose die oven dooI:
ofslot
 Loading...