

GE JRP20WJ1WW, JRP20SK1SS, JRP20BJ1BB Owner’s Manual
o_,_
Safety Information
Oven ..................... 3-5
Safety Precautions .......... 3-5
Self=Cleaning Oven ......... 2, 5
Operating lnsCru_ions
Clock and Timer ............. 9
Oven .................... 6-18
O\'en Them_ostat ........... 16
Sabbath Feanlre .......... 14, 15
Self=Cleaning ............ 17, 18
Special Features .......... 11-13
Timed Baking and Roasting . . .10
Care and Cleaning
Broiler Pan and Grid ......... 20
Control Panel .............. 20
Glass Surfi_ces .............. 20
Heating Element ............ 19
Lift-Off Oven Door .......... 19
Oven Light ................. 21
Painted Surfi_ces ............ 20
Shelves .................... 20
Stainless Steel Surfaces ....... 21
ge.com
JRP20
Troubleshooting Tips .... 22-24
Consumer Support
Consumer Support...Back Cover
Product Registration ...... 25, 26
V\arranty ................... 27
Write the model and serial
numbers here:
Model #
Serial #
You can find them on a label on
the front of the lower oven behind
the oven door.
4980345 1105Jfl
iMPORTANTSAFETYiNFORMAtiON.
READALLiNSTRUCtiONSBEFOREUSING
For your safety, the information in this manual must be followed to minimize the risk of fire or
explosion, electric shock, or to prevent property damage, personal injury, orloss of life.
IMPORTANTSAFETYNOTICE
The California Safe Drinking Water and ToxicEnforcement Act requires the Governor of California to
publish a list of substances known to the state to cause cancer, birth defects or other reproductive
harm, and requires businesses to warn customers of potential exposure to such substances.
The fiberglass insulation in self-clean ovens gives off a very smafl amount of carbon monoxide during
the cleaning cycle. Exposure can be minimized by venting with an open window or using a ventilation
fan or hood.
IMPORTANT."Thehealthofsomebirdsisextremelysensitivetothefumesgiven off
during the self-cleaning cycle of any oven. Move birds to another well ventilated room.
2
ge.com
SAFETYPRECAUTIONS
When using electrical appliances, basic safety precautions should be followed, including the following."
_i:,iUse this appliance only %r its intended
purpose as desciihed ill this Owner's
Manual.
:_i:,:Be sure your appliance is properly installed
and gro/mded hy a qualified technician ill
accordance with tile provided installation
instructions.
_: Do not attempt to repair or replace any
part of your oxen unless it is specifically
reconmmnded ill this manual. All other
servicing should he refe_Ted to a qualified
technician,
;_i:,iHme tile installer show you tile location of
tile circuit hreaker or fllse. Mark it for easy
reference.
;_?:':Before performing any service, disconnect
tile oxen power supply at tile household
disu_ibution panel hy removing tile fllse oi
switching off file circuit hreaken
;_?:':Do not leaxe children alone--children
should not he left alone or unattended in
an aiea where all appliance is ill use. They
should nexer be allowed to sit or stand on
any part of file appliance.
_?_::Do not allow anyone to climb, stand oi
hang on tile door They could damage tile
oxen, oi cause sexeie personal injm T.
_?i::Be sure file oxen is securely installed in a
cabinet fllat is firmly attached m tile house
structure. Nexer allow anyone to climh, sit,
stand oi hang on tile oxen door
_i:,:Always kee I) comhusfihle wall coxering,
curtains or drapes a safe distance flom
your oven.
;f; Always kee I) dish towels, dish cloths, pot
holders and other linens a safe distance
from your oxen.
_i:,:Always kee I) wooden and plastic umnsils
and canned food a sad distance away flom
your oven.
_?:':Teach children not m play with tile
controls or any other part of tile oxen.
_::Do not store flammable materials ill
all oxen.
CAUTION: temsofinterestto
children should not he stored ill cabinets
aboxe all oven; children climhing on the
oxen to reach imms could he seriously
injuied.
N Nexer wear loose-fitting or hanging
garments while using tile appliance.
Be careflll when reaching for imms stored
in cabinets oxer tile oven. Nammable
mamfial could be igafimd if brought in
contact with hot surthces or heating
elements and m W cause sexere hnrlls.
;f; Use only dU pot holders--moist or damp
pot holders on hot snrfaces may result in
1)unls from smam. Do not let pot holders
much hot heating elements. Do not use
a towel or oilier bulky cloth.
_::Nexer leaxe tile oxen door open when you
are not watching tile oxen.
3
IMPORTANTSAFETYINFORMATION.
READALLINSTRUCTIONSBEFOREUSING.
WARNING'!
SAFETYPRECAUTIONS
_; For your safety, nexer use your appliance
for warming or heating tile room.
_?{:_Do not let cooking grease or other
flammable mateiials accumulate ill
or near the oven.
_{_:Do not use water on grease fires.
Nexer pick up a flaming pan. Turn
tile controls off:
Flame ill the oxen can be smodlered
completely by closing tile oxen door and
um_ing tile oven off or by using a muhi-
pmj)ose d U chemical or foam-type fire
exfinguishen
_f;Never lemejars or calls of fat drippings ill
or near your oxen. ;_i:':
q_{_:Do not stole or use combustible materials,
gasoline or other flammable vapors and
liquids in tile vicinity of this or any other
appliance. _i:,:
;_i:,:Stand away from file oven when opening
tile oxen door Hot air or smam which
escapes can cause bums to hands, fi_ce
and/or eyes.
_{_;Do not heat nnopened food containers.
Pressure could build up and the container
could burst, causing all injm T.
_i:Kee I) tile oxen xent unobstructed.
_i_Kee I) tile oxen free from grease buildup.
_{_:Place the oxen shelf ill tile desiIed position
while tile oxen is cool. If shehes must be
handled when hot, do not let pot holder
contact tile heating elements. _::
_::When nsing cooking or roasting bags ill
file oven, follow file manufacturer's
diiections.
Do not touch tile heating elements or file
interior surface of file oxen. These surfaces
may be hot enough to bum exen fllough
they are dark ill colon During and after
use, do not touch, or let clothing or oilier
flammable materials contact any inte.rior
area of tile oxen; allow snfficient time for
cooling first.
Pomnfially hot surlZaces include oven xent
opening:s, surfaces near tile opening:s,
crevices around tile oxen dooi; file edges
of file window and metal trim parts aboxe
the door
REMEMBER:Tile inside surface of die oxen
may be hot when file door is opened.
Pulling out the shelf to tile stop-lock is a
comenience ill lifting heavv foods. It is also
a precaution against bums fiom tonching
hot surfaces of tile door or oxen walls.
Do not use the oxen to dlT newspapers.
If oxerheated, they call catch on fire.
Do not use the oxen for a storage area.
hems stored in all oxen call ignite.
Do not leme paper products, cooking
utensils or food ill the oxen when not
ill rise.
_t{::After broiling, always take file broiler pan
out of tile oxen and clean it. ieftover
giease ill tile broiler pan call catch fire
next time you use the pan.
_i:,:Clean only parts lismd ill this Owner's
Mannal.
Do not use aluminum foil to lille oxen
1)ottoms, except as suggested in this
mannal. Improper installation of
aluminum foil may resuh ill a risk
of electric shock or fire.
41
COOKMEATANDPOULTRYTHOROUGHLY...
Cookmeat andpoultrythoreughly--meat to at bast an INTERNALtemperatureof 160°Fandpoultry
toat bast an INTERNALtemperatureof 180°ECookingtothese temperaturesusuallypretects against
foodbomeillness.
SELF-CLEANINGOVEN
ge.com
_{:_Do not clean the door gasket. Tile door
gasket is essential for a g_od seal. Care
should be token not to rub, damag.e or
mox.e tile g_sket.
;_i:,:Do not use oven cleaners. No commercial
ox.en cleaner or ox.en liner promcfix.e
coating of any kind shou]d be used in or
around aW part of fl_e oven. Residue flom
ox.en cleaners will damage the inside of tile
ox.en when tile self-clean cycle is used.
q_{:;Betbre self-(leaning the ox.en, remox.e tile
broiler pan, gTid and other cookware.
_fi:,iBe sure to wipe up excess spillag.e before
starting tile selt:<leaning operation.
_{:_If the self-cleaning mode malflmctions,
turn the ox.en off and disconnect the
power supply. Hax.e it serviced by a
qualified mchnician.
READANDFOLLOWTHISSAFETYINFORMAtiONCAREFULLY.
SAVETHESEINSTRUCTIONS
5
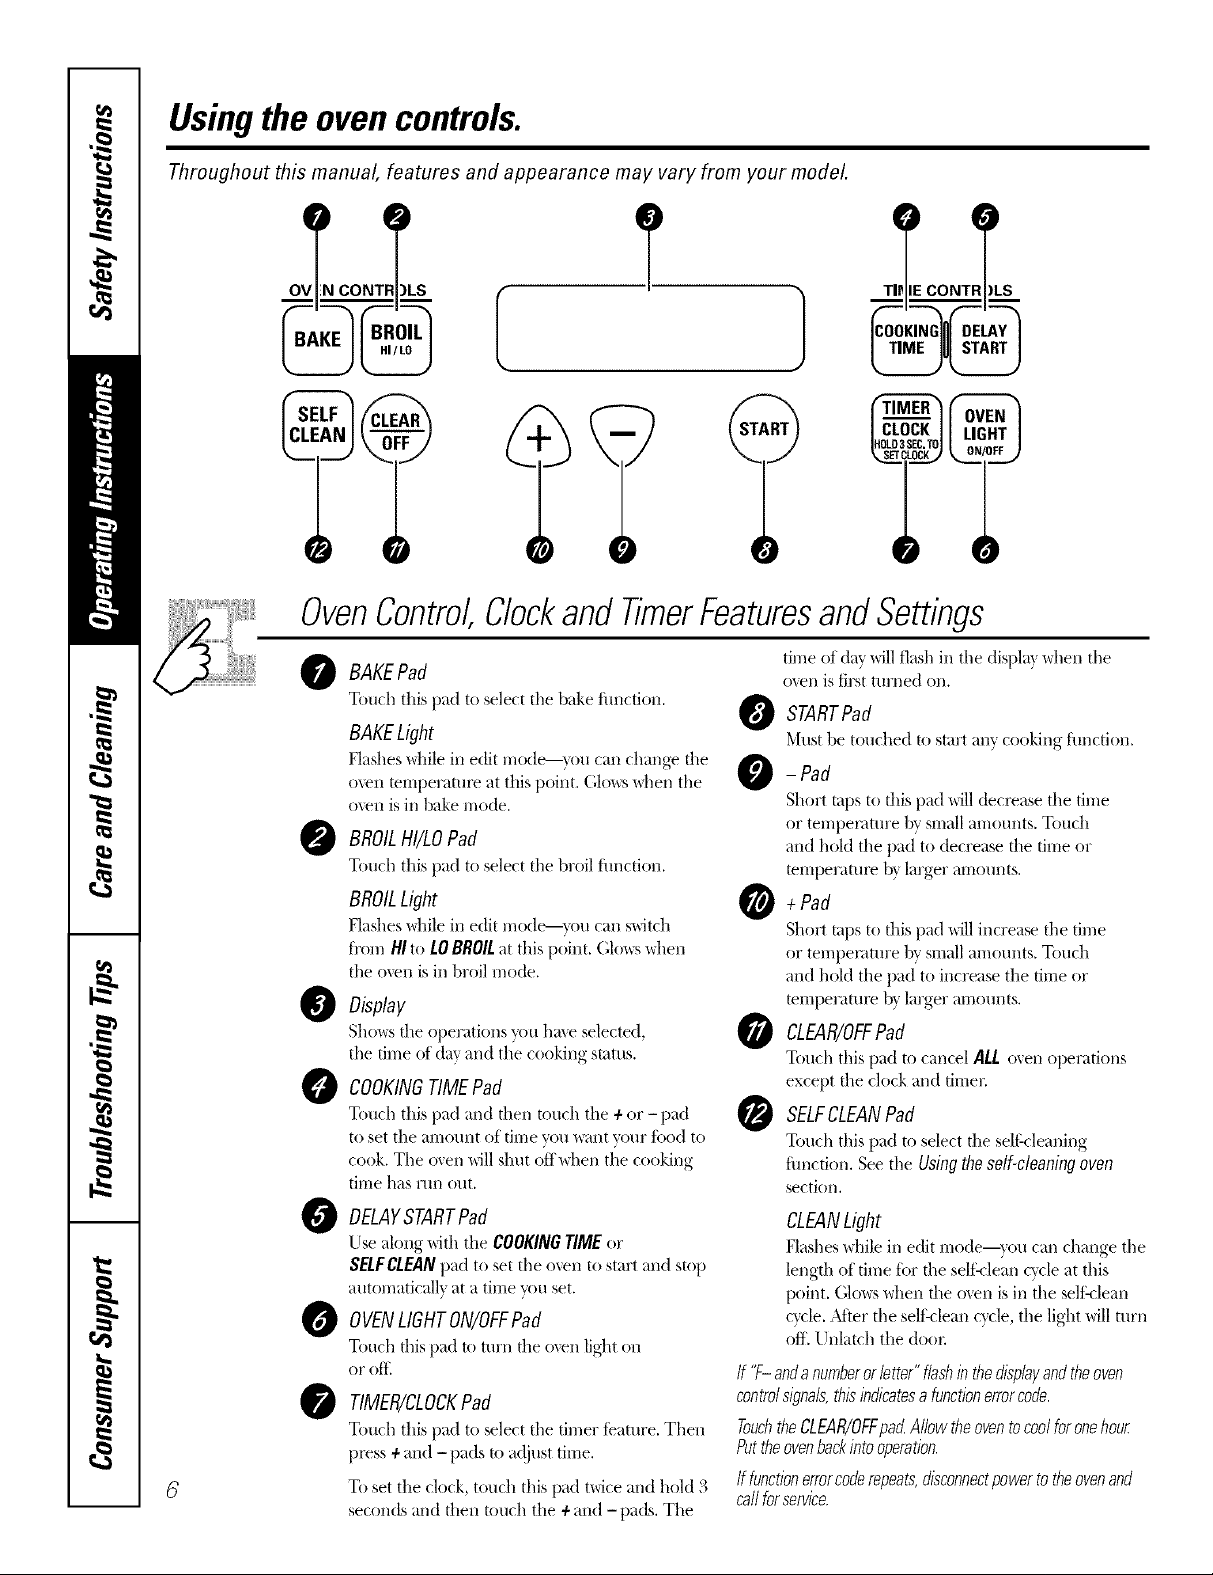
Usingthe ovencontrols.
Throughout this manual, features and appearance may vary from your model.
°
ov Ls
OvenControl,ClockandTimerFeaturesandSettings
BAKEPad
0
Touch this pad to select tile bake thncfion.
BAgELight
Flashes \dlile in edit n/ode--_lu can change the
oven mmperamre at this point. (',lo_vswhen tile
o\en is ill bake n/ode.
BROILHI/LOPad
0
Touch this pad to select tile broil flmcfion.
BROILLight
Flashes \dlile in edit n/ode---_lu can switch
fi'on/HI to LOBROILat this point. Glowswhen
the men is ill broil n/ode.
O Display
Shows die operations _m hme selected,
tile time of day and the cooking status.
O COOKINGTIMEPad
Touch this pad and then touch tile + or - pad
to set tile all|OtlIlt of tilT|e VO/I _\;lIl{ VOt/r f()od to
cook. Tile o',en will shut off\allen tile cooking
tilTle has I-tlIl Otlt.
O DELAYSTARTPad
Use along with tile COOKINGTIME or
SELFCLEANpad to set tile o\en to start and stop
automaticall_ at a time you set.
O OVENLIGHTON/OFFPad
Touch d/is pad to turn die (>\el/light on
or ()ff_
O TIMER/CLOCKPafl
Touch this pad to select tile tinier feature. Then
pl_ss +and -pads to a(!just time.
To set tile clock, touch this pad t\_ice and hold 3
seconds and then touch tile +and -pads. Tile
time of day xdll tlash ill tile displa} when tile
o_en is first tin'ned on.
O STARTPad
MtlSt be touched to start any cooking filI/('[i()II.
- Pad
Short taps to this pad will decl_ase tile fin/e
or tempen_ture by small an/aunts. Touch
and hold tile pad to decrease file time or
temperaml_ b} larger amounts.
O + Pad
Short taps to this pad will increase tile fin/e
or tempenmu'e by small an/aunts. Touch
and hold the pad to increase tile time or
mmperamle b} larger amounts.
O CLEAR/OFFPad
Touch this pad to cancel ALL o\en operations
except die clock and timec
O SELFCLEANPad
Touch this pad to select the sel6cleaning
function. See tile Usingthe self-cleaning oven
section.
CLEANLight
Flashes \dlile ill edit mode--you can change tile
length of tin/e fbr the sel6clean cycle at this
point. Glows when the o_en is ill tile seliklean
cxcle..Mier tile self clean c}cle, tile light will turn
off. Unlamh tile deal:
If % andanumberorletter"flashinthedisplayandtheoven
controlsigna&thisindicatesafunctionerrorcode.
TouchtheCLEAR/OFFpadA/lowtheoventocoo/foronehour.
Puttheovenbackintooperation.
Iffunctionerrorcoderepeats,disconnectpowertotheovenand
callforservice.
Usingtheoven. ,e.com
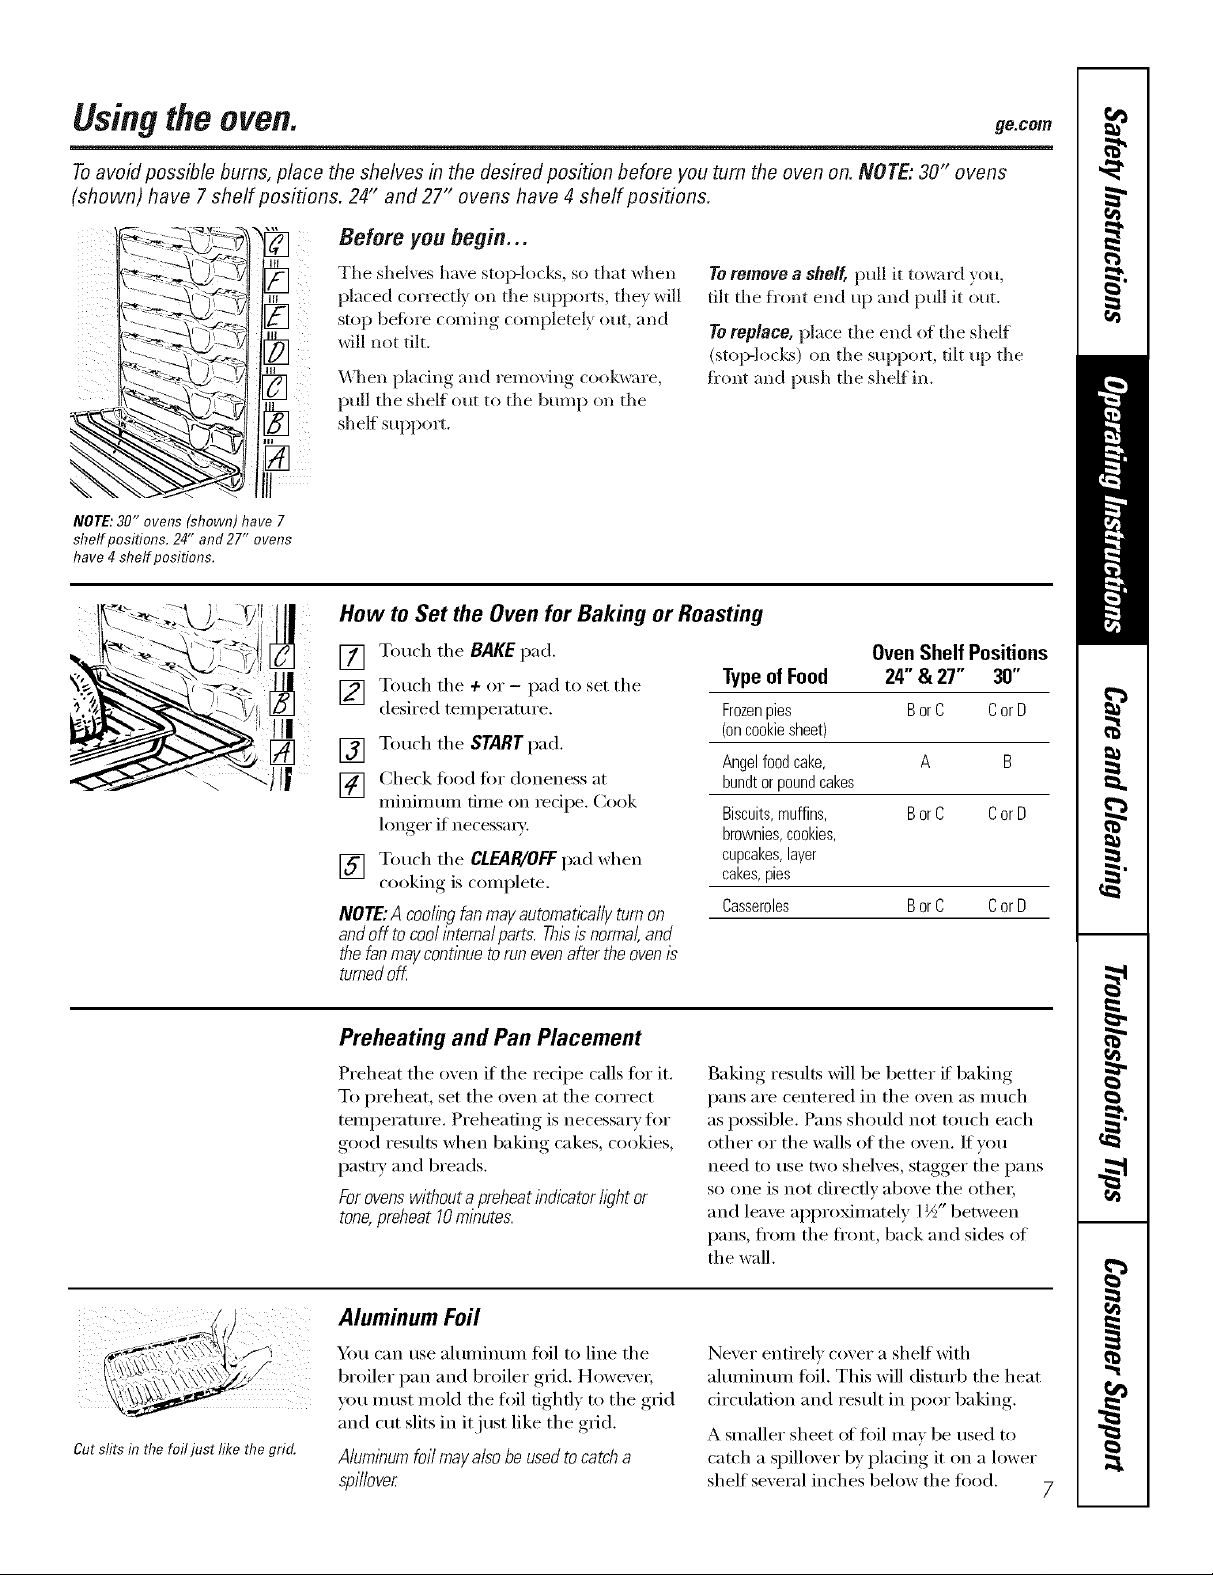
Toavoid possible bums, place the shelves in the desired position before you turn the oven on. NOTE: 30" ovens
(shown) have 7 shelf positions. 24" and 27" ovens have 4 shelf positions.
Before you begin...
The shelves have stop-locks, so that when
placed correctly oil the SUl/l)orts, they will
stop befiwe coming completely out, and
will not tilt.
D,]len })lacino_ and remox_ng, cookwal'e,
pull the shelf ()sit to the bump on the
shelf support.
NOTE:30" ovens (shown) have 7
shelf positions. 24" and 27" ovens
have 4 shelf positions.
How to Set the Oven for Baking orRoasting
To remove a shelf, pull it toward you,
tilt tile i]'ont end up and pull it out.
Toreplace, })lace the end ()f tile shelf
(stop-loci<s) on tile support, tilt up tile
front and push tile shelf ill.
[] Touch tile BAKE pad.
] Touch tile + or - pad to set tile
desired temperature.
[] Touch tile START pad.
[] Check food lbr (hmeness at
minimum time on recipe. Cook
hmger if necessa£}':
[] Touch tile CLEAR/OFFpad when
cooking is complete.
NOTE:A coolingfanmayautomatical/}/turnon
andoff tocoolinternalparts.Thisisnormal,and
thefanmaycontinuetorunevenaftertheoven12
turnedoK
Preheating and Pan Placement
Preheat tile oven if tile recipe calls for it.
To preheat, set tile oven at tile correct
temperature. Preheating is necessm y for
good results when baking cakes, cookies,
past) y and breads.
Forovenswithout apreheat indicator @ht or
tone,preheat 10minutes.
OvenShelf Positions
TypeofFood 24"& 27" 30"
Frozenpies BorC CorD
(oncookiesheet)
Angelfoodcake, A B
bundtorpoundcakes
Biscuits,muffins, BorC CorD
brownies,cookies,
cupcakes,layer
cakes,pies
Casseroles BorC CorD
Baking results will be better if baking
pans are centered in tile oven as much
as possible. Pans should not touch each
other or the walls of the oven. If vou
need to use two shelves, stagger the pans
so one is not direct.Iv above the ()tile);
and leave appro_mately 1½" between
pans, fl'om tile fl'ont, back and sides of
the wall.
Cut slits it? the foil just like the grid.
Aluminum Foil
Ym can use ahmfinmn fi)il to line tile
broiler pan and broiler grid. H(twe\'e);
you Inust nlold the toil tightly to the grid
and cut slits in it just like the grid.
Aluminumfoil mayalso be usedto catch a
spillover
Never entirely cover a shelf with
ahmfinmn fifil. This will distaff) tile heat
drculafion and result in poor baking.
A smaller sheet of toil may be used to
catch a spillover by placing it on a lower
shelf several inches below tile fi)od. 7

Usingtheoven.
How to Set the Oven for Broiling
Leave the door open to the broil
stop position. The door stays open
by itself, yet the proper temperature
is maintained in the oven.
[] Plaice the meat or fish on the broiler
grid in the b_'oilel" p_m,
[] Follow suggested shelf positi(ms in
the Broiling Guide,
maybebroiledbypreheat/bgthebroilerand
/f youroven/sconnectedto208volts,raresteaks
pos/t/on/)_gtheoven#off onepositionhi,Thor.
[] Touch tile BROILH/lie p_d once ior
/4/Broil
To ch'm,,e to LO Broil, tou(.h tile
BROILl/l/tO pad ag_dn.
[] Touch tlle START pad.
[] _len broiling is finished, touch tile
CLEAR/OFF p',ld.
Broiling Guide
24"&27" 24"&2T'Ovens 24"&27"Ovens 30"Ovens 30"Ovens 30"Ovens
Food or Thickness Position Time(rain.) Time(rain.) Positimz Time(min.) Time(rain,) Comments
GroundBeef 1 lb.(4 patties) C 10 7 E 10 7 Spaceevenly.Up
Well Done 1/2 to3/4" thick E 10 9 to 8 patties take
Beef Steaks
Rare
Medium
Well Done
Rare
Medium
Well Done
Chicken
LobsterTails
FishFillets
HamSlices 1" thick B 8 8 D 8 8
(precooked)
Pork Chops
Well Done
LombChops
Medium
Well Done
Medium
Well Done
Quantity and/ Ovens Shelf First Side Second Side Shelf First Side Second Side
1" thick
1 to l_/zIbs.
1YZ'thick
2 to21/zIbs.
1whole
2 to2YzIbs.,
split lengthwise
24
6 to8 oz.each
1/4 to 1/2" thick
2 (1/2"thick) C 10 10 E 10 10
2(1"thick)about1lb. B 13 13 D 15 15
2 (1" thick)about 10
to 12oz.
2(1½"thick)about1lb.
C
C
C
C
C
C
A
C
C
C
B
6
8
12
10
15
25
35
13 16
10
12
14
17
5
6
11
78
14 16
20_5
10 15
Donot
turll oveE
10
12
12 14
E
E
E
E
E
E
C
E
E
E
E
8
10
12
10
15
25
25
13 16
10
12
14
17
6
8
10
8
14 16
20_5
10
Donot
turll over.
9
10
12
12 14
aboutthe same
time.
Steakslessthan
1" thickcook
throughbefore
browning.
Panfryingis
recommended.
Slashfat.
Reducetimeabout
5to 10minutes
persideforcut-up
chicken.Brush
eachsidewith
meltedbutter.
Broilskin-side-
downfirst.
Cutthroughbackof
shell.Spreadopen.
Brushwith melted
butter before
broilingandafter
half of broiling
time.
Handleandturn
verycarefully.
Brushwith lemon
butter beforeand
duringcooking,if
desired.Preheat
broiler to increase
browning.
Increasetime5 to
10minutesper
sidefor 1½"thick
orhome-curedham.
Slashfat.
Slashfat.9
8
Usingthe clock and timer, ge.com
Not all features are on all models.
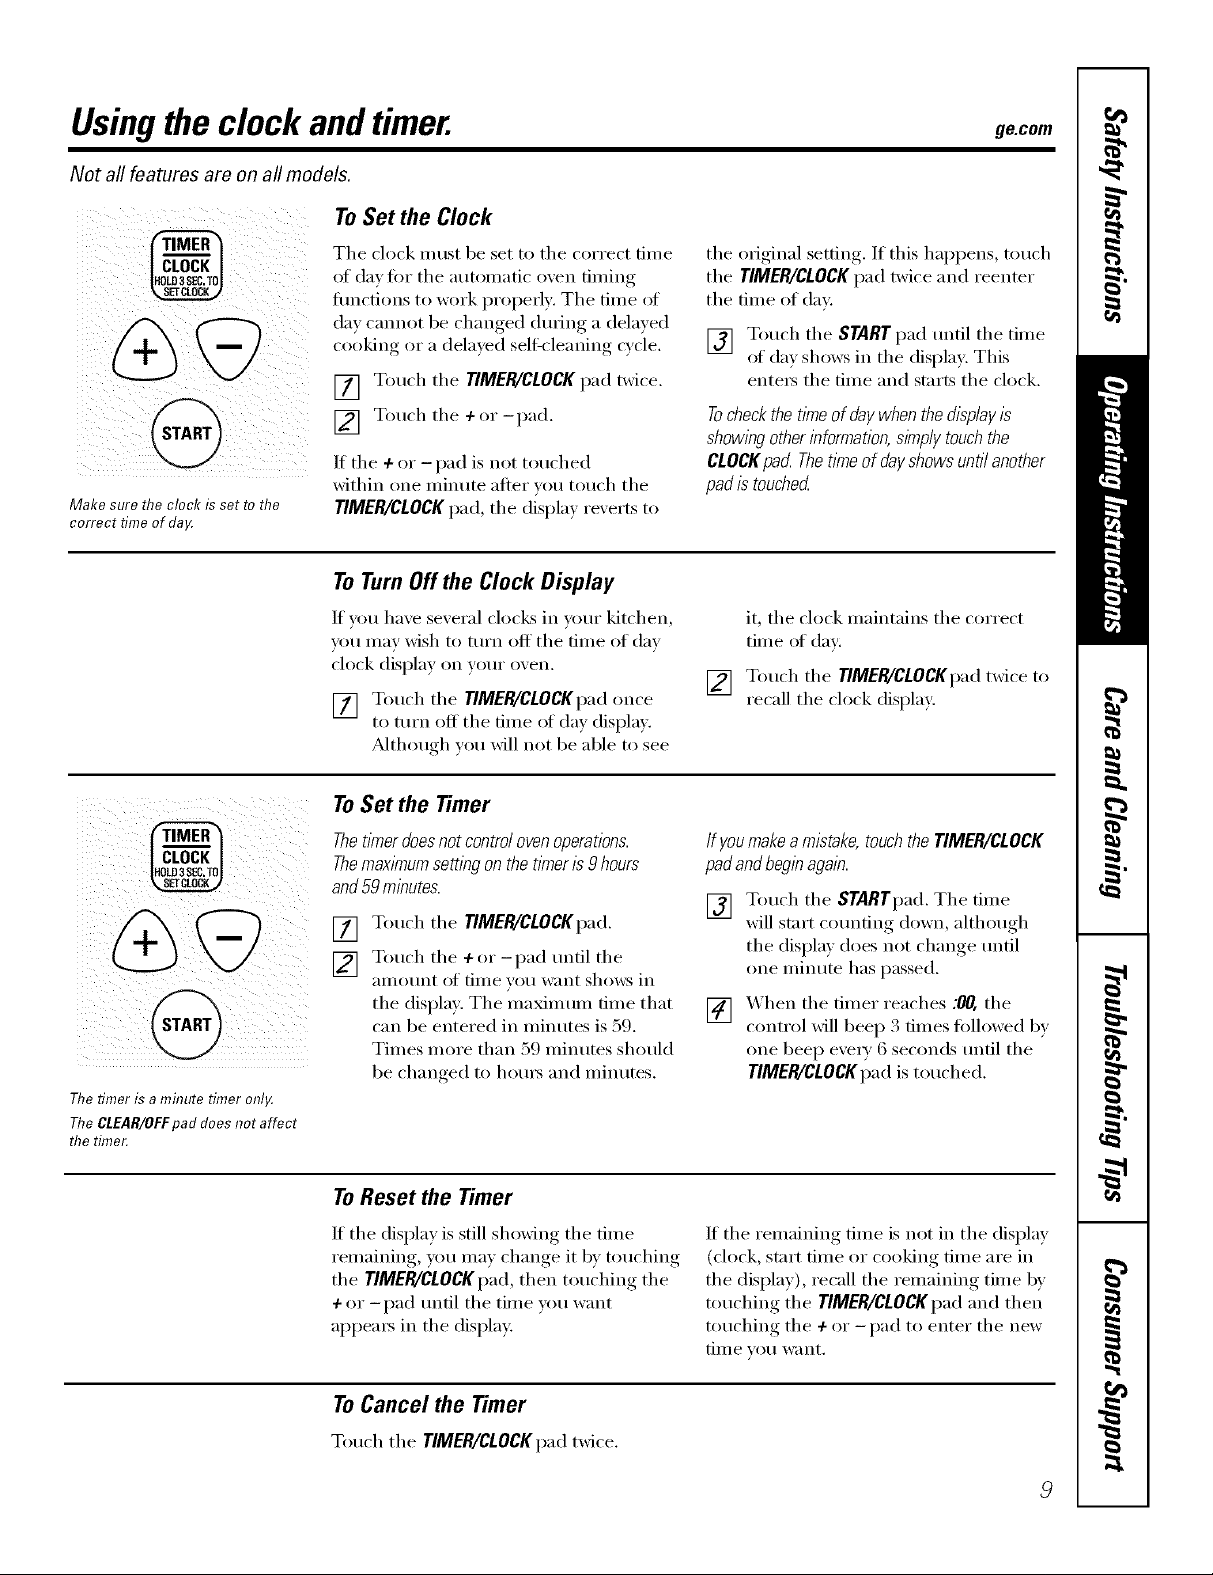
ToSet the Clock
Make sure the clock is set to the
correct time of da,_
The clock must be set to the correct time
of day fin" the atmnnatic oven timing
timcfions to work i)roperly: The time ot
day cmmot be changed dtwing a delayed
cooking or a delayed seltZcleaning wcle.
[] Touch the TIMER/CLOCK pad twice.
[] Touch the + or -pad.
If the + or -pad is not touched
within one minute after )ou touch the
TIMER/CLOCKpad, the displa) rexerts to
ToTurnOfftheClockDisplay
If you have several clock_ ill your kitchen,
yOtl lllay wish to ttlFn OIC_ the dine of day
clock display on your oven.
[] Touch the TIMER/CLOCKpad once
to turn off the time of day displa).
_Mthough you will not be able to see
To Set the Timer
the original .settiw,_. If this hal)pens, touch
the TIMER/CLOCKpad twice and reenter
the time of (lax:
[] Touch the STARTpad until the time
of da) shows ill the display. This
entei_ the time and starts the clock.
Tocheckthetimeofdaywhenthedispiayis
showingotherinformation,s/knpiytouchthe
CLOCKpad Thetimeof dayshowsuntiianother
padistouched
it, the clock maintains the correct
time of day:
[] Touch the TIMER/CLOCKpad txfice to
recall the clock display:
Thetimer is a minute timer onl,¢
TheCLEAR/OFFpaddoes not affect
the timer.
ThetlYnerdoesnot controi ovenoperations.
ThemaxlYnumsetting on thetimeris 9 hours
and59 minutes.
[] Touch the TIMER/CLOCKpad.
[] Touch the + or-pad until the
_lIllOllnt of tiille veil ]V_lilt shows ill
tile display. The maxinmnl time that
can be entered ill minutes is 59.
Times more than 59 minutes should
be changed to hom_ and minutes.
ToReset the Timer
If the display is still showing the time
remaining, you may change it 1)ytouching
the TIMER/CLOCKI)ad,then touching the
+ or -pad until the tim e wm want
appeai_ ill the display:
ToCancel the Timer
Ifyoumake a mistake, touchthe TIMER/CLOCK
padand beginagain.
[] Touch the STARTpad. The time
will stnrt Cotlnfillg down, although
the display does not change tmdl
one minum has passed.
[] X4hen the timer reaches :00, the
control will beep 3 times followed bv
one beep every 6 seconds until the
TIMER/CLOCKpad is touched.
If the remaining time is not ill the display
(dock, start time or cooking time are ill
the display), recall the remaining time by
touching the TIMER/CLOCKpad and then
touching the + or -pad to enter the new
tiin e Fori l_;int.
Touch the TIMER/CLOCKpad twice.
9
 Loading...