

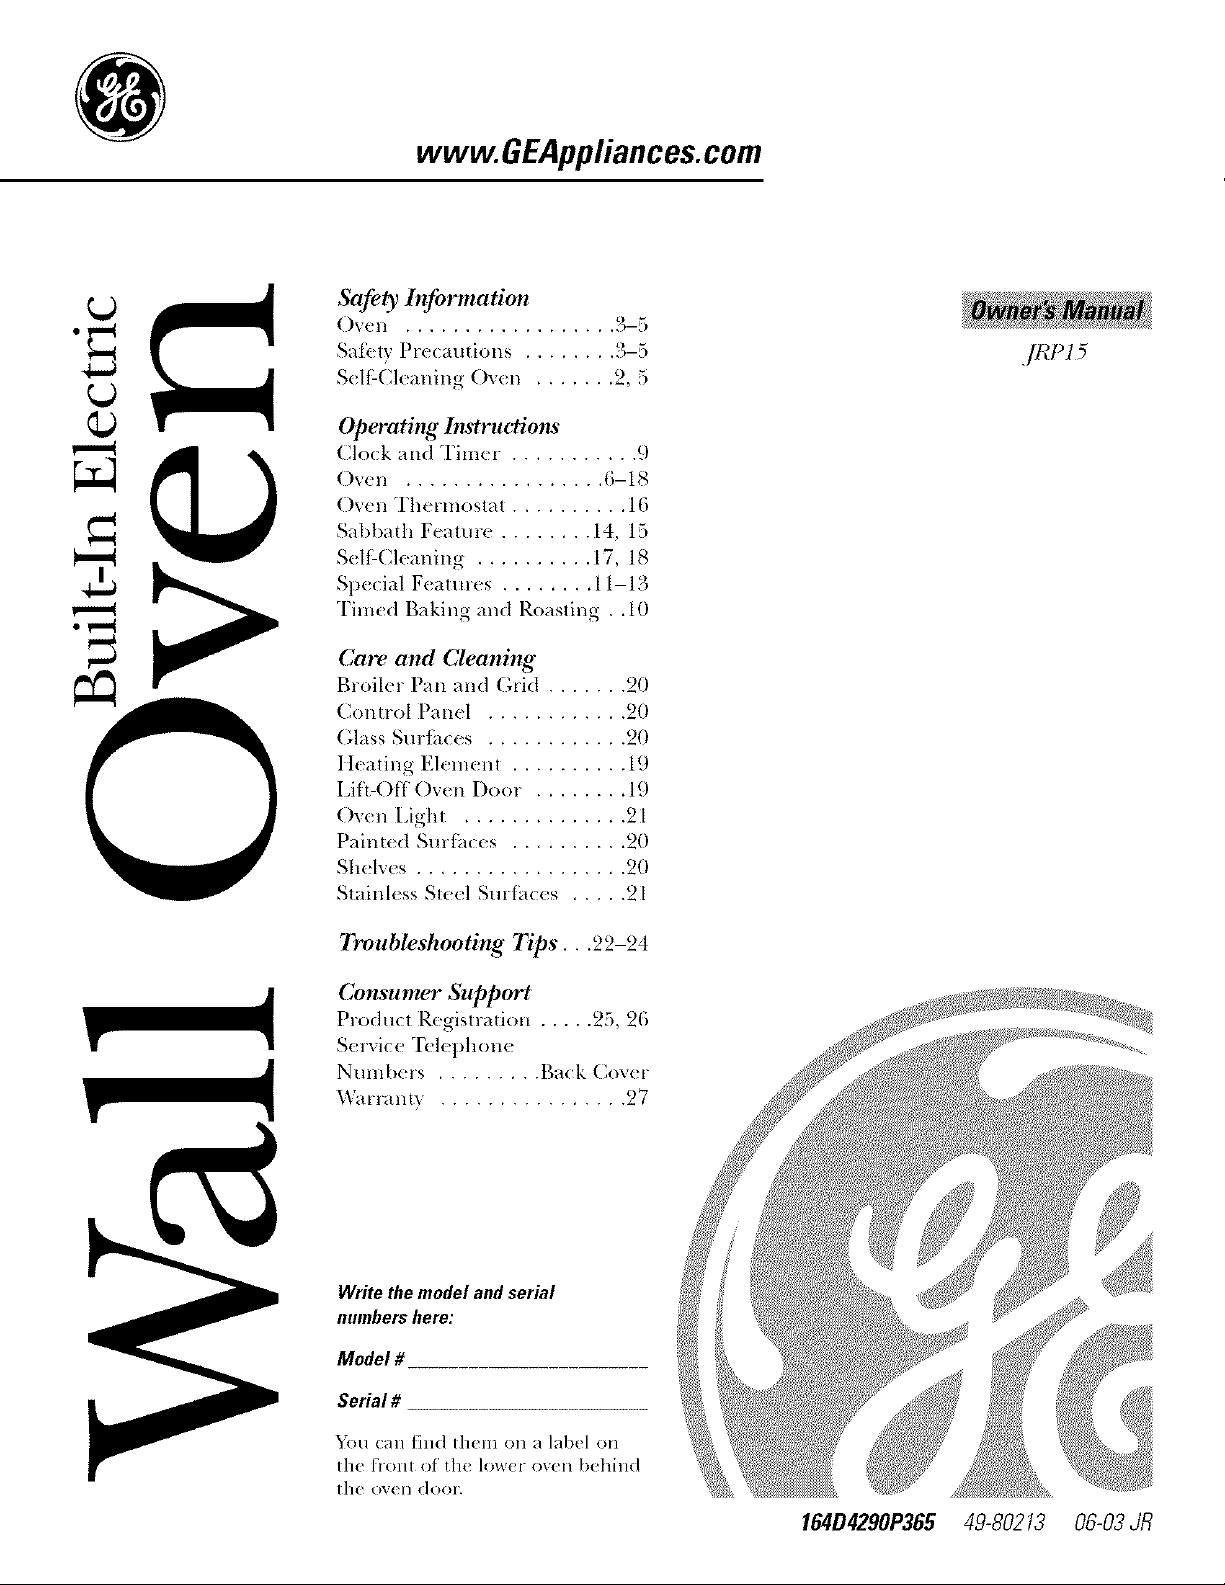
GE JRP15WW6WW, JRP15WW5WW, JRP15WW4WW, JRP15WW3WW, JRP15WW2WW Owner’s Manual
...
www.GEAppliances.com
Safety Injormation
Oven .................. 3-,>
Sat}. ly Precautions ........ ?,-5
S(If-(_leaMng ()v(n ....... 2, 5
Operating It_tru_Cions
Clo(k and Timer . .......... 9
Oven ................. 6-18
Oven Thermostat .......... 16
Sabbath Featmc ........ 14, 15
S( lt-Cleaning .......... 17, 18
Sp( cial F(atu res ........ 11-13
Timed Baking and Roasting . .10
Care and Cleaning
Broiler P_m mM Grid ....... 20
Comrol Panel ............ 20
Glass Surtimes ............ 20
I t( afing Elemem .......... 19
Liti-()tl'Oven Door . ....... 19
()x(n Light .............. 21
Palm( d Surth( es .......... 20
Shelves .................. 20
Stainl(ss S_eel Surfi_ces ..... 21
.#¢P 15
Troubleshooting Tips...22-24
Consumer Support
Product Rcgistradon ..... 25, 26
Servi( e T('lepho):e
Numbers ......... Back Cov(r
Warranly ................ 27
Write the model and serial
numbers here:
Model #
Serial #
You (an find them on a label on
tile front of' the lower oven behind
tile O_,'ell dool',
164D4290P365 49-80213 06-03 JR
IMPORTANTSAFETYINFORMATION.
READALLINSTRUCTIONSBEFOREUSING.
WARNING!
For your safety, the information in this manual must be followed to minimize flTerisk of fire or
explosion, electric shock, or to prevent property damage, personal injury, or loss of life.
IMPORTANTSAFETYNOTICE
The California Safe Drinking Water and ToxicEnforcement Act requires the Governor of California to
publish a list of substances known to the state to cause cancer, birth defects or other reproductive
harm, and requires businesses to warn customers of potential exposure to such substances.
The fiberglass insulation in self-clean ovens gives off a very small amount of carbon monoxide during
the cleaning cycle. Exposure can be minimized by venting with an open window or using a ventilation
fan or hood.
IMPORTANT"The health of some birds is extremely sensitive to the fumes given off
during flTe self-cleaning cycle of any oven. Move birds to another wel! ventilated room.
2
ww_.GEAppliances.com
SAFETYPRECAUTIONS
When using electrical appliances, basic safety precautions should be followed, including the following.
N Us_ this applian_ c oMv [in' its intcn& d N Ahvavs k(_p combustible wall coveting,
putpos( as described in this Owner's cmlains or drapes a safe distance from
Mamml. your oven.
_;ZBe sure your appliance is properly installed
and grounded bv a qualified technician in
accoMance with the p_vMded installation
insmmtions,
{4_Do not attempt to )-(:pair or replace any
part ot your ov(!I; unless it is specifical N
recommended in this manual..MI other
setMcing shoukt b< )-(,tbt red m a qualified
to( hnician.
{_+Have tlle installer show you th( location of
the cir( uit brcak_ r or fuse. Mark it for easy
F( f(:X'(:l;Ce,
_g Befbr( perfbtming any service, disconne(t
the oven power supply at the household
distribution panel bv removing the ihse or
swit( hing ofl_the (ircuit brcaken
{_+I)o not leave child rcn alonc----chiMrct;
shouM not be lef_ ahme or unattended in
an area whetv an appliance is in us(. The}
shoukl nev(r b( allow(:d to sit or strum on
any part ot the applian(e.
_;gDo not allow anyone tv)(limb, stand or
hang on th_ doon Th( T (ould damag_ the
oven, or cause s,.xere personal il!jxu>
{_;Be stir( die ov(n is s(curdv instalk d in a
cabinet that is firml 7,auached to the hous(
structxtr,c. Never allow anyon(: to climb, sit,
stand or hang (m th_ oven doon
_;_,M',_v_yskeep dish t*)wels, dish cloths, pot
holders and other linens a sail: distance
f}OlXl VOXIY OV(ql,
_ Alwavs k('q)wooden and plastic utensils
and canned tood a sate" distance ax<g flom
yOU;" OV,L"I;.
_>g"I_'a(h chikhcn not to plav with the
(omrols or any other part of the oven.
{4_Do not stor_ flammabl_ malerials in
all OVelX,
CAUTION: of,. .>
children should not be stored in cabinets
above an oven; chil(trcn climbing on th(
ox<n to reach itxms couM b( s( )iously
it_jmcd.
_ Ncv(r wear loose-titting or hanging
garments while using the applian( e.
Be careful whet; reaching tor items stored
in cabinets over the ov(n. Flammable
matcxial coukl be ignited if brought in
c(mtact with hot smt_m(s or h(ating
(_l(!llletlt,S a;;d x;x_lv (at;se s(w(wc bx;l-;;s.
_ [rse only dU pot hold(rs--mois_ or damp
pot holders on hot sut _itc_s m W result in
burns flom steam. Do not let pot hold< rs
mu(h hot heating elemems. Do not xlse
a towel or other bulk v cloth.
_ Nev('r lear( the oxen door open whet; y:)u
at-(: not war* hing the oven.
3
IMPORTANTSAFETYINFORMATION.
READALLINSTRUCTIONSBEFOREUSING.
WARNING!
SAFETYPRECAUTIONS
_XFor y..,ur sah'tx, n(_'er use your appliance
ibr warming or headng the rOOnL
_¢_Do not [el cooking grease or ofll(r
flammable mat_ :ials accumulaw in
Of l:(_t:" [h( ov(tl:,
_;_Do not use water on grease fires.
Ne',er pick up a flaming pan. Turn
{l_e (omrols ofl_
Flame in the oven can be smothered
completdy by closing the oven (loot and
turning the oven oti" or 1)) using a multi-
pu:pose dry chenfical or toan:-typ( fire
exfit:guish( ::
_2Never leave jars or cans of fat drippings in
01" llCal" y()l:r OV('I:,
_; Do not stotc or use combustible mat_ rials,
gasoline or ofll(r tlammable vapor5 and
liquids in fl:e vicini W of rids or any ofl:(r
appliance.
_ Stand away fl-om file oven when opening
dm oven dool: ttot air or steam whith
escapes tan (ause burl:s u:) hands, time
and/or ey(s.
{4_;Do not hea_ unolx n(d fi>od containers.
Pressure could buiM up and ill( comainer
(ould burst, causing an i:l,}ut>
_ Keep the oven vent unob_U'ucted.
{_;Keep dm ow*n fl*e flom grcas( buildup.
_2Place the oven shelf it: the desired position
while the oven is cool. If shelves must be
handkd when hot, do not let pot hoMer
contact the heating elements.
{_When using cooking or roasting bags in
d:e ov(n, follow the lllAIIIIIilCHII'(!I"S
directions.
_2 Do not touch the heating elements or th(
it:tailor sut [i_c( of the oven. These surfi_c(s
may be hot enough m butn exert though
th_3"are dark in colo:; During and atk'r
:is(, do not {ouch, or le{ clothing or other
flammable mamfials contact any imetior
area of dm oven; allow sufliciem time tot
cooling first.
Potentially hot surfaces include oven vent
openings, smlimes near tl_e openings,
cr:wices around the oven do(n; the edges
of the window and metal ttJn: parts above
th( doom
REMEMBER:"Fh( inside smlime of die oven
may be hot wh(n the door is opened.
_ Pulling out the shelf to the stop-lock is a
(onvenience in lifting hea:y fbods. It is also
a precaution agains_ burI:s ['ronl touching
hot surfhces of the (loot or oven _Mls.
@
I)O HOt llS(: Ill t. oven _o dr:" newspapels.
If overheated, they ca:: cat(h on fire.
Do Ilot llSe the OV('II 1()1"a storage arta.
Items stored in an oven can ignite.
@
Do not lear( pap(r products, cooking
utensils or tbod in the oven when not
ill ltSe,
?'_Mk:r broiling, always mk_ the broiler pan
out of tl_e oven and clean it. Leftover
grease in tl_e broiler pat: can catch fire
next time you use tim pan.
{_;Clean only par_s listed in dfis (7)_r_(:_"s
Matmal.
_;2Do not use alumim,m ti:il to line (:wen
bottoms, except as suggested it: this
n:anual, hnproper installation of
alumimm_ fbil may wsult in a risk
of el(x ttic sho(k or fire.
4
ww_.GEAppliances.com
COOKMEATANDPOULTRYTHOROUGHLY...
Cookmeat andpoultry fl?oroughly--wTeatto at least anINTERNALtemperatureof 160°Eandpoultry
to at least an INTERNALtemperatureof 180%Cookingto fl?esetemperaturesusuallypmtects against
foodborneillness.
SELF-CLEANINGOVEN
_E Do not clean tile door gasket. "File door
g:_sket is essential f_)ra good seal. C_rc
should be taken not to [ub, damage or
mov( the g_sket.
)_ I)O t:O{ ttS(! OV(_n cleal:et-s. No COllltl:(!:( i_tl
ovel: clea::er or ovel: litter [trolc(tive
coasting otan} kind shoukt lie :ls(d it: or
around _my partoftit(oven.Residueflom
oven cleaners will dama_ge d:e inside of the
ov(n when d:e self-ck:an cycle is us(d.
_EBefk:reselFcleaning, lheoven,remow file
broilerpan, gridand othercookware.
_; Be sm,._ towipe ul)excess spillage betk)re
starting d:e self:deaning operation.
@ If fl:( seltk'leaning mode malflmctions,
turn the ov(n ofland disconnect the
power suppl?: It[ave it serviced by a
qualified t,.:chnician.
READANDFOLLOWTHISSAFETYINFORMAtiONCAREFULLY.
SAVETHESEINSTRUCTIONS
5
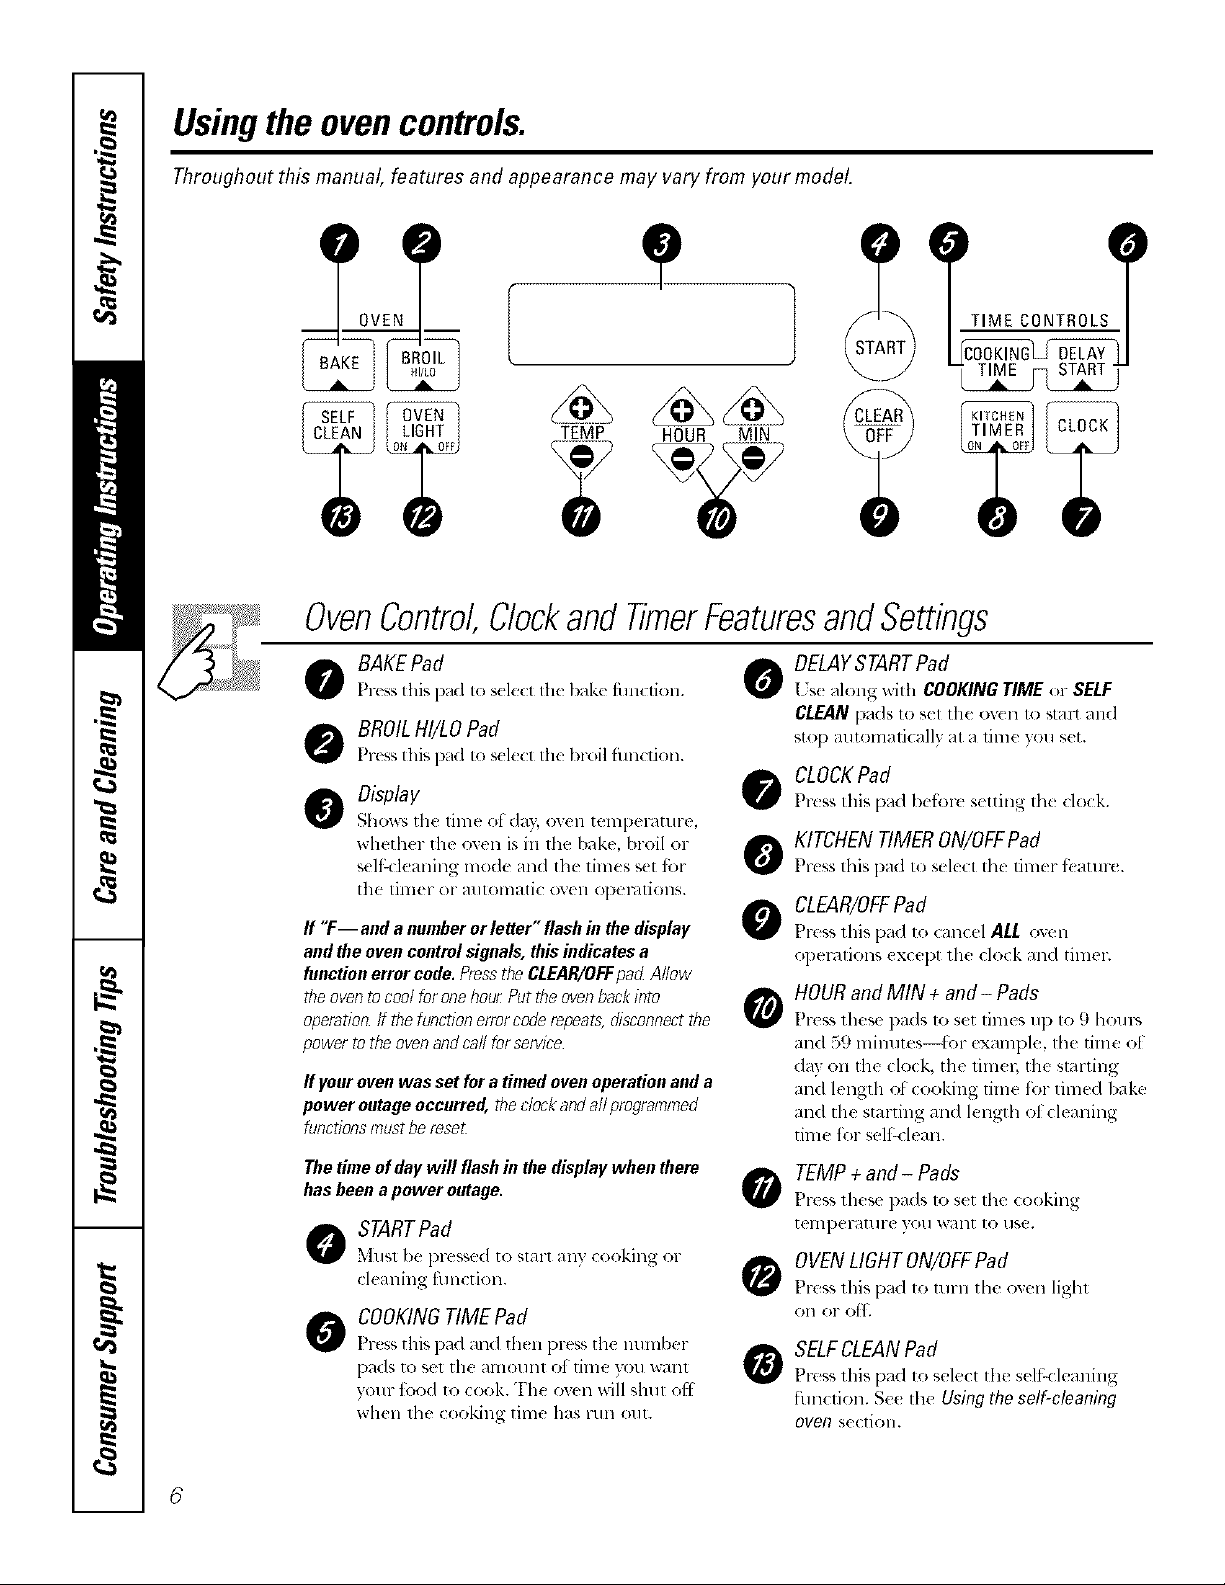
Usingthe ovencontrols.
Throughout this manual, features and appearance may vary from your model.
) 1
[
BAKE
OvenControl,Clockand TimerFeaturesandSettbgs
DELAYSTARTPad
o BAKEPadPrtss this pad to s(lect 111(bak( thnclion. 0
O BROIL HI/LO Pad
Press this pad to s( lect the broil finlclion.
o Display
Shows the lime of da_, oven temperature,
wheth(r the oven is in the bake, broil or
s(lf-clcaning rood( and th_ tilll(:s set }}._r
the tim(r or automatic OV(ll ol)emtions.
ff "F-- and a number or letter" flash in the display
and the oven control signals, this indicates a
function error code. Pressthe CLEAR/OFFpad Al/ew
the ovento cool for one/?ourPut d?eovenbackinto
operation ff the functionerror code repeats,disconnect d?e
power tothe oven and call forservice
ff youroven was set for a timed oven operation and a
power outage occurred, theclockand all programmed
functions must berese£
[ s( along ',',ith COOKING TIME or SELF
CLEAN pads to s(I th( ov(n to stair mid
s _l_ _t n_li(_ y tin( )'_t s(
CLOCKPad
0
Press this pad/)efbr( s(tting lh_ clock.
KITCHENTIMERON/OFFPad
O
Press this pad to sele(t the tiln( r f(attne.
CLEAR/OFFPad
0
Press lhis pad to can(el ALL o_en
ol)emfions except Ill(: clock and tilllel-.
HOURand MIN + and- Pads
Pre_s these pads 1o set limes u l) to 9 horns
and 59 minutes_f'or example, the time ot
day on the clock, the time 1; the starting
and length el cooking time ii_l"timed bake
and the starting and length ot cleaning
time frw self:_'lean.
)
TIME CONTROLS
The time of day will flash in the display when there
has been a power outage.
O STARTPafl
*_ltlsl 1)e ])l-essed 1o slaF[ ally ( o(;killg or
cleaning function.
O COOKINGTIMEPafl
Press this pad and th(n press tile number
pads to set tile amount of time you want
your food to cook. The oven will shut ell
when the cooking time has run out.
6
O TEMP +and- Pads
Press these pads 1o set lhe (ooking
[(?llll)(?l;R[/ll'( yotl _*_]ll[ 10 lille.
OVENLIGHT ON/OFFPad
F're_,s this pad to mrn the oxen light
(Ill or o11_
SELFCLEANPad
0
Pl'e_s this pad to select the sclfZ-clcmfing
timction. Se( the Using the self-cleaning
oven st'( tiOIL
Usingthe oven. www.GEAppliaeces.oom
Toavoid possible bums, place the shelves in the desired position before you turn the oven on.NOTE: 30" ovens
(shown) have 7 shelf positions. 24" and 27" ovens have 4 shelf positions.
Before yon begin..,
NOTE:30" ovens (shown)have 7
drelfpositions 24" and27" ovens
have 4shelf posigons,
The shelves haw stop-locks, so that when
placed corr('ctly on the supports, they will
stop bet}.._re,.:oming (onlpletel} o111,and
will not tilt.
When placing and rcmoving cookware,
To remove a shelf, pull il towar(1 you,
lilt the lront end u l) and pull it out.
Toreplace, pla<e the {rid o{ the shelf
(StOl)qo(ks) on Ihe SUl)pOI_L,lilt up the
tl'Ollt alld push the sh{lf in.
ptdl th/sh(lt out to the 1)llnlp on tll{
shill support.
How to Set the Oven for Baking or Roasting
[] Pr(:ss lilt BAKEpad.
Type of Food 24" & 27" 30"
[] Pr(!ssthe TEMP+or- padstos,et
the desir,ed lellll)el'_/liire.
Frozenpies BorC CorD
(oncookiesheet)
[] Press lh( START pad.
[] (iheck t;._od ti)r don{ n,.:ss at
minimmn time on r,.:cilx. (*.ook
long_ r if n(c(ssm T.
[] Press the CLEAR/OFFpad when
cooking is colnplel,..
NOTE:Acoolingfanmayautomaticallyton?on
Angelfoodcake, A B
buedtorpoundcakes
Biscuits,muffins, BorC CorD
brownies,cookies,
cupcakes,layer
cakes,pies
Casseroles BorC CorD
andoff tomot internalparts Thisisnormal,and
thefanmaycontinuetorunevenafterd?eovenis
tornedof_
OvenShelf Positions
Cut slits in the foiljust like the grid
Preheating and Pan Placement
Preheat tile oven it tile recipe calls f_r it.
"['_)pr,:heat, set tile oven at tile correct
t(nlperature. Preheating is nec(ssa W t_)r
good results when baking cakes, (ookies,
pastly and breads.
Forovenswidloutapreheatindicatorlightor
tone,preheat10minutes
Aluminum Foil
X_%ucan us( altmlinum f)fil 1o line the
broiler pall and broiler gli(1. I Iow(_'el;
you rot/st mold tile tifil tightly to tile glid
and cut slits ill it just like th( grid.
Alaminumfoilmayalsobeusedto catcha
spillover
Baking results will be better it baking
palls are (Telltt_Yed ill tile ox,ell as Hl!lch
as possible, l)ans should not touch ea(h
other or tile walls of tile oven. It )(al
need to use two shelves, stagger the palls
SO one is not dircctlv above the othel;
and leave approxin_ltely 1½" bel,,veen
pans, fronl lhe front, back and sides of
lhe wall.
Never entir.zqv cover a shelf with
ahnnimml t;_)il.This will (lismfl) tile heat
circulation and result in poor baking.
.\ smaller sheet el tifil may 1)eused lo
catch a spillover by placing it on a low(r
sh(lf severed irlch(s below the ti.,od. 7

Usingthe oven.
How to Set the Oven for Broiling
Leave the door open to the broil
stop position TBedoor stays open
by i_self,yet theproper _empera_ure
is mainta#wd #7the oven
[] Place th( meat or fish on Ill< broil(r
grid in the broiler pan.
[] Follo,,_ su%est( d sh( 1tpositions iu
the Broiling Guide.
/f yourovenisconnectedto208volts,raresteaks
maybebroiledbypreheatingdTebroilerand
positioningtheovenshe.Ifonepositionhigher
[] Press the BROILHI/LOpad once for
HIBroil.
'Ib change to LOBroil, press the
BROILHI/LOpad again.
[] Press Ill_ STARTpad.
[] When bloiling is finished, l)ress flvu
CLEAR/OR:pad.
Broiling Guide
24"&2T 24"&27"Ovens 24"&27"Ovens 30"Ovens 30"Ovens 30"Ovens
Quantity and/ Ovens Shelf First Side Second Side Shelf First Side Second Side
Food orThickness Position Time(rain.) Time(rain.) Position Time(rain.) Time(min.) Comments
GroundBeef I lb.(4patties} C 10 7 E 10 7 Spaceevenly.Up
Well Done 1/2to 3/4" thick E 10 9 to 8 pattiestake
Beef Steaks
Rare 1"thick C 6 5 E 8 6 Steakslessthan
Medium 1to 1½ Ibs. C 8 6 E 10 8 1" thickcook
Well Done C lg 11 E 12 10 throughbefore
Rare 1½"thick C 10 7-8 E 10 8 Panfryingis
Medium 2 to2½1bs. C 15 1_16 E 15 1_16 recommended.
Well Done C g5 20-25 E 25 20-25 Slashfat.
Chicken 1whole A 35 10-15 C 25 10 Reducetime about
LobsterTails 2-4 B 13-16 Donot C 13-16 Donot Cut111roughbackot
FishFillets 1/4to 1/2" thick C 5 5 E 5 5 Handleandturn
HamSlices 1" thick B 8 8 D R 8 increasetime5 to
(precooked) 10minutesper
PorkChops
Well Done
LambChops
Medium
Well Done
Medium
Well Done
2 to 2Vz[bs., 5to 10minutes
split lengthwise persideforcut-up
6 to8 oz.each turnove_. turnove_ shell.Spreadopen.
2 (1/2"thick) C 10 10 E 10 10 Slashfat.
2{1"thick) about1lb. B 13 13 D 15 15
2 (1"thick) about10
to I2 oz.
2(1½"thick)aboutI lb.
C
C
C
B
10
12
14
17
9
lO
12
1_14
E
E
E
E
10
12
14
17
9
10
12
1_14
aboutthe same
time.
browning.
chicken.Brush
eachsidewith
meltedbutten
Broilskin-side-
downfirst.
Brushwith melted
butter before
broilingandafter
half of broiling
time.
verycarefully.
Brushwith lemon
butter beforeand
duringcooking,if
desired Preheat
broilerto increase
browning.
sidefo_1½"thick
orI_me-curedham.
Slashfat.
8

Usingthe clock and timer, ww .CEA .lia.co .com
To Set the Clock
Make sure the clock is set to the
correct time of dag
Thetimer is a mfltute timer onlg
Thetimer does not control oven
operations Themaximum setting on
the timer is 9 hours and 59 minutes
Th( dock must be set to the correct time
otday fbr tile uut(nnntic t)_,ell timing
finlctions to work prop_ rl}. "File time of
day cannot be changed dming a timed
baking or sellk:leaning (3*cle.
To Set the Timer
[] Pressth_ KITCHENTIMER
ON/OFFpad.
[_] t)re_sthe HOURand MIN+ or -
pads until 1he amollllt el lim(
you want shows ill the (lispla>
If you make a mistake, pl*ss
KITCHENTIMERON/OFFand
begin again.
[] t)re_s th{ CLOCKpad.
[] Press the HOUR and MIN + or -
l)_(ls Io s(I the lime el da}.
[] Press tll_ STARTI)ad.
[] Pre_s 1he STARTpad.
AfterpressingtheSTARTpad,SETdisappears,
thistelbyouthetimeis tauntingdowo,although
fl_edisplaydoesnotchangeuntiloneminute
haspassecL
[] Wh{n Ihe timer reaches :00,file
( 11-)l _Cllb_e) >1" (s foil )_(1
by one beep eve13'6 seconds tllllil
the KITCHENTIMERON/OFFpad
is 1)r_ss{d.
fl}e 6 secondtone canbe canceledby following
the steps_nthe Specialfeatares of youroven
controlsectionunder Tonesat the Endof a
fimedCycb
To Reset the Timer
If the display is still showing the time
remaining, you 1_1}1}chm_ge it by l)ressing
tile KITCHENTIMERON/OFFpad, lhen
press file HOURand MIN÷ or - pads
until th{ time ?ou want appears in
the displaF
To Cancel the Timer
Pressth{ KITCHENTIMERON/OFF
pad lxvk e.
If the r_ lnaining time is not in tile display
(clock, delay starl or cooking time are in
tile display), recall the remaining time by
pressing tile KITCHENTIMERON/OFFpad
and then pressing tile HOURand MIN+
of -- p_l(Is to clltel" th(' lleW tiIll(' VOtl
W_IIIt.
9
 Loading...