

Page 1

COOKTOP
Page 2
Help us
help you...
Before
your
read this book carefully.
It is intended to help you operate
and maintain your new
properly.
Keep it handy for answers to your
questions.
If you don’t understand something
or need more help, write (include
your phone number):
Consumer Affairs
GE Appliances
Appliance Park
Louisville, KY 40225
Write down the model
and serial numbers.
You’ll find them on a label on the
bottom of the
These model and serial numbers
are
on the Consumer Product
Ownership Registration Card that
came with your
sending in this card, please write
these numbers here:
Number
Number
Use these numbers in any
correspondence or service calls
concerning your
If you received
a
cooktop...
Immediately contact the dealer (or
builder) that sold you the
Save time and money.
Before you request
service...
Check the Problem Solver on
page 14. It lists causes of minor
operating problems that you can
correct yourself.
Your Direct Line to General Electric
The GE
Centef 800.626.2000
2
Page 3
Page 4
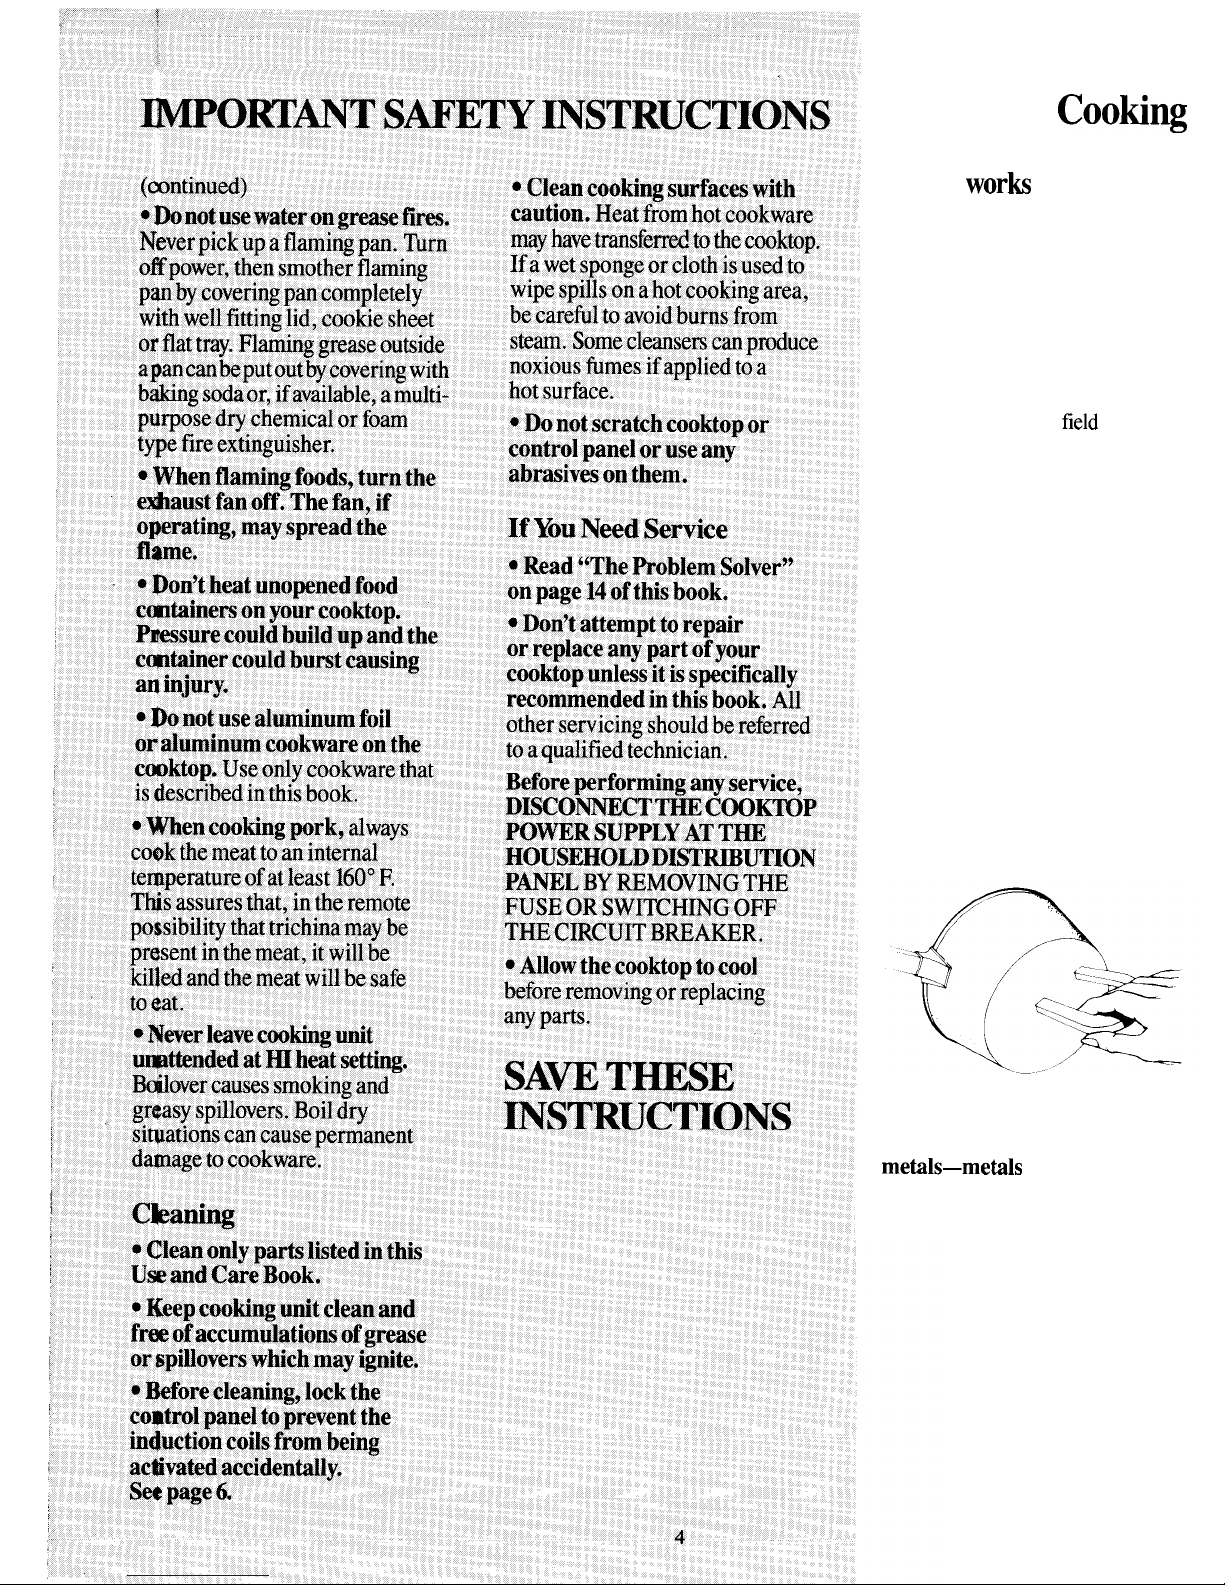
Induction
How it
When you touch ON, select a
power level and center a cast iron
or steel pan on the cooking
surface, the induction coil circuit
detects the pan and allows the
induction coil to be activated.
This high-frequency coil,
located
just below the cooking surface,
generates a magnetic
that causes
the molecules of ferrous metal in
the pan to vibrate. Molecular
friction produces heat.
The pan begins to heat immediately
and, in turn, heats the contents.
The cooking unit itself does not
heat.
The only heat in the cooking
unit is that which is transferred
from the cooking pan, and no heat
is generated unless a pan is placed
on the cooking area.
Power response is virtually
instantaneous,
for precise cooking
control. No time is lost waiting for
the cooking unit to heat. And no
cool-down time is required after
cooking.
Remember, magnetic induction
cooking requires the use of
cookware made of ferrous
to which magnets
will stick, metals such as iron or
steel.
Page 5
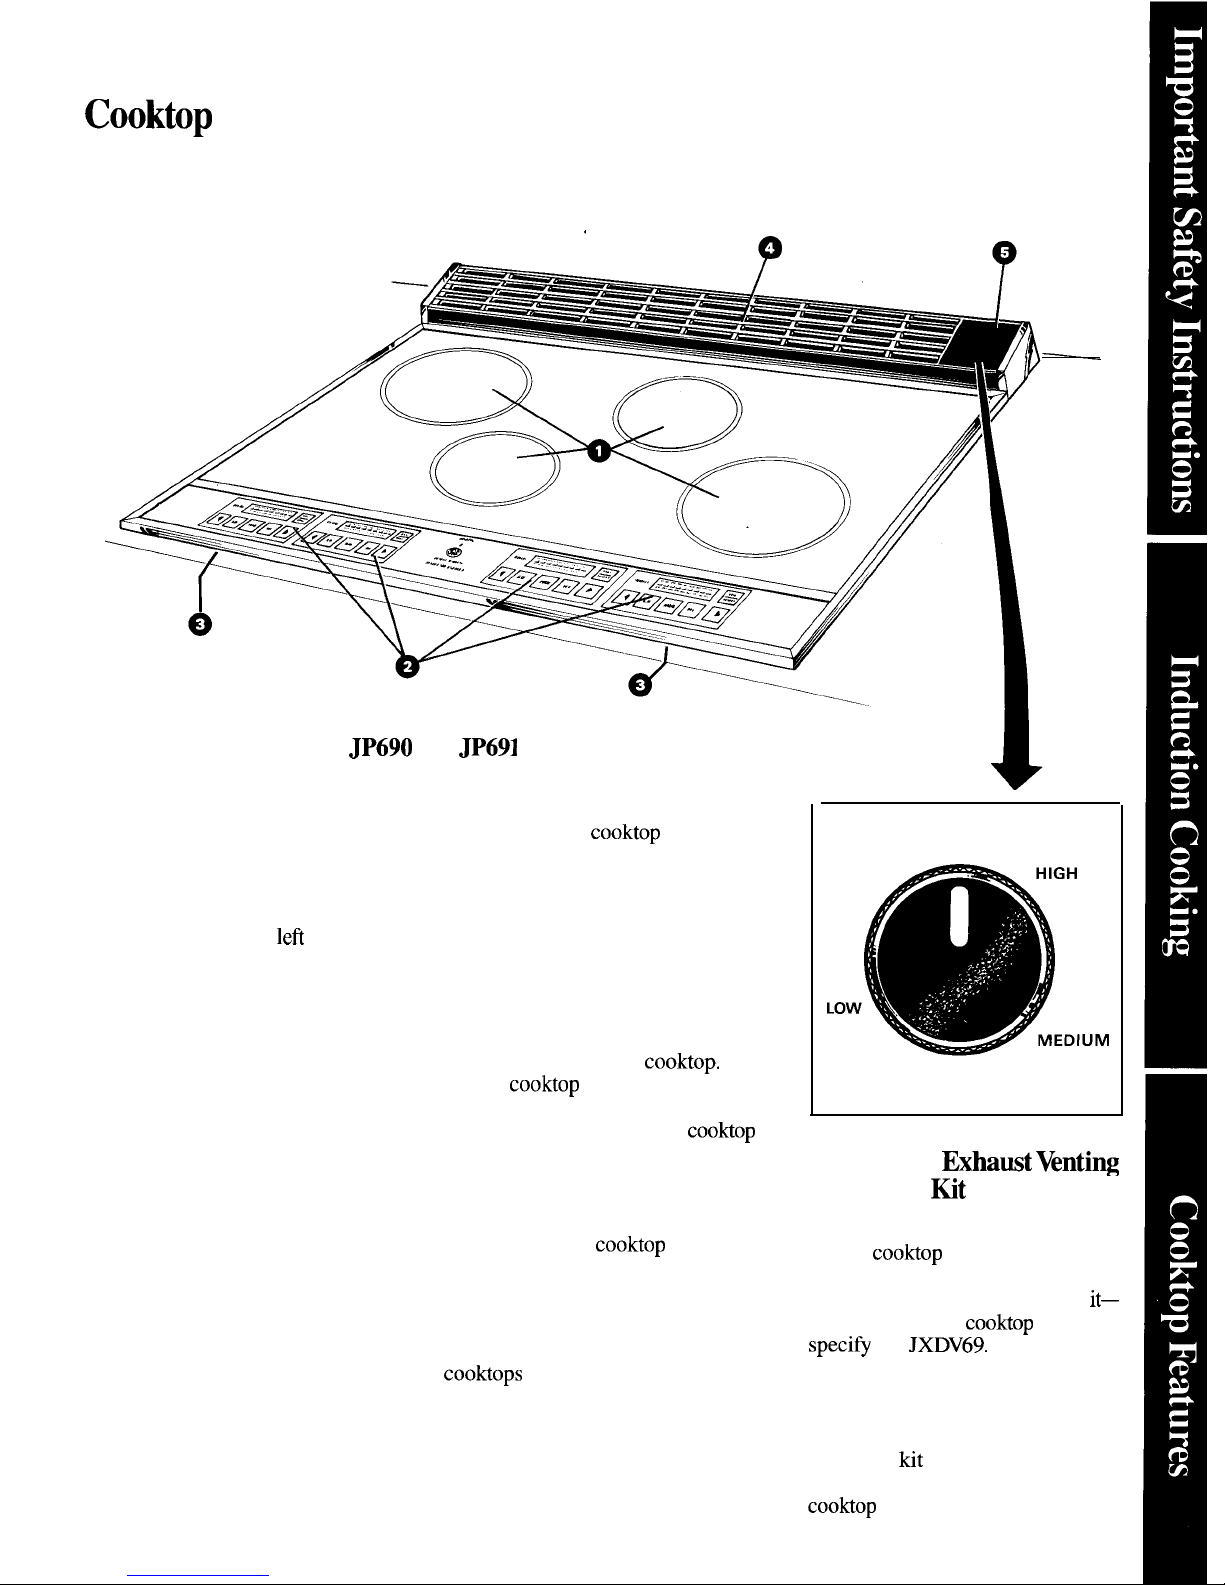
Features
Models
and JP691
1. Cooking Surfaces—two
6-inch
and two 8-inch units.
2.
Electronic Touch Control Panel.
Each cooking surface has its own
control. Controls for the two left
units are located at the
of the
panel. Controls for the two right
units are located at the right of the
panel. See page 6 for Electronic
Touch Control Panel Features.
3. Air Intake Openings on the
underside of the cooktop allow
air to circulate under the cooking
surfaces to keep the induction
coils cool when cooking.
Note: You’ll hear a slight noise
when cooking—the sound of the
automatic fans circulating the cooling
air. Fans go off automatically when
cooking units are turned off.
4. Air Vents at rear of
If your cooktop is equipped for
downdraft exhaust venting, smoke
and cooking odors from the
are drawn down and out of the
kitchen through these vents.
Otherwise, cooling air circulating
under the cooking surfaces flows
up and out of the
through
these vents.
5. Downdraft Venting Control
Area
contains control knob for
downdraft venting system on
so equipped. This
control lets you select an infinite
variety of exhaust fan speeds.
OFF
VARIABLE SPEED VENT
Downdraft
Accessory
—
(optional at extra cost)
If your cooktop did not come
already equipped for downdraft
exhaust venting, you may convert
contact your local
supplier;
Kit
This kit
includes blower, vent connection,
power connection, grease filter,
and a variable-speed control which
replaces the blank plate in the rear
grill. This
ductwork required to vent the
to the outside.
5
Page 6

Features of Your Electronic Touch Control
Q
When the cooktop is first
connected, or when power is
restored after a power failure,
the entire display lights up for 15
seconds. Next, LOCKED appears
for 8 seconds to inform you that the
goes blank but
locked until you unlock it (see
instructions below).
LOCKED
I
TOUCH TWICE
TO LOCK/UNLOCK
Your
has a provision for
locking the control panel to prevent
the cooking units from being
activated
the control panel and to keep children
from operating the
Touch the GE symbol in the center
of the control panel button twice
within 3 seconds and all pads
become inoperative. The word
LOCKED appears in the control
display for 8 seconds and a small
green light directly above the GE
symbol lights up. No cooking
surface can be activated until the
lock is released. If you try to turn
on any cooking surface, the word
LOCKED will appear in each
control display.
To unlock the control panel,
touch the GE symbol twice within
3 seconds.
REAR
ON
—
246a
OFF
1
I
1. ON/OFF.
Touch this pad for
To raise desired cooking heat,
the desired cooking surface before
press pad with right-pointing arrow
making any additional settings.
(4) until exact heat is reached on
If no heat setting is made within
control display. To lower cooking
15 seconds, the induction coil
heat, press pad with left-pointing
automatically shuts off.
arrow
until desired heat shows
To turn the induction coil off after
on control display.
touch ON/OFF and remove
I
the
the cooking surface.
2. Power Control Area. Each
cooking surface has its own power
level pads that let you select LO,
3. &4. Fine-Tuning Pads. Each
cooking surface has its own pads
that let you fine-tune heat settings
between LO, MED and HI. When
you press and hold one of these
pads, cooking heat will change in
one-step increments and color bar
will show exact heat setting.
Remove finger when cooking
heat has been adjusted.
Sometimes grease or water
droplets on the power level pads
will prevent you from changing
the heat level up or down. To
correct this, turn the unit off by
pressing the ON/OFF pad.
Then clean the power level
pads with a cloth dampened
with warm soapy water.
5.
Control Display Bar.
Colored
bar lights and shows heat setting in
use. When new setting is touched,
bar changes to indicate new setting.
6
Page 7

How to
Your Induction
How to
Grain Rice
1 cup rice
2 cups water
1 tsp. salt
1 T. butter or margarine (optional)
In 6-inch steel saucepan, combine
rice, water and salt. Add butter or
margarine if desired. Place pan on
center of circled cooking area.
Step 1:
Unlock the
See page 6.
Step 2:
Touch ON/OFF. You now
have 15 seconds to select a cooking
power level. If heat setting is not
entered by then, the
automatically turn off and you
must touch ON/OFF again.
Step 3: Touch HI (9). The control
display bar will show color all the
way up to HI (9), telling you the
is now on and the selected
heat setting is HI
(9).
Step 5: Touch the
arrow pad until the colored heat bar
goes
to 4 to reduce heat.
Color will disappear from all
segments of control display heat
indicator bar greater than 4.
Step 6: Cover tightly with lid and
cook approximately 20 minutes,
until
water is absorbed and rice
is tender.
Step
7:
Touch ON/OFF. Power to
the induction coil will shut off and
the control display light will go out.
If you remove a pan or move
it off center from an activated
cooking surface before you touch
ON/OFF,
the cooktop will beep,
the control panel will flash, and
power to the induction coil will
shut off.
If you put the pan back on or
center it on the cooking surface
within one minute,
flashing and
beeping will stop and cooking will
continue.
If you touch the ON/OFF
within one minute of the time
you remove the pan, flashing and
stop, the control display
light will go out, and power to the
induction coil will shut
off. To start
have to touch
a heat setting.
Step
4:
Bring rice to boil on HI (9)
setting (approximately 3 minutes).
Stir with fork.
7
CAUTION: To help prevent
scratching, do not slide
across the cooktop surface.
Page 8

Cookware to Use
Some of your pots and pans will
probably give good results on the
induction
Which ones?
Find out this way:
Put a small amount
of water in
the pan and center it on one of the
circular heating patterns. Touch the
ON and HI pads. If the pan is
suitable, it will heat in seconds. If
the pan is not suitable, the control
display will flash on and off and the
pan will not heat.
When you shop for suitable new
cookware, take a magnet along and
test before you buy.
for cookware made from
magnetic stainless steel, cast iron,
enameled steel and combinations
of these materials.
Do not use aluminum, or
aluminum clad cookware, copper
or copper clad cookware, aluminum
foil, glass/ceramic cookware and
some stainless steel that will not
attract a magnet.
Round pans give best results.
Square or rectangular pans do not
heat uniformly.
Do not use a pan less than 4“
across the bottom. The cooking
unit is designed so it will not
accidentally start if very small
steel or iron utensils (less than 4“
across the bottom) are placed on
the cooking surface when the unit
is on—items such as steel spatulas,
cooking spoons, knives and other
small utensils.
The bottom of the pan need not
be perfectly flat. Although pans
with rims or ridges are acceptable,
give best results.
We do not recommend frying pans
over
in diameter for foods
that are not stirred or redistributed
in the skillet while frying—foods
such as fried eggs, French toast or
pancakes. The outer edges of an
oversize skillet develop less heat
than areas within the
center
and foods in the outer area may
be undercooked.
However, foods that are stirred
like scrambled eggs, or moved
about like chicken, can be cooked
successfully in skillets up to
(10%” across
the bottom) because
the heat is distributed within the
food when you stir or redistribute
it while it is cooking.
When speed is desirable,
such as
when boiling water, use lighter weight
cookware. Lightweight pans heat
and cool rapidly, but may not heat
as evenly as you like. Do not use
extremely thin pans-they may warp.
For frying bacon, pancakes or
other foods where small amounfi
of fat are used in the pan,
use
heavier pans that distribute heat
more uniformly. Cooking results
will be more even, and there will
be less chance of scorching.
For most types of boiling,
simmering and sauce making,
lightweight magnetic stainless steel
cookware works well providing the
proper heat setting is used.
Enamel-coated steel or cast iron
cookware
may also be used.
Some steel pans have a layer
of aluminum embedded in the
bottom.
Test them carefully with a
magnet before you buy. Some can
be used in induction cooking.
Others cannot.
of cookware we found
suitable for the induction
Brand
Material
Regal Ware
Stainless Steel
with Carbon
Core
General
Porcelain-
Housewares
on-Steel,
Cast Iron
on-Steel,
Stainless Steel
on-Steel
Taylor & NG
Carbon Steel
I
Porcelain-onCast Iron
Stainless
with Carbon
Core
Enamel-Coated
Steel
All-clad
7-Ply Magnetic
Magna*Core
Stainless Steel
with Aluminum
Core
These are just some of the suitable
cookware selections available for
induction cooking. Before buying
new cookware for your
check it carefully regardless
of brand.
Remember, magnetic induction
cooking requires the use of
cookware made of ferrous
to which magnets will stick,
metals such as iron or steel.
8
Page 9

Energy-Saving
● Use magnetic cookware of steel
or cast iron with tight-fitting covers
and flat bottoms.
● Cook fresh vegetables with a
minimum amount of water in a
covered pan.
Watch foods when bringing them
to cooking temperature at
HI heat. When food reaches cooking
temperature, reduce heat immediately
to lowest setting that will keep it
cooking.
● Use correct heat for cooking task.
See cooking guides on pages 10 and 11.
● When boiling water for tea or
coffee, heat only the amount
needed. It is not economical to
boil a container full of water
for only one or two cups.
Questions &Answers
Q. If I do not select a heat
setting, what will happen?
A. Fifteen seconds after you touch
ON, the unit will automatically
shut off if you have not selected a
heat setting. Touch ON again and
then select the desired heat setting
to begin cooking.
Q. May I change heat settings
more than once during cooking?
A. Yes,
as many times as you wish.
Q. Must I add water to my foods
before cooking them?
A. Yes,
in some instances such as
defrosting frozen vegetables, more
water may be needed. Since induction
heats the bottom of the pan first and
then the sides, the water might tend
to evaporate slightly faster.
Q.
Is it necessary to have a pan on
the unit before setting the
A. No. However, the control will
beep and the display will flash for a
minute or until you (a) place proper
cookware correctly on the unit or
(b) touch the OFF pad.
Q. Should I use a cover when
bringing foods to a boil?
A. Yes,
lids help reduce heat loss
and shorten cooking time.
Q.
Will my food continue to cook
after the unit is turned
A. Cooking ceases
when a
unit is turned
off because there is no
surface unit or burner to retain heat.
Q. Does the shape of the pan
affect cooking results?
A. Yes. Only round pans are
recommended since square or
rectangular pans do not heat
uniformly. The induction coils
generate heat on the surface of the
pan, and round pans match best
with the round coil of the unit.
Q.
Will I hear any sound during
cooking?
A. You may hear a slight fan noise
after the unit is turned on—the sound
of cooling air flowing through the
Q. What if the cooking surface
is
cooking?
A. You must reset. Touch ON, then
select the desired heat setting and
the unit will resume cooking.
Q. What will happen if I cook
with a large pan that covers two
cooking surfaces—for
a large griddle?
A. Heat distribution will be
uneven, and
food may not cook
satisfactorily.
9
Page 10

Induction
Guide
weight stainless steel Heavier cookware may require
Size of cookware and amount of
cookware was used in determining
higher settings; thinner cookware food to be cooked may also make it
settings in this guide.
Food
Cereal
Cornmeal, grits,
oatmeal
Cocoa
Cooked in shell
Fried sunny-side-up
Fried over easy
Poached
Scrambled or omelets
Fruits
Mints, Poultry
Braised: Pot roasts of
beef, lamb or veal;
pork steaks and chops
Pan-fried: Tender
chops; thin steaks up
to 314-inch; minute
steaks; hamburgers;
franks; and sausage;
thin fish fillets
Covered
Saucepan
Uncovered
Saucepan
Covered
Saucepan
Covered
Skillet
Skillet
Covered
Skillet
Uncovered
Skillet
Covered
Saucepan
Covered
Skillet or
Covered
Dutch
Oven
Uncovered
Skillet
may require lower ones. When in
necessary for you to modify these
doubt, it is best to start with a suggested settings.
lower setting.
Directions and Setting
to Start Cooking
HI (9). In covered pan, bring
water to boil before adding
cereal.
or milk, cocoa ingredients.
Heat until blended.
HI (9). Cover eggs with cool
water. Cover pan, cook until
steaming.
6. Melt butter, add eggs and
cover skillet.
6. Melt butter.
HI (9). In covered pan, bring
water to a boil.
6. Heat butter until light
golden in color.
HI (9). In covered pan, bring
fruit and water to boil.
HI (9). Melt fat, then add
meat. Switch to 5 or 6 to
brown meat. Add water or
other liquid.
HI (9). Preheat skillet if
desired, then grease lightly.
Setting to Complete
Cooking
6 or 7, then add cereal. Finish
timing according to package
directions.
3
or 4. Cook only 3 to 4
minutes for soft cooked; 15 to
20 minutes for hard cooked.
Continue cooking on setting
3 or 4 until whites are just set,
about 3 to 5 minutes.
3 or 4, then add eggs. When
bottoms of eggs have just set,
carefully turn over to cook
3. Carefully add eggs. Cook
about 5 minutes at 6.
Add egg mixture. Cook,
to desired doneness.
3
and
check for sticking.
3 or 4. Simmer covered until
fork tender.
as needed.
Comments
Cereals bubble and expand as they
cook; use large enough saucepan
to prevent boilover.
Milk boils over rapidly. Watch as
boiling point approaches. Do not
leave pan unattended
If you do not cover skillet, baste
eggs with fat to cook tops evenly.
Remove cooked eggs with slotted
spoon or pancake turner.
Eggs continue to set slightly after
cooking. For omelet, do not stir
last few minutes. When set, fold
in half.
Fresh fruit. Use 1/4 to 1/2 cup
water per pound of fruit.
Dried fruit: Use water as package
directs. Time depends on whether
fruit has been presoaked. If not,
Meat can be seasoned and floured
before it is browned, if desired.
Liquid variations for flavor could
be wine, fruit or tomato juice or
meat broth. Check during cooking
to be sure sufficient liquid is
present.
Timing: Steaks 1/2 to l-inch,
to 1 hour. Beef Stew: 2 to 3
hours. Pot roast:
to 4 hours.
frying is best for thin steaks
and chops. If rare is desired,
preheat skillet before adding
meat. Minute steaks or hamburger
do not need additional oil.
10
Page 11

Food
Fried Chicken
Pan broiled bacon
Sauteed: Less tender,
thin steaks (chuck,
round, etc.); liver;
thick or whole fish
Simmered or stewed
meat; chicken; corned
beef; smoked pork;
stewing beef; tongue;
etc.
Melting chocolate,
butter, marshmallows
Pancakes or
French toast
Pasta
Noodles or spaghetti
Sauces,
Candies, Frostings
Vegetables
Fresh
Frozen
Sauteed: Onions; green
peppers; mushrooms;
celery; etc.
Rice and Grits
Container
Covered
Skillet
Uncovered
Skillet
Covered
Skillet
Covered
Dutch
Oven,
Kettle or
Large
Saucepan
Covered
Saucepan.
Skillet or
Griddle
Covered
Large
Kettle
or Pot
Uncovered
Saucepan
Saucepan
Uncovered
Skillet
Covered
Saucepan
Directions and Setting
to Start Cooking
HI (9). Melt fat. Switch to
between MED and HI to
brown chicken.
HI (9). In cold skillet, arrange
bacon slices. Cook just until
starting to sizzle.
6. Melt fat. Brown slowly.
HI (9). Cover meat with water
and cover pan or kettle. Cook
steaming.
2. Allow 8 to 10 minutes to
melt through. Stir to smooth.
or 5. Heat skillet 2 to 5
minutes. Grease lightly.
HI (9). In covered kettle,
bring salted water to a boil,
uncover and add pasta slowly
so boiling does not stop.
6. Bring just to
HI (9). Measure 1/2 to 1 inch
water in saucepan. Add salt
prepare vegetable. In
saucepan, bring
to
boil.
HI (9). Measure water and
salt as above. Add frozen
of vegetable. In covered
saucepan, bring to boil.
(9). In skillet, melt fat. If
using butter, use 5 or 6.
HI (9). Bring salted water
to a boil.
Setting to Complete
Cooking
or 5. Cover skillet and cook
tender. Uncover last
minutes.
or 5. Cook, turning over
as needed.
6. Cover and cook until
tender.
3 or 4. Cook until fork tender.
(Water should slowly boil.)
or 5. Cook 1 to 2 minutes
or 9. Cook uncovered until
tender.
3 or 4. To finish cooking.
or 4. Cook l-lb. 15 minutes
vegetable.
or 4. Cook according to
on package.
or 6. Add vegetable. Cook
desired tenderness is
reached.
3 or 4.
and cook
to time on package.
Comments
For crisp, dry chicken, cover only
for 10 minutes after reducing
setting. Then uncover and cook,
turning occasionally, for 10 to
20 minutes.
Bacon should be turned
frequently for even cooking.
Meat may be breaded or marinated
in sauce before frying.
Add salt or other seasoning before
cooking if meat has not been
smoked or otherwise cured.
When melting marshmallows, add
or water.
time. Turn over pancakes when
bubbles rise to surface.
Use large enough kettle to prevent
Pasta doubles in size
when cooked.
Stir constantly to prevent sticking.
Uncovered pan requires more
and longer time.
Break up or stir as needed while
rum over or stir vegetable as
necessary for even browning.
in volume after cooking.
11
Page 12

Care and Cleating
Surface
The smooth glass surface of your
induction
little care to keep it glossy and
new looking.
Before using the
first time, clean it thoroughly to
remove any dirt or dust from the
packing material. Use a
cleaner/conditioner such
as
Scrub brand and follow
package directions.
The cooking surfaces may get
hot enough to cause spills and
to stick. Spills and
spatters wipe off with damp cloth
or sponge. Heavier soil may be
removed with warm, soapy water,
the cooking unit cleaner/conditioner,
or baking soda. Non-impregnated
plastic pads may be used
gently
for
really stubborn spots.
Avoid use of abrasive materials
such as metal pads, cleansing
powders and impregnated pads
which may scratch the surface.
Do not use harsh chemicals such as
bleach or chemical oven cleaners.
Clean the cooktop regularly to
avoid discoloration and stains from
soil buildup. Wiping before each
use
remove tiny, coarse particles
of dust, sugar or salt that may cause
scratches if caught between cooking
unit and pan. Regular use of a good
cooking unit cleaner/conditioner
will build a coating to protect the
surface from scratches and make
it easier to clean.
Control
Lock the cooktop (see page 6) to
prevent the induction coils from
being activated accidentally
while cleaning.
Clean up any spills or spatters with
a damp cloth. Remove heavier soil
with warm, soapy water.
Clean touch pads with mild liquid
dish detergent and a soft cloth.
Rub touch pads
lightly.
CAUTION:
DO NOT USE ANY ABRASIVE
MATERIAL OF ANY KIND ON
THE CONTROL
TOUCH
PADS—the lettering on the pads is
sensitive to abrasives and pressure.
Vent Grill
The vent grill at the rear of the
using a damp cloth.
For a more thorough cleaning, the
grill can be removed and washed in
the sink with mild soap and a soft
vegetable brush.
To remove the grill:
1. Pull off the downdraft exhaust
vent control knob if your
has one.
2. Grasp the top of the grill at
both ends.
3. Rotate the grill forward.
To replace the
grill, lower the
right side into
place first,
making sure
tabs on grill
y.\
and grill
interlock.
in place.
12
Page 13

Venting
Grease
(on cooktops so equipped)
The downdraft venting system (see
page 5) includes a metal filter that
collects grease. When the exhaust
fan is operated, air is drawn down
through the filter and is then
discharged through venting to
the outside.
The grease filter should be
cleaned at least once a month.
To remove the grease filter, first
remove the vent grill (see page 12).
Then grasp the tab on the filter and
lift it out.
To clean the grease filter, soak,
then agitate the filter in a hot
detergent solution. Light brushing
can help remove embedded dirt.
Rinse and shake to remove moisture
before replacing the filter.
13
Page 14

Solver
toll free:
The
GE
Center”
consumer information service
14
Page 15

If You Need Service
To obtain service, see your warranty
on the back page of this book.
We’re proud of our service and
want you to be pleased. If for some
reason you are not happy with the
service you receive, here are three
steps to follow for further help.
FIRST, contact the people who
serviced your appliance. Explain
why you are not pleased. In most
cases, this will solve the problem.
NEXT, if you are still not pleased,
write all the details—including
your phone number—to:
Manager, Consumer Relations
GE Appliances
Appliance Park
Louisville, Kentucky 40225
FINALLY, if your problem is still
not resolved, write:
Major Appliance
Consumer Action Panel
20 North
Drive
Chicago, Illinois 60606
15
Page 16

YOUR
WARRANTY
Save
proof of original purchase date such as your sales slip or
check to establish warranty period.
WHAT IS COVERED
FULL ONE-YEAR WARRANTY
This warranty is extended to
For one year from date of original
the original purchaser and any
purchase, we will provide, free of
succeeding owner for products
charge, parts and service labor
purchased for ordinary home use
in your home to repair or replace
in the 48 mainland states, Hawaii
part of
cooktop that fails
and Washington,
In Alaska the
because of a manufacturing defect.
warranty is the same except that it is
LIMITED because you must pay to
ship the product
service
or for the service technician’s travel
costs to your home.
All warranty service will be provided
by our Factory Service Centers or
by our authorized Customer
servicers during normal working
hours.
Look in the White or Yellow Pages
of your telephone directory for
GENERAL ELECTRIC COMPANY,
GENERAL ELECTRIC FACTORY
SERVICE, GENERAL
FACTORY SERVICE or
GENERAL ELECTRIC CUSTOMER
SERVICE.
WHAT IS
COVERED ●
●
Replacement of house fuses or
teach you how to use the product.
resetting of circuit breakers.
Read your Use and Care material.
If you then have any questions
●
Failure of the product if it is used
about operating the product,
for other than its intended purpose
please contact your dealer or our
or used commercially.
Consumer
office at the
●
Damage to product caused
address below, or call, toll free:
accident, fire, floods or acts
The GE Answer
God.
800.626.2000
consumer information service
WARRANTOR IS
RESPONSIBLE
FOR CONSEQUENTIAL DAMAGES.
●
Improper installation.
If you have an installation problem,
contact your dealer or installer.
You are responsible for providing
adequate electrical, gas, exhausting
and other connecting facilities.
Some states do not allow the exclusion or limitation of incidental or consequential damages, so the above limitation or exclusion
not apply to you. This warranty gives you specific legal rights, and you may also have other rights which vary from state to state.
To know what your legal rights are in your state, consult your local or state consumer affairs office or your state’s Attorney General.
Warrantor: General Electric Company
If further help is needed concerning this warranty, write:
Manager—Consumer
Part
164
Pub.
49-4830
3-88
 Loading...