

Page 1

Ran#e
Safety instructions ....................3-5
Operating instructions, Tips
Aluminum Foil ...........................5, 15, 18, 20
Features ............................................................6
Oven ........................................................12-21
Baking ..................................................13-15
Broiling, Broiling Guide ....................20, 21
Control Settings ........................................12
Light; Bulb Replacement .................12, 23
Oven Cycling Light ...................................12
Oven Set Light ...........................................12
Preheating ...................................14, 19, 21
Roasting, Roasting Guide ...............18, 19
Shelves ................................. 12-15, 18, 22
Timed Baking ............................................16
_i_i_i_i_i_i_i_i_i_i_i_i_i_i_i_i_i_i_!i!iiiiiiiiiiiiiiiiiiiiiiiiiiiiiiiiiiiiiiiiiiiiiiiiiiiiiiiiiiiiiiiiiiiiiiiiiiiiiiiiiiii_
_i_i_i_i_i_i_i_i_i_i_i_i_i_i_i_i_i_i_i_i_i_i_i_!i!iiiiiiiiiiiiiiiiiiiiiiiiiiiiiiiiiiiiiiiiiiiiiiiiiiiiiiiiiiiiiiiiiiiii_
_i_i_i_i_i_i_i_i_i_i_i_i_i_i_i_i_i_i_i_i_i_i_i_i_i_i_i_!i!iiiiiiiiiiiiiiiiiiiiiiiiiiiiiiiiiiiiiiiiiiiiiiiiiiiiiiiii_
iiiiiiiiiiiiiiiiiiiiiiiiiiiiiiiiiiiiiiiiiiiiiii_
Surface Cooking ......................................7-10
Control Settings ...........................................8
Cooktop Comparison .................................7
Cookware Tips .............................................9
Home Canning Tips .................................10
Surface Indicator Lights ............................8
Timers and Clock .........................................11
iiiiiiiiiiiiiiiiiiiiiiiiiiiiiiiiiiiiiiiiiiiiilhi
iiiiiiiiiiiiiiiiiiiiiiiiiiiiiiiiiiiiiiiiiiiiilhi
Problem Solver ...............................26
Thermostat Adjustment-
Do/t Yourself .............................................17
More questions ?...call
GEAnswer Center®800.626.2000
Care and Cleaning ....................22-25
Cooktop ..........................................................25
Door Removal ...............................................24
Consun'|er Services ...................27
Appliance Registration ..................................2
important Phone Numbers ........................27
Model and Serial Number Location ...........2
Removal of Packaging Tape .........................2
Warranty ........................................Back Cover
GEAppliances
Models: JMS08
JMSIO
164D2966P113
49-8593-1
2-95 CG
Page 2

HELP US HELP YOU...
Before using your range,
read this guide carefully.
It is intended to help you operate and maintain your
new range properly.
Keep it handy for answers to your questions.
If you don't understand something or need more help, call:
GE Answer Center _"_
800.626.2000
24 hours a day, 7 days a week
How to Remove Packaging Tape
To assure no damage is done to the finish of the
product, the safest way to remove adhesive left from
packaging tape on new appliances is an application of
a household liquid dishwashing detergent, mineral oil
or cooking oil. Apply with a soft cloth and allow to
soak. Wipe dry and then apply an appliance polish to
thoroughly clean and protect the surface.
NOTE: The plastic tape must be removed from the
chrome trim on oven parts. It cannot be removed if it
is baked on.
Write down the model
and serial numbers.
You'll find them on a label behind the range door.
These numbers are also on the Consumer Product
Ownership Registration Card that came with your
range. Before sending in this card, please write these
numbers here:
Model Number
Serial Number
Use these numbers in any correspondence or service
calls concerning your range.
If you received a damaged range...
Immediately contact the dealer (or builder) that sold
you the range.
Save time and money.
Before you request service...
Check the Problem Solver in the back of this guide. It
lists causes of minor operating problems that you can
correct yourself.
IF YOU NEED SERVICE...
To obtain service, see the Consumer Services page in
the back of this guide.
We're proud of our service and want you to be
pleased. If for some reason you are not happy with the
service you receive, here are three steps to follow for
further help.
FIRST, comact the people who serviced your
appliance. Explain why you are not pleased. In most
cases, this will solve the problem.
NEXT, if you are still not pleased, write all the
details--including your phone number--to:
Manager, Consumer Relations
GE Appliances
Appliance Park
Louisville, KY 40225
FINALLY, if your problem is still not resolved, write:
Major Appliance Consumer Action Panel
20 North Wacker Drive
Chicago, IL 60606
2
Page 3
IMPORTANT SAFETY INSTRUCTIONS
Read all instructions before using this appliance.
When using electrical appliances, basic safety
precautions should be followed, including the following:
• Use this appliance only for its intended use as
described in this guide.
• Be sure your appliance is properly installed and
grounded by a qualified technician in accordance
with the provided installation instructions.
• Be sure the range is securely installed in a
counter that is firmly attached to the house
structure. Weight on the oven door could cause
the oven to tip and result in injury,Never allow
anyone to climb, sit. stand or hang on the oven door. surface unit or heating element.
• Never wear loose-fitting or hanging garments
while using the appliance. Be careful _vhen
reaching for items stored in cabinets over the
range l_lammable material could be ignited if
brought in contact with hot surface units or
heating elements and may cause severe burns
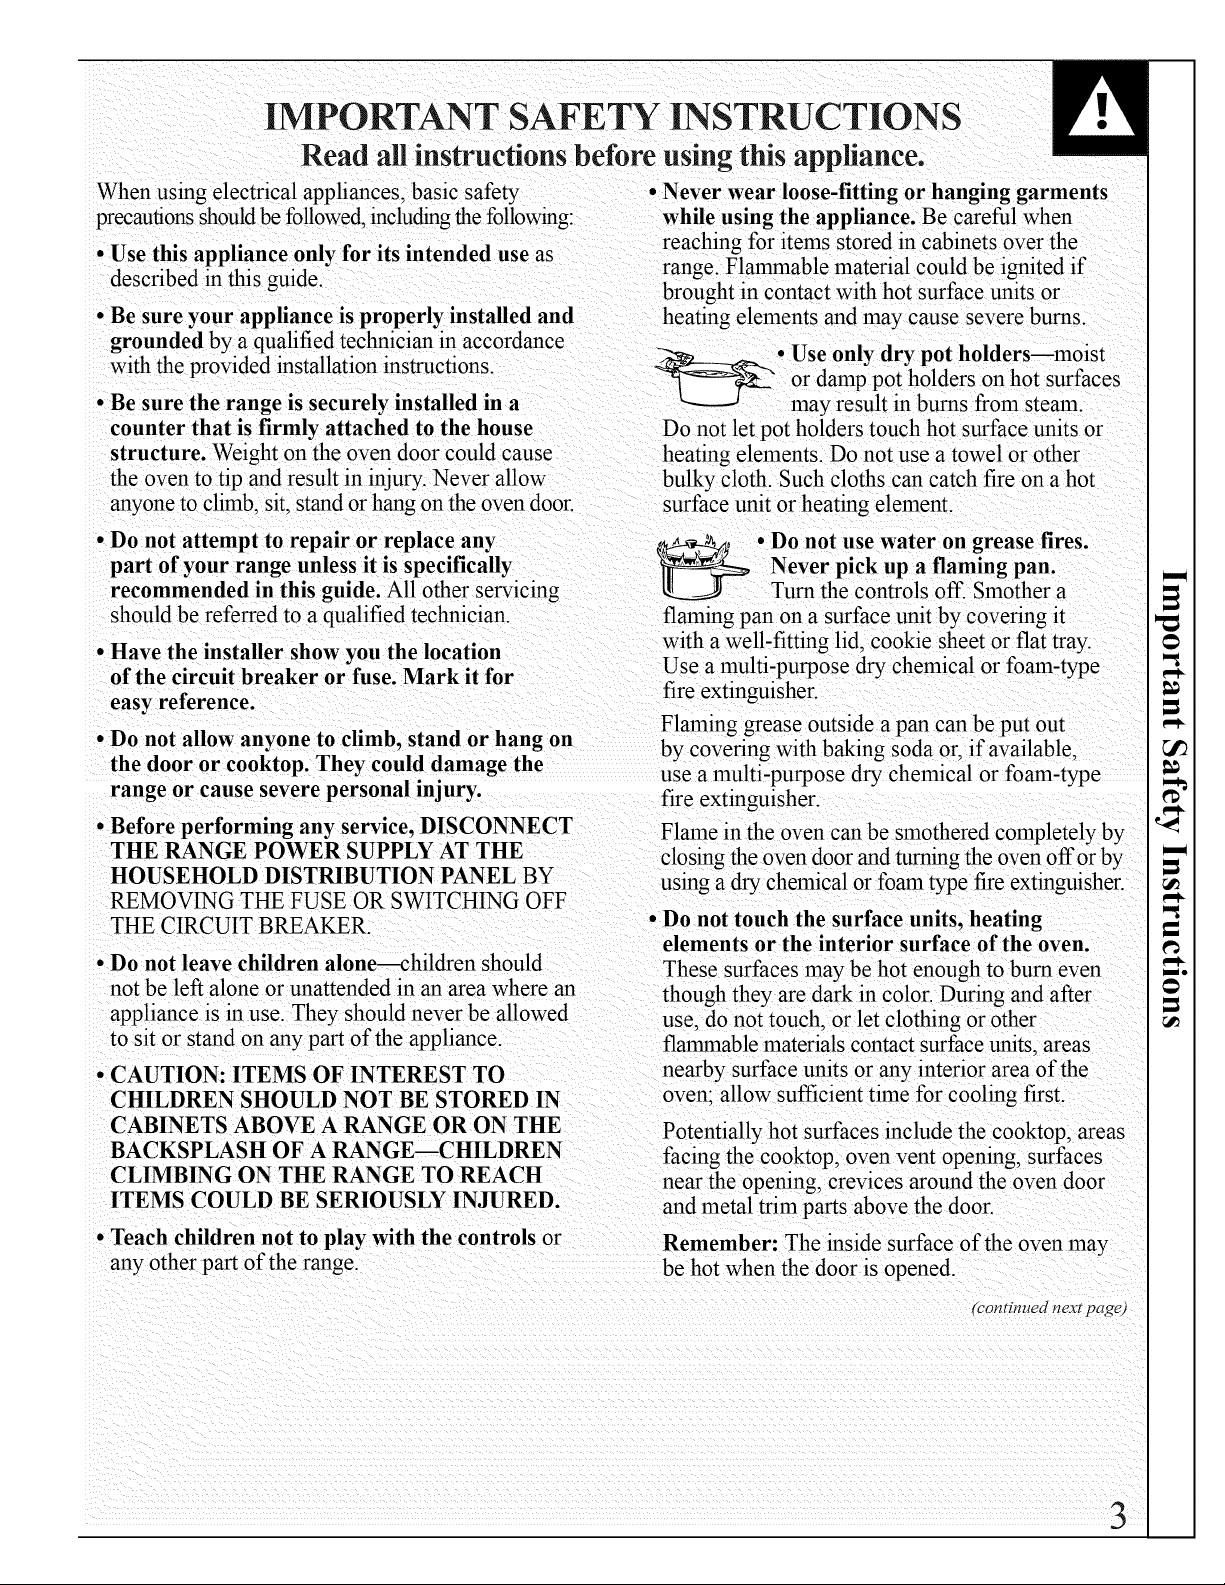
. Use only dry pot holders--moist
or damt_ pot holders on hot surfaces
may result in burns from steam
Do not let pot holders touch hot surface units or
heating elements. Do not use a towel or other
bulky cloth. Such cloths can catch fire on a hot
• Do not attempt to repair or replace any
part of your range unless it is specifically
recommended in this guide. All other servicing
should be referred to a qualified technician
• Have the installer show vou the location
of the circuit breaker or fuse. Mark it for
easy reference.
• Do not allow anyone to climb, stand or hang on
the door or cooktop. They could damage the
range or cause severe personal injury.
• Before performing any service, DISCONNECT
THE RANGE POWER SUPPLY AT THE
HOUSEHOLD DISTRIBUTION PANEL BY
REMOVING THE FUSE OR SWITCHING OFF
THE CIRCUIT BREAKER.
• Do not leave children alone--children should
not be left alone or unattended in an area where an
appliance is in use. They should never be allowed
to sit or stand on any part of the appliance.
• CAUTION: ITEMS OF INTEREST TO
CHILDREN SHOULD NOT BE STORED IN
CABINETS ABOVE A RANGE OR ON THE
BACKSPLASH OF A RANGE--CHILDREN
CLIMBING ON THE RANGE TO REACH
ITEMS COULD BE SERIOUSLY INJURED.
• Teach children not to play with the controls or
any other part of the range.
_ • Do not use water on grease fires.
Never pick up a flaming pan.
Turnthe controls off Smother a
flaming pan on a surface unit by covering it
with a well-fitting lid, cookie sheet or flat tray
Use a multi-purpose dry chemical or foam-type
fire extinguisher.
Flaming grease outside a pan can be put out
buYcovering with baking soda or, if available,
sea multi-purpose dry chemical or foam-type
fire extinguisher.
Flame in the oven can be smothered completely by
closing the oven door and turning the oven offor by
using a dry chemical or foam type fire extinguisher.
• Do not touch the surface units, heating
elements or the interior surface of the oven.
These surfaces may be hot enough to burn even
though they are dark in color During and after
use, do not touch, or let clothing or other
flammable materials contact surface units, areas
nearby surface units or any interior area of the
oven: allow sufficient time for cooling first.
Potentially hot surfaces include the cooktop, areas
facing the cooktop, oven vent opening, surfaces
near the opening, crevices around the oven door
and metal trim parts above the door.
Remember: The inside surface of the oven may
be hot when the door is opened.
I
t<
I
_o
rbontinued nex_ pc_qe)
Page 4
IMPORTANT SAFETY INSTRUCTIONS
(continued)
• For your safety, never use your appliance for
warming or heating the room.
. Never leave the oven door open when you are
not watching the range.
• Do not store flammable materials in an oven
or near the cooktop.
• DO NOT STORE OR USE COMBUSTIBLE
MATERIALS, GASOLINE OR OTHER
FLAMMABLE VAPORS AND LIQUIDS IN
THE VICINITY OF THIS OR ANY OTHER
APPLIANCE.
• Keep hood and grease filters clean to maintain
good venting and to avoid grease fires.
*Never leave jars or cans of fat drippings on or
near your range.
*Do not let cooking grease or other flammable
materials accumulate in or near the range.
• When cooking pork, follow the directions exactly
and always cook the meat to an internal temperature
of at least 170%. This assures that. in the remote
possibility that trichina may be present in the meat.
it will be killed and the meat will be safe to eat.
Oven
• Stand away from the range when opening
the oven door. Hot air or steam which escapes
can cause burns to hands, face and!or eyes.
*Do not heat unopened food containers.
Pressure could build up and the comainer could
burst, causing an injury.
• After broiling, always take the broiler pan out of
the range and clean it. Leftover grease in the broiler
pan can catch on fire next time you use the pan.
• Never leave the oven door open when you are
not watching the oven.
*Ahvays keep combustible wall coverings, curtains,
or drapes a safe distance from your range.
* Keep the oven vent unobstructed.
_. Keep the oven free from grease
buildup.
• Always keep dish towels, dish cloths, pot
holders and other linens a safe distance from
your range.
• Always keep wooden and plastic utensils and
canned food a safe distance from your range.
• Place the oven shelf in the desired position
while the oven is cool. If shelves must be
handled when hot. do not let pot holder contact
the heating elements.
• Pulling out the shelf to the shelf stop is a
convenience in lifting heavy foods. It is also a
precaution against burns from touching hot
surfaces of the door or oven walls.
• When using cooking or roast!ng bags in the
oven, follow the manufacturer s directions.
• Do not use your oven to dry newspapers.
If overheatecl, they can catch on fire
• Do not use oven for a storage area. Items stored
in an oven can ignite.
• Do not leave paper products, cooking utensils
or food in the oven when not in use.
• Do not use aluminum foil to line the oven
bottom except where recommended in this guide.
hnproper installation of aluminum foil may result
in a risk of electrical shock or fire.
Page 5
Surface Cooking Units
• Use proper pan size--This appliance
is equipped with different size
surface units. Select cookware having
flat bottoms large enough to cover the surface unit
heating element. The use of undersized cookware
will expose a portion of the surface unit to direct
contact and may result in ignition of clothing,
Proper relationship of the cookware to the surface
unit will also improve efficiency.
• Never leave the surface units unattended at
high heat settings. Boilovers cause smoking and
greasy spillovers that may catch on fire.
• Be sure the drip pans are not covered and are
in place. Their absence during cooking could
damage range parts and wiring.
• Do not use aluminum foil to line the drip pans
or anywhere in the oven except as described in
this guide. Misuse could result in a shock, fire
hazard or damage to the range.
• Only certain types of glass, glass/ceramic,
earthenware or other glazed containers are
suitable for cooktop cooking; others may break
because of the sudden change in temperature
See the Surface Cooking section.
• Do not immerse or soak the removable surface
units. Do not put them in a dishwasher.
• When flaming foods are under the hood, turn
the fan off. The fan, if operating, may spread
the flame.
• Clean the cooktop with caution. If a wet sponge
or cloth is used to wipe spills on a hot cooktop, be
careful to avoid steam bums.
• Foods for frying should be as dry as possible.
Frost on frozen foods or moisture on fresh foods
can cause hot fat to bubble up and over the sides
of the pan.
• Use little fat for effective shallow or deep-fat
frying. Filling the pan too full of fat can cause
spillovers when food is added.
• If a combination of oils or fats will be used
in frying, stir together before heating, or as fats
melt slowly.
• Always heat fat slowly, and watch as it heats.
• Use a deep fat thermometer whenever possible
to prevent overheating fat beyond the smoking point.
• Never try to move a pan of hot fat, especially a
deep fat t'ryer. Wait until the fat is cool.
I
'z3
I
• To minimize the possibility of burns, ignition of
flammable materials and spillage, the handle of a
container should be turned toward the center of the
range without extending over nearby surface units.
•Alwavs turn the surface unit controls to off
before removing the cookware.
• Keep an eye on foods being fried at high or
medium high heat settings.
• To avoid the possibility of a burn or electric
shock, always be certain that the controls for
all surface units are at the off position and all
surface units are cool before attempting to lift
or remove the unit.
SAVETHESE INSTRUCTIONS
_o
Page 6

c IIII
FEATURES OF YOUR RANGE
JMS08
JMS10
Explained
Feature Index on page
1 Model and Serial Number 2
2 Broil Element 20, 22
3 Oven Vent 4
4 Surface Unit Controls 8, 23
5 Surface Unit "ON" 8
Indicator Light
6 Lift-Up Cooktop 25
Support rods hold it up to simplify
cleaning underneath.
7 Plug-In Surface Units 7, 9, 10, 25
8 Oven Set Light 12
9 Oven Set Knob 12, 23
10 Automatic Timers and Clock 11
(on some models)
11 Drip Pans 25
12 Oven Light Switch 12
/I/T/It IFI IItl/_/'t \'_\'t\\))
Explained
Feature Index on page
13 Oven Cycling Light 12
14 Oven Temp Knob 12, 23
15 Oven Interior Light 12, 23
16 Oven Shelf Supports 12, 13, 18,
Shelf positions for cooking are 20, 21
suggested in the Baking, Roasting
and Broiling sections.
17 Oven Shelves with Stop-Locks 12-15,
18, 22
18 Bake Element 22
May be lifted gently for wiping the
oven bottom.
19 Lift-Off Oven Door with 20, 24
Broil Stop position
Easily removed for oven cleaning.
20 Broiler Pan and Rack 4, 20,
21, 22
6
Page 7
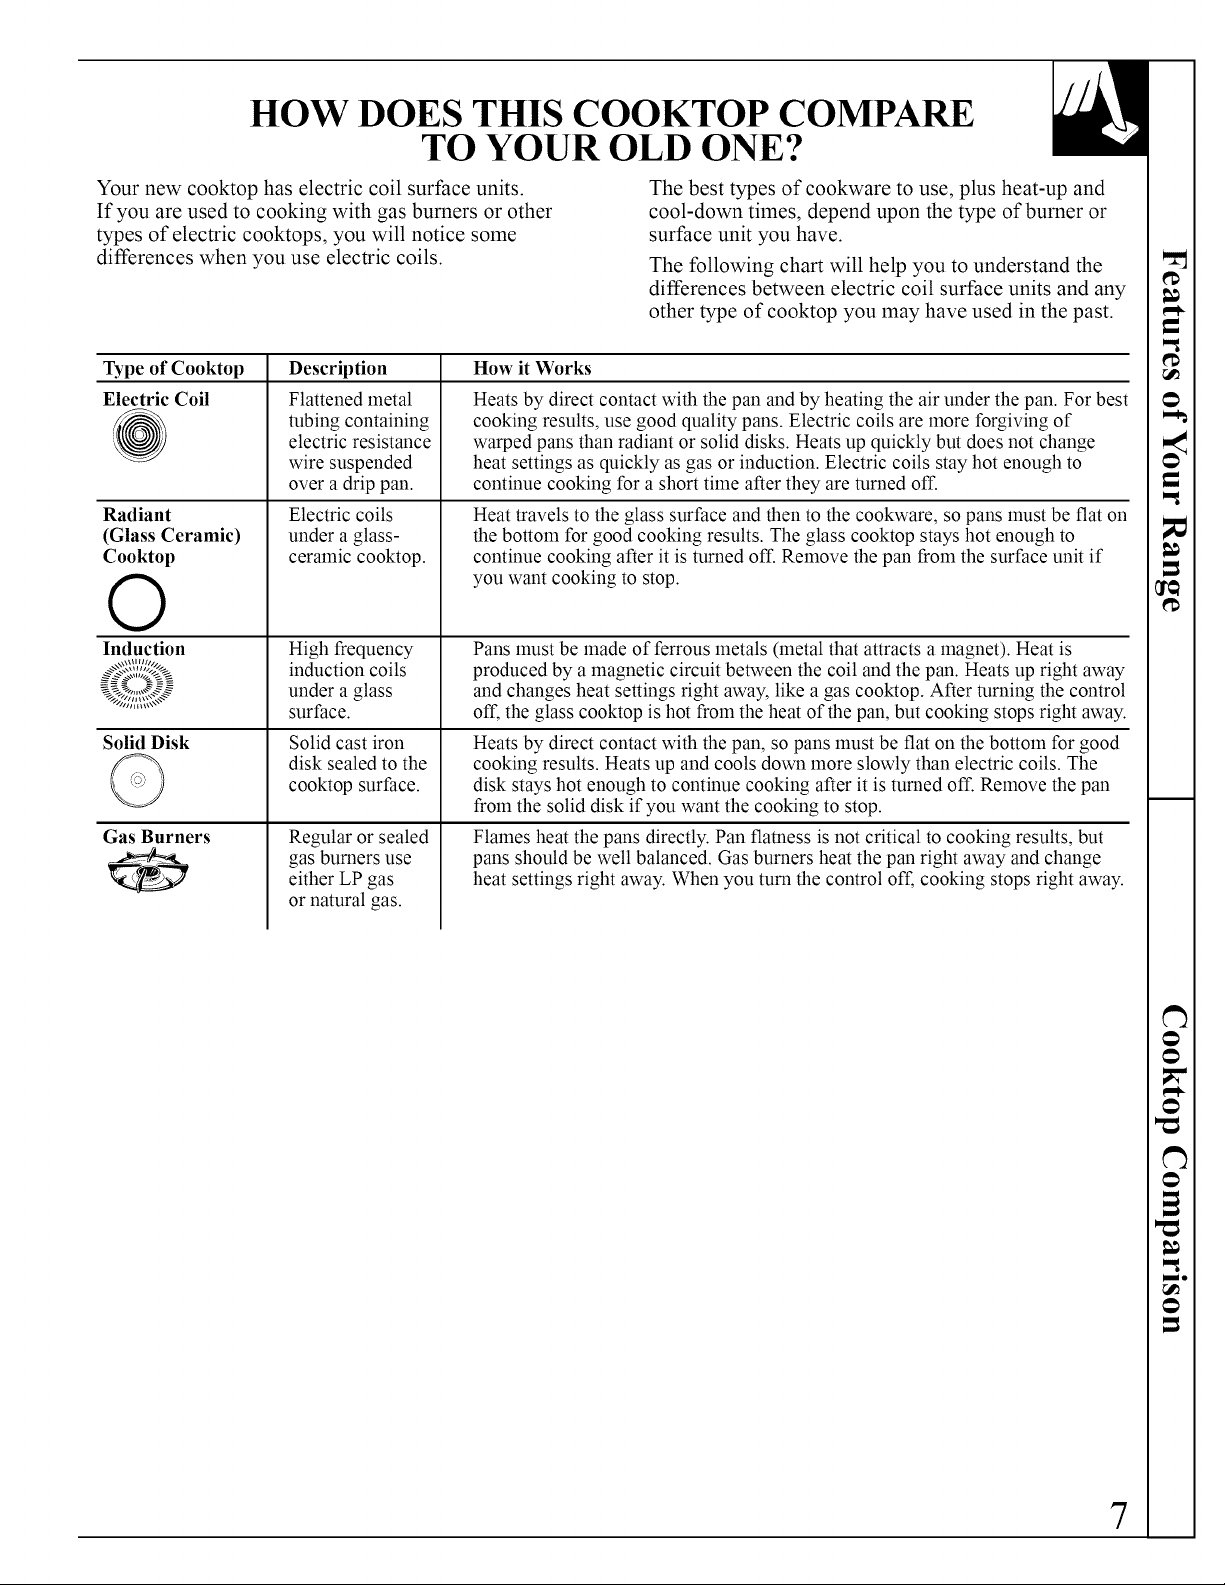
HOW DOES THIS COOKTOP COMPARE
TO YOUR OLD ONE?
Your new cooktop has electric coil surface units.
If you are used to cooking with gas burners or other
types of electric cooktops, you will notice some
differences when you use electric coils.
Type of Cooktop
Electric Coil
@
Radiant
(Glass Ceramic)
Cooktop
Description
Flattened metal
tubing containing
electric resistance
wire suspended
over a drip pan.
Electric coils
under a glass-
ceramic cooktop.
How it Works
Heats by direct contact with the pan and by heating the air under the pan. For best
cooking results, use good quality pans. Electric coils are more forgiving of
warped pans than radiant or solid disks. Heats up quickly but does not change
heat settings as quickly as gas or induction. Electric coils stay hot enough to
continue cooking for a short time after they are turned off.
Heat travels to the glass surface and then to the cookware, so pans must be fiat on
the bottom for good cooking results. The glass cooktop stays hot enough to
continue cooking after it is turned off. Remove the pan from the surface unit if
you want cooking to stop.
O
Induction
\\\\u rlt///
Solid Disk
Gas Burners
High frequency
induction coils
under a glass
surface.
Solid cast iron
disk sealed to the
cooktop surface.
Regular or sealed
gas burners use
either LP gas
or natural gas.
Pans must be made of ferrous metals (metal that attracts a magnet). Heat is
produced by a magnetic circuit between the coil and the pan. Heats up right away
and changes heat settings right away, like a gas cooktop. After turning the control
off, the glass cooktop is hot from the heat of the pan, but cooking stops right away.
Heats by direct contact with the pan, so pans must be fiat on the bottom for good
cooking results. Heats up and cools down more slowly than electric coils. The
disk stays hot enough to continue cooking after it is turned off. Remove the pan
from the solid disk if you want the cooking to stop.
Flames heat the pans directly. Pan flamess is not critical to cooking results, but
pans should be well balanced. Gas burners heat the pan right away and change
heat settings right away. When you turn the control off, cooking stops right away.
The best types of cookware to use, plus heat-up and
cool-down times, depend upon the type of burner or
surface unit you have.
The following chart will help you to understand the
differences between electric coil surface units and any
other type of cooktop you may have used in the past.
7
_,,,,Be
r_
Page 8
SURFACE COOKING
Your surface units and controls are designed to
give you an infinite choice of heat settings for surface
unit cooking.
At both OFF and HI, the control "clicks" into position.
In a quiet kitchen, you may hear slight "clicking"
sounds during cooking, indicating heat settings
selected are being maintained.
Switching to higher heat settings always shows a
quicker heat change than switching to lower settings.
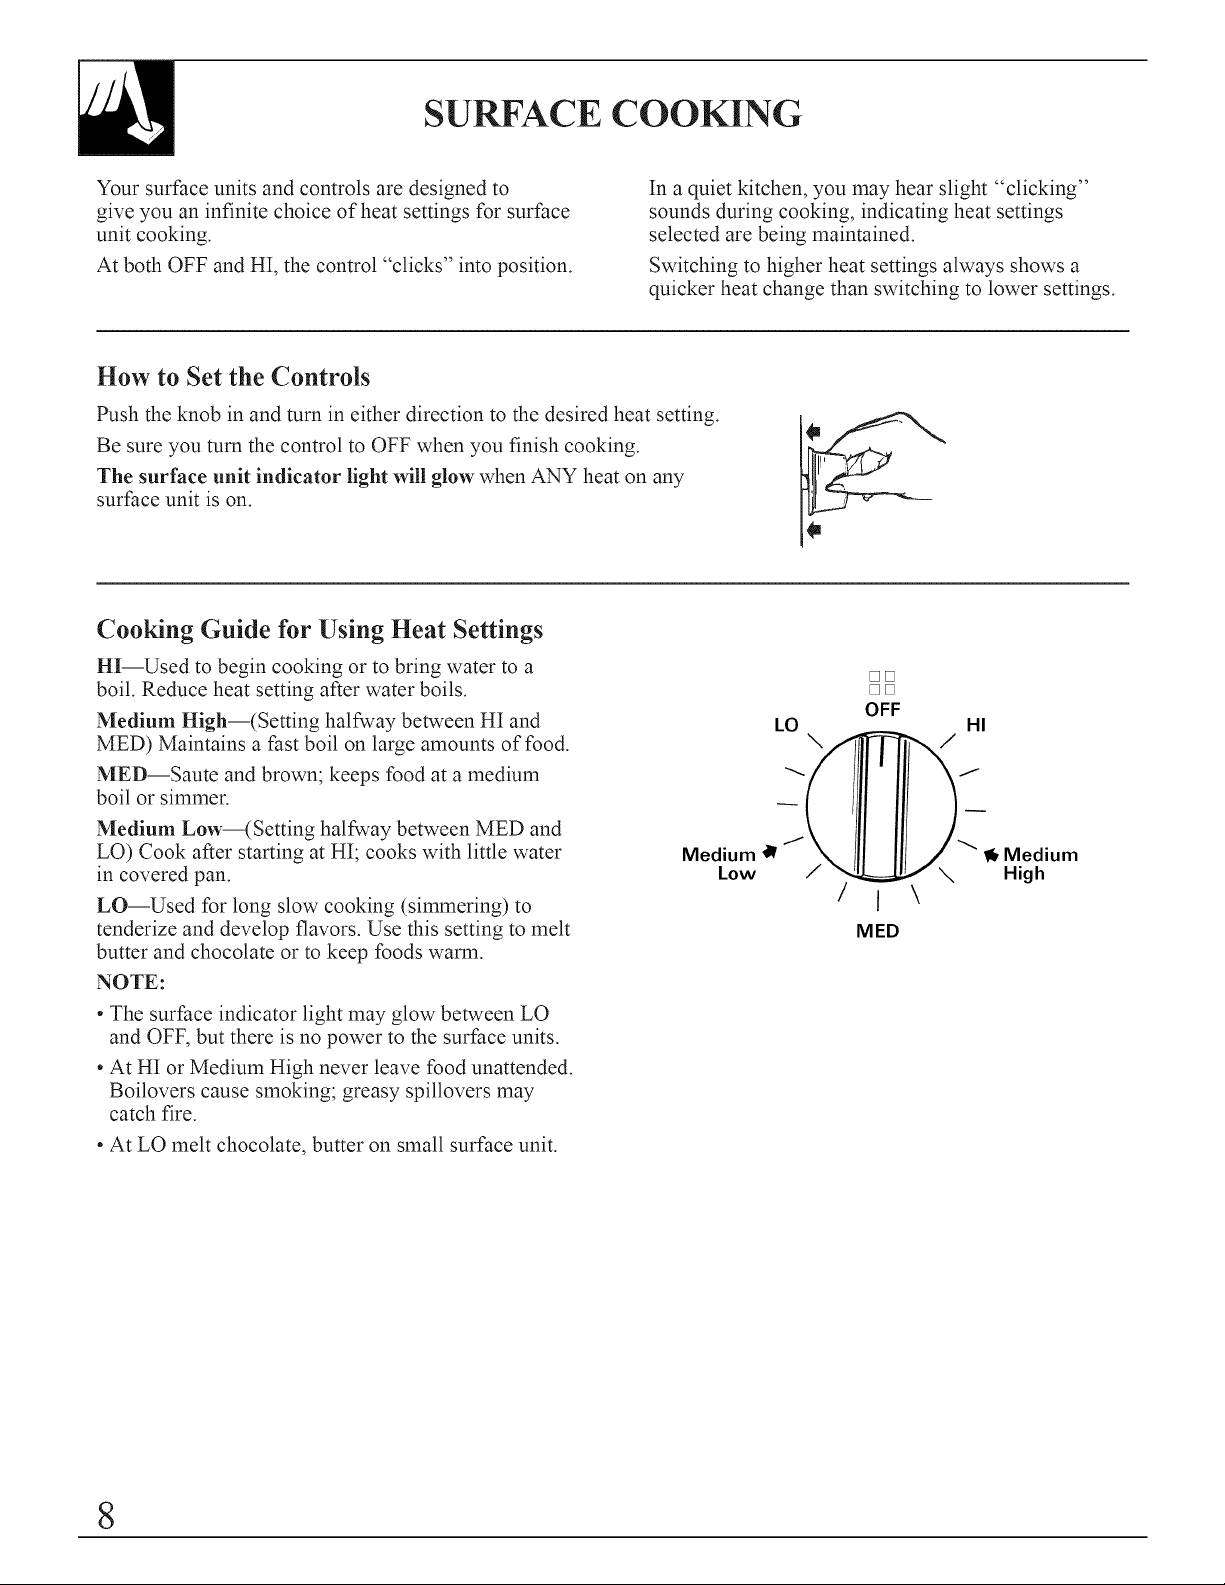
How to Set the Controls
Push the knob in and turn in either direction to the desired heat setting.
Be sure you turn the control to OFF when you finish cooking.
The surface unit indicator light will glow when ANY heat on any
surface unit is on.
Cooking Guide for Using Heat Settings
HI--Used to begin cooking or to bring water to a
boil. Reduce heat setting after water boils.
Medium High--(Setting halfway between HI and
MED) Maintains a fast boil on large amounts of food.
MED--Saute and brown; keeps food at a medium
boil or simmer.
Medium Low--(Setting halfway between MED and
LO) Cook after starting at HI; cooks with little water
in covered pan.
LO--Used for long slow cooking (simmering) to
tenderize and develop flavors. Use this setting to melt
butter and chocolate or to keep foods warm.
NOTE:
. The surface indicator light may glow between LO
and OFF, but there is no power to the surface units.
. At HI or Medium High never leave food unattended.
Boilovers cause smoking; greasy spillovers may
catch fire.
. At LO melt chocolate, butter on small surface unit.
Medium _ J
LO
Low /
/
DD
DD
OFF
I
MED
HI
/
/
_, Medium
\ High
\
8
Page 9
COOKWARE TIPS
Cookware
Use medium- or heavy-weight cookware. Aluminum
cookware conducts heat faster than other metals.
Cast-iron and coated cast-iron cookware are slow to
absorb heat, but generally cook evenly at low to
medium heat settings. Steel pans may cook unevenly
if not combined with other metals.
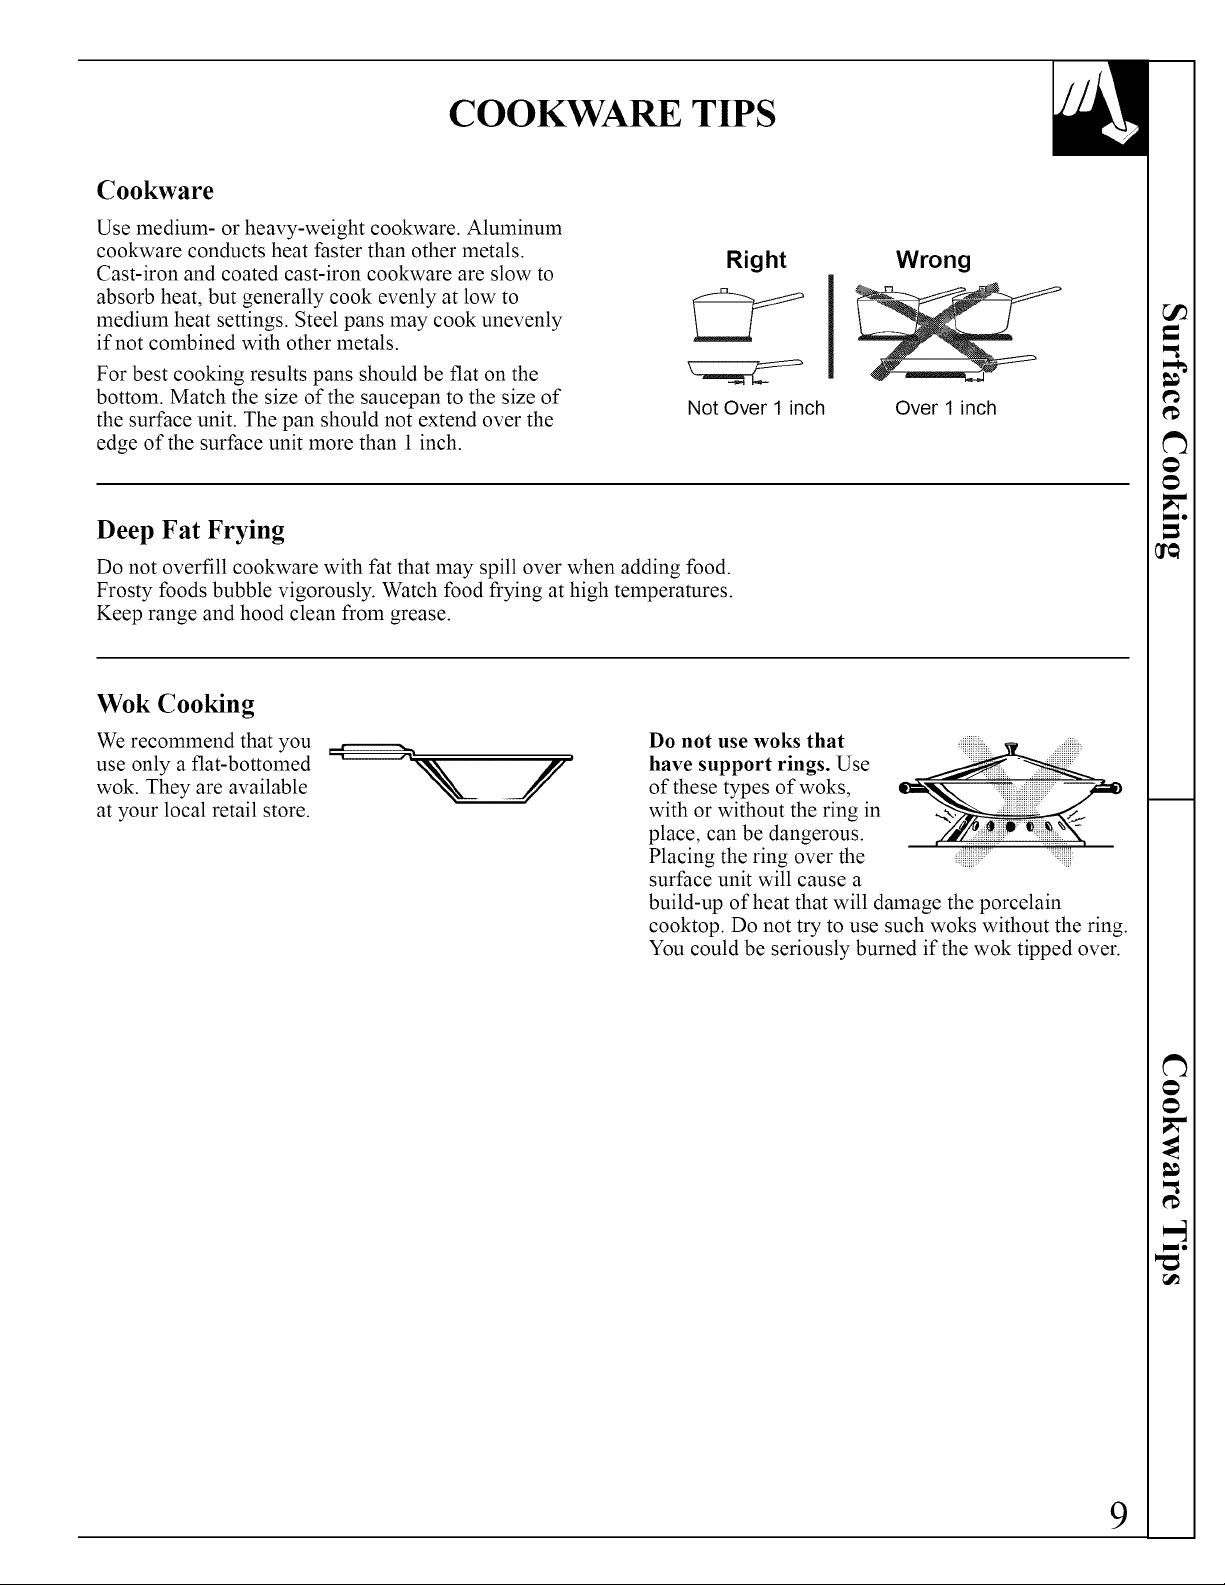
For best cooking results pans should be flat on the
bottom. Match the size of the saucepan to the size of
the surface unit. The pan should not extend over the
edge of the surface unit more than 1 inch.
Right
Not Over 1 inch
Wrong
ra¢_
,'i
Over 1 inch
Deep Fat Frying
Do not overfill cookware with fat that may spill over when adding food.
Frosty foods bubble vigorously. Watch food frying at high temperatures.
Keep range and hood clean from grease.
Wok Cooking
We recommend that you
use only a flat-bottomed
wok. They are available
at your local retail store.
Do not use woks that .............
have support rings. Use
of these types of woks,
with or without the ring in
place, can be dangerous. .................................
Placing the ring over the /_:_[_i:,: '_ii:ip_
surface unit will cause a
build-up of heat that wilt damage the porcelain
cooktop. Do not try to use such woks without the ring.
You could be seriously burned if the wok tipped over.
1111111/o
9
..]
[mile
Page 10
HOME CANNING TIPS
Canning should be done on the surface unit only.
Pots that extend beyond one inch of the surface unit's
drip pan are not recommended for most surface
cooking. However, when canning with water-bath or
pressure canner, larger-diameter pots may be used.
This is because boiling water temperatures (even
under pressure) are not harmful to cooktop surfaces
surrounding the surface units.
Observe the Following Points in Canning
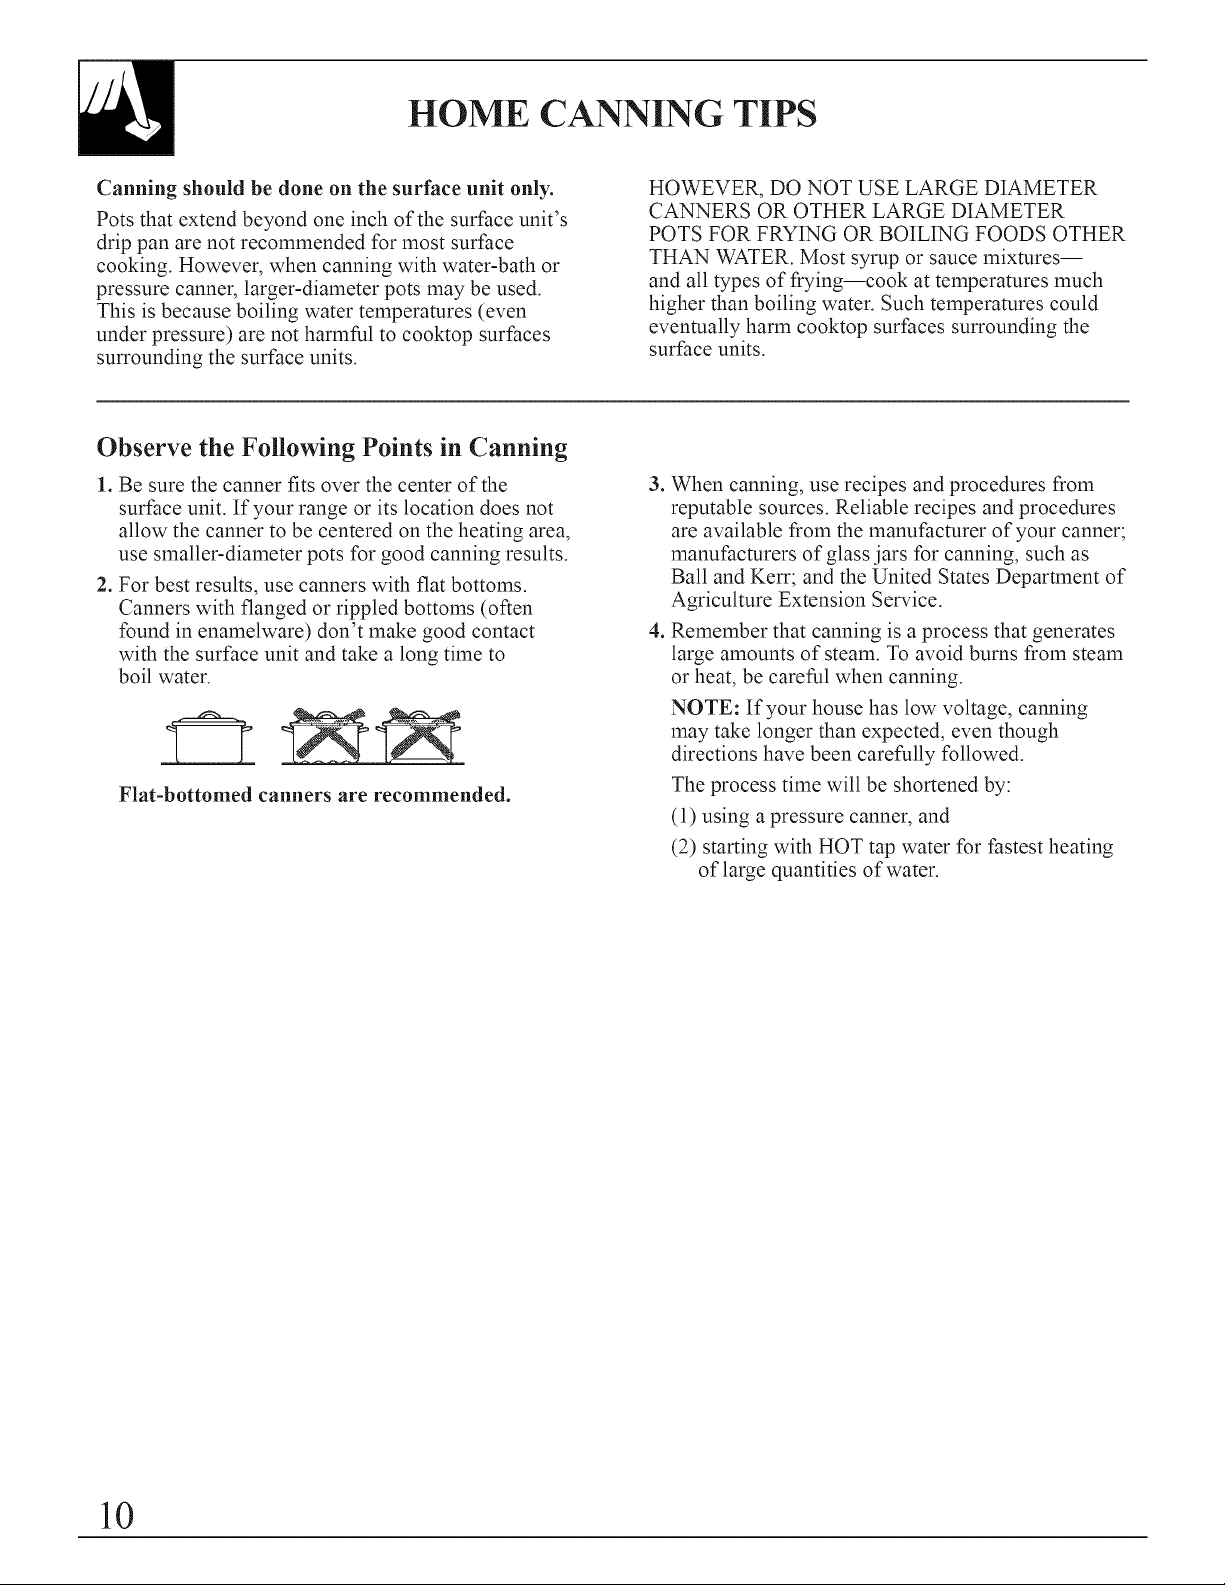
1. Be sure the canner fits over the center of the
surface unit. If your range or its location does not
allow the canner to be centered on the heating area,
use smaller-diameter pots for good canning results.
2. For best results, use canners with flat bottoms.
Canners with flanged or rippled bottoms (often
found in enamelware) don't make good contact
with the surface unit and take a long time to
boil water.
Flat-bottomed canners are recommended.
HOWEVER, DO NOT USE LARGE DIAMETER
CANNERS OR OTHER LARGE DIAMETER
POTS FOR FRYING OR BOILING FOODS OTHER
THAN WATER. Most syrup or sauce mixtures--
and all types of frying--cook at temperatures much
higher than boiling water. Such temperatures could
eventually harm cooktop surfaces surrounding the
surface units.
.
When canning, use recipes and procedures from
reputable sources. Reliable recipes and procedures
are available from the manufacturer of your canner;
manufacturers of glass :jars for canning, such as
Ball and Kerr; and the United States Department of
Agriculture Extension Service.
.
Remember that canning is a process that generates
large amounts of steam. To avoid burns from steam
or heat, be careful when canning.
NOTE: If your house has low voltage, canning
may take longer than expected, even though
directions have been carefully followed.
The process time will be shortened by:
(1) using a pressure canner, and
(2) starting with HOT tap water for fastest heating
of large quantities of water.
10
Page 11
AUTOMATIC TIMERS AND CLOCK
The automatic timers and clock on your range are
helpful devices that serve several purposes.
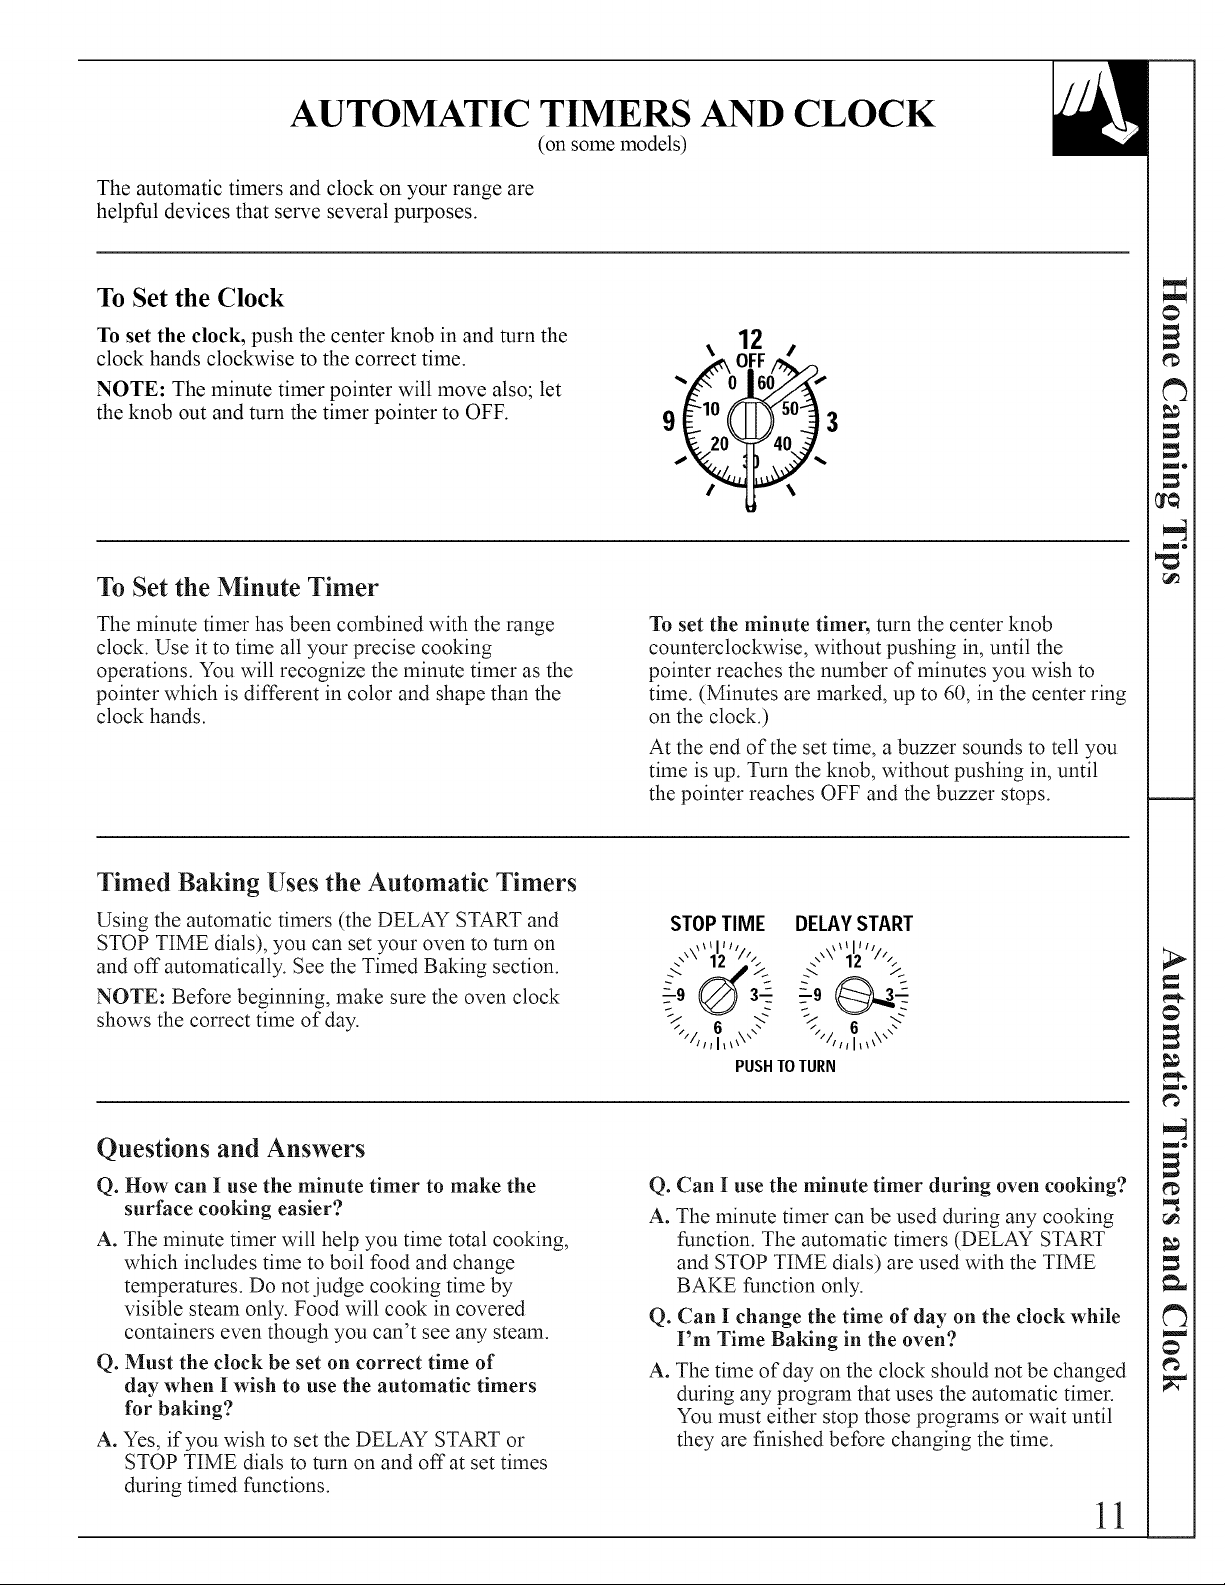
To Set the Clock
(on some models)
To set the clock, push the center knob in and turn the
clock hands clockwise to the correct time.
NOTE: The minute timer pointer will move also; let
the knob out and turn the timer pointer to OFF.
To Set the Minute Timer
The minute timer has been combined with the range
clock. Use it to time all your precise cooking
operations. You will recognize the minute timer as the
pointer which is different in color and shape than the
clock hands.
Timed Baking Uses the Automatic Timers
/
9 lO
3
To set the minute timer, turn the center knob
counterclockwise, without pushing in, until the
pointer reaches the number of minutes you wish to
time. (Minutes are marked, up to 60, in the center ring
on the clock.)
At the end of the set time, a buzzer sounds to tell you
time is up. Turn the knob, without pushing in, until
the pointer reaches OFF and the buzzer stops.
_o
_o
Using the automatic timers (the DELAY START and
STOP TIME dials), you can set your oven to turn on
and off automatically. See the Timed Baking section.
NOTE: Before beginning, make sure the oven clock
shows the correct time of day.
Questions and Answers
Q. How can I use the minute timer to make the
surface cooking easier?
A. The minute timer will help you time total cooking,
which includes time to boil food and change
temperatures. Do not judge cooking time by
visible steam only. Food will cook in covered
containers even though you can't see any steam.
Q. Must the clock be set on correct time of
day when I wish to use the automatic timers
for baking?
A. Yes, if you wish to set the DELAY START or
STOP TIME dials to turn on and off at set times
during timed functions.
STOPTIME DELAYSTART
\\_ll:;
.._-" 12 /'_. .\ /.
-',// 6 \,_ ",// 6 Vc-
PUSH TO TURN
Q_
Can I use the minute timer during oven cooking?
A.
The minute timer can be used during any cooking
function. The automatic timers (DELAY START
and STOP TIME dials) are used with the TIME
BAKE function only.
Q_
Can I change the time of day on the clock while
I'm Time Baking in the oven?
A°
The time of day on the clock should not be changed
during any program that uses the automatic timer.
You must either stop those programs or wait until
they are finished before changing the time.
_to
rJ_
11
Page 12
USING YOUR OVEN
Before Using Your Oven
1. Look at the controls. Be sure you understand how
to set them properly. Read over the directions for
the automatic oven timers (on some models) so you
understand its use with the controls.
2. Check the oven interior. Look at the shelves.
Take a practice run at removing and replacing them
properly to give sure, sturdy support.
Oven Controls
3. Read over the infomlation and tips that follow.
4. Keep this guide handy so you can refer to it, especially
during the first weeks of using your new range.
NOTE: You may notice a "burning" or "oily" smell the
first few times you turn your oven on. This is normal in
a new oven and will disappear in a short time.
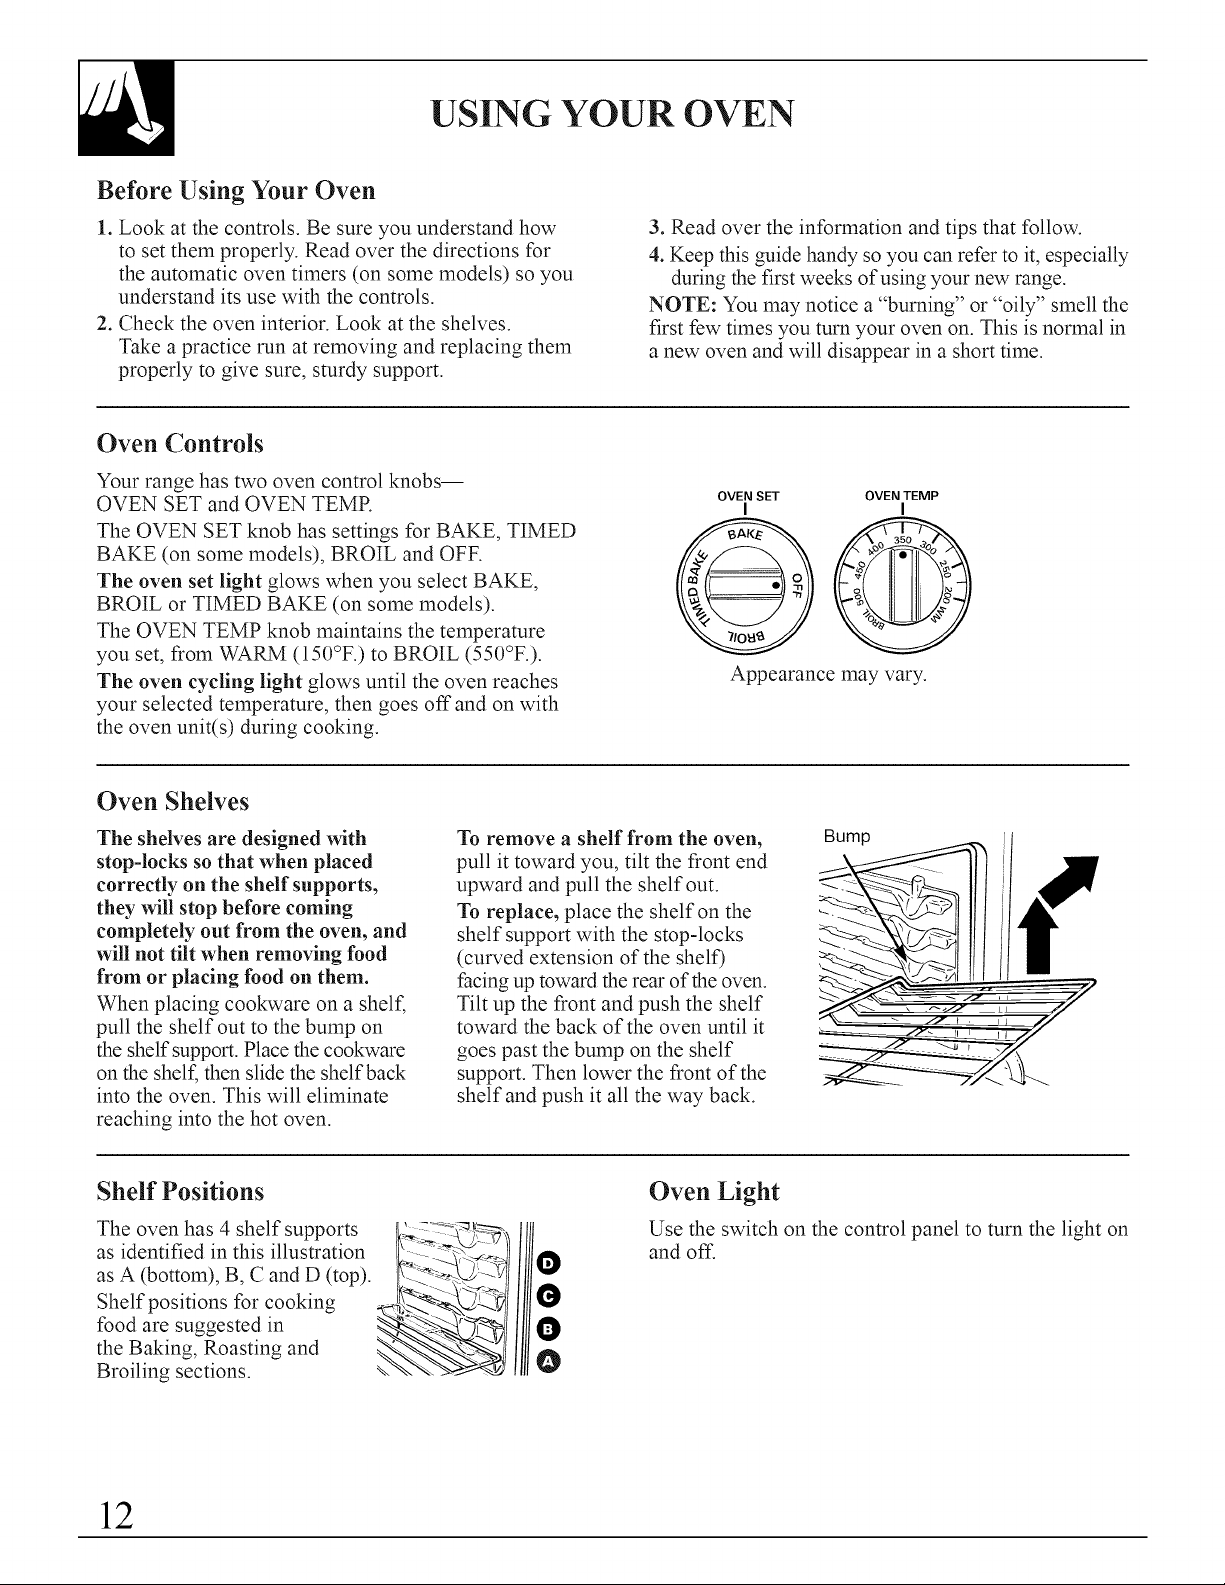
Your range has two oven control knobs--
OVEN SET and OVEN TEMR
The OVEN SET knob has settings for BAKE, TIMED
BAKE (on some models), BROIL and OFF.
The oven set light glows when you select BAKE,
BROIL or TIMED BAKE (on some models).
The OVEN TEMP knob maintains the temperature
you set, from WARM (150°F.) to BROIL (550°F.).
The oven cycling light glows until the oven reaches
your selected temperature, then goes off and on with
the oven unit(s) during cooking.
Oven Shelves
The shelves are designed with
stop-locks so that when placed
correctly on the shelf supports,
they will stop before coming
completely out from the oven, and
will not tilt when removing food
from or placing food on them.
When placing cookware on a shelf,
pull the shelf out to the bump on
the shelf support. Place the cookware
on the shelf, then slide the shelf back
into the oven. This will eliminate
reaching into the hot oven.
To remove a shelf from the oven,
pull it toward you, tilt the front end
upward and pull the shelf out.
To replace, place the shelf on the
shelf support with the stop-locks
(curved extension of the shelf)
facing up toward the rear of the oven.
Tilt up the front and push the shelf
toward the back of the oven until it
goes past the bump on the shelf
support. Then lower the front of the
shelf and push it all the way back.
OVEN SET OVEN TEMP
I I
@@
Appearance may vary.
Bump
Shelf Positions
The oven has 4 shelf supports
as identified in this illustration
as A (bottom), B, C and D (top).
Shelf positions for cooking
food are suggested in
the Baking, Roasting and
Broiling sections.
12
Oven Light
Use the switch on the control panel to turn the light on
and off.
Page 13
BAKING
Your oven temperature is controlled very accurately using an oven control
system. We recommend that you operate the oven for a number of weeks to
become familiar with your new oven's performance. If you think an
adjustment is necessary, see the Adjust the Oven Thermostat section. It lists
easy Do It Yourse_instructions on how to adjust the thermostat.
NOTE: When the oven is hot, the top and outside surfaces of the range
get hot too.
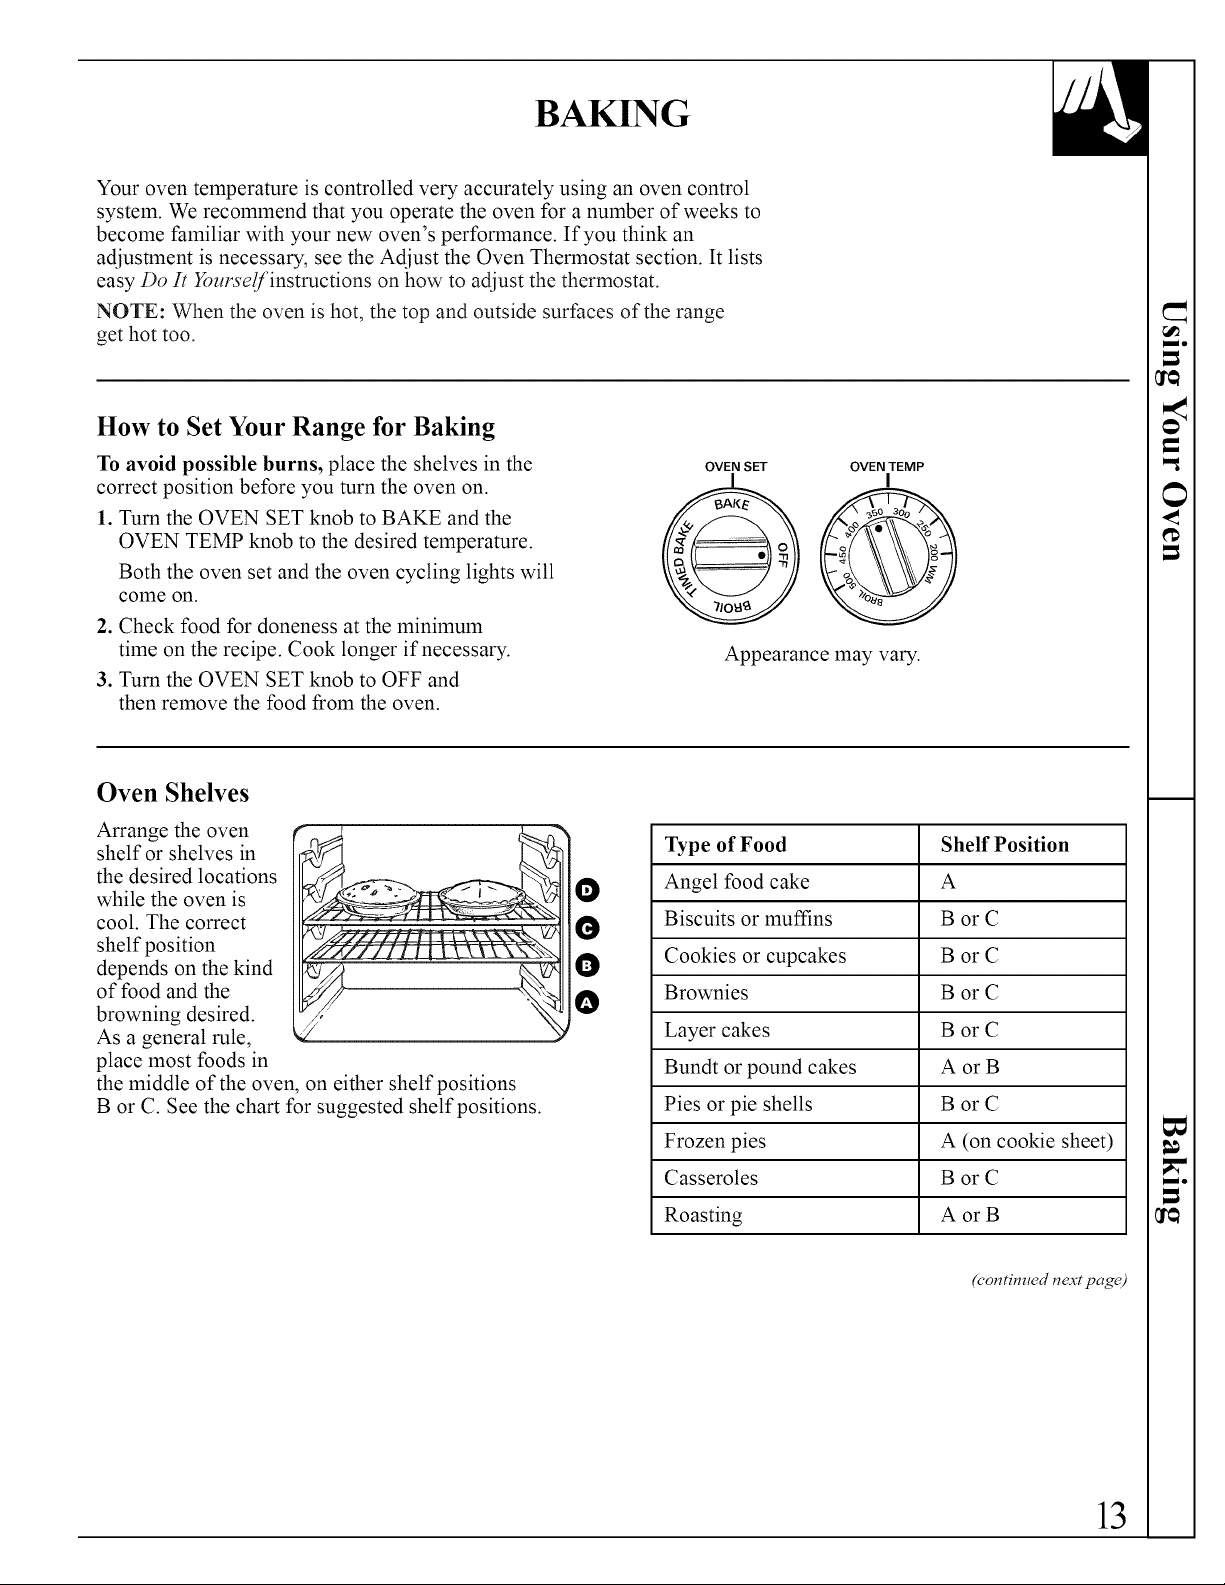
How to Set Your Range for Baking
To avoid possible burns, place the shelves in the
correct position before you turn the oven on.
1. Turn the OVEN SET knob to BAKE and the
OVEN TEMP knob to the desired temperature.
Both the oven set and the oven cycling lights will
come on.
2. Check food for doneness at the minimum
time on the recipe. Cook longer if necessary.
3. Turn the OVEN SET knob to OFF and
then remove the food from the oven.
OVEN SET OVEN TEMP
Appearance may vary.
Oven Shelves
Arrange the oven
shelf or shelves in
the desired locations
while the oven is
cool. The correct
shelf position
depends on the kind
of food and the
browning desired.
As a general rule,
place most foods in
the middle of the oven, on either shelf positions
B or C. See the chart for suggested shelf positions.
Type of Food Shelf Position
Angel food cake A
Biscuits or muffins B or C
Cookies or cupcakes B or C
Brownies B or C
Layer cakes B or C
Bundt or pound cakes A or B
Pies or pie shells B or C
Frozen pies A (on cookie sheet)
Casseroles B or C
Roasting A or B
(continued next page)
13
Page 14

BAKING
Preheating
Preheating is necessary for good results when baking
cakes, cookies, pastry and breads. For most casseroles
and roasts, preheating is not necessary. For ovens
without a preheat indicator light or tone, preheat
10 minutes. After the oven is preheated, place the
food in the oven as quickly as possible to prevent
heat from escaping.
(continued)
Preheat the oven if the recipe calls for it.
Preheat means bringing the oven up to the specified
temperature before putting the food in the oven.
To preheat, set the oven at the correct temperature--
selecting a higher temperature does not shorten
preheat time.
Baking Pans
Use the proper baking pan. The type of finish on the
pan determines the amount of browning that will occur.
*Dark, rough or dull pans absorb heat resulting in a
browner, crisper crust. Use this type for pies.
* Shiny, bright and smooth pans reflect heat, resulting
in a lighter, more delicate browning. Cakes and
cookies require this type of pan.
*Glass baking dishes also absorb heat. When baking
in glass baking dishes, the temperature may need to
be reduced by 25°F.
*If you are using dark non-stick pans, you may find
that you need to reduce the oven temperature 25°F.
to prevent overbrowning.
Baking Guides
When using prepared baking mixes, follow package recipe or
instructions for the best baking results.
Pan Placement
For even cooking and proper browning, there must be
enough room for air circulation in the oven. Baking
results will be better if baking pans are centered as
much as possible rather than being placed to the front
or to the back of the oven.
Pans should not touch each other or the walls of the
oven. Allow 1- to 1½-inch space between pans as well
as from the back of the oven, the door and the sides. If
you need to use two shelves, stagger the pans so one
is not directly above the other.
Cookies
When baking cookies, flat cookie sheets (without
sides) produce better-looking cookies. Cookies baked
in a jelly roll pan (short sides all around) may have
darker edges and pale or light browning may occur.
Do not use a cookie sheet so large that it touches the
walls or the door of the oven. Never entirely cover
a shelf with a large cookie sheet.
For best results, use only one cookie sheet in the oven
at a time.
14
Page 15
Pies
Cakes
For best results, bake pies in dark, rough or dull pans
to produce a browner, crisper crust. Frozen pies in foil
pans should be placed on an aluminum cookie sheet
for baking since the shiny foil pan reflects heat away
from the pie crust; the cookie sheet helps retain it.
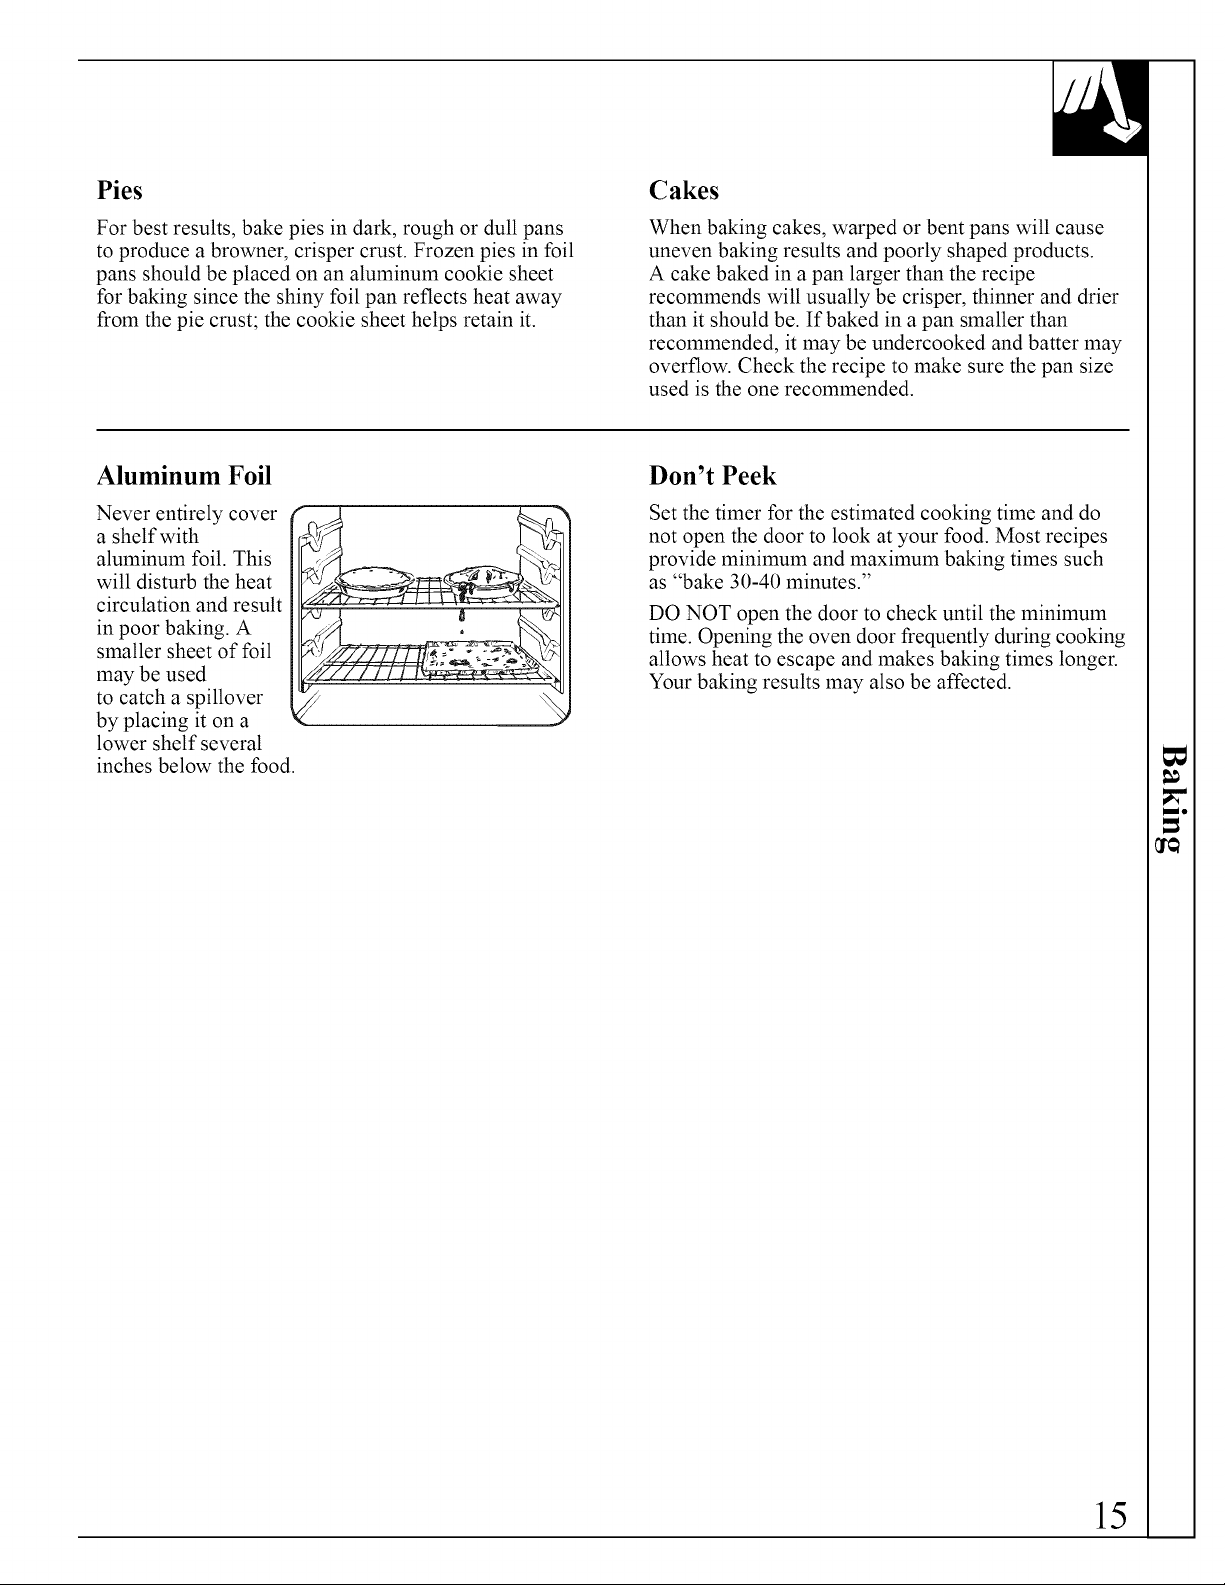
Aluminum Foil
Never entirely cover
a shelf with
aluminum foil. This
will disturb the heat
circulation and result
in poor baking. A
smaller sheet of foil
may be used
to catch a spillover
by placing it on a
lower shelf several
inches below the food.
When baking cakes, warped or bent pans will cause
uneven baking results and poorly shaped products.
A cake baked in a pan larger than the recipe
recommends will usually be crisper, thinner and drier
than it should be. If baked in a pan smaller than
recommended, it may be undercooked and batter may
overflow. Check the recipe to make sure the pan size
used is the one recommended.
Don't Peek
Set the timer for the estimated cooking time and do
not open the door to look at your food. Most recipes
provide minimum and maximum baking times such
as "bake 30-40 minutes."
DO NOT open the door to check until the minimum
time. Opening the oven door frequently during cooking
allows heat to escape and makes baking times longer.
Your baking results may also be affected.
15
Page 16
How to Time Bake
TIMED BAKING
(on some models)
The oven can be set to turn on and off automatically
at specific times that you set. Examples of Immediate
Start (oven turns on now' and you set it to turn off
automatically) and Delay Start and Stop (setting the
oven to turn on automatically at a later time and turn
off at a preset Stop Time) will be described.
How to Set Immediate Start and Automatic Stop
To avoid possible burns, place the shelves in the
correct position before you turn the oven on.
The oven will turn on immediately and cook for a
selected length of time. At the end of the bake time,
the oven will turn off automatically.
NOTE: To start cooking immediately and turn off
automatically, you must turn the OVEN SET knob
to TIMED BAKE.
1. To set the Stop Time, push in the knob on the
STOP TIME dial and turn the pointer to the time
of day you want the oven to turn off; for example
6:00. The pointer on the DELAY START dial
should be at the same time of day as the clock.
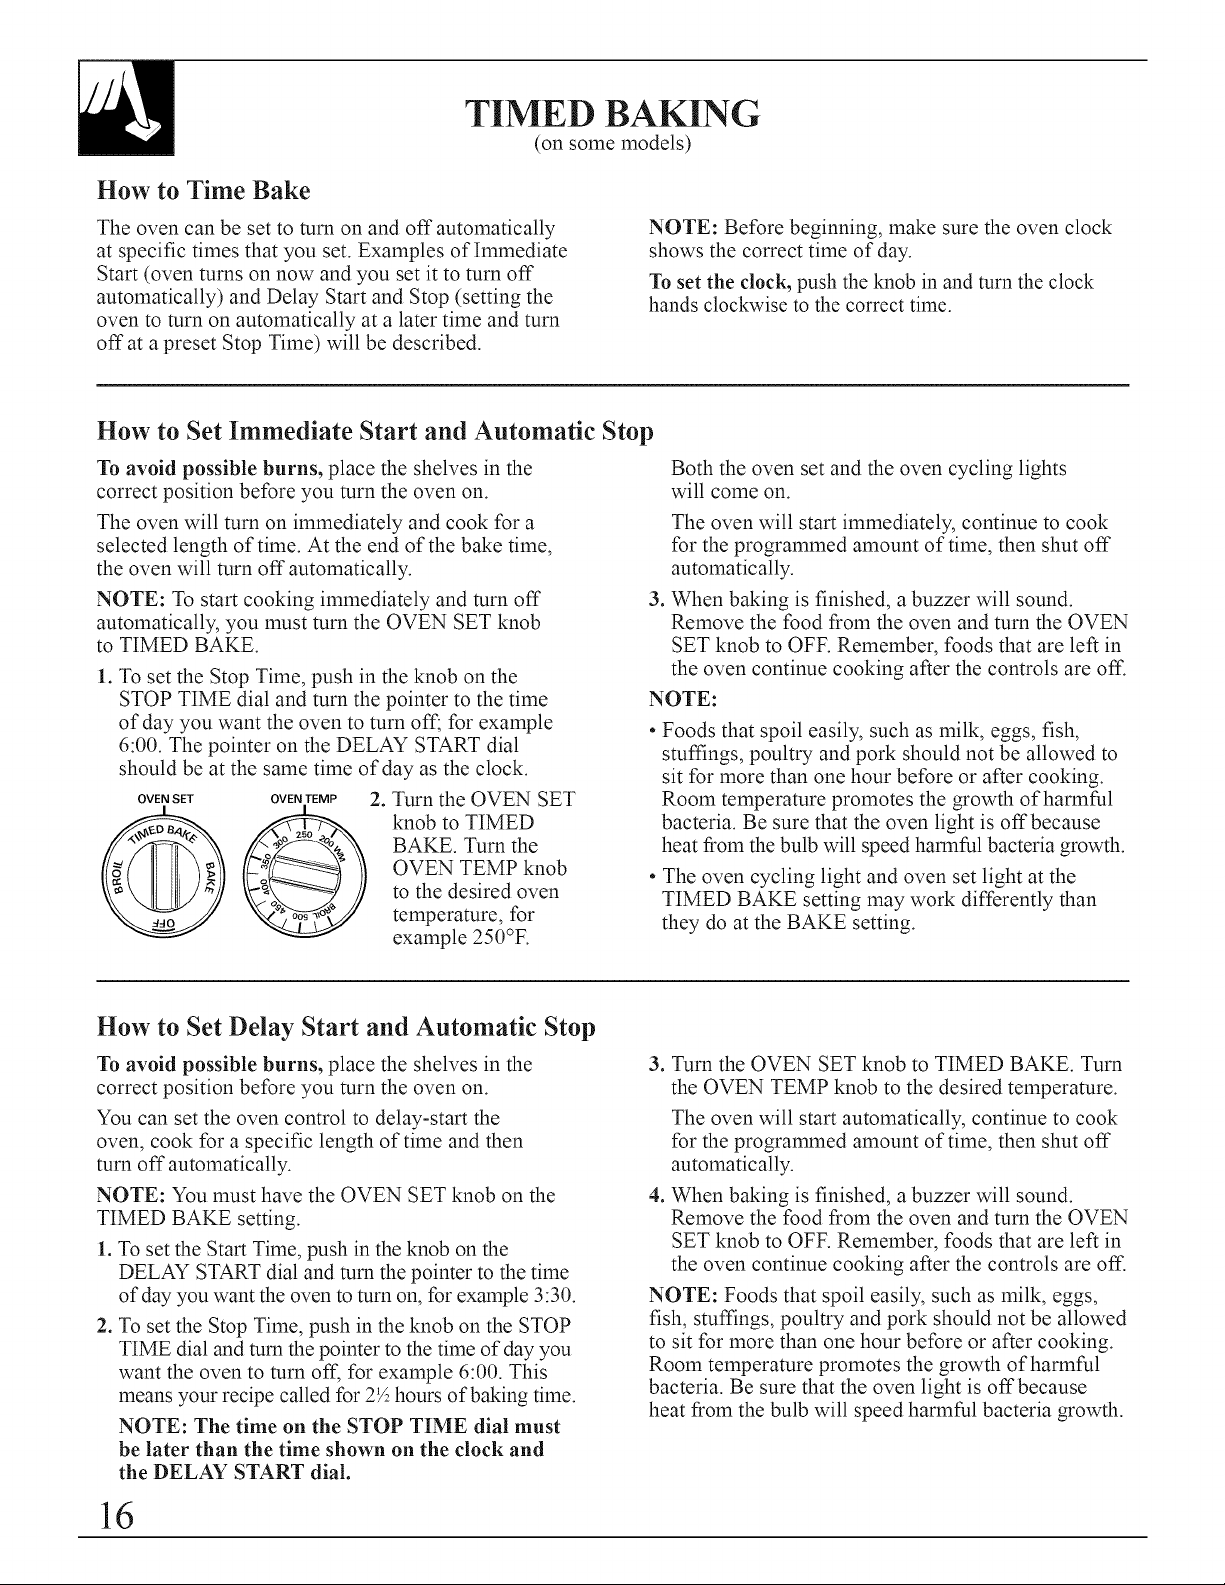
OVEN SET OVEN TEMP
2. Turn the OVEN SET
knob to TIMED
BAKE. Turn the
OVEN TEMP knob
to the desired oven
temperature, for
example 250°F.
NOTE: Before beginning, make sure the oven clock
shows the correct time of day.
To set the clock, push the knob in and turn the clock
hands clockwise to the correct time.
Both the oven set and the oven cycling lights
will come on.
The oven will start immediately, continue to cook
for the programmed amount of time, then shut off
automatically.
.
When baking is finished, a buzzer will sound.
Remove the food from the oven and turn the OVEN
SET knob to OFE Remember, foods that are left in
the oven continue cooking after the controls are off.
NOTE:
*Foods that spoil easily, such as milk, eggs, fish,
stuffings, poultry and pork should not be allowed to
sit for more than one hour before or after cooking.
Room temperature promotes the growth of harmful
bacteria. Be sure that the oven light is off because
heat from the bulb will speed harmful bacteria growth.
* The oven cycling light and oven set light at the
TIMED BAKE setting may work differently than
they do at the BAKE setting.
How to Set Delay Start and Automatic Stop
To avoid possible burns, place the shelves in the
correct position before you turn the oven on.
You can set the oven control to delay-start the
oven, cook for a specific length of time and then
turn off automatically.
NOTE: You must have the OVEN SET knob on the
TIMED BAKE setting.
1. To set the Start Time, push in the knob on the
DELAY START dial and turn the pointer to the time
of day you want the oven to turn on, for example 3:30.
2. To set the Stop Time, push in the knob on the STOP
TIME dial and turn the pointer to the time of day you
want the oven to turn off, for example 6:00. This
means your recipe called for 2½ hours of baking time.
NOTE: The time on the STOP TIME dial must
be later than the time shown on the clock and
the DELAY START dial.
16
3. Turn the OVEN SET knob to TIMED BAKE. Turn
the OVEN TEMP knob to the desired temperature.
The oven will start automatically, continue to cook
for the programmed amount of time, then shut off
automatically.
.
When baking is finished, a buzzer will sound.
Remove the food from the oven and turn the OVEN
SET knob to OFE Remember, foods that are left in
the oven continue cooking after the controls are off.
NOTE: Foods that spoil easily, such as milk, eggs,
fish, stuffings, poultry and pork should not be allowed
to sit for more than one hour before or after cooking.
Room temperature promotes the growth of harmful
bacteria. Be sure that the oven light is off because
heat from the bulb will speed harmful bacteria growth.
Page 17
ADJUST THE OVEN THERMOSTAT
DO IT YOURSELF!
You may find that your new oven cooks differently
than the one it replaced. We recommend that you
use your new oven for a few weeks to become more
familiar with it, following the times given in your
recipes as a guide.
If you think your new oven is too hot or too cold,
you can adjust the thermostat yourself. If you think
it is too hot, adjust the thermostat to make it cooler.
If you think it is too cool, adjust the thermostat to
make it hotter.
We do not recommend the use of inexpensive
thermometers, such as those found in grocery stores,
to check the temperature setting of your new oven.
These thermometers may vary 20-40 degrees.
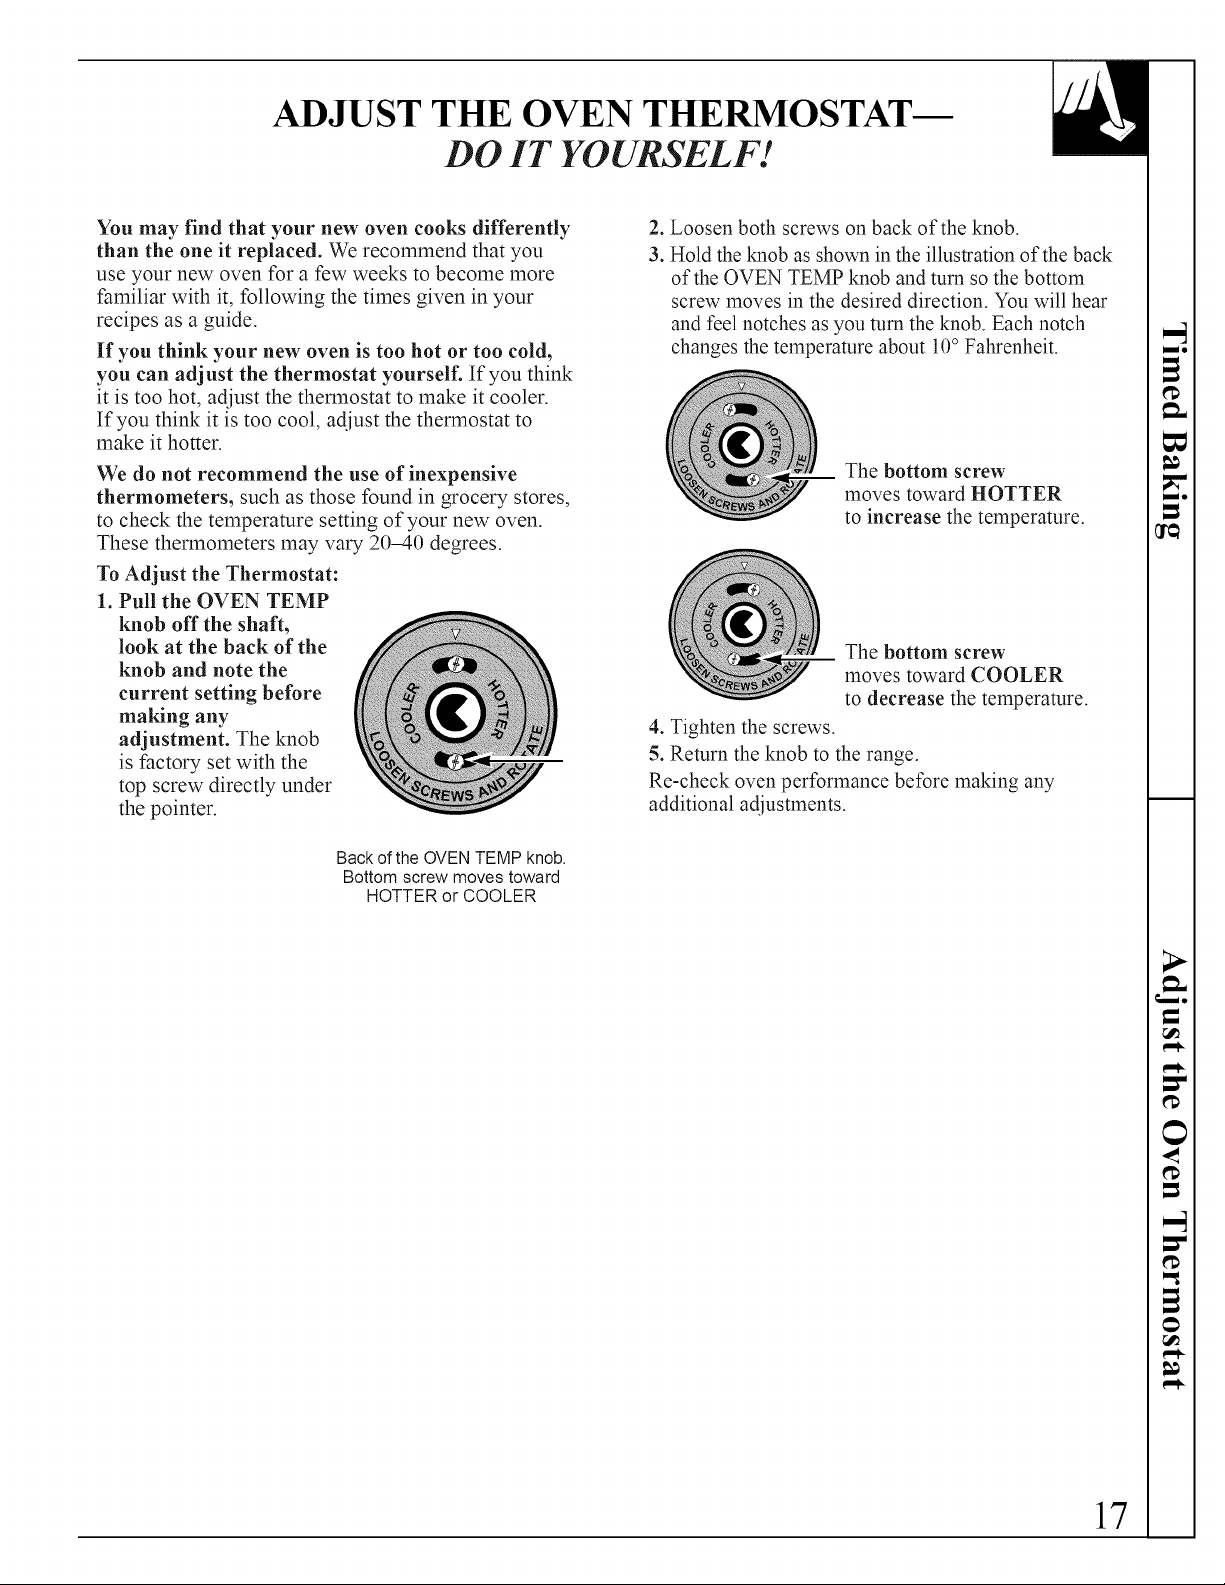
To Adjust the Thermostat:
1. Pull the OVEN TEMP
knob off the shaft,
look at the back of the
knob and note the
current setting before
making any
adjustment. The knob
is factory set with the
top screw directly under
the pointer.
2. Loosen both screws on back of the knob.
3. Hold the knob as shown in the illustraion of the back
of the OVEN TEMP knob and turn so the bottom
screw moves in the desired direction. You will hear
and feel notches as you turn the knob. Each notch
changes the temperature about 10° Fahrenheit.
The bottom screw
moves toward HOTTER
to increase the temperature.
The bottom screw
moves toward COOLER
to decrease the temperature.
4. Tighten the screws.
5. Return the knob to the range.
Re-check oven performance before making any
additional adjustments.
Back of the OVEN TEMP knob.
Bottom screw moves toward
HOTTER or COOLER
17
Page 18

ROASTING
Roasting is cooking by dry heat. Tender meat or
poultry can be roasted uncovered in your oven.
Roasting temperatures, which should be low and
steady, keep spattering to a minimum.
Roasting is really a baking procedure used for meats.
Therefore, the oven controls are set for Baking or
Timed Baking (on some models). (You may hear a
slight clicking sound, indicating the oven is working
properly.) Timed Baking will turn the oven on and
off automatically.
1. Place the shelf
in A or B position.
No preheating
is necessary.
2. Check the weight
of the meat. Place
the meat fat-side-up
(or poultry breast- ""
side-up) on roasting rack in a shallow pan. The
melting fat will baste the meat. Select a pan as
close to the size of the meat as possible. (The
broiler pan with rack is a good pan for this.)
Most meats continue to cook slightly while standing,
after being removed from the oven. Standing time
recommended for roasts is 10 to 20 minutes. This
allows roasts to firm up and makes them easier to
carve. Internal temperature will rise about 5° to 10°F.;
to compensate for temperature increase, if desired,
remove roast from oven sooner (at 5° to 10°F. less
than temperature in the Roasting Guide).
Remember that food will continue to cook in the
hot oven and therefore should be removed when
the desired internal temperature has been reached.
3. Turn the OVEN
OVEN SET OVEN TEMP
SET to BAKE
and the OVEN
TEMP to
the desired
temperature.
4. After roasting is complete, turn the OVEN SET
knob to OFF.
Use of Aluminum Foil
You can use aluminum foil to line the broiler pan.
This makes clean-up easier when using the pan for
marinating, cooking with fruits, cooking heavily
cured meats or basting food during cooking. Press
the foil tightly around the inside of the pan.
'I_ "
18
Page 19

Questions and Answers
Q. Is it necessary to check for doneness with
a meat thermometer?
A. Checking the finished internal temperature at the
completion of cooking time is recommended.
Temperatures are shown in Roasting Guide. For
roasts over 8 lbs., check with thermometer at half-
hour intervals after half the time has passed.
Q. Why is my roast crumbling when I try
to carve it?
A. Roasts are easier to slice if allowed to cool l0 to
20 minutes after removing them from the oven.
Be sure to cut across the grain of the meat.
ROASTING GUIDE
Frozen Roasts
Frozen roasts of beef, pork, lamb, etc., can be started
without thawing, but allow 10 to 25 minutes per
pound additional time (10 minutes per pound for
roasts under 5 pounds, more time for larger roasts).
Q. Do I need to preheat my oven each time
I cook a roast or poultry?
A. It is not necessary to preheat your oven.
Q. When buying a roast, are there any special tips
that would help me cook it more evenly?
A. Yes. Buy a roast as even in thickness as possible,
or buy rolled roasts.
Q. Can I seal the sides of my foil "tent" when
roasting a turkey?
A. Sealing the foil will steam the meat. Leaving
it unsealed allows the air to circulate and brown
the meat.
Make sure poultry is thawed before roasting.
Unthawed poultry often does not cook evenly. Some
commercial frozen poultry can be cooked successfully
without thawing. Follow the directions given on the
package label.
Oven Internal
Type
Meat
Tender cuts; rib, high quality sirloin
tip, rump or top round*
Lamb leg or bone-in shoulder*
Veal shoulder, leg or loin*
Pork loin, rib or shoulder*
Ham, precooked
Poultry
Chicken or Duck
Chicken pieces
Turkey
*For boneless rolled roasts over 6 inches thick, add 5 to 10 minutes per pound to times given above.
?The U.S. Department of Agriculture says "Rare beef is popular, but you should know that cooking it to only 140°F. means
some food poisoning organisms may survive." (Source: Safe Food Book. Your Kitchen Guide. USDA Rev. June 1985.)
Temperature Doneness Temperature °F.
325°
325°
325°
325°
325°
325°
350°
325°
Rare:
Medium:
Well Done:
Rare:
Medium:
Well Done:
Well Done:
Well Done:
To Warm:
Well Done:
Well Done:
Well Done:
Approximate Roasting Time
in Minutes per Pound
3 to 5 lbs. 6 to 8 lbs.
24-33 18-22
35-39 22-29
40-45 30-35
21-25 20-23
25-30 24-28
30-35 28-33
35-45 30-40
35-45 30-40
17-20 minutes per pound (any weight)
3 to 5 lbs. Over 5 lbs.
35-40 30-35
35-40
10 to 15 lbs. Over 15 lbs.
18-25 15-20
140°-150° t
150o-160 °
170o-185 °
140°-150° t
150o-160 °
170o-185 °
170o-180 °
170o-180 °
115o-125 °
185o-190 °
185o-190 °
In thigh:
185°-190 °
19
Page 20

BROILING
Broiling is cooking food by intense radiant heat from
the upper element in the oven. Most fish and tender
cuts of meat can be broiled. Follow these directions to
keep spattering and smoking to a minimum.
1. If the meat has fat or gristle around the edge, cut
vertical slashes through both about 2 inches apart.
If desired, the fat may be trimmed, leaving layer
about 1/8" thick.
2. Place the meat on the broiler rack in the broiler pan.
Always use the rack so the fat drips into the broiler
pan; otherwise the juices may become hot enough
to catch on fire.
3. Position the shelf on the recommended shelf
position as suggested in the Broiling Guide. Most
broiling is done on C position, but if your range is
connected to 208 volts, you may wish to use a
higher position.
Turn the food using tongs only once during cooking.
Time the foods for the first side according to the Broiling
Guide. Turn the food, then use the times given for the
second side as a guide to the preferred doneness.
.
Leave the door open to
the broil stop position.
The door stays open by
itself, yet the proper
temperature is maintained
in the oven.
.
Turn the OVEN SET and the OVEN TEMP knob
to BROIL. Preheating elements is not necessary.
(See the Comments column in the Broiling Guide.)
.
When finished broiling, turn the OVEN SET knob
to OFE Serve the food immediately, leaving the
broiler pan and rack outside the oven to cool during
meal for easiest cleaning.
Use of Aluminum Foil
You can use aluminum foil to line your broiler pan and broiler rack.
However, you must mold the foil tightly to the rack and cut slits in
it just like the rack.
Without the slits, the foil will prevent fat and meat juices from
draining into the broiler pan. The juices could become hot enough to
catch on fire. If you do not cut the slits, you are frying, not broiling.
Questions and Answers
Q. When broiling, is it necessary to always use a
rack in the pan?
A. Yes. Using the rack suspends the meat over the
pan. As the meat cooks, the juices fall into the pan,
thus keeping meat drier. Juices are protected by the
rack and stay cooler, thus preventing excessive
spatter and smoking.
Q. Do I need to grease my broiler rack to prevent
meat from sticking?
A. No. The broiler rack is designed to reflect broiler
heat, thus keeping the surface cool enough to
prevent meat from sticking to the surface.
However, spraying the broiler rack lightly
with a vegetable cooking spray before cooking
will make clean-up easier.
20
Q. Why are my meats not turning out as brown as
they should?
A. In some areas, the power (voltage) to the oven
may be low. In these cases, preheat the broil
element for 10 minutes before placing broiler pan
with food in oven. Check to see if you are using
the recommended shelf position. Broil for longest
period of time indicated in the Broiling Guide.
Turn food only once during broiling. You may
need to move the food to a higher shelf position.
Q. Should I salt the meat before broiling?
A.
No. Salt draws out the juices and allows them
to evaporate. Always salt after cooking. Piercing
the meat with a fork also allows juices to escape.
Turn meat with tongs instead of a fork.
Page 21

BROILING GUIDE
• Always use the broiler pan and rack that comes with
your oven. It is designed to minimize smoking and
spattering by trapping juices in the shielded lower
part of the pan.
• The oven door should be open to the broil
stop position.
• For steaks and chops, slash fat evenly around the
outside edges of the meat. To slash, cut crosswise
through the outer fat surface just to the edge of the
meat. Use tongs to turn the meat over to prevent
piercing the meat and losing juices.
• If desired, marinate meats or chicken before broiling,
• When arranging food on the pan, do not let fatty
edges hang over the sides because the dripping fat
will soil the oven.
• The broiler does not need to be preheated. However,
for very thin foods, or to increase browning, preheat
if desired.
• Frozen steaks can be broiled by positioning the oven
shelf at next lowest shelf position and increasing
cooking time given in this guide 1½ times per side.
• If your range is connected to 208 volts, rare
steaks may be broiled by preheating the broiler
and positioning the oven shelf one position higher.
or brush with barbecue sauce last 5 to 10 minutes only.
Quantity and/or Shelf First Side Second Side
Food Thickness Position Time, Minutes Time, Minutes
Bacon 1/2 lb. (about 8 C 4½ 4½
thin slices)
Ground Beef
Well Done
1 lb. (4 patties)
1/2 to 3/4 inch thick C 10 7
Comments
Arrange in single layer.
Space evenly.
Up to 8 patties take about same time.
Beef Steaks
Rare
Medium
Well Done
Rare
Medium
Well Done
Chicken
1inch thick
(1 to 1_ lbs.)
1½ inch thick
(2 to 2½ lbs.)
1 whole
(2 to 2½ lbs.),
split lengthwise
c
c
c
c
c
c
A
6
8
12
10
15
25
35
ll
7-8
14-16
20-25
10-15
5
6
Steaks less than 1 inch thick cook
through before browning. Pan frying
is recommended.
Slash fat.
Reduce time about 5 to 10 minutes
per side for cut-up chicken. Brush
each side with melted butter. Broil
skin-side-down first.
Bakery Products
Bread (Toast) or
Toaster Pastries
English Muffins
Lobster Tails
2 to 4 slices
1pkg. (2)
2 (split)
2-4
(6 to 8 oz. each)
C orD
C orD
B
1½-2
3-4
13-16
1/2
Space evenly. Place English muffins
cut-side-up and brush with butter,
if desired.
Do not Cut through back of shell. Spread
turn over. open. Brush with melted butter before
broiling and after half of broiling time.
Fish l-lb. fillets 1/4 to C 5 5 Handle and turn very carefully. Brush
1/2 inch thick with lemon butter before and during
cooking, if desired. Preheat broiler to
increase browning.
Ham Slices 1inch thick B 8 8 Increase time 5 to 10 minutes per side
(precooked) for 1½ inch thick or home cured ham.
Pork Chops 2 (1/2 inch thick) C 10 10 Slash fat.
Well Done 2 (1 inch thick), B 13 13
about 1 lb.
Lamb Chops
Medium
Well Done
Medium
Well Done
Wieners and
similar precooked
2 (1 inch thick),
about 10 to 12 oz.
2 (1_ inch thick),
about 1 lb.
l-lb. pkg. (10)
c
c
c
B
C
l0
12
14
17
6
9
10
12
12-14
1-2
Slash fat.
If desired, split sausages in half
lengthwise; cut into 5- to 6-inch pieces.
sausages,
bratwurst
_,,,,Be
_,,,,Be
_,,,,Be
_,,,,Be
me
21
Page 22

CARE AND CLEANING
Proper care and cleaning are important so your range
will give you efficiem and satisfactory service. Follow
these directions carefully in caring for it to help assure
safe and proper maintenance.
Oven Shelves
Clean the shelves with a mild abrasive cleanser or
steel wool. After cleaning, rinse the shelves with clean
water and dw with a clean cloth.
Broiler Pan and Rack
After broiling, remove the broiler pan from the oven.
Remove the rack from the pan. Carefully pour out the
grease from the pan into a proper container. Wash and
rinse the broiler pan and rack in hot water with a
soap-filled or plastic scouring pad.
If food has burned on, sprinkle the rack with
detergent while hot and cover with wet paper
towels or a dishcloth. Soaking the pan will remove
burned-on foods.
Both the broiler pan and rack may be cleaned with a
commercial oven cleaner.
BE SURE THAT THE ELECTRIC POWER
IS OFF BEFORE CLEANING ANY PART OF
THE RANGE.
////'/It lJ I tTt111\'_\_\'_\\ _)
Both the broiler pan and rack can also be cleaned in
the dishwasher.
Do not store a soiled broiler pan and rack anywhere
in the range.
Oven Heating Elements
Do not clean the bake element or the broil element.
Any soil will burn offwhen the elements are heated.
The bake element can be lifted gemly to clean the
oven floor. If spillovers, residue or ash accumulate
around the bake element gently wipe around the
element with warm water.
Broil Element
Bake Element
22
Page 23

Control Panel and Knobs
It's a good idea to wipe the control panel after each
use. Clean with mild soap and water or vinegar and
water, rinse with clean water and polish dry with a
soft cloth.
Do not use abrasive cleansers, strong liquid
cleansers, plastic scouring pads or oven cleaners
on the control panel--they will damage the finish. A
50/50 solution of vinegar and hot water works welt.
The control knobs may be removed for easier
cleaning.
Before removing the knobs for cleaning, please note
that the knobs on the left side and the knobs on the
right side are in the proper OFF position. When
replacing the knobs, check the OFF position to insure
proper placement.
Painted Surfaces
Painted surfaces include the control panel. Clean these
with soap and water or a vinegar and water solution.
Do not use commercial oven cleaners, cleansing
powders, steel wool or harsh abrasives on any
painted surface.
To remove a knob, pull it straight off the stem. If a
knob is difficult to remove, place a thin cloth (like a
handkerchief) or a piece of string under and around
the knob edge and pull up.
Wash the knobs in soap and water but do not soak.
Avoid getting water down in to the knob stem holes.
Glass Surfaces
To clean the outside glass finish, use a glass cleaner.
Rinse and polish with a dry cloth. Do not allow the
water or cleaner to run down inside openings in
the top of the oven door while cleaning.
Oven Light Replacement
CAUTION: Before replacing your oven light bulb,
disconnect the electrical power for your range at
the main fuse or circuit breaker panel.
Be sure to let the light cover and bulb cool completely
before removing or replacing them. When in use, light
bulbs can become warm enough to break if touched
with a moist cloth or towel. When cleaning, avoid
touching warm lights with cleaning cloths if the light
cover is removed.
The oven light bulb is covered with a removable glass
cover which is held in place with a wire. Remove the
oven door, if desired, to reach the cover easily.
To remove:
• Hold your hand under the cover so it doesn't fall
when released. With fingers of the same hand,
firmly push back the wire cover holder. Lift off
the cover.
• DO NOT REMOVE ANY SCREWS TO
REMOVE THE COVER.
• Replace bulb with 40-watt home appliance bulb.
To replace cover:
• Place it into the groove of the light receptacle. Pull
the wire forward to the center of cover until it snaps
in place. When in place, the wire holds the cover
firmly. Be certain the wire is in the depression in the
center of the cover.
• Connect the electrical power to the range.
holder
(continued next laage)
23
Page 24

Lift-Off Oven Door
CARE AND CLEANING
(continued)
The oven door is removable, but it is heavy.
You may need help removing and replacing
the door. Do not lift the door by the handle.
This can cause the glass to break or cause
damage to the door.
To remove the door, open it a few inches
to the special stop position that will hold the [
door open. Grasp firmly on each side and
lift the door straight up and off the hinges, j
NOTE:
*Be careful not to place hands between the hinge and
the oven door frame as the hinge could snap back and
pinch fingers.
*While working in the oven area, cover the hinges with
towels or empty paper towel rolls to prevent pinched
fingers and chipping the porcelain enamel on the frame.
To replace the door, maJ;e sure the hinges are in the
special stop position. Position the slots in the bottom of the
door squarely over the hinges. Then lower the door slowly
and evenly over both hinges at the same time. If hinges
snap back against the oven frame, pull them back out.
!
D
TO CLEAN THE DOOR:
Inside of door:
* Soap and water will normally do the job. Heavy
spattering or spillovers may require cleaning with a
mild abrasive cleaner. Soapy, wet metal pads may also
be used. Do not allow food spills with a high sugar or
acid content (such as milk, tomatoes, sauerkraut, fruit
juices or pie filling) to remain on the surface. They
may cause a dull spot even after cleaning.
If necessary, you may use an oven cleaner.
Follow the package directions. Do not use oven
cleaners, cleansing powders or harsh abrasives on
the outside of the door.
Outside of door:
*Use soap and water to thoroughly clean the top, sides
and front of the oven door. DO NOT let water run
down through openings in the top of the door. Rinse
well. You may also use a glass cleaner to clean the
glass on the outside of the door.
* Spillage of marinades, fruit juices, tomato sauces and
basting materials containing acids may cause
discoloration and should be wiped up immediately.
When surface is cool, clean and rinse.
Porcelain Oven Interior
With proper care, the porcelain
enamel finish on the inside of
the oven--top, bottom, sides,
back and inside of the door--
will stay new-looking for years.
Let the range cool before
cleaning. We recommend that
you wear rubber gloves when cleaning the range.
Soap and water will normally do the job. Heavy
spattering or spillovers may require cleaning with a
mild abrasive cleaner. Soapy, wet metal pads may also
be used. Do not allow food spills with a high sugar or
acid content (such as milk, tomatoes, sauerkraut, fruit
:juices or pie filling) to remain on the surface. They
may cause a dull spot even after cleaning.
Household ammonia may make the cleaning job
easier. Place 1/2 cup in a shallow glass or pottery
container in a cold oven overnight. The ammonia
fumes will help loosen the burned-on grease and food.
If necessary, you may use an oven cleaner.
Follow the package directions.
Cautions about using spray-on oven cleaners:
*Do not spray on the electrical controls and switches
because it could cause a short circuit and result in
sparking or fire.
*Do not allow a film from the cleaner to build up
on the temperature sensor--it could cause the oven
to heat improperly. (The sensor is located at the top
of the oven.) Carefully wipe the sensor clean after
each oven cleaning, being careful not to move the
sensor as a change in its position could affect how
the oven bakes.
*Do not spray any oven cleaner on the outside of
the door, handles or any exterior surface of the
oven, cabinets or painted surfaces. The cleaner
can damage these surfaces
24
Page 25

Surface Units and Drip Pans
To clean the surface units, turn the control to the highest
setting for a minute. The coils wilt burn off any soil.
CAUTION
• Be sure all the controls are turned to OFF and
the surface units are cool before attempting to
remove them.
• Do not immerse the surface units in liquids of any kind.
• Do not clean the surface units in a dishwasher.
• Do not bend the surface unit plug terminals.
• Do not attempt to clean, adjust or in any way repair
the plug-in receptacle.
To remove a surface unit:
To remove the drip pans for cleaning, the surface units
must be removed first.
Lift the surface unit about 1 inch above the drip pan
and pull it out.
Surface Unit
Receptacle
,Drip Pan
Do not lift the surface unit more than 1 inch. If you
do, it may not lie flat on the drip pan when you plug
it back in.
Repeated lifting of the surface unit more than 1 inch
above the drip pan can permanently damage the
receptacle.
To replace a surface unit:
• Replace the drip pan into the recess in the cooktop.
Make sure opening in the pan lines up with the
receptacle.
• Insert the terminals of the surface unit through the
opening in the drip pan and into the receptacle.
• Guide the surface unit into place so it rests evenly.
Drip Pans
Remove the surface units. Then lift out the drip pans.
For best results, clean the drip pans by hand.
Place them in a covered container (or a plastic bag)
with 1/4 cup ammonia to loosen the soil. Then scrub
with a soap filled scouring pad if necessary. Rinse with
clean water and polish with a clean soft cloth.
The drip pans may also be cleaned in the dishwasher.
Clean the area under the drip pans often.
Built-up soil, especially grease, may catch on fire.
Do not cover drip pans with foil. Using foil so close
to the receptacle could cause shock, fire or damage to
the range.
Porcelain Cooktop (on some models)
The porcelain enamel finish is sturdy but breakable if
misused. This finish is acid-resistant. However, any
acidic foods spilled (such as fruit juices, tomato or
vinegar) should not be permitted to remain on the finish.
If acids spill on the cooktop while it is hot, use a dry
paper towel to wipe it up right away. When the surface
has cooled, wash with soap and water or cleansing
powders. Rinse well.
Lift-Up Cooktop
cooktop often. Built-up
Clean the area under the __/_'__-v
soil, especially grease, ,_ J i__
may catch fire. To make _
cleaning easier, tile __
entire cooktop may be \x /_
lifted up and supported
in the up position.
For other spills, such as fat spatterings, wash with
soap and water or cleansing powders after the surface
has cooled. Rinse welt. Polish with a dry cloth.
Be sure all surface units are turned off before
raising the cooktop. Grasp the front sides of the
cooktop and lift. The surface units and drip pans do not
need to be removed before raising the cooktop, however,
you may remove one to make raising the cooktop easier.
After cleaning under the cooktop with hot, mild soapy
water and a clean cloth, lower the cooktop. Be careful
not to pinch your fingers.
25
Page 26

QUESTIONS?
USE THIS PROBLEM SOLVER
PROBLEM
OVEN WILL
NOT WORK
OVEN LIGHT
DOES NOT WORK
FOOD DOES NOT
BROIL PROPERLY
FOOD DOES NOT ROAST
OR BAKE PROPERLY
SURFACE UNITS
NOT FUNCTIONING
PROPERLY
OVEN TEMPERATURE
TOO HOT OR TOO COLD
"BURNING" OR "'OILY"
ODOR EMITTING FROM
OVEN WHEN TURNED ON
STRONG ODOR
AUTOMATIC OVEN
TIMERS DO NOT
WORK PROPERLY
POSSIBLE CAUSE
, The circuit breaker in your house has been tripped, or a fuse has been blown.
• Oven controls not properly set.
• Light bulb is loose.
, Bulb is defective. Replace.
• Switch operating light is broken. Call for service.
- OVEN TEMP and OVEN SET knobs not set at BROIL.
- Door not left open to the broil stop position.
, Improper shelf position being used. See the Broiling Guide.
- Food is being cooked on hot pan.
, Low voltage. See the Broiling section.
, Cookware isnot suitable for broiling.
• Aluminum foil used on the broi! pan rack has not been fitted properly
and slit as recommended.
- OVEN SET and OVEN TEMP knobs are not set correct1>
• Shelf position is incorrect. See Roasting or Baking sections.
, Oven shelf is not level.
, Incorrect cookware or cookware of improper size is being used.
• The oven thermostat needs adjustment. See the Adjust the Oven Thermostat--
Do I1 Yourself section.
° Surface u_its are not plugged in solidly.
- Drip pans are not set securely in the range top.
• Surface unit controls are not properly set_
. The oven thermostat needs adjustment. See the Adjust the
Oven Thermostat Do II Yourself section.
. This is normal in a new"oven and wil! disappear in time.
- An odor from the insulation around the inside of the oven is normal for the
first few times the oven is used. This is temporary-.
*Check to be certain step by step directions were followed correctly.
See the Automatic Timers and Clock section.
If you need more help...call, toll free:
GE Answer Centeff'*
800.626.2000
consumer information service
26
Page 27

We'll Be There
With the purchase of your new GE appliance, receive the assurance that if you ever need
information or assistance from GE, we'll be there. All you have to do is call-toll-free!
GEAnswer Center®
800.626.2000
Whatever your question about any GE major appliance, GE Answer Center ®
infbrmation sm_,ice is available to help. Your call-and your question-will be
answered promptly and courteously. And you can call any time. GE Answer
(;enter ®selMce is open 24 hours a day, 7 days a week.
In-HomeRepairService
800-GE-CARE$(800-432-2737)
A GE consumer sm_,ice professional will provide expert repair sei_,ice,
scheduled at a time that's convenient for you. Many GE Consumer Set_'ice
company-operated locations offer you seiMce today or tomorrow, or at your
convenience (7:00 a.m. to 7:00 p.m. weekdays, 9:00 a.m. to 2:00 p.m. Saturdays).
Our fhctotT-trained technicians know your appliance inside and out-so most
repairs can be handled in just one visit.
ForCustomersWithSpecialNeeds...
800.626.2000
_,_°
SECTION A_A
Upon request, GE will provide
Braille controls for a variety of GE
appliances, and a brochure to
assist in planning a barrier-flee
I
kitchen for persons with limited
mobilib_. To obtain these items,
flee of charge, call 800.626.2000.
Consumers with impaired hearing or speech who hm_e
access to a TDD or a conventional teletypewriter may
call 800-TDD-GEAC (800-833-4322) to request
information or sel_4ce.
ServiceContracts
800-626-2224
You can have the secure feeling that GE Consumer Setwice will sdll be there
after your warranty expires. Purchase a GE contract while your warranty is still
in effect and you'll receive a substantial discount. With a muldpleTear contract,
you're assured of timbre setMce at todw's prices.
PartsandAccessories
800-626-2002
=
=
Individuals qualified to service their own appliances
can have parts or accessories sent directly to their home.
The GE parts system provides access to over 47,000
parts...and all GE Genuine Renewal Parts are fi.llly
warranted. VISA, MasterCard and Discover cards
are accepted.
User maintenance instructions contained in this guide
cover procedures intended to be performed by any user.
Other servicing generally should be referred to qualified
service personnel. Caution must be exercised, since
improper servicing may cause unsafe operation.
Page 28

YOUR GE ELECTRIC RANGE
NTY
Staple sales slip or cancelled check
here. Proof of original purchase date
is needed to obtain service
under warranty.
WHAT IS COVERED
WHAT iS NOT COVERED
FULL ONE-YEAR WARRANTY
For one year from date of original
purchase, we will provide, free of
charge, parts and service labor in
your home to repair or replace
any part of the range that fails
because of a manufacturing defect.
• Service trips to your home to
teach you how to use the product.
Read your Use and Care material.
If you then have any questions
about operating the product,
please contact your dealer or our
Consumer Affairs office at the
address below, or call, toll flee:
GE Answer Center _
800.626.2000
consumer information service
• Improper installation.
If you have an installation problem,
contact your dealer or installer.
You are responsible for providing
adequate electrical, gas, exhausting
and other connecting facilities as
described in the Installation
Instructions provided with
the product.
This warranty is extended to the
original purchaser and any succeeding
owner for products purchased for
ordinary home use in the 48 mainland
states, Hawaii and Washington, D.C.
In Alaska the warranty is the same
except that it is LIMITED because
you must pay to ship the product to
the service shop or for the service
technician's travel costs to your home.
All warranty service will be provided
by our Factory Service Centers or by
our authorized Customer Care®
servicers during normal working hours.
Should your appliance need service,
during the warranty period or beyond,
call 800-GE-CARES (800-432-2737).
• Replacement of house fuses or
resetting of circuit breakers.
• Failure of the product if it is used
for other than its intended purpose
or used commercially.
• Damage to product caused
by accident, fire, floods or acts
of God.
WARRANTOR IS NOT RESPONSIBLE
FOR CONSEQUENTIAL DAMAGES.
Some states do not allow the exclusion or limitation of incidental or consequential damages, so the above limitation or exclusion
may not apply to you. This warranty gives you specific legal rights, and you may also have other rights which vary from state to state.
To know what your legal rights are in your state, consult your local or state consumer affairs office or your state's Attorney General.
O Recycled Paper
Part No. 164D2966P113
Pub No. 49-8593-1
2-95 CG
Warrantor: General Electric Company
If further help is needed concerning this warranty, write:
Manager=Consumer Affairs, GE Appliances, Louisville, KY 40225
JMS08
JMS10
Printed in LaFayette, GA
Page 29

Estufa
Seguridad ............................................3-5
Operacibn: instrucciones
¥ consejos
Papel de aluminio .....................4, 15, 18, 20
Reloj e indicador de tiempo ......................11
Caracteristicas ................................................ 6
iiiiiiiiiiiiiiiiiiiiiiiiiiiiiiiiiii ,
iiiiiiiiiiiiiiiiiiiiiiiiiiiiiiiiiiiiiii
iiiiiiiiiiiiiiiiiiiiiiiiiiiiiiiiiiiiiiiiiii ,
iiiiiiiiiiiiiiiiiiiiiiiiiiiiiiiiiiiiiiiiiiiiiii_
iiiiiiiiiiiiiiiiiiiiiiiiiiiiiiiiii_
iiiiiiiiiiii_i_i_iiiiiiiiiiiiiiiiiiiiiiiiiiiiiiiiiiiiiiiiiiiiiiiiiiiiiiiiiiiiiiiiiiiiiiiiiiiiiiiiiiiiiiiiiiiiiiiiiii_i
iiiiiiiiiiiiiiiiiiiiiiiiiiiiiiiiiiiii i ,
iiiiiiiiiiiiiiiiiiiiiiiiiiiiiiiiiiiiiiiiii i ,
iiiiiiiiiiiiiiiiiiiiiiiiiiiiiiiiiiiiiiiiiiiiiii_
Horno .......................................................12-21
Hornear ...............................................13-16
Asar al horno/Guia ...........................20, 21
Ajustes de los controles ..........................12
Luz del homo: Cambio de foco ......12, 23
Luz indicadora del
ciclo de horneado ...................................12
Luz indicadora de los
controles del homo ................................12
Precalentamiento ......................14, 19, 21
Asado al fuego directo/Guia .........18, 19
Parrillas ..................................12-15, 18, 22
Horneado retardado ......................... 15, 16
Cocinar en la parte superior ..................7-10
Ajustes de los controles ............................8
Consejos sobre los implementos
para cocinar ................................................ 9
Comparaci6n de cubiertas .......................7
Consejos para hacer enlatados
en la casa ..................................................10
Luces indicadoras de la superficie ........ 8
iiiiiiiiiiiiiiiiiiiiiiiiiiiiiiiiiiiiiiiiiiiiiiiii
iiiiiiiiiiiiiiiiiiiiiiiiiiiiiiiiiiiiiiiiiiiiiiiii
Guia para resolver
probiemas ..........................................26
Ajuste del termostato del homo--
H_ga/o Ud. mismo ................................... 17
_M_s preguntas?...llame a
GEAnswer Center®800.626.2000
Cuidado y iimpieza ..................22-25
Cubierta ..........................................................25
Puerta del homo removible .......................24
Servicios al consurnidor ......27
Registro del aparato .......................................2
NQmeros telef6nicos importantes ...........27
NQmeros de modelo y de serie ...................2
C6mo quitar la cinta adhesiva
del empaque .................................................2
Garantia ..........................................................28
Electrodom#sticos GE
Modelos: JMS08
JMSlO
Page 30

PERMITANOS AYUDARLE...
Antes de usar su estufa lea esta guia
cuidadosamente.
Asi podr_ operar y mantener su nueva estufa.
Mantdngala siempre a mano para resolver
cualquier duda.
Si no comprende algo o necesita ayuda, llame a:
GE Answer Center _"_
800.626.2000
24 horas del dia, 7 dias a la semana
Cdmo quitar la cinta adhesiva del
empaque
Para asegurarse de que el acabado del producto no
sufra ningfn datio, la manera m_s segura de quitar los
restos de adhesivo del empaque que hayan quedado
en la superficie de los aparatos nuevos, es la
aplicacidn de un detergente liquido domdstico para
m_quinas lavavajillas, aceite mineral o aceite para
cocinar. Apliquelo con una tela suave y permita que
los restos se empapen. Seque con un patio y aplique
un producto para pulir limpiando meticulosamente y
protegiendo asi la superficie.
NOTA: La cinta de pl_stico debe quitarse de los
acabados cromados de las partes del horno. No podrfi
quitarse si se hornea dejimdola puesta.
Anote los nfimeros del modelo y de la serie.
Los encontrarh en la etiqueta que se halla detr_s de la
puerta de la estufa.
Estos nOmeros tambidn se encuentran en la tarjeta
de registro que viene con su estufa. Antes de enviar
dicha tarjeta, anote los nfimeros aqui:
NOmero dei modeio
NOmero de la serie
Refidrase a estos n6meros en cualquier carta o
llamada relacionada con su estufa.
En caso de que su estufa resulte dafiada...
Pdngase en contacto inmediatamente con el
distribuidor (o fabricante) que le vendi6 la estufa.
Ahorre tiempo y dinero.
Antes de solicitar el servicio...
Consulte la seccidn de Guia para resolver problemas al
respaldo de este manual. Alli aparecen los principales
problemas de operacidn que Ud. mismo puede corregir.
SI NECESITA SERVICIO...
Para obtener servicio, yea la seccidn Servicios al
consumidor al respaldo de esta guia.
Estamos orgullosos de nuestro servicio y queremos
complacerlo. Si por alguna razdn no est_ satisfecho
con el servicio que recibe, he aqui tres pasos que
puede seguir.
PRIMERO, pdngase en contacto con quien le prest6
el servicio. Expliquele por qud no est_ satisfecho. En
la mayoria de los casos, esto solucionarfi el problema.
DESPUES, si afin no estfi satisfecho, escriba todos los
detalles, incluyendo su nfimero telefdnico, a:
Manager, Consumer Relations
GE Appliances
Appliance Park
Louisville, KY 40225
FINALMENTE, si su problema afln no est_ resuelto,
escriba a:
Major Appliance Consumer Action Panel
20 North Wacker Drive
Chicago, IL 60606
2
Page 31

INSTRUCCIONES IMPORTANTES DE SEGURIDAD
Lea estas instrucciones antes de usar este aparato.
Cuando utilice aparatos el_ctricos, deben
seguirse instrucciones bfisicas de seguridad.
que incluyen las siguientes:
• Utiliee este aparato s61o para el uso al que estfi
destinado, segim se describe en esta guia.
• Haga que un instalador calificado instale y
conecte a tierra su estufa de acuerdo con las
Instrucciones de instalacidn.
• Asegfirese de que la estufa haya sido instalada
en manera segura sobre una base firmemente
anclada a la estructura de la casa. E1peso en la
puerta del homo puede ocasionar que el homo se
vuelque y causar graves dafios. No le permlta
nunca a nadie encaramarse, sentarse o colgarse de
la puerta del homo.
• No trate de reparar o reemplazar cualquier
parte de la estufa a menos que se recomiende
especificamente en esta guia. Cualquier otto
servicio se debe completar s61o por instaladores
de estufas de gas calificados o t_cnicos de servicio.
• Pida que el instalador le muestre el lugar del
interruptor autom_itico del circuito de su casa o
del fusible. Indiquelo para referencia Ncil.
• No permita que nadie escale, se pare o se
cuelgue de la puerta o de la superficie para
cocinar. Podrian dafiar la estufa o causar
graves lesiones personales.
• Antes de llevar a cabo cualquier servicio,
DESCON_CTE LA ESTUFA DEL
SUMINISTRO DE CORRIENTE ELECTRICA
EN EL PANEL DE DISTRIBUCION DE LA
CASA QUITAI_O EL FUSIBLE 0 APAGANDO
EL INTERRUPTOR DEL CIRCI_TO ELECTRICO.
• Nunca deje abierta la puerta del horno cuando
no est6 usted vigilando la estufa
• No almacene materiales inflamables en un
horno ni cerca de la superficie de la estufa.
• Nunca use ropa suelta o prendas que cuelguen
cuando utilice este aparato. Tenga cuidado cuando
vaya a tomar articulos que est6n guardados en
gabinetes sobre la estufa. Los materiales inflamables
podrian incendiarse si se ponen en contacto con
_tuemadores cuya superficie est_ caliente o con
los elementos calefactores y podrian causar
quemaduras graves.
• Utilice s61o agarraderas que est6n
secas--las agarraderas h6xnedas o
mojadas que entren en contacto con
superficies calientes pueden provocar quemaduras
por el vapor. No permita que las agarraderas queden
en contacto con los quemadores calientes o con los
elementos calefactores. No use una toalla u otra
tela abultada. Dichas telas pueden incendiarse con
un quemador que est_ caliente o con tm elemento
calefactor.
• No use agua en incendios causados
pot grasa. Nunca levante una olla
que est_ en llamas. Apague la olla en
llamas sobre el quemador cubriendo la olla por
completo con una tapa que ajuste bien, una bandeja
para hornear galletas o una charola plana o, si lo
tiene disponible, con un extinguidor de polvo
quimlco seco o un exnnguidor a base de espuma.
La grasa en llamas que est_ fuera de la olla puede
apagarse cubri_ndola con polvo de hornear o. si lo
tiene disponible, con un extinguidor para usos
mfiltiples de polvo quimico seco o de espuma.
I
€-a
_o
_e
_o
• No deje solos a los nifios--los nifios no deben
quedarse solos o sin vigilancia en un firea dome
se est._.usando al.gfin aparato. Nunca se. les debe
permltlr clue se slenten o se paten en mnguna
parte del aparato.
• PRECAUCION: ARTICULOS DE INTERES
Las llamas en el homo pueden apagarse por
completo cerrando la puerta del homo y apagando
el homo. o usando un extinguidor de polvo
quimico seco o de espuma.
• Nunca deje cerca de su estufa frascos o latas
con grasa escurrida.
A LOS NINOS NO SE DEBEN GUARDAR
DENTRO DE LOS ARMARIOS ENCIMA DE
UNA ESTUFA O SOBRE LA CONSOLA
POSTERIOR DE LA ESTUFA LOS NINOS
QUE SUBEN A LA ESTUFA PARA TOMAR
ALGO PUEDEN DA_NARSE GRAVEMENTE.
• Ensefie a los nifios a no jugar con los controles
• Para su seguridad, nunca use su aparato para
calentar la habitaci6n.
• NO GUARDE NI USE MATERIALES
COMBUSTIBLES, GASOLINA U OTROS
VAPORES O LIQUIDOS CERCA DE ESTE
O CUALQUIER OTRO APARATO.
ni con cualquier otra parte de la estufa. _co,,ti,,,_a_, l_,pag_,,_,<_,_,,t_,
Page 32

INSTRUCCIONES IMPORTANTES DE SEGURIDAD
(continuacidn)
• No toque los quemadores, los elementos
calefactores ni la superficie interior del homo.
Estas superficies pueden estar lo suficientemente
calientes como para provocar quemaduras aunque
su color sea oscuro. Durante y @spuds del uso, no
las toque ni permita que la ropa u otros materiales
inflamab les entren en comacto con los quemadores.
con las fireas cercanas a los quemadores ni
cualquier itrea interior del homo. Primero deje que
pase el tiempo suficiente como para clue se enfrien.
Las superficies potencialmente calientes pueden
incluir la cubierta de la esmfa, las fireas que dan
hacia la cubierta de la estufa, las rejillas de
ventilacidn del homo, las superficies cercanas a la
ybertura, las ranura s que rodean la puerta del homo
las partes metfilicas decorativas sobre la puerta.
Recuerde: La superficie interior del homo puede
estar caliente cuando la puerta estd abierta.
• Mantenga limpios los filtros de la campana y
los de grasa para conservar una buena ventilacidn
y evitar clue la grasa se incendie.
, No deje que la grasa para cocinar u otros
materiales inflamables se acumulen en la estufa
o cerca de _sta.
*Al cocinar puerco, siga las instrucciones
precisamente y siempre cocine el puerco a una
temperatura interna de al menos 170 °F. Esto
asegura que, en la posibilidad remota que se
presente triquina en el p.uerco, se morirfi y se
podrfi comer el puerco sm peligro.
• Mantenga siempre a una distancia segura de su
estufa los tapices de pared que sean
combustibles y las cortinas o colgaduras.
• Mantenga libre de obstrucciones la
rejilla de ventilaeidn del homo.
• Mantenga el horno limpio contra
la grasa.
• Mantenga siempre las toallas de secar, los trapos
de coeina, las agarraderas para lo caliente y
otras telas a una distancia segura de su estufa.
• Mantenga siempre los utensilios de madera y
plfistico y la comida enlatada a una distancia
segura de su estufa.
• Coloque la parrilla del homo en la posicidn
deseada mientras el horno est6 frio. Si deben
manipularse las parrillas cuando el homo estd
caliente, no deje que las agarraderas para lo
caliente toquen los elementos calefactores.
• Tirando la parrilla hasta la posicidn en que se
detiene es una ventaja al levantar los alimentos
pesados. Es tambi_n una precaucidn contra
quemaduras al tocar las superficies calientes de
la puerta o las paredes del homo.
• Al usar las bolsas de coccidn o de asar en
el homo, siga las instmcciones del fabricante.
• No use el horno para secar papel periddico. Si
se sobrecalienta, puede incendiarse.
• No use el homo para guardar cosas. Los articulos
guardados en el homo pueden encenderse.
Horno
• Qu6dese lejos de la estufa al abrir la puerta
de un horno caliente. E1 aire caliente y el vapor
que escapan pueden causar quemaduras en las
manos, la cara y los oios.
- No caliente los recipientes cerrados. Lapresidn
podria aumentar y el recipiente podria estallar.
causando dafios.
• Despu_s de asar, saque siempre de la estufa la
charola para asar y limpiela. La grasa acumulada
en la charola del asador puede incendiarse la
siguiente vez que usted use la charola.
• No deje productos de papel, utensilios para
cocinar o alimentos dentro del horno cuando
no 1o est6 usando.
• No utilice papel aluminio para forrar el
fondo del homo excepto como se recomienda
en esta guia. La instalacion incorrecta de papel
aluminio podria causar un choque el&trico o
riesgo de incendio.
Page 33

Quemadores de superficie para cocinar
con quemadores de superficie de
diferentes tamafios. Elija las cacerolas para
cocinar que tengan un t'ondo plano lo
suficientemente grande como para cubrir el
elemento calefactor del quemador. E1 uso de
cacerolas mils pequefias expondria una porcidn
del quemador al contacto directo pudiendo causar
que la ropa se incendie. La proporcidn correcta
entre la cacerola y el quemador tambidn mejorarfi
la eficiencia de la estufa.
• Para evitar la posibilidad de quemaduras o de
choque el6ctrico, asegfirese siempre de que los
controles de todos los quemadores est6n en la
posici6n apagada y de que todos los
quemadores est6n frios antes de tratar de
levantarlos o de quitarlos.
• No sumerja o remoje los quemadores
removibles. No los ponga en la mfiquina
lavavajillas.
• Cuando haya alimentos en llamas debajo de la
campana, apague el ventilador. Si el ventilador
se encuentra en operaci6n podria hacer que las
llamas se extendieran.
• Nunca deje los quemadores sin vigilancia en
temperaturas elevadas. Los derrames de liquidos
que hierven pueden ocasionar salpicaduras
grasosas que tienden a incendiarse
• Asegfirese de que las charolas graseras no est6n
cubiertas y se encuentren en su sitio. Si no estfin
puestas durante el proceso de cocinar, esto podria
dafiarel cableado y las partes de la estufa.
• No utilice papel aluminio para forrar las
charolas graseras ni en cualquier otra parte del
homo excepto como se describe en este libro. • Utilice poca grasa para freir de manera
E1 uso incorrecto de las charolas podria causar efectiva en una sart6n poco profunda o muy
un choque eldctrico, riesgo de incendio o dafios profunda. Si llena la sartdn hasta el borde poclria
a la estufa, causar derrames cuando afiada los alimentos.
• S61o ciertos tipos de vidrio, combinaciones de
cerfimica/vidrio, barro u otros contenedores
vidriados son adecuados para cocinar en la
• Limpie la cubierta de la estufa con precauci6n.
Si usa una esponja o trapo hfimedo o moiado
para limpiar derrames en una cubierta caliente.
tenga cuidado para evitar quemaduras producidas
pot vapor.
• Los alimentos para freir deben estar tan secos
como sea posible. La escarcha sobre los alimentos
congelados o la humedad sobre los alimentos
frescos pueden provocar que la grasa calieme
burbujee y escape por los lados del recipiente.
• Si una combinaci6n de aceites o grasa se usarfi
al freir, revuelva antes de calentar o mientras la
grasa derrite lentamente.
superficie. Otros pueden romperse debido al
cambio sfibito de temperatura. Consulte la seccidn
Cocinar en la superficie.
• Para disminuir al mfiximo la posibilidad de
quemaduras, la ignici6n de materiales
inflamables y los derrames, el mango de los
recipiemes que se usen para cocinar debe dirigirse
al centro de la estufa sin extenderse sobre los
quemadores que estdn cerca
• Apague siempre los controles de los
quemadores antes de quitar las cacerolas.
• Siempre caliente la grasa lentamente y
obs&vela cuando se calienta.
• Use un term6metro para freir con bastante
aceite cuando sea posible para evitar
sobrecalentar la grasa sobre el punto de humo.
• Nunca trate de mover una sart6n de grasa
caliente, especialmente un freidor con bastame
aceite. Espere hasta que se enfrie el aceite.
• Vigile los alimentos que se est6n friendo a GUARDE ESTAS
temperatura alta o media alta. INSTRUCCIONES
Page 34

c IIII
CARACTERISTICAS DE SU ESTUFA
JMS08
JMS10
Indice de caracterisficas
1 Nfimeros de modelo y de serie
2 Unidad para asar
3 Rejilla de venfilaci6n del aire
4 Controles del quemador
5 Luz indicadora de "ON"
(encendido) del quemador
6 Cubierta que se levanta
Los rodillos de soporte la
mantienen levantada para
simplificar la limpieza de la
parte de abajo.
7 Quemadores embonables
8 Luz indicadora del horno
9 Perilla de OVEN SET
(programar el homo)
10 Reloj e indicador de tiempo
autom:iticos (en algunos modelos)
11 Charolas graseras
12 Interruptor de la luz del horno
Pfigina
2
20, 22
4
8, 23
8
25
25
12
12, 23
11
25
12
/Ill/It IFI Iltl/_/'t \'_\'t\ \))
Indice de caracterisficas
13 Luz indicadora del ciclo del horno
14 Perilla de OVEN TEMP
(temperamra del homo)
15 Luz del horno
16 Posiciones de las parrillas
Las sugerencias para las posiciones
de las parrillas se encuentran en las
secciones de Hornear, Asar al homo
y Asar al fuego directo.
17 Parrillas del horno con topes
1819Unidad de horneado
Puede levantarse con suavidad
para limpiar el fondo del homo.
Puerta del horno que se levanta,
con posicidn de tope para el asador
Se quita con facilidad para limpiar
el homo.
20 Charola y rejilla para asar 4, 20,
P_igina
12, 23
12, 23
12, 13, 18,
20, 21
12-15,
18, 22
20, 24
21, 22
12
22
6
Page 35

zCOMO SE COMPARAN ESTA
CUBIERTA Y LA VIEJA?
Su nueva esmfa tiene quemadores con resistencias
eldctricas. Si usted estfi acosmmbrado a cocinar con
quemadores de gas o con otros tipos de esmfas
eldctricas, notarfi algunas diferencias cuando utilice
resistencias eldctricas.
Los mejores tipos de recipientes que se pueden usar,
mils los tiempos de calentar y enfriar, dependen del
tipo de quemador o conjunto superior que Ud. tiene.
La tabla siguiente le ayudarfi a comprender las
diferencias entre los quemadores con resistencia
eldctrica y cualquier otro tipo de esmfa que pudiera
usted haber usado con anterioridad.
Tipo de cubierta
Bobina el_ctrica
@
Cubierta radiante
(vitrocer_mica)
©
Inducci6n
.---"?.',',,-,,;"L%
Disco s61ido
Quemadores
de gas
Descripci6n
Tuberia de metal
allanada comen-
iendo alambre
eldctrico resistente
suspendido sobre
una charola
grasera.
Las bobinas
eldctricas debajo
de una cubierta
vitrocerfimica.
Bobinas de
inducci6n de alta
frecuencia debajo
de una superficie
de vidrio.
Disco de hierro
colado s61ido
sellado a la
superficie de la
cubierta.
Los quemadores
regulares o
sellados de gas
usan el gas LP
(Propano) o gas
natural.
C6mo funciona
Se calienta por contacto directo con el recipiente y por calentando el aire
debajo del recipiente. Para obtener los lnejores resultados de cocci6n, use
recipientes de calidad buena. Las bobinas eldctricas toleran mils los
recipientes con fondos deformados que los radiantes o los discos sdlidos.
Se calienta rfipidamente pero no cambia los ajustes de calentamiento tan
rfipidamente colno el gas o la inducci6n. Las bobinas eldctricas se quedan
bastante calientes para continuar la cocci6n poco tielnpo despuds de apagarlas.
E1calor corre hacia la superficie de vidrio y entonces alas ollas, por eso los
recipientes deben tener fondos planos para buenos resultados de cocci6n. La
cubiel_a de vidrio se queda bastante caliente para continuar la cocci6n despuds
de apagarla. Quite el recipiente del conjunto superior si quiere parar la cocci6n.
Los recipientes deben ser de metales fdrreos (metales que atraen a los
ilnanes). E1calor se produce por un circuito lnagndtico entre la bobina y el
recipiente. Se calienta inmediatamente y cambia los ajustes de calor
inmediatamente, como una cubierta de gas. Despuds de apagar el control, la
cubierta de vidrio estfi caliente a causa del calor del recipiente, pero la
coccidn se para inlnediatamente.
Se calienta por contacto directo con el recipiente, por eso los recipientes
deben tener fondos planos para obtener buenos resultados. Se calienta y se
enfria mils lentamente que las bobinas eldctricas. E1disco se queda bastante
caliente para continuar la cocci6n despuds de apagarlo. Quite el recipiente
del disco sdlido si quiere parar la coccidn.
Las llamas calientan los recipientes directamente. No es esencial que el
recipiente tenga fondo plano para obtener buenos resultados de coccidn, pero
los recipientes deben estar bien equilibrados. Los quemadores de gas
calientan inlnediatamente el recipiente y cambian los ajustes de calentamiento
inlnediatamente. A1 apagar el control, la coccidn se para inlnediatamente.
_o
7
iiiiii/o
_o
Page 36

COCINAR EN LA PARTE SUPERIOR
Los quemadores y los controles correspondientes
est_n disefiados para proporcionarle una infinita
variedad de opciones de calor para cocinar en la
superficie.
En la posicidn OFF (apagado) y HI (alto), el control
hace un "click" cuando llega a la posicidn correcta.
En una cocina silenciosa, es posible que escuche
ligeros "clicks" mientras cocina, y esto le indicarfi que
el grado de calor elegido se est_i manteniendo.
Si cambia la opcidn a la de un calor mayor esto
representarfi un cambio de calor mils r@ido que
cambiar a menores grados de calor.
C6rno se manejan los controles
Oprima la perilla y h_gala girar en la direcci6n del calor que @see.
Asegfirese de poner el control en OFF (apagado) cuando termine
de cocinar.
La luz indicadora del quemador se encenderfi siempre que est_ puesto
CUALQUIER grado de calor en el quemador.
Guia de cocina para usar los controles de calor
HI (alto)--Se usa para empezar a cocinar o para
hacer que el agua hierva. Reduzca el calor una vez
que el agua ya hirvid.
Medium High (medio alto)--[Se coloca a la mitad
entre HI (alto) y MED.] Mantiene un hervido r@ido
en grandes cantidades de alimentos.
MED--Para saltear y dorar; mantiene los alimentos
en hervor medio o cocido a fuego lento.
Medium Low (medio bajo)--[Se coloca a la mitad
entre MED y LO (bajo)]. Es para cocinar @spuds de
iniciar con HI (alto). Se cocina con poca agna en una
cacerola tapada.
LO--Se usa para cocinar de manera lenta y
prolongada (a fuego lento) para suavizar y acrecentar
el sabor. Utilice este calor para derretir mantequilla y
chocolate o para mantener caliente la comida.
NOTA:
, La luz indicadora de la superficie se encender_ entre
LO (baio) y OFF (apagado), pero no hay energia
eldctrica en los quemadores.
, En la posicidn HI (alto) o Medium High (medio
alto) mmca deje la comida sin vigilancia. Los
derrames de liqnidos qne hierven pueden ocasionar
salpicaduras grasosas; salpicaduras grasosas tienden
a incendiarse.
, En la posicidn LO (baio) derrita el chocolate y la
mantequilla sobre el quemador pequefio.
Medium Low
(medio bajo)
LO
\
OFF
/ I
MED
DD
DD
HI
/
J
II, Medium High
\
(medio alto)
\
8
Page 37

CONSEJOS SOBRE LOS IMPLEMENTOS
PARA COCINAR
Recipientes para cocinar
Utilice cacerolas de peso mediano o pesadas. Los
recipientes de aluminio conducen el calor con mayor
rapidez que otros metales. Las cacerolas de hierro
fundido o con recubrimiento de hierro fundido son
lentas para absorber el calor, pero por lo general
cocinan de manera uniforme a calor bajo o medio. Las
cacerolas de acero pueden cocinar de manera desigual
si no estfin combinadas con otros metales.
Para mejores resultados al cocinar, las cacerolas
deben ser de fondo plano. Trate de que el tamafio de
la cacerola sea igual al del quemador. La cacerola no
debe sobresalir de la orilta del quemador por mils de
una putgada.
Correcto
No m_s de una
pulgada
Incorrecto
_o
Mas de una pulgada
Freir con grasa profunda
No llene en exceso la cacerola con grasa que puede salpicar cuando se
afiadan los alimentos. Los alimentos escarchados burbujean mucho. Vigile
los alimentos que se estfin friendo a altas temperamras. Mantenga la esmfa
y la campana libres de grasa.
Cocinar en cacerola profunda
Le recomendamos que
use s61o cacerolas de __ //
fondo piano. Estfin N___
disponibles en su
tienda local.
No use cacerolas que
tengan anillos de soporte.
E1 uso de este tipo de
cacerolas, con o sin los
anillos, puede ser
peligroso. E1 hecho de _iiiiii_...... _i{ii
colocar el anillo sobre el
quemador podrfi causar que el calor se acumule y
dafie la porcelana de la cubierta. No intente usar este
tipo de cacerolas sin el anilto. Podria sufrir
quemaduras graves si la cacerola llegara a volcarse.
m,,,,B•
i ...................... t
_e
9
_e
Page 38

CONSEJOS PARA HACER ENLATADOS
EN LA CASA
Las conservas deben hacerse s61o en los quemadores.
Las ollas que sobresalen mis de una pulgada de la
charola grasera del quemador no se recomiendan para
la mayoria de los procedimientos de cocina en la
superficie. Sin embargo, cuando va a hacer conservas
en bafio Maria o con una olla de presidn, puede usar
ollas de mayor diimetro. Esto se debe a que la
temperatura de ebullici6n del agua (incluso bajo
presi6n) no dafia las superficies de la cubierta que
rodean los quemadores.
Observe los siguientes puntos cuando vaya a hacer conservas
1. Asegfirese de que la olla para hacer conservas se
ajuste en el centro del quemador. Si su estufa o su
localizacidn no permiten que la olla quede centrada
en el irea de calor, utilice ollas de diimetro mis
pequefio para obtener mejores resultados al hacer
sus conservas.
2. Para obtener mejores resultados, use ollas con
fondo plano. Las ollas con rebordes o con
ondulaciones (que con frecuencia se encuentran
entre las ollas esmaltadas) no hacen buen contacto
con el quemador y se requiere de mucho tiempo
para que el agua hierva en ellas.
Se recomiendan ollas para conservas con
fondo piano.
SIN EMBARGO, NO UTILICE OLLAS DE
DIAMETRO MUY GRANDE NI OTRO TIPO DE
RECIPIENTES DE GRAN DIAMETRO PAPA
FREIR O HERVIR ALIMENTOS QUE NO SEAN
AGUA. La mayor parte de los jarabes o mezclas de
salsas y todo tipo de frimras se cuecen a temperamras
mucho mis elevadas que el agua hirviendo. Dichas
temperaturas pueden dafiar a la larga las superficies de
la cubierta que rodean los quemadores.
.
Cuando haga conservas, siga las recetas y los
procedimientos que obtenga de fuentes confiables.
Las recetas y procedimientos confiables se los
puede brindar el fabricante de su olla para hacer
conservas; los fabricantes de los frascos de vidrio
para conservas, por eiemplo Ball and Kerr; y el
Departamemo de Agricultura de los Estados Unidos.
.
Recuerde que la elaboracidn de conservas es un
proceso que genera grandes cantidades de vapor.
Para evitar quemaduras por el vapor o el calor,
tenga cuidado al elaborar sus conservas.
NOTA: Si su casa tiene bajo voltaje, el proceso de
elaboracidn de conservas puede requerir de mils
tiempo del esperado, aunque las instrucciones se
hayan seguido con todo cuidado.
E1 proceso puede acortarse si:
(1) se usa una olla de presidn y
(2) si inicia con agua CALIENTE de la llave
para calentar con mayor rapidez grandes cantidades
de agua.
10
Page 39

RELOJ E INDICADOR DE
TIEMPO AUTOMATICOS
(en algunos modelos)
E1 reloj e indicador de tiempo automfiticos de su esmfa son dispositivos
riffles que cumplen varios fines.
_o
Para programar el reloj
Para programar el reloj,
oprima la peritla central y
haga girar las manecillas
en sentido de las manecillas
del reloj hasta ponerlas en la 9
hora correcta.
\
3
Para programar el indicador de minutos
E1 indicador de minutos se ha combinado con el reloj
de la esmfa. Utilicelo para tomar el tiempo de todas
sus operaciones de cocina precisas. Reconocerfi el
indicador de minutos ya que la manecilla es de color y
forma distintos a los de las manecillas del reloj.
Para programar el indicador de minutos, haga girar
la perilta central contra las manecillas del reloj sin
oprimirla, hasta que la manecilla llegue al nfimero de
NOTA: La manecilla del minutero tambidn se
moverfi; deie la perilta sin oprimir y coloque el
indicador de tiempo en posicidn de OFF (apagado).
minutos que usted desea. (Los minutos estfin
marcados hasta 60 en el anilto central del reloj.)
A1 terminar el tiempo establecido, se escucharfin
zumbidos que le indicarfin que el tiempo ha
terminado. Haga girar la perilla sin oprimirla hasta
que la manecilla llegue a la posicidn de OFF
(apagado) y el zumbido finalice.
El horneado retardado utiliza los indicadores automfiticos
Por medio de los indicadores automfiticos--las perillas de DELAY START
(inicio demorado) y STOP TIME (hora de apagado)--usted puede
determinar que su homo se encienda y se @ague de manera automfitica.
Consulte la seccidn Horneado retardado.
NOTA: Antes de comenzar, cercidrese de que el reloi del homo muestre la
hora correcta.
STOPTIME DELAYSTART
.\\_1111. .\_llll.
"/ "x" 7/ "-."
O//,,,I_ \, xx O///,,I_ \, ©
PUSHTO TURN
(presione para girar)
rj_
_o
_o
Preguntas y respuestas
P. iC6mo puedo usar el indicador de minutos para
facilitar el hecho de cocinar en la superficie?
R. E1 indicador de minutos le ayudarfi a controlar el
tiempo total que se invierte en cocinar, lo que incluye
tiempo para hervir los alimentos y cambiar
temperamras. No juzgue el tiempo requerido para
cocinar sdlo por el vapor. Los alimentos se
cocinar_n en recipientes cubiertos aunque usted no
pueda ver nada de vapor.
P. zDebo poner el reloj en la hora correcta
cuando quiero usar los indicadores automfiticos
para hornear?
R. Si, si desea que los controles de DELAY START
(inicio demorado) o el de STOP TIME (hora de
apagado) se enciendan y se apaguen en tiempos
preestablecidos durante las funciones de tiempo
controlado.
P_
zPuedo usar el indicador de minutos mientras
cocino al horno?
R.
E1 indicador de minutos puede usarse durante
cualquier proceso de cocinar. Los indicadores
automfiticos [DELAY START (inicio demorado) y
STOP TIME (hora de apagado)] se usan sdlo con
la funcidn de TIME BAKE (horneado retardado).
P_
iPuedo cambiar la hora que muestra el reloj
mientras estoy usando el ttorneado retardado
en el horno?
R_
La hora que estd establecida en el reloj no debe
cambiarse durante el funcionamiento de cualquier
programa que use el indicador de tiempo
autom_tico del homo. Usted debe, ya sea detener
los programas o esperar basra que terminen, antes
de poder cambiar la hora.
_o
_o
11
Page 40

Antes de usar su horno
USO DE SU HORNO
1. Observe los controles. Asegfirese de que entiende
cdmo colocarlos de manera adecuada. Lea las
instrucciones para los indicadores de tiempo
automfiticos (en algunos modelos) de modo que
comprenda cdmo se usan con los controles.
2. Revise el interior del horno. Observe las parrillas.
Practique quitarlas y volver a ponerlas de manera
correcta para que ofrezcan un soporte seguro y firme.
Controles del homo
OVEN SET OVEN TEMP
I I
@@
E1 aspecto puede variar
Su esmfa tiene dos perillas de control--OVEN SET
(programar el homo) y OVEN TEMP (temperamra
del homo).
La perilla OVEN SET (programar el homo) tiene
indicadores para BAKE, TIMED BAKE (en algunos
modelos), BROIL y OFF (hornear, horneado
retardado, asar y apagado).
La luz indicadora del horno se enciende cuando
usted elige BAKE (hornear), BROIL (asar) o TIMED
BAKE (horneado retardado) (en algunos modelos).
La perilla de OVEN TEMP (temperamra del homo)
mantiene la temperamra que usted eligid, desde
WARM [tibia (150 °F)] basra BROIL (asar) (550 °F).
La luz indicadora del ciclo del horno se enciende
hasta que el homo alcanza la temperatura que usted ha
seleccionado. Luego se enciende y se apaga de
manera intermitente junto con la unidad o unidades
del homo durante el proceso de cocinar.
3. Lea la informacidn y los conseios que siguen.
4. Mantenga esta guia a la mano de modo que puede
consultarla, en especial durante las primeras
semanas de uso de su nueva esmfa.
NOTA: Es posible que note un olor a "quemado" o a
"aceite" las primeras veces que encienda el homo.
Esto es normal en un homo nuevo y desaparecerfi en
poco tiempo.
Parrillas del horno
Las parrinas est_in disefiadas con topes de
detenci6n de modo que cuando est_n colocadas
correctamente sobre los soportes, se detendr_in
antes de que sean sacadas completamente del
horno, de manera que no se inclinen cuando usted
est_ quitando o poniendo alimentos.
Cuando coloque una cacerola sobre una parrilla,
saque la parrilla basra el bache del soporte para
parrilla. Coloque la cacerola en la parrilla y luego
deslicela de nuevo en el homo. Esto eliminarfi la
necesidad de meter las manos en un homo caliente.
Para quitar una parrilla del horno, tire de la
parrilla hacia usted, levante el extremo de la parrilla
y s_quela.
soporte para parrilla -
coloque la parrilla en el _ l_l
con las depresiones (la __, _xi,___ tl II I
Para volver a ponerla, Bache [
extensidn curva de la _ _f I[I
parrilla) hacia arriba y
hacia la parte posterior _ 5_,-'_-_=_ _L ,:,y
del horno. Levante el _._// ,, //
frente y empNe la ___.__/__, _//
parrilla hacia la parte _.__ ' -
posterior del homo __-.,.._
basra que pase el bache
del soporte para parrilla. Luego, baie la parte
delantera de la parrilla y empfijela basra atrfis.
• - .z_, ,_ f/
Posiciones de las parrillas
E1 homo tiene cuatro soportes
para parrillas, identificados en
esta ilustracidn como A (basra
abaio), B, C y D (basra arriba).
Las posiciones de las parrillas
para cocinar se sugieren en las
secciones de Hornear, Asar al
homo y Asado al fuego directo.
12
La luz del horno
Utilice el interruptor en el panel de control para
encender y apagar la luz.
Page 41

HORNEAR
La temperatura de su homo esti controlada en forma
muy precisa mediante un sistema de control de homo.
Se recomienda que opere el homo durante varias
semanas para familiarizarse con el desempefio de su
nuevo homo.
C6mo preparar su estufa para hornear
Para evitar posibles quemaduras, coloque las parrillas
en la posici6n correcta antes de encender el homo.
1. Haga girar la
peritla de
OVEN SET
(programar
el homo)
hasta BAKE
(homear) y la
peritla de
OVEN TEMP
(temperatura del homo)
hasta la temperatura deseada.
OVEN SET OVEN TEMP
,3_gO 300
E1 aspecto puede variar
Si cree que es necesario un ajuste, vea la seccidn
Ajuste del termostato del homo. Le da una lista de
instrucciones fficiles de Hdgalo Ud. mismo sobre
cdmo ajustar el termostato.
NOTA: Cuando el horno esti caliente, la parte
superior y las superficies exteriores de la esmfa
tambidn se calientan.
Se encenderin tanto las luces del ciclo del homo
como la de control del homo.
.
Controle la comida para ver si esti bien cocinada
cuando se vence el tiempo minimo de la receta.
Cocinela por mils tiempo si es necesario.
°
Haga girar la perilla de OVEN SET (programar el
homo) hasta la posicidn de OFF (apagado) y luego
saque la comida del homo.
Parrillas del horno
Acomode la parrilla
o parrillas en las
posiciones deseadas
cuando el homo estfi
frio. La posici6n
correcta de la parrilla
depende del tipo de
alimento y de cuinto
desea que se dore.
Como regla general,
coloque la mayoria
de los alimentos en la mitad del homo, en la posici6n
de la parrilla B o C. Consulte la tabla donde se
sugieren las posiciones de las parrillas.
Tipo de alimento Posici6n de la parrilla
Pastel Angel A
Bisquet o bollos B o C
Galletas o pastelillos B o C
homeados en molde
con forma de taza
Galletas brownies B o C
Pastel en capas B o C
Bizcocho con pasas A o B
Pays o bases para pay B o C
Pays congelados A (en hoja para
homear galletas)
Cacerolas B o C
Asados A o B
(contim'ta en hi pc_gina si_tiente)
13
Page 42

Precalentamiento
HORNEAR
(continuacidn)
Precaliente el homo si la receta asi lo requiere. Precalentar
significa llevar el horno hasta la temperamra
especificada antes de meter el alimento en el homo.
Para precalentar, ponga el homo en la temperamra
correcta. E1 hecho de seleccionar una temperamra mis
alta no acorta el periodo de precalentamiento.
Recipientes para hornear
Utilice el recipiente adecuado para hornear. E1 tipo de
acabado del recipiente determina qud tan dorado
quedari el alimento.
, Los recipientes oscuros, opacos o rugosos absorben
calory dan como resultado una corteza mils dorada
y crujiente. Uselos para pays.
*Los recipientes brillantes y lisos retiejan el calor
produciendo un dorado mis ligero y delicado. Los
pasteles y galletas requieren este tipo de molde.
, Los recipientes de vidrio para hornear tambidn
absorben calor. Cuando homee en recipientes de vidrio,
puede ser necesario bajar la temperatura en 25 °E
, Si se usan recipientes oscuros antiadherentes, puede
ser necesario bajar la temperatura por 25°F para
evitar sobredorar la comida.
E1 precalemamiento es necesario para obtener buenos
resultados cuando hornee pasteles, galletas, pastas y
pan. Para la mayoria de las cacerolas y los asados no
es necesario precalentar. En los homos que no tienen
una luz o un sonido que indiquen el precalentamiento,
precaliente durante 10 minutos. Despuds de
precalentar el homo, coloque el alimento tan r@ido
como sea posible para evitar que el calor escape.
Colocacidn de! molde o recipiente
Para una coccidn uniforme y un dorado correcto, debe
de haber suficiente espacio para que el aire circule en
el homo. Los resultados del homeado serin meiores si
los moldes se centran tanto como sea posible en lugar
de colocarse en el freme o en la parte posterior del homo.
Los recipientes no @ben tocarse unos a otros ni estar
en contacto con las paredes del homo. Permita que
haya una distancia de 1- a 1_-pulgadas entre los
recipientes, lo mismo que entre la pared del homo, los
costados y la puerta. Si necesita utilizar dos parrillas,
acomode los recipientes para que ninguno quede
directamente encima de otro.
Consejos para hornear
Cuando use mezclas preparadas, siga la receta que viene en el paquete o las
instrucciones para obtener meiores resultados al homear.
Galletas
Cuando homee galletas, las hqias planas
para homear (las que no tienen lados),
producen galletas con mejor aspecto.
Las galletas homeadas en charolas con
pequefios costados que las rodean
pueden tener orillas mis oscuras y el
dorado podria ser pilido o muy ligero. _' .,_A
No utilice una hoja de homear tan grande
que toque las paredes o la puerta del
homo. Nunca cubra por completo una
parrilla con una charola grande para
homear galletas.
Para meiores resultados, meta en el homo s61o una hoja de homear a la vez.
14
Page 43

Hojas de papel aluminio
Nunca cubra por completo una parrilla
con papel aluminio. Esto alterarfi la
circulacidn del calory ocasionarfi un
horneado deficiente. Puede usar una
hoja de hornear o de aluminio mils
pequefia para recoger cualquier
salpicadura o derrame colocfindola en
una parrilla inferior, varios centimetros
debajo del alimento.
Pays
Para mejores resultados, hornee los pays en moldes
oscuros, rugosos u opacos para producir una corteza
mils oscura y cr@ente. Los pays congelados en
moldes de aluminio deberfin colocarse sobre una hoja
de aluminio para hornear galletas cuando se horneen,
ya que el molde de aluminio brillante refleja el calor
alejfindolo de la corteza del pay y la hoja para hornear
galletas ayuda a retenerlo.
No se asome
Coloque el indicador de tiempo para el tiempo
estimado de coccidn y no abra la puerta para mirar su
comida. La mayor parte de las recetas le proporcionan
un tiempo minimo y miximo de horneado, por
ejemplo "hornee de 30-40 minutos."
HORNEADO RETARDADO
(en algunos modelos)
C6mo controlar el tiempo de horneado
Pasteles
Cuando hornee pasteles, tenga en cuenta qne los
moldes doblados o combados provocarin un horneado
disparejo y productos con una forma inadecuada. Un
pastel que se hornee en un molde mis grande que el
que recomienda la receta, por lo general quedari mils
cr@ente, delgado y seco de lo que deberia. Si se
hornea en un molde mis pequefio que el
recomendado, puede quedar crudo y la masa puede
desbordarse. Verifique la receta para asegurarse de
que el tamafio del molde que use sea el recomendado.
NO ABRA la puerta del horno para revisar el
alimento sino hasta que haya estado el tiempo
minimo. Si abre la puerta con frecuencia durante la
coccidn, permitiri que el calor escape y alargari el
tiempo de horneado. Los resultados del horneado
tambidn pueden verse afectados.
E1 homo puede ponerse en un ciclo en que se prenda y
se apague de manera automitica en horas establecidas
que usted especifica. Los ejemplos de Inicio
inmediato (el horno se enciende de inmediato y usted
decide en qud momento se apagari de manera
automitica) y el Inicio demorado y Hora de apagado
(poner el homo de modo que se encienda
automiticamente a una hora posterior y se apague a
una hora de apagado preestablecida) se describirin a
continuacidn.
NOTA: Antes de empezar, asegfirese de que el reloj
del horno indique la hora correcta del dia.
Para programar el reloj, empuje la perilla hacia
adentro y haga girar las manecillas en sentido de las
manecillas del reloj a la hora correcta.
(contim_a en lclpdgina si_dente)
15
Page 44

HORNEADO RETARDADO
(continuacidn)
Cdmo programar el Inicio inmediato y
el Apagado autom_tico
Para evitar posibles quemaduras, coloque las parrillas
en la posicidn correcta antes de encender el homo.
E1 homo se encenderit de inmediato, cocinar5 durante
el tiempo seleccionado y @spuds del tiempo de
homeado se apagarfi automfiticamente.
NOTA: Para empezar a cocinar de inmediato y
apagarse automitticamente, debe hacer girar la perilla
de OVEN SET (programar el homo) al ciclo TIMED
BAKE (horneado retardado).
1. Para establecer la Hora de apagado, oprima la
perilla en el control STOP TIME (hora de apagado)
y coloque el indicador en la hora del dia en que
@see que el homo se @ague; por eiemplo, alas
6:00. E1 indicador del dial de DELAY START
(inicio demorado) debe estar en la misma posicidn
que la hora marcada en el reloj.
OVEN SET
OVEN TEMP (temperamra del homo) basra la
temperamra deseada para el homo, por ejemplo,
250 °F.
OVEN TEMP
2. Ponga la perilla de
OVEN SET
(programar el
horno) en TIMED
BAKE (horneado
retardado). Haga
girar la perilla de
Tanto la luz de control del homo como las luces
indicadoras de los ciclos se encenderfin.
E1 homo comenzarfi a funcionar de inmediato,
continuar_ cocinando durante el tiempo programado
y luego se apagarfi de manera automfitica.
3.
A1 terminar de hornear, se escuchar_n zumbidos.
Retire la comida del homo y @ague la perilla de
OVEN SET (programar el homo) ponidndola en
posicidn de OFF (apagado). Recuerde, los
alimentos que se deian en el homo siguen
cocinfindose afin cuando los controles estdn
apagados.
NOTA:
Los alimentos que se derraman con facilidad como
la leche, huevos, pescado, embutidos, ayes y cerdo
no deben deiarse reposar en el horno durante mils de
una hora @spuds de haberlos cocinado. La
temperamra ambiente promueve el crecimiento de
bacterias nocivas. Asegfirese de que la luz del homo
estd apagada ya que el calor del foco apresurarfi el
crecimiento de bacterias nocivas.
Las luces del ciclo del homo y de la programacidn
del homo en el ciclo de TIMED BAKE (horneado
retardado) pueden funcionar de manera distinta a
como lo hacen en el ciclo de BAKE (homear).
Cdmo programar el Inicio demorado y el Apagado autom_tico
Para evitar posibles quemaduras, coloque las parrillas 3. Coloque la perilla de OVEN SET (programar el
en la posicidn correcta antes de encender el homo.
Puede programar el control del horno de manera que el
homo se encienda autom5ticameme, cocine durante un
tiempo especifico y se apague tambidn automfticamente.
NOTA: Debe tener la perilla de OVEN SET
(programar el horno) en el ciclo de TIMED BAKE
(homeado retardado).
1. Para programar la Hora de inicio, oprima la perilla
del dial de DELAY START (inicio demorado) y haga
girar el indicador hasta la hora del dia en que usted
quiera que el homo se encienda, por eiemplo alas 3:30.
2. Para programar la Hora de apagado, oprima la perilla de
STOP TIME (hora de apagado) y coloque el indicador
en la hora en que usted quiere que el homo se
@ague; por ejemplo las 6:00. Esto significa que su
receta requeria 2½ horas de tiempo de homeado.
NOTA: La hora en el dial de STOP TIME (hora de
apagado) debe superar la hora del reloj y del dial
de DELAY START (inicio demorado).
homo) en TIMED BMZ-_E(homeado retardado). Haga
girar la perilla de control de OVEN TEMP (temperatura
del homo) basra la temperamra deseada.
E1 homo se encenderfi automfiticamente, continuarfi
cocinando durante el tiempo ya programado y
luego se apagar5 de manera autom5tica.
.
Saque la comida del homo y ponga la perilla de
OVEN SET (programar el homo) en posicidn de
OFF (apagado). Recuerde, los alimentos que se
quedan en el horno siguen cocinfindose @spuds de
que los controles se hayan apagado.
NOTA: Los alimentos que se derraman con facilidad
como la leche, huevos, pescado, embutidos, ayes y
cerdo no deben deiarse reposar en el homo durante
mils de una hora @spuds de haberlos cocinado. La
temperamra anabiente promueve el crecimiento de
bacterias nocivas. Asegfirese de que la luz del homo
estd apagada ya que el calor del foco apresurarfi el
crecimiento de bacterias nocivas.
16
Page 45

AJUSTE DEL TERMOSTATO DEL HORNO---
iliA GAL 0 UD. MISMO !
Puede creer que su horno nuevo cocina
diferentemente del horno que reemplaz6.
Recomendamos que use su homo nuevo por algunas
semanas para familiarizarse con el, siguiendo el
tiempo que se indica en las recetas como guia.
Si cree que su horno nuevo estil demasiado caliente
o demasiado frio, puede ajustar el termostato Ud.
mismo. Si cree que estfi demasiado caliente, ajuste el
temaostato para enfriarlo. Si cree que estfi demasiado
frio, ajuste el termostato para calentarlo.
No recomendamos el uso de termdmetros baratos,
como los que se encuentran en las tiendas de abarrotes,
para verificar la temperamra de su homo nuevo. Estos
termdmetros pueden tener variaciones de 20-40 °F.
El tornillo de la parte
Para ajustar el termostato:
1. Tire de la perilla de
OVEN TEMP
(temperatura del horno)
para sacarla del eje,
observe la parte
posterior de la perilla y
anote en que
temperatura estaba
antes de haeer cualquier
ajuste. La perilla se
calibra en la fhbrica
mediante el tornillo que se
encuentra directamente
abajo de la marca indicadora.
inferior se mueve hacia
HOTTER (mas caliente) o
COOLER (mas frio).
Parte posterior de la
perilia de OVEN TEMP
(temperatura del homo)
2.
Afloie los dos tornillos que est_n en la parte
posterior de la perilla.
3.
Sostenga la perilla como se muestra en la
ilustracidn de la parte posterior de la perilla de
OVEN TEMP (temperamra del homo) y h_gala
girar de modo que el tornillo de la parte inferior se
mueva en la direccidn deseada. Escucharfi y sentir_
muescas a medida que hace girar la perilla. Cada
muesca cambia la temperamra de aproximadameme
10 °Farenheit.
E1 tornillo inferior se mueve
hacia HOTTER (mils caliente)
para aumentar la temperamra.
E1 tornillo inferior se mueve
hacia COOLER (mi_s frio) para
disminuir la temperamra.
4. Apriete los tornillos.
5. Vuelva a colocar la perilla en la esmfa.
Vuelva a verificar su desempefio antes de hacer
cualquier ajuste adicional.
17
Page 46

ASAR AL HORNO
Asar es cocinar mediante calor seco. La came tierna
o las ayes pueden asarse en su homo sin cubrirse.
Las temperamras de asado, que deben ser baias y
constantes, mantienen las salpicaduras al minimo.
Asar es un procedimiento de hornear para carne.
Por eso, los controles del homo se ponen en Hornear
y Horneado retardado (en algunos modelos). (Tal vez
escucharit un pequefio chasquido, lo cual indica que el
homo estfi funcionando correctamente.) En Horneado
retardado el horno se encenderit y se apagarfi
automfiticamente.
1. Coloque la
parrilla en la
posicidn A o B.
No es necesario
precalentar.
2. Verifique el peso de
la came. Coloque la
came con el lado de ""
la grasa hacia arriba o las ayes con la pechuga hacia
arriba en la parrilla para asar, dentro de una charola
no muy profunda. La grasa que se derrita rociarfi la
came. Elija una charola que quede tan aiustada a
los costados de la came como sea posible. (La
charola para asar con rejilla es adecuada para esto.)
La mayoria de las carnes siguen cocinfindose
ligeramente cuando ya estfin fuera del homo. E1
tiempo de espera recomendado para los asados al
homo es de 10 a 20 minutos. Esto permite que los
asados se afirmen y sean m_is fficiles de trinchar. La
temperamra interna aumentarfi de 5 a 10 °F. Para
compensar el aumento de temperamra, si se @sea,
saque el asado del homo cuando su temperamra sea
de 5 a 10 °F menos que la temperamra en la Guia
para asar al homo.
Recuerde que los alimentos siguen cocinfindose en el
homo caliente y que, en consecuencia, deberfi retirarlos
cuando hayan alcanzado la temperamra interna deseada.
3_
Haga girar la OVENSET OVENTEMP
SET (programar _,_o_oo
el homo) hasta _ " "_0
BAKE (hornear) _
perillaOVEN _ __
y haga girar la ._;
perilla de
OVEN TEMP
(temperamra del homo) basra la temperamra
deseada.
4_
A1 terminar el asado al horno, haga girar la
perilla de OVEN SET (programar el homo) basra
OFF (apagado).
Uso de papel aluminio
Puede utilizar papel aluminio para forrar su charola
para asar. Esto facilita la limpieza cuando usa la
charola para marinar, cocinar con frutas, cocinar
carnes muy saladas o cuando vaya a hornear durante
la coccidn. Moldee el aluminio alrededor del interior
de la charola.
18
Page 47

Preguntas y respuestas
P. i,Es necesario verificar la cocci6n con un
term6metro de carne?
R. Se recomienda verificar la temperatura intema
final al final del tiempo de coccidn. Las
temperaturas se muestran en la Guia para asar
al homo. Para asados sobre 8 lbs., verifique el
termdmetro a intervalos de media hora despuds
de haber pasado la mitad del tiempo.
P. i,Por qu_ se desmiga mi asado cuando trato
de trincharlo?
R. Los asados son mils fficiles a rebanar si se dejan
enfriar 10 a 20 minutos despuds de sacarlo del
homo. Asegfirese de cortar a travds del grano de
la came.
GUIA PARA ASAR AL HORNO
Asados congelados
P.
i,Se necesita precalentar mi horno cada
vez que se cocinan un asado o aves?
R.
No se necesita precalentar su homo.
P.
Cuando se compra un asado,/,hay consejos
especiales que me ayudarfin a cocinarlo mils
igualmente?
R. Si. Compre un asado tan igual en espesor como
sea posible, o compre asados redondos.
P. i,Se pueden sellar los lados de mi "tienda de
campafia" de papel aluminio al asar un pavo?
R.
Sellar el papel aluminio cocerfi al vapor la
came. No deiarlo sellado permite que el aire
circule y dore la came.
Los asados congelados de res, cerdo, cordero,
etcdtera, pueden hacerse sin descongelar, pero permita
de 10 a 25 minutos de tiempo adicional por cada libra
(10 minutos por cada libra para asados de menos de
5 libras, y mils tiempo para asados mils grandes).
Temperatura Temperatura
Tipo del horno Coccidn interna °F.
Carne
Trozos tiernos; costilla,
punta de solomillo de
alta calidad o cuarto*
Pierna de cordero o lomo
con hueso*
Lomo o chuleta de ternera*
Lomo o costilla de puerco*
Jam6n, precocinado
Aves
Pollo o pato
Presas de polio
Pavo
325 °
325 °
325 °
325 °
325 °
325 °
350 °
325 °
Crudo:
Medio:
Bien cocinado:
Crudo:
Medio:
Bien cocinado:
Bien cocinado:
Bien cocinado:
Para calentar:
Bien cocinado:
Bien cocinado:
Bien cocinado:
Asegfirese de que las ayes estdn descongeladas antes
de asarlas. Muchas veces, las aves congeladas no
pueden cocinarse con igualdad. Algunas aves
comerciales congeladas pueden cocinarse con dxito
sin descongelarlas. Siga las instrucciones que vienen
en la etiqueta del empaque.
Tiempo aproximado de asar al
horno en minutos por libra
3 a 5 lbs. 6 a 8 lbs.
24-33 18-22
35-39 22-29
40-45 30-35
21-25 20-23
25-30 24-28
30-35 28-33
35-45 30-40
35-45 30-40
17-20minutosporlibra(cualquierpeso)
3 a 51bs. M_s de 51bs.
35-40 30-35
35-40
10 a 151bs. M_s de 151bs.
18-25 15-20
140°-150°?
150°-160 °
170°-185 °
140°-150°?
150°-160 °
170°-185 °
170°-180 °
170°-180 °
115°-125 °
185°-190 °
185°-190 °
Enmuslo:
185°-190 °
* En los asados redondos sin hueso de mils de 6" de espesor, afiada 5 a 10 minutos por libra a los tiempos dados arriba.
? E1U.S. Department of Agriculture (Departamento de agricuttura de los Estados Unidos) dice, "La came de res cruda es
popular, pero se debe saber que cocinarla a s6to 140 °F quiere decir clue algunos organismos tdxicos en los alimentos pueden
sobrevivir." (Procedencia: Safe Food Book Your Kitchen Guide. USDA Rev. junio 1985.)
19
Page 48

ASADO AL FUEGO DIRECTO
Asar al fuego directo es cocinar el alimento por calor
directo que llega desde arriba del alimento. La
mayoria de los pescados y cortes tiernos de came
pueden asarse al fuego directo. Siga estos pasos para
mantener las salpicaduras y humo al minimo.
1. Si la came tiene grasa o cartilago alrededor de la
orilla, haga cortes verticales a travds de ambos a
intervalos de 2" pero no corte la carne. Si lo @sea,
la grasa puede ser cortada, dejando una capa de
1/8" de grosor.
2. Coloque la came sobre la rejilla para asar en la
charola para asar. Use siempre la rejilla para asar
para que la grasa escurra en la charola. De otro
modo, los jugos pueden calemarse lo suficiente
como para arder.
3. Coloque la parrilla en la posicidn recomendada, como
se sugiere en la Guia para asado al fuego directo. La
mayor parte del proceso de asado se realiza en la
posicidn C, pero si su homo est_ conectado a 208
voltios, tal vez usted quiera usar una posicidn mils alta.
Ddle sdlo una vuelta a la comida usando pinzas
durante la coccidn. Calcule el tiempo de coccidn para
la comida para el primer lado de acuerdo con la Guia
para asado al fuego directo. Ddle una vuelta, entonces
use los tiempos dados para el segundo lado como una
guia para el punto de coccidn preferido.
4_
Deje la puerta abierta __--" Z_l_>_
hasta la posicidn de tope _-"'2_
para asar. La puerta
permanece abierta por si
misma, pero aun asi, en el
homo la temperamra se mantiene.
5. Haga girar la perilla de OVEN SET (programar el
horno) y de OVEN TEMP (temperamra del homo)
basra BROIL (asar). No es necesario precalentar los
elementos. (Vea la columna de comentarios en la
Guia para asado al fuego directo.)
6. Cuando termine de asar, haga girar la perilla de OVEN
SET (programar el homo) hasta la posicidn de OFF
(apagado). Sirra los alimentos de inmediato, deiando
afuera del horno la charola para asar y la parrilla
para que se enfrien durante la comida y se facilite
su limpieza.
Uso de papel aluminio
Puede utilizar papel aluminio para forrar su charola y su rejilla para asar. Sin
embargo, debe moldear el aluminio para que se aiuste perfectamente a la forma de la
rejilla y debe cortar las ranuras justo como estfin en la rejilla para asar.
Sin las ranuras, el aluminio evitarfi que la grasa y los jugos de la came escurran dentro
de la charola. Los jugos pueden calentarse lo suficiente como para arder. Si no corta
las ranuras, estar_ friendo, no asando al fuego directo.
Preguntas y respuestas
P. Cuando se asa al fuego directo, ;,es necesario usar P.
siempre una rejina para asar sobre la charola? R.
R. Si. A1 usar la rejilla para asar, la came queda
suspendida sobre la charola. A medida que se cocina
la came, los jugos caen en la charola, manteniendo
asi la came mits seca. Los jugos estfin protegidos por
la reiilla para asar y se conservan mits frios, evitando
de este modo salpicaduras y humo excesivos.
P. g,Necesito engrasar mi rejilla para asar para
evitar que la earne se pegue?
R. No. La rejilla para asar esth disefiada para refleiar
el calor del asador, manteniendo asi la superficie lo
suficientemente fria como para que la came no se
adhiera a la superficie. Sin embargo, si rocia
ligeramente la rejilla del homo con aceite vegetal
para cocinar en aerosol antes de cocinar, la
limpieza se harit con m_s facilidad.
;,Por qu_ las carries no se doran como deberian?
En algunas _reas, la energia (voltaje) que llega al
homo puede ser baja. En estos casos, precaliente la
unidad para asar durante diez minutos antes de colocar
la charola para asar con alimentos en el homo.
AsegOrese de que esth usando la posicidn adecuada
para la parrilla. Ase durante el periodo de asar mils
prolongado que se indica en la Guia para asado al
fuego directo. Voltee el alimento s61o una vez
durante el proceso de asar.
P.
;,Debo ponerle sal a la carrie antes de asarla al
fuego directo?
R.
No. La sal hace que la came pierda los jugos y
dstos se evaporan. Siempre ponga sal @spuds de
cocinar. Usando un tenedor tambidn ocasionar_
que los jugos escapen. Voltee la came usando
pinzas en vez de usar un tenedor.
20
Page 49

GUIA PARA ASADO AL FUEGO DIRECTO
• Siempre use la charola y la reiilla para asar que vienen
con su esmfa. Estfin disefiadas para minimizar la
cantidad de hum• y salpicaduras ya que atrapan los jugos
en la parte inferior de la charola, que estfi protegida.
• La puerta del horno deberia abrirse a la posici6n
de paro de asado al fuego directo.
• Para filetes o chuletas, haga cortes pareios en las orillas
exteriores de la came. Para cortar, realice cortes
tmnsversales a travds de la superficie exterior de la grasa,
llegando hasta la orilla de la came. Use pinzas para
voltear la came y asi evitarfi picarla y que pierda jugos.
• Si lo desea, marine las cames o poll• antes de
asarlos al fuego direct•. O barnicelos con salsa para
barbacoa (barbecue) de 5 a 10 minutos solamente.
Posici6n de
parrillas
C
Aliment•
Tocino
Cantidad y/o
espesor
1/2-lb. (aprox. 8
trozos finos)
Carne molida
Bien cocinada
l-lb. (4 hamburguesas)
1/2" 3/4" de espesor
C 10 7
Bistec
Crudo
Medio
Bien cocinado
Crudo
Medio
Bien cocinado
Polio
Pan, pastel
Pan (tostado) o
Pasteles de pan
Panecillos ingleses
Colas de langosta
1" de espesor
(1-1½ lbs.)
1" de espesor
(2-2½ lbs.)
1 enter•
(2 to 2½-1bs.)
separe a lo largo
2 a 4 trozos
1paquete (2)
2 (separados)
2a4
C 6 5
C 8 6
C 12 ll
C l0 7-8
C 15 14-16
C 25 20-25
A 35 10-15
C o D 1½-2 1/2
CoD 3-4
B 13-16 No dd
(6 a 8-oz. c/u)
Pescado
Trozos de jam6n
Filetes de l-lb.
1/4" a 1/2"
de espesor
1" de espesor
C 5 5
B 8 8
Precocinados
Chuletas de puerco
Bien cocinadas
2 (1/2" de espesor)
2 (1" de espesor),
C 10 10
B 13 13
aprox. 1lb.
Chuletas de cordero
Medio
Bien cocinadas
Medio
Bien cocinadas
Salchichas,
salchichas semeiantes
2 (1" de espesor),
aprox. 10-12 oz.
2 (1_" de espesor),
aprox. 1lb.
Paquete de l-lb.
(10)
C l0 9
C 12 l0
C 14 12
B 17 12-14
C
precocinadas,
bratwurst
• Cuando acomode los alimentos en la charola, no deie
que las orillas grasosas cuelguen a los lad•s, pues
podrian ensuciar el homo con la grasa que escurre.
• E1 compartimiento para asar al fuego direct• no
necesita precalentarse. Sin embargo, para alimentos
muy delgados, o para aumentar el dorado,
precaliente si lo desea.
• Los filetes congelados pueden asarse al fuego direct•
colocando la charola y la reiilta para asar en la
siguiente posicidn mils baia y aumentando el tiempo
de coccidn que se da en esta guia 1½ veces por lad•.
• Si su esmfa estfi conectada a 208 voltios, las cames
crudas pueden asarse precalentando el asador y
subiendo una posicidn la parrilla del homo.
F" lad• 2° lad•
minutos minutos Observaciones
4½ 4½ Coloque en un solo nivel.
Separe iguahnente. Hasta 8 hamburguesas
toman aprox, el raisin• tiempo.
Los bistecs de menos de 1" de espesor
se cocinan completamente antes de
dorarse. Se recomienda freir en una sartdn.
Acuchille la grasa.
Reduzca el tiempo 5 a 10 minutos por lad• para
polio en trozos. Barnice con mantequilla derretida.
Ase al fuego direct• primer• el lad• con piel.
Separe igualmente. Coloque los panecillos
ingleses lad• cortado arriba y barnice con
mantequilla si deseado.
Corte a travds de la concha y separe hasta abierto.
vuelta.
Barnice con mantequilla derretida antes de asar
al fuego direct• y @spuds de la mitad del tiempo.
Maneje y dd vuelta con cuidado. Barnice con
mantequilla de limdn antes de asar al fuego direct•
y durante el asado al fuego direct• si deseado.
Precaliente el asador para aumentar el dorado.
Aumente el fiempo 5 a 10 minutos por lad•
parajam6n de 1_" de espesor o curado en casa.
Acuchille la grasa.
Acuchille la grasa.
Si deseado, separe las salchichas en mitad
a lo largo; corte trozos de 5-6".
>.
_e
m_
_,,,,Be
21
Page 50

CUIDADO Y LIMPIEZA
E1 cuidado y la limpieza adecuados son importantes
para que su esmfa le proporcione un servicio eficiente
y satisfactorio. Siga estas instrucciones
meticulosamente durante su cuidado para ayudar a
darle un mantenimiento seguro y adecuado.
Parrillas del horno
Limpie las parrillas con un limpiador abrasivo
suave o una fibra metfilica.
Despuds de la limpieza, enjuague las parrillas con
agua limpia y seque con un trapo limpio.
Charola y rejilla para asar al fuego directo
Despugs de asar al /]',¢_/I'_-rlTY'ft_Y_'I_'I\'I_'_'xX'_
fuego directo, quite _A//I/I/1[/It II 1 iI/IIl\_\'_\'_\ \_
la charola para asar
del horno. Saque la _ .....f
rejilla para asar de la charola. Con cuidado, vacie la
grasa de la charola en un recipiente apropiado. Limpie
y enjuague la charola y la rejilla para asar con agua
caliente con una fibra llena de jabdn o plfistico.
Si hay alimentos quemados, rocie la rejilla para asar
con detergente mientras esti_ caliente y cfibrala con
toallas de papel hfimedas o con un trapo para secar
platos. Sumergir la rejilla para asar en agua quitarfi los
alimentos quemados.
ASEGURESE DE QUE LA CORRIENTE
ELECTRICA ESTE DESCONECTADA ANTES
DE LIMPIAR CUALQUIER PARTE DE SU
ESTUFA.
La charola y rejilla para asar se pueden limpiar con un
limpiador comercial para hornos.
La rejilla y la charola para asar pueden limpiarse en
una mfiquina lavavajillas.
No guarde la charola y la rejilla para asar sucias en
ninguna parte de la esmfa.
Elementos calefactores del horno
No limpie el elemento para hornear ni el elemento
para asar. Cualquier suciedad se quemar_ cuando los
elementos se calienten.
E1 elemento para hornear puede levantarse un poco
con suavidad para limpiar el fondo del horno. Si
derrames, residuos o ceniza se acumulan alrededor del
elemento para hornear limpie con suavidad alrededor
del elemento con agua tibia.
Superficies pintadas
Las superficies pintadas incluyen el panel de control.
Limpie dstas con jabdn y agua o con una solucidn de
vinagre y agua. No utilice limpiadores comerciales
para horno, polvos limpiadores, fibra metfilica o
abrasivos fuertes en ninguna superficie pintada.
22
Elemento para asar
Elemento para hornear
Superficies de vidrio
Para limpiar el acabado exterior de vidrio, use un
limpiador para vidrio. Eniuague y pula con un patio
seco. No permita que el agua o el limpiador se
metan por las aberturas que se encuentran en la
parte superior de la puerta del horno mientras
usted est_ limpiando.
Page 51

Panel de control y perillas
Es buena idea limpiar el panel de control despu_s
de que use el horno. Limpielo con jab6n suave y
agua, o con vinagre y agua, eniuague con agua limpia
y pula hasta deiar seco con una tela suave.
No use limpiadores abrasivos, limpiadores liquidos
fuertes, fibras de plfistico o limpiadores para
hornos en el panel de control pues dafiarfin el
acabado. Una solucidn 50/50 de vinagre y agua caliente
funciona bien.
Las perillas de control pueden quitarse para
facilitar su limpieza.
Antes de quitar las perillas para limpiarlas, por
favor fijese que las periltas del lado izquierdo y las
perillas del lado derecho estdn en la posicidn correcta
de OFF (apagado). Cuando reemplace las perillas,
verifique que estdn en posicidn de OFF (apagado)
para asegurar que se coloquen adecuadamente.
Cambio del foco del horno
Para quitar una
perilla, tire de ella
para sacarla de la
espiga. Si una peritla
no se puede quitar con
facilidad, coloque una
tela delgada (por
ejemplo un pafiuelo) o un trozo de cuerda debaio y
alrededor del borde de la perilta y tire.
Lave las perillas con jabdn y agua pero no las
remoje. Evite que el agua entre en los agujeros para la
espiga que tiene la peritla.
PRECAUCION: Antes de cambiar el foco de su
horno, desconecte la energia el6ctrica que va a la
estufa desde el fusible principal o desde el panel de
interruptores automfiticos del circuito.
Asegfirese de que la luz de la cubierta y el foco del
homo se enfrien por completo antes de quitarlas o
reemplazarlas. Cuando se estdn usando, los focos
pueden calentarse lo suficiente como para romperse si
son tocados con una toalla o tela hfimeda. Cuando
limpie, evite tocar los focos tibios con trapos para
limpiar si la cubierta del foco no estfi en su sitio.
La luz del homo (foco) estfi protegida por una cubierta
de vidrio removible que se sostiene en su sitio mediante
un alambre en forma de aro. Si lo desea, quite la
puerta del homo para alcanzar el foco mils fficilmente.
Para quitarlo:
• Ponga la mano debajo de la cubierta de vidrio para
que no se caiga cuando quede libre. Con los dedos
de la misma mano, empuje con firmeza hacia atrfis el
aro de alambre hasta que deje de sujetar la cubierta.
Quite la cubierta.
• NO QUITE NINGUN TORNILLO PARA
QUITAR LA CUBIERTA.
• Cambie el foco por un foco comfn de 40 vatios.
Para volver a poner la cubierta:
• Pdngala en la ranura del receptficulo del foco. Tire
hacia adelante del alambre en forma de aro hacia el
centro de la cubierta, hasta que con un chasquido
quede sujeto en su lugar. Cuando estd en su sitio, el
alambre sostiene la cubierta con firmeza. Asegfrese
de que el aro estd en la depresidn que se encuentra
en el centro de la cubierta.
• Conecte la energia eldctrica a la esmfa.
Cubierta de alambre
(c'o17tim_a en lclp6gina si_dente)
23
Page 52

Puerta del horno removible
CUIDADO Y LIMPIEZA
(continuacidn)
La puerta del homo es removible, pero pesada.
Es posible que necesite ayuda para quitar y
poner la puerta. No levante la puerta del
horno tomfindola por la manija. Esto puede
ocasionar que el vidrio se rompa o que la
puerta sufra dafios.
Para qnitar la puerta, i_brala unas cuantas
pulgadas basra la posicidn especial de detener
que mantendrfi abierta la puerta. St@tela con
firmeza por anabos lados y tire de ella hacia arriba para
zafarla de las bisagras.
NOTA:
, Tenga cuidado de no meter las manos entre la bisagra
con resorte y la estructura del homo, ya que la bisagra
podria cerrarse de golpe y pellizcarle los dedos.
, Mientras estd trabaiando en el _irea del homo, cubra
las bisagras con toallas o con rollos vacios de toallas
de papel para evitar pellizcarse los @dos y
despostillar el esmalte de porcelana del marco.
Para volver a colocar la puerta, asegflrese de
que las bisagras estdn en la posicidn especial de
detencidn. Coloque las ranuras que se encuentran
en la parte inferior de la puerta directamente sobre
las bisagras. Luego baje la puerta con lentitud y
uniformemente sobre ambas bisagras, al mismo
tiempo. Si las bisagras se cierran contra la estrucmra
del homo, vuelva a retirarlas.
PARA LIMPIAR LA PUERTA:
Interior de la puerta:
• Con jabdn y agua por lo general serfi suficiente para
haeer el trabajo. Los sedimentos muy adheridos o las
salpicaduras secas pueden requerir una limpieza con un
limpiador abrasivo suave. Las fibras metfilicas moiadas
y jabonosas tambidn pueden ser fitiles. No permita que
los derrames de alimentos con alto contenido de azflcar
o de _icido (como leche, jitomate, col fermentada,
zumos de fruta o rellenos para pay) permanezcan en la
superficie. Pueden causar una mancha opaca incluso
despuds de que se hayan limpiado.
• Si es necesario, puede utilizar un limpiador para
hornos. No use limpiadores para homos, polvos
abrasivos o abrasivos fuertes en el exterior de la
puerta.
, Limpie la parte interior de la vemana del homo con
un limpiador suave que no raspe y con una tela mojada.
Exterior de la puerta:
, Use jabdn y agua para limpiar perfectamente la parte
superior, los costados y el frente de la puerta del homo.
NO PERMITA que el agua corra por las abermras que
se encuentran en la parte superior del homo. Eniuague
bien. Tambidn puede usar un limpiador para vidrio
para limpiar el vidrio en el exterior de la puerta.
, Las salpicaduras de marinadas, jugos de fruta, salsas
de tomate y materiales para rociar que contengan _cido
pueden causar decoloracidn y deben limpiarse de inmediato.
Cuando la superficie estd fria, limpie y enjuague.
Interior del horno con acabado de porcelana
Si se tiene el cuidado necesario, el terminado de
esmalte porcelanizado del interior del homo--parte
superior, inferior, costados, parte posterior e interior de
la puerta, ten&fin apariencia de nuevos durante afios.
Permita que la estufa se enfrie antes de limpiarla.
Le recomendamos el uso de guantes de hule cuando
limpie la esmfa.
Normalmente, basta con agua y jabdn para realizar
el trabajo. Los sedimentos muy adheridos o las salpicaduras
secas pueden requerir una limpieza con un limpiador
abrasivo suave. Las fibras metfilicas mojadas y jabonosas
tambidn pueden ser riffles. No permita que los derrames
de alimentos con alto contenido de azflcar o de ficido (como
leche, jitomate, col fermemada, zumos de fruta o rellenos
para pay) permanezcan en la superficie. Pueden causar
una mancha opaca incluso despuds de que se hayan limpiado.
E1 amoniaco para uso dom_stico puede facilitarle el
trabajo. Ponga 1/2 taza en un recipiente de vidrio o una
olla de cer_mica no muy profundos y mdtalo en el homo
frio durante toda la noche. Los vapores del amoniaco
le ayudarfin a aflojar la grasa quemada y los alimentos.
24
Si es necesario, puede utilizar un limpiador para
hornos. Siga las instrucciones del empaque.
Precaueiones al usar limpiadores para horno en
aerosol:
*No rocie los controles eldctricos ni los imermptores
ya que puede ocasionar un corto circuito y dar como
resultado chispas o fuego.
*No permita que se forn_e una pelicula de limpiador
sobre el sensor de temperamra ya que esto podria
ocasionar que el homo funcionara de manera inadecuada.
(El sensor se localiza en la parte superior del homo.)
Limpie con cuidado el sensor @spuds de cada
limpieza del homo, teniendo cuidado de no mover el
sensor ya que un cambio de posicidn podria afectar
la manera en que el homo realiza sus funciones.
. No rocie ningfln tipo de limpiador para homo sobre
el exterior de la puerta del homo, las manijas o
cualquier superficie exterior del homo, gabinetes o
superficies pintadas. E1 limpiador puede dafiar estas
superficies.
Page 53

Quemadores y charolas graseras
Para limpiar los quemadores, ponga el control en la
temperatura mils alta durante un minuto. Las
resistencias quemarfin cualquier suciedad.
PRECAUCION
• Asegfirese de que todos los controles est_n en
posici6n de OFF (apagado) y los quemadores est_n
frios antes de tratar de quitarlos.
• No sumerja los quemadores en liquidos de ningfin tipo.
• No lave los quemadores en una mfiquina lavavajillas.
• No doble las terminales de las clavijas de los
quemadores.
• No trate de limpiar, aiustar o reparar de manera
alguna el receptficulo de conexidn.
Para quitar un quemador:
Para quitar las charolas graseras para su limpieza,
primero debe quitar los quemadores.
Levante el quemador aproximadamente una pulgada
por encima de la charola grasera y tire del quemador.
Quemador
Receptaculo
-Charola grasera
No levante el quemador mils de una pulgada. Si 1o
hace, es posible que no quede piano sobre la charola
grasera cuando usted lo vuelva a conectar.
Si levanta repetidamente el quemador mils de una
pulgada sobre la charola grasera, puede dafiar de
modo permanente el receptficulo.
Para reemplazar un quemador:
• Vuelva a colocar la charola grasera en la parte libre de
la cubierta. Asegflrese de que la abertura en la charola
se alinee con el receptficuto.
• Inserte las terminales del quemador a travds de la
abertura en la charola grasera y mdtalas en el receptficulo.
• Guie el quemador en su lugar hasta que descanse de
manera uniforme.
Charolas graseras
Quite los quemadores. Luego levante las charolas graseras.
Para mejores resultados, limpie a mano las charolas
graseras.
Coldquelas en un recipiente cubierto (o en una bolsa de
plfistico) con 1/4 de taza de amoniaco para aflojar el
cochambre. Luego tale con una fibra llena de jabdn si es
necesaxio. Enjuague con agua limpia y pula con una tela seca.
Las charolas graseras tambidn pueden lavarse en una
mfiquina lavavaiillas.
Limpie con frecuencia el firea debajo de las charolas
graseras. E1 cochambre acumulado, en especial la
grasa, puede incendiarse.
No cubra las charolas graseras con papel alnminio.
E1hecho de usar aluminio tan cerca del receptficulo
puede causar un choque eldctrico, fuego o dafiar la estufa.
Cubierta despegable
Limpie con frecuencia el
firea debajo de la cubierta.
E1 cochambre acumulado,
en especial la grasa,
puede incendiarse. Para
facilitar la limpieza, debe
levantarse toda la
cubierta y mantenerse
levantada usando el soporte para mantenerla en posicidn.
Asegfirese de que todos los quemadores est_n
apagados antes de levantar la cubierta. Tome los lados
del frente de la cubierta y levimtela. Las unidades de la
superficie y las charolas graseras no necesitan quitarse
antes de levantar la cubierta. Sin embargo, puede quitar
una para que la cubierta se levante con mayor facilidad.
Despuds de limpiar baio la cubierta con agua caliente y
con jabdn suave y una tela limpia, baie la cubierta.
Tenga cuidado de no pellizcarse los dedos.
'\,
Cubierta de porcelana (en algunos modelos)
E1 acabado de porcelana esmaltada es resistente, pero
puede romperse debido a un mal uso. E1 acabado es
resistente a los ficidos. Sin embargo, cualquier tipo de
alimentos ficidos que se derramen (como zumos de
fruta, jitomate o vinagre) no debe deiarse mucho
tiempo sobre el acabado.
Si se derraman ficidos sobre la cubierta cuando
estfi caliente, use una toalta de papel seca para limpiar
de inmediato. Cuando la superficie se haya enfriado,
lave con jab6n y agua o con polvos limpiadores.
Eniuague bien.
Para otro tipo de derrames, como son las
salpicaduras de grasa, lave con jabdn y agua o con
polvos para limpiar una vez que la superficie estd fria.
Pula con una tela seca.
25
Page 54

i.PREGUNTAS? USE ESTA
GUIA PARA RESOLVER PROBLEMAS
PROBLEMA POSIBLE CAUSA
EL HORNO NO FUNCIONA • E1interruptor automi_tico del circuito de su casa esfft trabado o se fundid
un fusible.
- Los controles del homo no estfin programados de manera correcta,
LA LUZ DEL HORNO , E1 foco no estfi apretado,
NO FUNCIONA , E1 foco es defectuoso. Reemplitcelo.
- E1 interruptor que acciona la luz estfi dafiado. Pida el servicio de reparacion.
LA COMID_A NO SE ASA-- _de OVEN TEMP (temperamra del homo) y OVEN SET
AL FUEGO DIRECTO {programar el homo) no estfin puestas en BROIL (asar).
CORRECTAMENTE ° La puerta no se qued6 abierta en la posicidn de tope para asar.
• Se usa la posicidn de parrilla incorrecta. Vea la seccidn Asado al fuego directo.
• La comida se cocina sobre una cacerola caliente.
• La energia (voltaje) que llega al homo puede ser baja. Consulte la seccidn Asado
al fuego directo.
• Los recipientes no son adaptados para asar al fuego directo.
• E1 papel aluminio usado en la rejilla de la charola para asar no ha sido
bien ajustado y cortado como recomendado.
LA COMIDA NO SE ASA _illas de OVEN TEMP (temperatura del homo) y OVEN SET (programar
AL HORNO NI SE HORNEA el homo) no estfin puestas correctamente.
CORRECTAMENTE , La posicidn de la parrilla no es correcta. Consulte las secciones de Asar u Hornear.
• La parrilla del homo no estfi nivelada.
• Las cacerolas son incorrectas o el tamafio de las cacerolas que estit usando es
del tamafio inadecuado.
- E1 termostato del homo necesita aiustes. Consulte la seccidn Ajuste del
termostato--Hdgalo UU. mismo.
LOS QUEMADORES • Las charolas graseras no estfin colocadas de manera segura en la parte superior
NO FUNCIONAN de la estufa,
CORRECTAMENTE - Los quemadores no estfin bien conectados.
• Las unidades de control de la superficie no estfin colocadas de manera correcta.
TEMPERATURA DEL • E1 termostato del homo necesita ajustes. Vea la seccidn Ajuste del termostato
HORNO DEMASIADO del homo--Hdgato _. mismo.
FRIA O CALIENTE
CUANDO SE PRENDE EL , Esto es normal en un homo nuevo y desapareceriL con el tiempo.
HORNO, ESTE PRODUCE
L R"A E "
UN O O QU MADO
O "GRASIENTO
OLOR FUERTE , Durante las primeras veces que use el homo. es normal un olor proveniente
del aislamiento del homo. Esto es temporal.
EL INDICADOR DE TIEMPO • Asegfirese de seguir las instrucciones paso a paso y de manera correcm.
AUTOMATICO DEL HORNO Consulte la seccidn Reloj e indicador de tiempo automfiticos.
NO FUNCIONA
CORRECTAMENTE
Si necesita m_s ayuda...llame sin costo a:
GE Answer Cente( "_
800.626.2000
consumer information service
26
Page 55

Estaremos con usted
Con la compra de su nuevo aparato GE recibifft la seguridad de que si alguna vez necesita
infonnaci6n o asesor_a de GE, estaremos a su disposici6n. Todo lo que fiene que hacer es
llamar-isin costo! En GE Answer Center ®se habla espafiol.
GEAnswer Center®
800.626.2000
Cualquiera que sea su pregunta sobre alguno de los grandes aparatos de GE, el sm_Ticiode infbrmaci6n de
GE Answer Center ®ser_i dispuesto a ayudar. Su llamada-y su pregunta-serfin contestadas inmediatamente y con
cortesia. Y usted puede llamar a cualquier hora. E1selMcio de GE Answer (;enter ®estfi abierto 7 dias a la semana las 24
horas del dia.
Serviciodereparaci6nonsuho#ar
800-GE-CARE$(800432-2737)
Un especialista del sm_icio al consumidor de GE le proporcionarfi el sm_icio especializado de reparaci6n,
programado a la hora m_is conveniente para usted. Muchos centros de sm_icio al consumidor de GE operados pot" la
compaf_ia le ofi'ecen servicio hoy o mafiana o cuando a usted le convenga (7:00 am a 7:00 pmen dias laborables y 9:00
am a 2:00 pm los sfibados). Nuesu'os tdcnicos capacitados por la Librica conocen su aparato pot" filera y pot
dentro--asi, la mayoria de las reparaciones se hacen en sdlo una visita.
:a
Paraclientesconnecesidadesespeciales...
800.626.2000
SECTION A-A
Si se solicita, GE puede
proporcionar controles Braille
para numerosos aparatos, asi
como un fblleto de ayuda en la
I
planeaci6n de una cocina sin
barreras para personas limitadas
en su movilidad. Para adquirir
estos articulos, llamar sin costo al
teldfbno 800.626.2000.
Los consumidores con impedimentos (de oido o de
habla) que tienen acceso a TDD o a algOn teletipo
convencional, llamar al 800-TDD-GEAC (800-833-4322)
para solicitar informacidn o sel_icio.
Contratosdeservicio
800-626-2224
Usted puede estar seguro de que el GE Consumer SmMce estarfi alli aOn despu4s de que expire su garantia. Compre
usted un contrato de sm_icio GE mientras que est6 vigente su garantia y recibirfi un descuento considerable. Con un
contrato para varios af_os, usted asegura el sel_4cio fimlro a los precios de boy.
Partesy accesodos
800-626-2002
¢,a
Las personas calificadas para dar servicio a sus propios
aparatos pueden solicitar las partes y accesorios que se
les enviar>in directamente a sus hogares. E1sistema de
refacciones de (;E fiene acceso a mSts de 47000 partes.., y
todas las refacciones originales de GE cuentan con
plena garamia. Se aceptan ta_jetas VISA, Mastercard y
Discover.
Las instrucciones de mantenimiento para el usuario que
contiene esta gula cubren procedimientos que puede
realizar cualquier usuario. Otro tipo de servicios los
deberfi ejecutar exclusivamente personal calificado. Es
necesario tener precauci6n, ya que el servicio inadecuado
puede ser causa de peligros en la operaci6n.
27
Page 56

SU ESTUFA ELECTRICA GE
GA NTIA
Engrape aqui ia nota de caja o el cheque
cancelado. Es necesario rnostrar la fecha
original de ia compra para obtener
servicio bajo garantia.
LO QUE ESTA CUBIERTO
LO QUE NO ESTA
CUBIERTO
GARANTIA COMPLETA POR
UN ANO
Durante un a_o a partir de la fecha de
la compra original proporcionaremos sin
cargo alguno partes y servicio de mano
de obra en su mismo hogar para
reparar o reponer cualquierparte de
la estufa el_ctrica que falle a causa de
algOn defecto de fabricaci6n.
Esta garantia se extiende al comprador
original y a cualquier propietario
subsecuente por productos comprados
para uso normal en el hogar en los 48
estados continentales, Hawai y
Washington D.C. En Alaska valdra la
misma garanfia pero con la LIMITACION
de que el propietario pagara el costo del
embarque al taller de servicio los vi_ticos
del t6cnico de servicio hasta su hogar.
Viajes de servicio a su hogar para
mostrar c6mo se usa el producto.
Lea el material para el Uso y el
¢uiclado. Si a0n tuviera alguna
pregunta sobre c6mo operar el
producto, favor de contactar a
nuestro representante o a nuestra
oficina de Asuntos del consumidor
en la siguiente direcci6n o Ilame sin
cargo a:
GE Answer Center s
800.626.2000
consumer information service
Instalaci6n inadecuada.
Si usted tiene alg0n problema de
instalaci6n, contacte a nuestro
representante o instalador.
Todos los servicios de garantia
ser_n proporcionados por nuestros
centros de servicio de f_brica o por
los t6cnicos autorizados del
Customer Care® (Atenci6n al
cliente) durante las horas
laborables normales.
Si su aparato necesitara servicio
durante el periodo de garanfia o
posteriormente, Ilamar al
800-GE-CARES (800-432-2737).
Usted es responsable de
proporcionar las instalaciones
adecuadas de electricidad, gas,
escapes y otras conexiones
como descritas en las
Instrucciones de instalaci6n
incluidas con el producto.
Reemplazo de fusibles del hogar
o eliminaci6n de cortocircuitos.
Fallas del aparato si 6ste se usara
para otros prop6sitos que los
propuestos o se usara para fines
comerciales.
Da5os al producto causados por
accidentes, fuego, inundaciones o
cualquier de causa fuerza mayor.
LA EMPRESA QUE OTORGA
LA GARANTIA NO ES
RESPONSABLE DE DANOS
CONSECUENTES.
Algunos estados no permiten la exclusi6n o la limitaci6n de dafios incidentales o consecuentes, de manera que lalimitaci6n o
exclusi6n mencionada no seria valida para usted. Estagarantia te proporcionaderechos legales especificos y usted podra tenet otros
derechos masque varian de estado. Parasaber que derechos legalestiene en su estado, consutte a la oficina local de derechosdel
Empresa que otorga la garantia: General Electric Company
Si necesitara asesoria con respecto a esta garantia, escriba a:
ManagermConsumer Affairs, GE Appliances, Louisville, KY 40225
Papel reciclado
[ Part No. 164D2966P113 JMS08
consumidoro a la procuraduria de su estado.
l PubNo.49-8593-1 JMS10
2-95 CG
Impreso en LaFayette, GA
 Loading...