

Page 1
°_
ge.com
Safety Instructions ........ 2-_;
Operating IrL_uctions
Broiling, Broiling Guide ...... 13
Clo(k and Timer . ........... 14
Oven ................... 8-18
Self=Cl< aning ............ 17, 18
Sj?ecial Features ........... 9-i i
Surti_( e Units ................ 7
Thermostat ................. 16
Timed Baking and Roasting . . . 15
Care and Cleaning
Control Pm_el and I_lobs ..... 19
Drip Pans .................. 22
tleating Elements ........... 21
Liti.Ott'Oven Door . ......... 20
Lifi-IJp (]ook_op ............. 22
Light ..................... 21
Painted Sut[_lces ............ 21
Porcelain Enamel Cook_op .... 19
Shelves .................... 20
Surthce [Joins ................. 22
"_2nl ...................... 19
Troubleshooting Tips . . "3 "_
• , ,2.--Z'.)
Consumer Support
Consumer Support . . . Ba(k Cover
Product Registration ...... 29, 30
Warra nty .................. 31
Write the model and serial
numbers here:
Model #
Serial#
You cml find thrum on _ bd)el
behind the range door.
49-80467 07-07JR
Page 2

IMPORTANTSAFETYINFORMATION.
READALLINSTRUCTIONSBEFOREUSING.
WARNING!
For your safety, the information in this manual must be followed to minimize the risk of fire, electric
shock, or to prevent proper_/ damage, personal injury, or loss of life.
IMPORTANTSAFETYNOTICE
The California Safe Drinking Water and ToxicEnforcement Act requires the Governor of California to
publish a list of substances known to the state to cause cancer, birth defects or other reproductive
harm, and requires businesses to warn customers of potential exposure to such substances.
The fiberglass insulation in self-clean ovens gives off a very small amount of carbon monoxide
during the cleaning cycle. Exposure can be minimized by venting with an open window or using a
ventilation fan or hood.
2
Page 3
ge.com
SAFETYPRECAUTIONS
When using electrical appliances, basic safety precautions should be followed, including the following,
_ Us_ this appliance only fbr its intended
[)tit [)OS( as described in tiffs Owner's
Mamtal.
{_Be sur( your appliance is properly
it:smiled and grotmded by a qualified
installer in accotxlance with the provided
insmllation instt u( tions.
{_Haw the insmll(r show you tll( location of"
ill,.: (ircuit btx:ak( r or fuse. Mark it tot eaEv
re_q'(:ll( (!,
_ Do not attempt to repair or replace any
part of yolu- range unless it is spe(ifically
recommended in tiffs mam*al. _MIother
s_lwicing shouM be t*fi.'rrcd tv)a qualified
to( hni(ian.
{#_;Do not store flammal)le materials in an
OV(!II Of n(ar th( cooktop,
_ Bet}ore perfi)t ruing any service, disconnect
the range power supply at the househokl
distribution panel by removing th( ti*se or
swit( hing off the circuit brcakee
{_;I)o not leave children alon(_-children
shouM no_ be left alone or tmatmnded in
an area where an appliance is in us(. Th( 3
shouM nev(r 1)( allowed Io si_ or stand on
any part of the appliance.
_2Do not allow anyone t,:) climb, stand or
hang on the door or cooku)p. They couM
damage the i_t.ll_(! arid CatlS( severe
personal ilWty.
_ 7Ibach chikhcn not to play wifl_ the
controls or any oflmr part of the range.
_ CAUTION: hems of illtercst to chiMren
shoukt not be stot* d in cabinets abov(
a _wngc>--children (limbing on th( rang-c
u) reach items could ])e seriously injured.
_ New'r wear loose-fitting or hanging
garments while using the applian( e.
Be careflfl when rea(hing fbr it(ms stored
over the range. Flammable material couM
be ignited if brought in contact with hot
sm'face units or heating elem( nts and may
(ause severe blllllS.
{_;Use only (1U pot hoMers--moist or damp
pot hoM(rs on hot sm-li_(es may r(suh in
burns fl'OH'isteam. Do not let pot holders
tou(h hot surts(( units or heating
elements, Do not use a towel or oth(r
bulky (lofl_ in pla(( of pot hoM( rs.
_gFor your satiq); never use your appliance
fbr wm ruing or heating tim room.
3
Page 4
IMPORTANTSAFETYINFORMATION.
READALLINSTRUCTIONSBEFOREUSING.
A WARNING!
SAFETYPRECAUTIONS
_gDo not let cooking grease or other
flammable materials accumulate in or
near the range.
{f;Never k aw! jals or calls of titt drippings
iil Ol 11( ai voltF l_tllge,
_gKeep the hood and grcase fihers clean
m maintain good w:nting and to avoid
grease fil*s.
{#;Do not use water on grease fir<s. N<xer
pick up a flaming [)all. Turn d_e controls
olE Smother a tlaming pan (m a surlace
unit 13 coveting the pan compl(mly
with a wdl-litting lkl, cookk sheet or
flat troy. Use a muhi-l)urpose d U ch(mital
or f}.mm-type fire extinguishel:
Flaming grease outside a pan can be put
out b7, <oveling it with baking soda ol,
if available, by using a multi-purpose dlx
dmmi(al or tbam-type fire _xfing-uishel:
Flame in the oven can be smofllered
/:ompl(tely by closing the oven door
and tm-ning the oven off or by using
a nmhi-puH)os_ dt T / hemi/al or
fbanH?l)e fire extinguishel:
{f;Do not store or use combustible mat< rials,
gasoline or ofll(r flalnmable vapol_ and
Iktuids ill Ill<!vicinity ot tiffs or ally ofl_(r
appliance.
_ _Mways keep dish towels, dish cloflls, [lot
hoMers and other linens a satb distan/e
fi-omyour l-angc.
{f;Always ke(p wooden and plasd( ut_ nsils
and _anned tood a sal_ distance fl'om
VOUI" l_tllge,
_;_:Mways keep comlmstible wall coverings,
(urmins or drapes a safe distan( e h-onl
your range.
{#;Do not touch the surtime units, dlt!
heating demems or the interior surtime
of th( oven. These smfi_ces may b( hot
(hough to burn even flmugh th_ T are dark
ill ( olot: DulJng and alier use, do not
touch, or let cloflfing or other flammable
materials contact, the surthce units, areas
nearby the sm-fi_ce units or ally im_ riot
area of the oven; allow sufl_k:i( nt time for
cooling first.
Potentially hot surtsc(s include the
cooktop, areas ti,cing tim cooku)p, oven
v_nt op_ ning, surtimes n(ar tll_ opening,
cl*'xi(_ s around d_e oxen door and metal
lliIn [)aI1s above lhe dooF,
REMEMBER:The inside sullime of tile oven
may be hot when the door is opened.
COOKMEATANDPOULTRYTHOROUGHLY...
Cookmeat andpoultry thoroughly--meat to at least an INTERNALtemperatareof 160%andpoultry
toat least an INTERNALtemperatureof 180°,£.Cookingto these temperatures"usuallyprotectsagaflTst
foodbomeillness.
4
Page 5
OVEN
ge.com
_;_Stand away flom the t_mgc wh(n opening
tile oven do(In Hot air or steam which
escapes can cause butns to hands, ti_(e
and/or ey(s.
_;_Do not heat unopened tbod cotmdn(rs.
Pressure (ould build up and tlle (onminer
((mid burst, (ausing an il_jms:
_;gKeep tile oven vent unobstH_cted.
{_;;Keep tim ow_n ti*e fixml gtvas( 1)uildup.
{_;;Plate tilt` oven shelf ill file deshx:d posidon
whik the oven is cool. If'shelves must bt`
handled wh(n hot, do not let pot holder
tonla( t the heating elements.
_;gPulling out the sh(lf to the stop-lot k is a
o.mvenit` rice in lifting heax) foods. It is also
a pre(aution agzfinst burns flx/nl touching
hot surfi_ct` s of the door or oven walls.
_ When using cooking or masting bags
in the oven, fbllow the ltlalltlf_lt` tIlrel"s
directions.
{_ Do not use the oven to dlT l/t`_.'s[)a[)ers.
If ovt`rheat_ d, they can catvh on fire.
?_Do llO[ ltS_.' the ovetl It)t a stoIag-c arta.
hems stored in an oven can ignite.
_2 Do not leave paper products, cooking
umnsils tit-food ill the ovt`n when no_
ill fiSt..
{_Aft(r broiling, al_<_7,s take ally broik r [)all
out of th( tmlge and clean it. h't_over
grease in a broiler pan can cat*:h on fire
tile next tittle you us( the pan.
{_iI)o not use ahmfinum foil to line
ovetl bottottlS. Impropt` r installation
of ahmfimnn foil m W resuh in a risk
of t`kcttic shock tit fire.
SELF-CLEANINGOVEN
_;gDo not clean tile door gasket. "File door
gasket is essential fi.w a good seal. Care
should be token not to rob, damage or
mov( the gasket.
{4_;Clean tml} parts lisIed in dfis Owner's
Mamml.
_;_ D() llOt rise ovetl t` l(atwIs. No t OltlIi]eYt` ia[
ovetl t;_ealleF or OVell liller pi_tective
coating of any kind should be used in or
around any part of tile oven. Residue ti-om
ox(n ( leaners will dan*age the inside of
th( oven when tile selt:_ lean cy(le is used.
_2 Belore seltk:leaning tile oven, rt move
shin B silvermolored oven shelves (on some
models) and all other cookware.
{_;Bt` sure to x,_,,ipt` tl[) t`X(ess spillage Ix tbre
starting the st`llLcleaning opetv, tion.
_2 If th( self:cleaning mode malflmctions,
tllill the oxen off and disconnect the
power suppl}: ttave it se_Mced by a
qualified technician.
5
Page 6
IMPORTANTSAFETYINFORMATION.
READALLINSTRUCTIONSBEFOREUSING.
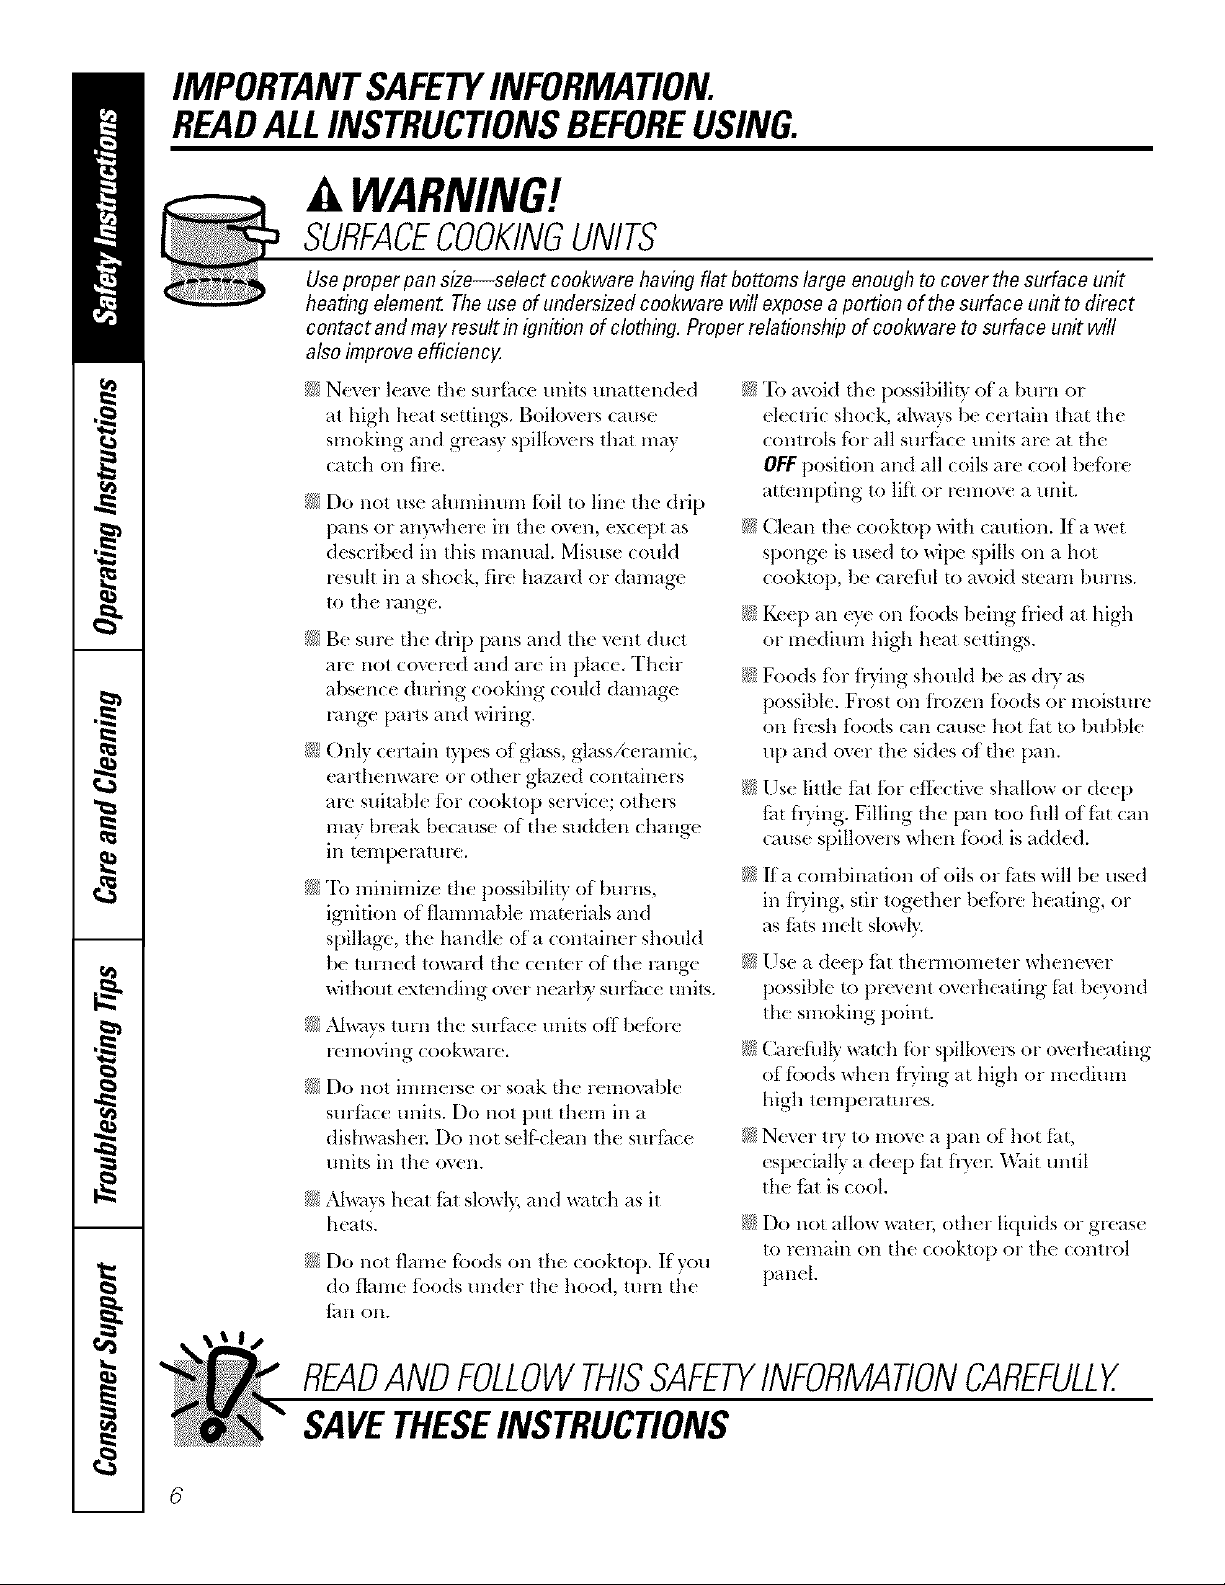
A WARNING!
SURFACECOOKINGUNITS
Use proper pan size--select cookware having flat bottoms large enough to cover the surface unit
heating element The use of undersized cookware will expose a portion of the surface unit to direct
contact and may result in ignition of clothing. Proper relationship of co&ware to surface unit will
also improve efficiencg
_ZN(wer leave the surli_ce units unatt(nded
at high heat settings. Boilov(rs cause
smoking and greasy spillow_t_ that may
catch on fire.
?_2Do not use ahmfinum foil to line the drip
pans or an?where in the oven, except as
described in this matmal. Misuse could
rt sult in a shock, fire hazard or damage
to tim range.
_2 Be sure the drip pans and the vent duct
arc not covered and art in plate. Th(ir
absem e during cooking could damage
range pm-ts and wiring.
_4_;Only certain types of glass, glassA( mmic,
eartht mwm" or other glazed containers
arc suitable tot cooktop service; othe_
may break because of the suddt n change
in temperature.
_2To minimize the possibilit T of burns,
ignition of flammable matt'rials and
spillage, the handle of a (:ontainer should
bc turned to_s_td the (enter ofthe rangc
wilhout extending ov(r nearby Stltlilc( units.
_2 ;Mw, lys turn the surfi_ce units off l)et}.)rc
t-clllovillg cookwat-c,
_2 Do not imme_se or soak the remowd)le
surt_,ce unils. Do not put th(m in a
dishwashen Do not stir:clean the surli,ce
units in the oven.
_2,M_ys heat fht slowl}; and watch as it
heats.
_2 Do not flame foods on the cooktop. Ifvou•
do flame foods under th( hood, tmn the
_111 Oil.
_ To avoid the possibility of a burn or
(l(c_lic shot k, always be certain that die
o.'*ntlx)ls f(_t all surtace units art, at th(
OFFposition and all (oils are cool before
atmmpting to lift or t*:move a refit.
_2 Clean the cooktop with caution. If a wet
sponge is used to wipe spills on a hot
cooktop, be careflfl to aw)id smam burHs.
_; Ktep an tT( on fi)ods being fli(d at high
or medium high heat settings.
_; Foods fi)r flying should b( as (hN as
possible. Frost on flozen fbods or moisture
on fr(sh foods can cause hot fat Io bubble
up and over the sides of the pan.
{_;Us( little tat tor ettk:ctive shallow or deep
tilt fiTing. Filling tlle Dm too till ofti,t can
cause spillovers when tood is added.
_ ff a combination of oils or ihts will be used
in flying, stir together b( fi')te heating, or
as fats meh slowly
_2[ Jse a deep tia themlometer whenever
possible to pre_ent ov(flmating [i_t beyond
th( smoking point.
{_;Ca_*_fillly watch [or spillov( _s or overheating
of foods whtn flying at high or medium
high t_mpemmr(s.
_ Ntxer ttT to move a pan of hot ti_t,
(specially a de(p t;_t fiT(l: Wait until
the tht is cool
{_;Do not allow wam_; odler liquids or grease
to remain on the cooktop or the control
panel.
READANDFOLLOWTHISSAFETYINFORMATIONCAREFULLY.
SAVETHESEINSTRUCTIONS
6
Page 7
Usingthe surface units, ge.com
Throughout this manual, features and appearance may vary from your model
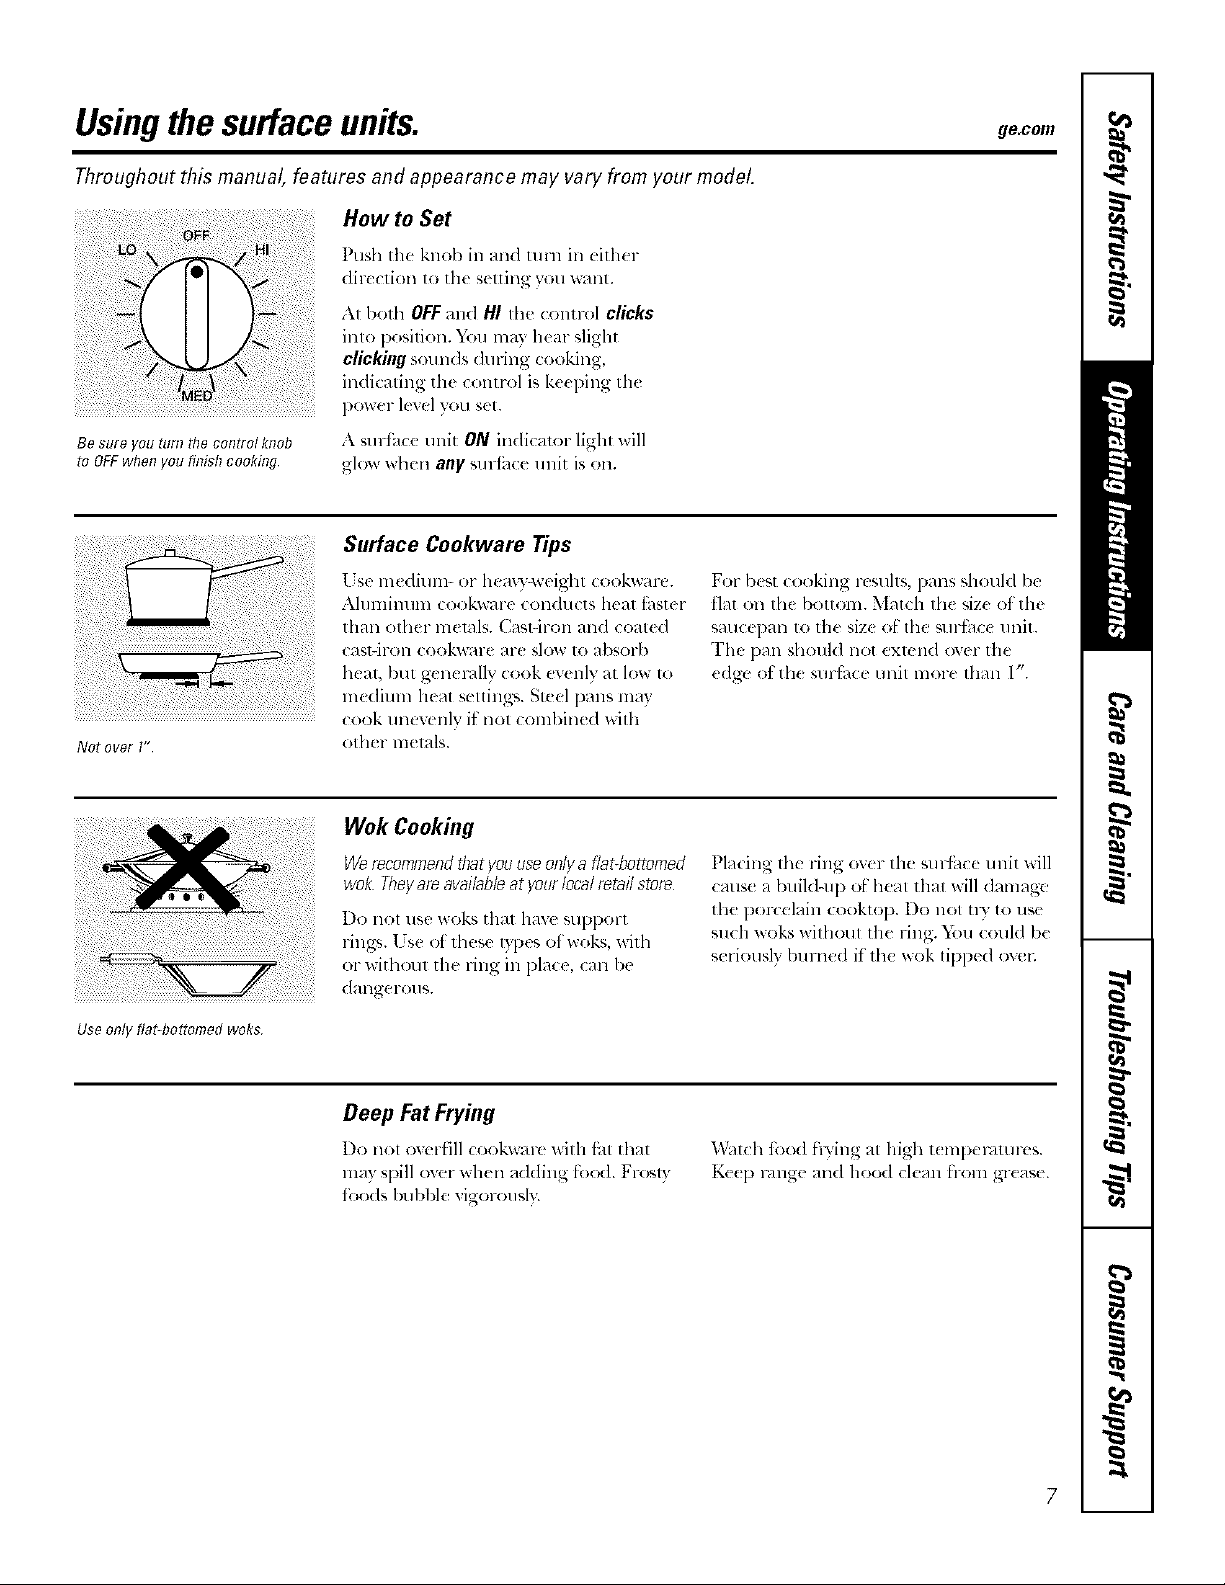
How to Set
Push the knob ill and turn ill either
direction to the setting you _mt.
At botb OFFand HI tile control clicks
into lx_sition. You may hear slight
clickingsounds duling cooking,
indicating the control is ke(ping tile
power level you set.
Be sure you turn the control knob
ro OFFwben you finish cookfl?g
Noto#rl"
A surfhce unit ON indicator light will
glow when any stll-filce tlnit is oil.
Surface Cookware Tips
Is(' mediun> or hemy_wcight (ookware.
Aluminum cookware conducts heat thster
than other metals. Casl-iron and coated
cast-iFOll cook'¢,_tle are slow to absorb
beat, but generally cook evenly at low to
medium heat settings. Steel palls may
cook unevenly if not (ombined with
other metals.
Wok Cooking
Werecommendthatyouuseonlyaflabbdtomed
wok 77}eyare.availableatyourlocalretailstore
I)o not use woks that have support
rings. Ise of tbese types of woks, witb
or without tile ling in ])lace, call be
dTIll_el-Oll%.
For best cooking resuhs, pans should be
flat on the bottom. Match the siz( of the
saucepan to tile size of tile surfhce unit.
"File pan should not extend over the
edgv ot tb( surfime unit more tbml 1".
Placing the ring over tile surfi_ce unit will
cause a build-up of heat that will damage
tile l)ort elaill (o{)kt(:)[). Do llOt [IWto llSe
sucll woks without the ring. xZ:)ucould b(
seriousl} burned if the wok tipped ovel;
Use only flat-bottomed woks
Deep Fat Fryhlg
I)o not ovcrfill cookwarc with flit that
may spill over when adding R_o(I.FrosW
foo(Is bubble vigorousl?:
Watch fbod flying at high t(ml)emmrt, s.
Ke(p cange and hood clean from gr(ase.
7
Page 8
Usingthe ovencontrols.
Throughout this manual, features and appearance may vary from your model.
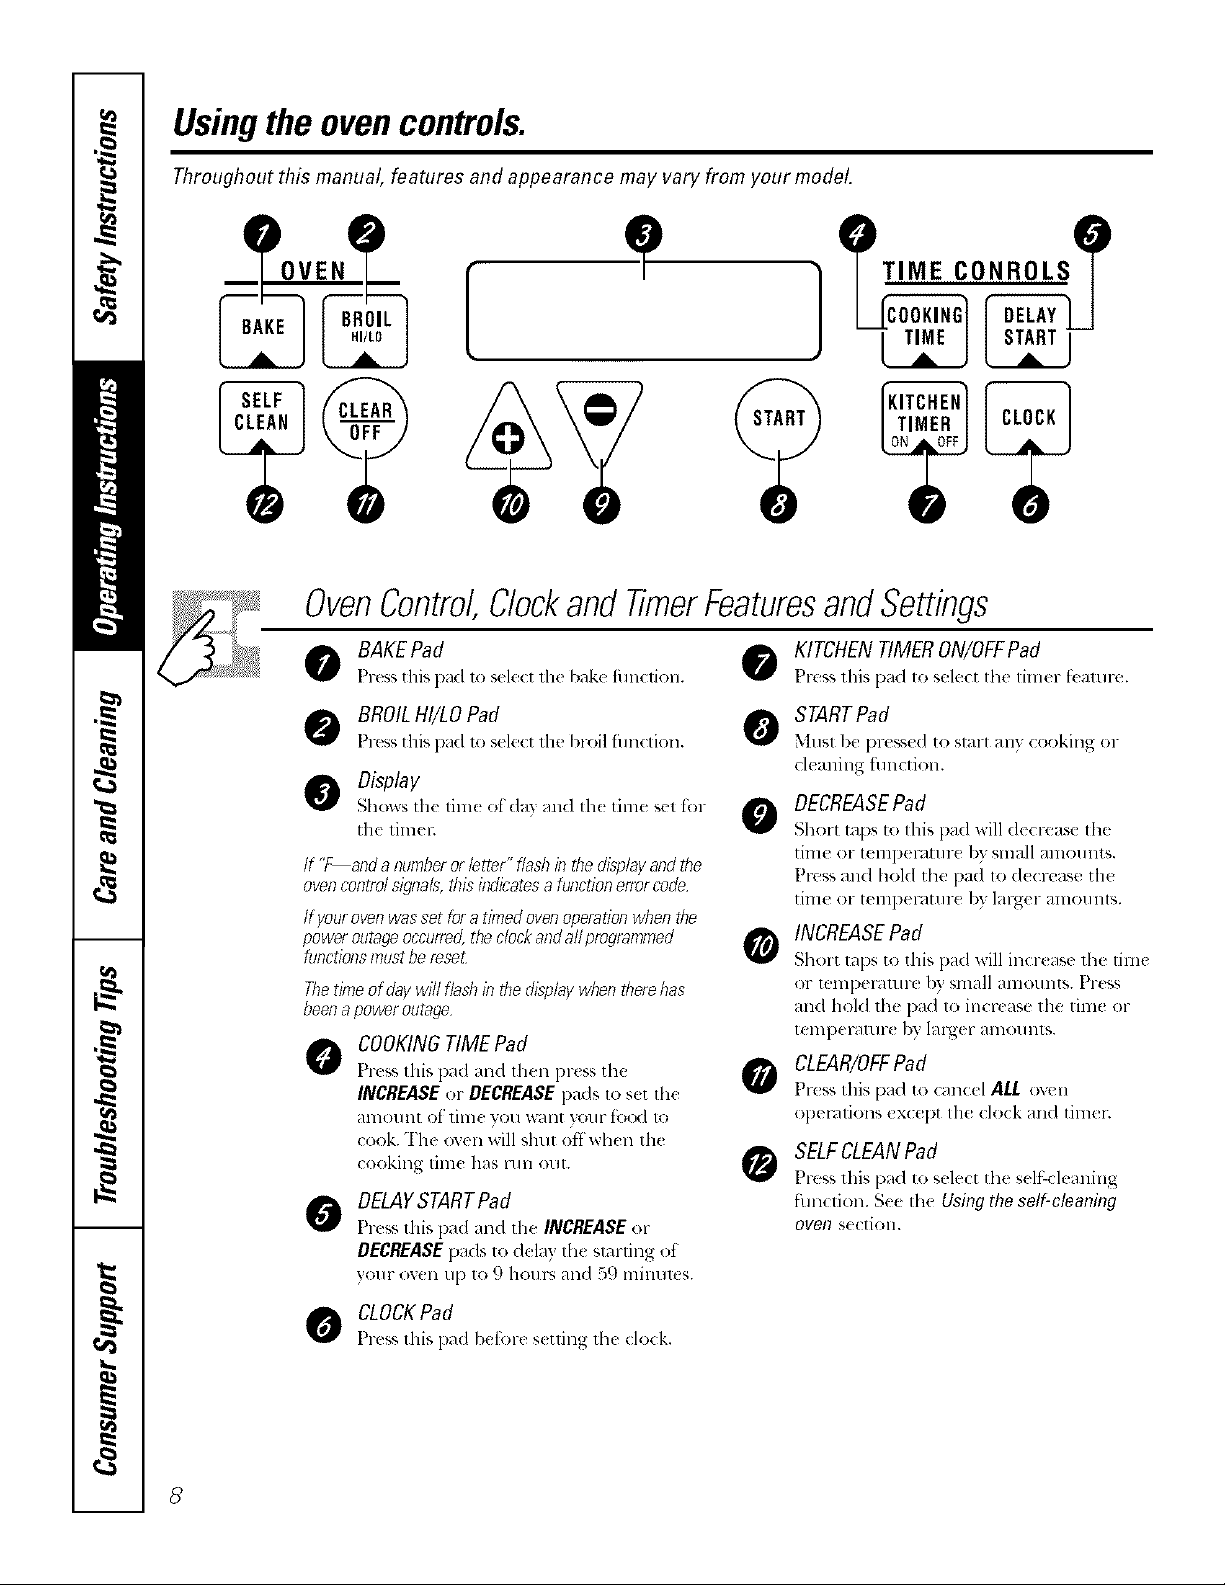
I1 e)
OVEN
[
ONROLS
OvenControlClockand timer FeaturesandSettings
BAKEPad
F'ress this pad lO sele(t the bak( tim(lion.
BROIL HI/LO Pad
Press this pad lo sele( t the broil fimclion.
Display
Shows the tim( of (la? and th( time sel for 0
the limel:
If "F aodaoumberorletter"flashfi?thed_playandthe
ovencontrolsignals,thisindicatesa functionerrorcode
If youroven was set for a thnedoven operation when dTe
power outage occurred,the clockandall programmed
functions most berese_
Thetimeof daywill flashb thedisplaywhendTerehas
bee/;apoweroutage
O COOKINGTIMEPafl
Press Ihis pad and then press th(
INCREASE or DECREASE pads Io s(t fl_(
al_lollllt O_ lilll( }'Otl "_all[ }'0111" _()(_l to
(ook. Tht ovtn will shin offwh_ n ill(
( )okillg tlll]( ltlll OtlL 7jr,4
DELAYSTARTPafl
Press this pad and the INCREASE or
DECREASEpads to delay th( slatting ot
VOIIF ox, ell t/l ) tO 0 hoIll'S all(I 5(.) tllilltll(S.
has
KITCHEN TIMER ON/OFFPad
F're_s lhis pad to select the limer tealure.
STARTPafl
_[llSl l)e pFesse(I to Slal-t all V cookillg Ol-
cleaning function.
DECREASEPad
Short taps to this pad will decrease tile
time or telllp( l_lIIIl-( 1)}" small 3111o11111s.
Press and hoM the pad 1o d(( tease tile
[illl( _ O1" [_'lll])_'l_][lll'( 1)}" lal-ger amounts.
INCREASEPad
Short taps to this pad will incr(ase the time
O1" [t'llll)el'Hllll't l;,', small alllOtllltS. Press
and hold the pad to incr_ ase the time or
tClllpel_ltl/l'( by l?lrgel- AIIIOllIID,.
CLEAR/OFFPad
Press this pad to Calltel AU. ov(ll
OpelVlllOllS ( Xc(!pt Ihe do(k alld tilll( 1".
SELFCLEANPad
Press this pad to select the self:<leaning
tunction. See tile Using the serf-cleaning
over S( C[iOII.
O CLOCKPad
Press this pad/)( ['o1{s(tling the clock.
8
Page 9
Special features ofyourovencontrol. e.com
Yournew touch pad contro! has additional features that you may choose to use. Thefollowing are the features and
hew you may activate them.
Thespecial feature modes can only be activated while the display is showing the time of day They remain in the
control's memory until the steps are repeated.
When the display shows your choice, press the STARTpad. The special features will remain in memory after
a power failure.
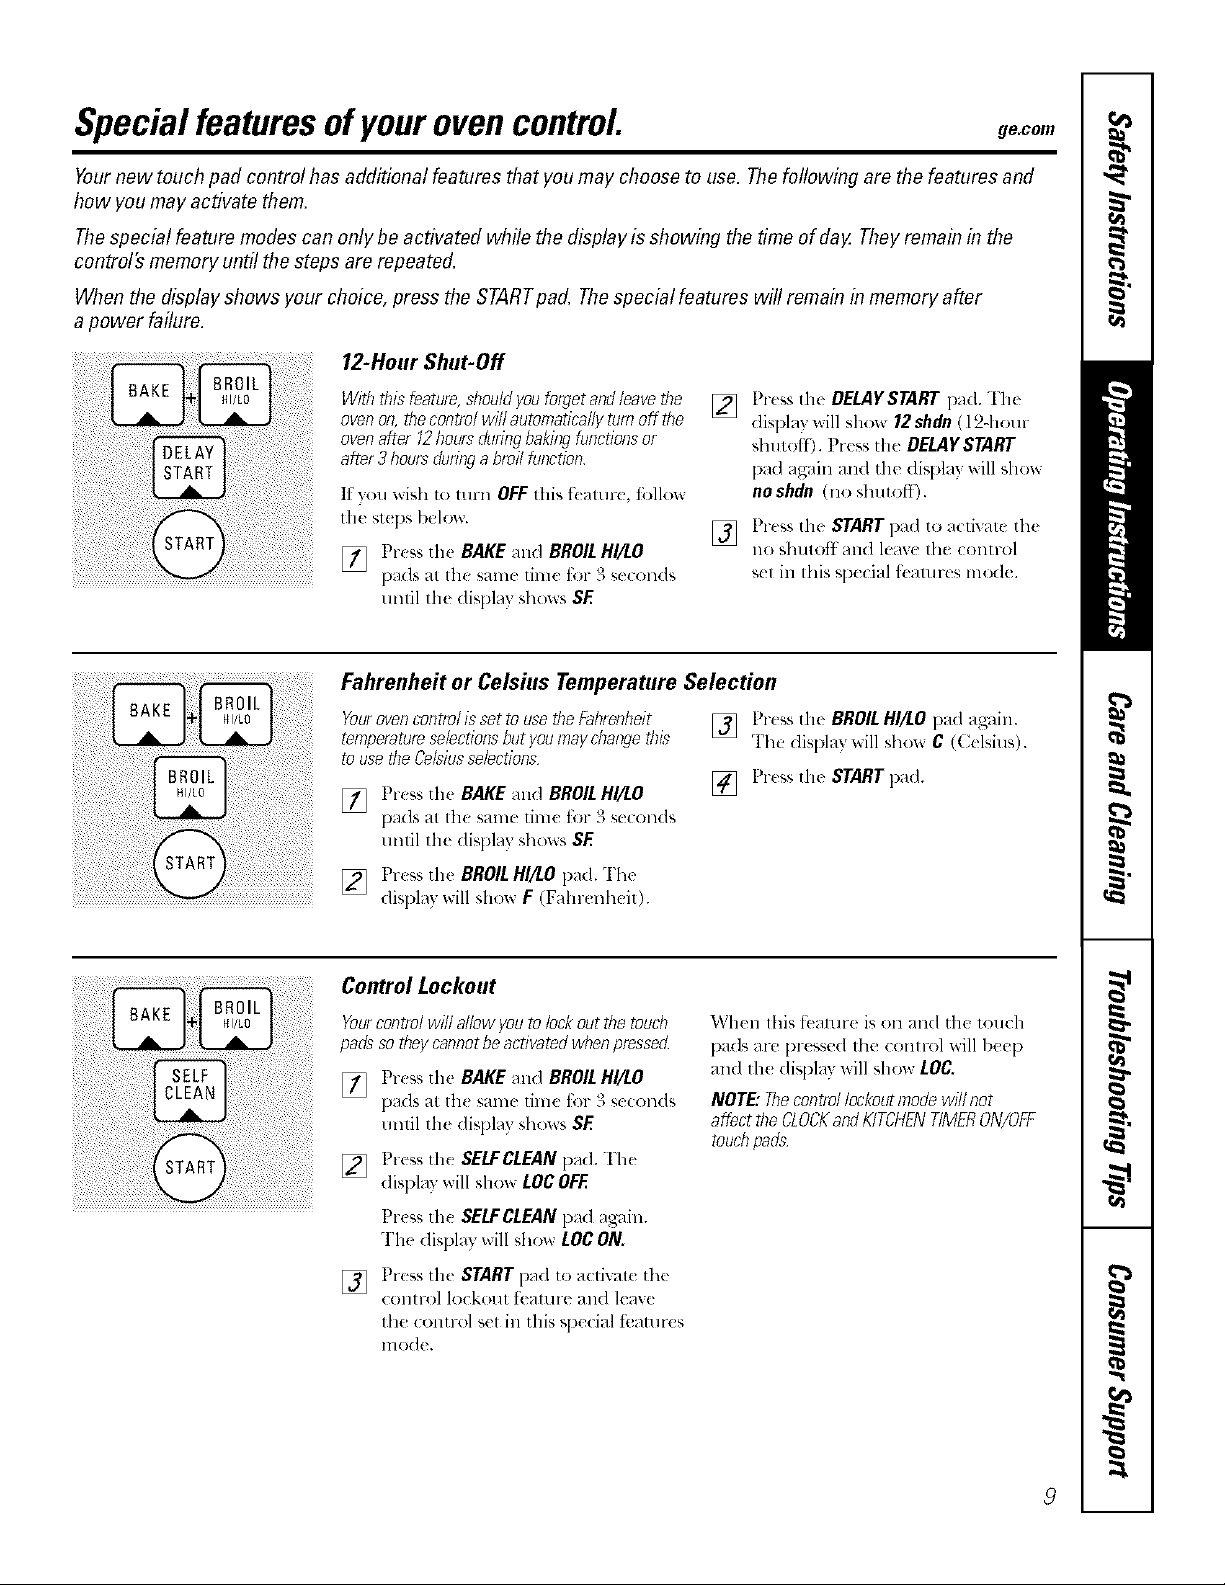
12-Hour Shut-Off
.... J÷L0¸¸¸¸¸¸¸¸........
i i!!i!ii!i iiiiiiii!ii i
Widlthisfeatare,shouldyoaforgetandleavethe
ovenon,thecontrolwillautoroaticallytamoff the
ovenafter12hoursdaringbakiagfuactioasor
after3 hoof_daringa broilfunction
It you wish tt) mrn OFF this t_amr¢, fi>llov,
the slq:,s b,.do,,,,.
[] Press the BAKEand BROILHIll.0
Fahrenheit or Celsius Temperature Selection
YourovencontrolissettousetheFahrenheit
teroperatureselectionsbutyoumaychaago_1_
tousetheCelsiussobctions
[] Press the BAKEand BROILHIll.0
[] Press the BROILHI/LOi)ad. Th(
pads al the same t"n( f< - 3 s{(onds
tmtil th( display sho_s SE
[:,adsal the sam,.: t"n( t'_"3 su. onds
until th( display shov,s SE
display will show F (Fahr_ nhdt).
Press tht DELAYSTART pad. The
[]
display will shov, 12shdn ( 12-hour
shu',ofl). Prcss the DELAYSTART
F,ad again and the display ,,,,ill show
noshdn (no shutof[).
Press th{ STARTpad to actixate th(
[]
no shutoll and l(:a_+(the control
S{I ill this SF,:{ial f_ allll-eS ln(xl(.
[] Press thc BROILHI/LOpad ag'ain.
Th,.: disl)lay will sh,.,>_C (C(lsius).
[] Press tilt STARTpad.
Control Lockout
Yourcontrolwill allowyoutolockoutdretouch
padssodreycannotbeactivatedwhenpressed
I_ Press the BAKEand BROILHI/LO
pads at 1t1( sallle 1" 1( t " :_ S(X:OII(!%
until tim (lisping)"sh,.)wsSE
[] Press th{ SELFCLEANpad. The
display will show LOCOFF..
Press the SElf CLEANpad again.
The display will show LOCON.
[] Pressth_ STARTpad to a(ti',at_ th_
(Oll[l'ol lockou[ ]'1 attll( an(! l_l\(
thu ,.ontr,.4 set in this spc,.ial feamr,..s
lno(lt'.
When Ibis fbature is on and the lotlch
pads aT(' pressed tim control will [)eel;,
and th_ diq)l_q will show LOC.
NOTE:Thecontrolloci<outmode will not
afl_cttheCLOCKaMKITCHEA/TIMERON/OFF
touchpads_
9
Page 10
Specialfeaturesofyourovencontrol
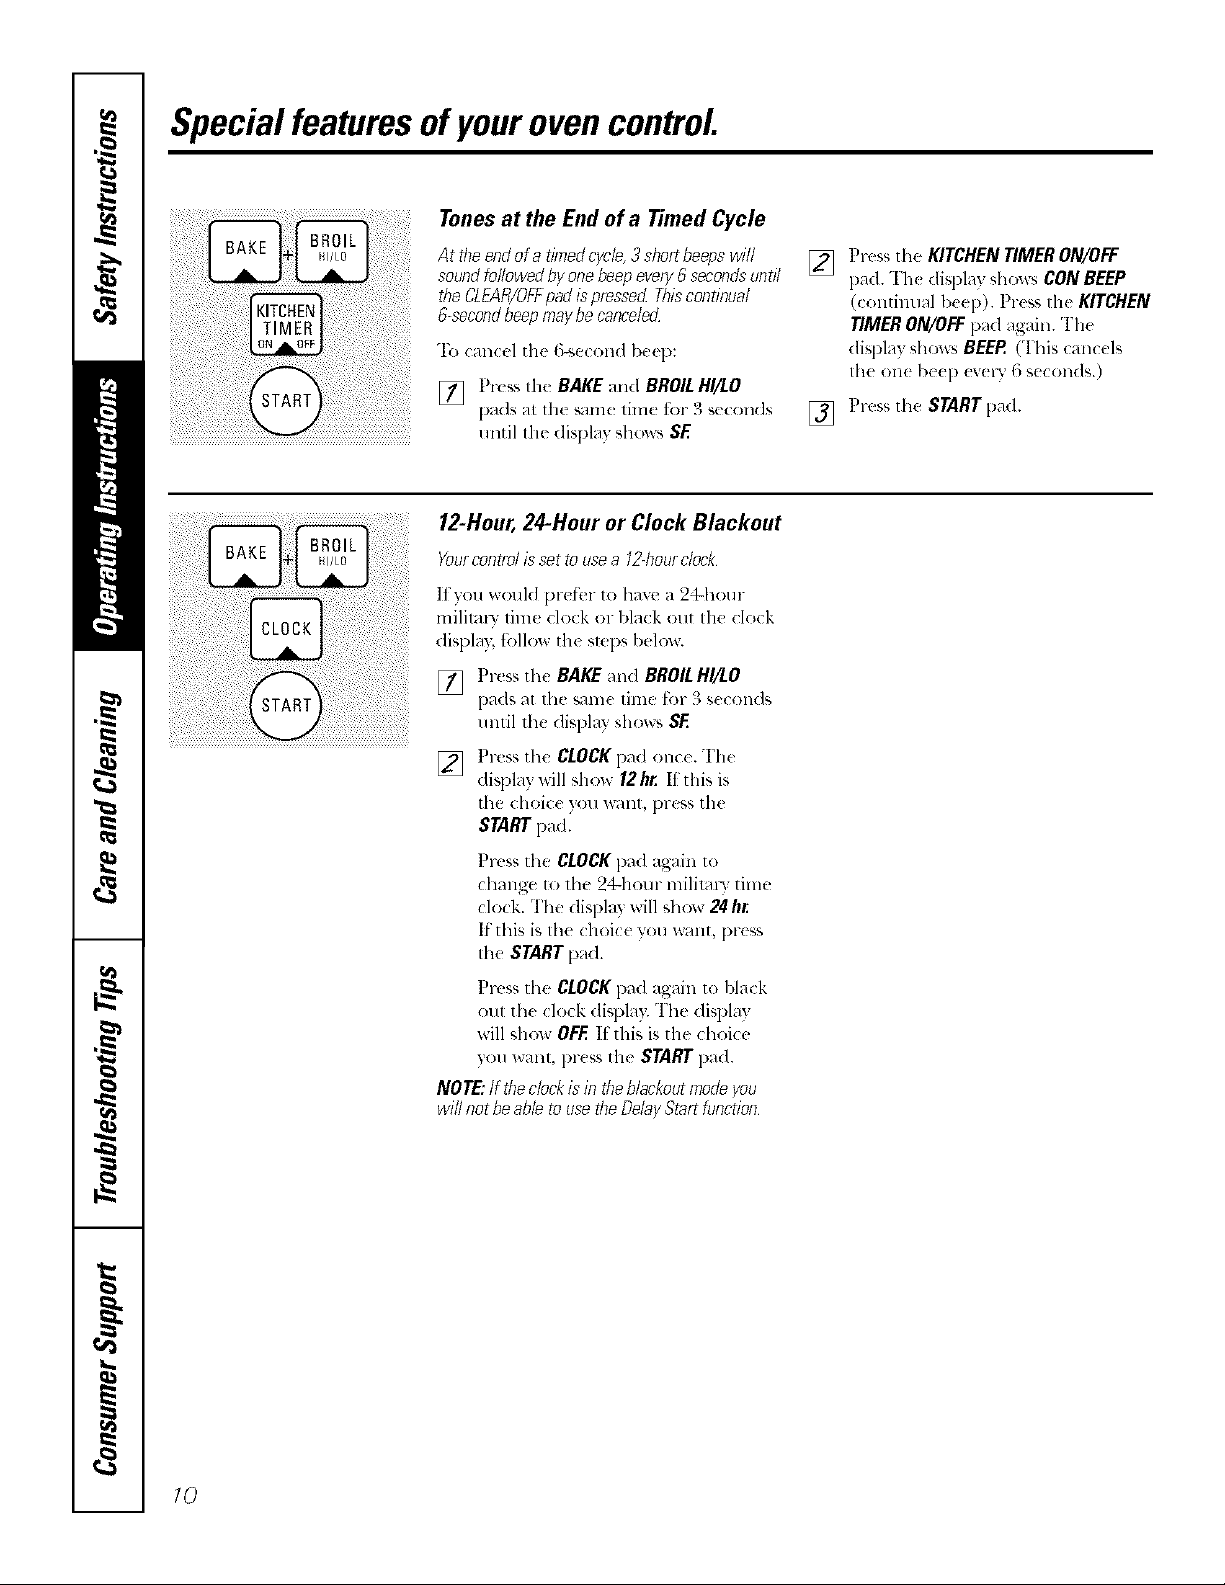
Tones at the End of a Timed Cycle
At theendof atimedcycle,3shortbeepswill
soundfollowedbyonebeepevery6secondsuntil
d_eCLEAR/OFFpadispressedThiscontioual
&secondbeepmaybecancelerZ
"Ib ( ancel the 6-_econd be(p:
[] Press fll( BAKE and BROIt HI/LO
pads at ttl_ sameliln_ t) 3s((:)l(ls
until the ,:lisF,lay sh,.)v,s SE
12-Hour,24-Hour or Clock Blackout
Yourcontrolis settousea 12-hourclock
]tyou would pref_!r to have a 24q/mr
mililm'V lim_ clock or black out Ill(! clo(k
display, t'ollo_ th( sleps I)elo_.
[] Press tIl(! BAKEand BROILHI/LO
pads at the same time fbr 3 seconds
until the disl)lay shows SF..
[] Pr(ss th( CLOCKpad OllC(.The
display will show/2 hr. If this is
[h(_choic( "_Ol/ V_DII[ l)l'(_SS the
STARTpad.
[] F'ress the KITCHENTIMERON/OFF
pad. "['h( display shows CONBEEP
(continu_ll bee[)). Prc_,',flw KITCHEN
TIMERON/OFFpad _gain. The
di',pl_y show_, BEER(This _ml(cls
tile on( be(p (v(l T 6 seconds.)
[] Press the STARTpad.
Press tile CLOCKpad again to
changu to the 24-hour mililm-_ time
clock. The display will show 24 hr..
Ii this is tile choice 3ou want, press
tile STARTpad.
Press tile CLOCKpad again to black
out th( clock display. The display
will show OFF.[t this is the choice
you want, pr(ss the STARTpad.
NOTE:If theclockisin theblackoutmodeyou
willnot beable.tousetheDelayStartfancfioo
10
Page 11

Cook and Hold
ge.com
Yournewcontrolhasa cookandholdfeatare#lat
keepscookedfoodswarmforupto3hoursafter
[] Press the COOKING TIME pad. The
disl)lay will show Hid OFF..
thecookingfanctionisfinishecL
77fsfeaturecallbeusedonlyatdieendofa
timedbakingcycle_zhichhasallautomaticstop
Press tll{ COOKING TIME pad again
to activate lll_ f'(atur_. '1'[1_(Âisplay
will show Hid ON.
To activate this i_:amr,., fk:,ll,.re,Ih{!s,t(l_S
below.
[] Press file BAKE and BROILHI/LO
pads al the s_ne 1"_ e fi)- 3 *,e,.-c,lds
until th_ diSFdayql,,_v,,sSF.
] Press the START pad 1o activate
the cook and hoM featm-_ and
l,.:m_ the ,_:omrol set in this sl)eciaÂ
_12_111 l'eS lllOd(L
Changing the Speed of the Increase or Decrease Pads
AsyouusetileINCREASEofDECREASEpads
wheosettingatimeortemperature,youmay
noticetiledisplaychaogesslowly Thisspecial
featureallo_ youto changetilespee_L
'lb ¢,el th{ six e(I you 1)1-{f_l; folio'c, Ihe
stel)s I)elow.
[] Press the BAKE and BROILHIiLO
pads al the same t" n_ t) - 3 s_(onds
tmtil th( display shows SE
[] Press the INCREASE pa(L The disI)lay
will show you a sel spe_d betw{ c n
1 and 5.
[] Press th_ INCREASE pad to increas_
the s[)(!ed t] l) to lhe 11!11111)(71 _').
Press th_ DECREASE pad 1o decrease
the speed down 1o th_ rmmber 1.
[] Press START to acliVale the s_tting
and l{avc lhe (xmtrol s_t in Ihis
special f<mn-_ s mo&.
!!
Page 12

Usingthe oven.
Toavoid possible bums, place the shelves in tbe desired position before you turn tbe oven on.
Before you begin...
Theoven has 4 shelf positions
The shelxes have Stol>lock+,,so fllat when
placed corr('ctly on tile suppolts, flmy will
stop betow coming completely out, alld
will not tilt.
To remove a shell, pull it toward you, tilt
the tiOllt elld up and pull it out.
Toreplace, place lhe (rid ot the shelf
(stopqocks) on the support, tilt up the
Wh{n placing and rem<_'ing cookware,
pull the shell out until it slops.
flont and push the shell in.
How to Set the Oven for Baking or Roasting
[] Press th< BAKE l)ad.
[] Press the INCREASE or DECREASE
pad to sol th_ oven teml)eralur_.
Tochangethe oven temperature&dng the Bake
cycle,press the BAKEpadandset the new
temperature
[] Press the STARTl)ad. When the
oxen starts to heat, the changing
Type of Food Shelf Position
Frozenpies(oecookiesbeet) BorC
Angelfoodcake, A
bundtorpoundcakes
Biscuits,muffins,brownies, BorC
cookies,cupcakes,
layercakes,pies
Casseroles BorC
tenll)er, mlrc will b_ in the display.
Th_ display starts changing once
the temlx:mtnre l*!aches 100°E
NOTE:A toolingfanmayautomaticallyturnon
andoff tocoolinternalparts Thisis normal,and
thefanmaycontt?TuetorunevenafterdTeovenis
[] Press the CLEAR/OFF pad when
I)aking is fhfished.
turnedof_
12
Preheathlg and Pan Placement
Preh{ at tile oven it tile recipe calls tbr it.
Preheating is necessal 3 for good resulls
when baking cakes, cookies, past U and
/)wads.
Topreheat,settheovenat thecorrecttemparature
Thecontrolwill beep_A}entheovenispreheated
anddTedisplaywill showyoursettetr_paretore
Thi_willtakeapproximatelylO-15minotes
Aluminum Foil
Donotu_ _lminum foilontheboriom
oftheoven
Never entirely co_er a shelt'with
ahuninum toil. This will (listurb the heat
circulation and resuh in l)oor 1)aking.
Baking re+,ultswill be better it baking
palls are { enteFed ill the oven as HlIIch
as po',sible. Pans should not lOlleh each
olher or tile walls of tile oven. If you
need to use p.vo shelves, stagger the pans
so one is not directly abow, tile othel;
and leave approxilnamly 1½" bep.veen
pans, from tile front, back and sides of
tile x_:dl.
A smaller sheet (ff foil may be used to
catch a spillover by l)lacing it on a lower
shdf s_veral inches below the food.
Page 13

How to Set the Oven for Broiling
ge.com
Leave the door open to the broil
step position. Thedoor stays open
by itselt; yet the proper temperature
is maintained in the oven
[] F'lace the meal oF fish on a broil_ r
grid in a broiler pan designed
for broiling.
[] Follow suggesled shelf positions in
file Broiling Guide.
ff yourevenisconnectedto208volts,raresteaks
maybebroiled& preheatingthebroilerand
pesitieninfltheevenshelfone,positionhigher
Ise LO Broil to cook tbods such as
poultt} or thick cuts of meat thoroughly
without Rye>browning them.
Broiling Guide
Shelf
Position
C
C
C
C
C
C
A
C
C
C
B
Food
Bacon
Ground Beef
Well Done
Beef Steaks
Rare
Medium
Well Done
Rare
Medium
Well Done
Chicken
Lobster Tails
Fish Fillets
HamSlices
(precooked}
Pork Chops
Well Done
LambChops
Medium
Well Done
Medium
Well Done
Quantityand/
or Thickness
1/21b.
(aboutRthin slices)
1lb.(4 patties)
1/2to3/4" thick
1" thick
f to 1½Ibs.
1½"tMck
2to 2½Ibs.
1whole
2 to 2½Ibs.,
split lengthwise
2-4
Bto 8oz.each
1/4to 1/2" thick
1" thick
2 (1/2" thick)
2 (1" thick) about 1 lb.
2 {1" thick) about 10
to 12oz.
2 (1½"thick)about I Ib
[] Press th_ BROILHI/LOpad on(x fbr
HI Broil.
To ,.bng( to LOBroil, prt's'_th,:
BROILHI/LOpad again.
[] Press d_e STARTpad.
[] When broiling is finish(d, pr(ss the
CLEAR/OFFl)ad.
FirstSide
Time(rain.)
4½
I0
6
8
12
10
15
25
35
13-16
10
13
10
12
14
17
SecondSide
Time(rain.)
4½
5
6
11
78
14-16
2_25
10-15
Do not
turn
oveL
10
13
9
10
12
12-14
Comments
Arrangeinsinglelaye_
Spaceevenly.Up to 8
pattiestake aboutthe
sametkne.
Steakslessthan 1"
thickcookthrough
beforebrowning.Pan
frying isrecommended
Slashfat.
Reducetimeabout5
to 10minutesper side
for cut-up chicken.
Brusheachside with
meltedbutter.Broil
skin-side-downfirst.
Cutthroughbackof
shell. Spreadopen.
Brushwith melted
butterbeforebroiling
andafter half ot
broilingtime.
Handleandturn very
carefully.Brushwith
lemonbutter before
anddudngcooking,if
desired Preheat
broilerto increase
browning.
Increasetime 5 to 10
minutesperside for
11/,"thick 0r home-
cured ham.
Slashfat.
Slash fat.
!3
Page 14

Usingtheclockandtimer.
To Set the Clock
The clock must be set to fl_e correct time
of day t_.n" tile automati( owm timing
t_mctions to work pvopefl_ The time oi!
Make sure tile clack is set to the day cannot be changed dt/l-illg a lilll(:(]
correct time of dalz baking or self-clea ning (yck.
To Set the Timer
[] ]'tess the KITCHENTIMERON/OFF
pad.
Thetimer is a minute timer onlg
Thetimer does not control oven
operations Themaximum setting
on the timer is 9 hours and59
mflTutes,
[] Press the INCREASEor DECREASE
pads lllltil the alnOlllll of tilll( VOtl
wmlt shows in Ihc display.
Ilvou lllak_ a mislak( I)rcss the
KITCHEN TIMER ON/OFF pad and
begin again.
To Reset the Timer
If the display is still showing the time
remaining, you may changv it by pressing
the KITCHEN TIMER ON/OFF pad, dlen
press the INCREASE or DECREASEpads
tmlil the flirt< you want appeals, in the
displaF
[] Press the CLOCKpad.
[] Pressthe INCREASEor DECREASE
pads.
[] Pre_the STARTI)ad.
[] Ihess lh_ STARTpad.
[] _Nllen the tinier reaches :00, the
<ontrol will becp g lim_s t;.41ow_ d by
one I)eq) ex_]T 6 se< onds tmtil tl]_
KITCHEN TIMER ON/Off pad is
pressed.
7he&secondtonecanbecanceledbyfollowing
thestepsin dTeSpecialfeaturesofyouroven
controlsectionunderTonesat dTeEndof a
TimedCycle
If the remaining time is not in the display
(clock, dela? strut or cooking time arc in
the display), rucall the remaining time by
pressing the KITCHENTIMERON/OFFpad
and then pressing the INCREASEor
DECREASEpads to cnwr the new tinlc
yoll Wallt.
14
To Cancel the Timer
Pressthe KITCHENTIMERON/OFFpad
D'_i(:(,
Power Outage
MY_r a power outage, when power is
restored the display will flash and time
shown will no longer be correct--fog
exampl<aftera5qTtinutepowerinterruption
theclockwillbe5minutesslow
The display t]ashes until th_ clock is reset.
."dl other fhn(tions that were in opel-dtion
when the power went out will have to be
l)rogF, unmed again.
Page 15

Usingthe timedbakingandroastingfeatures.(onsome models) ge.com
NOTE:Foods that spoil easily-such as milk, eggs, fish, stufings, poultry and pork-should not be allowed to sit for
more than I hour before or after cooking. Roomtemperature promotes the growth of harmful bacteria. Be sure that
the oven light is off because heat from the bulb wril speed harmfu! bacteria growth.
Thelow temperature zone of this range (between 170°t:and 2gO°F)is avariable to keep hot cooked foods warm. Food
kept in the oven longer than 2 hours at these low temperatures may spoil.
How to Set au Immediate Start and Automatic Stop
Theovenwillturnonirnmedintdyandcookfora
selectedlengthoftime AttheendofdTecooking
timetheovenwill turnoffautomatically
[] Press the BAKEpad.
[] Using the INCREASEor DECREASE
[)ads_ {!111( r Ill{! d{!Sil{!d [(!lllpel_[IIl-(.
[] Pr(ss th{ COOKINGTIME pad.
NOTE."If yourreciperequirespreheatingyou
mayneedtoaddadditionaltimetothebngtk of
thecookingtime
[] Using the INCREASEor DECREASE
pads, eltwr the desired baking tinle.
The ovell t(?lllp('l-_tlll_( alld Ih_
(ooking lin)_ Ihat you (ntered :',ill
be display{ d.
The display shows the oven tempemtm-c
that you set and the cooking time
countdown. The display starts chmlging
once the temperatm-e reaches I{X) K
The ovell will continue to cook fbr fix:
l)lOgl_llllllled _/ll3(}tlll[ O[ 1i111( [hell Shll[
off automatically.
Press th( CLEAR/OFFpad Io cl(ar lh{
disl)la ?.
[] Press th( STAKr pad.
How to Set a Delayed Start and Automatic Stop
Youcansettheovencontroltodday-startthe
oven,cookforaspecificlengthof timeandthen
turnoffauternaticafly
Make SllreIhe dock showsIll{ COlT( C[
time ot day.
[] Press the STARTpad.
NOTE:Anattentinetonewill soundif youarn
usingtimedbakinganddonotpresstheSTART
padafterenteringthebakingtemperature
ltyou would like to check the times you
[] Press the BAKEpad.
[] [ sing the INCREASEor DECREASE
pads, (ll[(r th( d(sil'(d [(lllp(l_ltlre.
have set, pre_,stile DELAYSTARTl)ad to
check the start tilne you ha_,'eset or press
the COOKINGTIMEpad to check the
lengfll of cooking time you have set.
[] Presstll_ COOKINGTIMEpad.
NOTE:If yalrreciperequirespreheatingyou
mayneedtoaddadditionaltimetothe/engt/iof
thecookingthne
WheH Ihe c?,-{ql ttll-llS oil a£ the tillle
ot day you have set, the display will
show the changing temperature
(slatting al 100°F) and the cooking
time cou lltdOWll,
[] tsing the INCREASEor DECREASE
pads, emer the desired baking tilne.
At the end ol timed baking, the ov(n
will turn of]: The (rid ot (vcle tom: ',',ill
[] Press the DELAYSTARTpad.
[] [sing Ill{ INCREASEor DECREASE
pads, (!lll(r Ill(! tim,.: otday you
%'Elll[ Ill{! OV(ll 10 [llrll Oil alld Sl_lr[
cooking.
sOt/lid.
Press Ill( CLEAR/OFFpad to clear th(
displa 3.
!5
Page 16

Adjustthe oventhermostat--Do it yourself!
Youmay find that your new oven cooks differently than the one it replaced. Use your new oven for a few weeks to
become more familiar with it, If you stiff think your new oven is too hot or too cold, you can adjust the thermostat
yourself,
Do not use thermometers, such as those found in grocery stores, to check the temperature setting of your oven.
These thermometers may vary 20-40 degrees•
NOTE: This adjustment will not affect the broiling or the self-cleaning temperatures. Theadjustment will be
retained in memory after a power failure•
To Adjust the Thermostat
Press the BAKE and BROILHI/LO
)a(ls_tt the _,al ( 1" le [o _ st(o (lS
until file display shows SE
[] Pr(ss th,_BAKEpad. A t_,,odigit
numb( r shows in the clisplay•
] Wh( o_,(11 lelnl)(!Fallll'(! tall be
_(! sttd _l)(+)a FI It_ or(-)
:,_F( k .
Press the INCREASEpad to increase
Ihe temlx mture ill ] degree
illcl'elllelllS.
Press the DECREASEpad to decrt as(
Ihe temlxmture in ] degree
illCFt'lllelllS,
When you hay( made tile
[]
a_!justment, press tile STARTpad to
go back to the time el day displa):
Lse your oven as you would
no*mall)'.
Thetypeofmargarinewill affectbakingperformance!
Most recipes for baking have been developed using high fat products such as butter or margarine (80% fat). If you
decrease the fat, the recipe may not give the same results as with a higher fat product,
Recipe failure can result if cakes, pies, pastries, cookies or candies are made with low fatspreads. Thelower the fat
content of a spread product, the more noticeable these differences become.
Federal slxmdards require l)_x)ducls labeled "mm-garine" 1ocontain aI least 80% thl by weight. Low tht spreads, on tile
other hand, contain less li,t and more walel: The high nloistm( content ot these spr(ads atlbcls tile textln-e and tlavor
ot baked goods. For besl resuhs with your old fawwite recipes, us( margarine, bull( r or stick spreads containing at least
70% vegetable oil.
0
16
Page 17

Usingthe self-cleaning oven. e.com
The oven door must be closed and aft controls must be set correctly for tlTe cycle to work properly,
....... ................. Before a Clean Cycle
Wipe up heaw soft on the oven
bottom (appearance may vary)
lVVerecommend venting your kitchen
with an open window or using
a ventilation tim or hood during tim
first s( lt:t lean (3*cle.
Remove shelves, broiler pan, broiler grid,
all cookware and any ahuninum tifil h-ttm
the ()VEIl.
Tbe shin}: silver_:olored oven sbelves
(on some models) can be selt:-d(mled,
bt/t they will darken, los( their luster
and become haM to slide.
Soil on tile ffonl h'am( of llle range and
outside tbe gasket on tbe door will n(ed
to be cleaned by band. Clean tbese areas
with hot watel; soap4illed smel-wool pads
or cleansers such as Soil Scrub ®.Rinse
well wilh clean x_v/lt,l-and d13:
How to Set the Oven for Cleaning
[] Press th_ SELFCLEANl)ad.
[] [sing the INCREASEor DECREASE
pads, (nt(r the d(sir(d (lean time, it
a time other than 4 hours is n(eded.
Clean cycle tim( is normally 4 hours.You
(an change the ch'an time to ally time
betwe( n 3 hom_ an(I 5 hom_, depending
Oil how dirlv VOtll" oveIl is.
[] Press the STARTl)ad.
Do HOt clean the gasket. Tile fibmglass
material of the oven door gasket cannot
withstand abl-4sion. It is essential tbr the
gasket to remain intact. If you notice it
becoming worn or f'l-ay(d, replace it.
Wipe up any heavy spillovers on tim ow*n
botlolll.
Make sure tbe oxen ligbt bull) cover is ill
place and th( oven light is oft.
IMPORTAN_ Th( heahh of some biMs
is exn-emelv sensitive to the lhmes given
off (hning tile self:cleaning cycle of any
range. Move 1)irds to another well
ventilated room.
The door locks automatically Tim displa)
will sho_ the clean time remaining. It will
not be possible to open tile oven (Ioor
tmtil tim temperature drops below the
lock temperature and the LOCKEDDOOR
light goes off.
Tim oven shuts off automatically when
the clean c}cle is (omplete.
When tim LOCKEDDOOR light is off. open
the (loon
i!(#The woMs LOCKDOOR will tlash and
the oven control will signal if you set
tile (lean cycle and tblg(t 1o (los( the
o_el] dool_
_5_To stop a clean Q'cle, press tim
CLEAR/OFFpad.When tile LOCKED
DOOR light goes off in(li_ afing the
oven has cooled below the locking
telllpel_ltl/l'(, opell the do()l_
!7
Page 18

Usingthe self-cleaning oven.
The oven door must be closed and all controls must be set correctly for the cycle to work properly,
How to Delay the Start of Cleaning
._lk( stlY( [he dock shows tilt COLT(([
time of (lay.
[] Press th_ SELFCLEAN pad.
[] tsing ill(: INCREASE or DECREASE
pads, enter lh( desired (lean time.
[] Pr(ss tile DELAYSTART pad. The
e_lFli(:S[ Sl_/l'[ [illdZ VOII C_III S(:I _xill
appear in the display.
[] lsing the INCREASE or DECREASE
pads, ent(r the time of(lay you '¢_]111
[he (I(!_lll (v(I( 1o SHII[.
[] Press the STARTpad.
After a Clean Cycle
The door lock', automaficall). The (]ispla?
will sho_,_ the start time. It will not be
po,,sible to open the oven door until
the tempec, mlre drops below the lock
temp(t-,iture and the LOCKEDDOOR
light goes off.
"l'h( ox,(m shuts off autonlalicallv _ahen
the (lean (y(l( is compl(te.
When the LOCKEDDOOR light is ofl', open
the dool;
_,_)t/nlay nolice some whirr ash in the
OV(11.Wipe it up with a damp cloth af'ter
the OV(ll ( OOlS.
If whitespotsremain,removedTemwi#za soap-
filledsteelwoolpadanddnsedlomughlywid7a
vinegarandwatermixture
Thes( d(posits arc usually a sah r(sklu(
thai cannot be l-(lno\(d by th( ckan
(vcl(.
It the oven is nol clean afler one clean
oxl(, rel)eal the (y(le.
_)_ _'XIII (allllO[ St[ lh( o_,ell ]_()Y cooking
unlil th( ov+n is cool (hough for the
dOOl" Io tlnlo(k.
{;?_While the oven is sell:-deaning, you
(ml pr('ss the CLOCK pad to display
the time of da}. "Ib return to th(
clean cotmtdown, press the COOKING
TIME pad.
{;?_If tile shelves b(come hard to slide,
apply a small alnount of vegetable oil
()r cooking oil to a pal}er lowel an(I
wipe the ((Ig(s ot the oven shelves with
the paper towel.
18
Page 19

Careand cleaningof therange, gecom
Be sure electrical power is off and aft surfaces are cool before cleaning any part of the range.
How to RemoveProtective ShippingFilm andPackaghlg Tape
Carefully grasp a corner of the protective
shipping fihn with your finger_ and qowly
peel it ti-om the appliance surfhc(. Do
not use any shalp items to remove the
film. Remove all of tile film I)etore using
tile applimlce for the fil_,t time.
Control Panel
To assure no damag( is done to tile
finish otthe product, the satcst way to
rcmow, tile adhesive from packaging tape
on new appliances is all application of a
household liquid dislmashing detergent.
Appl) with a soft cloth and allow to soak.
NOTE:r#ea&esivemustberemovedfromaft
parts It cannotberemovedflit is bakedon
It's a good idea 1o wipe the control panel
after each llse. Ckan x_ith mild soap
all(I water or Vill(gar alld water; lJllse
with clean water and polish dcv with
a soft cloth.
Control Knobs
Thecontrolknobsmayberemovedforeasier
cleaning
Make sure tile knobs are ill tile Off
po*itions and pull th(m straight off tile
stems for cleaning.
Oven Vent
The oven isxenwd flnough an opening
under the right t>ar surfi_ce unit.
Do not use abrasive cleansers, strc,ng
liquid cleans_ rs, plastic scouring pads or
oven cleans( [s on the control panel--th(y
will damage th< finish. A 50/50 solution
ot vin_gar and hot _ater works well.
The knobs can 1)e cleaned in a
dishwasher or lhey may also be washed
with soap and watel; Make surf the insi(les
ot the knobs are (hT before repladng.
Replace th( knobs in tile OFFposition
to ( IISlll'( proper placement,
Nevercoverd?eopenir_gwitb aluminumfoilor
anyotbermaterial
Porcelain Enamel Cooktop
The porcelain enamel finish is smMy
hilt lyrcakable if nfisused. This finish is
acid-resistant. Howevel; any acidic fbods
spilled (such as fruit.juices, tomato or
vin(gar) should not be pemliued to
remain O11the finish.
Kacids spill Oll th( cooktop while it is
hot, use a (hT lx_per towel or cloth to
wipe it up right aw_%When the surfhce
has cooled, wash with soap and walel_
Rinse well.
For other spills such as tit spattefings,
wash with soap an(1 wal('r or cleansing
powders atler the surthce has cooled.
Rinse w(ll. Polish with a dly cloth.
!9
Page 20

Careand cleaningof therange.
OvenS helves
Lift the door straight up and off the
hbtges
(appearance may vary)
Thegasket is designed with a gap at
the bottom to allow for proper air
circulation,
O0 not fub or clean the door
gasket it has an extremely low
resistance re abrasion,
If you notice the gasket becoming
worn, frayed or damaged in any way
or if it has become displaced on the
door, you should have it replaced
:M1 oven shelxes ma_ b_ cleaned by lland
with all abr_Jsive cleaner or swel wool.
±\t_er el_aning, rinse tile shelw,s with
(lean water and chv with a (leml cloth.
Gray por(elain-coated o_en shelves may
remain ill the oven during the self-
clemfing cycle without being dmnaged.
Tl'le shin 5 silx er-colored oven shelves
may remain in the oven during the hell=
cleaning cycle, but they will lose their
hlst_ r and beconl_ hm_l to slide.
Lift-Off Oven Door
The oven door is remoulble tin easier
access to tile light bulb.
Do not lift the door by dle hancqe
To remove the door, open it to the broil
sl_q_ position. Grasp firmly on each side
and lift tile door stcaight up and off the
hinges.
Donotplacehandsbetweenthehingeandthe
ovendoorframe
To replace the door, make sllre lhe hinges
at( in tim broil stop position. Position the
slots in the bottom of the door squarely
over the hinges and slowl)lower it over
/)olll hinges.
Toclean the inside ofthe door:
_ Because the m-ca inside the gasket is
ck aned during the seltkleml cycle, you
do not need to ckan this by hand.
i{_iThe m-el outside the gasket and tile
h-ant flame can be cleaned with a
s_fl)-filled steel wool or plastic pad,
hot water mid detelg_ at. Rinse well
with a vinegar and water sohltion.
It will b_ neces_n T to grease all own
shell side edges with a light co_Jting at
vegt'table oil after clemfing fllem by hand
or ill the own. This will help maintain
th_ ease of sliding tile shelw:s ill and
OIIt of the ovell.
Toclean the outsideof the door:
!_5Use soap mid water to thoroughl 3
clean the lop, sides mid from ot the
ov<n dool: Rinse well. You may also use
a glass ('leaner u) clean the glass on the
outside of file (loo1: Do nol let x,_/lt'l
drip into tile vent openings.
!_ Spillage ot marinades, fluit.juices,
tomato _ltlces mid basting malerials
containing acids may cruise
discoloF, nion and shouM be wiped up
immediately. Wh(n surti_ce is cool,
clean and rills(.
_? Do not use oxell clean(rs, cleaning
powder_ or llm'ql abrasiv_ s on th_
outside ot th_ deal;
20
Page 21

Oven Heating Elements
Donot clean the bakeelementor me broil
elemen_Anysoil will bum off when the
elemen_ are heated
To clean the oven floo_; gently lift
tile bake element. Clean with _arm
soapy wam_;
Painted Surfaces
ge.com
WiYo COVEY ho[_e£
P_dnt(d _ulfi_ es in(lu&' the sides m_d
the drawer tiont.
Clean these with soap and water or
a _ineg',_r and water sohltion.
Oven Light Replacement
CAUTION: Before replacing your oven
light bulb, disconnect the electrical
power to the range at the main fuse
or circuit breaker panel.
Be sure to let the lighl cover and I)ulb
cool COml>lete b.
Toremove the cover:
[_q IIold a hand under th( cov(r so it
do_ sn't fall s_llel_ released. _Nilh
fingers of tim saln_ hand, ('irmly
push back the wire co_,er holder;
till ofl th( covet;
DO Rot remove any screws to remove
the covel_
[)0 1101 /1S(_ (Oll]lllel-(ial OV(_II (leall(?lN,
cleaning powders, steel wool or harsh
abmsives on an?<painted surf_ac(.
Toreplace the cover:
[] Place it into groove otth( light
rer( placle. ]:'ul[ wire folxxard to
Ihe t':( ll[(:l" o[ ? lh(? co'_el" llllli[ i[
snaps into place.
] Connect el_cltical power to
[] Replace bulb with a 40-Wall
appliance bulb.
21
Page 22

Careand cleaningof therange.
Be sure the controls are turned to OFFand the surface units are cool before attempting to remove them.
Surface Units
"Ib clean the surlilce units, tnrn tile
conn-ol to tile highest setting fbr a
minum. The coils will burn off any soil.
Toremove a surface unit:
To rt move the ddp pans fbr cleaning,
ttl_ surthce units must be! removed illst.
Lifl tile surtilce unit about l" above the
drip pan and pull it out.
Donotlift Ne sartaceunitmorethan1" If you
do,it maynotlieflatonthe_@panwhenyou
Repeated lifting of the surihce unit
more than 1" above lhe drip pan (:all
perlnanently damage the receptacle.
Drip Pans
Rumove tile sur_hce u nits. Then lill out
tile drip pans.
For best resuhs, clean lhe drip pans by
hand. Place them ill a coxered container
(or a plastic bag) with 1/4 cup ammonia
to loosen the soil. Then sclub with a
soap4illed scouling i)ad if necessm>
Rinse with dean water and polish with a
clean soft cloth.
Toreplacea surfaceunit:
Ruplacc tht" dlip pml into the recess in
lhe cooktop. Make sin( the opening in
lhe pan lines up with tile receptacle.
Insert tile telminals of the surfhce unit
dn-ough the opening in the (hip pan and
inlo the receptacle.
Guide the surIhce unit into [)lace so it
l'ests eve111"<
Donotimmersethesaffaceunitsin liquidsof
anykind
DonotcleandTesurfaceunitsina dishwasher
Do not bendthe surface unit plag terminals
Do not attempt to than, adjust or in any way
repairthe ping-#}receptacle
The drip pans ma) also be cleaned in
a dishwashel:
(2lean die area under tile drip pans
ol_t.n. Buih-up soil, especiall? grease,
lllav catch fire.
Do not coverthe drippans with toil Using foil so
cbse to the receptaclecouht causeshock,fire or
damageto the range
Be suro all surface units are turned
off before raising flTeceoktop
22
Lift-Up Cooktop
Clea_theareaunderthe,woktopoften Built-up
soil,especiallygrease,maycatchfire
To make cleaning easiel; the entire
cooktop may be lifted up and suppolted
in tile up position.
Be sure all the surfhce units are turned
ofi I)etbre raising tile cooktop. The
surf;_ce units and drip pans do not need
to be l-ellloved; howevel; you lllaV l-elllove
one to make raising the cooku_p easien
A support rod will hold the cooklop up
while you clean underlmath it.
_M'tercleaning raider the cooktop with
hot, soap)water and a clean cloth, lower
the cooktop. Be cal*!flll *lot 1o pinch yotlr
fing_ rs.
Page 23

Before YouCallForService... ge.com
Troubleshooting Tips
Save time and money! Review the charts on the following
pages first and you may not need to carl for service.
Possible Causes What To Do
The surface units are * With the (ontrols ell, ched_ to nl_lke sure tilt' surfeit('
not plugged in solidity; unit is plugged ( ompletely into Ill( re( ept_lcl(.
The surface unit * Check to see the corre(t (ontrol is set fbr the surth(e
controls improperly set. unit _ou are using.
The chip pans are **With the controls off, check to make sure the drip
not set securely in pan is in tile r(cess in tile cooklop and that tile
the cooktop, opening in the pall lines up with the r(ceptacle.
Large pans hold heat '* Choose a pan that matches th( size ot the surfuc(
close to the cooktop, unit you are using.
The oven vent * Pans on the right rear surLl(e unit blo(k air flow
is blocked, hom tile oven vent and (ause tile cooktop to get hot.
Oven controls * See tile UsilTg the oven section.
improperly set.
Shell" position is incorrect * St,( th( Using the oven set tion.
or the shelf is not level.
Incorrect cookware * See the Using the oven section.
or cookware of improper
size being used.
Oven thermostat needs * See the Adjust the oven thermostat--Do it yourself!
adj us|lnent, section.
Door not open to tim * See tile Using the oven section.
broil stop position
as recommended.
Oven controls
improperly set.
Improper shelf position
being used.
Food being cooked
in a hot pro1.
Cookware not suited
for broiling.
In some areas the power
(voltage) may be low.
• Make sur_ you press the BROIL HI/LO pad.
• See tile Broiling Guide.
• For best r('stllts, llse a pall designed for hroiling.
Make sure it is cool.
• For hest results, llse a pall designed fbr hroiling.
• Preheat tile broil el(m(nt l_n" lO minutes.
• Broil fbr tile longesl period of time recommended in
tile Broiling Guide.
23
Page 24

Before YouCall ForService...
Troubleshooting Tips
Possible Causes What ToDo
You forgot to enter * Press the BAKE pad m_d desired Letup(rarer(' (_1tilt'
a bake temperature SELF CLEAN pad and desired (leml time.
or denning time.
A fuse inyour home maybe * Repla(e th( fi,se or reset the dr(tilt brcak(n
blown or tile circuit breaker
tripped.
Oven controls * So( the Using the clock and timer section.
improperly set.
Light bulb is loose or defective. * Tight( n or repla(e the bu|b.
Sx_itch operating light * Call fbr s( rni(e.
is hroken.
Oven thermostat * Scc the Adjust the overt thermostat--Do it yourself!
needs adjustment, s(ction.
A fuse in your home nlay be * Replace th( fllse or res_ t Ihe (ircuit breakeL
bh)wn or the chx:uit
breaker tripped.
Oven controls * Set the Using the over section.
improperly set.
The oven temperature *.Allow lh( oxen to (ool Io room teml)< l_,mrc and rtsel
is too high to set a self- the controls.
clean operation.
Oven controls improperly set. * So+ the Using tile self-(loan]rig ovon so(Lion.
This is tile sound of the **This is normal.
metal heating and cooling
during both the cooking mid
cleaning fmmfions.
Excessive soil. * Press the CLEAR/OFF pad. Op(n t}_ ,,indows to
rid the room of smoke. Wail until lhe LOCKED DOOR
light goes (:)if'. Wip( up Ih( (X((SS soil _]lld r(s([ th(
(lean (v('l(.
Oven too hot. * Allow the ()','ell to cool below lo(king tCml)cratlu( .
Oven controls not * See tlae Using the self-cleaning oven so(don.
properly set.
Oven was heavily" soiled. • Clean up heax T spillovers b(ik)re starting the clean
cycle, tieavilv soiled ov(ns may n((d to s( If-clean
again or for a longer period of time.
24
Page 25

ge.com
Possible Causes What ToDo
The self-clean cycle has been * Ch_s(, the _wen door.
selected but the door is not
dosed.
The oven door is locked * Pr(ss the CLEAR/OFF pad. Allow the ov(n 1o cool.
because the
inside the oven has not
dropped below thelocking temperature.
You have a function * Press the CLEAR/OR: pad. ,Mlow the (a,en to cool fi'w one
error code. h()m: Put the oven ba(k into operation.
If the function code repeats. * Disconnect all power to the range tier at least 30
temperatttre
s(conds and then r((onnect power. It the fun(tion
error code repeats, <:all fbl service.
!i !i i ! i
A fuse in your lmme may be * Replace th( fi,se or reset the cir(t,it break( L
blown or the circuit
breaker hipped.
The clock is in the * So( the Special features of your over control secli(m.
black-out mode.
Power failru-e. * R(s(t the (1o( k.
Oven control pads were * The BAKE mid BROIL HI/LO pads must be pressed
not pressed properly, at the same tim_ _llld held for 3 s_ tends.
Vower outage or surge. * R(s(t lhe ( h:,( k. If"Ihe oven was in us(, you must ruset
ii by pressing the CLEAR/Off pad, sitting tht clocl<
This is normal in a new oven * "l()speed the l)roccss, set a s{ lI=clt,an cycle for a
and will disappear in time. mininmmol3homs. See tlae Using the self-cleanin9
ouea secdon.
An odor from the insulation * This is temporal T.
around the inside of the
oven is normal for the first
few times the oven is used.
A cooling fan may * This is normal. The cooling lan will ttu-n off alld on.
automatically turn on and
off to cool intern',d parts.
25
Page 26

m
r_
Notes.
m
_h
4
m
k_
h
i
26
Page 27

Notes.
q_m
_D
m
m_b
r_
27
wJ_
i
Page 28

m
r_
Notes.
m
_h
4
m
k_
h
i
28
Page 29

GE Service Protection Plus '_'
GE, a name recogniz(d _orld_ M¢ fbr q lal t_ and d¢ 1 (ndabflll, oriels • on
Ser_4(e Protection 1 lu, --(omp_(h( nsl ( t , I I -
No Matter What Brand!
S '_' " ": .... *_,:' )FOI(_(lJOII 011 all _om- a ))liances--
Benefits Include:
• Backed by GE
• All brands covered
• Unlimited service calls
• All parts and labor costs included
• No out-of-pocket expenses
• No hidden deductibles
• One 800 number to call
5_tl will b( completely salisfied with ore servic( prot(ction or you may r(quest your lnon_y back
_m tla( remaining vahl( _fl'y_nlr COllll-a(l. No qu(stions asked. It's thai simple.
Prot(ct your reh-igeratol, dishwashel; washer and d_y( l; range, TV, VCR and much more--any bramd!
Phls there's no extra charge for (mergency servic( and low monthly financing is available, t,',Vell icemaker
coverage and tbod spoilage prot(ction is ott;vred. You can rest ( a',y, knowing that all your valuable
household pro(lucts are protected against expensive r_pairs.
Pla¢( your confid(ncc in (;E and call t,s in th, I .S. toll-lr(c at _UUoOZO.ZZZ_
[Of lIlOl'(! ill_})l'lll_/[il)ll.
\l] bl Illds (I)_(?H!d, I11) I0 20 _('_[rs Old, ill Ih0 (otllitwl]lil [ S.
.......................................................................................... _m_Ctll here
We'll CoverAny Appliance.
Anywhere. Anytime.*
Pleaseplace in envelopeand mail to:
GeneralElectricCompany
Warranty Registration Department
EO. Box 32150
Louisville, KY 40232-2150
29
Page 30

Consumer Product Ownership Registration
Dear C_us[olll(21:
Thank vo, for purchasing our product and thank you {or t)lac lg, vo, "confidence in us.
_v_e al< [)Ioltd to haxe xx)u _ls _1 (us[olIl(}l}
Follow these three steps to protect your new appliance
1
Complete and mail
your Consumer
Product O_mership
Registration toda)_
Ha_e tile peace of
mind of knowing wc
can contact oil ]n
lhc illl]]kt']v (!_(!lll o[ a
sat_ t_ modification,
2
Model Number Serial Number
IIIIIIIIIII IIIIIII
:kflel mailing the
i egist/allan beh )w.
S[Ol-e lh/s d()c[l/_/el31
ill a sa_ place. It
conlains i/l_)lt//atJon
you will need should
yOtl reqtllre SelWice.
()111¸sel'vice i/tln/]3el ¸ is
800.GE.CARES
(800A32.2737).
investment:
Important: If you did not get a registration card with your
product, detach and return the form below to
ensure that your product is registered, or register
online at ge.com.
R<ad you, O_sne,'s
Manual ca]efillh.
It will help you
opelale VOlII" i/cW
appliance properl_
Consumer Product Ownership Registration
I I I I I I I I I I I I I I I I I
Ms M_s Miss i
Fi_sl ] Lasl]
Nmle I ] I I I I I I I Nmle I I I I I I I I I I I I
Sl I col I
A(tdl_ ss I I I I I I I I I I I I I I I I I I I I I I I I
kpl. # I I I I I I I I l;-m dl Addless =
I ZipI I
<:i,>I I I I I I I I I I I I I I S,a,e I I C,,d_ ! I I I I
Due Ph/_d
In [s_ _J
Momh I I I I I
Appliances
General Electric Compang
GE Consumer & Industrial
Louisville, KY 40225
gecom
Model Number Serial Number
* Please pl(wide }our ,>mail addl('ss l_/leceive, via l>lnail, dlseounla. Sl)ecial oflcls and othel impo/tant
commu_fications fi'om (;E Appliances (GEA).
ii Check hem if you do not wanl to receive communicatk)ns fi_n/GFoVs caret_flly selected parme]_.
FAILURE TO COMPLH_ AND RETURN THIS CARD I)OES N(YI" I)IMINISH YOUR
\VARIL-\NTV RIGt tl_.
_)r more intbmlafiol_ aboul GFoVs pliva_ and dala usage poliQ; go to ge coin and click on
"PJi_ Polio" or call 8_.626.2224.
30
Page 31

GEElectricRangeWarranty.
All warranty service provided by our Factory Service Centers,
or an authorized Customer Care®technician. Toschedule service,
on-line, 24hours a day, visit us at ge.corn, or call 800.GE.CARES
(800.432.2737).Please ha veserial number and model number
available when calling for service.
GE Will Provide:
Any part of' fl_e range which iilils due to a de|t, ct in nl_tel-i_ds or workm_mship.
During this limited one-year warranty, GE will _dso pro'dde, free of charge, _fll labor
mid in-home selvice to rcpbJce the defk,ctive p_rt.
)'2Service trips to your home to teach you how to use
the product.
N Improper installation, delivery or maintenance.
i!i:"Failure of the product if it is abused, misused, or used
for other than the intended purpose or used
commercially.
;i:,Replacement of house fuses or resetting of circuit
breakers.
Staple yourreceipt here.
Proof of the original purchase
date is needed to obtah7service
under the warrant_
i3_;Damage to the product caused by accident, f'n-e, floods
or acts of God.
i3_;Incidental or consequential damage caused by possiNe
defects _4th this appfiance.
!(_Damage cattsed after delivery.
!(_Product not accessible to provide required service.
EXCLUSIONOFIMPLIED WARRANTIES--Your sole and exclusive remedyis productrepair as providedin this Limited
Warranty. Any implied warranties, including the implied warranties of merchantability or fitness for a particular purpose,
are limited toone year or the shortest period allowed by law
I
This warranty is extended to the original purchaser and any succeeding owner for products purchased for
home use within the USA. If the product is Iocated in an area where service by a GEAuthorized Servicer is not
available, you may be responsible for a trip charge or you may be required to bring the product to an Authorized GE
Service location for service. In Alaska, the warranty excludes the cost of shipping or service calls to your home.
Some states do not allow the exclusion or limitation of incidental or consequentia! damages. This warranty
gives you specific legal rights, and you may also have other rights which vary from state to state. Toknow
what your legal rights are, consult your local or state consumer affairs office or your state's Attorney General
Warrantor: GeneralElectric Company.Louisville,KY 40225
I
3/
Page 32

ConsumerSupport.
GEAppliancesWebsite
I lave a question or need assistam ¢ wilh you r apl)liance? "fit Ihe (;E Apl)lian(es W( bsite 24 h,, ut_, a day,
any day of the y(arl For gr(at(r ( onvenience and fhst( r s_ lvice, you can n,,_v,,downh:,ad ()]_-11(l-'s Manuals
ol'd( F [)_111S OF (v(ll s(he(hde s(l\ice on-lh](.
( )
ScheduleService
Exp_ rt GE repair s__i_e is only one step mvay fi-om your door. (ki on-fine and sch_,dule your s_l_,ic( at
RealLifeDesignStudio
G,E supports the 1_niv( l_,al Design con(ept--products, s(lwices and environments that can be used by
people of all ages, sizes and capabilities. We recognize the need to d(sign fi)r a wide range of physical and
mental abilities alld impaimmnts. For d(tails of GE's Univep, al [)(sign applications, including kiu. ['lell
design ideas for people with disabilities, check out our Wt bsite todaT_: For the healing impaired, please call
8tX).TI)D.GIL\C (800.833.4322).
ExtendedWarranties
ge.com
ge.com
ge.com
ge.com
Purchase a (;E exlended warranty and learn aboul special discounls lhat are available while your warranty
is slill in effect. You can purchase it oil-Jill( ,t117[1111( , Ol (all 8(X1•626•2224 dm mg normal business hom_,•
(;E COllSlllll(?l- I Iome Servic( s will still b( tiler( at'ler your warranly ( xpir( s.
• . , .• . ,, ) 2c -co( j .
PartsandAccessories
Indivi(hlals qualifi{ d to smvic( Ih(ir own applimlc( s can hay( parts or ac(essoties s(nt directly 1o their
I'l,.ml_s (VIS\ Masl(rCard and Dis(i)ver cards ar_ a(c(l)l(d). Ord(r on-line Ioday, 24 hours _.:_,_.:12.'day or
by phone at 800.626.2002 during normal busin_ ss hotll-s.
Instructions contained in this manual cover procedures to be performed by any user. Other servicing generally
should be referred to qualified service personnel. Cautionmust be exercised, since improper servicing may cause
unsafe operation.
ContactUs
It}ou art* llOt satisfied with the sel',ice you rcceiw' from GE, contact us on omW_ bqte with all the d(mils
inchlding your phone numb_ l; or write to: General Managel; Customer Relations
GE Applianc(s, Appliance Park
I.ouisvill(, KY 40225
RegisterYourAppliance
ge.com
ge.com
ge.com
Register ),-our new appfiance on-line---at your convenience! Tim( ly producl regisll-,tfion will allow for
(!llh_tll((XI (Oll]lllt]lliC_tliOll _llld ])l-Onll)t selxice tllld( F lhe [Ol'l]]S OfVOHI" x.V_?FI'_/II[}, shoul(I lhe ne_(l _llJS(?.
xI-_)/IlllaV also mail in the l)r(-l;,linl( (1 regislralion card inchld( d in the l>acking material.
Printed in the United States
 Loading...