

Page 1
UseandQre
Guide
Safety Instructions
...................3 --5
Operating Instructions, Tips
Aluminum Foil . . . 5, 14, 18, 20
Clock and Timer . . . . . . . . . . . . . . . . . . . . . . . . . . . . . . . . . . . . . . . . . 11
Features . . . . . . . . . . ............6
Oven . . . . . . . . . . . . . . . . . . . . . . . . . . . . . . . . . . . . . . . . . . . . . . . . . . . . 10-24
Baking . . . . . . . . . . . . . . . . . . . . . . . . . . . . . . . . . . . . . . . . . . . . . . . . . . 13--16
Broiling, Broiling Guide . . . . . . . . . . . . . . . . . . . 20,21
Control Panel . . . . . . 10
Control Settings . . . . . . . . . . . . . . . . . . . . . . . . . . . . . . . . 10, 11
Light; Bulb Replacement . . . . . . . . . . . . . . . . . 12, 28
Preheating . . . . 14, 19, 21
Roasting, Roasting Guide ...............18, 19
Self-Cleaning Instructions ..............22. -24
Shelves . . . . . . . . . . . . . . . . . . . . 12-14, 18, 22, 24, 27
Timed Baking . . . . . . . . 15, 15
Surface Cooking . . . . . . . . 8, 9
Control Settings . . . . . . . . . . . . . . . . . . . . . . . . . . . . . . . . . . ........8
Cooking Tips . . . . . . . .....8, 9
Cooktop
Home Canning Tips. . . . . . . . . . . . . . . . . . . . . . . . 9
Comparison . .........7
Problem Solver . . . . . . . . . . . . . . . . . . . . . .
Thermostat
Do It Yourself . . . . . . . . . . . . . . . . . . . . . . . . . . . . . . . . . . . . . . . . . . .
More questions ?...call
GE Answer
Care
and Cleaning . . . . . . . . . . . . . . . . . . .
Cooktop..........................................................2 5
Door Removal ...............................................2 7
Oven Shelves
Consumer Services .,,..,.............3
Appliance Registration ..................................2
Important Phone
Model and Serial Number Location ...........2
Removal of Packaging Tape ........................2
Warranty ........................................Back Cover
Adjustment–
Center@
800.626.2000
................................................2 7
Numbers........................3 1
29,30
.
17
25-28
1
GE Appliances
Models:
164D2966P715
JMP28
JMP29
JMP31
Page 2
HELP US HELP YOU...
Before using your range, read
this guide carefully.
It is intended to help you operate
new
range
properly.
Keep it handy (or
If yOLI
don’t understand something or need more help,
C,E
Answer Center”
800.626.2000
24 hours a day, 7 days a week
unswers
to your questions.
~nc{
maintain your
c211:
How to Remove Packaging Tape
To assure no damage is done to the finish of the
product,
p~~k~ging tape on new appliances is
a
household liquid dishwashing detergent, mineral oil
or cooking oi 1. Apply with a soft cloth and allow to
soak. Wipe dry and then apply on appliance polish to
thoroughly
NOTE:
chrome trim on oven
is
baked on.
the
safest way to remove adhesive left
clean and protect the surface.
The plastic tape must be removed from the
purts.
It cannot be removed if it
an application
fr(~rn
Of’
Write down the model
and serial numbers.
You’ II find them on a
These numbers are also on
Ownership
range.
nurnbcr~
Model Number
Serial
Number
(hesc
Use
ca
I IS concerning
Registr-atiorl
Before sending i n this card, please write these
here:
number-s in any correspondence or service
jour
label
behind the range door.
the
Consumer
Card
th~t
came with your
-
range.
ProducI
If you received a damaged range . . .
lmrnediate[y
you the range.
contact the dealer (or builder)
thtit
sold
Save time and money.
Before you request service . . .
Check the Problem Solver in the
lists causes of minor operating problems that you
correct yourself.
bfick
of this guide. It
can
IF YOU NEED SERVICE
To obtain service, see the Consumer Services
the back of this guide.
We’re proud of our service and want you to be
pleased. If for some reason you are not happy with the
service you receive, here are three steps to follow for
further help.
FIRST, contact the people who serviced your
appliance. Explain why you are not pleased. In most
cases, this will solve the problem.
page
in
NEXT,
details—including your phone number-to:
FINALLY, if your problem is
if you are
Manager, Consumer Relations GE Appliances
Appliance Park
Louisville. KY 40225
Major Appliance Consumer Action
20 North
Chicago,
still not pleased. write all
stil[
Wacker
[L
Drive
60606
not resolved, write:
Pane[
the
2
—
.——
Page 3
IMPORTANT SAFETY
Read all instructions before using this appliance.
iMPORTANT SAFETY NOTICE
●
The California Safe Drinking Water and
Toxic Enforcement Act
of
California to publish a list of substances known
to the state to cause birth defects or other
reproductive harm, and requires businesses to
warn customers of potential exposure to such
substances.
*
The fiberglass insulation in self-clean ovens
gives off a very small amount of carbon
monoxide during the cleaning cycle.
can be minimized by venting with an open
window or using a ventilation fan or hood.
When using electrical appliances, basic safety
precautions should be followed, including the
following:
●
Use this appliance only for its intended
described in this guide.
●
Be
sure
your appliance is properly installed and
grounded
by a qualified technician in accordance
with the provided installation instructions.
s
Do not attempt to repair or replace any part of
your range unless it is specifically recommended
in this guide.
All other servicing should be referred
to a qualified technician.
●
Before performing any service, DISCONNECT
THE RANGE POWER SUPPLY AT THE
HOUSEHOLD DISTRIBUTION PANEL
REMO\’lNG
CIRCUJT
THE
THE FUSE OR SWITCHING OFF
BREAKER.
requires the Governor
Exposure
use as
BY
mSTRUCTIONS
●
CAUTION: ITEMS OF INTEREST TO
CHILDREN SHOULD NOT BE STORED IN
CABINETS ABOVE A RANGE OR ON THE
BACKSPLASH OF A RANGE—CHILDREN
CLIMBING ON THE RANGE TO REACH
ITEMS COULD BE SERIOUSLY INJURED.
●
Never leave the oven door open
not watching the range.
●
Always keep combustible wall coverings,
curtains or drapes a safe distance from
your range.
●
Do not store flammable materials in an oven or
near the cooktop.
●
Never wear
loose-fhting
or hanging garments
while using the appliance.
reaching for items stored over the range.
Flammable material could be ignited if brought in
contact with hot surface units or heating elements
and may cause severe burns.
●
Use only dry pot holders—moist
or damp pot holders on hot surfaces
*
may result
in burns from steam.
Do not let pot holders touch hot surface units
or heating elements. Do not use a towel or
other bulky cloth. Such cloths can catch fire
on a hot surface unit or heating element.
●
For your safety, never use your appliance for
warming or heating the room.
“
Always keep dish
toweh,
dish cloths, potholders
and other linens a safe distance from your range.
when you are
Be careful when
●
Have the installer show you the location of the
circuit breaker or fuse. Mark it for easy
reference.
*
Be sure the range is securely installed in a
counter that is firmly attached to the house
structure.
Weight on the oven door could cause the
oven to tip and result in injury. Never allow anyone
to climb, sit, stand or hang on the oven door.
●
Do not leave children
alone—children should
not be left alone or unattended in an area where an
appliance is in use. They should never be allowed
to sit or stand on any part of the appliance.
●
Do not allow anyone to climb, stand or hang on
the door or cooktop. They could damage the
range or cause severe personal injury.
“
Always keep wooden and plastic utensils and
canned food a safe distance away from
your range.
●
Teach children not to play with the controls or
any other part of the range.
●
DO NOT STORE OR USE COMBUSTIBLE
MATERIALS, GASOLINE OR OTHER
FLAMMABLE VAPORS AND LIQUIDS
IN THE VICINITY OF THIS OR ANY
OrrHER
c
Keep the hood and grease filters clean
APPLIANCE.
to
maintain good venting and to avoid grease fires.
●
Do not let cooking grease or other flammable
materials accumulate in or near the range.
(continued next page)
3
Page 4
IMPORTANT SAFETY INSTRUCTIONS
(continued)
●
4:
‘
,(
‘
&
on surface unit by covering the pan completely
with well-fitting lid, cookie sheet or flat tray. Use
a multi-purpose dry chemical or foam-type fire
extinguisher.
Flamin&
covering with baking soda, or, if
using a multi-purpose dry chemical or foam-type
fire
extin&uisher.
Flame in oven can be smothered completely
by closing the oven door and turning the oven off
or by using a multi-purpose dry chemical or
type fire extinguisher.
●
Do not touch the surface units, heating
elements or the interior surface of the oven.
These surfaces may be hot enough to burn even
though they are dark
use, do not touch, or let clothing or other
flammable materials contact surface units, areas
nearby surface units or any
oven; allow sufficient time for
Potentially hot surfaces include the cooktop, areas
facing the cooktop, oven vent opening, surfaces
near the opening, crevices around the oven door
and metal trim parts above the door.
Remember:
be hot when the door is opened.
●
When cooking pork,
exactly and always cook the meat to an internal
temperature of at least
the remote possibility that trichina may be present
in the meat, it will be killed and the meat will be
safe to eat.
Oven
●
Stand away from the range when opening the
oven door. Hot air or steam which escapes can
cause burns to hands, face antior eyes.
c
Do not heat unopened food containers.
could build up and the container
causing an injury.
●
Do not use aluminum foil to line oven bottom,
except as suggested in this guide. Improper
installation of aluminum foil may result in a risk of
electric shock or fire.
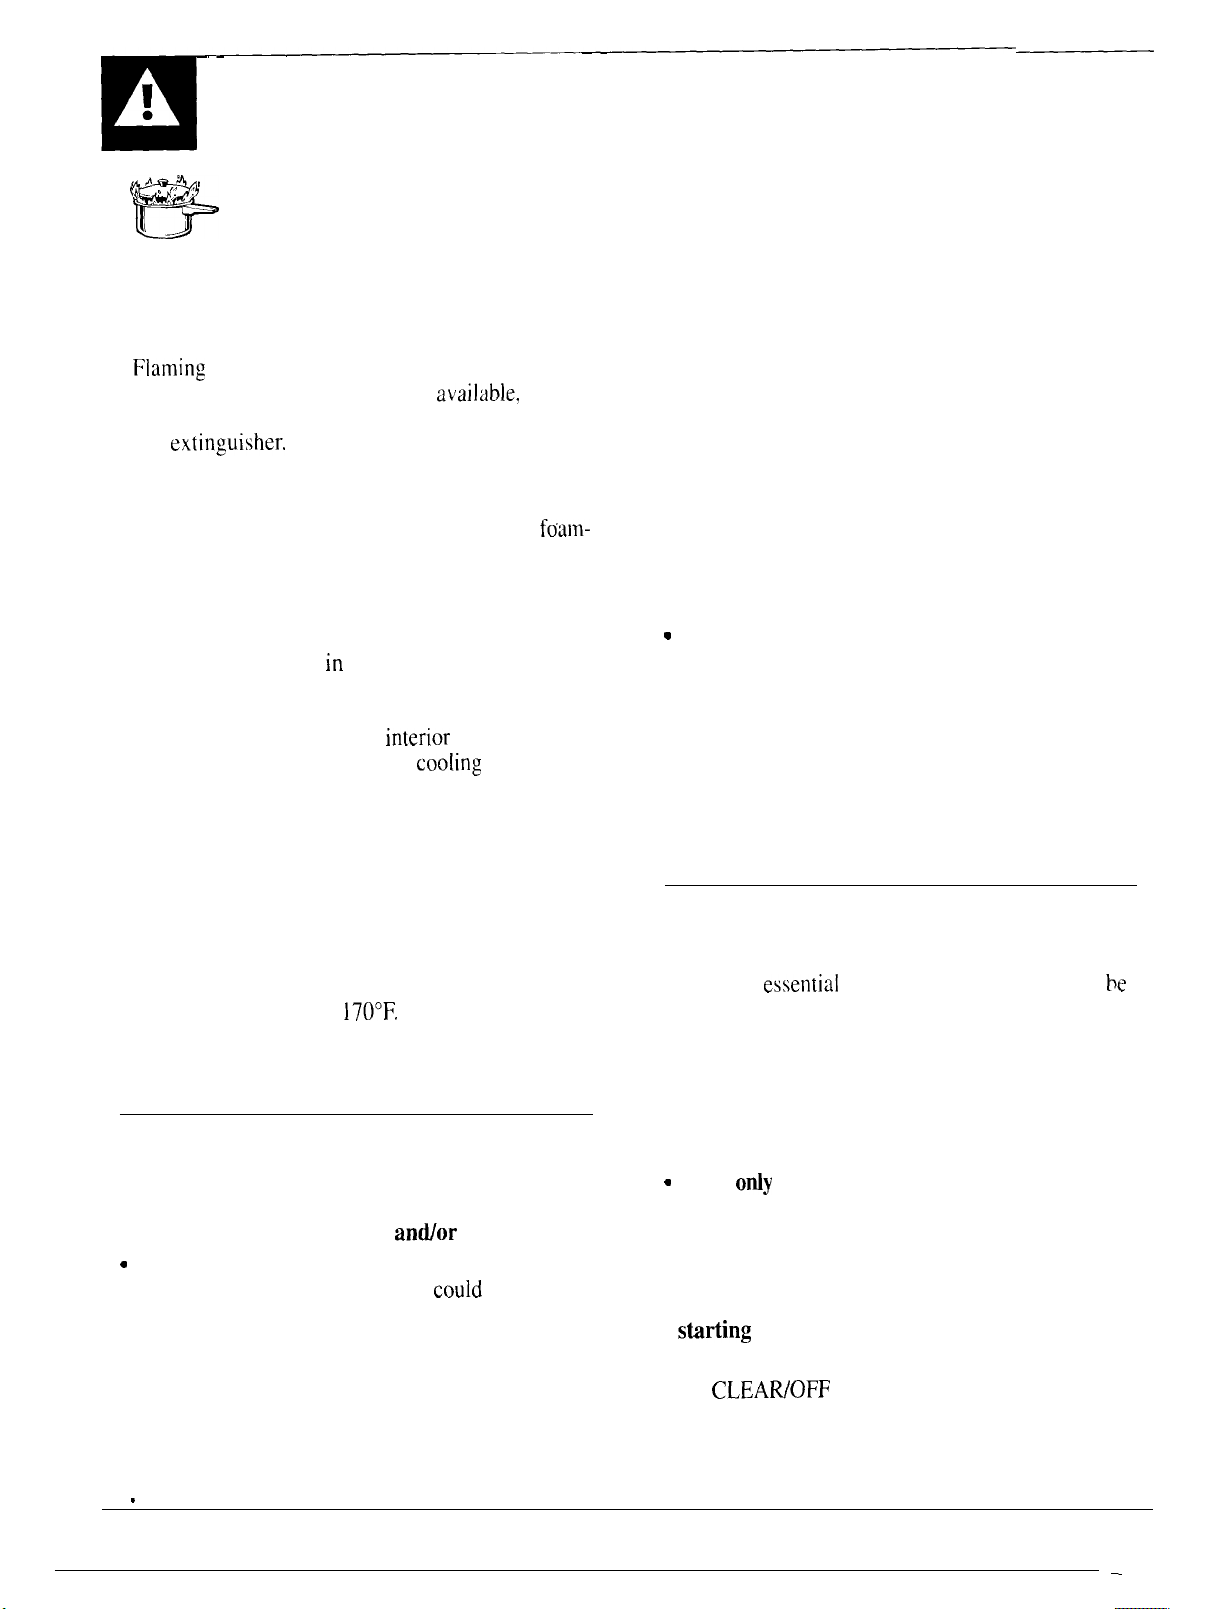
Do not use water on grease fires.
Never pick up a flaming pan.
Turn
the controls off. Smother flaming pan
grease outside a pan can be put out by
avajlable,
by
foam-
jn
color. During and after
jnterior
area of the
coo[ing
first.
The inside surface of the oven tnay
follow the directions
170°F,
This assures that, in
Pressure
couId
burst,
●
Keep the oven vent duct unobstructed.
●
Keep the oven free from grease buildup.
●
Place the oven shelf in the desired position
while the oven is cool.
If shelves must be handled
when hot, do not let pot holder contact heating
elements in the oven.
●
Pulling out the shelf to the shelf stop is a
convenience in lifting heavy foods.
It is also a
precaution against burns from touching hot
surfaces of the door or oven walls.
●
When using cooking or roasting bags in the
oven, follow
●
Do not use your oven to dry newspapers.
the manufacturer’s directions.
If overheated, they can catch fire.
●
Do not use oven for a storage area.
Items stored in an oven can ignite.
Q
Do not leave paper products, cooking utensils,
or food in the oven when not in use.
●
After broiling, always take the broiler pan out
of the range and clean it.
Leftover grease in the
broiler pan can catch fire next time you use the pan.
●
Never leave jars or cans of fat drippings on or
near your range.
●
Never leave the oven door open when you are
not watching the range.
Self-Cleaning Oven
●
Do not clean the oven door gasket.
gasket is
essential
for a good seal. Care should
taken not to rub, damage or move the gasket.
●
Do not use oven cleaners. No
cleaner or oven liner protective coating of any
kind should be used in or around any part of the
oven. Residue from oven cleaners will damage the
inside of the oven when the self-clean cycle is used.
“
Clean
ordy
parts listed in this Use
and Care Guide.
●
Before self-cleaning the oven, remove the
broiler pan and other cookware.
●
Be sure to wipe up excess spillage before
sbrting
●
If the self-cleaning mode malfunctions,
the
the self-cleaning operation.
CLEAWOFF
pad and disconnect the power
supply. Have serviced by a qualified technician.
The door
be
commercial oven
press
4
.
.
Page 5
lurface
i$p>~~;i
Cooking Units
.
>
ir-
~lSC
proper
cookware
pan size—Select
havin&
flat bottoms large
enough to cover the surface unit
heating element. The usc of undersized cookware
will expose a portion of the surface unit to direct
contact and may result in ignition of clothing.
Proper relationship of the cookware to the
suflace
unit will also improve efficiency.
* Never leave the surface units unattended at
high heat settings.
Boilovers
cause smoking and
greasy spillovers that may catch on fire.
*
Be sure the drip pans and vent are not covered
and are in place.
Their absence during cooking
could damage range parts and wiring.
e
Do not use aluminum foil to line drip pans or
anywhere
in the oven except as described in this
guide. Misuse could result in a shock, fire hazard
or damage to the range.
●
Only certain types of glass,
glassjceramic,
earthenware or other glazed containers are
suitable for cooktop cooking;
others may break
because of the sudden change in temperature.
●
Do not immerse or soak the removable surface
units. Do not put them in a dishwasher. Do not
self-clean the surface units in the oven.
●
When flaming foods are under the hood, turn
the fan off. The fan, if operating, may spread
the flame.
●
Foods for frying should be as dry as possible.
Frost on frozen foods or moisture on fresh foods
can cause hot fat to bubble up and over the sides
of the pan.
●
Use little fat for effective shallow or deep-fat
frying.
Filling the pan too full of fat can cause
spillovers when food is added.
“
If a combination of oils or fats will be used
in frying,
stir together before heating, or as fats
melt slowly.
●
Always heat fat slowly,
o
~Tse a deep fat thermometer
possible
to prevent overheating fat beyond the
and watch as it heats.
whenever
smoking point.
●
Never try to move a pan of hot fat, especially a
deep fat fryer.
W’ait
until the fat is cool.
Q
‘1o
minimize the possibility of burns,
ignition of
tlammable
materials and spillage,
the handle of a container should be turned
toward the center of the range without extending
over nearby surface units.
* INever
clean cooktop surface when it is hot.
Some
cleaners
produce noxious fumes and
wet cloths could cause steam burns if used on
a hot surface.
. ~
~WJayS turn the
surface unit controls to off
before removing the cookware.
a
Keep an eye on foods being fried at high or
medium high heat settings.
*
To avoid the possibility of a burn or electric
shock,
always be certain
surface units are at the off position and
thtit
the controls for all
all
coils
are cool before attempting to lift or remove a unit.
SAVE THESE
INSTRUCTIONS
5
Page 6
FEATURES OF YOUR RANGE
w
UI
N
Ill
Feature Index
I Bake Element
for
wiping oven
2
Model and Serial
Numbers Location
3
Broil Element
4 Oven Vent
5 Surface Unit Controls
6
Surface Unit “ON” Indicator Light
7 Lift-Up
it up to simplify cleaning underneath.
8 Plug-In Surface Units
9 Drip Pans
10
Oven Light Switch
Lets you turn the oven
light on
Cooktop
and
May be lifted gently
tloor.
Support rods hold
off.
Explained
on page
28
1
2
I
28
4
8,25
8
25
26
26
12
“-
Models:
Feature Index
1
[ Oven Controls
Oven Thermostat
Clock
Timed Baking
Timer
12
Oven Interior Light
13 Oven Shelf Supports
Shelf positions
sug&ested
and Broiling sections.
14
Oven Shelves with Stop-Locks
15
Removable Oven Door with
Broil Stop Position
Easily removed for cleaning.
16
Oven Door Gasket
17 Broiler Pan and Rack
Do not clean in Self-Clean oven.
for
in the Baking, Roasting
cooking
are
JMP28
JMP29
JMP31
Explained
on page
I (). 1 I , I 7
17
II
15,
16
11
I 2.28
12-14, 18,
22,24,
4, 22, 27
27
27
4, 18,
20,26
6
Page 7
HOW DOES THIS COOKTOP COMPARE
TO YOUR OLD ONE?
four new
If
you are used to cooking
types of electric
differences when you
Type of Cooktop
Electric Coil
\..,=,.
@
Radiant
~(rlass
Cooktop
cooktop has electric coil surface units.
cooklops.
use
Description
,-=
~, \
~
Ceramic)
Fla[tened metal
tubing containing
eleclric
wire suspended
o~er a
Electric coils
under
ceramic
o
High frequency
induclion coi
under a glass
surface.
Solid Disk
, -.,
“!
\ ““
\
. .
o
(;as
Burners
Sol id
disk sealed
cooktop surface.
Regular or sealed
gas burners usc
eitbel- LP gas
or natural gas
I
with
gas burners or other
The best
cool-down
types of cookware to use, plus heat-up and
tilnes,
depend upon the type of burner or
you will notice some surlace unit you have.
electric coils.
-, ,. ,,
I ne ]“01 low In& ~ndr[
-,. . . .. .,1, ,.-1 — . . . . .
Wll! [l~lp
differences between electric coil surface units and any
olher
type of cooktop you may have used in the past.
How It Works
resistance
drip
pan.
a
glass-
cook~op.
Is
cast iron
[o the
Heats by direct contact with
cooking results, usc good quality pans. Electric coils are more forgiving of
warped pans than radiant or solid disks. Heats up quickly but does not change
hea[ settings as quickly as gas or induction. Electric coils stay hot enough to
continue cooking for a short time after they are turned off.
Heat travels LO the
tbc bottom for good cooking results. The glass cooktop stays hot enough to
continue cooking after it is turned off.
you want cooking to stop.
Pans must be made of ferrous metals (metal that attracts
produced by
and changes heat settings
off. the glass
Heats by direct
cooking results. Heats up
stays hot enough 10 continue cooking after it is turned off. Remove the pan
disk
from tbe solid disk if you want the cooking to stop.
Flames
pans should be well balanced. Gas burners heat the pan right away and change
hca~
heal the pans directly. Pan flatness is not critical to cooking results, but
settings
&lass
~
rnagnctic circuit between the coil and tbe pan. Heats up right away
cooktop
con[ac[ with the pan. so pans must be
rigbt
away. When you turn the control off, cooking stops right away.
Lhe
pan and by heating the air under tbe pan. For best
surface and tben to the cookware, so pans must be flat on
Remove the pan from the surface unit
rigbt
away, like a gas cooktop. After turning the control
is hot
froln
the heat of the pan, but cooking stops
and cools down more slowly than electric coils. Tbe
YOU
flat
LU
._.I--,,.
UIIUCI hLdllU
a
magnet). Heat is
on the bottom for &ood
--,J
Ll LG
righ[
.Ln
if
away.
7
Page 8
Your
SL1l-filCe
give you an infinite choice
cooking. At both OFF
unit
units
tind controls
into position.
SU~ACE
are designed to
of
heat settings for surface
and
HI the
control
“click s..
COOKING
When
“c
you
Switching to higher heat settings
quickel heat change than switching to
How to Set the Controls
pLlsh
the knob in and turn in either direction to the heat setting
Be sure you turn the control to OFF when you finish cooking. The
surface unit indicator light will glow when ANY heat on any
surl’acc
unit is on.
Cooking Guide for Using Heat Settings
Hi—Used to begin cooking or to bring water to a boil.
Reduce heat setting after water boils.
MEDIUM
MED) Maintains a fast boil on
MED-Saute
boil or simmer.
MEDIUM
and LO) Cook after starting at HI; cooks with little
water in covered pan.
LO—Used for long slow cooking (simmering) to
tenderize and develop
butter and chocolate or to keep foods warm.
NOTE: The surface indicator
between LO
the surface units.
HIGH—(Setting
halfway between HI and
lar&e
amounts of food.
and brown; keeps food at a medium
LOW—(Setting
halfway between MED
tlavors, Use this setting to melt
light
may glow
and
OFF, but there is no power to
ct~okirlg
I
ick
i rig.’ SOLI rids—an indication that the heat settings
selected
in a
are
quiet
being
kitchen, you may
maintained
alwtiys resulls
Iowt’r
yOLI
want.
+
1’
4
F
<,,
>0
.,, +
;. ‘>
$:
~, ,7
~, ;,
0
—;
3
~ ~ ~
—
: i
:,”
;ED )%
Medium
Medium
/
~
Low
hear
slight
in a
settings.
High
COO~NG
Cookware
Use medium- or heavy-weight cookware. Aluminum
cookware conducts heat faster than other metals.
Cast-iron and
absorb heat, but generally cook evenly at low to
medium heat settings. Steel pans may cook unevenly
if
not combined with other metals.
For best cooking results pans should be
bottom. Match the size of the saucepan to the size of
the surface unit.
edge of the surface unit more than 1 inch.
coaled
cast-iron cookware are slow to
The
pan should not extend over the
jlat on the
TIPS
Right
Not over 1 inch
Wrong
Over 1 inch
Page 9
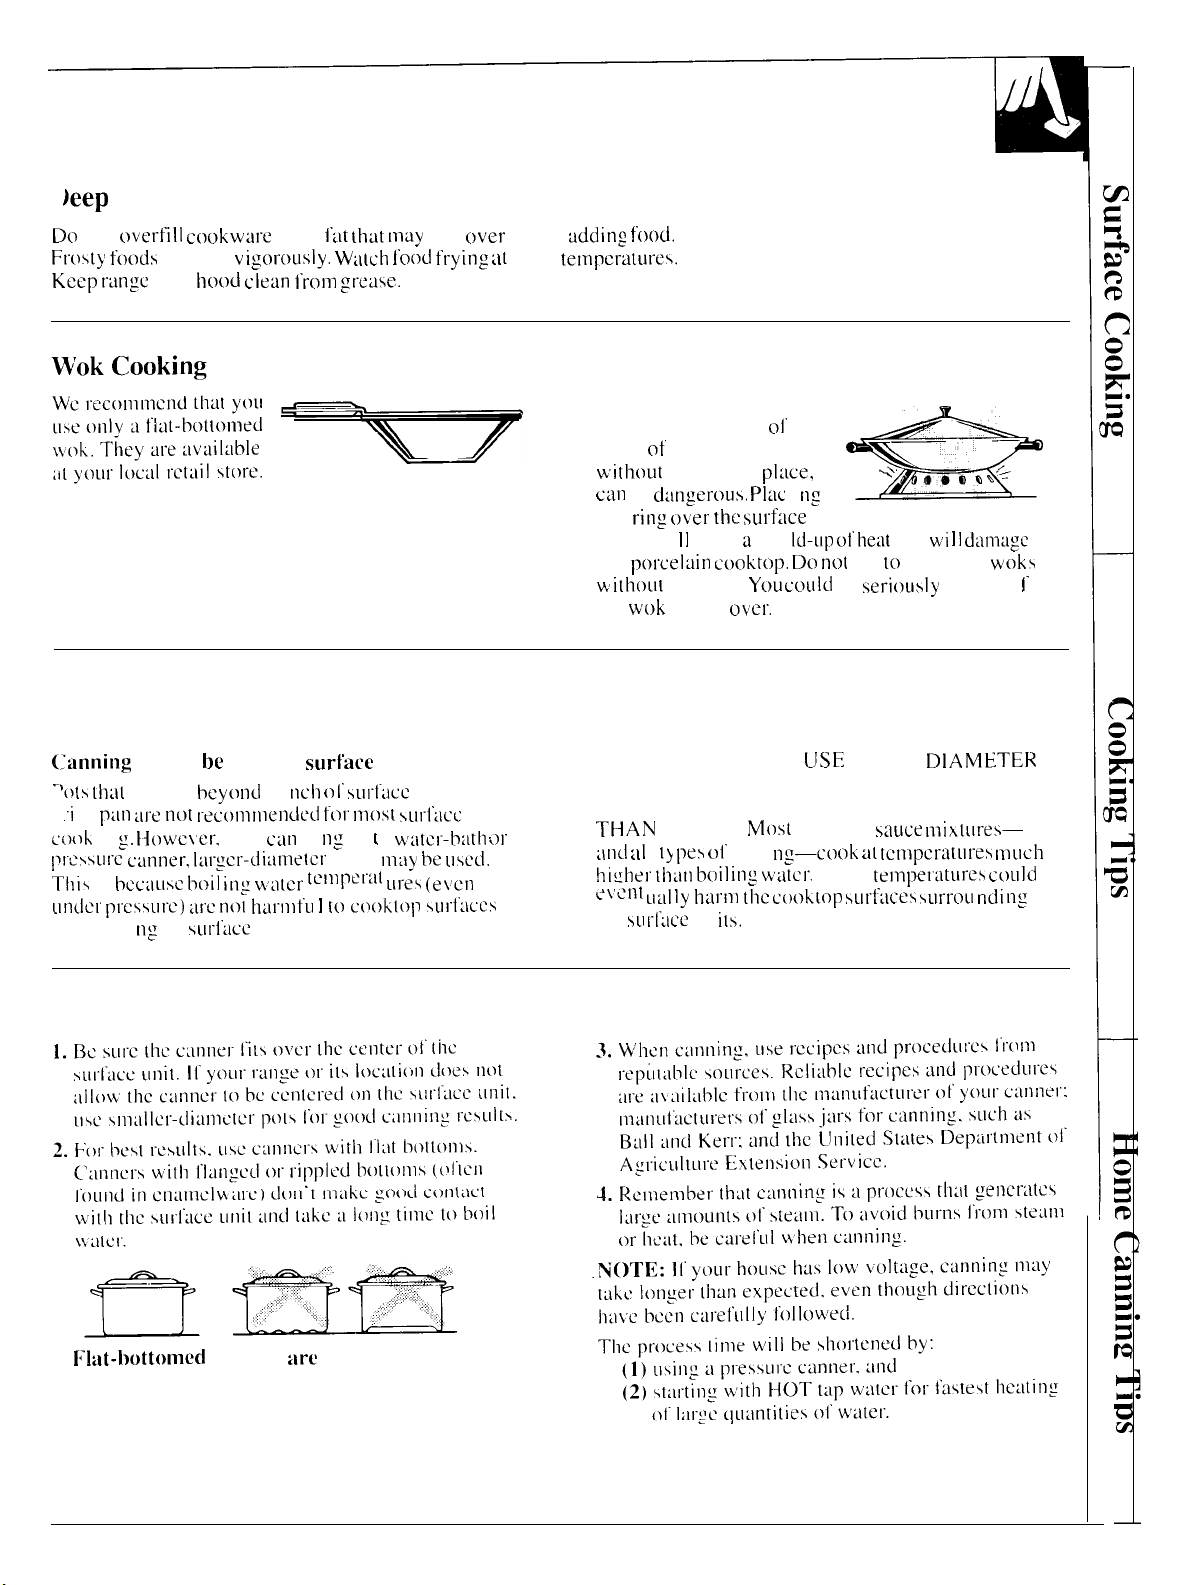
)eep
Fat Frying
D(>
not
t~verfill c(>okw~ire
Frc~sty foc)ds
Keep rtingc
and
bubble
vigorously. W;llch l’o(~d trying :it
ll(~od clean f’r(~ln
with
i’zlt [hot nlay
spill
over
when
high
tidding food.”
tetnpcratures.
~reas~
Do not use woks that have
support rings.
types
of
woks, with or
W’ith(lut
c~~n
the
u n i t w i
the
w ittlou(
the
the ring in
be
d:inger-t~us. Pl:lc
ring over the surf:lce
t t
cause a bu i
por’celtiin c~)oktop. Dc> not
the r-in:.
wok
tipped
HOME CANNING TIPS
Use
You
o}cr.
c>l’
these
pt:lce,
i
ng
td-up oi’ he:~t
c(~ulcl
*
that
w’i ] I d;lrn:lgc
try to use such
be
seriousty
burned i
woks
1-
(;anning
“(J(s (11:1[
.i
ci){lk
prcssurc
Thi\
unc]cr’
surround i ng the suri’:lcc unit.
should be done on
extend
p
p:~n ilre not reconlrllendc’~i f(>r ln(lst suri’:lcc
i n g.
tl(~wc\er,
cilnner, tlirgcr-ctillrllelcr’
is hcc:ILIsc
pr”cssut”c) :u’c n(~l
beyt)nct
when
bc~it in: Wlltcr ternpet”:lt L1l-es (e\;cn
surt’ace
I i
ncb (J1’ surfticc
c~ln
n i n: w i ( h wzltcl--b:ltll t)r
pots
units only.
nl:l)
h~ll”!lltu I tt) c(~ok[~)p suri’:lccs
units
be lrscci.
observe the Following Points in Canning
HOWEVER. DO NOT
[USE
LARGE
DtAMETER
CANNERS OR OTHER LARGE DIAMETER
POTS FOR FRYING OR BOILING FOODS OTHER
TtHAN
WATER.
tlnct
:It
t I} pes
higher
lll~irl bc~iting w:ltcr.
e\’cnt Lr21t ]y
the su
rl’:lcc
un
c)i’
I-ry i
h~]rnl ttlc
ils.
M(Js1
syrup or
ng-c(~t>k a~ tcrnpcratures nluch
Such
cooklop
s:iuce nlix[\lres-
te]npeli~tures could
suri’:lces
sLlrrC>ll
ndi
rl:
IJlat-hottomed
canners
arc
recommended.
9
Page 10
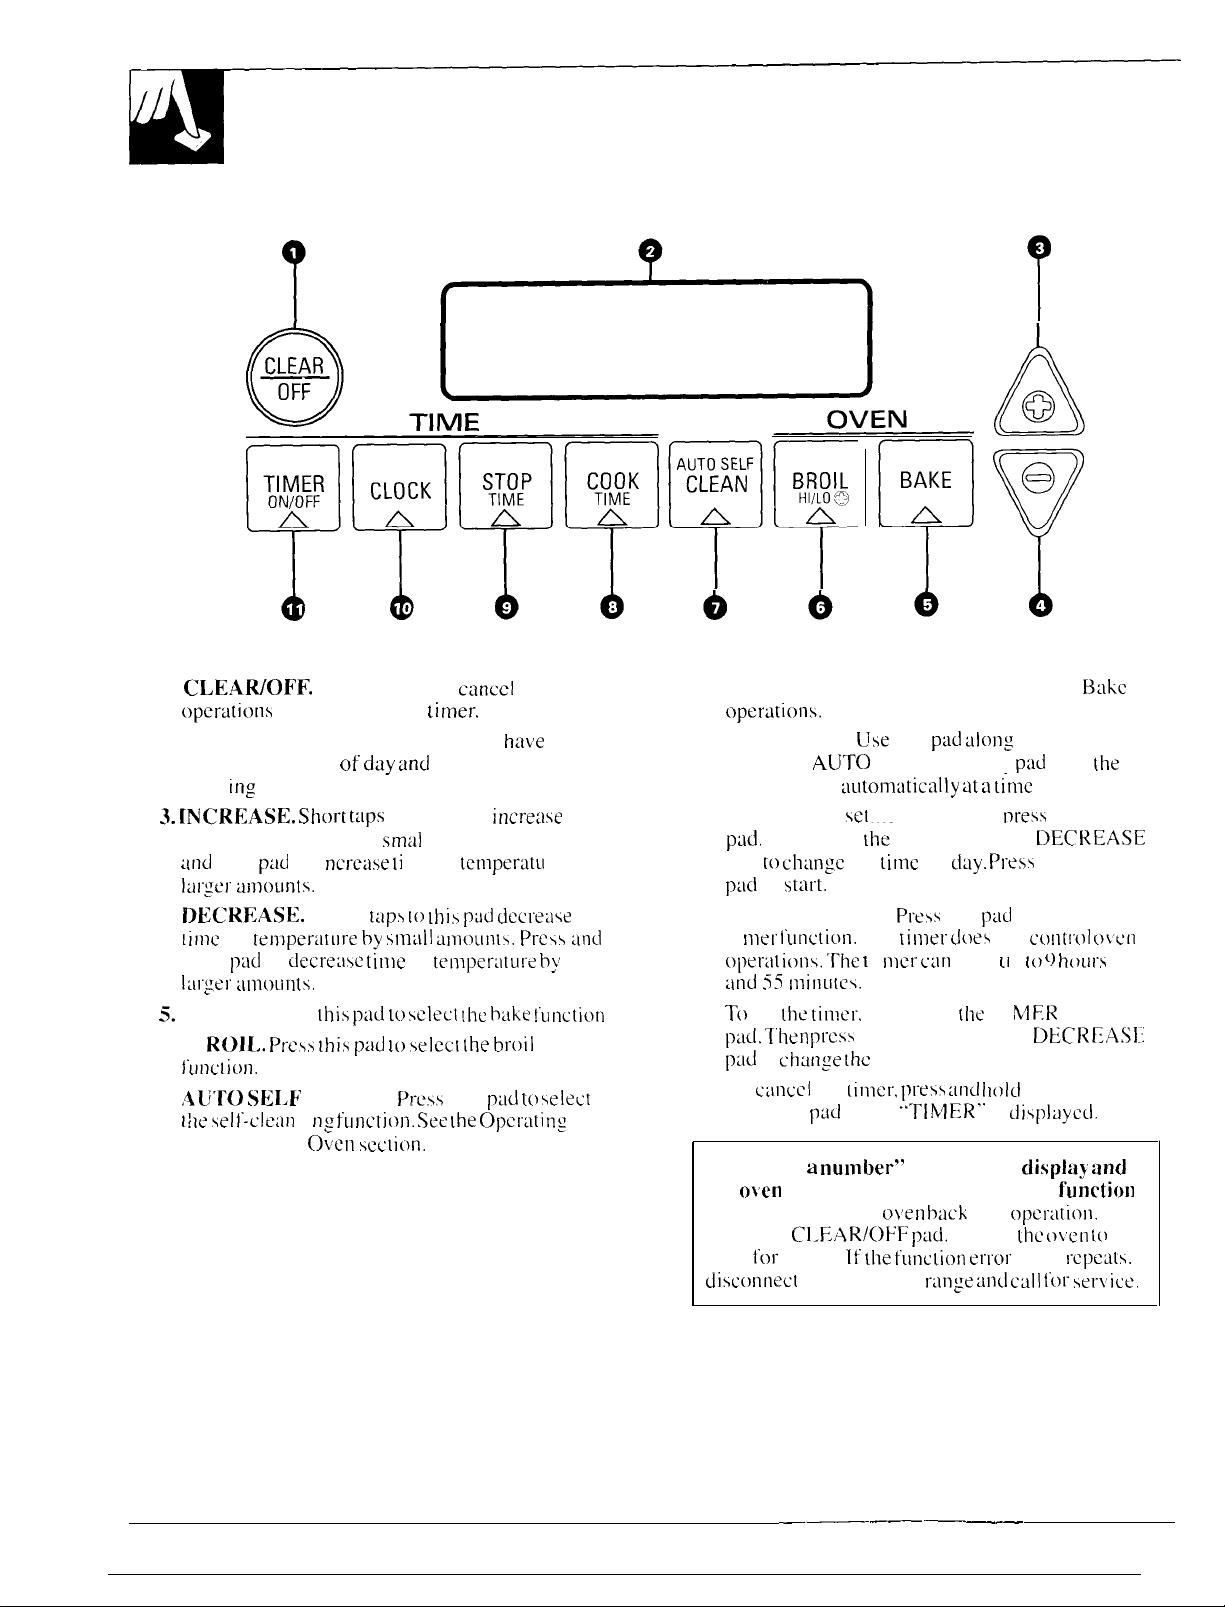
FEATURES OF YOUR OVEN CONTROL
1.
CLEAWOFF.
t)pcra~ions
Press this pad to
except clock and li
c;]nccl
rner.
2. DISPLAY. Shows the operation you
selected, the time of
clean
ing
status.
3. [NCREASE. ShO1.t [zips
time or temperature by
:ind
hold
p:ld
to i
ldl”ger
anloLlnts.
4.
Dk;CREASE.
lime
or
hold
p~ld
!:ll’gel’
illlloLill[S.
BAKE. Press
j.
II ROJL.
6.
Short
temperiltllre
to
decreilse tin]e
Pre\s Ihis p:ld 10 selecl [he broil
d~y and
the cooking or
to this pad
sm:ll
I amounts. Press
ncre~~se Ii
me or
temperotu
t;]ps L() lhis p:id dccreiise
by
snl~iil dmounls.
or
trmper:]ture b}
[his p:ld 10 sclec[ !he h~ike !’unction
~’unclion.
7.
,4u’ro
t!le seli’-clei]ll
Self-(-”lc;lr]ing
Sh;I.E’
i
CLEAN.
ng
furlcti(~r~. See
O\crl
seclion.
Press
this
Lhe Opcr:]ti
all oven
h:tke
incre:]se
re by
Prcs3 ~lnd
p:ld to select
ng the
8. COOK TIME. Press this pad for Timed
opcr~tions.
9. STOP TIME.
TIME or
oven to start
10. CLOCK. To
p:~d.
Then press
pad to
ch~lngc
p:ld
to
stllrt.
11.
TIMER ON/OFF.
ti
met I’unction.
Ope[-21t ions. ‘rhe 1
:ind
55 mirlu[es.
T()
set
the tirncr.
i)ild.
T’hcn
pLId
to
change
To
ci~nccl
ON/OFF
Jf “k’-and a
the
o~en
control signals, this indicates
error code. Put the
Press the
coot
disconnec[
C1.EAR/OFF p~ld.
l’or
t hour.
power to the
Use
this
-
A(JTO
ptid along
SELF CLEAN
with COOK
p:~d
:Iutomilticillly at a t{rne
set
the clock. first
the-
INCREASE’ or IIECREASE
the
tirnc
ol’
Press
this
The [i
nler dt~es
i
Iller- c’:lrl
first press
\31CSS
the INCREASE 01 DECREASI
lhc
time.
the
[imer. press :ind Ilotd
p:id
while
nulnher”
‘TIMER’.
flush on the
o\erl bilck
If (he funcliorl er”ror
nress
d:]y. Press
pild
not
time
[I
p 10
the
TI
is
into
At low
to select the
hlER
the TIMER
displ~lycd.
display and
opcr:ltio]~.
~hc L~\en ((~
code
r~]r):e und ctilt t’or
to set
you select.
the CLOCK
the CLOCK
con[rc)l oie[r
C,
B:lkc
[he
hou
I’S
ON/OFF
functi{~n
I’cpeti(s.
ser\icc.
10
—
———
—.
—-—
Page 11

OVEN CONTROL, CLOCK AND
T~ER
Clock
The
clock
must be set to
{he
autoillatic o~en
The
tilnc 0[’
Baki n:
day cannot be chan:cd during a Timed
or
Sel l’-C’lear]ing c>cle.
Timer
‘T”’ilc
timer
( )pcrat ions. Tbc
i)ll the
i 1]
i
nutes.
does
t i me r is ‘)
the correct tin]e (~1”
timing
not
maximum sel li
tlolll-s a[ld
i’unctions
control o\crl
55
da!) for
to work properly.
To Set the Timer
n:
TIMER
@N/oFF
A
D
2.
Prcs\
[JE.C’REASE paci to sel ~h~
amou n~ 01’ t i
1. Press tile
TIMER (“) N/OFF pad.
the I NC
R13AS
Inc on the t i mer.
To Set the Clock
1. Press the CLOCK pad.
CLOCK
A
D
2. Press the INCREASE or 1> ECREASE pad to set
time of day.
3. Press
E or
the CLOCK pad to start.
The timer will
i
n a f’ew seconds of
with
the pad. The timer. as you are
setti n:
it, wilt
one
minute
is reached. Then it
display’
60
After (j(j
hours
lninutes
minules is
minutes, it
(.’HR’.
display) and
mtix
i mum time of 9 hours
ss minutes is reached.
sturt
automatically
releasi n:
display
seconds
and seconds until
reached.
witt
displa)
now
appci~rs
minules untit
in
the
unl
uit
and
the
i I
I
To Reset Timer
Ii’ “TINIF;R”
DECREASE pad until the desired
If
“TIhlFIR”
ON/OFF pad
(o
set the timer.
is displayed, press the
is not displayed,
I’irst,
then
l’otlow
press
the
End of Cycle Tones
The end
I beep that repeats elcry six
:Iny’ opertit
repcatin:
l’or
T() re[urn
press and hold the
Power
A1’~cr
iisplay
.Ort”cct--t’ol” Cxal)lptc. al’(cr
interrupt ion
ol’
cycle
ion: 11’
beeps, press and
I () seconds.
the
cnd
Otltage
a power outage.
wi II flash and
(Ilc c’!oc’k W’i It
tone is
yOLI wou Id
01’
tbrec
cyctc
CLEAR1OFF
when
tilnc sht~url mill no l~>rlger
short beeps
secc~nds
I
i kc to eliminate
h(~td
the CL, EAR/OFF pad
tone to the
poucl-
a
5-llli
bc 5 minutes
INCREASE
tilne is
reached.
the TIMER
i])structi(~ns
foltowed
until
}OLI
repeating
pad
I’or
I () seconds
is restored the
llUtC
pow’cl”
slow.
01”
abo\c
pre~s
(h>
beeps.
hr
by
To Cancel Timer
Press and bold
word
“TI IMER’.
tllc
TIMER
ON/OFI;
disappears from the
Display Messages
“ lf
“clean’> appears in the display,
and the oien cent
cycle
and did not shut
● If “1.OC K“
()~cn
door is in
and COO K TIME
locked
The
t’unctions
C)U1 w
position.
disptay ilashes
that
i ! I
tlaye to
r(~l
signals, you set the
t~le
door.
only’
appears in the display, the
[he
locked position. BAKE,
cannot
bc set if’ the
until the clock is reset. All other
wet-e
in
operfition
bc program riled again.
pad
un[il
the
di~play.
DOOR tlasbes
sett’-clean
BROI
door
is in the
when the power went
—
11
Page 12

USING YOUR OVEN
Before Using l’our Oven
1. Look at the controls. Be sure
how to set them properly.
2. Check the oven interior. Look at the
Take a practice run at
them
properly to give sure, sturdy
3.
Read over the information
4. Keep this guide
hundy
so you can refer to it, especially
during the first weeks Of
Oven Shelves
The shelves are designed with stop-locks so that
when placed correctly on the shelf
will stop before coming completely out from the
oven, and will not tilt when removing food from or
placing food on them.
When placing cookware on a shelf,
to the bump on the shelf support. Place the
on the she]
This will eliminate reaching into the hot oven.
f,
then S1 ide the shelf back into the oven.
yOLI understfind
removin& and
tind
tips
using YOUI”
sheli”es.
replacing
support.
that
follow.
new ran~e
sopports, the~
pLIll the
shelf out
cookwfire
NOTE:
.
YoLl Illfiy notice a
first few times you turn your oven on. This is
normal in
time. To speed
a minimum of 3 hours. See the
“burning” or
a
new oven
the
“oily”
~nd
will disappear in a short
process,
set a
self-cle~n
Operaling
sl~lell the
Cleaning Oven section.
● On some models, a fan
~oOI
internal parts. This is normal.
continue to run even
mtiy automalical
~nd
~fter
the oven is turned
Iy
the fan
To remove a shelf from
the oven,
PUII Lhe shelf
toward you, tilt the front
end Lrpward and
pLrll
the
shelf out.
To replace,
shelf
on the shelf
support with the
Iocks
(curved extension
place
the
stop-
under the shelf) facing
up toward the rear
push the shelf toward the back of
(7c~es
past the bump on the shelf
~he
front of the shelf and push it all the way hack.
of the
o~en.
Tilt up the I’rent and
tt,e
oven until
sup}~ort.
Then
cycle
the
lurn
for
Se! f-
on to
[ll:IY
oft.
it
Iowel’
Shelf
Positions
The
o~en
has 4
shelf
supper’ls identified in this
i
II
ustra(i{)n
a~
A (bottom), B. C
aild
D
(t~>p).
Shelt positions for cooking are suggested in
Baking. Roasting and Broiling sections.
Oven Light
Llsc [be
switch on
lhe
ptincl to turn the
light
12
the
on and
(){t’.
1~~~1
~::~>~~:ti]
\
\
..... ’’y,~<>,
\
>.
—
—————
Page 13

/(~ur
(lkcn tetnpcrdture
sys[enl, We ].econlrnend
Llsing
the ti Ine
given
c>\en’s pcri’(~rnl~nce.
the
Over) Tclnperi~ture sccti~~n.
NOTE: When
hot
too.”
is c(~ntrol
on
recipes
It’
[he t>vcn
led kcry
th~lt you (lpet”tlte I he rilngc
as a gLlide to
yoLI
think
:)n :ldjustnlcnt
It lists easy
is
hc~t,
the top
:Iccu
becolne }anliliar
f)f)
~ind t)utside surldccs
How to Set Your Range for Baking
‘Ki)
avoid possible burns,
~.(>rrect p~~si [ ion bet’(~r”c yt)u
~
BAKE
1– A
J
I
2. Press
[hc
pild. I“hc t~lst tJ\ell tcnlpcr:lture
i/Q
\
:Ippc211’s
pressing
is d
ispl~lycd.
4
@
v’
pt:lcc
the shelves in
ILI
rn the
OVCI1
011.
INCREASE or [> E(;REASE
i n tbc
displ:lj. (;i)n[inuc
unlil
the desired
Lenlpcl-:ltu!”c
BAKING
ra[cly
LI
si n:
:ln
(~tcrl corrtr(l!
for LI
llUlllhCi’ of
with
is necessary. scc the Adjust
It
Y~~ll}-.\[J/j”i
nstrLlctions.
of the
the
Llsed
we~~s
y(>[lr
rt~nge
The
w~>rd “ON’. :Ind “
t~~crl
[enlperiltur-c.
}ou
set. :1
CLEAR
OFF
o
NOTE;: A f~r~ In:]) ~]lrrorll~]tic:ltly)
in[ern~ll pilrts.
continue to
To change the oven temperature during the
BAKE cycle, press the BAKE
t
NC
tenlpcr~ltur-e.
new
get
hc;l[s
up,
lone \vi
3.
run even
REASE or
I ()()0” wi tt be
[hc di spta)j
When t hc
I t
sound.
Pr~>s\
the
is finished
t’r-t)nl
the
Tbis is
rlorrndt, ~~ntt
:lfter
DECREASE
displtiyed.
wil 1 sh(>w the
t>\cn re;lches
the temperature
CLEAR1OFF pad
t~rld
then
rcrnove
(~verl.
turn on to
the
the
t)ven
is turned
pod tind
p:id to
get the new
ch:ulgi n:
when
the
food
cool”
l’i~n rn~ly
ot’t’.
then the
As the
bilking
—
Oven Shelves
,Arr:lnyc
shcl
[hc
w h i Ic tbc
coot”.
t be
1’ or
shc
desired
The
t)\crl
I
vcs
i n
loc~tions”
()\crl is
correct
stlcli’ position”
depends on
1)1’
food” :]nd
brown ing dcsi
i\s :1
gcrlcr’~11
~)l;lcc
most
tbt>
kind
the
red.
ru Ic.
l’()~.)ds
the rniddlc 01” tthe ()\crl, ~~n
[~ or” (;. See
the
.
i n
either
ch:lrt t’or” su~gestcd shett ptlsitiorls
shctf p~)\i[ ions
((’()/1/;/11/(,(/
//(.\/
/)(/:()
—-
—..———————
—
13
Page 14

BAKING
(conti
Preheating
Preheating is necessary for good results when baking
cakes,
c[>okies,
and
rotists,
wilhout a
10
minutes. After the oven is preheated,
food in the oven as quickly as possible to prevent heat
from
escaping.
pastry and breads. For most casseroles
preheating is not necessary. For ovens
preheat indicator I
ight
or tone, preheat
place
the
nLled)
Preheat the oven if the recipe calls for
means bringing the oven up to the
tenlpcrature before putting the food in
To
preheat,
tenlper;~ture—scle~tl ng
set the
oven at the correct
a higher
shorten preheat time.
it. Prehcal
specified
the
oven.
tenlperatLlre
does
nf~t
Baking Pans
Use
[he
proper baking pan. The type of finish on the
pan
delerl~lirlcs
“
Dark, rough or
br-owner,
●
.Sh
i ny, bright and smooth pans reflect heat, resulting
in a I
ighter,
cookies
. Glass
bilking
~]ass
baking
● I f you are using dark non-stick pans, you may
lh~t
you need to reduce the oven temperature
to pr-event
the
crisper
rnor-e
an~~~unt
dLI
1 I pans absorb heat resulting i n
crusl.
of browning
Use this type for pies.
clel icate
browning. Cakes
lhat
will
require this type of pan.
dishes also absorb heat. When baking i n
dishes,
lower the temperature
t~verbrowning.
b>’ ~5’3 F.
Baking Guides
follow
When
using
prepared baking mixes,
package recipe or
for the best baking results.
Cookies
wben
baking
c(~~)kies. flat
sheets (\~itllout
]lrodLiCC
I(loking
IL)(lkies
.j~l]y rol
sides all
ha\e
and ~>a!c
browning may occur
r~(~
not use a cookie sheet so large
~al
Is or the door of the oven. Never entirely cover a
sbel
f with a cookie sheet.
For best
at a (i me.
cookie
sides
t>etter-
cookies.
baked in
I pan (short
:Ir-ou nd
)
darker cdge~
or I i
ght
r-esults,
use
~
ma!
(~nly
one
cookie
thal
it
tOU~hes the
sheet in the
(>ccllr-.
and
find
25C’F.
a
o\;erl
Pan Placement
For
eten cooking ~nd
cnou gh
room for air ci
results wi II be better- if baking pans are
Illuch
as possible rather than being
or to the back of the
Pans
should
not touch
o\en. Allow I to 1 Y? inch space
as
from the back of the oven. the door and the sides.
If you need to use two shelves
that one is not directly
proper browning, there
rcu Iation
in the
o~cn. Bak
ccnlered
p]:l~ed tO
o\en.
e:~ch
other or the walls of
abo\e
belween
, stagger
the other-.
pans as well
the
I he
pans
instrucliofls
Aluminum Foil
~~v~r
entirely
a
she! f with
al 11 In
i nu m foi ]. Th
\vi
I I
dis[urh
cir”cula[lon
111 1>001- hak
sr)):r]
Ier shdcl
ITla>
bc
bclo\v the t’()()d.
anLl rc\ul\
i n g.
Lrsed
cover
the hedt
A
01” t’oi I
to
ca[ch
Is
l~lLI~t be
i
n:
as
fr-(~rll
[he
so
14
————
—-—
Page 15

>i~s
Cakes
For
best results, bake pies in dark, rough or dull pans
to produce
pans
f(~r
baking
from the
a
browner. crisper crust. Frozen pies in foil
sh(~uld
be placed on an
\ince
the shiny i-oil
pic
crus[:
the cookie sheet helps retain it.
tiluminum
pun reflects
cookie sheet
heat
Don’t Peek
Set
I he timer
not open the door
pro\idc
‘bake
3(]-40
tor [hc eslimated
minirnunl
minutes.”
cooking time and
10
look at your food. Most recipes
and maximum baking times such as
TIMED BAKING
The
()\;cn control
auloma[ical ]y
of
1
mrncdiale Starl (o\erl
lrn ot’f au[omalical ly )
,he c)t’erl 10
lar-n off
at a preset Stop Time)
ollows
yOLI to turn the
at
spec if.ic
limes I hat y
turns on now
and Delay
turn on automat
o~’en
OLI
set. Ex amp
and
you set i( to
Start
and
S[op
ical
t) al a later time and
wil
I bc described later.
on or off
(
away
do
Ies
sctti n:
When baking cakes, warped or bent pans will cause
uneven baking results and
A cake
recommends will
buked
in a pan larger than
usually’
poorly
shaped
the
pr~du~ts.
recipe
be crisper, thinner and drier
than i[ should be. If baked in a pan smaller than
recommended, it may be undercooked and batter may
[~vertlow.
Check the recipe to make sure the pan size
used is the one recommended.
DO NOT open the door to check until the minimum
time. Opening the oven door frequently during cooking
allows
Y’our
NOTE:
shows the correct
To
hea[
to escape and makes baking times
baking results may also be affected.
Before beginning,
set the clock,
[irne
first
mtike
sure the oven clock
of day.
press the CLOCK pad. Press
l~~nger.
the INCREASE or DECREASE pad until correct time
of day is displayed. Press the CLOCK pad to start.
How to Set Immediate Start and Automatic Stop
l-o
avoid possible burns, place the shel\es in
cf~rrect p~)si Lion
I“hc
(lvcn
sclectcd tength
the
(~\cn
1. l’rcss
the (TOOK TIME pad.
NOTE;:
need to
before
w’itt tLll”n
of’ time. At
wit I
tLlrn
tf your recipe
yt~u
turn t hc oven
on immediately and cook for a
off aL::.:jrnalicat
rcquir-es
ad~ additioilat ti~ne 10
(I1c end of Cook
t~.
preheating. you
the
tcngth
Cook Time.
2.
Press
the t NC REASE pad unlit the desired
of baking time appear’s in the display.
3.
Press the BAKE pad.
4.
PICSS
the iNCREASE or DECREASE pad
desired temperature is
wit
t sound if step 3 is not done.
The words ‘TIME
wil I be displayed
disptayed.
BAKE’.
atong
with the oven temperature
An
aITd
COOK TIN4E’
that you set and the Cook Time that yOLI entered.
on.
Time.
of the
tcng[h
untit
attention
Lhc
lnaj
the
tone
The
o\en will start automatically. The word “ON”
:Ind .’
t
()()0”
begin 10 c(~unt
wit t show the
reaches
[he
The oven
anlo[lnt
c
n.
Press
01 time. then shut off
~he CLE.
necessary.
e\cn
though
cent inue
NOTF:!
.,
.
. .
●
Foods
stul’fi
sit for
cooking after the
—.
Lhat
spoil
rigs, pout try
-
more
wi It be
down. As the oven
temperature you set. ~ tone will sound.
witl
Renlo\e
the oven
th~n
dispttiyed.
chtinging
The Cook Time
heats
up. the display
temperature. When the
wit t
o\en
continue to cook for the programmed
autornaticai
A R/OFF pad to
the
tk~od trorn the o\erl. Relnernber.
sbuls
ctear
ofl
autornaticat
controts
easi
ty, such as milk, eggs, fish,
and
pork, should not be at towed to
one hour before or after
the
dispt a)
are off.
cookin&.
ly.
i f
Iy, foods
Room temperature promotes the growth of harmful
bacteria. Be sure that the oven light is 011 because heat
from the
● A fan ma!)
internal
parts.
butb wit]
speed harmful bacteria growth.
autorrralicalty
This is
turn on and off to cool
normal. and the fan may
continue to run after the oven is turned off.
(i(~illitlltc(l t)c,.ri I?(i,yo
15
Page 16

TIMED BAKING
(continued)
How to Set Delay Start and Automatic Stop
Quick Reminder:
1.
Press the COOK TIME pad.
2. Press the
the length of baking time.
3. Press the STOP TIME pad.
4. Press the INCREASE/DECREASE pad until
the desired Stop Time
5. Press the BAKE pad.
6. Press the
select an oven temperature.
TO avoid possible
correct position before you turn the oven on.
You
con
cook for
automatically.
cT?$f
A
n
2. Press the INCREASE pad until the desired
of baking time appears in the display.
~?j[
A
D
The control automatically sets the Stop Time by
adding the Cook Time to the time of day. For
example, the time
Time is
equals 5:00.
4. Change the Stop Time by pressing the
INCREASE pad until the desired Stop Time
appears in the display.
INCREASEIDECREASE
appetirs
INCREASEIDECREASE
burns, pl~~e the shelves in the
set the oven control to delay-start the oven,
a
specific length of time and then turn off
1. Press
3. Press the STOP TIME pad. “STOP
3
hours. Adding 3 hours to the time of day
the COOK TIME pad.
NOTE: If your recipe requires
preheating, you may need to add
additional time to the Cook Time.
TIME” and
can set appear in the display.
the
earliest Stop Time you
of day is
2:00
pad to
in the display.
pad
and the Cook
set
to
lenglh
5. Press the BAKE
n
BAKE
6. Press the INCREASE or
A
CLEAR
OFF
o
NOTE:
●
Foods that spoi I easily, such as milk, eggs, fish,
stuffings. poultry and pork, should not be allowed to
sit for more than one hour before or after cooking.
Room temperature promotes the growth of harmful
bacteria. Be sure the oven light is off because heat
from the bulb will speed harmful bacteria growth.
● A fan may
internal parts. This is normal, and the fan may
continue to run after the oven is turned off.
DECREASE pad until the desired
temperature is displayed.
The oven will turn on automatically. The
word ‘. ON”
The Cook Time will begin to count down.
AS the
oven heats up, the display
the
ch:]nging tempertiture.
continue to cook for the programmed
time
and
shut
At the end of Timed Bake, the display
will show
the oven will turn
tone will sound.
7. Press the CLEAR/OFF pad to clear
the display if
food from the oven. Remember, even
though the oven shuts off
foods continue cooking after the controls
are off.
autornatical Iy
pfid.
tind
“ 1000’” wi 11 be displayed.
will show
The-oven
off
automatically.
“OHR:OO
necessury.
COOK TIME” and
oft.
The end of cycle
Remove the
automatically
turn on and off to cool
Wi!l
—
16
Page 17

ADJUST THE OVEN
DO IT YOURSELF!
‘OU
may find that your new oven cooks differently
-han
the one it replaced. We recommend that
use your new oven
tami Iior
recipes as
If you think your new oven is too hot or too cold,
you can adjust the thermostat yourself.
it is
you think it is
i t
We do not recommend the use of inexpensive
thermometers, such as those
to check the
These thermometers may vary
with it, following the times given in your
a
guide.
too
hot,
hotlet-.
for
a
I’cw
weeks to become more
tid,]ust
the thermostat to make it cooler. If
too
cool, adjust the thermostat to make
tempertiture
found in
setting of your new oven.
2040
grocery stores,
degrees.
yoa
[f
you think
THE~OSTAT—
To Adjust the Thermostat:
1.
Press the BAKE pad.
BAKE
A
❑
2. Select an oven temperature between
3. Immediately, before “ON” appears, press and
hold the BAKE pad for about 4 seconds. The time
display will change
4. The oven temperature can be adjusted up
to
Q
A
-
CLEAR
OFF
o
NOTE: This adjustment will not affect the Broiling
or Self-Cleaning temperature. It will be retained in
memory after a power failure.
Use the INCREASE or DECREASE pad
to select the desired change in the display.
5. When you have made the adjustment,
press the CLEAR/OFF pad to go back to
tbe time of day display. Use your oven as
you would normally.
10
(+) 35°F.
the oven adjustment display.
hotter or (–)
5000F. und 5500F.
35°F.
cooler.
17
Page 18

ROASTING
Roasljr]g
poultry
Roas(ing
steady, keep spattering to
Roastirrg
Therefore,
Baking. (You may hear a slight clicking sound.
indicating the oven is working properly.)
1.
2. Check the
n
LJ
is cooking by dry heat. Tender meat or
can
be roasted uncovered in your oven.
temperatures, which should be low and
a
minimum.
is really a baking procedure used for meats.
oken
controls are set for Baking or Timed
Place the shelf in A or B
is
necessary.
weight
of the
meat. Place it fat side
up (or for poultry, breast
side up) on a
rack in a shallow pan.
The
melting fat will
baste the
pan
:1s CIOSC
of the
meat
(The
broiler pan with
rack is
this. )
BAKE
A.
~
good pan for
3.
rOasting -
me~t.
Select a
to
the size
as possible.
prc~s
the BAKE
position.
No preheating
pad,
Most meats continue to cook slightly while standing.
after being removed from the oven. The
recommended
allows roasts to firm up and makes them easier to
carve. The internal temperature wi II rise about 5“ to
1O°
remove the roast from the oven sooner (at 5° to
less than the temperature in the Rousting Guide).
Remember that
oven and therefore should be removed when
desired
I\@/
o
NOTE: A fan may automatically turn on to cool
in[ L>rnal
continue to run even after
standi n&
for
roasts is I () to 20 minutes. This
F.: to compensate for temperature rise, if desired,
food
will continue to cook in the hot
internul
n
CLEAR
OFF
parts. This is normal. and the fan ma)
temperature has been reached.
4. Press the INCREASE or DECREASE
pad. The
appears in the display’.
until the desired temperature is
The oven will start automatically.
The word
displayed. As the oven heats up, the
display will show the
temperatures. When the oven reaches the
temperature you set. a tone will sound.
Press the CL
5.
roasting is finished, and then
the
food
Ias(
oven temperature used
Conti rrue
“ON.’
and ‘. 10
EAR1OFF
I-rem the
lhe
oven is
O[’..
changing
pad when
oven.
turned oft.
will be
time
10OF.
[he
pressing
disployed.
Icnl(J\c
~)se of Aluminum
You can usc aluminum foil to line the broiler pan.
This
rnakcs
clean-up easier when using the pan
rnarinati ng, (:ooking
cured meats or basting food during
the [oil tightly around the inside of the pan.
Foil
with fruits, cooking heavily
cookin&.
Press
ti)r
18
To
change the oven temperature during roasting,
press the BAKE pad and then
DECREASE pad to
get
the
INCREASE or
the
new tcrnperature.
Page 19

Juestions and Answers
Q. Is it necessary to check for doneness with
meat thermometer’?
1.
Checking
the completion
Temperatures arc shown in
For roasts
at ha! f-hour i
h:]s
passed.
Q.
Why is my roast crumbling when 1 try to
the
finished internal
of
coo~ing
o~er 8
Ibs.. check with
ntcrvals at’ter
[cnlper”alure
time is recommended
the R(>asting
Guide.
thcrrnorneter
hal f the cook i ng ti rne
car}e it’?
.-i.
Roasts arc
z() rlll rlLr~cs ~lfter- rerllo\
Be
sure [o
e~]sier
to slice if allowed to coo] I ()
in:
[hem Fronl (he o\’en.
CLI1
across
lhe
grdin
ot’
[he nlcat.
ROASTING
Frozen Roasts
Frozen
.
roasls
ithout
.)urld
additional
under 5
roasts
oi’ beet. pork, Iamb, etc.,
thaw
ing,
but al low I ~ to 25 nl
[irne
( I () rni
pounds.
more time tor
nutes
per pound for
can
inu[es
larger
be started
per
roasts).
at
a
Q. Do I need to preheat my oven each time I cook a
roast or poultry?
,4.
It is not necessary to preheat your oven. Preheat
only
for \ery srnal
length
of
time.
Q.
When buying a roast, are there any special tips
I roasts, which cook a short
that would help me cook it more evenly’?
A.
Y’es.
Buy
o
roast as even in thickness as possible,
or
buy rol
Icd r-oasts.
to
Q. Can I seal the sides of my foil “tent” when
roasting a
i.
Sealing the
Lrnsealed ~1 lows
turkey:)
toil
will steam the meat. Leaving
the
:li
r- to c
i
rcu
late and brown
il
the meat.
GU~E
Make sure poultry is thawed before roasting,
Unthawed poultry often does not cook evenly. Some
commercial
without
package
frozen
poultry can be cooked successfully
thawil]g. FOI1OW
the directions given on the
label
Doneness
,4pproxinlate
in Nlinutes per Pound
3 to
5
Ibs.
1~-.~~
;5-3~)
40-45
Q I
..75
-.
25--30,
Roasting
30--35
jj ..J5
.{i .4.$
)
7-
Q()
lllillLllC\ PC1’
3
to
5
11)s.
.35
-4( I
.:5- 4(
)
10 to i5 11)s.
I
8–2.7
170
Time
6
to 8 lbs.
18–22
~~–~c)
30-35
?()–23
24–2X
2X–33
30-40”
30-40”
LI11(I (illl>’ !! Clgh[)
()\’cl- 5
30-35
()*er
I
5--20
111s.
15 Ibs.
Internal
Temperature
I ~()- I 50’’-;
I 500-I 60(
I 70-] s~
I 40”- [
I 50”- I 60[
I 70[’- I 85”
I
70 ‘–1
I 70’” I
I I 5“-- I
85 -i
I
I Sj... I C)()
In tbigb:
[
X5”- I
”
50<’”;”
”
800
80
20”
~)()
()()”
‘E’.
19
Page 20

r-----
BROILING
Broiling is cooking food by intense radiant
the upper broil element in the oven.
cuts of meat can be broiled. Follow these directions to
keep spattering and smoking to a
[f’ the meat has fat or gristle around the edge, cut
vertical slashes through both about 2 inches
If desired. the [’al may be trimmed. leaving a
about
1/8
inch thick.
Place
the meat on the broiler rack in the broiler
Always use the rack so the fat drips into the
pan: otherwise the juices may” become hot enough
to catch
3. Position the shelf on the recommended
po\ition
broiling is done on C position. but if your range
connected to 208 volts, you may wish to use
higher position.
4. leave the door open position. The door sla)s
open by itself. yet the proper
rnai ntained
on fire.
as suggested in the Broiling Guide.
i n the oven.
,Most fish
minimuln.
ternpcru[ure
heat
and
shtlf
is
from
tender
apar[.
layer
DJII.
bro~lel
h/lo\[
i:-
a
I’ui-n [he Iood
cooking. Time the foods f’or the
to the Broiling Guide. Turn the food. then use the
times given for the second side as a guide to
preferred doneness.
5. Press the BROIL pad.
nol
necessary. (See the
Broiling Guide. )
6.
Press
t\k
ice for HI Broil.
To change
BROIL
7. When hi-oiling is finished, press the CLEAR/OFl:
p~d.
~)tin out:~idc
easiest c
NOTE: A t~Il
internal parts, This is
continue to run e\en after the oven is
using
tongs
the INCREASE
I“rorn
HI Broil to LO
Pild
then
press tbc
Ser\c the
food irnrncdialcly.
the oven to cool
Ietini ng.
IIIa~
aut(>l~lati~illl~ tLlrn
only once during
t’irst
Prehca[i ng
Cornrncnls
p~d
once for LO
DECREASE
during
norma
1. and the
side
a~’cord
i
ng
[he
the elements is
cOILI
rnn in the
Brt~il o:
Br~~il, pr-ess the
~)ad once.
and
lca~’e tllc
the meal for
011 to
~0[)1
I’i[n Inaj’
tur-ncd oft.
Use of Aluminum
You
can use
to line your broiter pan and
~,r~>ilerr:lck
must
the rack and
lust
like the rack.
atuminurn fbil
However, you
rnotd the
cul
slits in it
I1oil
foit
tightly to
~~~g?$’~
fj&~~>~~-’”:~\ <j!
.s.:
;Q$~\)>>)~” M
(2
Questions and Answers
Q. Should I salt the meat before broiling’?
A. No. Salt draws out the
e~aporate.
meat
the meat with
When broiling, is it necessary to always use
Q.
racl<
Yes.
A.
pan. As
Illu\
[he
rack and
spatter- and smoking.
Always salt after cook i
wi[b a
fork also allows
tc~ngs
in the
keeping
Usins
tie
uan?
the rack
meat
the
meat drier. Juices tire protected by
stay
cooler, thus
20
,juiccs and atlows
juices tt~
instead of a fork.
suspends
cooks:
——
the
the meat
juices f’alt
prcventi ng
them
n!.
Piercing the
escape
o\er
into the
10
.-TLlrn
a
the
p~n.
excessive
WiLhout
juices
cou Id become
not cut the
Q.
A. No. The broiler
Q.
A. In
the
stils,
the
i’oit witl
from
dri]ining into
hot enough to catch
slits, you are
I]o
I need to grease mj broiler rack to prevent
meat from sticking’?
heat. thus keeping the
mcot f’rom
[he br[)i
sprtiy
Why,
they should?
s(>rnc
be low. In these cases.
I () minutes
o\en.
shel
i
ndicatcd
once
food
sticking to
!cr rack
befort
are my meats not turning out as brown as
areas. the power
[’heck [() \ee il’ you are
1’
p{}sition. Broi
i n
duri
n:
tt~
a
hiyhcr’ shelf l~o~i[it)l~.
fry
rack
lightl)
ct)oki ng wi
bcli)rc ptdcing
I
lhc Broi
I>roi
I i n:.
pre\ent
the broiler pan. The juices
(Jn I’ire.
i n g. not
is designed to
surl’ace coo]
the surlticc.
with a
11
pr-chcd[
i’or Iongcs(
I i n: Gu
Y(>11 IIlil!’
~Jr”oi
enough to pre\cnt
Howe\er. spraying
\cgct:lhlc
l~lilh~’
c
lelltl-~li: ~:l~,i~r’.
(\cllIage)
broiler
using the
————-————
to the range
the broil
period
idc. TUIJI food”
rlecd
fat
and
mei]t
I
f
yOLI
do
I i n
g.
r-el-lcct broiter
cookin:
clement t“t)r”
pan \vith food
rec(~nlnlendcd
t)l’
time
on
1)
[t)
Ino\ c Illc
ma>
in
Page 21

Always use
(he
broilerpao and rack that comes
your oven. lt is designed to mini
spattering by
trappin&
the juices in the shielded lower
part of the pan.
● The oten door should
be
open to the broil
stop position.
* For
steaks and chops, slash fat even Iy
outside
through [hc outet” f~t Surf:lce
nleLIL. ~) sc totlgs
piercing the
●
11.
desired,
or
edges
m:tri nalc
brush with
of the
meat.
To
just to the
to turn
nle~lt
b~rbecue sducc
[hc
meat over to pt-event
and losing the juices.
meats or
c-h icken
last 5 to I () minutes only.
tnize
slash,
cut crosswise
before
BROILING
wilh
smoking and
tirou nd
the
edge
of
[he
broi
I i ng,
GU~E
●
When arranging food on the pan, do not let fatty
edges
hang over the sides because the
w
i I I soil the oven.
●
The broiler does not need to be preheated. However,
\cry
thin foods, or to increase browning, preheat if desired.
●
b’
se LO Broil to cook foods
SUCIJ
pork chops thoroughly without over-browning
● Frozen steaks can
she If at
cook i ng ti
● If
tnay be
next Ic)west
tne
~four
range is connected to 208 volts, rare steaks
broiled b~ preheating the broiler and
positioning the
be
broiled by positioning the oven
shelf
pos
i ! ion and increasing
given in lh is guide 1‘/~ ti rnes per side.
o~en shelf
one position higher.
drippin& fal
as poultry or thick
lhern.
ft]r
I?,)(,d
Bacon
(;round
Well
Reef Steaks
Rare
Mcdiunl
Beet. I lb. (4
Done
Quantity and/or
‘1’hickness
1/?
lb.
(:lboul
x
[hit] SI
ices)
p~lt~ics)
[1?
to 3/4 inch thick
incb thick c
I
( I
101 Y:
Ibs.) c
Position
‘Vcll Donr
.<are
Mcdiurn
Well Done c
Chicken
llakery’ Products
Brc:id
(T(~:l\t) or
T():litcr P:lstt-ics
I;ngt
ish
NILlf ”i’in\
lobster
l~ish
a’::::
(
~}ork
Well
I,arnb
Nlcdiutll
Wcl I Dollr
klcd
\$;icners
\i
\;l LI
plcco{)hc[l }
Chops
Doll,”
Chops
iunl
V’cl
I I
)OIIC
Ill i
lilt
\;
I:c\.
Tails
. . . . . .
2]11cI
l)IccooLccl”
bl”Llt\4 U I
I X inch thick
(2 to 2X Ibs.)
I W’hole
(2
(() 2X
lbs. ).
s
‘ ~ L lengthwise
2 to 4
SI ices (’
I pkg. (2)
2
(split)
2–4
((>
108 ()/..
I -lb.
.———————.—.
2
( I /? inch I 11 ick )
2
( I i nc’h th ic’k ).
:] boLrt
2
( t inch th ich ). (’
;Ibolll i ()
2
( t ,:
i~bour
t
-Ill. pkg. ( t ())
\l
l’illcts
i ib.
to 12 ()/.
i[lctl
III
t
lb.
cilL’h )
I/4
..
icL
10
——-—
),
—-
Shelf”
c
c
c
c
c
A
01”
c
ot”
;
~.
t3
~.
~.
B
(:
—
13
D
D
— -..
~
F’irst
Side
Time,
Wlinutes
J,,:
I ()
b
8
1~
10
15
?5
35
I ,,’. -~
3–4 wi rb
I
3-. I 6
:
t
()
13
I ()
12
t4
17
6
Second Side
Time, Minutes
4’h
7
5
6
tl
7-x
I 4–I 6
~~_~5
I ()– I
~/~
r)() nol
t LI rn
()\’cr
:
10
i 3
9
10
1?
t 2– i 4
t-~
Comments
Arri]nge
in single layer-.
Space evenly.
(Like
about same time.
S(eaks less than 1 inch
through bcl-ore browning.
frying is recommended.
Slash
filt.
5
RedLlce
side
for
side with
Broil skin-side-down
SpLrcc
ekenly. Pl:lce English
nlLI
[’ii
!1s
buILe
CLII
Lbrough back of shell.
open.
Br-[Jsb with nlcltcd bul[cr bet’c)rc
broiling :~nd :~t’tcr h:llf ot’ broiling tin~c.
H:indlc iind
Brush \\ ith
:Incl dLlri n: c’t)OA
Prchc;lt
[llCrCLl\~
lot 1
Y!
inch thick
brp
to 8 patties
tbick
cook
P:tn
titne about S to I ~ nlinL]tes pcr
cut-up chicken. BrLlsb e:lch
n]c]ted
buttet-.
tirsl.
cLlt-side-Llp
I-, if desired.
turn
brc)ilcl [u incrcilsc bi(~wnlng.
~illl~ ~ to 1
tcl]l~)n
i ng, ii”
Jnd brush
Sprc:Ld
\cry c:u”c~’LIi!}.
butter
bel’(~rc
dcs
i red.
()
ITllIILli~\ pCr SiLl~
~~r
l~oi])~ cured
“
I1;IIII.
SILl\ll t’ilt.
Slash
l’~lt.
1 t’ desired,
11:11
1’ Icnglbmisc: cut int(l 5-
6-i[lch
,spl
pi~~cc\.
it
saus~Igcs
in
[()
21
Page 22

.-.
-..
———..—
. .
—.-
F
/
OPE~T~NG
THE SELF-CLEANING OVEN
h:or~~lai
Before a Clean Cycle
1.
Remove the
and
any aluminum
withstand the high
NOTE: The oven shelves may be cleaned in
the self-cleaning oven.
lose their luster and become hard to slide. Wipe the
shelf supports
to
lnake
2. Wipe up heavy soil on
usc soap, rinse thoroughly before SC I f-cleaning
to prevent
Oven
front
*
brc>iler
pan.
broiler rack, all cookware
toil
from the oven–-the}; can.1
cleanin&
with
cooking oil
shelves slide more easily.
staini
n:.
Opetiings
in door
temperatures.
l+owever,
after
the
oven bottom. 11- yOIJ
Oven” door
they will darken,
self-clean in
gasket
(le:IniIlg
g
Qv,.)
!lf”~
Time:
3
ho!i]s
3. <;!c:irl
4.
Do not use commercial oven cleaners or oven
protectors in or near the self-cleaning oven.
A combination of any’ of these products
high clean-cycle
porcelain
spirt[ers L)r soil
the
()~en
door
cloth. The oven front frame
outside the gasket do not
clean cycle.
water or a soap-filled steel wool pad. Rinse well
with
a
:)rc\erlt a bl.[l~tl residue
~)\crl
is
Do not clean the gasket.
Clean the top, sides and outside front
door with soap and
o%’en
cleaners.
IM :~ke
Do not rub or clean the door
the t’iherglass
extreme I y
Jnd
well-fitting
energy’-eft’ic
rcsu
I
Iraycd ~jr”
displaced on I he door. you should
D(J
not let water run down through openings in
the top of the door. To help
(>ctti
n g i n
r
as
far
CILlse
light is oft’. 11” the
the I i [e of the bulb wil I be shortened 0
burn out
automatical Iy
01~
vinegar and water solution. This will help
heuted. BrJft
sure
the
low’
ts.
[ f
you notice lhe
datna:cd in any way or if it has
[hesc
as it will go.
the
()\erl
irnn]edia[el)’.
finisl] of the oven.
on the oven
outsid~
o\erl I
material
resistance 10 abrasion. A]] intact
ient ovc
after the clean cycle is set.
temperatllre Illay ~lalllag~
the
these areas,
from forming
these areas with a dry
water. Do
igh[ hu
01”
the gasket has an
oven U(>or gasket is
n operation and
gasket becoming
slots
when
door and
make sure
o\en
light is not turned
The door
frorri I’rainc
gusket with a dalllP~l~ed
und (he
oven door
get clcantci
use detergent and
not use
lb
prevenl
Clean
co\)er
is i n
gasket—
essential
ha\e
111:.
the
Iatchcs
b) the
got>d
water
open [he
and
self-
when the
cloth,
(~1
the
oven
ahrasives
pla~’c’.
lot
baking
\%orn,
bec~lrn~
it
rcplaccd.
I’ton]
()\cn
otf.
-
1
it nla!
plLIS
the
tile
ho(
or
door
22
——
-—
——_——
—.—
———
Page 23

Low
to Set Oven for Cleaning
Quick Reminder:
!
1. Press the AUTO SELF CLEAN pad.
~
2. Press
I
11
the oven is too hot
lhc
word
additional
1.
~ollow
\cc[
2. After
the
INCREASE or DECREASE pad
unti I the desired
‘OFF” wi
tllc directions in
II appear in the
tilnc
for
ion.
c]osing [hc
Clean Time
and
you
start
appe~rs.
to
set u
display’.
co~)lillg hcfore
Lhc
you try to set the cycle
Before a
Clean
door, press the AUTO SELF
CLEAN pad.
3.
Press the
desired
Clean
the
depending
INCREASE or DECREASE pad until the
Clean Time is displayed.
Time is
Cletin
norlnally 3
Time 10
on
the amount
hours You
~ny time
between 2
of
soil in your oven.
How to Delay Start of Cleaning
Quick Reminder:
1.
press
the AU1’O
~. pr-css the I N(’REASE
unti I the desired Clean
3.
Prc\\
the
STOP
4. Press ttrc
the
Del;Iy Start is
c~c
lc
~l(l((~rnat
ot d:ly’.
1.
b’(~llow [he
sccti~)rl.
ALITO
SELF
CLEAN
INCREASE or
dc\ired
ic;ll l) al :1
directions in the
2. A
>
AIJTO SELF
3.
PI-CSS
LO
enter
@
SELF CLEAN
““”” M F.
Stop Time
setting II)c
Iatcr
t’tcr
clt)si n:
the
INCREASE
LIle
Clean Time.
pad.
or L> EC
Time
REASE
appears.
pad
DECREASE pad until
appe:u”s
okeIl timer to start the
the do(~l.
CLEAN
in
~he clisplay.
t i Inc than the pi”escnt time
BcI’01’C
a
pr”e~s Lhc
pad
or
DECR[”:ASE
clean
Allow
Cycle
ctin
change
~nd
4 hours.
pad
Cleklr~
cycle.
clean
C)c!c
I
pad
The self-clean cycle will automatically begin after
‘CLEAN’.
is set. The words “ON”
display when the door
is displayed and the time for the clean cycle
and
“LOCK” will appear in the
aulonlatically
locks. It will not be
possible to open the oven door until the temperature
drops below the
tock
temperature
and
the LOCK light
goes off.
1. When the
1.OCK
light is off. open the door.
NOTE:
a
You can
by
* The
~
~ÿÿÿÿÿяяяяяя “7 tltish and oven control” lvill
clean
● A
i
continue to run
find
out when the clean cycle w i 11 be fin i shed
pressing the STOP TIME pad.
word “door’” wil I he di
cycte
and
I’orgct [O
f’tin
may automatically turn on
Illernal
parts. This is normal, and the
;Ifter
the oven is turned off.
sptayed,
close the oven door.
[he
signal if
and t~ff
word “LOCK”
you set the
to cool
fan ma)’
4. Press the STOP TIME pad. “STOP
y?:[
A
n
The
c~rliesl
plLIS
the time of d~y.
three
hour~ and (he ti
[tl~t ~ppcars
j. Press lhe
LO
a
set
Stop Time a( 1 I
S:()() and
The sel
‘C1.IIAN’.
is
\cl.
the
not he
~~lll}l~l”atU1’e drops bt’!ow”
the
set \vill
Stop
Tirnc wilt
in the display will bc
1 NC REASE pad to change the Stop Ti
IULer
[i me of
end
at 11
t-clean
c~ctc will ~lutc)lnalicall)
is displayed and the time for clean cycle
The
\JOI-dS
“ON. ” and
displa!
when
possible to opcll the oicn
1.( )CK light g~lcs ol”f.
~nd the etirliest
tippear
in the
be the
For example: If(he
rne of da>
da! if Li~Sire~i. For example: If’ YOLI
:()().
oven wi I I
:()().
l-he do(~l l~ltch~s automtitically
the
door ~~Lit(~rll:lti~~lll\ l(~~k~ II ~rl
(he lock
Stop Time you
displuy.
Cleon
is
6:()().
9:()().
stal-t CICJII CYCIC at
-
LOCK’. \vill
‘
door until
tcrnperatur(! :Ir]d
Time selected
Clean Tll~le is
the Stop Time
Inc
begin after
:lppear ill
the
T]
ME”
6. When the LOCK light ii off. open the door.
NOTE:
●
Duri n: a
OLIl
holding
c
A fan may
internal
con[inuc to
delayed se I
when
the AUTO
par[s.
the o~’en
autorna[icdl
This is
rLIIl
after the
t’-c le:~l~ op~l”:lt ion you ~arl
is set to turn on by pressing
SEI.F
CLEAN pad
I y turn on and
normal. ~uld
o\en
is tLlrned
the
(C(lllt;llll<(l
I’or 3 sccorlds.
off
to cool
Farl nlay
off.
/1(,.\/
fi
lld
tlnd
etin
II
/)(/:<1)
—.
23
Page 24

OPEWTING THE SELF CLEANING OVEN
r--’---”--”-”----”--::;
After a Clean Cycle
You
may
notice
it up with
11’ white spots
steel wool
vinegar
a
stilt
and
residue
How to Stop a Clean Cycle
CLEAR
OFF
o
Questions and Answers
Q. If my oven clock is not set to the correct tired
of
day,
A. I f the clock
w i 11 not be
specific time.
Q. Can 1 use commercial oven cleaners on
solme
white ash in
a
dump cloth after the oven cools.
relnain, re]nove theln
pod.
Be sure to rinse thorough)’ with
water
thi~t
1.
can 1 still
Inixture.
cannot bc
Press the CLEAR/OFF
is
not set to the correct time of
able 10
These
retnoved
self-cican my o~’en’?
set a dela)
Ihe
oven Just wipe
with d
deposits
hy the clean cycle.
pi~d.
clctln IL)
so:lp-filled
a
are usually
dit~
end at
~~
any’
part
I’OLI
‘-
If the
oken
is not
clean
after
repeal
(he
cycle.
If the shelves
shelf
supports with cooking oil.
NOTE: No functions
dOO1- ilutonlatic:l]]y
2. When the LOCK
co(~led below
Q.
W’hat
surface of
A. This is :)
ilnd
coLJl
i~lfect how’ your c~\cn per-li)rrns.
Q.
Why
h~]ve
become
can
be
unlocks.
light goes
the
locking
causes the hair-like lines on the enameled
nlj
oven?
nor]nil]
condition.
i n: during cleaning. These I i
do 1 have ash
Ief’t
in m~ oven after cleaning’?
one clean
h~rd
progralnmed
off :Lnd
ternper~llure,
cycle.
to slide. wipe [he
before the
[he oven has
open the
rcsuliing fronl hc~itiny
nes
do
d~~or”.
no(
A.
p:lrt
01”
this oven. if
thoroughly
:Ihso] Lltc!y clean at’terw:lt”ds,
the oven
tilne the
Q.
What
during cleaning?
A. This is
Open the windows 10 rid the
until the o\en
ofi’
in
the
Q. 1s
the “crackling” or “popping” sound I bear
during cleaning normal?
A. Yes. This is
and coot
c Ieiln
Q. Should there be any odor during the cleaning’?
A. Yes, there
ctc:ln ings. F~li ture
ii tst) ci~usc a strong
rin$e
surf~lce i~nd d~~nl:lge rnet~l p:lrts
oven is
should 1 do if excessive smoking occurs
caused
the
disptily.
c[e~ln ~y~l~.
the
in:
during both the
i ng fu
nction~.
witt
y;~u
do usc
the o\en w
autonl;lticztl Iy
by
excessi\e
htis
cooled
Wipe up the
sound of the
be
tin
odor during the
to
wipe
out
odor
whc
thenl
:ind do not “
i[h w~~ter,
the residue
soil. Turn
~]nd
cooking :Ind
n c
wiping it
cleaned.
r“oonl
of
the
\~ord ‘.1 .OCK’.
excess s{)i
nlct:~t he:itin:
tirst i’ew
cxcessi IC
tc:Ln
i
ng.
c:[n sc:lr”
the next
the (J\cn
stnoke. }k’:lit
soil rn
t
:Ind rese[
off.
i\
ight
01-
Ctc)ttl.
Q.
Nly oken shel~es
the matter?
A. After
Q. ~IJ
A. Yes.
Q.
Can I cook food on the
ln:]n~ cte:inings.
IIleil” tuster :Ind becollle h:lrd
she t
tes
s] i de
with
cooking
o~cn shel~es
self-cie:in cJ/cle.
Attcr
l(J\c solne tusler :Ind discotor to ii
is
self-cleaningt)
do not
nlorc cilsit],
oil.
have become
Is this normal’?
the
se] l’-cte:in cycte.
the o\en shcl\es
cooktop
slid~ e:6$il?. YVhat
wilt tose
to St
ide.
To
nl:Lke
w i pe
[he
shett
suppor[s
gru~ af>ter
the stlct\es \k il
derp
while the oven
the
gr-:l!
is
the
t
Lolor.
24
——-————-.———-— —-.
——
—.——
—————-
Page 25

CA~
AND CLEANING
7
oper care
,tiill gi\e
these
sofe
tind proper maintenance.
and cleaning ure important so your range
you
efficient
directions
and satisfactory service.
c~rcfully
in
caring
for il to help assure
FOIIOW
Metal Parts
Do not use steel wool,
safely
clean
surfaces; wash, rinse and then dry with a soft cloth.
~brasives,
ammonia or commercial oven cleaners. To
Glass Window
To clean the outside of the window, use a glass
cleaner. Rinse and polish with
Do not allow the water or cleaner to run down
inside the openings in the top of the oven door
while cleaning.
a
dry cloth.
Lift-Up Cooktop
Clean the
cooktop often. Built-up
\i 1, especial Iy grease,
.ay catch fire.
To make cleaning easier,
the entire cooktop may be
lifted up and supported in
the up position.
tirea
under the
,,,:@,;;<
,&- j ,,,
~
@g)
,~-<~(;
,
y
,
. . . . . . . . . . . . . . . . . .
.\,
‘.
.
‘@?H-
a
BE SURE THAT ELBCTRIC POWER IS
OFF BEFORE CLEANING ANY PART OF
THE RANGE.
Painted Surfaces
Painted surfaces include the outside oven door, sides,
control panel and
and water or a vinegar and water solution.
commercial oven cleaners, cleansing powders, steel
wool or harsh abrasives on any painted surface.
Be sure all surface units are turned off before
raising the cooktop. Grasp the front sides of the
cooktop and
be removed before lifting, however, you may remove
one to make raising the cooktop easier.
After cleaning under the cooktop with hot, mild soapy
Water and a clean cloth, lower the cooktop. Be
not to pinch your fingers.
drtiwer
front. Clean these with soap
Do not use
lift. The surface units do not need to
careful
Control Panel and Knobs
[t’s a good idea to wipe the control panel after each
use.
Clean with mild soap and water or vinegar and
water, rinse with clean water and polish dry with a
soft cloth.
Do not use abrasive cleansers, strong liquid
cleansers, plastic scouring pads or oven cleaners
on the control panel—they will
A 50/50 solution of vinegar and hot water works well.
The control knobs may be removed for easier
cleaning.
Before removing the knobs for cleaning, please note
that the knobs on the left side and the knobs on the
right side
replacing the knobs,
proper placement.
are in the proper
check the OFF
OFF position. When
damage the finish.
position to
insure
To remove a knob,
pull it straight off the stem.
lf a knob is difficult to
remove, place a thin cloth
(like a
piece of string under and
around the knob edge and
pull up.
Wash the knobs in soap and water but do not do soak.
Avoid getting water down in to the knob stem holes.
handkerchiet~
-~-— “-~-.--—
~
c.
or a ‘
~’
6’
(C{)lltinltl,d n(?.rt IIclg(,)
.–—–—
/<;q’
)
~- _
—
25
Page 26

Broiler Pan and Rack
CA~ Am
(continued)
CLEANING
After broiling,
remove the
broi!er
pan and rack from
the oven. Remove the rack from the pan. Carefully
pour
Lhe
grease from the pan into a proper container.
Wash
and
rinse the broiler pan and rack in hot water
with a soap-filled or plastic scouring pad.
lf
food has burned on, sprinkle the rack with detergent
while hot and cover with wet paper towels or a dishcloth.
Soaking the pan will
remo\:e
burned-on foods.
Both the broiler pan and rack may be cleaned with a
cornmercial
oven cleaner.
Surface Units and Drip Pans
To clean the surface units, turn the control to the
highest
off any
CAUTION
● Be sure all the controls are turned to OFF and
“
● Do
c
*
Tb
I I)US[ bc
I.ift
and pull it out.
Do not lift the surface unit more than 1 inch.
[f you do, it may not lie flat on the drip pan when
you plug it back in.
Repeated lifting of the surface unit more than
1 inch above the drip pan can permanently
damage the receptacle.
settin& for a minute. The coils will burn
soil.
the surface units are cool before attempting to
remove them.
Do not immerse the surface units in 1
iquids
of any kind.
no(
clean the surface units in a dishwasher.
Do
no[
bend the surface unit plug
terrni nals.
Do not attempt to clean, adjust or i n any way repair
the plug-in receptacle.
remove a surface unit:
ro
remove the drip pans for cleaning, the surface units
removed first.
the surface unit about 1 inch above the drip pan
[m?:’~x:g
Do not store a soiled pan and rack anywhere in
the range.
Both the broiler pan and rack can also be cleaned in the
dishwasher.
Do not clean the broiler pan or rack in the
self-
cleaning oven.
To replace a surface unit:
●
Replace the drip pan into the recess in the
cooktop.
Make sure opening in the pan lines up
with the receptacle.
●
insert the terminals of the surface unit through the
opening in
=
Guide the surface unit into place so it rests evenly’.
the
drip pan and into the receptacle.
Drip Pans
Remove the surface units. Then lift out the drip pans.
For best results, clean the drip pans by hand.
Place
them in a covered container (or a plastic bag) with 1/4
cup ammonia to loosen the soil. Then scrub with a
soap filled scouring pad if necessary. Rinse with clean
water and polish with a clean
sof’t
cloth.
The drip pans may also be cleaned in the dishwasher.
Black drip pans may be cleaned in a
self-cleanin&
oven after they have been thoroughly rinsed.
However, self-cleaning them may
c~use
them
to lose their original luster and shine.
Clean the area under the drip pans often. Built-up
soil, especially grease. may catch
Do not cover the drip pans with foil.
fire.
Using foil so
close to the receptacle could cause a shock, fire or
damage to the ran&e.
26
Page 27

)ven Shelves
Clean the shel}es with a mild abrasive cleanser or steel wool.
clcalling,
To remove heavy, hurried-on soil,
scrubbing, wash with
NOT~J:
Howcvet-.
SI ide.
shelves
rinse the shelves with clean
so~py
w~ter, rinse and dry.
The
o\en
shelves may also be
they will darken in color.
Wipe the shelf supports
siide nlorc eosi Iy.
w~ter
soapy metal pads
cletined
lose
with
cooking oi I
and dry with a clean
nl~y bc
in
the
se]
f-cletining
their luster
find
become hard to
after
self-cleaning to make
used.
Lift-Off Oven Door
The oven door is removable,
but it is heavy.
help removing
door. Do
handle. This
to break or can cause
~
he door.
J
not
remove the door,
YOLI
may need
tind replacing the
lift the door by the
c~n caLlse the glass
damage
open it
to
a
tew inches to the special stop
position that will hold the door
open. Grasp firmly
on
each side
and lift (he door straight up and
off the hinges.
NOTk;:
●
Be
careful not to place hands between the h i
the oven door
fra;ne
as the hinge could snap back
nge
and
and pinch fingers.
●
While working i n the oven area. cover the hinges
with towels or empty paper towel rolls to prevent
pinched fingers and
chippin&
the porcelain enamel
on the frame.
To replace the door,
special stop position.
make sure the hinges are in the
Position
the slots in the bottom
of the door squarely over the hinges. Then lower the
door slowly and evenly over both hinges at the same
time. If hinges snap back against the oven frame, pull
them back out.
TO CLEAN THE DOOR:
Inside of the
●
Because the area inside the gasket is cleaned during
door:
the self clean cycle, you do not need to clean this by
and.
Any soap left on the I iner causes additional
.;tains
when the oven is heated.
● The area outside the gasket can be cleaned with a
soap-filled scouring pad.
● Do not rub or clean the door gasket—the
fiberglass material of the gasket has an extremely
low
oven door gasket is essential for energy-efficient
oven operation and
notice the gasket becoming worn, frayed or damaged
in
you should have it replaced.
NOTE: The gasket is designed with a gap at the
boltorn
Outside of the door:
“
Use soap and water to thoroughly clean the top,
●
Spillage of marinades, fruit juices, tomato sauces
“
Do not use oven cleaners, cleansing powders or
After
clolh.
After
oven.
resist~nce (o
uny
way or if it has become displaced on the door,
abrasion. An intact and well-fitting
&ood
baking results. If you
to allow for proper air circulation.
Inside Gasket
Gasket
Outside Gasket
sides and front of the oven door. DO NOT let water
run down through
openin&s
in the top of the door.
Rinse well. You may also use a glass cleaner to
clean the glass on the outside of the door.
and basting materials containing acids may cause
discoloration and should be wiped up immediately.
When surface is
coo],
clean and rinse.
harsh abrasives on the outside of the door.
Page 28

CAM
AND CLEANING
(continued)
Oven
(;
disconnect the electric power
l,igl~t
AIJTION:
Replacement
Before replacing your oven light bulb,
for
your range at the
main fuse or circuit breaker.
Be
sure to let the light cover and bulb cool completely
before removing or replacing them. When in use,
billb~ can
with
{ouching
light
“~he ~)ven light
cl ~\er
oven door,
become warm enough to break if touched
a
moist cloth or towel, When cleaning, avoid
warm light bulb with cleaning cloths if the
cover is
which is held in place with a wire.
rei~loved.
bulb is covered with a
if desired, to reach
the
removab]e
Remove the
cover easily.
glass
Iigh[
To remove:
● Hold your hand
under the cover
so
it
doesn’
t fall when released.
With fingers of
[P
w
‘,
(–;,
&
.//
)r
A
\\
the same hand.
firmly push back
the wire cover
holder. Lift off
the cover.
●
DO NOT REMOVE ANY SC: REWS.
● Replace bulb with 40-watt home
To
replace:
●
PI
ace
it into the groove of
b
N’
Wire Cover Holder
the
oppliance
1
igh{
receptacle. Pul I
bulb.
the wire forward to the center of cover until it snaps
in place. When in place, the
firmly. Be certain the wire
center
of the cover.
● Connect electric power to the range.
\vire
holds the cover
is
in the depression in the
Porcelain Enamel Cooktop
The
porcelain enamel finish is sturdy but breakable
if
misused. This finish is acid-resistant. However, any
ii~ idic foods
or
vlne!:ur) should
the finish.
... —. ——. -
~~~ )~Ien
. . .
ijo not
,\ny
The bake clement can be lifted gently to clean the
oven floor, If
around the bake element
element with warm water-.
sp i I led (such
not be permitted
fis
fruit juices, tomato
t(>
remain on
Heating Elements
clean the bake element or the broil element.
soit
witl
burn oft when the
spillovers,
residue or ash accumulate
etclnents are
&ently
wipe around the
heated.
tind
water or
h{~t.
If’ tic ids spill on the cooktop while it is
paptr-
towel or
~Ll!.t’:ice
has
ctolh
c[)oJed.
to wipe it up right away. When the
wash with soap
cleansing powders. Rinse well.
For
olher
spills such as fat smatterings. wash with soap
and water or
cooled, R
~=~
,
cteansing
insc wet
powders after
t. Polish with a dry
the surl’acc
cloth.
:::::,
~sq
‘~~
(
use a
dry
has
28
Page 29

QUESTIONS?
USE THIS PROBLEM
●
SOL17ER
PROB[,Ehf
“F-AND A
NUMBER..
FLASH ON DISPLAY
OVEN WILL
NOT WORK
OVEN LIGHT
DOES NOT WORK
FOOD DOES NOT
BROIL PROPERLY
FOOD DOES NOT
ROAST OR BAKE
PROPERLY
pos~l~L~ ~Ausk:
●
If
the time display flashes “F-and a number”. you have a function error code.
Press the CLEAWOFF pad. Allow oven to coo] for one hour. If the failure code
repeats, disconnect all power
●
The circuit
● Oven controls not properly set.
● Light bulb is loose or
●
Switch operating oven light is broken.
●
Oven controls not properly set. See the Broiling section of this guide.
●
Door not left i n broi I stop position.
● Improper shelf position being used.
● Food is being cooked on hot pan.
● Cookware is not suited for broiling.
●
Low voltage. See the Broi I
●
Aluminum foil used on the broiler pan rack has not been fitted properly
bretiker
i n your house has been tripped, or a fuse has been blown.
defecti
10
the range. Call for service.
\e. Tighten or replace.
Cal
I for service.
Sec
the Broiling Guide.
ing
section.
and slit as recommended.
● Oven controls not properly set.
●
She] f position is incorrect.
● Incorrect cookware or cookware of improper size is being used.
● Oven shelf is not level.
●
The oven thermostat needs adjustment. See the Adjust the Oven
Thermostat-Dc~ 1(
~[~ur$e~fsection.
SURFACE UN ITS
NOT FUNCTIONING
PROPERLY
CLOCK AND
MINUTE/SECOND
TIMER DO NOT WORK
●
Surface units are not plugged in solidly.
● Drip pans are not set securely in the
● Surface unit controls are not properly set.
● Make sure the electrical
plu&
is
cooktop.
plu&ged
into a live, properly grounded
power outlet.
● Check for power outage.
●
Review the Oven Control, Clock and Timer section of this guide.
([’otltitlLle(l
Ilc,.Yr
/J[/,q(,)
29
Page 30

●
(continued)
PROBLEM SOLVER
PROBLEM
“BURNING”
ODOR
EMITTING
OR “OILY”
FROM OVEN WHEN
TURNED ON
STRONG
ODOR
OVEN TEMPERATURE
TOO HOT OR TOO COLD
CONTROL BEEPS AFTER
ENTERING OVEN TIME
OR STOP TIME
OVEN NOT CLEAN
AFTER CLEAN
If you need more
CYCLE
help...call,
toll free:
GE Answer Center”
800.626.2000
consumer information service
POSSIBLE CAUSE
●
This is normal in a new oven and will disappear in time. To speed the process,
set a self-clean cycle lasting for a minimum of 3 hours.
See the Operating the Self-Cleaning Oven section.
●
An odor from the insulation around the inside of the oven is normal for the first
few times the oven is used. This is temporary.
● Oven thermostat needs adjustment. See the
Do It
Y(~ursevseCtion.
Adju:jt
the Oven
Thermostat—
. This is reminding you to enter a bake temperature.
● Oven controls not set properly.
●
Heavily soiled ovens require 3 Y? to 4-hour clean time.
● Heavy
spillovers
should be cleaned up before starting clean cycle.
30
Page 31

Wdll
Be There
GEAnswer Center@
800626.2000
In-Home Repair
Semice
800-GEXARES(80W32-2737)
For Customers With Special Needs...
800.626.2000
Semice
Contracts
80&626-2224
YOLL
c:tn h:~ic
,tf’lcl- }’(
In
effect ;Ind ~ou”
)OLI
‘I-C ;lSSllrCd
Parts
I he secure tkeling
)LIr
mr;~l’r-:ul[}’
expi[-cs. Purchase t~
11 rccei\e ~1 subs{
of f’11 tUr~
andAccessories
80@626-2002
[ndividuds
I h;l~’e
.eir tl( )lI1e.
47,()()()
!’,lll~ ~,~l]-,-;,,] r t;cl. V’ l.S,\,
I
IL’ :L(’L’(’[)1
qualified to service their
needed
par[s...;ind idl (1E
~hc
C’(I
p~lrls
~;~
()1”
pilr’ls
ttl:lt (;E (Uorlsumer
(;E COIltr~Cl
arrliit]
discc)uu t.
S~117~C~ ilt
access(~l’ies sen [ dir-ectl)’
Syslem pro~’ides
(;enuinc
h4itstec(;;lld
t.od~)”S priC~S.
o-
appliances
:lccess to
Rcrrcw~~l l’:lrl.s :tr-e
;lncl
l~isco~er
Service will
while
f$~ilh
a
mull
I
()
()\er’
C2Ll”d
S
still I>e
there
yr)ur” w:~rr~lrlty’
ipte-ye:il-
User maintenance instructions contained in
cover procedures intended to be performed by any user.
Other servicing
service personnel. Caution must be exercised, since
improper servicing may cause unsafe operation.
is
stitl
con[ract,
generdy shodd
&is
be referred to
guide
qu~fied
Page 32

—
YOUR GE ELECTRIC RANGE
WARRANTY
WHAT IS COUERED
WHAT IS NOT COVERED
Staple sales slip or cancelled check
here. Proof of original
is needed to obtain service
II
FULL ONE-YEAR
For one year from date of original
purchase, we
charge, parts and service labor
your home to repair or replace
any part of the range that fails
because of a manufacturing defect.
● Service trips to your home to
teach you how to use the product.
Read your Use and Care materials.
If you then have any
about operating the product, please
contact your dealer or our
Consumer Affairs office at the
address below, or call, toll free:
GE Answer
800.626.2000
consumer
. Improper
WARRANTy
will provide, free of
-
queslions
Cente@
informaficn
installal,
service
:>n.
in
under
purchase
warranty.
date
***********************
This warranty is extended to the
original purchaser and any succeeding
owner for products purchased for
ordinary home use in the 48 mainland
states, Hawaii and Washington,
D.C.
In Alaska the warranty is the same
except that it is LIMITED because you
must pay to ship the product to the
service shop or for the service
technician’s travel costs to your home.
All warranty service will be provided
by our Factory Service Centers or by
our authorized Customer
Care@
servicers during normal working hours.
Should your appliance need service,
during the warranty period or beyond,
call 800-GE-CARES
If you have
an installation problem,
(800-432-2737).
contact your dealer or installer.
You are responsible for
providing
adequate electrical, gas, exhausting
and other connecting facilities as
described in the Installation
Instructions provided with the product
● Replacement of house fuses or
resetting of circuit breakers.
● Failure of the product if it is used
for other than its intended purpose
or used commercially.
● Damage to product caused by
accident, fire, floods or acts of God.
WARRANTOR IS NOT Responsible
FOR CONSEQUENTIAL DAMAGES.
~~
Part No.
P,, h N(, 49-8592
..- . .- -—
1
2 95 (:G
Some slates do not allow
Imay not
apply 10 you This warranty gives you
To know what your legal
nghls are in your slate.
Manager—Consumer Affairs, GE Appliances, Louisville, KY
——
.ecycledpaper
16.1D2966P115
1
so
the excluslon
or Ilmitaliofl of incidental or consequeflllai damages,
Specihc
legal
consult
your local or stale consumer
and you may also have other
nghls,
attalrs
[he
rights
ofllce or your slate’s Attorney General.
Warrantor: General Electric Company
If further help is needed concerning this warranty, write:
above
IimitatlOn
or
which va~ from slale to slale.
exclos!on
40225
Prinlt:d ii, l.a Fayelte, GA
JMP28
JMP29
JMP31
 Loading...