

Page 1

Page 2
Read~h!$ Use’ and ~a@fkmk
Takethe time to read this book and learn how to
enjoYyour now Microwave CookingCenter.It contains detailed operating jnstructjons and recommendedmaintenance, aswell ashandytips to help
you gain maxjmum benefits from your Microwave
Cookhg Center.Onceyou havereadthe book, keep
it handy to answer any questions you may have.
if you hav”eany additional- questions concerning
the operation of your Microwave Cookhg Center,
write—includin your phonenumber—to:
IF YOURECEIVEDA DAMAGEDCOOKINGCENTER,
immediately contact the dealer (or builder) from
whom you purchased it. They have beeninformed
of the proper procedure to take care of such mat-
ters and can handleit for you.
onsumerAffairs ~
1!
GeneralElectric Company
ApphaneePark
Louisville, Kentucky 40225
RegisterYourCookingC%naer
it is important that we,the manufacturer, know the
location of your Microwave Cooking Centershould
aneedoccur for adjustments.
Pleasecheck with your supplier to be sure he has
registered you asthe owner; also sendinyour Purchase Record Card. If you move, or if your are not
the original purchaser please write to us, stating
model and serial numbers. Thisapyllancemustbe
registered.Pleasebe certainthatit is.
Write to:
GeneralElectric Company
Range Product Service
AP2-21O
Appliance Park
Louisville, Kentucky 40225
RecordModelandSerialNumbers
YourRangehas a nameplate on which is stamped
themodeland serial numbers. To locate nameplate,
openovendoor and look at top of ovenopening.
Modelandserial numbers are also onthe Purchase
Record Card which came with your Microwave
Cooking Center. Recordthe numbers inthe spaces
provjded below.
Pleaserefer to both model and serial numbers in
anyfuture correspondence or product service calls
concerning your Microwave Cooking Center.
ModeliNumber
SerialNumber
DatePurchased
KEEPPURCHASERECEIPTWITHTHISf100KTOESTABLISHTHEWARRANTYPERIOD.
,.
B63fore‘YouCkilfor Servkxx
Check“Common Problems” section, (Seepage30.)
{t lists many minor causes of operathg problems
that you can correct yourself and may save you an
unnecessary service calL
H ‘Ycbul+!eecl Serv!ce
In many cities, there’s a General Electric Factory
ServiceCenter. Call and a radio-dispatched truck
will cometo your homeby appointment—morning
or afternoon. Chargethe work, if you like. All the
centers accept both Master ChargeandWsacards.
Orlook for theGeneralElectric franchised Customer
Care@servicers. You’ll find them in the Yellow
Pagesunder“GENERALELECTRICCUSTOMERCARE@
SERVICE.” or “GENERAL ELECTRIC–HOTPOINT
CUSTOMERCARE@SERVICE.”
lfyoune~dservicoliterature,patislists,partsor -
series,contact oneofthe Factory Servjce Cent ,a
franchised CustomerCare@servicer or your General
Electric dealer.
Ext6ndedServiceContracts:Theterms of your warranty provide free service covering fajlures dueto
manufacturing defectsfor adefinite period of time.
After this warranty expires you may purchase an
ExtendedService Contract which will enableyou to
budget you.rservice needs. This coverage beyond
warranty IS available from our Factory Service
Centersandfrom manyfranchised Customer Care@
servicers. It is a good idea to apply for this coveragebeforeyour warranty expires.
Stepsto FollowforFWtherHelp
First,contact the people who serviced your microwave oven, Explain why you are dissatisfied. In
most cases,this will solve the problem.
Next,if youarestill dissatisfied, write all thedetails–
including your phonenumber—to:
Manager,ConsumerRelations
GeneralElectric Company
WCE-312
Appliance Park
Louisville, Kentucky 40225
I%ally, if your problem is still not resolved, write:
MajorAp IianceConsumerAction Panel
Chicago,Illinois 60606
This paneliknown asiMACAP, isagroupofl ‘
pendent consumer experts under the sponsor
of several industry associations. Its purpose is o
study practices andadvise the industry of ways to
improve customer service. Because MACAPis free
of industry control andinfluence, it is able to make
im artial recommendations andconsider eachcase
f
in ividually.
1
m
.
!V20North acker Drive
.
Page 3
—
Pilliii&Wit shi4i;~Hthewaytothe shelfstopisi“ co.nw
* ~
foixh=R is alsdd ‘we~authm.%gain$t-‘burnsfro,.titdicbiiig (@,:
Page 4
—
Don’t heat unopened food containers in the oven. Pressurecould build up and
the container could burst, resulting in injury.
When using cooking or roasting bags in oven, follow manufacturer’s directions.
Do not store flammable materials in the ovens.
DO NOT USE WATER ON GREASE FIRES.
When
cookingin the oven, flame can be smothered by completely closing door
and turning OVEN SET to OFF.
Don’t use aluminum foil anvwhere in the oven except as described in this
booklet. Improper instailatio~ could result in a shock,”fire hazard, or damage
to the range.
Self-CleaningOven. ..
Do not clean doorgasket.The door gasket is essential for a good seal. Care
should be taken not to rub, damage, or move the gasket.
Do not use oven cleaners. No commercial oven cleaner or oven liner protectiv
coating of any kind should be used in or around any part of the oven.
Clean only parts listed in this Use& Care booklet.
Before self-cleaning the oven, remove broiler pan and other utensils.
Listen for fan—a fan noise should be heard during the cleaning cycle.
—.
If not,
call aserviceman before self-cleaning again. -
MicrowaveOvene . .
0 Cooking utensils may become hot because of heat transferred from the heated
food, Pot holders may be needed to handle them.
Also, under some cooking operations the shelf can become too hot to touch.
THEREFORE, DURING AND AFTER COOKING, CAUTION SHOULD BE EXERCISED IN TOUCHING THE SHELF.
o Remove wire twist-ties on
oven.Twist-ties can cause
paper and plastic bags before placing in microwave
heating of the bag under certain conditions, and can
cause fire.
If you needservice.. .
e
Read “Before You Call for
●
Don’t attempt to repair or replace any part of yourrange unlessit is specifically
recommended in the book. All other servicing should be referred to a qualified
technician,
*
Disconnect range at range circuit breaker or main fuse before performing
service.
Product Service” at rear of book,
3
Page 5
1,. Cooking utensils may become hot because
ofheat transferredfromtheheated food.This
is especially true if plastic wrap has been
covering the top and handles of the utensil.
Pot holders may be needed to handle the
utensil.
2. Sometimes, the oven shelf can become too
hot to touch. 13e careful touching the shelf
during and after cooking.
3. Don’t heat unopened food containers in
the oven. Pressure building up can cause the
container to burst, resulting in injury.
4. Don’t defrost frozen liquids—especially
rbonated ones—
container is opened, pressure can build
This can cause the container to burst, resuRing in injury.
5. Don’t overcook food excessively. Food
dries out, and can even ignite in some cases.
6. If food should ever ignite: Keep the oven
door closed. Turn off the power immediately:
turn timer to OFF or disconnect power cord
or shut off power at the fuse circuit breaker
panel.
7. Remove the temperature sensor from the
oven when not using it to cook with.
leave the
sensorinsidethe ovenwithoutin-
in the oven. Even if the
UP.
If you
sertingit infoodorliquid,andturnonmicrowaveenergyitcancreateelectricalarcingin
theoven,anddarnageovenwalls.
S. Remove wire twist-ties on paper and plas-
tic bags before placing in oven. Twist-ties
sometimes cause bag to heat, and may cause
fire. Foods in paper or plastic bags should
only be heated for short periods of time.
9. Boiling eggs (in or out of shell) is not rec-
ommended for microwave cooking. Pressure
can build up inside egg yolk and may cause
it to burst, resulting in injury.
10. Do not pop popcorn in your microwave
oven unless in a special microwave popcorn
accessory or unless you use popcorn in a
package labeled for microwave ovens. Because of the heat generated without these
precautions, the container could catch fire.
11. Use metal only as directed in cookbook.
Metal strips as used on meat roastsarehelpful in cooking food when used as directed.
Metal trays may be used for TV dinners.
However, when using metal in the microwave
oven, keep metal at least l-inch away from
sides of microwave oven.
12. Do not operate the oven while empty to
avoid damage to the oven and the danger of
fire. If by accident the oven should runempty
a minute or two, no harm is done. However,
try to avoid operating the oven empty at all
times-it saves energy and prolongs life of
the oven.
13. Foods with unbroken outer “skin” such
as potatoes, hot dogs or sausages, tomatoes,
apples, chicken livers and other giblets, and
eggs (see above) should be pierced to allow
steam to escape during cooking.
14. “Boilable” cooking pouches and tightly
closed plastic bags or plastic wrap tightly
covering containers should be slit, pricked or
vented as otherwise directed in Cookbook.
If they are not, plastic could burst during or
immediately after cooking resulting in injury. Also, plastic storage containers should
be at least partially uncovered because they
formsuch a tight seal.
IG. DOnot use your microwave oven to dry
newspaper. If overheated, it can
catchfire.
16. Whencookingpork eitherconventionallyor
in the microwaveoven,followourdirections
exactlyand alwayscookthe meatto at least
170’.Thisassuresthat, intheremotepossibility
that trichinamaybepresentinthemeat,itwill
bekilledandmeatwillbesafetoeat.
4
Page 6
?0
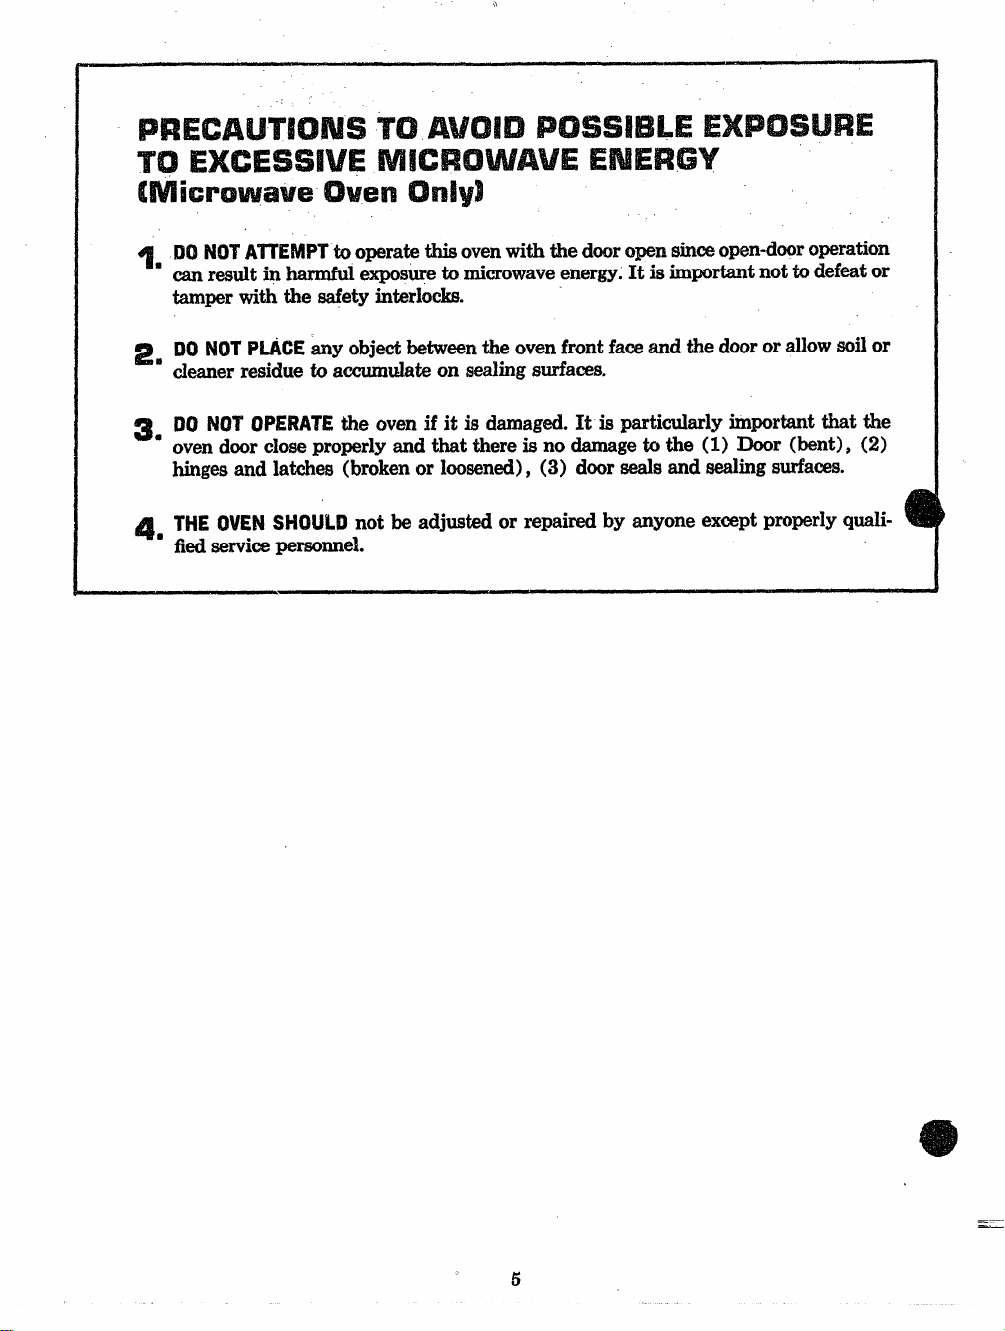
TO
I DO NOT A~EMPTho~ratiti oventi**edw~OW~ s~@OWn-d@r operation
‘ cm resmlt in
tamper with the safety interlocks.
~ 90 NOTPLACE anyobjectbetween theovenfrontfa@ andthed@roral~ow soil or
cleanerresidueto amunulateon sealingsurfaces.
“
3 DONOT’OPERATEthe ovenif it is damaged.It is particularlyimportantthat the
“ ovendoorcloseproperlyandthat thereis no darnageto the (1) Door (bent), (2)
hingesandlatches(brokenor kmened), (3) doorsealsand sealingsurfaces.
a THEOVEN SHOULD not be adjustedor repairedby anyoneexceptproperlyquali-
‘ fiedservicepersonnel.
harmful exposure to rnicrovvave energy. It is important not to defeat or
———
—
Page 7
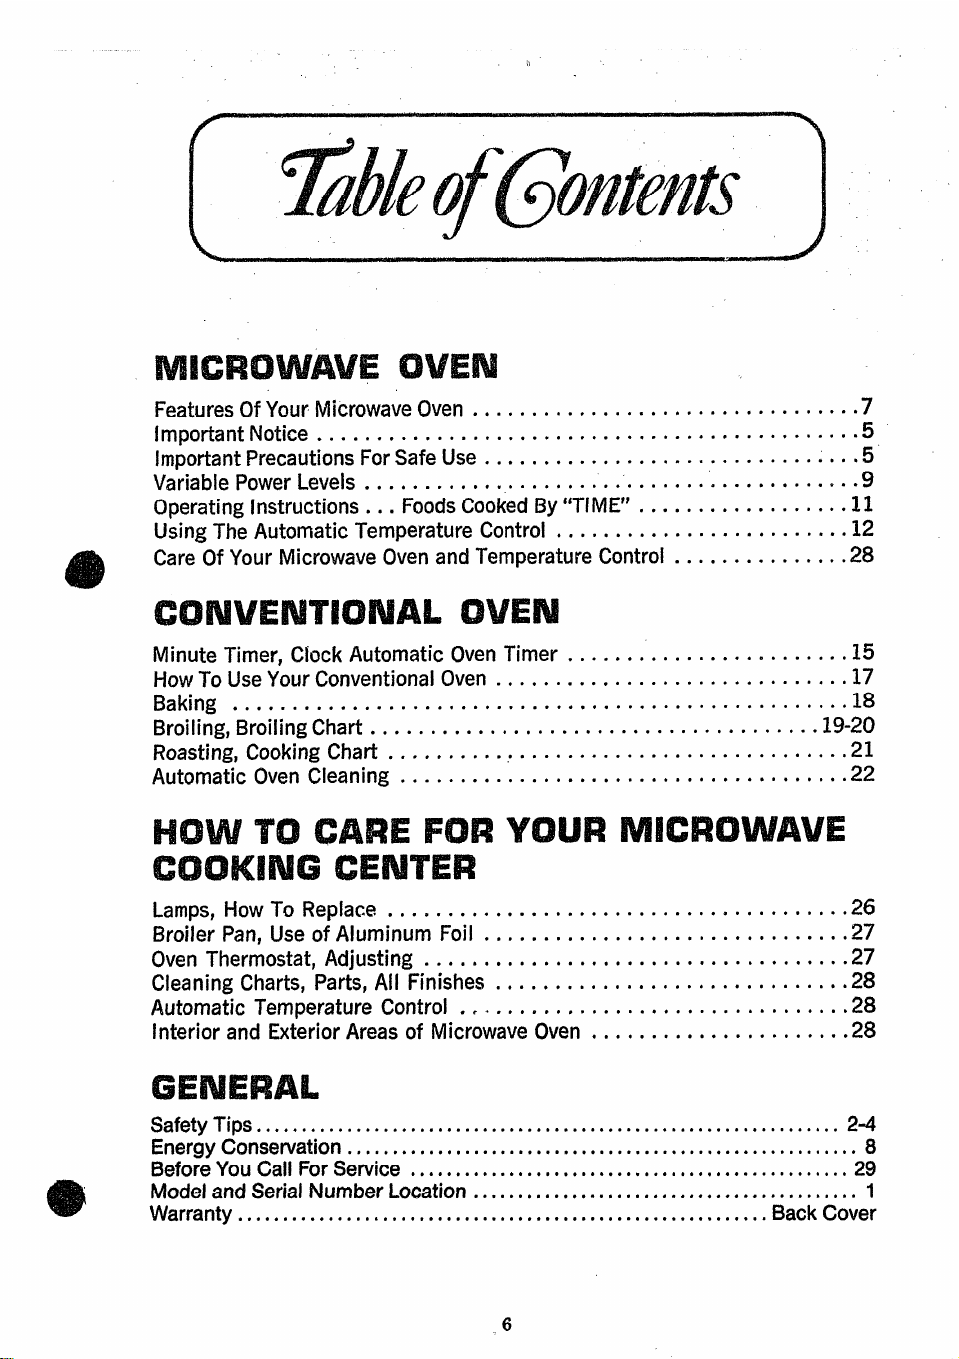
Features ClfYour Microwave Oven . . . . . . . . . . . . . . . . . . . . . . . . . ........7
Important Notice . . . . . . . . . . . .
● . . . . . . . . . . . . . . . . . . . . . . . . . . ● . . . . ~● 5
ImportantPrecautions ForSafe Use . . . . . . . . . . . . . . . . . . . . . . . . . . . ....*5
Variable Power Levels . . . . . . . . . . . . . . . . . . . . . . . . . . . . . . .=. ... ”9.9”.9
Operating Instructions
.. .Foods CoOkedBy’’TM?’ . . . . . . . . . . . . . . . ...~l
Using The Automatic Temperature Control . . . . . . . . . . . . . . . . . . .......12
Care OfYour Microwave Oven anciTemperature Control .. .. ... ... .....2$
Minute Timer, Clock Automatic Oven Timer . . . . . . . . . . . . . . . . . . . . .. ..15
How To Use Your Conventional Oven . . . . . . . . . . . . . . . . . . . . . . . .......17
Baking . . . . . . . . . . . . . . . . . . . . . +. . . . . . . . . . . . . . . . . . . . . . . .......18
Broiling, Broiling Chart . . . . . . . . . . . t . . . . . . . . . . . . . . . . . . . . . . ....19-20
Roasting,
~~okingchart.......................................21
Automatic Oven Cleaning . . . . . . . . . . . . . . . . . . . . . . . . . . . . . . . . . . . t ..22
Lamps, How To Replace . . . . . . . . . . . . . . . . . . . . . . . . . . . . . . . . .......26
Broiler Pan, Use of Aluminum Foil . . . . . . . . . . . .......9. . . . . .......27
Oven Thermostat, Adjusting . . . . ~ . . . . . . . . . . . . . . . . . . . . . . . . .......27
Cleaning Charts, Parts, All Finishes . . . . . . . . . . . . . . . . . . . . . . . .......28
Automatic Temperature Control . . . . . . . . . . . . . . . . . . . . . . . . . . . . . . . ..28
Interior and Exterior Areas of Microwave Oven . . . . . . . . . . . . . . . . . . . . ..28
Safety Tips *.*** *.. ... .*. ..*** ..*. ... ..o. ..*. *.. o*e.....*..*..*.*.*......*..
Energy Conservation
... ***** .,. o,. .*. ***** .., *.o*o, *.. *.. .o. .*. *.. .**. o*4*o** 8
24
Before YouCallForServiceo.*..,. .., .*. .*, ... o* *e.*., ..,, **,, .............. 29
ModelandSerialNumberLocation
Warranty
*****..e*o.c..*.. *o..*o*.o.o.*.*** ****. .*, ..*. .e*..***o.*o.
. . . . . . . . . . . . . . . . . . . . . . . . . . . . . . . . . . . . . . . . . . . 1
BackCover
Page 8
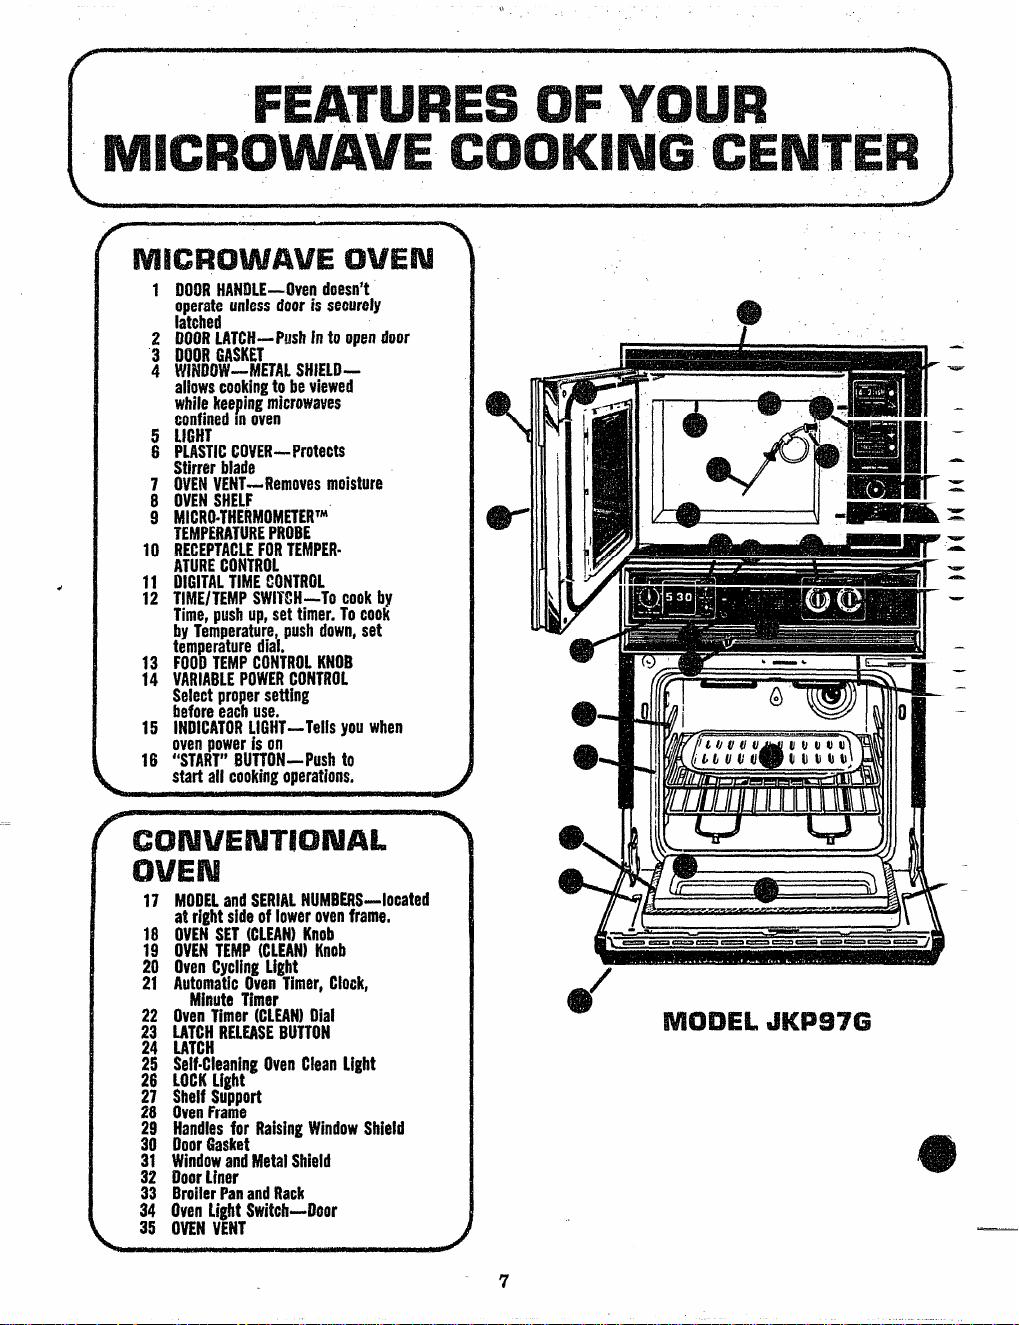
1 DOORHAN!lLE-Ovendossn’t
operateunlessdooris securely
latched
2 OOORLATCH-Pushinto Ope~$OOr
00011GASKET
3
4
WNWIOW—METALSHIELD–
allowscookingtobeviewed
whilekeepingmicrowaves
confinedm oven
5 LIGHT
6 PLASTICCOVER--Protects
StirrerMade
7 OVEldVEtlT-Removes moisture
8 OVENSHELF
9 MICRO-THERMOMETER’M
TEMPERATUREPROBE
10 RECEPTACLEFORTEMPER-
ATURECONTROL
11 DIGITALTIMECONTROL
12 TIME/TEMPSWITCH-To cookby
Time,pushup,settime~Tocook
byTemperature,pushdown,set
temperaturedkl
13 FOODTEMPCONTROLK?lOB
14 VARIABLEPOWERCONTROL
Selectpropersetting
heforeeachuse.
15 INDICATORLIGHT—Teiisyouwhen
ovenpowertson
16 “START’’BUT?ON-push to
startaiicookingoperations.
,1
I
*—
—
.
.
-
-
e-
w
m
.
—
—
—
<
17 MODELandSERIALfdUMBERS-located
atrightsldeof lowerovenframe.
18 OVENSET(CLEAN) Knob
19 OVEN TEMP(CLEAN)Knob
20 OvenCyclingLight
21 AutomaticOvenTime~ Clock,
MifiuteTim@r
22 OvenTimer(CLEAN)Dial
~? ~~~~RELEASEBUTTON
25 Seif”CleaningOvenCieanLight
26 LOCKLight
27 ShelfSupport
28 OvenFrame
29 Handiesfor RaisingWindowShield
30 Ooorttaskd
31 WindowandMetaiShieid
32 DoorLiner
33 BroilerPanandRack
34 Oven LightSwitch-Door
35 OVENVENT
7
.-
Page 9
L Use properpowerlevel as recommendedand IN NOT OVERCOOK. -
2. Try toavoidoperatingtheovenemptyat all times—
termlife ofoven.
1. Preheatthe ovenordyw-hennecessary.Mostfoodswill cooksatisfactorilywithoutpreheating.
If you find preheahn Mnecessary,keep an eye on the indicator1ight,and put foodin the
oven promptlyafter
AlwaysturnovenOFFbeforeremovingfood.
.
3. Duringbaking,avoidfrequentdooropenings.Keepdooropenas shorta time aspossiblewhen
it is opened.
4. Forseif-cleaningoven,besureto wipeup excessspillagebeforeself-cleaningoperation.
5. Cookcompleteovenmealsinsteadof justone fooditem. Potatoes,othervegetables,andsome
dessertsWWcooktogetherwitha main-dishcasserole,meatloaf,chickenorroast.Choosefoods
thatcookat thesametemperaturein approximatelythesame time.
6. Use residualheatin ovenwheneverpossibleto finishcookingcasseroles,ovenmeais,etc.Also
addrolls orprecookeddessertstowarmoven,usingresidualheat to warmthem.
&e light goes out.
savesenergyand alsoensuresgoodlong
Self-cleaningovenshelpconserveenergysincetheirspecificallydesignedinsulationsys-
tem meanslesselectricity(than non self-cleaningovens) is necessaryduringnormal
bakingand roasting.In fact,enoughenergyis savedthroughouta year’stimeto payfor
theaverageenergycostsusedinautomaticallyself-cleaningtheovenoverthe sameperiod
of time.
8
—.
Page 10

.
-
,,
.,
Yournewvariablepowermicrowaveovenallowsyou a completeselectionof microwave
powerlevelsfor cookingversatility.
The VariablePowerControlis marked with 10settings,whichhave been used in testing
recipesavailablein your newMicrowaveOven CookBook.However,you canadjust the
powerlevelto selectsettings betweenthe numbersmarked on the control,to fitthe type,
amount and kind of food you are cooking.In this way,you,the user,havecompletecontrol overthe amount ofmicrowavepowerused forcookingyourfood.And,youhaveflex
ibilityto cookall foodtypes,becausepowercan be adjusted. Do use your CookBookas a
guideto excellentmicrowavecookingresults.
Use the 10 settings on your Variable Power Controlin some of the many wayslisted
below:
WTTlh!G ~~ (High or “Full On” Power):
Boiling candy, puddings and sauces, cooking small to medium-size vegetables, pastry shells,
chicken pieces, fish, hamburgers, bringing to boil soups, stews and simmered-type meats.
Also, cooking baked-type fruits such as apples, beverages, many moist cakes and bar cookies
such as brownies, appetizers and fast melting of butter.
Partial cooking of delicate foods, reheating leftover refrigerated foods (individual portions or
plates), cooking some pie fillings, fast defrosting very small foods such as individual rolls or
doughnuts.
W1’TNG$ ~~~ (Medium High)
Reheating larger portions leftover refrigeratedfoods, reconstituting TV dinners and some other
frozen foods, some cakes made from a mix, some large whole vegetables such as broccoli spears.
SETTINGS (Medium)
Cookingcustard-type vegetable casseroles, whole head of cauliflower, omelets, commercially
frozen souflies, some cookies, finish cooking fudge, bread pudding and other dessert custards,
drying homemade noodles, and roasting some meats with automatic temperature control, ineluding “Carefree Roasting.”
9
Page 11

VariablePowerCooking(’continued)
,’
,“
$~~~~t!ti~f!!h~
$etting 3 is used for most defrosting. Also, melting chocolate, making icings aridgkxzes,cheese
*e, roasting some meats with automatic temperature control, including some “Carefree
Roasting.” Also, de~icde sauces, finish cooking some stews and soups, simmering dried peas
and beans.
Wll!l(i q
Soften butter to spreading consistency, raising yeast doughs, keeping heated foods warmu~ to
one hour.
(Low)
(Vi/arm)
‘!
The variablepowercontrol for your microwaveovenspecifiesSetting 3 (LOW) as De-
frost. For most defrostingof normal size foods,this setting givesbest results.
However,when defrostingsmall foods,such as a singlefrozendoughnut,sweetroll,a few
hors d’oeuvres,one or two frankfurters, a higher power level may be used becauseof
these small foodamounts Microwaveenergy can reach all inner and outer areas at the
sametime thus, settings 8-9may often be used with very goodand quick results.
Foodskept in Frozen Food Storage Compartment at the top of somesingledoorrefrigerators are at higher temperatures than most food freezers.These foodsmay take less
time to defrostthan timesgivenin the cookbook.
In defrostingfroxenfoods,our HomeEconomistsnoticeda definiterelationshipoffreezer
temperature to defrostingtime. That is, foodsdefrosted fromfreezersset at coldestset-
tingstook longer to thaw than foodsfromfreezersat middle or high settings.DEFROSTING TIME MAY VARYACCORDING TO THE FREEZER TEMPERATURE AT
WHICH THE FOOD WASSTORED.
All
1, Steam or vapor
the door,
2, Light reflection
case.
escaping from around
around
are normal with your microwave oven:
3. Dullthumpingsoundwhile cookingat
powerlevelsotherthanhigh.
door or outer
4. Flickering light, under iow voitage
conditions.
10
——.—.———————
Page 12

MICROWAVE OVEf4
The operatinginstructionsbelowtell youhowto start, interrupt and stop cookingin the
oven.While you are reading these instructions why not make &cup of coffeeor other
hot beverageas you learnto use the controls?Use a plastic-coatedpaper cup for hot
drinks,or pottery
a teaspoonoffreezedriedcoffee.Removespoon.
Plainfood(w cupofcMw?)in mm.OvenMe-
riorlightcomesonautomaticallywhen dooris
open. C1oseovendoor; it Iatchesautomatically.
SelectPowerSetting.Seerecipe for suggested
powerlevelsfor foods.For your cup of coffee,
set at SETTING 10 (HIGH).
SWW TIMWTEIWsetting.For your cup of
3
*coffee,set switch to TIME by pushing Time/
Temp Switch up. SEE SPECIAL OPERATING INSTRUCTIONS PAGE 13.
ordinacupnotdecoratedwithmetal.Fill cup ~ fullofwaterandadd
SetlfimeControl
4
~ fee). Digital timer goesup to 59 minutes and
59 seconds.Wheel at left of time~sets!inmements of 10 minutes; knob at right of timer
sets minutes and seconds.To set minuteknob,
grasp knob and push in. Turn to desiredtime
setting.Timercanbe reset duringcookingif
needed.
PushW’ART’Sbutton.When
5
~ ~tefior
andanindicatorlightcomesonto tell youoven
is operating.
Thetimerindicatormovestoward“(Y’onIywhen the ovenis cookingor defrostingwith
microwaveenergy.
Whenthe timerreaches“O,”a bellwillsoundto tellYOUthat cookingis completedand
the power,the indicatorlight,interiorlightandfanare shut offautomatically.
Remember
ingstops,thetimerstopsandovenindicatorlightgoesout.WhenyoucIosethedoorand
push“START” button again,cookingresumeswhereyouleft off!
lightcomeson,a fandarb to opepa~
. . . ifyouopenthedoorbeforethe timerhasreached“0,” cookingordefrost-
(1$4 to l% minutes for cof-
ovenis cooking,
11
Page 13

HANDLE
. cp’3~E
SENSOR
/
CLIP
The temperature control isdesignedto help make your microwavecooking moreaccu-
te and requiring lessattention for appropriate foods. Up to now, microwavecooking
as been done by TIME. Now you can cook many foods to a pre-set TEMPERA-
TURE, and be assured that they areas hot as you want them to be for serving.
See page 14for many foods recommended for cooking with your automatic tempera-
ture probe. Page 14also lists foods not recommendedfor use with the probe.
In generalinsert probe (sensor end) into
centermostpart offood,positioningas directed in recipe.Insert the probeat least
1-inchinto the food.
Place food with probe into oven.Aswith
anymetalusedinmicrowaveoven,hesure
probeisat leastl-inch awayfromsidesof
oven.
Insert cable end into receptacle on oven
wall until “seated,”
BE SURE CABLEEND IS ATTACHED
SECURELYTO OVENRECEPTACLE.
If it is not attached securely, buzzerW “
sound when “Start” button is premed,as
a reminderto securecableend to ovenre-
I
ceptacle.
Use clip on cable to loop cable where ap-
propriate. Loopingcablenot onlycontrols
length of cablebut also suppliesmorestability of probe ~ food (helps prevent
probe slipping in food).
firmlyto insureproperlatching.
Closeovendoor
12
—————
Page 14

MICROWAVE OVEN
NOTE:
Set oven controls, followingrecipeinformation in special section for Automatic
Temperature cooking, located in back
pages of Cook Book,which accompanies
your
oven.
a.
Set powerlevel.
h.
Set TIME/TEMP switchto TEMP
(push stitch down) and dial fin-
ished temperature followingrecipe
information. (NOTE: If the actual
temperature offoodin ovenishigher
than the temperature you dial, buzzer willsound when ‘%TART” button is pressed to tell you of this
condition. Check temperature on
dial to be sure it is set correctly. If
not, reset. If so, then food in oven
has already reached or exceededde-
sired finished temperature . . . n
further heating needed!)
c.
Push “START” button.
When preset internal temperature is
reached,ovenautomaticallyturns off,and
a buzzer sounds to tell you foodis done.
Open oven doorto stop buzzer.Remove
cableend of controlfromreceptacle,then
remove food and temperature probe
together.
So that you can plan an approximateservingtime, rwipes for using temperature
probe giveboth temperatureto set and approximate cookingtime.If buzzersounds
unusually early, it may be that probehas slipped out of place in cooking.(This
can happen with any food thermometer). When this happens, reposition thermometer and continue cooking.To determine actual cooking temperature of
food,turn TEMP control dial to lowertemp setting until buzzersounds.
13
Page 15

MICROWAVE OVEN
Casseroles-150°-1600 internal temperature gives best doneness on mixture of precooked
1.
foods heated together into a main dish. Some other casseroles and main dishes starting from
raw ingredients may also be cooked.
Reheating leftovers-this type of food is excellent to heat with temperature probe because
2.
often the amount of leftover
ing to a preset temperature (usually 140 to 155°) eliminates the guesswork.
Plates of Food—in g~neral,p!ace ternperatur6probe in largest piece of food, then coverplate
3.
with wax paper (or hghtly with plastic wrap). A preset temperatureof 150to 160°gives piping hot food.
4.
Beverages and soups—use clip on cable of probe to help stabilize probe in liquids. A preset
temperature of 130° is “warmto drink,” about 170° is “steaming hot.”
Beef, lamb and ham loaves—be sure to place probe as horizontally as possible, and use clip
5.
tn stabilize probe in meat mixture.
For best results, consult meat loaf recipes in cook book and do not exceed total weight of
meat. A good rule of thumb to follow in preparing meat loaf mixtures is to use 1 cup liquid
(milk, water or juice such as tomato) to l% total pounds ground meat.
6.
Roasts-carefree microwavemany roasts. Very specific instructions are included in Cookbook.
7,
Di~s—hot dins area popular appetizer. An internal temperature of 90-130° (depending on
th&ingredien~) is ju~t;ight to-~erveguests.
foodisnot known,therefore, the to cook is only a guess. Cook-
—
Stewing,simmeringandcandymaking-this typeofcookinginvolvesbringingfoodtoa boil-
1.
ingor simmeringtemperatureandholdingit at that temperaturefora longperiodoftime.
Delicatebuttericings,icecream,frozenwhippedtopping,etc.
2.
—thesesoftenrapidlyat warm
temperatures.Lowestsettingon temperaturecontrolis90°.
Manyfoodsin the frozenstate-because temperatureprobeshouldnotbeforcedintorodr-
3*
hardfoods,it couldbreak.However,afterdefrosting,manyconveniencefoodsmaybeheated
withthe probeto the precisetemperatureforserving.
Individualfoodscookedin batches-in cookingwithmicrowaveenergy,differencesfromone
4.
foodh another,evenof thesametypeof
food canresultin different%nokingtimesoffoods
inthesamebatch.Avariationinsize(suchas incupmkes,sandwiches,etc.) ormoisturecon-
tent (suchas in potatoesandothervegetables)cahcausevariationin cookingspeed.Temperature robein onefoodina batchrnightnotcorrectlyindicateinternaltemperatureofa.11
foodscoo ed together.
Starchyvegetables-potatoeswhichcookto steamyhot timperatires tend to stickto tem-
5.
i
peratureprobedueto starchynatureofinterior.(Cleanimmediatelywithsoapycloth,then
rub lightlywithplasticscouringball,if necessary.)
Battersand doughswhichare baked. This type of food shouldbe observedwhencook-
6.
ingto bestjudgewhendone.Also,periodicturningofthedishisusuallyrequiredon these
delicatefoodtypes.
Page 16

CONVENTIONAL COOKING: TIMER
MINUTE
TIJllpius
CLEA
+DIAL
7
13igkal Clock ad! Mha9dte ‘Timer
E31G#TALCLOCK
‘IOSET THE CL4WK,pushin the center knob
of the Minute Timer and turn Knob in either
direction to set the Digital Clock numerals to
the correcttime.
(Aftersettingthe clock,let the knobout, and
turnthe Minute Timer pointerto C)FF.)
nmw’rE
TO SET THE MINUTE TIMER, turn the
center knobclockwise,
pointerreachesnumberof minutes you wish to
time (up to 60).
TIMER
withoutpushing in, until
At the end of the set time a buzzer sounds to
tell you time is up. TO TURNOFF BUZZER
turn center Knob,
without pushing in, until
pointer reachesOFF.
Ammatk China m’mf?’
The automatic oven controls are designed for
the homemakerwhocan’tbe tied downto being
in the kitchen or at home at specific times t
turn an oven on or off. These controls can be
preset to start and stop your oven for you. Or,
if youprefertostartthefoodyourself,theywill L -
takeoverthejob of turningtheovenoff.
16
——
Page 17

-——.——.
CONVENTIONAL COOKING: TIMER
To set the automatic oven timer, use thetwo
dialsnext to the clock,markedSTART and
STOP. Each dial is markedoff in 15 minute
segmentsandnumberedbythehour.Thepoint-
ersonthesedialscanbemoved
only whenknob
is pushedin. (Whenthe pointersare turned
you can heara “ratchety”sound.)If pointer
can be turnedit meansknobhasbeenpushed
inandpointer,hasbeenset.To becertainknob
isinoutposition,turnknobsopointerisattime
showingon the clock.Knobwill pop out and
cannotthenbe turned,(Note: Beforeyou set
thesedials,be surethenumeralsof the range
clockshowthecorrecttimeof day.)
A TO SET THE AUTOMATIC OVEN
TIMER SO IT WILL SWITCHTHE OVEN
EAT ON AND OFF AUTOMATICALLY,
T A LATER TIME THAN SHOWS ON
THE RANGE CLOCK,DO AS FOLLOWS:
1. SetSTART time.Pushin knobon START
did andturnpointertotimeyouwantovento
turnon.TheillustrationshowsSTART pointer
at3:30.
2. SetSTOPtime.
Push in knobonSTOPdial
qndturnpointerto timeyouwantovento turn
off. The illustrationshowsthe STOP time at
6:00.
AutomaticTimerworksonIyif STOP timeis
setfor a latertimethanshowson rangeclock
andon START dial.
& TO SET THE OVENTO START IMMEDIATELY AND TO TURN OFF AUTOMATICALLY AT A
LATER TIME, follow
onlyA2andA3 above.
G WhenfoodisremovedfromoventurnOVEN
SET toOFF.
Meats,fruitsandvegetablesgenerallytakewell
to automaticcooking.You can cookone food,
orseveralfoodstogetheraslongastheyrequire
thesametemperatureandtime.
However foods
ofahighlyperishablenature,suchasmilk,eggs,
fish,stuffings,poultry,andpork,shouldnot be
cookedautomaticallyunlessstandingtime in
theovenis not morethan2 hoursbeforeand
about2 hoursaftercookingof thesefoods.In
allcases,nomatterwhatthenatureofthefood,
unlesscookingis to start immediately,foods
shouldbethoroughlychilledin therefrigerator
beforeplacingin theoven.
3. a. Turn OVEN SET to TIME BAKE.
b. TurnOVENTEMP to propertemperature for food to becooked.Placefood in oven,
closethedoorandautomaticallytheovenwill
beturned
on andOHatthetimesyouhaveset.
16
Page 18

Yourovenis designedto giveyou top resultsin
baking, roasting,and broiling when used as
recommended.
1, Lookat thecontrols+Be sureyou understand
howto setthemproperly.Readoverthe direc-
tions for the AutomaticOvenTimerso you un-
derstanditsusewiththecontrols.
2. Checkoveninterior.Lookattheshelves.Take
a practicerun at removingand replacingthem
proper~y,to givesuresturdysupport.
3. Readoverinformationandtipsthatfollow.
4. Keep thisbookhandyso you can referto it,
especiallyduringthe firstweeksof gettingac-
quaintedwithyouroven.
The controlsforthe oven(s) are markedOVEN
SET and OVEN TEMP. OVEN SET has settings for BAKE, TIME BAKE, BROIL,
CLEAN, and OFF. When you turn the knobto
the desired setting, the properheating units are
then activatedfor that operation.
OVEN TEMP maintains the temperatureyou
set from WARM (150°) to BROIL (550°) and
also at CLEAN ($800). A light near this control
glows until oven reachesthe selectedtempera-
ture,thengoesoffandon withtheovenunit(s)
duringcooking.PRE-HEATINGthe
to hightemperaturesettings,is speedy—rarely
morethanabout10 minutes.Preheatthe oven
onlywhennecessary.Mostfoodswillcooksatisfactorilywithoutpreheating.If youfindpreheating is necessary,keep an eye on the indicator
lightand put food in the ovenpromptlyafter
lightgoesout.
.
oven, even
.
{ “
OVEN‘f’Hvw’
\
,.
SEl”rw?iFOR ‘
NORMAL
COOKUW
L
For CLEAN, rotatethe knobto the right (clockwise) until the blue pointer is pointing up, toward the index marker. When this location is
reached, the control should snap into fin
position.
t’-
H’4DEX --’--e
MARKER ~po~”s”
“
\
w
{ ““”’”
‘.
+-4
0
&
.
OVEN “rENIP ~
SETTINGFt
CLEAN
CYCLE
m I ‘ ‘.
\
‘Qlbi
‘,
\
.
,,
A
men Interior
!wadwes
The shelve(s) are designedwithstop-locksso
thatwhenplacedcorrectlyontheshelfsupports,
(a) willstopbeforecomingcompletelyfromthe
oven, (b) willnot tih whenremovingfood nor
whenplacingfoodon them.
TO REMOVE shelve(s) from the oven, when
cool,lift up
Iocksalong
TO REPLACEshelve(s)in oven,insertshelf
withstop-locksrestingon shelf supports.Push
shelftowardrearof oven;it willfal~intoplace. ,
Whenshelf is in properposition,stop-lockson
shelfwill runundershelfsupportwhenshelfis
pulledforward.
rear of shelf,pullforwardwithstop-
top of shelfsupports.
IMPORTANT: The OVENTEMP controlhas
abluepointerthatis usedonlyfor CLEAN.For
normalcooking,lineup thedesiredtemperature
(markedon theouteredge of thecontrol knob)
withtheindexmarkerlocatedimmediatelyabove
thecordrol.
ILi~ht
Thelightcomesonautomaticallywhenthedooris
opened.Useswitchunderleftsideof handleon
windowd’oortoturnlightonandoffwhendooris
closed.Pushtoturnon—pullto turnoff,
1,7
Page 19

CONVEiWVQiWkt.OVEN
When cooking a food for the first time in your new oven, use time
given on recipes as a guide.Oven thermostats,over a period of years,
may ‘rdri~t”from the factory settingand differences in timingbetween
an old and a new oven of
5 to 10 minutes are not unusualand you
may be inclined to think that the new oven is not performing correctly. However, your new oven has been set correctly at the factory
and is more apt to be accurate thanthe oven it replaced.
1. It is recommended
that you operatethe
rangefor a numberof weekst; beco~efamiliar
withyournewoven’sperformance.However,if
youfindthat your foodsconsistentlybrowntoo
little or too much,you may make a simple adjustment in the thermostat (OVEN TEMP)
knob. See section titled “Adjusting Oven
Thermostat.”
use tested recipes from reliablesources.
2.
Measureingredientsaccuratelyand combine
carefully.Usecorrectsizebakingutensil.
3. Placeshelf
at positionsuggestedonchartbe-
low.Onmodelsso equipped,lettersaremarked
on wallof largeoven.Onmodelswhereletters
arenot markedon oven,lowestpositioncorrespondsto A inchart,B isnexthighestposition,
tco
4. Preheattheovenonlywhennecessary.Most
foodswillcooksatisfactorilywithoutpreheating.
Ifyoufindpreheatingisnecessary,keepaneye
—
.-
BREADS,tXJICK1
Biscuits
Coffee Cake B, A
Corn Bread
Gingerbread
Plain Muffins A, B 400-425
Popovers
Quick Loaf Bread B
.———----
--.—---— ......—-. ...-.---—
B, C 42!5-475
350-400
B 425.450 25-40
B
B
350
375
350-375
-------
-_— ---..------.--——
10-20
20-30
30-45
20-30
45-60
45-60
-——
on theindicatorlightandputfoodin theoven
promptlyafterlightgoesout.
5. To setoven:Closeovendoor.TurnOVEN
SETtoBAKEandOVENTEMP totemperature onrecipeoronBakingChart.
6. Place food in oven, beingcertainto leave
aboutl-inch of spacebetweenpansandwalls
of ovenfor goodcirculationof heat.Closeoven
door.Duringbaking,avoidfrequentdooropeningstopreventundesirableresults.
7. Checkfoodsfor donenessat minimumtime
on recipe.Cooklongerif necessary.Remove
foodsandswitchoffheat.Whencookingfoodfor
firsttimein thisoven,usetimeson recipesasa
guide.Be certainfoodsaredonebeforeremovingfromoven.See
ProductService.
Baking, Before You Callfor
NOTE: Informationaboutbakingat highaltitudescanusuallybeobtainedatyourstateagri-
culturalstation.
.—
-—
~..-—
COOKIES’
Brownies
Drop
Refrigerator
Rolled or
—— ----—
— ---- —.-. _— ----- -...--——.---——
Sliced
—
———-—.—
-- —.-.—
c, El
c, a
C, B
c, B
—.--——
D.- ——-_—. -
325-350
350-400 10-20
400-425 6-12
375.400
I
-----
25-35
7-12
CAKES1
(without shortening)
Angel Food
Sponge
Jelly Roll
For best results, use shiny aluminum utensils, with dull finish on bottom. To RAISE YEAST DOUGHS, cov
with cloth and place in your well insulated oven to keep
oven lamp should be off during rising. FRUIT CAKES: place large ones on lower sheif position; place srnaii or loaf
pan type on shelf in center of oven.
To brown meringue oniY, use 400, 8-10 rein; to cook meringue through, use lower temperatures for times given.
NOTE: When two shelf positions are listed, the first one gives well browned and cooked food. If you desire a different
browning, use the seqond shelf position the next time
cessfully on any poshon listed, aione or in an oven mea .
111
A
A
B
325-375 30-55
325-350 45-60
375.400 10-15
MISCELLANEOUS
Apples, Baked
Custard, Cup
Potatoes,Baked
Puddin s, Rice
tand ustard
Scalloped Dishes
Souffles
awaYfrom drafts. Yeast doughs raise best at 85° t
YOU cook. Foods listed with three sheif positions cook suc-
A, B, C
A, B, C
A, B, C
B
B
B
350-400
300-350 30-60
325.400 60-90
325
325-375
300-350
1
1
m–-—
Zl%h%
30-60
60-90
30-6~
30-75
18
—.—
Page 20

Broiling is cooking foodsby intense mdi-
ant heat fromthe upper unit in the oven.
Most fishand tender cuts of meat can be
broiled.Followthese steps to keep spattering and smokingto a minimum.
1. If meathasfat orgristlenear edge,cut
vertical slashes through both about 2-in.
apart. If desiredfat maybe trimmed,leav-
ing a layer about ~s-in.thick.
2. Place meat on broilerrack in broiler
pan whichcomeswith range. Alwaysuse
rack so fat drips into broiler pan; other-
wise juices may become hot enough to
catch fire.Aluminumfoilmay be used to
line broiler pan and rack. But, be CER-
TAIN to cut openingsin foil, to correspond with rack so fat drips into pan
below.See note belowbefore marinating
and using barbecuesauce.
3. Letters on ovenwall,and chart below,
indicate where to position shelf for best
browningwhilecookinginside of food to
desired doneness. Placing food closer to
top ofovenincreasessmoking,spattering,
o
exteriorbrownonmeat and the possibility
of fats on foodscatching fire.
4. LEAVE 13001? AJAR about 3 inches
—door stays open by itself, and keeps
heating unit at proper temperature for
broiling.
SWITCH OVEN SET and OVEN
5.
TEMP CONTROLS TO BROIL. Preheating unit is not nece~~sary.~~
6. Turn food only once during cooking.
Time foods for first side as on chart. Turn
food,then usetimes givenfor secondside
as a guide to preferred doneness.(Where
two thicknesses and times are given to
gether, use first times given for thinnest
food.)
7. Turn ovenoff,servefoodimmediately,
leavepan outsideovento coolduringmeal
for easiest cleaning.
Cookingtimes givenare approximateand
should be used only as a guide; they are
basedonmeat at refrigeratortemperature
whenplacedin oven.
Ml$lfl’1’~:If your range is being operated on low power (voltage), broiled foodsmay be
lighterbrownthan expected,eventhoughdirectionshavebeencarefullyfollowed.
Browningcan be improvedas follows:
1. Followdirectionsgivenon this page for setting up the oven, preparing food,
setting controls and leavingdoorajar.
2. Preheat the broil unit fo~10minuteswithfoodand broilerpan outsidethe oven,
3. Place foodin oven,leavedoorajar and time first side of food as directed.Turn
foodand timesecondside,BUT for the LONGEST time givenon the chart for
your particular food type, thickness,etc.
19
Page 21

CONVEN’IYOPW. OVEN
1. See UsingYourOvenfor positioning shelves.
2. See
noteon roastkgchart about tendered beef.
3. Brush each side with fat, Broil
CLOSED. For any weight over 2 Ibs., cook first side 5 minutes longer than time given on chart.
4. Cut lobster lengthwise through hard back with sharp knife—break open and brush with melted
oil or butter and again after half the cooking.
NOTE: Line broiler pan with aluminum foil when using pan for marinating, cooking with fruits,
cooking heavily cured meats, or for basting food during cooking. Avoid spilling these materials
on oven liner or door. If spilled, wipe up immediately with a paper towel; when surface is
cool, clean and rinse.
skinside down first. Forall weights of chicken, BROIL WITH DOOR
20
Page 22

—
Roastingisovencookingoftendermeatorpoultryby dry heat.Roastingtemperaturesshould
be steadyand low.
spattering and oven c~eaningto a minimum.)
It is not necessaryto sear, cover, baste or add
water.
1. Checkweightof meat,and place, fat side up,
on roastingrackin a shallowpan. (Broiler pan
with rack is a goodpanfor this.)**
2. Place in ovenon shelfin A or B position.No
preheatingisnecessary.
Switch OVEN SET to BAKE and OVEN
3.
TEMI?to325.Smallpoultrymaybecookedat
r
for bestbrowning.
375
4. The chart below gives approximate tide in
minutesper pound. These timesshould only be
used as a guide. A meat thermometer,inserted
into the centerof the thickestpart of the meat,
isthe only accuratetest for doneness.
(Low temperatureskeep
5. Most meats continue to cook slightly while
standingafter beingremovedfrom theoven.For
rare or mediuminternaldoneness,if meatis to
stand 10-20 minutes while makinggravy or for
easier carving, you may wish to remove meat
from oven when internaltemperatureis 5-10°F
below temperature suggested on
chart. If no
standingisplanned,cobkmeatto suggestedtem-
peratureon chart.
a. I’rozen roastsof beef, pork, lamb,etc., can be
started without thawing, but allow 10-25 minutes per pound additional time (10
min. per
poundfor roastsunder5pounds,moretimefor
largerroasts).
b. Thawmostfrozenpoultrybeforeroastingto
ensureevendoneness.Somecommercialfroze
poultrycan~
ing. Follow directions givenon packer’slabel.
cookedsuccessfullywithoutthaw-
3-5 Ibs.
24-30 min.
30-35 min.
35.45 min.
3-5 Ibs.
35-40 min.
3-5 Ibs.
35-40 min.
Under 10 Ibs.
20.30 min.
1 For roasts over 8 pounds, roast at 300 and reduce time.
that time has passed, check meat thermometer for Internal temperature at half-hour intervals.
2 Tendered beef, found in some markets, may require less cookin
estimate cooking time us~ng shortest time given in minutes pound for desired doneness. AlSO this type of beef
is usually well-done at 170 Internal temperature.
**NOTE: Line broiler
meats, or for basting food during cooking. Avoid spilling these materia!s on oven liner or door. See Cleanlng note, on
careSXWm.
charts,
panwithaluminum foil when using pan for marinating, cooking with frUit’& COOkingh~avily cured
Figure the estimated time from the above chart. After
6-8 lbs.l
18-22 min.
22-26 min.
28-33 min.
6-8 Ibs.
30-35 min.
30-40 min.
Over 5 Ibs.
30-35 min.
10-15 Ibs.
20-25 min.
time than regular beef. When cookingtendered beef,
f
Over 15 Ibs.
15.20 min.
I
In Thigh
185-190
170-175
185-190
Stu’f?ing
165
—.
V2 !
Page 23

1
e
2●
Q
(!9
CONVENTIONAL OVEN
T(IJPREVENT SlkKKINGo
(a) Wipe up excess greaseor boiloverson oven bottom.
[~)Remove broilerpan, rack and other cooking utensils. See photo in
frontof bookto identify.
Cleanspattersorspillson ovendooroutsidegasketandareaaroundoven
opening,See OVENFRAME,DOOR LINER followingpages.NEVER
USECOMMERCIALOVENCLEANERIN ORAROUNDTHE SELF’CLEANINGOVEN.
DO NOT CLEAN REFLECTOR I?AN/RINGS FROM MODELS
WITH PLUG-IN SURFACE UNITS IN SELF-CLEANINGOVEN.
They are chrome-platedand will discolor.
4
5
6
On modelsso equipped,be surerotisseriereceptacleis closed.
e
Be sure oven light is o#.
e
On models so equipped, raisethe window shield by lifting handles to
fullyraisedposition.
e
Shieldmustbe up so doorcanbe latchedfor oven to operate.
CLOSE OVEN DOOR. TURN
OVEN SET KNOB TO CLEAN.
TURN OVEN TEMP KNO13 TO
THE RIGHT (CLOCKWISE)
PAST BROIL SETTING TO
CLEAN. THE POINTER ON
THE OVEN TEMP CONTROL
SHOULD POINT UPWARD TO-
WARD THE INDEX MARKER.
(When thislocationis reachedthe
control should snap into final
position.)
OVEN TEMP SETTING FOR CLEANCYCLE 4
L
22
——
Page 24

CONVECTIONAL OVEN
PUSH AND HOLD LATCHRELEASEBUTTONWHILE SLIDING
LATCHTORIGHTUNTILITISIN CLEANPOSITION,(OVENSET’
knobmust be in OFF or CLEANpositionbeforelatch canbe moved.)
ON YOURAUTOMATICOVEN TIMER:
CHECK STARTIX& TO BE CERTAINPOINTER IS AT THE &41’$4E
TIME ASTHE RANGECLOCK.IF NOT,TURN
START’KNOBUNTILIT
POPSOUTANDGANN’OT.BE TXJRNED.
SET THE POINTERAHEAD,ON THE DIALMARKEDCLEAN,FORAS
MANYHOURSAS NEEDED TO CLEAN THE AMOUNTOF SOIL IN
MXJROVEN.SUGGESTEDTIMESFOR CLEANINGARE.
Self-Cleanovenalone, 1}~hours for moderate soil,2 to 3 hours or more
for a more heatiy soiledoven.
,.
c1
i?
For exampleif range clockreads 7:00, set pointer on CLEAN dial at 8:30
for a moderately soiledoven.
OVEN CLEANINGLIGHT will glow when all steps have been set up
properly.
When the LOCKLIGHTfirstcomes on this indicatesthat the oven is
hot and the doorwill soon be LOCKED.The light will stay on during
cleaning time and until oven heat decreasesin temperatureagain.See
more informationunder When Lock Light Glows.DOOR AND WIN-
DOW GETHOT DURING SELF-CLEANCYCLE.DO NOTTOUCH.
WHENLOCKLIGHTISOFF, PUSHAND HOLDLATCHRELEASE
BUTTON WHILE SLIDING LATCH LEFT TO OPEN POSITION.
o
Now, open the oven doorto see your sparklingoven! (Lowerwindow
shie~dby pushing handles towardbottomof window.)
TURN OVEN SET TO OFF.
e
See More Information(h the Self-Cleaning(hen, nextpage.
23
Page 25

OVEN
HELVES
CONVENTIONAL OVEN
DOOR
GASI(
L!!!---
*DO NOT CLEAN CHROME-PLATED REFLECTOR PAN/
RINGS IN SELF-CLEANING OVEN, THEY WILL DISCOLOR,
Yourovenis cleanedby heat (at temperatures
aboveusualcookingheats)whichmusessoil
to disappearfrom the oven. A devicein the
oven furtherconvertssoil into an essentially
odorlessandcolorlessvapor.A slightodormay
be detected,especiallyduring the first few
cleanings.
OVEN FRAME AND DOORLINER-Door
liner outside the wovengasket (see photograph
frontofbooktoidentify) andthe ovenframe,
re sealed off from the oven during cleaning,
herefore,are not cleaned automatically.How-
ever, duringcleaningtheseareasheatenough
to “bakeon” soilpresentso it becomesharder
toclean.If theseareasare soikd,removebe~ore
cleaningautomatically,usingsoap filledsteel
wool pad,if necessary.Rinse thoroughlyto removesoapb,eforecleaning.DO NOT CLEAN
GASKET.See
CAREOFWOVENGASKET—Onovendoor,
seephotograph,thewovenfiber-glassgasketis
essentialforagood ovenseal.CARESHOULD
BE TAKEN NOT ‘IU RUB, DAMAGE OR
MOVETHE GASKET.It is notnecessaryto
useany cleaningmaterialson the gasketand
todosomightdamageit.
NO COMMERCIAL OVEN CLEANER OR
OVEN LINER PROTECTIVE COATINGOF
ANY KIND SHOULD BE USED IN OR
AROUND ANY PART OF THE SELFCLEANING OVEN. ALSO DO NOT USE
PIECES OF FOILTO CATCHSPILLOVERS
Care of Woven Gasket below,
24
Page 26

OR TO DELAY C!LEANING OF SELF-
CLEANINGOYEN.
Parts !M3be Cleaned
The ah.uninurn reflectorpans from General
Electricbuilt-incooktopsmay be cleanedin
your ovenduringautomaticchxmin
placementof thesepartsin theovenis VERY
importantforcleaning.
g. Proper
CMearaonly ‘mmiw$PartsLkwd
Herein‘tfmsu’Self”ckm
a. oVEN SHELVES.PlaceshelvesonA andC
positionsin
specifiedhere.During cleaning,shelvesmay
becomeiridescentand may 1osesomeluster.
(Ovenshelvesdiscolortoadeepgrayaftermany
cleanings.)
NOTE: Ovenshelvesmaybe&omesocleanthat
theywillnotslideeasilyon shelfsupportsafter
self-cleaning.To reducethiscondition,dampen
fingertipswithsmallamountofcookingoil.Rub
lightlyoverrightandleftsidesofshelves(where
theycontactshelfsupports).Usea lightapplicationof oil so it doesn’trun downand soil
ovenwalls.
b. ALUMINUMREFLECTORPANS found
undersurfaceunitsonsomemodelGEcooktops.
DONOTSELF-CLEANCHROMEREFLEC‘IWRPAN/RINGSfoundonotherGEcooktops.
especiallythoseequippedwithplug-insurface
units.Chromediscolorspe
cleaningoven.
Whenself-cleaningaluminumreflectorpans,it
isimportantto (1) wipeoffboiloversnotstuck
to pan, (2) invertthepansand (3) be certain
nothingisplacedon topof panstopreventdis-
tortion. Reflector pans cleaned automatically
maysoftenandchangeincoloroveraperiod
time.Replacementsmaybepurchasedifdesired
fromyourdealer.
NOTE: Onlythealuminumpanssuppliedwith
a GEcooktopshouldbe cleanedautomatically.
Reflector’pansof foil, shinychromeor other
materialsshouldnot be cleanedin the oven.
See previouspages for recommendedcleaning
times.
oven. Cleanonlyshelvesfromoven
rmanentlyin self-
Owen:
of
dependingupontheamountof soilwhichwas
in the oven.This ashcan be removedwith‘a
wipeof a moistspongeor cloth.IF PART OF
A DARK DEPOSIT REMAINS ,AFTER
WIPING WITH A MOIST SPONGE,THE
SELF-CLEANINGOVENWASNOTTIMED
LONGENOUGH.Thedepositwillberemoved
insubsequent-cleanings.
HAIR-LIKE LINES may be noticedon the
grayenameledsurfacesoftheself-cleaningoven.
Thisisacomrhoncondition,resultingfromheatingandcoolingduringcleaning.Theselinesdo
not affectovenperformance.
WHEN LOCKLIGHT GLOWS-If you broil
orcookathightemperaturesthelocklightmay .
glowandyoumayhearthewhirringsoundofa
fanwhentheOvenSetis switchedto CLEAN.
The glowandfansoundindicatetheovenmay
betoo hotfor thelatchto bemovedtoCLEAN.
However,the locklightand fando notinter-
fere with normalbaking,broilingor roastin
mandthe ovenwillperformproperlyif usedfo
theseoperationswhilethe1ock1ightglowsand
thefansoundisheard.
IF SMOKINGOCCURSDURING CLEAN-
ING becauseof excessivegreasein oven or
utensilbeingleft in ove~ DO NOT TRY TO
FORCEDOOROPENbutfollowthesesteps:
a. SWITCH OVEN SET TO OFF.
b. Openwindowsanddoorto ridthe roomof
smoke.
C.AI1owovento coolAT LEASTONEHOUR
beforeopeningtheovendoor.
d. Correctthe conditionwhichcausedsmoking
andstarttheself-cleaningovenoperatingagain.
HEATING AND COOLINGof metalduring
cleaningor duringcookingresultin“crackling”
soundswhichareconsiderednormal.
ASH Sometypesofsoil,eventhoughtheydis-
integrate,willleavea depositin theoven.This
appearsasa lightfilmora darker,heavierash,
Page 27

— ——
MICROWAVE COOKING CENTER: CARE ANO CLEANING
Owen
A walls,shelfwad
Plastic
Becausethereis littleheatexceptin thefood,
orsometimesin theutensils,spi~sandspatters
are easy to remove.Somespattercan be removedwitha papertowel,othersmay require
a dampcloth.Removegreasyspatterswitha
sudsycloth,then rinse,and dry. Oo not
abrasiwe
cumstancesshouldyou attemptto removethe
coveroverthe“stirrer”at thetopof theoven
forcleaning.NEVERUSEA COMMERCIAL
OVENCLEANERONANYPARTOFYOUR
MICROWAVEOVEN.
SPECIAL NOTE WHEN USING
DISH
WITH MICROWAVEOVEN:
SCORCHEfhAPPEARINGSTAINSON THE SHELF
OFYOURMICROWAVEOVEN,
greasebakingontoshelfwhilepreheatingBrown
‘~NSearDish,mayberemovedwithDELETE,
(Note:Greasedoesnotnormallybakeontooven
interiorin microwaveoperation,however,high
heatageneratedon bottomof Brown‘N Sear
Dishcancausebaked-onconditionon shelfonly,
if greaseis present.)
AfterusingDELETE,rinseanddrythoroughly,
following instructions on can. Do not use
DELETEon thepaintedsurfacesof theoven,
suchasthewalls.It willscratchthepaint.
DELETE may be purchasedfrom your kcal
GEdealerorfromyourGEAuthorizedService
Center,checkthe “yellowpages”for location
andphonenumber.
DELETEmayalsobe soldatlocal groceryor
hardwarestores,or at housewaresdepartment
of somedepm%rnentstores.
cower
US8
cleaners on oven walls. Underno cir.
BROWN‘N SEAR
USUdlyUiUSedby
THEY WILL MAR THE SURFACE OF
THESE PARTS. ALSO, ALL CLEANING
MATERIALSUSED ON THE DOORP~TS
MUST BE THOROUGHLYRINSED OFF.
C. ‘hnperatwe
Prdm
Probeis sturdy,butcareshouldbetakenhandling.Donot twistorbend;avoiddroppingtemperatureprobe.
Cleanassoon afterusingaspossible.To clean,
wipe with sudsycloth,then rub lightlywith
plasticscouringballif necessary.Rinseanddry.
(Orwashin dishwasher.)
DO NOTUSETEMPERATUREPROBEIN
OVEN UNLESS IT IS INSERTEDINTO
FOOD,AND TIME/TEMP SWITCHIS AT
TEMP.
WHEN COOKING WITH AUTOMATIC
TEMPERATUREPROBE,ALWAYSKEEP
PROBE l-INCH AWAY FROM SIDES OF
OVEN.
LAMP
CAUTION: BEFORE REPLACING ANY
LAMP, DISCONNECTELECTRICPOWER
TO RANGEAT THE MAIN FUSEOFCIRCUITBREAKIJRPANEL.LET LAMP (OR
BULB) AND LAMP COVERCOOLCOMPLETELY,
(Mm luarclp m?lf”m?aning
owed
Dtmdnside
1%
Glass-wipe upspattersdaily,washwhensoiled
witha minimumof sudsywarmwater.Rinse
thoroughlyanddry.
MetalandPlasticPartson Door-to assurea
tightsealarounddoor,ttisareamu@bewiped
frequentlywithadampclothtoremoveailsoil.
A buildupof soilcouldresultin leakageof microwaveenergyfromthe oven.DO NOT USE
ABRASIVES,SUCHAS CLEANINGPOWDERS OR STEEL AND PLASTIC PADS.
.-—
——.——
a. Removethe three slottedscrewsin lamp
cover;see diagram.Removecover;replacelamp
with40 wattappliancehrnp.
b.Replacelampcoverwiththreescrews.
c. Connectelectricpower@ range.
26
Page 28

MIC!?fJWAVE600KING CENTER: CARE A?+#DCLEANING
tmmllLamp 13wml
Microwaveovenlampshouldlastalmostaslong
astheappliancelasts.To replaceit requiresa
ProductServiced.
Owen
Whencookinga foodfor thefirsttimeinyour
newoven,usetimegivenon recipeas a guide.
Oventhermostats,overa periodof years,may
“drift”fromthefactorysettinganddifferences
in timingbetweenan oldanda newovenof 5
to 10minutesare not unusual.Yournewoven
hasbeensetcorrectlyatthefactoryandismore
apt to be accuratethantheovenwhichit replaced.However,ifyoufindthatyourfoodsconsistentlybrowntoo littleor toomuch,youmay
makea simpleadjustmentin the thermostat
(OvenTemp) knob.
PULL KNOB OFF OF SHAFT. LOOK AT
BACK OF KNOB AND NOTE CURRENT
SETTING, BEFORE MAKING ANY AD-
JUSTMENT. To increaseoven temperature,
adjusttowardHI or RAISE; to decreasetemperatureadjusttowardLO or LOWER.Each
notch changesoven temperature10 degrees.
Oventemperaturecan be raisedby 20 degrees
or loweredby 30 degrees.
Seesketchesbelow.Oneof thetwotypeknobs
shownwillbe on yourrange.To adjust,follow
directionsundertheapplicablesketch.
used Foil!
A IN MICROWAVEOVEN,use metal only as
directedin theCook”Book.Metalstripsasused
onmeatroastsarehelpfulincookingfoodwhen
usedas directed.Metaltraysmaybeusedfor
TV dinnersand,of course,themetaItemperat-
ure probeis designedformicrowaveovenuse.
However,whenusinganymetalin the&icro-
waveoven,keev
sides of microwave oven.
B.
IN CONVENTIONALOVEN, if desired,
broilerpanmaybe linedwithfoilandbroiler
rack may be coveredwith foil for broiling.
ALWAYS BE CERTAIN TO MOLD FOIL
THOROUGHLYTO BROILERRACK AND
SLIT FOILTO CONFORMWITH SLITSIN
RACK. Broiler rack is designedto minimize
smokingand spattering,andto keepdrippings
cool during broiling.Stoppingfat and meat
juicesfromdrainingtothebroilerpanprevents
rackfromservingitspurpose,andmayletjuices
becomehotenoughto catchfire.
metalat least l-inch awayfrom
.
0
1. Removeknob,andholdso pointeris at top
of knob.Usinga potholderorsimilarmaterial,
hold“skirt”of knobfirmlyinonehand.Grasp
handleof knobin otherhand.Notepositionof
pointerandturnhandletomovepointertoward
RaiseorLower.Pointerisdesignednottomove
easily.If it is seatedso it is difiicultto move,
pointermaybe loosenedslightiy.Inserta thin
screwdriver,knifebladeor sirnikminstrument
andliftupend of pointerslightly.
2.Afteradjustmentismade,presspointerfirmly
againstknob.Returnknobto range,matching
flatareaonknobandshaft.Recheckovenperformancebeforemakingan additionaladjustment.
2.DONOTplaceasheetof aluminumfoilon
shelf of eitherconventionalor microwave
oven.To do so may resultin improperly
cookedfoods,damageto ov~nfinish,andincreasein heat on outsidesurfacesof the
range.
27
Page 29

Sudsycloth,
Pl~&if scouring
.
Wash as soonafter using as possible,TOclean, wipe with sudsy cloth,
then rub lightly with plastic scouring ball if necessary. Rinse and dry.
(CMwash in dishwasher.)
Metal
See page 26
Soapand Water
Soap-Filled
ScouringPad
Plastic Scouring Pad
Soapand Water
Soapand Water
Soapand Watcw
Coflrnae~:al OvorI
Soap-Filled
Scouring Pad
ght bulbs can become warm enough to break ;f touched with moist cloth or towel. When cleaning
?anirrgcloths if lamp cover is removed. See Lamp Replacement, Care Section,)
Clean with damp cloth. DO NOT TRY T(3 REMOVE, you will damage
your oven.
(Do not let soiled pan and rack stand in oven to cool.) Drain fat, COOI
pan and rack slightly. Sprinkle on detergent, fill pan with warm water.
Spread cloth or paper towel over rack, let stand
scouring is necessary. Rinse and dry. (Or wash in dishwasher.)
Wash all glass with cloth dam ened in soapy water. Rinse and polish
with dry cloth. Knobs on con rot panel are removable,. if desired. if
knobs are removed, do not allow water to run down inside surface of
glass while cleaning,
Wash, rinse then polish with dry cloth. DO NOT USE steel wool, abrasives,ammonia, acids or commercial oven cleaners which may damage
finish.
Cool before cleaning,
FOR LIGHT SOIL: Frequent wiping with mild soap and water (particularly after cooking meat will prolongthe time between major cleaning,
Rinse thoroughly. NO”r : Soap left on liner causes additional stains
when oven is reheat~d.
FOR HEAVY SOIL: Choose a non-abrasive cleaner and follow label instructions, using thin layer of cleaner, Use of rubber gloves is recommended. Wipe.or rub lightly on stubborn spots.
Rinse Well, W!p@off any oven cleaner that gets on thermostat bulb.
When rlnslng oven after cleaning, also wipe off thermostat bulb, found
in back,or on side, near top of oven.
-—--- .
1’
1!
afew minutes. Wash,
Page 30

W, WHEll!i C043$CIIWIMTH MH’CWIAT’M2 TEiV’iPEFtATLBREIPFMM3E,NO UX3CB!WUG
TAKES FM&X AFTER %T’AFM’”MJITtM# HM IBEENIP#?EW$EltB:
Checkto be sure TIME/TEMl? Switch is set at TEMP. If set at TIME, and Timer is at
“0/’ no cookingtakes place. (U time remainson Timer, ovenwilloperate until timereaches
“o:’ then go
off.)
IFI!3uzzmSOUIW3SIwrm ‘K!mmrr”ENmrmlm PRESSED:
a. Checkto makesure TIME/TEMP switchis correctlyset, Whencookingby TIME, if
mistake TIME/TEMP switch is set at TEMP, buzzer sounds when Wart” button..
pressed.
b. Whencookingwith TEMPERATUREPROBE,checkto be surecableendis securely
“seated”into ovenreceptacle.If is is not securely“seated/)andovenis otherwiseset for
TemperatureProbeCooking,buzzersoundsto tell youfirmconnectionhasnotbeenmade.
C. WhencookingwithTEMPERATUREPROBE,checkto besuretemperaturesetondial
ishigherthanactualtemperatureoffoodin oven.Iffoodhasreachedor exceededtemperatureset on dial,buzzersoundsto tell youset temperaturehasbeenreached.
!F THE MICROWAVE POWER WOWI’ COME ON
Checkto becertainthedooris securelyclosed,andthe timerset. Ifa dishtouchesthedoor
whenthe doorseemsclosed,it actuallymaynotbe firmlyclosed.Unlessthe dooris closed
to engagethesafetyinterlocks,the microwaveenergycannotcomeintotheoven.Checkto
be certainthat TIME/TEMPswitchis pushedalithe way up ordown.An “in-between”
settingshouldbeavoided.
MICROWAVE ENEf4GVGOES OFF IBEFOF!ESET TIME HAS ELAPSED
IF
Checkthe housefuse protectingthe rangecircuit.If fuse has not blownandpowercontinuesto gooff,thissignalsaproblem,socdl serviceman.
LAMP !3LIJIRNSOUT’
K-
Changingmicrowaveoven lamprequiresa ProductServicecall.However,originallamp
shouldlast foraboutthe lifeof range.
TV-RADIO U’W’ERFERENCE
SomeTV andradiointerferencemightbe noticedwhik operatingthe microwaveoven.It
is similarto the interferencecausedby other smallappliancessuch as vacuumcleanem,
mixers,etc. It doesnot indicatea problemwith youroven.
VARIABLE POWER PULSIING RK36SE
OnpowerlevelsotherthanHIGH,apulsatingsoundmaybeheard.Thisisanormalcondition.
Page 31

—.
Rmge is EMt
T’rwbk k With A
AUTOMATIC OVEN TIMER, Checkto be certain
step-by-stepdirectionswere followedcorrectly,
Reviewpagesonuseof timer.
BAKING. Checkmaterialandsizeof bakingutensil; placementof shelfandfoodin oven.If the
ovenwasusedfor broiling,just beforebakinga
food, turntheovencompletelyoffandopenthe
r wideso it cancool (5or
)
maybe usedfor baking.
ILING. Be sure OVEN TEMP is set at
BROIL. If there was excessivesmokingand
spattering:Were shelfand broilerpanat position suggestedon broilingchart?If aluminum
foil wasusedon broil rack,wasit handledaccordingto directions?
Feature:
10minutes).Then
Sdtwkmirlg Chfetl
CANTLATCHDOOR. Checkthestepby stepdi-
rectionsfor 1atchingdoor: (a) Didyoupushand
hold in latch releasewhilemovinglatch? (b)
TurnOvenSet knobto CLEAN.GlowingLock
Lightafterknobis turnedshowsovenis toohot
from previousoven use and door won’t latch.
Opendoor wide so
canbe moved,(c) Be surethedoorshieldis in
up positionandisfirmlyin place.(d) OvenSet
mustbeat CLEANor OFF beforelatchcan be
moved.
OI)OR,SOUNDS.Check
Se!f-Cleaning Oven, Care Section.
OVEN DOESN’T CLEAN. Checkthe directionsto
be certain
forstartingthe cleaningcycle. Cleanlight should
comeon.
Possible causes of the problem: (a) Failure to
set properAutomaticTimer dial. The STOP dial
mustbe set and advancedbeyondthe time noted
on rangeclock. (b) The STOP dial was not ad-
overwhencleanedleavesaheavylayerofash
mspotswhichcouldhaveinsulatedthe area from
furtherheat.Seepage27concerningash.(d)J30th
OVEN SET and OVEN TEMP must be at
CLEANsetting.
ALLoperationswere done correctly
ed for long enoughtime. (c) A thick pile of
oven can cool, then latch
More Informatwn on the
SB#lOKINQ,Cooking utensils and excessive
amountsof spilloversand liquid grease not
baked on were not removed before starting
SELF-CLEANINGOVEN.
Range IHuxm Fuse
The difficultymightalsobe in the maindistri-
butionpanel of your houseby a blownoven
circuitfuse,a trippedovencircuitbreaker,the
mainfuse,or themaincircuitbreaker,depend-
ing upon the natureof the powersupply.If a
circuitbreakeris involved,resetit. If the control box employsfuses,the oven fuse (a cartridge-type)shouldbe changed.BUT ONLY
BY SOMEONE FAMILIAR WITH ELECTRICALCIRCUITS.
Apartmenttenantsand condominiumowners
shouldrequesttheirbuiidingmanagementtoperformthischeckbeforecallingfor service.
If after replacingthe ovencircuitfuse or resettingthe circuit breaker,the fuse blows or
circuitbreakertripsopenagain,call yourserviceman.
WHEN YOU CALL GENERAL ELECTRIC
FOR SERVICE help them give you prompt
serviceby:
1. Givingan accuratedescriptionof thetrouble.
2. Givingthe completemodelnumberof your
oven.Belowis an exampleof name plate.To
locatenameplateopenconventionalovendoor
andlookonframeaboveoven.Modelandserial
numbersare alsoon thePurchaseRecordCard
whichcamewithyouroven.If desired,copy the
numbersfromcardbeforesendingit in.
—.——
30
Page 32

YOUR ~~:’:--:
(includes microwave cookingcentersandovens)
f$aveproofoforigina lpurchasedatesuchasyoursalessliporcancelledchecktoestablishwarrantyperi#:,j ,,~f+
WHAT1sCOVERED
.’.
FULL ONE-YEAR WARRANTY
Foroneyearfromdateof original
purchase,-wewill provide,freeof
charge,partsandservicelaborin
yourhometo repairorreplaceany
part of themicrowaveoven/range
thatfailsbecauseof amanufacturingdefect.
LiMITEIl ADDITIONAL
FOURDYEARWARRANTY
Forthesecondthroughfifth year
fromdateof originalpurchase,we”willprovide,freeof charge,a
replacementmagnetrontubeif the
magnetrontubefails becauseof a
manufacturingdefect.Youpayfor
theservicetripto yourhomeand
servicelaborcharges.
WHAT Is NOT COVERED ● Servicetripsto yourhometo
teachyouhowto-usetheproduct.
ReadyourUseand Carematerial,
If youthenhaveanyquestions
aboutoperatingtheproduct,
pleasecontactyourdealer
ConsumerAffairsofficeat the
addressbelow.
e Improper installation.
If youhaveanin~taiiationproblem, WARRANTORis NOTRESp~N.
contactyourdealeror installer,
Youareresponsiblefor providing
adequateelectrical,exhausting
andotherconnectingfacilities.
or our
>
Thiswarrantyisextendedt$ the -”‘
originalpurchaserandany.s.ucceed-::.
ingownerforproductspuj%hased..
forordiparyhomeusein thd48
mainlandstates,Hawaiian~
Washington,D.(I [nAlaska’the
warrantyISthesameexceptthat it~.
is LIMITEDbecauseyoumqstpay
to shipthe producttothes~rvj,ce
shoporforthe servicetectiriic[an’s
travelcoststoyour
All warrantyservicewill be#ovided
byourFactoryServi,ceCen@rsor
byourfranchisedCustomer;.Care’
servicersduringnormalworking
hours,ChecktheWhitePagesfor
GENERALELEG.TRICX20MPA
orGENERALELEC~RIGFAC ~
SERVI’CE.Lookin’theYellow~,---- ‘
PagesforGENERAL,ELECTRIC
CUSTOMERCARE@SERVICE.or
GENERALELECTRIC-$@Ti?O.lNT
CUSTOMERCARE@SERVICE
—
● Replacementof housefu’ses ,,.
orresettingof circuit breakt$r$ ‘:.
eFailureof thq{productif it$s ““
usedforotherthanits intended
purposeor
@Damageto productcause”d
byaccident,fire,floodsor acts
Of God.
SIBLE FORCONSEQUENTIAL~~IŠ$
DAMAGES.
usedcommercia~ly.
‘:’’:’%!.<:“
home. ‘$: t
(
.-.
-.,
,’,;:’:..
,,.,!, --
,,:..,. = .1
,; ,.
~$
,;.
‘.:.;,
*-T
,.
i -,.,
Somestates
orexclusionmay not applyto you.Thiswarrantygivesyou specificlegalrights,andyoumayalso haveotherri~hts
whichvaryfromstateto state.Toknowwhatyourlegalrightsareinyourstate,consultyourlocalor stateconsumer
affairsoffice oryourstate’sAttorneyGeneral.
m
donotallowtheexclusionor limitationof incidentalor consequentialdamages,sotheabovelimitation
Warrantor: General ElecXric Company
Iffurther helpisneededconcerningthiswarranty,contact:
Manager–consumerAffairs,GeneralElectricCompany,AppliancePark,Louisville,KY40225 ;’ ‘:,
@ ELECTRIC
$/81
,.,
:~--
 Loading...