

GE JKP56 Use and Care Manual
Use and Care Guide
Built-in Electric Convection Oven
Safety Instructions.................... 3, 4
Operating Instructions, Tips
Aluminum Foil................... 4, 20, 24, 27, 30
Baking .................................................... 18–20
Broiling/Broiling Guide ...................... 28, 29
Control Panel........................................... 6–10
Convection Cooking ........................... 12–18
Convection Baking .......................... 13–15
Convection Roasting....................... 16–18
Convection Roasting with the Probe ...... 17
Multi-Shelf Baking................................... 13
Offset Shelf ..........................11, 13, 16, 34
Special Roasting Rack............................ 16
Timed Convection Baking.............. 14, 15
Features ........................................................... 5
Oven Control, Clock and Timer........... 6–10
Preheating.............................. 19, 24, 27–29
Probe........................................ 16, 17, 25, 26
Roasting/Roasting Guide.................. 24, 27
Roasting with the Probe ...................... 25, 26
Self-Cleaning Instructions................. 30–33
Shelves ...............................4, 10, 11, 13, 16,
17, 19, 28–30, 33, 34
Special Features of Your Control ........8–10
Timed Baking........................................ 21, 22
Problem Solver...................... 37, 38
Thermostat Adjustment—
Do It Yourself............................................ 23
More questions ?…call
GE Answer Center® 800.626.2000
Care and Cleaning................... 34–36
Broiler Pan and Grid.................................... 34
Oven Door..................................................... 35
Oven Light Bulb............................................36
Oven Shelves ............................................... 34
Probe.............................................................. 36
Self-Cleaning Instructions................. 30–33
Consumer Services.................. 39
Appliance Registration................................. 2
Important Phone Numbers....................... 39
Model and Serial Number Location.......... 2
Removal of Packaging Tape ....................... 2
Warranty ....................................... Back Cover
GE Appliances
Model: JKP56
164D2966P224

HELP US HELP YOU…
Before using your oven, read this
guide carefully.
It is intended to help you operate and maintain
your new oven properly.
Keep it handy for answers to your questions.
If you don’t understand something or need more help, call:
GE Answer Center
800.626.2000
24 hours a day, 7 days a week
®
How to Remove Packaging Tape
To assure no damage is done to the finish of the
product, the safest way to remove adhesive left from
packaging tape on new appliances is an application of
a household liquid dishwashing detergent, mineral oil
or cooking oil. Apply with a soft cloth and allow to
soak. Wipe dry and then apply an appliance polish to
thoroughly clean and protect the surface.
NOTE: The plastic tape must be removed from the
chrome trim on oven parts. It cannot be removed if it
is baked on.
Write down the model and serial numbers.
You’ll find them on a label on the front of the lower
oven behind the oven door.
These numbers are also on the Consumer Product
Ownership Registration Card that came with your
oven. Before sending in this card, please write these
numbers here:
Model Number
Serial Number
Use these numbers in any correspondence or service
calls concerning your oven.
If you received a damaged oven…
Immediately contact the dealer (or builder) that sold
you the oven.
Save time and money .
Before you request service…
Check the Problem Solver in the back of this guide.
It lists causes of minor operating problems that you
can correct yourself.
IF YOU NEED SER VICE…
To obtain service, see the Consumer Services page
in the back of this guide.
We’re proud of our service and want you to be
pleased. If for some reason you are not happy with
the service you receive, here are three steps to follow
for further help.
FIRST, contact the people who serviced your
appliance. Explain why you are not pleased. In most
cases, this will solve the problem.
NEXT, if you are still not pleased, write all the
details—including your phone number—to:
Manager, Consumer Relations
GE Appliances
Appliance Park
Louisville, KY 40225
FINALLY, if your problem is still not resolved, write:
Major Appliance Consumer Action Program
20 North Wacker Drive
Chicago, IL 60606
2
IMPOR TANT SAFETY INSTRUCTIONS
Read all instructions before using this appliance.
IMPORTANT SAFETY NOTICE
• The California Safe Drinking Water and Toxic
Enforcement Act requires the Governor of
California to publish a list of substances known to
the state to cause birth defects or other reproductive
harm, and requires businesses to warn customers
of potential exposure to such substances.
• The fiberglass insulation in self-cleaning
ovens gives off a very small amount of carbon
monoxide during the cleaning cycle.
Exposure can be minimized by venting with an
open window or using a ventilation fan or hood.
When using electrical appliances, basic safety
precautions should be followed, including the
following:
• Use this appliance only for its intended use
as described in this guide.
• Have the installer show you the location of the
circuit breaker or fuse. Mark it for easy reference.
• Be sure your appliance is properly installed and
grounded by a qualified technician in accordance
with the provided Installation Instructions.
• Do not attempt to repair or replace any part of
your oven unless it is specifically recommended
in this guide. All other servicing should be
referred to a qualified technician.
• Before performing any service, DISCONNECT
THE OVEN POWER SUPPLY AT THE
HOUSEHOLD DISTRIBUTION PANEL
BY REMOVING THE FUSE OR SWITCHING
OFF THE CIRCUIT BREAKER.
• Do not leave children alone—Children should
not be left alone or unattended in an area where
appliance is in use. They should never be allowed
to sit or stand on any part of the appliance.
• Do not allow anyone to climb, stand or hang on
the door. They could damage the oven or cause
severe personal injury.
• CAUTION: ITEMS OF INTEREST TO
CHILDREN SHOULD NOT BE STORED IN
CABINETS ABOVE AN OVEN. CHILDREN
CLIMBING ON THE OVEN TO REACH
ITEMS COULD BE SERIOUSLY INJURED.
• Teach children not to play with the controls
or any other part of the oven.
• Never leave the oven door open when you are
not watching the oven.
• Always keep combustible wall coverings, curtains
or drapes a safe distance from your oven.
• Never wear loose-fitting or hanging garments
while using the appliance. Be careful when
reaching for items stored in cabinets over the
oven. Flammable material could be ignited if
brought in contact with hot heating elements and
may cause severe burns.
• DO NOT STORE OR USE COMBUSTIBLE
MATERIALS, GASOLINE OR OTHER
FLAMMABLE VAPORS AND LIQUIDS IN
THE VICINITY OF THIS OR ANY OTHER
APPLIANCE.
• Use only dry pot holders—Moist or
damp pot holders on hot surfaces may
result in burns from steam. Do not let
pot holders touch hot heating elements. Do not
use a towel or other bulky cloth. Such cloths can
catch fire on a hot heating element.
• Always keep dish towels, dish cloths, pot
holders and other linens a safe distance from
your oven.
• Always keep wooden and plastic utensils
and canned food a safe distance away from
your oven.
• For your safety, never use your appliance for
warming or heating the room.
• Do not store flammable materials in the oven.
• Do not let cooking grease or other
flammable materials accumulate in
or near the oven.
• Be sure the oven is securely installed in a
cabinet that is firmly attached to the house
structure. Never allow anyone to climb, sit or
stand on the oven door.
(continued next page)
Important Safety Instructions
3
IMPOR TANT SAFETY INSTRUCTIONS
(continued)
• Do not use water on grease fires.
Smother fire or flame or use a multipurpose dry chemical or foam-type
fire extinguisher.
Flame in the oven can be smothered completely
by closing the oven door and turning the oven off
or by using a multi-purpose dry chemical or foamtype fire extinguisher.
• Do not touch the heating elements or the
interior surface of the oven. These surfaces may
be hot enough to burn even though they are dark
in color. During and after use, do not touch, or let
clothing or other flammable materials contact, any
interior area of the oven; allow sufficient time for
cooling first.
Potentially hot surfaces include the oven vent
openings and surfaces near the openings, crevices
around the oven door, the edges of the door
window and metal trim parts above the door.
Remember: The inside surface of the oven may
be hot when the door is opened.
• When cooking pork, follow the directions
exactly and always cook the meat to an internal
temperature of at least 170°F. This assures that, in
the remote possibility that trichina may be present
in the meat, it will be killed and the meat will be
safe to eat.
• When using cooking or roasting bags in the
oven, follow the manufacturer’s directions.
• Do not use your oven to dry newspapers.
If overheated, they can catch fire.
• Do not leave paper products, cooking utensils
or food in the oven when not in use.
• After broiling, always take the broiler pan out
of the oven and clean it. Leftover grease in the
broiler pan can catch fire the next time you use
the pan.
• Never leave jars or cans of fat drippings
in or near your oven.
• Clean only parts listed in this Use and
Care Guide.
• Do not use aluminum foil to line oven bottoms,
except as suggested in this guide. Improper
installation of aluminum foil may result in a
risk of electric shock or fire.
• Do not use the oven for a storage area.
Items stored in an oven can ignite.
Self-Cleaning Oven
• Do not clean the oven door gasket. The door
gasket is essential for a good seal. Care should be
taken not to rub, damage or move the gasket.
Oven
• Stand away from the oven when opening the
oven door. The hot air or steam which escapes
can cause burns to hands, face and/or eyes.
• Do not heat unopened food containers.
Pressure could build up and the container
could burst, causing an injury.
• Keep the oven vent duct unobstructed.
• Keep the oven free from grease buildup.
• Place the oven shelf in the desired position
while the oven is cool. If the shelves must be
handled when hot, do not let the pot holder
contact the heating elements.
• Pulling out the shelf to the stop-lock is a
convenience in lifting heavy foods. It is also a
precaution against burns from touching the hot
surfaces of the door or the oven walls.
4
• Do not use oven cleaners. No commercial oven
cleaner or oven liner protective coating of any
kind should be used in or around any part of the
oven. Residue from oven cleaners will damage
the inside of the oven when the self-clean cycle
is used.
• Before self-cleaning the oven, remove the broiler
pan, grid and other cookware.
• Be sure to wipe up excess spillage before
starting the self-cleaning operation.
• If the self-cleaning mode malfunctions, turn
the oven off and disconnect the power supply.
Have it serviced by a qualified technician.
SAVE THESE
INSTRUCTIONS
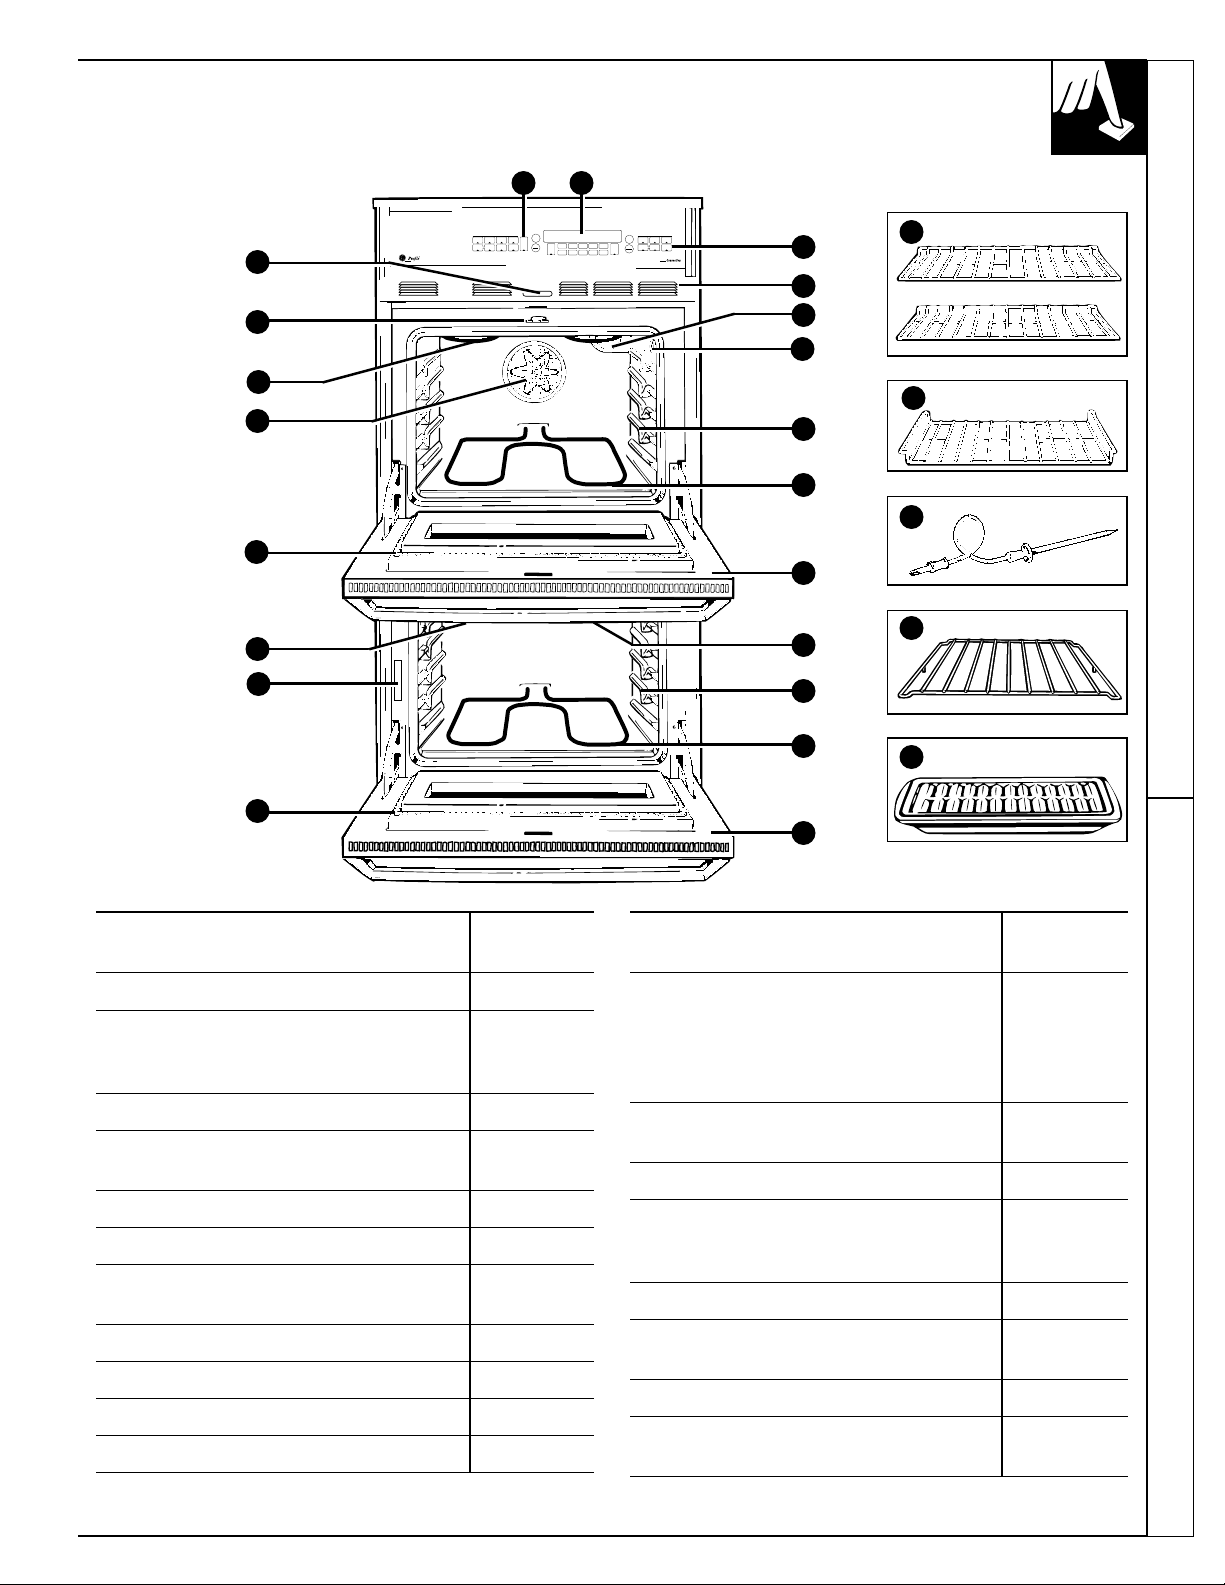
FEATURES OF YOUR OVENS
87
UPPER OVEN
START
CONVECTION
CONVECTION
BROIL
BAKE
ROAST
BAKE
HI/LO
OVEN
LIGHT
1
SELF
DELAY
COOKING
PROBE
CLEAN
TIME
START
6
2738495
CLEAR
KITCHEN
ON/OFF
OFF
TIMER
ON/OFF
6
LOWER OVEN
SELF
BROIL
START
BAKE
CLEAN
HI/LO
OVEN
DELAY
COOKING
CLEAR
LIGHT
TIME
START
CLOCK
ON OFF
OFF
0
7
15
Important Safety Instructions Features of Your Ovens
9
5
10
11
3
2
12
16
13
17
1
14
18
3
4
10
12
13
19
1
Explained
Feature Index on page
1 Oven Door Gasket 4, 30, 35
Convection Fan and 12
2
Heating Element
Operates
during convection cooking.
3 Oven Broil Element 3, 4, 36
4 Model and Serial 2
Number Location
5 Automatic Oven Door Latch 30–32
6 Oven Vent 4, 30
7 Oven Light Pads Lets you turn —
interior oven lights on and off.
8 Oven Control, Clock and Timer 6–10
9 Oven Vent Grille 30
10 Oven Interior Light 36
11 Probe Outlet 17, 25, 26
14
Explained
Feature Index on page
12 Oven Shelf Supports 4, 10, 11, 13
Shelf positions for cooking are 16, 17, 19,
suggested in the Convection 28–30,
Cooking, Baking, Roasting 33, 34
and Broiling sections.
13 Bake Element May be lifted 3, 4, 36
gently for wiping the oven floor.
14 Lift-Off Oven Door with Window 35
Oven Shelves with Stop-Locks
15
4, 10, 11, 13,
16, 17, 19,
28–30, 33, 34
16 Offset Shelf 11, 13, 16, 34
17 Probe
16, 17, 25,
26, 36
18 Roasting Rack 16, 34
19 Broiler Pan and Grid 16, 24, 28,
29, 34
5
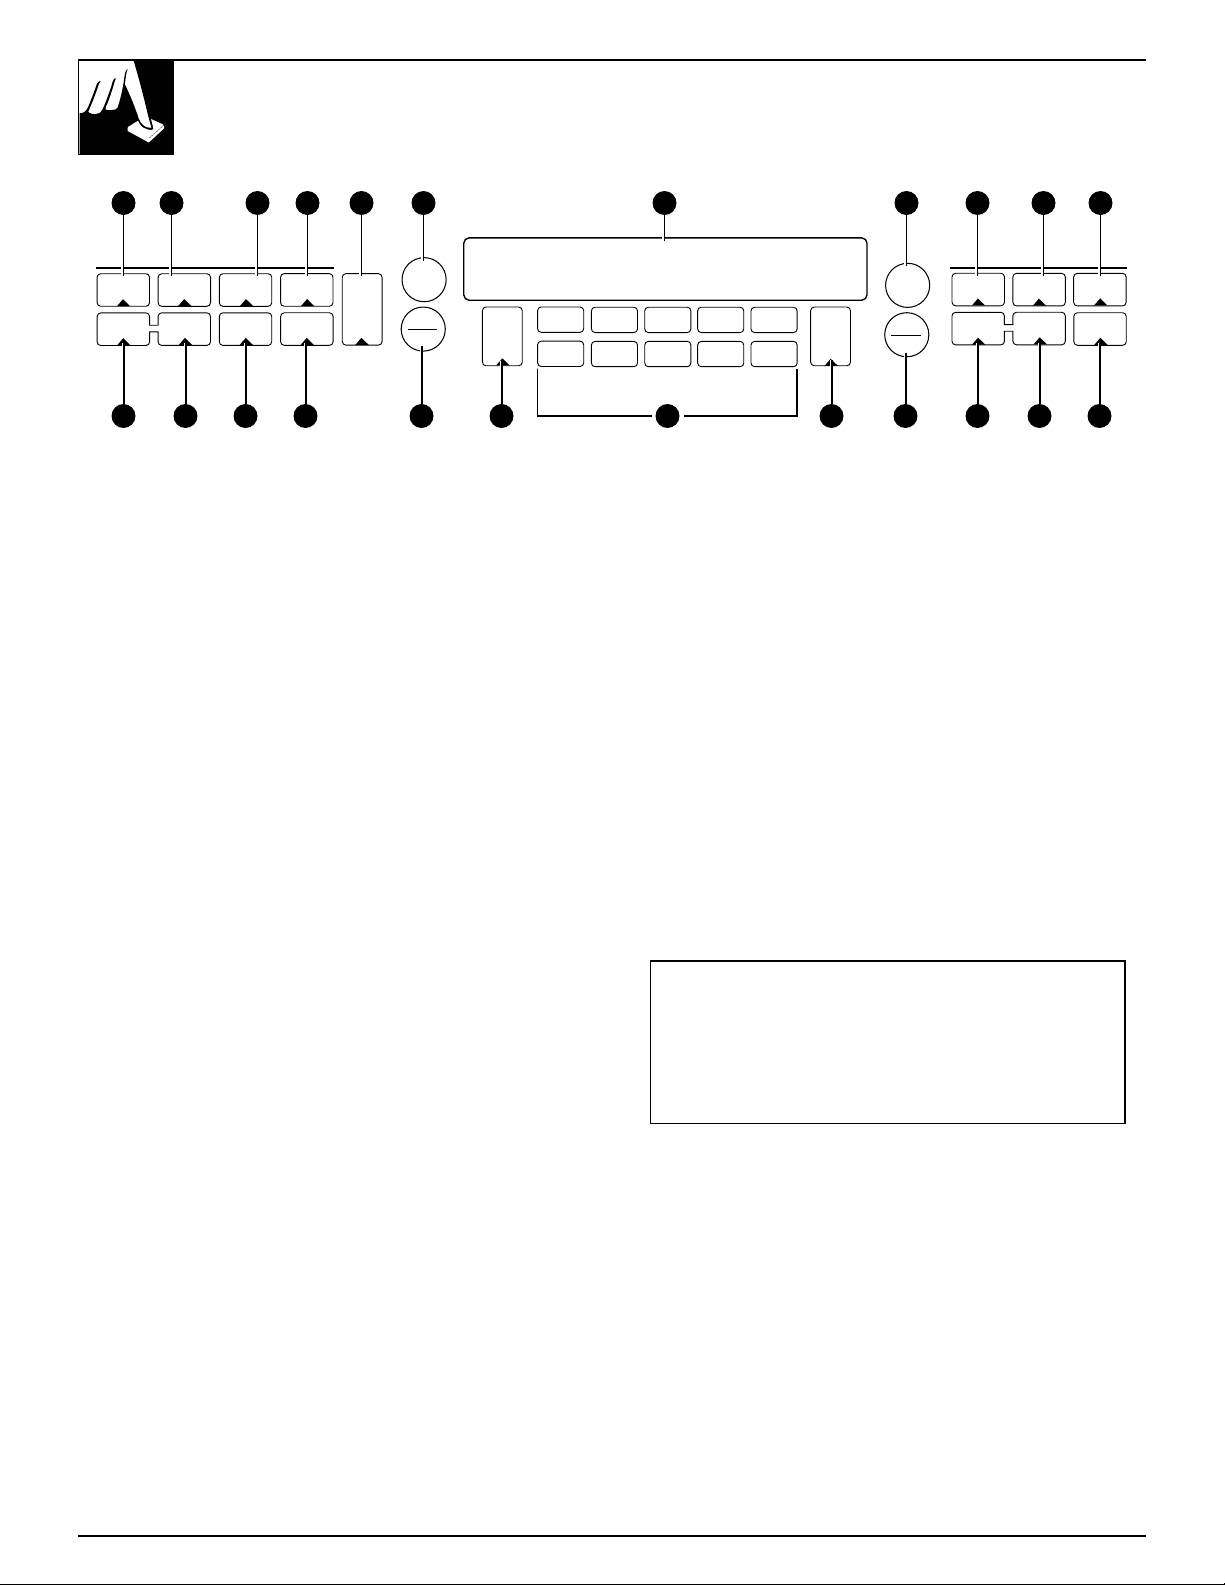
FEATURES OF YOUR OVEN CONTROL
4 5 6 7 6321 1 2 8
UPPER OVEN
CONVECTION
BROIL
BAKE
COOKING
TIME
10 9 8 15 11 10 9 511 14 12
HI/LO
DELAY
START
BAKE
SELF
CLEAN
CONVECTION
ROAST
PROBE
OVEN
LIGHT
1. BAKE. Press to select the bake function.
2. BROIL HI/LO. Press to select the broil function.
3. CONVECTION BAKE. Press to select baking
with convection.
4. CONVECTION ROAST. Press to select roasting
with convection.
5. OVEN LIGHT ON/OFF. Press to turn the oven
lights on or off.
6. START. Must be pressed to start any cooking or
cleaning function.
7. DISPLAY.Shows the operations you have
selected, the time of day and the cooking or
cleaning status.
8. SELF CLEAN. Press to select the self-cleaning
function. See the Operating the Self-Cleaning
Oven section.
9. DELAY START. Use along with COOKING
ON/OFF
START
CLEAR
OFF
KITCHEN
TIMER
ON/OFF
1
2
3
4
5
6
7
8
9
0
13
10. COOKING TIME. Use for Timed Bake, Timed
Convection Bake and Timed Convection Roast
operations.
11. CLEAR/OFF. Press to cancel any timed oven
operation except the clock and timer.
12. CLOCK. Press to enter the time of day.
13. NUMBER PADS. Use to set any function
requiring numbers—for example, the time of day
on the clock, the timer, the oven temperature, the
internal food temperature, the starting and length
of cooking time for Timed Bake and the starting
and length of cleaning time for Self-Clean.
14. KITCHEN TIMER ON/OFF. Press to select the
timer function. The timer does not control oven
operations. The timer can time up to 9 hours
and 59 minutes.
15. PROBE. Press when using the probe to cook food
(upper oven only).
TIME or SELF CLEAN to set the oven to start
and stop automatically at a time you select.
If “F–and a number or letter” flash in the
display and the oven control signals, this
indicates function error code. Press CLEAR/OFF.
Allow oven to cool for one hour. Put the oven
back into operation. If function error code repeats,
disconnect power to the oven and call for service.
CLOCK
START
CLEAR
OFF
BAKE
COOKING
TIME
LOWER OVEN
BROIL
HI/LO
DELAY
START
SELF
CLEAN
OVEN
LIGHT
ON OFF
6
OVEN CONTROL, CLOCK AND TIMER
Clock
The clock must be set for the automatic oven timing functions to work properly.
The time of day clock cannot be changed during Delay Start. (It can be changed
during a regular bake or broil operation.)
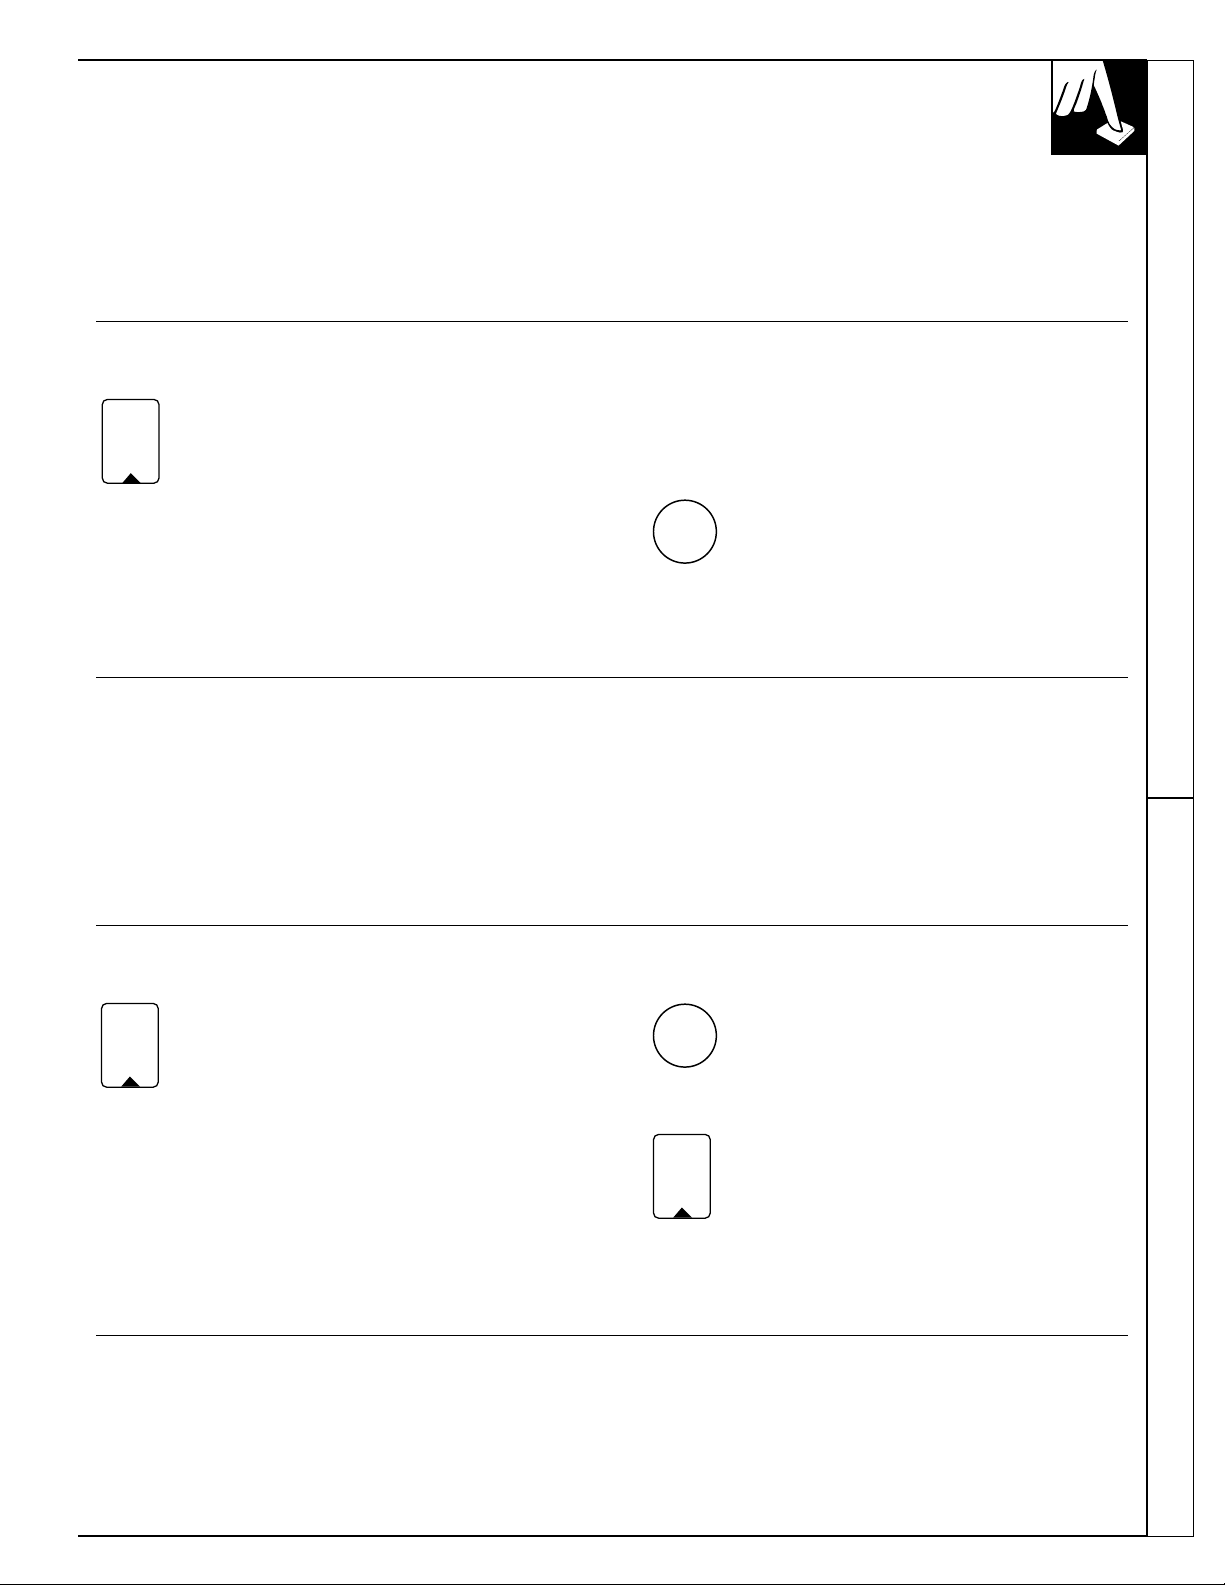
To Set the Clock
1. Press CLOCK.
CLOCK
2. Press the number pads the same way you
read them. For example, to set 12:34,
press the number pads 1, 2, 3 and 4 in
that order.
If number pads are not pressed within one minute
after you press CLOCK, the display reverts to the
original setting. If this happens, press CLOCK and
reenter the time of day.
3. Press START. This enters the time and
START
To check the time of day when the display is
showing other information, simply press CLOCK.
The time of day shows until another pad is pressed.
starts the clock.
Timer
You may program the timer to time cooking or other
household activities for up to 9 hours and 59 minutes.
The timer counts down in minutes, 1 minute at a time,
until the last 60 seconds are reached, then the control
will beep one time. The seconds will not be displayed
until the last minute is reached.
When the timer reaches “ :00,” the control will beep
3 times followed by one beep every 6 seconds until
KITCHEN TIMER ON/OFF is pressed.
The 6 second tone can be canceled by following the
steps in the Special Features of Your Oven Control
section under Tones at the End of a Timed Cycle.
Features of Your Oven Control Oven Control, Clock and Timer
How to Set the Timer
3. Press START.
4. When time is up, the oven control
KITCHEN
TIMER
ON/OFF
1. Press KITCHEN TIMER ON/OFF.
2. Press the number pads to set the time.
For example, to enter 2 hours and 45
minutes, touch 2, 4 and 5 in that order.
If you make a mistake, press KITCHEN
TIMER ON/OFF and begin again.
START
KITCHEN
TIMER
ON/OFF
NOTE: The minute timer is independent of all the
other functions and it does not control the oven.
The CLEAR/OFF pad does not affect the timer.
Power Failure
If a flashing time of day is in the display,you have experienced a power
failure. Reset the clock. To reset the clock, press CLOCK. Enter the correct
time of day by pressing the appropriate number pads. Press START.
(continued next page)
After pressing START, “SET” disappears;
this tells you the time is counting down,
although the display does not change until
one minute has passed.
signals until you press KITCHEN
TIMER ON/OFF. Display then shows
the time of day.
7
OVEN CONTROL, CLOCK AND TIMER
(continued)
The control has a series of tones that will sound at different times. These
tones may sound while you set the control for an oven function or at the
end of the oven function. They will also alert you when an incorrect time
or temperature has been entered or if there is a problem with the oven.
Tones While Setting the Control Preheat Notification Tone
When you press a touch pad you will hear a beep.
This beep will let you know you have placed enough
pressure on the pad to activate it.
When you set an oven temperature the oven
automatically starts to heat. When the temperature
inside the oven reaches your set temperature a tone will
sound to let you know to place the food in the oven.
Attention Tone
This tone will sound if you set an invalid function or try to set an additional
function. The tone can be quickly identified by watching the display messages.
SPECIAL FEATURES OF YOUR OVEN CONTROL
Your new touch pad control has additional features that you may choose
to use. The following are the features and how you may activate them.
The special feature modes can only be activated while the display is
showing the time of day clock.
They remain in the control’s memory until the steps are repeated. When the
display shows your choice press START. The special features will remain in
memory after a power failure.
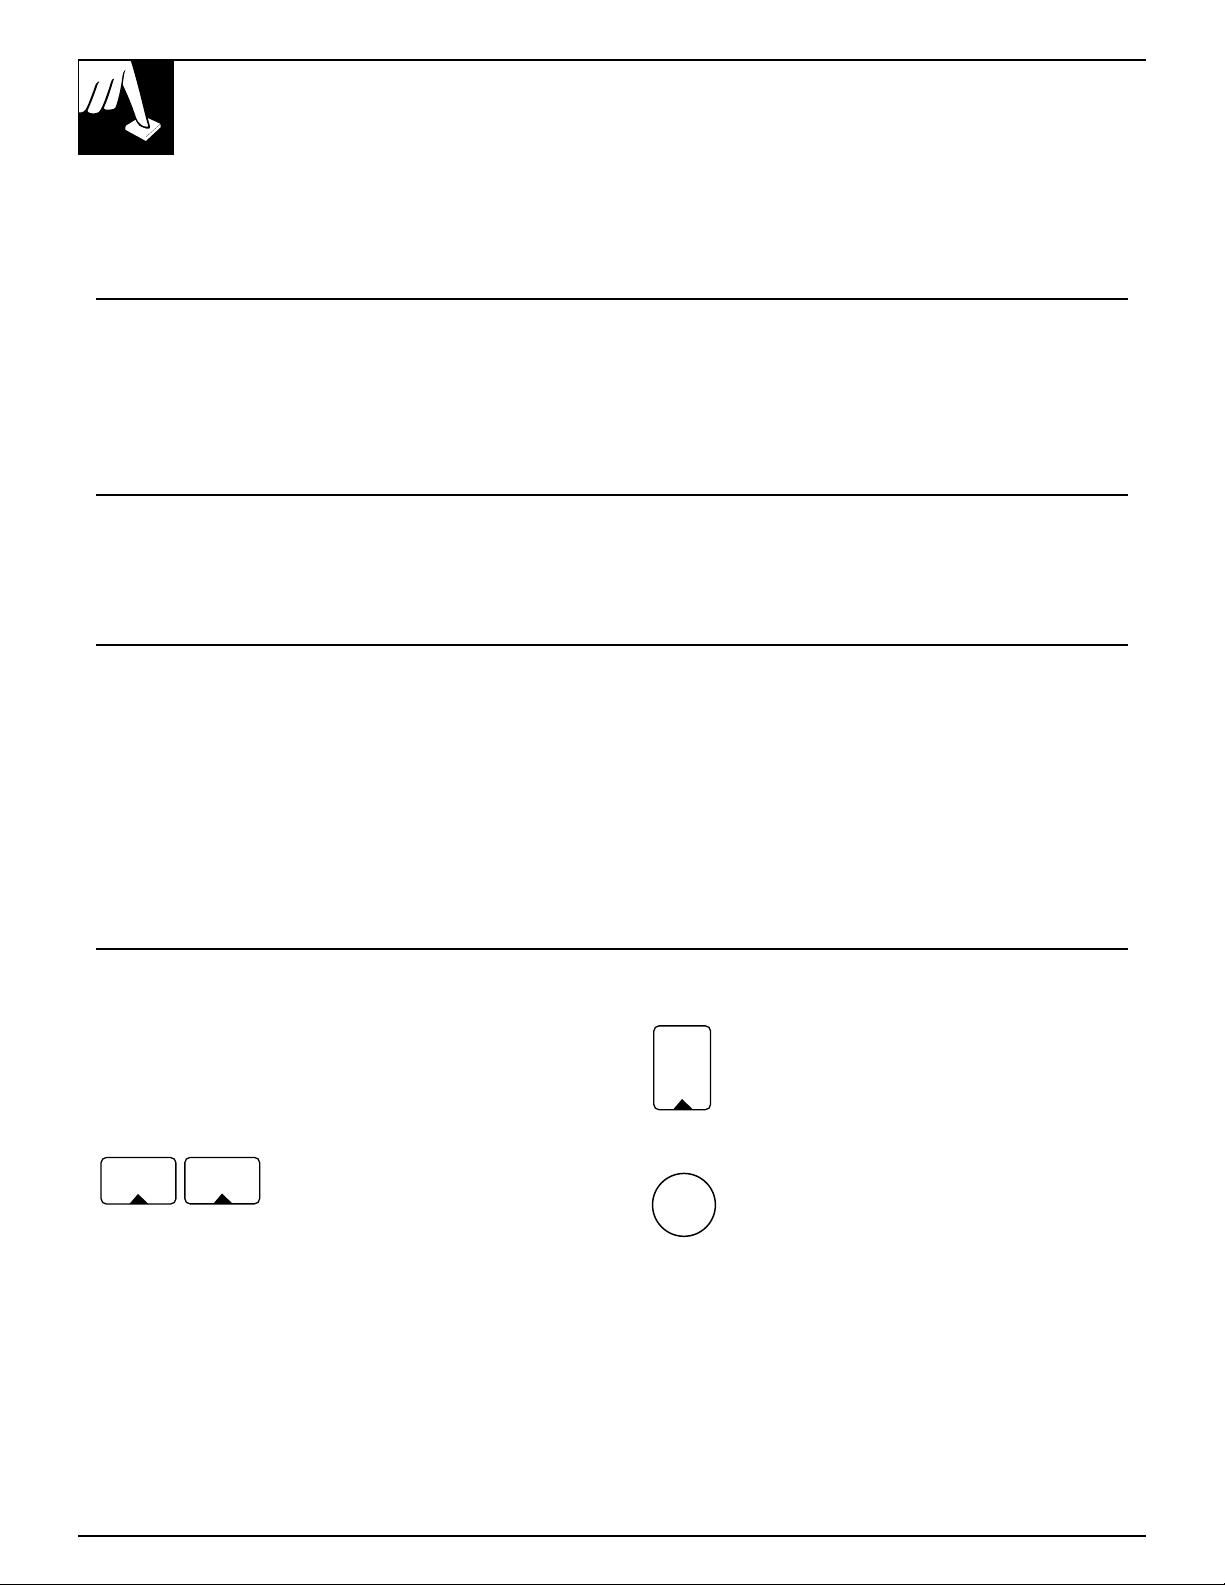
Tones at the End of a Timed Cycle
At the end of a timed cycle, 3 short beeps will sound
followed by one beep every 6 seconds, until
CLEAR/OFF is pressed. This continuous 6 second
beep may be canceled.
To cancel the 6 second beep:
BAKE
BROIL
HI/LO
1. Press the upper oven BAKE and
BROIL HI/LO at the same time
for 2 seconds until the display
shows “SF .”
8
2. Press KITCHEN TIMER ON/OFF.
KITCHEN
TIMER
ON/OFF
START
NOTE: This cancels the end of cycle tone for
both ovens.
The display shows “CON BEEP”
(continuous beep). Press KITCHEN
TIMER ON/OFF again. The display
shows “BEEP.” (This cancels the one
beep every 6 seconds.)
3. Press START.
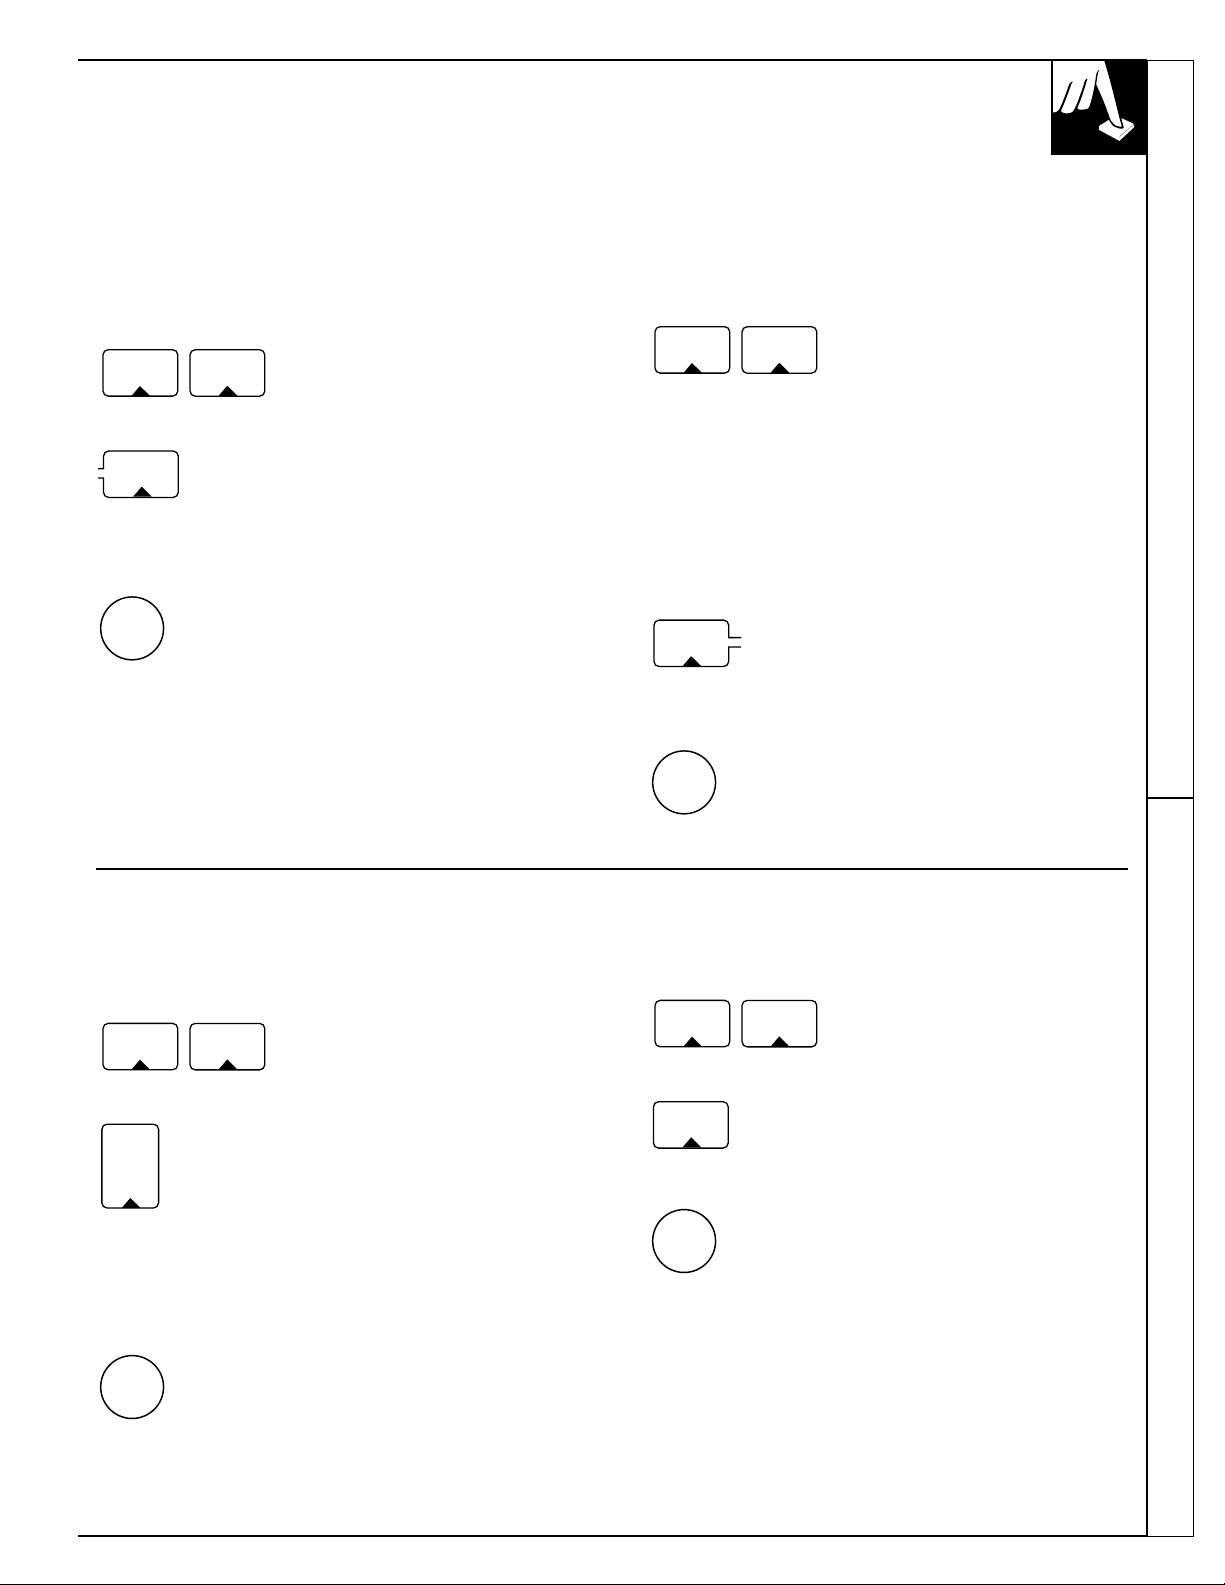
12 Hour Shut-Off Cook and Hold
Oven Control, Clock and Timer Special Features of Your Oven Control
With this feature, should you forget and leave the
oven on, the control will automatically turn off the
oven after 12 hours during baking functions or after
3 hours during a broil function. If you wish to turn
off this feature, follow the steps below.
BAKE
BROIL
HI/LO
1. Press the upper oven BAKE
and BROIL HI/LO at the same
time for 2 seconds until the
display shows “SF.”
DELAY
START
2. Press DELAY START. The
display will show “12 shdn”
(12 hour shut-off). Press
DELAY START again and the
display will show “no shdn”
(no shut-off).
3. Press START to activate the
START
no shut-off and leave the
control set in this special
features mode.
NOTE: This activates this special feature in both ovens.
Your new control has a cook and hold feature that
keeps cooked foods warm for up to 3 hours after the
cooking function is finished. To activate this feature,
follow the steps below.
BAKE
BROIL
HI/LO
1. Press the upper oven BAKE
and BROIL HI/LO at the same
time for 2 seconds until the
display shows “SF.”
NOTE: Cook and hold in the
upper and lower ovens will need
to be set separately. Once you
have completed step 1 follow
the steps below pressing the
upper or lower oven pads
depending on which oven you
want to use cook and hold in.
COOKING
TIME
2. Press COOKING TIME. The
display will show “Hld OFF.”
—Press COOKING TIME again
to activate the feature. The
display will show “Hld ON.”
3. Press START to activate the
START
cook and hold feature and
leave the control set in this
special features mode.
12 Hour, 24 Hour or Clock Black-Out Control Lockout
Your control is set to use a 12 hour clock. If you
would prefer to have a 24 hour military time clock or
black-out the clock display, follow the steps below.
BAKE
BROIL
HI/LO
1. Press the upper oven BAKE
and BROIL HI/LO at the same
time for 2 seconds until the
display shows “SF.”
2. Press CLOCK once. The
CLOCK
display will show “12 hr.”
—Press CLOCK again to
change to the 24 hour military
time clock. The display will
show “24 hr.”
—Press CLOCK again to black-
out the clock display. The
display will show “OFF.”
3. Press START to activate your
START
choice and leave the control set
in this special features mode.
NOTE: If the clock is in the black-out mode you will
not be able to use the Delay Start function.
Your control will allow you to lock down the touch
pads so they cannot be activated when pressed.
BAKE
SELF
CLEAN
START
BROIL
HI/LO
When this feature is on and the touch pads are pressed
the control will beep and the display will show “LOC.”
NOTE:
• This activates this special feature in both ovens.
• The control lockout mode will not affect the clock,
timer and the oven light touch pads.
1. Press the upper oven BAKE
and BROIL HI/LO at the same
time for 2 seconds until the
display shows “SF.”
2. Press SELF CLEAN. The
display will show “LOC OFF.”
—Press SELF CLEAN again.
The display will show “LOC.”
3. Press START to activate the
control lockout feature and
leave the control set in this
special features mode.
(continued next page)
9
SPECIAL FEATURES
OF YOUR OVEN CONTROL
(continued)
Fahrenheit or Centigrade Temperature Selection
Your oven control is set to use the Fahrenheit
temperature selections but you may change this
to use the Centigrade selections.
BAKE
BROIL
HI/LO
1. Press the upper oven BAKE
and BROIL HI/LO at the same
time for 2 seconds until the
display shows “SF.”
USING YOUR OVEN
Before Using Your Oven
1. Look at the controls. Be sure you understand
how to set them properly.
2. Check the oven interior. Look at the shelves.
Take a practice run at removing and replacing
them properly to give sure, sturdy support.
3. Read over the information and tips that follow.
4. Keep this guide handy so you can refer to it,
especially during the first weeks of using your
new oven.
BROIL
HI/LO
BROIL
HI/LO
START
NOTE:
• You may notice a “burning” or “oily” smell the first
few times you turn your oven on. This is normal in a
new oven and will disappear in a short time. To
speed the process, set a self-clean cycle for 4 hours.
See the Operating the Self-Cleaning Oven section.
• A cooling fan may automatically turn on and off to
cool internal parts. This is normal, and the fan may
continue to run even after the oven is turned off.
• You will hear a convection fan while cooking with
the convection feature. The fan will stop when the
door is opened, but the heat will not turn off.
2. Press BROIL HI/LO. The display will
show “F” (Fahrenheit).
3. Press BROIL HI/LO again. The display
will show “C” (Centigrade).
4. Press START. The new setting will be
displayed for both ovens.
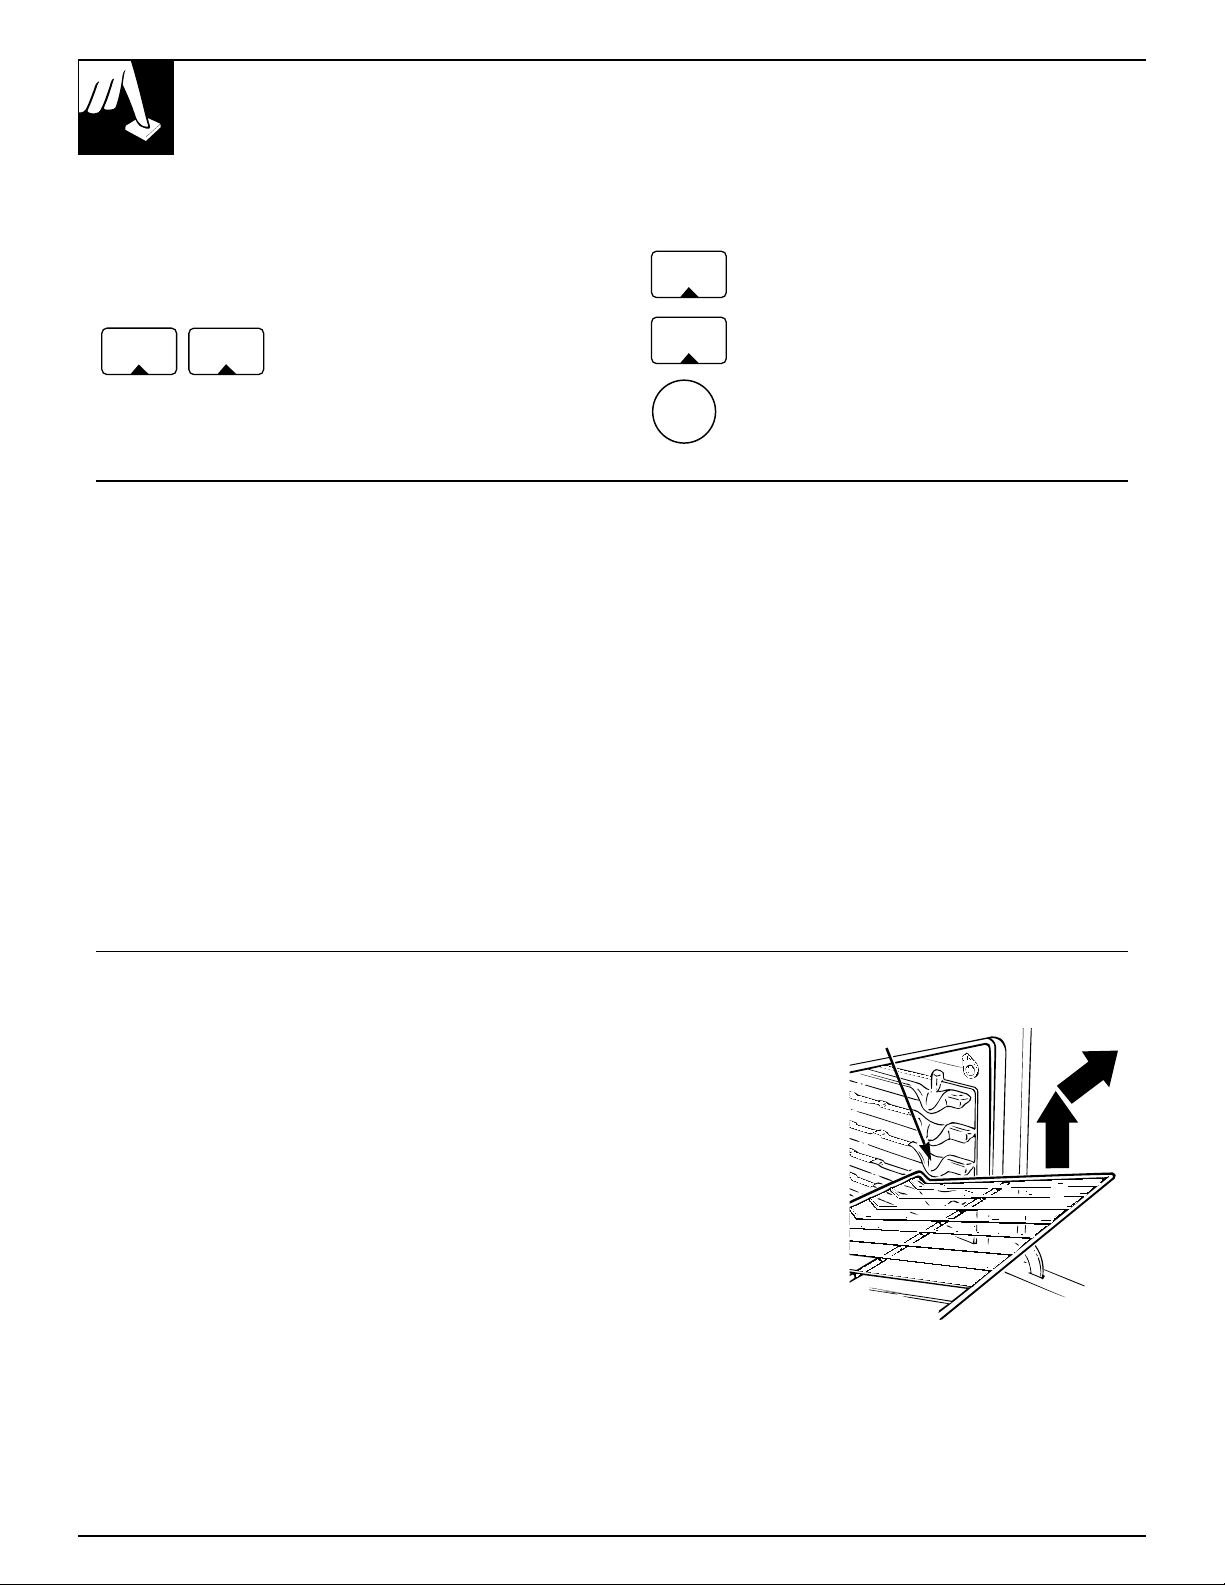
Oven Shelves
The shelves are designed with stop-locks so that,
when placed correctly on the shelf supports, they
will stop before coming completely out of the oven,
and will not tilt when removing food from or
placing food on them.
When placing cookware on a shelf, pull the shelf out
to the bump on the shelf support. Place the cookware
on the shelf, then slide the shelf back into the oven.
This will eliminate reaching into the hot oven.
To remove the shelf from the oven, pull the shelf
toward you, tilt the front end upward and pull the
shelf out.
10
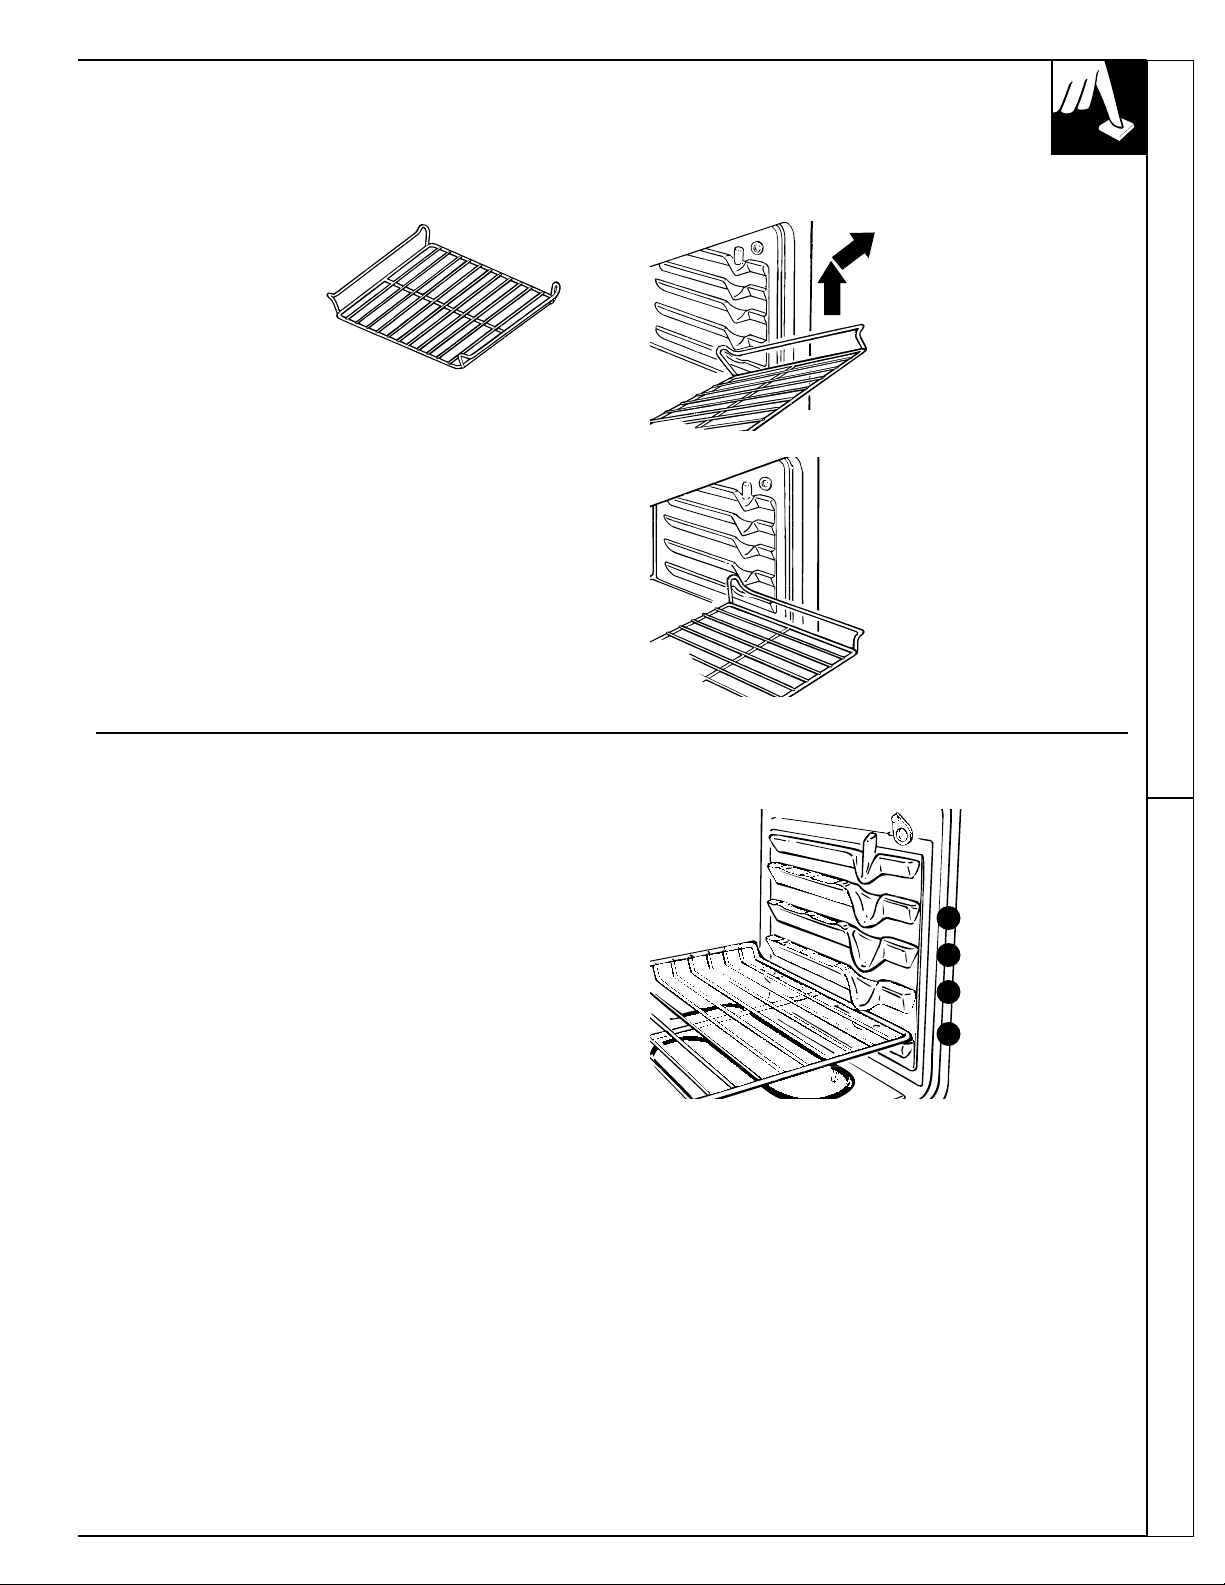
To replace, place
the shelf on the
shelf support with
the stop-locks
(curved extension
of the shelf) facing
up and toward the
rear of the oven.
Tilt up the front
and push the shelf
toward the back of
the oven until it goes
past the bump on the
shelf support. Then
lower the front of the shelf
and push it all the way back.
NOTE: The shelves for the convection oven are
2 inches shorter than the regular oven shelves.
Bump
Offset Shelf
Special Features of Your Oven Control Using Your Oven
The offset shelf provides
more cooking space
between itself and the
shelf above it. This
allows more flexibility
when placing foods in
the oven. See the MultiShelf Baking section.
The offset shelf can be placed at any shelf position.
CAUTION: When you are using the offset shelf
in the lowest position (A), you will need to use
caution when pulling the shelf out. We recommend
that you pull the shelf out several inches and then,
using two pot holders, pull the shelf out by holding
the sides of it. The offset shelf is low and you could
be burned if you place your hand in the middle of the
shelf and pull all the way out.
Shelf Positions
To remove the shelf,
pull it forward to the
stop-locks and lift the
front of the shelf.
To replace the shelf,
tilt the shelf up at the
front and slide the curved
extension of the shelf
under the stop-locks on
the shelf supports. Then
slide the shelf all the way
into the oven.
The oven has 4 shelf supports identified in this
illustration as A (bottom), B, C and D (top).
Shelf positions are suggested in the Convection
Cooking, Baking, Roasting and Broiling sections.
D
C
B
A
11
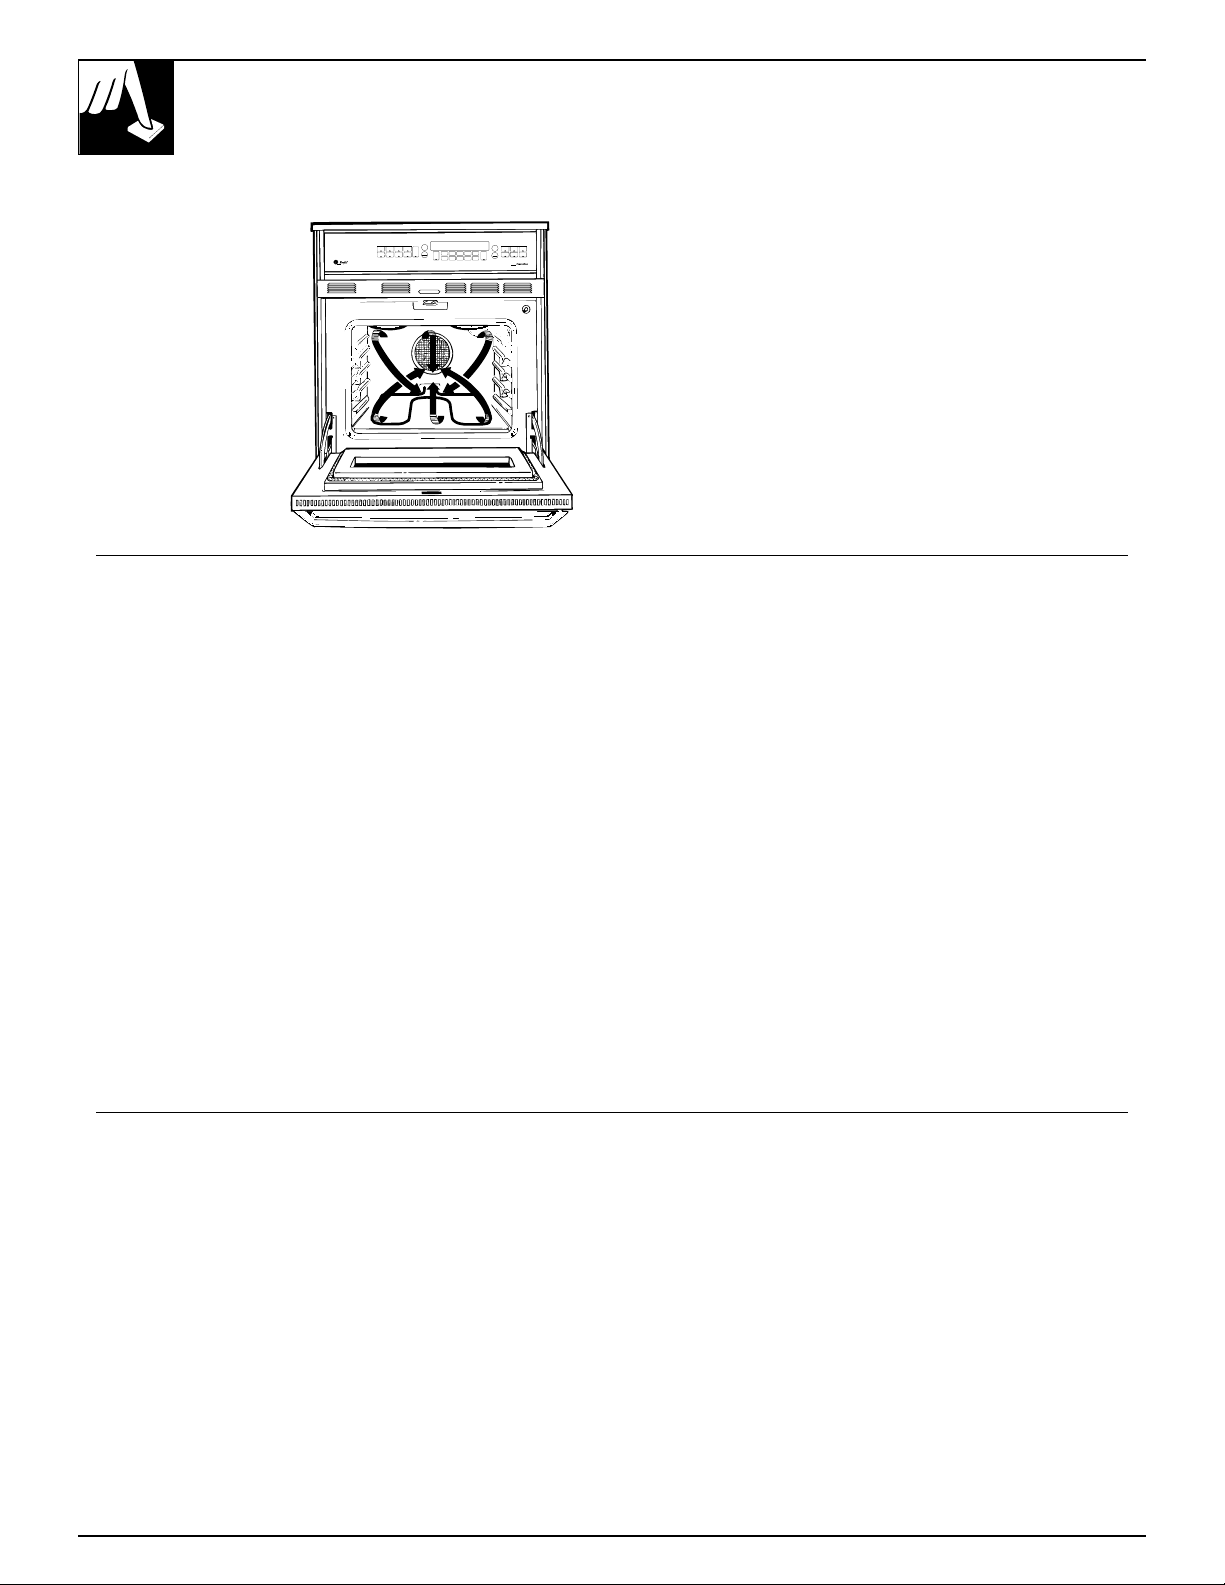
What is Convection?
CONVECTION COOKING
In a convection
oven, a fan circulates
hot air over, under and
around the food. This
circulating hot air is
evenly distributed
throughout the oven
cavity. As a result,
foods are evenly
cooked and
browned—often in
less time with
convection heat.
UPPER OVEN
START
CONVECTION
CONVECTION
BROIL
BAKE
ROAST
BAKE
HI/LO
OVEN
LIGHT
1
SELF
DELAY
COOKING
CLEAR
KITCHEN
PROBE
ON/OFF
CLEAN
TIME
START
OFF
TIMER
ON/OFF
6
2738495
LOWER OVEN
SELF
BROIL
START
BAKE
CLEAN
HI/LO
OVEN
DELAY
COOKING
CLEAR
LIGHT
TIME
START
CLOCK
ON OFF
OFF
0
Because food is heated faster in a convection oven
when using the convection modes, many types of food
can be cooked at lower temperatures than those
suggested for regular ovens. Do remember that recipe
books often give times and temperatures for cooking
in regular ovens. Convection ovens make it possible
to reduce the temperature by 25°F.
CAUTION: The convection oven fan shuts off when
the oven door is opened. DO NOT leave the door
open for long periods of time while using convection
cooking or you may shorten the life of the convection
heating element.
When Should You Use Convection Bake or Convection Roast?
To help you understand the difference between
convection bake and roast and traditional bake and
roast, here are some general guidelines.
In convection bake, heat comes from the heating
element in the rear of the oven. The convection fan
circulates the heated air evenly, over and around the
food. Preheating is not necessary with foods having
a bake time of over 15 minutes.
In regular baking, the bottom oven element heats
the air in the oven which then cooks the food.
Convection Bake
• Ideal for baked foods cooked on all 3 shelves.
• Good for large quantities of baked foods.
• Good results with cookies, biscuits, brownies,
cream puffs, sweet rolls, angel food cake and bread.
Regular Bake
• Foods such as layer cakes have a more level top
crust when not baked with convection heat.
In convection roast, heat comes from the top oven
element. The convection fan circulates the heated air
evenly over and around the food. Meat and poultry
are browned on all sides as if they were cooked on
a rotisserie. Using the roasting rack provided, heated
air will be circulated over, under and around the food
being roasted. The heated air seals in juices quickly
for a moist and tender product while, at the same
time, creating a rich golden brown exterior.
Convection Roast
• Large tender cuts of meat, uncovered.
• Roasting pans with low sides to allow air movement
around food.
Regular Roast
• Less tender cuts of meat because these need to cook
a long time in liquid to become tender.
• Cooking bag
• Foil tent
• Covered dish
Cookware for Convection Cooking
Before using your convection oven, check to see
if your cookware leaves room for air circulation in
the oven. If you are baking with several pans, leave
space between them. Also, be sure the pans do not
touch each other or the walls of the oven.
Metal and Glass
Any type of cookware will work in your convection
oven. However, metal pans heat the fastest and are
recommended for convection baking.
• Darkened or matte-finished pans will bake faster
than shiny pans.
• Glass or ceramic pans cook more slowly.
12
Paper and Plastic
Heat-resistant paper and plastic containers that are
recommended for use in regular ovens can be used in
convection ovens. Plastic cookware that is heatresistant to temperatures of 400°F. can also be used.
When baking cookies, you will get the best results
if you use a flat cookie sheet instead of a pan with
low sides.
For recipes like oven-baked chicken, you should
use a pan with low sides. Hot air cannot circulate
well around food in a pan with high sides.
 Loading...