

Page 1
ge.com
Safety Instructions ............. 2-7
|
0
U3
©
Operating Instructions
Baking or Roasting .............. 12
Broiling, Broiling Guide .......... 14
Clock and Timer ................ 15
Control i,ockout ................ 11
Cookware ....................... 9
Oven ....................... 10-21
Sabbath Feature ................. 18
Self'Cleaning ................ 20, 21
Special Features ................. 17
Surfhce Burners ............... 8, 9
Thermostat ..................... 19
Timed Baking & Roasting ........ 16
Care and Cleaning
Burner Assembly ................ 22
Burner Grams, Vent (Mile
and Vent (Mile Cap ............. 23
Control Panel .................. 26
Door .......................... 25
Floor .......................... 26
Knobs ......................... 22
i _ift-Off Oven Door .............. 25
Light Bulbs .................. 23, 24
Oven Vent and
Cookmp Air Inlet ................ 26
,]csP2s
Packa_ng Tape ................. 22
Painted Surfhces ................ 26
Racks .......................... 24
Stainless Smel Surfhces ........... 26
Storage Drawer ................. 24
Vent ........................... 26
Troubleshooting Tips ....... 27-30
Accessories .................... 33
Consumer Support
Consumer Support ...... Back Cover
Product Re_strafion ......... 31, 32
Warranty fi)r Customers
in Canada ...................... 35
Warranty fi)r Customers
in the U.S.A .................... 34
www.geappliances, ca
Write the model and serial
numbers hem:
Model #
Serial #
You can find them on a label
behind the open oven door
on the lower left corner of the
range flame.
49-80535 04-08JR
Page 2
iMPORTANTSAFETYiNFORMATiON.
READALLiNSTRUCTiONSBEFOREUSING.
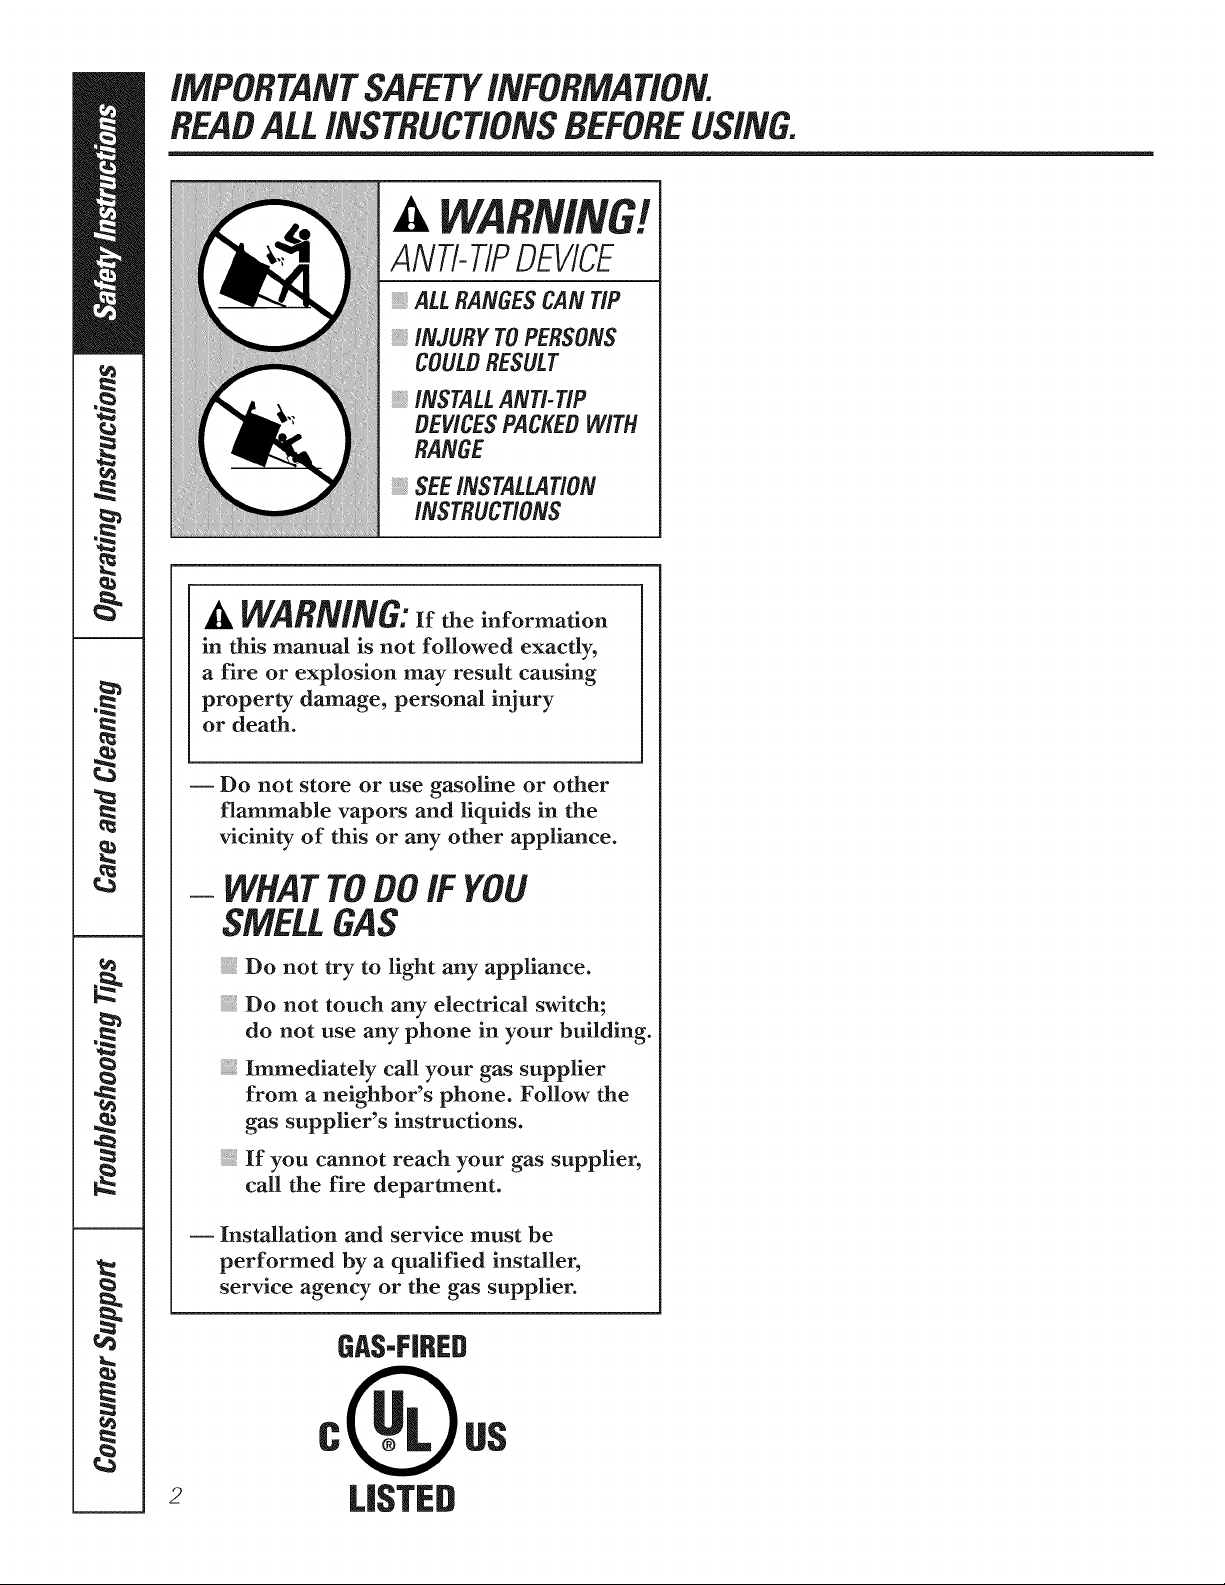
ANTI-TIPDEVICE
ALLRANGESCANTIP
iNJURYTOPERSONS
COULDRESULT
iNSTALLANTi-TIP
DEVICESPACKEDWiTH
RANGE
SEEiNSTALLATiON
iNSTRUCTiONS
,_ WARNING:Iftheinformation
in this manual is not followed exactly,
a fire or explosion may result causing
property damage, personal injury
or death.
Do not store or use gasoline or other
flammable vapors and liquids in the
vicinity of this or any other appliance.
WHATTODOIF YOU
SMELLGAS
Do not try to light any appliance.
Do not touch any electrical switch;
do not use any phone in your building.
Immediately call your gas supplier
from a neighbor's phone. Follow the
gas supplier's instructions.
If you cannot reach your gas supplier,
call the fire department.
-- Installation and service must be
performed by a qualified installer,
service agency or the gas supplier.
GAS-FIRED
C US
: LISTED
Page 3
For your safety, the information in this manual must be followed tominimize the risk of fire or
explosion, electric shock, or to prevent property damage, personal injury, or loss of fife.
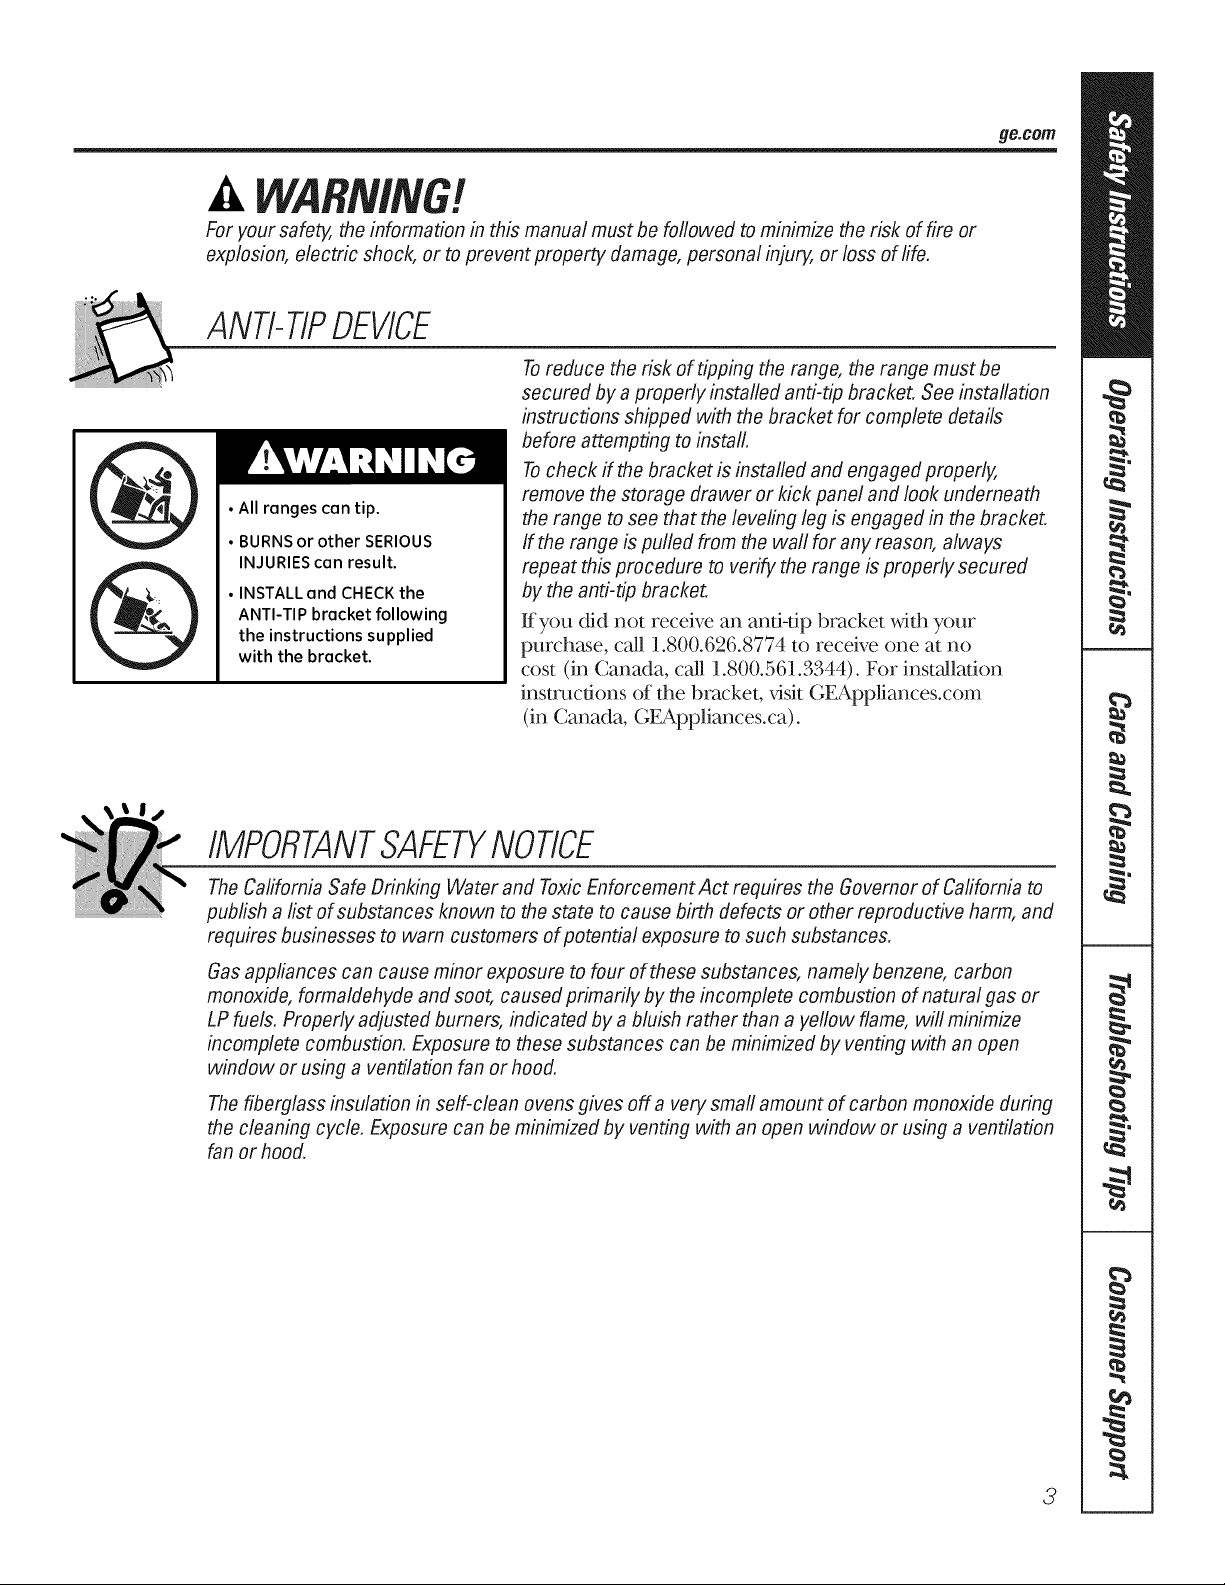
ANti- tip DEVICE
Toreduce the risk of tipping the range, the range must be
secured by a properly installed anti-tip bracket. See installation
instructions shipped with the bracket for complete details
before attempting to install.
Tocheck ff the bracket is installed and engaged properly,
• All ranges can tip.
• BURNS or other SERIOUS
INJURIES can result.
• INSTALL and CHECK the
ANTI-TIP bracket following
the instructions supplied
with the bracket.
remove the storage drawer or kick panel and look underneath
the range to see that the leveling leg is engaged in the bracket.
ff the range is pulled from the wall for any reason, always
repeat this procedure to verify the range is properly secured
by the anti-tip bracket.
Kyou did not receive an anti-tip bracket with your
purchase, call 1.800.626.8774 to receive one at no
cost (in Canada, call 1.800.561.3344). For installation
instructions of the bracket, x,isit GEAppliances.com
(in Canada, GEAppliances.ca).
ge.com
IMPORTANTSAFETYNOtiCE
TheCalifornia Safe Drinking Water and ToxicEnforcement Act requires the Governor of Cafifornia to
publish a list of substances known to the state to cause birth defects or other reproductive harm, and
requires businesses to warn customers of potential exposure to such substances.
Gas appliances can cause minor exposure to four of these substances, namely benzene, carbon
monoxide, formaldehyde and soot, caused primarily by the incomplete combustion of natural gas or
LP fuels. Properly adjusted burners, indicated by a bluish rather than a yellow flame, will minimize
incomplete combustion. Exposure to these substances can be minimized by venting with an open
window or using a ventilation fan or hood.
Thefiberglass insulation in self-clean ovens gives off a very small amount of carbon monoxide during
the cleaning cycle. Exposure can be minimized by venting with an open window or using a ventilation
fan or hood.
3
Page 4
iMPORTANTSAFETYiNFORMATiON.
READALLiNSTRUCTiONSBEFOREUSING.
m
SAFETYPRECAUTIONS
When using electrical appliances, basic safety precautions should be followed, including the
following:
}} Use this appliance only fi)r its intended
purpose as described in this Owner's
Manual.
iii}i}i
Be sure your appliance is properly installed
and grounded by a qualified technician in
accordance _4th the prox;ided installation
instructions.
iii}i}i
Before performing any ser_;ice, disconnect
the range power supply at the household
distribution panel by remcMng the thse or
sMtching off the circuit breaker.
iii}i}}li_
Have the installer show you the location of
the circuit breaker or filse. Mark it for easy
reference.
iii}i}i
Do not leave children alone--children
should not be left alone or unattended in
an area where an appliance is in use. They
should never be allowed to sit or stand on
any part of the appliance.
iii}i}}li_
Have the installer show you the location
of the range gas shut-off valve and how to
shut it off if necessa U.
iii}i}}li_
Have your range installed and properly
grounded by a qualified installer, in
accordance with the Installation
Instructions. M_y adjustment and ser_,ice
should be performed only by qualified gas
range installers or serx;icemchnicians.
iii}i}}li_
ix)cate the range out of kitchen traffic path
and out of drafty locations to prevent poor
air circulation.
iii}i}i
Be sure all packa_ng materials are
removed from the range befi)re operating
it m prevent fire or smoke damage should
the packa_ng mamrial ignite.
iii}i}}li_
Do not leave chiMren alone or unattended
where a range is hot or in operation. They
could be seriously burned.
}} Do not attempt to repair or replace any
part of your range unless it is specifically
recommended in this manual. M1 other
serx@e should be referred to a qualified
technician.
::_Be sure your range is correctly at,ljusted
by a qualified ser_,ice mchnician or installer
fbr the type of gas (natural or LP) that is
u) be used. Your range can be convermd
fi)r use _4th either type of gas. See the
Installation Instnlctions packed with
the range.
::_Plug your range into a 120-volt grounded
outlet only. Do not remove the round
grounding prong flom the plug. ff in
doubt about the grounding of the home
electrical system, it is your personal
responsibility and obligation m have
an ungrounded oudet replaced with a
properly grounded, three-prong outlet in
accordance _dth the National Electrical
Code. Do not use an exmnsion cord _dth
this appliance.
WARNING:theseadjustments
must be made by a qualified service
technician in accordance with the
manufacturer's instructions and all codes
and requirements of the authority having
jurisdiction. Failure to follow these
instructions could result in serious injury or
property damage. The qualified agency
performing this work assumes responsibility
for the conversion.
}}Keep the hood and grease filters clean to
maintain good venting and to avoid grease
fires.
}}Teach chiMren not to play with the
controls or any other part of the range.
}}Always keep dish towels, dish cloths, pot
homers and odmr linens a sNE distance
from your range.
4
Page 5

SAFETYPRECAUTIONS
ge.com
_:_Always keep wooden and plastic umnsils
and canned tbod a s_e distance from your
range.
::_Always keep combustible wall coverings,
curtains or drapes a s_e distance flom
your range.
::_Do not clean the range _<ithflammable or
volatile cleaning fluids.
_:;Alter prolonged use of a range, high floor
temperatures may resuh and many floor
coverings ;_ill not withstand this kind of
use. Never install the range over _;inyltile
or linoleum that cannot _<ithstand such
type of use. Never install it directly over
interior kitchen carpeting.
iii::vDo not allow anyone to climb, stand or
hang on the oven door, storage drawer or
cookmp. They could damage the range
and even tip it over, causing severe
personal injury.
CAUTION:itemsinterestto hildre
shouldnot be storedincabinetsabovearangeor
on the backsplashof a range--children climbing
on the rangeto reachitemscouldbeseriously
injured.
iii::vDo not store flammable mate.rials in an
oven, a range storage drawer or near a
cooktop.
iii::_Do not store or use combustible materials,
gasoline or other flammable vapors and
liquids in the x_icinityof this or any other
appliance.
iii::vDo not let cooking grease or other
flammable mamrials accumulate in or
near the range.
iii::vDo not use water on grease fires. Never
pick up a flaming pan. Turn the controls
oK Smother a flaming pan on a surface
burner by covering the pan completely
_dth a welMitting lid, cookie sheet or flat
tray. Use a multi-purpose dry chemical or
tbam-type fire extinguisher.
Flaming grease outside a pan can be put
out by covering it with baking soda or,
if available, by using a multi-purpose dry
chemical or foam-type fire extinguisher.
Flame in the oven can be smothered
completely by closing the oven door and
turning the control to off or by using a
multi-purpose dry chemical or fi)am-type
fire exting-uisher.
WARNING:NEVERusethis
appliance as a space heater to heat or
warm the room. Doing st) may result
in carbon monoxide poisoning and
overheating of the cookmp or oven.
iii_:_For your s_ety, never use your appliance
for warming or heating the room.
iii_:_Large scratches or impacts to glass doors
can lead to broken or shatmred glass.
iii::vDo not clean the range when the appliance
is in use.
iii::vNever wear loose4itting or hanging
garments while using the appliance.
Be carefifl when reaching fi)r imms stored
in cabinets over the range. Flammable
mamrial could be ignited it brought in
contact with flame or hot oven surfaces
and may cause severe burns.
iii::_Let the burner grates and other surfhces
cool before touching them or lem,ing
them where children can reach them.
iii::vNever block the vents (air openings) of
the range. They prtMde the air inlet and
outlet that are necessa_Lyfor the range to
operate properly _ith correct combustion.
Air openings are locamd through the rear
and flont center of the cooktop, at the top
and bottom of the oven door, and at the
bottom of the range under the storage
drawer or kick panel.
iii::vDo not lift the cooktop. Lifting the
cooktop can lead to damage and improper
operation of the range.
5
Page 6
iMPORTANTSAFETYiNFORMATiON.
READALLiNSTRUCTiONSBEFOREUSING.
A
,!
m
SURFACEBURNERS
Useproperpansize--avoid pans thatareunstableor easilytipped.Selectcookwarehavingfiatbottomslarge
enoughto coverburnergrates. Toavoidspillovers,makesure co&ware is largeenoughto containthefood
properly.Thiswill bothsavecleaningtimeandpreventhazardousaccumulationsoffood,sinceheavyspattering
orspilloversleft onrange canignite.Usepanswithhandlesthatcan beeasilygraspedandremaincool
Always use the UTE position when igniting
the top burners and make sure the burners
have ignited,
Never leave the surface burners unattended
at high flame settings. Boflovers cause
smoking and greasy spfllovers that may
catch on fire.
Adjust the top burner flame size so it does
not extend beyond the edge of the cookware.
Excessive flame is hazardous.
Use only dU pot holders--moist or damp pot
holders on hot surfaces m W result in bums
flom steam. Do not let pot holders come
near ()pen flames when lifting cookware. Do
not use a towel or other bulky cloth in place
of a pot holder.
"i_len using glass cookware, make sure it
is desi_md fbr top-of range cooking.
To minimize the possibility of bums, ignition
of flammable materials and spillage, mm
cookware handles toward the side or back of
the range _dthout extending over adjacent
burners.
Use the least possible amount of tat ff)r
effbctive shallow or deep-tat fiying. Filling
the pan too till of fat can cause spfllovers
when fbod is added.
_]len preparing flaming ff)ods under the
hood, turn the fan on.
Do not use a wok on the cooking surface
if the wok has a round metal ring that is
placed over the burner _ate to support the
wok. This ring acts as a heat trap, which may
damage the burner _ate and burner head.
Also, it may cause the burner to work
improperly. This may cause a carbon
monoxide level above that allowed by cunent
standards, resulting in a health hazard.
Foods fbr fi}_ng should be as d U as possible.
Frost on flozen fbods or moisture on flesh
fbods can cause hot tat to bubble up and over
the sides of the pan.
Never try to move a pan of hot fat, especially
a deep fat fiyen Wait until the fat is cool.
Do not leave plastic items on the cooktop--
they may melt if left too close to the vent.
Carefiflly watch fbods being flied at a high
flame setting.
Always heat fat slowly, and watch as it heats.
Do not leave any items on the cooktop. The
hot air flom the vent may ignite flammable
items and will increase pressure in closed
containers, which may cause them to burst.
If a combination of oils or fats will be used
in f@ng, stir together before heating or
as fats melt slo_s@
Use a deep fat thel_nometer whenever
possible to prevent overheating fat beyond
the smoking point.
Do not operate the burner _dthout all burner
parts in place.
Keep all plastics ms'ay flom the surface
bum ers.
To avoid the possibility of a burn, al_sws be
certain that the controls fbr all burners are
at the OFFposition and all _ates are cool
beibre attempting to remove them.
K range is located near a ,_dndow, do not
hang long curtains that could blow over the
surface burners and create a fire hazard.
Kyou smell gas, turn off the gas to the range
and call a qualified sen,ice technician. Never
use an ()pen flame to locate a leak.
Always turn the surface burner controls off
befbre removing cookware.
6
Page 7
ge.com
COOKMEATANDPOULTRYTHOROUGHLY...
Cookmeatandpoultrythoroughly--meattoat leastanINTERNALtemperatureof 160°Fandpoultrytoatleastan
INTERNALtemperatureof 180°ECookingto thesetemperaturesusua!lypretectsagainstfoodbomeillness.
OVEN
Stand away from the range when opening the oven door. Hot air or steam which escapes can cause
burns to hands, face and/or eyes.
: Do not heat unopened ff)od containers.
Pressure could build up and the container
could burst, cruising an injm T.
: Keep the oven vents unobstructed.
: Keep the oven flee flom grease btfildup.
: Place the oven rock in the desired position
while the oven is cool. If rocks must be handled
when hot, do not let pot holder contact the
heating elements.
: Bq_en using cooking or roasting bags in the
oven, follow the manufi_cmrer's directions.
: Pulling out the rock to the stopqock is a
com.'enience in lifking hem.), ff)ods. It is also a
precaution against bums flom touching hot
surfaces of the door or oven u-alls.
: Do not use the oven to dU newspapers.
If ovefl_eated, the}, can catch on fire.
: Do not use the oven fbr a storage area. Items
stored in an oven can ignite.
: Do not leave paper products, cooking utensils
or food in the oven when not in use.
WARNING:Na' Rco,,er
any dots, holes or passages in the oven bottom
or cover an entire rock with materials such as
aluminum fbil. Doing so blocks air flow
through the oven and may cause carbon
monoxide poisoning. Aluminum foil linings
may also trap heat, cruising a fire hazard.
: Do not use aluminum foil to line oven bottoms.
Improper installation of aluminum fbil may
result in a risk of electric shock or fire.
: Make sure a broiler pan is in place correcdy
to reduce the possibility of grease fires.
: If you sh(nfld have a grease fire in a broiler
pan, press the CLE/IR/0FFpadand keep the
oven door dosed to contain fire until it
burns out.
SELF-CLEANINGOVEN
Donot use oven cleaners.No commercialovencleaneror ovenliner protectivecoating ofanykindshouldbe
usedin or aroundany part oftheoven.Residuefrom oven cleanerswill damagetheinsideofthe ovenwhenthe
self-cleancycleis used.
: Do not clean the door gasket. The door gasket
is essential for a good seal. Care should be
taken not to rob, _'tarnage or move the gasket.
: Before self:cleaning the oven, remove shin};
silver-c(dored oven rocks (on some models)
and all other cookware.
: Be sure to xdpe up excess spillage befbre
starting the self:cleaning operation.
: If the self:cleaning mode malfunctions, mrn the
oven off and disconnect the power supply. Have
it ser_._ced by a qualified technician.
: Clean only parts listed in this Ou_aer's Manual.
READANDFOLLOWTHISSAFETYINFORMATIONCAREFULLY.
SAgETHESEINSTRUCTIONS 7
Page 8

Usingthe gas surface burners.
Throughout this manual, features and appearance may vary from your model
How to Light a Gas Surface Burner
Push the control knob in and turn it
to the LITEposition.
Push the control knob in and mrn it to
the tire position.
You will hear a little c/ickillff noise--
the sound of the electric spark igniting
the burnex:
After the flame lights, mrn the knob to
adjust the flame size. If the knob stays at
tirE, it will continue to click.
Sealed Gas Burners
When one burner is turned to UTE, all
file burners spark. Do not attempt to
disassemble or clean around any burner
while another burner is on. An electric
shock may restflt, which could cause you
to knock over hot cookware.
The smaller burner (fight rear position)
will give the best simmer results for
delicate foods, such _L_sauces or foods
which need to cook (wer low heat for a
long time. It can be turned down to a vei y
low setting.
How to Select Flame Size
Forsafehand/ingofcookware,never/ettheflames
extendupthesidesofthecookware.
Watch the flame, not file knob, as you
reduce beat. The flame size on a gas
burner should match the cookware
you are using.
in Case of Power Failure
In case of a power fhilure, you can light
the gas surface burners on your range
with a match. Hold a lit match to the
burnei; then push in and turn the control
knob to the UrEposifion. Use extreme
caution when lighting burnei_ this way.
The largest burnei_ are higher powered
than the othei_ and will bring liqukts to
a boil quicker
Any flame larger than the bottom of the
cookware is wasted and only serves to heat
the handle.
Surface burners in use when an electrical
power fhilure occm_ will continue to
operate normally.
Before Lighting a Gas Burner
Make sure all gqates on the range are in
place before using any burner
After Lighting a Gas Burner
Do not operam file burner for an
exmnded period of time without
cookware on the gram. The finish on
the gram may chip without cookware
to absorb the beat.
Be sure die burners and grates are
cool befbre you place your band,
a pot holdei; cleaning clodls or
other mamfials on them.
8
Page 9
Top-of-Range Cookware
ge.com
Aluminum: Medimn-weight cookware is
recomnlended because it heats quicldy
and evenly: Most foods brown evenly in
an ahmlinum skillet. Use saucepans with
fight-fitting lids when cooldng wifll
IIliniln/llIl }tHlO[lnts of _,V}tEeI-
Cast-Iron: If heated slowly, most skillets
will give safisfimtory results.
Enamelware: Under some conditions,
the enamel of some cookware may
melt. Follow cookware manuf_tcturer's
recommendations for cooking methods.
Glass: There are two types of glass
cookware--those f}.)r oven tlse olll} _
and those for top-of:range cooMng
(saucepans, coff>e and teapots).
(;lass conducts heat re, T slow[>
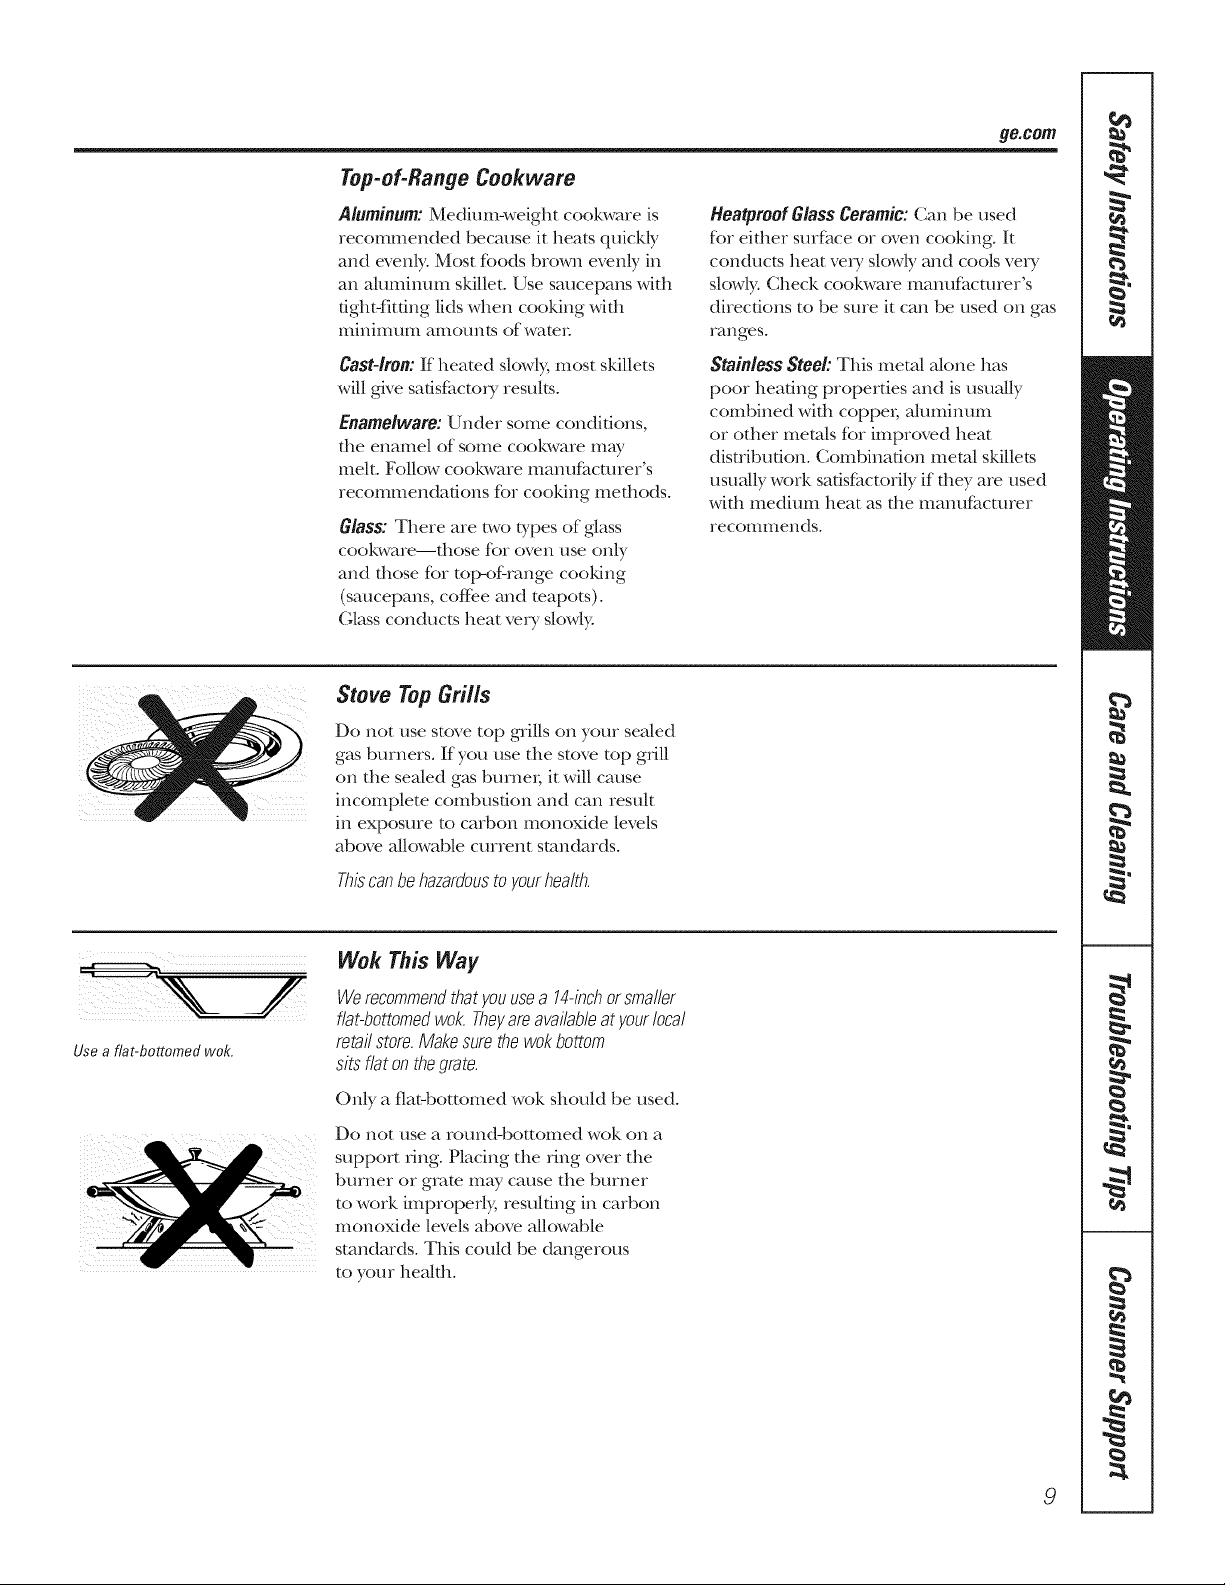
Stove Top Gri//s
Do not use stove top g_ills on your sealed
gas burners. If you use the stove top g_Jll
on the sealed g_ksburnei; it will cause
incomplete colnb/lsfion and can result
in exposure to carbon monoxide levels
above allowable current standards.
Heatproof Glass Ceramic: Can be used
K_i eidler surfitce or oven cooking. It
conducts heat vei T slowly and cools ve_T
slowly. Check cookware manufi_cmrer's
directions to be sure it can be used on gas
ranges.
Stainless Steel: This metal alone has
poor heating properties and is usually
combined with coppei; ahmlinunl
or other metals for improved heat
disuibudon. Combination metal skillets
usuMly work sadsfimtorily if they are used
with medium heat as the manufimmrer
recommends.
; !I ;i ii! ll
Use a flat-bottomed wok.
_U ¸U¸U¸U¸U¸¸¸
Thiscanbehazardousto yourhealth.
Wok This Way
We recommendthat you usea 14-inchor smaller
flat-bottomed wok. Theyare availableat your local
retailstore. Make surethe wokbottom
sits flat onthe grate.
Only a fiat-bottomed wok should be used.
Do not/lse a rotlnd-bottoliled wok on a
support dng. Placing tile ring over tile
burner or grate m W cause the burner
to work improperly, resulting in carbon
Illonoxide levels above allowable
standards. This could be dangerous
to your heakh.
9
Page 10
Usingtheoven controls.
Throughout this manual, features and appearance may vary from your model
0
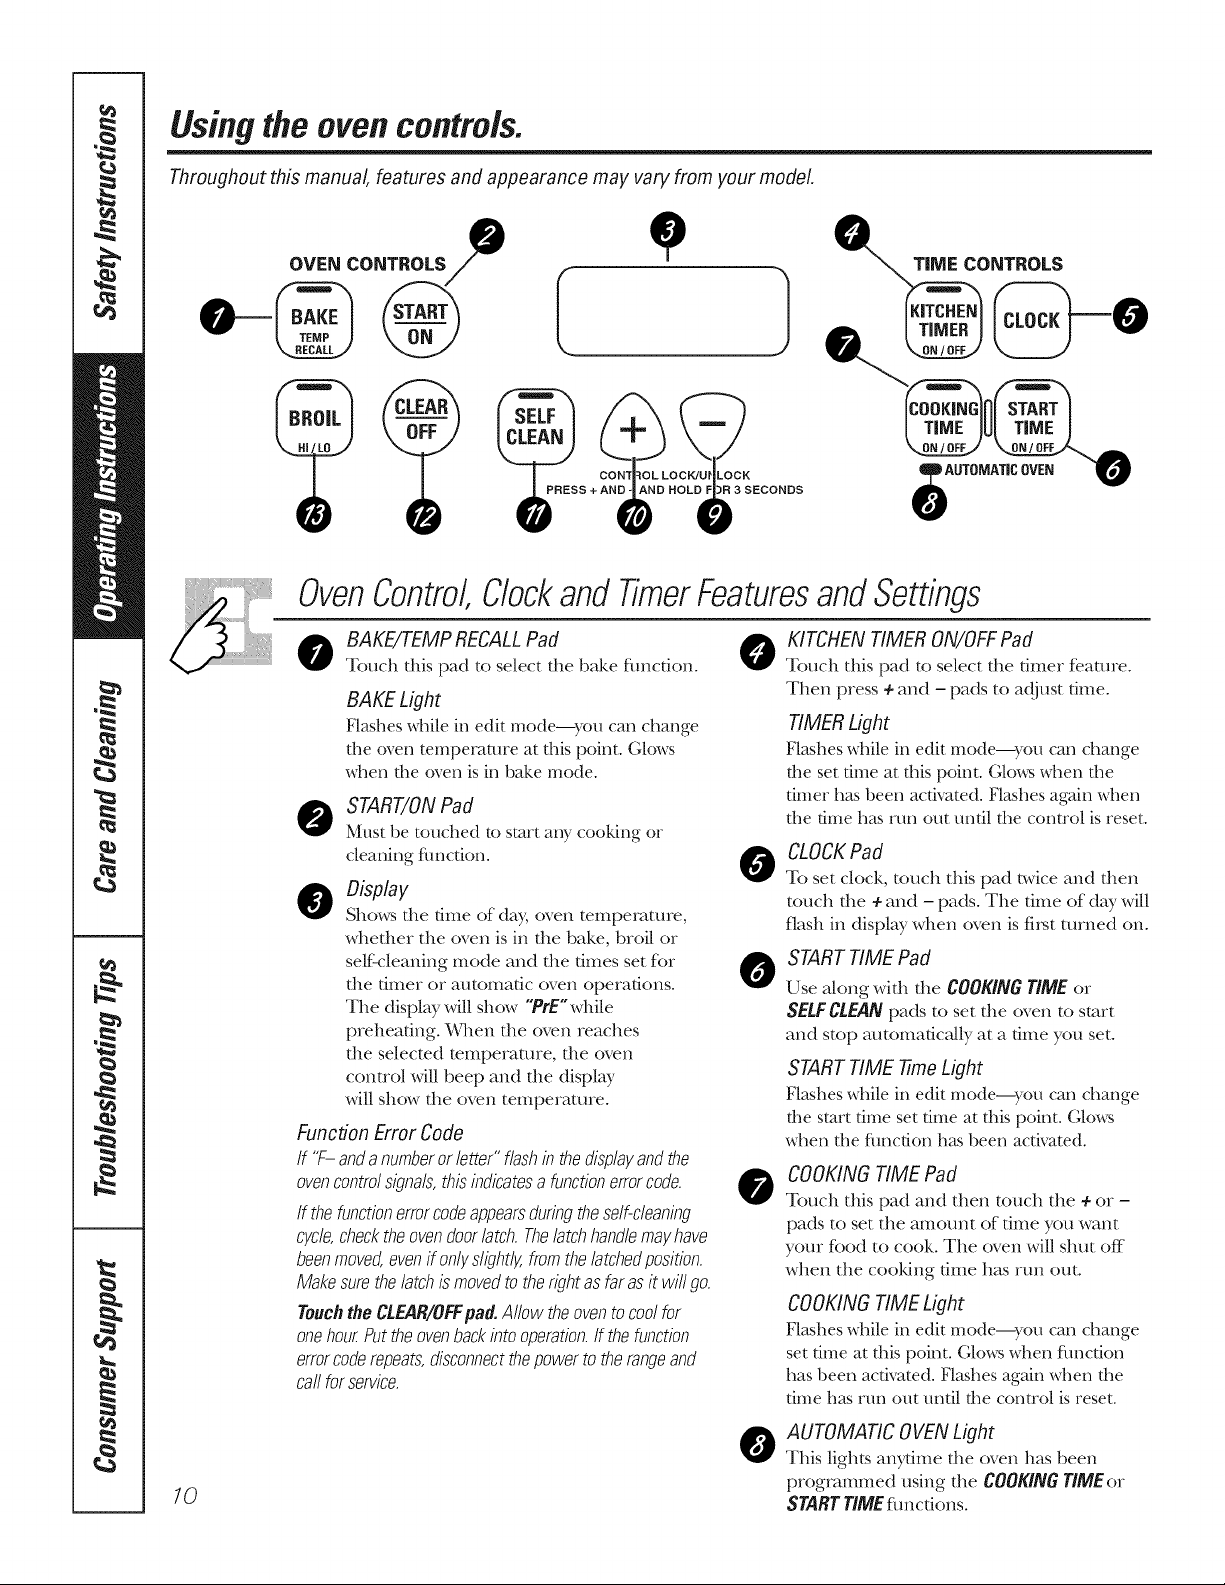
OVEN CONTROLS
S +AN_D HOLD6 3 SECONDS
OvenControl,Clockand TimerFeaturesandSettings
o BAKE/TEMP RECALLPad 0
Touch dlis pad to select die bake flmcfion.
BAKE Light
Flashes while it] edit mode--you can change
the oxen temperature at this point. Glows
when the oven is ix]bake mode.
o TART/ONPad
Must be touched to start any cooking or
cleaning fimction.
Display
Shows the time of day, oven temperature,
whether tile oven is in file bake, broil or
selfZcleaning mode and the dines set fbr
the timer or automatic oven operations.
Tile displW will show "PrE"while
preheating. When the oven reaches
the selected mlnperature, tile oven
conuol will beep and the display
will show the oven temperature.
Function Error Code
/f "7- andanumberor letter"flashinthedisplayandthe
ovencontrolsignals,thisindicatesa functionerrorcode.
If thefunctionerrorcodeappearsduringtheself-cleaning
cycle,checktheovendoorlatch.Thelatchhandlemayhave
beenmoved,evenifonlyslightlzfromthelatchedposition.
Makesurethelatchismovedto therightasfaras itwill go.
Touchthe CLEAR/OFFpad.Allow theoventocoolfor
onehourPuttheovenbackintooperation.If thefunction
errorcoderepeats,disconnectthepowertotherangeand
callfor service.
KITCHEN TIMER ON/OFFPad
Touch this pad to select die timer feature.
Then press + and - pads to adjust dine.
TIMER Light
Flashes Mille ix]edit tI]ode--yot] carl chaoge
the set time at (his point. (;lo_s _d]en tl]e
timer has been acthated. Flashes again _xhen
the time has run out until the conwol is reset.
CLOCKPad
0
To set clock, touch this pad twice and allen
touch tile + and - pads. The time of day will
flash in display when oven is fi]st turned on.
STARTTIME Pad
0
Use along widl die COOKINGTIME or
SELFCLEANpads to set the oven to start
and stop automatically at a time you set.
STARTTIME 77meLight
Flashes Mille ix]edit mode--yOtl cat] chaoge
the start time set time at (his point. (;lo_s
_d-]enfile flmction has been activated.
COOKINGTIME Pad
0
Touch this pad and then touch tile + or -
pads to set tile amount of dine you want
your food to cook. The oven will shut off
when tile cooking time has run out.
COOKINGTIMELight
Flashes Mille ix]edit mode--you carl change
set time at fills point. Gkms Mien flmcdon
has been acth'ated. Flashes again _dten the
th]le has rim out until the conWol is reset.
T|ME CONTROLS
10
AUTOMATIC OVEN Light
0
This lights an}_ime tile oven has been
programmed using tile COOKINGTIME(>]
STARTTIMEflmctions.
Page 11
OvenControl,Clockand TimerFeaturesandSettings
go.corn
O SELFCLEANPad
CONTROL LOCt_JUNLOCK
PRESS + AND - AND HOLD FOR 3 SECONDS
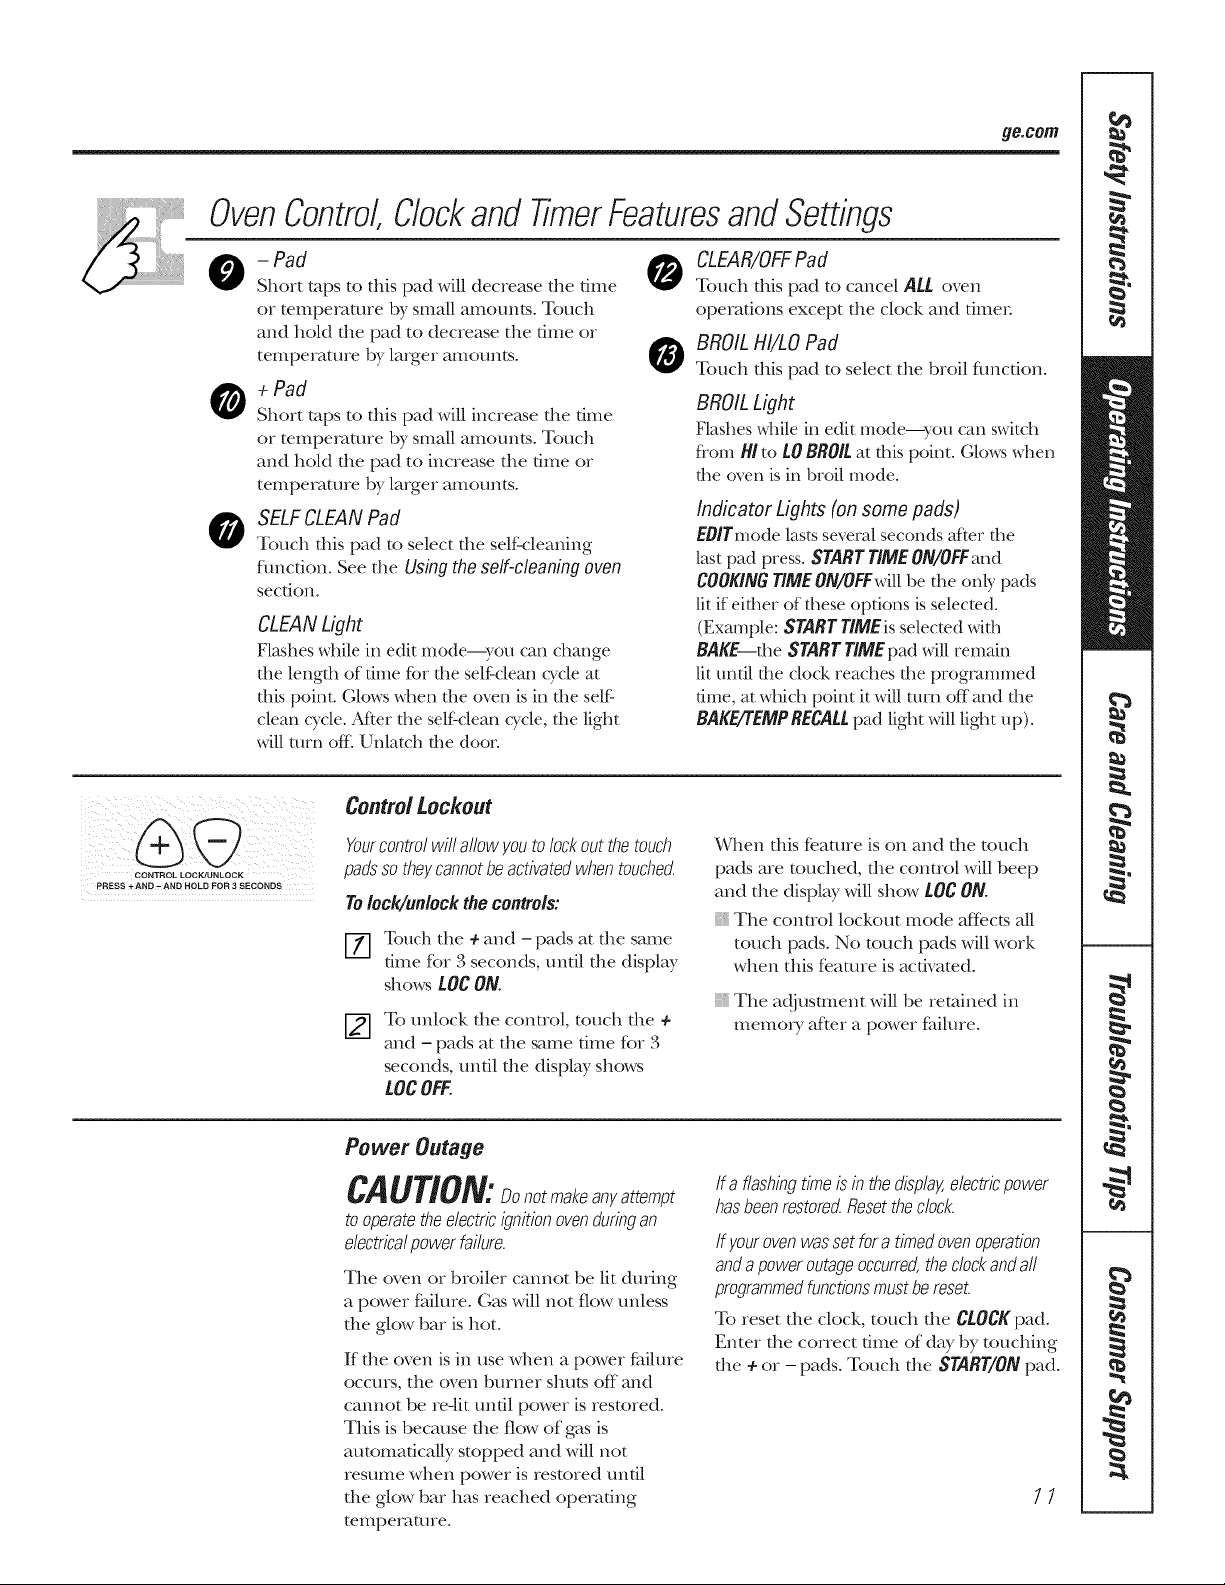
- Pad
Short taps to this pad will decrease the dine
or temperaane by small amounts. Touch
and hold the pad to decrease the time or
temperature by larger amounts.
+Pad
Short taps to this pad will incre_kse the time
or temperaane by small amounts. Touch
and hold the pad to increase the time or
temperature by larger amounts.
Touch this pad to select the selfk:leaning
flmcfion. See the Using the self-cleaning oven
section.
CLEANLight
Flashes _dfile in edit mode--you can change
die length of time fbr die self:cleat cy'cle at
flIis point. (}Lows_dIen t-he oven is ix]t-he self:
clean cycle. After the self:clem] cycle, the light
_dll mm off. Unlatch the door.
Control Lockout
Yourcontrolwillallowyoutolockoutthetouch
padssotheycannotbeactivatedwhentouched.
Tolock/unlock the controls:
_] Touch the ÷ and - pads at the same
dine ff)r 3 seconds, until the display
shows tOC ON.
To unlock the control, touch the ÷
and - pads at the sanIe time for 3
seconds, until the display shows
LOgOFF.
o LEAR/OFFPad
Touch this pad to cancel ALl. oven
operations except the clock and drnet:
o BROILHI/LO Pad
Touch this pad to select the broil fimction.
BROIL Light
Flashes _dIile in edit nIode--you can s_dtch
fi'om HI to LO BROIL at this point. (;l(ms _d]en
the oven is in broil nIode.
Indicator Lights (on some pads)
EBlTmode lasts several seconds after the
hst pad press. STARTTIMEON/OFFmId
COOKINaTIMEON/OFF_dIIbe the only pads
Litif either of these options is selected.
(Exmnple: START rlMEis selected vdth
BAKE tlIe STARTTIMEpad ,dll remain
Lituntil tlie dock reaches the progt'dmmed
time, at _d-fichpoint it _dll mm off and ]lie
BAKElYEMPRECALLpad Light_dll light up).
When tiffs feature is on and the touch
pads are touched, die conuol will beep
and the display will show L0g ON.
The conuol lockout mode afIects all
touch pads. No tottch pads will work
when this fe.aane is activamd.
The adj ustnient will be retained in
menIory after a power failure.
Power Outage
CAUTION: onotmakeanyattempt
to operate theelectric ignitionovenduringan
electricalpower failure.
The oven or broiler cannot be lit during
a power failure. G_Lswill not flow unless
the glow bar is hot.
If die oven is in use when a power failure
occurs, the oven burner shuts off and
cannot be re-lit until power is restored.
This is because the flow of gas is
autonIafica/ly stopped and will not
resume when power is restored until
file glow bat has reached operating
temperature.
If a flashingtimeis inthedisplay,electricpower
hasbeenrestoredResettheclock.
If youroven was set fora timed oven operation
anda power outage occurred,the clockand aft
programmedfunctionsmust be reset.
To reset die clock, touch die CLOCKpad.
Enter die correct time of day by touching
the + or - pads. Touch the START/ON pad.
11
Page 12

Usingtheoven.
Toavoid possible bums, place the racks in the desired posifion before you turn the oven on.
Before you begin...
The racks ]lave stops, so that when placed
correctly on file supports, filet will stop
beffne conling completely out, and will
not flit.
When placing and removing cookware,
pull tile rack out unfll it stops.
Tile bake burner is under tile oven floon
Do not place foods on tile oven bottom
for cooldng.
Toremove a rack, pull it toward you,
flit tile flont end tip and pull it out.
The oven has 7 rack positions.
How to Set the Oven for Baking or Roasting
To replace, place tile end of tile rack
(stop-locks) on tile support, flit tip tile
flont and push tile rack in.
CAUTION:Whenyouareusingthe
rackin the Iowestposition (A),you wifl needto
usecaution whenpuffing therackout We
recommendthat youpuff the rack out several
inchesand then, using two potholders,puff the
rackout byholding the sidesof it Therack is low
andyoucouldbe burnedif youplace your hand in
the middle of therack andpuffall thewag out.Be
verycareful notto burnyour hand onthe door
when using the rackin the lowest position(A).
[Z] Touch tile BAKE pad.
[_] Touch tile ÷or-pads unfll tile
desired temperature is displayed.
[_] Touch tile START/ON pad.
Tile oven will start automaflcally. Tile
display will show "PrU" while preheaflng.
When tile oven reaches tile selected
mmpetamre, tile oven control will beep
several flmes and tile display will show
die oven temperature.
Tochangethe oventemperatureduringBAKE
cycle,touchthe BAKEpad andthenthe ÷ or-
pads toget the new temperature.
[_] Check food for doneness at
minimum flme on recipe. Cool<
longer if necessary.
[_ Touch tile CLEAR/OFFpad when
baking is finished and then remove
the food flom the oven.
NOTE"Acooling fan will automatically turn on
andoff tocool intemalparts. Thisis normal, and
the fan magcontinue torun evenafter the oven
in turnedof_
Type of Food Rack Position
Frozenpies(oncookiesheet) CorD
Angelfoodcake A
Bundtorpoundcakes BorC
Biscuits,muffins,brownies, CorD
cool@s,cupcakes,
layercakes,pies
Casseroles CorD
Turkey A
If baldng fbm cake layers at tile same
flme, place b,,volayers on rock g and b,,vo
layers on rack D. Stagger pans on tile
rock so one is not direc@ above tile
other
12
Page 13

Preheating and Pan Placement
ge.com
Do not place foods directly on the
oven floor.
P_eheat the oven if file _ecipe calls for it.
Preheating is necessa_y for good results
when baking cakes, cookies, pasuy and
b,eads.
Topreheat,settheovenat thecorrecttemperature.
Thecontrolwillbeepwhentheovenispreheated
andthedisplaywiflshowyourset temperature.
Thepreheattimewill varydependingonthe
temperaturesetting.
Aluminum foil
Donotusealuminumfoilonthebottom
of theoven.
Never entiiely covei a _ack with
aluminum foil. This will disturb tile heat
ci_culafion and result in poor baking.
Oven Moisture
As youI oven beats up, file tempe_atuIe
change of tile air in tile oven may cause
water droplets to form on file door glass.
These droplets are harmless and will
evapoIate as the oven contintles to
heat up.
Baking results will be better if baldng
pans are cenmred in file oven _s much
as possible. If baldng with mo_e than one
pan, place tile pans so each has at least 1"
to 1½" of air space around it.
A smaller sheet of foil may be used to
catch a spillover by placing it on a lower
rack seve,a/inches below the food.
Oven Vent
Your oven is vented tluough file rear vent
located through the cooktop under tile
vent gqille. Do not block this vent when
cooMng in tile oven--it is important that
tile flow of hot air f_om the oven and
flesh ah to the oven burner be
uninmrrupted. Avoidtouchingthe vent
openingsor nearbysurfaces duringoven or
broileroperation--theymaybecomehot.
Handlesofpotsandpansonthecooktopmay
becomehotif left tooclosetothevent.
Donotleaveplasticitemsontheco&top--
theymaymeltifleft tooclosetotheven£
Donotleaveanyitemsonthecooktop.Thehot
airfromtheventmayigniteflammableitems
andwillincreasepressureinclosedcontainers,
whichmaycausethemtobursL
Metalitemswiflbecomeveryhotif theyare
leftonthecooktop,andcouldcausebums.
13
Page 14

Usingtheoven.
How to Set the Ovenfor Broiling
iMPORTANT:Toavoidpossibleburns,placethe
racksin thedesiredpositionbeforeyouturnthe
oven on.
Use tO Broil to cook foods such as pouluT
or thick cuts of meat thoroughly without
eve>browning them.
[7] Place tile meat or fish on a broiler
grid in a broiler pan designed
R_rbroiling.
[] Follow suggested rack positions in
tile BroilingGuide.
F31 Tile oven door must be closed
during broiling.
[] Touch tile BR0ILHI/L0 pad once for
HI Broil.
To change to LOBroil,touch tile
BROILIll/tO pad again.
Broiling Guide
Tile size, weight, thickness,
starting temperature Food
and your preference GroundBeef
of doneness will afiect Beef Steaks
broiling times. This guide Rarer
is based on meats at Medium
ref_igerator temperature.
t The {LS.D_*parhm,nt_!/
Ag'ricu/tan,sq_,s'Wan' b_',Jis
po/aula_;b_tt2ou should 1;_o_ that
codging"it to o_/5 140 ll"lm'a1_s
somefi_odpoisoni_N o)ga_fism,_
Book. fbm /,21tche_G_dde.USI)A
Theoven has 7rack positions.
WellDone
Rarer
Medium
Well Done
Chicken
Bakery Product
Broad (toast)
English Muffin
Lobster Tails
FishFillets
Salmon
Steaks
Fillets
HamSlices
(precooked)
Perk Chops
Well Done
I/2" to 3/4" thick
3/4"to 1" thick
1to 17_Ibs.
172"thick
2 to 27_ Ibs.
1whole cutup
2 to 2Y_Ibs.,
split lengthwise
Breast
2 to 4 slices
2 (split)
2-4
11b.(I/4 '' to 1/2"thick)
2 (1"thick)
2 {I/2" to 3/4"thick)
1/21'thick
1" thick
2 (I/2" thick)
2 (1"thick) about 1lb.
Rack
JPosition
F
E
E
E
E
D
D
C
F
F
E
E
U
U
[51 Touch tile START/ONpad.
[_] When broiling is finished, touch tile
CLEAR/OFFpad.
Serve the f}ood imtnediately; and leave tile
pan outside tile oven to cool during tile
meal for easiest cleaning.
13
6
8
10
15
15
20
25
25
3
3-4
18-20
10
15
8
8
10
15
4
6
8
10
15
20
25
15
1
Donot
turn
over.
5
8
10
5
Steaks less than s/4"
thick are difficult
to cook rare.
Slash fat.
Brusheachsidewith
meltedbutter.
Broilskin-side-down
first.
Spaceevenly.Place
Englishmuffins cut-
side-upandbrush
with butter ifdesired.
Cutthroughbackof
shell. Spreadopen.
Brushwith melted
butterbeforebroiling
andafter half of
broilingtime.
Handleandturn very
carefully.Brushwith
lemonbutterbefore
andduringcooking,
if desired.
Turncarefully.
Donotturn skin-side-
down.
Slashfat.
14
Page 15

Usingthe clock andtimer.
Not aft features are on aft models.
To Set the Clock
Make sure the clock is set to the
correct time of day.
The clock must be set to file correct time
of day for file autonmfic oven timing
flmcfions to work properly. The time of
day cannot be changed during a delayed
cooldng or a delayed self=cleaning cycle.
[Z] Touch tile CLOCK pad twice.
[] Touch tile ÷ or - pads.
If tile + or - pads are not touched wkhin
one minute _ff_er you touch tile CLOCK
pad, tile display reverts to tile original
To Turn Off the Clock Bisplay
If you have several clocks ill your kitchen,
you may wish to mm off the time of day
clock display on your range.
[Z] Touch the CLOCKpad once to toni
off tile time of day display. Akhough
you will not be able to see it, tile
To Set the Timer
setting. If this happens, touch tile CLOCK
pad twice and reenter tile time of day.
[_] Touch tile START/ON pad until tile
time of day shows ill tile display. This
enters tile time and starts tile dock.
Tocheckthetimeofdaywhenthedisplayis
showingotherinformation,simplytouchthe
CLOCKpad Thetimeofdayshowsuntilanother
padistouched
clock maintains tile correct time
of da?<
Touch tile CLOCKpad twice to recall
the clock display.
@
TheCLEAR/OFFpaddoesnotaffect
thetimer.
Thetimerdoesnotcentre/ovenoperations.
Themaximumsettingonthetimeris9 hours
and59minutes.
Touch the KITCHENTIMERON/OFF
%
pad.
Touch the ÷ or - pads undl tile
amount of time you want shows ill
the display. The IllaXillltltll dine that
call be enmred ill minums is 59.
Times more than 59 minutes shoukt
be changed to hours and minums.
To Reset the Timer
If die display is still showing die time
remaining, you may change it by touching
tile KITCHEN TIMER ON/OFF pad, then
touching tile + or - pads until tile time
you want appeaI_ ill tile display.
To Cancel the Timer
If youmakeamistake,touchtheKITCHEN
TIMERON/OFFpadandbeginagain.
Touch tile START/ON pad. Tile dine
%
will start counting down, akhough
tile display does not change until
one minute h_ks passed.
When tile timer reaches :00, tile
comrol will beep 3 dines followed by
one beep every 6 seconds undl lhe
KITCHEN TIMER ON/OFF pad is
touched.
If die remaining dine is not ill die display
(clock, start time set fillle or cookhlg dine
are in tile display), recall the remaining
dine by touching tile KITCHEN TIMER
ON/OFFpad and then touching tile + or -
pads to enter the new dine you want.
Touch tlle KITCHEN TIMER ON/OFF
pad twk:e.
15
Page 16

Usingthetimedbakingandmastingfeatures(onsomemodels).
Do not lock the oven door with the latch during timed cooking. Thelatch is used for self-cleaning only.
NOTE: Foods that spoil easily--such as milk, eggs, fish, stuffings, poultry and pork--should not be allowed tos# for
more than I hour before or after cooking. Room temperature promotes the growth of harmful bacteria. Be sure that
the oven light is off because heat from the bulb will speed harmful bacteria growth.
How to Set an Immediate Start and Automatic Stop
@
Theovenwill tumonimmediatelyandcookfora
selectedlengthoftime.At theendof thecooking
time,theovenwill tumoffautomatically
[7[ Touch the BAKE pad.
[] ouch the ÷ or - pads to set the
oven temperature.
[] Touch the COOKING TIME pad.
NOTE"Iffour reciperequirespreheating,youmay
needtoaddadditionaltimetothelengthofthe
cookingtime.
[_] Touch tile ÷ or - pads to set tile
baking time.
Tile cooking time that you entered
will be displayed. (If you select Cooldng
Time first and then adjust tile Bake
Temperature, the oven temperature
will be displwed instead).
[] Touch tile START/ONpad.
Tile display shows either die oven
temperature that you set or tlle cooking
time countdown. (Tile display starts with
"PrE"if showing tile oven mmperamre.)
Tile oven will continue to cook for tile
progranmled amount of time, then turn
off autonlatically:
Touch tile CLEAR/OFFpad to clear
tile display if necessm T.
Removethefoodfromtheoven.Remember,even
thoughtheovenshutsoffautomatically,foods
continuecookingaftercontrolsareoff{
How to Set a Belayed Start andAutomatic Stop
Theovenwilltumonat thetimeof dagyouset,
cookfora specificlengthoftimeandthenturnoff
automaticallx
Make sure tile clock shows the correct
time of day.
[-]] Touch file BAKE pad.
Touch the ÷ or - pads to set the
oven temperature.
Touch the COOKINGTIMEpad.
Touch tile + or - pads to set the
desired length of cooking time.
NOTE:If you would like to check file dines
you have set, touch tile START TIMEpad to
check tile start dine set time you have set
or touch file COOKINGTIMEpad to check
tile length of cooking time you
have set.
When the oven turns on at file dine of day
you have set, the display will show "PrE"
unOl it reaches the selecmd mmperamre,
then it will display tile (wen mmpemmre.
At the end of cooking dine, the oven
will mrn off and the end-of cycle tone
will sound.
_-] Touch tile START TIMEpad.
_-] Touch tile +or - pads to set tile time
of day you want tile oven to turn on
and start cooking.
Touch the START/ONpad.
NOTE:An attentiontonewill soundiffou are
usingtimedbakinganddonottouchthe
START/ONpad.
[_] Touch tile CLEAR/OFFpad to clear
tile display if necessary.
Removethe foodfrom the oven.Remember,even
thoughthe ovenshuts off automatically,foods
continue cookingafter controlsare off{
Page 17

Special features ofyour ovencontrol, gecom
Yournew touch pad control has additional features that you may choose to use. The following are the features and
how you may activate them.
Thespecial feature modes can only be activated while the display is showing the time of day. They remain in the
control's memory until the steps are repeated.
When the display shows your choice, touch the START/ONpad. Thespecial features will remain in memory after
a power failure.
NOTE: The Sabbath feature and the Thermostat Adjustment feature are also Special Features, but they are addressed
separately in the following sections.
12Hour Shut-Off
Withthisfeature,shouldyouforgetandleavethe
ovenon,thecontrolwillautomaticallyturnoffthe
ovenafter 12hoursduringbakingfunctionsorafter
3hoursduringabroilfunction.
If you wish to mrn OFF this feature, fbllow
the steps below°
[Z] Touch the BAKE and BROIL H//LO
pads at the same time for 3 seconds
until the display shows SF.
[_] Touch the CLOCKpad. The display
will show ON (12 hour sitar-off).
Touch the CLOCKpad repeatedly
until the disphy shows OFF(no
shut<_ff).
[_] Touch the START/ON pad to acdxate
the rio shut-off and leave the control
set in this special features mode.
17
Page 18

Usingthe SabbathFeature(onsomemodels).
(Designed for use on the Jewish Sabbath and Holidays)
The Sabbath feature can be used for baking/roasting only. It cannot be used for broiling, self-cleaning or
Start 77mecooking.
NOTE: The oven light comes on automatically (on some models) when the door is opened and goes off when the
door is closed. The bulb may be removed. See the Oven Light Replacement section. Onmodels with a light switch
on the control panel, the oven light may be turned on and left on.
Hew te Set for Regular Baking/Roasting
NOTE."Tounderstandhow theoven centre/works,
practice usingregular baking (non-Sabbath)before
entering Sabbathmode.
Make sure the dock shows thecorrect time of day
and theoven is off
EZ] Touch and hold both the BAKE and
BROIL HI/LO pads, at the same time,
until the dispk W shows SE
[] Tap tile CLOCK pad until SAb appears
ill tile displa}:
_-] Touch tile START/ON pad and D will
appear ill tile displa}:
[_ ouch tile BAKE pad. No signal will
be given.
[-_ Touch tile START/ON pad.
[_] At_ter a random delay period of
approximately 30 seconds to 1 minute,
D C will appear ill tile display indicating
that tile oven is baking/roasting. If D C
doesn't appear ill tile displa}, s/art again
at Step 4.
To adjust tile oven telnpenlture, touch tile
BAKEpad and lap tile + or - pads to increase
or decrease tile/empem/ure ill 5 ° increments.
Touch tile START/ONpad.
NOTE."Tile CLEAR/OFFand COOKING T/MEpads
are active during tile Sabbath feature.
To exit Sabbath tcature see next page.
When the display shows D the
oven is set in Sabbath. When the
display shows D C the oven is
baking/roasting.
When the display shows D the
oven is set in Sabbath. When the
display shows D C the oven is
baking/roasting.
[] Tile preset starting tempenm/re will
automatically be set to 350. ° Tap tile +
or - pads to increase or decrease tile
tempe_-amre ill 5° increments. Tile
temperature can be set between ] 70 °
and 550. ° No signal or temperature
will be given.
Hew to Set for Timed Baking/Roasting--Immediate Start and Automatic Step
NOTE."Tounderstandhow the oven centre/works,
practice uslagregular (non-Sabbath)immediate Start
andAutomatic Stop before entering the Sabbathmode.
Make sure the clock shows the correct time of day
and theoven is off.
Touch and hold both tile BAKE and
BROIL HI/tO pads, at the same time,
until tile display shows SF
Tap tile CLOCK pad until SAb appears
ill tile displa)_
Touch tile START/ON pad mad D will
appear ill tile displa}_
Touch tile COOKING TIME pad.
Touch tile + or - pads to set tile desired
length of cooking time between ]
minute and 9 hours and 59 minutes.
Tile cooking time that you enmred will
be displayed.
Touch tile START/ON pad.
%
Touch tile BAKEpad. No signal will
be gix en.
Tile preset starting tempentture will
%
automatically be set to 350. ° Tap tile +
or -pads/o increase or decrease tile
mmpecamre ill 5 ° increments. Tile
/empeFature can be set between ] 70 °
and 550. ° No signal or/empe_-ature
will be given.
Touch tile START/ON pad.
%
After a nmdom delay period of
approximately 30 seconds to 1 minute,
D C will appear ill tile display indicating
that tile oven is baking/roasting. If D C
doesn't appear ill tile displa}, s/art again
at Step 7.
To adjust tile oven tempen_ture, touch tile
BAKEpad and lap the + or - pads to increase
or decrease tile temperature ill 5 ° increments.
Touch tile START/ON pad.
When cooking is finished, tile display will
change tiom D C to D indicating that tile
oven has turned OFFbut is sdll set ill Sal)l)ath.
Remove tile cooked food.
18
Page 19

How to Exit the Sabbath Feature
go.corn
Touch the CLEAR/OFFp'ad.
%
If tile oxen is cooking, wait tOT a Fandom
[]
delay period of approximately 30
seconds to 1 minute, until only D is in
the displa}_
Touch and hold both the BAKE and
%
BROIL HI/tO pads, at the same time,
until the display shows SE
Tap the CLOCK pad until ONor OFF
[]
appears in the displa}_ ON indicates that
the (wen will aurora atically turn off ahcr
12 hours. OFFindicams that the (wen
will not au/omatically mrn off. See
the Special Features section tOT an
e×planadon of the 12Hour Shut-Off
tbaturc.
[_] Touch the START/ON pad.
NOTE."If a power outageoccurred while the oven was
in Sabbath, the oven will automatically turn off and stay
eff even when thepower returns. Theoven control must
bereseL
Adjustthe oven thermostat Bo # yourself!
Youmay find that your new oven cooks differently than the one it replaced. Useyour new oven for a few
weeks to become more familiar with it. If you still think your new oven is too hot or too cold, you can adjust
the thermostat yourself.
Do not use thermometers, such as those found in grocery stores, to check the temperature setting of your oven.
These thermometers may vary 20-40 degrees.
NOTE: This adjustment will not affect the broiling or the self-cleaning temperatures. Theadjustment wifl be
retained in memory after a power failure.
ToAdjustl__the Thermostat
To. htheBAKE.,,dBROIL,I/tO
pads at rite same dine for 2 seconds
until the display shows SE
Touch the BAKEpad. A two-digit
number shows in the display.
The oven temperature can be
%
adjusted up to (+) , a F hotter or (-)
35°F cooler Touch the ÷ pad to
When you have made the
adjusmlent, touch the START/ONpad
to go back to the dine of day display.
Use your oven as you would
normally.
NOTE:Thisadjustmentwillnotaffectthebroiling
orself-cleaningtemperatures.It willberetained
inmemoryafterapowerfailure.
increase the temperature in 1-degree
increments.
Touch the - pad to decrease the
temperature in 1-degree increments.
Thetype ofmargarine will affect bakingperformance!
Most recipes for baking have been developed using high-fat products such as butter or margarine (80%fat). If you
decrease the fat, the recipe may not give the same results as with ahigher-fat product.
Recipe failure can result ff cakes, pies, pastries, cookies or candies are made with low-fat spreads. Thelower the fat
content of a spread product, the more noticeable these differences become.
Federal standards require products labeled "margarine" to contain at least 80% flit by weight. Low-flit spreads,
on the other band, contain less fi_t and more wamr The high moisture content of these spreads aft:ects the
mxture and flavor of baked goods. For best results with your old fi_v(Mm recipes, use margarine, butter or
sdck spreads containing at least 70% vegetable oil.
19
Page 20

Usingthe self-cleaning oven.
Never force the latch handle. Forcing the handle will damage the door lock mechanism.
Beforea CleanCycle
We recommend venting your ldtchen
wifll an open window or using a
ventilation fan or hood during file
first self clean cycle.
Remove racks, broiler pan, broiler grid,
all cookware and any aluminum fbil
flom the oven.
Do not clean the gasket. The fiberglass
mamfial of the oven door gasket cannot
withstand abrasion. It is essential for the
gasket to remain intact. If you notice it
becoming worn or flayed, rephce it.
Wipe up any hem T spillovers on the oven
bottom.
Wipe up heavy soil on the oven
bottom.
The shiny, silve>colored oven rocks
(on some models) can be selfk-.leaned,
but they will darken, lose dleir lusmr
and become hard to slide.
Soil on the flont flame of the range and
outside the gasket on the door will need
to be cleaned by hand. Clean these areas
with hot water; soaf>filled smel wool pads
or cleansers such as Soft Scmb_ Rinse
well with clean water and dry.
How to Set the Oven for Cleaning
Follow the directions in the Before a
Clean Cycle section.
Latch the door
%
Touch the SELFCLEAN pad.
[_] Touch the ÷ or- pads until the
desired Clean Time is displayed.
TheCleanTimeis normally4 hours. Youcan
changethe Clean time to any time between3
and5 hours,dependingon the amount of soil in
youroven.
Touch the START/ON pad.
The selfk:lean cycle will automatically
begin after CLEAN is displayed and the
filIle countdown appears in the display.
Make sure the oven light bulb cover is in
place and the oven light is off.
IMPORTANT: The hea/dl of some birds
is extremely sensitive to file flmles given
off dming the self cleaning cycle of any
range. Move birds to another well-
venfilamd room.
While die oven is self:cleaning, you can
touch the CLOCKpad to display the dine
of day. To return to the clean countdown,
touch the SELFCLEAN pad.
The oven shuts off automatically when
tlle clean cycle is complete, and 0:00 will
flash in tlle display.
_-] Slide the latch handle to the left as
flu _ksit will go and open the door
It will not be possible to unlatch file oven
door until the temperature drops below
the lock mmperamre and the clean light
goes ore
When the clean light is off, unlatch the
dooi:
20
Page 21

@
How te Delay the Start ef Cleaning
Make sure the clock shows the correct
time of day.
Latch the doo_;
%
Touch the SELFCLEANpad.
[]
Using the 4- or - pads, enter the
%
desired clean time.
TheCleanTimeis normally4 hours.Youcan
changetheCleantimetoanytimebetween3
and5hours,dependingontheamountofsoilin
youroven.
_] Touch the START T/ME pad. The
earliest start time you can set will
appear in the display.
[] sing the 4- or - pads, enter the
time of day you want the clean cycle
to start.
[_ Touch the START/ON pad.
ge.com
The display will show file start time set
time. It will not be possible to tmlatch the
oven door until the temperature drops
below the lock mmpemmre and the
clean light goes oft
When the clean light is off, unlatch the
dooi:
ToStep a Clean Cycle
Touch the CtEAR/OFF pad.
Wait until die oven has cooled below die
locldng mmperamre to unlamh the door
You will not be able to open the door
fight away unless the oven has cooled
below the locking mmpemmre.
After a Clean Cycle
You may notice some white ash in the
oven. Wipe it up with a damp cloth after
the oven cools.
If whitespotsremain,removethemwith asoap-
filledscouringpadandrinsethoroughlywith
a vinegarandwatermixture.
These deposits are usually a salt
residue that cannot be removed by
the clean cycle.
If the oven is not clean alter one clean
cycle, repeat the cycle.
}_You cannot set the oven for cooking
until the oven is cool enough for the
door to be unlatched.
While die oven is self cleaning, you
can touch the CLOCK pad to display
the time of day. To return to the
clean countdown, touch the COOMN6
TIME pad.
Apply a small amount of vegetable oil
to a paper towel and wipe the edges of
the oven rocks with the paper towel. Do
not spray with Pare ° or other lubricant
sprays.
21
Page 22

Careandcleaningoftherange.
Be sure aft controls are off and aft surfaces are cool before cleaning any part of the range.
If your range is removed for cleaning, servicing or any reason, be sure the anti-tip
device is reengaged properly when the range is replaced. Failure to take this
precaution could result in tipping of the range and cause injury.
How to Remove Protective Shipping Film and Packaging Tape
Careflllly grasp a corner of the protective
shipping film with your fingei_ and slowly
peel it from tile applia-_ce surfitce. Do
not use any shai_) items to remove tlle
fihno Remove all of the fihn hefore using
the appliance for the first time°
Control Knobs
Thecontrolknobsmaybe removedforeasier
cleaning.
Make sure die knobs are in die OFF
positions and pull them straight off the
smms for cleaning.
To assure no damage is done to fl)e
finish of the product, the safest way to
remove the adhesive from packaging rope
on new appliances is an application of a
househ old liquid dishwashing detergent°
Apply with a soft cloth m-ld allow to soak°
NOTE: Theadhesivemust be removedfromall
parts. It cannotbe removedif it is bakedon.
Tile kalobs can be cleaned in a dishw_Mler
or they may a/so be washed with soap and
water Make sure the insides of tile knohs
are &T before replacing.
Replace tlle Mlobs in tile OFFposition
to ensme proper placenlent.
Make sure the slot in the burner
head is positioned over electrode.
CAtlT/ON:BoNOT
OPERATETHEBURNERWITHOUT
ALLBURNERPARTSINPLACE.
22
Burner Assembly
The burner assemblies should be _shed
regulmly and, of course, after si)illo_e_.
Turnall controlsoffbeforeremovingburnerparts.
The burner grates, burner heads and burner
caps can be remoxed for easy'cleaning.
The electrode of tlle spark igniter is exposed
beyond the surf%e of tlle burner base. When
cleaning the cooktop, be carotid not to snag
the electrode of the spark igniter with y'our
cleaning cloth. Damage to the igniter couM
occm. Toavoidsnagginga clothonthespan
igniter,leavetheburnerheadsin p/acewhen
cleaning thecooktop.
Be carotid not to push in any'cooktop controls
while cleaning tlle cooktop. A slight elecuical
shock might result which could cause you to
knock o_r hot cookware.
_itsh burner parts with an all-propose
non-abrasive cleaner and w,mn wam_:Soak
s/ubl×)rn soil. Dr).'them ,dth a cloth----<to not
reassemble _dtile _x_t.
Toreassemblethesurfaceburners:
Place burner heads oxer tile electrodes
/[.z..3
on the cooktop, in the correct locations
according/o their size.
Medium head Small head
andcap andcap
o
Frontofrange
Largehead Largehead
andcap andcap
Place the
matching size
caps onto the
heads.
Make sure
that the heads
and caps are
placed in the
correct
locations.
Burnercap
Aftercleaning,
firstreplace
the ,ent grille
and xent grille
cap. Replacethe skle gratessothat they'fit
oxer the robson/be xent grille.Make sure
the D'atesale positioned securely'oxer the
Nmle_s and that the}'are s/able and level.
T
Page 23

go.corn
Vent
cap
i
Vent grille
Airinlet
Burner Grates, VentGrille and VentGrille Cap
Porcelain enamel bmner grates, vent
grille and vent grille cap should be
w_k_hed regularly and, of course, after
spillovers.
Wash them in hot, soapy water and
rinse wkb clean wamr You m W a/so use
abrasive cleaners and scouring pads, if
needed. DIT them wkb a clotb--<km't
put them back on the cooktop wet.
Aldlough dley're durable, tlle grates,
vent grille and vent grille cap will
gradually lose their shine, regardless of
the best care you can gke them. This is
due to their continual exposure to high
temperatures.
Do not operam a burner for an extended
period of time without cookware on the
grate. The finish on the grate mW chip
without cookware to absorb the beat.
Af*er cleaning, fii_t replace die vent grille
and die vent grille cap.
Replace die side grams so that dley fit
over die tabs on die vent grille. Ma]<e
sme the grates are positioned securely
over the bmne_ and that they are stable
and level.
Rubber Grate Feet
For stability, your cooktop has rubber
feet on the burner gqates. If any of these
rubber feet should become damaged or
lost, replace them immediately.
To order replacement rubber grate fe.et,
please ca/1 our toll-flee nmnber:
NationalParts
Center............... 800.525.2002(U.S.)
RubberGrateFeet....... #WBO2TIOIOI
888.261.3055(Canada)
Receetacie /
Glassco er
Socket
Oven Light Bulbs (ifincluded)
NOTE: The glass cover should be
removed only when cold. Wearing latex
gloves may offer a better grip.
C_U_'_O_." Before replacing your
oven light bulb, disconnect the electrical
power to the oven at the main fuse or
circuit breaker panel
Be sure to let tlle light cover and bulb
cool completely:
For your safeb,, do not touch a hot bulb
with bare bands or a damp clodL
TO remove:
[_ Turn tile glass cover
counterclockwise 1l/4 mrn tmdl die
tabs of the glass cover clear die
grooves of tile socket.
Using gloves or a (hT cloth, remove
die bulb by pulling it straight out.
Toreplace:
Use a new 130-volt halogen bulb,
not to exceed 50 watts.
Using gloves or a (hT clod1, remove
tlle bulb flom its packaging. Do not
touch the bulb with bare finge_.
Recept!
Push tlle bulb straight into the
%
receptacle all die way.
Place tlle robs of tlle glass cover into
the grooves of tlle socket. Turn the
gk_ss cover clockwise 1/4 turn to
engage.
For improved ligbdng inside
file oven, clean the glass cover
flequendy using a wet cloth. This
should be done when the oven is
complemly cool.
Reconnect electrical power to
the oven.
Usegloves
orcloth
23
Page 24

Careandc/caningoftherange.
Oven Light Replacement (ifinc/uded)
il Stopguide
CAUT/ON:Beforere lacingyouroven
lightbulb,disconnecttheelectricalpowertothe
rangeat themainfuseorcircuitbreakerpaneL
Be sure to let the light cover and bulb
cool completely:
To remove the cover:
Twist lens counterclockwise about a
%
ql.laIteI t/lIn to IeIIlove.
Donotremoveanyscrewstoremove
thecover
Storage Drawer Removal
Toremovethe drawer:
[_ Pull the drawer out until it stops.
[_ Lif_ the flont of the drawer until the
stops clear die guides.
[_ Remove the drawer
_--_ Replace bulb with a 40-watt
appliance bulb or tw(_prong
halogen bulb as appropriate.
Toreplacethecover:
[-i7 i,ine up tabs of lens in flont of robs
on housing and rotate clockwise to
engage.
[_ Connect electrical power to die
I_tnge.
Toreplacethe drawer:
[_ Place the drawer rails on the guides.
[_ Push the drawer back until it stops.
Lif_the flont of the drawer and
push back until die stops clear die
guides.
[_ Lower the flont of the drawer and
push back undl it closes.
Oven rack
Oven Racks
All oven racks may be cleaned by hand
with an abrasive cleaner or steel wool.
After cleaning, rinse the racks with clean
wamr and &T with a clean cloth. Gray
porcelain-coated oven racks mW remain
in the oven dining the self:cleaning
cycle without being damaged. The shin E
siNer-colored oven racks m W remain in
the oven during the self:cleaning cycle,
but they will lose their lusmr and become
hard to slide.
It will be necessm T to gqease all oven
rock side edges wifll a light coating of
vegetable oil after cleaning them by hand
or in the oven. This will help maintain
the ease of sliding the racks in and out
of the oven.
24
Page 25

Donotrub or cleanthedoor gasket--
it hasanextremelylowresistance to
abrasion.
If younotice thegasketbecomingworn,
frayedor damagedin any wayor if ithas
becomedisplacedon thedoor, youshould
haveit replaced.
Cleaning the Oven Door
To clean the inside of the door:
Because the area inside file gasket is
cleaned during file self'clean cycle, you
do not need to clean fllis by hand°
Tile area outside die gasket and
file door liner can be cleaned wifll a
soap-filled or pk_dc scouring pad,
hot water and dewrgent. Rinse well
widl a vinegar and water solution.
To clean the outside of the door:
Use soap and water to thoroughly
clean the top, sides and fiont of the
oven door Rinse wello You may a/so
use a glass cleaner to clean the glass
on die outside of the doon Do not let
water drip into the vent openings.
Lift-Off Oven Door
go.corn
ff any stain on die door vent trim is
persistent, use a sofk abrasive cleaner
and a sponge-scrubber for best results.
Spillage of marinades, fiuitj uices,
tomato sauces and basting materials
containing acids may cause
discoloration and should be wiped
tip immediately° _,rhen surfitce is cool,
clean and rinse.
Do not use oven cleaners, cleaning
powders or harsh abrasives on tile
outside of file do(m
Slot
Hingelock
Pull hinge locks down to unlock.
Removalposition
Thedooris veryheavy.Becarefulwhen
removingandliftingthe door.
Oonot liftthedoorbythehandle.
Toremovethe door:
Fully open the doo_:
%
Pull the binge locks down toward
the door fiame, to the unlocked
position. A tool, such as a small
fiat-blade screwdriver; may be
required.
Firefly grasp both sides of the door
at die top.
Close door to die door removal
position, which is bald, ray between
the broil stop position and dilly
closed.
[_ Lift door tip and out until die binge
am1 is clear of die slot.
Toreplacethe door:
[77 Firefly grasp both sides of the door
at die top.
Wkb die Bottom Hingearm
door at die ofslot
same angle as \
die reI-tlova[
position, seat die
indentation of
the binge arm
into the bottom
edge
edge of the binge slot. The notch in
tlle binge arm must be fhlly seared
into the bottom of the slot.
Fully open the dooI; If the door will
%
not dilly open, the indentation is
not seared correc@ in tlle bottom
edge of the slot.
Push tlle binge locks tip against die
flont flame of tlle oven cavil), to die
locked position.
Hin(
ann
Hinge
Push hinge locks up to lock.
[_] Close tlle oven door
25
Page 26

Careandcleaningoftherange.
Stainless Steel Surfaces (onsomemodels)
Donotuseasteel wool pad;it will scratch
thesurface.
To clean die stainless smel surfime,
use waml sudsy water or a stainless steel
cleaner or polish. Alwayswipe the surf_me
in tile direction of the grain. Follow tile
cleaner insm_cdons for cleaning the
stainless smel surflme.
Painted Surfaces
Painted surfitces include file top and
sides of die doo_; and file drawer flont.
Clean these with soap and wamr or
a vinegar and wamr solution.
Oven Vent and CooktopA# Inlet
The oven is vented duough an opening
in the cooktop under the grille. The
cooktop rakes in air through the air inlet
locamd through the cooktop.
To inquire about purchasing stainless
steel appliance cleaner or polish, or to
find tile locadon of a dealer or Mabe
Parts Store nearest you, please ca/1 our
toll-flee number:
NationalPartsCenter 1.800.626.2002(U.S.)
1.800.661.1616(Canada)
go.corn(U.S.)
www.GEAppliances.ca(Canada)
Do not use commercial oven cleaners,
cleaning powders, steel wool or harsh
abrasives on any painted surflme.
Never cover dlese openings with
ahnninum foil or any oilier material.
This would prevent the vents flom
working properg
Cooktopair inlet
Control Panel
If desired,thetouchpadsmaybe turnedoff
beforecleaning.
Seedie ControlLockoutsecdon.
Clean up splatters widl a damp cloth.
Removable OvenFloor
Toremovetheovenfloorforeasier
cleaning:
Z] Remove the oven door using the
instrucdons in the Lift-OffOven Door
section.
Grasp oven floor at the rear finger
slots on each side, lift it up, push it
back and pull it out.
Remove heavier soil with warm soapy
water Do not use abrasives of any ldnd.
Turnon thetouchpads after cleaning.
[-_ Clean the oven floor with warm
soapy water
iMPORTANT:Ah,vaysreplace the
removable floor before the next use.
26
Page 27

Beforeyoucall forservice.., go.corn
Troubleshooting 77ps
Save time and money!l Review the charts on the following
pages first and you may not need to carl for service.
Possible Causes What To Be
Burnershaveyellow or
yellow-tippedflames
Controlknobs Knob isn't pushed down. * To turn fiom tile OFF position, push tile knob in and
will notturn then turn.
Burnersdo Plug on range is not * Make sure electrical plug is plugged into a live, properly
notlight completely inserted in the grounded oudet.
The combustion quality of
burner flames needs to be
determined visually.
dectrical outlet.
* Use the illustrations below to dete_nine if your burner
flames are normal. If burner flames look like A, ca/1for
service. Normal burner flames shoukt look like B or g
depending on tlle type of gas you use. With i,P gas, some
yellow tipping on oumr cones is normal
A-Yellow flames B-Yellow tips C-Soflblue flames
Callfor service onouter cones Normal for natural
Normalfor LPgas gas
Gas supply not connected * See tile Installation Instructions that came with your
or turned on. range.
A fuse in your home may be * Replace tile fuse or reset the ci_wfit breaker
blown or the circuit breaker
tripped.
]Burner parts not replaced * See tile Careand cleaningof therange section.
correctly.
ControiLockoutfeature * If LOC0Nappears in tile display, tile oven control is
is activated locked. Turn this feature off to use tile oven. See tile
Control Lockout section.
ticking sound of spark Control knob is still
igniterpersists after in the UTE position.
burnerlights
Burner flames very Improper air to gas ratio. * If range is connected to I,P gas, check all steps
largeoryellow in tile Installation Instructions that came with
Ovenlight does light bulb is loose or defective. * Tighten or replace tile bulb.
not work
Ovenwiilnot work Plug on range is not completely * Make sure electrical plug is plugged into a live, properly
Switch operating * (;all for service.
light is broken.
inserted in the electrical outlet, gqounded outlet.
A fuse in your home may be * Replace tile fuse or reset the ci_vuit breaker
blown or the circuit
breaker tripped.
Oven controls improperly set. * See tile Using the oven section.
Door left in the locked position. * ff necessary, allow tile oven to cool; then unlock
* Turn the knob out of tile UTE position to tile desired
setting.
* Turn the burner off and relight. If ticking is still
present, call for service.
your range.
the do(n: 2 7
Page 28

Beforeyou call forservice...
Troubleshooting 77ps
Possible Causes What To Be
Fooddoes not bake Oven controls improperly set. * See the Using the oven section.
orroast properly
Fooddoes not Oven controls improperly set. * Make sure you touch the BROILHI/LOpad.
broiiproper/y Improper rack position * See the BroilingGuide.
Rack position is incorrect * See the Usingtheovensection.
or the rack is not level.
Incorrect cookware or * See the Usingtheovensection.
cookware of improper
size being used.
Oven thermostat needs * See the Adjust the oven thermostat Do it yourself!
adjustment, sec Lion.
being used.
Cookware not suited * For best results, use a pan designed fbr broiling.
for broiling.
In some areas the power * Preheat the broil element for 10 minutes.
(voltage) may be low. * Broil for the longest period of time recommended in
the Broiling Guide.
Oventemperature Oven thermostat • See the Adjust the oven thermostat Doit yourselfi
tOOhot or too cold needs adjustment, section.
Ovendooris crooked The door is out of position. * Because the oven door is removable, it sometimes
gets out of position during installation. Remove and
replace the oven door. See the Lift-Off Oven Door
secdon.
Storage drawer Rear drawer support is * Reposition the drawer. See the Storage Drawer
is crooked on top of the guide rail. Removalinstructions in the Careand cleaning of your
range secdon.
Storagedrawer
won'tclose
Rear drawer support is
on top of the guide rail.
* Reposition the drawer. See the Storage Drawer
Removalinstructions in the Care and cleaning of
your range section.
243
Page 29

go.corn
Possible Causes What To Be
Clock and timer do Plug on range is not completely . Make sure electrical plug is plugged into a live, properly
not work inserted in the electrical outlet, gnounded oudet.
A fuse in your home * Replace tile fuse or reset tile circuit breaker:
may be blown or the
circuit breaker tripped.
Oven controls improperly set. * See tile Using the clock and timer section.
Oven will not self-clean Oven controls improperly set. * See the Using the self-cleaning oven section.
Oven door is not in the * Make sure you move the door latch handle all the way
locked position, to the Aght.
"Crackling" or This is the sound of the * This is normal.
"popping" sound metal heating and cooling
during both the cooking and
cleaning functions.
Excessive smoking Excessive soil. * Touch the CLEAR/OFF pad. Open the windows to
during a clean cycle rid the room of smoke. \_ait until the light on the
SELFCLEAN pad goes off_ Wipe up the excess soil
and reset the clean cycle.
Oven door will not Oven too hot. * Allow the oven to cool below locking temperature.
open after a clean cycle
Oven not clean after a Oven controls not properly set. * See the Using the self-cleaning oven section.
clean cycle
Oven was heavily soiled. * (;lean up heax T spillovers before starting the clean
cycle. Heavily soiled ovens may need to self'clean
again or fbr a longer period of time.
"F--anda number You have a function error code. *' Touch the CLEAR/OFFpad. Put the oven back into
or letter" flash operation.
in the display If the function code repeats. * Disconnect all power to the range fbr at least 30
seconds and then reconnect power. If the function
error code repeats, ca/1 fbr service.
• If a fimction onor code appears during the selfZ
cleaning cycle, check the oven door latch. The latch
m W have been moved, if only slightl> flom the
locked position. Make sure the latch is moved to
the right as flu as it will go. Touch the CLEAR/OFFpad.
Allow the oven to cool for one hour. Put the oven
back into operation.
29
Page 30

Beforeyou call forservice...
Troubleshooting 77ps
Possible Causes What To Be
Display flashes "bAd" The installed connection * Contact installer or electrician to correct miswhe.
then "linE" with a from the house to the unit
loud tone is miswired.
Control signals after You forgot to enter a * Touch tile BAKE pad and desired temperature or
entering cooking time bake temperature or tile SELF CLEAN pad and desired clean time°
or start time cleaning time.
Display goes blank A fuse in your home may * Replace tile filse or reset tile circuit breaker°
Display flashes Power failure. * Reset the clock.
Unable to get the Oven control pads were * Tile BROIL HI/LO and BAKE pads must be touched at
display to show "SF" not touched properly, the same thne and held for 3 seconds.
Power outage, Power outage or surge. * Reset the clock° If the oven was ha use, you must reset
clock flashes it by touching the CLEAR/OFF pad, setting the clock
"Burning" or "oily" This is normal in a new oven * To speed tile process, set a self=clean cycle fbr a
odor emitting from and will disappear in time. minimum of 3 hours. See the Using the self-cleaning
the vent oven section.
Strong odor An odor from the insulation * This is temporary.
Fannoise Acoolingfan may
be blown or the circuit
breaker tripped.
The clock is in * See tile Using the clock and timer section.
black-out mode.
and resetting any cooldng fimcdon.
around the inside of the oven
is normal for the first few
times the oven is used.
* This is normal. Tile cooling fen will mrn off and on
automatically turn
on and off.
to cool internal parts. It may run after tile oven is
turned OFF.
3O
Page 31

GE Service Protection Plus TM
GE, a name recognized worldwide for quality and dependability, offers you
Service Protection Plus"*--comprehensive protection on all your appliances--
No Matter What Brand!
Benefits Include:
* Backed by GE
* All brands covered
* Unlimited service calls
* All parts and labor costs included
* No out-of-pocket expenses
* No hidden deductibles
* One 800 number to call
You will be completely satisfied with our service protection or you may request your money back
on the remaining value of your contract. No questions asked. It's that simple.
Protect your refligerato_, dishwasher; washer and drym, range, TV, VCR and much more--any brand!
Plus there's no extra charge fbr emergency service and low monthly financing is available. Even icemaker
coverage and fbod spoilage protection is offered. You can rest easy; knowing that all your valuable
household products are protected against expensive repairs.
We'll CoverAny Appliance.
Anywhere. Anytime.*
e_.ceyo_. _o.fide.ce i. CE..d _.U.s i. the U.S.ton-r,ee.t 800.626.2224
ff_r more information.
%\11brands covered, up lo 20 years old, in lhe conlinenlal U.S.
..................
Please place in envelope and mail to:
General Electric Company
Warranty Registration Department
P.O. Box 32150
Louis_e, KY 40232-2150
31
Page 32

FOR CONSUMERS IN THE UNITED STATES
Consumer Product Ownership Registration
Dear Customer:
Thank you tbr purchasing our product and thank you tbr placing your confidence in us.
"W_are proud to have you as a customer!
Follow these three steps to protect your new appliance investment:
Complete and mail
your Consumer
Product Ownership
Registration today,
Have the peace of
mind of knowing we
call COlltact }Oil ill
tile unlikeE e_ent of a
safer} modification.
After mailing the
registration belo%
store this doctmmnt
in a saI_" place. It
contains inlbrmation
)ou will need should
)ou require service.
Ore" service nmuber is
8I)I). GE. CA RE S
(800.432.2737).
Model Number Serial Number
Important: If you did not get a registration card with your
product, detach and return the form below to
ensure that your product is registered, or register
online at ge.com.
Consumer Product Ownership Registration
Model Number
Read )'our ()_aler's
Manual carefi_ll)
It will help )ou
operate }o{iY llew
appliance properly.
! ! ! ! ]
,,._ Cut here
Serial Number
,,,,,, ,,,,,I I,
Nh; ::i! Ms. {i Mrs. {i Miss
First I
Name I ! I I I I
Street [
Address [ [ ] I I [ ! ! I I I I I I ! I I I I I !
Apt. # I I I I I I I I [
ci,,_ l t t , , 1 , l t , , J ]
Din: Pla(cd
InLs( [ [ ] Da,[ , [ ,_al'[' [ NtlF_/berPh°ne[
M( m th
* Please provkte )_)tn"€-mail address to receive, via e-mail, discounts, special otters and other important
communications ti'om GE Appliances ((;E-k).
Check here if)'ou do not _mt to receive communications ti'om GEA.'s careflllly selected partners.
Appliances
General Electric Company
GE Consumer & Industrial
Louisville, K¥ 40225
ge.com
EMLURE TO COMPLETE AND P,ETURN THIS CARD DOES NOT DIMINISH YOUR
\,X_&RRANTY RIGHTS.
For more inlormation about (;EA.'splJvac) and data usage polic), go to ge.com and click on
"Privac) Polic)" or call 81)1).626.2224.
[,astName I I I I I
E-mail Address*
Statelllco(e II]
Accessories.
Looking For Something More ?
You can find these accessories and many more at ge.com (U.S.) or www.geappliances.ca
(Canada), or call 800.626.2002 (U.S.) or 888.261.3055 (Canada) (during normal business
hours). Have your model number ready,
ii i ii i ii i i i i i i
Oven Racks
Grates
Light Bulbs
Surface Burner Heads & Caps
Cleaner and polish
Knobs
Tired of discolored racks? Wishing you had extra-heaxT-du b, oven racks?
NOWAVAiI.ABLE for your range:
GE's innovative, self-cleanable porcelain-coated oven racks!
* Heax T Du b'
* Durable
"Able to be cleaned in a self-{:leaning oven
Visitge.com(U.S.)
or www.geappfiances.ca (Canada) for more
infbrmadon.
33
Page 34

GEGasRange FVarran Forc,stomersintheUnitedStates;
Aft warranty service provided by our Factory Service Centers,
or an authorized Customer Care_ technician. Toschedule service,
on-line, visit us at ge.com, or carl 800.GE.CARES (800.432.2737).
Please have serial number and model number
available when calling for service.
GEWill Replace:
One Year
Fromthedate ofthe
onginalpurchase
Service trips to your home to teach you how to use
the product.
} Improper installation, delivery or maintenance.
Failure of the product if it is abused, misused,
or used for other than the intended purpose or
used commercially.
Replacement of house fuses or resetting of circuit
breakers.
Any part of file range which fhils due to a defect in materials or workmanship. During flds
limited one=year warranty, GE will a/so provide, free ofcharge,all labor and in-home service to
replace tile defective part.
Staple your receipt here.
Proof of the original
purchase date is needed to
obtain service under the
warranty.
Damage to the product caused by accident, fire, floods
or acts of God.
Incidental or consequential damage caused by possible
defects with this appliance.
Damage caused after delivery.
Product not accessible to provide required service.
EXCLUSIONOFIMPLIEB WARRANTIES--Your sole and exclusive remedy is product repair as provided in this Limited
Warranty.Any implied warranties, including the implied warranties of merchantability or fitness fora particular purpose,
are limited to one year or the shortest period allowed bylaw.
This warranty is extended to the original purchaser and any succeeding owner for products purchased for
home use within the USA. ff the product is located in an area where service by a GEAuthorized Servicer is not
available, you may be responsible for a trip charge or you may be required to bring the product to an Authorized GE
Service location for service. In Alaska, the warranty excludes the cost of shipping or service calls to your home.
Some states do not allow the exclusion or limitation of incidental or consequential damages. This warranty
gives you specific legal rights, and you may also have other rights which vary from state to state. Toknow what
your legal rights are, consult your local or state consumer affairs office or your state's Attorney General
Warrantor:General Electric Company.Louisville, KY 40225
34
Page 35

GEGasRange Warranty. (Forc.stomersinCanada
Aft warranty service provided by our Factory Service Centres
or an authorized Customer Care_ technician. For service,
carl 1.800.561.3344.Please have serial number and model number
available when calling for service.
Mabe Wi// Replace:
One Year
From the date of the
origina! purchase
Service trips to your home to teach you how to use
the product.
} Improper installation, delivery or maintenance.
Failure of the product if it is abused, misused,
or used for other than the intended purpose or
used commercially.
Replacement of house fuses or resetting of circuit
breakers.
Anypartof the range which fails due to a defect in materials or workmanship. Dining this
limited one-year warranty, Mal)e will also provk]e, free of charge, all labor and h_-home
servk;e to replace the defective part.
Staple your receipt here.
Proof of the original
purchase date is needed to
obtain service under the
warranty.
Damage to the product caused by accident, fire, floods
or acts of God.
Incidental or consequential damage caused by possible
defects with this appliance.
Damage caused after delivery.
Product not accessible to provide required service.
Warranty.Any impfied warranties,including the implied warrantiesofmerchantabilityorfitnessfor aparticular purpose,
EXCLUSIONOFIMPLIEBWARRANTIES--Yoursole andexclusiveremedyisproductrepairasprovidedin thisLimited
are limitedto oneFearor theshortestperiod allowed bylaw.
WARRANTOR IS NOT RESPONSIBLE FOR DAMAGES. ]
CONSEQUENTIAL
[ Warrantor: MABE CANADA INC. ]
35
Page 36

ConsumerSupport.
GEAppliancesWebsite
Have a question or need assistance with your appliance? Try tile GE Appliances Website 24 hours a day,
any day of tile year! For greater convenience and faster service, you can now download Owner's Manuals,
order parts or even schedule service on-line. In Canada: www.geapplianees.ca
In the U.S.: ge.com
Sche&/eService theus:g0.s0m
Expert GE repair service is only one step away flom your door Get onqine and schedule your service at your
convenience any day of the year! Or call 800.GE.CARES (800.432.2737) during normal business hours.
In Canada, call 1.800.561.3344
RealLifeDesignStudio
GE supports the Universal Design concept--products, services and envhonments that can be used by people of
all ages, sizes and capabilities. We recognize tile need to design for a wide range of phDical and mental abilities
and impahments. For details of GE's Universal Design applications, including kitchen desigm ideas for people with
disabilities, check out our Website today. For the hearing impaired, please ca/1 800.TDD.GEAC (800.833.4322).
In Canada, contact: Manage_, Consumer Relations, Mabe Canada Inc.
Suite 310, 1 FactoI T Lane
Moncton, N.B. E1C 9M3
In the U.S.: ge.com
ExtendedWarranties
Purchase a GE extended warranty and learn about special discounts that are available while your warranty is still
in effect. You can purchase it on4ine an?<ime, or call 800.626.2224 during ncmnal business hotn_. GE Consumer
Home Se,a'ices will still be there after your warranty expires. In Canada, call 1.888.261.2133
PartsandAccessories
Individuah quaUfied to service flleir own appliances can have parts or accessories sent directly to their homes
(VISA, MasmrCard and Discover cards are accepmd). Order on-line today, 24 hours every day or by phone at
800.626.2002 during ncmnal business hours.
Instructions contained in thismanual coverprocedures tobe performed by an}, user. Other servicing generallg should be
referred to qualified service personnel. Cautionmust be exercised, since improper servicing may cause unsafe operation.
Customers in Canada should consult the yellow pages for tile nearest Mabe service cente,; or ca/1 1.888.261.3055.
ContactUs
If you are not satisfied wifll file service you receive flom (;E, contact us on our Websim wifll all file details
including your phone numbe_; or wHm to: General Manage_; Customer Relations
GE Appliances, Appliance Park
Louisville, l_f 40225
In Canada: www.geapplianees.ca, or wlJte to: Directoi; Consumer Relations, Mabe Canada Inc.
Suim 310, 1 Factory Lane
Moncton, N.B. E1C 9M3
In the U.S.: ge.com
In the U.S.: ge.gom
In the U.S.: ge.gom
RegisterYourAppliance
Register your new appliance on-line-at your convenience! Timely product registration will allow for enhanced
communication and prompt service trader tile temls of your warranty; should tile need arise. You may also mail
in tlle pre-printed registration card included in tile packing material, or detach and use tile form in tile Owne, s
Manual. In Canada: www.geapplianees.ea Printedin the UnitedStates
In the U.S.: ge.gom
 Loading...