

Page 1
.q&com
=c13
Safety Instruc_ons ............ 2-7
Operating Instrudions
Baking or Roasting .............. 12
Broiling, Broiling Guide ......... 14
Clock and Timer . .............. 15
Control I_ockout ............... 11
Cookware ...................... 9
()yen ...................... 10-21
Sabbath Feature ................ ] 8
SelfZCleaning ............... 20, 21
Special Features ................ ] 7
Surfi_ce Burneis .............. 8, 9
Thermostat .................... ] 9
Timed Baking & Roasting ........ 16
Care and Cleaning
Burner Assembly ............... 22
Burner (;rates, Vent Grille
and Vent Grille Cap ............ 23
Control Panel ................. 26
Door ......................... 25
Floor ......................... 26
I_mobs ........................ 22
I,ift-Off ()yen Door ............. 25
I,ight Bulbs ................. 23, 24
N
JCSP28
()yen Vent and
Cooktop ,Mr Inlet ............... 26
Packagdng _E_pe ................ 22
Painted Surfaces ................ 26
Racks ........................ 24
Stainless Steel Surfi_ces .......... 26
Storage Drawer . ............... 24
Vent ......................... 26
Troubleshooting Tips _ _
Accessories ................... 33
Consumer Support
Consumer Support ..... Back Cover
Product Regdstrafion ......... 31,32
Warranty fbr Customeis
in Canada .................... 35
*¢\arranty for Customeis
in the U.S.A ................... 34
....... 21-,: 0
www.geappliances, ca
Write the model and serial
numbers here:
Model #
Serial #
You can lind them on a label
behind the open oven door
on the lower left corner of the
range ti'ame.
49-80486 04-07 Jfl
Page 2
IMPORTANTSAFETYINFORMATION.
READALLINSTRUCTIONSBEFOREUSING.
WARNING!
ANTI-TIPDEVICE
_!_ALLRANGESCAN TIP
_ INJURY TOPERSONS
COULDRESULT
@INSTALLANTI-TIP
DEVICESPACKEDWITH
RANGE
_ SEEINSTALLATION
INSTRUCTIONS
A WARNING:If the information
in this manual is not followed exactly,
a fire or explosion may result causing
property damage, personal injury
or death.
I Do not store or use gasoline or other
flammable vapors and liquids in the
vicinity of this or any other appliance.
- WHATTODOIFYOU
SMELLGAS
iJ_:illDo not try to light any appliance.
i_i:iDo not touch any electrical switch;
do not use any phone in your building.
Immediately call your gas supplier
from a neighbor's phone. Follow the
gas supplier's instructions.
If you cannot reach your gas supplier,
call the fire department.
-- Installation and service must be
performed by a qualified installer,
service agency or the gas supplier.
GAS-FIRED
2
LI_;TED
Page 3
_e.COITI
WARNING!
For your safety, the information in this manual must be followed to minimize the risk of fire or
explosion, electric shock, or to prevent property damage, personal injury, or loss of life.
ANTI-TIPDEVICE
All rangescan tip and injury could result.
Toprevent accidental tipping of the range, attach it to the wall or floor by installing the Anti--tip device
supplied.
If the Anti--tip device supplied with the range does not fit this application, use the universal Anti--17p
device WB2X7909.
Tocheck if the device is instafled and engaged properly, remove the storage drawer and inspect the
rear leveling leg. Make sure #fits securely into the slot.
If yOU pull tile range otlt flom tile wall for ally reason, mal<e stlie the device is properly
engaged when you push tile rang_ back against file wall. If it is not, there is a possible risk of
the rang_ tipping oxer and causing iIlju]_] if YOUor a child stand, sit or lean on an open door
Please refer m the And-Tip device infounafion in tiffs manual. Failure m rake fills precaution
could resuh in tipping of the rang_ and iIIjm>
IMPORTANTSAFETYNOTICE
The California Safe Drinking Water and ToxicEnforcement Act requires the Governor of California to
publish alist of substances known to the state to cause birth defects or other reproductive harm, and
requires businesses to warn customers of potential exposure to such substances.
Gas appliances can cause minor exposure to four of these substances, namely benzene, carbon
monoxide, formaldehyde and soot, caused primarily by the incomplete combustion of natural gas or
LP fuels. Properly adjusted burners, indicated by abluish rather than a yellow flame, will minimize
incomplete combustion. Exposure to these substances can be minimized by venting with an open
window or using a ventilation fan or hood.
The fiberglass insulation in self-clean ovens gives off a very small amount of carbon monoxide during
the cleaning cycle. Exposure can be minimized by venting with an open window or using a ventilation
fan or hood.
3
Page 4
IMPORTANTSAFETYINFORMATION.
READALLINSTRUCTIONSBEFOREUSING.
WARNING!
SAFETYPRECAUflONS
When using electrical appfiances, basic safety precautions should be foflowed, including the
following:
_:;Use this appliance only tbr its intended
purpose as described ill tins )wner s
Mannal.
_t{:;Be sure your appliance is properly installed
and grounded by a qualified technician in
accordance with the provided installation
instrnctions.
_{:_Before perfo_ning any service, disconnect
the range power supply at the household
disu-ibufion panel by removing the fl_se or
switching off the circuit breaken
;fi:,iHaxe the installer show you tile location of
tile circuit breaker or fl_se. Mark it for easy
reference.
;f; Do not leme children alone----r'hildren
should not be left alone or unattended in
all area where all appliance is ill use. They
should nexer be allowed to sit or stand on
ally part of the appliance.
;f; Haxe the installer show you the location
of the range gas shut-offxahe and how to
shut it off if necessa U.
_i:,:Hax> your rang_ installed and pioperly
grounded by a qualified installei; in
accordance with tile Installation
Instructions. Ally' adjusunent and se_Mce
should be perfomled only by qualified gas
range installers or service technicians.
_{::i,ocate the range out of kitchen tral_c path
and out of dr_fftv locations to prexent poor
air circulation.
_::Be sure all packaging materials are
removed from rite rang_ before operating
it to pre\ent fire or smoke damage should
the packaging mamrial ignite.
;f; Do not leme children alone or nnattended
where a range is hot or in operation. They
could be seriously burned.
• {_
Do not attempt to repair or replace ally
part of your range unless it is specifically
recommended in this manual. All other
service should be refelTed to a qualified
technician.
Be sure your range is con-ecfly adjusted
by a qualified se_Mce mchnician or installer
for tile type of g_s (natural or I,P) that is
to be used. Your rang_ call be comermd
for use with either type of gas. See the
Installation Instructions packed with
the rang_.
_::Plug your range into a 190=\olt grounded
outlet only. Do not remove tile round
g_ounding prong from the plug. If in
doubt about the grounding of the home
elecuical system, it is your personal
responsibility and obligation m haw
all ungrounded outlet replaced with a
properly gTonnded, three-prong onflet ill
accordance with rite National Electrical
(',ode. Do not use all exmnsion cord with
this appliance.
-& WARNING:Theseadjustments
must be made by a qualified service
technician in accordance with the
manufacturer's instructions and aft codes
and requirements of the authority having
jurisdiction. Failure to follow these
instructions could result in serious injury or
property damage. The qualified agency
performing this work assumes
responsibility for the conversion.
_::Kee I) the hood and grease filters clean to
maintain good xenting and to mold grease
fires.
_::Teach children not to play with tile
controls or ally other part of the rang>.
_]_::Always kee I) dish towels, dish cloths, pot
holders and other linens a satb distance
fronl vonr rangP.
4
Page 5
SAFETYPRECAUTIONS
ge.com
;_?:,;Always kee I) wooden and plastic utensils
and canned tbod a safe distance flora your
range.
_i:,:Always kee I) combnsdble wall coxefings,
curtains or drapes a safe distance flom
yonr range.
_;:Do not clean tile rang_ with flammable or
x_latile cleaning fluids.
_i:,i'After prolonged use of a range, high floor
mmperamres may result and many floor
coxeling3 will not withstand this kind of
use. Nexer install tile range oxer vinyl tile
or linoleum that cannot withstand such
type of use. Nexer install it directly over
inmxJor kitchen caq)eting.
;_i:,:Do not allow anyone to climb, stand or
hang on dm oxen doox; storage drawer or
cooktop. They could damage tile range
and even tip it oxex; causing sexere
personal i_jury.
,&CAUTION:Itemsinteresttochildren
shouldnot be storedin cabinetsabovea rangeor
on thebacksplashof arange--children climbing
on therangeto reachitems couldbeseriously
injured.
Do not store flammable mamdals in an
oxen, a range storage drawer or near a
cooktop.
Do not store or use combustible materials,
gasoline or other flammable vapors and
liquids in the vicinity of this or any other
appliance.
Do not let cooking grease or other
flammable mamrials accumulam in or
near the range.
Do not use wamr on grease fires. Nexer
pick up a flaming pan. Turn fl_e controls
off: Smother a flaming pan on a surfi_ce
burner by coveting the pan completely
wiflx a well-fitting lid, cookie sheet or fiat
trW. Use a mulfi-pml)ose dU chemical or
tbam-type rixe extinguisher
Flaming grease outside a pan can be put
out by covering it with baking soda ox;
if available, by using a multi-pml)ose d U
chemical or foam-type fire extinguisher.
Flame in dxe oven can be smothered
completely by closing the oven door and
turning tile control to off or by using a
multi-pull)ose d U chemical or tbam-tvpe
fire extinguisher
,&WARNING:NEVERusethis
appliance as a space heater to heat or
wam_ the room. Doing so may result
in carbon monoxide poisoning and
oxerheating of the cooktop or oxen.
_i:,iFox your safety', nexer use your appliance
fox wmlning or heaung the room.
;_?:':Larg> scratches or impacts to glass doors
can lead to broken or shattered glass.
;_i:,:Do not clean the range when flxe appliance
is in use.
:_i:,:Nexer wear loose-fitting or hanging
garments while using file appliance.
Be carefifl when reaching for imms stored
in cabinets oxer the range. Flammable
material could be ig_lited if brought in
contact wifll flame or hot oxen snrt_aces
and may cause sexere bums.
q_{_;i,et tile burner gxates and other surfaces
cool before touching them or leaving
them where children can reach them.
_?_::Nexer block d_e xents (air openings) of
the range. They provide tile air inlet and
outlet that are necessmw fox rixe range to
operate properly with coxxect combnsuon.
'Air openings are located through the rear
and front center of the cooktop, at the top
and bottom of the oxen doox; and at the
bottom of the range under the storage
drawer or kick panel.
_7_::Do not lift the cooktop. IJfting the
cooktop can lead to damage and improper
operation of the range.
Page 6
IMPORTANTSAFETYINFORMATION.
READALLINSTRUCTIONSBEFOREUSING.
WARNING!
SURFACEBURNERS
Useproperpan size--avoid pansthat are unstableor easilytipped.Selectcookwarehavingflat bottomslarge
enoughto coverburnergrates.Toavoidspillovers,makesure cookwareis largeenoughto containthe food
properly, Thiswillbothsavecleaningtimeandpreventhazardousaccumulationsof food,sinceheaw spattering
or spilloverslefton rangecan ignite.Usepans with handlesthat canbe easilygraspedand remaincooL
_i_!Ahvays use dm UTE position when igniting
tim to I) burners and make su_e tim burners
have ig_fimd.
!_ Ne\er lea\_ tim surface burners unattended
at high flame settings. Boilo\>rs cm_se
smoking and greasy spillo\>rs that mW
catch on fire.
!;_;Adjust tim to I) burner flame size so it does
not exmnd beyond the edge of tim cookware.
Excessive flame is hazardous.
!;_Use only dry pot holders--moist or damp pot
holders on hot surPaces may resuh in burns
flom smam. Do not let pot holders come
near open flames when lifting cookware. Do
not use a towel or other bulky cloth in place
of a pot holde_:
!;_When using glass cookware, make sure it
is desig_md for top-of-cange cooking.
!_;To minimize dm possibili b' of bums, ignition
of flammable materials and spillage, turn
cookware handles toward the side or back of
the range without exmnding o\er adjacent
btlI'IleI's.
_i?![.lse tim least possible amount of £_t for
effective shallow or deep-_lt flying. Filling
the pan mo fifll of _t can cm_se spillo\_rs
when food is added.
_i?!X,\]mn prepa_ing flaming foods under tim
hood, mm tim fan on.
_i?!Do not use a wok on dm cooking sur£1ce
h"the wok has a round metal _ing that is
placed o\er the burner giv_m m support the
wok. This dng acts as a heat m_p, which mW
damage tim N_rner gcam and N_rner bead.
Also, it may cm_se tim N_mer m work
improperly. This may cause a cad)on
monoxide le\_l abo\_ that allowed by cuiiei_t
standards, _esuldng in a heahh hazard.
i:i!_:Foods for flying should be as d U as possible.
Frost on flozen foods or moisture on flesh
foods can cm_se hot Pat to bubble up and o\er
the sides of the pan.
_i?!Never uy to move a pan of hot Pat, especially
a deep _t flyer. X,\ait until the _lt is cool.
_i_!Do not lea\e plastic imms on tim cooktoi)--
they may meh if left too close to tim \>nt.
_i_!Careflflly watch foods being flied at a high
flame setting.
_i?!Ahvays heat fat slowly, and watch as it beats.
!;_:Do not lea\> any imms on tim cooktop. Tim
hot air flom tim vent may ig_im flammable
imms and will increase pressure in closed
containers, which may cruise them m burst.
_i?!/fa coml)ination of oils or _lts will be used
in flying, sdr together before beating or
as _lts meh slowly.
_i_!Use a deep £_t thermomemr whene\>r
possible m pre\ent o\_flmating l_lt beyond
the smoking point.
_i_!Do not opecam tim burner wifl_out all burner
parts in place.
_i?!Kee I) all plasucs away flom tim surPace
btlI'Ile I'S.
To avoid tim possibility of a burn, always be
certain that tim conuols for all burners are
at the OFFposition and all gca/es are cool
before attemI)dng to remo\> them.
If range is locamd near a window, do not
hang long curtains that could blow o\er the
surface burners and cream a fire hazard.
_i?!If you smell gas, turn off tim gns to tim range
and call a qualified service mchnician. Ne\>r
use an open flame m locam a leak.
_i)!Ahvays turn tim sur£_ce burner conuols off
before removing cookware.
Page 7
ge.com
COOKMEATANDPOULTRYTHOROUGHLY...
Cookmeatandpoultrythoroughly--meattoatleastanINTERNALtemperatureof 160°Fandpoultrytoatleastan
INTERNALtemperatureof I80°ECookingto thesetemperaturesusua@pmtectsagainstfoodbomeillness.
it WARNING!
OVEN
Stand awayfrom the range when opening the oven door. Hot air or steam which escapes can cause
bums to hands, face and/or eyes.
!_:Do not heat unopened food containets.
Pressure could 1)uild up and the container
could buL_t,causing an inju U.
!_i:!Keep the oven vents unol)stmcted.
ij;_:Kee I) the oven flee from grease buildup.
iJii:iPlace the oven ,'ack in the desired position
while the oven is cool. If ,'acks must be handled
when hot, do not let pot holder contact the
heating elements.
iJii:iWhen using cooking or roasting bags in the
oven, follow the manufi_ctuter's directions.
!_:Pulling out the tack to the stop-lock is a
convenience in lifting heax3 fbods. It is also a
precaution against 1)urns flom touching hot
surfilces of the door or oven walls.
iJii:iDo not use the oven to dU newspape,s.
If overheated, the) can catch on fire.
iJii:iDo not use the oven fbr a stot'age area. Items
stored in an oven can ignite.
Do not leave paper products, cooking utensils
or food in the oven when not in use.
a, WARNING:NEVERcover
any slots, holes or passages in the oven bottom
or cover an entire rock with materials such as
alulninuln fioil.Doing so blocks air flow
through the oven and may cause carbon
inonox]de poisoning. Ahllninuln foil linings
may also map heat, causing a fire hazard.
Do not use aluminum foil to line oven 1)ottoms.
hnproper installation of aluminum foil ma,
result in a risk of electric shock or fire.
Make sure a broiler pan is in place correctl)
to reduce the possibilit) of grease fires.
If)ou should have a grease fire in a broiler
pan, press the C/fAR/0FFpad and keep the
oven door closed to contain fire until it
btlI'ns OUt.
SELF-CLEANINGOVEN
Donotuse ovencleaners.No commercialovencleaneror ovenliner protective coatingofanykind shouldbe
usedin oraroundanypartof theoven.Residuefrom ovencleanerswill damagethe insideoftheoven whenthe
self-cleancycleis used.
!_:Do not clean the door gasket. The door gasket
is essential fbr a good seal. Care should be
token not to ml), damage or move the gasket.
!:_:Be%re self:cleaning the oven, ,emove shin),
siDe>colored oven mc_ (on some Inodels)
and all other cookware.
!_:Be sure to xOpe up excess spillage befbre
starting the self,leaning operation.
!:_:If the self,leaning mode malflmctions, turn the
oven off and disconnect the power suppl): Have
it serviced 1)xa qualified technician.
!_:Clean only parts listed in this Owner's Manual.
READANDFOLLOWTHISSAFETYINFORMATIONCAREFULLY.
SAVETHESEINSTRUCTIONS 7
Page 8
Usingthegas surfaceburners.
Throughout this manual, features and appearance may vary from your model.
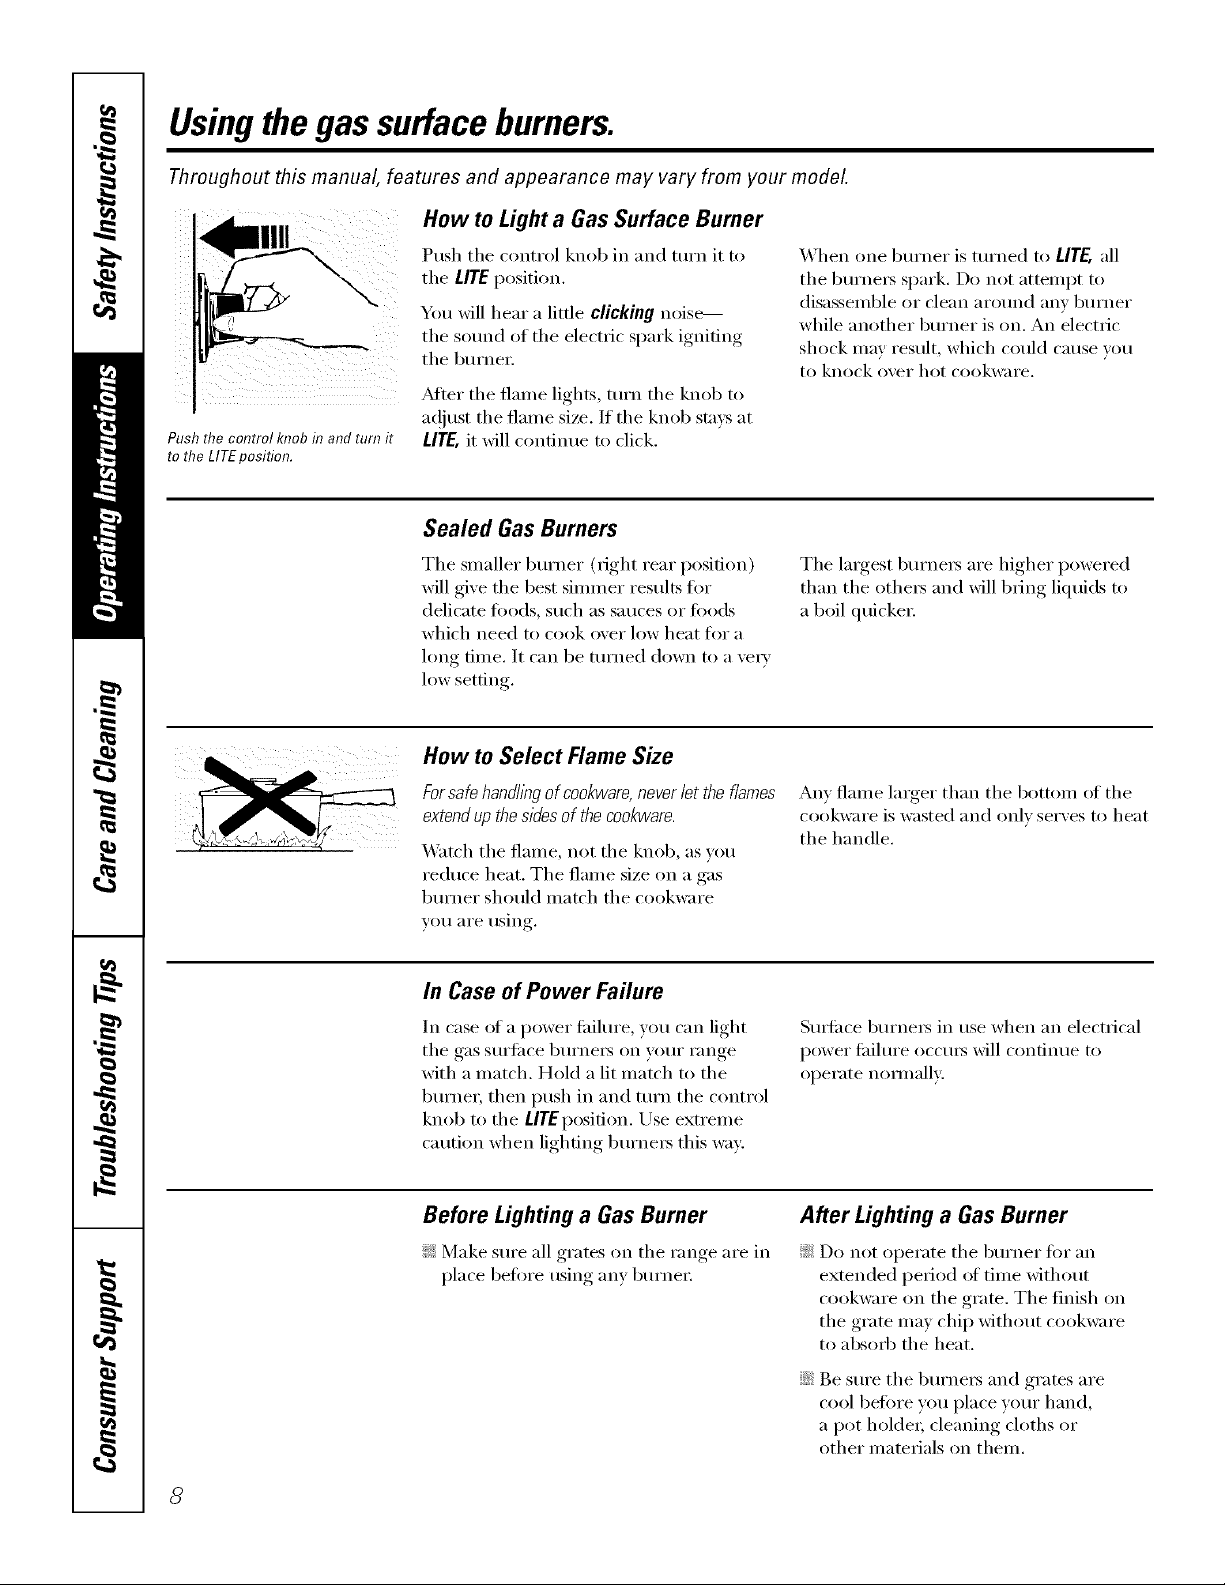
How to Light a Gas Surface Burner
Push the control knob in and turn it
to the LITEposition.
Push tile control knob in and mrn it to
tile tirE position.
You will hear a little clicking noise_
tile sotmd of the electric spark igniting
the burne_:
?dter the flame lights, turn the knob to
at!just tile flame size./f the knob stays at
t/rE, it will continue to click.
Sealed Gas Burners
When one burner is turned to LITE, all
the burners spark. Do not attempt to
disassemble or clean around anv bm'ner
while another burner is on. An electric
shock may result, which could cause you
to knock over hot cookware.
The smaller burner (right rear position)
will give the best simmer results fin.
delicate toods, such as sauces or fi)ods
which need to cook over low heat fin" a
hmg time. It can be turned down to a very
low setting.
How to Select Flame Size
Forsafe handh}_gof cookware,never let the flames
extendup the sidesof thecookware.
_A'atch tim flame, not tile knob, as you
reduce heat. The flame size on a gas
burner should match the cookware
VOII aI'e rising.
In Case of Power Failure
In case ot a power fililure, you can light
the gas surtilce burners on your range
with a match. Hold a lit match to the
burner, then push in and mrn the control
knob to the L/TEposifion. Use extrelne
caution when lighting burne_ this way:
The largest, burnei_ are hi,*her,_ I)°wered
than the others and will bring lkluids to
a boil qtficke_;
An} flame larger than the bottom of the
cookware is wasted and oiflv ser\ es to heat
the handle.
Smtilce burners in use when an electrical
power tililure occms will continue to
operate nommllv.
Before Lighting a Gas Burner
!;_:Make sure ;111grates on the range are in
place befin'e tlsino,b [IIIV, bt/rner
After Lighting a Gas Burner
_: Do not operate the burner for an
extended period ot time without
cookware on the grate. The finish on
the grate may chip without cookware
to absorb the heat.
::Ji::Be sure the burners and grates are
cool betore you place your hand,
a pot holder; cleaning cloths or
other materials on them.
8
Page 9
Top-of-Range Cookware
ge.com
Aluminum: Medium-weight cookware is
recommended because it heats quickly
and evenly: Most fi)ocls brown evenh' in
an almninum skillet. Use saucepans with
tight-fitting lids when cooking with
IllinillltlI// alllOtlnts ot _;Ken
Cast-#on: If heated slowly, most skillets
will give satisti_cto_ T results.
Enamelware: Under some conditions,
tile enaillel of SOille cookware Ill}IV
Illelt. Follow cookware Ill_lllt/lilCttlI'eI"S
recommendations fin" cooking methods.
Glass: There are two t)pes of glass
cookware--those fi)r oven rise only
and those fin" toi>olZrange cooking
(saucepans, coffee and teapots).
Glass conducts heat ve_' slowly.
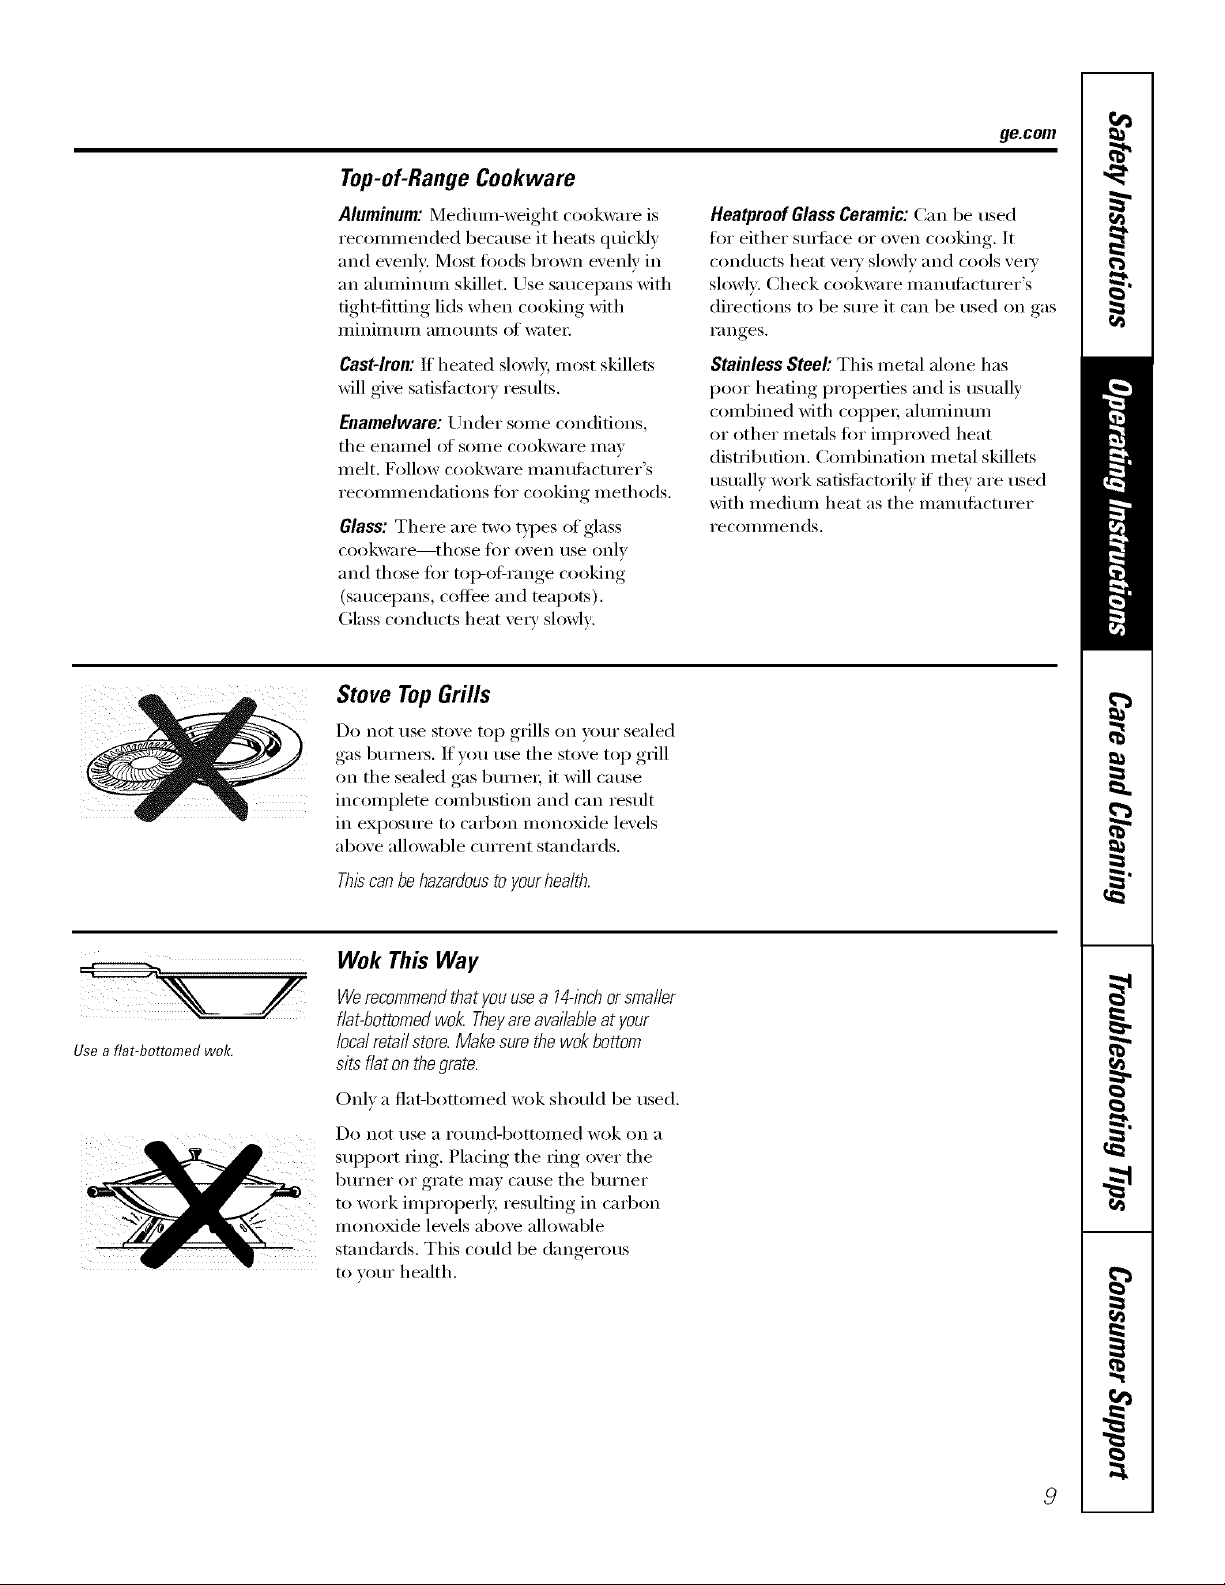
Stove TopGrills
Do not use stove top grills on your sealed
gas burne_. If you use tile st()ve top grill
on the sealed gas bm'ne_; it will cause
incomplete combustion and can result
in exposure to carbon inonoxide levels
above allowable cmTent standards.
Heatproof Glass Ceramic: Can be used
tor either surlilce or ()veil cooking. It
conducts heat very slowly and cools very
slowh'. Check cooi<ware inanufilcturer's
directions to be sure it can be used on gas
i'anges.
Stainless Steel'. This metal alone has
poor heating properties and is usually
combined with coppe_; ahmfinmn
or other metals fin" improved heat
distribution. Combination metal skillets
usually work safisfi_ctorilv if they are used
with medium heat as the manufi_cmrer
i'ecoi/liilends.
Use a flat-bottomed wok.
Thiscanbehazardoustoyourhealth.
Wok This Way
Werecommendthatyouusea 14-inchorsmaller
flat-bottomedwok.Theyareavailableatyour
localretailstore.Makesurethewokbottom
sitsflatonthegrate.
Onh a fiat-bottomed wok should be used.
Do not rise a i'otlnd-bottollled wok on a
support ring. Placing tile ring over tile
burner or grate inay cause tile burner
to work improperly, resulting in carbon
monoxide levels above allowable
standards. This could be dangerous
to veto" health.
Page 10
Usingtheovencontrols.
Throughout this manual, features and appearance may vary from your model.
0
T|IVlE CONTROLS
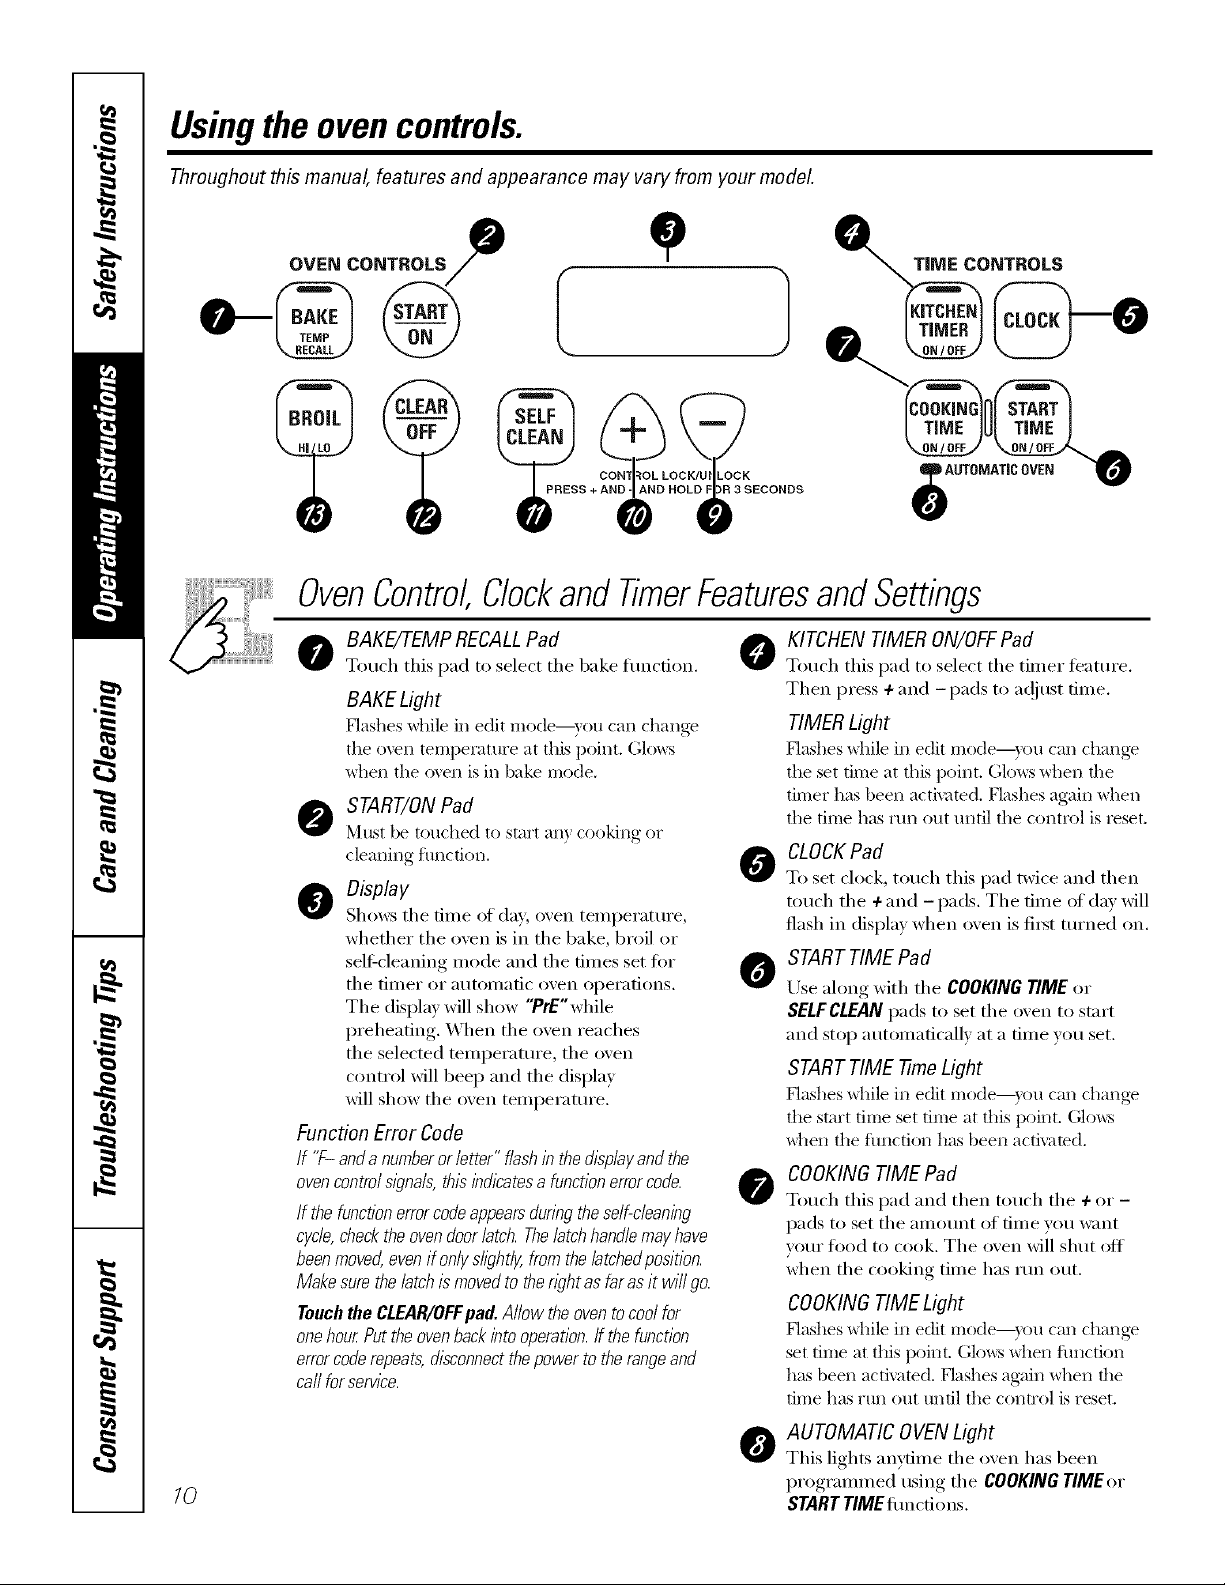
OvenControlClockandTimerFeaturesandSettings
o BAKE/7-EMPRECALLPad O
Touch tlfis pad to select tile bake flmcfion.
BAKE Light
Hashes while in edit Illode--}Otl (aI1 (hange
tile o\reI1 temperature at this point. Glo_:s
when the o\en is in bake mode.
O START/ONPad
]_'ltlStbe touched to start an} cooking or
cleaning ftlnctioi1,
O isplay
Sbo_:_ tile time of day; oven temperatm'e,
whether tile oven is in tile bake, broil or
self:cleaning mode and tile dines set for
tile tilller or a/ltoi//atic ()veil opei'ations.
Tile display will show "PrE'while
preheating. When tile oven reaches
tile selected temperatm'e, tile oven
control will beep and tile display
will show tile oven temperature.
Function Error Code
If 7- andanumberorletter" flashin the &splay and the
ovencontrol mgna& thisihdlcates a functionerrorcode.
If thefunction errorcodeappearsdunbgtheself-cleaning
cycle,checkthe ovendoorlatch. Thelatchhandle mayhave
beenmoved,even if onlyslightly, from the/atchedposition.
Makesure the latch ismoved to thewht as farasit wi// go.
Touch the CLEAR/OFFpad. Allow the oven tocool for
onehour Put the ovenback into operation./f the function
errorcoderepeats, disconnectthepower to therangeand
ca//for service.
KITCHEN TIMERON/OFFPad
Touch this pad to select tile timer teatm'e.
Then press + and -pads to at!just time.
TIMERLight
Flashes _]lile ill edit Illode--}Otl call ch}lllge
the set time at this I/oint. Glows when the
timer has been activated. Hashes again when
the time has mn out until the control is reset.
CLOCK Pad
0
To set clock, to/lcb this pad twice and then
touch tile + and - pads. Tile time of day will
flash in display when oven is fiI_t turned on.
STARTTIME Pad
0
Use along with tile COOKING TIME or
SELFCLEAN pads to set tile oven to start
and stop automatically at a time vou set.
START TIME -time Light
Hashes _hile in edit mode--)ou can change
the start time set time at this point. Glows
when the flmction has been acti\ramd.
COOKINGTIME Pad
0
Touch this pad and then touch tile + or -
pads to set tile amount of time you want
vom" food to cook. Tile oven will shut off
when the cooking time has rtm out.
COOKINGTIME Light
Flashes _hile ill edit Illode--}Otl c}lI1 ch}lllge
set time at this point. Gkm:s _hen flmction
has been activated. Hashes again when the
time has run out until the control is reset.
@,
AUTOMATIC OVENLight
O
This lights anytime tile oven has been
/0
programmed using tile COOKING TIMEor
STARTTIME flmctions.
Page 11
OvenControl,Clockand TimerFeaturesandSettings
ge.com
- Pad
Short taps to this pad _dll decrease tile time
or temperature by small amounts. Touch
and hold the pad to decrease the time or
teml)erature by larger amounts.
+ Pad
Short taps to this pad will increase the time
or temi)eramre 1U small amounts. Touch
and hold the pad to increase the time or
teml)erature by larger amounts.
O SELFCLEANPad
Touch this pad to select the selfkleaning
traction. See the Using the self-cleaning
oven section.
CLEANLight
Flashes _ddle ill edit nlode--)ou can change
tile length of time for the self,lean c) cle at
this point. (;h:ms _dlen the o\rell is ill the self
clean c)cle. AJier the selt_lean c)cle, the lig]lt
will ttlrll oft_ Unlatch tile do(n:
Control Lockout
CLEAR/OFF Pad
Touch this pad to cancel ALL oven
operations except the clock and timei;
BROILHI/LO Pad
Touch this pad to select tile broil fimcfion.
BROILLight
Iqashes while ill edit nlode---y()u can switch
fl'om HI to tO BROILat this point. Glows when
the ()veil is ill broil mode.
Indicator Lights (on some pads)
EOlTmode lasts several seconds after tile
last pad press. START TIME ON/OFFand
COOKINGTIMEON/OFFwill be the only pads
lit if either of these options is selected.
(Example: START TIMEis selected _ith
BAKE the START T/MEpad will remain
lit until the clock reaches the progianmled
time, at which point it will turll off and the
BAKE/rEMPRECAtt pad lig41twill light up),
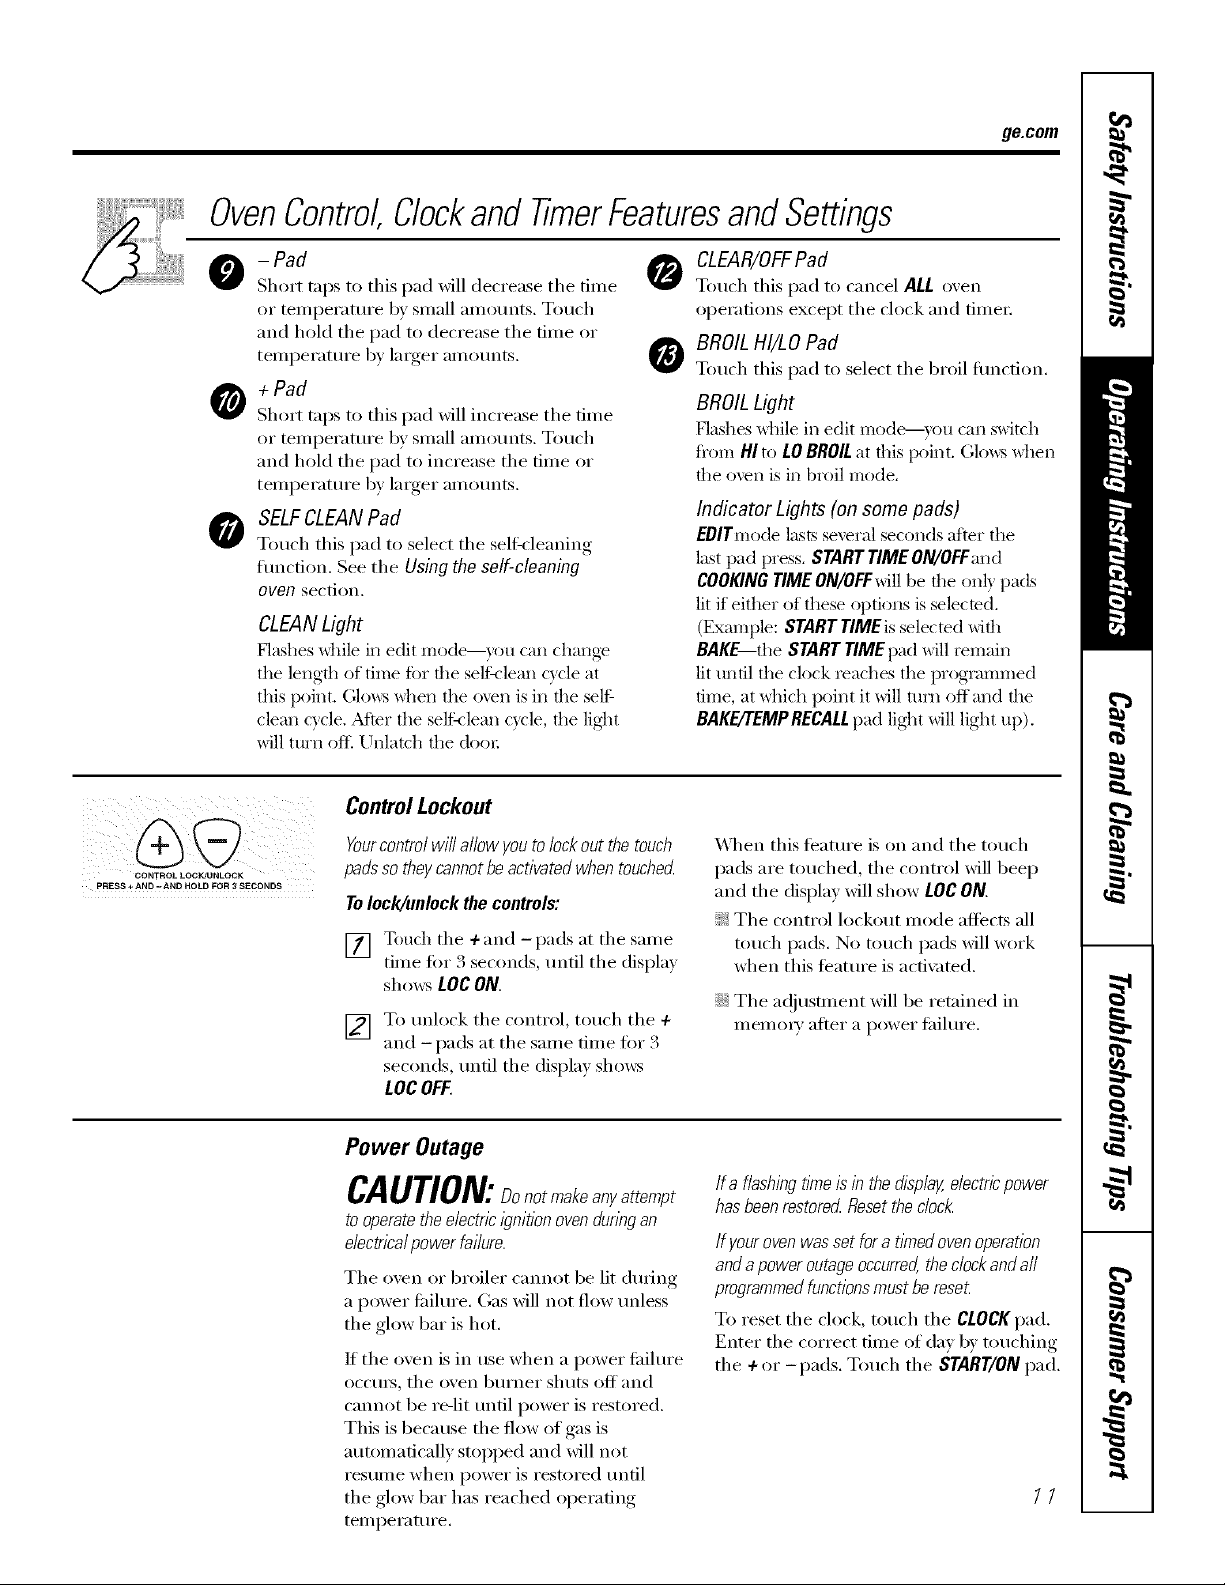
;ii iiii)i)ii
PRESS + AND -AND HOLD FOR 3 SECONDS
Yourcontrol will allow youto lock out the touch
padsso theycannot beactivated when touched
Tolock/unlock the controls:
[] Touch the +and -pads at the same
] To unlock the control, touch the +
Power Outage
CAUTION:Donotmakeanya.empt
to operatetheelectricignitionovendunbgan
e/ectricalpower failure.
Tile oven or broiler cannot be lit during
a power fifilure. Gas will not flow unless
the glow bar is hot.
If tile ()veil is ill use when a power fifilure
OCC/II'S_ tile oven b/IFneY shuts off and
cannot be re-lit tmtil power is restored.
This is because the flow of gas is
autonmtically stopped and will not
resume when power is restored until
tile glow bar has reached operating
temperature.
time fin" 3 seconds, until tile displa)
sho_vs LOC ON.
and -pads at tile same time fi)r 3
seconds, until tile display sho_:s
LOCOFF.
_]/ell this teature is on and tile touch
pads are touched, tile control will beep
and the display will show LOC ON.
_: Tile control lockout mode affects all
touch pads. No touch pads will work
when this feature is acti\_Ked.
::Ji::Tile a(!jusnnent will be retained ill
nlemor)' after a power fifilure.
Ira flashingfl_neisin thedisp&gelectricpower
hasbeenrestoredResettheclod<
If your oven was set fora timed oven operation
andapower outageoccurred,the clockandaft
programmedfunctionsmustbe reseL
To reset tile clock, touch tile CLOCKpad.
Enter tile correct time of clay by touching
tile + or-pads. Touch tile START/ON pad.
11
Page 12

Usingthe oven.
Toavoid possible bums, place the racks in the desired posifion before you turn the oven on.
Before you begin...
Tile racks have stops, so that when placed
correctly on tile suppoils, they will stop
befl)re confing coinpletely ()/it, and will
not tilt.
To replace, place tile end ot tile rack
(StOl)-locl_s) on tile SUl)port, tilt up tile
fl'ont and push the rack in.
CAUTION:Whenyouareusingthe
When placing and renloving cookware,
pull tile rack out until it stops.
The bake burner is under the oven floor.
Do not place fi)ods on tile ()veil bottoi/l
tOI" cooking,
Toremove a rack, pull it toward you,
tilt the fl'ont end up and pull it ()/it.
The oven has 7 rack positions.
How to Set the Oven for Baking or Roasting
rackin the lowestposition (A),you will needto
usecaution whenpuffing the rackout We
recommendthat you puffthe rackout several
inchesand then,using two pot ho/ders,puff the
rackout by holding the sides of it Therack is low
andyoucouldbe burnedif youplace yourhandin
the middleof the rackand puff aft thewayout Be
verycarefulnot to burn your handon the door
when using the rackin the/owestposition (A).
[] Touch tile BAKE pad.
[] Touch tile + or-pads until tile
desired teinl)erature is displayed.
[] Touch tile START/ON pad.
Tile oven will start automatically. Tile
display will show "PrE" while l)reheating.
When the oven reaches the selected
ten/l)erature, tile ()veil control will beep
several tiInes and the display will show
tile oven telllpei'attli'e,
Tochangethe oven temperatureduringBAKE
cycle,touchthe BAKE pad and then the + or-
pads toget thenew temperature.
[] (_heck fl)od for doneness at
nlininluin dine on I'edpe. Cook
longer if necessai w.
[] Touch tile CLEAR/OFFpad when
baking is finished and then ren/oxe
tile fl)od fl'on/ tile ()veil.
NOTE"Acoolingfanwillautomaticallyturnon
andoff tocoolinternalparts.Thisisnormal,and
thefanmaycontinuetorunevenaftertheoven
in turnedoK
Typeof Food Rack Position
Frozenpies(oncookiesheet) CorD
Angelfoodcake A
Bundtorpoundcakes BorC
Biscuits,muffins,brownies, CorD
cookies,cupcakes,
layercakes,pies
Casseroles CorD
Turkey A
If baking four cake laveI_ at tile san/e
tiine, place two lavei_ oil rack B and two
layeI_ oil rack D. Stagger pans oil the
rack so one is not directly above the
othei:
/2
Page 13

Preheating and Pan Placement
ge.com
Do not place foods directly on the
ovenfloo_
Preheat the o\ en if the recipe calls fi)r it.
Preheating is necessary for good results
when baldric cakes, cooldes, pasn T and
breads.
Topreheat,set theovenat thecorrecttemperature.
Thecontrol will beep when the oven/s preheated
andthe display will show yourset temperature.
Thepreheat t/nTewill varydependingon the
temperaturesetting.
Aluminum Foil
Do not usealuminum foil on the bottom
of the oven.
Never entirely cover a rack with
ahmfilmln fifil. This will disturb the heat
circulation and result ill poor baking.
Oven Moisture
_s x_mr oven heats up, the telnperature
change of the air ill the oven Inav cause
water droplets to titan on the door glass.
These droplets are hamfless and will
e\'aporate as the ()veil contintles to
heat up.
Baldric resuhs will be better if baldric
pans are centered ix* the oven as much
as possible. If baldng with more than one
pan, })lace the pans so each has at least 1"
to 1½" oiair space are*rod it.
A slnaller sheet of fi)il inav be used to
catch a spillover by placing it on a lower
rack several inches below the food.
Oven Vent
_4mr oven is vented through the rear vent
located through the cooktop under the
vent grille. Do not block this vent when
cooking ill the oven--it is important that
the flow of hot air fl'om the oven and
fl'esh air to the oven burner be
uninterrupted. Avoid touching the vent
openings or nearby surfaces during oven or
broiler operation--they may become hot.
_ Handlesofpotsandpansonthecooktopmay
becomehotif left tooclosetotheven£
;;Ji::Donotleaveplasticitemsonthecooktop--
theymaymeltif lefttoodosetothevenL
;;Ji::Donotleaveanyitemsonthecooktop.Thehot
ak fromtheventmayigniteflammableitems
andwillincreasepressureinclosedcontainers,
whlehmaycausethemtoburst.
_ Metalitemswill becomeveryhotif theyare
leftonthecooktop,andcouldcauseburns.
13
Page 14

Usingtheoven.
How to Set the Oven for Broiling
IMPORTANT'.Toavoidpossibleburns,placethe
racksinthedesiredpositionbeforeyouturnthe
oven 017.
[] Place the meat or fish on a broiler
<grid in a broiler I)an designed<
fin" broiling.
[] Follow suggested rack positions in
the Broiling Guide.
[] The o_en door must be closed
during broiling.
[] Touch the BROILHI/LOpad once fin.
HIBroil.
To change to LOBroil, touch the
BROILHI/LO pad again.
Broiling Guide
The size, weight, thickness,
starting< teml)erature Food
and VO/lI" preference GroundBeef
Ot doneness will afli_ct Beef Steaks
broiling tillles. This guide Rarer
is based on meats at Medium
refrigerator temperature.
4 71w[L'_.De/:a_lm(_l o/
Agdcu/hz*_,*(0* <7tm_,b,,,jis
p<p./a_;but you d_ouldMow tha_
(:_Mdugit > on/) 140<7:means
somejood tmismzi_,_o_;_zz_isms
ma) su:'ui-u(,."(Sough:e:_ I')x)d
Book. );nu Kilchm (;uide. US1)A
l'ezaJune i %'5.)
Well Done
Rarer
Medium
Well Done
Chicken
Bakery Product
Bread (toast)
English Muffin
LobsterTails
FishFillets
Quantityand/
or Thickness
1/2ff to 3/4" thick
a/4"to I" thick
1to 11/2Ibs.
11/2"thick
2 to 272 Ibs.
1wholecut up
2 to 2½Ibs.,
split lengthwise
Breast
2 to 4slices
2 (split)
24
1lb. {I/4" to I/2" thick)
Rack
Position
F
E
E
E
E
D
C
D
F
F
Use LO Broil to cook fi)ocls such as poultx T
or thick cuts of meat thoroughly without
ove_q)rowning them.
[] Touch the START/ON pad.
[] XAq_en broiling is finished, touch the
CLEAR/OFF pad,
Serve the food immediately, and leave the
pan outside the oven to cool during the
meal fin" easiest cleaning.
FirstSide
Time(rain.)
13
10
15
15
20
25
25
3-4
18 20
Second Side
Time (min.)
8
6
8
3
4
6
8
10
15
20
25
15
Donot
turn
over.
Comments
Spaceevenly.
Steakslessthans/y,
thick aredifficult
to cookrare.
Slashfat.
Brusheachsidewith
meltedbutter.
Broilskin-side-down
first.
Spaceevenly.Place
Englishmuffins cat-
side-Lipandbrush
with butter if desired.
Cutthroughbackof
shell. Spreadopen.
Brushwith melted
hatterbeforebroiling
andattar Mf of
broilingtime.
Handleandturnvery
carefuNy.Brushwith
lemonbutter before
anddaringcooking,
if desired.
Steaks
Fillets
Sablron
HamSlices
The oven has 7 rack positions. (precooked)
Pork Cbops
Well Done
/4
2 (1" thick)
2 {1/2" tos/4" thick)
1/_-thick
1" thick
2 (V2"thick)
2 (1" thick)about 1lb.
Turncarefully.
Donotturn skin-side-
down.
8
8
10
15
5
8
10
5
Slashfat.
Page 15

Usingthe clockand timer, ge.com
Not all features are on all models.
ToSet the Clock
Make sure the clock is set to flTe
correct time of da_¢
The clock nmst be set to the correct tilne
of (lax fi)r the autonmtic oxen timing
fimctions to work properly, The tilne of
day cmmot be changed during a dela)ed
cooking or a delmed selfk'leaning c) cle.
[] Touch the CLOCKpad twice,
[] Touch the + or-pads,
If the + or - pads are not touched within
one minute alier you touch the CLOCK
pad, the display reverts to the ofigilml
ToTurnOffthe Clock Display
If you have several clocks in your kitchen,
you Inay wish to turll off the tilne of day
clock display on yore" range.
[] Touch the CLOCKpad once to mrn
off the time of day display. _Mthough
you will not be able to see it, the
To Set the Timer
setting, If this hal)pens, touch the CLOCK
pad twice and reenter the time of din.
[] Touch the START/ON pad until the
time of day shows in the display: This
ente_ the time and starts the clock.
Tocheckthetlkneofdaywhenthedisplayis
showlbgotherinformation,s/knp/ytouchthe
CLOCKpad Thettmeofdayshowsunti/another
padistouched
clock nmii_tains the correct tilne
of day,
Touch the CLOCKpad twice to recall
[]
the clock display.
TheCLEAR/OFFpad does not affect
the time_
ThetlYnerdoesnot control ovenoperations.
ThemaxlYnumsetting on the timer is 9 hours
and59 mlbutes.
Touch the KITCHEN TIMER ON/OFF
[]
pad.
Touch the + or-pads tmtil the
[]
alllOtlnt 01' time you want shows ill
the display: The maxim mn time that
can be entered in minutes is 59.
Times more than 59 minutes should
be changed to hom_ and minutes.
To Reset the Timer
If the display is still showing the time
remaining, you may change it by touching
the KITCHEN TIMER ON/OFFpad, then
touching the + or -pads tmtil the tilne
wm _I_t appeai_ in the display.
To Cancel the Timer
If youmakeamistake, touchtheKITCHEN
TIMER ON/OFFpad and beginagain.
[] Touch the START/ONpad. The time
will start cotmting down, althotwh
the display does not change tmtil
one minute has passed.
[] X4q_en the timer reaches .'/70, the
control will beep 3 dines followed b",
one beep every 6 seconds tmtil the
KITCHEN TIMER ON/OFFpad is
touched.
If the remaining time is not in the display
(clock, start time set time or cooking time
are in the display), recall the remaining
time by touching the KITCHEN TIMER
ON/OFF pad and then touching the + or -
pads to enter the new time you want.
Touch the KITCHEN TIMER ON/OFF
pad twice.
/5
Page 16

Usingthetimedbakingandmastingfeatures(onsomemodels).
Donot lock the oven door with the latch during timed cooking. The latch is used for self-cleaning only.
/VOTE"Foods that spoil easily--such as milk, eggs, fish, stuffings, poultry and pork--should not be allowed to sit for
more than 1hour before or after cooking. Room temperature promotes the growth of harmful bacteria. Be sure that
the oven light is off because heatfrom the bulb will speed harmful bacteria growth.
How to Set an Immediate Start and Automatic Stop
Theoven wi// turnon/mmediate/yandcook for a [] Touch tile START/ON i)ad.
selectedlength of time. At theend of thecooking
tkne, the ovenwi//turn offautomat/ca//y The disl)lay shows either the oxen
[] Touch tile BAKEpad.
] Touch tile ÷ or -pads to set tile
o'_en teillpei'at tii'e,
[] Touch tile COOKING TIME pad.
NOTE:If your reciperequirespreheating, youmay
need to addadditionaltime to the length of the
cookingtime.
] Touch tile + or -pads to set tile
baking din e.
Tile cooking tilne that you entered
will be displayed. (If you select Ct)oking
Tiine fii_t and then a(!just the Bake
TeInl)erature, tile oven tenil)erature
will be displayed instead).
tenli)eramre that you set or tile cooking
tii/le COtlntdown. (Tile display starts with
"mOrE"if showing tile ()veil minl)eramre. )
The oven will continue m cook t0r the
l)rograniined alllO/Int ot fiI/le, then ttlI'n
ott autonlaficallv.
[] Touch the CL_lR/OFFl)ad to clear
tile display if necessary,
Remove the food from the oven. Remember, even
thoughtheovenshuts off automatlca//y,foods
continuecookingafter controlsare oK
How to Set a Delayed Start and Automatic Stop
Theoven will turn onat thetitheof dayyouset,
cookfor a specificlength of time andthen turnoff
automatically
Make StlI'e tile clock shows tile ('OlTect
din e of day
[] Touch tile BAKEpad.
] Touch tile ÷ or -l)ads to set the
()veil teIll peI'att II'e.
I
[] Touch tile COOKING TIME pad.
] Touch tile + or -pads to set tile
desired length of cooking time,
[] Touch tile STARTTIMEI)ad.
] Touch tile +or -pads to set tile tiIne
of (l_l_ VO/I want tile o'_en to [/IFn on
and stai* cooking.
[] Touch tile START/ON pad.
NOTE:Anattention tone wili soundif youare
using tlYnedbakingand donot touch the
START/ONpa_
NOTE:If vou would like to check tile tiines
you have set, touch tile STARTTIMEl)ad to
check the start time set fiIne you have set
or touch tile COOKING TIMEl)ad to check
the length of cooking finIe you
have set.
When tile oven turns on at tile finie ot day
vou have set, tile display will show "PrE"
until it reaches tile selected tenll)erature,
then it will display tile ()veil teniperamre.
At tile end of cooking tiine, tile oven
will turn offand the end-otk'vcle tone
will sound.
[] Touch tile CLEAR/OFFpad to clear
tile displa) if' necessai T.
Removethe food from the oven. Remember,even
thoughtheovenshuts off automatically,foods
continue cookingafter controisareoK
Page 17

Special featuresofyourovencontrol ge.com
Yournew touch pad control has additional features that you may choose to use. The following are the features and
how you may activate them.
The special feature modes can only be activated while the display is showing the time of day. They remain in the
control's memory until the steps are repeated.
When the display shows your choice, touch the START/ONpad. Thespecial features will remain in memory after
a power failure.
NOTE: The Sabbath feature and the Thermostat Adjustment feature are also Special Features, but they are
addressed separately in the following sections.
12 Hour Shut-Off
Withthisfeature,shouldyouforgetandleavethe
ovenon,thecontrolwi//automaticallyturnoffthe
ovenafter12hoursduringbakingfunctionsor
after3hoursduringabroilfunction.
If you wish to mrn OFFthis feature, follow
the stops belong:
[] Touch the BAKE"and BROILHI/LO
pads at the same time fin"3 seconds
tmtil tile display sho_:s SF.
[] Touch tile CLOCKpad. Tile displa_
xdll show ON (l 2 hour shut-off),
Touch the CLOCKp'ad repeatedly
tmtil the display sho_:s OFF (no
sh tl[-OlCD.
[] Touch tile START/ONpad to acfi'__te
the no shut-off and lea_e the control
set in this special teatures mode.
17
Page 18

Usingthe SabbathFeature(onsomemodels).
(Designed for use on the Jewish Sabbath and Holidays)
The Sabbath feature can be used for baking/roasting only. It cannot be used for broiling, self-cleaning or
Start -timecooking.
NOTE"The oven light comes on automatically (on some models) when the door is opened and goes off when the
door is closed. Thebulb maybe removed. See the OvenLight Replacement section. Onmodels with a light switch
on the control panel, the oven light may be turned on and left on.
How to Set for Regular Baking/Roasting
%
NOTE: Tounderstand bow theoven control works,
practice usingregular baking (non-Sabbath)before
entering Sabbathmode.
Make sure the clockshows thecorrect time of day
and the oven is off
] "lbu(h and hold both the BAKE and
BROIL HI/tO pads, at the same time,
m/dl the display shov,_'_ SE
] "Ihp the CLOCK pad until SAb appears
in the display.
[_] "lbuch the START/ON pad and D will
appear in the displa}.
] "lbu(h the BAKE pad. No sigllal will
be _,_','en.
[_] "lbud/the START/ON pad.
[_ After a random (lela'_ period ot
at)t)1 oximately 30 se(onds to 1 minute,
D c will at)t)ear ill the (list/l_l _ indicating
that file o_vn is baking/r(msdng. If D c
doesn't apt)ear in tile dist)lm, start again
at Step 4.
"Ib a@lst tile oven temperature, touch tile
BAKEpad and tap tile + or -pads to increase
or decrease tile tenlperatttre in 5 ° increments.
"Ibuch tile START/ONpad.
NOTE.."The CLEAR/OFF and COOKING TIME pads
are active dining tile Sabbath/['ature.
To exit Sabbath t('ature see next page.
Whel7 Tl?e otspt81 Sl?OWS _ [l?e
oven is seth7 Sabbath. When the
display shows D c the oven is
bakhTg/roasting.
When the display shows D the
oven is set fl7 Sabbath. When the
display shows D c the oven is
bakflTg/roasting.
] Tile ])reset St_tlTtil/g" telllilelT_tHiFe will
autonmticall'_ be set to 350. ° Tap the +
or -pads to illcrease or dect'ease tile
temperature ill 5° increments. The
temperatm'e can be set between 170 °
and 550. ° No sig_lal or temperature
will be given.
How to Set for Timed Baking/Roasting--Immediate Start and Automatic Stop
NOTE: Tounderstand bow theoven control works,
practice usingregular (non-Sabbath)Immediate Start
andAutomatic Stopbefore entedng theSabbath mode,
Make sure the clockshows thecorrect time of day
and the oven is off,
] "lbu(h mid hold both the BAKE and
BROIL HI/tO pads, at the same time,
mltil tile displa} shows SF.
] "Ihp the CLOCK pad tmtil SAb appears
in the display.
[_] "lbuch the START/ON pad and D will
appear in the displa}
I_] "lbud/the COOKING TIME pad.
] *Ibuch the + or -pads to set the desired
length of cooking time lx tween l
mintlte and 9 hottrs mid 5(.) mintttes.
The cooking thne that you entered will
be (tisplmx'd.
[_ "lbuch the START/ONpad+
] "lbtlch the BAKEpad. No si_01al will
l>e_,iven.
] The preset starting tempemttlre vdll
atltolnaticallv be set to 350. ° "[;ap file 4-
or -pads to ill€lZ'ase or decrease tile
telllpet&_t/lre ill ,-o il/crel//el/tS. The
tempeI_mlre Call be set between 170 °
and 550. ° No signal or tenq)enmlre
will be given.
[_] "lbud/the START/ON pad.
[_] After a random delay pelJod ot
al)proxinlately 30 se(onds to 1 minute,
D c will appear in tile dispL£: indkating
that tile oven is baking/roasting. If D c
doesn't appear in tile display, start again
at Step 7.
"Ib adjust the o_en temperaulre, touch tile
BAKEllad and tap the 4- or - pads to in(rease
or decrease the temperature in 5 ° in(relnents.
"Ibuch tile START/ON pad.
When cooking is liMshed, the displa} will
change ti'om D c to D indicating that tile
oven has mined OFFbut is still set in Sabbath.
Relno_v tile (ooked/ood.
78
Page 19

How to Exit the Sabbath Feature
ge.com
[] "]'ou(h the CLEAR/OFFpad.
]
dela} t)elJod ot al)l)roxJmatel _ 30
seconds to 1 minute, until on]_ D is in
the dist)la )
] "Ibudl and hold both the BAKE and
BROIL HI/tO pads, at the same time,
until the display' sl/o*ws SE
] "Fat) die CLOCK pad m_til ONor OFF
appears in the disl)la } ONindkates that
the oven will automad(allv mrn off alier
12 hours. OFFindicates that the o_'n
will not automatically mrn oil See
the Special Features section Jar an
ex])lmmtion of the 12Hour ghut-Off
t_,_tt ill(,.
[] "lbu(h the START/ON pad.
NOTE: ff a power outage occurred while the oven was
in Sabbath, theoven wifl automatically turn off and stay
off even when thepower returns. Theoven control
must bereset.
Adjustthe oventhermostat Do # yourself/.
Youmay find that your new oven cooks differently than the one # replaced. Use your new oven for a few
weeks to become more familiar with iL If you still think your new oven is too hot or too cold, you can adjust
the thermostat yourself.
Do not use thermometers, such as those found in grocery stores, to check the temperature setting of your oven.
These thermometers may vary 20-40 degrees.
NOTE,"This adjustment will not affect the broiling or the self-cleaning temperatures. Theadjustment will be
retained in memory after apower failure.
To Adjust the Thermostat[] l, l,eBAKE.,,dBROlt.I/to
pads at the sanle time fi)r 2 seconds
tmtil the display shows SF.
[] Touch the BAKE pad. A tw(*digit
number shox_s in the display:
[] _._en }ou have made the
a(!i ustment, touch the START/ONpad
to go back to the time of da} displa,'}.
Use VOI.II" o,,en ;:Is VOl.i would
no illl;:ll]",.
NOTE:Thisadjustmentwill notaffectthebroiling
[] The (),,ell telnl)erature can be
a(!justed up to (+) . : F hotter or (-)
35°F coolei. Touch the 4-pad to
increase the temi)erature in 1-degree
inci'ei//ents.
35 o_
Touch the -pad to decrease the
temperatm'e in 1-degree increments.
orself-cleaningtemperatures.It will beretained
inmemon/afterapowerfailure.
Thetypeof margarine will affect bakingperformance!.
Most recipes for baking have been developed using high-fat products such as butter or margarine (80% fat). If you
decrease the fat, the recipe may not give the same results as with a higher-fat product.
Recipe failure can result ff cakes, pies, pastries, cookies or candies are made with Iow-fat spreads. The lower the fat
content of a spread product, the more noticeable these differences become.
Federal standards reqtfire i_roducts labeled "nmrgarine" to coi_tain at least 80% ti_t by weight, i,o\'_ti_t spreads,
on the other hand, contain less ti_t and more water: The high moistm'e conmnt of these spreads aftb'cts the
texture and flavor (ff baked goods. For best results with vour old fi_\'o_im redpes, rise inaigaiine, butter or
stick spreads containing at least 70% vegetable oil.
19
Page 20

Usingtheself-cleaning oven.
Never force the latch handle. Forcing the handle will damage the door lock mechanism.
Before a Clean Cycle
Wipe up heavy soil on the oven
bottom.
_A'erecommend venting your kitchen
with an open window or using a
ventilation tim or hood (lining tile
fi_3t seltXclean cycle.
Remove racks, broiler pan, broiler grid,
all cookware and am' aluminum fifil
ti'om tile o_en.
The shiny, silve>colored oven racks
(oil some models) can be self:cleaned,
but they will (hrken, lose their luster
and become hard to slide,
Soil on tile fl'ont fl'ame of tile range and
outside the gasket on the door will need
to be cleaned by hand. Clean these areas
with hot water; soap-filled steel wool pads
or cleanse_ such as Soft ScrubS'! Rinse
well with clean water and dry:
How to Set the Oven for Cleaning
Follow tile directions in tile Before a
Clean Cycle secdon.
[] I,atch tile door.
[] Touch tile SELFCLEAN pad.
[] Touch tile + or - pads until tile
desired (:lean Time is displa)ed.
TheCleanT/meis normally4 hours. Youcan
changethe Clean Timetoany flYnebetween3
and5hours,dependingon the amountof sot/in
youroven.
[] Touch tile START/ON pad.
Tile self_-lean cycle will automatically
begin alter CLEAN is displayed and tile
time countdown appea_ in tile display.
Do not clean tile gasket. Tile fiberglass
material of tile oven door gasket cannot
withstand abrasion. It is essential ,for tile
gasket to remain intact. If w)u notice it
becoming worn or fl'ayed, replace it.
_A]l)e up any hea\ T spillove_ on tile oven
bottom.
Make sm'e tile oven light bulb cover is in
place and the oven light is off.
IMPORTANT'. The health of some birds
is extremely sensitive to the tirades given
off dtwing the sel6cleaning cycle ot any
range. Move birds to another well-
ventilated room.
\A]/ile tile oven is sel6cleaning, you can
touch the CLOCKpad to display the time
of day. To i'ettlrn to tile clean co/intdown_
touch tile SELFCLEANpad.
The oven shuts off automatically when
the clean cycle is complete, and 0:00 will
flash in tile display.
[] Slide the latch handle to the left as
fin" as it will ,g° and oi)en tile dora:
It will not be possible to tmlatch tile oven
door tmfil tile temi)erature drops below
the lock temperatm'e and the clean light
goes off.
XA]mn the clean light is off', tmlatch the
dooI',
2O
Page 21

@
@
How to Delay the Start of Cleaning
Make sure the clock shows tile correct
time of din.
[77 i_tch tile do(n:
[] Touch tile SELFCLEAN pad.
[] Using tile ÷ or - pads, enter tile
desired clean time.
TheCleantime is normally4 hours. Youcan
changethe CleanT/Yneto any t/Ynebetween3
and5hours,dependingon theamountof soil in
youroven.
[] Touch tile START TIMEpad. Tile
earliest stm_ time you can set will
appear in tile display.
[] Using the ÷ or - pads, enter tile
time of da_ you want tile clean c_cle
to st;Irt.
[] Touch tile START/ON pad.
ge.com
Tile display will show tile start time set
time. It will not be possible to unlatch tile
oven door tmtil tile temperature drops
below tile lock tempemtm'e and tile
clean light goes off.
When the clean light is off; tmlatch the
dom:
ToStop a Clean Cycle
Touch tile CLEAR/OFFpad.
Wait tmtil tile oven has cooled below tile
locking temperature to tmlatch tile doo_:
You will not be able to open tile door
right away unless the oven has cooled
below tile locking temperature.
After a Clean Cycle
You may notice some white ash in tile
oven. _]I)e it up with a damp cloth alter
tile oven cools.
If white spots remain, removethem with a soap-
filled scouringpad and nnse thoroughlywith
a wnegarand waterml)_ture.
These deposits are usually a salt
residue that cmmot be removed by
the clean cycle.
If tile oven is not clean after one clean
cycle, repeat tile cycle.
iJi::You cmmot set tile oven for cooking
tmtil tile oven is cool enough for tile
door to be mflatched.
_: While tile oven is sel6cleaning, you
can touch tile CLOCKpad to display
tile time of day. To return to the
clean countdown, touch tile COOKING
TIME pad.
_: Apply a small amount oI vegetable oil
to a paper towel and wipe tile edges of
tile oven racks with tile paper towel. Do
not spray with Pare <':or other lubricant
spmys.
2/
Page 22

Camand cleaning ofthe tahoe.
Be sure all controls are off and aft surfaces are cool before cleaning any part of the range.
If your range is removed for cleaning, servicing or any reason, be sure the anti-tip
device is reengaged properly when the range is replaced. Failure to take this
precaution could result in tipping of the range and cause injury.
How toRemoveProtectiveShippingFilmand Packaging Tape
Carefillly grasp a corner of tile protective
shipping fihn with your fingers and slowly
peel it fi'om the appliance surtbce, Do
not use any sharp items to remove the
film. Remove all of the fihn betbre using
the appliance tbr the first time.
Control Knobs
Thecontrol knobs may be removed for easier
c/eanlbg.
Make sm'e the knobs :ue in the OFF
positions and pull them straight off the
stems %_ cleaning.
To assm'e no damage is done to the
finish of the i)roduct, the said'st way to
remove the adhesive fl'om packaging rope
on new appliances is an application of a
househokl liquid dishwashing detergent.
Apply with a soft cloth and allow to soak.
NOTE: Theadhesive must be removed from all
parts./t cannot be removed if it/s baked on.
The knobs can be cleaned in a dishwasher
(w they may also be washed with soap and
_;itel: Make sure fl_e insides (>t the knobs
are dry befbre iepladng.
Repk_ce the knobs in the OFFposition
to ensure proper placement.
Make sure theslot in the burner
head is positioned over electrode.
CAUTION:ooNoT
OPERATETHEBURNERWITHOUT
ALL BURNERPARTSIN PLACE
22
Burner Assembly
The burner assemblies should be _tshed
regularly and, of course, after spi]lo\ ers.
Turnallcontrolsoffbeforeremovingburnerparts.
The burner grates, burner heads and burner
caps can be remo\ed ti)r easy cleaning.
The dectrode of file spark ig_dmr is exposed
lxe}end the surtime of the burner base. When
cleaning> the cooktoi), be caretul not to snag
the electrode of the spark igniter xdth )our
cleaning cloth. Damage to the ig_fiter couk|
occm: Toavoidsnaggingaclothonthespark
igniter, leave the burner heads in place when
cleaning thecooktop.
Becareful not to push in any cooktop controls
\dWecleaning the cooktop.A slightelectrical
shock might lesult \dfich could cause YOUto
knock o_er hot cook\_me.
"_\_Jshburner partswith an all-puq)ose
non-abrasi\e cleaner and warm wamx: Soak
stubborn soil. Dry them with a clofl>-<to not
i_a_semble \xl_ile'x_t.
Toreassemblethesurface burners:
[] Place burner heads over the electrodes
on the cooktop, in the correct locations
according to dleir size.
Mediumhead Smallhead
andca andcap
Z >_ o
Fmntofrange=
Largehead Largehead
and cap and cau
Place the
[]
matching size Grate
eal)S el/to the
heads,
Make sure
that the heads _ _.)
wKÂcaps are Burnerhead
})laced in the
correct
]()cations.
_Mter cleaning, h
ti),'st replace
the vent gTille
mid _vnt grille
cap. Replace the side grams so that the} fit
o_er the tabs on the vent grille. Make sure
the gYams am positioned securel} o_er the
bumex_ and that thet are stable ;rod le\el.
Burnercan
Page 23

Airinlet
ge.com
Burner Grates,VentGrille and VentGrille Cap
Porcelain enamel burner grates, _ent I_.epla(e tile side grates so that the) tit
grille and vent grille cap should be oxer tile tabs on tile ;ent grille. Make
washed regularly and of com_e atter sure tile grates are positioned secm'el}
spilloxe_, oxer tile burne_ and that they are stable
X_tsh them in hot, soapy water and
rinse with clean water: _Am may also use
abrasive cleane_ and scorning pads, if
needed. D_T them with a cloth--don't
put them back on tile cooktop wet.
_Mthough they're din'able, the grates,
vent grille and vent grille cap will
gradually lose their shine, regardless ot
the best care you can give them. This is
due to their continual exi)osm'e to high
temperamres.
Do not operate a burner for an extended
period (ff time without cookware on tile
grate. Tile finish on tile gram may chip
without cookware to absorb tile heat.
_dter cleaning, fi_t replace tile xent _*rille
and tile xent ,grille cai ).
and lexel.
Rubber Grate Feet
For stability, your cooktop has rubber
teet on the burner grates. If any ot these
rubber feet should become damaged or
lost, replace them immediately
To order replacement rubber grate teet,
please call ore" toll-ti'ee number:
National Parts
Center ............... 800.6262002 (U.S.)
888.261.3055(Canada)
Rubber GrateFeet ....... #WBO2TI0101
]lass cover
Socket
Oven Light Bulbs (ifinc/udod)
NOT£" The glass cover should be
glovesrem°ved°nly when c°ldmayoffer a bettor Woaring latOXgrip.
CAUT/ON" _efore replacing J/our Receptacle
oven light bulb, disconnect the electrical
powerto the oven atthe main fuse or
circuit breaker panel
Be Sttl'e to let tile light covel" ;/Ill1 b[tlb
cool completely.
For }our s:ffeD', do not touch a hot bulb
with bare hands or a damp cloth.
Toremove: []
[] Tm'n tile glass co\er
counterclockwise ]/4 turn mlfil tile
tabs of tile glass cover clear tile []
groo\ es of tile socket.
[] Using gloves or a dr_ cloth, remove
tile bulb by pulling it straight ()lit.
Toreplace:
[] IJse a llel,%r 13(Molt halogen bulb,
not to exceed 50 watts.
[] Using gloves or a d0 cloth, remove
tile btdb fl'om its )'mk't *in , Do not
touch tile bulb ",Oth bare fingel>.
Push tile bulb straight into tile
receptacle all tile way.
Place the robs of the glass coxer into
tile grooves of tile socket. Turn tile
glass co\vr clockwise 1/4 turn to
engage.
For improved lighting inside
the oven, clean tile glass cover
fl'equently using a wet cloth. This
should be done when tile oven is
completely cool.
Recomlect electrical power to
tile ()veil,
Usegloves
orcloth
23
Page 24

Careand cleaning oftherange.
Oven Light Replacement (ifincluded)
I Stopguide
CAUTlON:seforereplacingyouroven
light bulb, disconnecttheelectncalpower to the
rangeat the main fuseor circuit breakerpanel.
Be sure to let the light cover and bulb
cool ('ompletel).
Toremove the cover:
Twist lens counterclockwise about a
[]
qtlarter [[irn to relllove.
Do not removeany screws toremove
thecover
Storage Drawer Removal
Toremove the drawer:
[] Pull the drawer out tmtil it stops.
V_ i,ifl the fl'ont of the drawer tmtil the
stol)s clear the ,guides.
V_ Remoxe the drawe_:
lal
[] Replace bull) xfith a 40-watt
appliance bulb or two-prong
halogen bulb as al)l)ropriate.
Toreplace the cover:
[] I,ine up tabs of lens in fl'ont of tabs
on housing and rotnte clockwise to
engage.
[] Connect electrical power to fl_e
range.
To replace the drawer:
[] Place the drmver rails on the guides.
[] Push the drawer back tmfil it stops.
[] Iift the fl'ont of the drawer and
push back tmfil the stops clear the
guides.
[] I,ower the fl'ont of the oh'rover and
push back tmfil it closes.
OVeR rack
Oven Racks
?dl oven rocks may be cleaned by hand
with an abrasive cleaner or steel wool.
_Mter cleaning, rinse the racks with clean
water and chT with a clean cloth. Gray
porcelain-coated oven racks may remain
in the oven dm_ing the self:cleaning
cycle without being damaged. The shin>
silve>colored oven racks may remain in
the oven during the selfXcleaning cycle,
but they will lose their luster and become
hard to slide,
It will be necessary to grease all oven
rock side edges with a light coating of
xvgetable oil after cleaning them by hand
or in the oven. This xdll help maintain
the ease of sliding the racks in and ()tit
of the o',en.
24
Page 25

Do not rub or clean the door gasket--
it has an extremely low resistance to
abrasion.
If you notice thegasket becoming worn,
frayed or damaged in any way or if it has
become displaced onthe door, you should
have it replaced.
Cleaning the Oven Door
Toclean the inside of the door:
i_:_Because tile area inside tile gasket is
cleaned during tile selfk'lean cycle, you
do not need to clean this bv hand.
_: The area outside the gasket and
tile door liner can be cleaned with a
soap-filled or plastic scom-ing pad,
hot water and detergent. Rinse well
with a vinegar and water solution.
Toclean the outsideof the door:
::Ji::Use soap and water to thoroughly
clean the top, sides and ti'(mt of the
oven d()o_: Pdnse well. Dm may also
use a glass cleaner to clean the glass
on tile outside of tile d()o_: D() not let
water drip into the vent openings.
Lift-Off Oven Door
ge.com
::Ji::If anv stain on tile door vent trim is
persistent, use a soft abrasive cleaner
and a si)onge-scrubber tot best results.
::Ji::Spillage ol marinades, fl'uitjuices,
tomato sauces and basting materials
containing acids may cause
discoloration and should be wiped
up immediately. When smti_ce is cool,
clean and _inse.
_: Do not use oven cleane_, cleaning
i)owde_ or hm_h abrasives on tile
outside ol tile doo_:
SI0t
Hingelock
Pull hinge locks down to unlock.
Removalposition
Thedoorisveryheavy.Becarefulwhen
removingandlifting thedoor.
Donothfithedoorbythehandle.
Toremovethe door:
[] Fully open tile dora:
[] Pull tile hinge locks down toward
tile door ti'ame, to tile tmlocked
I)osition. A tool, such as a small
fiat-blade screwdriver; may be
required.
[] Firefly grasp both sides of tile door
at tile top.
[] Close door to tile door remoxal
position, which is halfway between
the broil stop position and fllllv
closed.
[] I,ift door up and out tmtil tile hinge
am_ is clear of the slot.
Toreplace the door:
[] Fimd_ grasp both sides ot the door
at tile top.
X'_qthtile Bottom
[]
door at tile edge
same angle as \
tile removal
p()siti(m, seat the
indentation of
tile hinge am_
into tile bottom
edge of tile hinge slot. Tile notch in
the hinge am_ must be fldlv seated
into tile bottom of tile slot.
Fully open tile doo_: If tile door will
[]
not full} open, tile indentation is
not seated correcdv in tile bottom
edge of the slot.
Push tile hinge, locks uI) aoainstm tile
[]
fl'ont fl'ame of tile oxen cavit_ to tile
locked position.
arm
Hing,
Push hinge locks up to lock.
i J|/ Hingearm
d sbt
[] Close tile o_en doo_:
25
Page 26

Careand cleaning oftherange.
Stainless Steel Surfaces (onsomemodels)
Donotusea steel woolpad;it will scratch
thesurface.
To clean the stainless steel surfi_ce,
use warm sudsy water or a stainless steel
cleaner or polish. _M_)_s wipe the sm_i_ce
in the direction of the grain. Follow the
cleaner instructions fin" cleaning the
stninless steel sm_hce.
Painted Surfaces
Painted sm'ti_ces include the top and
sides of the doo_; and the drawer fi'ont.
Clean these with soap and _ter or
a vinegar and water solution.
Oven Vent and CooktopAir Inlet
The oven is vented through an opening
in the cooktop trader the grille. The
cooktop rakes in air through the air inlet
locamd through the cooktop.
To inquire about pro'chasing stainless
steel appliance cleaner or polish, or to
find the location _ff a dealer or Mabe
Parts Store nearest you, please call ore"
toll-fl'ee nunlber:
NationalPartsCenter 1.800.626.2002(U.S.)
1.800.661.1616(Canada)
ge.com(U.S.)
www.GEAppliances.ca(Canada)
Do not use commercial o',en cleanet_,
cleanin,,_ powde_, steel wool or ha_h
abrasixes on an) painted sm'ti_ce.
Never c_wer these openings Mth
almninmn fifil or anv other material.
This would prevent the vents fi'om
working i)roperly.
Cooktopairinlet
Ovenfloqr _
Control Panel
If desired,thetouchpadsmaybe turnedoff
beforecleaning.
See the Control Lockoutsection.
Clean up splatte_ with a damp cloth.
RemovableOvenFloor
To remove the oven floor for easier
cleaning:
2_
[] Remo_e the o_en door using the
instructions in the Lift-OffOvenDoor
section.
[] (;rasp o_,en floor at the rear finger
slots on each side, lift it up, push it
back and pull it out.
Remove heavier soil with wam_ soap)
wateI: Do not rise abI'asi_,es of _lIIV kind.
Turnonthetouchpadsaftercleaning.
V_ Clean the oven floor with warn/
SOalY_,wateI:
IMPORTANT Always replace the
removable floor befin'e the next use.
26
Page 27

Beforeyoucarl forservice.., gecom
Troubleshooting -tips
Save time and money/.Review the charts onthe following
pages first and you may not need to carl for service.
lem _i_ _i__i__i_ _ Possible Causes
Burners have yellow or The combustion quality of
yellow-tippedflames burner flames needs to be
determhaed visually.
What ToDo
• Lrse the illustrations beh)w to detemfine it your burner
tl_lI]les _lI'e IlOI_In_ll, ]f btu'IleI" t]_lInes look like A, call for
service. Normal btu'ilei" tl_lines should look like B or C,
depending on the type of gas you use. With I,P gas, some
yellow tipping on outer cones is hernial.
A-Yellow flames B-Yellow tips C-Softblue flames
Carlfor service onoutercones Normal for natural
NormalforLPgas gas
Control knobs Knob isn't pushed down. • To turn fl'om the OFF })ositiou, push the knob in and
will notturn then turn.
Burners do Plug on range is not • Make sure electrical plug ix l)lugged into a live, l)roperly
not light completely inserted in the grounded outlet.
electrical outlet.
Gas supply not comlected • See the lustnllatiou Instructions that came with your
or turned on. range.
A fuse in your home may be • Replace the fl/se or reset the circuit breakeL
blown or the circuit breaker
tripped.
Btuaaer parts not replaced • See the Care and cleaning oftherange section.
correctly.
ControlLockoutfeature •/f LOC0Napl]ea_s in the display, the oven control ix
is activated h)cked. Turn this teature off to use the oven. See the
Control Lockout section.
Ticking sound ofspa_ Control knob is still • Ttu'u the knob out of the LITEl)osifiou to the desired
igniterpersistsafter in the LITEposition, setfiu
burnerlights • Tm'u the burner off and relight./f ticking ix still
l)reseut, call for service.
Burner flames very hnproper air to gas ratio. • If range ix connected to LP gas, check all steps
large oryellow in the Installation Instructions that came with
your rnuge.
Oven light does Light bulb is loose or defective. • Tighten or replace tile btdb.
not work
Oven will not work Plug on range is not completely • Make sure electrical plug ix plugged into a live, l)roperly
Switch operating • Call fi)r service.
light is broken.
inserted ha the electrical outlet, grounded outlet.
A fuse ha your home may Be • Rel)lace the fl/se or reset the drcuit breaker:
blown or the circuit
breaker tripped.
Oven conlrols improperly set. • See the Using the oven section.
Door left ha the locked position. • If necessary, allow the (wen to cool; then mdock
the (h)oL 2 7
Page 28

Beforeyoucall forservice...
Troubleshooting -tips
Possible Causes What ToDo
Fooddoes not bake Oven controls improperly set. * See the Using the oven section.
orroastproperly
Fooddoesnot Oven controls improperly set. • Make sure vl)u tou(h the BROILHI/LOpad.
bmilproperly
Rack position is incorrect * See the Using the oven section.
or the rack is not level.
Incorrect cookware or * See tile Using the oven sectilm.
cookware of improper
size being used.
Oven thermostat needs * See the Adjust the oven thermostat- Do it yourself[
adjustment, section.
Improper rack position • See tile Broiling Guide.
being used.
Cookware not suited • For best results, use a laan designed, fi)r broilin_
for broiling.
ha some areas the power • Preheat the broil eleIuent tor 10 minutes.
(voltage) maybe low. • Broil for tile hmgest period of time recommended in
the Broiling Guide.
Oventemperature Oven therlnostat • See the Adjust the oven thermostat - Do it yourself!
too hot or too cold needs adjustment, se cti(m.
Oven door is crooked The door is out of position. • Because the oven door ix removable, it sometimes
gets out ()f position during installation. Remove and
replace tile oven door. See the Lift-Off OvenDoor
section.
Storage drawer Rear drawer support is • Reposition tile drawer. See the Storage Drawer
Oil top of the guide rail. Removal instructions in the Care and cleaning of your
range section.
Storagedrawer
won'tclose
Rear drawer support is
on top of the guide rail.
• Reposition the (lrawe_: See the Storage Drawer
Removalinmuctions in the Care and cleaning of
your range sectilm.
28
Page 29

ge.com
Possible Causes What To Do
Clock and timer do Plug on range is not completely * Make sure electrical l_lug, is l)lugged,, into a live, l)roperly
not work inserted ha the electrical outlet, grounded outlet.
A fuse ha your home * Rel)lace tile fl/se or reset tile circuit breaker:
may be blown or the
circuit breaker tripped.
Oven controls improperly set. * See the Using the clock and timer section.
Oven will not self-clean Oven controls improperly set. * See the Using the self-cleaning oven section.
Oven door is not in the • Make sure you move tile door latch handle :111tile way
locked poshion, to the fight.
"Crackling" or This is the sound of the • This is normal.
"popping" sound metal heating and cooling
during both the cooking mad
cleaning functions.
Excessive smoking Excessive soil. • Touch the CLEAR/OFFlaad. Olaeu tile windows to
during a clean cycle rid the room of smoke. Wait tu]til the light on the
SELFCLEANpad goes oH. \4"il)e uI) the excess soil
aud reset the clean cycle.
Oven door will not Oven too hot. • Alh>w the oven to cool beh>w h>ckiug temperature.
open after a clean cycle
Oven not clean after a Oven controls not properly set. • See the Using the self-cleaning oven section.
clean cycle
"F--anda number You have a function error code. • Touch the CLEAR/OFFI)ad. Put the oven back into
or letter" flash _l)erati_>u.
in the display If the function code repeats. • Disconnect all power to tile range for at least 30
Oven was heavily soiled. • Clean 1,1) heavy spilh>vers heft>re starting tile clean
cycle. Heavily soiled oveus may ueed to sell=cleau
again or for a lou,,er_ period of time.
secouds and the]] recouuect l)owe_: If the flu]ction
elTOf code repeats, call lot service.
•/f a flmctiou error code al)l)ears during tile self=
cleaning cycle, check the oven door latch. The latch
may have been moved if only slightly, fl'om the
h>cked position. Make sure the latch is moved to
the right as fhr as it will go. Touch the CLEAI_/OFFpad.
Allow the oven 1o cool lof Olle hot/I'. ])tit tile ovel]
back into operation.
29
Page 30

Beforeyoucall forservice...
Troubleshooting tips
Possible Causes What To Do
Displayflashes "bAd" The installed connection * Contact installer or electrician to correct miswire.
then "linE" with a from the house to the refit
loud tone is miswired.
Control signals after You forgot to enter a * Touch the BAKE pad and desired temperatm'e or
entering cooking time bake temperature or the SELFCLEANpad and desired clean time.
or start time cleaning time.
Display goes blank A fuse in your home may * Replace the fuse or reset the circuit breaker.
Oisplayflashes Power failure. * Reset the dock.
Unable to get the Oven control pads were *TheBROILHI/LOandBAKEpadsmt_stl)etouclaedat
displayto show "SF" not touched properly, the same time and held for 3 seconds.
be blown or the circuit
breaker tripped.
The clock is in * See the Using the clock and timer section.
black-out mode.
Power outage, Power outage or surge. * Reset the clock. If the oven was in use, )ou must reset
clock flashes it bx, touching, the CLEAR/OFFpad, settino_ the clock
and resetting an 3 cooking flmction.
"Burning" or "oily" This is normal in a new oven • To speed the process, set a self-clean cxcle for a
odor emitting from and wiU disappear ha time. minimum of 3 horn's. See the Using tho se/f-c/eaning
the vent oven section.
Strong Odor An odor from the insulation • This is temporary.
around the inside of the oven
is normaJ for the first few
times the oven is used.
Fan noise A cooling fan may
automatically turn
on mad off.
• This is normal. The cooling tim will mrn off and on
to cool internal parts. ]t may xtm after the oxen is
tin'ned OFE
3O
Page 31

GE Service Protection Plus 'M
GE, a name recognized worldwide fbr quality and dependability, offers you
Service Protection Plus'_'--comprehensive protection on all yore appliances--
No Matter What Brand!
Benefits Include:
* Backed by GE
* All brands covered
* Unlimited service calls
* All parts and labor costs included
o No out-of-pocket expenses
o No bidden deductibles
o One 800 number to call
You _dll be completel) satisfied with our service protection or )ou ma) request )our mone) back
on the remaining value of your contract. No questions asked. It's that simple.
Protect yore" refrigerator, dishwasher, washer and dryer, range, TV_ VCR and much more--a_y brand!
Plus there's no extra charge flw emergency service and low monthly financing is available. Even icemaker
coverage and toed spoilage protection is offered. You can rest easy, knowing that all your valuable
household products are protected against expensive repairs.
Place ,our confidence in GE and call us in the U.S. toll-free at _UU._Z_.ZZZ_
for l//Ol'e infol'I//atiOll.
:_,_*]1 hi}in(Is (o_.{!l_{!(L tip t(t _0 ){!iris Ill(I, ]11 the (on[lllenl tl [.S.
We TICover Any Appliance.
Anywhere. Anytime.
.n_ ( Jill here
Please place in envelope and mail to:
GeneralElectricCompany
Warranty Registration Department
P.O. Box 32150
Louisville, KY 40232-2150
21
Page 32

FOR CONSUMERS IN THE UNITED STATES
Consumer Product Ownership Registration
Dear Customer:
Thank you for purchasing our product and thank you for placing your confidence in us.
We are proud to haxe you as a custonler!
Follow these three steps to protect your new appliance investment:
Complete and mail
yoor Consurlrler
Product Ownership
Registration today.
ttavc tile peace of
mind of knowing w_
call ( olltact VOll ill
the unlikely exent of a
satbty m_Mification.
Aher mailing tile
registration below,
store this doclllllellt
in a sati,, place. It
contains intornlation
you will need should
you require service.
Our selMce mmlber is
800.GE.CARES
(800.432.2737).
Model Number Serial Number
I I I I
Important: If you did not get a registration card with your
product, detach and return the form below to
ensure that your product is registered, or register
online at ge.com.
Consumer Product Ownership Registration
Read VOllr ()wller's
Manual carefilllv.
It will help you
opel-_lte VOIlF llew
appliance properly.
I,,,,,, , , , , , I I , , , , , , , I
M*: Ms. Mrs. Miss
Name I I I I I I I I I Name I I I I I I I I I I I I
_[1"( (!1 [
A&hx ss I I I I I I I I I I I I I I I I I I I I I I I I
Model Number Serial Number
AI>,.#i, , , , , , , i E-lllail_\(l(h'ess*
* Please pr_)vid_ y_)ur e-mail address to receive, via eqnail, discounts, special oflbr_ and other important
communications from GE Appliances ((;ILk).
[ Check here if you do not want to receive comnmnications ti-om G1LVscarefillly selected partner',.
Appliances
General Electric Compang
GE Consumer & Industrial
Louisville,K¥ 40225
ge.com
FAILI JRE T() COMPLETE AND RETI RN TIIIS CAR1) D()ES NOT DIMINISt t _,_)t R
"_,)_),IL\N'IY RI(;IITS.
For more inti)rmaIion about (',ILVs priv_Q" and dala usage polio3; go to ge.com and click on
"Pri_a_y Policy" or call 800.626.2224.
22
Page 33

Accessories.
Looking For Something More?
Youcan find these accessories and many more at ge.com (U.S.) or www.geappliances.ca
(Canada), or call 800.626.2002 (U.S.) or 888.261.3055 (Canada) (during normal business
hours). Have your model number ready.
Grates Surface Burner Heads & Caps
Oven Racks
Broiler Pan
( i ¸ }
Cleaner and polish
i
Light Bulbs Knobs
Tired of discolored _cks? ¼qshing you had ext_Mlea_'y-duty oven racks?
NOW AVAILABLE for your range:
(;E's inn(wative, self:cleanable porcelain-coated oven racks!
• Heax T Duty
• Durable
• Able to be cleaned in a self-cleaning oven
Visit ge.com (U.S.) or www.geappliances.ca (Canada) fL_rmore
inf_)rmafion.
33
Page 34

GEGasRange Warranty.(Forc.stemersintheUnitedStates)
All warranty service provided by our Factory Service Centers,
or an authorized Customer Care®technician. Toschedule service,
on-line, 24 hours a day, visit us at ge.com, or carl 800.GE.CARES
(800.432.2737).Please have serial number and model number
available when calling for service.
GE Will Replace:
i iiiii _iiiii iii I _ _ iiiii
Any part of the range which tifils due to a detect in materials or wor!unanship. During this
Fromthe dateof the
originalpurchase
::Ji::Service trips to your home to teach you how to use
the product.
!i/:Improper h_sta]lation, delivery or mahltenmlce.
::Ji::Failure of the product if it is abused, misused,
or used for other thm_ the intended purpose or
used commercially.
_: Replacentent of house fuses or resetting of circuit
breakers.
limited one-year warranty, GE will also provkle, free of charge, all labor and in-home service to
replace the defecti\'e part,
Staple your receipt here.
Proof of the original
purchase date is neededto
obtain service under the
warranty.
::Ji::Damage to the product caused by accident, fire, floods
or acts of God.
_: h_cidenta] or consequential da_mage caused by possible
defects with this applimlce.
iJi::Dmnage caused after delivery.
_: Product not accessible to provide required service.
EXCLUSIONOFIMPLIED WARRANTIES--Your sole and exclusive remedy is product repak as providedin thisLimited
Warranty. Any implied warranties, including the implied warranties of merchantability or fituess for a particular purpose,
are limited to oneyear orthe shortestperiod allowed by law.
This warranty is extended to the original purchaser and any succeeding owner for products purchased for
home use within the USA. If the product is located in an area where service by a GEAuthorized Servicer is not
available, you maybe responsible for a trip charge or you maybe required to bring the product to an Authorized GE
Service location for service. In Alaska, the warranty excludes the cost of shipping or service calls to your home.
Some states do not allow the exclusion or limitation of incidental or consequential damages. This warranty
gives you specific legal rights, and you may also have other rights which vary from state to state. To know what
your legal rights are, consult your local or state consumer affairs office or your state's Attorney General.
Warrantor: General Electric Company.Louisville,KY 40225
34
Page 35

GEGasRange Warranty. (Forc.stomersinCanada)
Aft warranty service provided by our Factory Service Centres
or an authorized Customer Care®technician. For service,
carl 1.800.561.3344.Please have serial number and model number
available when calling for service.
Mabe Will Replace:
Anypart of the range which fifils due to a defect in materials or workmanship. During this
Fromthedateof the
originalpurchase
?_:Service trips to your home to teach you how to use
the product.
iJi::hnproper h_staJlation, delivery or maintenance.
?_:Failure of the product if it is abused, misused,
or used for other thm_ the intended purpose or
used commercially.
?_:Replacement of house fuses or resetting of circuit
breakers.
limited one-year warranty, Mabe will also provide, free of charge, all labor and in-home
service to replace the defecti\'e part,
Staple your receipt here.
Proof of the original
purchase date is needed to
obtain service under the
warrantz
!i?_Dmnage to the product caused by accident, fire, floods
or acts of God.
::Ji::IucidentaJ or consequential dmnage caused by possible
defects with this appliance.
!i_Dmnage caused after delivery.
!i?_Product not accessible to provide required service.
Warranty. Any implied warranties, including the implied warranties of merchantability or fitness for a particular purpose,
EXCLUSIONOFIMPLIED WARRANTIES--Your sole and exclusive remedy is product repa# as provided in this Limited
are limited toone year or the shortestperiod allowed bylaw.
I WARRANTOR IS NOT RESPONSIBI,E FOR CONSEQUENTIAI, DAMAGES. I
I X4'arrantor: MABE CANADA IN(;. I
35
Page 36

ConsumerSupport.
GEAppliancesWebsite Inthe_.s.go.corn
Haxe a question or need assistance _ith }our appliance? Tr} the (;E Appliances _ ebsite 24 hom_ a day,
an} da} of the }ear! For greater comenience and thster serxice, }ou can now downlo _d Owne_ 's Manu fls,
order parts or exen schedule service on-line. In Canada: www.geappliaJaces.ca
ScheduleService ,,_he_.,.s.:go.corn
Expe_ (;E repair service is onl} one step awa} fl'om _our doo_: (;et on-line and schedule ",our service at }our
convenience 24 hom_ am day of the ?ear! Or call 800.GE.CARES (800A32.2737) during mmnal business hom_.
In Canada, call 1.800.561.3344
RealLifeDesignStudio .,_he_,s:oo.com
GE suppo_s the lJnive_al Design concept--products, services and emiromnents that can be used by people (ff
all ages, sizes and capabilities. We recognize the need to design tot a wide range of physical and mental abilities
and impairments. For details of OE's Universal Design applications, including ldtchen design ideas for people with
disabilities, check out our Website today. For the hearing impaired, please call 800.TDD.GEAC (800.833.4322).
In Canada, contact: Managex; Consmner Relations, Mabe (;anada Inc.
Suite 310, I Factm_" I,ane
Moncton, N.B. E1C 9M3
ExtendedWarranties Intheu.s.:go.corn
Purchase a (;E extended warranty and learn about special discom_ts that are available while xom', warranty is still
in effect. You can ptu'dlase it on-line an}_ime, or call 8 ) ).026.2224 during n(mnal business houl_. (;E (]onstnner
Home Services will still be there after }our warrant} expires. In Canada, call 1.888.261.2133
PartsandAccessories
Individuals qualified to selaice their own appliances can have pmqrs or accessories sent direcdy to their homes
(VISA, MasterCard and Discover caids aie accepted). Order on-line today, 24 hours every clay or by phone at
800.626.2002 during normal business hem's.
Instrectiens contained in this manual cover procedures to fie performed by any user. Other servicing generally should he
referred to qua/ified service personnel Cautionmust he exercised, since impreper servicing may cause unsafe operation.
Customers in Canada shouM consult the yellow pages fin" the nearest Mabe service (entel. or call 1.888.261.3055.
ContactUs
If you are not satisfied with the service you receive fl'om GE, contact us on ore" Website with all the details
including your phone numbe_; or write to: General Manage_; Customer Relations
GE Appliances, Appliance Park
Louisville, KY 40225
In Canada: www.geappliaJaces.ca, or write to: Directo*; Consumer Relations, Mabe Canada Inc.
Suite 310, 1 Factory I,ane
Moncton, N.B. E 1C 9M3
In the U.S.: go.corn
In the U.S.: go.corn
Register your new appfiaaace on-line--at your convenience! Timel) product registration will al]o_ fin" enhanced
l RegisterYourAppliance .,the_,s:oo.com
, communication and prompt service under the terms of }our warranty, shoukl the need arise. You ma_ also mail
in the pro-printed registration card included in the })acldng, material. In Canada: www.geappliamces.ca
Printedin theUnitedStates
 Loading...