

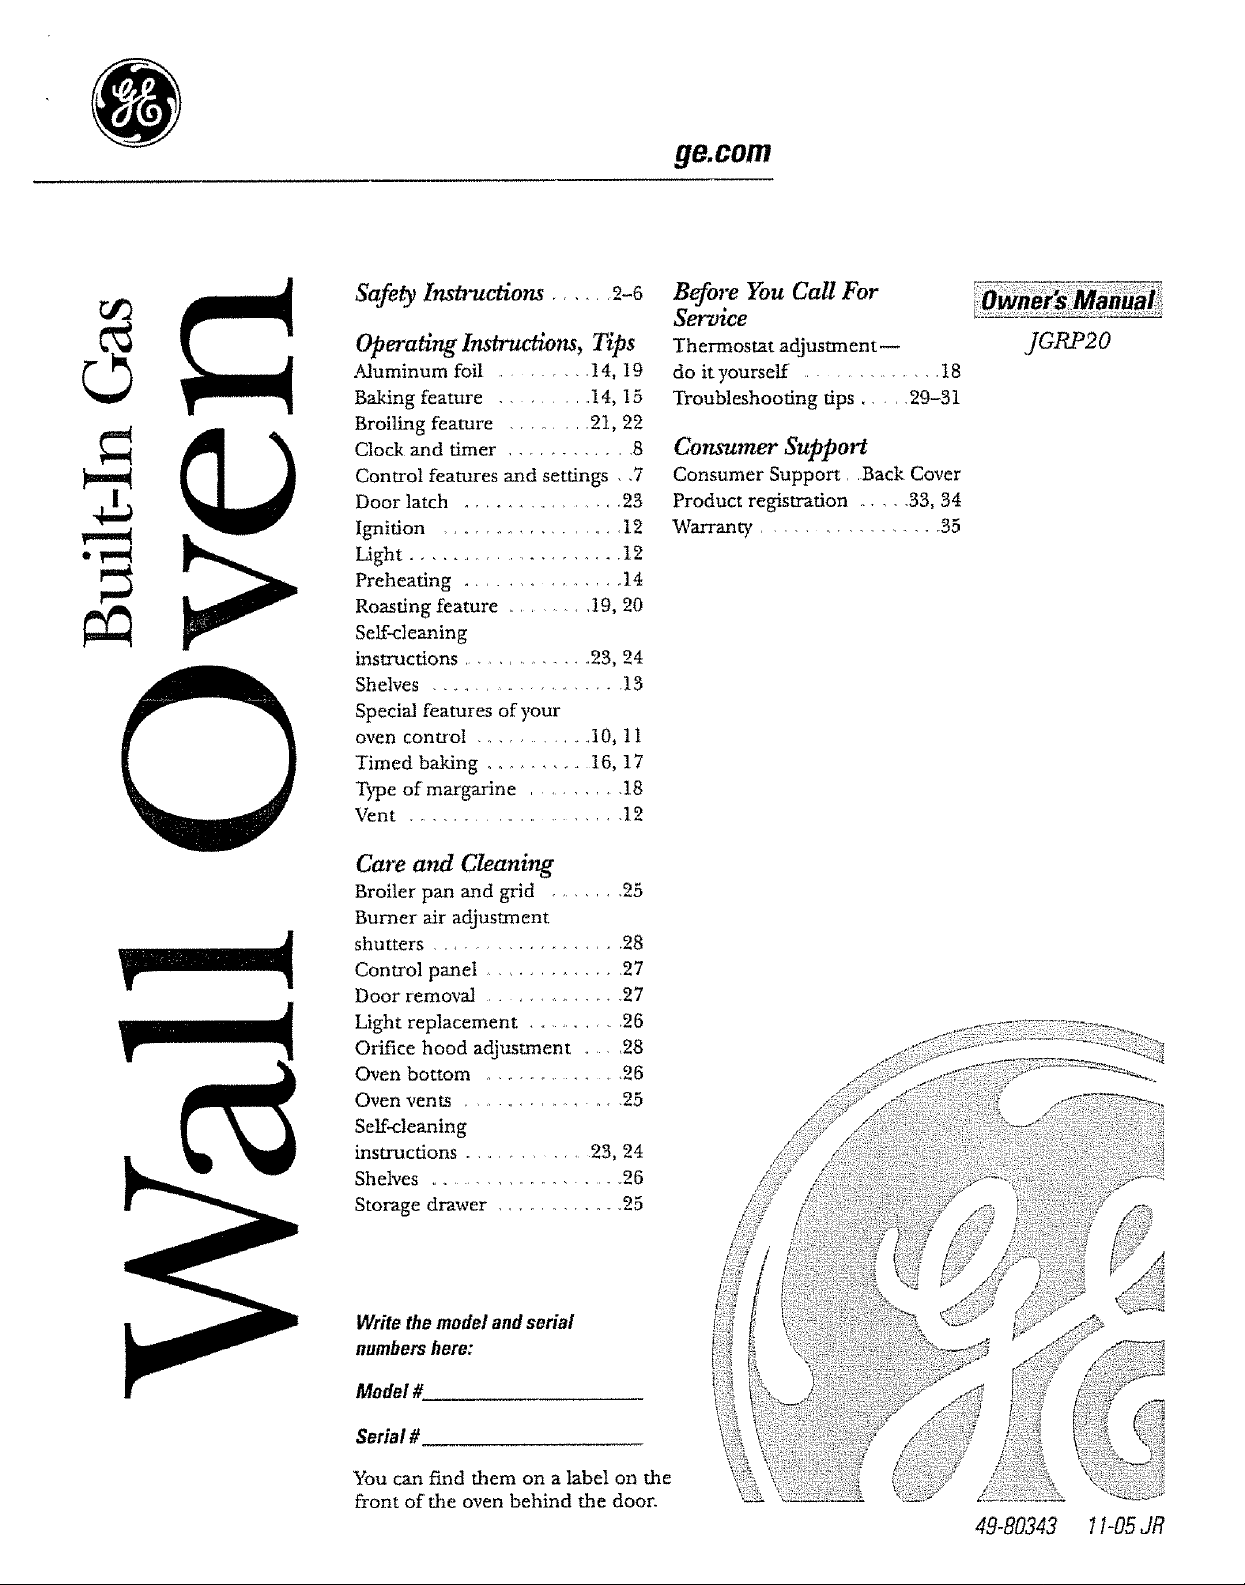
GE JGRP20WEJ1WW, JGRP20BEJ1BB Owner’s Manual
ge.com
Safety Instructions ..... 2-5
Operating Instructions, Tips
Aluminum foil ......... 14, 19
Baking feature ......... 14, 15
Broiling feature ........ 21, 22
Clock and timer ............ 8
Control features and settings , ,7
Door latch ............... 23
Ignition .................. 12
Light ........................ 12
Preheating ............... 14
Roasting feature .......... 19, 20
Self-cleaning
instructions ................ 23, 24
Shelves .................... 13
Special features of your
oven control .............. 10, !I
Timed baking ........... 16, 17
Type of margarine .......... !8
Vent ....................... 12
Care and Cleaning
Broiler pan and grid ....... 25
Burner air adjustment
shutters ................. 28
Control panel .............. 27
Door removal ............... 27
Light replacement ............ 26
Orifice hood adjustment .... 28
Oven bottom ............... 26
Oven vents ................ 25
Self-cleaning
instructions .............. 23, 24
Shelves ........................ 26
Storage drawer .............. 25
Before You Call For
Service
Thermostat adjustment--
do it yourself .............. t8
Troubleshooting tips ..... 29-31
Consumer Support
Consumer Support, .Back Cover
Product registration ...... 33, 34
Warranty ................ 35
JGRP20
Write themodelandserial
numbershere:
Model #,
Serial #
You can find them on a label on the
front of the oven behind the door.
49-80343 11-05JR
IMPORTANTSAFETYINFORMATION.
READALLINSTRUCTIONSBEFOREUSING.
WARNING:u themform_on
in this manual is not followed exactly,
a fire or explosion may result causing
property damage, personal injury
or death.
m Do not store or use gasoline or other
flammable vapors and liquids in the
vicinity of this or any other appliance.
WHATTODOIF YOU
SMELLGAS
ti__Do not try to fight any appliance.
E_Do not touch any electrical switch;
do not use any phone in your building.
_ Immediately call your gas supplier
from a neighbor's phone. Follow the
gas supplier's instructions.
Fi!_If you cannot reach your gas supplier,
call the fire department.
Installation and service must be
performed by a qualified installer,
service agency or the gas supplier.
2
_&COm
,R,WARNING!
Foryour safeb/, the information in this manual must be followed to minimize the risk of fire or explosion,
electric shock, or to prevent property damage, personal injury or lossof life.
IMPORTANTSAFETYNOtiCE
The California Safe Drinking Water and ToxicEnforcement Act requires the Governor of California to
publish a list of substances known to the state to cause birth defects or other reproductive harm, and
requires businesses to warn customers ofpotential exposure to such substances,
Gasappfiances can cause minor exposure to four of these substances, namely benzene, carbon
monoxide, formaldehyde and soo_ caused primarily by the incomplete combustion of natural gas or
LP fuels, Properly adjusted burners, indicated by a bluish rather than a yellow flame, wilt minimize
incomplete combustion, Exposure to these substances can be minimized by venting with an open
window or using a ventilation fan or hood,
SAFETYPRECAUtiONS
Have the installer show you the location of the oven gas shut-off valve and how to shut it off if necessan/
72Have your oven installed and properly _ Be sure your oven is correctly adjusted by a
grounded by a qualified installer, in
accordance,a_th the InsinUation Insmactions,
Any adjustment and service should be
performed only by qualified gas oven
insta!lers or service technicians°
L7Do not attempt to repair or replace any
part of your oven unless it is specifically
recommended in this manual. All other
sen, ice should be referred to a qualified
technidan,.
;2 Be suure all packaging materials are removed
from the oven before operating it to prevent
fire or smoke damage should the packaging
material ignite.
K Do not touch the interior surface of the
oven. These surfaces may be hot enough
to burn even though they are dark in color°
During and after use, do not touch, or let
dothing or other flammable materials
contact any interior area of the oven;
allow sufficient time for cooling first_
Potentially hot surfaces include the oven
vent openings, surfaces near the opening
and crevices around the door.
Remember:.The inside surfaces of an oven
may be hot when the door is opened.
qualified service technidan or installer for
the type of gas (natural or LP) that is to be
used. Your oven can be converted for use
with either type of gas. See the Installation
Insn'uctions,
WARNING:Theseadjustments must
be made by a qualified service technician in
accordance with the manufacturer's
instructions and all codes and requirements
of the authority having jurisdiction. Failure
to follow these instructions could result in
serious injury or property damage. The
qualified agency performing this work
assumes responsibifity for the conversion.
Be sure the oven is securely installed in a
cabinet that is firmly attached to the house
structure. Never allow anyone to climb, sit,
stand or hang on the oven door.
Do not leave children alone or unattended
where an oven is hot or in operation. They
could be seriously burned.
Do not allow anyone to climb, stand or
hang on the oven door or storage drawer.
They could damage the oven.
3
IMPORTANTSAFETYINFORMATION.
READALLINSTRUCTIONSBEFOREUSING.
SAFETYPRECAUTIONS
CAUTION:i_msofinterestto
children should not be stored in cabinets
above an oven--children climbing on the
oven to reach items could be seriously
injured.
._,WARNING:NEVERuse
appliance as a space heater to heat or
warm the room. Doing so may result
in carbon monoxide poisoning and
overheating of the oven.
For ),our safety, never use your appliance
for warming or heating the room.
E Never wear loose fitting or hanging
garments while using the appliance. Be
carebal when reaching for items stored in
cabinets over the oven. Flammable material
could be ignited if brought in contact with
flame or hot oven surfaces mad may cause
severe burns.
Do not store flarmnable materials in the
oven or storage drawee
Do not store or use combustible materials,
gasoline or other flammable vapors and
fiquids in the vicinity of this or any other
appliance.
K Do not let cooking grease or other flammable
materials accumulate in or near the oven.
Do not use water on grease fires, Smother
fire or flame or use a multi-purpose dry
chemical or foam-type fire extinguisher.
Flame in the oven can be smothered
completely by closing the oven door and
turning the oven offor by using a multi-
pro'pose dry chemical or foam-type fire
extinguisher,
12Use only dry pot holders--moist or damp
pot holders on hot surfaces may result in
bums from steam. Do not let pot holders
come near open flames when lifting
cookware_ Do not use a towel or other
bulky cloth. Such cloths can catch fire on
a hot burner.
[_Always keep dish towels, dish cloths, pot
holders and other linens a safe distance
from ),our oven.
Always keep wooden and plastic utensils
and canned food a safe distance away from
your oven°
Do not leave paper products, cooking
utensils or food in the oven when not in use.
COOKMEATANDPOULTRYTHOROUGHLY...
Cookmeat andpoultry thoroughly--meat toat least an INTERNALtemperatureof 160°Fandpoultry to at least an
INTERNALtemperatureof 180°ECookingto thesetemperaturesusuallyprotectsagainst foodbomeillness
4
ge,com
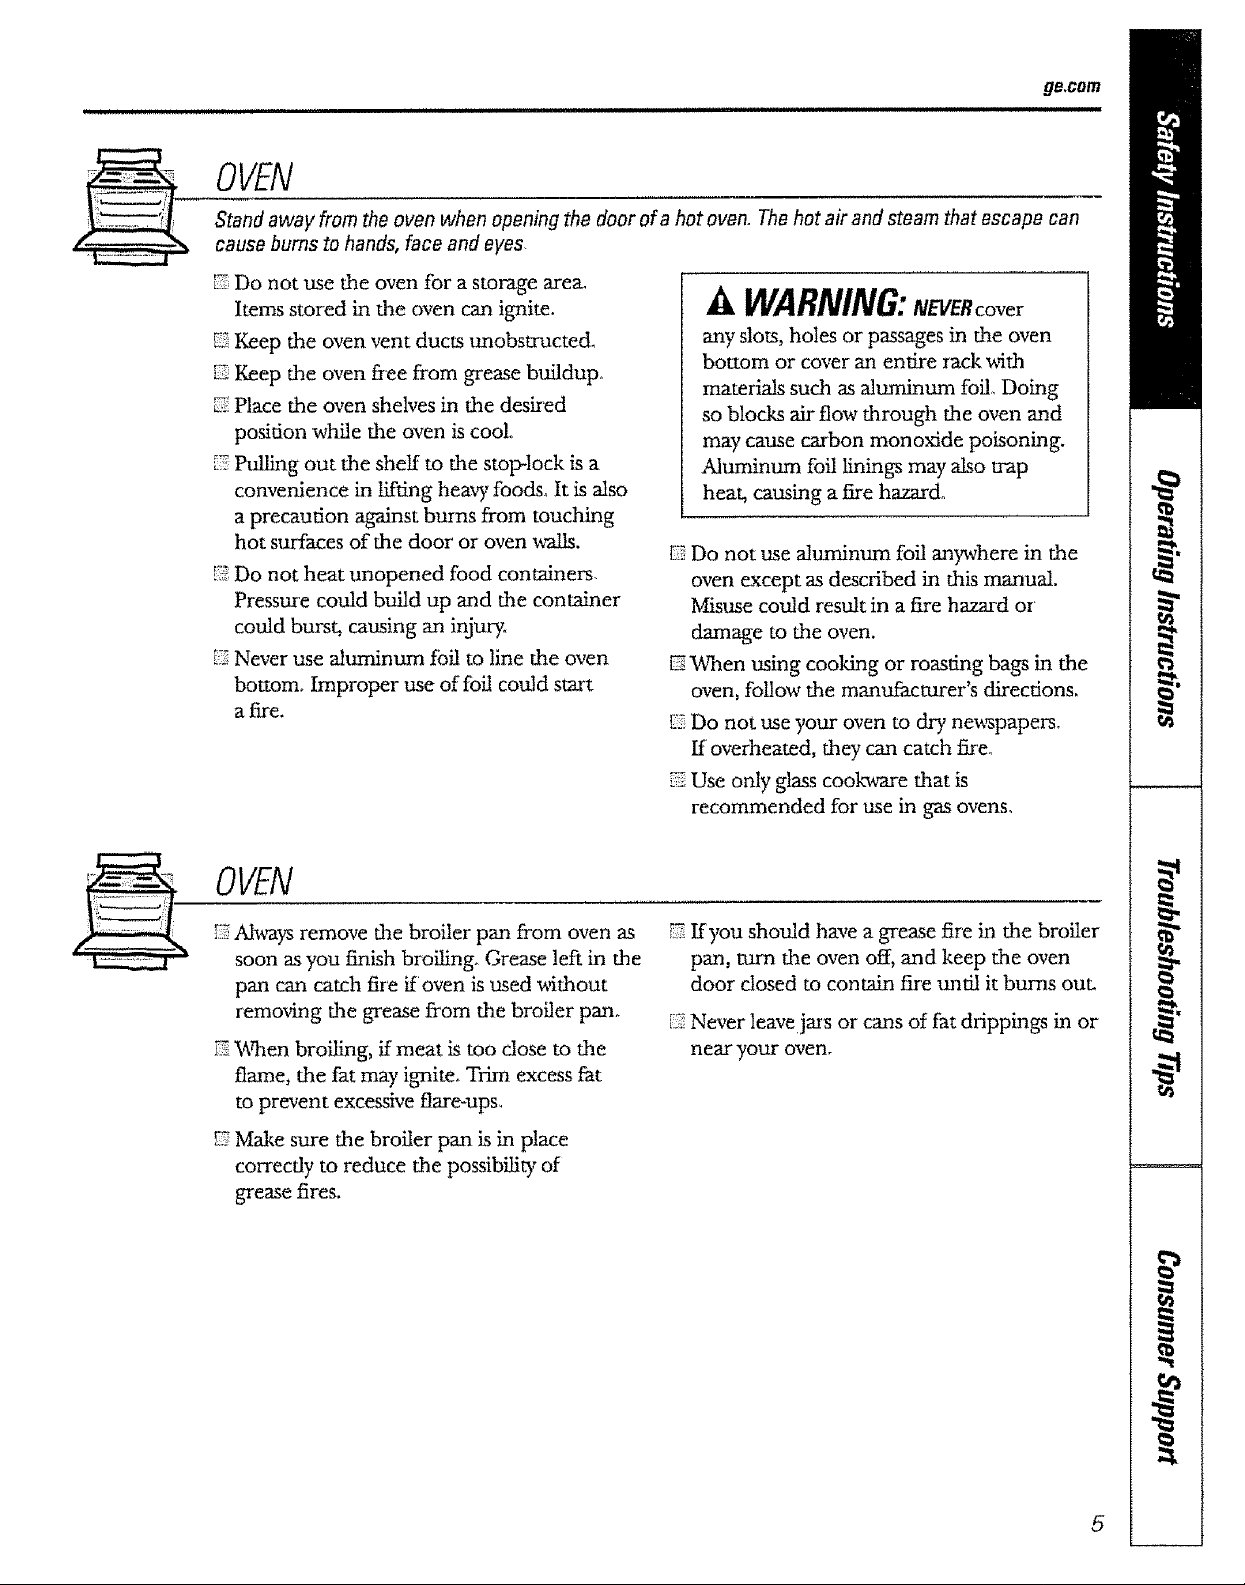
OVEN
Stand away from the oven when opening the door of a hot oven. Thehot air and steam that escape can
cause bums to hands, face and eyes.
[.7_Do not use the oven for a storage arem
Items stored in the oven can ignite.
_5Keep the oven vent ducts unobstructed,
[2 Keep the oven free from grease buildup..
_'.Place the oven shelves in the desired
position while the oven is cool.
[Z Pulling out the shelf to the stop-lock is a
convenience in lifting heavy foods. It is also
a precaution against burns from touching
hot surfaces of the door or oven _Is.
,_YYDo not heat unopened food containers
Pressure could build up and the container
could burst, causing an injury.
[2 Never use alunainum foil to line the oven
bottom. Improper use of foil could start
afire.
A WARNING:Na'ERcover
any slots, holes or passages in the oven
bottom or cover an entire rack with
materials such as aluminum foil. Doing
so blocks air flow through the oven and
may cause carbon monox4de poisoning.
Aluminum foil linings may also trap
heat, causing a fire hazard°
12_Do not use aluminum foil anywhere in the
oven except as described in this manual.
Misuse could result in a fire hazard or
damage to the oven.
When using cooking or roasting bags in the
oven, follow the manufacturer's directions,
I:ZDo not use your oven to dry neuspapers.
If overheated, they can catch fire°
Use only glass cookware that is
recommended for use in gas ovens.
OVEN
Always remove the broiler pan from oven as
soon asyou finish broiling° Grease left in the
pan can catch fire if oven is used without
removing the grease from the broiler pan°
F2When broiling, if meat is too close to the
flame, the fat may ignite_ Trim excess fat
to prevent excessive flare-ups_
_2_Make sure the broiler pan is in place
correctly to reduce the possibility of
grease fires.
[z If you should have a grease fire in the broiler
pan, turn the oven off, and keep the oven
door dosed to contain fire until it burns out.
i_i_Never leave jars or cans of fat drippings in or
near your oven.
5
IMPORTANTSAFETYINFORMATION.
READALLINSTRUCTIONSBEFOREUSING.
SELF-CLEANINGOVEN
E Be sure to wipe up excess spillage before
self-cleaning operation,,
Before self-cleaning the oven, remove the
shelves, broiler pan, grid and other
cookavareo
[2 Do not dean the door gaskeL The door
gasket is essential for a good seal. Care
should be taken not to rob, damage or
move the gasket..
Clean only parts listed in fllis Owner's
Manual.
If the self-cleaning mode malfunctions,
turn the oven offand disconnect the power
supply. Have it serviced by a qualified
technician.
E_Do not use oven cleaners° No commercial
oven cleaner or oven liner of any kind
should be used in or around any part of
the oven,, Residue from oven cleaners _
damage the inside of the oven when the
seK-clean cycle is used.
READANDFOLLOWTHISSAFETYINFORMATIONCAREFULLY,
SAVETHESEINSTRUCTIONS
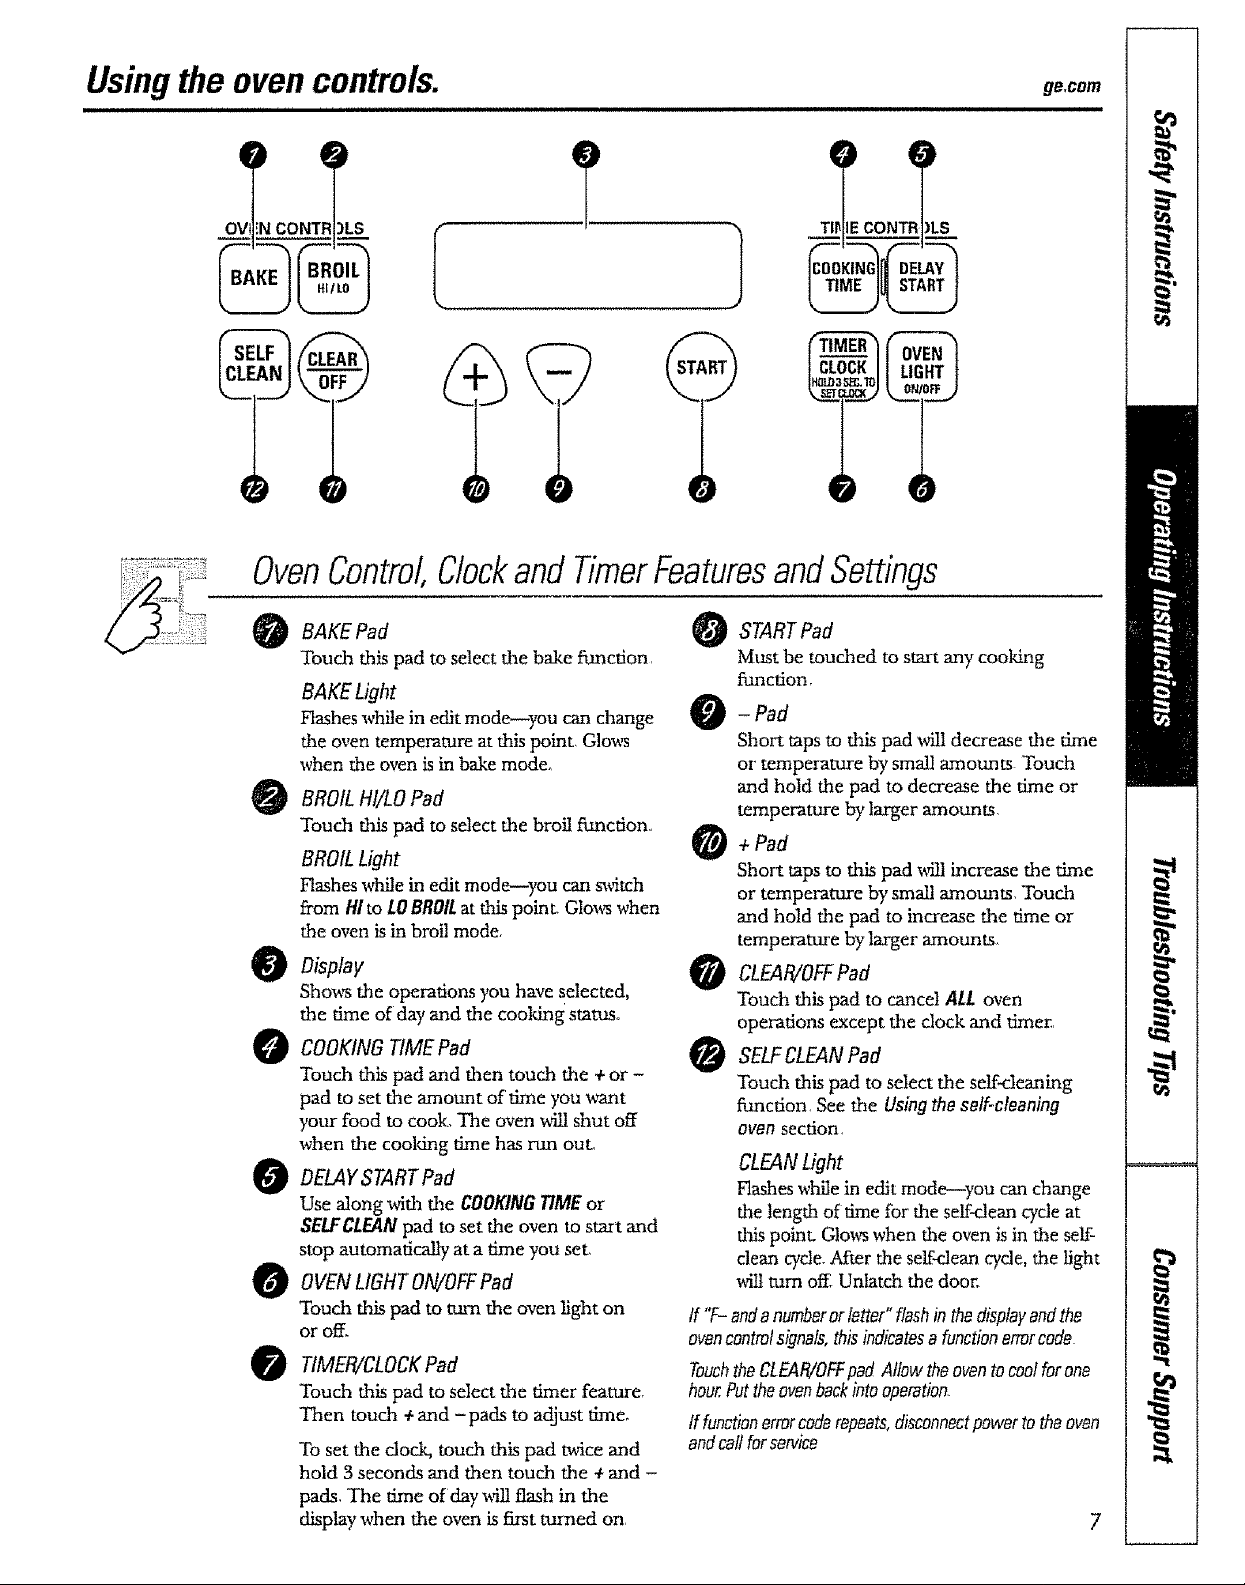
Usingthe ovencontrols.
OV IN CONTR _LS
OvenControl,Clockand TimerFeaturesandSettings
geocom
BAKEPOd
Touda this pad to select the bake function,
BAKE Light
Flashes while in edit mode--you can change
the oven temperature at this point, Glows
when the oven is in bake mode°
BROIL HI/LO Pad
Touch this pad to select the broil fimction,,
BROIL Light
Flashes while in edit mode--you can switch
from Hi to tO BROILat this point. Glo_ when
the oven isin broil mode.
Oisptav
Shou_ the operations you have selected,
the time of day and the cookdng status°
O COOKING TIME Pad
Touch this pad and then touch the +or -
pad to set the amount of time you want
your food to cook. The oven M!I shut off
when the cooldng time has run out,
O DELAYSTARTPad
Use along with the COOKINGTIMEor
SELFCLEANpad to set the oven to start and
stop automatically at a dine you set,
O OVENLIGHTON/OFFPad
Touch this pad to mrn the oven light on
or off_
O TIMER/CLOCKPad
Touch this pad to select the timer feature.
Then touch +and -pads to adjust fime_
To set the dock, touch this pad twice and
hold 3 seconds and then touch the ÷ and -
pads, The time of dayMll flash in the
display when the oven is first mined on,
STARTPOd
Must be touched to start any cooking
function.
-Pad
Short taps to this pad will decrease the dme
or temperature by small amounts Touch
and hold the pad to decrease the dme or
temperature by larger amounts,
+ Pad
Short taps to this pad will increase the time
or temperature by small amounts, Touch
and hold the pad to increase the time or
temperature by larger amounts.
CLEAR/OFFPad
Touch this pad to cancel All oven
operations except the clock and dmer.
SELFCLEANPOd
Touch this pad to select the self_eaning
function, Seethe Usingtheself-cleaning
ovensection.
CLEANLight
Hashes while in edit mode--you can change
the length of time for the serf-clean cycle at
tl_spoint Glows when the oven is in the self-
clean cycle°After the self-clean cycle, the light
will turn off. Unlatch the door.
If "f- endanumberorletter"flashin thedisplayandthe
avoncontrolsignals,thisindicatesa functionerrorcode
TouchtheCLEA_OFFpadAllow theoventocoolforone
hour.Puttheovenbackintooperation.
If functionerrorcodarepeats,discannectpowertotheoven
andcalfforservice
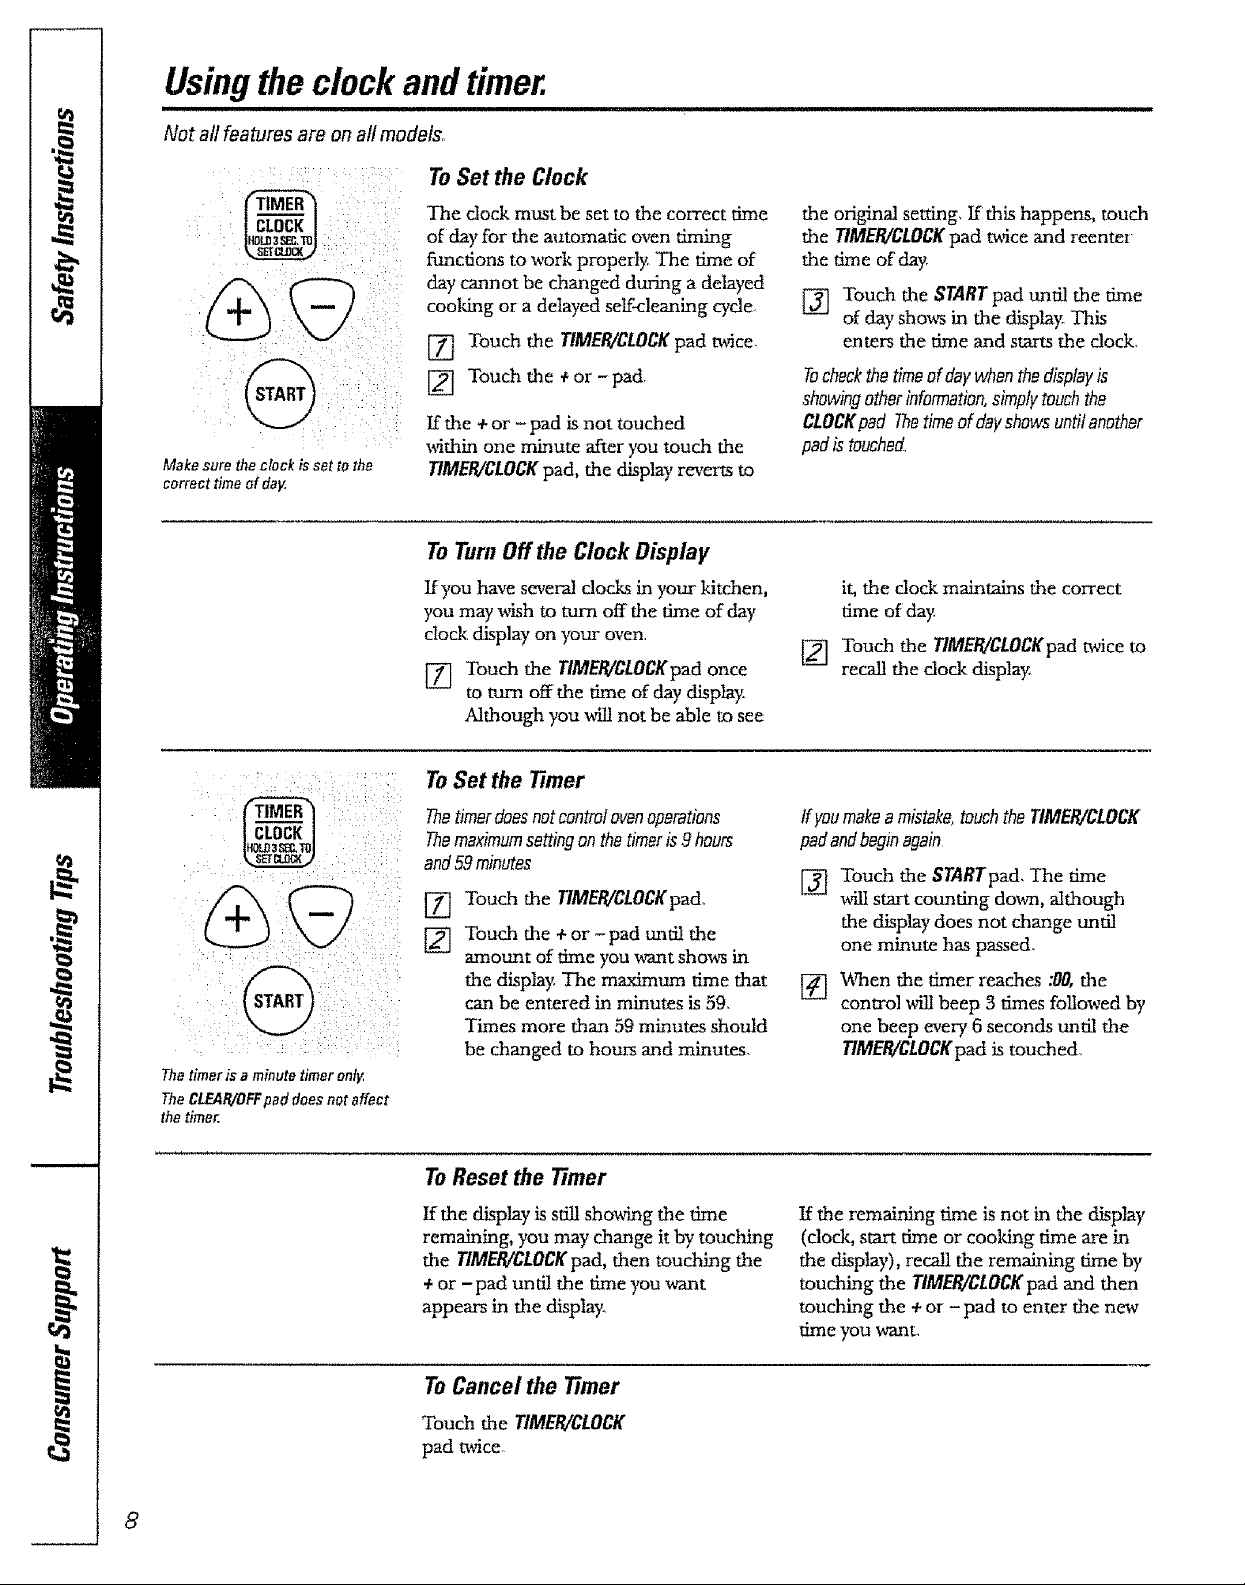
Usingthe clock and timer.
Not all features are onall models°
To Set the Clock
:ii iI
Make sure the clack is set to the
correct time of day.
The dock must be set to the correct time
of clayfor the automatic oven timing
functions to work properly The time of
day cannot be changed during a delayed
cooking or a delayed seN-cleaning cycle,
[] Touch the TIMER/CLOCKpad twice,
[] Touch the +or-pad,
If the +or - pad is not touched
Mthin one minute after you touch the
TIMER/CLOCKpad, the display reverts to
To Turn Off the Clock Display
Kyou have several docks in your kitchen,
you may _sh to mrn off the time of day
clock display on your oven.
[] Touch the TIMER/CLOCKpadonce
to turn off the time of day display.
Although you will not be able to see
To Set the timer
the original setting, If this happens, touch
the TIMER/CLOCKpad twice and reentel
the time of day,
[] Touch the STARTpad until the time
of day sho_ in the display This
enters the time and starts the dock,
Tocheckthe timeofdaywhenthedisplayis
showingotherinformation,simplytouchthe
CLOCKpad Thetimeofdayshowsuntifanother
padistouched
it, the clock maintains the correct
time of day
[] Touch the TIMER/CLOCKpadtwice to
recall the dock display,
.==
tr_L_T01
The timer is a minute timer only,
The CLEAR/BFFpad does not affect
the timer,
Thetimerdoesnot controlovenoperations
Themaximumsettingonthetimeris9hours
and59minutes
[] Touch the TIMER/CLOCKpad.
[] Touch the + or - pad until the
amount of time you u_nt shows in
the display The maximum time that
can be entered in minutes is 59,
Times more than 59 minutes should
be changed to hours and minutes.
To Reset the timer
If the display is still sho_ng the time
remaining, you may change it by touching
the TIMER/CLOCKpad, then touching the
+or -pad unt!l the time you _mat
appears in the display,,
ToCancel the Timer
tfyeumakeamistake,touchtheTIMER/CLOCK
padandbeginagain
Touch the STARTpad, The time
[]
MII start counting down, although
the display does not change until
one minute has passed,
V_en the timer reaches :00, the
[]
control _ll beep 3 times followed by
one beep every 6 seconds until the
TIMER/CLOCKpad is touched
If the iemaining time is not in the display
(clock, start time or cooking time are in
the display), recall the remaining time by
touching the TIMER/CLOCKpadand then
touching the +or - pad to enter the new
time you want,
Touch the TIMER/CLOCK
pad twice,
ge,gom
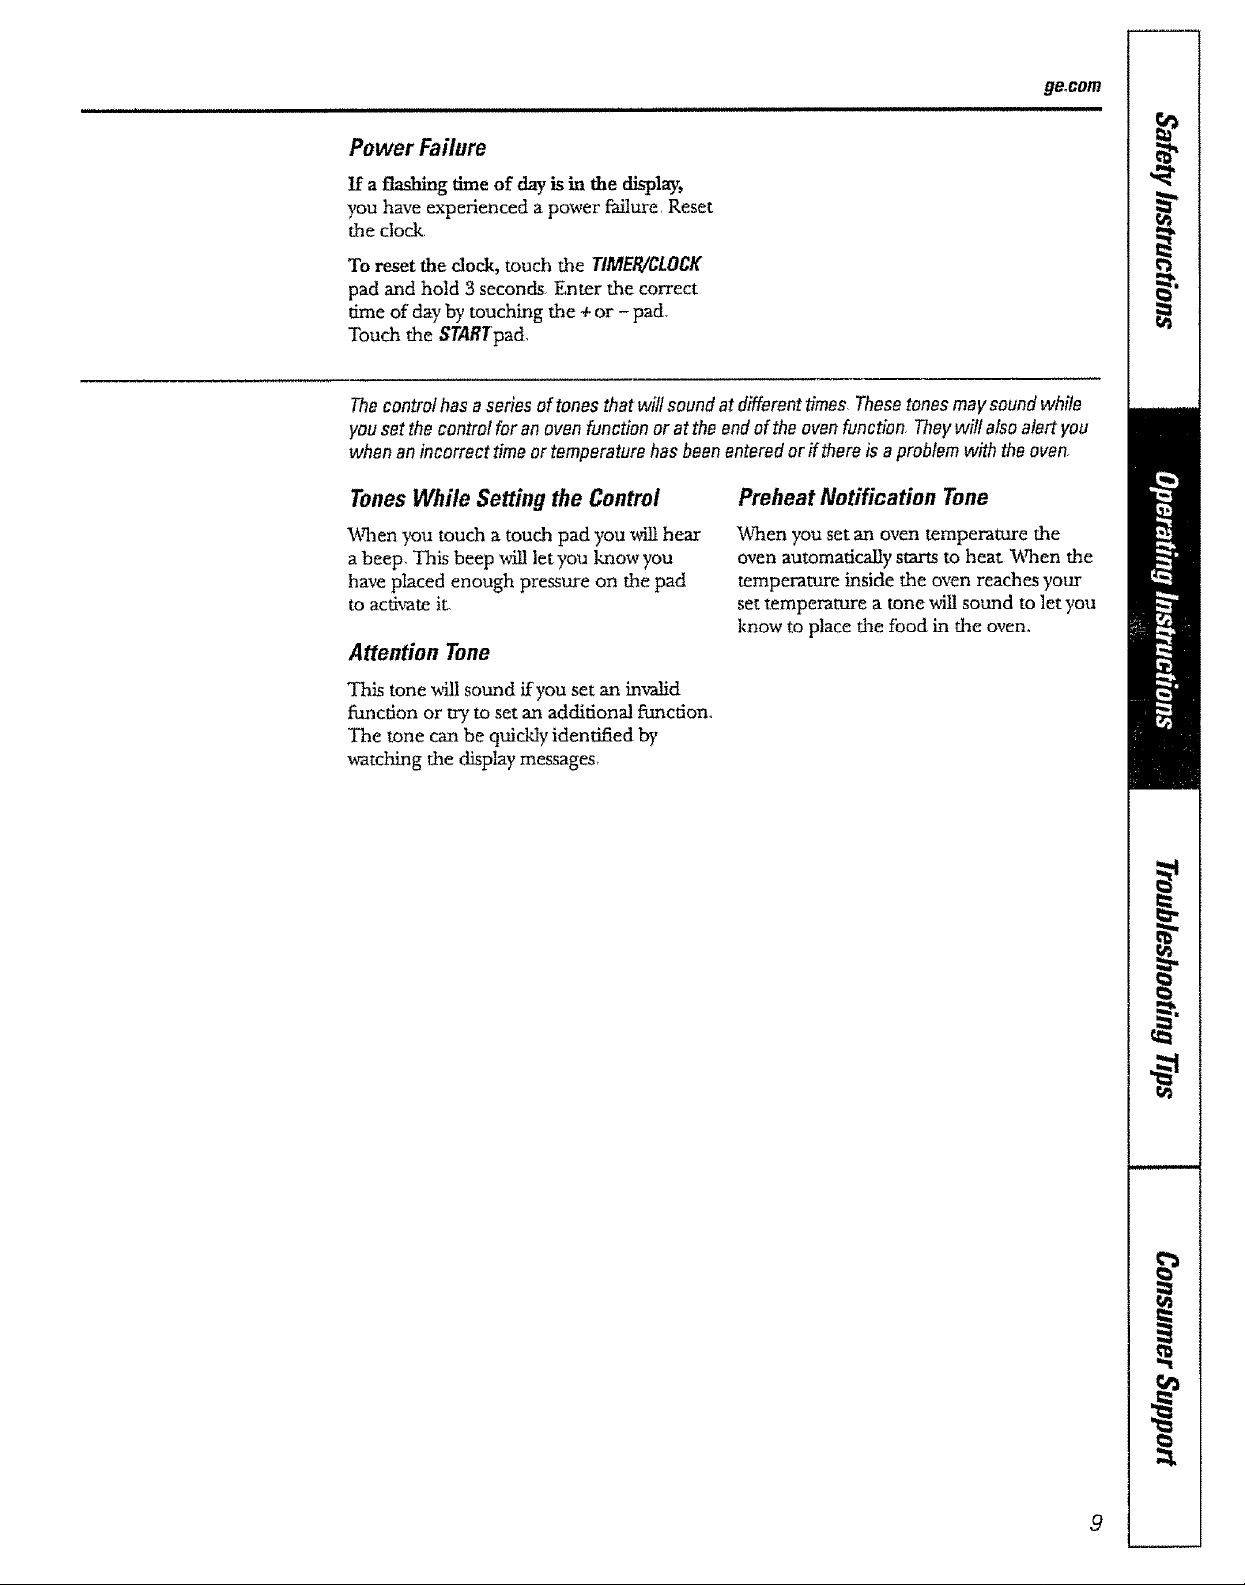
Power Failure
Ifa flashing time of day is in the d_lay,
you have experienced a power failure, Reset
the clock.
To reset the dock, touch the TIMER/CLOCK
pad and hold S seconds, Enter the correct
time of day by touching the ÷or - pad,
Touch the STARTpad,
Thecontrolhasaseries oftones that wilt soundatdifferenttimes,Thesetonesmaysoundwhile
youset thecontrolfor anovenfunction or atthe endof theovenfunction, Theywill alsoalert you
whenan incorrect timeor temperaturehasbeen enteredor if thereis aproblemwith theoven,
TonesWhile Setting the Control
V_q_enyou touch a touch pad you will hear
a beep, This beep will let you know you
have placed enough pressure on the pad
to activate it_
Attention Tone
This tone _11 sound ffyou set an inwAid
fi.mction or try to set an additional figtction,,
The tone can be quickly identified by
watching the display messages_
Preheat Notification Tone
When you set an oven temperature the
oven automatically starts to heat _rhen the
temperature inside the oven reaches your
set temperature a tone _h_llsound to let you
know to place the food in the oven,
9
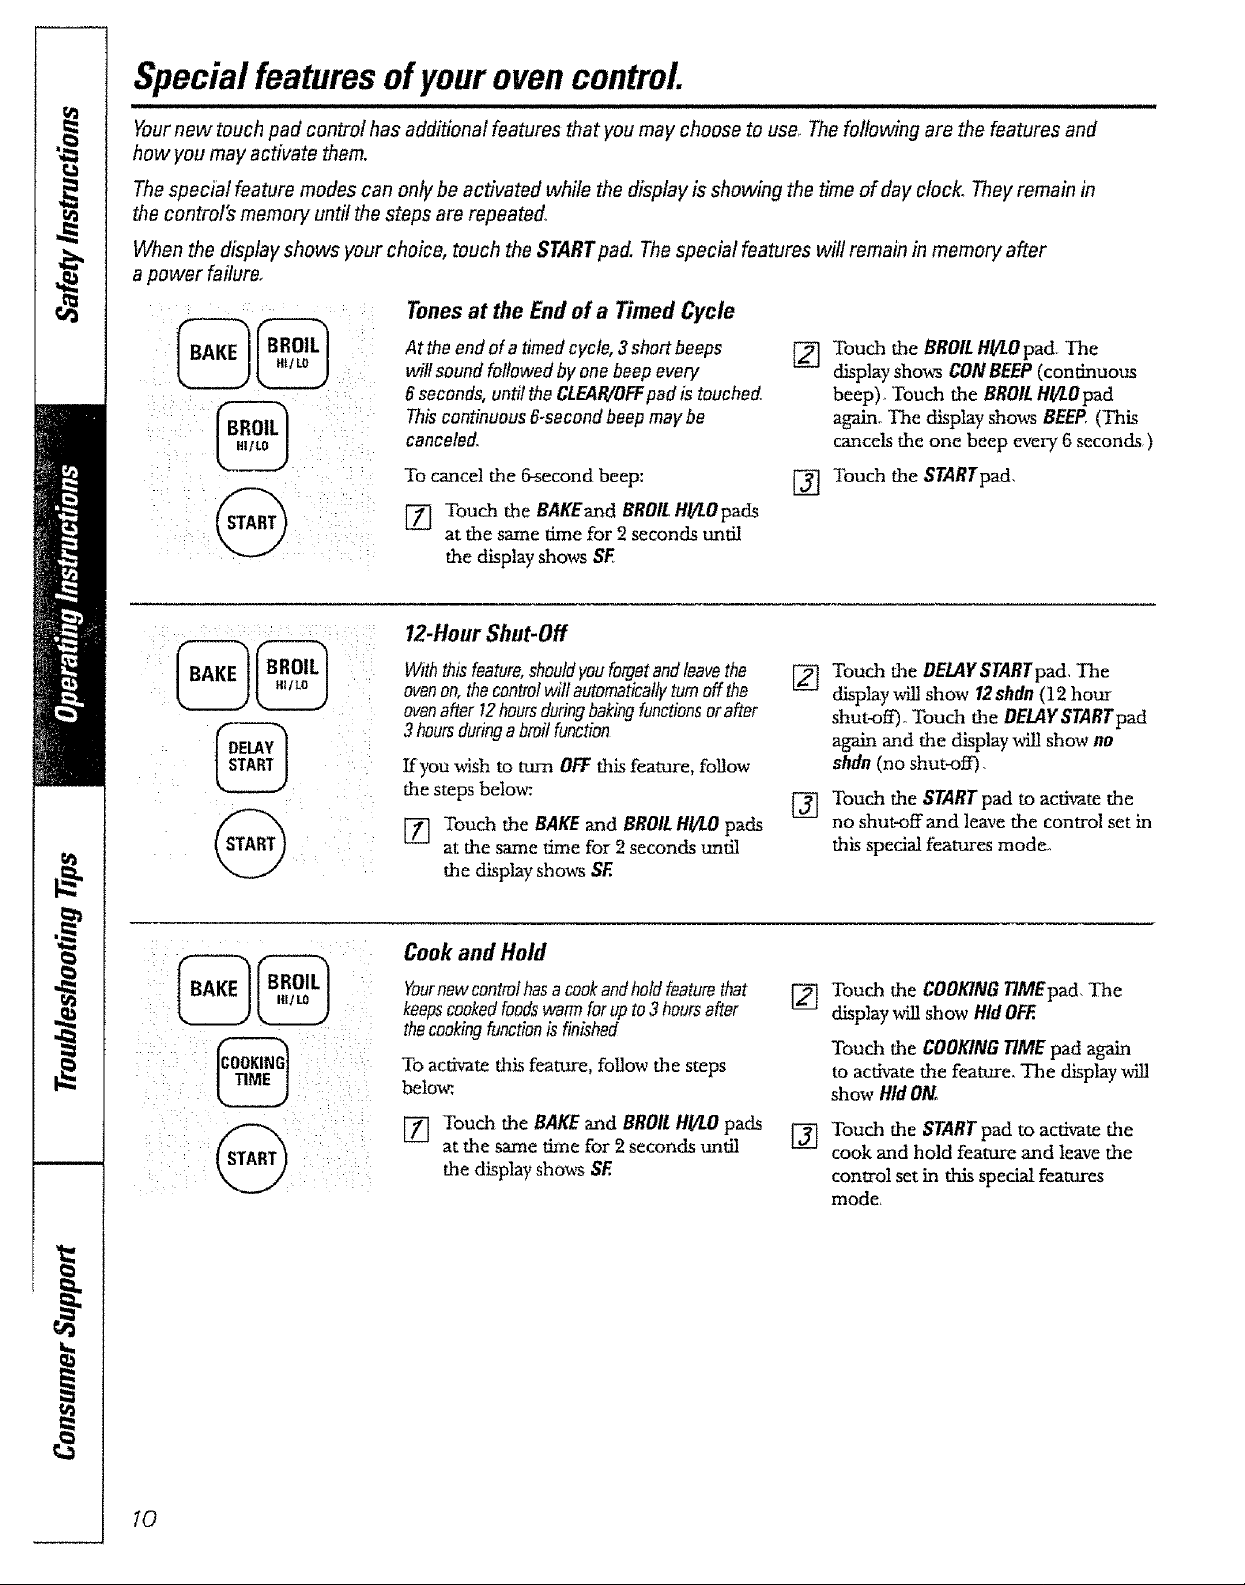
Special featuresofyourovencontrol
Yournew touch pad control has additional features that you may choose to use, Thefollowing are the features and
how you may activate them.
The special feature modes can only be activated while the display is showing the time of day clock. They remain in
the control's memory until the steps are repeated,
When the display shows your choice, touch the STARTpad. Thespecial features will remain in memory after
a power failure,
Tonesat the End of a Timed Cycle
At the endof a timed cycle,3 short beeps
willsoundfollowed by one beepevery
6 seconds,until the CLEAR/OFFpadis touched.
Thiscontinuous6-secondbeep maybe
canceled.
To cancel the _second beep:
[] Touch the BAKEand BROIL,H!/LOpads
at the same time for 2 seconds until
the display shows $F,
12-HourShut-Off
Withthisfeature,shouldyouforgetandleavethe
ovenon,thecontrolwillautomaticallyturnoffthe
ovenafter 12hoursduringbakingfunctionsorafter
3hoursduringa broilfunction
Kyou wish to mm OFFthis feature, follow
the steps belo_;
[] Touch the BAKE and BROILH!/LO pads
at the same time for 2 seconds until
the display shows SE
[] Touch the BBOILHI/LOpad The
display show_ CONBEEP(continuous
beep)_ Touch the BROILH//LOpad
again, The display shox_ BEEP,(This
cancels the one beep every 6 seconds )
[] Touch the STARTpad,
Touch the DELAYSTABTpad,The
[]
display ,_lI show 12shdn(12 hour
shut-off)o Touch the DELAYSTARTpad
again and the display will show no
shdn (no shut-off),
Touch the STARTpad to activate the
[]
no shut-off and leave the control set in
this special features mode_
10
Cook and Hold
Yournewcontrolhasa cookandholdfeaturethat
keepscookedfoodswarmforupto 3hoursafter
thecookingfunctionis finished
To activate this feature, follow the steps
belo_
[] Touch the BAKE and BROILHIV!.Opads
at the same time for 2 seconds until
the display sho_ SE
[] Touch the COOKINGT/MEpad. The
display will show Hid OFF.
Touch the COOKINGtiME pad again
to activate the feature. The display _A1
show HidON.
Touch the STARTpad to activate the
[]
cook and hold feature and leave the
control set in this special feaULres
rlelod e,
@
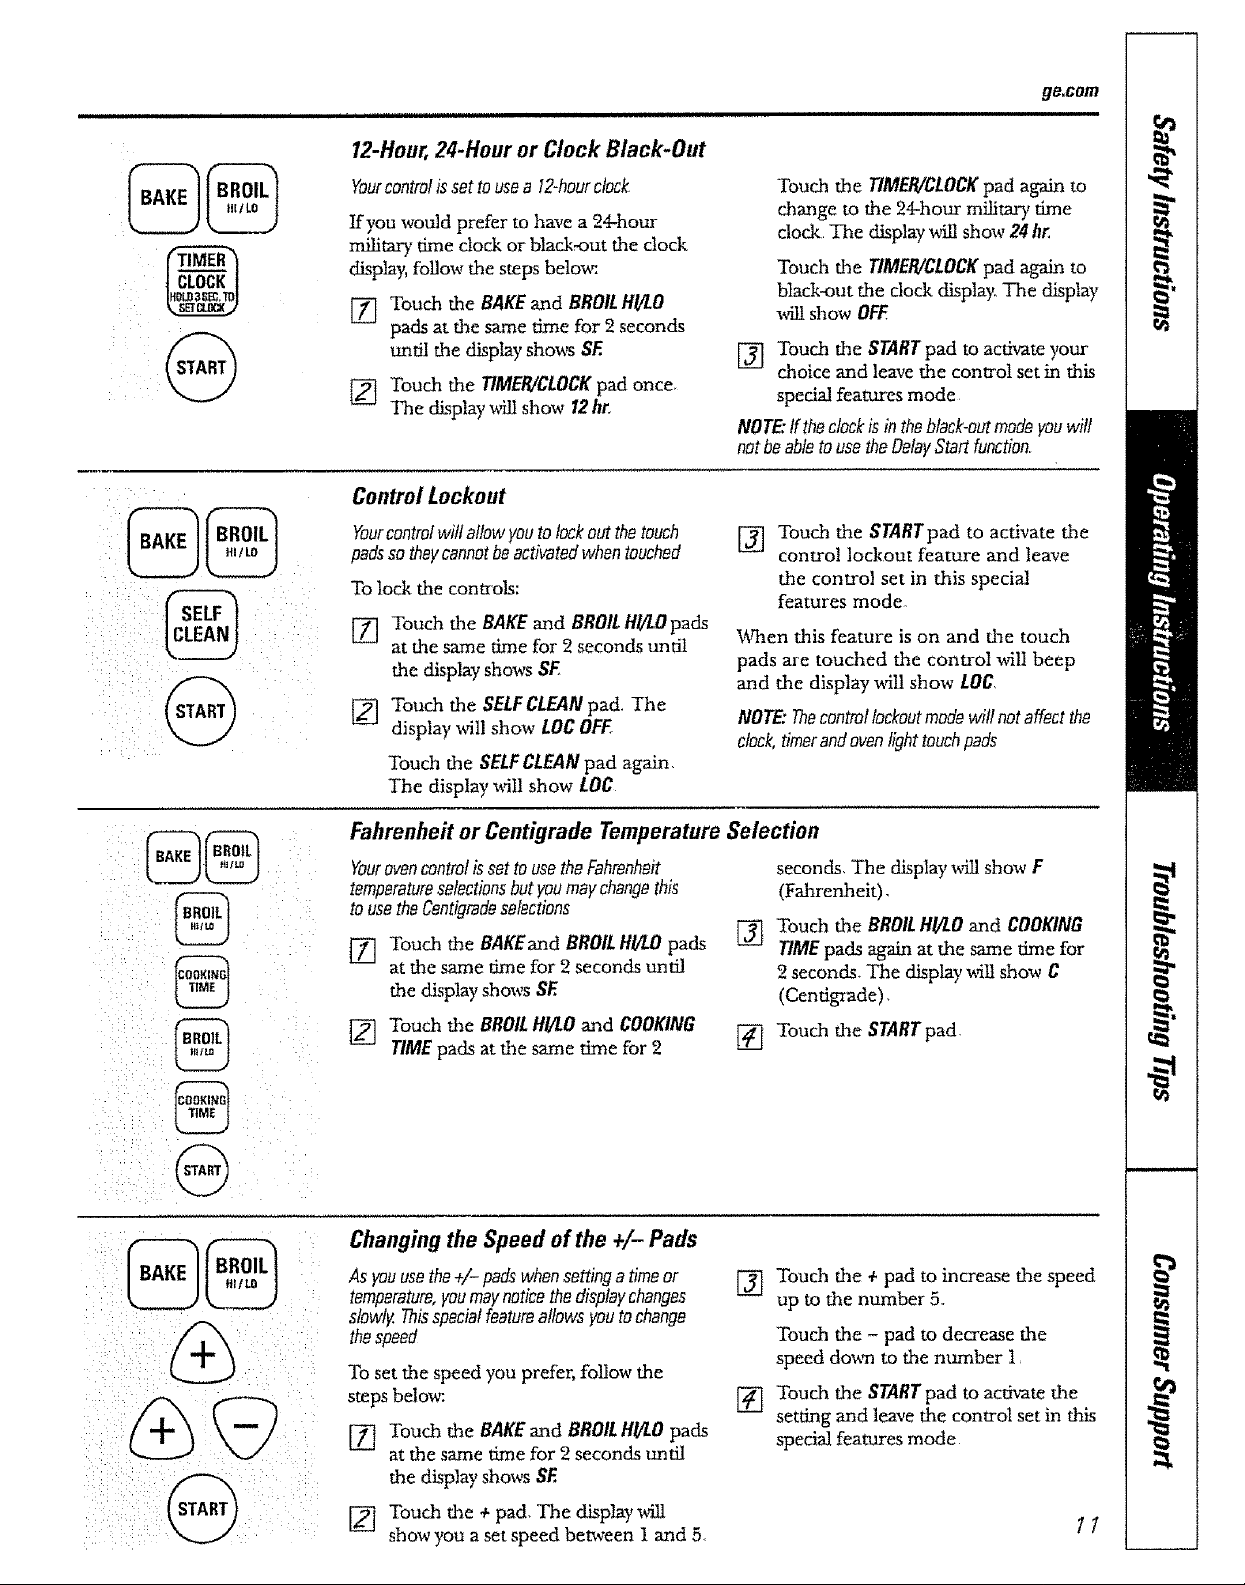
12-Hour, 24-Hour or Clock Black-Out
Yourcontrolis.settousea 12-hourctock_
If you would prefer to have a 24-hour
military time clock or black-out flue dock
display, follow the steps below.
[] Touch the BAKEand BROILHI/LO
pads at the same time for 2 seconds
until the display shou_ SE
[] Touch the tiMER/CLOCKpad once
The display will show 12hr.
Control Lockout
ge,com
Touch the TIMER/CLOCKpad again to
change to the 24-hour military time
clock. The display x_lI show 24 hr_
Touch the TIMER/CLOCKpad again to
black-out the clock display. The display
x_l show OFF,
[] Touch the STARTpad to activate your
choice and leave the control set in this
special features mode
NOTE."Iftheclockisin theblack-outmodeyouwill
notbeabletousetheDelayStartfunction
_i i_i _ • •
:i
Yourcontrolwillallow youtolockoutthetouch
padssotheycannotbeactivatedwhentouched
To lock the controls:
[] Touch the BAKEand BROILHI/LOpads
at the same time for 2 seconds until
the display shows SF.
[] Touch the SELFCLEANpad. The
display will show LOCOFF.
Touch the SELFCLEANpad again.
The display will show LOC
Fahrenheit or Centigrade Temperature Selection
YourovencontrolissettousetheFahrenheit
temperatureselectionsbut youmaychangethis
tousetheCentigradeselections
[] Touch the BAKEand BROILHI/LOpads
at the same time for 2 seconds until
the display shows SF,
[] Touch the BROILHI/LOand COOKING
TIMEpads at the same time for 2
[] Touch the STARTpad to activate the
control lockout feature and leave
the control set in this special
features mode.
When this feature is on and the touch
pads are touched the control will beep
and the display will show LOC,
NOTE:Thecontrollockoutmodewillnotaffectthe
clock,timerandovenlighttouchpads
seconds, The display _afillshow F
(Fahrenheit),
Touch the BROILH_LOand COOKING
[]
TIMEpads again at the same time for
2 seconds. The display will show C
(Centigrade).
[] Touch the STARTpad
Changing the Speed of the ÷/- Pads
Asyouusethe+/- padswhensettinga timeor
temperature,youmaynoticethedisplaychanges
slowlyThisspecialfeatureallowsyoutochange
thespeed
To set the speed you prefer, follow the
steps below.
[] Touch the BAKEand BROILHI/LOpads
at the same time for 2 seconds until
the display shows SF,
[] Touch the + pad. The display _l
show you a set speed between I and 5.
[] Touch the + pad to increase the speed
up to the number 5.r
Touch the - pad to decrease the
speed dough to the number l
Touch the STARTpad to actuate the
[]
setting and leave the control set in this
special features mode
II
 Loading...