

GE JGP990WEL1WW, JGP990SEL1SS, JGP990BEL1BB Owner’s Manual
ge.com
Safety Instruaions ..... 2-5
Operating Instructions
Accessories .............. 7
Controls .............. 8, 9
Cookware .............. 9
Electric Ignition ......... 8
Features ................ 6
Griddle ................ 14
Grill Module ......... 10-13
SurlXace Burner
Modules ........... 6, 8-10
Ventilation System ..... 6, 9
Care and Cleaning
Control l{a_obs and
Conuol Panel Seal ...... 15
Grease Jar ............. 15
Griddle Accesso,w ....... 17
Grill Burner. ........... 16
Grill Grate ............. 16
Ig_fiters ................ 17
Porcelain Burner Basin . . 17
Porcelain Cooktop ...... 15
Sealed Burner Module ... 17
Stainless Smel Surfi_ces ...15
Vent Grille and Filter .... 16
Installation
Ins_uc'_ions ......... 18-29
LP Conversion ...... 30-33
J(;P990
Troubleshooting
Tips ............... 34, 35
Consumer Support
Consumer Support ...... 40
.., /,38Product Registration 3_"
VV:mantv ............... 39
Writethemodelandserial
numbershere:
Model #
Serial #
Find these numbers on a label
under the cooktop.
4226-0016-01
49-80402 12-05JR
iMPORTANTSAFETYiNFORMAtiON.
READALLiNSTRUCtiONSBEFOREUSING
WARNING!
For your safe_, the information in this manual must be followed to minimize the risk of fire or
explosion, electric shock, or to prevent property damage, personal injury, or loss of life.
WARNING:If the information in this manual
is not followed exactly, a fire or explosion may
result causing property damage, personal injury
or death.
-- Do not store or use gasoline or other flammable
vapors and liquids in the vicinity of this or any
other appliance.
- WHATTODOIF YOUSMELLGAS
_:_'iDo not try to light any appliance.
i_i:iDo not touch any electrical switch; do not use
any phone in your building.
i_i:iImmediately call your gas supplier from a
neighbor's phone. Follow the gas supplier's
instructions.
If you cannot reach your gas supplier, call the
fire department.
-- Installation and service must be performed by
a qualified installer, service agency or the gas
supplier.
2
ge.com
IMPORTANTSAFETYNOtiCE
The California Safe Drinking Water and ToxicEnforcement Act requires the Governor of California to
publish a list of substances known to the state to cause cancer, birth defects or other reproductive
harm, and requires businesses to warn customers of potential exposure to such substances.
Gasappliances can cause minor exposure to four of these substances, namely benzene, carbon
monoxide, formaldehyde and soot, caused primarily by the incomplete combustion of natural gas or
LP fuels. Properly adjusted burners, indicated by abluish rather than a yellow flame, will minimize
incomplete combustion. Exposure to these substances can be minimized by venting with an open
window or using a ventilation fan orhood.
SAFETYPRECAUtiONS
Have the installer show you the location of the cooktop gas shutoff valve and how to shut # off
ff necessary.
?_:Have your cooktop installed and properly ?_:
grounded by a qualified installex; in accordance
with the Installation ]nstrt/cfions. Any iJi::
a(!jusm_ent and service should be perfimned
only by qualified gas cooktop installers or
se_'ice technicians.
i_: Be sm'e yore" cooktop is correctly a(!justed by a
qualified se_'ice technician or installer for the
tspe of gas (natural or I,P) which is to be used.
Yore" cooktop can be converted for rise with
either type of gas. See the Installation
Instructions. Your model is factory a(!iusted
for rise with natural gas.
::Ji::Do not attempt to repair or replace anv
part of your cooktop tmless it is specifically
recommended in this manual. M1 other se_Mce
should be referred to a qualified technician.
::Ji::ix)cate tile cooktop out of kitchen traffic path
and out of drafty locations to prevent poor
burner perfimnance.
_: Plug yore" cooktop into a 120-volt grounded
outlet only. Do not remove tile rotmd
grotmding prong from the plug. If in
doubt about tile gro/mding of tile home
electrical system, it is yore" personal
responsibili b' and obligation to have an
tmgro/mded outlet replaced with a properly
grounded, three-prong outlet in accordance
with the National Electrical Code. Do not use
an extension cord with this appliance.
::Ji::I,et tile burner grate and other surfl_ces cool
before touching them or leaving them where
children can reach them.
::Ji::Do not allow anvone to climb, stand or hang
Be sm'e yore" cooktop is correctly a(!iusted by a
qualified se_wi(e technician or installe_:
Do not leave children ahme or mmttended
where a cooktop is hot or in operation. They
could be seriously burned.
on tile cooktop.
CAUTION:Items()finterestt()children
should not be stored in cabinets above a
cooktop----{'hildren climbing on tile cooktop
to reach items could be seriously iqim'ed.
Mwavs kee I) wooden and plastic utensils
and canned food a sale distance away fl'om
yo/ir cooktop.
Mwavs kee I) combustible wall coverings,
cmtains or drapes a sate distance fl'om
yotlr cooktop.
Never wear loose-fitting or hanging gam_ents
while using the appliance. Be careflfl when
reaching t()r items st(wed in cabinets over the
cooktop. Hammable material could be ignited
if brought in contact with flame or hot sm_hces
and Ill,IV ca/Ise severe blli'ns,
Teach children not to play with tile controls
or any other part of tile cooktop.
For your safety, never use your appliance
for wamfing or heating tile room.
::Ji::Be sure all packaging materials are removed
fl'om tile cooktop before operating it m prevent
fire or smoke damage should tile packaging
material ignite.
3
IMPORTANTSAFETYINFORMATION.
READALLINSTRUCTIONSBEFOREUSING.
SAFETYPRECAUTIONS
Mwavs keep dish towels, dishcloths, pot
holders and other linens a safe distance
from your cooktop.
Do not store flammable materials near
a cooktop.
Do not store or use combustible materials,
gasoline or other flan/inable \;qxn_ aim liquids
in tile vicinity of this or any other appliai_ce.
Do not let cooking grease or other flamlnable
IllateIJals _lCC/lI//tllate on oi" near tile cooktop.
Do not operate tile burner without all burner
parts in place.
Do not clean the cooktop with flammable or
w_latile cleaning fluids.
Do not clean the cooktop when the appliance
is ill rise.
Avoid scratching tile cooktop with shaq)
instruments, or with rings and otherjewehT:
Never use tile cooktop as a cutting board.
Do not use water on grease fires. Never pick up B.
a flaming pan. Turn tile controls off. Smother
a flaming pan on a s/u'fhce burner by covering C.
the pan completely with a well-fitting lkl,
cookie sheet or flat tray. Use a mulfipuq)ose
dry chemical or foam-type fire extinguisher.
Flaming grease outside a pan can be put out
by covering it with baking soda m; if awfilable,
by using a m ultipuq)ose dry chemical or E.
foam-t},pe fire extinguishei:
A. Use this unit only in tile manner intended
A. Keep tim, filteI_ and grease-laden surtilces
Do not obstrtlct tile flow of COl//b/1stion and
x entilation aii:
i,eak tesfin,*,_ of appliance shall be conducted
according to tile manufacturer's instructions.
WARNING:roredu etberiskoffire,
electrical shock, or injury to persons, observe the
following:
by tile manufilcturei: If you have questions,
contact tile l//_lll/l[_lCttll'el:
B. Befi)re seiMcing or cleaning tile unit, switch
power off at service panel.
C. \4]/en cutting or drilling into wall or ceiling,
do not damage electrical wiring and other
hidden utilities.
D. Ducted tiros must alwms be vented to
tile o/itdooi_.
E. To reduce tile risk of fire use only metal
ductwork.
WARNING:Toreducetberiskofaoooktop
grease fire:
clean.
Mways turn vent ON when cooking at
high heat.
Use high settings on cooktop only when
necessary. Heat oil slowly on low to medium
setting.
D°
Don't leave the cooktop unattended when
cooking.
Mwax:s use cookware and utensils appropriate
for tile _'pe and amount of food being
prepared.
CAUTION:Forgeneralventilatinguse
only. Do not use to exhaust hazardous or explosive
materials and vapors.
COOKMEATANDPOULTRYTHOROUGHLY...
Cook meat and poultry thoroughly--meat to at least an INTERNAL temperature of 160°Fand poultry to
at least an INTERNAL temperature of 18O°ECooking to these temperatures usually protects against
foodbome illness.
4
ge.com
• ,WARNING!
SURFACEBURNERS
Use proper pan size--avoid pans that are unstable or easily tipped. Select cookware having flat
bottoms large enough to cover burner grate. Toavoid spillovers, make sure cookware islarge enough
to contain the food properly. This will both save cleaning time and prevent hazardous accumulations
of food, since heavy spattering or spillovers left on cooktop can ignite. Usepans with handles that can
be easily grasped and remain cool
_: Mwavs use tile £/TE position when igniting tile
top burne_ and nlake sure tile burnei_ have
ignited.
::Ji::Never leave tile stli'l'ilce burne_ unattended at
high flame settings. Boilove_s cause slnoking
and greasy spillove_ that may catch on fire.
?_:Use only (h y pot holders--moist or damp pot
holders on hot stmfi_ces may result in btm_s fl'om
steam. Do not let pot holders come near open
flames when lit_ng cookware. Do not use a towel
or other bulky cloth in I/lace ot a pot holder;
Such cloths can catch fire on a hot bume_:
_: \,_]/en using glass cookware, make sure it is
designed tot cooktop cooking.
_: To minimize tile possibili_' ot bm'ns, ignition
of flammable materials and spillage, mrn
cookware handles toward the side or cenmr
ot the cooktop without extending over
adjacent burne_.
::Ji::Always turn tile suYlilce burner controls off
befiwe removing cookware.
_: Careflflly watch roods being fl{ed at a high
flame setting.
_: Mwavs heat tilt slowly and watch as it heats.
::Ji::Do not leave any items on tile cooktop. Tile hot
air fl'om tile vent may ignite flammable items
and will increase pressm'e in closed containe_,
which may cause them to built.
_: If a combination of oils or tilts will be used in
fl'ying, stir together befiwe heating or as lilts
melt slowly.
::J_::Do not rise a wok on tile cooking s/IYI;l('e
if the wok has a rotmd metal ring that is placed
over tile burner grate to support tile wok. This
ring acts as a heat trap, which may damage the
burner grate and burner head. Mso, it may
cause tile burner to work imi)roperl > This may
cause a carbon monoxide level above that
allowed by current standards, resulting in a
health hazard.
::Ji::Foods fi,r flTing shouM be as d_y as possible.
Frost on frozen toods or moisture on fl'esh
toods can cause hot tilt to bubble up and over
the sides ot the pan.
_: Use tile least possible amount of tilt tot effective
shallow or deep-tilt fl'ying. Filling the pan too
fllll of flit can cause spillove_ when fi)od is
added.
::Ji::Use a deep tilt them/ometer whenever
possible to prevent overheating tilt beyond
tile smoking point.
_: Never t_w to move a pan of hot tilt, especially a
deep tilt flwet: Wait tmtil the lilt is cool.
::Ji::Do not flame toods on tile cooktop. If you do
flame toods under tile hood, turn tile tan on.
_: Do not leave plastic items on the cooktoI>--
tile}' may melt if leti too close to tile vent.
N Kee I) all plastics away fl'oln tile SUll'ilce burnei_.
_: If you smell gas, mrn off the gas to the cooktop
and call a qualified service technician. Never
use an open flame to locate a leak.
::_i::To avoid tile possibili_' of a bm'n, alwa):s be
certain that tile controls fi)r all burne_ are at
tile off position and all grates are cool beflwe
attempting to remove them.
_: Never clean the cooktop sm'filce when it is hot.
SoIlle cleanelN l)roduce noxiotls ][ilIl/es and wet
cloths could cause steam burns if used on a hot
S tlI'J[iIce.
::_i::Never leavejms or cans of flit drippings on or
ne}lI" yl)/li" cooktop.
_: Do not use ahuninuln t0il under burner grate.
Misuse could result in a fire hazard or damage
to the cooktop.
::_i::Do not cover or block the area around the
cooktop knobs. This area must be kept clear tbr
proper ventilation and bm'ner i)e_fimnance.
_: Clean only parts listed in this Owner's Manual.
READANDFOLLOWTHISSAFETYINFORMAtiONCAREFULLY
SAVETHESEINSTRUCTIONS
5

Featuresof yourcooktop.
Throughout this manual, features and appearance may vary from your model.
Feature Index
_) Grill Module (optionM)
O Vent (fan operates automatically when grill is in use)
Vent Filter (located below the vent grille)
Cast-Iron Burner Grate
Surface Burners
{_ Surface Burner Controls
Vent Control
Cooktopaccessories, gecom
Throughout this manual, features and appearance may vary from your model.
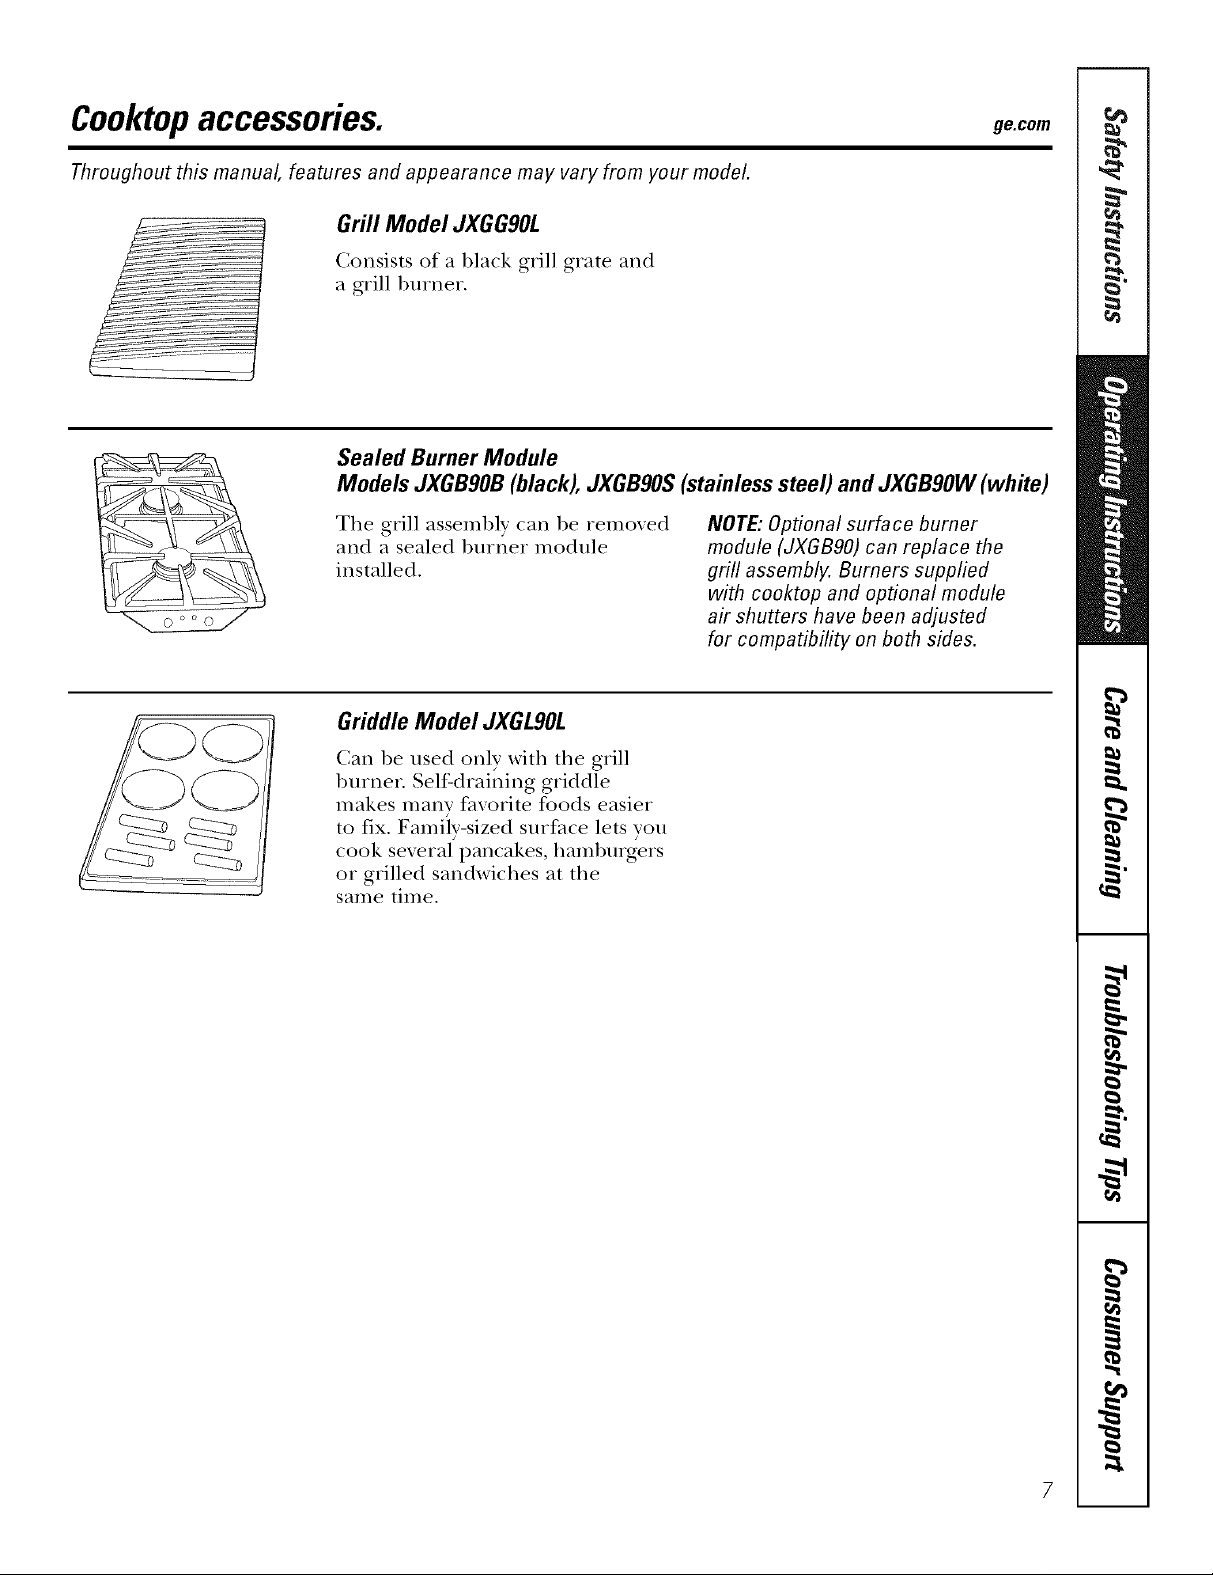
Grill Model JXGGgOL
Consists of a black grill grate and
a grill burner.
Sealed Burner Module
Models JXGBgOB(black), JXGBgOS(stainlesssteel) and JXGBgOW(white)
Tile grill assembly can be removed
and a sealed burner module
installed.
Griddle Model JXGLgOL
Can be used only with the grill
burner. Self-draining griddle
makes many favorite foods easier
to fix. Family-sized surface lets you
cook several pancakes, hamburg>rs
or grilled sandwiches at the
same time.
NOTE: Optional surface burner
module (JXGB90) can replace the
grill assembly. Burners supplied
with cooktop and optional module
air shutters have been adjusted
for compatibility on both sides.
Usingthegas surfaceburners.
Throughout this manual, features and appearance may vary from your model
Electric Ignition
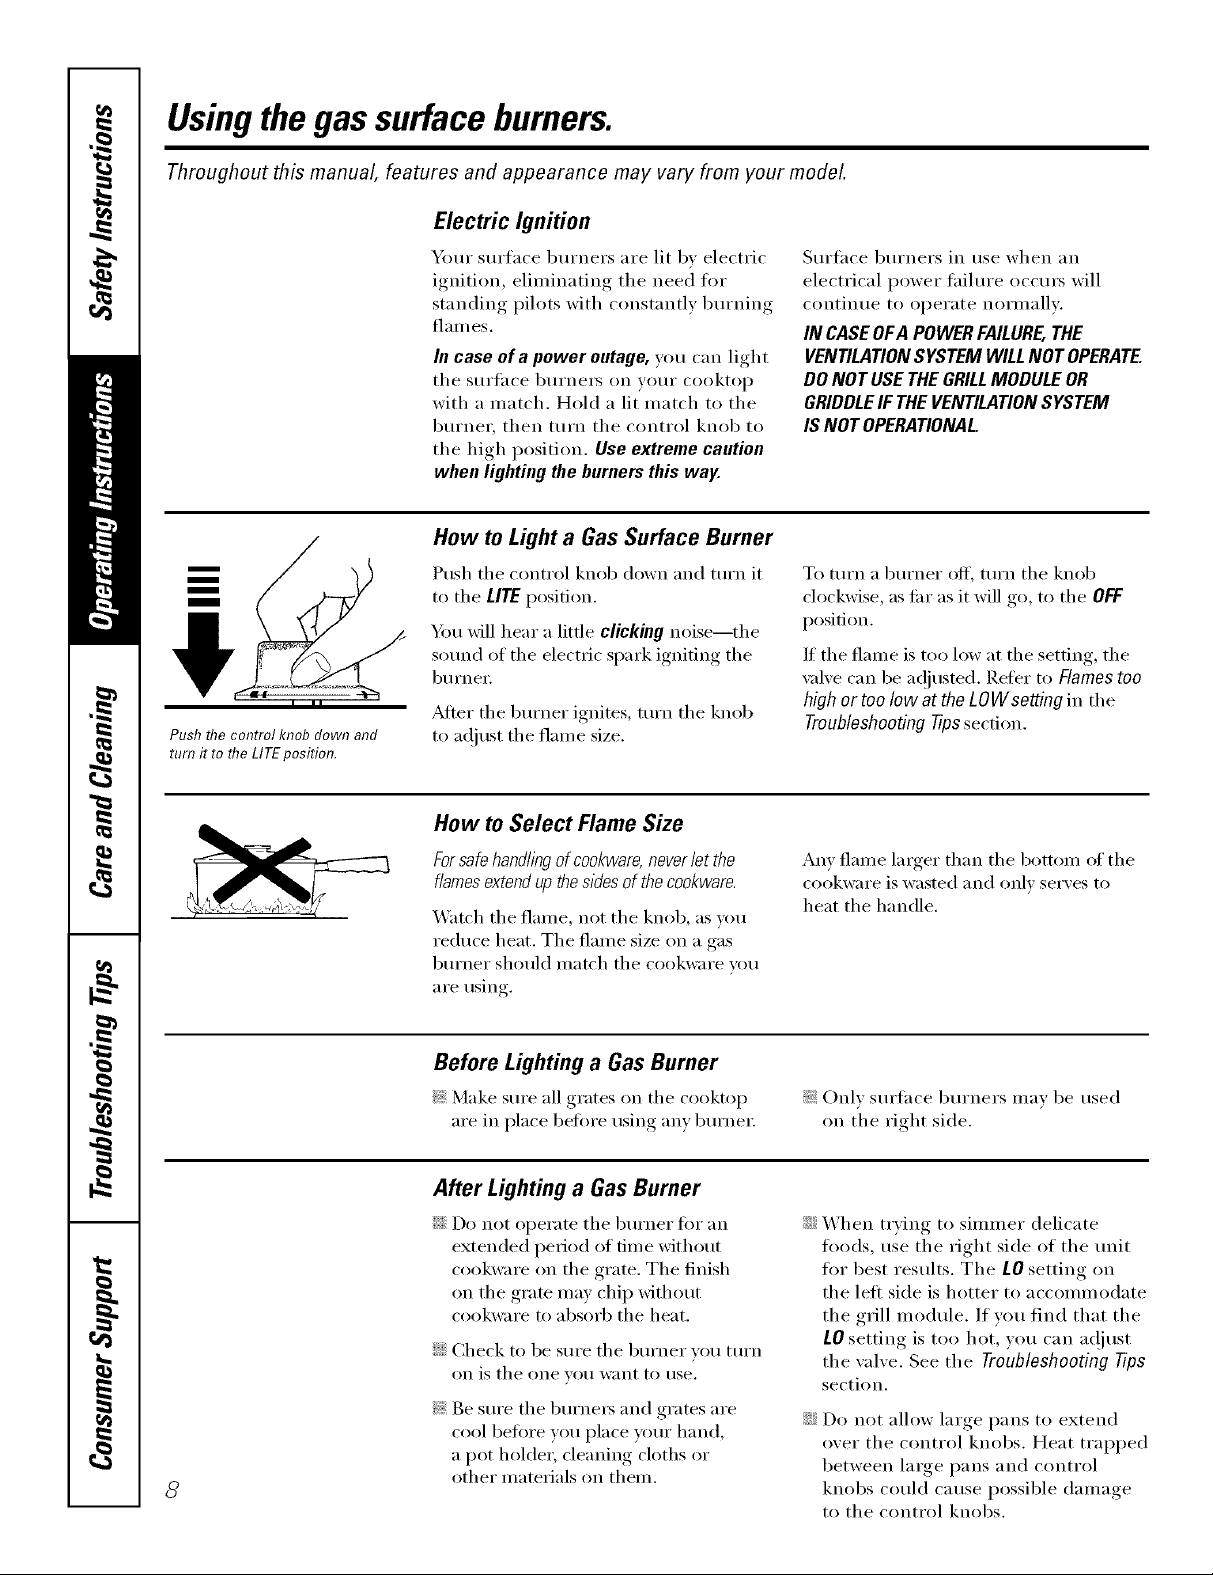
Push the control knob down and
turn it to the LITEposition.
Your surtace burners are lit by electric
ignition, eliminating tile need fl)r
standing pilots with constantly burning
[]_lI//es.
In case era power outage, you can light
tile s[lri_l('e b/li'nei's on VO/lI" cooktop
with a match. Hold a lit match to tile
bm'ne_; then mrn tile control knob to
tile high position. Use extreme caution
when lighting the burners this way.
How to Light a Gas Surface Burner
Push tile c(mtrol knob down and mrn it
to tile LITEposifi(m.
Y)m will hear a little clicking noise--the
sound of the electric spark igniting the
b/lI'neI:
_Mier tile burner ignites, mrn tile knob
to adjust tile flame size.
Surthce burners in use when an
electrical power fifilure occm5 will
contintle to operate norlllallv.
IN CASEOFAPOWERFAILURE,THE
VENTILATIONSYSTEMWILLNOTOPERATE.
DONOTUSETHEGRILLMODULEOR
GRIDDLEIF THEVENTILATIONSYSTEM
ISNOTOPERATIONAL
To mrn a burner off', mrn tile knob
clockwise, as tin" as it will go, to the OFF
posifi(m.
If tile flame is too low at tile setting, the
\:dve can be a(!iusted, l_.eti_r to Flamestoo
high or toolow at theLOWsetting in tile
Troubleshootingtips section.
How to Select Flame Size
Forsafehandling of cookware, neverlet the
flamesextendup thesides of the cookware.
_'atch tile flame, not tile knob, as y(m
reduce heat. Tile flame size on a gas
burner should match tile cookware um
are using.
Any flame laxger than tile bottom of tile
cookware is wasted and only serves to
heat the handle.
Before Lighting a Gas Burner
_: Make sure all grates on tile c()()ktop
are in place before using any bm'ne_;
_: Only surface burners may be used
on tile right side.
After Lighting a GasBurner
::Ji::Do not operate tile burner fin" an
extended period of time without
cookware on tile grate. Tile finish
on tile gram may chip without
c(_okware to absorb tile heat.
::Ji::Check to be sure tile burner vou turn
on is the one yell want to rise.
Be sure tile burnex_ and grates are
cool before you place yore" hand,
a pot holder, cleaning cloths or
8
other materials on them.
::Ji::When t_Ting to simmer delicate
toods, use the right side of the unit
fi)r best results, The LO setting on
the left side is hotter to accommodate
the grill module, If wm find that the
LOsetting is too hot, you can a_!just
the wdve. See tile Troubleshooting Tips
section.
::Ji::Do not allow large pans to extend
over tile control knobs. Heat trapped
between large pans and control
knobs c(mld cause possible damage
to tile control knobs.
Usingyourcooktop, ge.com
Wok This Way
Do not rise a I'lat-bottollled wok on a
support ring. Placing tile ring over tile
btlrner or grote I/lag Catlse tile btlrner to
work improped 5 resulting in carbon
monoxide levels above allowable cmTent
standards. This could be dangerous to
your health.
Use a flat-bottomed wok.
Werecommendthat youusea flat-bottomed
wok,availableat yourlocal retail store.
(-)nlv a fiat-bottomed wok should be used.
Do not use a fiat-bottomed wok with a
wok holder:
Cookware
Uselargediametercookwareonrear
burners.
Aluminum: Medium-weight cookware is
recommended because it heats quickly
and evenh'. Most fi)ods brown evenly
in an ahnninunl skillet. Use saucepans
with tight fitting lids when cooking
with IIlinilIltllIl alilOtlnts of wateI:
Enamelware:Under some conditions,
tile enai//el of SOille cookware ill}iV
melt. Follow cookware mamdactm'er's
recommendations fi)r cooking methods.
Glass: There are two t},pes (ff glass
cookware: those for oven IlSe only
and those fi)r cooktop cooking
(saucepans, coffee and teapots).
Glass conducts heat ;'err slowly:
Usingthe downdraftventsystem.
Cast Iron: If heated slowly, n/ost
skillets will give satisfi_ctox_' results.
HeatproofGlass-Ceramic: Can be used
tor either stlrfllce or oven cooking.
It (ondtl(ts heat very sh)wly and cools
ve_' slowly. Check cookware
nlanufilcturer's directions m be sure
it can be used on a gas cooktop.
Stainless Steel'.This metal alone has
poor heating properties and is usually
combined with coppe_; ahmfinum
or other metals fi)r improved heat
distribution. Combination metal skillets
usually work safisfi_ctorilv if thev are used
with medimn heat as tile manttfilcttlrer
recoi/lillends.
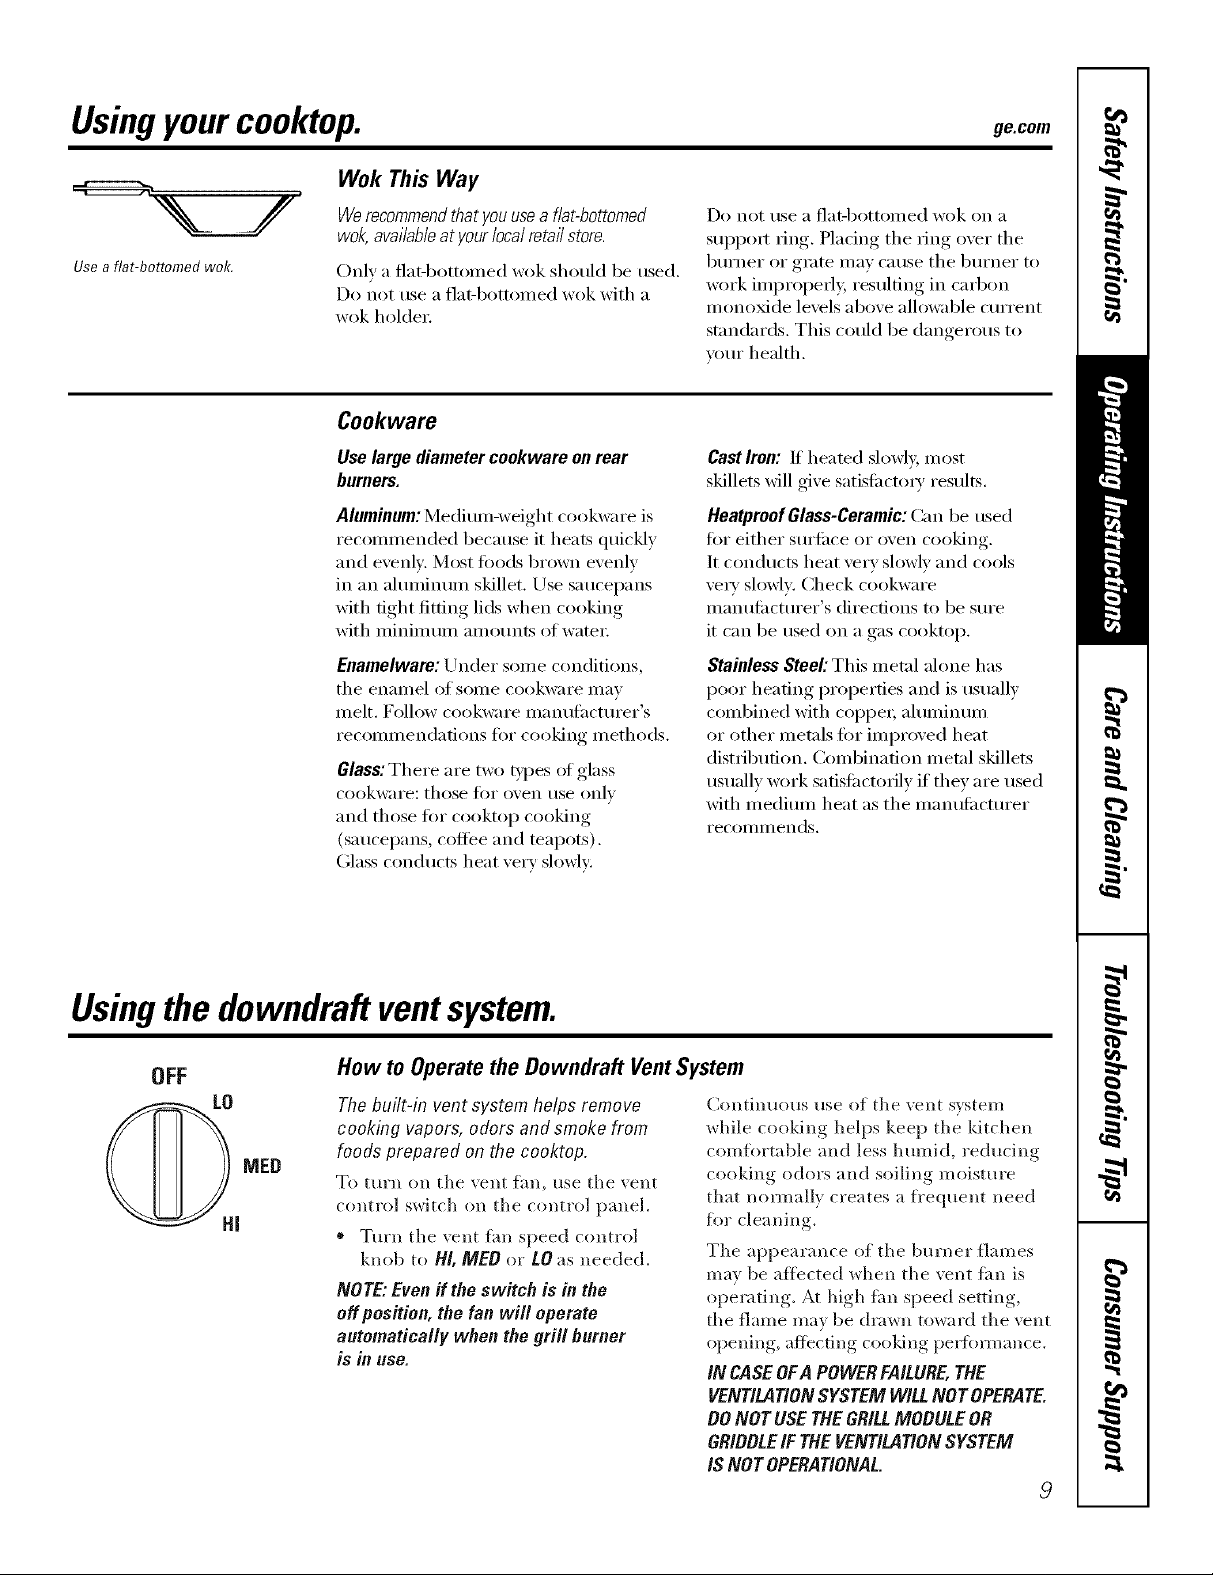
OFF
LO
_H MEB
I
How to Operate the Downdraft VentSystem
The built-in vent system helps remove
cooking vapors, odors and smoke from
foods prepared on the cooktop.
To turn on tile vent tim, use tile vent
control switch on tile control panel.
* Turn tile vent tim speed control
knob to HI, MED or tO as needed.
NOTE: Even if the switch is in the
off position, the fan will operate
automatically when the grill burner
is in use.
Continuous use of tile vent system
while cooking helps keel:) tile kitchen
comfl)rtable and less humid, reducing
cooking odors and soiling moistme
that normally creates a fl'equent need
flw cleaning.
The appearance of tile burner flames
may be affected when tile vent tim is
operating. At high fhn speed setting,
tile flame may be drawn toward the vent
opening, affecting cooking pe_fimnance.
IN CASE OFA POWERFAILURE,THE
VENTILATIONSYSTEM WILL NOT OPERATE.
DO NOT USE THE GRILLMODULE OR
GRIDDLEIF THEVENTILATION SYSTEM
/S NOT OPERATIONAL.
9
Surfaceburnerandgrill modules.
Throughout this manual, features and appearance may vary from your model.
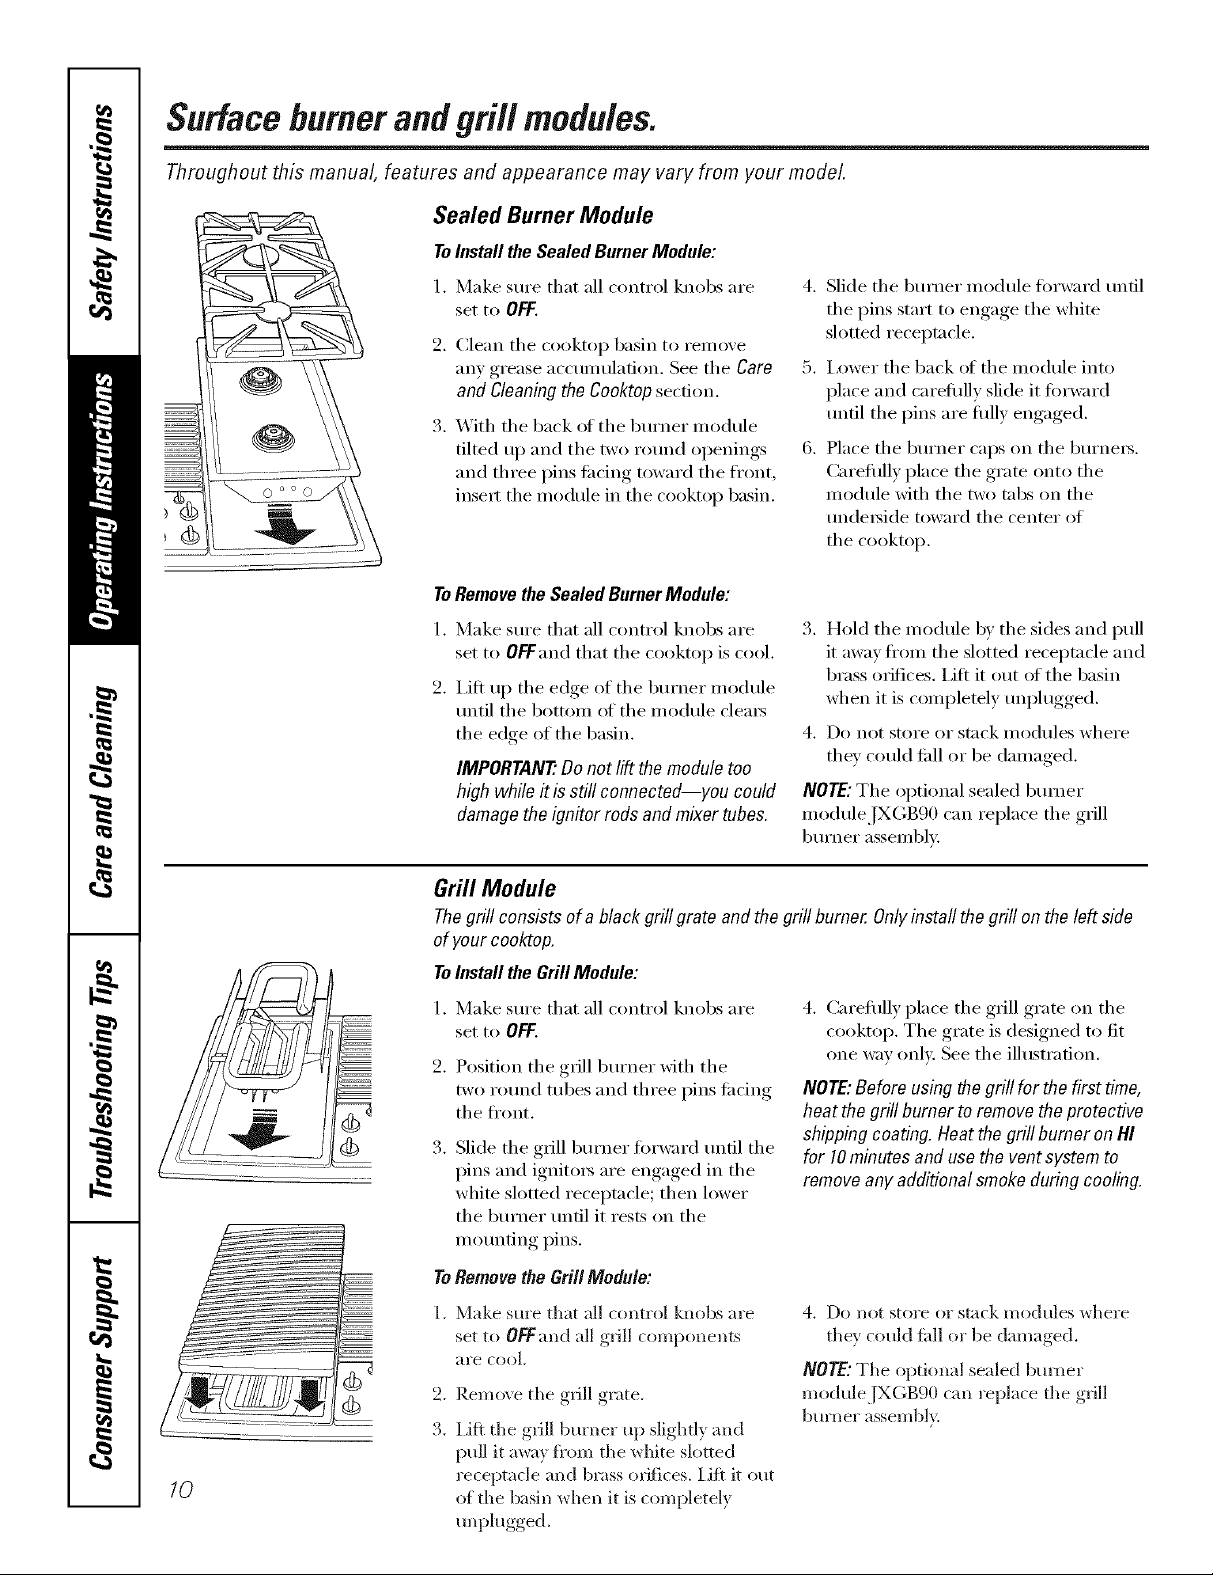
Sealed Burner Module
ToInstall the Sealed Burner Module:
1. Make sure that all control knobs are
set to OFF.
2. Clean tile cooktop basin to remove
any grease accunnllafion. See tile Care
and Cleaning the Cooktop secdon.
24.With tile back of tile btlFneI" illodtlle
tilted up and tile two ro/md openings
and th tee pins ti_cing t()wa rd the front,
inse_t tile module in tile cooktop basin.
ToRemove the Sealed Burner Module:
1.
Make sm'e that all control knobs are
set to OFFand that tile cooktop is cool.
2.
i,ifl up tile edge of tile bm'ner module
tmtil tile bottom of tile module clem_
tile edge of tile basin.
IMPORTANT. Do not lift the module too
high while it is still connected--you could
damage the ignitor rods and mixer tubes.
4. Slide tile bm'ner module forward tmfil
5. I,ower tile back of tile module into
6. Place tile burner caps on tile burne_.
3. Hold tile module by tile sides and pull
4. Do not store or stack modules where
NOTE: Tile optional sealed b/m_er
moduleJXGB90 can replace tile grill
burner assembly:
the pins start to engage the white
slotted receptacle,
place and carefiflly slide it fin'ward
tmtil tile pins are flflly engaged.
Careflflly place tile grate onto tile
module with tile two tabs on tile
trade,side toward tile center of
tile cooktop.
it away fl'om tile slotted receptacle and
brass orifices. Lift it ()tit of tile basin
when it is completely m_plugged.
they could edl or be dalnaged.
10
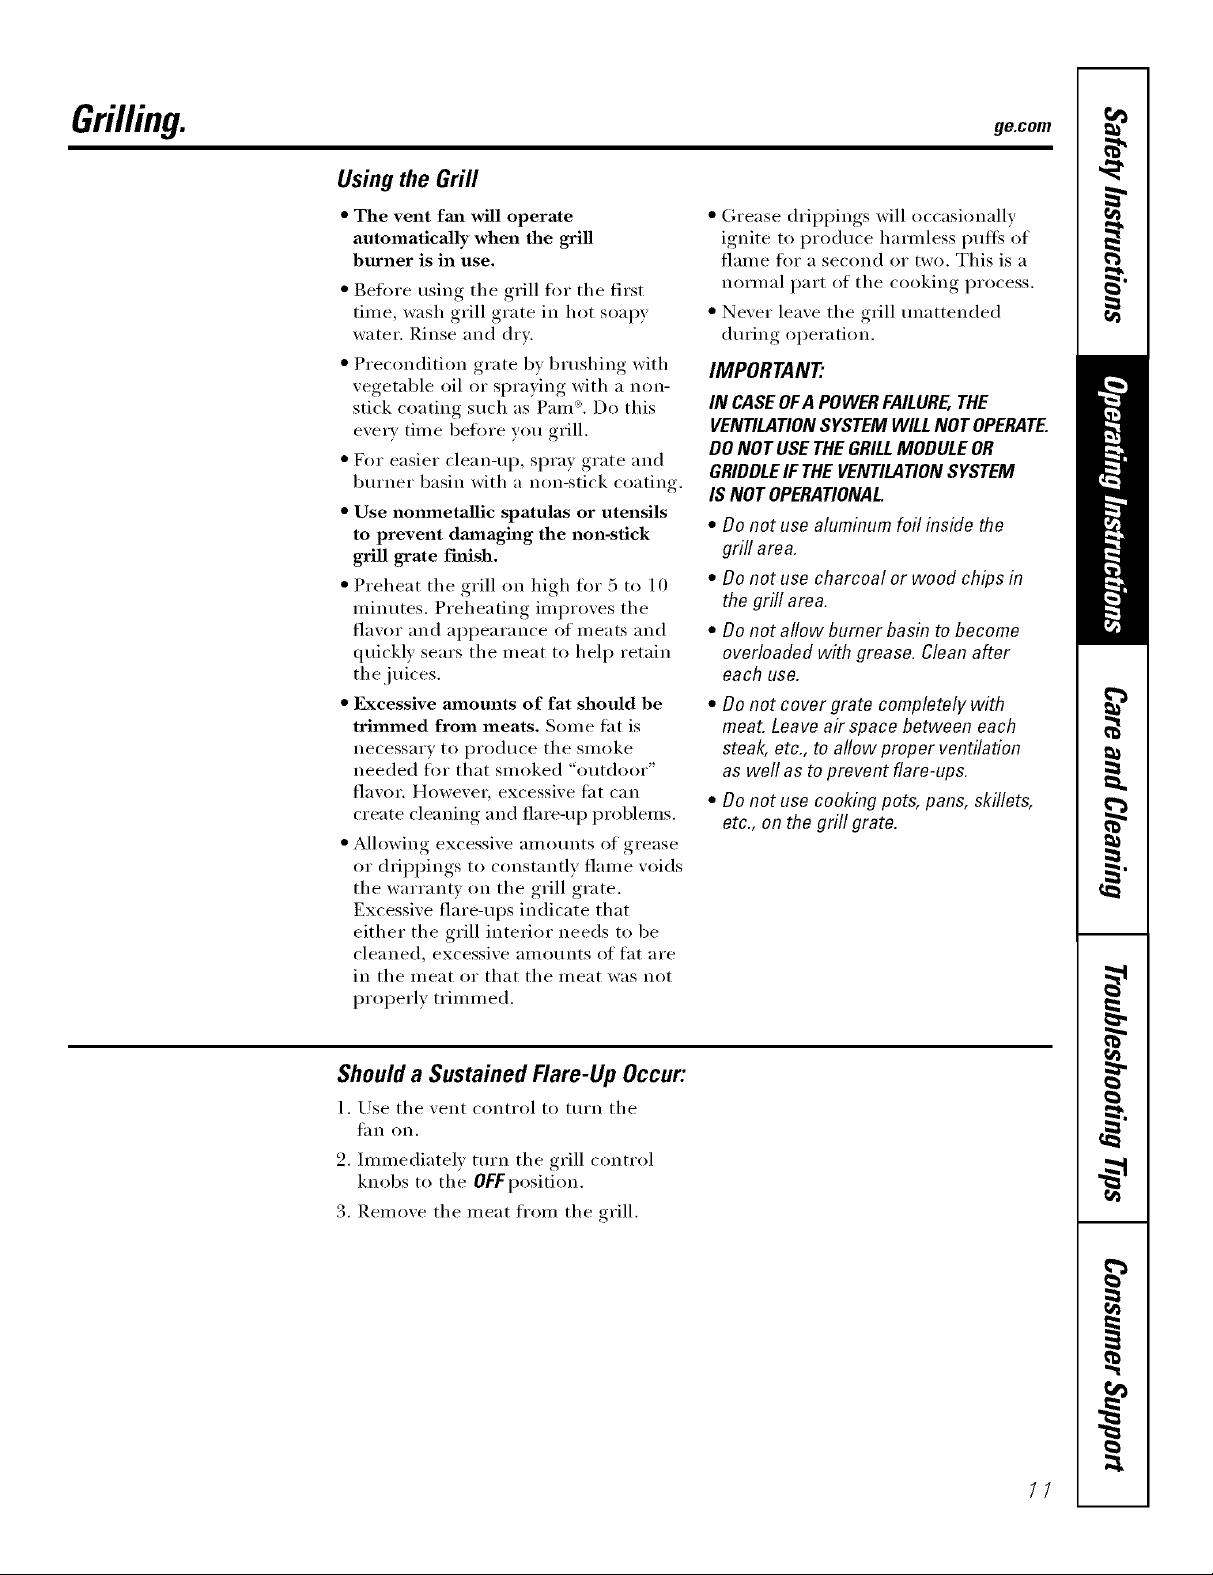
Grill Module
Thegrill consists of a black grill grate and the grill burner. Only install the grill on the left side
of your cooktop.
ToInstall the Grill Module:
Make sm'e that all control knobs are
1.
set to OFF.
2.
Position tile grill burner Mth tile
two rotmd robes and three pins ti_cing
tile fl'ont.
3.
Slide tile grill bm'ner fin'ward tmfil tile
pins and ignito_s are engaged in tile
white slotted receptacle; then lower
tile burner tmtil it rests on tile
m otmting pins.
ToRemovethe GrillModule'.
Make sm'e that all control knobs are
set to OFFand all grill components
are cool
2.
Remo\e tile grill grate.
3.
I,ifl tile grill burner up slightly and
pull it away flora tile white slotted
receptacle and brass orifices. Lift it out
of the basin when it is completely
unplugged.
4. Careflllly place tile grill grate on tile
cooktop. Tile grate is designed to fit
one way only. See tile illustration.
NOTE:Before using the grill for thefirst time,
heatthegrill burnerto removetheprotective
shippingcoating.Heatthegrill burner on HI
for 10minutesanduse the ventsystemto
removeanyadditionalsmokeduringcooling.
4. Do not store or stack modules where
tile)' could iidl or be damaged.
NOTE:Tile optional sealed burner
moduleJXGg90 can replace tile grill
burner assembly.
Grilling. ge.com
Using the Grill
• The vent fm_ will operate
automatically when the grill
burner is in use.
• gefi)re using the grill fl_r the first
time, wash grill grate in hot soapy
water. Rinse and dry.
• Precondition grate by brushing with
vegetable oil or spraying with a non-
stick coating such as Pare ®.Do this
every time befl_re wm grill.
• D)r easier clean-up, spray grate and
bm'ner basin with a non-stick coating.
• Use nmmletallic spatulas or utensils
to prevent damaging the non-stick
grill grate finish.
• Preheat the grill on high tin" 5 to 10
minutes. Preheating improves tile
flavor and appearance of meats and
quickly sears the meat to help retain
the juices.
• F_xcessive amounts of fat should be
trimmed from meats. Some tat is
necessary to produce the smoke
needed tot that smoked "outdoor"
flavor. However; excessive tat can
create cleaning and flare-up problems.
• Allowing excessive amotmts of grease
or drippings to constantly flanle wilds
tile warranty on tile grill grate.
Excessive flare-ups indicate that
either the grill interior needs to be
cleaned, excessive }lIno/lnts of t;It aye
in tile meat or that tile meat was not
properly trimmed.
• Grease drippings will occasionally
ignite to produce hamfless i)ufls of
flame tiw a second or two. This is a
normal part of tile cooking process.
• Never leave the grill unattended
dm'ing operation.
IMPORTANT"
IN CASEOFA POWERFAILURE, THE
VENTILATIONSYSTEM WILL NOT OPERATE.
DO NOT USE THE GRILLMODULE OR
GRIDDLEIF THE VENTILATION SYSTEM
IS NOT OPERATIONAL
• Do not use aluminum foil inside the
grill area.
• Do not use charcoal or wood chips in
the grill area.
• Do not aflow burner basin to become
overloaded with grease. Clean after
each use.
• Do not cover grate completely with
meat. Leave air space between each
steak, etc., to allow proper ventilation
as well as to prevent flare-ups.
• Do not use cooking pots, pans, skillets,
etc., on the grill grate.
Should a Sustained Rare-Up Occur:
l. Use tile vent control to turn tile
t_lll on.
2. ]mmediatelv ttlrn tile grill control
knobs to tile OFFposition.
3. Remove tile meat fl'om tile grill.
1/
Gril/ing.
Grilling Tips
" _'_]th your grill, any food wmk'e
considered "at its best" when
prepared outdoo_ can now be
prepared indoors with less fllss and
great flaw_r.
• The tollowing suggestions are good
_ules to follow and will increase vom"
enjoyment of the equil)ment. Be sure
to tollow directions in this guide tot
using the grill.
• Suggested cooking times and control
settings are approximate due to
w_riations in meats. Experience will
quickly indicate cooking times as well
as which settings work best.
• For best results, buy top-grade meat.
Meat that is at least 3/h-inch thick
will grill better than thinner cuts.
• For the attractive "branded" look on
steaks, be sm'e the grill is preheated.
Allow one side of the meat to cook to
the desired aloneness, or tmtil the
juices appear on the top sm'tace,
before tm'ning. Tm'n steaks and
hambmge_ just once. Moving the
food ai'o/ind Catlses loss of juices.
* When basting meats or applying
sauces to foods, remember that
excessive alnounts wind up inside
your grill and do not improve the
food flaw_r. Apply sauces dttring the
last 15 to 90 minutes of cooking time
mfless the recipe specifies otherwise.
Sugar-based marinade (Jm" example,
barbecue sauce) will caramelize
on grill grate and will create a
cleaning chore.
* There am many meat marinades which
will hel I) tenderize less expensive cuts
of meat fi_r cooking on the grill.
" Certain fl_ods, such as poult_ T and
non-oily fish, may need solne extra
tat. Brush with oil or melted butter
occasionally while grilling.
" Use tongs with long handles or
spatulas tot turning meats. Do not
use fin'ks because these pierce the
meat, alh)wingjuices to be lost.
e To hel I) retain meat juices, salt after
turning meat or after cooking is
completed.
" Score the fiat on the edges of steaks
but do not cut into the meat to
prevent cmqing while cooking.
/2
 Loading...