

Page 1

JGP979
www.GEAppliances.com
8111P461-60 164D4290P328 49-80172-3 05-04 JR
Owner’s Manual
& Installation
Instructions
Cooktop
Safety Instructions . . . . .2–5
Operating Instructions
Controls . . . . . . . . . . . . . . 8, 9
Cookware . . . . . . . . . . . . . . 9
Electric Ignition . . . . . . . . . 8
Features . . . . . . . . . . . . . . . . 6
Grill Module . . . . . . . . .10–13
Other Accessories . . . . .7, 14
Surface Burner
Modules . . . . . . . . . . . 6, 8–10
Ventilation System . . . . . 6, 9
Care and Cleaning
Control Knobs and
Control Panel Seal . . . . . . 15
Grease Jar . . . . . . . . . . . . . 15
Griddle Accessory . . . . . . . 17
Grill Burner . . . . . . . . . . . . 16
Grill Cover . . . . . . . . . . . . . 16
Grill Grates . . . . . . . . . . . . 16
Igniters . . . . . . . . . . . . . . . .17
Porcelain Burner Basin . . 17
Porcelain Cooktop . . . . . . 15
Sealed Burner Modules . . 17
Stainless Steel Surfaces . . .15
Vent Grille and Filter . . . . 16
Installation Instructions
Ductwork . . . . . . . . . . .22–25
Electrical
Connection . . . . . . . . .21, 26
Gas Connection . . . . . .21, 22
Installing the
Cooktop . . . . . . . . . . . .21–26
Preparation . . . . . . . . .19, 20
Safety Instructions . . . . . . .18
Troubleshooting
Tips . . . . . . . . . . . . . . .27, 28
Consumer Support
Consumer Support . . . . . .32
Product Registration . .29, 30
Warranty . . . . . . . . . . . . . . .31
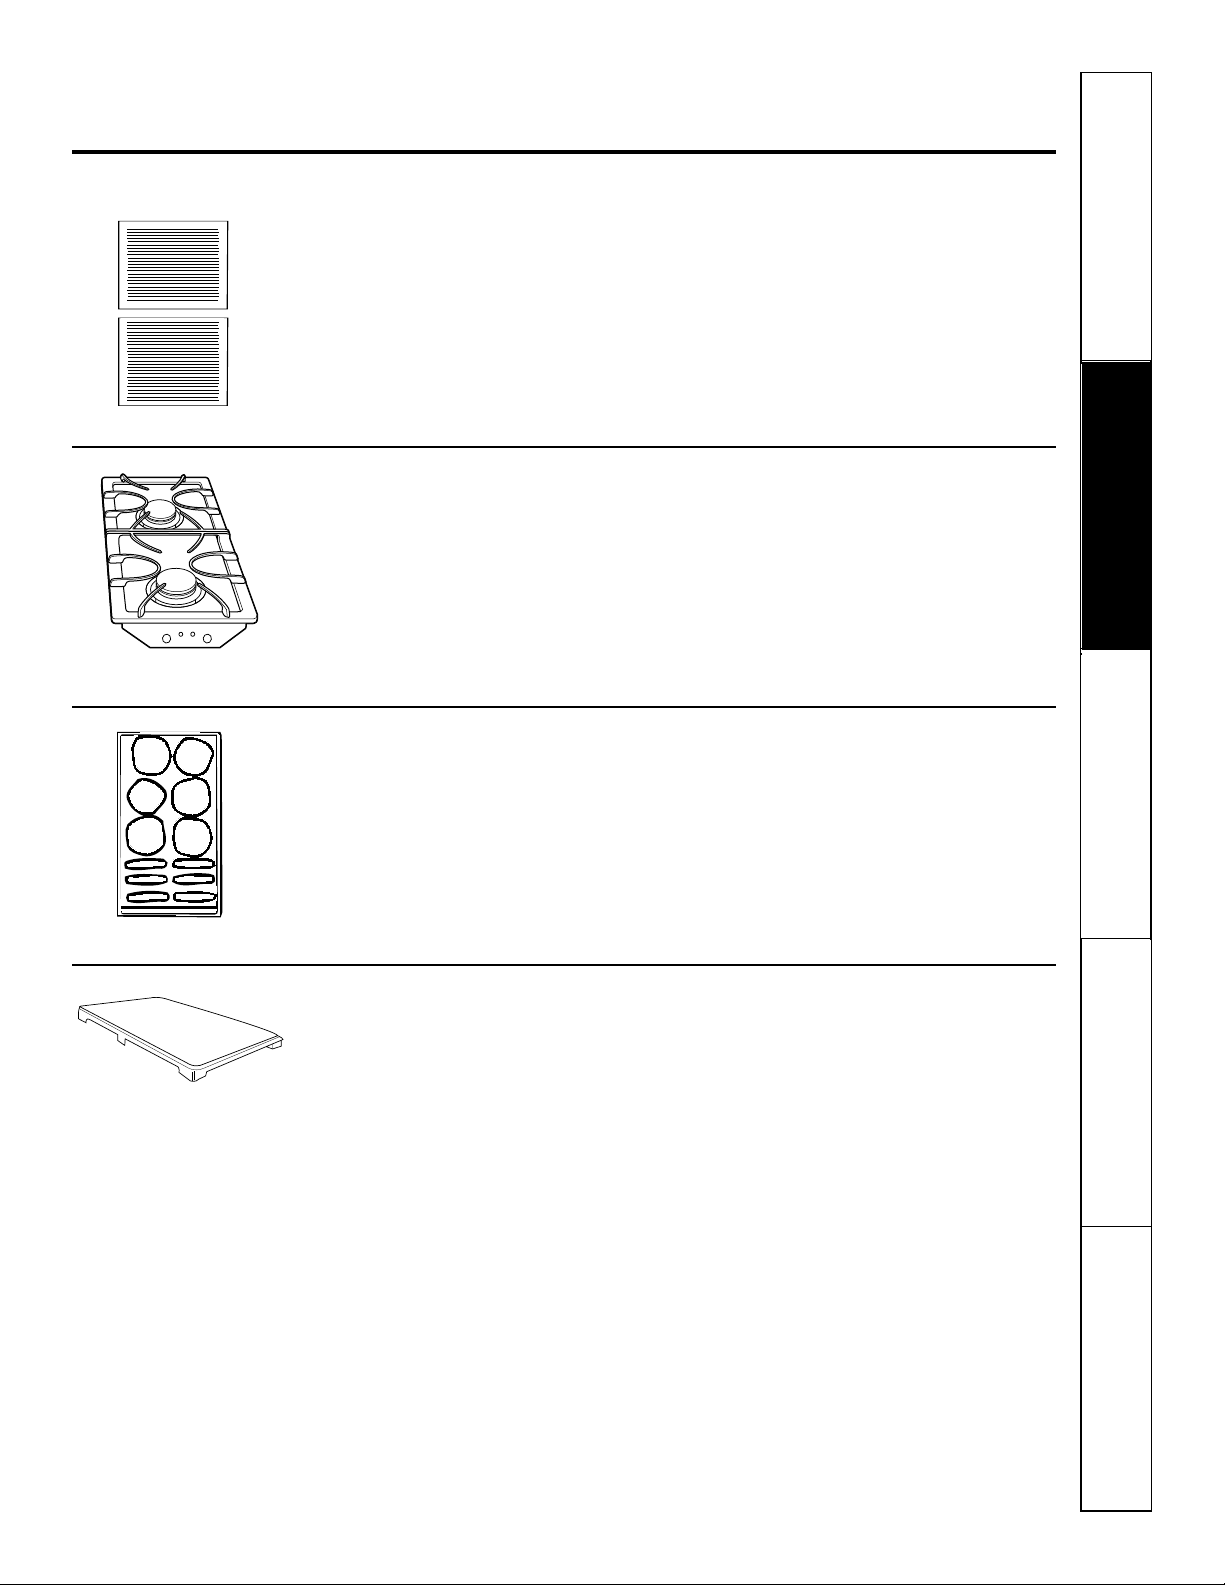
Gas Downdraft
Write the model and serial
numbers here:
Model # __________________
Serial #____________________
Find these numbers on a label
under the cooktop, on the side
of the vent chamber.
Page 2
2
IMPORTANT SAFETY INFORMATION.
READ ALL INSTRUCTIONS BEFORE USING.
Safety Instructions
Operating Instructions
Care and CleaningTroubleshooting TipsConsumer Support
— Do not store or use gasoline or other flammable
vapors and liquids in the vicinity of this or any
other appliance.
—
WHAT TO DO IF YOU SMELL GAS
■ Do not try to light any appliance.
■ Do not touch any electrical switch; do not use
any phone in your building.
■ Immediately call your gas supplier from a
neighbor’s phone. Follow the gas supplier’s
instructions.
■ If you cannot reach your gas supplier, call the
fire department.
— Installation and service must be performed by
a qualified installer, service agency or the gas
supplier.
WARNING: If the information in this manual
is not followed exactly, a fire or explosion may
result causing property damage, personal injury
or death.
WARNING!
For your safety, the information in this manual must be followed to minimize the risk of fire or
explosion, electric shock, or to prevent property damage, personal injury, or loss of life.
Page 3
Safety Instructions
Operating Instructions Care and Cleaning
Troubleshooting Tips Consumer Support
GEAppliances.com
IMPORTANT SAFETY NOTICE
The California Safe Drinking Water and Toxic Enforcement Act requires the Governor of California to
publish a list of substances known to the state to cause cancer, birth defects or other reproductive
harm, and requires businesses to warn customers of potential exposure to such substances.
Gas appliances can cause minor exposure to four of these substances, namely benzene, carbon
monoxide, formaldehyde and soot, caused primarily by the incomplete combustion of natural gas.
Properly adjusted burners, indicated by a bluish rather than a yellow flame, will minimize incomplete
combustion. Exposure to these substances can be minimized by venting with an open window or
using a ventilation fan or hood.
Have the installer show you the location of the cooktop gas shutoff valve and how to shut it off
if necessary.
■ Have your cooktop installed and properly
grounded by a qualified installer, in accordance
with the Installation Instructions. Any
adjustment and service should be performed
only by qualified gas cooktop installers or
service technicians.
■ IMPORTANT: This product is for use with
natural gas only. It is NOT convertible for
use with LP gas.
■ Do not attempt to repair or replace any
part of your cooktop unless it is specifically
recommended in this manual. All other service
should be referred to a qualified technician.
■ Locate the cooktop out of kitchen traffic path
and out of drafty locations to prevent poor
burner performance.
■ Plug your cooktop into a 120-volt grounded
outlet only. Do not remove the round
grounding prong from the plug. If in
doubt about the grounding of the home
electrical system, it is your personal
responsibility and obligation to have an
ungrounded outlet replaced with a properly
grounded, three-prong outlet in accordance
with the National Electrical Code. Do not use
an extension cord with this appliance.
■ Let the burner grates and other surfaces cool
before touching them or leaving them where
children can reach them.
■ Be sure all packaging materials are removed
from the cooktop before operating it to prevent
fire or smoke damage should the packaging
material ignite.
■ Be sure your cooktop is correctly adjusted by a
qualified service technician or installer.
■ Do not leave children alone or unattended
where a cooktop is hot or in operation. They
could be seriously burned.
■ Do not allow anyone to climb, stand or hang on
the cooktop.
■ CAUTION: Items of interest to children
should not be stored in cabinets above a
cooktop—children climbing on the cooktop
to reach items could be seriously injured.
■ Always keep wooden and plastic utensils
and canned food a safe distance away from your
cooktop.
■ Always keep combustible wall coverings,
curtains or drapes a safe distance from
your cooktop.
■ Never wear loose-fitting or hanging garments
while using the appliance. Be careful when
reaching for items stored in cabinets over the
cooktop. Flammable material could be ignited
if brought in contact with flame or hot surfaces
and may cause severe burns.
■ Teach children not to play with the controls or
any other part of the cooktop.
■ For your safety, never use your appliance
for warming or heating the room.
SAFETY PRECAUTIONS
3
Page 4
4
Safety Instructions
Operating Instructions
Care and CleaningTroubleshooting TipsConsumer Support
IMPORTANT SAFETY INFORMATION.
READ ALL INSTRUCTIONS BEFORE USING.
■ Always keep dish towels, dishcloths, pot
holders and other linens a safe distance
from your cooktop.
■ Do not store flammable materials near
a cooktop.
■ Do not store or use combustible materials,
gasoline or other flammable vapors and liquids
in the vicinity of this or any other appliance.
■ Do not let cooking grease or other flammable
materials accumulate on or near the cooktop.
■ Do not operate the burner without all burner
parts in place.
■ Do not place hot cookware on the glass
cooktop. This could cause glass to break.
■ Do not clean the cooktop with flammable or
volatile cleaning fluids.
■ Do not clean the cooktop when the appliance
is in use.
■ Avoid scratching the cooktop with sharp
instruments, or with rings and other jewelry.
■ Never use the cooktop as a cutting board.
■ Do not use water on grease fires. Never pick up
a flaming pan. Turn the controls off. Smother
a flaming pan on a surface burner by covering
the pan completely with a well-fitting lid,
cookie sheet or flat tray. Use a multipurpose
dry chemical or foam-type fire extinguisher.
■ Flaming grease outside a pan can be put out
by covering it with baking soda or, if available,
by using a multipurpose dry chemical or
foam-type fire extinguisher.
WARNING: To reduce the risk of fire,
electrical shock, or injury to persons, observe the
following:
A. Use this unit only in the manner intended
by the manufacturer. If you have questions,
contact the manufacturer.
B. Before servicing or cleaning the unit, switch
power off at service panel.
C. When cutting or drilling into wall or ceiling do
not damage electrical wiring and other hidden
utilities.
D. Ducted fans must always be vented to
the outdoors.
E. To reduce the risk of fire, use only metal
ductwork.
WARNING: To reduce the risk of a cooktop
grease fire:
A. Keep fan, filters and grease-laden surfaces
clean.
B. Always turn vent ON when cooking at
high heat.
C. Use high settings on cooktop only when
necessary. Heat oil slowly on low to medium
setting.
D. Don’t leave the cooktop unattended when
cooking.
E. Always use cookware and utensils appropriate
for the type and amount of food being
prepared.
CAUTION: For general ventilating use
only. Do not use to exhaust hazardous or explosive
materials and vapors.
SAFETY PRECAUTIONS
Cook meat and poultry thoroughly—meat to at least an INTERNAL temperature of 160°F and poultry to
at least an INTERNAL temperature of 180°F. Cooking to these temperatures usually protects against
foodborne illness.
COOK MEAT AND POULTRY THOROUGHLY…
Page 5
READ AND FOLLOW THIS SAFETY INFORMATION CAREFULLY.
SAVE THESE INSTRUCTIONS
■ Always use the LITE position when igniting the
top burners and make sure the burners have
ignited.
■ Never leave the surface burners unattended at
high flame settings. Boilovers cause smoking
and greasy spillovers that may catch on fire.
■ Use only dry pot holders—moist or damp pot
holders on hot surfaces may result in burns from
steam. Do not let pot holders come near open
flames when lifting cookware. Do not use a towel
or other bulky cloth in place of a pot holder.
Such cloths can catch fire on a hot burner.
■ When using glass cookware, make sure it is
designed for cooktop cooking.
■ To minimize the possibility of burns, ignition
of flammable materials and spillage, turn
cookware handles toward
the side or center of the cooktop without
extending over adjacent burners.
■ Always turn the surface burner controls off
before removing cookware.
■ Carefully watch foods being fried at a high
flame setting.
■ Always heat fat slowly and watch as it heats.
■ Do not leave any items on the cooktop. The hot
air from the vent may ignite flammable items
and will increase pressure in closed containers,
which may cause them to burst.
■ If a combination of oils or fats will be used in
frying, stir together before heating or as fats
melt slowly.
■ Do not use a wok on the cooking surface
if the wok has a round metal ring that is placed
over the burner grate to support the wok. This
ring acts as a heat trap, which may damage the
burner grate and burner head. Also, it may
cause the burner to work improperly. This may
cause a carbon monoxide level above that
allowed by current standards, resulting in a
health hazard.
■ Foods for frying should be as dry as possible.
Frost on frozen foods or moisture on fresh
foods can cause hot fat to bubble up and over
the sides of the pan.
■ Use the least possible amount of fat for effective
shallow or deep-fat frying. Filling the pan too
full of fat can cause spillovers when food is
added.
■ Use a deep fat thermometer whenever
possible to prevent overheating fat beyond
the smoking point.
■ Never try to move a pan of hot fat, especially a
deep fat fryer. Wait until the fat is cool.
■ When flaming foods, turn the fan off. The fan,
if operating, may spread the flames.
■ Do not leave plastic items on the cooktop—
they may melt if left too close to the vent.
■ Keep all plastics away from the surface burners.
■ If you smell gas, turn off the gas to the cooktop
and call a qualified service technician. Never
use an open flame to locate a leak.
■ To avoid the possibility of a burn, always be
certain that the controls for all burners are at
the off position and all grates are cool before
attempting to remove them.
■ Never clean the cooktop surface when it is hot.
Some cleaners produce noxious fumes and wet
cloths could cause steam burns if used on a hot
surface.
■ Never leave jars or cans of fat drippings on or
near your cooktop.
■ Do not use aluminum foil under burner grates.
Misuse could result in a fire hazard or damage
to the cooktop.
■ Do not cover or block the area around the
cooktop knobs. This area must be kept clear for
proper ventilation and burner performance.
■ Clean only parts listed in this Owner’s Manual.
Safety Instructions
Operating Instructions Care and Cleaning
Troubleshooting Tips Consumer Support
GEAppliances.com
5
Use proper pan size—avoid pans that are unstable or easily tipped. Select cookware having flat
bottoms large enough to cover burner grates. To avoid spillovers, make sure cookware is large
enough to contain the food properly. This will both save cleaning time and prevent hazardous
accumulations of food, since heavy spattering or spillovers left on cooktop can ignite. Use pans
with handles that can be easily grasped and remain cool.
WARNING!
SURFACE BURNERS
Page 6

6
Safety Instructions
Operating Instructions
Care and CleaningTroubleshooting TipsConsumer Support
Features of your cooktop.
Throughout this manual, features and appearance may vary from your model.
3
Feature Index
Grill Module
Vent (fan operates automatically when grill is in use)
Vent Filters (located below the vent grille)
Cast-Iron Burner Grates
Surface Burners
Surface Burner Controls
Vent Control
1
2
3
4
5
6
7
Page 7
Safety Instructions
Operating Instructions Care and Cleaning
Troubleshooting Tips Consumer Support
7
Cooktop accessories. GEAppliances.com
Throughout this manual, features and appearance may vary from your model.
Grill Model JXGG79
Consists of two black grill grates
and a grill burner.
Sealed Burner Module
Models JXGB79B (black) and JXGB79W (white)
The grill assembly can be removed
and a sealed burner module
installed.
NOTE: Optional surface burner module
(JXGB79) can replace the grill burner.
Burners supplied with cooktop and
optional module air shutters have
been adjusted for compatibility on
both sides.
Griddle Model JXGL89
Can be used only with the grill
module. Self-draining griddle
makes many favorite foods easier
to fix. Family-sized surface lets you
cook several pancakes, hamburgers
or grilled sandwiches at the same
time.
Grill Cover Model JXGC89
Attractive grill cover protects the
grill when not in use. Textured steel
with molded handles.
Page 8
8
Safety Instructions
Operating Instructions
Care and CleaningTroubleshooting TipsConsumer Support
Using the gas surface burners.
Throughout this manual, features and appearance may vary from your model.
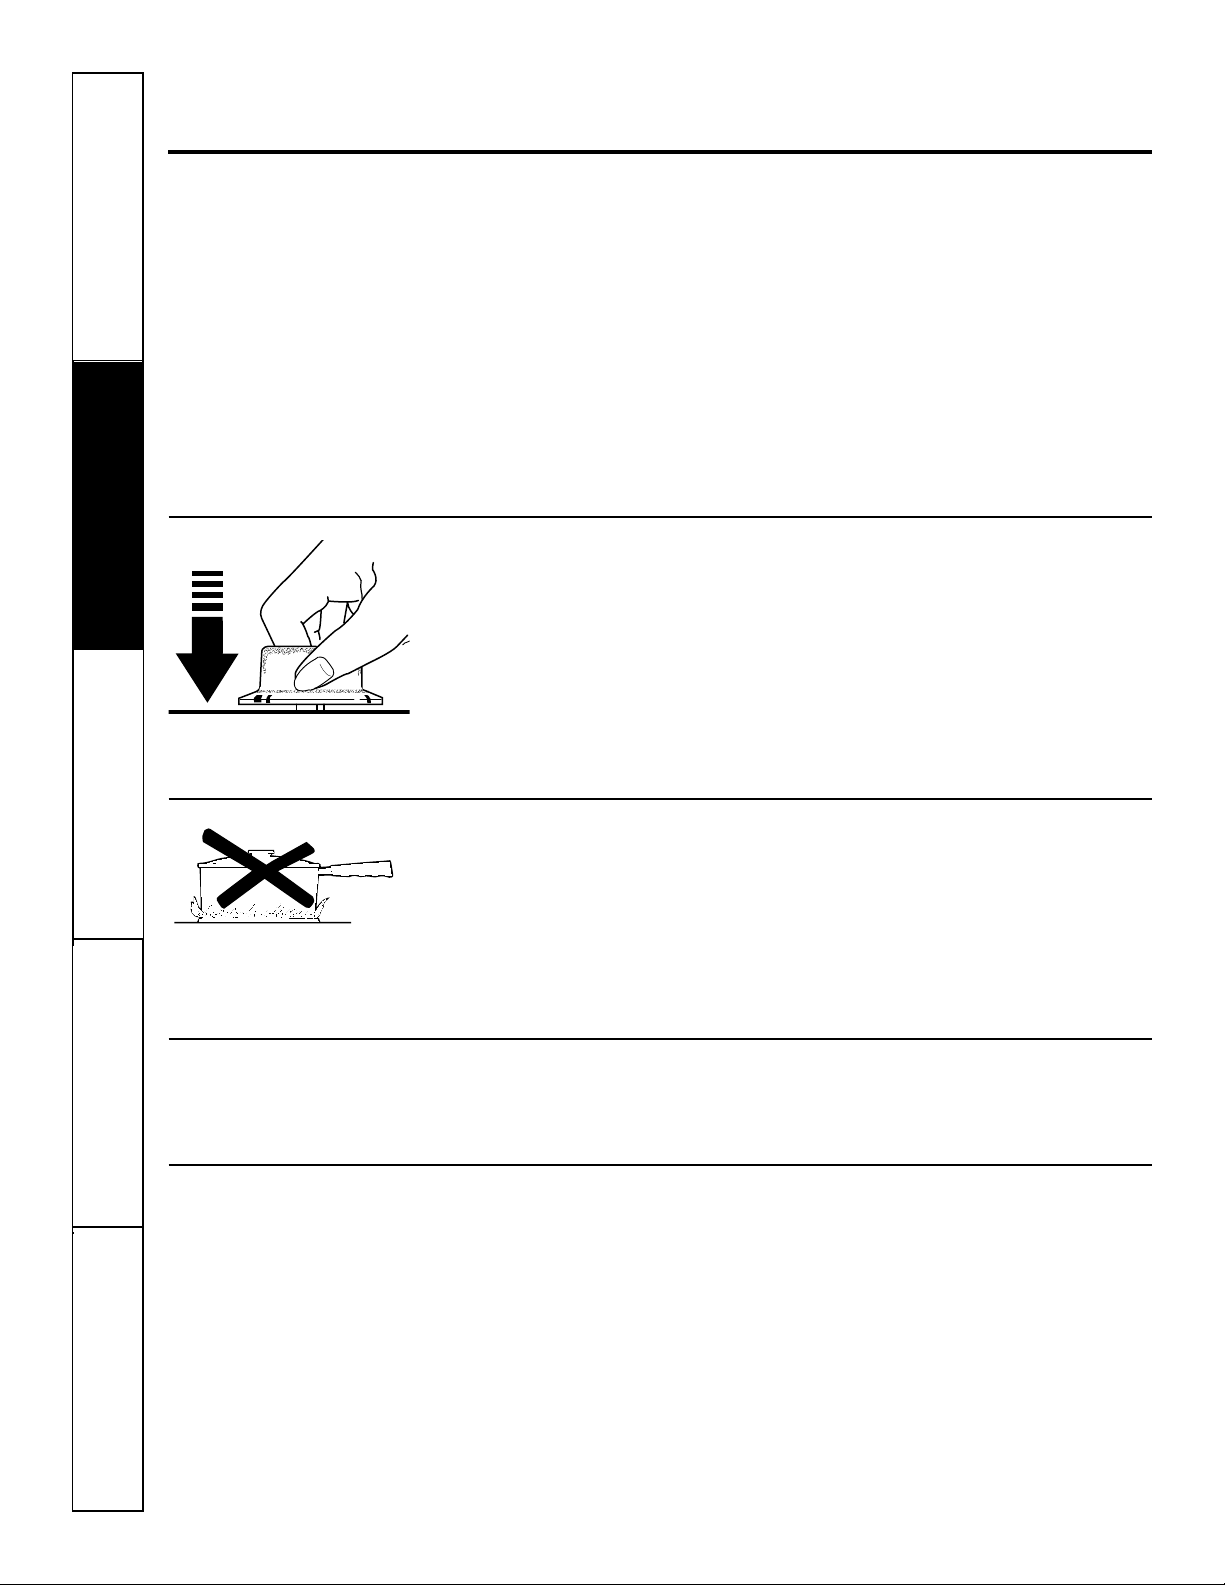
How to Light a Gas Surface Burner
Push the control knob down and turn it
to the LITE position.
You will hear a little clicking noise—the
sound of the electric spark igniting the
burner.
After the burner ignites, turn the knob to
adjust the flame size.
To turn a burner off, turn the knob
clockwise, as far as it will go, to the OFF
position.
If the flame is too low at the setting, the
valve can be adjusted. Refer to Flames too
high or too low at the LOW setting in the
Troubleshooting Tips section.
Push the control knob down and
turn it to the LITE position.
How to Select Flame Size
For safe handling of cookware, never let the
flames extend up the sides of the cookware.
Watch the flame, not the knob, as you
reduce heat. The flame size on a gas
burner should match the cookware you
are using.
Any flame larger than the bottom of the
cookware is wasted and only serves to
heat the handle.
Electric Ignition
Your surface burners are lit by electric
ignition, eliminating the need for
standing pilots with constantly burning
flames.
In case of a power outage, you can light
the surface burners on your cooktop
with a match. Hold a lit match to the
burner, then turn the control knob to
the high position. Use extreme caution
when lighting the burners this way.
Surface burners in use when an
electrical power failure occurs will
continue to operate normally.
IN CASE OF A POWER FAILURE, THE
VENTILATION SYSTEM WILL NOT OPERATE.
Before Lighting a Gas Burner
■ Make sure all grates on the cooktop
are in place before using any burner.
■ Only surface burners may be used
on the right side.
After Lighting a Gas Burner
■ Do not operate the burner for an
extended period of time without
cookware on the grate. The finish
on the grate may chip without
cookware to absorb the heat.
■ Check to be sure the burner you turn
on is one want you want to use.
■ Be sure the burners and grates are
cool before you place your hand,
a pot holder, cleaning cloths or
other materials on them.
■ When using the surface burners, if
you find that the LO setting is too hot
for delicate foods, you can adjust the
knob below the LO setting.
■ Do not allow large pans to extend
over the control knobs. Heat trapped
between large pans and control
knobs could cause possible damage
to the control knobs.
Page 9
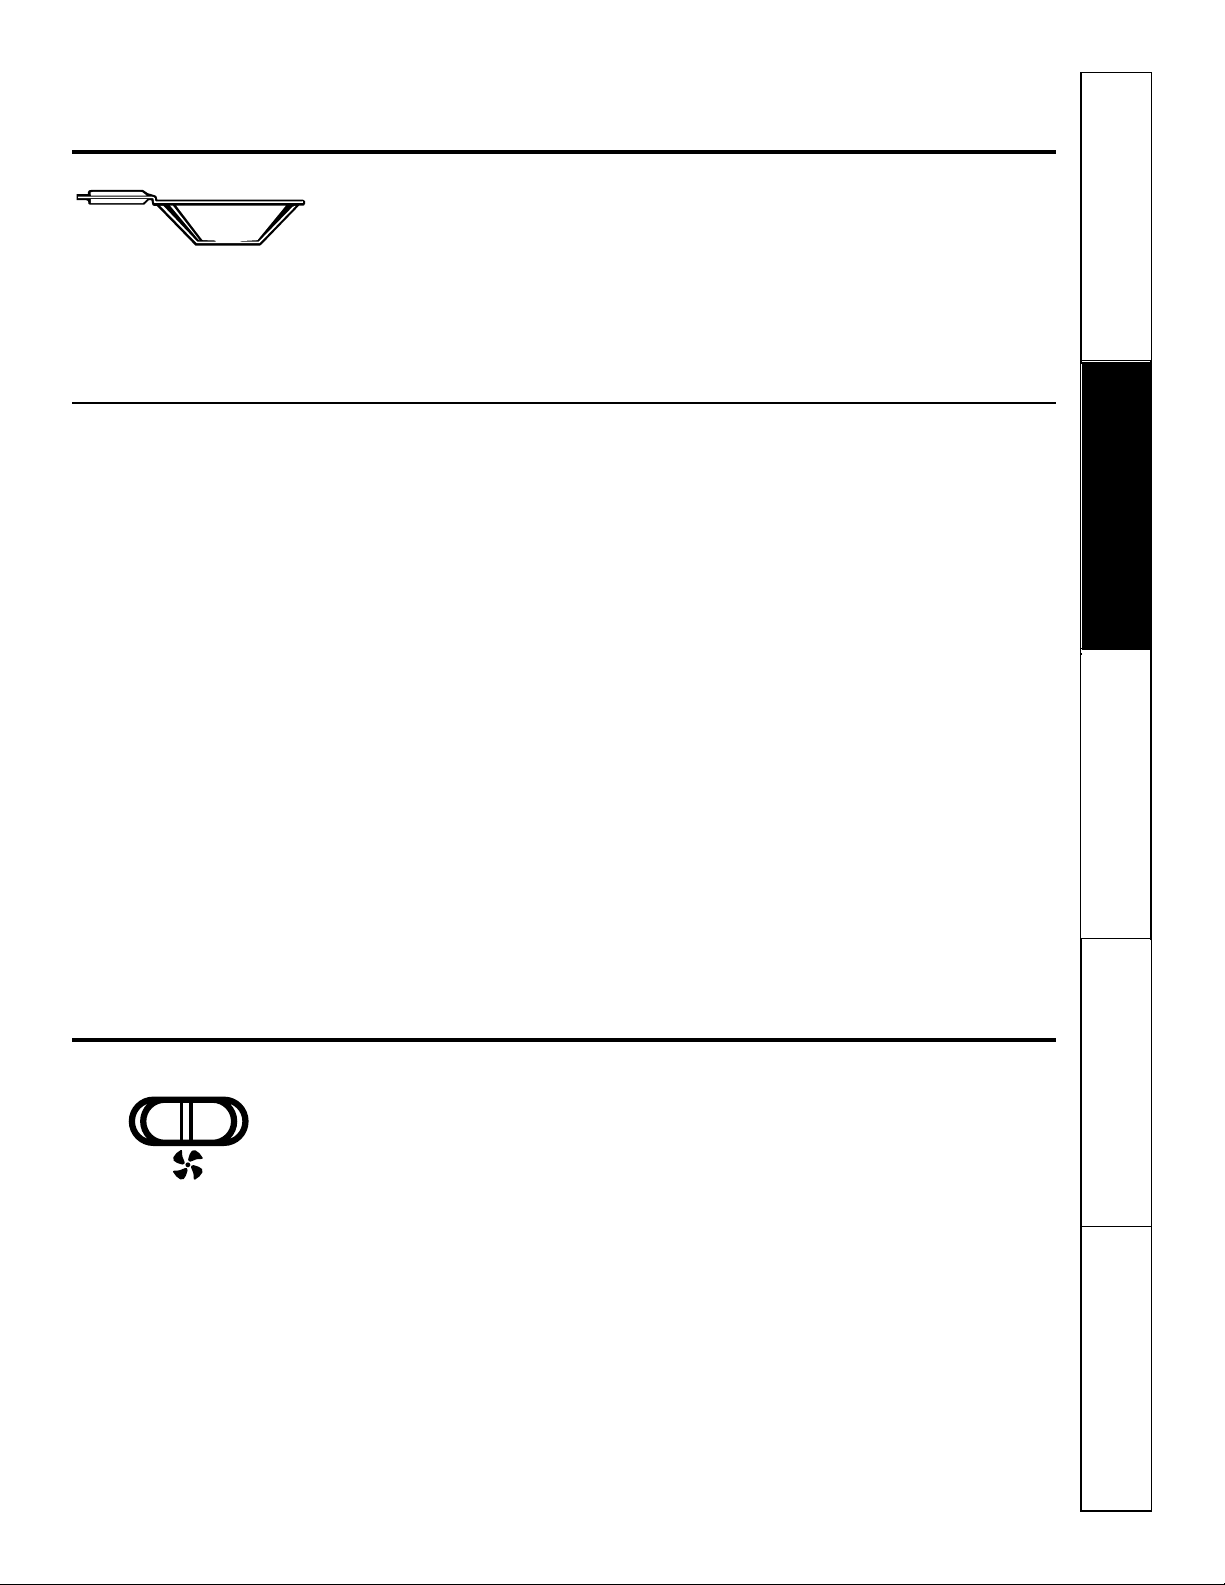
The built-in vent system helps remove
cooking vapors, odors and smoke from
foods prepared on the cooktop.
To turn on the vent fan, use the vent
control switch on the control panel.
• Press down on the left side of the
switch to turn the fan on.
• Press down on the right side of the
switch to turn the fan off.
NOTE: Even if the switch is in the
off position, the fan will operate
automatically when the grill burner
is in use.
Continuous use of the vent system
while cooking helps keep the kitchen
comfortable and less humid, reducing
cooking odors and soiling moisture
that normally creates a frequent need
for cleaning.
The appearance of the burner flames
may be affected when the vent fan is
operating.
IN CASE OF A POWER FAILURE, THE
VENTILATION SYSTEM WILL NOT OPERATE.
Safety Instructions
Operating Instructions Care and Cleaning
Troubleshooting Tips Consumer Support
9
OFF
ON
Wok This Way
We recommend that you use a flat-bottomed
wok, available at your local retail store.
Only a flat-bottomed wok should be used.
Do not use a flat-bottomed wok with a
wok holder.
Do not use a flat-bottomed wok on a
support ring. Placing the ring over the
burner or grate may cause the burner to
work improperly, resulting in carbon
monoxide levels above allowable current
standards. This could be dangerous to
your health.
Use a flat-bottomed wok.
Cookware
Use large diameter cookware on rear
burners.
Aluminum: Medium-weight cookware is
recommended because it heats quickly
and evenly. Most foods brown evenly in
an aluminum skillet. Use saucepans with
tight fitting lids when cooking with
minimum amounts of water.
Enamelware: Under some conditions,
the enamel of some cookware may
melt. Follow cookware manufacturer’s
recommendations for cooking methods.
Glass: There are two types of glass
cookware: those for oven use only
and those for cooktop cooking
(saucepans, coffee and teapots).
Glass conducts heat very slowly.
Cast Iron: If heated slowly, most
skillets will give satisfactory results.
Heatproof Glass-Ceramic: Can be used
for either surface or oven cooking.
It conducts heat very slowly and cools
very slowly. Check cookware
manufacturer’s directions to be sure it
can be used on a gas cooktop.
Stainless Steel: This metal alone has
poor heating properties and is usually
combined with copper, aluminum
or other metals for improved heat
distribution. Combination metal skillets
usually work satisfactorily if they are used
with medium heat as the manufacturer
recommends.
Using your cooktop. GEAppliances.com
How to Operate the Downdraft Vent System
Using the downdraft vent system.
Page 10
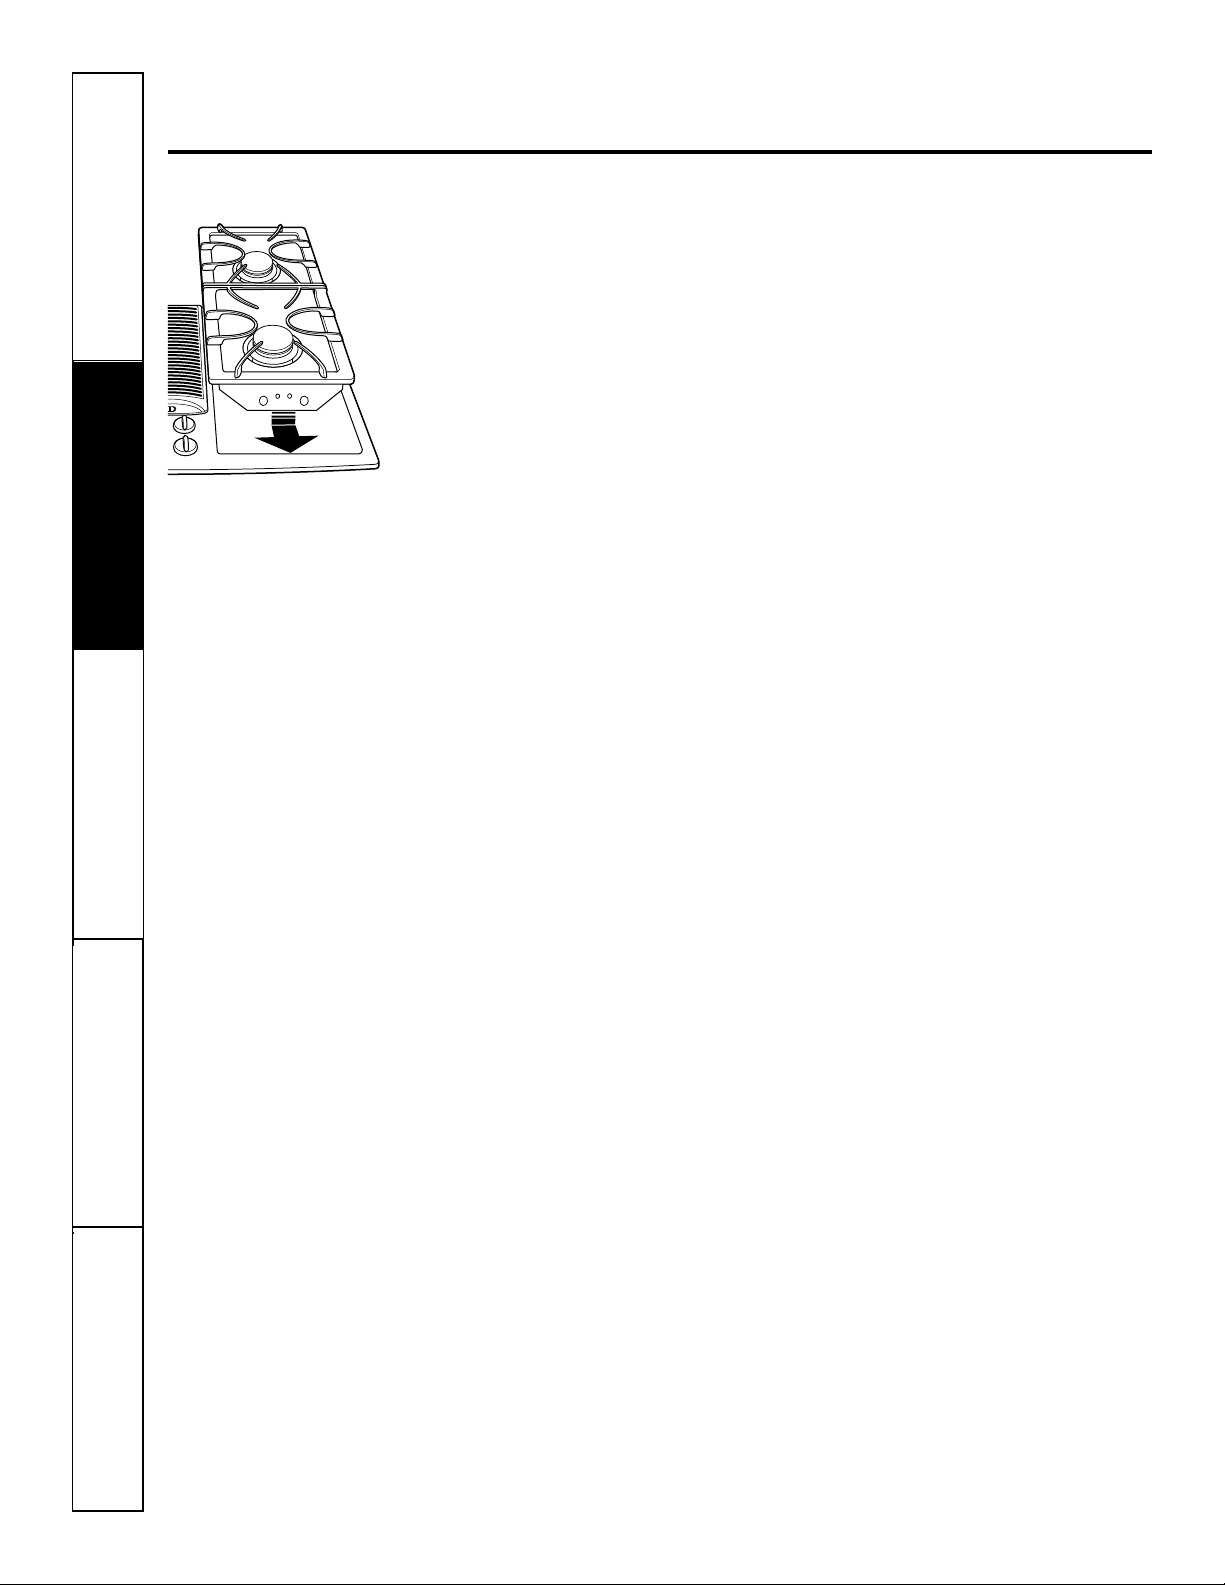
To Remove the Grill Module:
1. Make sure that all control knobs are
set to OFF and all grill components are
cool.
2. Remove the grill grates.
3. Lift the grill burner up slightly and
pull it away from the terminal
receptacle and orifices. Lift it out of
the basin when it is completely
unplugged.
4. Do not store or stack modules where
they could fall or be damaged.
NOTE: The optional sealed burner
module JXGB79 can replace the grill
burner assembly.
Surface burner and grill modules.
Throughout this manual, features and appearance may vary from your model.
Safety Instructions
Operating Instructions
Care and CleaningTroubleshooting TipsConsumer Support
10
Sealed Burner Module
To Install the Sealed Burner Module:
1. Make sure that all control knobs are
set to OFF.
2. Clean the cooktop basin to remove
any grease accumulation. See the Care
and Cleaning the Cooktop section.
3. With the back of the burner module
tilted up and the mixer tube openings
and ignitor rods facing the orifices
and terminal receptacle, insert the
module in the cooktop basin.
4. Slide the burner module forward until
the tubes and ignitors start to engage.
5. Lower the back of the module into
place and carefully slide it forward
until the mixer tubes and ignitor rods
are fully engaged.
To Remove the Sealed Burner Module:
1. Make sure that all control knobs are
set to OFF and that the cooktop is cool.
2. Lift up the edge of the burner module
until the bottom of the module clears
the edge of the basin.
IMPORTANT: Do not lift the module too
high while it is still connected—you could
damage the ignitor rods and mixer tubes.
3. Hold the module by the sides and pull
it away from the terminal receptacle
and orifices. Lift it out of the basin
when it is completely unplugged.
4. Do not store or stack modules where
they could fall or be damaged.
NOTE: The optional sealed burner
module JXGB79 can replace the grill
burner assembly.
Grill Module
To Install the Grill Module:
1. Make sure that all control knobs are
set to OFF.
2. Position the grill burner with the
mixer tubes and ignitor rod facing the
orifices and terminal receptacle.
3. Slide the grill burner forward until the
tubes and ignitors are engaged; then
Page 11
11
Safety Instructions
Operating Instructions Care and Cleaning
Troubleshooting Tips Consumer Support
Grilling. GEAppliances.com
Using the Grill
• The vent fan will operate
automatically when the grill
burner is in use.
• Before using the grill for the first
time, wash grill grates in hot soapy
water. Rinse and dry.
• Precondition grates by brushing with
vegetable oil or spraying with a nonstick coating such as Pam®. Do this
every time before you grill.
• For easier clean-up, spray grates and
burner basin with a non-stick coating.
• Use nonmetallic spatulas or utensils
to prevent damaging the non-stick
grill grate finish.
• Preheat the grill on high for 5 to 10
minutes. Preheating improves the
flavor and appearance of meats and
quickly sears the meat to help retain
the juices.
• Excessive amounts of fat should be
trimmed from meats. Some fat is
necessary to produce the smoke
needed for that smoked “outdoor”
flavor. However, excessive fat can
create cleaning and flare-up
problems.
• Allowing excessive amounts of grease
or drippings to constantly flame voids
the warranty on the grill grates.
Excessive flare-ups indicate that
either the grill interior needs to be
cleaned, excessive amounts of fat are
in the meat or that the meat was not
properly trimmed.
• Grease drippings will occasionally
ignite to produce harmless puffs of
flame for a second or two. This is a
normal part of the cooking process.
• Never leave the grill unattended
during operation.
IMPORTANT:
• Do not use aluminum foil inside the
grill area.
• Do not use charcoal or wood chips in
the grill area.
• Do not allow burner basin to become
overloaded with grease. Clean after
each use.
• Do not cover grates completely with
meat. Leave air space between each
steak, etc., to allow proper ventilation
as well as to prevent flare-ups.
Should a Sustained Flare-Up Occur:
1. Use the vent control to turn the
fan on.
2. Immediately turn the grill control
knobs to the OFF position.
3. Remove the meat from the grill.
Page 12
Grilling.
12
Safety Instructions
Operating Instructions
Care and CleaningTroubleshooting TipsConsumer Support
Grilling Tips
• With your grill, any food you’ve
considered “at its best” when
prepared outdoors can now be
prepared indoors with less fuss and
great flavor.
• The following suggestions are good
rules to follow and will increase your
enjoyment of the equipment. Be sure
to follow directions in this guide for
using the grill.
• Suggested cooking times and control
settings are approximate due to
variations in meats. Experience will
quickly indicate cooking times as well
as which settings work best.
• For best results, buy top-grade meat.
Meat that is at least 3/4-inch thick
will grill better than thinner cuts.
• For the attractive “branded” look on
steaks, be sure the grill is preheated.
Allow one side of the meat to cook to
the desired doneness, or until the
juices appear on the top surface,
before turning. Turn steaks and
hamburgers just once. Moving the
food around causes loss of juices.
• When basting meats or applying
sauces to foods, remember that
excessive amounts wind up inside
your grill and do not improve the
food flavor. Apply sauces during the
last 15 to 20 minutes of cooking time
unless the recipe specifies otherwise.
Sugar-based marinade (for example,
barbecue sauce) will caramelize
on grill grates and will create a
cleaning chore.
• There are many meat marinades which
will help tenderize less expensive cuts
of meat for cooking on the grill.
• Certain foods, such as poultry and
non-oily fish, may need some extra
fat. Brush with oil or melted butter
occasionally while grilling.
• Use tongs with long handles or
spatulas for turning meats. Do not
use forks because these pierce the
meat, allowing juices to be lost.
• To help retain meat juices, salt after
turning meat or after cooking is
completed.
• Score the fat on the edges of steaks
but do not cut into the meat to
prevent curling while cooking.
Page 13
Safety Instructions
Operating Instructions Care and Cleaning
Troubleshooting Tips Consumer Support
13
Grilling guide. GEAppliances.com
Preheat the grill on high for 5 to 10 minutes for best flavor.
Type Control Setting Cooking Time Procedure
Meat
Steak (1/2″–3/4″)
Rare HI 6 to 10 minutes Turn after 3 to 5 minutes.†
Medium HI 10 to 16 minutes Turn after 5 to 8 minutes.
Well HI 21 to 24 minutes Turn after 6 to 12 minutes.
Steak (1″–11⁄4″)
Rare HI 14 to 24 minutes Turn after 7 to 12 minutes.†
Medium HI 18 to 30 minutes Turn after 9 to 15 minutes.
Well HI 24 to 34 minutes Turn after 12 to 17 minutes.
Hamburgers (3–4 oz.) Medium 20 to 25 minutes Turn after half the time.
Pork chops Medium 20 to 30 minutes Turn occasionally.
Fully cooked smoked pork chops Medium 10 to 15 minutes Turn after half the time.
Ham slices Medium 15 to 20 minutes Turn after half the time.
Pork ribs Medium 50 to 65 minutes Turn occasionally. Brush
with barbecue sauce during
the last 15 minutes.
Fully cooked sausages
Hot dogs, brats HI 7 to 12 minutes Turn occasionally.
Polish HI 13 to 16 minutes Turn occasionally.
Fresh sausages
Links Medium 15 to 25 minutes Turn occasionally.
Patties (3″ diameter) Medium 15 to 20 minutes Turn after half the time.
Italian sausage Medium 25 to 30 minutes Pierce casing with a fork.
Turn once.
Lamb chops Medium 20 to 30 minutes
Turn occasionally. Brush with
glaze, if desired.
Poultry
Chicken
Pieces: bone-in Medium 35 to 50 minutes Turn occasionally.
Boneless breasts Medium 25 to 35 minutes Turn occasionally.
Wings Medium 25 to 35 minutes Turn occasionally.
Cornish hen (halved) Medium 35 to 45 minutes Turn occasionally.
Fish
Small, whole (1″) Medium 15 to 20 minutes Brush with butter. Turn after
half the time.
Steaks (1″) Medium 20 to 25 minutes Brush with butter. Turn after
half the time.
Fillets—with skin on (1/2″) Medium 10 to 15 minutes Start skin side down. Brush
with butter. Turn after half
the time.
Shrimp (skewered) Medium 10 to 20 minutes Turn and brush with butter
or marinade frequently.
Bread
Garlic bread Medium 4 to 6 minutes Turn after half the time.
Hot dog or hamburger buns Medium 1 to 2 minutes Turn after half the time.
† The U. S. Department of Agriculture says
“Rare beef is popular, but you should know that cooking it to only 140°F means some
food poisoning organisms may survive.” (Source: Safe Food Book. Your Kitchen Guide. USDA Rev. June 1985.)
Page 14
Other accessories.
14
Safety Instructions
Operating Instructions
Care and CleaningTroubleshooting TipsConsumer Support
Grill Cover
The textured steel grill cover makes an
attractive cover for the grill section of the
cooktop when it is not in use.
To use the grill cover:
Remove the cover before heating the
grill. Since a heated grill cover would
not appear hot, this could cause
accidental burns should it be touched.
Heating the grill cover could also
damage the finish.
Do not place the grill cover over a
heated grill. Let the grill cool before
putting the cover in place.
Use the cover over the grill grates only.
Do not place the cover over the griddle
or surface burner grates.
IMPORTANT: Although the finish is very
durable, care should be taken to avoid
setting utensils or other items on the
surface that could cause scratches.
DO NOT set extremely hot containers on
the surface, including handles, since these
could mar or discolor the cover. It is an
attractive cover and proper care will keep
it that way.
Griddle Accessory
Using the griddle:
1. Before the first use, wash your new
griddle in hot soapy water, rinse and
dry. Then “condition” the surface by
wiping on a thin coating of cooking
oil or shortening. Remove excess oil
or shortening by wiping again with
another paper towel.
2. Insert grill burner. DO NOT use grill
grates.
3. Place griddle over grill burner so
that the drain holes are in front.
This will permit excess grease to be
collected in the grease container.
4. Preheat the griddle 5 to 10 minutes
at the specified setting as noted in
the Griddle Guide.
5. Use non-metallic spatulas or utensils
while cooking to prevent damaging
the finish.
Griddle Guide
NOTE: These are suggested guides for control settings and times. Factors such as low gas pressure may affect the
times and control settings which provide the best results. Preheat 5 to 10 minutes at specified setting.
Control Approximate Cooking Approximate Cooking
Food Item Setting Time First Side Time Second Side
Bacon Medium 4–5 minutes 3–4 minutes
Buns HI 2–3 minutes
Eggs Medium 2–3 minutes 1 minute
Fish sticks (frozen) Medium 7–8 minutes 5–7 minutes
Ham slice Medium 6–7 minutes 5–6 minutes
Hamburgers Medium 5–7 minutes 4–6 minutes
Hot dogs HI 5 minutes 5 minutes
French toast HI 2–4 minutes 2–3 minutes
Grilled cheese sandwiches HI 2–3 minutes 2–3 minutes
Pancakes HI 1–2 minutes 1–2 minutes
Sausage patties Medium 6–8 minutes 4–5 minutes
Page 15

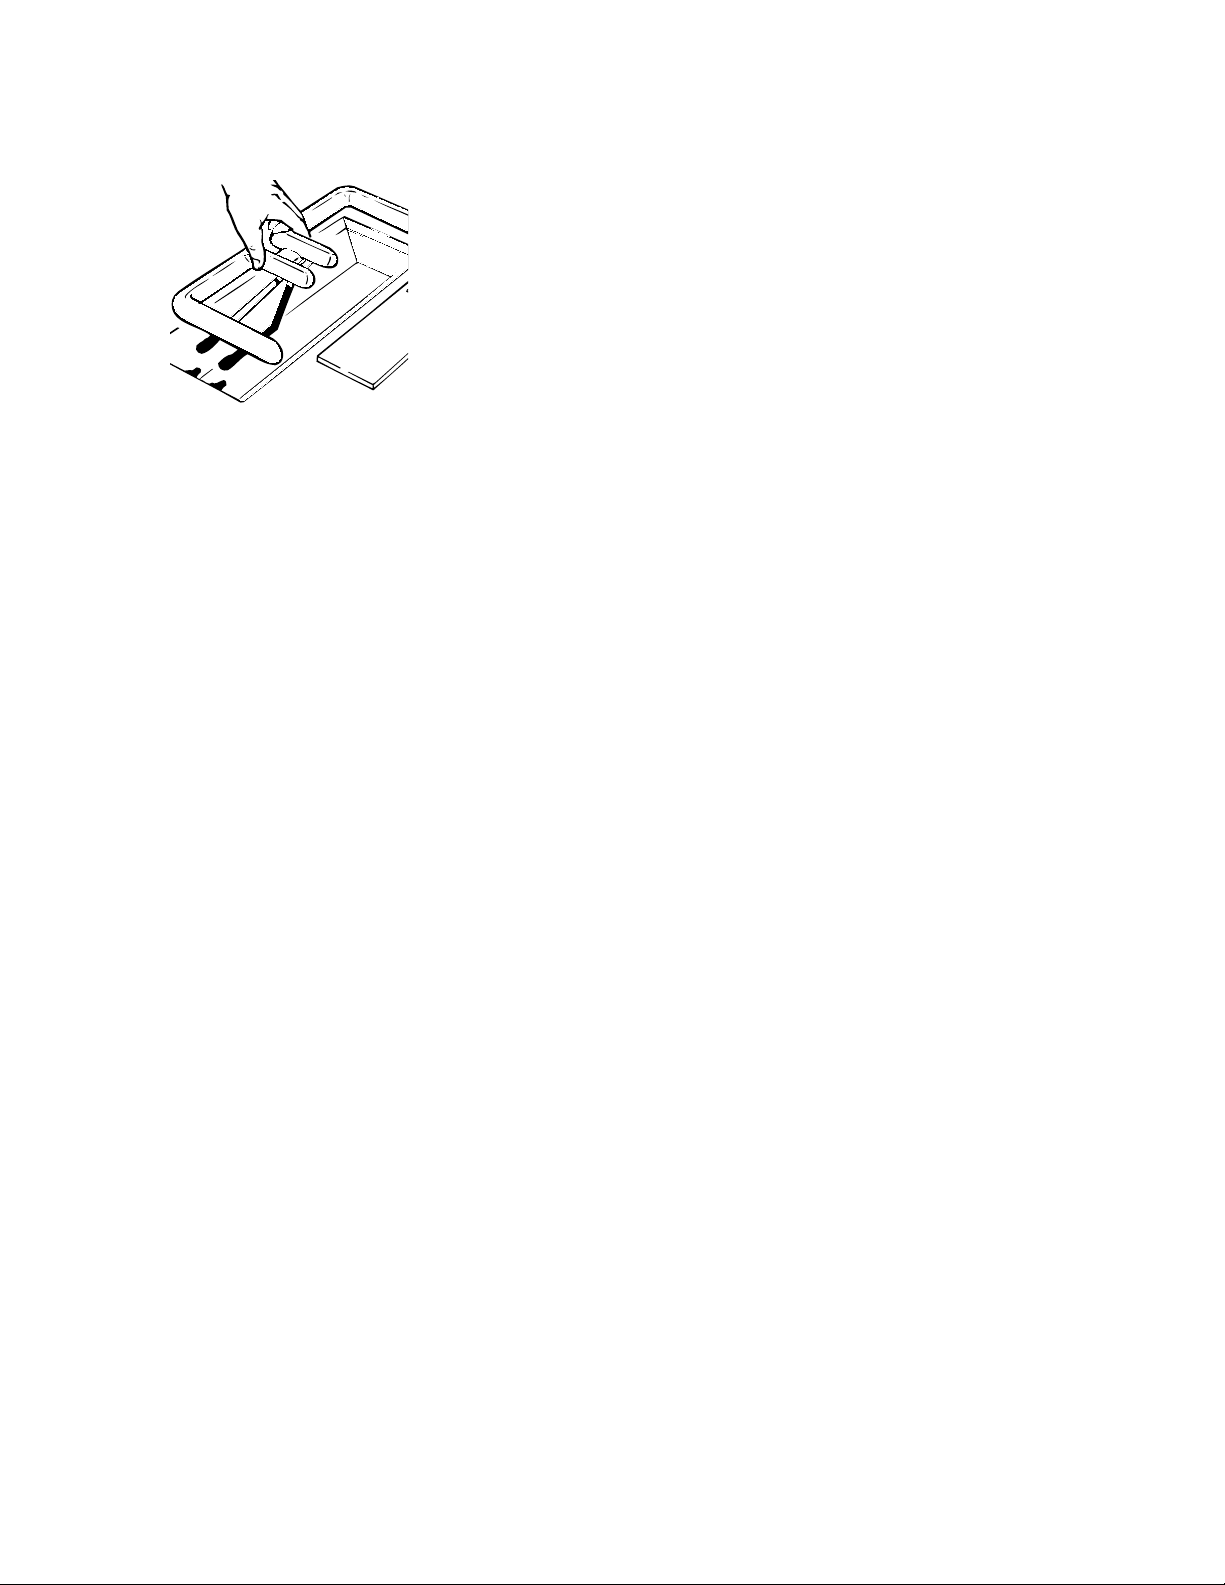
Control Knobs and Control Panel Seal
After grilling there may be soot on the
knobs and control panel seal. This soot
can be removed by scrubbing with a
plastic scrubber and mild dishwashing
detergent. The control knobs may
be removed for cleaning.
To remove a knob, pull it straight up.
Wash the knobs in soap and water but
do not soak. Avoid getting water down
into the knob stem holes.
Wipe with a sponge, damp cloth or
paper towel. Do not scrub with steel
wool pads or abrasive cleansers.
To replace a knob, match the flat part
of the knob opening with the flat side
of the shaft.
Care and cleaning of the cooktop. GEAppliances.com
Before Cleaning
Before cleaning any part of your
cooktop, be sure all controls are off
and DISCONNECT ELECTRICAL POWER
TO THE COOKTOP at the fuse box or
circuit breaker panel, or pull the
cooktop power plug, located beneath
the cooktop and inside the cabinets.
Do not operate the cooktop without all
parts in place.
Grease Jar
A grease jar is located below the grill
basin pan under the countertop. Check
periodically to prevent spillovers.
Unscrew and remove.
If the jar is broken, replace with any
heat tempered jar, such as a canning
jar, which has a standard screw neck.
Porcelain Cooktop
The porcelain enamel finish is sturdy
but breakable if misused. This finish is
acid-resistant. However, any acidic foods
spilled (such as fruit juices, tomato or
vinegar) should not be permitted to
remain on the finish.
If acids spill on the cooktop while it is
hot, use a dry paper towel to wipe it
up right away. When the surface has
cooled, wash with soap and water or
cleansing powders. Rinse well.
For other spills, such as fat spatterings,
wash with soap and water or cleansing
powders after the surface has cooled.
Rinse well. Polish with a dry cloth.
Stainless Steel Surfaces
Do not use a steel wool pad; it will scratch
the surface.
To clean the stainless steel surface, use
warm sudsy water, a stainless steel
cleaner such as Kleen King®, or an allpurpose liquid or spray cleaner. Always
wash in the direction of the grain. Rinse
thoroughly with a sponge or cloth and
clean water. Dry with a soft, clean cloth.
After cleaning, use a stainless steel
polish, such as Stainless Steel Magic
®
,
Revere Copper and Stainless Steel
Cleaner®or Wenol All Purpose Metal
Polish®. Follow the product instructions
for cleaning the stainless steel surface.
Safety Instructions
Operating Instructions Care and Cleaning
Troubleshooting Tips Consumer Support
15
Page 16
The grill burner should be cleaned after
each use. It can be cleaned with a non-
abrasive pad or in the dishwasher.
Rinse and dry thoroughly before using
again. For heavy soil, the burner
should be cleaned first with a soapy
steel wool pad, rinsed and dried. Then
it can be cleaned in a self-cleaning
oven for two hours.
NOTE: Check to be sure all burner ports
are open. To open clogged ports, insert
a twist tie directly into each port.
Grill Burner
Page 17
17
Safety Instructions
Operating Instructions Care and Cleaning
Troubleshooting Tips Consumer Support
Griddle Accessory
DO NOT immerse a hot griddle in
cold water.
Once the griddle has cooled, wash
with soap or detergent in hot water
in the sink. Be sure to remove all
food residue before cooking on
the griddle again.
Remove stubborn spots with a plastic
scouring pad. For best results, use only
those cleaning products which are
recommended for use when cleaning
non-stick surfaces. Do not use steel
wool or coarse scouring pads.
DO NOT wash in a dishwasher.
GEAppliances.com
Igniters
It is important to keep igniter port
openings on burners clear and free of
obstructions to avoid ignition failure
and possible gas buildup. If the port
openings are blocked, use a twist tie to
remove food particles.
Sealed Burner Modules
Cooktop surface:
To prevent the cooktop from
discoloring or staining:
• Clean the cooktop after each use.
• Wipe up acidic or sugary spills
as soon as the cooktop has cooled,
because these spills may discolor
the porcelain.
Sealed Burners:
The sealed burners of your cooktop are
secured to the cooktop module and are
not designed to be removed. Since the
burners are sealed into the module,
boilovers or spills will not seep
underneath the cooktop. However, the
burner heads should be cleaned after
each use.
Burner Grates:
The grates must be properly positioned
before cooking. Improper installation
of the grates may result in chipping of
the cooktop.
Do not operate burners without a pan on
the grate. The grate’s porcelain finish may
chip without a pan to absorb the heat
from the burner flame.
Although the burner grates are
durable, they will gradually lose their
shine and/or discolor, due to the high
temperatures of the gas flame.
Porcelain Burner Basin
This area is located under the grill and
surface burners and should be cleaned
after each use of the grill.
To remove light soil, clean with soapy
water or with a cleaner such as 409®.
For easier cleanup, soak paper towels
in a household cleanser, lay in the
burner basin and soak for at least a
half hour or longer.
To remove moderate soil, scrub
with Comet®, Bon Ami®, a soft
scrub cleanser or plastic scrubber.
To remove stubborn soil, spray with an
oven cleaner. Let soak overnight. Wipe
clean. Rinse and dry.
Page 18
IMPORTANT SAFETY
INSTRUCTIONS
The cooktop has been design-certified by CSA
International. As with any appliance using gas and
generating heat, there are certain safety precautions
you should follow. You’ll find these precautions in the
Important Safety Instuctions section in the front of this
Owner’s Manual. Read them carefully.
• Be sure your cooktop is installed properly by a qualified
installer or service technician.
• The cooktop must be electrically grounded in accordance
with local codes, or in their absence, with the National
Electrical Code ANSI/NFPA No. 70 – Latest Edition.
• Installation of this cooktop must conform with local
codes, or in the absence of local codes, with the National
Fuel Gas Code ANSI Z223.1 – Latest Edition.
• Improper installation, adjustment, alteration, service
or maintenance can cause injury or property damage.
Refer to this manual. For assistance or additional
information, consult a qualified installer, service agency,
manufacturer (dealer) or the gas supplier.
• Disconnect electrical supply before servicing.
• Never reuse old flexible connectors. The use of old
flexible connectors can cause gas leaks and personal
injury. Always use NEW flexible connectors when
installing a gas appliance.
• Make sure the wall coverings around the cooktop can
withstand heat generated by the cooktop up to 200°F.
• Avoid placing cabinets above the cooktop.
• If cabinets are placed above the cooktop, allow a
minimum clearance of 30″
between the cooking
surface and the bottom of protected cabinets.
• If a 30″ clearance between cooking surface and overhead
combustible material or metal cabinets cannot be
maintained, protect the underside of the cabinets above
the cooktop with not less than 1/4″ insulating millboard
or gypsum board at least 3/16″ thick covered with 28
gauge sheet steel or 0.020″ thick copper.
• Clearance between the cooking surface and protected
cabinets MUST NEVER BE LESS THAN 24.″ The
vertical distance from the plane of the cooking surface
to the bottom of adjacent overhead cabinets extending
closer than 2″ to the plane of the cooktop sides must not
be less than 18.″
FOR YOUR SAFETY
If You Smell Gas:
1. Open windows.
2. Don’t touch any electrical switches.
3. Extinguish any open flame.
4. Immediately call your gas supplier.
Do not store or use gasoline or other flammable vapors
and liquids in the vicinity of this or any other appliance.
Installation Gas Downdraft Cooktop
Instructions
If you have questions, call 800.GE.CARES (800.432.2737) or visit our Website at: GEAppliances.com
BEFORE YOU BEGIN
IMPORTANT NOTE: This product is for use with
natural gas only. It is NOT convertible for use with
LP gas.
Read these instructions completely and carefully.
•
IMPORTANT
–
Save these
instructions for local inspector’s use.
•
IMPORTANT
–
Observe all
governing codes and ordinances.
• Note to Installer – Be sure to leave these
instructions with the Consumer.
• Note to Consumer – Keep these instructions
for future reference.
• Proper installation is the responsibility of
the installer.
• Product failure due to improper installation is not
covered under the Warranty.
WARNING
–
Before beginning the
installation, switch power off at the service panel
and lock the service disconnecting means to prevent
power from being switched on accidentally. When
the service disconnecting means cannot be locked,
securely fasten a prominent warning device, such as
a tag, to the service panel.
In the Commonwealth of Massachusetts:
• This product must be installed by a licensed plumber
or gas fitter.
• When using ball-type gas shut-off valves, they shall be
the T-handle type.
• A flexible gas connector, when used, must not exceed
3 feet.
18
Page 19
PREPARING FOR INSTALLATION
19
Installation Instructions
TOOLS AND PARTS NEEDED
• Large flat-blade screwdriver
• Saw
• Carpenter’s square
• Pipe wrench
• 7/16″ open end wrench
• Gas line shut off valve
• Pipe joint sealant for use with gas connections
For flexible connection where local
codes permit:
• Flexible metal tubing (same 3/4″ or 1/2″ I.D. as
gas supply line)
• Flare union adapter for connection to supply line
(3/4″ NPT x 3/4″ I.D. or 1/2″ NPT x 1/2″ I.D.)
• Flare union adapter for connection to regulator
(1/2″ NPT x 3/4″ I.D. or 1/2″ I.D.)
For rigid connection:
• Pipe fittings as required
PARTS LIST
• Gas cooktop base unit
• Literature pack
• 1 Surface burner assembly
• 2 Surface burner grates
• 1 Vent filter
• 1 Vent grille
• 1 Grease jar
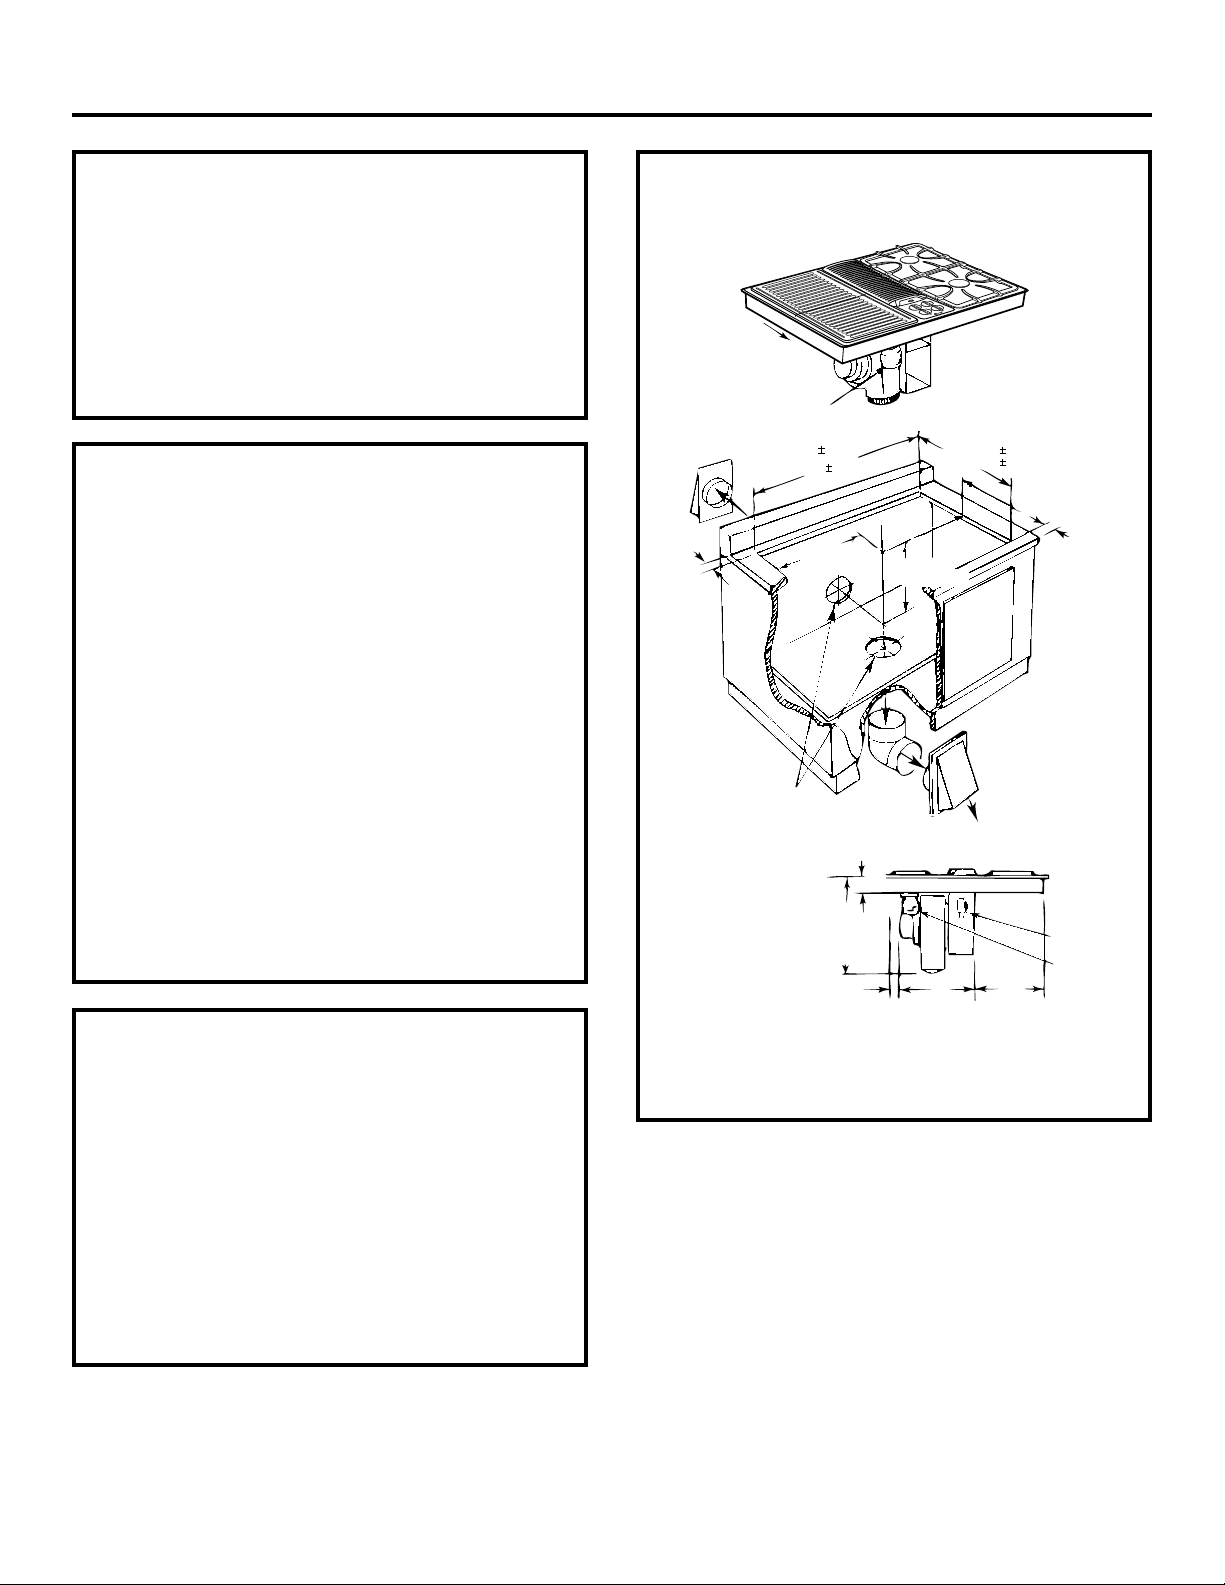
JGP979
Tie down bolt
on each end
Select appropriate
duct cutout. (See
ducting installation
instructions.)
Appliance
Pressure
Regulator
Grease
Container
Grease Container
Pressure Regulator
Wiring Box Cover
287⁄8″1⁄16″
*Blower can be
swiveled 90°
* Blower may be rotated for horizontal or vertical direction by loosening
nuts around blower inlet. Accessible inside ventilation chamber.
79⁄16″
15
5
⁄8″
3
5
⁄16″
11
7
⁄8″
9
3
⁄8″
17⁄8″ Min.
15
⁄16″
20
15
⁄16″1⁄16″
Minimum
Clearance
Minimum
Clearance
73.34 .16 cm
23.81 cm
2.38 cm
8.41 cm
39.69 cm
2″
30.16 cm
4.76 cm
19.21 cm
53.18 .16 cm
14″
35.56 cm
13″
33.02 cm
IMPORTANT
Motor Clearance—Provide 2″ min. (5.1 cm) cabinet
clearance to motor for cooling purpose.
NOTE: Where possible, 6″ (15.2 cm) is
recommended for motor/blower service.
Side Clearance—Grills installed near a side wall
should allow a minimum clearance of 8″ (20.3 cm).
You must allow room enough to remove and empty
grease container(s).
CAUTION: Warranty is void on equipment installed
other than as recommended by GE. Recommended
wall caps and transitions must be used for proper
operation and installation.
5.08 cm
Minimum
Clearance
Page 20
INSTALLING CABINETS OVER
YOUR COOKTOP
Avoid placing cabinets above the cooktop unit,
if possible, in order to reduce the hazards caused
by reaching over heated surface units.
If the cabinets are installed above the cooktop,
allow a minimum 30″ (76.2 cm) clearance
between the cooking surface and the bottom of
the cabinet.
A non-combustible material must be installed on
the under side of the cabinet. Use a flame retardant
millboard at least 1/4″ (6.3 mm) thick, or gypsum
board at least 3/16″ (4.7 mm) thick, covered with
28 gauge sheet steel or 0.020″ (.5 mm) thick
copper. The maximum depth of cabinets above
the cooktop is 13″ (33 cm).
EXCEPTION: Installation of a listed microwave
oven or cooking appliance over the cooktop shall
conform to the installation instructions packed
with that appliance.
Working areas adjacent to the cooktop should have
an 18″ (45.7 cm) minimum clearance between the
countertop and the bottom of the cabinet. If the
clearance is less than 18″ (45.7 cm), the adjacent
cabinets should be at least 8″ (20.3 cm) from the
side of the cooktop.
20
Installation Instructions
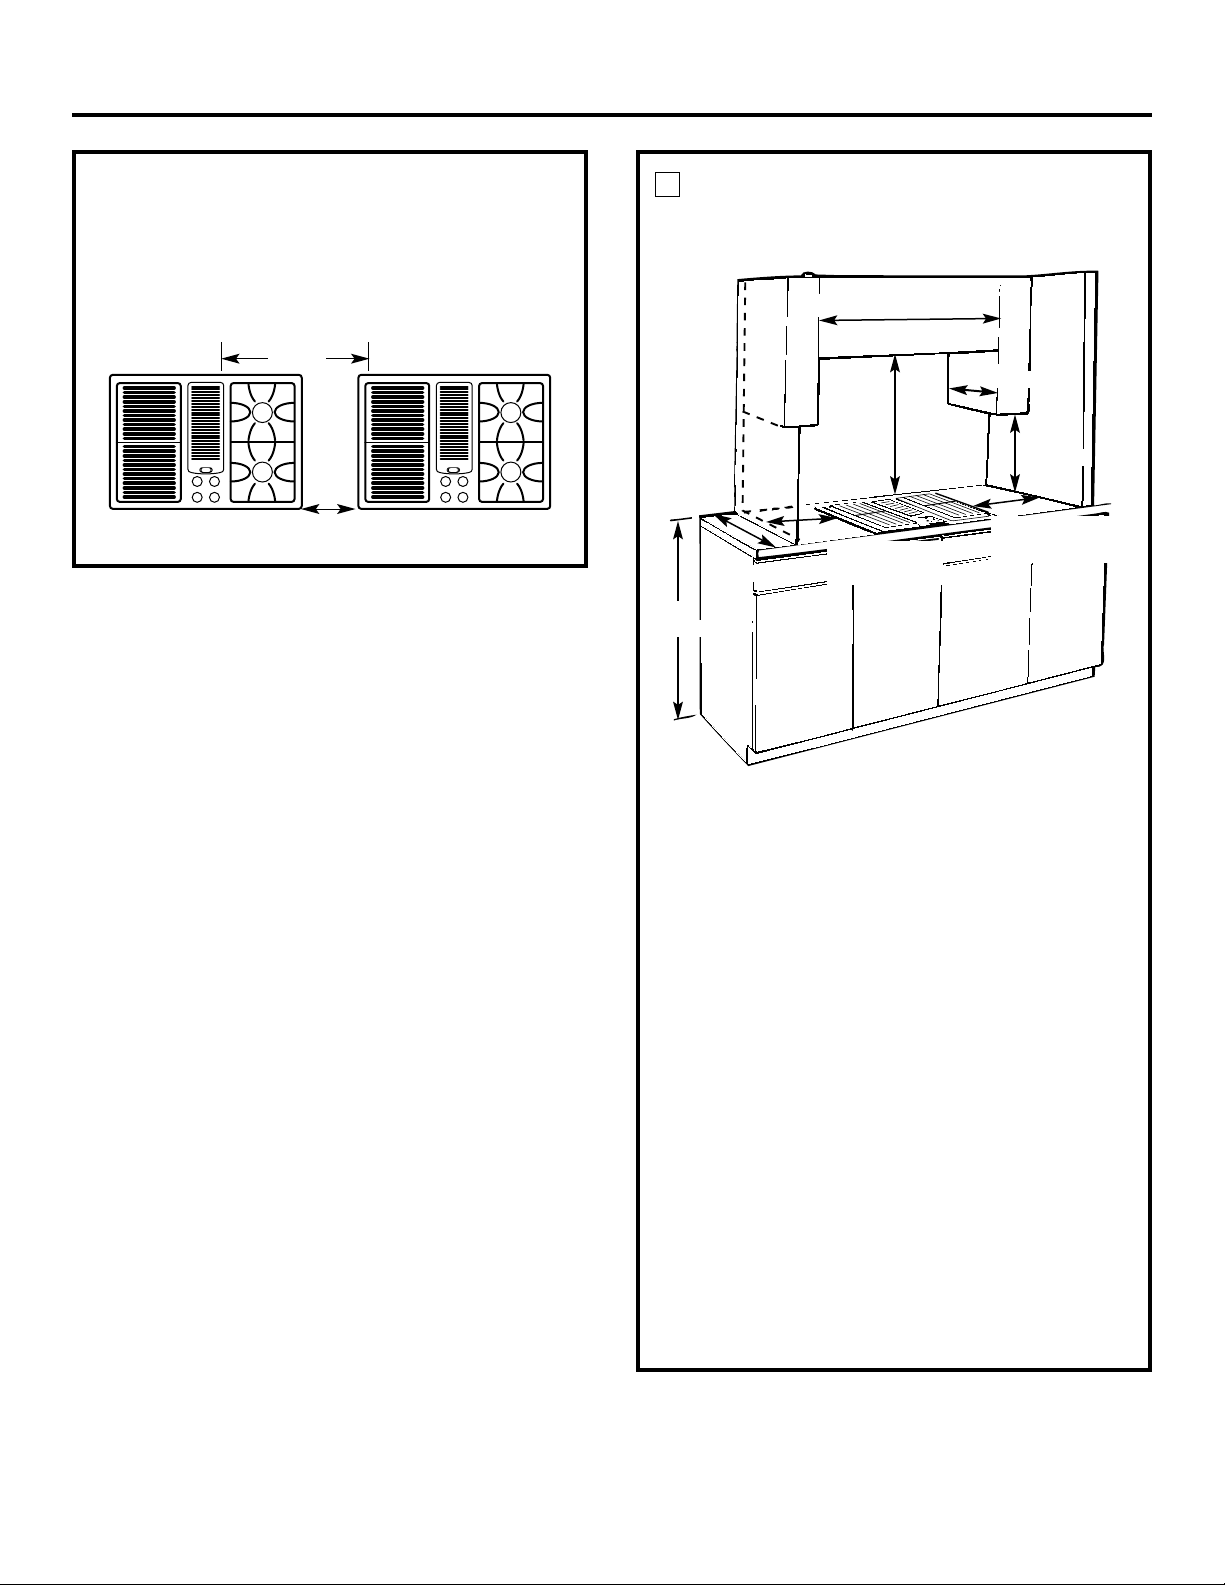
MINIMUM SPACING REQUIREMENT
When installing a double bay downdraft cooktop in
combination with another downdraft cooktop
maintain the minimum spacing between units as
shown below. Installing them too close will affect
cooking performance.
25″
(63.5 cm)
30″ min
(76.2 cm)
30″
(76.2 cm)
13″
(33 cm)
18″
(45.7 cm)
8″ min to wall
(20.3 cm)
8″ min to wall
(20.3 cm)
36″
(91.4 cm)
18″
45.7 cm
1
43⁄8″
11 . 1 c m
Page 21

GAS AND ELECTRICAL
LOCATION
The position of
the electrical
supply receptacle
and the gas supply
pipe entering the
cabinet should be
positioned as
shown in the
shaded areas
marked below.
The cooktop is
equipped with a 4 ft (1.2 m) power cord, which
should reach any desired location on the cabinet
walls. The cooktop must be disconnected from the
power supply before any servicing is carried out.
Page 22

PREPARE FOR DUCTWORK
NOTE: Ductwork MUST be vented outside. DO
NOT vent into a wall, ceiling, crawlspace, attic or
any concealed space.
Determine the best route for ductwork; it can be
routed in a variety of ways depending on the
kitchen layout.
Typical duct arrangement countertop series.
Page 23

23
Installation Instructions
INSTALL THE DUCTWORK
• Ducting must conform to local code materials
and “make-up” requirements—300 CFM minimum.
• IMPORTANT: Save for local electrical
inspector’s use.
• Ducting a cooktop is easy but critical for proper
performance.
• After reading these instructions, plan the duct run.
• Use the Duct Length Chart on page 25 to find the
equivalent length of the run.
• Shift the blower to “high range” if indicated
(done by snapping the “restricter ring” out of
the blower inlet). Be sure blower is not running.
• Install the duct hardware.
GENERAL CONSIDERATIONS:
1. Use 6″ diameter round or 31⁄4″ x 10″ rectangular
only except as follows: For gas models, 5″
diameter round must be used if the straight
duct length is 10 feet or less, using 5″ round
wall cap.
2. Do not use 5″ elbows except in a 5″ system.
Instead, use a 5″ to 6″ transition followed by a
6″ elbow, or a 5″ to 31⁄4″ x 10″ elbow transition.
IMPORTANT
Total allowance duct system is:
90 ft. with 6″ round wall cap
80 ft. with 31⁄4″ x 10″ wall cap
Low range is up to 60 ft.
High range is 61 to 90 ft.
3. Use quality metal duct of at least 26-gauge
galvanized or 24-gauge aluminum. Inferior
quality pipe and fittings can cause up to twice
the restriction shown and is a poor value. See
the Prepare for Duct Work section of this guide
for optional under-slab ducting. Local codes
may require a heavier gauge material or
restrict PVC.
4. Distance between adjacent fittings (elbows,
transitions, etc.) should be at least 18″. The
farther the better. Closer distance promotes
turbulence which reduces airflow.
5. The number of downstream elbows or
transitions should be limited to three. The initial
5″ to 6″ straight transition, if used, need not be
counted in this number.
6. Handmade crimps are likely to cause restrictions.
7. If an alternate wall or roof cap is used, be
certain duct size is not reduced and that there
is a backdraft damper. It is best to use listed
caps to be certain of proper performance.
8. Thermal breaks: In areas of extreme cold
weather, it may be necessary to provide a short
length of nonmetallic duct as close to the wall
as possible to prevent conduction along the
metal duct.
9. High altitude installations: It is advisable to
reduce allowable duct run by 20%.
10. Follow the duct calculation in this guide carefully
for best performance and satisfaction.
PLAN THE DUCT RUN
1. Make a sketch of the total system. Identify the
type of each fitting and the length of straight
pipe. Refer to the examples on page 24.
2. Enter your run into the Duct Length Chart on
page 25. Elbows, wall caps and other fittings
are shown in the chart with their equivalent
straight duct length. Each fitting value must be
added to the amount of straight duct length
used to determine the overall straight duct
equivalent length. Use the following examples
as a guide.
3. Using good quality ducting material, install per
these instructions. A few minutes and pennies
spent now will pay long term dividends for the
life of the cooktop.
SHIFTING THE BLOWER FROM
“LOW RANGE” TO “HIGH
RANGE”
This cooktop is equipped with a dual range
blower. It is shipped from the factory in low range
for most installations. If the Equivalent Duct
Length exceeds 60 feet, it must be shifted to high
range. Do not shift to high range for shorter
lengths. This will cause excessive noise,
conditioned air loss and affect the flame pattern
on gas burners.
To shift to high range,
be sure the blower is
stopped. Remove the
air grille. Remove the
filter and intake guard.
Pop the spring loaded
“restricter ring” out of
the blower inlet.
Replace the intake
guard, grille and filter.
8
9
10
Page 24

24
Installation Instructions
Example 2
Duct Fitting Number Total
Equivalent of Fittings Equivalent
Length Length of
Fittings
5″ to 6″
Transition 111
6″ Straight 1 2+4+6+4=16 16
6″ Elbow 5315
6″ to
31⁄4″ x 10″
Transition 111
31⁄4″ x 10″
Straight 11010
31⁄4″ x 10″
Wall Cap 20 1 20
Total 63
Example 1
Duct Fitting Number Total
Equivalent of Fittings Equivalent
Length Length of
Fittings
5″ to 6″
Transition 111
6″ Straight 1 2+4+6=12 12
6″ Elbow 5210
6″ Wall Cap 28 1 28
Total 51
5″ to 6″ Transition
5″ to 6″ Transition
10 ft. of 31⁄4″ x 10″ Straight
6″ to 3
1
⁄4″ x 10″ Transition
2 ft. of 6″ Round
2 ft. of 6″ Round
6″ Elbow
6″ Elbow
6″ Elbow
6″ Elbow
6″ Elbow
4 ft. of 6″ Round
4 ft. of 6″ Round
4 ft. of 6″ Round
3
1
⁄4″ x 10″ Wall Cap
6 ft. of 6″ Round
6 ft. of 6″ Round
6″ Wall Cap
Page 25

25
Installation Instructions
DUCT LENGTH CHART
Duct Fitting Number Total Equivalent
Duct Fitting Equivalent Length of Fittings Length of Fitting
8″ Diameter 90° Elbow 5 ft.
(1.52 m)
6″ Diameter 45° Elbow
2.5 ft.
(0.76 m)
5″ to 6″ Transition
1 ft.
(12.7 cm to 15.24 cm) (0.30 m)
6″ to 31⁄4″ x 10″ 90° Elbow 5 ft.
(15.24 cm to 8.26 cm x 25.4 cm) (1.52 m)
31⁄4″ x 10″ to 6″ 90° Elbow 9 ft.
(8.26 cm x 25.4 cm to 15.24 cm) (2.75 m)
6″ to 31⁄4″ x 10″ Transition 1 ft.
(15.24 cm to 8.26 cm x 25.4 cm) (0.30 m)
3
1
⁄4″ x 10″ to 6″ Transition 4.5 ft.
(8.26 cm x 25.4 cm to 15.24 cm) (1.37 m)
5″ to 31⁄4″ x 10″ 90° Elbow 6 ft.
(12.7 cm to 8.26 cm x 25.4 cm) (1.83 m)
31⁄4″ x 10″ 90° Elbow 5 ft.
(8.26 cm x 25.4 cm) (1.52 m)
3
1
⁄4″ x 10″ Flat Elbow 12 ft.
(8.26 cm x 25.4 cm) (3.66 m)
6″ Wall Cap
28 ft.
(15.24 cm) (8.53 m)
3
1
⁄4″ x 10″ Wall Cap 20 ft.
(8.26 cm x 25.4 cm) (6.10 m)
10″ x 10″ Roof Jack
0 ft.
(25.4 cm x 25.4 cm) (0 m)
Thermal Break
2 ft.
(0.61 m)
6″ Diameter Straight Duct–Feet
1 ft.
(For flex duct multiply by 2.) (0.30 m)
3
1
⁄4″ x 10″ Straight Duct–Feet 1 ft.
(0.30 m)
System Total
Page 26

26
Installation Instructions
ELECTRICAL CONNECTION
Electrical requirements:
120-volt, 60-Hertz, individual, properly grounded
branch circuit protected by a 15-amp circuit
breaker or time-delay fuse.
GROUNDING
IMPORTANT: (Please read carefully.) FOR
PERSONAL SAFETY, THIS APPLIANCE MUST
BE PROPERLY GROUNDED.
The power cord of this appliance is equipped
with a three-prong (grounding) plug which mates
with a standard three-prong grounding wall
receptacle to minimize the possibility of electric
shock hazard from this appliance. The customer
should have the wall receptacle and circuit
checked by a qualified electrician to make sure
the receptacle is properly grounded and has
correct polarity.
Where a standard two-prong wall receptacle is
encountered, it is the personal responsibility and
obligation of the customer to have it replaced
with a properly grounded three-prong wall
receptacle in accordance with the National
Electrical Code.
Do Not, Under Any Circumstances, Cut Or
Remove The Third (Ground) Prong From The
Power Cord.
Do not use an extension cord with this appliance.
CHECK IGNITION
After installing the cooktop, check the ignition of
each burner.
1. Push in one knob and turn to the LITE
position (180° from OFF). The igniter will
spark and the burner will light.
2. After the burner is lit, turn the knob to HI and
the igniter will stop sparking.
3. Turn the knob to the OFF position.
Repeat this for each burner.
NOTE: If flames are yellow or too low, refer to the
Troubleshooting Tips section in this manual.
11
12
Page 27

Before you call for service… GEAppliances.com
Troubleshooting Tips
Save time and money! Review the chart on this page
first and you may not need to call for service.
Problem Possible Causes What To Do
Burners do not light Plug on cooktop is not • Make sure electrical plug is plugged into a live, properly
completely inserted in the grounded outlet.
electrical outlet.
Gas supply not connected • See the Installation Instructions section.
or turned on.
A fuse in your home may be • Replace the fuse or reset the circuit breaker.
blown or the circuit breaker
Page 28

28
Before you call for service…
Troubleshooting Tips
Problem Possible Causes What To Do
Sparking sound persists Be sure the knob is in the • Remove knob by pulling it straight off the stem and
after burner is turned off OFF position. check the bottom of the knob for any build-up of soil.
Occasional Changing blower speed. • This is a typical electrical switching noise.
sparking sound This is normal.
Burner flames very Burner parts not replaced • See Care and cleaning of the cooktop section.
large or yellow correctly.
Flames are uneven Burner ports may • See the Care and cleaning section.
be clogged.
Flame setting may need • See Flames too high or too low at the LOW setting
to be adjusted. in this Troubleshooting Tips section.
Control knobs Controls improperly set. • To turn from the OFF position, push the knob in
will not turn and then turn. The knob can only be turned in a
counterclockwise direction. When the knob is at any
other position, it can be turned in either direction
without being pushed in.
Fan does not work Cord improperly connected • Check connections. Turn on power at the fuse box.
or power turned off.
Fan comes on Grill is being used. • This is normal. The fan comes on automatically
automatically when the grill is in use.
Poor venting Clogged filter. • Clean filter per instructions.
House too airtight. • Open a window slightly to provide fresh air source.
Wall cap obstructed. • Remove blockage from exterior wall cap.
Wall cap damper door stuck. • Check exterior wall cap damper door for free movement
or obstruction.
Duct length exceeds • Reduce number of elbows to simplify duct run.
recommended 100
equivalent foot maximum.
Areas of discoloration Food spillovers not cleaned • See the Care and cleaning section.
on the cooktop before next use.
Water won’t boil • Cover pan with a lid.
• Turn the downdraft fan OFF until the water begins
to boil.
Safety Instructions
Operating Instructions
Care and CleaningTroubleshooting TipsConsumer Support
Page 29

General Electric Company
Warranty Registration Department
P.O. Box 32150
Louisville, KY 40232-2150
GE Service Protection Plus
™
GE, a name recognized worldwide for quality and dependability, offers you
Service Protection Plus
™
—comprehensive protection on all your appliances—
No Matter What Brand!
Benefits Include:
• Backed by GE
• All brands covered
• Unlimited service calls
• All parts and labor costs included
• No out-of-pocket expenses
• No hidden deductibles
• One 800 number to call
You will be completely satisfied with our service protection or you may request your money back
on the remaining value of your contract. No questions asked. It’s that simple.
Protect your refrigerator, dishwasher, washer and dryer, range, TV, VCR and much more—any brand!
Plus there’s no extra charge for emergency service and low monthly financing is available. Even icemaker
coverage and food spoilage protection is offered. You can rest easy, knowing that all your valuable
household products are protected against expensive repairs.
Place your confidence in GE and call us in the U.S. toll-free at 800.626.2224
for more information.
*All brands covered, up to 20 years old, in the continental U.S.
We’ll Cover Any Appliance.
Anywhere. Anytime.*
Please place in envelope and mail to:
✁
Cut here
29
Page 30

Consumer Product Ownership Registration
I
m
p
o
r
t
a
n
t
M
a
i
l
T
o
d
a
y
!
GE Appliances
GE Consumer & Industrial
Louisville, Kentucky
www.GEAppliances.com
First
Name
Mr. ■■ Ms. ■■ Mrs. ■■ Miss ■■
Street
Address
City
State
Date Placed
In Use
Month
Day
Year
Zip
Code
Apt. #
Last
Name
Phone
Number
_
_
Consumer Product Ownership Registration
Dear Customer:
Thank you for purchasing our product and thank you for placing your confidence in us.
We are proud to have you as a customer!
Follow these three steps to protect your new appliance investment:
Important: If you did not get a registration card with your
product, detach and return the form below to
ensure that your product is registered, or register
online at GEAppliances.com.
1
23
Model Number Serial Number
✁
Cut here
Complete and mail
your Consumer
Product Ownership
Registration today.
Have the peace of
mind of knowing we
can contact you in
the unlikely event of
a
safety modification.
After mailing the
registration below,
store this document
in a safe place. It
contains information
you will need should
you require service.
Our service number is
800.GE.CARES
(800.432.2737).
Read your Owner’s
Manual carefully.
It will help you
operate your new
appliance properly.
Model Number Serial Number
E-mail Address*
30
* Please provide your e-mail address to receive, via e-mail, discounts, special offers and other important
communications from GE Appliances (GEA).
■■ Check here if you do not want to receive communications from GEA’s carefully selected partners.
FAILURE TO COMPLETE AND RETURN THIS CARD DOES NOT DIMINISH YOUR
WARRANTY RIGHTS.
For information about GEA’s privacy and data usage policy, go to www.GEAppliances.com and click
on “Privacy Policy” or call 800.626.2224.
Page 31

31
Safety Instructions
Operating Instructions Care and Cleaning
Troubleshooting Tips Consumer Support
GE Gas Cooktop Warranty.
■ Service trips to your home to teach you how to use
the product.
■ Improper installation, delivery or maintenance.
■ Failure of the product if it is abused, misused, or used
for other than the intended purpose or used
commercially.
■ Replacement of house fuses or resetting of circuit
breakers.
■ Damage to the product caused by accident, fire, floods
or acts of God.
■ Incidental or consequential damage caused by possible
defects with this appliance.
■ Damage caused after delivery.
What GE Will Not Cover:
This warranty is extended to the original purchaser and any succeeding owner for products purchased for
home use within the USA. In Alaska, the warranty excludes the cost of shipping or service calls to your home.
Some states do not allow the exclusion or limitation of incidental or consequential damages. This warranty
gives you specific legal rights, and you may also have other rights which vary from state to state. To know
what your legal rights are, consult your local or state consumer affairs office or your state’s Attorney General.
Warrantor: General Electric Company. Louisville, KY 40225
All warranty service provided by our Factory Service Centers,
or an authorized Customer Care
®
technician. To schedule service,
on-line, 24 hours a day, visit us at GEAppliances.com,
or call 800.GE.CARES (800.432.2737).
Staple your receipt here.
Proof of the original purchase
date is needed to obtain service
under the warranty.
For The Period Of: GE Will Replace:
One Year Any part of the cooktop which fails due to a defect in materials or workmanship. During this
From the date of the full one-year warranty, GE will also provide, free of charge, all labor and in-home service to
original purchase replace the defective part.
Page 32

Printed in the United States
Consumer Support.
GE Appliances Website
www.GEAppliances.com
Have a question or need assistance with your appliance? Try the GE Appliances Website 24 hours a day,
any day of the year! For greater convenience and faster service, you can now download Owner’s Manuals,
order parts, catalogs, or even schedule service on-line. You can also “Ask Our Team of Experts™”
your questions, and so much more...
Schedule Service www.GEAppliances.com
Expert GE repair service is only one step away from your door. Get on-line and schedule your service at
your convenience 24 hours any day of the year! Or call 800.GE.CARES (800.432.2737) during normal
business hours.
Real Life Design Studio www.GEAppliances.com
GE supports the Universal Design concept—products, services and environments that can be used by
people of all ages, sizes and capabilities. We recognize the need to design for a wide range of physical and
mental abilities and impairments. For details of GE’s Universal Design applications, including kitchen
design ideas for people with disabilities, check out our Website today. For the hearing impaired, please call
800.TDD.GEAC (800.833.4322).
Extended Warranties www.GEAppliances.com
Purchase a GE extended warranty and learn about special discounts that are available while your warranty
is still in effect. You can purchase it on-line anytime, or call 800.626.2224 during normal business hours.
GE Consumer Home Services will still be there after your warranty expires.
Parts and Accessories www.GEAppliances.com
Individuals qualified to service their own appliances can have parts or accessories sent directly to their
homes (VISA, MasterCard and Discover cards are accepted). Order on-line today, 24 hours every day or
by phone at 800.626.2002 during normal business hours.
Instructions contained in this manual cover procedures to be performed by any user. Other servicing generally
should be referred to qualified service personnel. Caution must be exercised, since improper servicing may cause
unsafe operation.
Contact Us www.GEAppliances.com
If you are not satisfied with the service you receive from GE, contact us on our Website with all the details
including your phone number, or write to: General Manager, Customer Relations
GE Appliances, Appliance Park
Louisville, KY 40225
Register Your Appliance www.GEAppliances.com
Register your new appliance on-line—at your convenience! Timely product registration will allow for
enhanced communication and prompt service under the terms of your warranty, should the need arise.
You may also mail in the pre-printed registration card included in the packing material.
Page 33

JGP979
www.GEAppliances.com
8111P461-60 164D4290P328 49-80172-3 05-04 JR
Manual del
propietario e
Instrucciones
de Instalación
Estufa de cubierta a gas
Instrucciones importantes
de seguridad . . . . . . . . . . . . .2–5
Instrucciones de operación
Cacerolas para cocinar . . . . . . . 9
Características . . . . . . . . . . . . . . 6
Controles . . . . . . . . . . . . . . . 8, 9
Ignición eléctrica . . . . . . . . . . . 8
Módulo de asador . . . . . . .10–13
Módulo de quemadores
sellados . . . . . . . . . . . . . . 6, 8–10
Otros accesorios . . . . . . . . .7, 14
Sistema de ventilación . . . . . 6, 9
Cuidado y limpieza
Accesorio de la plancha
para asar . . . . . . . . . . . . . . . . . 17
Contenedor de porcelana
de los quemadores . . . . . . . . . 17
Cubierta de porcelana . . . . . . 15
Cubierta del asador . . . . . . . . 16
Ignitores . . . . . . . . . . . . . . . . . .17
Módulo de quemadores
sellados . . . . . . . . . . . . . . . . . . 17
Parrillas del asador . . . . . . . . . 16
Perillas de control y
sello del panel de control . . . 15
Quemador del asador . . . . . . 16
Recipiente para grasa . . . . . . . 15
Rejilla y filtro de
ventilación . . . . . . . . . . . . . . . 16
Superficies de acero
inoxidable . . . . . . . . . . . . . . . .15
Instrucciones de instalación
Conducto . . . . . . . . . . . .22–25
Conexion de gas . . . . . .21, 22
Conexion eléctrica . . . . .21, 26
Instalación de la estufa
de cubierta . . . . . . . . . . .20–26
Instrucciones de
seguridad . . . . . . . . . . . . . . .18
Preparación . . . . . . . . . .19, 20
Solucionar
problemas . . . . . . . . . . .27, 28
Apoyo al consumidor
Apoyo al consumidor . . . . .32
Garantía . . . . . . . . . . . . . . . .31
con tiro descendente
Escriba aqui el modelo y números de serie:
Modelo No. ______________________
Serie No. ________________________
Estos números se encuentran en una
etiqueta debajo de la superficie de la
estufa, en el costado de la cámara de
ventilación.
Page 34

2
INSTRUCCIONES IMPORTANTES DE SEGURIDAD
Lea estas instrucciones antes de usar este aparato.
— No guarde ni use gasolina u otros vapores o
líquidos inflamables cerca de este o cualquier
otro aparato.
—
SI HUELE A GAS
■ No trate de encender ningún aparato.
■ No toque ningún interruptor eléctrico;
no use ningún teléfono en su edificio.
■ Llame inmediatamente a su abastecedor
de gas del teléfono de su vecino. Siga las
instrucciones del abastecedor de gas.
■ Si no puede comunicarse con su abastecedor
de gas, llame al cuerpo de bomberos.
— La instalación y el servicio deben ser efectuados
por un instalador calificado, la agencia de servicio
o el abastecedor de gas.
ADVERTENCIA: Si no se sigue con
precisión la información en este manual,
un incendio o explosión puede resultar
causando daños a la propiedad, heridas
personales o muerte.
¡
ADVERTENCIA!
Por su seguridad, se debe seguir la información de este manual para reducir el riesgo de incendio o explosión,
choque eléctrico o para evitar daños a la propiedad, lesiones personales o la pérdida de la vida.
Apoyo al consumidor
Solucionar problemas Operación Seguridad
Cuidado y limpieza
Page 35

GEAppliances.com
AVISO IMPORTANTE DE SEGURIDAD
La Ley sobre los productos tóxicos y de agua potable de California (California Safe Drinking Water
and Toxic Enforcement Act) requiere que el gobernador de California publique una lista de sustancias
que el estado sabe que causan cáncer, defectos de nacimiento u otros daños de reproducción, y
requiere que los negocios les avisen a los clientes contra la exposición potencial a tales sustancias.
Los aparatos de gas causan exposición mínima a cuatro de estas sustancias, tales como el benceno,
el monóxido de carbono, el formaldehido y el hollín, causados primordialmente por la combustión
incompleta de gas natural. Los quemadores bien ajustados, indicados por una llama azul en vez de
una llama amarilla, minimizarán la combustión incompleta. La exposición a estas sustancias puede
minimizarse más, ventilando con una ventana abierta o usando un ventilador o una campana de
ventilación.
Cuando reciba su estufa pídale al técnico que le muestre la localización de la llave de paso y cómo se
cierra en caso de necesidad.
■ Su estufa deberá ser instalada y conectada a
tierra correctamente por un técnico calificado,
de acuerdo a las Instrucciones de instalación.
Cualquier ajuste o servicio deberán realizarlo
únicamente técnicos calificados en instalación
de estufas de gas o técnicos calificados en
servicio.
■ IMPORTANTE: Este producto es para uso
con gas natural únicamente. NO se puede
convertir para uso con gas P.L.
■ No trate de reparar o reemplazar cualquier
parte de su estufa a menos que se recomiende
en forma específica en este instructivo.
Cualquier otro tipo de servicio deberá
confiársele a un técnico calificado.
■ Coloque la estufa fuera de la ruta del tráfico de
la cocina y de las corrientes de aire para evitar
un desempeño deficiente de los quemadores.
■ Conecte su estufa únicamente a una toma de
corriente de 120 voltios que esté conectada a
tierra. No quite la pata de conexión a tierra de
la clavija. Si tiene alguna duda sobre el sistema
eléctrico redondeada de conexión a tierra de su
casa, es su responsabilidad y obligación
personal cambiar la toma de corriente que no
esté conectada a tierra por una toma de
corriente adecuada para tres pates que esté
conectada a tierra de acuerdo con los
requerimientos del Código Eléctrico Nacional.
No utilice un cable de extensión para este
aparato.
■ Permita que las parrillas de los quemadores y
otras superficies se enfríen antes de tocarlas o
dejarlas donde los niños las puedan alcanzar.
■ Asegúrese de que su estufa sea ajustada por un
técnico de servicio calificado o un técnico
calificado en la instalación.
■ Asegúrese de quitar todo el material de
empaque de la estufa antes de utilizarla para
evitar riesgos de incendio o lesiones por fuego
o humo en caso de que se incendie el material
de empaque.
■ No deje a los niños solos o sin atención si la
estufa se encuentra caliente o funcionando.
Podrían quemarse gravemente.
■ No permita que nadie se suba, se pare o se
cuelgue de la estufa.
■ PRECAUCION: No deberán
guardarse objetos que puedan ser de interés
para los niños en los gabinetes que se
encuentran sobre la cubierta. Los niños que se
suban a la estufa para alcanzar algún artículo
pueden lesionarse gravemente.
■ Siempre mantenga los utensilios de madera
y plástico y los alimentos enlatados a una
distancia segura de la estufa.
■ Siempre mantenga los revestimientos de
paredes o los cortinas a una distancia segura
de la estufa.
■ No lleve nunca prendas sueltas o colgantes
al usar el aparato. Tenga cuidado al tomar los
artículos guardados en los armarios sobre la
estufa. Los materiales inflamables se podrían
encender si tuvieran contacto con llamas o
superficies calientes del horno y podrían causar
quemaduras graves.
■ Enseñe a los niños a no jugar con los controles
o cualquier otra parte de la estufa.
■ Por su seguridad nunca utilice este aparato para
calentar la habitación.
PRECAUCIONES DE SEGURIDAD
3
Apoyo al consumidorSolucionar problemas
Operación
Seguridad
Cuidado y limpieza
Page 36

4
INSTRUCCIONES IMPORTANTES DE SEGURIDAD
Lea estas instrucciones antes de usar este aparato.
■ Siempre mantenga las toallas y los paños
para platos, los agarradores de ollas y otros
elementos de tela a una distancia segura
de la estufa.
■ No guarde materiales inflamables cerca
de la estufa.
■ No guarde o utilice gasolina u otros vapores
o líquidos inflamables cerca de éste u otro
aparato.
■ No permita que se acumulen otros materiales
inflamables o grasa en o cerca de la estufa.
■ No opere el quemador sin todas las partes
en su lugar.
■ No limpie la estufa con líquidos inflamables
o volátiles.
■ No limpie la estufa cuando la esté utilizando.
■ Evite raspar la estufa con instrumentos filosos,
o con anillos y otras joyas.
■ Nunca use la estufa como una tabla de cortar.
■ No use agua para fuegos iniciados por grasa.
Nunca toque una sartén en llamas. Apague los
controles. Ahogue una sartén en llamas sobre
un quemador cubriendo completamente la
sartén con una tapa que ajuste bien, una
bandeja de hornear, o una charola plana.
Use un extintor de fuegos de sustancia química
seca de multiuso o de tipo espuma.
■ La grasa en llamas por fuera de una sartén se
puede extinguir cubriéndola con bicarbonato
de sodio, o si está disponible, usando un
extintor de fuegos de sustancia química seca
de multiuso o de tipo espuma.
ADVERTENCIA:PARA REDUCIR EL
RIESGO DE INCENDIO, CHOQUE ELECTRICO O
LESIONES A LAS PERSONAS, VIGILE LO SIGUIENTE:
A. Utilice esta unidad únicamente en la forma
que lo determina el fabricante. Si tiene alguna
pregunta póngase en contacto con el
fabricante.
B. Antes de darle servicio o limpiar la unidad,
apague la unidad con el interruptor que se
encuentra en el Panel de servicio.
C. Cuando corte o perfore una pared o el techo,
procure no dañar los cables eléctricos u otros
materiales que no se encuentren a la vista.
D. Los ventiladores de ducto siempre deberán
tener una salida de ventilación hacia el
exterior.
E. Para reducir el riesgo de incendio, utilice
únicamente ductos de metal.
ADVERTENCIA:PARA REDUCIR EL
RIESGO DE INCENDIO DEBIDO A LA PRESENCIA DE
GRASA EN LA ESTUFA:
A. Mantenga limpios el ventilador, los filtros y
las superficies que tengan exceso de grasa.
B. Siempre ENCIENDA el ventilador cuando
cocine con la llama alta.
C. Utilice la llama alta en la estufa únicamente
cuando sea necesario. Caliente lentamente
el aceite con una llama de intensidad baja
a media.
D. No deje sin vigilancia la estufa cuando esté
cocinando.
E. Siempre utilice ollas y utensilios de cocina
apropiados para el tipo y cantidad de comida
que se esté preparando.
PRECAUCION:Unicamente para usarse
como ventilación general. No se utilice para extraer
por succión materiales o vapores peligrosos o
explosivos.
PRECAUCIONES DE SEGURIDAD
Cocine muy bien todas las carnes, incluyendo las carnes de aves; las carnes de res, por ejemplo,
deben cocinarse a una temperatura INTERNA de por lo menos 160 °F (71 °C) y las carnes de aves
deben cocinarse a una temperatura INTERNA de por lo menos 180 °F (82 °C). Por lo general, cocinar
a estas temperaturas protege contra las enfermedades que se transmiten a través de los alimentos.
COCINE MUY BIEN TODAS LAS CARNES
Apoyo al consumidor Solucionar problemas Operación
SeguridadCuidado y limpieza
Page 37

■ Siempre use la posición de LITE (encendido) cuando
encienda los quemadores y asegúrese de que éstos
hayan encendido.
■ Nunca deje desatendidos los quemadores en las
posiciones de llamas altas. Las salpicaduras pueden
causar humo y derrames de grasa que pueden
encenderse.
■ Utilice únicamente agarraderas secos para las ollas
calientes—las telas húmedas o mojadas que se usen
en superficies calientes pueden dar como resultado
quemaduras por el vapor que se produce. No
permita que agarraderas de ollas se acerquen mucho
a las llamas encendidas cuando levante una olla. No
utilice toallas o cualquier otra tela voluminosa en
lugar de los agarraderas de ollas que son especiales
para agarrar cosas calientes.
■ Cuando vaya a usar utensilios de vidrio para la
cocina, asegúrese que estén diseñados para usarlos
en la estufa.
■ Para minimizar la posibilidad de quemaduras, el
incendio de materiales inflamables y derrames,
coloque los mangos hacia la parte de atrás sin
extenderlos sobre los quemadores al lado.
■ Siempre apague los quemadores antes de quitar
una cacerola.
■ Vigile con atención los alimentos que se fríen en
llama alta.
■ Siempre caliente la grasa lentamente y obsérvela
cuando se calienta.
■ No deje elementos en la estufa. El aire caliente
del ventilador podría encender los elementos
inflamables y aumentar la presión en contenedores
cerrados, lo que puede causar que exploten.
■ Si una combinación de aceites o grasa se usara al
freír, revuelva antes de calentar o mientras la grasa
se derrite lentamente.
■ No use una olla tipo "wok" en la estufa si ésta tiene
un aro metálico que se debe colocar sobre la parrilla
del quemador para soporte. Este aro actúa como una
trampa de calor que puede dañar la parrilla del
quemador y la cabeza del quemador. También puede
causar que el quemador funcione incorrectamente.
Esto puede causar un nivel de monóxido de carbono
superior al permitido por los estándares actuales,
resultando en un peligro para la salud.
■ Los alimentos para freír deben estar tan secos como
sea posible. La escarcha sobre los alimentos
congelados o la humedad sobre los alimentos frescos
pueden provocar que la grasa caliente burbujee y
escape por los lados del recipiente.
■ Use la cantidad mínima de grasa para freír con poco
o bastante aceite de una manera más eficaz. Llenar
el recipiente de grasa demasiado puede causar
salpicaduras al añadir alimentos.
■ Use un termómetro al freír con bastante aceite
cuando sea posible para evitar sobrecalentar la grasa
sobre el punto de humo.
■ Nunca intente mover una sartén de aceite caliente,
especialmente una olla de fritar en aceite. Espere
hasta que éste se enfríe.
■ Apague el ventilador con los alimentos llameantes.
Si el ventilador está operando, podría esparcir las
llamas.
■ No deje elementos plásticos sobre la estufa ya
que se podrían derretir si se dejan muy cerca
al ventilador.
■ Mantenga los plásticos alejados de todos los
quemadores.
■ Si huele a gas, cierre la llave de paso del gas de la
estufa y llame a un técnico de servicio especializado.
Nunca utilice una llama para localizar una fuga.
■ Para evitar la posibilidad de una quemadura, siempre
asegúrese de que los controles para todos los
quemadores estén apagados y que todas las parrillas
de los quemadores estén frías antes de tratar de
quitarlas.
■ Nunca limpie la estufa cuando está caliente. Ciertos
limpiadores producen humos nocivos y un paño
húmedo podría causar quemaduras de vapor si se
usa en una superficie caliente.
■ Nunca deje frascos o latas de grasa goteando en
la estufa o cerca de ésta.
■ No use papel aluminio debajo de las parrillas de los
quemadores. Un mal uso podría resultar en un
peligro de incendio o daños a la estufa.
■ No cubra ni obstruya el área alrededor de las perillas
de la estufa. Esta área debe mantenerse libre para
que haya un funcionamiento adecuado de los
quemadores y una ventilación apropiada.
■ Limpie únicamente las partes que aparecen
señaladas en este manual del propietario.
GEAppliances.com
Use el tamaño correcto de recipiente. Evite usar los recipientes que no son estables o se vuelcan fácilmente.
Seleccione los recipientes con fondo plano bastante grandes para contener el alimento y evitar las salpicaduras
y derrames y bastante grandes para cubrir las parrillas de los quemadores. Esto ahorrará el tiempo de cocción
e impedirá la acumulación peligrosa de alimentos; las salpicaduras dejadas o los derrames dejados sobre la
estufa se pueden arder. Use recipientes con mangos que se pueden agarrar fácilmente y que permanecen fríos.
ADVERTENCIA!
QUEMADORES DE LA SUPERFICIE
Apoyo al consumidor
Solucionar problemas
Operación
Seguridad
Cuidado y limpieza
LEA ESTAS INSTRUCCIONES DE SEGURIDAD CUIDADOSAMENTE.
GUARDE ESTAS INSTRUCCIONES
5
Page 38

6
Características de su estufa de cubierta.
Su modelo puede tener otras características y apariencia que las ilustradas en este manual.
Indice de las características
Módulo del asador
Rejilla de ventilación (el ventilador funciona automáticamente
cuando el asador está en uso)
Filtros de ventilación (al lado de la rejilla de ventilación)
Parrillas de los quemadores
Quemadores de la superficie
Controles de los quemadores de la superficie
Control de sistema de ventilación
1
2
3
4
5
6
7
3
Page 39

7
Accesorios. GEAppliances.com
Su modelo puede tener otras características y apariencia que las ilustradas en este manual.
Asador Modelo JXGG79
Consta de dos parrillas negras para
asar y un quemador de asador.
Módulo de quemadores sellados
Modelos JXGB79B (negra) y JXGB79W (blanca)
El asador se puede retirar para
instalar un módulo de quemador
sellado.
NOTA: El módulo de quemadores
sellados opcional (JXGB79) puede
reemplazar al quemador del asador.
Tanto los quemadores que se
suministran con la estufa como el
módulo opcional de persianas de
ventilación se han ajustado para que
sean compatibles en ambos lados.
Plancha Modelo JXGL89
Puede utilizarse únicamente con el
módulo del asador. La plancha, con
su sistema de autodesfogue, facilita
la preparación de mucha de su
comida favorita. La superficie
tamaño familiar le permite cocinar
varios panqueques, hamburguesas
o sándwiches a la parrilla al mismo
tiempo.
Cubierta del asador Modelo JXGC89
Una atractiva cubierta para el
asador lo protege cuando éste no
se utiliza. Es de acero texturizado
con asas moldeadas.
Apoyo al consumidor
Solucionar problemas
Operación
Seguridad
Cuidado y limpieza
Page 40

8
Cómo usar los quemadores de la superficie.
Su modelo puede tener otras características y apariencia que las ilustradas en este manual.
Cómo encender un quemador
Presione la perilla de control y hágala girar
hasta LITE (encender).
Escuchará un pequeño chasquido—que es
el sonido de la chispa eléctrica que
enciende el quemador.
Después de encender el quemador, haga
girar la perilla para ajustar el tamaño de
la llama.
Para apagar un quemador, haga girar la
perilla hacia la derecha, hasta que se
detenga en la posición de OFF (apagado).
Si la llama es muy baja para la posición, se
puede ajustar la válvula. Consulte La llama
es muy alta o muy baja en la posición LOW
(bajo) en la sección Guía para resolver
problemas.
Presione la perilla de control y hágala
girar hasta LITE (encender).
Cómo elegir el tamaño de la llama
Para un manejo seguro de los recipientes, nunca
permita que la llama se extienda sobre los lados
del recipiente.
Observe la llama, no la perilla del
quemador, a medida que reduce el calor. El
tamaño de la llama en un quemador de gas
debe adaptarse al tipo de recipiente que
esté usando.
Cualquier llama que sea mayor que el
fondo del recipiente se desperdicia y sólo
sirve para calentar el mango.
Page 41

OFF
ON
Cocinar en ollas tipo “wok”
Recomendamos que use sólo ollas tip “wok” con
fondo plano. Se encuentran disponibles en la tienda
de su localidad.
Use sólo ollas tipo “wok” con fondo plano.
No use ollas tipo “wok” con fondo plano
con un soporte.
No utilice ollas tipo “wok” con arillos de
soporte. Si coloca el arillo sobre la parrilla
del quemador, puede causar que el
quemador opere de manera inadecuada
produciendo niveles de monóxido de
carbono superiores a los estándares actuales
permitidos. Esto puede ser peligroso para
su salud.
Use sólo ollas tipo “wok” con
fondo plano.
Cacerolas para cocinar
Use cacerolas de diámetro grande en los
quemadores posteriores.
Aluminio: Los recipientes de peso mediano
se recomiendan porque se calientan rápido
y parejo. La mayor parte de los alimentos se
doran uniformemente en una sartén de
aluminio. Utilice sartenes con tapas que
ajusten bien cuando cocine con cantidades
de agua mínimas.
Recipientes esmaltados: Bajo determinadas
condiciones, el esmalte de algunos
recipientes puede derretirse. Siga las
recomendaciones del fabricante de los
recipientes respecto a los métodos para
cocinar.
Vidrio: Existen dos tipos de recipientes de
vidrio para cocinar—aquéllos que sólo se
usan en horno y los que sirven para cocinar
en la estufa (sartenes, cafeteras y teteras). El
vidrio conduce el calor con mucha lentitud.
Hierro colado: Si se calientan lentamente, la
mayoría de las sartenes darán resultados
satisfactorios.
Cerámica de vidrio resistente al calor: Puede
usarse para cocinar en la estufa o en el
horno. Conduce el calor muy lentamente
y se enfría también con gran lentitud.
Verifique las instrucciones del fabricante
para asegurarse de que pueda usarse en
estufas de gas.
Acero inoxidable: Este metal por sí solo es
un mal conductor de calor y por lo general
se combina con cobre, aluminio u otros
metales para mejorar la distribución de
calor. Las sartenes de metales combinados
casi siempre funcionan de manera
satisfactoria a calor medio, como lo
recomienda el fabricante.
Como usar su estufa de cubierta. GEAppliances.com
Cómo utilizar el sistema de ventilación
El sistema de ventilación integrado ayuda a
quitar los vapores al cocinar, los olores y el
humo de los alimentos que son preparados
en la estufa.
Para encender el ventilador, use el
interruptor de control del ventilador
en el panel de control.
• Presione hacia el lado izquierdo
del interruptor para encender el
ventilador.
• Presione hacia el lado derecho
del interruptor para apagar el
ventilador.
NOTA: Incluso si el interruptor está en
la posición de apagado, éste operará
automáticamente cuando el quemador
del asador está en uso.
El uso continuo del sistema de
ventilación ayuda a mantener la
cocina más cómoda y menos húmeda,
reduciendo los olores al cocinar y la
humedad que por lo general crea una
necesidad frecuente de limpieza.
El aspecto de las llamas del quemador
puede afectarse cuando el ventilador
está operando.
EN CASO DE UNA FALLA EN EL SUMINISTRO
DE ENERGÍA, EL SISTEMA DE VENTILACIÓN
NO OPERARÁ.
El sistema de ventilación.
Apoyo al consumidor
Solucionar problemas
Operación
Seguridad
Cuidado y limpieza
9
Page 42

Para quitar el módulo de asador:
1. Asegúrese de que las perillas de control
estén en la posición de OFF (apagado) y
todos los componentes del asador estén
fríos.
2. Quite las parrillas del asador.
3. Levante el quemador del asador
ligeramente y hálelo lejos del
receptáculo terminal y los orificios.
Sáquelo del contenedor inferior cuando
esté completamente desconectado.
4. No almacene ni acumule los módulos
donde se puedan caer o dañar.
NOTA: El módulo opcional de quemador
sellado JXGB79 puede reemplazar el
quemador del asador.
Módulos de quemadores y de asador.
Su modelo puede tener otras características y apariencia que las ilustradas en este manual.
10
Módulo de quemadores sellados
Para instalar el módulo de quemadores:
1. Asegúrese de que las perillas de control
estén en la posición de OFF (apagado).
2. Limpie el contenedor inferior
de la estufa para retirar cualquier
acumulación de grasa. Consulte la
sección Cuidado y limpieza.
3. Con la parte posterior del módulo de
quemadores inclinado y las aberturas del
tubo mezclador y los vástagos del ignitor
de frente a los orificios y el receptáculo
terminal, inserte el módulo en el
contenedor inferior de la estufa.
4. Deslice el módulo de quemadores hacia
delante hasta que los tubos y los
ignitores empiecen a calzar.
5. Baje la parte posterior del módulo
en su lugar y cuidadosamente deslice
hacia adelante hasta que los tubos
mezcladores y los vástagos del ignitor
hayan calzado por completo.
Para quitar el módulo de quemadores:
1. Las perillas de control deberán estar en
la posición de OFF (apagado) y la estufa
deberá estar fría.
2. Levante el borde del módulo de
quemadores hasta que el fondo del
módulo despeje el borde del
contenedor inferior.
IMPORTANTE: No levante el módulo muy
alto mientras todavía está conectado,
podría dañar los vástagos del ignitor y
los tubos mezcladores.
3. Sostenga el módulo por los costados
y hale hacia fuera del receptáculo
terminal y los orificios. Sáquelo del
contenedor inferior cuando esté
completamente desconectado.
4. No almacene o acumule los módulos
donde se puedan caer o dañar.
NOTA: El módulo opcional de quemadores
sellado JXGB79 puede reemplazar el
quemador del asador.
Módulo de asador
Para instalar el módulo de asador:
1. Asegúrese de que las perillas de control
estén en la posición de OFF (apagado).
2. Coloque el quemador del asador con los
tubos mezcladores y el vástago del
ignitor de frente a los oficios y el
receptáculo terminal.
3. Deslice el quemador del asador
hacia delante hasta que los tubos y los
ignitores calcen, luego baje el quemador
hasta que descanse en las patas de
montaje.
4. Cuidadosamente coloque las parillas del
asador en la estufa.
NOTA: Antes de utilizar el asador por primera
vez, caliente el quemador del asador para
quitar la cubierta protectora con que viene de
fábrica para su envío. Caliente el asador en HI
(alto) durante 10 minutos y utilice el sistema de
ventilación para quitar cualquier humo
adicional durante el enfriamiento.
El asador consta de dos parrillas negras para asar y un quemador para asar. Instale la parrilla
únicamente del lado izquierdo de su estufa.
Apoyo al consumidor Solucionar problemas Operación
SeguridadCuidado y limpieza
Page 43

11
Para asar. GEAppliances.com
Cómo utilizar el asador
• El ventilador funcionará
automáticamente cuando el
quemador del asador esté en uso.
• Antes de utilizar el asador por primera
vez, lave las parrillas del asador con
agua caliente jabonosa. Enjuague y
seque.
• Acondicione las parrillas untándoles
aceite vegetal con una brocha o
rocíeles una capa de aceite que no sea
pegajosa, por ejemplo use el de la
marca Pam
®
. Haga eso cada vez antes
de asar.
• Para una limpieza más fácil, rocíe las
parrillas y el contenedor de los
quemadores con una capa no pegajosa.
• Utilice espátulas o utensilios que no
sean de metal para evitar que se dañe
el acabado de la parrilla del asador que
tiene una cubierta de teflón.
• Precaliente el asador en alto de 5 a 10
minutos. Al precalentar se mejora el
sabor y apariencia de las carnes y se
dora rápidamente la carne ayudando
de este modo a que retenga su jugo.
• Las cantidades excesivas de grasa
deberán cortarse de las carnes.
Un poco de grasa es necesaria para
producir el humo necesario para
obtener ese sabor ahumado “al aire
libre.” Sin embargo, la grasa excesiva
puede crear problemas de limpieza y
llamaradas.
• Permitir que haya cantidades excesivas
de grasa o que se queme, anula la
garantía de las parrillas del asador. Las
llamaradas excesivas indican, ya sea que
el interior necesita limpiarse, que la
carne tiene demasiada grasa o que la
carne no fue preparada
adecuadamente.
• Al chorrearse la grasa, en ocasiones
ésta se incendiará y despedirá aire o
fuego por un segundo o dos. Esto es
una parte normal del proceso de
cocción.
• Nunca deje sin vigilancia el asador
cuando esté funcionando.
IMPORTANTE:
• No utilice papel aluminio dentro del área
del asador.
• No utilice trozos de madera o carbón
dentro del área del asador.
• No permita que el contenedor de los
quemadores se sobrecargue de grasa.
Límpielo siempre después de usarlo.
• No cubra las parrillas completamente con
la carne.
• Deje espacio para que circule aire entre
cada trozo de carne, etc., para permitir
una ventilación adecuada, así como para
prevenir llamaradas.
Si surgiera una llamarada constante:
1. Utilice el control de ventilación para
encender el ventilador.
2. Haga girar las perillas de control del
asador hasta la posición de OFF
(apagado) de inmediato.
3. Quite la carne del asador.
Apoyo al consumidor
Solucionar problemas
Operación
Seguridad
Cuidado y limpieza
Page 44

Para asar.
12
Consejos para asar
• Con su asador, cualquier comida que
haya considerado “de lo mejor” cuando
se prepara al aire libre, ahora puede
prepararse dentro de la casa con menos
ajetreo y con un magnífico sabor.
• Las siguientes sugerencias son buenas
reglas a seguir e incrementarán el
placer de disfrutar de su equipo.
Asegúrese de seguir las instrucciones
de este manual en lo que se refiere al
uso del asador.
• Los tiempos de cocción y los ajustes de
control sugeridos son aproximados
debido a las variaciones en los tipos
de carnes. La experiencia pronto le
indicará los tiempos de cocción
adecuados y también en qué ajustes
funciona mejor.
• Para mejores resultados compre
siempre carne de la mejor calidad. Las
carnes de por lo menos 3/4 de pulgada
(19,1 mm) se asarán mejor que las de
corte más delgado.
• Para que la carne se vea atractivamente
“de calidad,” asegúrese de que el
asador esté precalentado. Permita que
un lado de la carne se cocine hasta el
punto deseado, o hasta que los jugos
aparezcan en la superficie, antes de
voltearla. Voltee los bistecs y las
hamburguesas solamente una vez.
Estar moviendo la comida origina la
pérdida de sus jugos.
• Al rociar la carne o aplicar salsas a la
comida, recuerde que las cantidades
excesivas se acumulan dentro de su
asador y no mejoran el sabor de la
comida. Aplique las salsas durante los
últimos 15 a 20 minutos de cocción a
menos que la receta lo especifique de
otro modo. Marinar a base de azúcar
(salsa de barbacoa, por ejemplo)
origina que se forme caramelo en
las parrillas del asador y esto creará
grandes problemas en el momento
de limpiarlas.
• Existen muchos ablandadores de carne,
los cuales ayudarán a ablandar cortes de
carne menos caros para cocinarlos en
el asador.
• Ciertos alimentos, tales como el
pescado no grasoso y aves, pueden
necesitar algo de grasa extra. Únteles
aceite o mantequilla derretida
ocasionalmente mientras los asa.
• Utilice pinzas de mango largo o
espátulas para voltear las carnes. No
utilice tenedores ya que éstos rasgan
la carne, permitiendo que se pierdan
los jugos.
• Para ayudar a retener los jugos de la
carne, póngale sal después de voltear la
carne o una vez que ya esté cocida.
• Corte la grasa de los bordes de los
bistecs pero no corte la carne para
evitar que enrollen durante la cocción.
Apoyo al consumidor Solucionar problemas Operación
SeguridadCuidado y limpieza
Page 45

13
Guía para asar. GEAppliances.com
Precaliente el asador en alto de 5 a 10 minutos para obtener un mejor sabor.
Tipo Ajuste de control Tiempo de cocción Procedimiento
Carne
Bistec [1/2″–3/4″ (12,7–19,1 mm)]
Poco cocido HI (alto) 6 a 10 minutos Voltee después 3 a 5 minutos.†
Medio cocido HI (alto) 10 a 16 minutos Voltee después 5 a 8 minutos.
Bien cocido HI (alto) 21 a 24 minutos Voltee después 6 a 12 minutos.
Bistec [1″–1
1
⁄4″ (25,4–31,7 mm)]
Poco cocido HI (alto) 14 a 24 minutos Voltee después 7 a 12 minutos.†
Medio cocido HI (alto) 18 a 30 minutos Voltee después 9 a 15 minutos.
Bien cocido HI (alto) 24 a 34 minutos Voltee después 12 a 17 minutos.
Hamburguesas [3–4 oz. (85–113 gr)] Medio 20 a 25 minutos Voltee a la mitad del tiempo.
Chuleta de puerco Medio 20 a 30 minutos Voltee ocasionalmente.
Chuletas ahumadas de puerco ya cocidas Medio 10 a 15 minutos Voltee a la mitad del tiempo.
Rebanadas de jamón Medio 15 a 20 minutos Voltee a la mitad del tiempo.
Costillas de puerco Medio 50 a 65 minutos Voltee ocasionalmente. Únteles
salsa de barbacoa durante los
últimos 15 minutos.
Salchihas ya cocidas
Perritos calientes, marinas HI (alto) 7 a 12 minutos Voltee ocasionalmente.
Salchichón polaco HI (alto) 13 a 16 minutos Voltee ocasionalmente.
Salchichas frescas
Salchichón Medio 15 a 25 minutos Voltee ocasionalmente.
Empanadas [3″ diameter (76,2 mm)] Medio 15 a 20 minutos Voltee a la mitad del tiempo.
Salchicha italiana Medio 25 a 30 minutos Pique la cubierta con un tenedor.
Voltee una sola vez.
Chuletas de cordero Medio 20 a 30 minutos
Voltee ocasionalmente. Barnícelo
si lo desea.
Aves
Pollo
Piezas: con hueso Medio 35 a 50 minutos Voltee ocasionalmente.
Pechugas sin hueso Medio 25 a 35 minutos Voltee ocasionalmente.
Alas Medio 25 a 35 minutos Voltee ocasionalmente.
Gallina inglesa (mitad) Medio 35 a 45 minutos Voltee ocasionalmente.
Pescado
Pequeño, entero [1″ (25,4 cm)] Medio 15 a 20 minutos Úntele mantequilla. Voltee a
la mitad del tiempo.
Bistecs [1″ (25,4 cm)] Medio 20 a 25 minutos Úntele mantequilla. Voltee a
la mitad del tiempo.
Filetes—con piel [1/2″ (12,7 cm)] Medio 10 a 15 minutos Comience con la parte de
la piel hacia abajo. Úntele
mantequilla. Voltee a la
mitad del tiempo.
Camarones (brochetas) Medio 10 a 20 minutos Voltee y únteles mantequilla o
marínelos frecuentemente.
Pan
Pan con ajo Medio 4 a 6 minutos Voltee a la mitad del tiempo.
Pan para hamburguesas o perritos Medio 1 a 2 minutos Voltee a la mitad del tiempo.
calientes
† El Departamento de Agricultura de los Estados Unidos de América dice que: “La carne poco cocida es muy popular, pero debe saber que cocinarla a
solamente 140 °F (60 °C) significa que algunos organismos tóxicos de la comida pueden sobrevivir.” (Fuente: Libro de Comida Segura. Su Guía de
Cocina. USDA Rev. Junio 1985.)
Apoyo al consumidor
Solucionar problemas
Operación
Seguridad
Cuidado y limpieza
Page 46

Otros accesorios.
14
Cubierta del asador
La cubierta del asador de acero texturizado
es atractiva para la sección del asador de la
estufa cuando no está en uso.
Para utilizar la cubierta del asador:
Quite la cubierta antes de calentar el
asador. Puesto que la cubierta del asador
no parece estar caliente, esto podría
causar quemaduras accidentales en caso
de que usted o alguien la toque. Calentar
la cubierta del asador puede dañar el
acabado.
No ponga la cubierta del asador sobre
el asador caliente. Deje que el asador se
enfríe antes de volver a poner la cubierta
en su lugar.
Utilice la cubierta únicamente sobre las
parrillas del asador. No la ponga en la
plancha para asar o en las parrillas de los
quemadores de la superficie.
IMPORTANTE: Aunque el acabado es muy
durable, debe tenerse el cuidado de evitar
colocar utensilios u otros objetos en la
superficie que puedan rayarla.
NO ponga recipientes extremadamente
calientes en la superficie, incluyendo asas,
ya que éstas pueden estropear o decolorar
la cubierta. Es una cubierta atractiva y un
cuidado apropiado la mantendrá de esta
manera.
La plancha para asar
Como usar la plancha para asar:
1. Antes de utilizarla por primera vez,
lave la plancha nueva en agua caliente
jabonosa, enjuague y seque. Luego,
“acondicione o cure” la superficie
untándole una capa delgada de aceite
para cocinar o manteca. Quite el
exceso de aceite o manteca
limpiándolo con una toalla de papel.
2. Inserte el quemador del asador. NO
utilice las parrillas del asador.
3. Coloque la plancha para asar sobre el
quemador del asador de forma que los
orificios de drenaje queden hacia el
frente. Esto permitirá que el exceso de
grasa se deposite en la charola grasera.
4. Precaliente la plancha de 5 a 10
minutos a la temperatura especificada
como lo muestra la Guía de la plancha
para asar.
5. Utilice espátulas o utensilios que no
sean de metal mientras cocina, para
evitar daños al acabado.
Guía de la plancha para asar
NOTA: Estas son guías sugeridas para los ajustes de control y tiempos. Hay factores, como la baja presión del gas,
que pueden afectar los tiempos y ajustes de control que proporcionan los mejores resultados. Precaliente 5 a
10 minutos al ajuste indicado.
Tipo de Ajuste de Tiempo de cocción aproximado Tiempo de cocción aproximado
alimento control para el primer lado para el segundo lado
Tocino Medio 4–5 minutos 3–4 minutos
Panes HI (alto) 2–3 minutos
Huevos Medio 2–3 minutos 1 minuto
Dedos de pescado Medio 7–8 minutos 5–7 minutos
(congelados)
Rebanada de jamón Medio 6–7 minutos 5–6 minutos
Hamburguesas Medio 5–7 minutos 4–6 minutos
Perritos calientes HI (alto) 5 minutos 5 minutos
Tostada francesa HI (alto) 2–4 minutos 2–3 minutos
Sándwiches de queso fundido HI (alto) 2–3 minutos 2–3 minutos
Panqueques HI (alto) 1–2 minutos 1–2 minutos
Rodajas de salchicha Medio 6–8 minutos 4–5 minutos
Apoyo al consumidor Solucionar problemas Operación
SeguridadCuidado y limpieza
Page 47

Perillas de control y sello del panel de control
Después de asar, las perillas y el sello del
control pueden tener hollín sobre ellos.
Se lo puede quitar restregando con una
fibra de plástico y detergente suave de
lavavajillas. Las perillas de control
pueden quitarse para limpiarlas.
Para quitar una perilla, tire de ésta
directamente hacia arriba.
Lave las perillas con agua y jabón pero
no las empape. Evite que se meta agua
en los orificios de las perillas.
Limpie con una esponja, paño húmedo
o toalla de papel. No raspe con fibra de
acero ni con limpiadores abrasivos.
Para reemplazar una perilla, corresponda
la parte plana de la abertura de la perilla
con el lado plano del eje.
Cuidado y limpieza.
GEAppliances.com
Antes de limpiar
Antes de limpiar cualquier parte de
la estufa, asegúrese de que todos los
controles estén apagados y DESCONECTE
LA ENERGIA ELECTRICA DE LA ESTUFA en
la caja de fusibles o en el panel principal
del interruptor del circuito de suministro
de corriente, o desconecte el enchufe de
corriente localizada debajo de la estufa y
dentro de los gabinetes.
No opere la estufa sin que estén
colocadas todas las partes.
Recipiente para grasa
Hay un recipiente para grasa que está
localizado bajo el contenedor del
asador, debajo de la encimera. Revise
periódicamente para evitar que se
derrame. Desatornille y quítelo.
Si se rompe el recipiente, cámbielo por
cualquier recipiente templado al calor,
por ejemplo frascos que tengan un
cuello de rosca estándar.
Cubierta de porcelana
El acabado de porcelana esmaltada es
resistente, pero puede romperse debido a
un mal uso. El acabado es resistente a los
ácidos. Sin embargo, cualquier tipo de
alimentos ácidos que se derramen (como
zumos de fruta, jitomate o vinagre) no
debe dejarse mucho tiempo sobre el
acabado.
Si se derraman ácidos sobre la estufa
cuando está caliente, use una toalla de
papel seca para limpiar de inmediato.
Cuando la superficie se haya enfriado,
lave con jabón y agua o con polvos
limpiadores. Enjuague bien.
Para otro tipo de derrames, como son las
salpicaduras de grasa, lave con jabón y
agua o con polvos para limpiar una vez
que la superficie esté fría. Pula con una
tela seca.
Superficies de acero inoxidable
No use una almohadilla de lana de acero ya
que rayará la superficie.
Para limpiar la superficie de acero
inoxidable, use agua jabonosa tibia, un
limpiador de acero inoxidable tal como
Kleen King
®
, o un líquido o spray de
propósitos múltiple. Siempre lave en la
dirección de la veta. Enjuague
completamente con una esponja o paño y
agua limpia. Seque con un paño suave
y limpio.
Después de limpiar, use una cera para
acero inoxidable, como Stainless Steel
Magic
®
, Revere Copper®y Stainless Steel
Cleaner
®
o Wenol All Purpose Metal
Polish
®
. Siga las instrucciones del producto
para limpiar las superficies de acero
inoxidable.
15
Apoyo al consumidor
Solucionar problemas
Operación
Seguridad
Cuidado y limpieza
Page 48

El quemador del asador deberá limpiarse
siempre después de usarse. Puede
limpiarse con una fibra de lana de acero
o en la lavavajillas. Enjuague y seque
perfectamente bien antes de volver a
utilizarlo. Para manchas muy pegadas,
primero deberá limpiarse el quemador
con una fibra de acero remojada en agua
jabonosa, enjuagada y secada. Luego,
puede ponerse en un horno de
autolimpieza durante dos horas.
NOTA: Revise que todos los puertos de los
quemadores estén abiertos. Para abrir
puertos que estén obstruidos, meta un
alambre delgado directamente en cada
puerto.
Quemador del asador
Cuidado y limpieza.
16
Las parrilla deben limpiarse después de
usarse. Pueda limpiarse con detergente y
una fibra de plástico, como Tuffy, o
lavarse en la lavavajillas si primero se le
quitan los residuos quemados. Para
manchas muy adheridas, las parrillas
pueden meterse en agua jabonosa
caliente a la que se haya añadido
amoniaco casero.
No utilice cepillos de metal o fibras de
limpieza abrasivas u otras fibras que sean
para limpiar parrillas que están en el
exterior. Este tipo de fibras quitarán el
acabado y también rayarán las parrillas. No
se limpie en un horno de autolimpieza ni use
limpiadores para horno en las parrillas.
Parrillas del asador
La cubierta del asador puede limpiarse
fácilmente con un paño húmedo y
detergente suave o limpiador líquido
casero. Enjuague y seque perfectamente
bien.
NO se lave en la lavavajillas.
Cubierta del asador
Rejilla de ventilación: La rejilla de
ventilación puede levantarse fácilmente.
Límpiela con un paño o lávela en el
fregadero con detergentes caseros suaves.
NOTA: En los modelos con una rejilla
blanca de ventilación, las manchas de difícil
remoción se pueden eliminar colocando la
rejilla en remojo por toda la noche en una
mezcla 50/50 de blanqueador y agua.
Después de limpiarla, enjuague la rejilla
completamente y séquela antes de
reemplazarla.
Filtro: Apague el ventilador antes de
quitarlo. Haga girar la abrazadera de
presión que detiene al filtro para así poder
quitarlo. El filtro es del tipo permanente y
deberá limpiarse cuando se ensucie. Lávelo
en el fregadero con agua tibia y detergente
líquido de lavavajillas.
IMPORTANTE: No haga funcionar el
ventilador sin el filtro. El filtro siempre
debe colocarse en un ángulo. Estando
usted de frente a la estufa, la parte superior
del filtro debe descansar en la parte
izquierda de la abertura de ventilación
y la parte inferior del filtro deberá
descansar en la parte derecha de la cámara
de ventilación al fondo. Si el filtro está
plano pegado a la pared del ventilador, la
efectividad de la ventilación se reduce.
Cámara de ventilación: Esta área, que
guarda el filtro, debe limpiarse en caso
de algún derrame o siempre que se cubra
con una capa de grasa. La cámara de
ventilación puede limpiarse con una
toalla de papel, paño húmedo o esponja
y un detergente o limpiador suave casero.
Rejilla y filtro de ventilación
Al reemplazar el filtro, cerciórese
de que éste descanse en un
ángulo, en los soportes de la
abertura de ventilación. Asegúrelo
en su lugar.
Page 49

17
Accesorio de la plancha para asar
NO sumerja la plancha caliente en
agua fría.
Una vez que se haya enfriado la plancha,
lave con jabón o detergente en agua
caliente en el fregadero. Asegúrese de
quitar todos los residuos de comida antes
de volver a cocinar en la plancha.
Quite los puntos difíciles con una fibra
de plástico. Para obtener mejores
resultados, utilice únicamente aquellos
productos de limpieza recomendados
para limpiar superficies de teflón. No
utilice fibras de acero o fibras ásperas.
NO se lave en la lavavajillas.
GEAppliances.com
Ignitores
Es importante mantener las aberturas del
puerto de ignitores en los quemadores
libres de obstrucciones para evitar fallas
en la ignición y posible acumulación de
gas. Si las aberturas del puerto están
bloqueadas, use un alambre para retirar
las partículas de alimentos.
Módulos de quemador sellado
Estufa de superficie:
Para evitar que la estufa se descolore o
se manche:
• Limpie la estufa después de
cada uso.
• Limpie los derramamientos de ácido
o azúcar tan pronto como la estufa se
haya enfriado, ya que éstos pueden
decolorar la porcelana.
Quemadores sellados:
Los quemadores sellados de su estufa
están fijados al módulo de la estufa y no
están diseñados para retirarse. Dado que
los quemadores están sellados en el
módulo, los hervores excesivos o los
derramamientos no se filtrarán por
debajo de la estufa. Sin embargo,
después de cada uso se deben limpiar las
cabezas de los quemadores.
Parrillas de los quemadores:
Las parrillas se deben colocar
correctamente antes de cocinar. La
instalación incorrecta de las parrillas
puede resultar en el descascaramiento
de la estufa.
No opere los quemadores sin una sartén en
la parrilla. El acabado de porcelana de la
parrilla puede descascarse sin una sartén
que absorba el calor de la llama del
quemador.
Aunque las parrillas de los quemadores
son duraderas, gradualmente perderán
su brillo y/o se descolorarán, debido a
las altas temperaturas de la llama de gas.
Contenedor de porcelana de los quemadores
Esta área está localizada debajo del
asador y de los quemadores de la
superficie y deberán limpiarse después
de cada uso del asador.
Para quitar las manchas suaves, limpie
con agua jabonosa o con un limpiador
como el 409
®
. Para una fácil limpieza,
empape toallas de papel en un limpiador
casero, póngalos en el contenedor de los
quemadores y deje en remojo por lo
menos media hora o más.
Para quitar manchas moderadas, raspe
con Comet
®
, Bon Ami®, una fibra suave o
de plástico.
Para quitar manchas difíciles, rocíe con
un limpiador de hornos. Deje reposar
toda la noche. Limpie, enjuague y seque.
Apoyo al consumidor
Solucionar problemas
Operación
Seguridad
Cuidado y limpieza
Page 50

INSTRUCCIONES
IMPORTANTES DE
SEGURIDAD
La estufa es un diseño que ha sido certificado por la
Asociación Norteamericana de Gas. Como sucede con
cualquier aparato que utilice gas y genere calor, hay ciertas
precauciones de seguridad que debe seguir. Encontrará estas
precauciones en la sección Instrucciones importantes
de seguridad en esta manual. Léala detenidamente.
•
Asegúrese de que la estufa sea instalada adecuadamente
por un técnico calificado o un técnico en servicio
.
• La estufa debe tener conexión a tierra de acuerdo con los
códigos locales, o en ausencia de éstos, con el Código Eléctrico
Nacional ANSI/NFPA No. 70—última edición.
• La instalación de esta estufa debe realizarse de acuerdo
con los códigos locales, o en la ausencia de códigos locales,
con el Código de Gas Combustible Nacional.
ANSI Z223.1—última edición.
• La instalación, el ajuste, la alteración, el servicio o
mantenimiento incorrectos pueden causar lesiones o
daños a la propiedad. Consulte este manual. Para
asistencia o información adicional, consulte a un instalador
calificado, agente de servicio, fabricante (distribuidor) o
al abastecedor de gas.
• Desconecte el suministro eléctrico antes de dar servicio
al aparato.
• Nunca reutilice conectores flexibles viejos. Usarlos
podría causar fugas de gas y lesiones personales. Siempre
use conectores flexibles NUEVOS al instalar un
electrodoméstico a gas.
• Asegúrese de que los recubrimientos de las paredes que
están alrededor de la estufa resistan el calor generado por
la estufa hasta 200 °F (93 °C).
• Evite colocar gabinetes encima de la estufa.
• Si hay gabinetes colocados arriba de la estufa, deje una
distancia mínima de 30″ (76,2 cm) entre la superficie para
cocinar y la parte de abajo de los gabinetes que están protegidos.
• Si una tolerancia de 30″ (76,2 cm) entre la superficie de cocina
y el material combustible encima de la estufa o los gabinetes
metálicos no pueden mantenerse, proteja la parte de abajo de
los gabinetes que se encuentran en la parte superior de la estufa
con no menos de
1
⁄4″ (6,4 mm) de cartón y aislante o lámina de
yeso de al menos
3
⁄16″ (4,8 mm), cubierta con una hoja de metal
de calibre 28 o de cobre 0,020″ (0,5 mm) de espesor.
• La distancia entre la superficie para cocinar y los
gabinetes protegidos NUNCA DEBE SER MENOR QUE
24 PULGADAS (61 cm). La distancia vertical desde la
superficie para cocinar hasta la parte inferior de los
gabinetes adyacentes superiores que se extienden más de
2″ (5,1 cm) a los lados del plano de la estufa no debe ser
menor de 18″ (45,7 cm).
POR SU SEGURIDAD
Si percibe olor a gas:
1. Abra las ventanas.
2. No toque los interruptores eléctricos.
3. Apague cualquier llama abierta.
4. Llame de inmediato a su abastecedor de gas.
No almacene o use gasolina u otros vapores y líquidos
inflamables en la cercanía de este o cualquier otro aparato.
Instrucciones Estufa de cubierta a gas
de instalación con tiro descendente
¿Preguntas? llame a 800.GE.CARES (800.432.2737) o visite nuestro sitio Web: GEAppliances.com
ANTES DE COMENZAR
NOTA IMPORTANTE: Este producto es para uso con
gas natural únicamente. NO se puede convertir para
uso con gas P.L.
Lea estas instrucciones completa y cuidadosamente.
•
IMPORTANTE
–
Guarde estas
instrucciones para el uso del inspector local.
•
IMPORTANTE
–
Observe todos los
códigos y ordenanzas vigentes.
• Nota al instalador – Cerciórese de dejar estas
instrucciones con el consumidor.
• Nota al consumidor – Conserve estas
instrucciones para referencia futura.
• La instalación correcta es responsabilidad del
instalador.
• La falla del producto debido a una instalación
incorrecta no está cubierta por la garantía.
ADVERTENCIA
–
Antes de empezar la
instalación, cierre el suministro de corriente en el panel
del servicio y bloquee el medio de desconexión del
servicio para evitar que se encienda accidentalmente.
Cuando el medio de desconexión del servicio no se pueda
bloquear, fije firmemente en el panel de servicio un
dispositivo de advertencia prominente, como un letrero.
En el Estado de Massachusetts:
• Este producto lo debe instalar un plomero con
licencia o un instalador de gas.
• Al usar válvulas de cierre de gas de tipo esfera,
no deben ser del tipo de manija en T.
• Un conector de gas flexible, cuando se utilice,
no debe superar los 3 pies.
18
Page 51

PREPARANDOSE PARA LA
INSTALACION
Instrucciones de instalación
HERRAMIENTAS Y PARTES
NECESARIAS
• Destornillador largo de punta plana
• Serrucho
• Escuadra de carpintero
• Llave para cortar tubos
• Llave de boca de 7/16″
• Llave de paso para gas
• Sellador para las juntas de tubería para uso con
conexiones de gas
Para conexiones flexibles donde los códigos locales lo
permitan:
• Tubería de metal flexible [de diámetro interior igual
a la línea de abastecimiento de gas de 3/4″ ó 1/2″
(19,1 mm ó 12,7 mm)].
• Adaptador cónico de unión para conectarlo a la línea
de abastecimiento [3/4″ medida estándar (NPT) x
3/4″ de diámetro interno, o 1/2″ medida estándar
(NPT) x 1/2″ de diámetro interno] (19,1 mm x 19,1
mm o 12,7 mm x 12,7 mm).
• Adaptador cónico de unión para conectarlo al
regulador [1/2″ medida estándar (NPT) x 3/4″
de diámetro interno o 1/2″ de diámetro interno]
(12,7 mm x 19,1 mm o 12,7 mm).
Para conexiones rígidas:
• Piezas de conexión de tubería según se requiera.
LISTA DE PARTES
• Unidad de base de la estufa de cubierta a gas
• Paquete de literatura
• 1 ensamblaje de quemador de superficie
• 2 parrillas de los quemadores
• 1 filtro de aire
• 1 rejilla de aire
• 1 recipiente para grasa
JGP979
Apriete los
pernos que
están en
cada extremo
Seleccione el corte
apropiado para el
tubo. (Consulte las
instrucciones de
instalación de la
tubería.)
Regulador
de presión
del aparato
Recipiente
contenedor
de grasa
Recipiente contenedor
de grasa
Regulador de
presión
Cubierta de la
caja del cableado
28
7
⁄8″1⁄16″
* La unidad de tiro
descendente puede
girarse 90 grados.
* El tiro puede hacerse girar en dirección horizontal o vertical al aflojar
las tuercas que se encuentran alrededor de la entrada del tiro.
Dentro existe una cámara de ventilación accesible.
79⁄16″
15
5
⁄8″
3
5
⁄16″
11
7
⁄8″
9
3
⁄8″
17⁄8″ Mín.
15
⁄16″
20
15
⁄16″1⁄16″
Distancia
mínima
Distancia
mínima
73,34 .16 cm
23,81 cm
2,38 cm
8,41 cm
39,69 cm
2″
30,16 cm
4,76 cm
19,21 cm
53,18 .16 cm
14″
35,56 cm
13″
33,02 cm
IMPORTANTE
Distancia del motor—Proporciona 2″ mínimo (5,1 cm)
de distancia entre el gabinete y el motor destinado al
enfriamiento.
NOTA: Donde sea posible, se recomiendan 6″
(15,2 cm) para el servicio del motor/extractor.
Distancia lateral—Los asadores instalados cerca de una
pared deben tener una distancia de 8″ (20,3 cm).
Debe permitirse que haya espacio suficiente para poder
quitar y vaciar el recipiente para grasa.
PRECAUCION: La garantía es nula cuando el equipo se
instala de manera diferente a la recomendada por GE.
Deben utilizarse las protecciones para cables de la pared
y los cables recomendados para un funcionamiento e
instalación apropiados.
19
Distancia
mínima
5,08 cm
Page 52

COMO INSTALAR LOS
GABINETES EN LA PARTE
SUPERIOR DE LA ESTUFA
(cont.)
Si los gabinetes se instalan en la parte superior
de la estufa, deje una distancia mínima de 30″
(76,2 cm) entre la superficie para cocinar y la
parte de abajo del gabinete.
Se debe instalar un material no combustible en la
parte de abajo del gabinete. Utilice una estufa
retardante a las llamas por lo menos de 1/4″
(6,3 mm) de ancho o una lámine de yeso por lo
menos de 3/16″ (4,7 mm) recubierta con una
hoja de acero de calibre 28 o de cobre de 0,020″
(0,5 mm) de ancho. La profundidad máxima de
los gabinetes en la parte superior de la estufa es
de 13″ (33 cm).
EXCEPCION: La instalación de un horno de
microondas o de otro aparato para cocinar sobre
la estufa debe estar en conformidad con las
instrucciones de instalación que estén incluidas
en el aparato.
Las áreas de trabajo adyacentes a la estufa
deberán tener una distancia mínima de 18″
(45,7 cm) entre la estufa y la parte de abajo de los
gabinetes. Si la distancia es menor de 18″ (45,7
cm), los gabinetes adyacentes deberán estar por
lo menos a 8″ (20,3 cm) de los lados de la estufa.
20
Instrucciones de instalación
ESPACIO MINIMO REQUERIDO
Cuando instale una estufa de doble unidad de tiro
en combinación con otra estufa de tiro, conserve
entre las unidades el espacio mínimo que se
muestra. Instalarlas demasiado cerca afectará su
funcionamiento.
43⁄8″
11,1 cm
18″
45,7 cm
1
COMO INSTALAR LOS
GABINETES EN LA PARTE
SUPERIOR DE LA ESTUFA
Si es posible, evite colocar gabinetes sobre la
unidad de la estufa, para reducir así los peligros
que se originan cuando hay que tomar algo que
esté en un gabinete, pasando el brazo sobre las
unidades de la superficie que están calientes.
25″
(63,5 cm)
30″ mín
(76,2 cm)
30″
(76,2 cm)
13″
(33 cm)
18″
(45,7 cm)
8″ mín. desde la
pared (20,3 cm)
8″ mín. desde la
pared (20,3 cm)
36″
(91,4 cm)
1
Page 53

UBICACION DEL SUMINISTRO
ELECTRICO Y DE GAS
La posición del
receptáculo para
el suministro
eléctrico y del tubo
para el suministro
de gas que ingresa
al gabinete debe ser
ubicada como se
muestra en las áreas
de sombra indicadas
en seguida. La
estufa está equipada
con un cable eléctrico
de 4′ (1,2 m), que puede alcanzar cualquier
posición en las paredes del gabinete. La estufa debe
ser desconectada del suministro eléctrico antes de
llevar a cabo cualquier mantenimiento.
;;;;;;;
;;;;;;;
;;;;;;;
;;;;;;;
;;;;;;;
PREPARACION DE LA
SUPERFICIE
Corte la abertura como lo muestra el diagrama.
Mida cuidadosamente cuando corte la superficie,
asegúrese de que los lados de la abertura estén
paralelos y que los cortes del frente y de atrás están
exactamente perpendiculares a los lados.
La parte del frente de la abertura debe dejar libre
el riel de soporte en el gabinete y la parte de atrás
de la abertura debe dejar libre el soporte trasero
del gabinete.
Bisele todas las orillas expuestas del laminado
decorativo para evitar que se astillen.
Curve las esquinas de los cortes y lije para asegurar
que las orillas estén suaves y así prevenir que se
rompan las esquinas.
Las orillas rasposas dentro de las esquinas que no se
hayan redondeado y los ajustes forzados pueden
contribuir a que se rompa el laminado de la superficie.
La superficie debe mantenerse con un corte dentro
de 3″ (7,62 cm).
21
Instrucciones de instalación
PROPORCIONE EL SUMINISTRO
ADECUADO DE GAS
Esta estufa está diseñada para funcionar
solamiente con gas natural a 5″ (12,7 cm) de
la presión de la columna de agua. Es para uso
con gas natural únicamente y no es convertible
a gas P.L.
Se deberá conectar un regulador de presión en
serie al múltiple de la estufa y deberá permanecer
en serie con la línea de abastecimiento.
Para una operación correcta, la presion máxima
de entrada hacia el regulador no debe ser
superior a 10″ (25,4 cm) de presión de
columna de agua para gas natural. Para revisar el
regulador, la presión de entrada deberá ser por lo
menos 1″ (2,54 cm) mayor que la del ajuste de
salida del regulador. Si el regulador está ajustado
para una presión de columna de agua de 5″ (12,7
cm), la presión de entrada deberá ser de por lo
menos 6″ (15,2 cm).
Para poder facilitar la instalación, y si los códigos
locales lo permiten, la línea de abastecimiento de
gas hacia la estufa deberá tener un diámetro
interior de 1/2″ (13 mm) o 3/4″ (19 mm) con un
aditamento conector de metal flexible de tres
(0,91 m) a cinco pies (1,52 m) de largo.
No menos de 17⁄8″
4,8 cm
No menos de 15⁄16″ (2,4 cm)
813⁄16″ (22,2 cm) corte
mín. desde la pared
813⁄16″ (22,2 cm) corte
mín. desde la pared
19″
(48,2 cm)
14″
(35,5 cm)
(40,6 cm)
Tomacorriente
Areas adecuadas para el
suministro eléctrico y de gas.
Dimensiones del corte en
la superficie
Parte trasera de la
superficie
Parte delantera
de la superficie
Entrada del gas
COMO PROBAR LA PRESION
La presión máxima de abastecimiento de gas para
el regulador proporcionado en este aparato es de
14″ (35,6 cm) W.C. La presión de prueba para
revisar este regulador deberá ser de por lo menos
6″ W.C. (15,2 cm). Se despacha con ajuste de la
fábrica para gas natural a 5″ W.C. (12,7 cm).
Este aparato y su llave de paso individual deberán
desconectarse del sistema de tubería del
abastecimiento de gas cuando se haga alguna
prueba de presión de este sistema a presiones de
prueba que excedan 1⁄
2 PSIG.
Este aparato deberá aislarse del sistema de la
tubería de abastecimiento de gas cerrando su
llave de paso individual manual durante cualquier
prueba de presión del sistema de la tubería del
abastecimiento de gas a una presión de prueba
igual o menor que
1
⁄2 PSIG.
16″
2015⁄
16 ±
1
⁄16″
53,2 ± 0,16 cm
2815⁄
16 ±
1
⁄16″
73,3 cm ± 0,16 cm
2
3
4
5
Page 54

PREPARACION PARA EL DUCTO
NOTA: El ducto DEBE desfogarse en el exterior.
NO se desfogue en una pared, techo, espacios
pequeños, ático o cualquier espacio cerrado.
Determine la mejor ruta para el ducto, que
puede colocarse en una gran variedad de formas,
dependiendo de la distribución de la cocina.
Arreglo típico del ducto de la serie de estufas en
cubiertas.
22
Instrucciones de instalación
CONEXION DE GAS
Haga la conexión de
gas en la entrada del
regulador de presión
usando este aditamento
con una unión de tubo
de 1/2″ (12,7 mm) con
rosca macho. Utilice un
compuesto de unión de
tubos aprobado en las
conexiones de tuberías.
Instale una llave de
paso manual en la línea
de gas en una
localización de fácil
acceso, lo más cerca
posible del extremo del
tubo, dejando espacio
para la tubería de
ventilación.
Asegúrese de saber
cómo y dónde se cierra el abastecimiento
de gas de la estufa.
NOTA:
En lugar de usar tubería sólida para conectar
el regulador de presión, puede utilizarse un
conector de metal flexible que esté aprobado,
para colocarlo entre el extremo del tubo, la llave
de paso y el regulador de presión, si los códigos
locales lo permiten.
Se requieren adaptadores de unión para tubería
apropiados en los extremos de cada conector
flexible.
Abra la llave; revise que no haya fugas utilizando
un detector de fugas en líquido y pruebe todas las
uniones del sistema de tubería.
PRECAUCION: NO UTILICE UNA LLAMA
PARA DETECTAR FUGAS DE GAS.
IMPORTANTE—Desconecte la estufa y la llave de
paso individual del sistema de la tubería de
abastecimiento de gas durante cualquier revisión
de presión de ese sistema a presiones de prueba
mayores a 1⁄2 PSIG. Aísle la estufa del sistema de
la tubería del suministro de gas cerrando la llave
de paso individual hacia la estufa durante
cualquier revisión de presión del sistema de la
tubería de abastecimiento de gas a presiones de
prueba iguales o menores a 1⁄2 PSIG.
Gabinete de la
pared interior
Arriba en la pared interior hacia
el techo o colgado
Directamente al exterior
Entre las vigas del piso A través del espacio del
gabinete de la base
Península o isla
Peninsula
Gabinete de la
pared exterior
Codo de transición
de 3
1
⁄4″ x 10″
(8,2 cm x 25,4 cm)
Codo de
transición
3
1
⁄4″ x 10″
(8,2 cm x 25,4 cm)
6
Arreglo opcional del ducto bajo la losa de concreto.
7
Extremo del tubo
Llave de paso
Regulador de presión
para aparatos de gas
Unión de tubo de
1/2″ (12,7 mm)
con rosca
NOTA: Ducto de desfogue de PVC tipo PSM 1254-B.
Catálogo 40 ASTM D1785
Tapa de
la pared
16″ máx.
(40,6 cm)
Losa de
concreto
12″ mín.
(30 cm)
Unión de
PVC de 6″de
diám. (15,2 cm)
Unión de
PVC de 6″
de diám.
(15,2 cm)
Tubo de metal
de 6″ de diám.
(15,2 cm)
Adaptador de metal de 5″ a 6″
(12,7 a 15,2 cm)
Ducto de desfogue
de PVC de 6″ de
diám. (15,2 cm)
Codo del conducto
de desfogue de
PVC de 6″ de diám.
(15,2 cm)
Codo del ducto de
desfogue de PVC
de 6″ de diám. 90°
(15,2 cm)
Rellene muy bien
alrededor de los
ductos con grava
o arena.
30′ (9,14 m)-0″máx.
Tubo de metal de 6″
de diám. (15,2 cm)
Ducto de desfogue
de PVC de 6″ de
diám. (15,2 cm)
Codo de metal de
6″ de diám. 90°
(15,2 cm)
Page 55

Instrucciones de instalación
INSTALACION DEL CONDUCTO
• Las tuberías deben estar de conformidad con los
requerimientos de los códigos locales de materiales y
“vista de la instalación”—300 CFM como mínimo.
• IMPORTANTE: Guarde estas instrucciones para uso
del inspector local de electricidad.
• Las conexiones de la tubería de una estufa son muy
sencillas pero son de importancia esencial para el
funcionamiento adecuado de la misma.
• Después de leer estas instrucciones, planee la trayectoria
del ducto.
• Use la Tabla de Longitud del Ducto en la página 25 para
encontrar la longitud equivalente de la trayectoria.
• Cambie el ventilador a “margen alto” si está indicado
hacerlo (esto se hace quitando el “anillo
estrangulador” de la entrada del ventilador).
Asegúrese de que el ventilador no esté funcionando.
• Instale el ducto.
CONSIDERACIONES GENERALES:
1. Use un ducto de 6″ de diámetro (redondo) o de 31⁄4″
x 10″ (8,3 cm x 25,4 cm) si es rectangular, con las
siguientes excepciones: Para modelos de gas, debe
usarse un diámetro de 5″ (12,7 cm) si el largo de la
tubería recta es de 10 pies (3,05 m) o menos, usando
una tapa redonda de pared de 5″ (12,7 cm).
2. No use codos de 5″ (12,7 cm) excepto en un sistema
de 5″ (12,7 cm). En lugar de eso, utilice un conector
de 5″ (12,7 cm) a 6″ (15,24 cm), o un codo de
transición de 3
1
⁄4″ x 10″ (8,3 x 25,4 cm) de 5″
(12,7 cm).
3. Utilice una tubería de metal de buena calidad,
galvanizada, por lo menos de calibre 26 ó 24, de
IMPORTANTE
La tolerancia total del sistema de ductos es:
90 pies con tapa redondo de pared de 6″
80 pies con tapa de pared de 3
1
⁄4″ x 10″
(8,26 cm x 25,4 cm)
El margen bajo es hasta de 60 pies.
El margen alto es de 61 a 90 pies.
aluminio. Si usa tubos de calidad inferior puede causar
una restricción hasta del doble de lo que se muestra y
eso representa un valor muy bajo. Consulte la sección
Preparación para el ducto de esta guía para ver que otro
tipo de tubería puede elegir. Los códigos locales
pueden exigirle el uso de un material de mayor calibre
o restringir el uso de PVC.
4. La distancia entre las conexiones adyacentes (codos,
transiciones, etcétera) debe ser por lo menos de 18″
(45,7 cm). Entre más lejanas estén una de otra, será
mejor el resultado. Las distancias cortas promueven
turbulencias que reducen el flujo de aire.
5. El número de codos o transiciones de bajada debe
limitarse a tres. La transición recta de 5″ a 6″ (12,7
cm a 15,2 cm), en caso de usarse, no necesita
limitarse a esta cantidad.
6. Los emboquillados hechos a mano quizá originen
restricciones.
7. Si se usa una tapa de pared o de techo alternativa,
cerciórese de que no se reduzca el tamaño del ducto
y de que no haya una válvula de retroceso de
corriente. Es mejor utilizar las tapas que se
encuentran en la lista para estar seguros de que
funcionarán de manera correcta.
8. Interruptor térmico: En áreas de clima
extremadamente frío, quizá sea necesario
proporcionar un ducto corto no metálico colocado
tan cerca de la pared como sea posible para evitar la
conducción a lo largo del ducto de metal.
9. Instalaciones a gran altitud: Es recomendable reducir la
trayectoria del ducto en un 20%.
10. Siga cuidadosamente los cálculos para
ductos que están en esta guía para un mejor
rendimiento y satisfacción.
PLANEE LA TRAYECTORIA DEL
DUCTO
1. Haga un boceto de todo el sistema. Identifique el tipo
de cada una de las conexiones y la longitud del tubo
recto. Consulte los ejemplos de la página 24.
2. Anote el valor de su trayectoria en la Tabla de
longitudes de ducto en la página 25. Los codos, las tapas
de pared y otras conexiones se muestran en la tabla con
su longitud equivalente de ducto recto. Cada valor de
conexión debe añadirse a la longitud de ducto recto
usado para determinar la longitud equivalente del ducto
recto total. Utilice como guía los siguientes ejemplos.
3. Usando material para ductos de buena calidad, instale
siguiendo estas instrucciones. Unos cuantos minutos y
un poco de dinero que invierta ahora le rendirán
beneficios a largo plazo durante la vida útil de la estufa.
COMO CAMBIAR EL TIRO O
EXTRACTOR DE “BAJO
RANGO” A “ALTO RANGO”
Esta estufa está equipada con un extractor de rango
doble. Se envía desde la fábrica en el modo de bajo
rango para la mayoría de las instalaciones. Si el
Tamaño equivalente del ducto excede los 60 pies
(18,3 m) entonces debe cambiarse a alto rango.
No lo cambie a alto rango para tuberías más cortas.
Esto causaría un ruido excesivo, pérdida de aire
acondicionado y afectaría el patrón de la llama de los
quemadores de gas.
Para cambiar a alto
rango, asegúrese de que
el tiro o extractor esté
apagado. Quite la rejilla
de aire. Quite el filtro y la
salvaguardia de entrada.
Saque el anillo reductor
de la entrada del tiro o
extractor. Vuelva a
colocar la salvaguardia
de entrada, la rejilla y
el filtro.
8
9
10
23
Page 56

24
Instrucciones de instalación
Ejemplo 2
Longitud Número Total de
equivalente de las longitud
de las conexiones equivalente
conexiones de las
conexiones
Transición
5″ a 6″ 111
Tubería
recta de 6″ 1 2+4+6+4=16 16
Codo de 6″ 5315
Transición
6″ a
31⁄4″ x 10″ 111
Tubería
recta de
31⁄4″ x 10″ 11010
Tapa de
pared de
31⁄4″ x 10″ 20 1 20
Total 63
Ejemplo 1
Longitud Número Total de
equivalente de las longitud
de las conexiones equivalente
conexiones de las
conexiones
Transición
5″ a 6″ 111
Tubería
recta de 6″ 1 2+4+6=12 12
Codo de 6″ 5210
Tapa de
pared de 6″ 28 1 28
Total 51
Transición 5″ a 6″
Transición 5″ a 6″
10′ de tubería recta de
3
1
⁄4″ x 10″
Transición 6″ a 3
1
⁄4″ x 10″
2′ de tubería recta
de 6″
2′ de tubería recta
de 6″
Codo de 6″
Codo de 6″
Codo de 6″
Codo de 6″
Codo de 6″
4′ de tubería recta
de 6″
4′ de tubería recta
de 6″
4′ de tubería recta
de 6″
Tapa de pared
de 3
1
⁄4″ x 10″
6′ de tubería recta
de 6″
6′ de tubería recta
de 6″
Tapa de pared de 6″
Page 57

25
Instrucciones de instalación
TABLA DE LONGITUD DEL DUCTO
Longitud equivalente Número Total de longitud
de las conexiones de equivalente de
Conexiones de los ductos del ducto conexiones las conexiones
Codo de 90° de 8″ de diámetro
5′
(1,52 m)
Codo de 45° de 6″ de diámetro
2,5′
(0,76 m)
Transición de 5″ a 6″
1′
(12,7 cm a 15,24 cm) (0,30 m)
Codo de 90° de 6″ a 31⁄4″ x 10″ 5′
(15,24 cm a 8,26 cm x 25,4 cm) (1,52 m)
Codo de 90° de 31⁄4″ x 10″ a 6″ 9′
(8,26 cm x 25,4 cm a 15,24 cm) (2,75 m)
Transición de 6″ a 31⁄4″ x 10″ 1′
(15,24 cm a 8,26 cm x 25,4 cm) (0,30 m)
Transición de 3
1
⁄4″ x 10″ a 6″ 4,5′
(8,26 cm x 25,4 cm a 15,24 cm) (1,37 m)
Codo de 90° de 5″ a 31⁄4″ x 10″
6′
(12,7 cm a 8,26 cm x 25,4 cm) (1,83 m)
Codo de 90° de 31⁄4″ x 10″ 5′
(8,26 cm x 25,4 cm) (1,52 m)
Codo plano de 3
1
⁄4″ x 10″ 12′
(8,26 cm x 25,4 cm) (3,66 m)
Tapa de pared de 6″
28′
(15,24 cm) (8,53 m)
Tapa de pared de 3
1
⁄4″ x 10″ 20′
(8,26 cm x 25,4 cm) (6,10 m)
Desfogue de techo de 10″ x 10″
0′
(25,4 cm x 25,4 cm) (0 m)
Interruptor térmico
2′
(0,61 m)
Ducto recto de 6″ de diámetro–Pies
1′
(para ducto flexible multiplique por 2) (0,30 m)
Ducto recto de 3
1
⁄4″ x 10″ Pies 1′
(0,30 m)
Total sistema
Flujo de aire
Flujo de aire
Flujo de aire
Flujo
de aire
Flujo de aire
Flujo de
aire
No se recomienda esta dirección para el flujo de aire.
No se recomienda esta dirección para el flujo de aire.
Page 58

26
Instrucciones de instalación
CONEXION ELECTRICA
Requerimientos eléctricos:
120 voltios, 60 Hertz, circuito individual, rama
de circuitos conectados a tierra adecuadamente
y protegidos por un interruptor de circuito de
15 amperios o un fusible de retardo.
CONEXION A TIERRA
IMPORTANTE: (Por favor lea con cuidado)
POR SU SEGURIDAD PERSONAL, ESTE
APARATO DEBE ESTAR CONECTADO A
TIERRA EN FORMA APROPIADA.
El cable eléctrico de este aparato está equipado
con una clavija de tres patas (para conexión a
tierra) la cual se conecta a una tomacorriente de
pared que esté conectada a tierra y que tenga tres
entradas estándar para minimizar de este modo la
posibilidad de riesgo de un choque eléctrico con
este aparato. El cliente debe hacer que un
electricista calificado revise la tomacorriente de la
pared y el circuito para asegurarse de que
la tomacorriente esté conectada a tierra de
manera correcta y de que tenga la polaridad
correcta.
Donde haya una tomacorriente de pared de dos
entradas, es la responsabilidad y obligación
personal del cliente cambiarla por una
tomacorriente de tres entradas que esté
conectada a tierra de la manera adecuada en
conformidad con el Código Eléctrico Nacional.
De ninguna manera, bajo ninguna circunstancia,
corte o quite la tercera pata (conexión a tierra)
de la clavija del cable eléctrico.
No utilice un cable de extensión para este
aparato.
REVISE EL ENCENDIDO
Después de instalar la estufa, verifique la ignición
de cada quemador.
1. Oprima una perilla y hágala girar hasta la
posición de LITE (encender) (180° de OFF
[apagado]). El piloto producirá chispas y se
encenderá el quemador
2. Después de encender el quemador, haga girar
la perilla hasta la posición de HI (alto) y el
piloto dejará de producir chispas.
3. Haga girar la perilla hacia la posición de
OFF (apagado).
Repita eso para cada quemador.
NOTA: Si las llamas son amarillas o muy bajas,
consulte la sección Guia para resolver problemas
en este manual.
11
12
Page 59

Antes de llamar para solicitar servicio…
GEAppliances.com
Solucionar problemas
¡Ahorre dinero y tiempo! Revise la siguiente tabla primero y
quizás no tenga que llamar para solicitar servicio.
Problema Causas posibles Qué hacer
Los quemadores El enchufe de la estufa no está • Cerciórese de que el enchufe esté conectado en un
no encienden completamente conectado en tomacorriente activo, correctamente conectado a tierra.
el tomacorriente.
El suministro de gas no está • Consulte la sección Instrucciones de instalación.
conectado o encendido.
Es posible que un fusible o el • Reemplace el fusible o vuelva a establecer el interruptor
interruptor de circuitos se de circuitos.
haya saltado en su casa.
Es posible que el orificio del • Retire la obstrucción.
ignitor en el cuerpo del
quemador esté obstruido.
Las partes del quemador no • Consulte la sección Modulos de quemadoras sellados en
se reemplazaron correctamente. la sección Cuidado y limpieza.
El orificio en el quemador • Use una aguja de coser pequeña para destaparlo.
superior detrás del ignitor
puede estar obstruido.
Los quemadores tienen La calidad de la combustión • Use las siguientes ilustraciones para determinar si las
llamas amarillas o de las llamas del quemador llamas de su quemador son normales. Si las llamas del
con puntas amarillas o se debe determinar quemador tienen el aspecto de A, ajuste la persiana de
las llamas se levantan visualmente. aire. Las llamas normales del quemador deben tener el
del puerto aspecto de B.
A–Llamas amarillas B–Llamas suaves azules
Ajuste la persiana del aire Normales para gas natural
Se debe ajustar la persiana • Cierre la persiana en
del aire. el tubo mezclador
hasta que las llamas se
establezcan en los puertos
del quemador.
Las partes del quemador no • Consulte la sección Cuidado y limpieza.
se reemplazaron correctamente.
Las llamas son Ajuste el nivel de la 1.Encienda los quemadores
demasiado altas o bajas llama baja. superiores y continúe
en el nivel LOW (bajo) girando todas las perillas
de la superficie a LOW (bajo).
2.Retire las cuatro perillas.
3.Con un destornillador plano
gire los tornillos de la válvula
hacia la derecha para
aumentar el tamaño de la
llama. Ajuste hasta que la
llama esté casi a la misma
altura que la parte superior del quemador.
4.Reemplace las perillas.
Vástago de
la válvula
Hacia la derecha
para reducir el
tamaño de
la llama
Hacia la
izquierda para
aumentar el
tamaño de
la llama
Apoyo al consumidor
Solucionar problemas
Operación
Seguridad
Cuidado y limpieza
27
Tornillo
Persiana de
aire
Para cerrar
Para abrir
Abertura de
aire
Screw
Air Shutter
Air Opening
To Open
To Close
Page 60

28
Antes de llamar para solicitar servicio…
Solucionar problemas
Problema Causas posibles Qué hacer
El sonido de chispa Cerciórese de que la perilla • Retire la perilla halándola en línea recta fuera del
persiste después de esté en la posición OFF. vástago y revise la parte de abajo de la perilla en
haber apagado el busca de cualquier acumulación de suciedad.
quemador
Sonido ocasional de Cambio de la velocidad del • Este es un ruido eléctrico normal. Esto es normal.
chispa calefactor.
Las llamas de los Las partes del quemador no se • Consulte la sección Cuidado y limpieza.
quemadores son muy reemplazaron correctamente.
grandes o amarillas
Las llamas son Los puertos de los • Consulte la sección Cuidado y limpieza.
desiguales quemadores pueden
estar obstruidos.
El nivel de la llama • Consulte la sección Las llamas son demasiado altas
necesita ajuste. o bajas en el nivel LOW en esta sección Solucionar
problemas.
Las perillas de control Los controles se instalaron • Para girar de la posición OFF, empuje la perilla y
no giran incorrectamente. luego gire. La perilla sólo se puede girar hacia la
derecha. Cuando la perilla esté en otra posición, se
puede girar en cualquier dirección sin necesidad
de empujarla.
El ventilador no El cable está conectado • Revise las conexiones. Conecte la electricidad en la
funciona incorrectamente o la energía caja de fusibles.
está desconectada.
El ventilador se prende El asador está en uso. • Esto es normal. El ventilador se prende
automáticamente automáticamente cuando el asador está en uso.
Ventilación deficiente El filtro está obstruido. • Limpie el filtro según las instrucciones.
La casa es muy hermética. • Abra la ventana ligeramente para ofrecer una fuente
de aire fresco.
La tapa de pared está obstruida. • Retire la obstrucción de la tapa de pared.
La puerta del regulador de tiro • Revise el movimiento libre o si hay alguna obstrucción
de la tapa de pared se atascó. en la puerta exterior del regulador de tiro de la tapa
de pared.
La longitud del ducto supera • Reduzca el número de codos para simplificar la longitud
el equivalente máximo del ducto.
recomendado de 100 pies.
Áreas descoloradas No se limpiaron los • Consulte la sección Cuidado y limpieza.
en la estufa derramamientos antes
del siguiente uso.
El agua no hierve • Cubra la olla con una tapa.
• Apague el ventilador descendente hasta que el agua
empiece a hervir.
Apoyo al consumidor Solucionar problemas Operación
SeguridadCuidado y limpieza
Page 61

29
Apoyo al consumidor
Solucionar problemas
Operación
Seguridad
Cuidado y limpieza
Notas.
Page 62

30
Notas.
Apoyo al consumidor Solucionar problemas Operación
SeguridadCuidado y limpieza
Page 63

31
Garantía de GE para su estufa de cubierta a gas.
■ Viajes de servicio a su casa para mostrarle cómo
funciona el equipo.
■ Instalación inapropriada.
■ Fallo del producto resultante de modificaciones al
producto o debido a uso incorrecto incluyendo no
proporcionar mantenimiento razonable y necesario.
■ Reemplazo de fusibles de la casa o reajuste del sistema
de circuitos.
■ Daño al producto causado por accidentes, incendios,
inundaciones o actos de la naturaleza de fuerza mayor.
■ Daños incidentales o consecuenciales causados por
defectos posibles con este aparato.
■ Daños causados después de la entrega.
Lo que no está cubierto por GE:
Esta garantía se extiende al comprador original y cualquier comprador posterior de productos comprados para
uso residencial dentro des Estados Unidos. En Alaska, la garantía excluye el costo de envío o las visitas de servicio
a su casa.
Algunos estados no permiten la exclusión o las limitaciones de daños incidentales o consecuenciales. Esta garantía
da derechos legales específicos, y usted podría tener otros derechos que variarán de estado a estado. Para saber
cuáles son sus derechos legales, consulte a la oficina de asuntos del consumidor local o la oficina del Prucurador
(Attorney General) en su localidad.
Garante: General Electric Company. Louisville, KY 40225
Todos los servicios de garantía los proporcionan nuestros Centros
de Reparación de Fábrica o nuestros técnicos Customer Care
®
autorizados. Para concertar una cita de reparación, en línea,
24 horas al día, visítenos en www.GEAppliances.com, o llame
al 800.GE.CARES (800.432.2737).
Peque aquí su recibo.
Se requiere facilitar prueba
de la fecha de compra original
para obtener un servicio
bajo la garantía.
Por el período de: GE reemplazará:
Un año Cualquier parte de la estufa de cubierta a gas que falle debido a defectos en los materiales
A partir de la fecha o en la fabricación. Durante este año completo de garantía, GE también proporcioná, sin
de la compra original costo alguno, toda la mano de obra y los servicios internos para reemplazar partes defectuosas.
Apoyo al consumidor
Solucionar problemas
Operación
Seguridad
Cuidado y limpieza
Page 64

Impreso en los E-U
Apoyo al Consumidor.
Página Web de GE Appliances
www.GEAppliances.com
¿Tiene alguna pregunta sobre su electrodoméstico? ¡Pruebe la página Web de GE Appliances 24 horas al
día, cualquier día del año! Para mayor conveniencia y servicio más rápido, ya puede descargar los Manuales
de los Propietarios, pedir piezas o incluso hacer una cita en línea para que vengan a realizar una
reparación. También puede “Ask Our Team of Experts™” (Preguntar a nuestro equipo de expertos)
sobre cualquier cuestión y mucho más...
Solicite una reparación www.GEAppliances.com
El servicio de expertos GE está a tan sólo un paso de su puerta. ¡Entre en línea y solicite su reparación
cuando le venga bien 24 horas al día cualquier día del año! O llame al 800.GE.CARES (800.432.2737)
durante horas normales de oficina.
Real Life Design Studio (Estudio de diseño para la vida real)
www.GEAppliances.com
GE apoya el concepto de Diseño Universal—productos, servicios y ambientes que pueden usar gente de
todas las edades, tamaños y capacidades. Reconocemos la necesidad de diseñar para una gran gama de
habilidades y dificultades físicas y mentales. Para más detalles cobre las aplicaciones de GE Diseño Universal,
incluyendo ideas de diseño para la cocina para personas con discapacidades, mire nuestra página Web hoy
mismo. Para personas con dificultades auditivas, favor de llamar al 800.TDD.GEAC (800.833.4322).
Garantías ampliadas www.GEAppliances.com
Compre una garantía ampliada y obtenga detalles sobre descuentos especiales disponibles mientras su
garantía está aún activa. Puede comprarla en línea en cualquier momento, o llamar al 800.626.2224
durante horas normales de oficina. GE Consumer Home Services estará aún ahí cuando su garantía termine.
Piezas y accesorios www.GEAppliances.com
Aquellos individuos con la calificación necesaria para reparar sus propios electrodomésticos pueden
pedir que se les manden las piezas o accesorios directamente a sus hogares (aceptamos las tarjetas
VISA, MasterCard y Discover). Haga su pedido en línea hoy, 24 horas cada día o llamar por teléfono
al 800.626.2002 durante horas normales de oficina.
Las instrucciones descritas en este manual cubren los procedimientos a seguir por cualquier usuario. Cualquier
otra reparación debería, por regla general, referirse a personal calificado autorizado. Debe ejercerse precaución
ya que las reparaciones incorrectas pueden causar condiciones de funcionamiento inseguras.
Póngase en contacto con nosotros www.GEAppliances.com
Si no está satisfecho con el servicio que recibe de GE, póngase en contacto con nosotros en nuestra página
Web indicando todos los detalles así como su número de teléfono o escríbanos a:
General Manager, Customer Relations
GE Appliances, Appliance Park
Louisville, KY 40225
Registre su electrodoméstico www.GEAppliances.com
¡Registre su nuevo electrodoméstico en línea—cuando usted prefiera! El registrar su producto a tiempo le
proporcionará, si surgiera la necesidad, una mejor comunicación y un servicio más rápido bajo los términos
de su garantía. También puede enviar su tarjeta de registro pre-impresa que se incluye en el material
de embalaje.
 Loading...