

Page 1

GEAppliances.com
Safety Instructions ....... 2–4
Operating Instructions
Control Lock ....................5
Cookware ...................... 6
Dual Stack Burner ...............5
Flame Size ..................... 6
Lighting a Burner ............... 5
PowerBoil
Sealed Gas Burners .............5
Care and Cleaning
Burners and
Built-In Gas
Cooktop Electrodes ..............8
Burner Bases. . . . . . . . . . . . . . . . . . . . 8
Burner Caps and Heads .........8
Burner Grates ...................9
Burner Head and
Cap Replacement ...............9
Control Knobs ...................7
Electrodes ......................8
Glass Cooktop .............10, 11
Porcelain Enamel Cooktop .......7
Shipping Film and Tape ..........7
Stainless Steel Surfaces .........7
™
Burner ..............5
Owner’s Manual
JGP329
JGP333
JGP633
JGP940
JGP970
PGP943
PGP966
In Canada:
www.GEAppliances.ca
Printed in the United States
Troubleshooting Tips .. 12, 13
Consumer Support
Consumer Support ............ 20
Ownership Registration
for Customers in
Canada only ............... 15, 16
Warranty (Canada) .............19
Warranty (U.S.) .................18
Write the model and serial
numbers here:
Model # ______________
Serial # _______________
You can find them on a label
under the cooktop.
Cooktops
GE is a trademark of the General Electric Company. Manufactured under trademark license.
49-80660-2 05-17 GEA
Page 2
IMPORTANT SAFETY INFORMATION.
READ ALL INSTRUCTIONS BEFORE USING.
WARNING
may result, causing property damage, personal injury or death.
- Do not store or use gasoline or other flammable vapors and liquids in the vicinity of this or any other appliance.
- Do not install this product with air curtain hood or other range hood that blows air down on the cooktop. Airflow may
interfere with operation of gas burners resulting in fire or explosion hazard.
- WHAT TO DO IF YOU SMELL GAS
■ Do not try to light any appliance.
■ Do not touch any electrical switch; do not use any phone in your building.
■ Immediately call your gas supplier from a neighbor’s phone. Follow the gas supplier’s instructions.
■ If you cannot reach your gas supplier, call the fire department.
- Installation and service must be performed by a qualified installer, service agency or the gas supplier.
If the information in these instructions is not followed exactly, a fire or explosion
2
SAVE THESE INSTRUCTIONS
Page 3
GEAppliances.com
WARNING
GENERAL SAFETY INSTRUCTIONS
WARNING
NEVER use this appliance as a space heater to heat
or warm the room. Doing so may result in carbon
monoxide poisoning and overheating of the oven.
■ Use this appliance for its intended purpose as described
in this owner’s manual.
■ Have your cooktop installed and properly grounded by
a qualified installer in accordance with the provided
installation instructions. Any adjustment and service
should be performed only by qualified gas appliance
installers or service technicians. Do not attempt to
repair or replace any part of your cooktop unless it is
specifically recommended in this manual.
■ Your cooktop is shipped from the factory set for use
with natural gas. It can be converted for use with
Propane (LP) gas. If required, these adjustments must
be made by a qualified technician in accordance with
the installation instructions and local codes. The agency
performing this work assumes responsibility for the
conversion.
■ Have the installer show you the location of the cooktop
gas shut-off valve and how to turn it off if necessary.
■ Before performing any service, unplug the cooktop
or disconnect the power supply at the household
distribution panel by removing the fuse or switching off
the circuit breaker.
■ Avoid scratching or impacting glass cooktop. Doing so
may lead to glass breakage. Do not cook on a product
with broken glass. Shock, fire or cuts may occur.
■ Do not leave children alone or unattended in an
area where an appliance is in use. They should never
be allowed to climb, sit or stand on any part of the
appliance.
■ Do not store items of interest to children above the
cooktop - children climbing on the cooktop to reach
items could be seriously injured.
■ Do not allow anyone to climb, stand or hang on the
cooktop.
■ 8VHRQO\GU\SRWKROGHUV³PRLVWRUGDPSSRWKROGHUVRQ
hot surfaces may result in burns from steam. Do not let
pot holders touch surface burners or burner grates,
■ Be careful not to touch hot surfaces of the cooktop.
Potentially hot surfaces include burners, grates, and
cooktop.
■ Do not heat unopened food containers. Pressure could
build up and the container could burst, causing an
injury.
■ &RRNPHDWDQGSRXOWU\WKRURXJKO\³PHDWWRDWOHDVWDQ
internal temperature of 160°F and poultry to at least
an internal temperature of 180°F. Cooking to these
temperatures usually protects against foodborne illness.
■ Be sure all packing materials are removed from the
product before operating to prevent ignition of these
materials.
SAVE THESE INSTRUCTIONS
3
Page 4
IMPORTANT SAFETY INFORMATION.
READ ALL INSTRUCTIONS BEFORE USING.
WARNING
■ Do not store or use flammable materials near the
cooktop, including paper, plastic, pot holders, linens,
wall coverings, curtains, drapes and gasoline or other
flammable vapors and liquids.
■
Never wear loose-fitting or hanging garments while
using the appliance. Avoid storing commonly used items
in cabinets above the cooktop and be careful when
WARNING
KEEP FLAMMABLE MATERIALS AWAY FROM THE COOKTOP
IN THE EVENT OF A FIRE, TAKE THE FOLLOWING STEPS
TO PREVENT INJURY AND FIRE SPREADING:
■ Do not use water on grease fires. Never pick up a
flaming pan. Turn the controls off. Smother a flaming
pan on a surface burner by covering the pan completely
with a well-fitting lid, cookie sheet or flat tray. If
necessary, use a multi-purpose dry chemical or foamtype fire extinguisher.
WARNING
COOKTOP SAFETY INSTRUCTIONS
reaching over the cooktop. Clothing in close proximity to
burners or hot surfaces may ignite causing severe burns.
■ Do not let cooking grease or other flammable materials
accumulate in or near the cooktop. Grease on the
cooktop may ignite.
■ Clean ventilating hoods frequently. Grease should not
be allowed to accumulate on the hood or filter.
■ Never leave the surface burners unattended at medium
or high heat settings. Foods, especially oily foods, may
ignite resulting in fire that could spread to surrounding
cabinets.
■ Never leave oil unattended while frying. If allowed to
heat beyond its smoking point, oil may ignite resulting
in fire that may spread to surrounding cabinets. Use a
deep fat thermometer whenever possible to monitor oil
temperature.
■ To avoid oil spillover and fire, use a minimum amount of
oil when shallow pan-frying and avoid cooking frozen
foods with excessive amounts of ice.
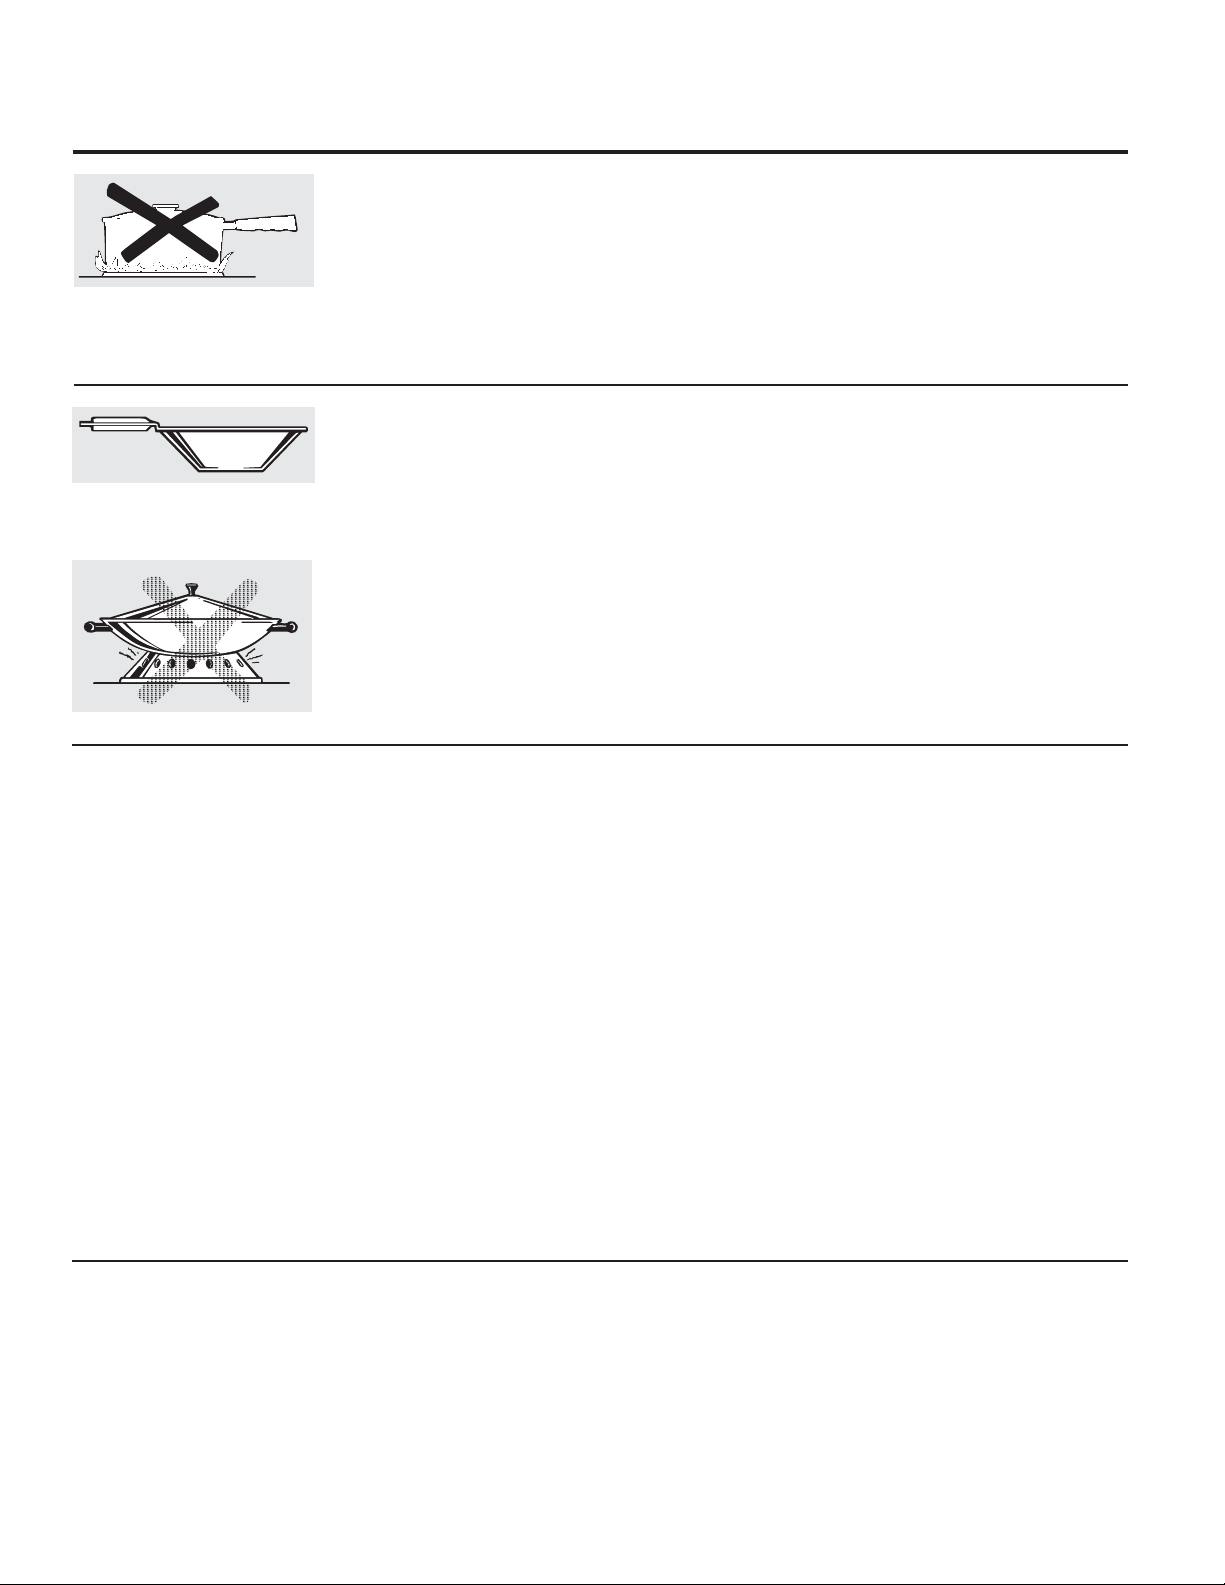
■ Use proper pan size and avoid pans that are unstable
or easily tipped. Select cookware that is matched to the
size of the burner. Burner flames should be adjusted so
that they do not extend beyond the bottom of the pan.
Excessive flame may be hazardous.
■ Always use the LITE position when igniting the top
burners and make sure the burners have ignited.
■ When using glass/ceramic cookware, make sure it is
suitable for cooktop service; others may break because
of sudden change in temperature.
■ To minimize the possibility of burns, ignition of
flammable materials and spillage, the handle of a
container should be turned toward the center of the
cooktop without extending over nearby burners.
■ When preparing flaming foods under a hood, turn the
fan on.
■ Do not use a wok with a round metal support ring. the
ring may trap heat and block air to the burner resulting
in a carbon monoxide hazard.
■ Do not attempt to lift the cooktop. Doing so may
damage the gas tubing to the surface burners resulting
in a gas leak and risk of fire.
■ When disabling Gas/Control Lockout (on some models),
make sure the surface controls are set to the OFF
position. This will prevent unintended gas flow from the
burners.
■ Do not use aluminum foil to cover the grates or line
any part of the cooktop. Doing so may result in carbon
monoxide poisoning, overheating of the cooktop
surfaces, or a potential fire hazard.
4
SAVE THESE INSTRUCTIONS
Page 5
Using the cooktop burners. GEAppliances.com
Throughout this manual, features and appearance may vary from your model.
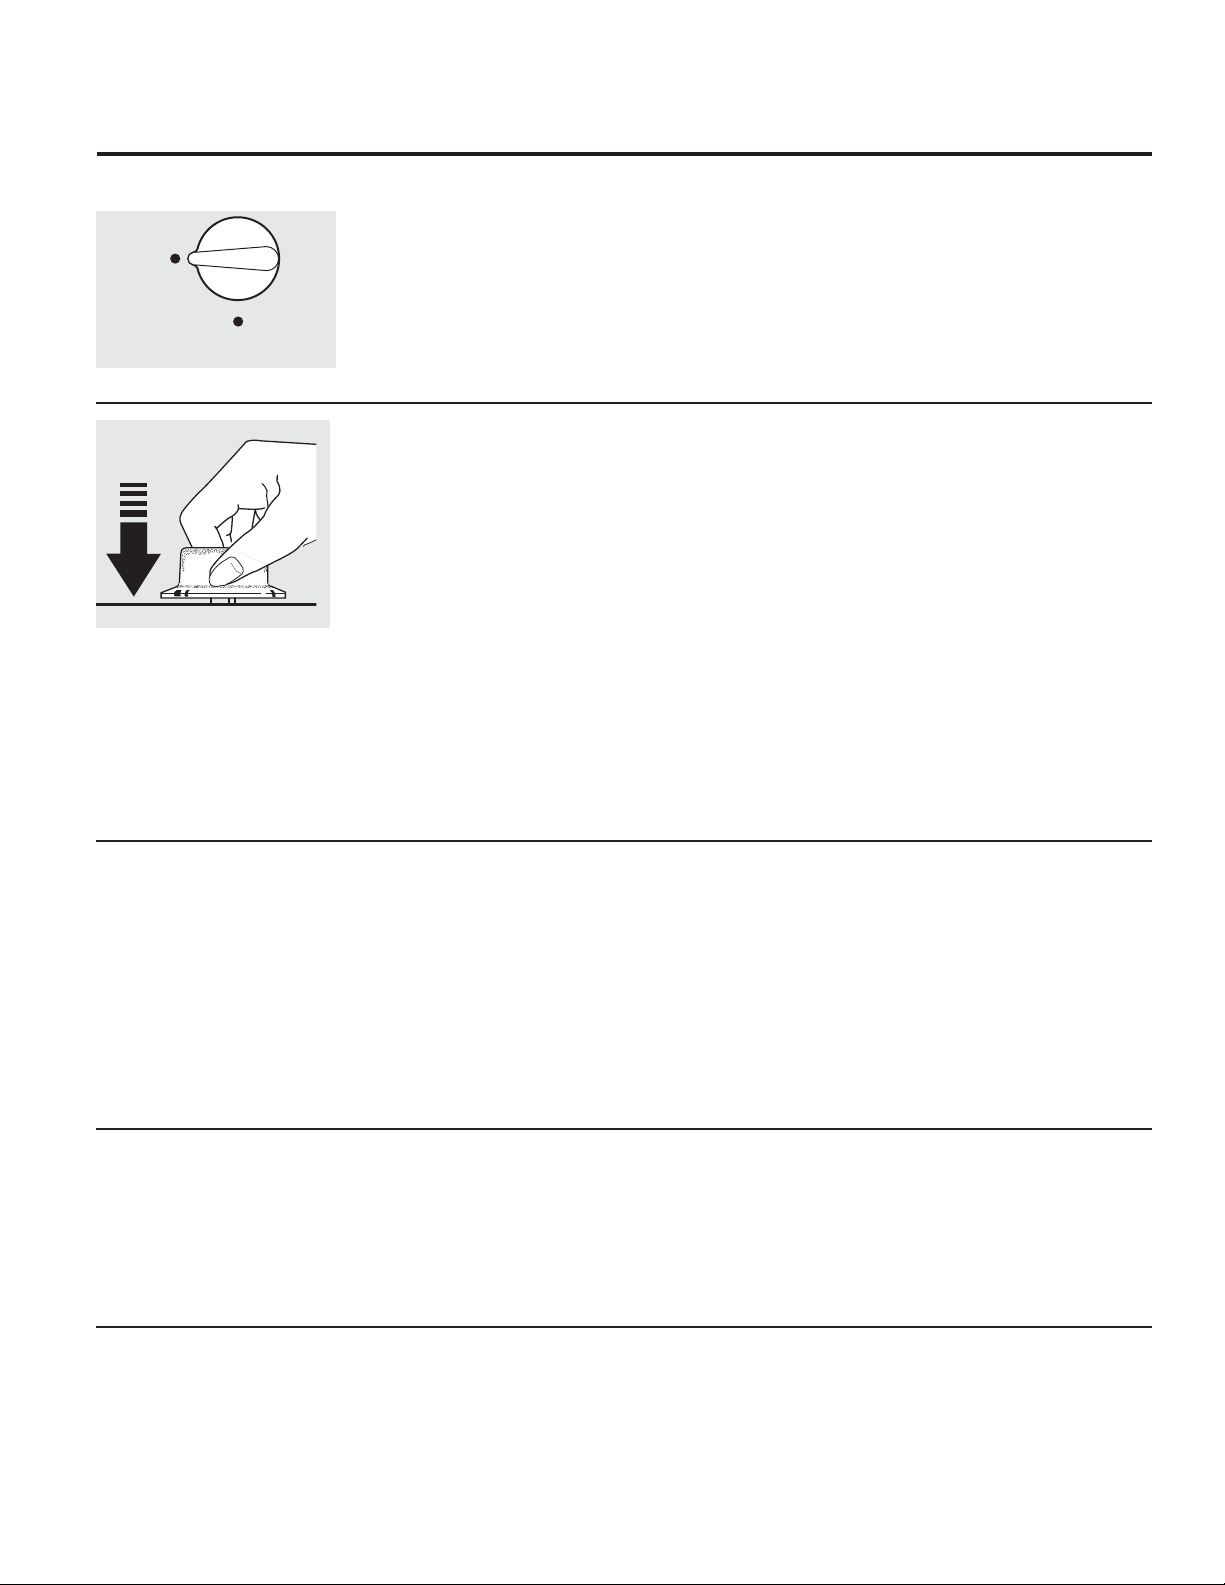
Control Lock (on some models)
UNLOCK
LOCK
CONTROL LOCK
To lock the cooktop and prevent unwanted use,
turn the control lock knob counterclockwise to
LOCK. An indicator light will glow to show that
the cooktop is locked.
How to Light a Burner
Make sure the control lock knob is in the
UNLOCK position.
Your cooktop burners are lit by electric ignition,
eliminating the need for standing pilot lights
with constantly burning flames.
Push the control knob down and turn it to the
LITE position. After the burner ignites, turn
the knob to adjust the flame size. To turn the
burner off, turn the knob clockwise as far as it
will go, to the OFF position.
■ Check to be sure the burner you turn on is the
one you want to use.
■ Be sure you turn the control knob to OFF
when you finish cooking.
When locked, the cooktop will sound if any
control knob is set to any position other than
OFF.
To unlock, turn the control lock knob to
UNLOCK.
■ In case of a power failure, you can light the
burners with a match. Hold a lit match to
the burner; then push in and turn the control
knob to the LITE position. Use extreme caution
when lighting burners this way. Burners in use
when an electrical power failure occurs will
continue to operate normally.
■ Do not operate the burner for an extended
period of time without cookware on the grate.
The finish on the grate may chip without
cookware to absorb the heat.
■ Be sure the burners and grates are cool
before you place your hand, a pot holder,
cleaning cloths or other materials on them.
Sealed Gas Burners
The smallest burner in the right rear and the
center burner (on some models) are the simmer
burners. These burners can be turned down
to LO or SIMMER (depending on model) for a
very low setting. They provide precise cooking
performance for delicate foods such as sauces
or foods that require low heat for a long
cooking time.
Dual Stack Burner (on some models)
The extra large right front burner has maximum
heating and precise simmer capability. It can be
turned down from PowerBoil™ to SIMMER for a
wide range of cooking applications.
PowerBoil™ Burner (on some models)
The extra large right front burner has special
PowerBoil™ settings. This feature should only be
used with cookware 11s or larger in diameter,
and flames should never be allowed to extend
The medium (left rear) and the large (left front)
burners are the general-purpose burners that
can be turned down from HI to LO to suit a
wide range of cooking needs.
up the sides of the cookware. This feature is
designed to quickly bring large amounts of
liquid in pots 11s or larger in diameter to a boil.
5
Page 6
Using the cooktop burners.
How to Select Flame Size
Use a flat-bottomed wok.
For safe handling of cookware, never let the
flames extend up the sides of the cookware.
Watch the flame, not the knob, as you reduce
heat. The flame size on a gas burner should
match the cookware
you are using.
Wok This Way
We recommend that you use a 14-inch or
smaller flat-bottomed wok. They are available at
your local retail store.
Only a flat-bottomed wok should be used.
Make sure the wok bottom sits flat on the
grate.
Cookware
Any flame larger than the bottom of the
cookware is wasted and only serves to heat the
handle.
Do not use a wok support ring. Placing the
ring over the burner or grate may cause the
burner to work improperly, resulting in carbon
monoxide levels above allowable standards.
This could be dangerous to your health.
Aluminum: Medium-weight cookware is
recommended because it heats quickly and
evenly. Most foods brown evenly in aluminum
cookware. Use saucepans with tight-fitting
lids when cooking with minimum amounts of
water.
Enamelware: Under some conditions, the
enamel of some cookware may melt. Follow
cookware manufacturer’s recommendations
for cooking methods.
Glass: There are two types of glass cookware:
those for oven use only and those for cooktop
cooking (saucepans, coffee and tea pots). Glass
conducts heat very slowly.
Cast Iron: If heated slowly, most cookware will
give satisfactory results.
Home Canning Tips
Be sure the canner is centered over the burner.
To prevent burns from steam or heat, use
caution when canning.
Heatproof Glass-Ceramic: Can be used for
either surface or oven cooking. It conducts
heat very slowly and cools very slowly. Check
cookware manufacturer’s directions to be sure
it can be used on a gas cooktop.
Stainless Steel: This metal alone has poor
heating properties and is usually combined
with copper, aluminum or other metals for
improved heat distribution. Combination metal
cookware usually works satisfactorily if it is
used with medium heat as the manufacturer
recommends.
Use recipes and procedures from reputable
sources. These are available from
manufacturers such as Ball® and Kerr® and the
Department of Agriculture Extension Service.
6
Page 7
Care and cleaning of the cooktop. GEAppliances.com
Be sure electrical power is off and all surfaces are cool before cleaning any part of the cooktop.
How to Remove Protective Shipping Film and Packaging Tape
Pull the knob straight up off the stem.
Carefully grasp a corner of the protective
shipping film with your fingers and slowly peel
it from the appliance surface. Do not use any
sharp items to remove the film. Remove all of
the film before using the appliance for the first
time.
Control Knobs
The control knobs may be removed for easier
cleaning.
Make sure the knobs are in the OFF positions
and pull them straight off the stems for
cleaning.
Porcelain Enamel Cooktop (on some models)
The porcelain enamel finish is sturdy but
breakable if misused. This finish is acidresistant. However, any acidic foods spilled
(such as fruit juices, tomato or vinegar) should
not be permitted to remain on the finish.
To assure no damage is done to the finish of
the product, the safest way to remove the
adhesive left from packaging tape on new
appliances is an application of a household
liquid dishwashing detergent. Apply with a soft
cloth and allow to soak.
NOTE: The adhesive must be removed from
all parts before using the cooktop. It cannot be
removed if it is baked on.
The knobs can be cleaned in a dishwasher or
they may also be washed with soap and water.
Make sure the insides of the knobs are dry
before replacing.
Replace the knobs in the OFF position to
ensure proper placement.
If acids spill on the cooktop while it is hot, use
a dry paper towel or cloth to wipe it up right
away. When the surface has cooled, wash with
an all-purpose cleaner and water. Rinse well.
For other spills such as fat spatterings, wash with
soap and water or an all-purpose cleaner after
the surface has cooled. Rinse well. Polish with a
dry cloth.
Stainless Steel Surfaces
Do not use a steel wool pad; it will scratch the
surface.
To clean the stainless steel surface, use warm
sudsy water or a stainless steel cleaner or
polish. Always wipe the surface in the direction
of the grain. Follow the cleaner instructions for
cleaning the stainless steel surface.
(on some models)
To inquire about purchasing stainless steel
appliance cleaner or polish, or to find the
location of a dealer or Camco Parts Store
nearest you, please call our toll-free number:
National Parts Center 1.800.626.2002 (U.S.)
1.800.661.1616 (Canada)
GEAppliances.com (U.S.)
www.GEAppliances.ca (Canada)
7
Page 8
Care and cleaning of the cooktop.
Burners and Cooktop Electrodes
WARNING
DO NOT OPERATE A BURNER
WITHOUT ALL BURNER PARTS
IN PLACE.
Turn all controls off before removing burner
parts.
NOTE: Before removing the burner caps
and heads, remember their size and
location. Replace them in the same
location after cleaning.
The burner assemblies should always be
kept clean. Spillovers should be cleaned
immediately; they can clog the openings in the
burner assemblies.
Burner Caps and Heads
Wash burner caps and burner heads in hot,
soapy water and rinse with clean running
water. You may scour with a plastic scouring
pad to remove burned-on food particles.
Use a sewing needle or twist tie to unclog the
small holes in the burner head, if required.
To remove burned-on food, soak the burner
heads in a solution of mild liquid dishwashing
detergent and hot water for up to 20–30
minutes, if required. For more stubborn stains,
use a toothbrush.
Remove the burner grates, burner caps and
burner heads for easy cleaning.
NOTES:
■ Do not attempt to remove the electrode from
the cooktop or any screws from the burner
head or burner base.
■ Do not use steel wool or scouring powders
to clean the burners.
If the spill went inside the burner head
assembly (right front burner on models JGP333,
PGP943, and PGP966), wash it under running
water. Shake to remove any excess water. Air
dry and make sure the small ignitor holes are
open.
NOTE: Do not wash any burner parts
in a dishwasher.
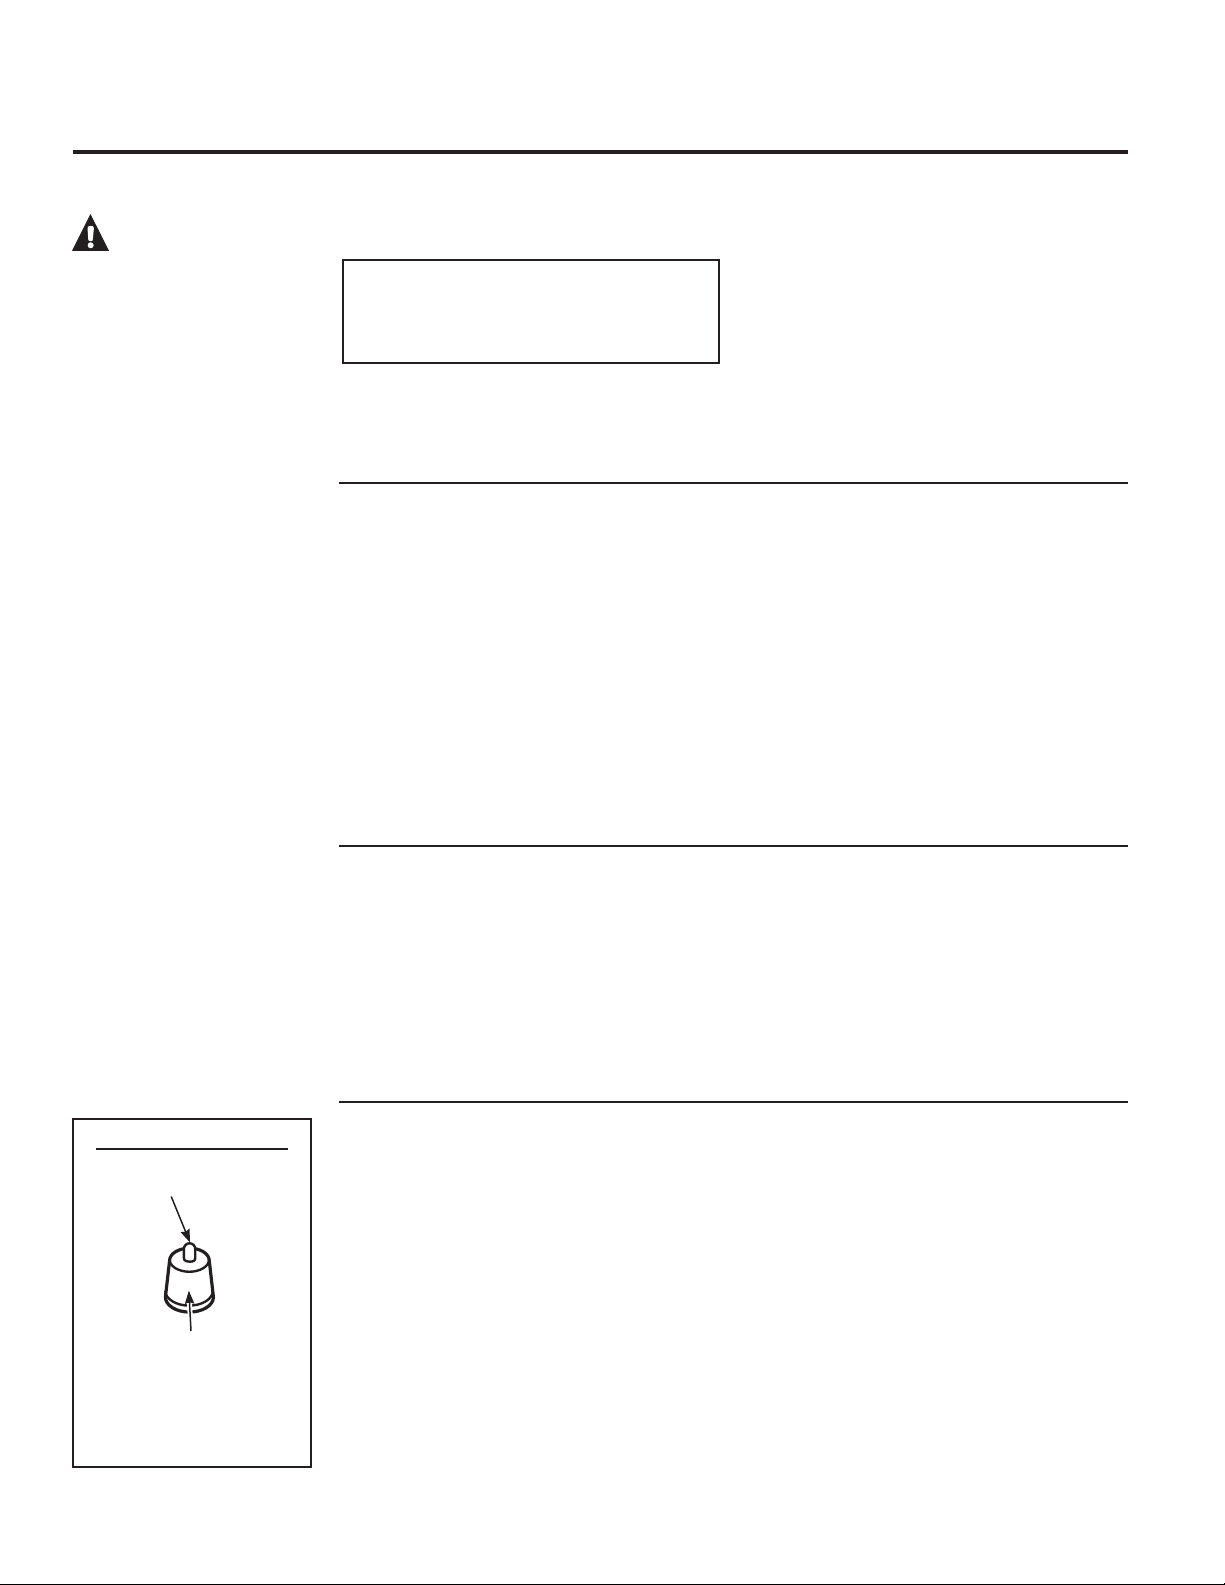
Cooktop Electrode
Clean this metal part
Do not clean this
white ceramic part
with an emery board
NOTE: Do not attempt to remove
the electrode from the cooktop.
Burner Bases
The burner bases should not be removed for
cleaning.
To clean the burner bases, use soapy water and
a plastic scouring pad. Make sure that no water
gets into the burner bases and the brass gas
orifices.
Electrodes
The electrode of the spark igniter is exposed
beyond the surface of the burner base. When
cleaning the cooktop, be careful not to snag the
electrode of the spark igniter with your cleaning
cloth. Damage to the igniter could occur.
Be careful not to push in any cooktop controls
while cleaning the cooktop.
A slight electrical shock might result which
could cause you to knock over
hot cookware.
Wipe clean with a damp cloth. Allow them to
dry fully before using.
Make sure that the white ceramic electrodes
in the cooktop are clear of soil and dry. Clean
the metal part of the electrode with a soft cloth.
For stubborn, hardened soil, clean the metal
portion of the electrode with an emery board.
Do not clean the white ceramic portion of the
electrode with the emery board. It is acceptable
to clean the white portion of the electrode with
a soft cloth, but not with an emery board.
Before reassembling the surface burners, push
down on each of the white ceramic electrodes
to make sure they are pressed against the
burner bases.
8
Page 9
GEAppliances.com
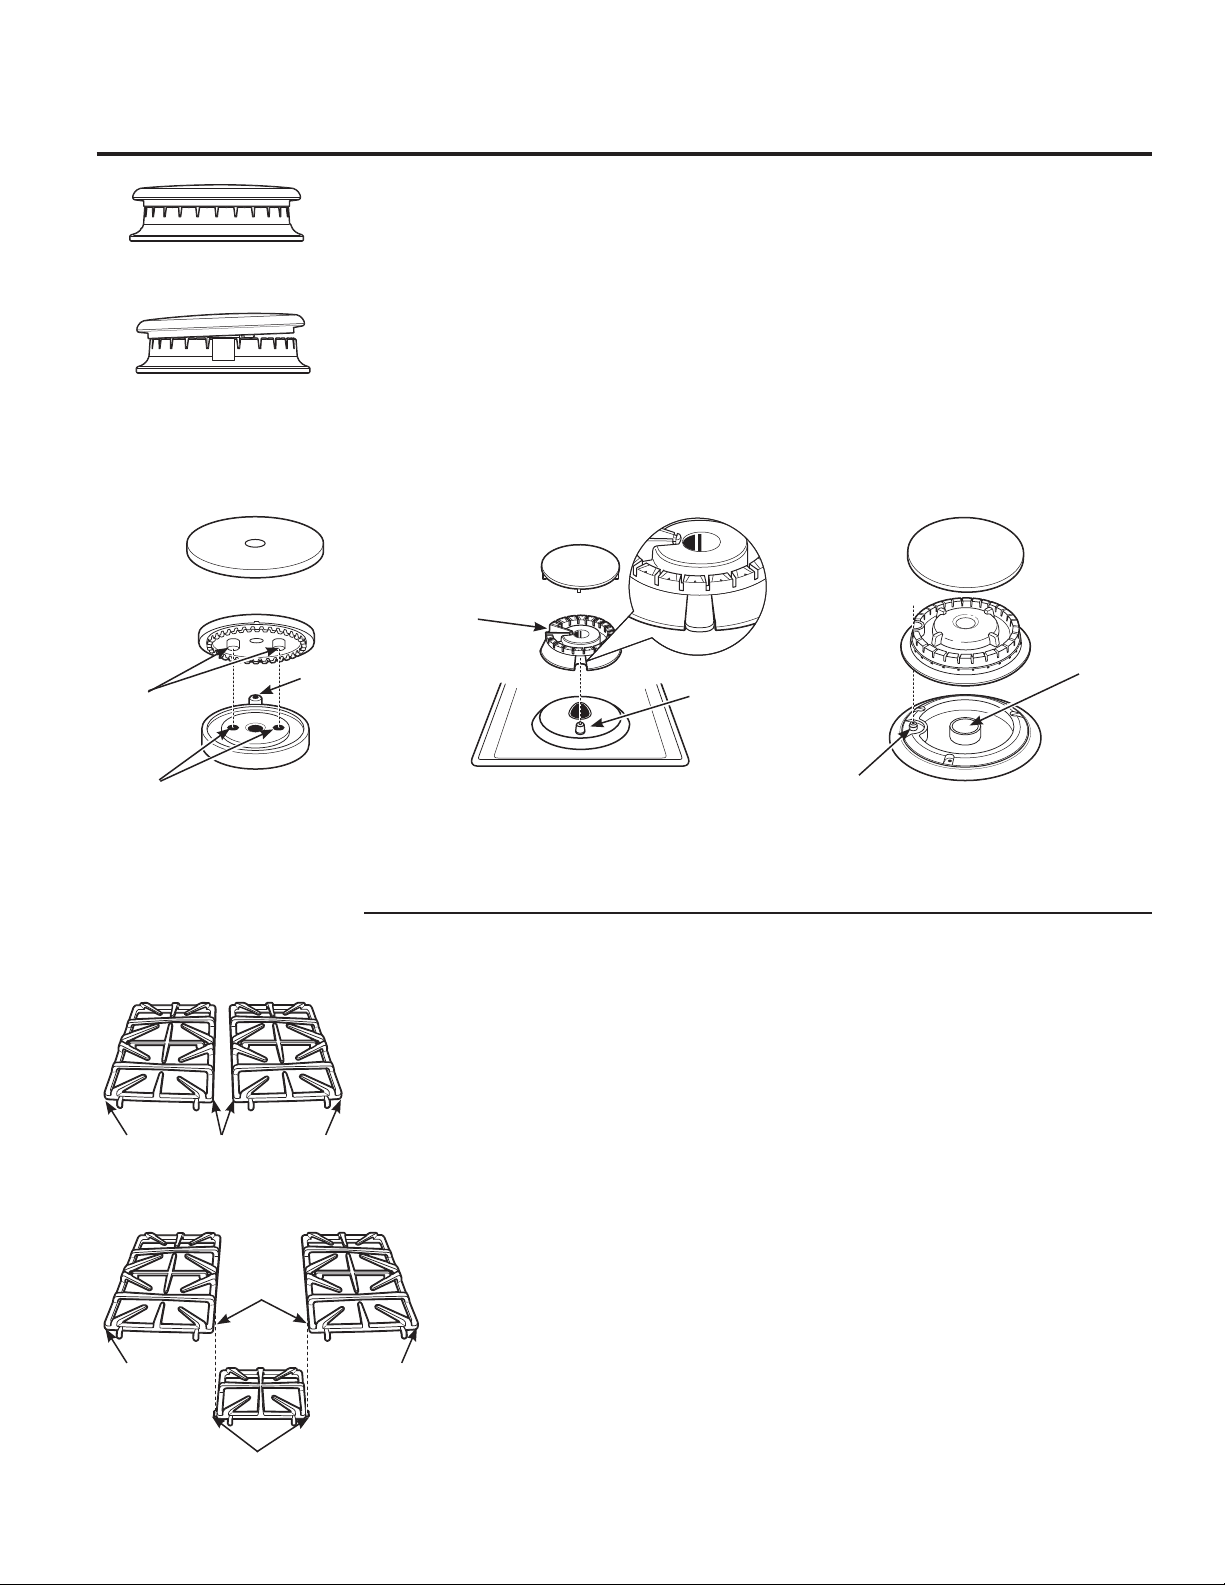
Burner Head and Cap Replacement
Replace the burner head onto the burner base,
making sure that the head is properly oriented
Burner cap properly seated
over the burner base and the electrode. Make
sure to place the correct burner head on the
correct burner base and that the burner head
sits level on the burner base. The burner heads
are not interchangeable.
Burner cap not properly seated
JGP940 and JGP970 (all burners)
Burner cap
Burner head
Locator
pins
Pin
indentations
Make sure the pins in the burner heads match
the burner base indentations and that they are
properly seated in them by rotating the heads
until they are level.
Electrode
Burner
base
JGP329, JGP333, JGP633, PGP943
and PGP966
Burner cap
Stability
chamber
Make sure the slot in the burner head is positioned
over the electrode. The burner cap has three
to four pins. When replacing the cap, make sure
none of the pins sits in the stability chamber.
Burner head
Burner base
Electrode
Replace the burner cap onto the burner head,
making sure to place the correct burner cap on
the correct burner head. The burner caps are
not interchangeable. Also, make sure that the
burner caps are properly seated on the burner
heads.
JGP333, PGP943 and PGP966
(right front burner only)
Burner cap
Burner head
assembly
Electrode
Make sure the hole in the burner head assembly
is positioned over the electrode and that the burner
head is fully inserted inside the burner base. A small
gap between the base and head is normal.
Orifice
Burner
base
(On some models)
“OUTSIDE”
edge
(On some models)
“OUTSIDE”
edge
“INSIDE”
edges
“INSIDE”
edges
Tabs
“OUTSIDE”
edge
Burner Grates
Your cooktop has professional style grates.
These grates are designed for specific
positions. These grates should only be used
in their proper positions; they should not be
interchanged. For your convenience, the
undersides of
the left and right grates are marked “OUTSIDE”
and “INSIDE”. Make sure that the sides marked
“OUTSIDE” are facing the outer edge of the
cooktop and the sides marked “INSIDE” are
facing each other. All grates should
touch once they are fully assembled
on the cooktop surface.
For cooktops with three grates, make
sure that the tabs on either side of
the center grate fit into the slots
“OUTSIDE”
edge
located on the “INSIDE” edge of the
side grates.
Lift the burner grates out only when cool.
Grates should be washed regularly and, of
course, after spillovers. Wash them in the
dishwasher or in hot, soapy water and rinse
with clean water. When replacing the grates,
be sure they are positioned securely over the
burners.
Although they are durable, the grates will
gradually lose their shine, regardless of the
best care you can give them. This is due to their
continual exposure to high temperatures. You
will notice this sooner with lighter color grates.
Do not operate a burner for an extended period
of time without cookware on the grate. The
finish on the grate may chip without cookware
to absorb the heat.
NOTE: Do not clean the grates in a self-cleaning
oven.
9
Page 10
Cleaning the glass cooktop surface. (on some models)
Normal Daily Use Cleaning
ONLY use CERAMA BRYTE® Ceramic Cooktop
Cleaner on the glass cooktop. Other creams
may not be as effective.
To maintain and protect the surface of your
glass cooktop, follow these steps:
Before using the cooktop for the first time,
remove the burner grates and clean the
cooktop with CERAMA BRYTE® Ceramic
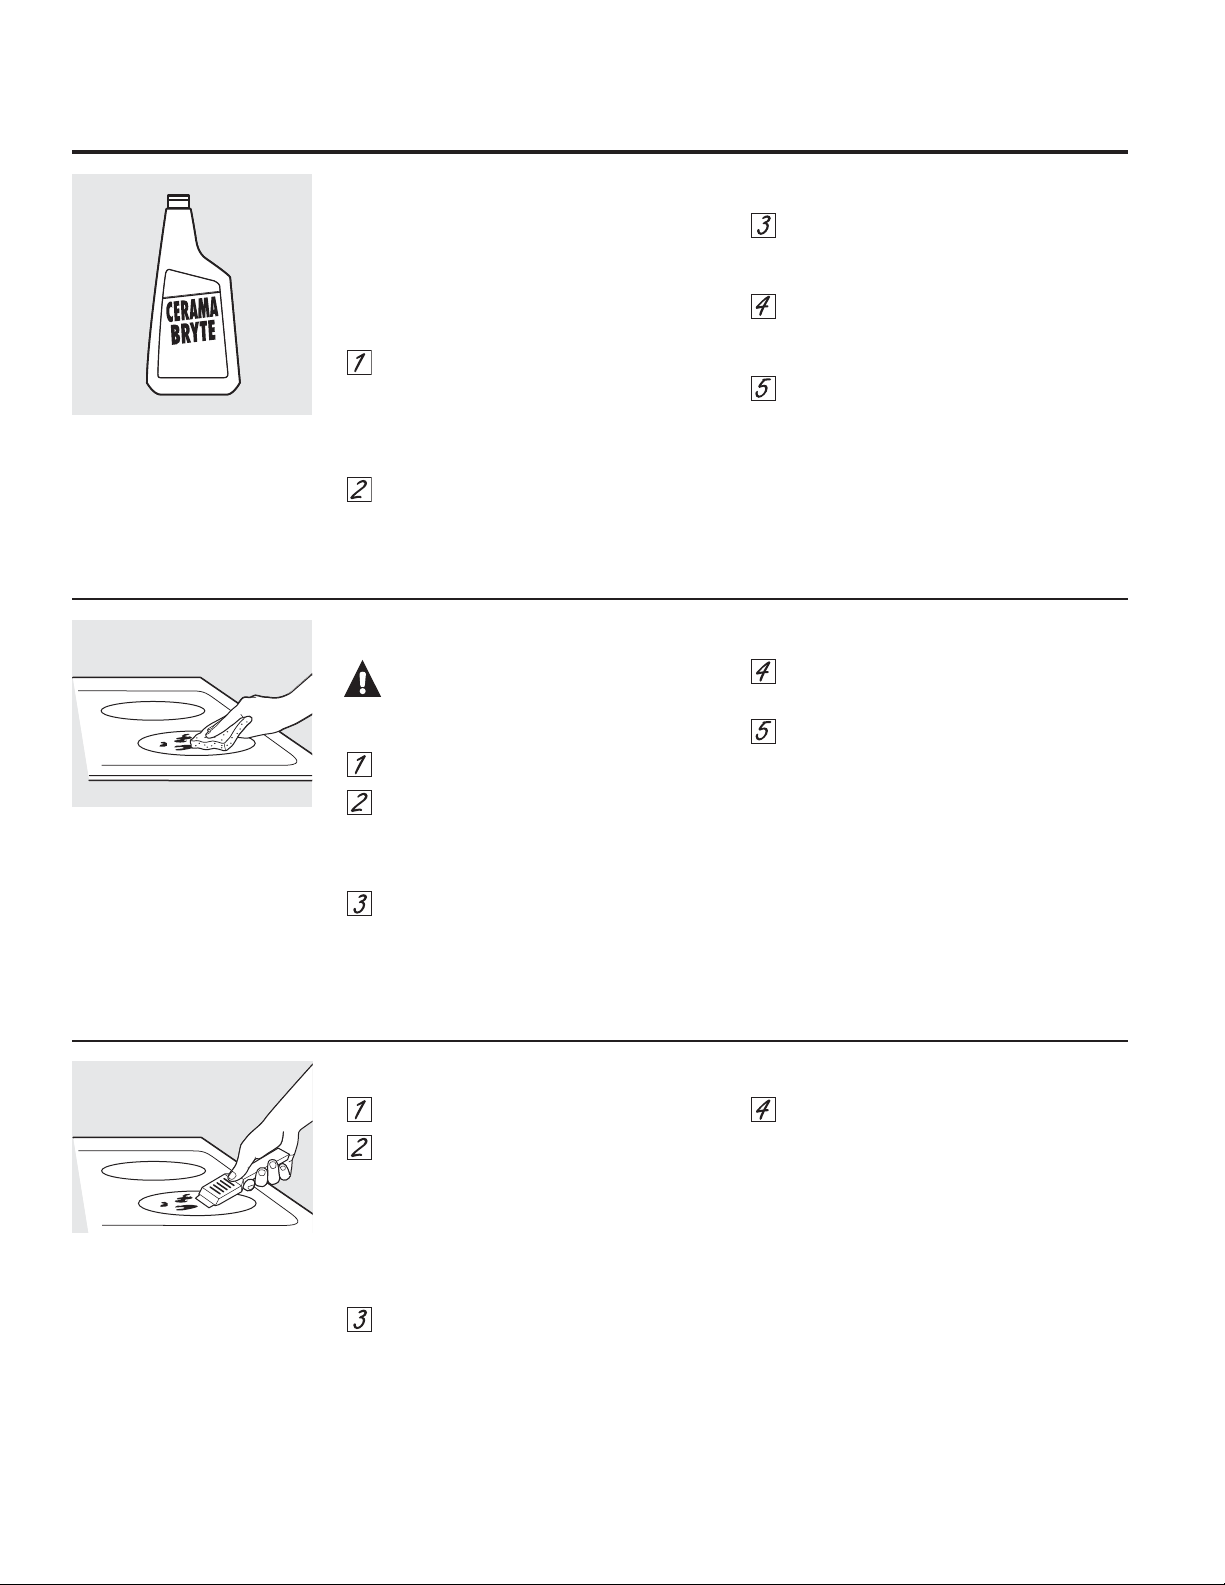
Clean your cooktop after
each spill. Use CERAMA
BRYTE® Ceramic Cooktop
Cleaner.
Cooktop Cleaner. This helps protect the
top and makes cleanup easier.
Daily use of CERAMA BRYTE® Ceramic
Cooktop Cleaner will help keep the
cooktop looking new.
NOTE: It is very important that you DO NOT
heat the cooktop until it has been cleaned
thoroughly.
Burned-On Residue
WARNING: DAMAGE to your
glass surface may occur if you use scrub
pads other than those recommended.
Allow the cooktop to cool.
Remove the burner grates and spread a
Use a CERAMA BRYTE® Cleaning
Pad for Ceramic Cooktops.
few drops of CERAMA BRYTE® Ceramic
Cooktop Cleaner on the entire burned
residue area.
Shake the cleaning cream well. Apply a
few drops of CERAMA BRYTE® Ceramic
Cooktop Cleaner directly to the cooktop.
Use a paper towel or CERAMA BRYTE®
Cleaning Pad for Ceramic Cooktops to
clean the entire cooktop surface.
Use a dry cloth or paper towel to
remove all cleaning residue. No need to
rinse.
If any residue remains, repeat the steps
listed above as needed.
For additional protection, after all
residue has been removed, polish the
entire surface with CERAMA BRYTE®
Ceramic Cooktop Cleaner and a paper
towel.
The CERAMA BRYTE® Ceramic
Cooktop Scraper and all
recommended supplies are
available through our Parts Center.
See instructions under “To Order
Parts” section on next page.
NOTE: Do not use a dull or
nicked blade.
Using the included CERAMA BRYTE®
Cleaning Pad for Ceramic Cooktops, rub
the residue area, applying pressure as
needed.
Heavy, Burned-On Residue
Allow the cooktop to cool.
Remove the burner grates. Use a single-
edge razor blade scraper at
approximately a 45° angle against the
glass surface and scrape the soil. It will
be necessary to apply pressure to the
razor scraper in order to remove the
residue.
After scraping with the razor scraper,
spr e a d a f e w dro p s of CERAMA BRYTE®
Ceramic Cooktop Cleaner on the entire
burned residue area. Use the CERAMA
BRYTE® Cleaning Pad to remove any
remaining residue.
For additional protection, after all
residue has been removed, polish the
entire surface with CERAMA BRYTE®
Ceramic Cooktop Cleaner and a p a p e r
towel.
10
Page 11

GEAppliances.com
Metal Marks and Scratches
Be careful not to slide pots and pans
across your cooktop. It will leave metal
markings on the cooktop surface.
These marks are removable using the
CERAMA BRYTE® Ceramic Cooktop Cleaner
with the CERAMA BRYTE® Cleaning Pad for
Ceramic Cooktops.
the bottom of pans for roughness that would
scratch the cooktop.
*ODVVVXUIDFH³SRWHQWLDOIRUSHUPDQHQWGDPDJH.
Our testing shows that if
you are cooking high sugar
mixtures such as jelly or
fudge and have a spillover,
it can cause permanent
damage to the glass
surface unless the spillover
is immediately removed.
Damage from Sugary Spills and Melted Plastic
Turn off all surface burners and, with an
oven mitt, remove hot pans and grates.
Wearing an oven mitt:
a. Use a single-edge razor blade scraper
(CERAMA BRYTE® Ceramic Cooktop
Scraper) to move the spill to a cool area
on the cooktop.
NOTE: If pitting or indentation in the glass
surface has already occurred, the cooktop glass
will have to be replaced. In this case, service will
be necessary.
If pots with a thin overlay of aluminum or
copper are allowed to boil dry, the overlay
may leave black discoloration on the
cooktop.
This should be removed immediately
before heating again or the discoloration
may be permanent.
WARNING: Carefully check
Don’t use the surface units again until all
of the residue has been completely
removed.
b. Remove the spill with paper towels.
Any remaining spillover should be left until
the surface of the cooktop has cooled.
To Order Parts
To order CERAMA BRYTE® Ceramic Cooktop
Cleaner and the cooktop scraper, please call
our toll-free number:
National Parts Center 800.626.2002.
CERAMA BRYTE® Ceramic
Cooktop Cleaner ..........# WX10X300
CERAMA BRYTE® Ceramic
Cooktop Scraper ..........# WX10X0302
Kit ........................# WB64X5027
(Kit includes cream and cooktop scraper)
CERAMA BRYTE® Cleaning Pads for Ceramic
Cooktops .................# WX10X350
11
Page 12

Before you call for service…
Troubleshooting Tips
Save time and money! Review the charts on these pages
first and you may not need to call for service.
Problem Possible Causes What To Do
Burners have yellow or The combustion quality of • Use the illustrations below to determine if your burner
yellow-tipped flames burner flames needs to be flames are normal. If burner flames look like A, call for
determined visually. service. Normal burner flames should look like B or C,
depending on the type of gas you use. With Propane (LP) gas,
some yellow tipping on outer cones is normal.
A–Yellow flames B–Yellow tips C–Soft blue flames
Call for service on outer cones Normal for natural
No rmal f or Propane gas
(LP) gas
Control knobs Knob isn’t pushed down. • To turn from the OFF position, push the knob down
will not turn and then turn.
Burners do Plug on cooktop is not • Make sure electrical plug is plugged into a live, properly
not light completely inserted in the grounded outlet.
electrical outlet.
Gas supply not connected • See the Installation Instructions that came with your
or turned on. cooktop.
A fuse in your home may be • Replace the fuse or reset the circuit breaker.
blown or the circuit breaker
tripped.
Burner parts not replaced • See the Care and cleaning of the cooktop section.
correctly.
The electrodes under the • See the Care and cleaning of the cooktop section.
burners are soiled.
The white ceramic electrodes • See the Care and cleaning of the cooktop section.
are not securely seated under
the burners.
Cooktop is locked. • Unlock the cooktop. See the Using the cooktop
burners section.
The igniter hole (on some • See the Care and cleaning of the cooktop section.
models) is plugged.
Ticking sound of spark Control knob is still • Turn the knob out of the LITE position to the desired setting.
igniter persists after in the LITE position. • Turn the burner off and relight. If ticking is still present,
burner lights call for service.
Burner flames very Improper air to gas ratio. • If cooktop is connected to Propane (LP) gas, check all steps
large or yellow in the Installation Instructions that came with
your cooktop.
12
Page 13

GEAppliances.com
Problem Possible Causes What To Do
Cooktop makes sound The cooktop is locked • Turn the control lock knob to UNLOCK.
when a control knob (on some models).
is turned on
Scratches on cooktop Cookware has been slid • See the Cleaning the glass cooktop surface section.
glass surface across the cooktop surface,
leaving deposits.
Incorrect cleaning • Scratches are not removable. Tiny scratches will
methods being used. become less visible in time as a result of cleaning.
being used or coarse particles procedures. Make sure bottoms of cookware are clean
(salt or sand) were between before use, and use cookware with smooth bottoms.
the cookware and the surface
of the cooktop.
Areas of discoloration Hot surface on a model • This is normal. The surface may appear discolored
on the glass cooktop with a light-colored cooktop. when it is hot. This is temporary and will disappear
surface as the glass cools.
Cookware with rough bottoms • To avoid scratches, use the recommended cleaning
Food spillovers not cleaned • See the Cleaning the glass cooktop surface section.
before next use.
Plastic melted Hot cooktop came into • See the*ODVVVXUIDFH³SRWHQWLDOIRUSHUPDQHQW
to the glass cooktop contact with plastic placed damage section in the Cleaning the glass cooktop
surface on the hot cooktop. surface section.
Pitting (or indentation) Hot sugar mixture spilled • Call a qualified technician for replacement.
of the cooktop on the cooktop.
13
Page 14

Notes.
14
Page 15

Please place in envelope and mail to:
Veuillez mettre dans une enveloppe et envoyez à :
OWNERSHIP REGISTRATION
P.O. BOX 1780
MISSISSAUGA, ONTARIO
L4Y 4G1
(FOR CANADIAN CONSUMERS ONLY)
15
Page 16

16
Page 17

Notes.
17
Page 18

GE Gas Cooktop Warranty.
All warranty service provided by our Factory Service
Centers, or an authorized Customer Care
To schedule service, visit us on-line at GEAppliances.com,
or call 800.GE.CARES (800.432.2737). Please have serial
(For Customers in the United States)
®
technician.
Staple your receipt here.
Proof of the original purchase
date is needed to obtain service
under the warranty.
number and model number availa ble when calling for service.
For The Period Of: GE Will Replace:
One Year Any part of the cooktop which fails due to a defect in materials or workmanship.
From the date of the During this limited one-year warranty, GE will also provide, free of charge, all labor
original purchase and related service costs to replace the defective part.
What GE Will Not Cover:
■ Service trips to your home to teach you how to use
the product.
■ Improper installation, delivery or maintenance.
■ Failure of the product if it is abused, misused,
or used for other than the intended purpose or
used commercially.
■ Replacement of house fuses or resetting of circuit
breakers.
■ Damage to the product caused by accident, fire, floods or
acts of God.
■ Incidental or consequential damage caused by possible
defects with this appliance.
■ Damage caused after delivery.
■ Product not accessible to provide required service.
(;&/86,212),03/,(':$55$17,(6³<RXUVROHDQGH[FOXVLYHUHPHG\LVSURGXFWUHSDLUDVSURYLGHGLQWKLV/LPLWHG
Warranty. Any implied warranties, including the implied warranties of merchantability or fitness for a particular
purpose, are limited to one year or the shortest period allowed by law.
This warranty is extended to the original purchaser and any succeeding owner for products purchased for home
use within the USA. If the product is located in an area where service by a GE Authorized Servicer is not available, you
may be responsible for a trip charge or you may be required to bring the product to an Authorized GE Service location
for service. In Alaska, the warranty excludes the cost of shipping or service calls to your home.
Some states do not allow the exclusion or limitation of incidental or consequential damages. This warranty gives
you specific legal rights, and you may also have other rights which vary from state to state. To know what your
legal rights are, consult your local or state consumer affairs office or your state’s Attorney General.
Warrantor: General Electric Company, Louisville, KY 40225
18
Page 19

Gas Cooktop Warranty.
All warranty service provided by our Factory Service Centres
or an authorized Customer Care
service, visit us on-line at www.GEAppliances.ca or call
1.800.561.3344. Please have serial number and model number
(For Customers in Canada)
®
technician. To schedule
Staple your receipt here.
Proof of the original purchase date
is needed to obtain service under the
warranty.
availa ble when calling for service.
For The Period Of: Mabe Will Replace:
One Year Any part of the cooktop which fails due to a defect in materials or workmanship.
From the date of the During this limited one-year warranty, Mabe will also provide, free of charge, all labor
original purchase and related service costs to replace the defective part.
What Mabe Will Not Cover:
■ Service trips to your home to teach you how to use
the product.
■ Improper installation, delivery or maintenance.
■ Failure of the product if it is abused, misused,
or used for other than the intended purpose or
used commercially.
■ Replacement of house fuses or resetting of circuit
breakers.
■ Damage to the product caused by accident, fire, floods or
acts of God.
■ Incidental or consequential damage caused by possible
defects with this appliance.
■ Damage caused after delivery.
■ Product not accessible to provide required service.
(;&/86,212),03/,(':$55$17,(6³<RXUVROHDQGH[FOXVLYHUHPHG\LVSURGXFWUHSDLUDVSURYLGHGLQWKLV/LPLWHG
Warranty. Any implied warranties, including the implied warranties of merchantability or fitness for a particular
purpose, are limited to one year or the shortest period allowed by law.
This warranty is extended to the original purchaser and any succeeding owner for products purchased in Canada
for home use within Canada. In-home warranty service will be provided in areas where it is available and deemed
reasonable by Mabe to provide.
Some provinces do not allow the exclusion or limitation of incidental or consequential damages, so the above exclusion
may not apply to you. This warranty gives you specific legal rights, and you may also have other rights which vary from
province to province. To know what your legal rights are in your province, consult your local or provincial consumer
affairs office.
Warrantor: Mabe Canada Inc.,
Burlington, Ontario
19
Page 20

Consumer Support
GE Appliances Website
Have a question or need assistance with your appliance? Try the GE Appliances Website 24 hours a day, any day
of the year! You can also shop for more great GE Appliances products and take advantage of all our on-line support
services designed for your convenience. In the US: GEAppliances.com
Register Your Appliance
Register your new appliance on-line at your convenience! Timely product registration will allow for enhanced
communication and prompt service under the terms of your warranty, should the need arise. You may also mail in
the pre-printed registration card included in the packing material. In the US: GEAppliances.com/register
Schedule Service
Expert GE Appliances repair service is only one step away from your door. Get on-line and schedule your service at
your convenience any day of the year. In the US: GEAppliances.com/ge/service-and-support/service.htm
or call 800.432.2737 during normal business hours.
Extended Warranties
Purchase a GE Appliances extended warranty and learn about special discounts that are available while your
warranty is still in effect. You can purchase it on-line anytime. GE Appliances Services will still be there after your
warranty expires. In the US: GEAppliances.com/ge/service-and-support/shop-for-extended-service-plans.htm
or call 800.626.2224 during normal business hours.
Remote Connectivity
For assistance with wireless network connectivity (for models with remote enable),
visit our website at GEAppliances.com/ge/connected-appliances/ or call 800.220.6899 in the US.
Parts and Accessories
Individuals qualified to service their own appliances can have parts or accessories sent directly to their homes
(VISA, MasterCard and Discover cards are accepted). Order on-line today 24 hours every day.
In the US: GEApplianceparts.com or by phone at 877.959.8688 during normal business hours.
Instructions contained in this manual cover procedures to be performed by any user. Other servicing
generally should be referred to qualified service personnel. Caution must be exercised, since improper
servicing may cause unsafe operation.
Contact Us
If you are not satisfied with the service you receive from GE Appliances, contact us on our Website with all the
details including your phone number, or write to:
In the US: General Manager, Customer Relations | GE Appliances, Appliance Park | Louisville, KY 40225
GEAppliances.com/ge/service-and-support/contact.htm
20
Page 21

www.electromenagersge.ca
À Gaz
Instructions de sécurité
. 2–4
Instructions de fonctionnement
Brûleur PowerBoil
Brûleur double raccordé .........5
Brûleurs au gaz scellés ..........5
Casseroles ..................... 6
Pour allumer un brûleur ........ 5
Taille de la flamme ............. 6
Verrouillage des contrôles .......5
™
..............5
Nettoyage et entretien
Bases de brûleur ................8
Boutons de commande ..........7
Brûleurs et électrodes
de la plaque de cuisson .........8
Capuchons et têtes
de brûleur ......................8
Électrodes ......................8
Email en porcelaine
de la plaque ....................7
Grilles de brûleur ................9
Pellicule et ruban d’expédition .....7
Plaque de cuisson en
v itrocéramique ............. 1 0 , 1 1
Remplacement des têtes
et des capuchons de brûleur .....9
Surfaces en acier inoxydable .....7
Manuel du propriétaire
JGP329
JGP333
JGP633
JGP940
JGP970
PGP943
PGP966
Plaque de Cuisson
Imprimé aux États-Unis
Informations sur
le dépannage ...........12, 13
Soutien au consommateur
Garantie ......................15
Soutien au consommateur .... 16
Transcrivez les numéros
de modèle et de série ici :
Modèle #______________
Série # _______________
Vous les trouverez sur une
étiquette apposée sous la
plaque.
GE est une marque déposée de General Electric Company. Fabriqué sous licence de marque.
49-80660 -2 05-17 GEA
Page 22

INFORMATIONS IMPORTANTES SUR LA SÉCURITÉ.
LIRE TOUTES LES INSTRUCTIONS AVANT UTILISATION.
AVERTISSEMENT
il pourra en résulter un feu ou une explosion entraînant des dommages matériels, des blessures ou même
la mort.
- Ne rangez pas et n’utilisez pas d’essence ou d’autres vapeurs et liquides inflammables à proximité de cet appareil ou
de tout autre appareil électroménager.
- Ne pas installer ce produit si l’on utilise une hotte à rideau d’air ou une hotte de cuisinière soufflant l’air au-dessus
de la surface de cuisson. Le débit d’air peut nuire au fonctionnement des brûleurs à gaz et représente un risque
d’incendie ou d’explosion.
- QUE FAIRE SI VOUS DÉTECTEZ UNE ODEUR DE GAZ
■ N’essayez pas d’allumer un appareil, quel qu’il soit.
■ Ne touchez à aucun interrupteur. N’utilisez aucun téléphone de votre domicile.
■ Appelez immédiatement votre fournisseur de gaz depuis le téléphone d’un voisin. Suivez les instructions de votre
fournisseur de gaz.
■ Si vous ne pouvez joindre votre fournisseur de gaz, appelez les pompiers.
- L’installation ainsi que les réparations doivent être effectuées par un installateur ou une entreprise de service
qualifiés, ou le fournisseur de gaz.
Si les instructions de ce manuel ne sont pas observées rigoureusement,
2
CONSERVEZ CES INSTRUCTIONS
Page 23

www.electromenagersge.ca
AVERTISSEMENT
CONSIGNES DE SÉCURITÉ GÉNÉRALES
AVERTISSEMENT
N Ne vous servez JAMAIS de cet appareil comme d’un
radiateur pour chauffer ou réchauffer une pièce. Cela
pourrait entraîner une intoxication par le monoxyde
de carbone et une surchauffe du four.
■ Cet appareil doit être utilisé aux fins prévues et décrites
dans ce manuel.
■ Faites installer et mettre votre surface de cuisson à la
terre par un installateur qualifié, conformément aux
instructions d’installation fournies. Les réglages et les
réparations, quels qu’ils soient, ne doivent être effectués
que par un installateur de surface de cuisson à gaz ou
par des techniciens qualifiés. Ne tentez pas de réparer
ou de remplacer une pièce de la surface de cuisson,
sauf si cela est spécifiquement recommandé dans ce
manuel.
■ Cette surface de cuisson est préréglée en usine pour
une utilisation au gaz naturel. On peut la convertir pour
une utilisation au GPL. Ces ajustements, au besoin,
doivent être effectués par un technicien qualifié,
conformément aux instructions d’installation et aux
codes locaux. L’entreprise qui effectue ce travail assume
la responsabilité de la conversion.
■ Demandez à l’installateur de vous montrer
l’emplacement du robinet de gaz de la surface de
cuisson pour pouvoir le fermer si nécessaire.
■ Avant d’effectuer une réparation, débranchez la
cuisinière ou coupez son alimentation électrique au
niveau du tableau de distribution de votre domicile
(fusible ou disjoncteur).
■ Ne laissez pas les enfants seuls ou sans surveillance
à proximité d’un appareil électroménager en cours
d’utilisation. Ils ne devraient jamais être autorisés à
grimper, s’asseoir ou se tenir debout sur aucune des
parties de l’appareil.
■ Ne rangez pas d’objets pouvant intéresser les enfants
au-dessus de la surface de cuisson ou sur son dosseret.
Les enfants s’exposeraient à de graves blessures s’ils
grimpaient sur la surface de cuisson pour les atteindre.
■ Ne laissez personne grimper, se tenir debout ou
s’accrocher à la surface de cuisson.
■ Utilisez uniquement des poignées sèches. La vapeur
émise par des poignées humides en contact avec une
surface chaude pourrait vous brûler. Ne laissez pas les
poignées entrer en contact avec les brûleurs ou la grille
du brûleur.
■ Prenez garde de ne pas toucher les surfaces chaudes
de la surface de cuisson. Les surfaces qui peuvent
être chaudes comprennent les brûleurs, les grilles et la
surface de cuisson.
■ Ne faites pas chauffer de récipient fermé. La pression
accumulée risquerait de faire éclater le récipient et de
causer des blessures.
■ Faites bien cuire la viande et la volaille. La température
interne de la viande doit atteindre au moins 160 °F
(71 °C) et celle de la volaille au moins 180 °F (82 °C). La
cuisson à ces températures protège habituellement
contre les intoxications alimentaires.
■ Afin d’éviter qu’il ne s’enflamme, assurez-vous que tout
le matériel d’emballage a été enlevé de la surface de
cuisson avant de la faire fonctionner.
■ Évitez de rayer ou de frapper les en verre surface
de cuisson. Cela pourrait casser le verre. Ne cuisinez
pas sur un appareil dont le verre est brisé. Un choc
électrique, un incendie ou des coupures pourraient en
résulte.
CONSERVEZ CES INSTRUCTIONS
3
Page 24

INFORMATIONS IMPORTANTES SUR LA SÉCURITÉ.
LIRE TOUTES LES INSTRUCTIONS AVANT UTILISATION.
AVERTISSEMENT
CONSERVEZ LES MATÉRIAUX INFLAMMABLES À
L’ÉCART DE LA SURFACE DE CUISSON
■ N’entreposez pas et n’utilisez pas de matières
inflammables ou près de la surface de cuisson,
notamment du papier, du plastique, des poignées, du
tissu, des revêtements muraux, des rideaux, des draperies
et tout type de vapeur ou de liquide inflammable.
■
Ne portez jamais de vêtements amples ou qui pendent
lorsque vous utilisez cet appareil. Évitez de ranger des
objets couramment utilisés dans les armoires situées
au-dessus de la surface de cuisson et faites preuve de
prudence lorsque vous vous penchez au-dessus de
AVERTISSEMENT
EN CAS D’INCENDIE, SUIVEZ LES ÉTAPES
celle-ci. Les vêtements qui se trouvent à proximité des
brûleurs ou des surfaces chaudes peuvent s’enflammer
et entraîner de sérieuses brûlures.
■ Ne laissez pas de graisse de cuisson ou d’autres
matériaux inflammables s’accumuler à ou près le
surface de cuisson. La graisse ou sur la surface de
cuisson peut prendre feu.
■ Nettoyez régulièrement les hottes. Ne laissez pas la
graisse s’accumuler sur la hotte ou sur le filtre..
CI-DESSOUS POUR ÉVITER LES BLESSURES ET
EMPÊCHER L’INCENDIE DE SE PROPAGER :
■ Ne versez pas d’eau sur un feu de friture. N’essayez
jamais de soulever un ustensile de cuisson en feu.
Arrêtez l’appareil. Étouffez les flammes de l’ustensile
situé sur le brûleur de surface, en le recouvrant
AVERTISSEMENT
CONSIGNES DE SÉCURITÉ POUR LA SURFACE DE
complètement d’un couvercle de dimension appropriée,
d’une plaque à biscuits ou d’un plateau. Utilisez un
extincteur chimique ou à mousse à usage général, au
besoin.
CUISSON
■ Ne laissez jamais sans surveillance les brûleurs
de surface à des réglages moyens ou élevés. Les
aliments, particulièrement les aliments huileux, peuvent
s’enflammer et causer un incendie qui pourrait se
propager aux armoires environnantes.
■ Ne laissez jamais l’huile sans surveillance lorsque
vous faites frire des aliments. Si elle chauffe trop et
dégage de la fumée, l’huile peut s’enflammer et causer
un incendie qui se propagerait jusqu’aux armoires
environnantes. Utilisez un thermomètre à friture, lorsque
cela est possible, pour surveiller la température de l’huile.
■ Pour éviter les projections d’huile et les incendies, utilisez
une quantité minimale d’huile lorsque vous faites frire
des aliments dans une casserole peu profonde et évitez
de cuire des aliments surgelés comportant trop de glace.
■ Utilisez des ustensiles de dimensions appropriées. Évitez
les ustensiles de cuisson qui ne sont pas stables ou
qui basculent facilement. Choisissez un ustensile qui
correspond à la dimension du brûleur. Les flammes
du brûleur devraient être réglées de façon à ne pas
dépasser le fond de l’ustensile. Des flammes trop
intenses peuvent être dangereuses.
■ Utilisez toujours la position LITE (allumage) lorsque vous
allumez les brûleurs supérieurs et assurez-vous que les
brûleurs se sont bien allumés.
■ Lorsque vous utilisez des ustensiles de cuisson en
vitrocéramique, assurez-vous qu’ils sont compatibles
avec cette surface de cuisson. Les autres matériaux
pourraient se casser à la suite d’une variation subite de
la température.
■ Pour minimiser les risques de brûlure, de combustion de
matériaux inflammables et de débordement, la poignée
du récipient devrait être dirigée vers le centre de la
surface de cuisson, sans toutefois les placer au-dessus
des brûleurs.
■ Pour faire flamber des aliments sous une hotte, vous
devez mettre le ventilateur en marche.
■ N’utilisez pas de wok muni d’un support rond
métallique. Le support peut retenir la chaleur et bloquer
l’air arrivant au brûleur, ce qui pourrait entraîner une
intoxication par monoxyde de carbone.
■ N’essayez pas de soulever la surface de cuisson. Cela
pourrait endommager le conduit d’alimentation en gaz
des brûleurs de surface et conduire à une fuite de gaz
et un risque d’incendie.
■ Lorsque vous désactivez le dispositif de verrouillage des
commandes/du gaz (certains modèles), assurez-vous
que les commandes de la surface de cuisson sont à la
position OFF (arrêt). Cela empêchera les fuites de gaz
accidentelles des brûleurs.
■ N’utilisez pas de papier d’aluminium pour couvrir les
grilles ou recouvrir une quelconque partie de la surface
de cuisson. Cela peut entraîner une intoxication par
monoxyde de carbone, une surchauffe des surfaces de
cuisson ou un risque d’incendie.
4
CONSERVEZ CES INSTRUCTIONS
Page 25

Utilisation des brûleurs de la plaque de cuisson. www.electromenagersge.ca
Tout au long de ce manuel, les caractéristiques et l’apparence peuvent varier d’un modèle à l’autre.
Verrouillage des contrôles (sur certains modèles)
UNLOCK
LOCK
CONTROL LOCK
Pour verrouiller la plaque de cuisson et prévenir
une utilisation non voulue, tournez le bouton de
verrouillage des contrôles dans le sens opposé à
celui des aiguilles d’une montre en position LOCK
(verrouillage). Un voyant lumineux s’allume pour
indiquer le verrouillage de la plaque de cuisson.
Comment allumer un brûleur
Assurez-vous que le bouton de verrouillage
des contrôles est en position UNLOCK
(déverrouillage).
Les brûleurs de votre plaque sont allumés
électriquement, éliminant ainsi la nécessité
d’avoir une flamme témoin constamment
allumée.
Poussez le bouton de commande et le tournez
dans le sens anti-horaire sur la position LITE
(allumage). Après l’allumage du brûleur, tournez
le bouton pour régler la taille de la flamme.
Pour éteindre le brûleur, tournez le bouton dans
le sens horaire jusqu’au maximum de sa course
sur la position OFF (arrêt).
■ Vérifiez que le brûleur que vous voulez utiliser
est celui que vous avez allumé.
Quand elle est verrouillée, la plaque de cuisson fait un
bruit si un bouton de commande est mis en position
autre que OFF (arrêt).
Pour déverrouiller, tournez le bouton
de verrouillage des contrôles en position
UNLOCK (déverrouillage).
■ Assurez-vous de placer le bouton sur
OFF (arrêt) après la fin de la cuisson.
■ En cas de panne de courant, vous pouvez
allumer les brûleurs avec une allumette. Tenir
une allumette allumée proche du brûleur puis
pousser le bouton de commande et le placer
sur la position LITE (allumage). Faire très
attention lorsque vous allumez les brûleurs
de cette façon. Les brûleurs en cours
de fonctionnement lorsque la panne de
courant survient continuent à fonctionner
normalement.
■ Ne pas utiliser le brûleur longtemps sans qu’il
y ait de casserole sur la grille. La finition de
la grille peut s’écailler sans la présence d’une
casserole pour absorber la chaleur.
■
Assurez-vous que les brûleurs et les grilles sont
froids avant d’y poser la main, des mitaines de
four, des chiffons ou tout autre matériau.
Brûleurs au gaz scellés
Le brûleur le plus petit (arrière droite) et le
brûleur du centre (sur certains modèles) sont des
brûleurs à mijoter. Vous pouvez diminuer ces
brûleurs en les mettant en position LO (basse)
ou SIMMER (mijotage) (selon le modèle). Cela
permet une température précise de cuisson
pour les aliments délicats comme les sauches
ou les aliments qui nécessitent une température
basse et une durée de cuisson lente.
Le brûleur moyen (arrière gauche) et le grand
brûleur (avant gauche) sont des brûleurs tout
usage, qui peuvent passer d’une position
HI (élevée) à une position LO (basse) pour
permettre la cuisson d’une gamme étendue
d’aliments.
Brûleur double raccordé (sur certains modèles)
Le brûleur extra grand (avant droite) a une
capacité maximale de chauffage et de mijotage
précis. Vous pouvez le faire passer d’une position
PowerBoil™ (sur-bouillonnement) à une position
SIMMER (mijotage) pour une gamme étendue de
cuissons.
Brûleur PowerBoil™ (sur-bouillonnement) (sur certains modèles)
Le brûleur extra grand (avant droite) a
un réglage spécial PowerBoil™ (sur-
bouillonnement). Vous ne pouvez utiliser cette
caractéristique qu’avec des ustensiles de
cuisine d’au moins 28 cm (11 po) de diamètre,
et vous ne devez jamais permettre aux flammes
de dépasser les côtés de l’ustensile de cuisine.
Cette caractéristique est conçue pour faire
bouillir rapidement de grandes quantités de
liquide dans des casseroles d’au moins 28 cm
(11 po) de diamètre.
5
Page 26

Utilisation des brûleurs de la plaque de cuisson.
Comment choisir la taille de la flamme
Utiliser un Wok à fond plat.
Afin de sécuriser l’utilisation des casseroles,
ne jamais laisser la flamme dépasser les parois
de celles-ci.
Lorsque vous réduisez la chaleur, surveillez
la flamme et non le bouton de commande.
La taille de la flamme d’un brûleur à gaz doit
correspondre au type de casserole que vous
utilisez.
Cuisinez avec un Wok comme suit
Nous vous recommandons d’utiliser un wok
à fond plat de 36 cm (14 po) ou plus petit. Ces
woks sont vendus par votre détaillant local.
Vous ne pouvez utiliser qu’un wok à fond plat.
Assurez-vous que le bas du wok repose bien
horizontalement sur la grille.
Casseroles
Toute flamme qui dépasse le fond de
la casserole est gâchée et ne fait que
réchauffer la poignée.
N’utilisez jamais une bague de soutien
de wok. Si vous mettez la bague sur
le brûleur ou la grille, vous pouvez occasionner
un mauvais fonctionnement du brûleur et
une augmentation du niveau de gaz CO
au-dessus des normes permises. Cela peut être
dangereux
pour votre santé.
En aluminium : Les casseroles de dimensions
moyennes sont recommandées compte tenu
du fait qu’elles se réchauffent rapidement
et uniformément. La plupart des aliments
brunissent uniformément dans les casseroles
en aluminium. Utiliser un poêlon avec un
couvercle bien ajusté lorsque la cuisson est
faite avec une quantité minime d’eau.
En métal émaillé : Sous certaines conditions,
l’émail de certaines casseroles peut fondre.
Suivre les recommandations du fabricant pour
la méthode de cuisson à suivre.
Verre : Il existe deux types de casseroles en
verre : celles pour utilisation dans un four
seulement et celles pour la cuisson sur plaque
(casseroles, pots à café et à thé). Le verre
conduit la chaleur très lentement.
En fonte : Si réchauffées lentement, la plupart
des casseroles en fonte donnent des résultats
satisfaisants.
En verre céramique insensible à la chaleur
: Ce type d’ustensiles peut être utilisé pour
cuisson soit au four, soit en surface. Il conduit la
chaleur et se refroidit très lentement. Vérifier les
instructions du fabricant pour s’assurer qu’il est
possible d’utiliser l’ustensile sur une plaque de
cuisson à gaz.
En acier inoxydable : Les propriétés de
chauffage de ce métal sont médiocres.
Habituellement, il est combiné avec du cuivre,
de l’aluminium ou avec d’autres métaux
pour améliorer la répartition de chaleur. Les
casseroles en alliage de métaux se comportent
de manière satisfaisante si elles sont utilisées
avec une chaleur moyenne comme le fabricant
le recommande.
Renseignements pratiques de mise en conserve à la maison
Assurez-vous que l’ustensile de mise en
conserve se trouve bien au centre du brûleur.
Pour prévenir toute brûlure de vapeur
ou de chaleur, faites attention quand
vous mettez en conserve.
Utiliser des recettes et des procédures de
sources réputées. Vous les trouverez en vous
adressant à des fabricants comme Ball®
et Kerr® et aux services de publications du
ministère de l’agriculture.
6
Page 27

Entretien et nettoyage de la plaque de cuisson. www.electromenagersge.ca
Assurez-vous que l’alimentation électrique est coupée et que toutes les surfaces sont froides avant de nettoyer une
partie quelconque de la plaque.
Comment retirer la pellicule protectrice d’expédition et le ruban d’emballage
Tirez le bouton droit vers vous pour
l’enlever de sa tige.
Saisissez soigneusement un coin de la pellicule
protectrice d’expédition avec vos doigts et
pelez-la de la surface de l’appareil. N’utilisez
aucun objet aiguisé pour enlever cette pellicule.
Enlevez toute la pellicule avant d’utiliser votre
appareil pour la première fois.
Pour s’assurer qu’aucun dommage ne soit
causé à la finition du produit, le plus sûr
moyen d’enlever l’adhésif provenant du ruban
Boutons de commande
Les boutons de commande se retirent pour faciliter
leur nettoyage.
Assurez-vous que les boutons soient en position
OFF (ARRÊT) et retirez-les des tiges pour les
nettoyer.
d’emballage resté sur les appareils neufs est
d’appliquer du détergent liquide pour lavage de
la vaisselle. Appliq u e r a v e c u n li n g e d o u x
et laisser le liquide s’imbiber.
NOTE : Vous devez enlever la pellicule adhésive
de toutes les pièces avant d’utiliser la plaque de
cuisson. Vous ne pourrez plus l’enlever si elle cuit
sur la plaque.
Les boutons se nettoient au lave-vaisselle ou
vous pouvez les laver avec de l’eau et du savon.
Assurez-vous que l’intérieur des boutons soit sec
avant de les replacer.
Replacez les boutons en position OFF (ARRÊT)
pour vous assurer qu’ils soient bien placés.
Plaques avec porcelaine émaillée (sur certains modèles)
La finition en porcelaine émaillée est durable.
Cependant, elle peut être endommagée en
cas de mauvaise utilisation. La finition résiste à
l’acide. Néanmoins, tout aliment acide qui a été
épandu (jus de fruits, de tomates ou vinaigre)
ne doit pas demeurer sur la finition.
Surfaces en acier inoxydable
N’utilisez pas de tampons de laine d’acier;
ils pourraient rayer la surface.
Pour nettoyer la surface en acier inoxydable,
utilisez de l’eau chaude savonneux ou un produit
nettoyant ou cire à acier inoxydable. Essuyez
toujours la surface dans le sens du grain. Suivez
les instructions du produit nettoyant pour nettoyer
la surface en acier inoxydable.
(sur certains modèles)
Si de l’acide est épandu sur la plaque alors qu’elle
est chaude, utiliser une serviette en papier sèche
ou un chiffon pour l’essuyer immédiatement. Une
fois la surface refroidie, laver avec de l’eau et du
nettoyant universel. Bien rincer.
Pour les autres débordements, par exemple des
éclaboussures de graisse, laver avec de l’eau
et du savon ou un nettoyant universel après
refroidissement de la surface. Bien rincer et polir
avec un chiffon sec.
Pour savoir comment acheter le produit nettoyant
ou le cire pour appareils électroménagers en acier
inoxydable, ou pour trouver un détaillant ou un
magasin de pièces Camco près de chez vous,
veuillez appeler notre numéro sans frais :
Centre national de pièces 1.800.661.1616
www.electromenagersge.ca
7
Page 28

Entretien et nettoyage de la plaque de cuisson.
Brûleurs et électrodes de la plaque de cuisson
AVERTISSEMENT
NE FAITES JAMAIS FONCTIONNER
UN BRÛLEUR SANS TOUTES SES PIÈCES
EN PLACE.
Mettez tous les contrôles en position arrêt avant
d’enlever des pièces de brûleur.
NOTE : Avant d’enlever les capuchons et
:
les têtes de brûleur, notez leur taille et leur
emplacement. Remettez-les à leur place
après les avoir nettoyés.
Les systèmes de brûleur doivent toujours être
propres. Vous devez nettoyer immédiatement
tout renversement sur un brûleur. Il peut
boucher les ouvertures du système de brûleur.
Capuchons et têtes de brûleur
Lavez les capuchons et les têtes de brûleur
dans de l’eau savonneuse chaude et rincez-les
à l’eau propre courante. Vous pouvez récurer
avec un tampon à récurer en plastique pour
enlever les particules de nourriture brûlées.
Utilisez une aiguille à coudre ou un lien torsadé
pour déboucher les petits trous de la tête de
brûleur, le cas échéant.
Pour enlever les aliments brûlés, trempez les
têtes de brûleur dans une solution de détergent
liquide léger pour lavage de la vaisselle et
d’eau chaude pendant 20 à 30 minutes, le cas
Enlevez les grilles de brûleur, les capuchons de
brûleur et les têtes de brûleur pour nettoyer
plus facilement.
NOTES :
■ N’essayez jamais d’enlever l’électrode de
la plaque de cuisson ou une vis de la tête
de brûleur ou de la base de brûleur.
■ N’utilisez jamais de laine d’acier ou de poudre
à récurer pour nettoyer les brûleurs.
échéant. Pour les taches plus difficiles à enlever,
utilisez une brosse à dents.
Si le renversement est entré dans le système
de tête de brûleur (brûleur avant droit dans les
modèles JGP333, PGP943 et PGP975), lavez-le
à l’eau courante. Remuez pour enlever l’eau en
trop. Séchez à l’air et assurez-vous que les petits
trous de l’allumeur soient bien ouverts.
NOTE : Ne lavez aucune pièce de brûleur dans
un lave-vaisselle.
Électrode de plaque
de cuisson
Nettoyez cette partie métallique
Ne nettoyez pas cette partie
en céramique blanche à l’aide
d’une lime émeri
NOTE : N’essayez jamais d’enlever
l’électrode de la plaque de cuisson.
8
Bases de brûleur
Vous ne devez jamais enlever les bases
de brûleur pour les nettoyer.
Pour nettoyer les bases de brûleur, utilisez de
l’eau savonneuse et un tampon à récurer en
plastique. Assurez-vous de ne pas faire entrer
Électrodes
L’électrode de l’allumeur est exposée sous la
surface de la base de brûleur. Quand vous
nettoyez la plaque de cuisson, prenez bien soin
de ne pas accrocher l’électrode de l’allumeur
avec votre linge de nettoyage. Vous pouvez
endommager l’allumeur.
Prenez bien soin de ne pas pousser un contrôle
de la plaque de cuisson en nettoyant la plaque
de cuisson. Cela peut vous donner une petite
secousse qui peut vous faire toucher des
ustensiles brûlants.
Assurez-vous que les électrodes en céramique
blanche de la plaque de cuisson soient propres
et secs. Nettoyez la partie métallique de
l’électrode à l’aide d’un linge doux. Pour les
d’eau dans les bases de brûleur et dans les
orifices de gaz en laiton.
Frottez à l’aide d’un linge humide. Laissez sécher
complètement avant d’utiliser.
saletés difficiles à enlever, durcies, utilisez une
lime émeri pour nettoyez la partie métallique de
l’électrode. N’utilisez jamais une lime émeri pour
nettoyer la partie en céramique blanche de
l’électrode. Vous pouvez utiliser un linge doux,
mais jamais une lime émeri, pour nettoyer la
partie blanche de l’électrode.
Avant de monter à nouveau les brûleurs de
surface, poussez vers le bas chaque électrode
en céramique blanche pour vous assurer de
bien les faire reposer sur les bases de brûleur.
Page 29

www.electromenagersge.ca
Remplacement de la tête et du capuchon de brûleur
Remettez la tête de brûleur dans la base de
brûleur, en vous assurant que la tête est bien
Capuchon de brûleur bien installé
orientée sur la base de brûleur et l’électrode.
Assurez-vous de placer la bonne tête de
brûleur sur la bonne base de brûleur et de bien
faire reposer horizontalement la tête de brûleur
sur sa base. Les têtes de brûleur ne sont pas
interchangeables.
Capuchon de brûleur mal installé
JGP940 et JGP970 (tous les brûleurs)
Capuchon de brûleur
Tête de brûleur
Taquets
d’emplacement
Creux
pour les taquets
Assurez-vous que les taquets de brûleur
correspondent aux creux de la base de brûleur
et qu’ils soient bien installés dans ces creux en
faisant tourner les têtes jusqu’à ce qu’elles soient
bien horizontales.
Électrode
Base de
brûleur
JGP329, JGP333, JGP633, PGP943
et PGP966
Capuchon de brûleur
Chambre
de stabilité
Assurez-vous que la fente de la tête de brûleur
soit placée sur l’électrode. Le capuchon de brûleur
a trois ou quatre taquets. Quand vous remettez
le capuchon en place, assurez-vous qu’aucun
taquet ne repose dans la chambre de stabilité.
Tête de brûleur
Base de brûleur
Électrode
Remettez le capuchon de brûleur dans
la tête de brûleur, en vous assurant de
placer le bon capuchon sur la bonne tête de
brûleur. Les capuchons de brûleur ne sont pas
interchangeables. Assurez-vous également de
bien faire reposer les capuchons de brûleur sur
les têtes
de brûleur.
JGP333, PGP943 et PGP966
(brûleur avant droit seulement)
Capuchon de brûleur
Système de
tête de
brûleur
Électrode
Assurez-vous que le trou du système de tête de
brûleur soit placé sur l’électrode et que la tête de
brûleur pénètre bien à l’intérieur de la base de
brûleur. Un petit espace libre entre la base et la
tête est normal.
Orifice
Base
de brûleur
(Sur certains modèles)
Côté
« OUTSIDE »
(extérieur)
Côté
« OUTSIDE »
(extérieur)
Côtés
« INSIDE »
(intérieur)
(Sur certains modèles)
« OUTSIDE »
(extérieur)
Côtés
« INSIDE »
(intérieur)
Taquets
Côté
Grilles de brûleur
Votre plaque de cuisson a des grilles de style
professionnel. Ces grilles sont conçues pour leur
emplacement particulier. Vous devez placer
ces grilles dans leur bon emplacement. Elles ne
sont pas interchangeables. Pour vous aider, les
dessous des grilles de gauche et de droites sont
marquées « OUTSIDE » (extérieur) et « INSIDE »
(intérieur). Assurez-vous que les côtés marqués
« OUTSIDE » (extérieur) soient en face des
extrémités extérieures de la plaque de cuisson
et que les côtés marqués « INSIDE »
(intérieur) soient en face l’un de l’autre.
Toutes les grilles doivent se toucher
quand elles sont assemblées sur la
surface de la plaque de cuisson.
Pour les plaques de cuisson qui ont
trois grilles, assurez-vous que les
Côté
« OUTSIDE »
(extérieur)
taquets situés de chaque côté de
la grille du centre entrent dans les
fentes situées du côté marqué
« INSIDE » (intérieur) des grilles de
côté.
Enlevez les grilles de brûleur en les soulevant
uniquement quand elles sont froides. Vous
devez laver régulièrement les grilles et,
naturellement, après tout débordement.
Lavez-les dans le lave-vaisselle ou dans de
l’eau savonneuse chaude et rincez-les à l’eau
pure. Quand vous remettez les grilles en place,
assurez-vous de bien les fixer sur les brûleurs.
Bien qu’elles soient durables, les grilles perdront
graduellement leur brillant, malgré tous les
soins que vous leur prodiguerez. C’est dû à
leur exposition constante à des températures
élevées. Vous noterez ce phénomène plus tôt
avec les grilles de couleur claire.
Ne faites pas fonctionner un brûleur pendant
longtemps sans un ustensile de cuisine sur la
grille. La surface des grilles peut s’écailler sans
ustensile pour absorber la chaleur.
NOTE : Ne nettoyez jamais les grilles dans
un four auto-nettoyant.
9
Page 30

Nettoyage de la surface en vitrocéramique
de la plaque de cuisson. (sur certains modèles)
Nettoyage normal quotidien
Utilisez UNIQUEMENT la crème nettoyante
CERAMA BRYTE® sur votre plaque de cuisson en
vitrocéramique. Autres crèmes peuvent être moins
efficaces.
Pour entretenir et protéger votre plaque de
cuisson en vitrocéramique, conformez-vous aux
instructions suivantes :
Avant d’utiliser votre plaque de cuisson
Nettoyez votre plaque
de cuisson chaque fois
qu’elle est sale. Utilisez
la crème nettoyante
CERAMA BRYTE® pour
plaque de cuisson.
pour la première fois,
des brûleurs et
crème nettoyante CERAMA BRYTE® pour
plaque de cuisson. Cela vous aidera à la
protéger et à la conserver propre.
Votre plaque de cuisson conservera son
aspect neuf si vous utilisez chaque jour la
crème nettoyante CERAMA BRYTE® pour
plaque de cuisson.
enlevez les grilles
nettoyez-la avec de la
Secouez bien le flacon de crème nettoyante.
Versez quelques gouttes de crème
nettoyante CERAMA BRYTE® directement sur
votre plaque de cuisson.
Utilisez une serviette en papier ou une
éponge CERAMA BRYTE® pour plaque de
cuisson en vitrocéramique afin de nettoyer
la surface de la plaque de cuisson.
Utilisez un linge sec ou une serviette en
papier pour enlever tous les résidus du
nettoyage.
Pas besoin de rincer.
NOTE : Vous devez faire bien attention de NE
PAS faire chauffer la plaque de cuisson avant
de la nettoyer complètement.
Utilisez une éponge CERAMA
BRYTE® pour plaque de cuisson
en vitrocéramique.
On peut se procurer le grattoir
CERAMA BRYTE® pour plaque de
cuisson en vitrocéramique et tous
les accessoires recommandés dans
nos Centres de pièces détachées.
Consultez les instructions dans la
section « Comment commander des
pièces » à la page suivante.
NOTE : N’utilisez jamais une lame
émoussée ou ébréchée.
Résidus calcinés
AVERTISSEMENT : Vous
pouvez ENDOMMAGER votre surface
en vitrocéramique si vous utilisez des éponges
de récurage autres que celles recommandées.
Laissez refroidir la plaque de cuisson.
Enlevez les grilles de brûleurs et v
quelques gouttes de crème nettoyante
CERAMA BRYTE® sur tous les résidus
calcinés.
À l’aide de l’éponge de récurage CERAMA
BRYTE® pour plaque de cuisson en
vitrocéramique, frottez les résidus en
exerçant la pression nécessaire.
Résidus calcinés difficiles à enlever
Laissez refroidir la plaque de cuisson.
Enlevez les grilles de brûleurs.
grattoir à lame simple
à un angle d’environ 45º sur la surface de
vitrocéramique et raclez les résidus. Vous
devrez exercer de la pression sur le
grattoir à lame pour les enlever.
Après avoir enlevé les résidus avec le
grattoir à lame, versez quelques gouttes
de crème nettoyante CERAMA BRYTE®
pour plaque de cuisson sur les résidus
calcinés. Utilisez l’éponge CERAMA BRYTE®
pour enlever les résidus restants.
ersez
Tenez un
S’il reste des résidus, répétez les opérations
indiquées ci-dessus.
Pour mieux protéger après avoir enlevé
les résidus, polissez toute la surface avec
la crème nettoyante CERAMA BRYTE® et
une serviette de papier.
Pour mieux protéger après avoir enlevé
les résidus, polissez toute la surface avec
la crème nettoyante CERAMA BRYTE® et
une serviette de papier.
10
Page 31

www.electromenagersge.ca
Traces de métal et rayures
Faites attention de ne pas faire glisser des
ustensiles de cuisine
sur votre plaque de cuisson. Ils laisseront
des traces de métal
sur la surface de vitrocéramique.
Vous pourrez enlever ces traces
en appliquant la crème nettoyante CERAMA
BRYTE® à l’aide de l’éponge CERAMA BRYTE®
pour plaque de cuisson en vitrocéramique.
Si vous laissez des casseroles recouvertes
d’une couche d’aluminium ou de cuivre
chauffer à sec, leur métal peut laisser des
traces noires sur la plaque de cuisson.
Vous devez enlever ces traces
immédiatement, avant de faire chauffer
à nouveau la plaque de cuisson.
Autrement, les traces risquent de devenir
permanentes.
AVERTISSEMENT :
Vérifiez toujours le fond de vos casseroles pour
vous assurer qu’elles n’aient pas d’aspérités qui
risquent de rayer la plaque de cuisson.
6XUIDFHGHYLWURFpUDPLTXH³SRVVLELOLWpGHGRPPDJHVSHUPDQHQWV
D’après nos essais,
il semble que si vous
cuisinez des aliments
riches en sucre comme de
la confiture ou du caramel,
et s’ils débordent, ils
peuvent occasionner des
dommages permanents
à la surface de
vitrocéramique
si vous ne la nettoyez pas
immédiatement.
Dommages causés par du sucre chaud ou des matières plastiques fondues
Éteignez tous les brûleurs de surface et,
avec des gants isolants, enlevez
les ustensiles de cuisine chauds et
les grilles.
Portez des gants de cuisine :
a. Utilisez un grattoir à lame simple
(grattoir CERAMA BRYTE® pour plaque
de cuisson en vitrocéramique) pour
repousser les matières fondues sur une
surface froide de la plaque de cuisson.
b. Enlevez les matières fondues avec une
serviette en papier.
Vous devez laisser toute matière fondue
que vous n’avez pas réussi à enlever
jusqu’à ce que la plaque de cuisson
refroidisse complètement.
Ne réutilisez jamais la plaque de cuisson
avant d’avoir enlevé complètement les
résidus.
NOTE : S’il s’est déjà formé sur votre plaque
de cuisson en vitrocéramique des creux ou des
piqûres, vous devrez la remplacer. Dans ce cas,
vous devez appeler le service.
Comment commander des pièces
Pour commander la crème et le grattoir CERAMA
BRYTE®, veuillez composer notre numéro de
téléphone sans frais.
Appelez-nous au : 1.800.661.1616.
Crème nettoyante CERAMA BRYTE®
pour plaque de cuisson
en vitrocéramique . . . . . . . . . . . . . . . . . . .# WX10X300
Grattoir CERAMA BRYTE® pour plaque de
cuisson en vitrocéramique . . . . . . . .# WX10X0302
Trousse . . . . . . . . . . . . . . . . . . . . . . . . .# WB64X5027
(la trousse comprend un flacon de crème et un
grattoir)
Éponges CERAMA BRYTE® pour plaque de
cuisson en vitrocéramique . . . . . . . . .# WX10X350
11
Page 32

Avant d’appeler un technicien
pour le service...
Informations sur le dépannage
Gagnez du temps et économiser de l’argent! Passez en revue les cartes
de ces pages d’abord. Il est possible que vous n’ayez pas besoin de service.
Problème Causes possibles Que faire
La flamme ou l’extrémité La qualité de combustion • Utiliser l’illustration ci-dessous pour déterminer
de la flamme du brûleur de la flamme de brûleur si la flamme de votre brûleur est normale. Si la flamme
est jaune doit être déterminée est semblable à A, appeler le technicien de service.
visuellement. Normalement, la flamme devrait être semblable à B ou C
en fonction du type de gaz utilisé. Avec le gaz Propane (LP), il est
normal que l’extrémité de la flamme sur le cône
extérieur soit jaune.
A–Flamme jaune B–Extrémité jaune C–Flamme bleue
Appelez le sur les cônes pâle
technicien extérieurs Normal pour
de Service Normal pour le gaz naturel
le gaz Propane (LP)
Les boutons de Le bouton n’est pas poussé • Pour tourner de la position OFF (arrêt), pousser
commande ne au fond. le bouton et tourner.
tournent pas
Les brûleurs ne La prise de la plaque de • S’assurer que la prise d’alimentation électrique est
s’allument pas
enfoncée.
L’alimentation en gaz n’est pas • Voir les instructions d’installation qui accompagnaient
raccordée ou mise en circuit. la plaque de cuisson.
Un fusible de votre domicile • Remplacer le fusible ou réenclencher le disjoncteur.
a sauté ou un disjoncteur
s’est déclenché.
Les éléments du brûleur n’ont • Voir la section Entretien et nettoyage de votre plaque
pas été replacés correctement. de cuisson.
Les électrodes sous le brûleur • Voir la section Entretien et nettoyage de votre plaque
sont sales. de cuisson.
Les électrodes en céramique • Voir la section Entretien et nettoyage de votre plaque
blanche ne sont pas bien fixées de cuisson.
sous les brûleurs.
La plaque de cuisson • Déverrouillez la plaque de cuisson. Voir la section
est verrouillée. Utilisation des brûleurs de plaque de cuisson.
Le trou de l’allumeur (sur • Voir la section Entretien et nettoyage de votre plaque
certains modèles) est bloqué. de cuisson.
cuisson n’est pas complètement
branchée dans un circuit correctement mis à la terre.
12
Page 33

www.electromenagersge.ca
Problème Causes possibles Que faire
Le bruit tic-tic de Le bouton de commande • Tourner le bouton de la position LITE (allumage) pour
l’allumeur à étincelles est encore sur la position le placer au réglage désiré.
persiste après LITE (allumage).
l’allumage du brûleur
persiste, appelez pour le service.
Les flammes du brûleur Mélange air/gaz incorrect. • Si la plaque est connectée à une source de
sont très grandes ou gaz Propane (LP), vérifiez toutes les étapes des instructions
jaunes accompagnant la plaque.
La plaque de cuisson fait La plaque de cuisson • Mettez le bouton de verrouillage des contrôles
un bruit quand vous mettez
un bouton de commande (sur certains modèles).
en position ON (marche)
Fines égratignures Vous avez fait glisser un • Voir la section Nettoyage de la surface en vitrocéramique
ou marques d’abrasion ustensile de cuisine sur la de la plaque de cuisson.
sur la surface de surface de la plaque de
vitrocéramique cuisson, en laissant des traces.
Méthodes de nettoyage • Vous ne pourrez pas faire disparaître les égratignures.
inappropriées. Vous rendrez moins visibles les égratignures peu
profondes en nettoyant la plaque de cuisson.
Utilisation d’ustensiles de • Pour éviter les égratignures, utilisez les méthodes de
cuisson dont le fond est nettoyage recommandées. Assurez-vous que le fond de
rugueux ou présence de vos ustensiles de cuisine soit propre avant de les utiliser
particules (sel ou sable) et n’utilisez que des ustensiles de cuisine à fond bien lisse.
de la plaque de cuisson.
est verrouillée en position UNLOCK (déverrouillage).
entre l’ustensile et la surface
• Eteindre le brûleur et le rallumer. Si le problème
Décoloration de la Surface chaude sur un • C’est normal. La surface peut apparaître décolorée
plaque de cuisson modèle avec une surface quand elle est chaude. Cette décoloration
en vitrocéramique claire. temporaire disparaît quand la surface en
vitrocéramique refroidit.
Déchets de nourriture non • Voir la section Nettoyage de la surface en vitrocéramique
nettoyés avant l’usage suivant. de la plaque de cuisson.
Matière plastique fondue De la matière plastique • Voir la section Surface en YLWURFpUDPLTXH³
sur la surface a été placée sur la plaque possibilité de dommages permanents dans la section
de cuisson chaude. Nettoyage de la surface en vitrocéramique de la plaque
de cuisson.
Creux ou piqûres sur Mélange contenant du sucre • Appelez un technicien pour remplacer la surface de
la plaque de cuisson chaud renversé sur la plaque la plaque de cuisson.
de cuisson.
13
Page 34

Notes.
14
Page 35

Garantie sur les plaques de cuisson à gaz.
Le service sous garantie est assuré par nos centres de
service de l’usine ou par un technicien agréé Customer Care
obtenir le service, visitez notre site Web à electromenagersge.ca
ou contactez 1.800.561.3344. Veuillez fournir le numéro de série et
(Pour la clientèle au Canada)
®
. Pour
Agrafez le reçu d’achat ici.
Pour obtenir le service sous
garantie, vous devrez fournir
la preuve de l’achat original.
le numéro de modèle lorsque vous appelez pour obtenir le service.
Pendant une période de : Mabe remplacera :
Une année Tout élément de la plaque de cuisson déficient à cause d’un vice de fabrication
à partir de la date d’achat ou de main d’oeuvre. Durant cette période de garantie limitée d’un an, Mabe fournira
également sans frais le service à domicile pour le remplacement de l’élément
faisant défaut.
Ce que Mabe ne couvre pas :
■ Le déplacement à votre domicile du technicien
de service pour vous enseigner comment utiliser
le produit.
■ Installation, livraison ou entretien incorrectement
effectués.
■ Une panne du produit causée par une utilisation abusive,
une mauvaise utilisation dans un but autre
que celui lequel pour il a été conçu ou s’il a été utilisé
commercialement.
■ Les dommages au produit causés par un accident,
un incendie, une inondation ou un acte de Dieu.
■ Les dommages indirects ou accidentels causés par
des défauts possibles de cet appareil.
■ Dommage occasionné après la livraison.
■ Le service s’il est impossible d’avoir accès au produit pour
ce faire.
■ Le remplacement de fusibles à votre domicile
ou le réenclenchement de disjoncteurs.
EXCLUSION DE GARANTIES IMPLICITES – Votre seul et unique recours est la réparation du produit
selon les dispositions de cette Garantie limitée. Toutes les garanties implicites, incluant les garanties
de commercialité et d’adéquation à un usage spécifique, sont limitées à une année ou à la période
la plus courte autorisée par la législation.
Cette garantie est offerte à l’acheteur initial, ainsi qu’à tout propriétaire subséquent d’un produit acheté
en vue d’une utilisation domestique au Canada. Le service à domicile en vertu de la garantie sera fourni
dans les régions où il est disponible et où Mabe estime raisonnable de le fournir.
Certaines provinces n’autorisent pas l’exclusion ou la limitation des dommages indirects, la limitation ou l’exclusion
ne vous sont pas applicables. Cette garantie vous confère des droits spécifiques, et vous disposez de droits
supplémentaires qui varient d’une province à l’autre. Pour en savoir plus sur les droits qui vous
sont conférés pour une province donnée, consultez le bureau d’informations pour les consommateurs
le plus proche ou le procureur de votre province.
Garant : Mabe Canada Inc.
Burlington, Ontario
15
Page 36

Soutien au consommateur
Site Web de GE Appliances
Vous avez une question ou vous avez besoin d’aide pour votre appareil électroménager? Visitez le site Web de GE
Appliances 24 heures par jour, tous les jours de l’année! Vous pouvez aussi y trouver d’autres formidables produits
GE Appliances et tirer avantage de tous nos services d’assistance en ligne. Aux États-Unis : GEAppliances.com
Au Canada : electromenagersGE.ca
Enregistrez votre électroménager
Enregistrez votre nouvel appareil en ligne au moment qui vous convient le mieux! L’enregistrement de votre produit
dans les délais prescrits permet une meilleure communication et un service rapide, selon les modalités de votre
garantie, si besoin est. Vous pouvez également envoyer par courrier la carte d’enregistrement pré-imprimée qui se
trouve dans l’emballage de votre appareil.
Aux États-Unis : GEAppliances.com/register
Au Canada : Prodsupport.mabe.ca/crm/Products/ProductRegistration.aspx
Service de réparation
Un service de réparation expert GE Appliances se trouve à quelques pas de chez vous. Rendez-vous sur notre site
et programmez, à votre convenance, une visite de réparation à n’importe quel jour de l’année.
Aux États-Unis : GEAppliances.com/ge/service-and-support/service.htm ou composez le 800.432.2737 durant
les heures normales de bureau.
Au Canada : GEAppliances.ca/en/support/service-request ou composez le 800.561.3344
Prolongation de garantie
Procurez-vous une prolongation de garantie GE Appliances et informez-vous des rabais spéciaux en vigueur
pendant la durée de votre garantie. Vous pouvez vous la procurer en ligne en tout temps. Les services GE
Appliances seront toujours disponibles après l’expiration de la garantie. Aux États-Unis :
GEAppliances.com/ge/service-and-support/shop-for-extended-service-plans.htm ou composez le 800.626.2224
durant les heures normales de bureau.
Au Canada : GEAppliances.ca/en/support/purchase-extended-warranty ou composez le 800.290.9029
Pièces et accessoires
Les personnes ayant les compétences requises pour réparer elles-mêmes leurs appareils peuvent recevoir
directement à la maison des pièces ou accessoires (les cartes VISA, MasterCard et Discover sont acceptées).
Commandez en ligne 24 heures par jour.
Aux États-Unis : GEApplianceparts.com ou par téléphone au 877.959.8688 durant les heures normales de bureau.
Les instructions contenues dans le présent manuel comportent des procédures que tout utilisateur peut
effectuer. Les autres types de réparation doivent généralement être confiés à un technicien qualifié. Usez de
prudence : une réparation ou un entretien mal effectués peuvent rendre l’utilisation de l’appareil dangereuse.
Les consommateurs au Canada doivent consulter les pages jaunes pour connaître le centre de service Mabe le
plus proche, visiter notre site Web au GEAppliances.ca/en/products/parts-filters-accessories ou composer le
1.800.661.1616.
Communiquez avec nous
Si vous n’êtes pas satisfait du service après-vente de GE Appliances, communiquez avec nous depuis notre site Web
en fournissant tous les détails dont votre numéro de téléphone, ou écrivez à :
Aux États-Unis : General Manager, Customer Relations | GE Appliances, Appliance Park | Louisville, KY 40225
GEAppliances.com/ge/service-and-support/contact.htm
Au Canada : Director, Consumer Relations, Mabe Canada Inc. | Suite 310, 1 Factory Lane | Moncton, N.B. E1C 9M3
GEAppliances.ca/en/contact-us
16
 Loading...