

Page 1
Installation
36” Sealed Gas Cooktop
JGP636, JGP960
Instructions
Questions? Call GE Answer Center at 800.626.2000 or visit our
Website at: www.geappliances.com
CAUTION: Before you begin- read these
instructions completely and carefully.
• IMPORTANT- Save these instructions for
local inspector’s use.
• IMPORTANT-OBSERVE ALL GOVERNING
CODES AND ORDINANCES.
• Note to Installer- Be sure to leave these
instructions with the Consumer.
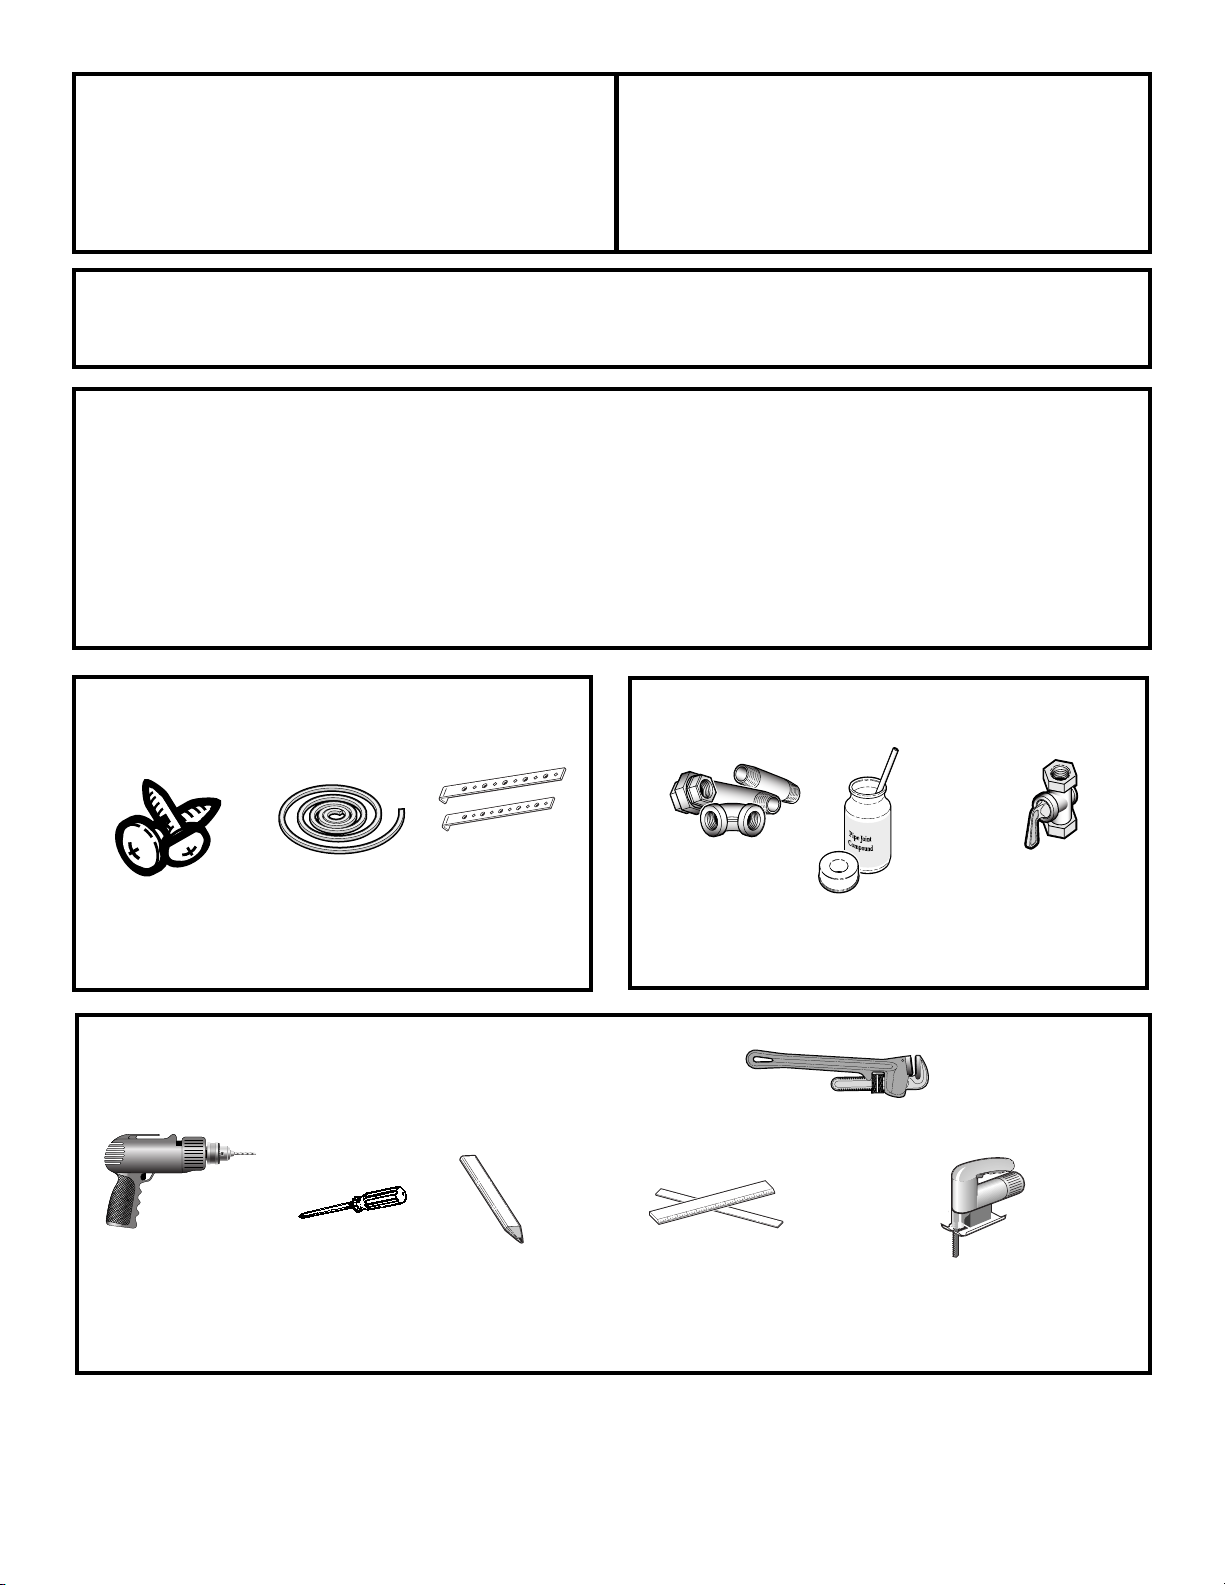
Parts Included
2 Hold
Down
Brackets
2 screws
Foam
Tape
• Note to Consumer- Keep these instructions
for future reference.
• Note- This appliance must be properly
grounded.
• IMPORTANT: Leak testing of the appliance
shall be conducted according to the
manufacturer’s instructions.
Materials Needed
n
T
o
l
a
f
p
e
e
Pipe Fittings
T
F
s
o
a
r
G
U
s
h
t
e
i
W
Joint Sealant
Shut Off
Valves
Tools You Will Need
1/8” Drill Bit &
Electric or
Hand Drill
Pub. No. 31-10505
229C4053P464
Phillips
Head
Screwdriver
Pencil
Pipe Wrench
Ruler or
Straightedge
Saber Saw
1
Page 2
Installation Instructions
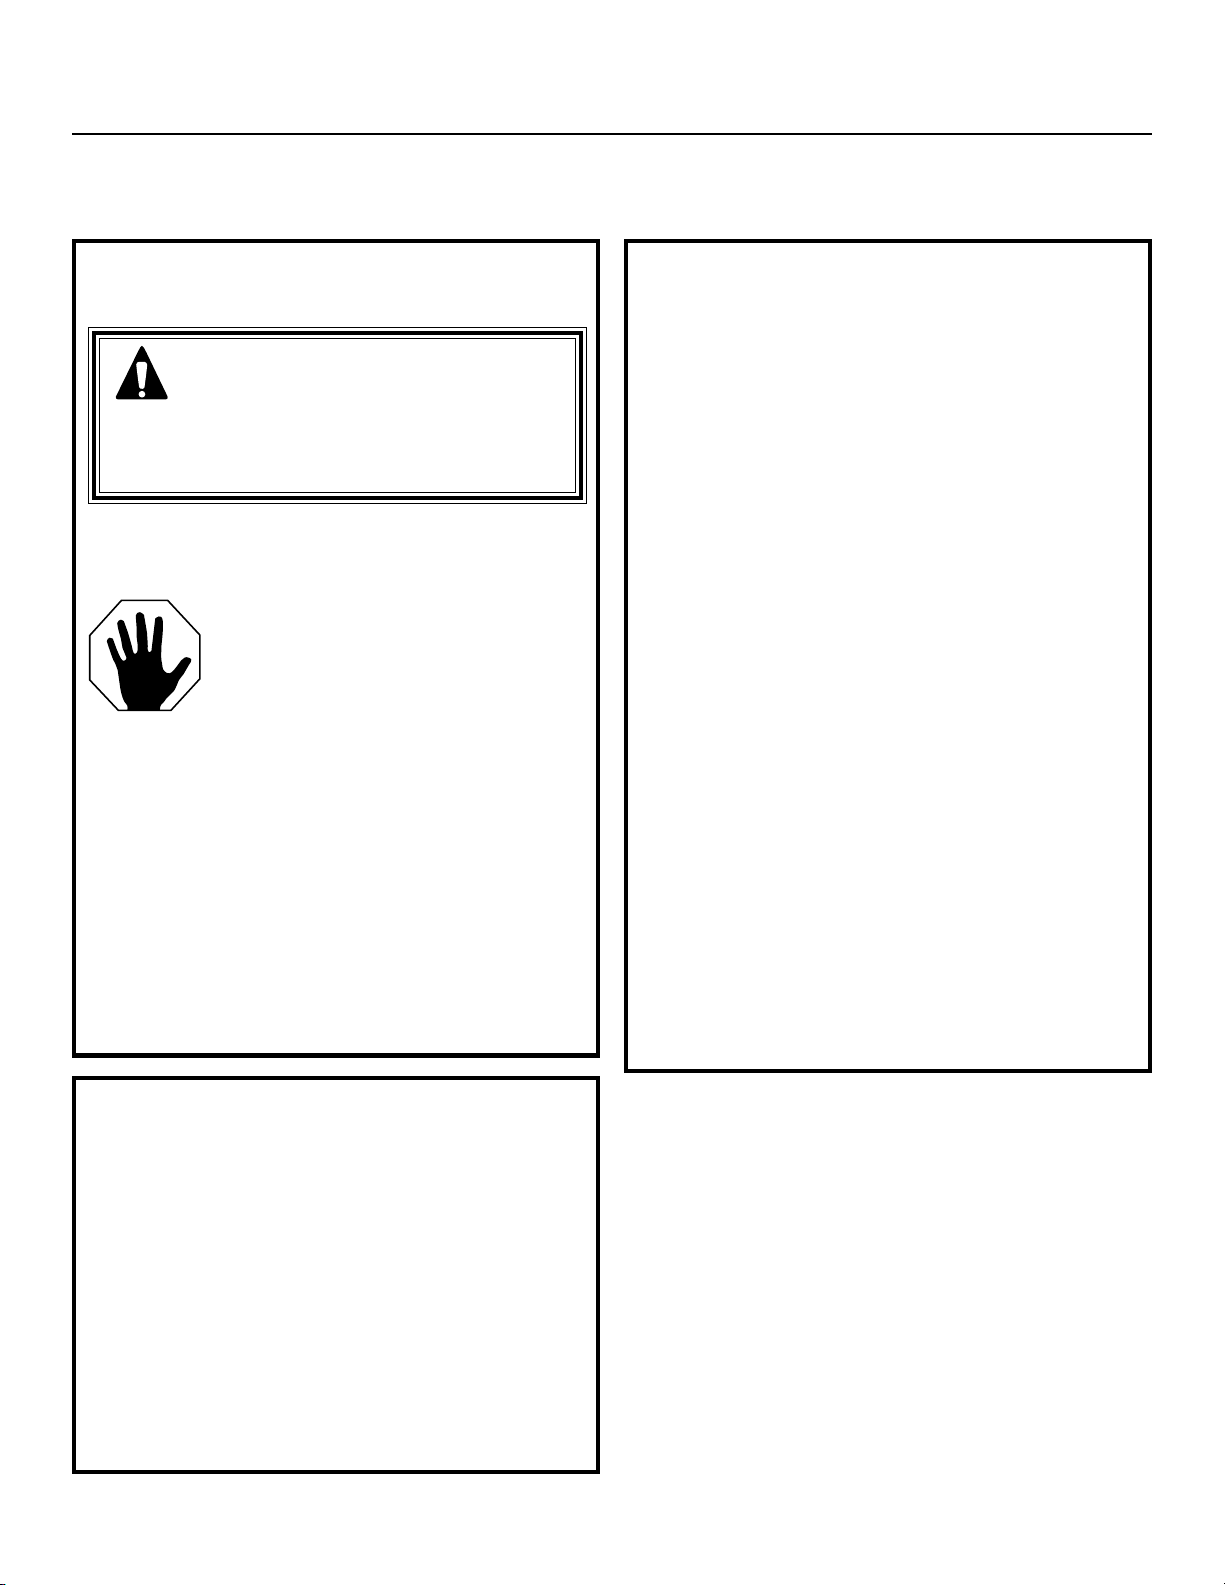
IMPORTANT SAFETY INSTRUCTIONS
For Your Safety
WARNING!! If the information in
this manual is not followed
exactly, a fire, explosion, or gas
leak may result causing property
damage, personal injury, or death.
Do not store or use gasoline or other
flammable vapors and liquids in the vicinity
of this or any other appliance!
WHAT TO DO IF YOU SMELL
GAS:
STOP!
• Do not try to light any appliance. Do not touch
any electrical switch; do not use any phone in
your building.
• Immediately call your gas supplier from a
neighbor’s phone. Follow the gas supplier’s
instructions.
• If you cannot reach your gas supplier, call the
fire department.
Installation and service must be performed by a
qualified installer, service agency or the gas
supplier.
Electrical
Requirements
This Appliance must be electrically
grounded. Check with your local codes
which apply in your area. If no local codes
apply, the National Electrical Code, ANSI/
NFPA No. 70-Latest Edition must be
followed. Write to:
National Fire Protection Association
Battery March Park
Quincy, MA 02269
Be sure the installation of this cooktop in a
mobile home conforms with the
Manufactured Home Construction and
Safety Standard, Title 24 CFR, Part 3280. If
this standard does not apply, you must
follow the standard for Manufactured Home
Installations, ANSI A225. 1 and
Manufactured Home Installations, Sites, and
Communities and ANSI/NFPA 501A or with
local codes. You can get a copy of the
Federal Standard by Writing:
Office of Mobile Home Standards
HUD Building
451 7th Street, S.W.
Washington, D.C. 24010
This cooktop has been design certified by CSA
International. You’ll find safety precautions in
your Use and Care Book. Read them carefully.
• Installation of this cooktop must conform with
local codes or in the absence of local codes
with the National Fuel Gas Code, ANSI Z223.
1-Latest edition.
• Be sure your cooktop is installed properly by a
qualified installer or service technician.
• To eliminate reaching over surface burners,
cabinet storage above burner should be avoided.
• Do not install the unit near an outside door or
where a draft may affect its use.
2
Page 3
Installation Instructions
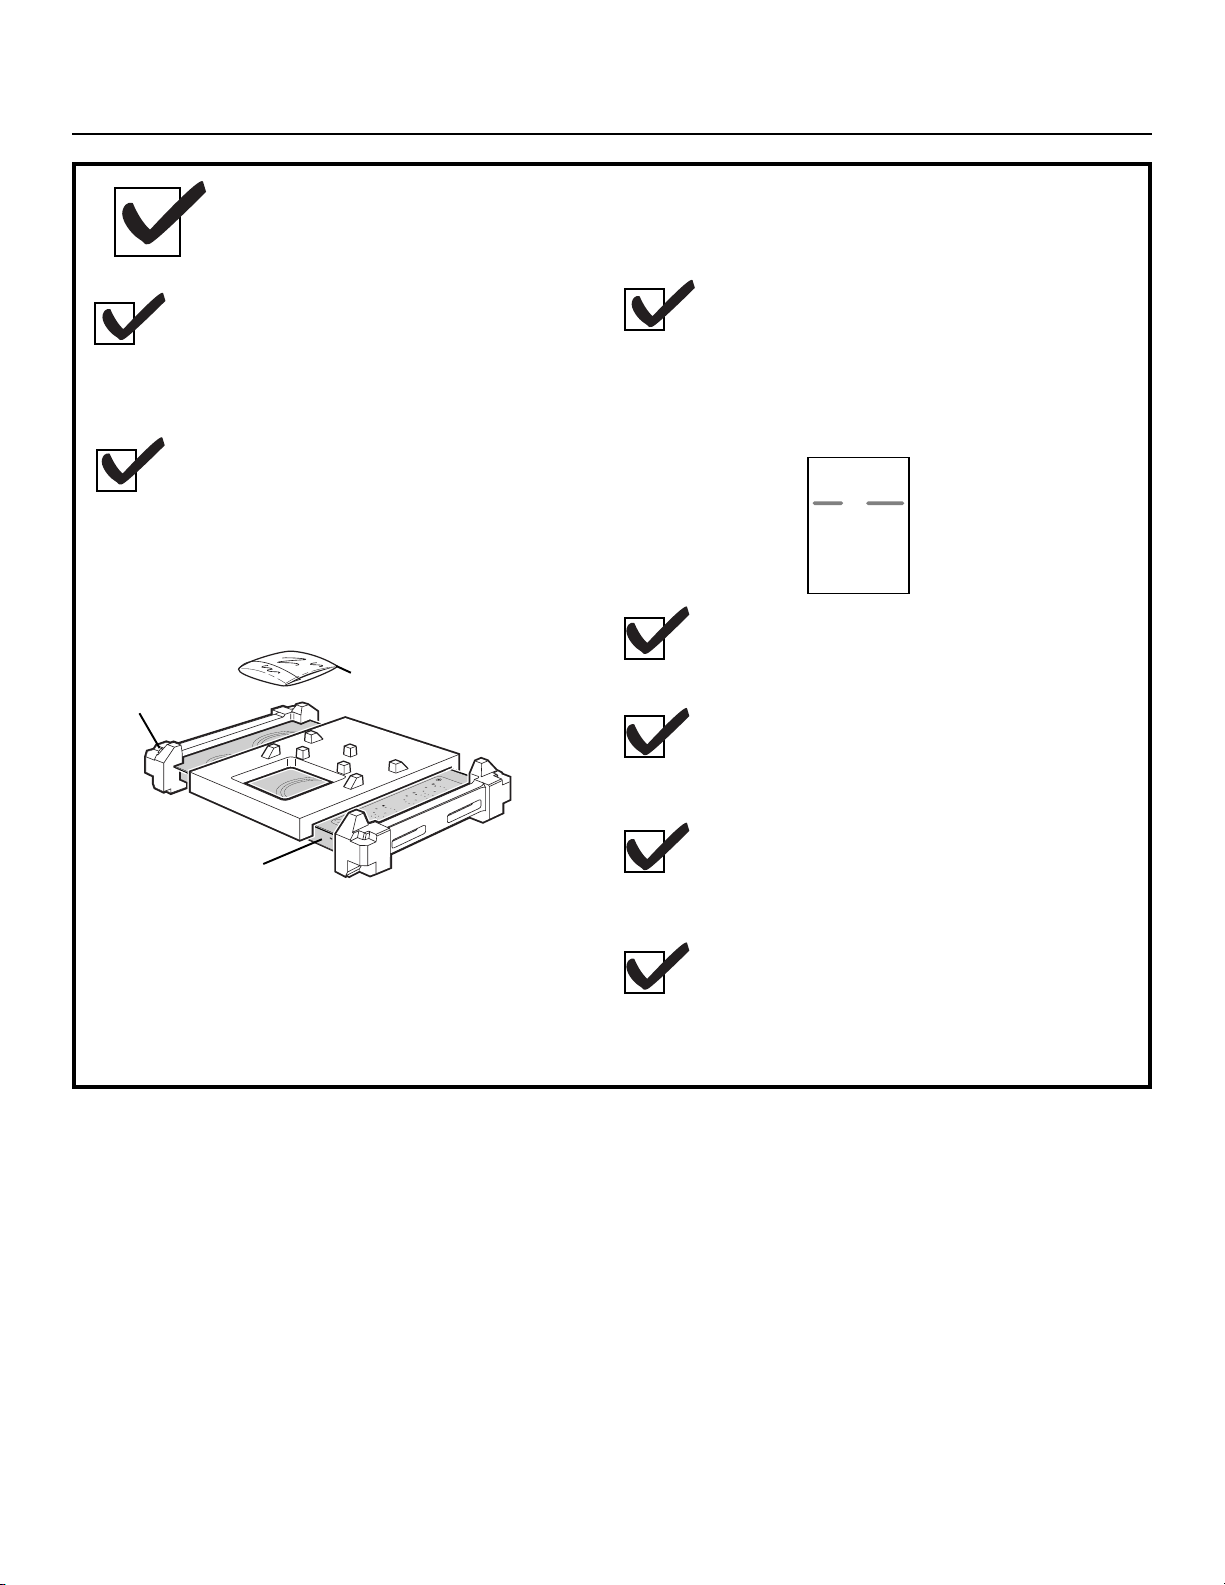
Pre- Installation Checklist
When preparing cooktop opening,
make sure the inside of the cabinet
and the cooktop do not interfere with
each other. (See section on preparing
the opening.)
Remove packaging materials and
literature package from the cooktop
before beginning installation.
Styro Foam
Packaging
Cooktop
Remove Installation Instruction from
literature pack and read them
carefully before you begin.
Be sure to place all literature, Use
and Care, Installations, etc. in a safe
place for future reference.
EASY INSTALLATION OF YOUR NEW
30" COOKTOP
Before you begin-Read these instructions completely and carefully.
Before you begin-Read these instructions completely and carefully.
Before you begin-Read these instructions completely and carefully.
IMPORTANT- Save these instructions for local inspector's use.
IMPORTANT- Save these instructions for local inspector's use.
IMPORTANT- Save these instructions for local inspector's use.
IMPORTANT- OBSERVE ALL GOVERNING CODES AND ORDIANCES.
IMPORTANT- OBSERVE ALL GOVERNING CODES AND ORDIANCES.
IMPORTANT- OBSERVE ALL GOVERNING CODES AND ORDIANCES.
Note to Installer- Be sure to leave these instructions with the consumer.
Note to Installer- Be sure to leave these instructions with the consumer.
Note to Installer- Be sure to leave these instructions with the consumer.
OWNER- Keep these instructions for future reference.
OWNER- Keep these instructions for future reference.
OWNER- Keep these instructions for future reference.
Note- This appliance must be properly grounded (if applicable).
Note- This appliance must be properly grounded (if applicable).
Note- This appliance must be properly grounded (if applicable).
FOR YOUR SAFETY
ELECTRICAL REQUIREMENTS
Before you begin-Read these
Before you begin-Read these
instructions completely and
instructions completely and
carefully.
carefully.
IMPORTANT- Save these
IMPORTANT- Save these
instructions for local inspector's use.
instructions for local inspector's use.
IMPORTANT- OBSERVE ALL
IMPORTANT- OBSERVE ALL
GOVERNING CODES AND ORDIANCES.
GOVERNING CODES AND ORDIANCES.
Note to Installer- Be sure to leave
Note to Installer- Be sure to leave
these instructions with the consumer.
these instructions with the consumer.
OWNER- Keep these instructions
OWNER- Keep these instructions
for future reference.
for future reference.
Note- This appliance must be
Note- This appliance must be
properly grounded (if applicable).
properly grounded (if applicable).
Before you begin-Read these
Before you begin-Read these
instructions completely and
instructions completely and
carefully.
carefully.
IMPORTANT- Save these
IMPORTANT- Save these
instructions for local inspector's use.
instructions for local inspector's use.
IMPORTANT- OBSERVE ALL
IMPORTANT- OBSERVE ALL
GOVERNING CODES AND ORDIANCES.
GOVERNING CODES AND ORDIANCES.
Note to Installer- Be sure to leave
Note to Installer- Be sure to leave
these instructions with the consumer.
these instructions with the consumer.
OWNER- Keep these instructions
OWNER- Keep these instructions
for future reference.
for future reference.
Note- This appliance must be
Note- This appliance must be
properly grounded (if applicable).
properly grounded (if applicable).
Make sure you have all the tools and
Literature Package
materials you need before starting the
installation of the cooktop.
Your home must provide the adequate
electrical service needed to safely and
properly use your cooktop. (Refer to
HOT
ON
section on electrical requirements.)
When installing your cooktop in your
home, make sure all local codes and
ordinances are followed exactly as
stated.
Make sure the wall coverings, counter
top and cabinets around the cooktop
can withstand heat (up to 200°F)
generated by the cooktop.
3
Page 4
Installation Instructions
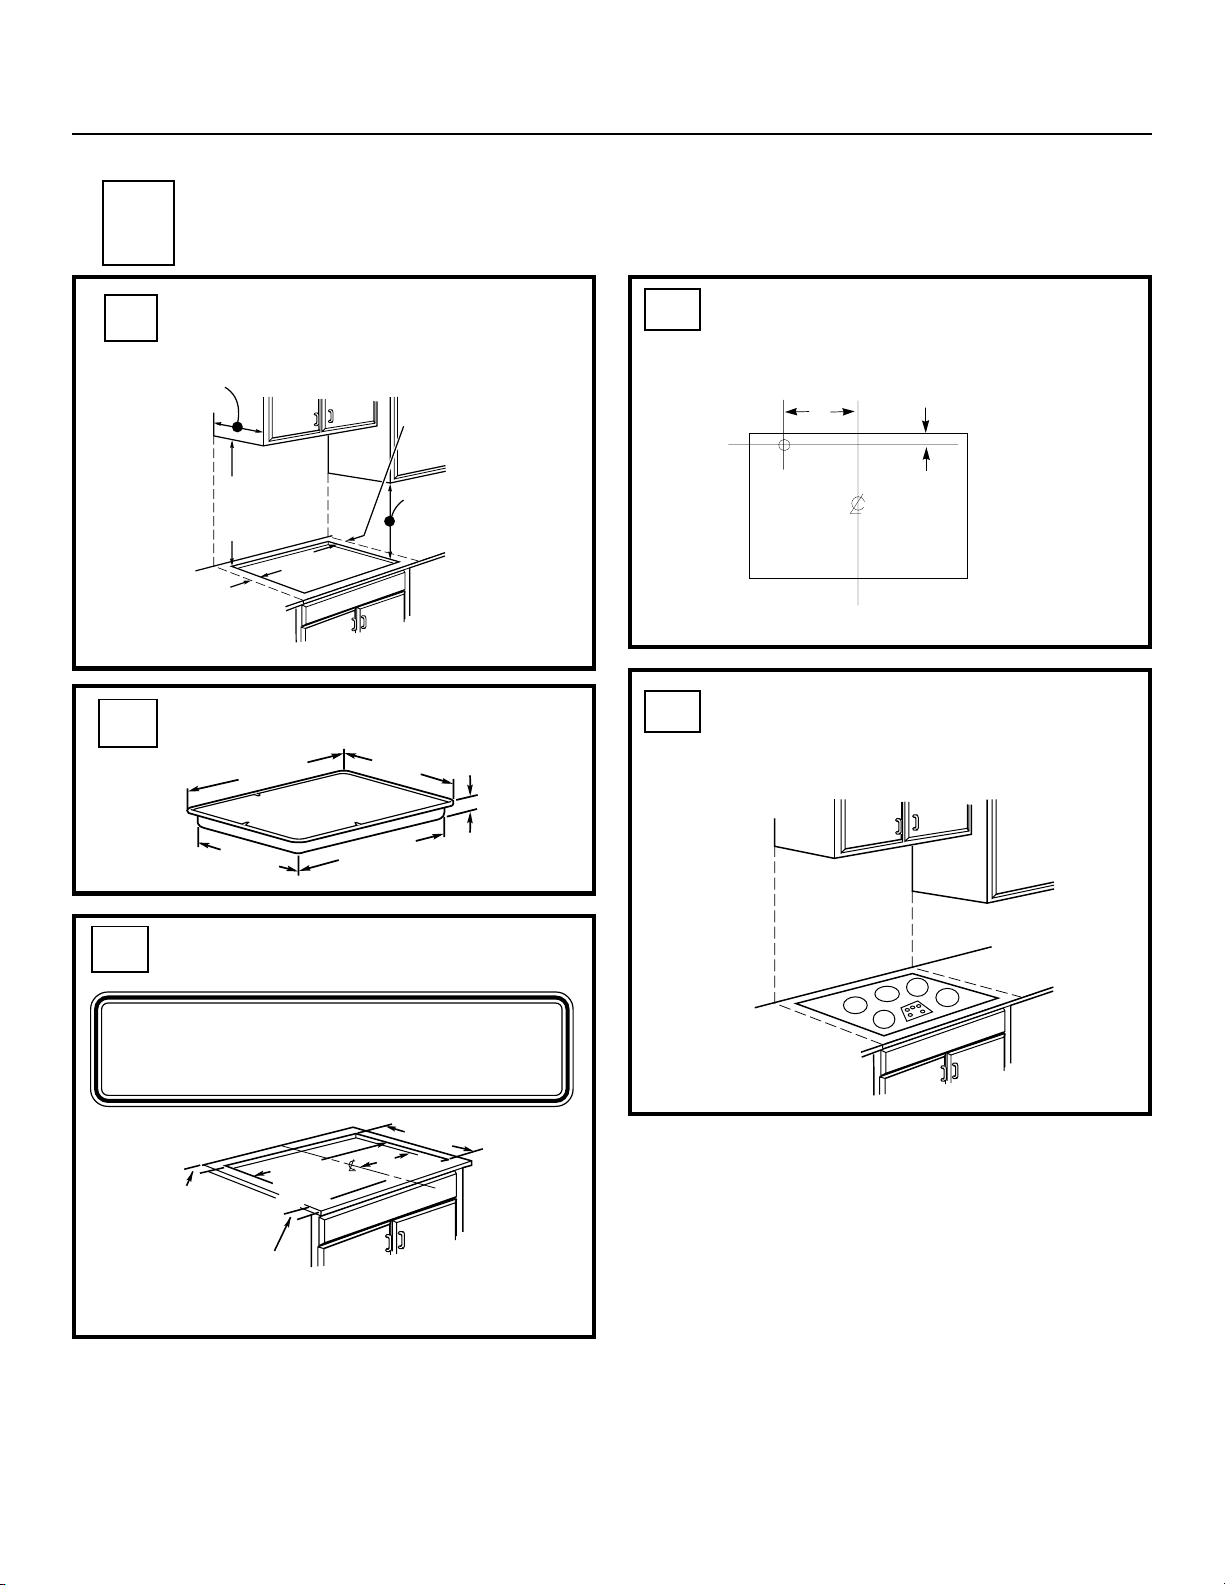
A
A1
13" MAX. Depth
of unprotected
overhead cabinets
A2
PREPARING THE OPENING
The following MINIMUM clearance
dimensions must be maintained.
3 3/4 MIN.
clearance from
cutout to side
wall on the right
of the unit
30" MIN.
clearance from
countertop to
unprotected
overhead surface
3 3/4" MIN.
clearance from
cutout to side
wall on the left
of the unit
18" MIN.
height from
countertop to
nearest cabinet on
either side of unit
OVERALL COOKTOP DIMENSIONS
36"
COOKTOP
21"
3"
A4
A5
The recommended Gas Supply
Location from the backwall.
9"
Recommended
gas supply
location.
1" Min. From Backwall
From Cutout
Center Line
Make sure the wall coverings, counter
top and cabinets around the cooktop
can withstand heat (up to 200°F)
generated by cooktop.
33 11/16"
A3
18 7/8"
CUTOUT DIMENSIONS OF THE
COUNTERTOP
To insure accuracy, it is best to make
a template when cutting the opening
in the counter.
19 1/8" width of cut
16 15/16"
2 1/4" Min.
Between cutout
and the wall behind
the cooktop
33 7/8"
length of
cut
2 1/2"Min.
from front edge
of cutout
and front edge
of countertop
Wall covering,
cabinets, and
countertop
must withstand
heat up to 200F.
4
Page 5

Installation Instructions
B
B1
Installing the Cooktop unit
Locate the electrical outlet
and the Gas Shut Off valve
beneath the cabinet.
NEVER REUSE
OLD CONNECTORS
WHEN INSTALLING
Shut Off
Valve
Electrical
Outlet
12" Below
Countertop
THIS UNIT.
Install a manual shutoff valve in the gas line in an
easily accessible location outside the cooktop.
Be sure you know how and where to shut off the
gas supply to the cooktop. Install the electrical
outlet 12” below the countertop.
B2
Protect the Surface of the
Cooktop
Place a towel or table cloth onto the counter
top. Lay the cooktop upside down onto the
protected surface.
Bottom of cooktop
B5
Attach Brackets to Cooktop
Remove the screw the bottom of the the
cooktop. Screw the hold down bracket to the
side of the cooktop unit. Repeat for opposite
side of cooktop.
Pre-drilled
hole
B6
Bottom of
Cooktop
Foam Strips
Cooktop
Glass
Insert Cooktop Into Cutout
Insert the cooktop centered into the cutout
opening. Make sure the front edge of the
countertop is parallel to the cooktop. Make
final check that all required clearances are
met.
COOKTOP
Cloth under Cooktop
B3
Attach the Adhesive Strip
( Glass Top Models Only)
Attach the adhesive strip around the maintop
glass as close to the edge as possible.
Outer edge
of glass bottom
B4
Cooktop
Burner
Box
Countertop
Locate The Mounting Parts
Adhesive Strips
to outer edge
of glass
Remove the hold down brackets from the
literature package.
Once the unit is in place, screw the hold
down bracket into the cabinet sides to
secure the unit into place.
5
Page 6

Installation Instructions
C
Installing the Cooktop
Provide Adequate Gas
C1
Supply
This cooktop is designed to operate on natural
gas at 4" of water column pressure. It is
shipped from the factory set for natural gas.
The convertible pressure regulator supplied
with the unit must be connected in series with
the manifold of the cooktop and must remain
in series with the supply line regardless of
whether natural or L.P. gas is being used.FOR
PROPER OPERATION, THE MAXIMUM
INLET PRESSURE TO THE REGULATOR
MUST BE NO MORE THAN 14" OF WATER
COLUMN PRESSURE. For checking the
regulator, the inlet pressure must be at least
1" (or 3.4 KPA) greater than the regulator
output setting. If the regulator is set for 4" of
water column pressure, the inlet pressure
must be at least 5". If the regulator is set for
10", the inlet pressure must be at least 11".
The gas supply line to the cooktop should be
1/2" or 3/4" pipe.
C2
NEVER REUSE OLD CONNECTORS WHEN
INSTALLING THIS COOKTOP.
Installing the Regulator
WARNING: Never reuse old flexible
connectors. The use of old flexible
connectors can cause gas leaks and
personal injury. Always use new
flexible connectors when installing a
gas appliance.
C3
Install the Regulator onto
the burner box bottom.
Screw the
regulator and
pipe connection
into the burner
box bottom.
Make sure the
top of the
regulator is
facing towards
the cabinet front,
easily accessible
through the
cabinet doors.
C4
Complete the connection
with a coupling.
Install a coupling
between the
regulator and the
shutoff valve to
complete the
connection.
Pressure
Regulator
Shut Off
Valve
Pressur
Regulator
Coupling
Shut Off
Valve
Electrical
Outlet
12" Below
Countertop
Electrical
Outlet
12" Below
Countertop
Screw a section of pipe
onto each end of the
pressure regulator.
To reduce the likelihood of gas leaks, apply
teflon tape or a thread compound approved
for use with LP or Natural gases to all
threaded connections.
Pressure
Regulator
6
continue on the following page
Page 7

Installation Instructions
C
Installing the Cooktop cont.
C5
After connecting the cooktop to gas, check
system for leaks with a manometer. If a
manometer is not available, turn the gas
supply on to the cooktop and use a liquid
leak detector at all joints and connections to
check for leaks.
Tighten all connections if necessary to
prevent gas leakage in the cooktop or supply
line.
Check alignment of valves after connecting
the cooktop to the gas supply to be sure the
manifold pope has not been moved. A
misalignment could cause the valve knob
stem to rub on the control panel, resulting in
a gas leak at the valve.
Check for Leaks
DO NOT USE OPEN FLAME TO CHECK
FOR LEAKS!
C6
INSTALLATION OVER
BUILT-IN OVEN
See built-in oven installation for complete
installation instruction.
5" TO CENTER
OF 2" DIA. HOLE
FROM COUNTERTOP
90°
STREET EL
CABINET SIDES
2" DIA. HOLE (20 7/8"
FROM FRONT OF
COUNTERTOP TO
HOLE CENTER)
Disconnect this cooktop and its individual
shutoff valve from the gas supply piping
system during any pressure testing of that
system at test pressures greater than 1/2"
psig.
Isolate the cooktop from the gas supply
piping system by closing its individual shutoff
valve during any pressure testing of the gas
supply system at test pressures equal to or
less than 1/2" psig.
7
Page 8

Installation Instructions
D
Installation–Electrical Connections
D1
Because of potential safety hazards
under certain conditions we strongly
recommend against the use of an
extension cord. However, if you still elect
to use an extension cord, it is absolutely
necessary that it be a UL listed 3-wire
grounding type appliance extension cord
and that the current carrying rating of the
cord in amperes be equivalent to or
greater than the branch circuit rating.
Such extension cords are obtainable
through your local appliance dealer.
IMPORTANT: (Please read carefully) FOR
PERSONAL SAFETY, THIS APPLIANCE
MUST BE PROPERLY GROUNDED.
D3
Where a standard two-prong wall
receptacle is encountered, it is the
personal responsibility and obligation of
the customer to have it replaced with a
properly grounded three-prong wall
receptacle.
Do not under any circumstances cut or
remove grounding prong from the
cooktop cord. Failure to provide proper
polarization may create a hazardous
condition.
D2
a. The power cord of this appliance is equipped
b. If you do not have a three-hole grounded
c. A grounding adaptor will be needed to convert
An adequate electrical supply and outlet
must be used to operate the electrical parts
of your cooktop.
with a three-prong (grounding) plug which
must be used with a properly grounded threehole outlet with a standard 120 Volt, 60 cycle
AC household current.
outlet, have a qualified electrician change
your old one.
the old one until the outlet can be replaced.
This method is only temporary, and a qualified
electrician should test it to be sure it meets
requirements.
N
Insure proper
L
ground and
firm connection
before use
8
continued on following page
Page 9

Installation Instructions
D
Installation–Electrical Connections
D4
For 15 amp circuit only. Do not use an adaptor
on a 20 amp circuit. Where local codes permit, a
TEMPORARY CONNECTION may be made to
a properly grounded two-prong wall receptacle
by the use of a UL listed adaptor available at
most hardware stores. The larger slot in the
adaptor must be aligned with the large slot in the
wall receptacle to provide proper polarity in the
connection of the power cord.
Usage situations where
appliance power cord will be
disconnected infrequent.
Insure proper ground
and firm connection
before use
Align large
prongs/slots
Temporary Method
(Adaptor plugs not permitted
in Canada)
CAUTION: Attaching the adaptor
ground terminal to the wall receptacle
cover screw does not ground the
appliance unless the screw is metal,
and not insulated, and the wall receptacle is grounded through the
housewiring. The customer should
have the circuit checked by a qualified electrician to make sure the
receptacle is properly grounded.
When disconnecting the power cord from the
adaptor, always hold the adaptor with one
hand. If this in not done the adaptor ground
terminals is very likely to break with repeated
use. Should this happen, DO NOT USE the
appliance until a proper ground has again
been established.
Usage situations where appliance power
cord will be disconnected frequently.
Do not use an adaptor plug in these situations
because disconnection of the power cord
places undue strain on the adaptor and leads
to eventual failure of the adaptor ground
terminal. The customer should have the twoprong receptacle replaced with a three-prong
(grounding) receptacle by a qualified
electrician before using the appliance.
9
Page 10

Installation Instructions
E
E1
The electrode of the spark igniter is exposed. Be careful not to push any cooktop controls while
the top of the burner is removed. Do not remove the top or touch the electrode of any burner while
another burner while another burner is turned on. Electrical shock might result.
a. Place the burner head on the burner bowl, so that the location of the spark igniter matches up with
the opening in the burner head.
b. Position the burner cap on the burner head.
c. Place the burner grate over the burner assembly and into the burner bowl. The bottoms of the
burner grates have fingers that fit into the corresponding indentations in the burner bowl.
Cooktop Burners
Assembling the Cooktop Burners
BURNER GRATE
MIXER TUBE
BURNER
BOWL
BURNER CAP
BURNER HEAD
SPARK IGNITER
MIXER TUBE
(CHIMNEY)
10
Page 11

Installation Instructions
C
B
E
E2
Operation of the electric igniters should be
checked after the cooktop and supply line
have been carefully checked for leaks and
the cooktop has been connected to the
electrical power.
a. Push and turn a burner valve to the LITE
position.
• The burner valve should light when gas
• Once the burner lights, it should be
b. Try each valve separately until all burnres
have been checked.
E3
Cooktop Burners
Checking the Igniters
is available to the burner
turned out of the LITE position.
Burner Ignition
E4
Turn each burner on. Flames should be blue
in color with no trace of yellow. The burner
flames should not flutter or blow away from
the burner. The inner cone of the flame
should be between 1/2” to 3/4” long.
The Burner Flames
ooktop
urner
1/2" to 3/4"
Burners should be checked frequently
Cooktop Spark Ignition- When you turn the
cooktop knob to LITE, the spark igniter
makes a series of electric sparks (ticking
sounds) which light the burner.
During a power failure the burners will not
light automatically. In an emergency, a
cooktop burner may be lit with a match by
following the steps below.
WARNING: Lighting gas burners with a
match is dangerous. You should match
light the cooktop burners only in an
emergency.
a. Light a match and hold the flame near the
burner you want to light. Wooden matches
work best.
b. Push in and turn the control knob slowly. Be
sure you are turning the correct knob for the
burner you are lighting.
NOTE: If the burner does not light within five
seconds, turn the knob off and wait one minute
before trying again.
WARNING: If you attempt to measure
the inner cone of the flame, please use
caution. Burns could result.
11
Page 12

Installation Instructions
Operation Checklist
Double check to make sure
everything in this guide has been
completed. Rechecking steps will
ensure safe use of the cooktop.
Make sure all controls are left in
the OFF position.
Make sure the flow of
combustion and ventilation air to
the cooktop is unobstructed.
The serial plate for your cooktop
is located on the bottom of the
burner box . In addition to the
model and serial numbers, it tells
you the ratings of the burners
and the type of fuel and pressure
the cooktop was adjusted for
when it left the factory.
When ordering parts, always
include the serial number, model
number and a code letter to ensure
proper replacement parts.
Recheck Steps:
Double check to make sure
everything in this guide has been
completed. Rechecking steps will
ensure safe use of the cooktop.
12
Page 13

LP Conversion
F
F1
Making the LP Conversion
Safety Information you
should know
The pressure regulator and burner orifices
are set for natural gas. To use Propane
Gas, the regulator and burner orifices
must be converted. The LP orifice spuds
for the cooktop burners can be located in
the literature package.
CAUTION: The cooktop, as shipped
from the factory, is set for use with
natural gas. If you wish to use your
cooktop with Liquefied Petroleum
(Propane) gas, you must first replace
the orifices and convert the pressure
regulator.
WARNING: This conversion must be
performed by a qualified installer or gas
supplier in accordance with the
manufacturer’s instructions and all codes
and requirements of the authority having
jurisdiction. Failure to follow instructions
could result in serious injury or property
damage. The qualified agency performing
his work assumes responsibility for the
conversion.
F2
To adjust your cooktop
for use with LP gas,
follow these instructions:
a. Disconnect all electrical power, at the main
circuit breaker or fuse box.
b. Shut off the gas supply to the cooktop by
closing the manual shut-off valve.
c. Adjust the pressure regulator, by the
following instructions:
• Unscrew the cap.
• Place your thumb against the flat side of
the spring retainer and press down to
remove the retainer.
• Carefully look at the spring retainer to
locate the NAT or LP position.
GASKET
CAP
NAT.
POSITION
LP
NAT
LP
NAT
PRESSURE REGULATOR
LP
NAT
LP
L.P./PROPANE
POSITION
FOR OFF
DOWN
NAT
RETAINER
SPRING
13
• Turn the spring retainer over so that
LP is showing on the bottom.
• Snap the retainer back into position.
continued on following page
Page 14

LP Conversion
F
F3
Making the LP Conversion cont.
Changing the Cooktop
Burner Orifices:
a. Remove the top grates, burner caps,
burner heads.
BURNER GRATE
BURNER CAP
MIXER TUBE
BURNER
BOWL
b. Using a 7mm or 9/32” nut driver, remove the
top burner orifices. These may be accessed
through the burner air/gas mixer tube
(Chimney).
NOTE: The orifices have a
spring loaded retaining
ring around the hex head to
hold the orifice in the nut
driver during installation
and removal. A slight
amount of force is required to push the nut
driver down over the ring.
BURNER HEAD
SPARK IGNITER
MIXER TUBE
(CHIMNEY)
MIXER TUBE (CHIMNEY)
RETAINER
RING
Glass Cooktop
I
II
II
I
III
d. Install the LP/Propane orifices in their
precise locations as noted in the illustrations above.
e. Replace the burner bases, heads, caps,
and top grates. (NOTE: When re-attaching
the burner bases to glass top units,
tighten screws to a maximum of 10in.lbs torque.)
f. Save the orifices removed from the appli-
ance for future use.
c. Locate the LP/Propane orifices shipped
inside the literature package. They will have
a digit number and the letter “L” on the side.
(IMPORTANT: Save the orifices removed
from the appliance for future use.)
Each orifice will show a series of engraved
marks, (I, II, or III), located on the top.
These marks denote the precise location of
each orifice to the cooktop burner.
14
continued on following page
Page 15

LP Conversion
F
F4
Making the LP Conversion cont.
Adjusting the Burners
Flames
Caution: The following adjustments
must be made before turning on the
burner. Failure to do so could result in
serious injury. Be sure pressure
regulator has been converted as
described in step F2.
a. Turn all burners full on and check the
flames.
They should be blue in color with no trace
of yellow. Foreign particles in the gas line
may cause an orange flame at first, but
this will soon disappear.
b. To make adjustments, remove the control
knobs. Insert a screwdriver through access
hole in the valve switch. Engage adjustment screw in valve.
Adjust the low flame setting using the valve
by-pass screw as follows:
Low setting adjustments must be made with two
other burners in operation on a medium setting.
This prevents the low flame from being set too
low resulting in the flame being extinguished
when other burners are turned on.
d. Testing flame stability:
Test 1 - Turn the knob from “HI” to “LOW”
quickly. If the “LOW” flame goes
out, increase the flame size and
test again.
Test 2 - With the burner on the “LOW”
setting, open and close the cabinet door under the cooktop. If the
flame is extinguished by the air
currents created by the door
movement, increase the flame
height and test again.
e. Flame recheck:
HIGH OUTPUT
• If the flames were yellow or fluttered, open
the valve more than the original setting.
• If the flames blew away from the burner,
close the valve more than the original
setting.
c. Make the adjustment, by slowing turning the
screw until flame appearance is correct.
After the adjustment is made, turn all burners
off. Ignite each burner individually. Observe
the flame at the “HI” position. Rotate the valve
to the “LO” position and be sure that the flame
size decreases as the valve is rotated
counterclockwise.
TO CONVERT THE COOKTOP BACK TO
NATURAL GAS, REVERSE THE STEPS
UNDER MAKING THE LP CONVERSION.
Once the conversion is complete and
checked ok, fill out the LP sticker and
include your name, organization, and date
conversion was made. Apply the sticker
near the cooktop gas inlet opening to alert
others in the future that this appliance has
been converted to LP gas. If converting
back to natural gas from LP, please
remove the sticker so others know the
appliance is set to use natural gas.
15
Page 16

NOTE
16
Pub. No. 31-10505
229C4053P464
 Loading...