

Page 1

www.GEAppfiances.com
©
°_._
oq
©
Z
Safdy tna_udior_ .... 2-7, 2t_
Operating Imfmc_ns
A] umin mn Foil ........ 12, l 3
Clock and TimeI . ......... 10
O_en ................ 10-15
Baking aim RoasfiI_g ..... 12
BIoiling ............. 13, 14
gIoiling Guide .......... 14
(_'en ContIol ........... 11
PoweI Omage ........... 11
Pieheafi_g .............. l 2
Smfi_ce Cooking ......... 8, 9
Thermostat Adj ustm e_ t .... l 5
Care and Cleaning
Aii Vems ................ 21
Broilei Pan and Grid ...... 21
gmnei Assemblies ..... t&-18
Bml_er Caps and Heads .... 18
Bm_ei G_aws ............ l 7
Contiol Panel and Kl_obs ...21
Cooktop Smfime .......... t0
Drip Pa_s ................ 16
Lift-Off Oven Door . ....... 20
IJft4,rp Cooktop .......... t9
Oxe_ Bottom ............. 20
(.k'en Imefioi . ........ 22, 23
Removable gFoiler DIawer . .21
SheEts .................. 22
StaiMess Steel Smfitces ..... [9
Installatim_
.......... £;fib--O J
Anti-Tip Device ..... 28, 38, 39
Com_ect the Rai_ge
to Gas ................ 29-32
Com>It to LP Gas ......... 39
Dime_sions and
Clearances ............... 27
Electrical Com_ectio_s . .33, 34
Le_wl the RaI_ge .......... 38
Light the Pilots ........ 34-37
Troubleshootb{g Tips..40-42
Accessories . ............. 45
Consumer Support
ConsmT_er
Supp<wt .......... Back Co_er
Pioduct Registratioi_ .... 43, 44
Wanantv for (5_stome_s
in Canada ............... 47
Wailamy fi)r (5_stome_s
i_ the U.S.A .............. 46
5'tandard-Ch_a_
Mod(&:
J(;BS04 R(;BS08
J(;BS07 R(;B524
J(;BS I 7 R(;B528
JGBS20 R(;B533
J(;BS2I RGB540
JGBS22
JGBS23
jcsso5
Continuous-C&an
Model."
JC_C2o
Write the model and serial
numbers here:
Model #
Serial #
You can find them on a label on
the fl'ont of the range behind the
kick panel or broiler drawer.
18305580P155 4g-85088 72-03Jfl
Page 2
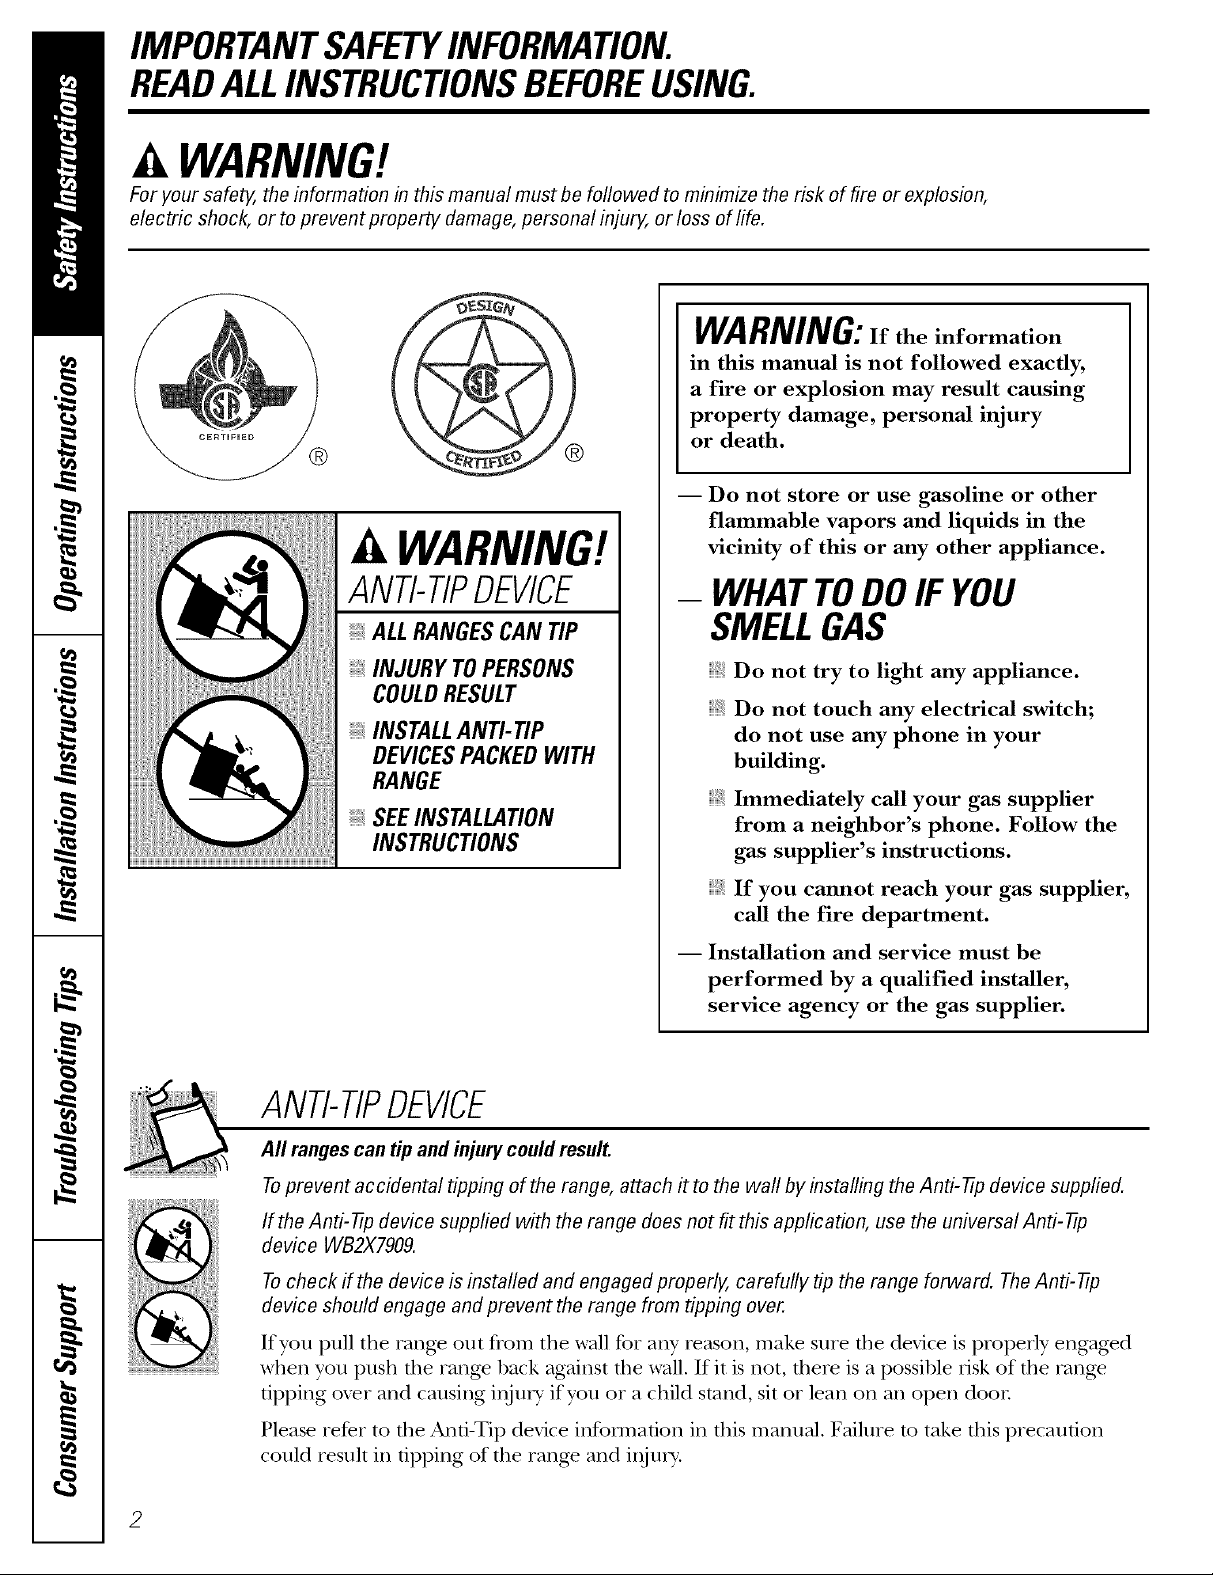
IMPORTANTSAFETYINFORMATION.
READALLINSTRUCTIONSBEFOREUSING.
WARNING!
For your safe_ the information in this manual must be followed to minimize the risk of fire or explosion,
electric shock, or to prevent property damage, personal injury, or loss of life.
WARNING:If the information
in this manual is not followed exactly,
a fire or explosion may result causing
property damage, personal injury
®
WARNING!
or death.
-- Do not store or use gasoline or other
flammable vapors and liquids in the
vicinity of this or any other appliance.
ANTI-TIPDEVICE
, ALL RANGES CAN TIP
INJURY TO PERSONS
COULD RESULT
INSTALL AN_ tiP
DEVICES PACKED WITH
RANGE
SEE INSTALLATION
INSTRUCtiONS
ANTI-TIPDEVICE
All rangescan tip andinjury could result.
- WHATTODOIF YOU
SMELLGAS
Do not try to light any appliance.
Do not touch any electrical switch;
do not use any phone in your
building.
Immediately call your gas supplier
from a neighbor's phone. Follow the
gas supplier's instructions.
If you cannot reach your gas supplier,
call the fire department.
-- Installation and service must be
performed by a qualified installer,
service agency or the gas supplier.
Toprevent accidental tipping of the range, attach it to the wall by installing the Anti--tip device supplied.
If the Anti--tip device supplied with the range does not fit this application, use the universal Anti--fip
device WB2X7909.
Tocheck ff the device is installed and engaged properly, carefully tip the range forward. TheAnti--tip
device should engage and pravent the range from tipping over.
If you pull tile rang_ OUt fl'om the wall %r ally' reason, make sure die device is properly engag>d
when you push tim rang_ back against tile wall. If it is not, there is a possible risk of the rang_
tipping ox_r and causing inju U if you or a child stand, sit or lean on all open doon
Please refer to file And-Tip device infot_nafion ill this manual. Failure m take tiffs precaution
could resu]t ill tipping of the rang_ and iIIju_>
Page 3
www.GEAppliances.com
WARNING!
IMPORTANTSAFETYNOtiCE
The California Safe Drinking Water and ToxicEnforcement Act requires the Governor of California to
publish a list of substances known to the state to cause birth defects or other reproductive harm, and
requires businesses to warn customers ofpotential exposure to such substances.
Gasappliances can cause minor exposure to four of these substances, namely benzene, carbon
monoxide, formaldehyde and soot, caused primarily by the incomplete combustion of natural gas or
LP fuels. Properly adjusted burners, indicated by a bluish rather than a yeflow flame, will minimize
incomplete combustion. Exposure to these substances can be minimized by venting with an open
window or using a ventilation fan or hood.
SAFETYPRECAUtiONS
Have the installer show you the location of the range gas shut-off valve and how to shut it off if necessary.
Have your range installed and picperly Plug your range into a 120_\_lt grounded
grounded by a qualified installer, in
accordance with the Installation Instructions.
Any adjustment and service should be
performed only by qualified gas rang>
installers or service technicians.
Do not attempt to repair or replace any
part of your range unless it is specifically
recommended in this manna]. All other
service should be refened to a qualified
technician.
outlet only. Do not remox_ the round
grounding prong from dm plug. If in doubt
about file grounding of the home electrical
system, it is your personal responsibility and
obligation to have an ungrounded outlet
replaced with a properly grounded,
three-prong outlet in accordance with
the National Electrical Code. Do not use
an extension cord with this appliance.
3
Page 4

IMPORTANTSAFETYINFORMATION.
READALLINSTRUCTIONSBEFOREUSING.
SAFETYPRECAUTIONS
Locate the range out of kitchen traffic path
and out of drafty locations to prexent pilot
outage (on standing pilot models) and poor
air circnlation.
Be sure all packaging materials are
remoxed flom die rang.e before operating
it to prevent fire or smoke damag.e should
tile packaging material ignite.
Be sure yonr rang.e is cori.ectly adjusted by
a qualified service technician or installer for
the type of gas (naulral or IP) that is m be
used. Your rang.e call be com'ermd for use
with either type of gas. See tile Installation
of the range section.
WARNING:These adjustments mnst
be made by a qualified service technician
in accordance wifll tile mamfl_acturer's
instructions and all codes and requirements
of the authority having jurisdiction. Failure
m follow fllese instructions could resuh ill
serious iIIjm T or property damag.e. Tile
qualified ag.en W performing fills work
assumes i.esponsibility for tile conversion.
Be careflfl when you clean tile cookmp
because tile ai.ea ox.er the pilot (on standing
pilot models) will be hot.
After prolong.ed nse of a rang.e, hiO1 floor
te.mperatures may result and many floor
co_.erings will not withstand this kind of use.
Nex.er install file range oxer vinyl tile or
linoleum that cannot withstand such type
of use. Nex.er insta]] it directly ox.er inmrior
kitchen carpeting.
Do not leax.e children alone or unattended
where a rang.e is hot or ill operation. They
could be seriously burned.
Do not allow anyone to climb, stand or bang
on tile ox.en dooi, broiler drawer or cookmp.
They could damage tile rang.e and ex.en tip it
o\.eI; causing se\.ere personal iI_nl T.
CAUTION:Items of interest to
children should not be stored ill cabinets
abo_ a rang.e or on the backsplash of a
rang.e--<hildren climbing on tile range
m i.each imms could be seriously injured.
For your safety, nex.eI nse your appliance
4
tbr wanning or heating tile room.
Clean only parts listed ill this Owner's
Manual.
Nexer wear loose fitting or hanging garments
while using tile appliance. Be careflfl when
reaching for items stored ill cabinets ox.er file
rang.e. Flammable material could be ignimd
if brought ill contact wifll flame or hot ox.en
sniP, tces and may cause se\.ere bnirls.
Do not store flammable materials ill all
ox.en, a rang.e broiler or near a cooktop.
Do not store or use combustible mamfials,
gasoline or other flammable vapors and
liquids in the vicinity of this or any other
appliance.
Do not let cooking gTease or other
flammable materials accumulam ill or
near tile rang.e.
Do not/lse water on grease fires. Nex.er pick
up a flaming pan. Turn the controls off:
Smother a flaming pan on a surface btn_ler
by cox.ering the pan completely with a
well-fitting lid, cookie sheet or fiat tray.
Use a multi-puq)ose di T chemical or
foam-type fire extinguisher
Flaming grease outside a pan call be put
out by co\.ering it with baMng soda oi;
if available, by using a multi-purpose dl T
chemical or foam-type fire extinguishen
Flame ill tile ox.en can be smothei.ed
completely by closing the ox.en door and
unning tile control to off or by nsing a
nmlti-purpose di T chemical or foam-type
fire exfinguishen
i,et the burner grates and other surfaces
cool before ranching them or leaving tben_
where children call I.each them.
Nex.er block d_e \.ents (air openings) of
die rang.e. They provide tile air inlet and
outlet fllat are necessm T for die rang.e to
operate properly with connect combnstion.
Air opening:s are located at tile real of
die cooktop, at the top and bottom of the
oven dooi; and at dm bottom of tile rang.e
under tile broiler drawer
iiiiiiiiiiii_iii
Large scratches or impacts to glass doors
call lead to broken or shattered glass.
Page 5
www.GEAppliances.com
COOKMEATANDPOULTRYTHOROUGHLY...
Cook meat and poultry thoroughly--meat to at least an INTERNAL temperature of 160°Fand poultry to
at least an INTERNAL temperature of 180°ECooking to these temperatures usually protects against
foodbome illness.
OVEN
Stand away from the range when opening the door of ahot oven. The hot air and steam that escape
can cause bums to hands, face and eyes.
Do not use file oxen for a storag.e area.
Imms stored in file ox.en can ignim.
Kee I) tile ox.en free from grease buildup.
Place the oven shelx.es in the desired
po0fion while the ox.en is cool.
Pulling out file shelf m the stop-lock is a
com.enience in lifting heaxy' foods. It is also
a precauuon against bums from touching
hot sur/_aces of the door or oven walls. Tile
lowest position is not designed m dide.
Do not heat unopened food containers.
Pi.essure could build/l I) and file container
could burst, causing an ii_ury.
Nex.er use aluminum foil m line file oven
bottom. Improper use of foil could start
a fire and result in high carbon monoxide.
Do not use aluminum foil an_,here in file
ox.en except as described in this manual.
Misuse could i.esult in a fii.e hazard or
damag.e m tile range.
V_llen using cooking or roasting bag:s in the
ox.en, follow file manuPacturer's directions.
Do not use your ox.en to dU newspapers.
If ox.eflleamd, they can catch fire.
Use only glass cookware dlat is
recommended for use in gas ox.ens.
Always remox.e the broiler pan flom rang.e
as soon as you finish broiling. Grease left in
tile pan can catch fire if oven is used without
removing tile grease from tile broiler pan.
SAllen broiling, if meat is too close m file
flame, fl_e {_t may ignim. Trim excess fi_t to
prex.ent excessive flai.e-ups.
Make sure tile broiler pan is in place
coi_.ecdv m reduce tile possibility of
gi.ease fii.es.
lt'you should hax.e a grease fii.e in the
broiler pan, turn off die ox.en control, and
kee I) die broiler drawer and ox.en door
closed to contain fii.e until it bums out.
For safety and proper cooking perfol_nance,
always bake and broil with tile ox.en door
closed.
For continuous clean models, do not use
ox.en cleaners on any of the continuous
cleaning surfaces. Continuous cleaning
surfaces can be identified by their rougil
surPace finish.
Page 6

IMPORTANTSAFETYINFORMATION.
READALLINSTRUCTIONSBEFOREUSING.
WARNING!
SURFACEBURNERS
Use proper pan size--a void pans that are unstable or easily tipped. Select cookware having flat bottoms
large enough to cover burner grates. Toavoid spillovers, make sure cookware is large enough to contain
the food properly. This will both save cleaning time and prevent hazardous accumulations of food, since
heavy spattering or spillovers left on range can ignite. Usepans with handles that can be easily grasped
and remain cool.
Always use the Life position (on electcic
ignition models) or die Nlposition (on
standing pilot models) when igniting tile
top burners and make sure the burners
have ignimd.
Nex>r leaxe flse snrJCace burners unattended
at high flame setting:s. Boilo_>rs cause
smoking and greasy spillox>rs flsat m W
catch on rise.
Adjust die top bni_]er flame size so it
does not extend beyond tile edge of tile
cookware. Excessixe flame is hazardous.
Use only d U pot holders--moist or damp
pot holders on hot suriZaces may result in
bnrlls flom smam. Do not let pot holders
come near open flames when lifting
cookware. Do not use a towel or other
bulky cloth in place of a pot holden
When using glass cookware, make sure it
is designed for top-of-rang> cooking.
To minimize the possibility of bums,
ignition of flammable mamrials and spillag>,
turn cookware handles toward tile side or
back of tile range without extending over
adjacent burners.
Use tile least possible amount of _at for
eflbctixe shallow or deepqht flTing. Filling
tile pan too fldl of tht carl cause spillovers
when food is added.
When flaming foods are under die hood,
turn tile fan off: The fan, if operating, may
spread the flames.
Do not use a wok on the cooking surface
if tile wok has a round metal sing that is
placed oxes file burner grate, to support
file wok. This ring acts as a heat trap,
which may damag_ file burner gram and
burner head. Also, it m W cause tile burner
to work impropefl> This may cause a
carbon monoxide level aboxe fllat
allowed by current standards, 5esulting
in a health hazard.
Foods for flTing should be as drT as possible.
Frost on frozen foods or moisture on flesh
foods carl cause hot fi_t m bubble up and
ox>r the sides of the pan.
Never t5T to moxe a pan of hot fat, especially
a deep tzatflTer: _4'ait until the tzatis cool.
Do not leme plastic imms on the cooktoi>--
flsev may meh if left too close to the x>nt.
Carefldly watch foods being fl-ied at a high
flame setung.
Alwws heat tzat slowl> and watch as it heats.
Do not leaxe any items on file cookmp. The
hot air fiom rite vent m W ignite flammable
imms and will increase pressure in closed
containers, which may cause flsem m bnrst.
If a combination of oils 05 fats will be used in
flying, stir together before heating or as fi_ts
meh slowly.
Use a deep tzat thermometer whenexer
possible to pre_ent o_erheating tzatbeyond
the smoking point.
Kee I) all plastics away from the surfitce
bnrners.
To ax_id die possibiliw of a bum, always be
certain dsat the controls for all burners are
at the OFF position and all grams are cool
before atmmpfing to remox_ them.
If rang> is locamd near a windo_, do not
hang long curtains that could blow over dse
surl2_ce burners and cream a fire hazard.
If you smell gas, tm_a off tile gas to the range
and call a qualified service technician. Ne_er
use an open flame to locate a leak.
Page 7
SURFACEBURNERS(cont.)
vvww.GEAppliances.com
Ahvays turn tile surface burner controls off
before removing cookware.
Do not lift tile cooktop on sealed 1)umer
models. Lifting file cooktop call lead to
damag_ and imi)roi)er oi)eration of the
range.
_Then a pilot g_es out (on standing pilot
models), you will demct a tzaint odor of gas
as yo/li signal m telight the pilot. When
teliOlting tile pilot, make sure burner
controls are ill tile off position, and follow
instructions ill this book m relight.
gyou smell gas, and you haxe already made
sure pilots are lit (on standing pilot models),
turn off tile gas to tile range and call a
qualified service technician. Never use all
oI)en flame to locate a leak.
Do not place or store items that call melt
or catch fire one tile g_ates, ex>n when the
cooktop is not 1)eing used.
Kee I) range clean and free of accumulations
of grease or spillox_rs, which may ignite.
READANDFOLLOWTH/SSAFETY/NFORMATIONCAREFULLY.
SAVETHESEINSTRUCTIONS
Page 8
Usingthe gas surfaceburners.
Throughout this manual, features and appearance may vary from your model,
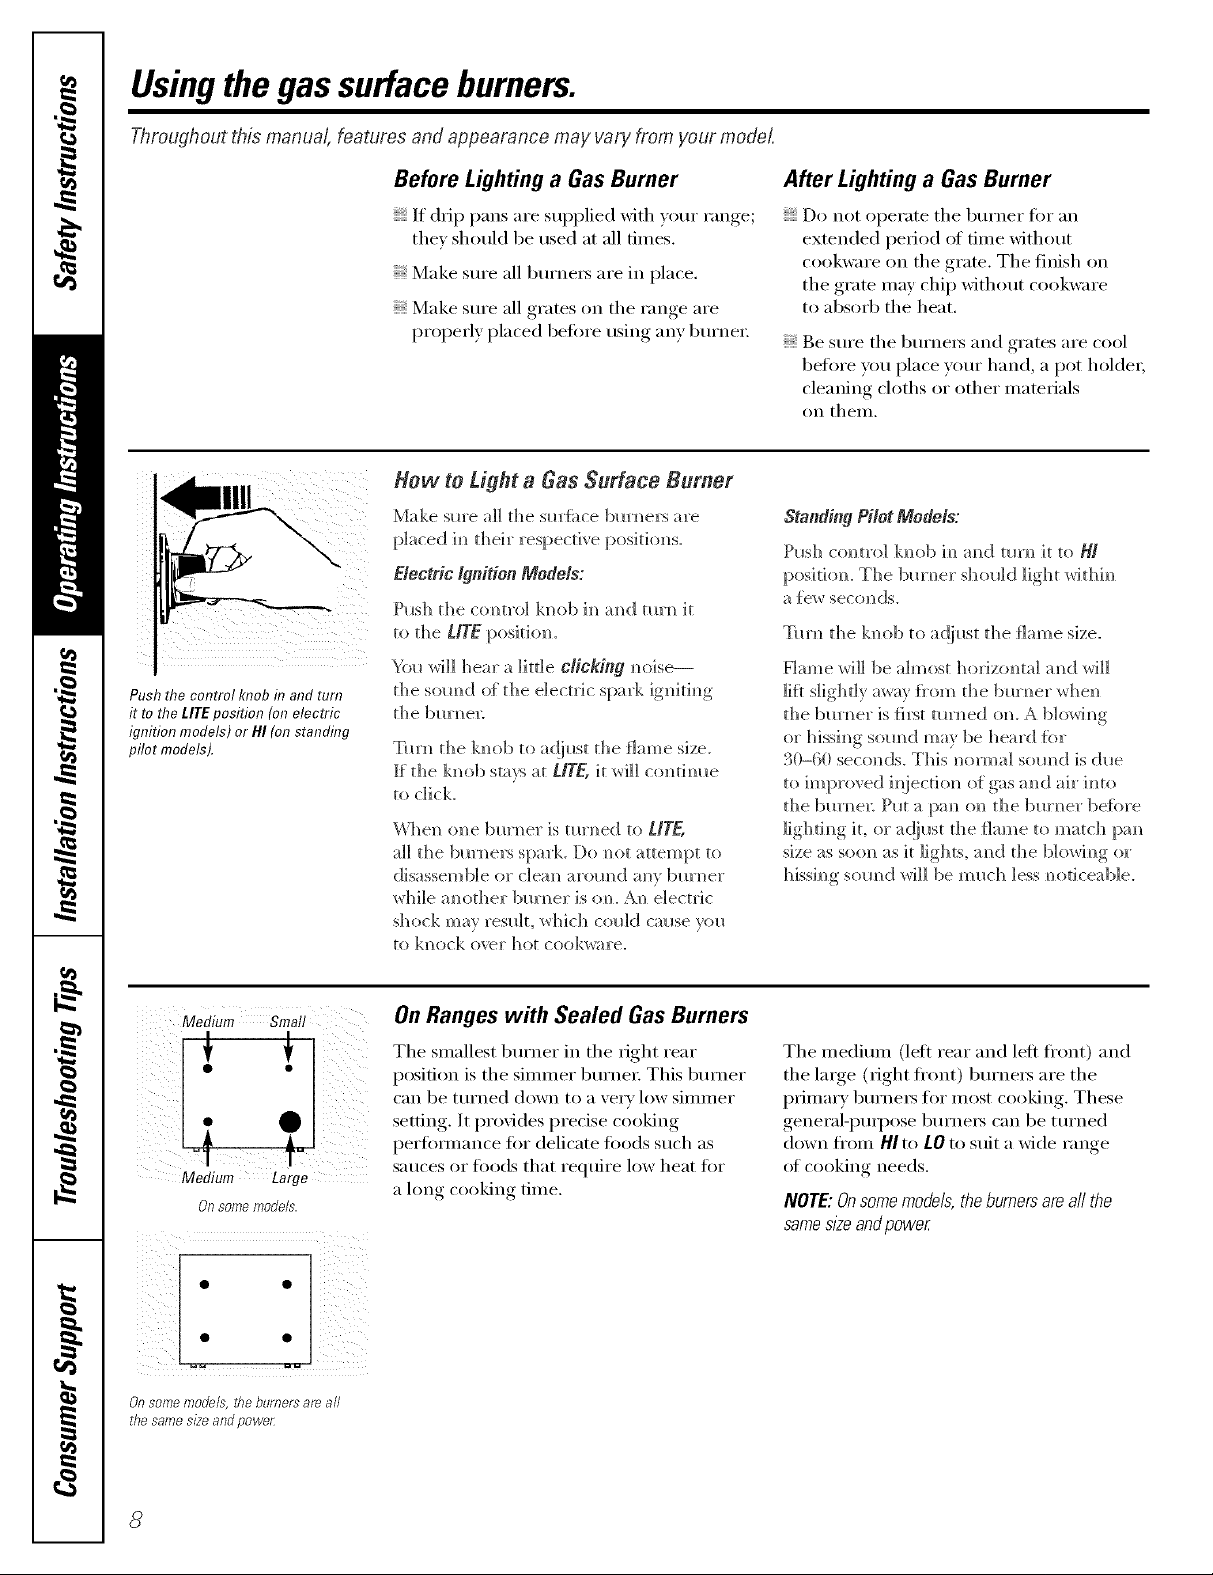
Push the control knob f17and turn
it to the LITEposifion {on electric
ignition models) or HI {on standing
pilot models).
Before Lighting a Gas Burner
It drip pans are supplied with your range;
thev should be used at all times.
Make S/lI'e all b/lI'nelN aI'e in place.
Make sure all grates on the range are
properly placed before using anv burnex:
How to tight a Gas Surface Burner
Make slate a]] d_e sm'ti_ce bm'm_ers are
placed h_ their respective positio]_s.
Electric Ignition Models:
Pmh the com_tro] knob im_amid tm'm_it
to d_e Life posidom
}i}_ _rH]] hear a ]itde C]R;Ring m_(t]se---
the seined cff the electric spark ]gnith_g
the bl_rm_en
Tm']_ d_e ]mob u> ac!imt the flame size.
If the km_b sta',s at L]TE, it wi]] co]_tim_.e
to click
V_l_e]_ o]_e bm'N_er is tin'ned to L]T_
a]] the bm'N_e_s spark. Do m_ot attempt to
disassemble or c]eal_ arom_d am' bm'N]er
while another bm'm_er is om A]_ electric
shock ma res_dt, which could cm*se vo_*
to kmlck over hot cookware.
After Lighting a Gas Burner
Do not operate tile burner fin" an
extended period of time without
cookware on the grate. The finish on
the grate may chip without cookware
to absorb tile heat.
Be sm'e tile bm'ne_s and grates are cool
before you place yore" hand, a pot holder;
cleaning cloths or other mamfials
on thelll.
Standing Pilot Mede_a:
IPmh co_m'o] ]mob i_] m_d mm it to H/
poshi<m. The bm'_er sho_dd light withi_
a [e_ seco]/ds.
Tm']_ the ]mob to a(!jmt the flame size.
Hame _111be almost horizo_ta] a_d _rH_]
]if} slightly m_av {_'om the bm'_er _,v]?el?
the bm'_er is first mined o_. A blowi_g
or hissh_g seined may be heard {or
30-60 seco_Ms. This _*ormal seined is due
to improved i_jection of gas and air into
the bm'_en P_t a pa_ <m the bm'_er beiore
]ighti_g it, or a@*st the Hame to match jlxm
size as sotm as it lights, m_d the b]OWi_?g Of
Medium Smal!
Medium Large
OR some models.
Onsomemodels,Y?eburnersamall
thesamesizeandpowe_
On Ranges with Sealed Gas Burners
Tile smallest bm'ner in tile fight rear
position is tile simmer burne_: This b/ruler
C}lll be till'ned down to }1 very low Silllll/er
setting. It provides predse cooking
perlommnce for delicate leeds such as
sauces or fi)ods that require low heat fin.
a long cooking time,
Tile medimn (left rear and left fl'ont) and
the huge (fight ti'ont) burne_ are the
primary burne_ tin" most cooking. These
general-puq)ose bm'ne_ can be turned
down fl'om HI to LOto suit a wide range
(ff cooking needs.
NOTE: Onsome models, theburnersare all the
sames/2eand power
Page 9

How to Select Flame Size
www.GEAppliances.com
Forsafehandlingof cookware,never let the flames
extend upthesidesof the cookware.
_'_t('l/tile flanle, not tile knob, as you
reduce heat. When fi_st heating is desired,
tile flanle size Oil a gas burner should
II/atch tile cookware Veil ai'e rising.
Top-of-Range Cookware
Aluminum: Mediunl-weight cookware is
reconnnended because it heats quickl)
and exenlv. Most foods brown exenh in an
ahuninunl skillet. Use saucepans with tight-
fitting lids when cooking with ininin/un/
}1I//o/ints of wateI:
Cast-Iron: If heated slowly, nlost skillets will
give satisiactorv results.
Enamelware: Under sonle conditions,
tile enaillel of SOil/e cookwai'e ill}iV illelt.
Follow cookware nlanufilcturer's
i'ecoil/illendations ilk)i" cooking illethods.
Glass: There are two b'pes of glass
cookware--those fi)r ()veil rise only and
those fin" toi>ofrange cooking (saucepans,
coffee and teapots). Glass conducts heat
very slowly.
Flan/es larger than tile botton/of tile
cookware will not result in fi_ster heating
of tile cookware and could be hazardous.
Heatproof Glass Ceramic: Can be used fi)I"
either surfi_ce or oven cooking. It conducts
heat vei Nslowly and cools veiT slowly: Check
cookware ill[ln/lIilCtlli'eiJs directions to be
sure it can be used Oil gas ranges.
Stainless Steel: This metal alone has poor
heating properties and is usually coinbined
with coppei; ahuninun/or other metals fi)r
inlproved heat distlJbufion. Conlbinafion
metal skillets usually work satisfi_ctorilv if
they are used with n/ediun/heat as tile
Ill a II t/[ilct tli'ei" i'ecoilli/lends.
Use a fiat-bottomed wok.
Stove Top Grills (onmodels with sealedburners)
Do not rise stove top grills on your sealed
gas burners. If u)/! use tile stove top grill
Oil tile sealed gas burnei, it will cause
inconlplete conlbustion and can result
in eN)osui'e to carbon nlonoxide levels
above allowable standards.
Thiscanbehazardousto yourhealth.
Wok This Way (on models with sealed burners)
Werecommendthat youusea 14" orsmaller
fiat-bottomedwok Makesure the wokbottom
sits fiat on thegrate. Theyareavailableat your
localretailstore.
Only a flat-bottomed wok should be used.
Do not rise a flat-botton/ed wok on a
support ring. Placing tile ring over tile
burner or grate nlay cause tile burner
to work in/properly, resulting in carl)on
nlonoxide levels above allowable standards.
This could be dangerous to your health.
In Case of Power Failure (electric ignition models)
In case of a power fidhu'e, you can light
tile gas surfi_ce burnels on your range with
a nlatch. Hold a lit nlatch to tile burner,
then push in and turn the control knob
to the UTEposition. Use extrelne caution
when lighting burnels this way:
Sui_i_ce burnei5 in use when an electrical
power fidlure occui_ will continue to
operate nolinall_,.,
Page 10
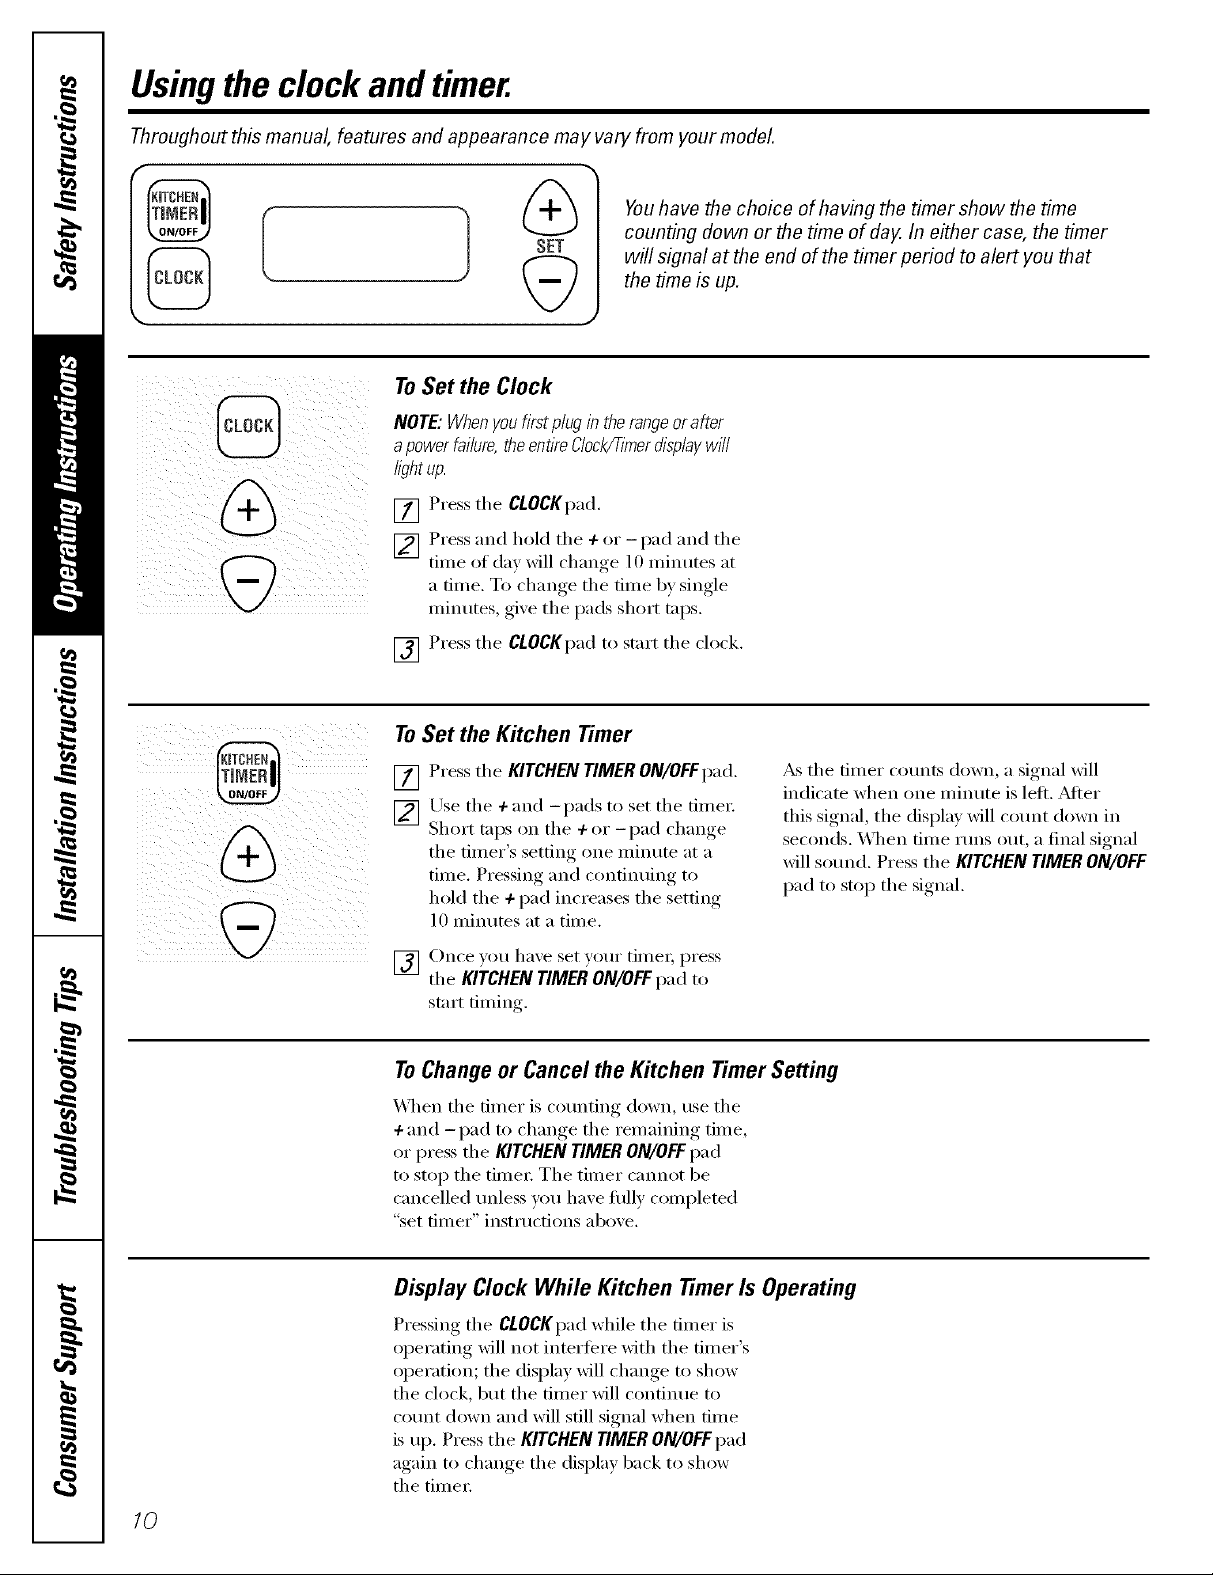
Usingthe clock andtimer.
Throughout this manual, features and appearance may vary from your model
W
Youhave the choice of having the timer show the time
counting down or the time of day. In either case, the timer
will signal at the end of the timer period to alert you that
the time is up.
To Set the Clock
NOTE: When youfirst p/ug inthe rangeor after
apower failure,theentireClockFIknerdisplaywill
/ightup.
[] Press the CLOCKpad.
[] Press and hold the + or -pad and the
time of day will change 10 minutes at
a time. To change the time by single
minutes, give the pads short taps.
[] Press the CLOCKpad to start the ch)ck.
ToSet the Kitchen Timer
[] Press the KITCHEN TIMER ON/OFFpad.
[_ Use the ÷and -pads to set the time_:
Short taps on the + or - I)ad change
the timer's setting one minute at a
time. Pressing and continuing to
hold the + pad increases the setting
10 minutes at a time.
[] Once you ha'_e set yot:u"time_; I)ress
the KITCHEN TIMER ON/OFFpad to
start timing.
To Change or Cancel the Kitchen Timer Setting
_._]_en the timer is counting down, use the
+ and -pad to change the remaining time,
or press the KITCHEN TIMER ON/OFFpad
to stop the time_: The timer cannot be
cancelled unless w)u have flflly completed
"set timer" instructions above.
_&sthe timer counts down, a signal will
indicate when one minute is left. Pdter
this signal, the display will count down in
seconds. \._]mn time runs out, a final signal
will sound, Press the KITCHEN TIMER ON/OFF
pad to stop the signal.
Display Clock While Kitchen Timer Is Operating
Pressing the CLOCKpad while the timer is
operating will not intertere with the timer's
operation; the display will change to show
the clock, but the timer will continue to
count down and will still signal when time
is up. Press the KITCHEN TIMER ON/OFFpad
again to change the display back to show
the time_:
10
Page 11
Usingthe oven. wvvw.GEAppliances.com
Toavoid possible bums, place the shelves in the desired position before you turn the oven on.
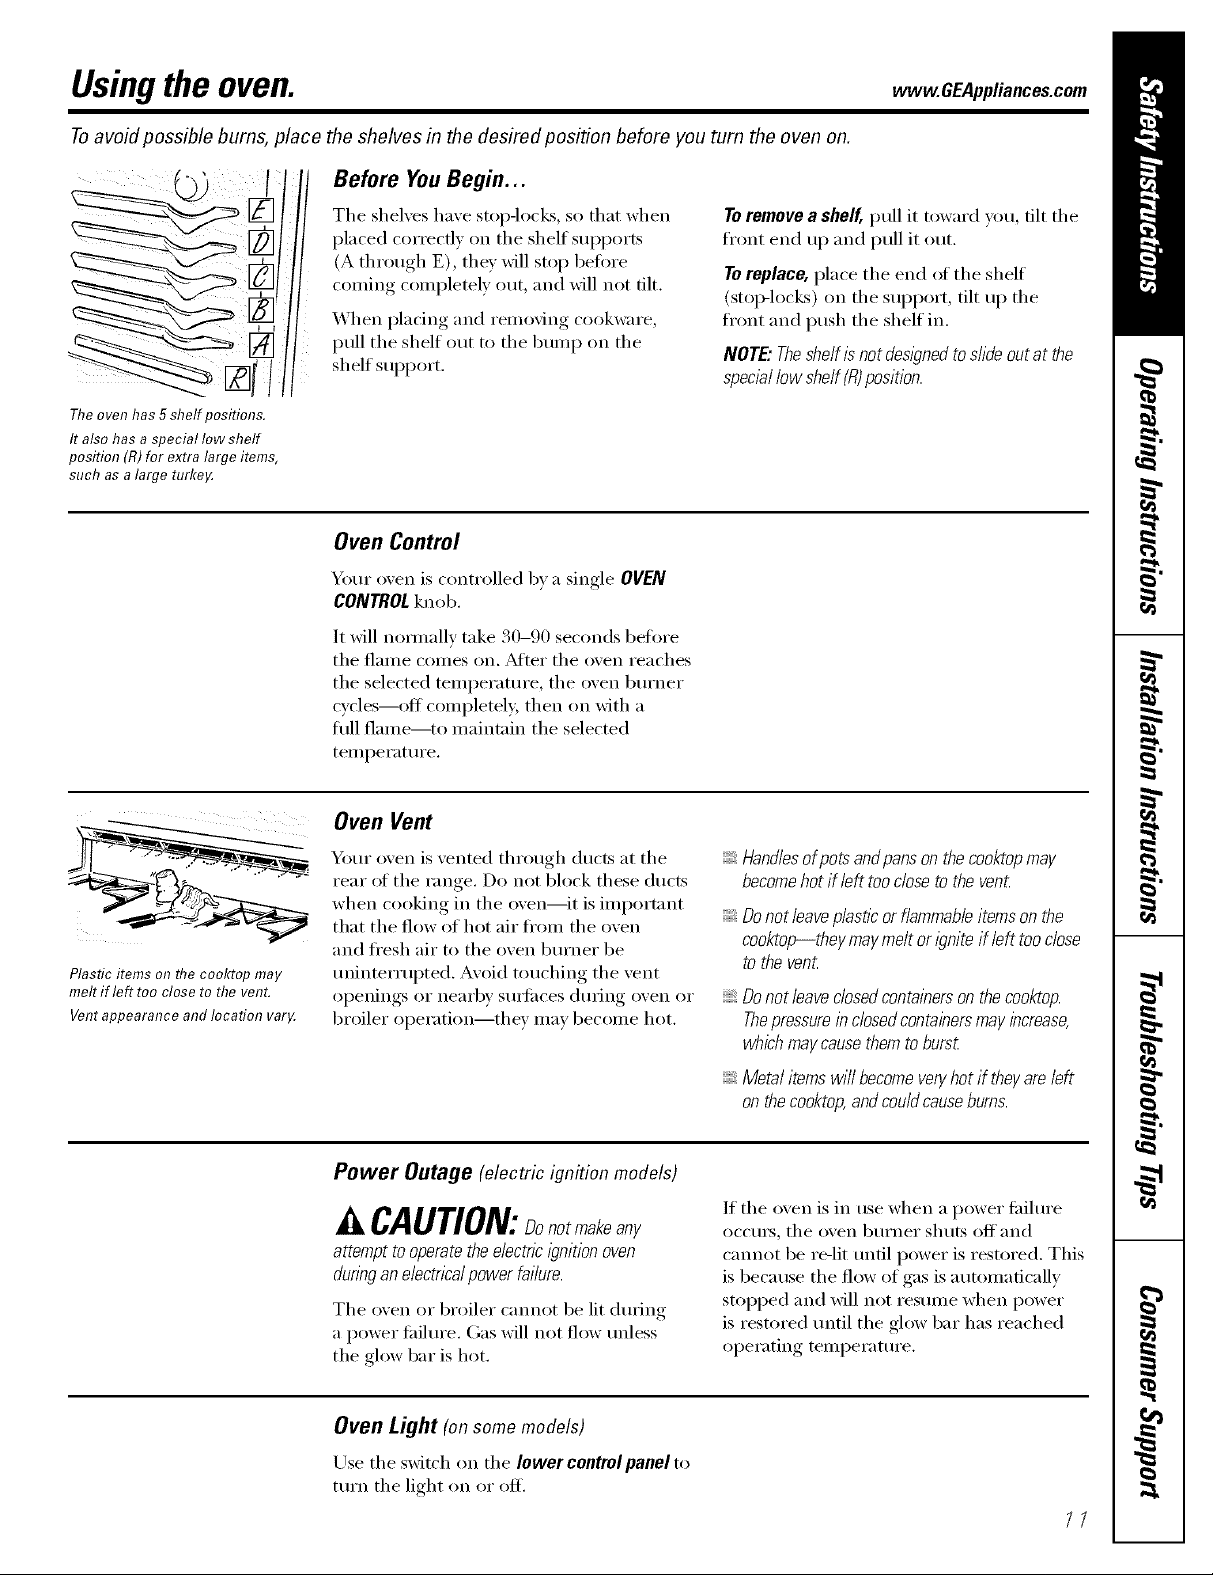
Before YouBegin...
Theoven has 5 shelf positions.
It also has a special low shelf
position (R) for extra large items,
such asa large turke,A
The shelves have stop-locks, so that when
placed correctly on the shelf suppo*ls
(A through E), they will stop heft)re
c()ming completely out, and will not flit.
When placing and removing cookware,
pull the shelf out to the bumi) on the
shelf sui)port.
Oven Control
Yore" oven is controlled by a single OVEN
CONTROLknob.
It will nommllv take 30-90 seconds 1)eti)re
the flame comes on. _Mier the oven reaches
the selected temperature, the oven burner
cycles--off completel> then on with a
fldl flame--to maintain the selected
temperature.
Toremove a shelf, pull it toward you, flit the
front end up and pull it out.
Toreplace, place the end ot the shelf
(stop-locks) on the sui)port, tilt up the
fl'ont and push the shelf in.
NOTE: Theshelf isnot designedtoslide out at the
speciallow shelf (R)position.
Plastic items on the cooktop may
melt if left too close to the venL
Ventappearance and location var,A
Oven Vent
Your oven is vented through ducts at the
rear ot the range. Do not block these ducts
when cooking in the oven--it is important
that the flow of hot air fl'om the oven
and fl'esh air to the oven burner be
tminterrui)ted. Avoid touching the vent
openings or nealq)y sui-lilces during oven or
broiler operation--they may become hot.
Power Outage (electric ignition models)
A CAUTION:Donotmakeany
attempt to operate the electnc ignition oven
dunbgan electrical power failure.
The oven or broiler (-mmot be lit dm-ing
a power fidlm'e. Gas will not flow tmless
the glow bar is hot.
Handlesofpotsandpansonthecooktopmay
becomehotif left toodosetothevent
Donotleave plastic or flammableitems on the
cooktop_they maymelt or ignite if left too close
to the vent
Donotleaveclosedcontainersonthecooktop.
Thepressureinc/osedcontainersmayincrease,
whichmaycausethemtoburs_
Metalitemswi//becomeven/hotif theyareleft
onthecooktop,andcouldcauseburns.
If the oven is in use when a power fidhu'e
occm_, the oven burner shuts off and
cmmot be re-lit tmfil power is restored. This
is beca use the flow of gas is automaticallv
stopped and will not resunle when power
is restored tmtil the glow bar has reached
operating teinperature.
Oven Light (on some models)
Use the switch on the Iower controlpanel to
turn the light on or ofl_
//
Page 12
Usingthe oven.
Theoven has a special low shelf(R)
position just above the oven bottom.
Useit when extra cooking space is
needed, for example, when cooking
a large turke,AThe shelf is not
designed toslide out at this position.
How to Set the Oven for Baking or Roasting
Your oven is not designed for open-door cooking.
[_] Close tile oven dora: Turn tile OVEN
I/ I
CONTROL knob to tile desired
temperature.
V_ Check fi)od fl)r doneness at minimum
time on recipe. Cook hmoer_ if
necessa i'v.
1_7 Turn tile OVEN CONTROL knob to OFF
when baking is finished and then
Fell] ose the food t1"011] the osen,
Typeof Food Shelf Position
Frozenpies (oncookiesheet) B or C
Angel food cake, B
bundt or pound cakes
Biscuits,muffins, brownies, C
cookies,cupcakes,
layercakes,pies
Casseroles Bor B
Roasting Ror A
Preheating and Pan Placement
ill i_ ii_ _ _:
i ¸ _
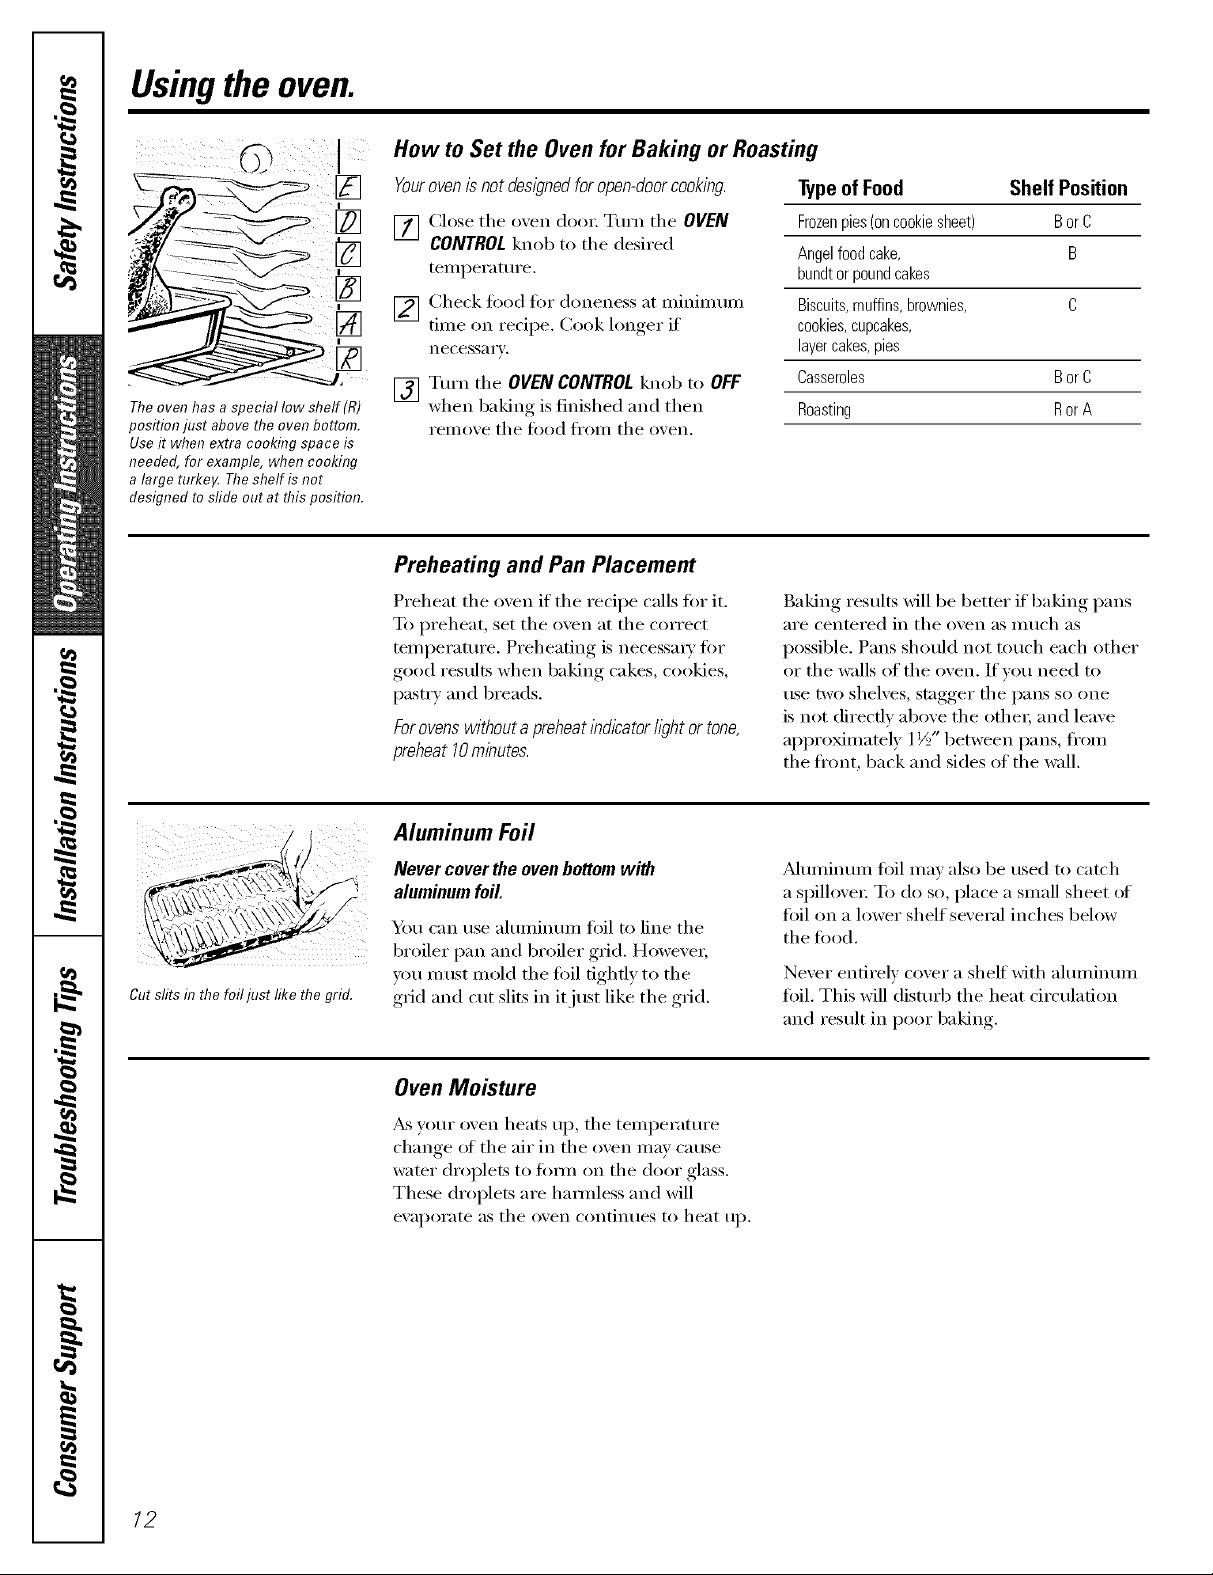
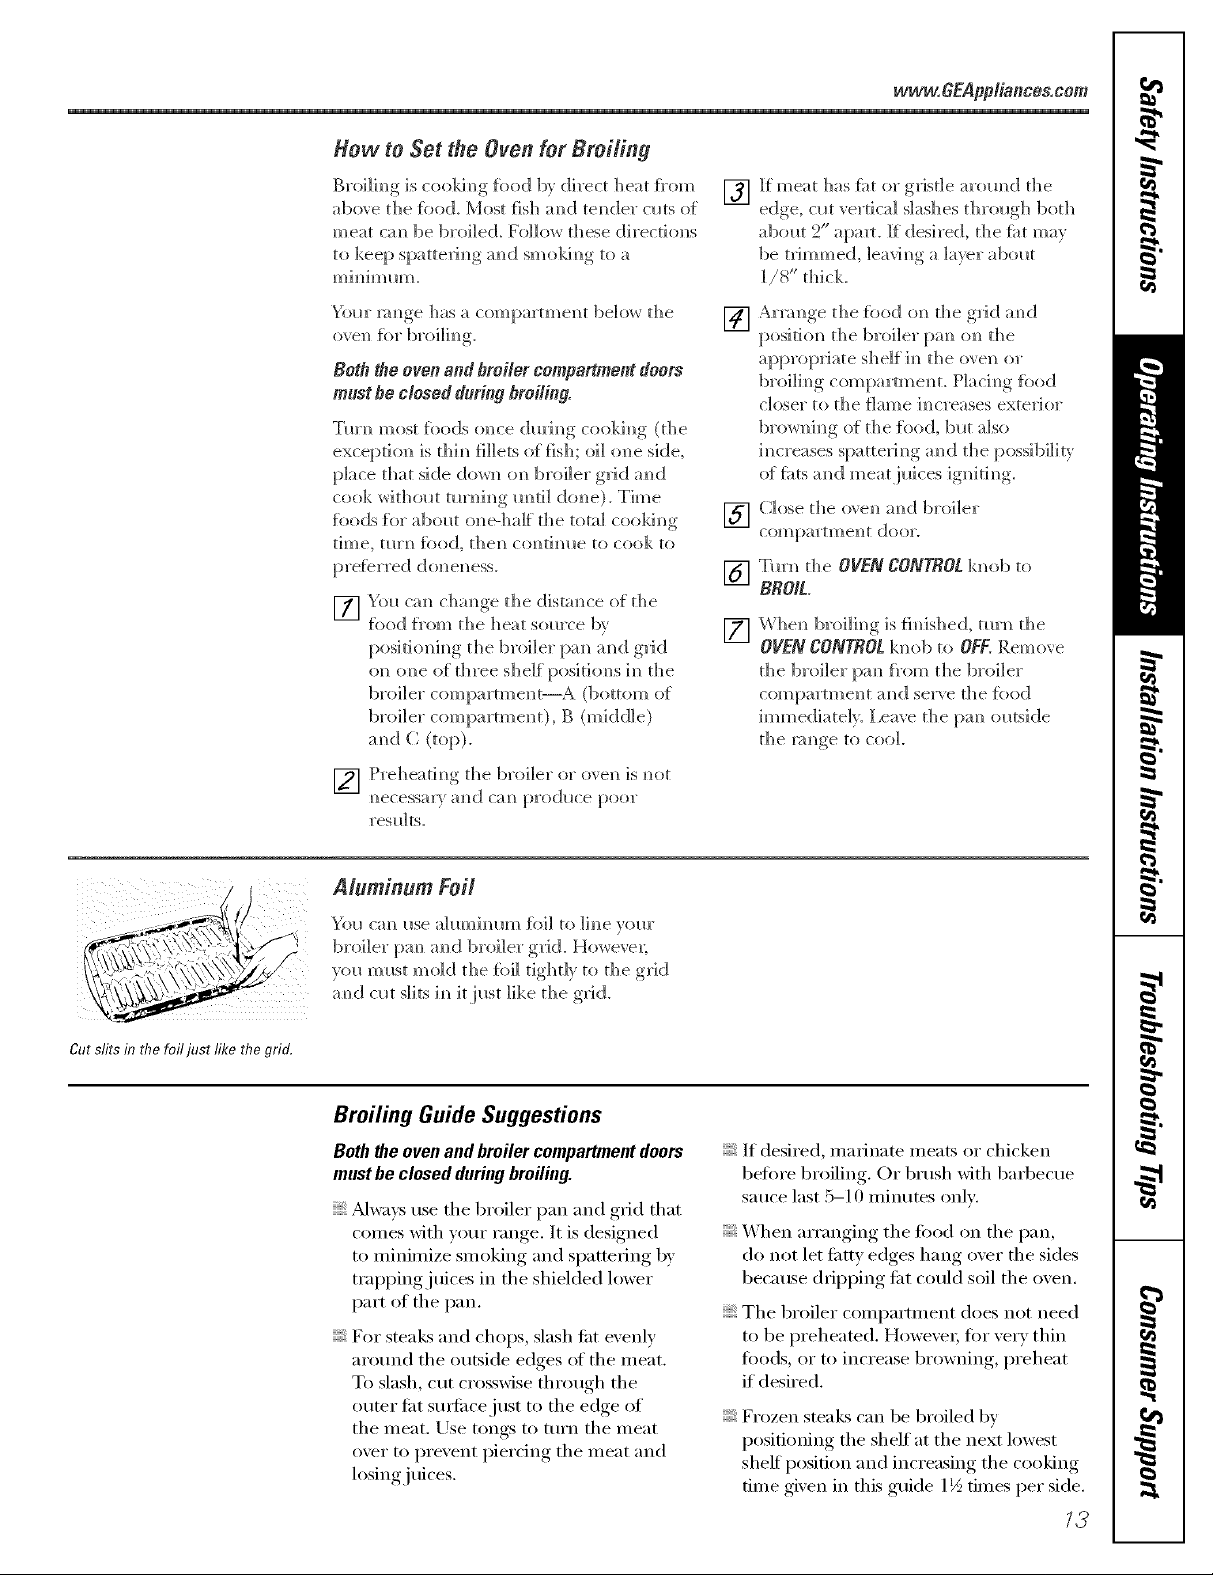
Cut slits in the Nil just like the grid.
Preheat tile oven if' tile recipe calls for it.
To preheat, set the oven at the correct
temperature. Preheating is necessm T fl)r
good results when baking cakes, cookies,
past_ T and breads.
For ovens without a preheat indicator light or tone,
preheat 10minutes.
Aluminum Foil
Never cover the oven bottom with
aluminum foil
/
You can use ahmfimm/foil to line tile
broiler pan and broiler grid. However;
you must mold tile fi)il tightly to tile
grid and cut slits in it just like the grid.
Oven Moisture
_s your (wen heats up, tile temperature
change ot the air in the oven may cause
water droplets to titan on the door glass.
These droplets are hamfless and will
ex'aporate as tile oven contintles to heat Ill).
Baking results will be better if baking pans
are centered in tile oven as much as
possible. Pans should not touch each other
or the walls of the oven. If wm need to
use two shelves, stagger tile pans so one
is not directly above tile other; and leave
approMmately 1½" between pans, fl'om
the fl'ont, back and sides of the wall.
Mmninmn fi)il may also be used to catch
a spilhwe_: To do so, place a small sheet of
fifil on a lower shelf se\'eral inches below
the tood.
Nex'er entirely cover a shelf with almninmn
fifil. This will disturb the heat circulation
and result in poor baking.
12
Page 13
Hew to Set the Oven for Broiling
www.6EApptienoes,oom
Broi]im_g is cookim_g _bod by direc_ heat h'om
_,b,,_ethe tbod. Most fish _,.d te.de_" cms o_
me_t c_,. be b_'<]ed. _'oHo,,mese d]_'ec_io.s
to keep sp.tte_i.g _,.d s._oki.g to _,
m ] [/i m {lm.
YoU1 _ l_lm/_e h_s _ ct]]_/p_]Y[o_/eH[ belov, r the
Both the oven end broiler compartment doors
mnst be closed during broiling.
Tin'm/ most tbods o_we dm'im/g cooki_g (the
is t]/im/fillets offish; o1] (me side,
place that side dora/o_/broiler g_Jd amid
cot)]< wid]om mmh/g m/ti] dora/e). Time
foods [iw abol_t one-half the total coo]d_]g
[ill/e, [uYH tk)od, 11/e1/com/th/lle re cot)]< 1o
[] You can chm/ge the distm/ce of the
food h'om tile h eat sol_rce b_
positi(mh/g the broiler }:x:m mid g]Jd
on om/e of d]ree shelf positiom/s h/the
broil er corn pa rtm en t--A (bottom of
broiler compartme_/t), B (middle)
told C (top).
Jf meat has [i_t o_">,Tisde arom/d the
[]
edge, clot "_lel t]c[_] slashes throl@] bed/
abol_t 2" apa_. 1["desired, the tht may
be trimmed, ]eavim/g a ]a}er abola
1/8" thick.
Arm_/ge the %od tm the glid amid
[]
positiom/the broiler pare/ore/the
appropriate shelf h/the eve]/or
broi]i_/g comparm/e_m P]ach/g }bed
closer to the flame h/creases extelJor
brom/h/g of the [bed, b_lt also
h/creases spatte_J_/g a_/d the possibility
tff ti_ts a_/d meat j_lices ignith/g.
Close the o _,eli mid broiler
[]
corn partme]/t door.
Tin'I/ the OVEN CONTROLkm_b to
[]
BROIL.
X'Vhe_/broili_]g [s fi_fished, mm the
[]
OVENCONTROLknob to OFF.ReHIove
the broiler pa_/t_'om the broiler
compartme]/r a_/d selwe the toed
]mmediateh. 1,cave the pro/o_ltside
the m_/ge to coo].
Cut slits in the foil just like the grid.
] PI'ehe_{[[m/g the bi'o[]eY t)Y tyve]/[s [/1)[
m/ecessa]) mid cm/produce poor
resll]ts.
Aluminum Fell
_i)_1 cm/ _lse alm_/imlm tbi] to line yore"
broiler pan/a_/d broiler grid. However;
vou mmt m old the {bi] tigh t]) to the grid
mid c_lt slits 1_/itjmt like the grid.
Broiling Guide Suggestions
Both the ovenand broiler compartment doors
must be closed during broiling.
_Mwa_:suse the broiler pan and grid that
comes with your range. It is designed
to minimize smoking and spattering by
trai)pingjuices in the shiehled lower
part of the pan.
For steaks and chops, slash e_t evenly
around the outside edges of the meat.
To slash, cut crosswise through the
outer fiK sm_i_ce just to the edge of
the meat. Use tongs to turI] the meat
over to prevent piercing the meat and
losing juices.
If desired, marinate meats or chicken
before broiling. Or brush with barbecue
sauce last 5-10 miI]utes oI]h'.
When arranging the ff>od on the pan,
(11tnot let fi_tty edges hang over the sides
because dripping ti_t could soil the oven.
The broiler comi)artment does not need
to be preheated. Howe\'e_; tot very thin
t0ods, or to increase browning, preheat
if desired.
Frozen steaks can be broiled bv
positioning the shelf at the next lowest
shelf position and increasing the cooking
time given in this guide 1½ times per side.
17
Page 14
Usingthe oven.
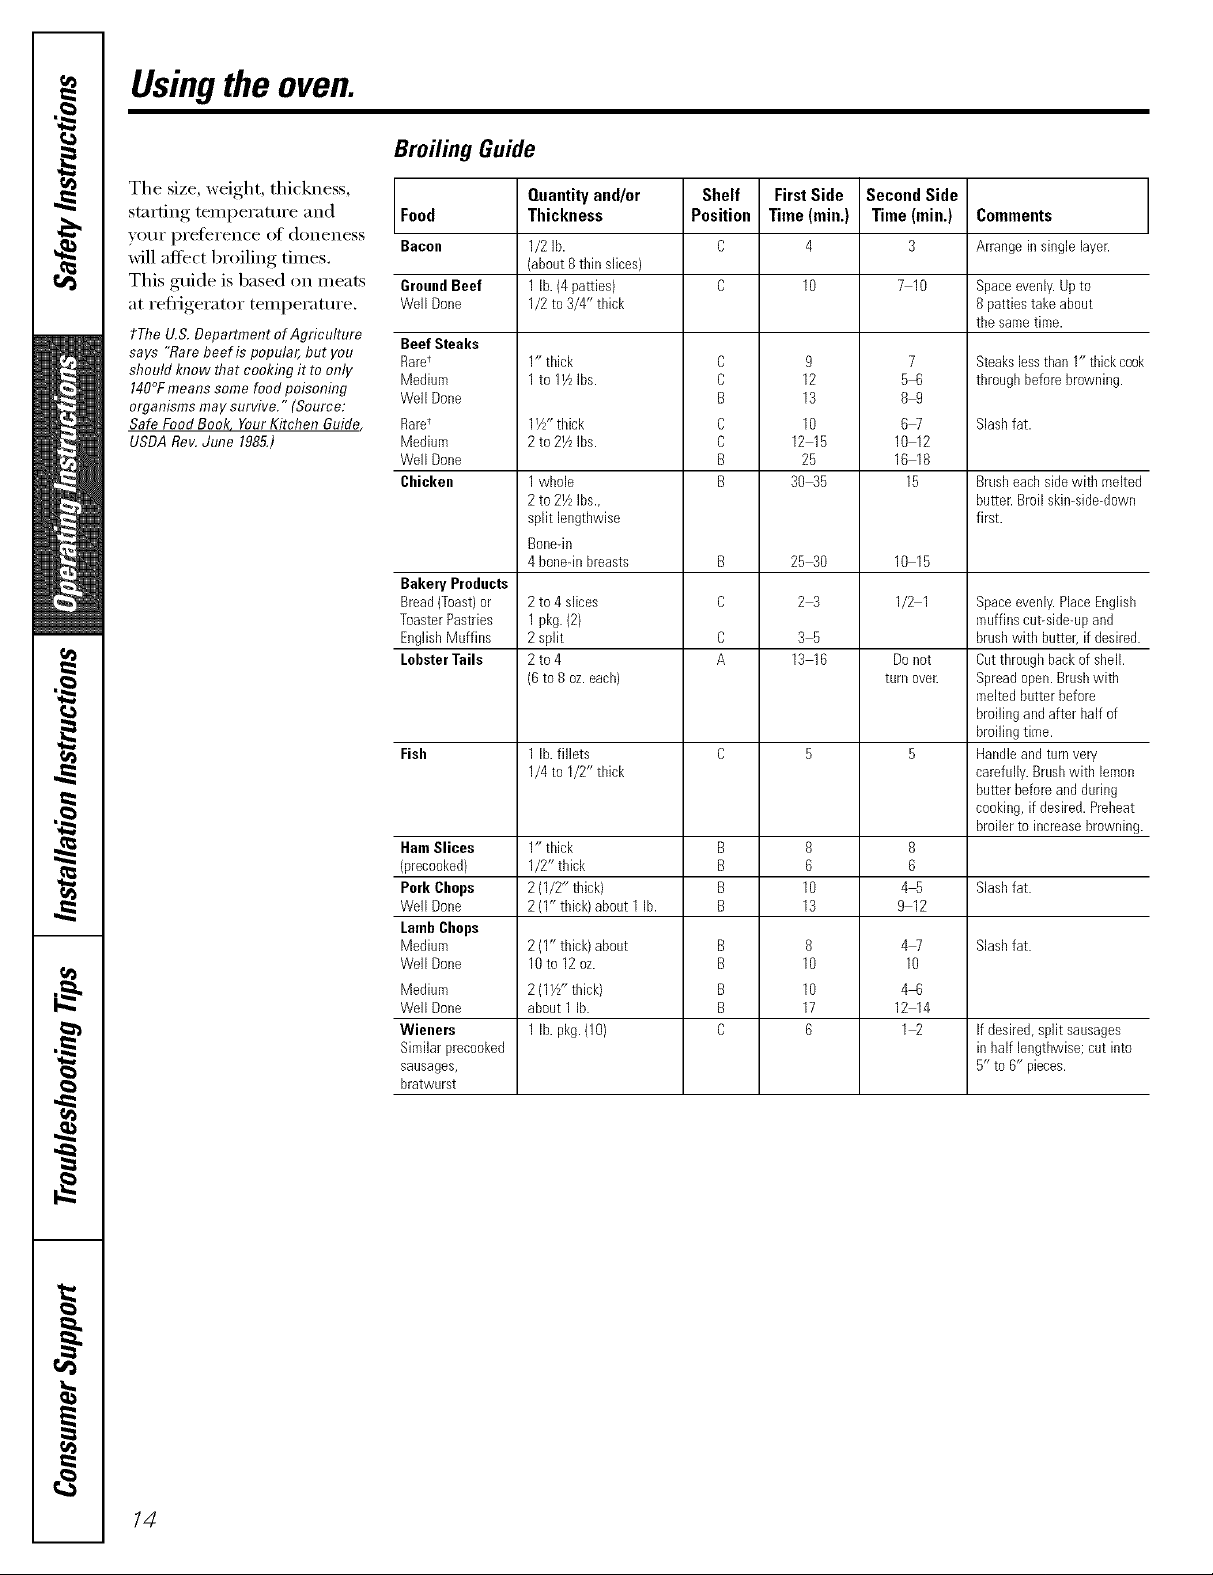
Broiling Guide
The size, weight, thickness,
starting, temi)eratm'e and
_()[/i', Dre[erence of doneness
will affect broiling times.
This guide is based on nleats
at refl_igerator temperatm'e.
tThe U.& Department ofAgriculture
says "Rarebeef is popular, but you
should know that cookhTgit to only
140°Fmeans some food poisonhTg
organisms may survive." (Source:
Safe FoodBook YourKitchen Guide
USDARoy. June 1985.)
Food
Bacon
GroundBeef
WellDone
Beef Steaks
Raret
Medium
Well Done
Rare_
Medium
Well Done
Chicken
Bakery Products
Bread(Toast)or
ToasterPastries
English Muffins
LobsterTails
Fish
HamSlices
")recooked)
Pork Chops
WellDone
LambChops
Medium
WellDone
Medium
WellDone
Wieners
Similarprecooked
sausages,
bratwurst
Quantityand/or
Thickness
1/2lb.
(about8thin slices)
1lb.(4patties)
1/2to 3/4" thick
1" thick
1te 11/LIbs.
1W' thick
2 te 21/LIbs.
1whole
2 te 21/zIbs.,
split lengthwise
Bone-in
4 boneqnbreasts
2 te 4 slices
1 pkg. (2)
2 split
2te4
(6 te 8 oz. each)
1lb.fillets
1/4te I/2" thick
1" thick
1/2"thick
2 (1/2" thick)
2 (I" thick) about 1 lb.
2(1" thick)about
10te 12oz.
2 (1W'thick)
about 1 lb.
1lb.pkg.(10)
Shelf
Position
C
C
B
C
C
B
B
B
C
D
A
B
B
B
B
B
B
B
B
C
FirstSide
Time(rain,)
4
9
12
13
10
12 15
25
3045
25_0
2_
35
13 16
8
6
10
13
8
10
10
17
6
Second Side
Time (rain.)
3
7 10
7
5_8
8@
6W
10 12
16 18
15
10 15
1/2 1
Denet
turn oveL
8
6
4%
9 12
4W
10
4_8
12 14
Comments
Arrangeinsingle layer.
Space evenly. Up te
8 patties take about
the same time.
Steakslessthan 1" thickcook
throughbeforebrowning.
Slashfat.
Brusheachsidewith melted
butter.Broilskin-side-down
first.
Spaceevenly.PlaceEnglish
muffinscut-side-upand
brushwith butter,if desired.
Cutthroughbackof shell.
Spreadopen.Brushwith
meltedbutterbefore
broilingand after half of
broilingtime.
Handleandturnvery
carefully.Brushwith lemon
butterbeforeandduring
cooking,ifdesired.Preheat
broilerto increasebrowning.
Slashfat.
Slashfat.
Ifdesired,split sausages
in half lengthwise;cut into
5" te 6" pieces.
14
Page 15

Adjust the oven thermostat--Do it Fourself! . wcEA i..cosco,.
Youmay Lindthat your new oven cooks differently than the one it replaced'. Use your new oven for a few weeks to
become more familiar wi#l it./f you stiff think your new oven is too hot or too cold, you can adjust the thermostat yourselL
Donot use thermometers, such as those found in grocery stores, to check the temperature setting of your oven.
These themtometers may vary 28-40 degrees.
NOTE: T,_isadjustment will not affect the broiling temperatures.
ToAdjust the Thermostat
Each dick wi]] change the o',en temperature
approximately l 0°K (Rmge is _+60°K }1"ore
the arrow;) We suggest that _ol* make the
a({]ustment one dick fl'om the odgina]
setting and check o',en performance
beiore ma]dng any additional a@_stme]_ts.
[] _{ter the a(!]mtment is made, retighten
screws so the_ are smtg, bla be careh_l
not to overtighten.
[] Re-install knob on _:mge and check
perfbn_ance.
(Appearance may vary)
[] Pl_lld_e OVENCONTROLk_ob o_
the _:mge and h_ok at the back side.
To make an a(!justment, loosen
(approxh_ate]y one turn), blot do not
completely remove, the two scre_s
on the back of the knob.
[] X'Vith t h e back of th e kn ob [i_ci ng yol
hold the outer edoe of the knob ;dth
O1] e ]/_t m/d _t m/d tl 0]'m/ [h e [_'()]/t of the
knob with the other hand.
To raise the oven tempemtm'e, move
t]_e top screw toward t]_e right. '_l*']]
hear a dick tbr each notch veil mo_e
the knob.
To h_wer die temperatm'e, move the
top screw toward the ]e{L
Thetype ofmargarine will affect bakingperformanc!!
Most recipes for baking have been developed using high fatproducts such as butter or margarine (80% fat). ff you
decrease the fat, the recipe may not give the same results as with ahigher fat product.
Recipe failure can result ff cakes, pies, pastries, cookies or candies are made with low fat spreads. Thelower the fat
content of aspread product, the more noticeable these differences become.
Federal standards require products labeled "margarine" to contain at least 80% fi_t by weight. I,ow fi_t spreads, on the
other hand, contain less ti_t and more water: The high moisture content of these spreads affects the textm'e and flavor
of baked goods. For best results with umr old tin.ofim recipes, use mmgmine, butter or stick spreads containing at least
70% vegetable oil.
15
Page 16

Careand cleaningof therange.
Be sure electrical power is off and all surfaces are cool before cleaning any part of the range.
If your range is removed for cleaning, servicing or any reason, be sure theanti-tip device
is re-engaged properly when the range is replaced. Failure to take this precaution could
result in tipping of the range and cause injury.
Standard Twin Burner Assemblies (onsomemodels)
Grate
Drippan(onsomemodels)
Surfaceburner
CAUTION:Donot operate the
cooktop without all burner parts,
drip pans (on somemodels) and
grates fl?place.
Onmodelswith standard twin burners,the cooktop
rifts up for easyaccess.
Turn all controls OFF before removing
burner parts and drip pans (if' so
equipped).
The burner grates and drip pans (if so
equipped) can be lifted off', making them
easy to clean.
The holes ill the surelce burneis of your
range must be kept clean at all times fl)r
proper ignition and an evell, unhampered
]L]}lll/e,
_)u should clean the surfilce burneis
routinely, especially alter bad sl)illoveI_,
which could clog these holes.
_,_]l)e off surlilce burnei_. If hea\ T spill()ver
OCCIAI3_ i'elllOve the StlYlilce btlrllelN l'l'OI/l
the range. Burnei_ lift ()tit fl)r cleaning.
Lift up the cooktop and then lift Otlt the
StlI'l[iIce btlYlleI3.
To remove burned-on food, soak the
stlrlilce btlrller ill a sohltiOll of mild liquid
(leteigent and hot watei: Soak the surlilce
burner fi)r 20-30 minutes.
Foi" lllOl'e sDlbbol'll staillS, IISe a cleallser
like Soft Scrub _'brand or Bon _&Jni: brand.
Rinse well to remove any traces of the
cleanser that might clog the stmf,lce burner
openings.
Do not use steel wool because it will clog
the smtace burner openings and scratch
the stu_hce burnei_. If the holes become
clogged, clean them with a sewing needle
or twist-tie.
Before putting the sm_ilce burner back,
shake ()tit excess water and then d U it
thoroughly by setting it ill a w;mn oven
tor 30 minutes. Then place it back ill the
range, making sure it is properly seated
and level.
Check the flame pattern of each burnei:
If the flames are "jtuni)y" (not stead)),
clean the holes again with a sewing needle
or twist-tie.
Cleat? these holes thoroughly on
each burnei;
16
Drip Pans (on some models)
]_emoxe the grates and lift out the drip
pans. Drip pans can be cleaned ill a
dishwasher or b_ hand.
X_q_en rel)lacin,*_ the (hi l) pans, make sure
they are ill the correct position.
To get lid ot burned-on fi)od, place them
ill a covered container (or plastic bag)
with 1/4 cup anm/onia to loosen the soil.
Then scrub with a soap-tilled scouring
pad if necessai T.
CAUTION:Oonotcleanthedrip
pansin a self-cleaningoven.
Page 17

www.GEAppliances.com
Grate
Burnerca[
Burnerheaa
Din banlet
:lectrode ,
_/ _ooktop
Sealed Burner Assemblies (onsomemodels)
Turn all controls OFF before rein(_ving the
burner parts and drip pans (if so equipped),
The burner grates, caps, burner heads and
drip pans (if so equipped) can be lifted ott_
nlaking thenl easy to clean. The electrodes
_li'e not i'ei/lovable.
NOTE: Donot usesteel wool or scouringpowders
todean theburners.
A CAUTION:Donotoperatethe
cooktop without allburnerparts, drippans (on some
mode/s)and grates inp/ace.
NOTE."Donot rift thecooktop.Lifting thecooktop
on sea/edburnermode/scan/ead to damageand
improperoperation of the range.
-_
Burner Grates
I,ifl out when cool. Grates should be
washed regulaity and, (ff coui_e, after
si)ilh_vei_. W_sh thenl in hot, soapy water
and rinse with clean watei: _MteI" cleaning,
(liT thenl th(woughly by putting theIn in
}1 IV;IIIII ()veil [k)I" a few Illintltes. Don't l)/lt
tile grates back on tile range while they are
wet. When rei)lacing the grates, be sure they
are positioned securely over tile burners.
Do not operate a burner fi)r an extended
period of tinIe without cookware oil tile
grate. The finish oil the grate inay chip
without cookware to absorb tile heat.
Tile electrode ot tile spark igniter is
exposed when tile burner head is
renioved, _]/eIl one burner is turned
to LITE,all tile burnei_ spark. Do not
atteinpt to disassenlble or clean
around any burner while an()ther
burner is oil. An electric shock nlav
result, which could cause )_)/I to
knock over hot cookware.
To get rid ot 1)urned-on t0o(l, place tile
grates in a covered containei: Add 1/4 cup
annnonia and let theni soak several houI_
or overnight. X.V_sh,rinse well and (liT.
_Mthough they are durable, the grates
will gradually lose their shine, regardless
of the best care you can give thenl. This is
due to their continual exposure to high
tenll)ei'atures. _)tI will notice this sooner
with lighter color grates,
NOTE."Donot cleanthe gratesin aself-cleaning
oven.
/7
Page 18

Careand cleaningof therange.
Burner Caps and Heads (onsealedburnersonly)
Usea sewing needle or twist-tie
to unclog the small hole h7the
burner head.
NOTE: Before removing the burner caps
and heads, remember their sloe and location.
Replace them in the same location after
cleaning.
Burner caps
I.ifl off when cool. _,Vash 1)urner caps
in hot, soapy water and rinse with clean
water: You me} scour with a I)lasfic scouting
pad to remoxe burned-on food particles.
Burner heads
For proper ignition, make sm'e the
small hole in the secdon that fits oxer the
electrode is kept open. A ,sewino_needle
or wire twist-tie works well to tmclo_* it
Theslits in the burnerheads must be keptclean
at aft timesfor an even,unhamperedflame.
(:logged or di m' bm'ner po_*s or electrodes
_ill not allow the burner to operate properly:
Any spill on or arotmd an electrode must
be careflfll} cleaned. Take care to not hit an
electrode with an}{hing hard or it could
be damaged,
You should dean the burner caps and
bm'ner heads routinely, especially alter bad
spillove_, which could clog the openings
in the bm'ner heads, i,ifl offwhen cool.
To remove burne&on fl)od, soak the
bm'ner heads in a solution of mild liquid
detergent and hot water fi)r 20-30 minutes.
For more stubborn stains, use a toothbrush.
Replacement
Replace bm'ner heads over the electrodes
on the cooktop, in the correct locations
according U) flmir size.
Mediumhead Smallhead
Mediumhead Large head
Make sure the slot in the bm'ner head is
positioned over fl_e electrode.
Replace the matching size caps onto the
heads. There is one small, two medium
and one lmge cap. Sizes are stamped into
the bottom of the caps.
18
After cleaning
Before putting the bm'ner caps and heads
back, shake out excess water and then (h')
them thoroughl) b) setting in a xwmn oxen
fi)r 30 minutes.
NOTE:Do notuse steel wool orscouringpowders
toclean theburners.
i!ii iii Smi"iii
I i
Mediumcap Largecap
Make sure that the heads and caps are
replaced in the correct locations.
NOTE: Onsome models, theburnersare a//the
samesizeandpowe_
Page 19

CooktopSurface
www.GEAppliances.com
To avoid (lamaging tile porcelain enamel
surfi_('e of the cooktop and to prevent it
fl'om 1)ecoming dull, clean up spills right
m_v. Foods with alot of ackl (tomatoes,
sauerkra ut, ti'uit juices, etc.) or toods with
high sugar content could Catlse a dull spot
if allowed to set.
When the sm'fi_ce has cooled, wash and
rinse. For other spills such as tilt spattefings,
etc., wash with soap and water once the
surelce has cooled. Then rinse and polish
with a (h T cloth.
Be careflfl when you clean tile cooktop
because the area over the pilot will be hot
(on models with standing pilots).
Stainless Steel Surfaces (onsome models}
Do not use a steel-wool pad; it will scratch
the surface.
[] Shake botde well.
[] Place a small amotmt of CEIL_4A
BRYTE _ Stainless Steel Appliance
Cleaner on a damp cloth or damp
paper towel.
[] Clean a small area (approximatel)
8" x 8"), rubbing with tile orain of tile
stainless steel if applicable.
[] D_)and buffwith a clean, (hT paper
towel or soft cloth.
[] Repeat as necessary:
NOTE:If a mineral oil-based stainless steel
appliance cleaner has been used before to
clean tile appliance, wash tile SUlSfilcewith
NOTE:Donot store flammablematerials in
an ovenor nearthe cooktop.Donot storeor
usecombustiblematerials,gasolineor other
flammable vaporsand//?luidsinthe vicinity
of this or anyother appflance.
NOTE."Donot lift the cooktoponsealedburner
models.Lifflbg the cooktopcanleadto damage
andimproperoperationof the range.
dish soap and water prior to using tile
(;ElL_d_t BRYTE ':Stainless Steel Appliance
Cleane_: _Mter washing tile SUll'ilce with dish
soap and watei; tlse a generotlS _lI//O/lnt oJ[
CEI_dMA BRYTE ': Stainless Steel Appliance
Cleaner to clean tile appliance.
re Order
To order CEI_d_4A BRYTE ':Stainless Steel
Appliance Cleane_; please call ore" toll-free
ntlI//beY:
National Parts Center 800.626.2002
www.GEAppliances.com
CERAMA BRYTE®
Stainless Steel Appliance
Cleaner .................... _ FMTOX377
Somemodelshavedualsupportrods
flTatwillhold flTecooktopupwhile
youcleanunderneafl7it.
Lift-Up Cooktop (onmodels with standard twin burners)
Clean tile ai'ea tinder tile cooktop oliten. Clean tinder tile cooktop with hot, soal)y
guilt-u I) soil, especially grease, ma) catch water and a clean cloth. If you remoxed
(111fire. VO/II"Stllbfilce btlrners while cleaning,
To make cleanin_ easier; tile cooktop may " '_ " ," " I "I ",' '_"
be lifted up. replacing them.
NOTE."Donot rift thecooktopon sealedburner
models.Lifting the cooktopcanlead to damage
andimproperoperationof the range.
Toraise the cooktop:
[] Be sm'e tile bm'ne_ are tin'ned off.
[] Remoxe tile grates and dil I) pans
(if st) equil)ped ).
[] (;rasp tile two ti'ont bm'ner wells and
1N uI).
_, make sine the_ a_e 1_o)e_l_ seated _d/en
_fter cleaning, lower tile cooktop (be
carefifl not to pinch yore" finge_s). I,ower
cooktop gently to avoid blowing out pilot
flames (on standing pilot models).
Replace drip pans (if so equil)l)ed ) and
grates.
19
Page 20

Careand cleaningof therange.
Lift-Off Oven Door
Lift the door straight up and off
the hh_ges.
Thegasket is designed with agap
at the bottom to allow for proper
air circulation.
Donot rub or clean the door gaske_
it has an extremely low resistance
to abrasion.
If you notice the gasket becomhTg
worn, frayed or damaged h7any way
or if it has become displaced on the
door, youshould have it replaced.
Theoven dooris removable,but it is heavy Youmay
needhelp removing and replacingthe door.
Toremove the door, open it a fbw h_('hes to
tile special stop position that will hold tile
door open. Grasp firefly on each side and
lift tile door straight up and off tile hinges.
NOTE:Becareful not toplace handsbetweenthe
hingeand the ovendoor frameas the h/we could
snapbackand pinchfingers.
Toreplace the door,make sure the hinges
are in tile special stop position. Position
the slots in the bottom of the door squarely
over the hinges. Then lower the door
slowly and evenly over both hinges at the
same time. If tile hinges snap back against
tile oven fl'ame, pull them back out.
Toclean the inside of the door:
Do not allow excess l_;itei" to i'tln into
any holes or slots in tile door.
Because tile area inside tile gasket is
cleaned during the self clean cycle, you
do not need to clean this bv hand. AI V
soap left on tile liner causes additional
stains when the oven is heated,
Tile area outside tile gasket can be
cleaned with a soap-filled steel wool or
plastic pad.
Toclean the outsideof the door:
Use soap and water to thoroughly clean
the top, sides and fl'ont ot the oven dora:
Pdnse well. _4m may also use a glass
cleaner to clean the glass on the outside
of the doo_:
Spillage _ffmarinades, fl'uit juices, tomato
sauces and basting materials containing
adds may cause discoloration and should
be wiped up immediately. _]/en tile
sm'ti_ce is cool, clean and rinse.
Do not rise oven cleanei_, cleansing
l)owdeIs or harsh abrasives on the
outside ot the door
Oven Bottom
Tile oven bottoill has a porcelain enalllel
finish. To make cleaning easier; protect
tile oven bottom from excessive sl)illove_
by placing a cookie sheet on tile shelf
below the shelf you are cooking on.
This is particularly important when baking
a fl'uit pie or other too(Is with a high add
content. Hot fl'uit fillings or other toods
that are highly acidic (such as tomatoes,
sauerkraut, and sauces with vinegar or
lemon juice) may catlse pitting and
damage to the porcelain enamel stwlhce
and should be wiped up immediatel>
X_'edon't recommend using ahm/inum
foil on tile oven bottom. It can afle('t air
flow if the holes are blocked and it can
concentrate heat at tile bottom of tile oven,
resulting in poor baking peffom/ance.
To clean up spilh)ve_, tlse soap and watei;
an abrasive cleaner or soap-filled scotwing
pad, Remove tile oven bottom fl)r easier
clean-u I) and to prevent damage to
tile conthlt]OtlS cleaning oven coating
(on some models).
2O
Page 21

www.GEAppliances.com
Grid
I .......... I
! z !
Pan
1
ii i
Broiler Pan and Grid
Mter 1)roiling, renlove tile broiler pan fl'oIn
tile oven. Ren/ove tile grid fl'oIn tile pan.
Carefully pour out grease fl'oIn tile pan
into a proper containei: "vgash and rinse
tile broiler pan and grid in hot water
with a soap-filled or plastic scouting pad.
If tood has burned oil, spi_nkle tile grid
with deteigent while hot and cover with
wet paper towels or a dishcloth. Soaking
tile pan will reniove burned-on too(Is.
Removable Broiler Drawer (onsomemodels)
To remove:
V_ "_q/eil tile broiler is cool, reinoxe tile
,LLJ
g6d and pan.
V2] Pull tile broiler drawer ()tit until it
/
stops, then push it back in about
one inch.
[] (;rasp tile handle, lift and pull tile
broiler drawer ()/it. Clean tile broiler
drawer with hot soap) wateI:
Tile broiler pan and grid nlay be cleaned
with a ('oi/illlercial ()',ell cleanei:
Both tile broiler pan and grid can also be
cleaned in a dishwashei:
Do not store a soiled broiler pan and grid
anywhere in the range.
CAUTION:Dono,clean,hebroiler
pan or grid in a self-cleaning oven.
To replace:
Hold tile broiler drawer in tile raised
position as you slide it partway into tile
range. Then lower tile drawer and push
it conipletely closed.
Ventappearance and location var,A
Pull the knob straight off the stem.
OvenAir Vents
Never block tile vents (air openings) of the
range. They provide the air inlet and outlet
that are necessaiw fin" tile range to operate
properly with correct conll)ustion.
Mr openings are located at tile rear of
tile cooktop, at tile top and bottoin (if tile
oven d(ioi; and at the bottoin of the range,
under tile kick panel or broiler drawer
(depending oil tile nlodel).
Lower Control Panel (Front Manifold Panel) and Knobs
It's a good idea to wipe tile control panel
after each use of tile oven. Use a danIp
cloth to clean or rinse. For cleaning, use
Inild soap and water or a 50/50 sohItion
of vinegar and wateI: For I_insing, use
clean watei: Polish di_' with a soft cloth.
Do not use abrasive cleansei_, strong
liquid cleanei_, plastic scouiing pads or
()veil cleanei_ on tile control panel--
they will danlage tile finish.
Do not bend knol)s by pulling theIn up or
down or by hanging a towel or other such
loads. This can daniage the gas wdve shaft.
Tile control knobs nlav be renloved fi)r
easier cleaning. To reniove a knob, pull
it straight off the stein. If knob is difficult
to renlove, place a towel or dishcloth
between tile knob and control panel and
pull gently. "_hsh tile knobs in soap and
water or a vinegar and hot water sohifion.
Metal parts can be cleaned with soap
and wateI: Do not rise steel wool,
abI'asives_ _lillillOili_l_ acids or coi//illei'cial
()veil cleaneis. Dry with a soft cloth.
2/
Page 22

Careand cleaningof therange.
Oven Shelves
Clean tile shelves with an abrasive cleanser
or scouting pad. _Mier cleaning, rinse the
shelves with clean water and dry with a
clean cloth.
Porcelain Oven Interior (onall models except continuous-cleaning models)
With proper care, tile porcelain enamel
interior will retain its attractive finish for
I11}1 nv VealS,
Soap and water will nommlly do the job,
Heavy spattering or spillove_s may reqtfire
cleaning with a mild abrasive cleanse_:
Soap-filled scouring pads may also be used.
Do not allow tood spills with a high sugar or
add content (such as tomatoes, sauerkraut,
fl'tfitjuices or pie filling) to remain on the
surti_ce. They may cause dtfll spots even
after cleaning.
Household ammonia Inav Inake tile
cleaning.job easier: Place 1/2 cup ammonia
in a shallow glass pan and leave in a cold
oven overnight. Tile ammonia tirades will
hel I) loosen tile burned-on grease and tood.
_(,\]/en necessar); you may use a commerdal
oven cleanei: Follow tile package directions.
Cautionsabout using spray-on oven cleaners:
Be carefld where tile oven cleaner is
sprayed.
; Do not Sl)i';ly oven cleaner on tile
electrical controls and switches (on some
models) because it could cause a short
circuit and result in sparking or fire.
Do not allow a fihn fl'om tile cleaner
to remain on the temperature sensing
bulb--it could cause tile oven to heat
improperly. (The bulb is located at the
rear ot tile oven.) Careliflly wipe tile
bulb clean afier each oven cleaning,
being careflfl not to move the bulb as
a change in its position could attect
how tile oven bakes.
Do not spray any oven cleaner on tile
outside oven door, handles or anv
exterior stu_i_ce of tile oven, cabinet
or painted surti_ces. The cleaner can
damage these surti_ces.
22
Page 23

www.GEAppliances.com
Special Care of Continuous-Cleaning Oven Interior (on somemodels)
Thespecialcoatingisaporousceramic
material,whichis darkin colorandfeels
slightly roughtothetouch.
The Conthmous-Clemlhlg Oven cleans itself
_dfile cooking. Tile oven walls are finished
with a special coating that cannot be cleaned
in the tlStlal ill_lnnei" with soap, detergents,
steel wool pads, conm/erdal oven cleanei_,
coaI_e abrasive [)ads or coai%e brtlshes.
Use of such cleanseis and/or the use of
()veil sprays will cause l)ei_/llanent danlage.
If nlagnified, tile suil'ace would appear as
peaks, ;_dlevs and sub-suil'hce "tunnels."
This rough finish tends to i)revent grease
spattei_ ti'oin t0iming little beads or
droplets that run down tile side walls (ff a
hard-surti_ce ()veil linei; leaving unsightly
streaks that require hand cleaning. Instead,
when spatter hits the porous finish, it is
dispeI_ed and partially absorbed. This
si)i'eading action increases tile exposure
of oven soil to heated air and nlakes it
sonlewhat less noticeable.
Soil may not disappear completely and at
sonIe finIe after extended usage, stains nlav
appear that cannot be renloved.
The special coating works best on small
mnom_ts of spatter. It does not work well
with laiger spills, especially sugai_, egg or
dairy niixtures. Tile ()veil bottonl does not
have the continuous cleaning oven coating
and can be reinoved and cleaned with a
COllllnei'cial oven cleanei:
This special coating is not used on the
oven shelves, oven bottom or the hlsJde
of the oven door. Reniove these to clean
with a coninlercial oven cleaner to i)revent
danlaging tile (]ontinuou_(3eaning Oven
coating.
Make sure the oven bottomis in place before
you turn the oven on forany mason.
Use care in removing mad replacing the
oven bottom mad shelves and in [)lacing
and renloving dishes and food to avoid
scratching, rubbing or othei_vise danlaging
tile porous finish on tile ()veil walls.
ToClean the Continuous-Cleaning Oven:
[] I,et range parts cool before handling
_A'ereconmiend rubber gloxes be worn
when cleaning.
[] Soil visibilit) nlay be reduced by
o[)eradng the oxen at 400°F. Close the
door and turn tile OVEN CONTROLknob
to 400° F.TiIne ti)i" at least tour houis.
Repeated cycles nlay be necessai-v
before illli)roveillent in al)l)eai'ance
is ai)i)ai'ent.
REMEMBER: During the operation of the oven,
the deer and ether range surfaces will get hot
enough to cause bums. Do net touch. Let the
range cool beforereplacing the oven shelves.
If a sl)illox er or heavy soiling occui5
[]
on tile l)OI'O/lS S/lI];Ice, as soon as tile
oven has cooled, I'eIllOVe as I//tlcl/ of
the soil as possible using a snlall
anlount of water and a stift=biJsfle nylon
brush. Use _;_teI" spai-ingly and change
it fl'equenfl 5 keeping it as clean as
possible, and be sure to blot it up
with i)aper towels, cloths or sponges.
Do not rub or scrub with paper towels,
cloths or sponges, since thev will leave
unsightly lint on the oven finish. If
water leaves a white ring oil the finish
as it dries, apply water again and blot
it with a clean sponge, starting at the
edge of tile ring and working toward
tile centei:
The oven bottom has a porcelain enmnel
f'ufish. The ()veil bottonl colnes o/lt tor
cleaning away fl'oin tile Continuous-
(3eaning Oven.
The h_side of the oven door has a porcelain
elmmel f'ufish. Tile oven door lifts off
ti)I" cleaning away fl'oni tile (_ontintlOtlS-
Cleaning Oven. For insmictions oil how
to clean the inside (ff the oven door I'eter
to the Lilt-Off ()veil Door section.
Do not use soap, detergent, sted wool
pads, commercial oven demmr, silicone
oven sprays, com'se pads or coarse
brushes on the porous surface. These
products will spot, clog and danlage tile
porous surii_ce and reduce its ability
to work.
Do not scrape the porous surface
with a Mfife or spatula--they could
i)eimanently daniage the finish.
] Relnoxe shelxes and cookwai'e.
23
Page 24

Installation
Range
Instructions
mfyou have questions, call 800.GE.CARES or visit our Website at: www.GEAppliancee.com
IN THE COMMONWEALTH OF
MASSACHUSETTS
• This product must be installed by
a licensed plumber or gas fitter.
• When using ball-type gas shut-off valves,
they shall be the T-handle type.
• A flexible gas connector, when used,
must not exceed 3 feet.
BEFORE YOU BEGIN
Read these instructions completely and
carefully.
Installation of this range must conform with
local codes, or in the absence of local codes,
with the National Fuel Gas Code, ANSI
Z223.1/NFPA.54, latest edition. In Canada,
installation must conform with the current
Natural Gas Installation Code, CAN/CGA-
B149.1 or the current Propane Installation
Code, CAN/CGA-B149.2, and with local
codes where applicable. This range has
been design-certified by CSA International
according to ANSI Z21.1, latest edition
and Canadian Gas Association according
to CAN/CGA-I.1 latest edition.
As with any appliance using gas and generating
heat, there are certain safety precautions you
should follow. You will find these precautions in
the Important Safety Information section in
the front of this manual. Read them carefully.
• IMPORTANT - Savethese
instructions for local inspector's use.
• IMPORTANT - Observeall
governing codes and ordinances.
• Note to Installer - Be sure to leave these
instructions with the Consumer.
• Note to Consumer - Keep these
instructions for future reference.
• Note - This appliance must be properly
grounded.
• Servicer - The electrical diagram is in an
envelope attached to the back of the range.
• Skill Level - Installation of this appliance
requires basic mechanical skills.
• Proper installation is the responsibility of
the installer.
• Product failure due to improper installation
is not covered under the Warranty.
24
Page 25

mnstaaiation mnstructions
FOR YOUR SAFETY
Do not store or use combustible materials,
gasoline or other flammabme vapors and
liquids in the vicinity of this or any other
appliance, mfyou smetl gas:
[] Open windows.
[] Don't touch electrical switches.
[] Extinguish any open flame.
[] Immediately catt your gas supplier.
TOOLS YOU WiLL NEED
PhHHps screwdriver
Open-end or
Hat-Made screwdriver
3/16" or smaller
adjustable wrench
MATERIALS YOU MAY NEED
e Gas line shut=off valve
, Pipe joint sealant or UL=approved pipe
thread tape with Teflon _ that resists action
of natural and LP gases
e Flexible metal appliance connector (1/2" I.D.)
A 5foot length is recommended for ease of
installation but other lengths are acceptable.
Never use an old connector when installing
a new range.
Flare union adapter for connection to gas
supply tine (3/4" or 1/2" NPT x 1/2" I.D.).
Flare union adapter for connection to
pressure regulator on range (1/2" NPT x
1/2" I.D.)
- Liquid leak detector or soapy water.
e Lag bolt or 1/2" O.D. sleeve anchor (for
concrete floors only).
e Long matches and/or match holder (for
models equipped with standing pilots).
÷Teflon: Registered trademark of DuPont
Pencil and ruler
Level
PART INCLUDED
Anti-tip bracket kit
Pipe wrenches (2)
(one for backup)
Drill, awl or nail
25
Page 26

mnstaaiation mnstructions
mNSTALLAT ON SAFETY
Read these instructions completely and
carefully.
improper installation, adiustment, alteration,
service or maintenance can cause injury or
property damage. Refer to this manuat.
For assistance or additional information,
consult a qualified installer, service agency,
manufacturer {dealer} or the gas supplier.
Never reuse old flexible connectors. The use
of old flexible connectors can cause gas leaks
and personal injury. Always use NEW flexible
connectors when installing a gas appliance.
IMPORTANT- Removea,pack#,g
matedal and literature from oven before
connecting gas and electrical supply to range.
CAUTION - Do not attempt to operate
the oven of this range during a power faihJre
(Electric Ignition models only).
• Have your range installed by a qualified
installer.
• Your range must be electrically grounded
in accordance with local codes or, in the
absence of local codes, in accordance with
the National Electrical Code (ANSt/NFPA 70,
latest edition). In Canada, electrical
grounding must be in accordance with the
current CSA C22.1 Canadian Electrical Code
Part 1 and/or local codes. See Electrical
Connections in this section.
• Before installing your range on linoleum or
any other synthetic floor covering, make
sure the floor covering can withstand 180°F
without shrinking, warping or discoloring.
Do not install the range over carpeting
unless a sheet of 1/4" thick plywood or
similar insulator is placed between the
range and carpeting.
• Make sure the wall coverings around the
range can withstand heat generated by
the range up to 200°R
• Avoid placing cabinets above the range.
To reduce the hazard caused by reaching
over the open flames of operating burners,
install a ventilation hood over the range
that projects forward at least 5" beyond
the front of the cabinets.
• The ventilating hood must be constructed
of sheet metal not less than 0.0122" thick.
Install above the cooktop with a clearance
of not less than 1/4" between the hood and
the underside of the combustible material
or metal cabinet. The hood must be at least
as wide as the appliance and centered
over the appliance. Clearance between the
cooking surface and the ventilation hood
surface MUST NEVER BE LESS THAN
24 INCHES.
EXCEPTION: Installation of a listed microwave
oven or cooking appliance over the cooktop
shall conform to the installation instructions
packed with that appliance.
• If cabinets are placed above the range,
allow a minimum clearance of 30" between
the cooking surface and the bottom of
unprotected cabinets.
• If a 30" clearance between cooking surface
and overhead combustible material or metal
cabinets cannot be maintained, protect the
underside of the cabinets above the cooktop
with not less than 1/4" insulating millboard
covered with sheet metal not less than
0.0122" thick. Clearance between the
cooking surface and protected cabinets
MUST NEVER BE LESS THAN 24 INCHES.
• The vertical distance from the plane of the
cooking surface to the bottom of adjacent
overhead cabinets extending closer than
1" to the plane of the range sides must not
be less than 18". (See the Dimensions and
Clearances illustration in this section.)
• CAUTION -Items of interest to
children should not be stored in cabinets
above a range or on the backsplash of a
rangeichildren climbing on the range to
reach items could be seriously injured.
26
Page 27

mnstaaiation mnstructions
DiMENSiONS AND CLEARANCES
Provide adequate clearances between the range and adiacent combustible surfaces. These
dimensions must be met for safe use of your range. The location of the electricam outtet and pipe
opening (see Gas Pipe and Electric Outlet Locations) may be adiusted to meet specific requirements.
The range may be placed with 0" clearance (fiush) at the back wall.
Minimum
to cabinets
on either
side of the
range
18"
14""- 30'I ""_1_ to 28_/_ 'I
_ 30" > cabinets above /
30" countertops L____
Minimum _1 '1To wall °n either side,
Depth with door closed (includes door handle)
standard burner models
2 'I To wall on either side,
sealed burner models
Depth varies depending on
model. See specifications
sheet for your model.
Maximum F-_
depth for
13 rl
Front edge
of the range
side panel
forward from
,__ cabinet ._
To cabinets below
cooktop and atthe
range back
Height *
361/4'I _+1/4 'I
I
Depth with door open: _
463/8'1 (glass door) _ ._.._ "_
46Y4 (porcelain door) ,. s-"
27
*Product Height:
36" JGSS05
40" RGB508
451/2" JGBS04 JGBS07 RGB524
473/8" JGBC20 JGBS21 RGB528
JGBS17 JGBS22 RGB533
JGBS20 JGBS23 RGB540
Page 28

mnstaaiation mnsttuctions
LOCATION
ANT oT P DEVICE
All ranges can tip and injury couJd
result.
@
®
e For your safety, never use your range for
warming or heating the room. Your oven
and cooktop are not designed to heat
your kitchen. Top burners should not be
operated without cookware on the grate.
Such abuse couJd result in fire and damage
to your range and wilt void your warranty.
Do not store or use combustible materials,
gasoline or other flammable vapors and
liquids in the vicinity of this or any other
appliance. Explosions or fires could result.
Do not use oven for a storage area. Items
stored in the oven can ignite.
e Do not let cooking grease or other
flammable materials accumulate in or
near the range.
To prevent accidental tipping of the
range, attach an approved Anti-Tip
device to the wail. {See Installing
the Anti-Tip Device in this section.)
To check if the device is installed
and engaged properly, carefully tip
the range forward. The Anti-lip
device should engage and prevent
the range from tipping over.
if you pull the range out from the
wall for any reason, make sure the
Anti-1]p device is engaged when
you push the range back against
the wail.
Do not locate the range where it may be
subject to strong drafts. Any openings in
the floor or wall behind the range should
be sealed. Make sure the openings around
the base of the range that supply fresh air
for combustion and ventilation are not
obstructed by carpeting or woodwork.
Your range, like many other household
items, is heavy and can settle into soft
floor coverings such as cushioned vinyl or
carpeting, Use care when moving the range
on this type of flooring. It is recommended
that the following simple and inexpensive
instructions be followed to protect your floor.
The range should be installed on a sheet of
plywood (or similar material). When the floor
covering ends at the front of the range, the
area that the range will rest on should be
built up with plywood to the same level or
higher than the floor covering.
This will allow the range to be moved for
cleaning or servicing, Also, make sure your
floor covering will withstand 180°F. (See the
Installation Safety Instructions section.)
Make sure the wall coverings around your
range can withstand the heat generated (up
to 200°F) by the range. (See the Installation
Safety Instructions section.)
MODEL AND SERIAL NUMBER
LOCATION
Depending on your range, you'll find the
model and serial numbers on a label on the
front frame of the range, behind the kick
panel or broiler drawer.
IMPORTANT!
Remove all tape and packaging. Make sure
the burners are properly seated and level.
Lift up the cooktop (on models with
standard twin burners) and remove any
packing material under it.
Take the accessory pack out of the oven
and/or drawer.
Check to be sure that no range parts have
come loose during shipping.
28
Page 29

mnstaaiation mnstructions
[] PROVIDE ADEQUATE
GAS SUPPLY
Your range is designed to operate at a
pressure of 4" of water cotumn on natural
gas or, if designed for LP gas (propane or
butane), 10" of water column.
Make sure you are supplying your
range with the type of gas for which
it is designed.
This range is convertible for use on
natural or propane gas. If you decide
to use this range on LP gas, conversion
must be made by a qualified LP installer
before attempting to operate the range
on that gas.
For proper operation, the pressure of
natural gas supplied to the regulator
must be between 4" and 13" of water
cohmn.
For LP gas, the pressure supplied must
be between 10" and 13" of water cohmn.
When checking for proper operation of
the regulator, the inlet pressure must be
at teast 1" greater than the operating
(manifold) pressure as given above.
The pressure regulator located at the
inlet of the range manifold must remain
in the supply tine regardless of whether
natural or LP gas is being used.
A flexible metal appliance connector used
to connect the range to the gas supply
tine should have an i.D. of 1/2" and be
5 feet in length for ease of installation.
tn Canada, flexible connectors must be
single wall metal connectors no longer
than 6 feet in length.
[] CONNECT THE RANGE TO GAS
Shut off the main gas suppty valve
before disconnecting the old range and
leave it off until the new hookup has
been completed. Don't forget to reiight
the pilot on other gas appliances when
you turn the gas back on.
Because hard piping restricts movement
of the range, the use of a CSA
tnternationaFcertified flexible metal
appliance connector is recommended
unless locat codes require a hard piped
connection.
Never use an old connector when
installing a new range. If the hard piping
method is used, you must carefully align
the pipe; the range cannot be moved
after the connection is made.
To prevent gas leaks, put pipe joint
compound on, or wrap pipe thread tape
with Teflon _ around, all male (external
pipe threads.
[]
Install a manual gas line shutoff valve in
the gas line in an easily accessed location
outside of the range. Make sure everyone
operating the range knows where and how
to shut off the gas supply to the range.
[]
Install male 1/2" flare union adapter to
the 1/2" NPT internal thread at inlet of
regulator. Use a backup wrench on the
regulator fitting to avoid damage.
[]
install male 1/2" or 3/4" flare union adapter
to the NPT internal thread of the manual
shut-off valve, taking care to back=up the
shutoff valve to keep it from turning.
[]
Connect flexible metal appliance
connector to the adapter on the range.
Position range to permit connection at
the shut-off valve.
[]
When all connections have been made,
make sure all range controls are in the
off position and turn on the main gas
supply valve. Use a liquid leak detector
at all joints and connections to check for
leaks in the system.
WARNING - DONOTUSEAFLAME
TO CHECK FOR GAS LEAKS.
When using test pressures greater than
1/2 psig to pressure test the gas supply
system of the residence, disconnect the
range and individual shutoff valve from
the gas supply piping. When using test
pressures of 1/2 psig or less to test the
gas supply system, simply isolate the
range from the gas supply system by
closing the individual shutoff valve.
_Teflon: Registered trademark of DuPont
' 29
Page 30

mnstaaiation mnsttuctions
GAS PiPE AND ELECTRICAL OUTLET LOCATIONS
(for modeJs with SeaJed Burners)
This area allows for flush
range installation with
through-the-wall connection
of pipe stub/shut-off valve
and rear wall 120V outlet.
\
Shortest connection from °
hard pipe stub location to
range hookup.
This area allows for flush
range installation with
through-the-floor connection
of pipe stub/shut-off valve.
GAS PIPE AND ELECTRICAL OUTLET LOCATIONS
(for models with Standard Twin Burners)
This area allows for flush
range installation with
through-the-wall connection
of pipe stub/shut-off valve
and rear wall 120V outlet.
30" hard pipe stub location to
from
range hookup.
3O
This area allows for flush
range installation with
through-the-floor connection
of pipe stub/shut-off valve.
Page 31

mnstaaiation mnstructions
FLEXIBLE CONNECTOR HOOKUP (for modeJs equipped with SeaJed Burners}
Adapter _ _ Flex connector
--_/_/J U (6 feet m axirnu m)
O_ _-_ Adapter
Installer: Inform I ] ]_
the consumer of I r-F_ lilY'--Gas shut-off
the location of the 1/2" or 3/4---_L_ _ valve
gas shut-off va ve. Gas pipe
RiGiD PiPE HOOKUP OPTIONS (for modeJs equipped with SeaJed Burners)
Alternate Hookup
45 ° E Ibow.._
90°E,bow
v_i//_"_ Nip_pleuniont _'II_'_ Black ir°n pipe
\ Pr;:_aU(: r _-_ Union
!
Installer: Inform I
the consumer of I I 1_ _e-Gas shut-off
the location of the _lt _ valve
gas shut-off va ve.
----- Nipple
bJJ_-.- 1/2" or 3/4"
Gas pipe
o _ ,/Adapter
90 Elbow ---_P" o
Nipple---_-_ _ _/Nipple
.... _'_-_I (_ Pressure
L_assnUta-i°i;-_[[J_ _ Nipple regulator
I/Z' or 3/4" ----_ /___
_, _k.f90 Elbow
LJ _- Quick connect
_ ,_-/o r union
Gaspipe90°Elbow
90 ° Elbow /
Installer: Inform I
the consumer of I _=_===_,_=_
the location of the
gas shut-off va ve,
Adapter
31
Page 32

JnstaJJation instructions
FLEXIBLE CONNECTOR HOOKUP
(for modeJs equipped with Standard Twin Burners}
Pressure
regulator
Adapter _Jl ,,
_ _'_'1= ,,,, .,,,. :_.,,,,[.,
Manifold -__ @ _'_
p,pe
Flex connector _ t
(6 feet maximum) [__
Installer: Inform
the consumer of
the location of the
gas shut-off va ve.
Adapter
_Gas shut-off
1/2" or 3/4" "-_L_J _ valve
Gas pipe
RiGiD PiPE HOOKUP (for modeJs equipped with Standard Twin Burners)
Pressure
regulator
M ani;°_de"--_ _
Nipple Union /[' _['_ Black iron pipe
Installer: Inform I
the consumer of
the location of the
gas shut-off va ve.
_ -,_-_ 90° Elbow
_ Union
_ Nipple
J ttiI_-- Gas shut-off
1/2" or 3/4"_ _] I__ valve
Gas pipe b-J
32
Page 33

mnstaaiation mnstructions
[] ELECTRICAL CONNECTIONS
Electrical Requirements
120=vok, 60 Hertz, properly grounded
branch circuit protected by a 15amp or
20amp circuit breaker or time delay fuse.
Extension Cord Cautions
Because of potential safety hazards
associated with certain conditions, we
strongly recommend against the use of an
extension cord. However, if you stilt elect
to use an extension cord, it is absolutely
necessary that it be a UL listed, 3wire
grounding-type appliance extension cord
and that the current carrying rating of the
cord in amperes be equivalent to, or
greater than, the branch circuit rating.
Grounding
mMPORTANT--(PIease read carefully)
FOR PERSONAL SAFETY, THINS
APPUANCE MUST BE PROPERLY
GROUNDED.
Preferred Method
E21sure proper ground
The power cord of this appliance is
equipped with a 3=prong (grounding) plug
which mates with a standard 3 prong
grounding wall receptacle to minimize the
possibility of electric shock hazard from
this appliance.
The customer should have the wall
receptacle and circuit checked by a
qualified electrician to make sure the
receptacle is properly grounded.
exists before use
A word about GFCI's--GFCI's are not
required or recommended for gas range
receptacles,
Ground Fault Circuit Interrupters (GFCI's)
are devices that sense leakage of current
in a circuit and automatically switch off
power when a threshold leakage level is
detected, These devices must be manually
reset by the consumer. The National
Electrical Code requires the use of GFCI's
in kitchen receptacles installed to serve
countertop surfaces. Performance of the
range will not be affected if operated on
a GFCI-protected circuit but occasional
nuisance tripping of the GFCI breaker
is possible.
[] Usage Situations where Appliance Power
Cord will be Disconnected Infrequently.
An adapter may be used only on a
15-amp circuit. Do not use an adapter
on a 20-amp circuit. Where local codes
permit, a TEMPORARY CONNECTION
may be made to a properly grounded
two-prong wall receptacle by the use of
a UL-listed adapter, available at most
hardware stores. The larger slot in the
adapter must be aligned with the larger
slot in the wall receptacle to provide
proper polarity in the connection of the
power cord.
Temporary Method
(Adapter plugs not
permitted in Canada)
Ensure proper
Align large firm connection
prongs/slots before use
ground and
Where a standard 2-prong wall
receptacle is encountered, it is the
personal responsibility and obligation
of the customer to have it replaced
with a properly grounded 3 prong watt
receptacle.
DO NOT, UNDER ANY CIRCUMSTANCES,
CUT OR REMOVE THE THmRD (GROUND)
PRONG FROM THE POWER CORD.
CAUTION - Attaching the adapter
ground terminal to the wall receptacle
cover screw does not ground the appliance
unless the cover screw is metal, and
not insulated, and the wall receptacle is
grounded through the house wiring. The
customer should have the circuit checked
by a qualified electrician to make sure the
receptacle is properly grounded.
33
Page 34

JnstaJJation instructions
[] ELECTRICAL CONNECTIONS {cont.}
When disconnecting the power cord from
the adapter, ah_vays hold the adapter with
one hand. Jf this is not done, the adapter
ground terminal is very likely to break
with repeated use. Should this happen,
DO NOT USE the appliance until a proper
ground has again been established.
[]
Usage Situations where Appmianee Power
Cord wiJJ be Disconnected FrequentJy.
Do not use an adapter phJg in these
situations because disconnecting of the
power cord places undue strain on the
adapter and leads to eventual failure
of the adapter ground terminal. The
customer should have the 2-prong wall
receptacle replaced with a three prong
(grounding) receptacle by a qualified
electrician before using the appliance.
The installation of appliances designed
for mobile home installation must
conform with the Manufactured Home
Construction and Safety Standard, Title
24 CFR, Part 3280 (formerly the Federal
Standard for Mobile Home Construction
and Safety, Title 24, HUD, Part 280) or,
when such standard is not applicable,
the Standard for Manufactured Home
Installations, latest edition (Manufactured
Home Sites, Communities and Set-Ups),
ANSi A225.1, latest edition, or with
local codes. In Canada, mobile home
installation must be in accordance with
the current CAN/CSA Z240/MH Mobile
Home Installation Code.
Electric Disconnect
, Locate disconnect plug on the range
back.
[] SEAL THE OPENINGS
Seal any openings in the wall behind the
range and in the floor under the range
when hookups are completed.
[] UGHT THE P(LOTS
(For models equipped with standing
pilots. Jf the range is an electdc ignition
model, the burners are ignited by electric
ignition which eliminates the need for
standing pilot lights.)
The range should be installed in its
permanent position before any pilots
are lit or adjusted.
CAUTION - Make sure the surface
burner control knobs are in the OFF position
before attempting to light the pilots.
[] Light the Surface Burner PHots
1. Raise the cooktop.
2. Light both pilots with a match.
3. To avoid pilot outage, use caution when
closing cooktop after lighting pilots.
, Pinch sides of connector and pull out
of range back.
NOTE: Do not leave standing pilot lit in
a newly constructed or remodeled home
or apartment that will be unoccupied for
more than a month.
Each pilot flame was adjusted at the
factory to be approximately 5/16" tall.
A tinge of yellow appearing at the upper
tip is normal. If you find pilot adjustment
is necessary, follow instructions in Step B.
34
Page 35

Installation Instructions
[] UGHT THE PILOTS tcont.)
[] Adjust the Surface Burner Pilots if
Necessary
CAUTION - Make sure the surface
burner control knobs are in the OFF position
before attempting to adjust the pilots.
Raise the cooktop.
2.
Locate the pilot adjustment screw.
tt can be accessed through the smatt
hole near the center of the manifold
panel.
3_
To adjust, use a bhde4ype screwdriver
with a shaft diameter of less than or
equal to 3/16". Turn pilot adjustment
screw until pilot flame is 5/16" high.
Do not reduce the flame to less than
5,,/16" or pilot outage may occur. A pilot
flame burning higher than recommended
may generate soot (carbon black) on
the bottom of your cooktop.
[] Light the Oven Pilot
1. Remove the oven door. See Lift-Off
Oven Door in the Care and cleaning
of range section.
2. Remove the oven shelves.
[] Light the Oven Pilot (cont.)
3. Remove the oven bottom. To remove:
• Remove knurled screws holding
down rear of oven bottom.
• Grasp oven bottom at finger slots
on each side.
• Lift rear of oven bottom enough
to clear the lip of range frame,
then pull out.
4. Locate the pilot in the back of the oven
bottom. The pilot is attached to the left
side of the oven burner.
Shield.
(on some
Pilot
5. To light the oven pilot, push in and
hold the oven control knob while
lighting the pilot with a long match or
match holder. Once the oven pilot is lit,
continue holding the oven control
knob for one minute before releasing.
35
No adjustments are required for
natural gas. If the range is connected
to LP gas, contact the person who
installed your range or made the
conversion. If pilot flame does not
stay lit, repeat this step.
Page 36

[nstaJiation [nstructions
[] UGHT THE PILOTS tcont.)
[]
Check ignition of Oven Burner
The oven is designed to operate quietly and
automatically. To operate the oven, turn the
OVEN CONTROL knob to a setting above
260°F. After 30=90 seconds, the oven burner
will ignite and burn untin the set temperature
is reached. The oven burner will continue to
cycle on and off as necessary to maintain
the oven at the temperature indicated by the
OVEN CONTROL knob.
Electric ignition models require electrical
power to operate, in case of a power
outage, the oven burners on these models
cannot be lit manually with a match. Gas
wiil not flow unless the glow bar is hot.
if the oven is in use when a power outage
occurs, the burner wiil shut off and cannot
be re-lit until power is restored.
[] Adjust Broi[ Burner Air Adiustment
Shutter on Models with a Broiler Drawer,
if Necessary
Determine if the bottom burner flames are
burning properly.
[] Adjust Broil Burner Air Adjustment
Shutter on Models with a Broiler Drawer,
if Necessary (cont.)
To Remove the Broiler Drawer:
1. Pull the drawer out until it stops, then
push it back in about one inch.
2. Grasp handle, lift and pull broiler
drawer out.
Loosen
ustment
Metal shield
(on some models)
On some models, remove the metal
shield at the rear of the cavity.
To adjust the flow of air to the burner,
loosen the Phillips-head screw and rotate
the shutter to allow more or less air into
the burner tube.
With the oven bottom removed,
properly adjusted flames should have
approximately 1" blue cones and, if range
is supplied with natural gas, should burn
with no yellow tipping. (With most LP
gas, small yellow tips at the end of outer
cones are normal.} Flames should not
lift off burner ports. If lifting is observed,
gradually reduce air shutter opening
until flames are stabilized.
The shutter for the oven burner is near
the back wail of the oven and behind the
broiier drawer.
36
Page 37

mnstaaiation mnsttuctions
[]
MGHT THE PILOTS (cont.)
[]
Check munition of Surface Burners
Operation of anncooktop and oven burners
shound be checked after pinots have been
nighted (on some modens) and the range
and gas suppny nines have been carefully
checked for neaks.
Standing Pilot Models
Senect a top burner knob and simukaneousny
push in and turn to HI position. The burner
shouM night within a few seconds. Try each
burner in succession until all burners have
been checked.
Electric ignition Models
Select a top burner knob and simultaneously
push in and turn to LITE position. You will
hear a cricking sound indicating proper
operation of the spark module. Once the air
has been purged from the supply lines,
burners should light within 4 seconds. After
burner lights, rotate knob out of the LITE
position. Try each burner in succession until
all burners have been checked.
[] Replace Oven Pa_'ts
After all adjustments are made, replace
the broiler drawer, oven bottom, shelves
and oven door.
Quality of Flames
The combustion quality of burner flames
needs to be determined visually.
(A) Yellow flames--
Call for service
(B) Yellow tips on
outer cones--
Normal for LP gas
(C) Soft btue
fmames--Normat
for naturat gas
if burner flames look like (A), eali for service.
Normal burner flames should look like (g) or
(C), depending on the type of gas you use.
With LP gas, some yellow tipping on outer
cones is normal.
37
Page 38

Installation Instructions
[] LEVEL THE RANGE
[] tnstatl the oven shelves in the oven
and position the range where it wilt be
installed.
Raise
range_ Lower
1,,] m _ Lower
Leg _ range
level:raise's__
range -_
(on some models)
[]
Check for levelness by placing a spirit
level or a cup, partially filled with water,
on one of the oven shelves, tf using a
spirit level, take two readings--with the
level placed diagonally first in one
direction and then the other.
[]
Remove the broiler drawer or kick panel.
See the Care and cleaning of the range
section. The front leveling legs can be
adjusted from the bottom and the rear
legs can be adjusted from the top or the
bottom.
[]
Use an open-end or adjustable wrench
to adjust the teveling legs until the range
is level
[]
After the range is level, slide the range
away from the wall so that the Anti-Tip
device can be installed.
(on some models)
range
[] INSTALL THE ANTI-TIP DEVICE
WARNING -
• Range must be secured with an
approved Anti-Tip device.
Unless properly installed, the range could
be tipped by you or a child standing,
sitting or leaning on an open door.
After installing the Anti-Tip device, verify
that it is in place by carefully attempting
to tilt the range forward.
This range has been designed to meet all
recognized industry tip standards for all
normal conditions.
• The use of this device does not preclude
tipping of the range when not properly
installed.
• If the Anti-Tip device supplied with the
range does not fit this application, use the
universal Anti-Tip device WB2X7909.
Mark the wall where the RIGHT EDGE
[]
of the range is to be located. Be sure
to allow for the countertop overhang
if you intend to install the range next
to cabinets.
Anti-Tip
device
Slotted head
screw
Wallplate [
Approx. 20°
I
I
21/8" . of range
J
[] Locate the outside edge of the device
21/8" toward the center of the range from
the marked edge of the range.
[] Using the device as a template, mark the
position of the hole for the screw.
Marked edge
38
Page 39

mnstaaiation mnstructions
[] iNSTALL THE ANTbTJP DEVICE
[]
For wood construction, drill a pilot hole
at an angle of 20 ° from the horizontal.
A nail or awt may be used if a dritt is not
available.
Mount the Anti-Tip device with the screw
provided.
For cement or concrete construction,
you will need a 1/4" x 11/2"lag bolt and
a 1/2" O.D. sleeve anchor, which are not
provided. Drill the recommended size
hole for the hardware.
Wallboard Back of
range
screw
WHEN ALL HOOKUPS ARE
Make sure aH controls are melt in the OFF
position. Make sure the flow of combustion
and ventilation air to the range is
unobstructed.
CONVERT TO LP GAS (or convert back
to naturam gas from LP)
This range meaves the faetorv set for use
with natural gas. mfVou want to convert to
LP gas, the conversion must be performed
bv a qualified LP gas installer.
The conversion instructions and LP orifices
can be found attached to the range next to
the pressure regulator.
Keep these instructions and the orifices in
case you want to convert back to natural gas.
tnstatt the sleeve anchor into the drilled
hole and then install the tag bolt through
the device. The bolts must be properly
tightened as recommended for the
hardware.
[]
Slide the range against the wall, and
check for proper installation by grasping
the front edge of the cooktop and
carefully attempting to tilt the range
forward.
39
Page 40

Beforeyoucall forservice...
Troubleshooting -tips
Save time and money! Review the charts on the following
pages first and you may not need to call for service.
Possible Causes What To Do
Topburners do not light Plug on range is not completely *
or do not burn evenly inserted in the electrical outlet.
Burner hole or slits on the side *
of the burner may be clogged.
Improper burner assembly. * Make sure the buruer parts are iustnlled correctly.
Make sure electrical plug is plugged into a live,
properly gmtmded outlet.
I_,emove tile burne_ (on models with standard twin
buruel_) or burner heads and caps (on models with
sealed burue_5) and clean them with a sewing needle
or twist-fie. Make sure you do not enlmge tile holes.
On sealed burner models, check and dean tile electrode
_ll'e_l t()Y bt/l'ned-_)u filed 01" grease.
Seetile Careand cleaningof therangesecdou.
Drip pans (on some models) " Make sure tile drip pans are installed correcdv.
are not hastalled correctly.
Pilot(s) is (are) not lit * See tile Light the Surface Burner Pilots section in tile
(on stmldhag pilot models). InstallationInstructions.
Burnerflames veq hnproper air to gas ratio. " If range is connected to LP gas, coutnct tile I/e_ou
large oryellow who iustnlled your range or made tile couve_iou.
Surface burnerslight The oven gas shut-off valve " To check tile oven gas shut-off _dve on sealed burner
but oven does not may have accidentally been models, remove tile broiler drawer or kick panel
moved during clemlhag or (see tile Careand cleaningofthe range sectiou) and
movhag, look fin" tile gas shut-off lever at tile back of tile l'auge.
4O
showncbsed
PULLTOOPEN.
Sealed burnermodels
To check tile oven gas shtlt-ofl \alve on standard twin
bm'ner models, raise tile cooktop and look fin" tile
gas silt]t-off lever at tile extreme right rear corner,
(Standing pilot models do not have a gas shtff-off wdve
on tile regulatm:) Follow tile directions in box A or B
that match yore" regulator _'pe.
Standardtwinburner models Standardtwin burnermodels
Page 41

www.GEAppliances.com
ii ii Possible Causes What To Do
Clock does not work Plug on range is not completely * Make sure electrical plttg is plugged into a live,
inserted in the electrical outlet, properly grouuded outlet.
A fuse ha your home may be • Replace tile fl/se or reset tile circuit breaker:
hlm_a or the circuit breaker
tripped.
Oven controls improperly set. • See the Using the clock and timer section.
Fooddoes notbake Oven controls improperly set. * See the Using the oven section.
or roastproperly
Shelf position is incorrect. * See the Using the oven section.
Incorrect cookware or cookware * See the Using the oven section.
of hnproper size being used.
Oven thermostat needs * See the Adjust the oven thermostat--Do it yourself! section.
adjustment.
Clock not set correctly. * See the Using the clock and timer section.
Almnhmm foil used improperly * See the Care and cleaning of the range section.
ha the oven.
Oven bottom not securely * See the Installation of the range sectiou.
seated ha position.
Food does not Oven conlrols improperly set. * See the Using the oven section.
broil properly Oven door mad/or broiler drawer * See the Broiling section.
not closed.
Improper shelf position * See the Broiling guide.
being used.
Food behag cooked ha a hot pan. * Llse the broiling pan m_d grid that came with w)tu"
rauge. Make sure it is cool.
Cookwa_e not suited for broiling. * Use the broiling l)aU m_d grid that came with your range.
Alumhmm foil used on the * See the Using the oven section.
the broiling pan mad grid has
not been fitted properly mad
slit as recommended.
Oven bottom not securely * See the Installation of the range section.
seated in position.
Oven temperature Oven thermostat * See the Adjust the oven thermostat--Do it yourself! section.
too hot or too cold needs adjustment.
Oven light does not work Light bulb is loose or defective. * Tighten or replace the btdb.
Plug on range is not completely * Make sure electrical plug is plugged into a live, properly
inserted ha the electrical outlet, grotmcled outlet.
Oven notheating up Pilot is not lit (on standing * See the Light the Oven Pilotsectiou in the installation
pilot models). Instructions.
4/
Page 42

Beforeyoucall forservice...
Troubleshooting -tips
Possible Causes What To Do
"Crackling" or This is the sound of the * This is normal.
metal heating and cooling
during cooking.
Rainbow effectin This is caused by the heat • This is normal.
the oven window treatment applied to the
(onsome models) oven window.
Power outage, Power outage or surge. * Reset tile clock.
clock flashes
Strong odor An odor from the hastdation * This is temporary.
around the h_side of the oven
is normal for the first few times
the oven is used.
hnproper air to gas ratio. • At!just oven burner ;fir shuttel:
Fan noise A cooling fan may automatically • This is normal. The cooling tim _611 turn off and on.
turn on mad off to cool
internal parts.
42
Page 43

GE Service Protection Plus '_'
GE, a imme recog_fized _;odd_;kte fbr q_mlhy' and depeildabHhy, offers }(m
Service Protectio_ } h_s --comp_ ehe_s_ e protecti(m o_ all yore" appliai_ces--
No Matter What Brand!
Benefits Include:
* Backed by GE
* All brands covered
. U_imited service calls
. _ parts and labor costs included
* No out-of-pocket expenses
* No bidden deductibles
* One 800 nnmber to call
Yim wi]] be completely satisfied wit]] oLlr service [:)rotectiom_ or vol_ may reql_est _r_)_r member back
o_ the remaim_im_g x'ab_e of }'oily tom, tract. No ql_estiom_s asked. It's that simple.
Protect velar rdHgerato_; dishwasher; washer a_/d d_ye_; raN_ge, TVI VCR al_d mlach more--any brand!
Pbas there's m_oextra charge ti)r emergel_cy service m_d ]o_* mol_tb]y fi_la_ci_g is a_ai]ab]e. Eve_ icemaker
coverage a_d %od spoilage protectiol_ is oftered_ '_)_ ca_ rest eas}, ki_owi_g that a]] vo_r w_bmb]e
bo_sebo]d prod_cts are protected agai_st expel_sive repairs.
for more
:_\[I /minds < )_(t, Iq:_ to 90_ _m_ old, in ib_ < m6m ntM _,,S,
We'tl CoverAny Appliance.
Angwhoro. Angtfmo.
_ (Jill hel_
Please place in envelope and mail to:
General Electric Cempanf
Warranty Registration Department
P.O. Box 3215{)
Louisville, KY 40232-215{)
43
Page 44

Consumer Product Ownership Registration
Deal Customer:
Thank you for purchasing our product and thank you for placing your confidence in us.
_a/e are proud to haxe you as a customer'.
Follow these three steps to protect your new appliance investment:
Complete and mail
your Consumer
Product Ownership
Registration today.
Itave the peace ot
mind of knowing we
can contact you in
the unlik(ly excnt of
a satctv modification.
After mailing the
registration below,
More this docllIIlent
in a sad place, h
contains in/orlnation
you will need should
you require service.
Our service mmfl)er is
800.GE.(LM¢_S
(800.432.2737).
Model Number Serial Number
I I
Important: If you did not get a registration card with your
product, detach and return the form below to
ensure that your product is registered, or register
online at www.GEAppliances.com.
Consumer Product Ownership Reg
Read your Owner's
Manual carefldlv.
It will help you
operate your new
appliance properl}.
, I
Model Number Serial Number
Mr. Ms. M_s. Mi,_
Fil,'st ] I L;_slI
Nam< I I I I I I I I I Nalne I I I I I I I I I I I I
Street I
Address I I I I I I I I I I I I I I I I I I I I I I I I
Ap*#I , , , , , , , I Eq_3ailA(I(lr,'_U
Zip I
* Please proxide your emlail address to receive, via e-mail, discounts, special ollbr'_ and other important
communications h-ore GE Appliances (Gig\).
[ Check her,:, if you do not wmlt to receixe communications fi-om G1LVs carcfillly selected paltner'.
FAILI JRE TO COMPI]{TE AND RETI JRN TIIIS C_\1)..1) DOES NOT DIMINISII Y()[ R
W.\I_ \N'IY RI(;IlTS.
44
GEConsumer Prodlmts
Ge#erai Efectdc Compa_ly
LotgsvilI_,gentucky
www.GEAppliatlces.com
6E App#ances
For more intbrmation about G1LVs privacy and dala usage polio?; go to w_w.(;EAppliances.com and
click on 'Primary Policy" or call 81,q).626.2224.
I
I
Page 45

Accessories.
Looking For Something More?Youcan find these accessories and many more at www.GEAppfiances.com, or
call 800.626.2002(during normal business hours). Have your model number ready.
! ii¸
i ii _ii_ i I
iiiiiii i
Drip Pans
Oven Racks Broiler Pan Cleaner
Light Bulbs Knobs
Grates
Surface Burners & Caps
Tired of discolored racks? Wishing you had exua-heaxT-duty oven rocks?
NOW AVAILABLE for your range:
(;E's innovative, self-cleanable porcelain-coated oven racks!
• Heaxy Duty
• Durable
• Able m be cleaned in a self-cleaning oven
Visit www.GEAppliances.com f_)r more information.
45
Page 46

GEGasRangeWarranty.(ForcustomersintheUnitedStates)
All warranty service provided by our Factory Service Centers,
or an authorized Customer Care®technician. Toschedule service,
on-line, 24 hours a day, visit us at www.GEAppliances.com, or
carl 800.GE.CARES(800.432.2737).
Staple your receipt here.
Proof of the original purchase
date is needed to obtain service
under the warrant_
GE Will Replace:
Any part of the range which tifils due to a detect in materials or workn_anship. During this
Fromthedateof the
originalpurchase
Service trips to your home to teach you how to use
the product.
Improper installation, delivery or maJntenm_ce.
Failure of the product if it is abused, misused,
or used for other than the intended purpose or
used commerciaJly.
This warranty is extended to the original purchaser and any succeeding owner for products purchased for home
use within the USA. In Alaska, the warranty excludes the cost of shipping or service cafls to your home.
full one-year warran#/, GE will also pro_ide, free of charge, all labor and in-home service to
replace the defective part,
Replacement of house fuses or resetting of circuit
breakers.
Damage to the product caused by accident, f'we, floods
or acts of God.
h_cidentaJ or consequentiaJ damage caused by possible
defects with this applimlce.
Damage caused after delivery.
Some states do not allow the exclusion or limitation of incidental or consequential damages. This warranty gives
you specific legal rights, and you may also have other rights which vary from state to state. Toknow what your
legal rights are, consult your local or state consumer affairs office or your state's Attorney General
Warrantor."General Electric Company.Louisville,KY 40225
46
Page 47

GEGasRange Warranty.(Forc.stomersinCanada)
All warranty service provided by our Factory Service Centers
or an authorized Customer Care®technician. For service,
call 1.800.361.3400.
Camco Will Replace:
Anypart of the range which fifils due to a defect in materials or wm&manship, During this
Fromthedateof the
originalpurchase
Service trips to your home to teach you how to use
the product.
hnproper h_staJlation, delivery or maintenance.
Failure of the product if it is abused, misused,
or used for other thm_ the intended purpose or
used commerciaJly.
full one-year warrant, (;amco will also provide, free of charge, all labor and in-home serxice to
replace the defecfixe part,
Staple your receipt here.
Proofof the original purchase
date is needed to obtain service
under the warrant_
Replacement of house fuses or resetting of circuit
breakers.
Dmnage to the product caused by accident, fire, floods
or acts of God.
Incidental or consequential dmnage caused by possible
defects with this applimlce.
Dmnage caused after delivery.
I WARRANTOR IS NOT RESPONSIBLE FOR CONSEQUENTIAI, DAMAGES. ]
I Warrantor: (:AM(',() IN(:. ]
47
Page 48

ConsumerSupport.
gEAppliancesWebsite www.GEAppliances.com
Have a question or need assistance with your appliance? Try tile GE Appliances X_'ebsite 24 hom_ a day,
any day of the year'. For greater convenience and faster service, you can now download Owner's Manuals,
order parts, catalogs, or even schedule service ondine. You C[IXl [llso "Ask O/xY Weax/xof EN)erts _'''
your questions, and so much more...
ScheduleService
Expert GE repair sexs,ice is onlx one step away fl'om xour doox: Get on-line and schedule your service at
_our, comenience 24 hom_ any da) of tile )ear! Or call 800.GE.CARES (800.432.2737) during nomml
business houx_. In Canada, call 1.800.361.3400.
www.GEAppliances.com
RealLifeDesignStudio www.GEAppliances.com
GE SUl)ports the IJni\'ex_al Design concept--l)roducts, services and environments that can be used by
people ot all ages, sizes and capabilities. We recognize the need to design fin" a wide range of physical and
mental abilities and impaimmnts. For details of GE's lJnivex_al Design applications, including kitchen
design ideas for people with disabilities, check out o/xx"Website today Fox"the hearing impaired, please call
800.TDD.GEAC (800.833.4322). In Canada, contact: Managex; Coxlsuxner Relations, Camco Inc.,
1 Factox_' I,ane, Suim 310, Moncton, N.B., El(: 9M3.
ExtendedWarranties www.GEAppliances.com
Purchase a GE extended warx'ant_ and learn about special discounts that are a_ailable while your warranla,
is still in effect. You can i)urchase it on-line an) time, or call 800.626.2224 during nomml business hom_.
GE (_onsuxner Home Set\ices will still be there after your warrant) expires. In Canada, call 1.800.461.3636.
PartsandAccessories www.GEAppliances.com
Individuals qualified to sex_'ice their own appliances can have parts or accessories sent directly to their
homes (VISA, MasterCard and Discover cards are accepted). Order on-line today, 24 hom_ evei_,' day or
by phone at 800.626.2002 during nomml business hom_.
Instructions contained in this manual coverprocedures to be performed by any user.Other servicing generally
should be referred to qualified service personnel Cautionmust be exercised, since improper servicing may cause
unsafe operation. In Canada,please consult your yellow pages foryour local Camco number.
ContactUs www.GEAppliances.com
If you are not satisfied with the service you receive ti'om GE, contact us on our _'ebsite with all the details
including your phone numbex; or write to: Genex'al Managex; Customer Relations, GE Appliances,
Appliance Park, Ixmisville, KY 40225. In Canada, to: Managex; ConstlilxeY Relations, (_mlco Inc.,
1 Factoxa, I,ane, Suim 310, Moncton, N.B., El(; 9M3.
RegisterYourAppliance www.GEAppliances.com
Register your new applimlce on-line--at yollr €onYenience! Tixnel) l)x'odtxct registration will allow for
enhanced communication and prompt service Hxlder the terms of_otxr warx'axltv should the need arise.
You may also mail in the pre-pxinted registration card included in the I)ackin°_ material.
Printed in Mexico
This book is printed on recycled pape_
 Loading...