

Page 1
contents
If-g?
........,.7.—,.-....
.—-—
~—----=—--.-.=-=-:=-=-.----a=--
—
...-
..
G
—
Anti-TipBracket
ApplianceRegistration
CareandCleaning
ClockandTimer
ControlPanel
Features 6
FlooringUnder Range
Leveling
Lift-UpCooktop
Modeland SerialNumbers 2
Oven 8
AirAdjustment
Baking,BakingGuide 10,11
BroilerPanand Rack
Broiling,BroilingGuide 13
ControlSettings 8
DoorRemoval 15
Light;BulbReplacement
OvenBottomRemoval
OvenTimer 9
Preheating 10,H
Roasting,RoastingGuide 12
3,5
14-18 S&etyInstructions
14 Burners
14
19
17
9,17
16
roblemSolver
2
9
5 ControlSettings 7
5
epairService
t
SurfaceCooking
BurnerGrates 15
CookwareTips 8
DripPans 15
FlameSize
LightingInstructions
Warranty BackCover
21
22
2-5
7,8
15
7
7
Shelves 8,17
VentDuct
MoclelJCd3S18GEJ
GEAppBaRces
EF@bfiT6
@l“
9
Gl!hswetd3MeP
wwi2&200fl
3+5W%Y7___-
~~q.k
qgs ‘- -_
Page 2
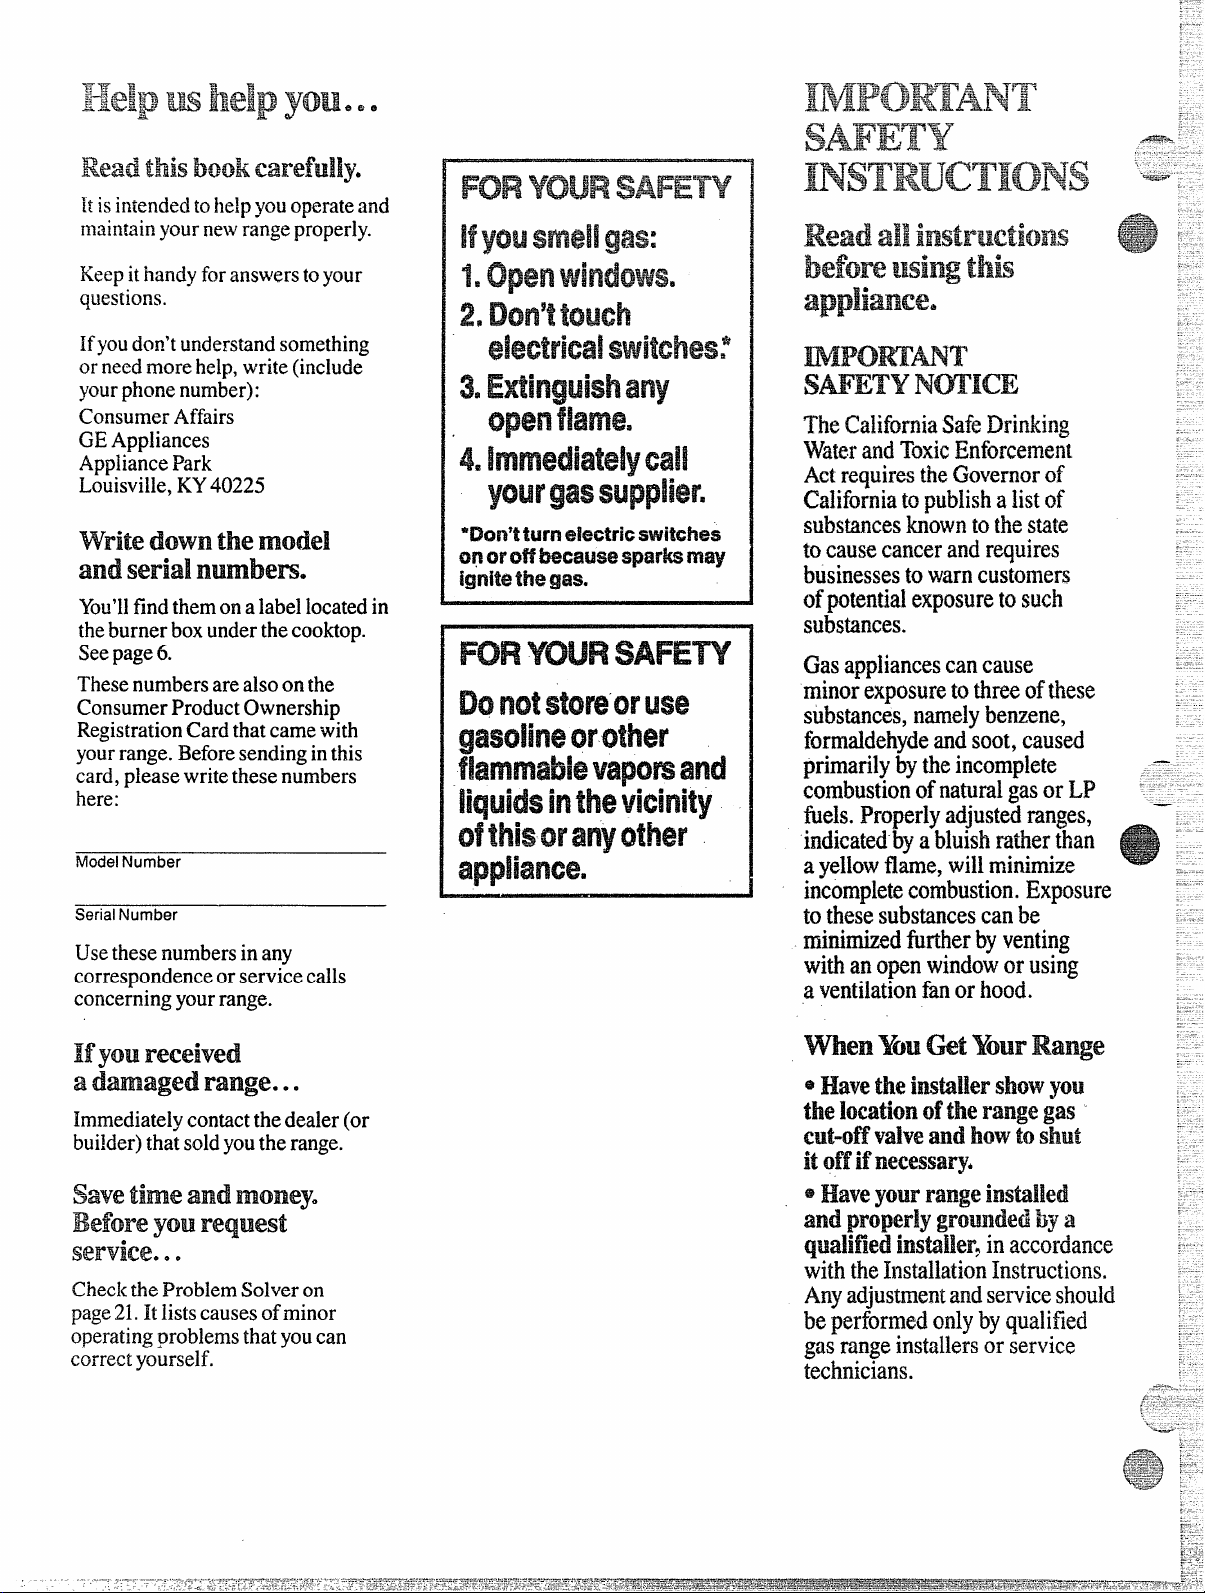
Readthisbookcarefully.
his intendedtohelpyouoperateand
maintainyOt.Nnewrangeproperly.
Keepithandyforanswerstoyour
questions.
Ifyoudon’tunderstandsomething
orneedmorehelp,write(include
yourphcmenumber):
ConsumerAffairs
GEAppliances
AppliancePark
Louisville,KY40225
Vvritedown themodel
andserialnmbem*
You’llfindthemonalabellocatedin
theburnerboxunderthe cooktop.
Seepage6.
Thesenumbersarealsoonthe
ConsumerProductOwnership
RegistrationCardthatcamewith
yourrange.Beforesendinginthis
card,p~easewritethesenumbers
here:
Model Number
Serial Number
Usethesenumbersinany
correspondenceorservicecalls
concerningyourrange.
TheCaliforniaSafeDrinking
WaterandToxicEnfot=cemefit
Actrequiresthe&WfXXIOrof
CWbmiatop.ibbshiiM of
substancesknowntothestate
tocausecancerandrequires
businesses{0warncustomers
ofpotentialexposuretosuch
substances.
(3wappliancescancause
minorexpOsUEetOthrtx ofthese
substances,namelybewene,
formaldehydeandsoot,caused
primarilybytheincomplete
combustionofnaturalgasorU?
fuels.Properlyadjustedranges,
indicatedbyabluishratherthan
ayel~owflame,willminimize
incompletecombustion.Exposure
tothesesubstancescanbe
minimizedkther byventing
withanopenwindowor using
aventilationfimor hood.
Ifyou received
a damaged range . .
Immediatelycontactthe dealer(or
builder)thatsoldyoutherange.
savetime
andmoney.
Beforeyw,llrequest
service. o e
ChecktheProblemSolveron
page21.Itlistscausesofminor
operatingproblemsthatyoucan
correctyourself.
a Havetheimb!lershowyol%
the
mltkmoftherangegas
cut-off‘vim%?andb%%’toshut
it
offifnecessary’.
Haveyourrangeinsblied
@
andproperlygroundedby24
qualifiedins@ller.inaccordance
.
withtheInstallationInstructions.
Amyadjustmentandserviceshould
beperformedonlybyqualified
gasrangeinstallersor service
technicians.
Page 3
*
BeSwe yw- rdnga isi.wrrdy
:lcljtl$tgdby*
teck2Hician
‘typiid $&i?%(Niattlrai(?!-m) on
ql;aiirledW%-icr
[Ir i%lsti%l}~rforthe
whichit isto bewwd.Mwr
rdngecan13cconvertedforuscon
ei[hcrtypeofgas.
*Afterprt}longeduseofa
range,highfloorten?pmtflras
mayresultandmanyfloor’
coveringswillnot$Vithstind
thiskindofuse.Neverinstallthe
rangeovervinyltileorlinoleum
thatcannotwithstandsuchtypeof
use.Neverinstallitdirectlyover
interiorkitchencarpe~ing.
@I%3%xuseyore’ appiiallctfor
$Yarn3ingoriktati~lgtheFQQfil*
PIWIOi&d Use Oftk IWH#3
wkhwt wkqwitc
he hazardous.
@Do not use WWWon
}~entilationcan
gram
fires,Neverpickupa flaming
pan.Turnoffburner,then =
smotherflamingpanby
completelywithwellfitting
pan
covering
lid,cookiesheetorflattray.
Flaminggreaseoutsideapancan
beputoutbycoveringwithbaking
sodaor.ifavailable,amukipq)ose drychemical
Or fOiMIl type
fireextinguisher.
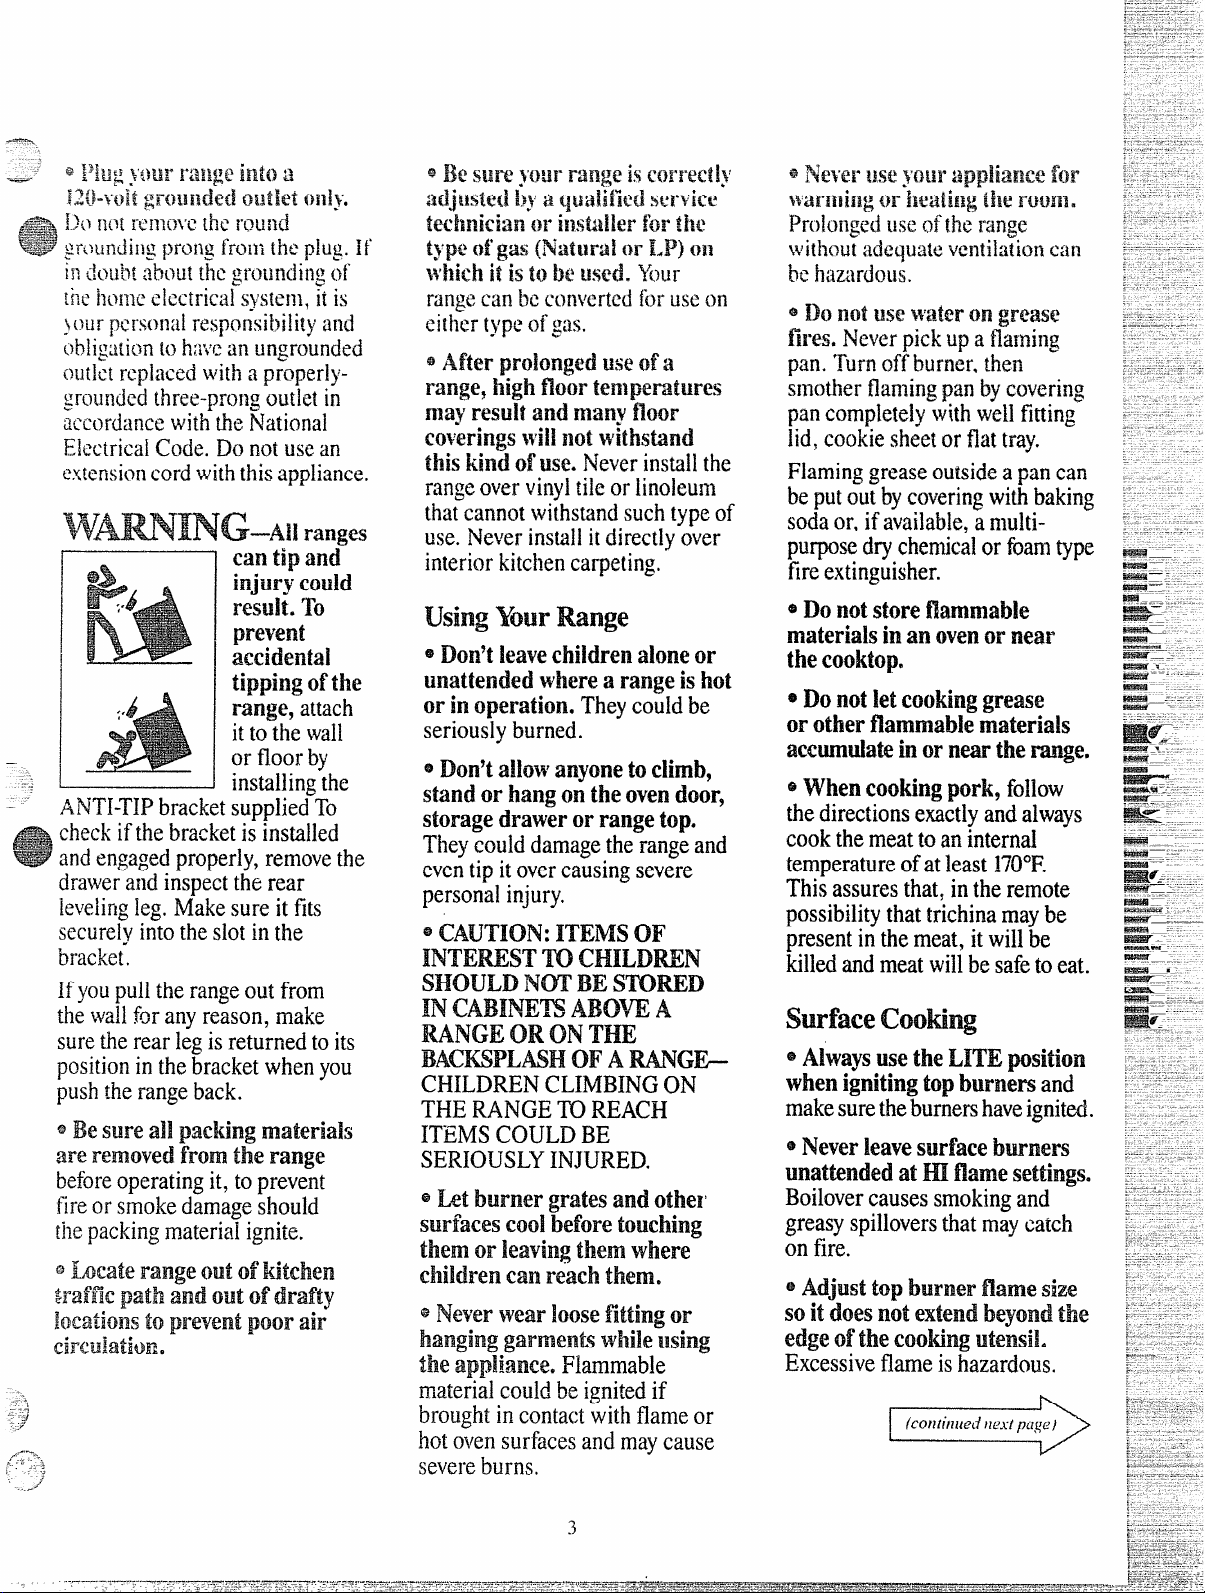
tipping(#the
range,attach
ittothewail
—
PldT1-TWbracketsupplied”To
- checkifthebracketisinstalled
I%!B7andengagedproperly,removethe
drawerandinspecttherear
levelingleg.Makesureitfits
securelyintotheslotinthe
bracket.
Hyoupulltherangeoutfrom
thewallforanyreason,make
suretherearlegisreturnedtoits
positioninthebracketwhenyou
pushtherangeback.
eBemm?aupaetingmaterials
areremovedfromthe range
beforeoperatingit, toprevent
fireorsioke d~mage~hould
!12t3packingmateriaiignite.
9Lwate rangeoutofkitchen
%%3ffkpath and
kx%kmi
eiwuiatiom
toplwent poorair
or
fiOO~ by
installin~the
witofdrafty
usingYiM.IrRange
@Don’t
unattendedwherearangeishot
orinoperation.Theycouldbe
seriouslyburned.
*Don’taliuwanyonetoclimb,
standorhangm theovendoor9
storagedrawerorrangetop.
Theycoulddamagetherangeand
eventipitovercausingsevere
personalinjury,
@CAUTION:ITEMSOF
INTEWST m cHILDmN
SHOULDNOTBEsmRED
IN~A~~~~ A~(_)~ A
RANGEORONTHE
BAC~PLMH OFARAJW&
CHILDRENCLIMBINGON
THERANGETOREACH
ITEMSCOULDBE
SERIOUSLYINJURED.
eLetburner gratesand Othel’
surfacescoolbeforetouching
themorleavingthemwhere
childrencm reachthem
eNeverweal!”kmsefittingor
hanginggarmentiwhileusing
theappliance.Flammable
materialcouldbeignitedif
broughtincontactwithflameor
hotovensurfacesandmaycause
severeburns.
leavechikh=endoneor
@DonotstoreNammab!e
materialsinanovenornear
thecoddope
*DonotMcookinggrease
motherflammablematerials
accumulateinorneartherange.
~Whencoding pork,follow
thedirectionsexactiyandalways
cookthemeattoaninternal
temperatureofatleastM)*F.
Thisassuresthat,intheremote
possibilitythattrichinamaybe
presentinthemeat,itwillbe
killedandmeatwillbesafetoeat.
Swface cooti~
@A!waysusetheMIX
psition
whenignitingtopburners and
makesuretheburne~haveignited.
@Neverleavesurfaceburners
unatkndedatH flamesettings.
Boilovercausessmokingand
greasyspilloversthatmaycatch
onfire.
@Adjusttopburnerflamesize
soitdoesnotextendbeyondthe
edgeofthecooMngutensil.
Excessiveflameishazardous.
3
Page 4

suse0311s’dry pathkk&---
_--—
---
Ill(vist01’ (imppotMckrs 011ha
w%cesmy resultin burnsfrcml
steam.DoMMletpotholderscome
nearopentlanleswhenlifting
utensils.Dom-ituseatowelori!Xher
bulkyckXhinplaceofapotholder,
s Tonlinimizethe ~ssibility
ofbilrnsrignitionofflammable
materials,andspillage,turnthe
cookwarehandlestowardtheside
orbackoftherangewithout
extendingoveradjacentburners.
*Al}vaysturn si.wfxeburnerto
OFFIbefmeremovingut4msiL
eCarefuliywatchfbodsbeing
friedatHIflamesetting.
@.Neverblockthevents(air
openings)oftherange.They
providetheairinletandoutlet
whichisnecessaryfortherange
tooperateproperlywithcorrect
combustion.
9Donot usea wokon the
cookingsurfaceifthe wokhasal
!rWMMlmetalringwhichis
placedoverthehmer grateto
support$hewok.Thisringacts
asaheattrapwhichmaydamage
theburnergrateandburnerhead.
Also,itmaycausetheburnerto
workimproperly.Thismaycause
acarbonmonoxidelevelabove
thatallowedbycurrentstandards,
resultinginahealthhazard.
@Foodsforfyyingshouldbeas
dryaspossible.Frostonfrozen
foodsormoisturecmfreshfoods
cancausehotfattobubbleupand
oversidesofpan.
@useleastpossibleamountof
!!%foreffectiveshaIlowor de$p-
fatfrying.Fillingths pantoofull
offatcancausespilloverswhen
foodisadded.
@u’aeombinatio~~d’Omor
fatswillbewiwilillfrying,stir
[ogedwrbeforeheating.oras
fatsmeltslowly.
*.MwaysheatM shMy9and
watchasitheats.
@Ust deepfat thernlometer
Ivheneverp~ssibietoprevent
overheatingfa!beyondthe
smokingpoint.
@
Useproperpans&--Avoid
pansthatareunstableoreasily
tipped.Selectutensilshavingflat
bottomslargeenoughtoproperly
containfoodavoidingboilovers
andspillovers,andlargeenough
tocoverburnergrate.Thiswill
bothsavecleaningandprevent
hazardousaccumulationsoffood,
sinceheavyspatteringorspillovers
lefionrangecanignite.Usepans
withhandlesthatcanbeeasily
graspedandremaincool.
~Useody glasscookwarethat
isrecommendedforuseongas
burners.
@Keepallplasticsawayfrom
topburners.
@lb avoidthepossibilityofa
burn,alwaysbecertainthatthe
controlsforallburnersareat
OFFpositionandallgratesare
cod beforeattemptingto
removeagrate.
%Whenflamingfoodsunder
thehood,turnthefanoff.The
fan,ifoperating,mayspread
theflame.
@IfrangeisIocatedneara
window9donotuselongcurtains
whichcouldblowoverthetop
burnersandcreateafirehazard.
~IfYOUsme]lgas9turnoffthe
gastotherangeandcallaqualified
servicetechnician.Neverusean
openflametolocatealeak.
@Standawayfromthe range
whenopening
m?$&x-Md’ahot
oven.Thehotah orsteam
whichescapescancamebums
tohand%faceador eyes,
@Placeovenshelvesindesired
positionwhileoveniscod.
@Wilingoutshelftotheshelf
stopisaconvenienceinlifting
heavyfoods,Hisalsoa
precautionagainstburnsfrom
touchinghotsurfacesofthe
doororovenwalk.
~Don’theatunopenedfood
containersintheoven.Pressure
couklbuildupandthecontainer
couldburstcausinganinjury.
@Don’tmealuminumfoil
anywhereintheovenexceptas
describedinthisbook.Misuse
couldresultina firehazardor
damagetotherange.
e UWonly glass cookwarethatis
recommendedforuseingas
ovens.
e whenusingcookingor
roastingbagsinoven9follow
themanufacturer’sdirection.
~Alwaysremovebroilerpan
fromtheovenassoonasyou
finishbroiling.Greaseleftinthe
pancancatchfireifovenisused
withoutremovingthegreasefrom
thebroilerpan.
@Whenbroiling,ifmeatistoo
closetothefhmYthefatmay
ignite.Trimexcessfattoprevent
excessiveflare-ups. .
-.
.
--—
4
Page 5
Wlooringunderthe
Range
Yourrange,me somanyother’
IBouseholditem, isheavymd can
Settk!intosoftmm-coverings
suchascushionedvinylor
emp%ing.Whenmovingtherange
onthistypeofflooring,usecare.
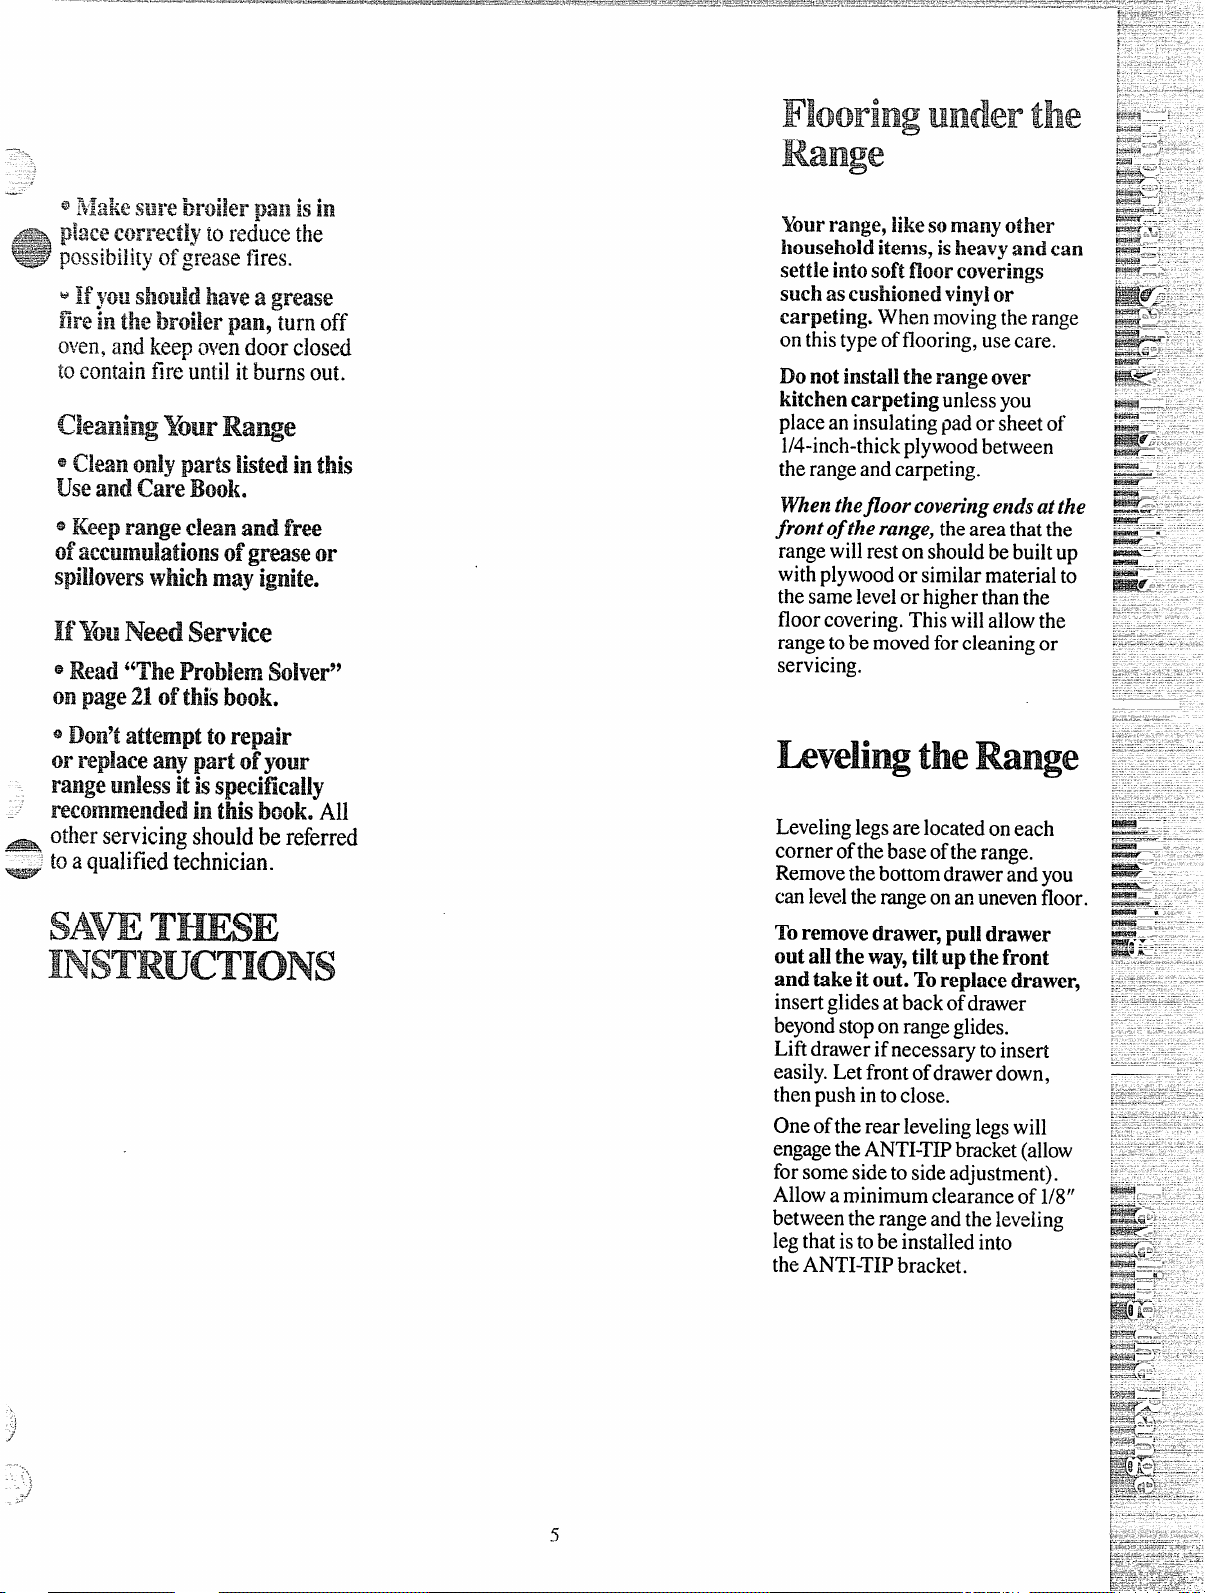
Donot imtailtherangeover
kitchencarpetingunlessyou
placeaninsulatingpadorsheetof
l/4-inch-thickplywoodbetween
the rangeandcarpeting.
= toaqwdifiecltechnician.
—
SAWTWE
INSTRUCTIONS
Whenthefioorcoven”ngends
atthe
front oftherange,theareathatthe
rangewillrestonshouldbebuiltup
withplywoodor similarmaterialto
the samelevelor higherthanthe
floorcovering.Thiswillallowthe
rangetobemovedforcleaningor
servicing.
Levelinglegsarelocatedoneach
cornerofthebaseoftherange.
Removethe bottomdrawerandyou
canleveltherangeonanunevenfloor.
TOremovedrawer,pulldrawer
outalltheway,tiltupthe front
and takeitout. Toreplacedrawer,
insertglidesat back ofdrawer
beyondstoponrangeglides.
Liftdrawerifnecessarytoinsert
easily.Letfrontofdrawerdown,
thenpushinto close.
Oneoftherearlevelinglegswill
engagetheANTI-TIPbracket(allow
forsomesidetosideadjustment).
Allowaminimumclearanceof1/8”
betweentherangeandtheleveling
legthatistobeinstalledinto
theANTI-TIPbracket.
,
/’
:-,,
,J-
...
.
Page 6
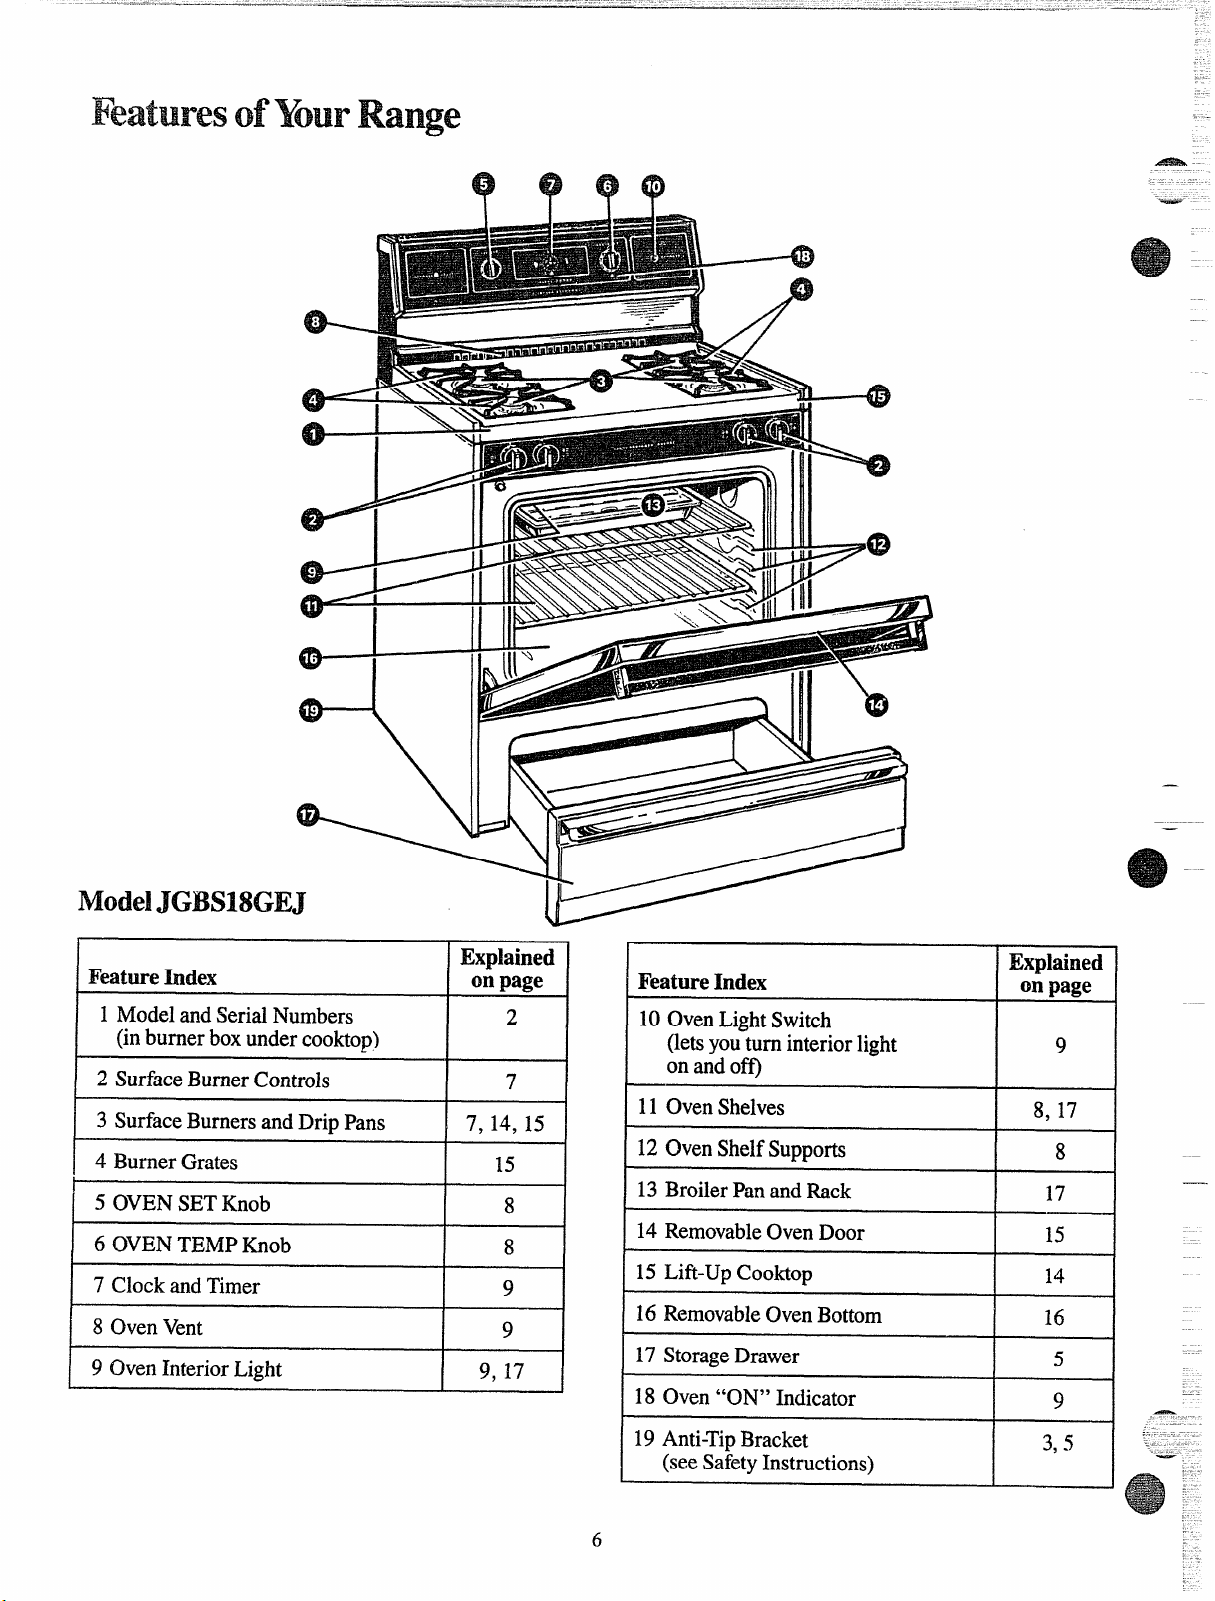
FeaturesofYourRange
B \\ \.—
.-
Ill
8(X3J
Feature Index
1 ModelandSerialNumbers
(inburnerboxundercooktop)
2 SurfaceBurnerControls
I
I 3 SurfaceBurnersandDrip Pans
I 4 BurnerGrates
5 OVENSETKnob
6 OVENTEMPKnob
I 7 ClockandTirner
8 OvenVent
9 OvenInteriorLight
Expbined
on page
2
7
I 7,14,15 I
15
8
8
9
9
9, 17
—
—
Feature Index
10OvenLightSwitch
(letsyouturninteriorlight
onandoff)
11OvenShelves
12OvenShelfSupports
I
13BroilerPanandRack
14 RemovableOvenDoor
15Lift-UpCooktop
16RemovableOvenBottom
17 StorageDrawer
18Oven“ON” Indicator
Explained
cmpage
9
8, 17
I
8
17
15
14
16
5
9
19Anti-TipBracket
(seeSafetyInstructions)
6
3,5
Page 7

-AFi?i%%=
~-
AutonlaticIgnition
%ur surfaceburnersareiighted
byelectricignifion,elin~inatingthe
needforstandingpilotlightswith
constantlyburningflames.
In caseofa poweroutage,youcan
lightthest.wfiaceburnersonyour
rangewi~ha match.Holda lighted
matchtotheburner,thenturnthe
knobtothe LITEposition.
extremecaution when lighting
burners thisway.
Surfhceburnersinusewhenan
electricalpowerfailureoccurswill
continuetooperatenormally.
SurfaceBurnerControls
Knobsthatturn thesurfaceburners
onandoffarelocatedonthelower
controlpanelandare markedasto
whichburnerstheycontrol.
LightaSurfaceBurner
TO
Use
Normalburner operation:
Whena burnerisfirstturnedon,
youmayheara blowingorhissing
soundfor30to45secondsor until
theburnerheatsup.Thisnormal
soundisdueto improvedinjection
ofgas andair intotheburner.Puta
panontheburnerbeforelightingit,
or adjusttheflameto matchpan
sizeassoonas itlights,andthe
blowingor hissingsoundwill be
muchlessnoticeable.
Lifting
Flame wiUbealmost horizontal
and willlift slightlyawayfrom the
burner when the burner is first
turned on. A Mowingor hissing
sound may beheard.
HowtoSdectFlamesize
Theflamesizeona gasburner
shouldmatchthecookwareyou
areusing.
NEVERLETTHEFLAME
EXTENDUPTHESIDESOFTHE
COOKW~. Anyflamehugerthan
thebottomofthe cookwareiswasted
andonlyservestoheatthe handles.
When usingaluminum or
aluminum-cladstainlesssteel
potsand pans, adjusttheflameso
thecircleitmakesisabout1/2inch
smallerthanthebottomofthe
cookware.
When boiling, usethissameflame
size-1/2 inchsmallerthanthe
bottomofthecookware—nomatter
whatthecookwareismadeof.Fbods
cookjust asquicklyata gentleboil
astheydoata furiousrollingboil.
Ahighboil createssteamandcooks
awaymoisture,flavorandnutrition.
Avoiditexceptforthefewcooking
processeswhichneedavigorousboil.
Ess!l
=“
—Tm
- _~
Ega@?a..
E?sB?fr
-
!E==.—
.
~......
=;
Is#ssir
—
-
—–
-.
-
- -–
-
=.
—=
-
-
-
m.- ..
—-
ms.
~
—.
Pushthecontrolknobin andturn
ittoLITE. Youwill hear a little
clickingnoise—thesoundofthe
electricsparkignitingtheburner.
Aftertheburnerignites,turnthe
knobtoadjusttheflamesize.
Flame willstabilize and curve
upwardsafter a burner heatsup or
30to 45secondsafter it isturned
on. The blowingor hissingsound
willstop.
After lightinga burner:
$1Checktobe suretheburneryou
turnedonistheoneyouwanttouse.
e Donotoperateaburnerforan
extendedperiodoftimewithout
cookwareon thegrate.Thefinish
onthegratemaychipwithout
cookwaretoabsorbtheheat.
~ Besuretheburnersandgratesare
cool beforeyouplaceyourhand,a
potholder,cleaningclothsor other
materialsonthem.
When frying or warming foods
in stainlesssteel,cast iron or
enamelware,keeptheflamedown
lower—toabout1/2thediameter
ofthepan.
When frying in glassor ceramic
coo- lowertheflameevenmore.
E;
Page 8

surfacecooking
—
..—
—
0__
—
.Muninum: Medium-weight
cookwareiswcomrnendedbecamek
heatsquicklyandeveniy.Mostfxds
brownevenlyinanaluminumskillet.
tMintmdsin fbodandwaterwillstain
bu~willnotharmaiumim.im.A
quickscourwitha soap-filledwool
padaftereachusekeepsaluminum
cookwarelookingshinynew.Use
saucepanswithtight-fittinglidsfor
cookingwithminimumamounts
ofwater.
CastIron: Ifheatedslowly,most
skilletswillgivesatist%ctoryresuhs.
Enamelware: Undersome
conditions,theenamelofsome
cookswmmaymeit.FMlowcookware
manufacturer’srecommendations
forcookingmethods.
Glass:Therearetwotypesofglass
cookware—thoseforovenuseonly
andthosefortop-of-rangecooking
(saucepans,coffeeandteapots).
Glassconductsheat veryslowly.
Heatproof GlassCeramic: Can
beusedforeither surface or oven
cooking.Xconductsheatvery
slowlyandcoolsveryslowly.
Checkcookwaremanufacturer’s
directionstobesureit canbeused
ongasranges.
UsingYourOveII
Theovenburner and broil
burner on your range are lighted
byekctric ignition.The ovenand
broiler cannot beoperated in the
eventofa powerfailure.
Tolightthe burners, turnthe
OVEN SETandOVENTEMP
knobstothedesiredfunctionand
temperature.Theburnershould
ignitewithin60seconds.
CAUTION:DONOTMAKEANY
ATTEMPI’TOOPERATETHE
ELECI’RICIGNITIONOVEN
DURINGANELECIIUCAL
POWERFAILURE.Resumption
ofelectricalpowerwhenOVEN
TEMPandOVENSETcontrols
areinanypositionotherthanOFF
willresultin automaticignitionof
theovenorbroilerburnerand
couldcauseseverebumsif, at the
time,youwereattemptingto light
theburnerwitha match.
ovencontrols
Thecontrolsforyour oven
aremarkedOVENSETandOVEN
TEMI?Theyare locatedonthe
uppercontrolpanel,oneon each
sideoftheclockandminutetimer.
BROIL—Usethis setting for
broiling.Onlythetop(broil)
burnerwilloperate.
OFF—-Shu~soffpowertotheoven
controls,Ovenwillnotoperate.
TheOVENSETandOVENTEMP
controlsshouldbeturnedtoOFF
whenevertheovenisnotinuse.
The OVENTEMP control
maintainsthetemperatureyouset
fornormalovenoperationaswell
asforbroiling.
For normal ovenoperation, turn
theknobtothedesired‘temperature
whichis markedin 25° increments.
Itwillnormallytake30to 60
secondsbeforethe flamecomeson.
Aftertheovenreachestheselected
temperature,theovenburnercycles
—offcompletely,thenm with‘a
fill flame-to keeptheoven
temperaturecontrolled.
OvenSheIves
....-
“—
—
_
StainlessSteel:Thismetalalone
haspoorheatingproperties,andis
usuallycombinedwithcopper,
aluminumor othermetalsfor
improvedheat distribution.
Combinationmetalskilletsusually
worksatisfactorilyif theyare
usedwithmediumheatasthe
manufacturerrecommends.
TheOVENSETcontrolhassettings
forBAKE,BROILandOFF.When
youturntheknobtothedesired
setting,theproperburneris
activatedforthatoperation.
BAKE-Use thissettingforall
normalovenoperations—for
example,forcookingroastsor
casseroles.Onlythebottomoven
burneroperatesduringbaking.
Theshelvesaredesignedwith
stop-lockssowhenplacedcorrectly
ontheshelfsupports,theywillstop
beforecomingcompletelyoutof
theovenandwillnot tiltwhenyou
areremovingfoodfromthemor
placingfoodonthem.
Whenplacingcookwareona shelf,
pulltheshelfouttothe “stop”
position.Placethecookwareon
theshelf,thenslidetheshelfback
intotheoven.Thiswilleliminate
reachingintothehotoven.
Toremovea shelffromtheoven,
pullitouttothe stopposition,lift
upon frontandpullout.
.-.
--–<
Page 9

ovenWh” lnticator
Lighton uppercontrolpanelglows
whenovenisinoperation;itgoes
outwhentheOVEN SETknobis
iumedto OFF.
Shelfmsitiom
The ovenhasfiveshelfsupports—
A(bottom),B,C,DandE(top).Shelf
positionsforcookingaresuggested
onBakingandRoastingpages.
oven
The light comesom~
~. Use
theswitchontheuppercontrol
paneltoturnthelightonandoff
whenthedoorisclosed.
Light
.
~,ss PA;~T
OvenVent
Yourovenisventedthroughducts
attherearoftherange(seepage6).
Donotblocktheseductswhen
cookingintheoven—itisimportant
thattheflowofhotairIkomtheoven
andfreshairtotheovenburnerbe
uninterrupted.Avoidtouchingthe
ventopeningsor nearbysurfaces
duringovenorbroileroperation—
theymaybecomehot.
@Vent
surfaces
touchthem.
~~an~es of~~ andpansonthe
cooktopmaybecome~otifleft
tooclosetothevent.
~DOnotleaveplasticitemson
thecooktop—theymaymelt
lefttooclose to the vent.
openingsandnearby
maybecomehot. Do not
if
TheClockandTimerarehelpful
devicesthatserveseveralpurposes.
m42ad
TosettheClock,pushintheknob
andturntheclockhands to the
righttothecorrecttime.Thenlet
theknoboutandcontinueturning
toOFF.
Timer
TheTimerhasbeencombinedwith
therangeclock.Useit totimeall
yourprecisecookingoperations.
You’llrecognizetheTimerasthe
pointerwhichisdifferentincolor
thantheclockhands.
Minutesaremarkedup to30 and
hoursaremarkedupto4 onthe
centerringoftheclock.
_——
OvenMoisture
Asyourovenheatsup,the
temperaturechangeoftheair
intheovenmaycausewater
dropletstoformon thedoor
glass.Topreventthis,openthe
ovendoorforthefirstminute
ofovenheat-uptoletthemoist
airout.
Toset the Timer, turntheknobto
theleft,withoutpushingin, until
thepointerreachesthenumberof
minutesyouwanttotime.
Attheendofthesettime,a
buzzersoundstotel~youtimeis
up.
Thrntheknob,withoutpushing
in, untilthepointerreachesOFF
andthebuzzerstops.
!m!lE.-.
—.
~
~
—.
~-— -–
mmw-
en--
.—
m...
Page 10

HowtosetYourRange
——
h’ Bating
L Positiontheshelfor shelvesin
theoven.
2. Closeovendoor.TurnOVEN
SETknobto BAKEandOVEN
TEMPknobtodesiredtemperature.
Preheatovenforatleast15minutes
ifpreheatingisnecessary.
3. Placefoodinovenoncenter
ofshelf.Allowatleast2 inches
betweenedge ofbakewareandoven
wallor adjacentcookware.
Ifcookingontwoshelvesatthe
sametime,placeshelvesabout4
inchesapartandstaggerfoodon
them.
4. Checkfoodfordonenessat
minimumtimeonrecipe.Cook
longerifnecessary.Switchoff
heat andremovefood.
mheati~
Preheatingisveryimportantwhen
usingtemperaturesbelow225”F.
andwhenbakingfoodssuchas
biscuits,cookies,cakesandother
pastries.
Preheatingisnot necessarywhen
roastingor forlong-timecookingof
wholemeals.
sheIfPositiom
Mostbakingisdoneonthesecond
shelfposition(B)fromthebottom.
Whenbakingthreeor fouritems,
usetwoshelvespositionedonthe
secondandfourthsetsofsupports
(B& D) frombottomofoven.
Bakeangelfoodcakeson firstshelf
position(A)frombottomofoven.
BaMw
Followatestedrecipeand
@
measurethe ingredientscarefully.
Ifyouareusingapackagemix,
followlabeldirections.
mps
@Ifmoistureisnoticeableonthe
frontoftheovenorontheblackglass
doorwhenfirstturningontheoven,
leavethe ovendoorajarforafew
minutesoruntiltheoveniswarm.
@Donotopenthe ovendoorduring
abakingoperation-heatwillbelost
andthebakingtimemightneedto
beextended.Thiscouldcausepoor
bakingresults.If’youmustopenthe
door,openitpartially-only 3or4
inches—andcloseitasquicklyas
possible.
~Donotdisturbtheheatcirculation
intheovenwiththeuseofaluminum
foil.If foilisused,placeasmall
sheetofit, about10by12inchesat
themost,onalowershelfseveral
inchesbelowthefood.Donotplace
foilontheovenbottom.
Comon Bakingproblems
andPossibleSolutions
Pm
Burningaroundedges
o
Oventoofill; avoidovercrowding.
~ Edgesofcrusttoothin.
@Incorrectbakingtemperature.
Bottomcrustsoggyandunbaked
~
Allowcrustand/orfillingtocool
sufficientlybeforefillingpie shell.
Filling maybe toothinorjuky.
e
e
Fillingallowedtostandinpieshell
beforebaking.(Fillpieshellsand
bakeimmediately.)
eIngredientsandpropermeasuring
affectthequalityofthecrust.Usea
testedrecipeandgoodtechnique.
Makesuretherearenotinyholesor
tearsinabottomcrust.“Patching”
apiecrustcouldcausesoaking.
fil~ingrunsover
Pie
Top and bottomcrustnotwell
e
sealedtogether.
@Edgesofpie crustnotbuiltup
highenough.
@Toomuchfilling.
eChecksizeofpieplate.
Pastryistough;crust notflaky
@Toomuchhandling.
@Fattoosofiorcutintoo fine.
Rolldoughlightlyandhandleas
littleaspossible.
mm
(like riseshigherononeside
~Batterspreadunevenlyinpan.
~oven shelvesnotlevel,
eUsingwarpedpans.
eIncorrectpansize.
Cakescrackingontop
eOventemperaturetoohigh.
eBattertoothick, followrecipe
orexactpackagedirections.
@Checkforpropershelfposition.
eCheckpansizecalledforinrecipe.
eImpropermixingofcake.
Cakefalls
eToomuchshortening,sugaror
liquid.
eCheckleaveningagent,baking
powderorbakingsodatoassure
freshness.Makeahabittonote
expirationdatesofpackaged
ingredients.
eCakenotbakedlongenoughor
atincorrecttemperature.
@Ifaddingoiltoacakemix,make
certaintheoil isthetypeand
amountspecified.
Crustishard
Checktemperature.
e
eCheckshelfposition.
Cakehassoggylayerorstreaks
atbottom
Undermining ingredients.
o
eShorteningtoosoftforproper
creaming.
TOO muchliquid.
s
COOKl(Efl&
Doughycenter;heavycruston
surface
echeck
eCheckshelfposition.
e
carefullyasgiveninreliablerecipe
oronconveniencefoodpackage.
eFlatcookiesheetswillgivemore
evenbakingresults.Don’tovercrowd
foodsonabakingsheet.
eConveniencefoodsusedbeyond
theirexpirationdate.
temperature.
FO11OW bakinginstructions
Browningmorenoticeableon
oneside
e
Ovendoornot closedproperly,
checkgasketseal.
eCheckshelfposition.
BIS(XJ’HW
#s#i!E%.
—
—
—
10
Page 11

—
-.
—
BakingGuide
1.l%eheatingisvery important
whenusingtempemtwresbekw
ZWF, WMI-WINXIbaking foodssuch
Mbiscuits?coohiq cakes andother
pastries.
15minutes.
Preheating
roas[ingor forlong-timecookingof
wholemeals.
Preheatthe ovenforat least
isnotnecessarywhen
2. Aluminum pansconductheat
quick?y.Formostconventionalbaking,
light,shinyfinishesgive best results
becausetheyhelppreventoverbrowninginthetime ittakesfor heatto
cookthe center areas.Werecommend
dull(satin-finish)bottomsurfiaccsof
pansfor
surethoseareasbrowncompletely.
cakepansandpieplatestobe
3. Darkornon-shinyfinishes,also
glassandPyrocerw@cookware,
generallyabsorbheatwhichmayresult
indry,crispcrusts.Reduceovenheat
25”FJiflightercrustsaredesired.
Preheatc&t ironfir bakingsome
f~s forrapidbrowningwhenfboclis
added.
Food
Ihwd
Biscuils(%-in.thick)
Coffeecake
Cornbreadormuffins
Gingerbread
Muffins
Popovers
Quickloafbread MetalorGlassLotifPans B
Yeastbread(2loaves) Metal orGlassLoafPans
Plainrolls ShinyOblongor MuffinPans A,B
Sweetrolls ShinyOblongor MuffinPans
Cakes
(withoutshortening)
Angelfood AluminumTubePan A
Jellyroll MetalJellyRollPan B 375°-4000 10-15
Sponge
Cakes
Bundtcakes MetalorCeramicPm A, B
Cupcakes
Fruitcakes
Layer
Layer,chocok+tc ShinyMetalPmwith B
Loaf
Cookies
Brownies
Drop CookieSheet B,C
refrigerator
<oiledorsliced CookieSheet B,C
Fruits,
3therDesserts
3akedapples GlassorMetalPans
;ustard
%ddings,rice GlassCustardCupsor
!ndcustard
‘ies
‘ro~en FoilPanon CookieSheet A
fieringue spreadtocrustedges B 325°-3500
)necrust
‘WOcrust
‘ash-yshell
4isce11aneous
Iakedpotatoes Scton OvenShelf
cailopcddishes
~oufiles
—
Cookware Positions Temperatures
ShinyCookieSheet B,c 400°-475”
ShinyMetalPanwith
satin-finishbottom
CastIronor GlassPan B 400°-4500 15-40 Preheatcastironpanforcrispcrust.
ShinyMetal Panwith B
satin-finishbottom
ShinyMetalMuffinPwts
DeepGlassorCastIronCups B
MetalorCeramicPan
ShinyMetalMuffinPans
MetalorGlassLoafor A, B
TubePan
ShinyMetalPanwith B 350°-3750
satin-finishbottom shelvesBandD.
satin-finishbottom
MetalorGlassLoafPans B
MetalorGlassPans
CookieSheet
GlassCustardCupsor
Casserole(setinpanofhot water)
Casserole
Glassor Satin-finishMetalPan A,B
GlassorSatin-finishMetalPan B 400°-4250
GlassorSatin-finishMetal
Glassor Mctd Pan
GlassPan
Pan
Shelf
B.A
A, B 400°-4250
A, B 375°-4250 45-60
B,A
A 325°-3500
B
B,C
B,C
A,B,C
B
B
B
A, B,C
A, B,C 325°-3750
B
Oven
350°-4000 20-30
350° 45-55
375° 45-60 Orbakeat450°F.for25 minutes,thenat
350°-375” 45-60 Darkmetalorglassgivesdeepest
375°-4250
350°-3750
325°-3750
325°-3500 45-65
350°-3750 20-25
275°-3000
350°-3750
350° 40-60
325°-3500
350”-400°
400°-4250
375°-4000
350°-4000 30-60
300°-3500
325° 50-90 Cookbreadorricepuddingwithcustard
400°-4250
400°-4250
450° 13-16
325°-4000
300°-3500
‘llme,
Minutes Comments
15-20 Canned,refrigeratedbiscuiL$take2to 4
20-30 Decreaseabout5minutesformuffinmix.
10-25
~-J-3(3
30-55
45-60
2-4hrs. Use300°F.andShelfBforsmallor
20-35 Ifbakingfourlayersuse
25-30
25-35 Barcookiesfrommixusesametime.
10-20 UseShelfCand increasetemperature
6-12
7-12
30-60 Reducetemperatureto300”F,forlarge
45-70 I.argepiesuse400°F.andincrease time.
15-25 Toquicklybrownmeringueuse400”F.for
45-60 Custardfillingsrequirelowertemperature,
40-60
60-90 Increasetimeforlargeamountor size.
30-60
30-75
minuteslesstime.
350”F.for 10to15minutes.
browning.
Forthinrolls,ShelfBmaybeused.
Forthinroils,ShelfBmaybeused.
Twopiecepanisconvenient.
Linepanwithwaxedpaper.
Pdperlinersproducemoremoistcrusts.
individualcakes.
25 to50°F.formorebrowning.
custard.
base80to90minutes.
9to 11minutes.
longertime.
11
Page 12

.Roasting
Roasting is cookingbydryheat.
l%dcr meator poultrycanbe
roasteduncoveredin youroven.
Roastingtemperatures,which
shmdcibelowandsteady,keep bastethemeat.Selectapanas
Step2: Check weightofroast.
Placemeatfat-side-upor poultry
Step4: Mostmeatscontinue(0
cookslightlywhilestandingafter
breast-side-uponroastingrackina beingremovedfromtheoven.For
shallowpan.Themehingfatwill
rareor mediuminternaldoneness,
youmaywishtoremovemeatfrom
spatteringtoa minimum.When closetothesizeofmeatas possible. theovenjust beforeitisdoneif i~is
rbasting,-itisnotnecessarytosear, (Broilerpanwithrackisagood
baste.cover,oraddwatertoyour panforthis.)
meat.Roastingiseasy,justf~llow thesesteps:
Step 1.Positionovenshelfat
secondfrombottomposition(B) andapproximatecookingtimes.
Step3:‘XhrnOVENTEMPto
desiredtemperature.Checkthe
RoastingGuidefortemperatures
.-
forsmallsizeroast(3to 5lbs.)and
atbottomposition(A) forlarger
roasts.
tostand~0to20 minuteswhileyou
makegravyorattendtootherf~s.
If nostandingisplanned,cook
meatto suggestedtemperature.
mown
Roasts
Frozenroastsofbeef,pork,
lamb,etc., canbestartedwithout
thawing,butallow15to25 minutes
perpoundadditionaltime(15
minutesper poundforroastsunder
5pounds,moretimeforlarger
roasts).
Thawmostfrozenpoultrybefore
roastingtoensureevendoneness.
Somecommercialfrozenpoultry
canbe cookedsuccessfullywithout
thawing.Followdirection~given
onpacker’slabel.
* --
Roasting(hide
TYPQMeat
Tendercuts;rib,highquality
sirlointip, rumportop round*
Lamblegorbone-inshoulder*
Vealshoulder,legor loin*
Porkloin,ribor shoulder*
Ham,pre-cooked
Ham,raw
*Forbonelessrolledroastsover6-inches
thick,add5to 10minutesperlb.totimes
givenabove.
Poultry
Chickenor Duck
Chickenpieces
Turkey
Oven ApproximateRoasting‘IIme
‘Ikmperature Doneness inMinutesperI%und
3to5-lbs. 6to8-lbs.
325° Rare: 24-30
325°
325° Well Done:
325° Well Done:
325° ToWarm: 18-23minutesperlb,(anyweight)
325° WellDone:
325°
3’75°
325° WellDone:
Medium:
WellDone:
Rare: 21-25
Medium:
WellDone:
Well !30ne:
Well Done:
29-33 22-26
35-45
~5-30
30-35 28-33
35-45
3545
Under10lbs.
27-35
3to5-lbs.
35-40 30-35
30-35
10to15-lbs.
16-22
18-22
28-33
20-23
24-28
30-40
3040
10tol$lbs.
24-27
Over5Ibs,
OverKlbs.
13-19
Internal
Temperature“F
130°-140°
150°-160°
170°-185°
130°-1400
150°-160°
170°-185°
1700-180°
170°-180°
115°-1250
170°
185°-1900
185°-190°
Inthigh:
185°-190°
12
Page 13

Broiling
Broilingiscookingfoodbydirect
heatfromabovethefood.Your
rangeisdesignedforwaist-high
broiling.A speciallydesigned
broilerpanandrackailows
drippingfattodrainawayfromthe
foodsandbekept awayfromthe
highheat of thegasflame.
Themmdoorshould beclosed
during broiling.
L If meathasfator gristlenearthe
edge,cutverticalslashesthroughit
about2 inchesapart,butdon’tcut
intomeat.Werecommendthatyou
$rimfattopreventexcessive
smoking,leavingalayerabout
118-inchthick.
2. Arrangefoodonrackand
positionthebroilerpanonthe
appropriateshelfintheoven.
Placingfoodclosertoflame
increasesexteriorbrowningof
food,butalsoincreasesspattering
andthepossibilityoffatsandmeat
juicesigniting.
3.Closetheovendoor.
4. TurnOVENSETknobto BAKE
ORBROIL.Formostfoods,turn
OVENTEMPknobto BROIL.
Note:Chickenandhamare broiled
atalowersettinginorder tocook
foodthroughwithoutoverlxowningit.
5.Turnmostfoodsonce during
;ooking(theexceptionis thinfillets
offish;oiloneside,placethatside
kwn onbroilermckandcookwithout
:urninguntildone).Timefoodsfor
aboutone-halfthetotal cooking
time,turnfood,thencontinueto
cooktopreferreddoneness.
6. TurnOVENTEMPknobto
OFF.Removebroilerpan from
ovenandservefoodimmediately.
Leavepauoutsidetheoventocool.
BmiliQ Tips
I.JsetongstoturnmeatOver— ~Steaksandchopsshouh!lbeat
~
piercedm;at losesjuices.
BroiIi~ Gtide
Quantity
Food
Bacon
GroundBeef
Well Done
BeefSteaks
Rare
Medium
WellDone
Rare
Medium
WellDone
Chicken(450°)
BakeryProducts
Bread(%oast)or
ToasterPastries
EnglishMuffins
Lobster‘l%ils
(6to8-02.each)
Fish 1-lb.fillets %to
HamSlices(450C
Precooked
PorkChops
WellDone
LambChops
Medium
Well Done
Medium
WellDone
Wieners,
similarprtcooked
sausages,
bratwurst
ancilor
Thickness
%-1b.(about 8
thinslices)
l-lb.(4patties)
%to %-in.thick
l-in. thick
(1 to 1%-lbs.)
I%-in. thick
(2tO2VNbs.)
1whole
(2to2YAbs.),
splitlengthwise
24 slices
1pkg.(2)
2-split
2-4
%-in.thick
1-in.thick
2(% in.)
2(l-in. thick),
about1lb.
2(1 in.)
about10to12-02.
2(1%in.),
about1 lb.
l-lb. pkg.(10)
Shelf
WsitionMinute
D 5
c 9-10
c 9
c
c 13
B,C
B,C 15
B 25
B 25-30
D 2-3
D 3-6
c 14-17
c
B,C
c
c 13-14
B
B 10
B
B 17
C, D 6
kmst1inch thick-forbest broiling
results.Panbroilthinnerones.
1stSide
Time,
12
10
5
8
10-12
8
10
?ndS]de
‘Eme,
Minutes
942
16-18
23-28 Reducetimesabout5to 10
I/j-z
Donot
turn
over.
5-7
11-13
4-7
4-6
12-14
1-2
Comments
Zy+
Arrangeinsinglelayer.
Spaceevenly.Upto9 patties
takeaboutsametime.7-8
7
Steaksless
6-8
throughbeforebrowning.
8-9
Panfryingisreeommendcd,
6-7
Slashfat.
minutespersideforcut-up
chicken.Brusheachsidewith
meltedbutter.Broilwithskin
sidedownfirst.
Spaceevenly.PlaceEnglish
muffinscut-side-upandbrush
withbutterifdesired.
Cutthroughbackofshell,spnxid
open.Brushwithmeltedbutter
beforeandafterhalftime.
Handleandturnverycarefully.
5
Brushwithlemonbutterbefore
andduringcookingifdesired.
Preheatbroilertoincrease
browning.
Increasetimes5-10minutesper
8
sidefor 1%-inchthickor home
cured.
Slashfat.
Slashfat.
10
Ifdesired,splitsausagesinhalf
lengthwise;cutinto5 to6-inch
pieces.
than l-inch cook
Page 14

CareandCleating
Propercareandcleaningare
importantsoyour range willgive
youefficientandsatisfactory
service.FO11OWthesedirections
carefullyin caringforittohelp
assuresafeandpropermaintenance.
BESURE
ELECTRICPOWER
1SOFFBEFORECLEANING
ANTPARTOFYOURRANGE.
controlrends
It’sagoodidea towipethecontrol
panelscleanaftereachuseofthe
oven.Fora morethoroughcleaning,
the controlknobscanbepulledoff
theknob stemsand,onmodelsso
equipped,the glassuppercontroi
panelcanbecleanedonbothsides.
Ir-----”’””” ~
TOremovethe glasspanel:
L Removethescrewoneachend
ofthebacksplash.
2. Removethemetalstripsoneach
endthatholdtheglassin place.
3. Removetheclockknobandnut
securingthe lightswitch.
4. Carefullyremovetheglassand
placeiton a smooth,flatsurface.
Cleanitwithmildsoapandwater,
rinsewithcleanwateranddrywith
asoftcloth.
abrasivecleansers,strongliquid
cleanersor ovencleanersonglass
orenamelcontrolpanelsurfaces—
theywilldamagethefinish.
Caution:Donotuse
OuterEnamelRnhh
Whentherangeiscool,washthe
enamelfinishwithmildsoapand
waterora mildabrasivecleanser
appliedwithadampcloth.Rinse
withcleanwateranddrv witha soft
cloth.If youwish,occa~ionally
applyathincoatofmildcleaning
waxtohelpprotectthefinish.
Toavoidmarringthesurfaceof
therangeandtopreventitfrom
becomingdull,don’tslideheavy
pansacrossit. If you spillfoods
withalotofacidorhighsugar
content,cleanthemupas soonas
possible.Ifallowedtoremain,
thesefoodscouldcausea dullspot.
Also,neveruseharshabrasive
cleansers.Theycouldpermanently
damagetheenamelsurface.
Lift-up(3Joktop
Cleantheareaunder thecooktop
often.Built-upsoil,especially
grease,maycatchfire.
Tomakecleaningeasier,theentire
cooktopmaybe liftedupand
supportedbylockingarmsthat
catchandholdthetopwhenit’sall
thewayup.
Besure
beforeraisingthecooktop.
removethegrates,graspthefront
sidesofthecooktopandlift.
Aftercleaningunderthecooktop
withhot,mildsoapywateranda
cleancloth,putthecooktopbackin
place.Liftup alittletorelease the
lockingarmsandpushthemin
whileguidingthetopbackdown.
Becarefu~nottoPinchyourfingers.
allburnersareturnedoff
Then
Gratesshouldbewashedreguiarly
and,ofcourse,afterspilkwers.
Washtheminhot, soapywaterand
rinsewithcleanwater.Dry the
grateswithacloth—don’tputthem
backon therangewet.
Togetridofburned-onfood,soak
thegratesina slightlydiluted
liquidcleanser.
Althoughthey’redurable,the
grateswillgraduallylosetheir
shine,regardlessofthebestcare
youcangive them.Thisisdueto
theircontinualexposuretohigh
temperatures.
Donotoperateaburnerforan
extendedperiodoftimewithout
cookwareon thegrate.Thefinish
onthegratemaychipwithout
cookwaretoabsorbtheheat.
Whenreplacinga
pairofgrates,
theirregular
sidesshould
interlockin
themiddleas
shownatright.
M+ “
_—_
—
14
Page 15

;- DripI%ns
RimgeTopBurner’s!
RemovableownDow’
01
,&--,@-’-”
/-+” /“
Removethegratesandliftoutthe
chromedrippans.Washthemin
hot,soapywater.Rinsethemwith
clean,hotwaterandpolishthem
drywitha cloth.Neveruse
abrasivecleaneror steel wool—
they’llscratchthesurface.Instead,
soakthedrippansforabout20
minutesin slight[ydilutedliquid
cleanseror mildsolutionof
ammoniaandwater(1/2cupof
ammoniatoonegallonofwater).
After soaking, washthem inhot,
soapywater.Rinsewithcleanwater
—
andpolishwithaclean,soflcloth.
—
Whenreplacing
drippans,the
notchontherear
panandthenotch
cmthefrontpan
shouldmeetin
themiddle.
Thehoiesintheburnersmustbe
keptcleanatalltimesforproper
Theovendoor is removableto
maketheinteriormoreaccessible.
ignitionandaneven,unhampered
flame.
Cleantheburnersroutinelyand
especiallyafterbadspillovers
whichcouldclogtheseholes.
Burnersliftoutforcleaning.
Opentheovendoorfullyand
removethetwoPhillipsscrewsthat
holdthedoortothehinges.Then
closethedoor to theautomaticstop
position(atabout3 inchesopen),
andliftthedoorstraightupandoff
thehinges.(Duetothelargeamount
ofinsulationandtheconstruction
ofthedoor,itisheavy.)
Note:‘13v0screwsholdeachburner
pairinplacetokeepthemfrom
wobblingaroundduringshipment.
Removeanddiscardtheshipping
screwsandlifttheburnersupand
out.Thisdisengagesthemfromthe
u
mountingbracketundereach
burnerpair.
Toremoveburned-onfood,soak
theburnerinasolutionofaproduct
usedforcleaningthe insideofcoffee
+- makers.Soaktheburnerfor20to
30minutes.Ifthefooddoesn’t
rinseoffcompletely,scrubitwith
soapandwateror amildabrasive
cleanserandadampcloth.
Donotattempttocleanburnersin
anautomaticdishwasher.Loosened
foodsoilcanclogburnerholes,
andthecausticactionofthe
dishwasherdetergentcandamage
theburnerheads.
Beforeputtingthe burnerback,dry
itthoroughlybysettingitin awarm
ovenfor30minutes.Thenplaceit
backin therange,makingsureitis
properlyseatedonthemounting
Note:Careshouldbetakennotto
placehandsbetweenthespring
hingeandtheovendoorframeas
thehingecouldsnapbackand
pinchfingers.
Toreplacethedoor,makesurethe
hingesareinthe “out”position.
Positiontheslotsinthebottomof
thedoorsquarelyoverthehinges.
Thenlowerthe doorslowlyand
evenlyoverbothhingesatthesame
time.If hingessnapbackagainst
theovenframe,pullthembackout.
Whenthedoorisinposition,open
itfilly andinsertthetwoPhillips
screws.
EHK.
——
—.
-
-
mlEa7-
—.
—.
—
-
~
~.
——
~
—.
—.
—
-
-
-.
-
-
--- .
iiiii: =
bracketandislevel.
Page 16

.—
.-
——
RemoldableovenBottom
Youcanremovetheporcelain
enamelovenbottomforcleaning
outsidetheoven.
TOremove
Removetheovenshelves.
L
2. Removethetwoknurledholddownscrewsattherearoftheoven.
Iftheyaretootighttoremoveby
hand, usea coinor screwdriver.
theovenbottom:
NmelainovenInterior
Withpropercare,the porcelain
enamelfinishontheinsideofthe
oven—top,bottom,sides,backand
insideofthedoor—willstaynewlookingforyears.
Letrangecoolbeforecleaning.
Werecommendthatyouwearrubber
gloveswhencleaningtherange.
Soapandwaterwillnormally
dothejob. Heavyspatteringor
spilloversmayrequirecleaning
witha mildabrasivecleanser.
Soapy,wetmetalpadsmayalsobe
used.Donotallowfoodspillswith
ahighsugaror acidcontent(such
asmilk,tomatoes,sauerkraut,fruit
juicesor piefilling)toremainon
thesurface.Theymaycausea dull
spotevenaftercleaning.
Householdammoniamaymakethe
cleaningjob easier.Place1/2cupin
a shallowglass or potterycontainer
ina cold ovenovernight.The
ammoniafbmeswillhelploosen
theburned-ongreaseandfood.
If necessary,youmayusea caustic
cleaner.FO11OWpackagedirections.
Cautionsaboutusing
spray-onovencleaners:
~Donot sprayontheelectrical
controisarids-witches(onmodels
soequipped)becauseitcould cause
a shortcircuitandresultinsparking
or fire.
notallowafilmfromthe
*Do
cleanertobuilduponthetemperature
sensingbulb—itcouldcausethe
oventoheatimproperly.(Thebulb
islocatedatthe topoftheoven.)
Carefullywipethebulbcleanafter
eachovencleaning,beingcarefhl
nottomovethebulbasa changein
itspositioncouldaffecthowthe
ovenbakes.
notsprayanyovencleaner
@Do
ontheovendoor,handlesorany
exteriorsurfaceoftheoven,wood
orpaintedsurfaces.Thecleaner
candamagethesesurfaces.
-saw
—
—
3. Toliftouttheovenbottom,
placeyourfingersintheslots-inthe
bottomandlifttherear oftheoven
bottomupandbackuntil theoven
bottomisclearofthe lipatthefront.
Thenlifithebottomupandout.
Toreplacetheovenbottom,place
itintheovenwiththebackraised
about6to 8 inchesoruntilyou can
insertthefrontoftheovenbottom
underthehold-downlipatthefront.
Thenpushthebackoftheoven
bottomdownfullyintoplaceon the
metalflangesandinserttheholddownscrews.
DOl?~ placea sheetofaluminum
foilonthebottomoftheoven.If
YOGdo,yourfoodsmaynotcook
properly.Theovenfinishmaybe
damaged.Andtheremaybean
increaseinheatontheoutside
surfmesoftheoven.
16
Page 17

BroilerPan&Rack
—————
QverIshelvesmaybe cleaned with
a mild
abrasivecleanserfollowing
manufacture’sdirections.After
cleaning,rinsetheshelveswith
cleanwateranddrywitha clean
To removeheavy,burned-on
cloth.
soil,soapymetalpadsmaybeused
followingmanufacturer’sdirections.
After scrubbing, wash with soapy
wa$er,rinseanddry.
ovenLightBum
Thelightbulbislocatedinthe
upperleftcorneroftheoven.
Beforereplacingthe bulb,
disconnectelectricpowertothe
rangeatthe mainfuseor circuit
breakerpanelor unplugthe range
fromtheelectricoutlet.Letthe
bulbcoolcompletelybefore
removingit. Donottoucha hot
bulbwitha dampclothas thebulb
willbreak.
—
After broiling, removethe broiler
rack anticarefully pour off the
grease. Washand rinse the pan
and rack in hot, soapywater.
If
foodhasburnedon, sprinklethe
broilerrackwhilehotwithdetergent
andcoverwithwetpapertowelsor
adishcloth.Burned-onfoodswill
thensoakloosewhilethemealis
beingserved.
Thebroilerpanandrackare
designedto allowdrippingfatto
drainandbe keptawayfromthe
highheatofthebroiler.Donot
covertherackwithaluminumfoil
or usethepanwithouttherack
becausetheexposedfatmay
catchfire.
Donotstorea soiledbroilerpan
andrackin theoven.
--
—=
—
--
-
~.
-
—
——
-
~––.
—.
—.
Page 18

CleaningGuide
Note:Letrange/ovenpartscool beforetouchingorhandling.
‘PART
BroilerPanandRack
ControlKnobs
OutsideGkss Finish
Metal,including
BrushedChrome
OuterEnamel
Finish*
I%intedSurfaces
Shelves
MATERIALS370USE
@SoapandWater
@Soap-Filled
PlasticScouringRad
~
~ MildSoapandWater
@SoapandWater
Soapand Water
~
~ I%perTwel
e Drycloth
@SoapandWater
* SoapandWater
~ SoapandWater
e Soap-FilledScouringPad
* PlasticScouringPad
ScouringPad
GENERALI)MUICHCMW
Drainflit,coolpanandrackslightly.(Donotletsoiledpanandrackstandin
oventocool.)Sprinkledetergent
spreadclothorpapertoweloverrack.Letpanand rackstandfora fewminutes.
scour if necessary.Rinseand dry.OPTION:Clean pannndrackin
Wash;
dishwasher.
Pulloff knobs.Washgentlybutdonotsoak.Dryandreturncontrolstorange.
Cleanoutsideofcooledblackglassdoorwitha glasscleanerthatdoesnot
containammonia.Wmhotherglasswithclothdampenedinsoapywater.Rinse
andpolishwithadrycloth.Ifknobsareremoved,do notallowwatertorun
downinsidesurfaceofglasswhilecleaning.
Wash,rinseandthenpolishwithadrycloth.
abrasives,ammonia,acids,orcommercialovencleanerswhichmaydamage
thefinish.
Avoidcleaningpowdersorharshabrasiveswhichmayscratchtheenamel.
Ifacidsshouldspillontherangewhileitishot,useadrypapertowelorcloth
towipeuprightaway.Whenthesurfacehascoded, washandrinse.
Forotherspills,suchas fit smatterings,etc., washwithsoapandwaterwhen
cooledandthenrinse.Polishwithadxycloth.
Usea mildsolutionofsoapandwater.Donotuseany harshabrasivesor
cleaningpowderswhichmayscratchormarsurf%ce.
Shelvescanbesoakedindishwasherorcleanedbyhandusingsoapandwater.
Rinsethorougldytoremoveanysoapaftercleaning.
onrackandpan.Fillpan withwarmwaterand
DONOI’USEsteelwool,
SurfaceBurner
Grates
Chrome-Piated
DripRms
SurfaceBurners
InsideOvenDoor*
OvenLiner ~SoapandWater
RemovablePorcelain
EnamelOvenBottom*
*SpWageofmarinades,fruitjuices,andbastingmaterials containingacidsmaycausediscoloration,soshouldbewipedupimmediately.
totouchhotportionofoven.Whensurfhceiscool,cleanandrinse.CAUTION:Lightbulbscangetwarmenoughtobreakiftouchedwith moist
not
cloth.Whencleaning,avoidwarmlamp.
e Soapand Water
e Soap-FilledScouringPad
(Non-metallic)
e SoapandWater
e Stiff-BristledBrush
e Soap-FNedScouringPad
(Non-metallic)
e SolutionforCleaning
InsideofCoffeeMakers
e Soapand Water
=MildAbrasiveCleanser
oDamp
clOth
eSeebelow
~ CommercialOvenCleaner
@Soap-FilledScouringPad
~ PlasticScouringPad
LiftoutwhenCOOLSoak5to 10minutesifdesiredinwarmsolutionof
dishwasherdetergent.Scourwithmaterials mentionedheretoremovebumedonfoodparticles.
Cleanatsinkor indishwasher.Wipedrip pansaftereachcookingso unnoticed
spatterwillnot“burnon”nexttimeyoucook.Toremove“burned-on”spatters,
useanyorallcleaningmaterialsmentioned.Rublighrlywithscouringpadto
preventscratchingofthesurfkce.
Wipeoffburnerheads.Ifheavyspilloveroccurs,removeburnersfromrange
(seepage15)andsoakthemfor20to30 minutesinsolutionofhotwaterand
productforcleaninginsideofcoffeemakers,suchasDip-Itbrand.Ifsoildoes
notrinseoffcompletely,scrubburnerswithsoapandwaterora mildabrasive
cleanserandadampcloth.Dryburnersina warmovenfor30minutesbefore
returningthemtotherange.
Removeovendoor—seepagelS.DONCYI’placedoorunderrunningwater,or
immerse.UsesamedirectionsforcleaningasforOvenLiner,below.
Coolbeforecleaning.Frequentwipingwithmildsoapandwater(particularly
aftercookingmeat)willprolongtimebetweenmajorcleanings.Rinse
thoroughly.Soaplefton linercancausestains,Forheavysoil,usenon-abrasive
cleanerandfollowlabelinstructions,usingthinlayerofcleaner.Useofrubber
glovesisrecommended.Wipeorrub lightlyonstubbornspots.Wipeoffany
cleanerthatgetsonthermostatbulbfoundinbackoronside,neartopofoven.
Theovenbottompanelcanberemovedforcleaning(seepage16).Usesame
directionsforcleaningasforOvenLinerabove.
T&ecare
18
Page 19

BroilandownB1.umer
Adjwtment Shutters
Air
Repeatedopeningsaridclosings
cancausetheovendoorto work
itse!foutof
mayclose
adjustment. One side
higherthantheother,
andthe doormaynotsealproperiy.
Toadjusttheheightof thedoor:
Removethe door (see page15).
L
2. Witha thin-bladed screwdriver,
turn the screw in the opening at
[hetop of each door hinge. Turn
clockwisetolower,counterclockwise
toraiseeachsideofthedoor.
Airadjustment shutters forthe
broilandovenburnersregulatethe
flowofair totheflame.
Theairadjustmentshutterforthe
top(broil)burnerisintheupper
right-handcornerneartherearwall
oftheoven.
Toadjusttheflowofairtoeither
burner,loosenthePhiilipshead
screwandrotatethe shutterto
allowmoreor lessair into the
burnertubeas needed.
Theflameforthetop(broil)
burnershouldbesteadywith
approximatelyl-inchbluecones
andshouldnotextendout overthe
baffleedges.
—.
-
Eitz?.
3. Replacethedoor,closeit, and
checkalignmentanddoorseal.
The shutterforthebottom(oven)
burnerisnearthebackwallofthe
ovenbehindthestoragedraweror
panelundertheoven.
Todetermineifthebottom(oven)
burnerflameisproper,
theovenbottom(seepage 16)and
theburnerbaffle.Theflameshould
have1/2”to 3/4”bluecones withno
yellowtipping.Whenthebaffleis
backinplace,theflamewillresettle.
remove
KEiHaI
-.
-
.-——.-
m“
IE4Ra.
19
Page 20

ovenTherIllostat
—
Adjtfitment
The temperaturecontrolinyour
newovenhasbeencarefullyadjusted
toprovideaccumtetempemtures.
However,if~hisOVCIIhasreplaced
oneyouhaveusedforseveralyears,
Voumaynoticeadifferenceinthe
~egreeofbrowningor the lengthof
timerequiredwhenusingyour
favoriterecipes.Oventemperature
controlshavea tendencyto“drift”
overaperiodofyearsandsince
thisdriftisverygradual,it isnot
readilynoticed.Therefore,you
mayhavebecomeaccustomedto
yourpreviousovenwhichmay
haveprovidedahigheror lower
temperaturethanyouselected.
Beforeattemptingto havethe
temperatureofyournewoven
changed,besureyouhavefollowed
the bakingtimeandtemperatureof
therecipecarefully.Then,after
youhaveusedtheovena fewtimes
andyoufeeltheovenis toohot
ortoocool,thereisa simple
adjustmentyoucanmakeyourself
ontheOVENTEMPknob.
Pulltheknoboffthecontrolshaft
andlookatthebackside.Thereis
adiscinthecenteroftheknob skirt
witha seriesofmarksoppositea
pointer.
Notetowhichmarkthepointeris
pointing.Tomakeanadjustment,
carefullyloosen(approximately
oneturn),butdo notcompletely
removethetwoscrewsthat holdthe
skirttotheknob.Holdtheknob
bladeinonehandandtheouter
skirtintheotherhand.
Toraisetheoventemperature,
movethe pointerinthedirectionof
thearrowforRAISE.Tolowerthe
temperature,movethe pointerin
thedirectionofarrowforLOWER.
Eachmarkwillchangethe oven
temperatureapproximately20”F.
Wesuggestthatyoumakethe
adjustmentone markfromthe
originalsettingandcheckoven
performancebeforemakingany
additionaladjustments.
Aftertheadjustmentismade,
pressskirtandknobtogetherand
retightenscrewssotheyaresnug,
butbecarefulnot toovertighten.
Re-installknobonrangeand
checkperformance.
Note:Afteranadjustmenthas
beenmade,theOFFandBROIL
positionswillnotline upwith
theindicatormarkonthecontrol
panelastheypreviouslydid. This
conditionis normalandwillnot
createa problem.
—
—
& Noteposition of
pointer to marks
before adjustment
Loosen only the
locking screws
—
—
20
Page 21

_.r,+. -
-- - .-. _*-
.- -. .-=----- --—
-—%-.- ..,* ..- --
.—- - .-T -.>
-.-S
a—s
------
.-
-
43iEz==:k =
-----
._—-..---
—-+.-———.——.——.—..
.4=--A. _
. . ..— ..-.. -—
---:-..
a-w+-: :——-
———-.—
.----
——
.——.-—.
.... .
~~tlestiolls?
useThisProblemSOher
PROBLEM
TOPBURNERS
E@NOT’LIGHT
mm-4 DOES NOT
COOK PROPERLY
CLOCKDOES
NOTWORK
OVENLIGHTDOES
COMEON
NOT
POSSIBLE CAUSEi4NDioR WHAT ‘m l-m
@Makesuretheelectricalplugis pluggedintoalive,properlygroundedpoweroutlet.
*Burnerholescmsideofburnermaybeclogged.Removeandcleanthem.
.
~Burnersnotfittedcorrectlyontomountingbrackets.Removeandreinstali
burnersproperly.
*Makesurethermostatcapillarybulbs(locatedinupperportionofoven)aresecurely
heldbythemountingclips,arenottouchingovensides,andarenotcoatedwithanything.
~Aluminumfoilbeingusedimproperlyinoven.
~Ovenventblockedontopofrange.
*Incorrectcookwarebeingused.Checkeachcookingsectionforcookwaretips.
~Ovenbottomnotsecurelyseatedinposition.
@OVENTEMPknobsetincorrectlyornotturnedon.
@Checkcommonbaking,roastingandbroiling”problernsonpages 10-13.
@JRangeelectricalplugmustbe securelyseatedinalivepoweroutlet.Checkforblown
fhseortrippedcircuitbreaker.
~Bulbmaybelooseorburnedout.
~Electricalplugmustbepluggedintoalivepoweroutlet.
STRONGODOR
@Improperair/gasratioinoven.Adjustovenburnerairshutters-seepage 19.
‘youneed more I-AD.● .Cau,M free:
GfiA1..nswercenter” “ ‘
800.626.2W0
eonswmlerinformationservice
Page 22

IfYouNeedservice
.—
—
TOobtainservice. seeyourwarranty
on the back pageofthisbook.
We’reproud of our service and
wantyou to be pleased. If for some
reasonyou are nothappywith the
service you receive, here are three
stepsto followfor further help.
FIRST,contactthepeoplewho
servicedyourappliance.Explain
whyyouare not pleased.Inmost
cases,thiswillsolvetheproblem.
NEXT,ifyouarestillnotpieased,
writeallthedetails-including
yourphone number-to:
Manager, Consumer Relations
GE Appliances
Appliance Park
Louisville, Kentucky40225
FINALLY, if yourproblem is still
not resolved, write:
Major Appliance
Consumer ActionPanel
20 North WackerDrive
Chicago, Illinois60606
—
—
—
22
Page 23

—
YOURGENERALELECTRICRANGE
WARRANTY
Save proof of original purchase date such as your sales slip or canceik?dcheckto establishwarranty period.
——.—
WHAT1sCOVERED
FULLONE-YEARWARRANTY
Forone year
purc~~se, we will provide,
charge, parts and service labor
in your home to repair or replace
from ciate of original
free of
anyparf offhe rangethat fails
becauseof a manufacturing defect.
WHAT1sNOTCOVEREDesefvi~etmmourhometo
teach you howto usethe product.
Read your Useand Cars
If youthen haveany questions
about operating the product,
please contact your dealer or our
Consumer Affairs office at the
address below,or call, toll free:
GE Answer Center”
800.626.2000
consumer information service
~ Improper installation.
material.
Thiswarranty isextended to
the originalpurchaser and any
succeeding owner for products
purchased for ordinary home use
in the 48 mainland states, Hawaii
and Washington, D.C.In Alaska the
warranty is the same except that it is
LIMITED because you must payto
ship the product to the service shop
or for the service technician’s travel
coststo your home.
Ail warranty service will be provided
byour FactoryService Centers or
byour authorized Customer Care@
servicersduring normal working
hours.
Look in the White or Yellow Pages
of your telephone directory for
GENERAL ELECTRICCOMPANY,
GENERAL ELECTRICFACTORY
SERVICE, GENERAL ELECTRICHOTPOINTFACTORYSERVICE or
GENERAL ELECTRICCUSTOMER
CARE@SERVICE.
* Replacement of house fuses or
resetting of circuit breakers,
* Failureof the product if it is used
for other than its intended purpose
or used commercially.
e Damage to product caused
byaccident, fire, floods or acts
of God.
WARRANK)R ISNOTRESPONSIBLE
FORCONSEQUENTIAL DAMAGES.
Some states do not allow the exclusion or limitation of incidental or consequential damages, so the abovelimitation or exclusion
may notapply to you. This warranty gives you
Toknowwhat your legal rights are in your state, consult your local or state consumer affairs office or your state’s Attorney General,
Part NO.WKI1352P217
NO.49-4985
Pub.
,—
Ifyou havean installation problem,
contact your dealer or installer.
Youare responsible for providing
adequateelectrical, gas,exhausting
and other connecting facilities.
specificlegalrights,andyou mayalso have other rights which vary from stateto state,
Warrantor:General Electric Company
Hfurther help is needed concerning this warranty,write:
Manager—Consumer Affairs, GE Appliances, Louisville, KY 40225
 Loading...