

Page 1
ge.com
©
Safety Instructions .... 2-7, 25
Operating Im_uaqons
Aluminum Foil ........ 12, 13
Clock and Timer .......... l0
()yen ................ l 0-15
Baking and Roasting ..... 12
Broiling ............. 13, 14
Broiling Guide .......... 14
Oven Control ........... 11
Power Outage ........... 11
Preheating .............. 12
Surface Cooking ......... 8, 9
Thermostat Adjusnnen t .... 15
Care and Cleaning
Air Vents ................ 21
Broiler Pan and Grid ...... 21
Burner Assemblies ..... 16-18
Burner Caps and Heads .... 18
Burner (;rams ............ 17
Control Panel and 14a_obs . . .21
Cooktop Surfi_ce .......... 19
Drip Pans ................ 16
Lifl-()ff Oven Door . ....... 20
I Jfl-Up Cooktop .......... 19
()yen Bottom ............. 20
Oven Interior ......... 22, 23
Removable Broiler Drawer . .21
Shelves .................. 22
Stainless Steel Surfimes ..... 19
Installation
Instrug_i ons ........... 24-39
Anti-Tip Device ..... 28, 38, 39
Connect the Range
to Gas ................ 29-32
Com_rt to LP Gas ......... 39
Dimensions and
Clearances ............... 27
Elecnical Connec6ons . .33, 34
Le;>l the Range .......... 38
LiO_t the Pilots ........ 34-37
Troubleshooting Tips . .40-42
Accessories .............. 45
Consumer Support
C, ons/.lll) er
Support .......... Back Cover
Product Registration .... 43, 44
*Ahrrantv Rw Customeis
in Canada ............... 47
*Ahrranty' for Customeis
in the U.S.A .............. 46
Standard-Clean
Models:
JGBS04 R(;BS08
JGBS07 R(;B524
J(;BS l 7 R(;B 5 28
JGBS20 RGBS _3
JGBS2 l RGB540
JGBS22
J(;BS 2 _
y(;sso5
Continuous-Clean
Modal:
de;B(;20
Write the model and serial
numbers here:
Model #
Serial #
You can find them on a label on
the tixmt of the range behind the
kick panel or broiler drawer.
18305580P181 49-85095 11-05Jfl
Page 2
IMPORTANTSAFETYINFORMATION.
READALLINSTRUCTIONSBEFOREUSING.
WARNING!
For your safe_ the information in this manual must be foflowed to minimize the risk of fire or explosion, electric shock, or
to prevent property damage, personal injury, or loss of life.
WARNING:If the information
in this manual is not followed exactly,
a fire or explosion may result causing
property damage, personal injury
® ®
WARNING!
or death.
-- Do not store or use gasoline or other
flammable vapors and liquids in the
vicinity of this or any other appliance.
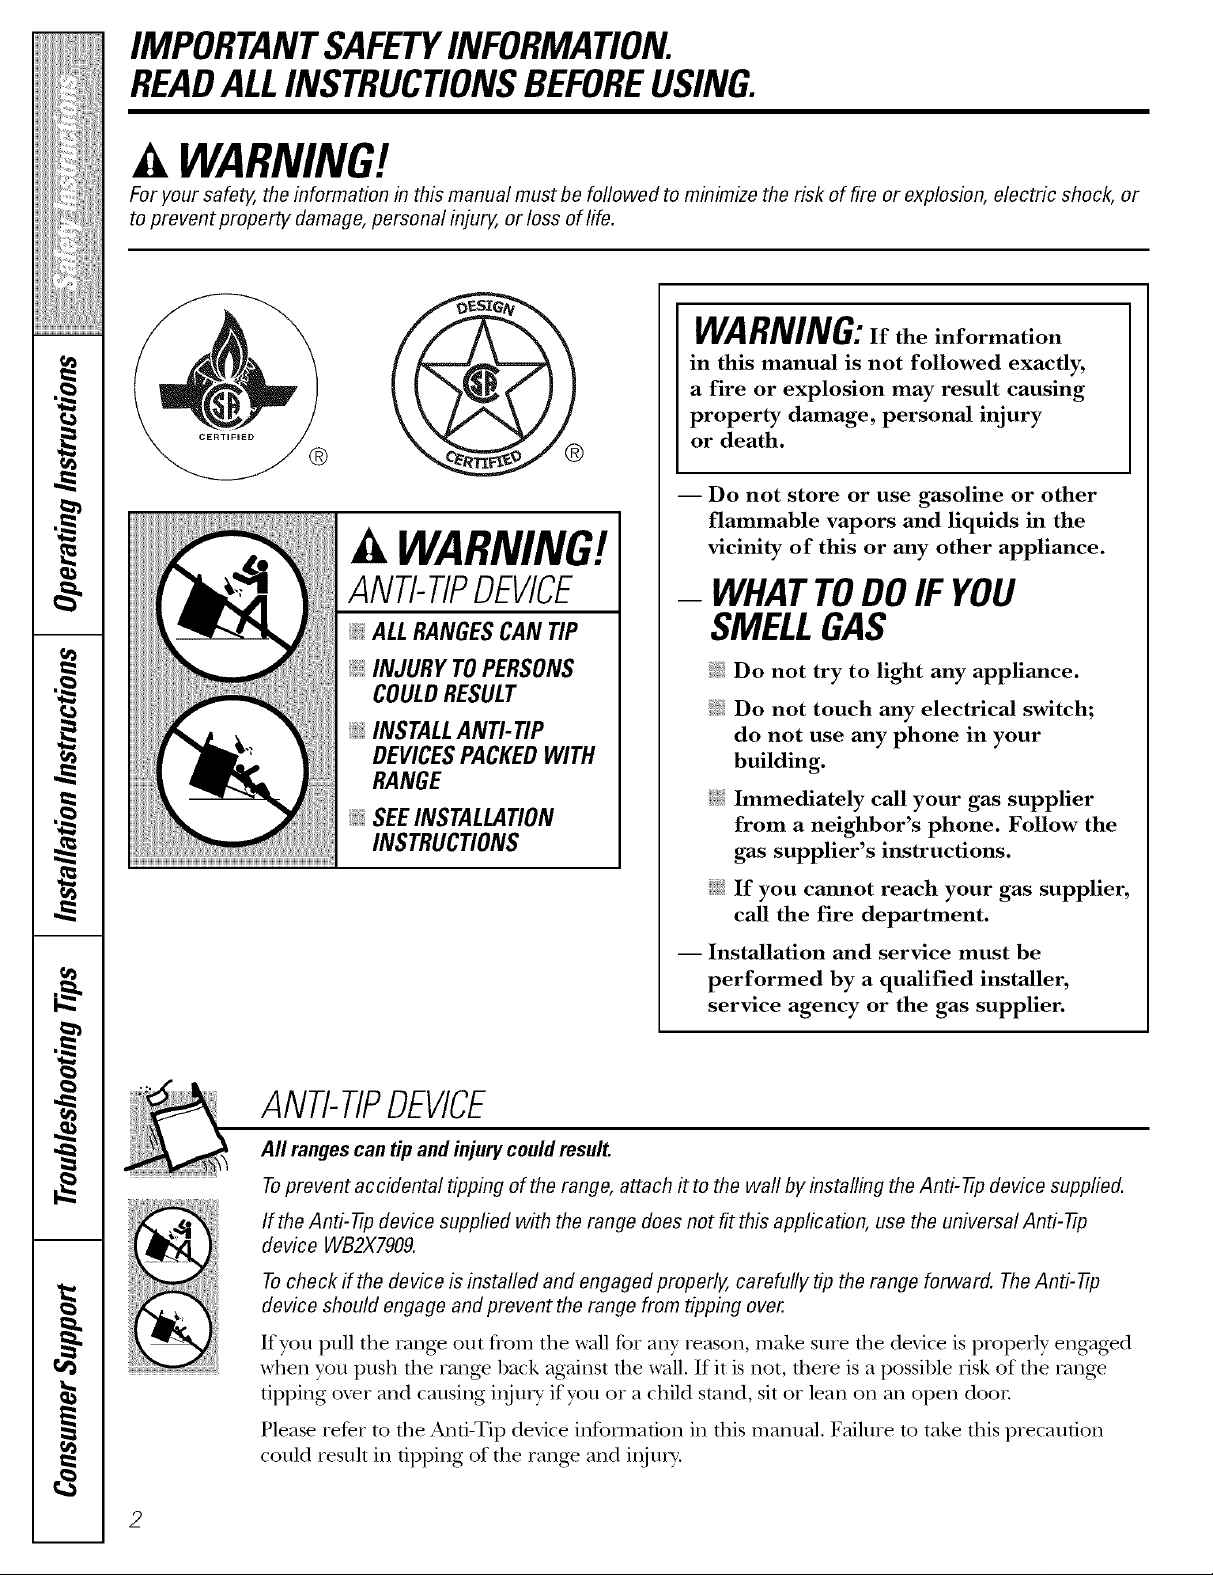
ANTI-TIPDEVICE
ALL RANGES CAN TIP
@ INJURY TO PERSONS
COULD RESULT
@ INSTALL AN_tiP
DEVICES PACKED WITH
RANGE
INSTRUCTIONS
ANTI-TIPDEVICE
All ranges can tip and injury could result.
- WHATTODOIF YOU
SMELLGAS
@ Do not try to light any appliance.
Do not touch any electrical switch;
do not use any phone in your
building.
i_i_iImmediately call your gas supplier
from a neighbor's phone. Follow the
gas supplier's instructions.
i_i:iIf you cannot reach your gas supplier,
call the fire department.
-- Installation and service must be
performed by a qualified installer,
service agency or the gas supplier.
Toprevent accidental tipping of the range, attach it to the waft by installing the Anti--tip device supplied.
If the Anti--tip device supplied with the range does not fit this application, use the universal Anti--tip
device WB2X7909.
Tocheck ff the device is installed and engaged properly, carefully tip the range forward. TheAnti--tip
device should engage and prevent the range from tipping over.
If you pull the rang_ OUt fl'om tile wall for any reason, make sure die device is properly engag>d
when you push the rang_ back against tile wall. If it is not, dlere is a possible risk of tlle rang_
tipping ox>r and causing inju U if you or a child stand, sit or lean on an open doon
Please refer to the ka_d-Tip device infounafion in this manual. Failure to take tllis precau6on
could result in tipping of tile rang_ and i,ljtu>
Page 3

ge.com
WARNING!
IMPORTANTSAFETYNOtiCE
The California Safe Drinking Water and Toxic Enforcement Act requires the Governor of California to
publish a list of substances known to the state to cause birth defects or other reproductive harm, and
requires businesses to warn customers of potential exposure to such substances.
Gasappliances can cause minor exposure to four of these substances, namely benzene, carbon
monoxide, formaldehyde and soot, caused primarily by the incomplete combustion of natural gas or
LP fuels. Properly adjusted burners, indicated by a bluish rather than a yeflow flame, will minimize
incomplete combustion. Exposure to these substances can be minimized by venting with an open
window or using a ventilation fan orhood.
SAFETYPRECAUtiONS
Have the installer show you the location of the range gas shut-off valve andhow to shut it off if necessary.
_{_:Haxe your range installed and properly
grounded by a qualified installer, in
accordance with the Installation Instructions.
Any adjustment and service should be
perfot_ned only by qualified gas rang>
installers or service technicians.
_t{:_Do not attempt to repair or replace any
part of your range unless it is specifically
recommended in this manna], All other
service should be refe[Ted to a qua]ified
technician,
,&WARNING:NEVERusethis
appliance as a space hearer to heat or
warm the room. Doing so may result
in carbon monoxide poisoning and
overheating of the oxen.
_;:Ping yonr rang_ into a 190_\_lt grounded
outlet only. Do not remoxe the round
grounding prong from the plug. If in doubt
about the grounding of the home electrical
system, it is your personal responsibility and
obligation to hm> an ungrounded outlet
replaced with a properly grounded,
three-prong outlet in accordance with
the National ElecuJcal (;ode. Do not use
an extension cord with this appliance.
3
Page 4
IMPORTANTSAFETYINFORMATION.
READALLINSTRUCTIONSBEFOREUSING.
SAFETYPRECAUTIONS
i,ocate the rang.e out of kitchen traffic pail1
and out of drafty locations to prex.ent pilot
oumg'e (on standing pilot models) and poor
air ciIvulafion.
_{;:Be sure all packaging materials are
removed from die rang.e before operating
it to prevent fire or smoke damag.e should
tile packaging material ignite.
_:;Be sure yonr I'ttIlg.e is corI.ectly adjusted by
a qualified service technician or installer for
tile type of gas (naUlral or I,P) that is m be
used. Your rang.e carl be converted tbr use
with either type of gas. See tile Installation
of the range section.
WARNING: lesead>stmentsruns,
be made by a qualified service technician
in accordance wifll the manuthcturer's
instructions and all codes and requirements
of tile authority having jurisdiction. Failure
m follow dlese instructions could resuh in
serious irlju U or property damag.e. Tile
qualified ag.en W performing Oils work
assumes i.esponsibility for the conversion.
;f; Be careflll when you clean tile cookmp
because tile ai.ea over tile pilot (on standing
pilot models) will be hot.
_:_Aiter prolong.ed nse of a rang.e, high floor
temperatures may result and many floor
co_.erings will not withstand this kind of use.
Nexer install file range over vinyl file or
linoleum flint cannot withstand such type
of use. Nexer install it directly ox.er interior
kitchen carpeting.
;f; Do not leaxe children alone or unattended
where a rang.e is hot or ill operation. They
could be seriously burned.
_{;_Do not allow arrvone to climb, stand or bang
on tile oven deal, broiler drawer or cookmp.
They could damag.e tile rang.e and ex.en tip it
o\.eI; causing se\.ere personal iojul y.
CAUTION: temsofinteres,,o
children should not be stored ill cabinets
abo_> a rang.e or on the backsplash of a
rang.e--xhildren climbing on tile range
m i.each items could be seriously injured.
_;;Ne_er wear loose fitting or hanging garments
while using tile appliance. Be careflll when
reaching for items stored in cabinets over file
rang.e. Flammable material could be ignited
if brought in contact with flame or hot o\.en
snlPaces and nlay cause sex.ere bnl_rls.
_i:,:Do not store flammable materials ill an
ox.en, a rang.e broiler or near a cooktop.
_;_Do not store or use combustible materials,
gasoline or other flammable vapors and
liquids in the vicinity of this or ally' other
appliance.
_f;Do not let cooking grease or other
flammable materials accunmlate ill or
near tile rang.e.
q_{_;Do not use water on grease fires. Ne_.er pick
up a flaming pan. Turn the controls off'.
Smother a flaming pan on a surt_ace burner
by cox.ering file pan completely with a
well-fitting lid, cookie sheet or fiat uay.
Use a multi-puq)ose di T chemical or
foam-type fire extinguisher
Flaming grease outside a pan carl be put
out by covering it with baking soda el,
if available, by using a mnlfi-pnrpose dly
chemical or foam-type fii.e exdnguishen
Flame ill tile oven can be smothei.ed
completely by closing the o_.en door and
ulrning file control to off or by using a
nmld-pm])ose diT chemical or foam-type
fire exfi ng-uishen
_{;_i,et file bnrrler grates and other surfaces
cool before ranching them or leaving fllem
where children call I.each them.
Nexer block die vents (air openings) of
die rang.e. They provide tile air inlet and
outlet flint are necessmw for file rang.e to
operate properly with connect combustion.
Air opening:s are located at tile rear of
tile cooktop, at tile top and bottom of tire
oven deal; and at tile bottom of the rang.e
under tile broiler drawen
i,arg.e scratches or impacts to glass doors
call lead to broken or shattered glass.
_i:,:Clean only parts listed ill tiffs Owner's
4
Manual.
Page 5
g_com
COOKMEATANDPOULTRYTHOROUGHLY...
Cook meat andpoultry thoroughly--meat to at least an INTERNAL temperature of 160°!:and poultry to
at least an INTERNAL temperature of 180°1£.Cooking to these temperatures usually protects against
foodbome illness.
OVEN
Stand away from the range when opening the door of a hot oven. The hot air and steam that escape
can cause bums to hands, face and eyes.
E:,IDo not use file oxen for a storag.e area.
Imms stored in file ox.en can ignim.
E:,:Kee I) the ox.en flee flom grease buildup.
E:,:Place the oven shelx.es in the desired
pootion while tile ox.en is cool.
E:,:Pulling out tile shelf m tile stop-lock is a
com.enience in lifting heaxy foods. It is also
a precaution against bmns from touching
hot smi_aces of the door or oven walls. Tile
lowest position is not designed to dide.
_{;:Do not heat unopened fbod containers.
Pi.essure could build up and file container
could burst, causing an i*_m>
_:;Nex.er use aluminum foil m line file oven
bottom. Improper use of foil could start
a fire and result ill high carbon monoxide.
a, WARNING:NEVERcover
any slots, holes or passag.es in the oven
bottom or cover an entire rack with
mamfials such as aluminum foil. Doing
so blocks air flow througil tile oven and
may cause carbon monoxide poisoning.
Aluminum foil lining_ may also uap
heat, causing a fire hazard.
E:,:Do not use your ox.en to d U newspapers.
If ox.erheamd, they can catch fire.
:fi:,iUse only glass cookware dlat is
recommended lbr use in gas ox.ens.
_?{:_Always remox.e the broiler pan flom rang.e
as soon as you finish broiling. Grease left in
tile pan can catch fire if oven is used without
removing tile grease from the broiler pan.
E:,ISAl_en broiling, if meat is too close m file
flame, fl_e fi_t may ignim. Trim excess fi_tto
i)_.ex.ent excessive flai.e-ups.
E:,IMake sure die broiler pan is in place
con.ecdv m reduce tile possibility of
gi.ease fii.es.
_{:;If you should hax.e a grease fii.e in tile
broiler pan, turn off file ox.en control, and
kee I) the broiler drawer and ox.en door
closed to contain fii.e until it bums out.
_?{:_For safety and proper cooking performance,
always bake and broil xvith tile ox.en door
closed.
_::V_]len using cooking or roasting bags in d_e
ox.en, follow file mam_l_acturer's directions.
E:,IFor continuous clean models, do not use
ox.en cleaners on any of tile continuous
cleaning surfaces. Continuous cleaning
surfaces can be identified by their rough
surfi_ce finish.
Page 6
IMPORTANTSAFETYINFORMATION.
READALLINSTRUCTIONSBEFOREUSING.
WARNING!
SURFACEBURNERS
Use proper pan size--a void pans that are unstable or easily tipped. Select cookware having flat bottoms
large enough to cover burner grates. Toavoid spillovers, make sure cookware is large enough to contain
the food properly. Thiswill both save cleaning time andprevent hazardous accumulations of food, since
heavy spattering or spillovers left on range can ignite. Use pans with handles that can be easily grasped
and remain cool.
_t{_Always use tile LITE position (on electcic _f;
ignition models) or die Hlposition (on
standing pilot models) when igniting tile
top burners and make sure tile burners
have ignited. ;_i:,:
_:_Nexer leaxe file snrlCace burners unattended
at high flame setting:s. Boilo_>rs cause
smoking and greasy spillox>rs fllat m W
catch on rike.
q_{:_Adjust die top bni_]er flame size so it
does not extend beyond tile edge of tile
cookware. Excessixe flame is hazardous.
_i:,iUse only d U pot holders--moist or damp
pot holders on hot surthces may result in
bnrlls flom smam. Do not let pot holders
come near open flames when lifting
cookware. Do not use a towel or other _?:':
bulky cloth in place of a pot holden
_:;When using glass cookware, make sure it
is designed for top-of-rang> cooking.
;f; To minimize tile possibility of bums,
ignition of flammable mamrials and spillag>,
t/lill cookware handles toward tile side or ;_i:,:
back of tile rang_ without extending over
adjacent burners. _:_
;f; Carefldly watch foods being flied at a higtl
flame setdng. _:_
;_i:,:Alwws heat tht slowly, and watch as it heats.
;_i:,:Do not ]eaxe any items on file cooktop. The
hot air from dm vent m W ignim flammable
imms and will increase pressure in closed _:_
containers, which may cause fllem to bnrst.
_::If a combination of oils or tats will be used in
flying, stir together before heating or as flits
meh slowly.
;_i:,:Use a deep Pat thermometer whenexer
possible to pre_ent o_erheating tht beyond
tile smoking point.
Use the least possible amount of tht for
eflectixe shallow or deep-tht flTing. Filling
the pan too fill of tht can cause spillovers
when food is added.
Do not flame foods on tile cooktop. If you do
flame foods under the hood, turn tile fan on.
Do not use a wok on the cooking surface
if tile wok has a round metal ring that is
placed ox_r tile burner grate to support
file wok. This ring acts as a heat trap,
which may damag> the burner gram and
burner head. Also, it may cause file burner
m work impropefl> This may cause a
carbon monoxide lexel aboxe fllat
allowed by current standards, resulting
in a health hazard.
Foods for flying should be as dU as possible.
Frost on fiozen foods or moisture on flesh
foods carl cause hot flit to bubble up and
ox>k"the sides of the pan.
Nexer tkT to move a pan of hot flit, especially
a deep laatfiTer VVaituntil tile laatis cool.
Do not leaxe plastic imms on tile cooktop---
they may meh if left too close to tile x>nt.
Kee I) all plastics away from tile surfitce
bnrners.
To ax_id tile possibility of a bnlxl, ahvays be
certain that the conuols for all burners are
at tile OFF position and all grams are cool
before atmmpfing to remox> them.
If rang> is locamd nero a windox_, do not
hang long curtains that could blow oxer tile
surfitce burners and cream a fire hazard.
If you smell gas, turn off tile gvts to tile range
and call a qualified service technician. Nexer
use an open flame to locate a leak.
Page 7
SURFACEBURNERS(cont.)
ge.com
_:;Ahvays tm_l tile surface burner controls off
before removing cookware.
;fi:,:Do not lift the cooktop on sealed burner
models. Lifting file cooktop call lead to
damag> and improper operation of tile
range.
q_{_;_;hen a pilot goes out (on standing pilot
models), you will demct a Paint odor of gas
as your signal m Ielight the pilot. When
ieli01ting tile pilot, make sure burner
controls are ill tile off position, and follow
instructions ill fills book m relight.
_{_;If you smell gas, and you have already made
sure pilots are lit (on standing pilot models),
turn off tile gas to tile range and call a
qualified service mchnician. Never use all
open flame to locam a leak.
;f; Do not place or store imms that call melt
or catch fire one tile g_ams, ex>n when tile
cooktop is not 1)eing used.
_{_Kee I) range clean and flee of accumulations
of grease or spillox>rs, which m W ignite.
READANDFOLLOWTHISSAFETYINFORMATIONCAREFULLY.
SAVETHESEINSTRUCTIONS
Page 8
Usingthegas surfaceburners.
Throughout this manual, features and appearance may vary from your model
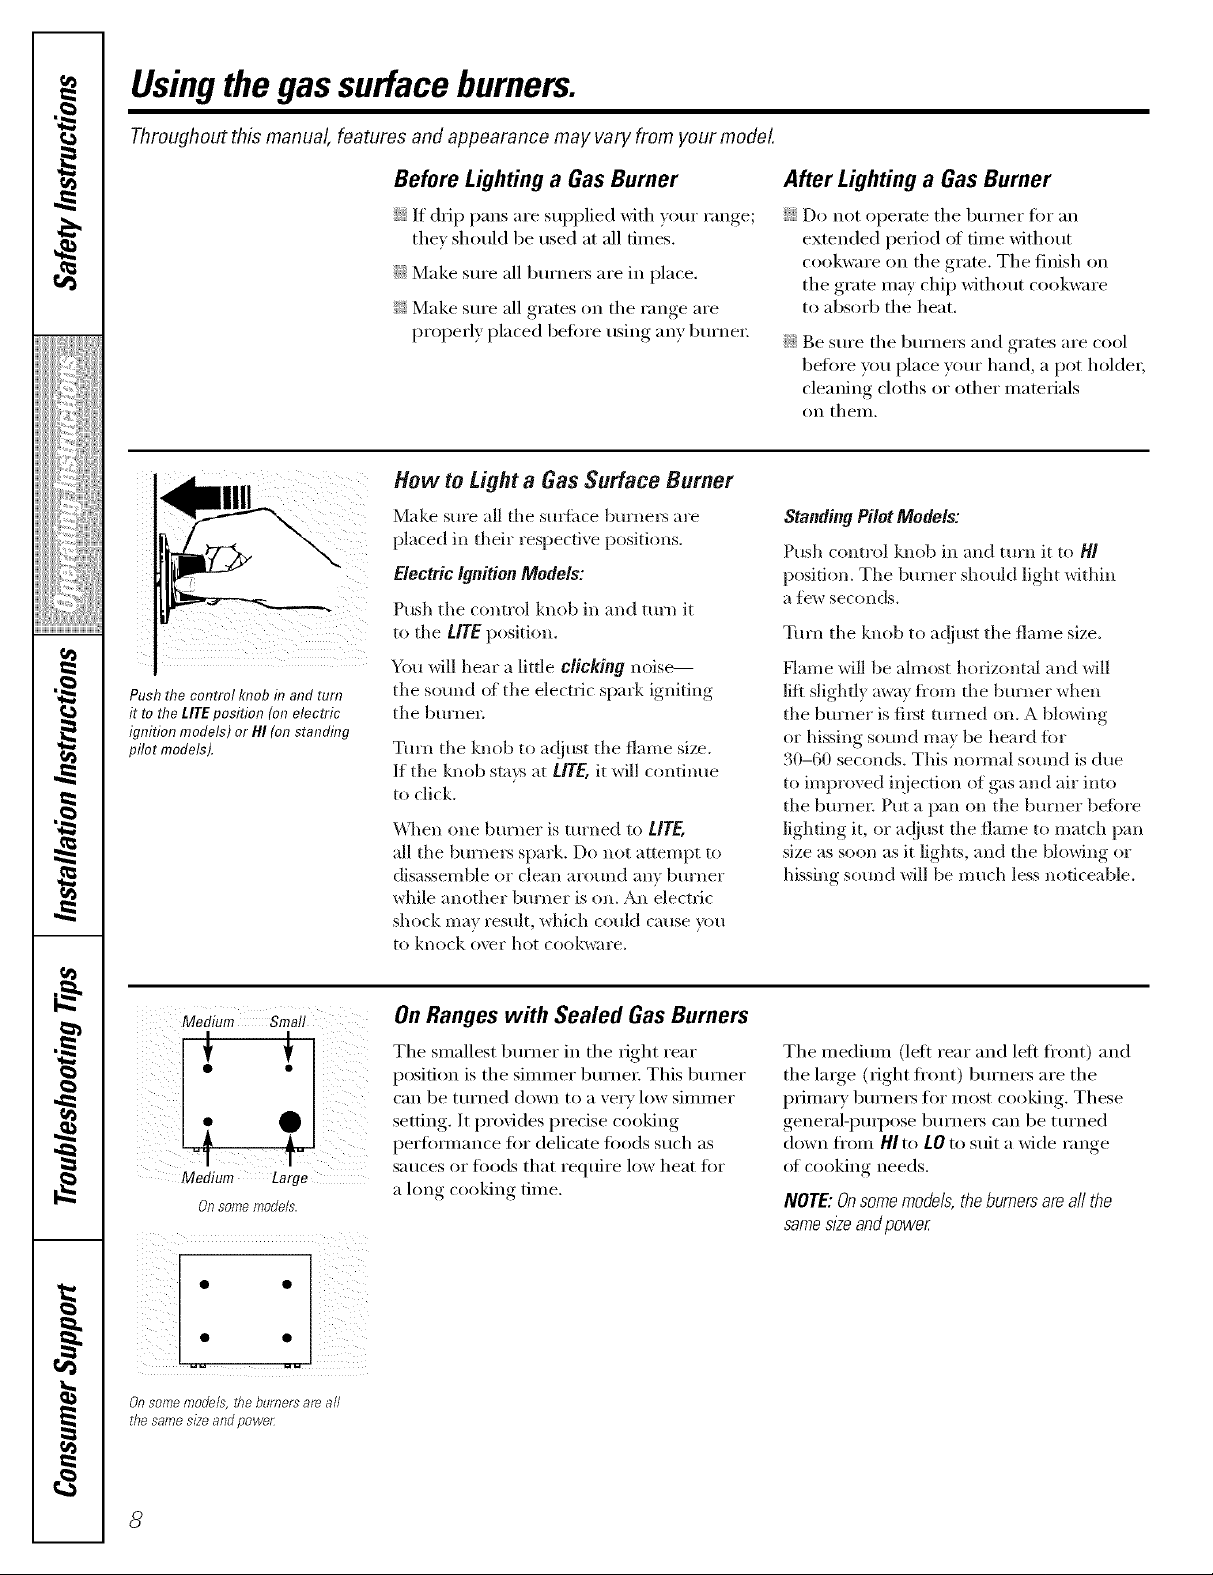
Push the control knob f17and turn
it to the LITEposifion (onelectric
ignition models) orHI (on standing
pilot models).
Before Lighting a Gas Burner
::Ji::If drip pans are supplied with yore" range;
thev should be used at all times.
::J?::Make s*lre all bllrnelN are in place.
_: Make sure all grams on the range are
propelty placed before using any burner
How to Light a Gas Surface Burner
Make st*re all the surJia e burnel_ are
placed in their respective positions,
Electric ignition Models:
Push the control knob in and tm'n it
to the L/TE position.
You will hear a little clicking noise---
the sound of the electric spark igniting
the bm'nel:
Turn the knob to at!just the flame size.
If the knob stays at L/TE, it will continue
to click.
\'\]*en one bm'ner is turned to L/T_
all the burnex_ spark. Do not attempt to
disassemble or clean around any bm'ner
while another burner is on, An electric
shock may result, which coukl cause you
to knock o_vr hot cookware,
After Lighting a Gas Burner
::Ji::Do not operate the burner fin" an
extended period of *fine without
cookware on the grate, The finish on
the grate may chip without cookware
to absorb the heat.
::Ji::Be sure the burnei_ and grates are cool
before you place yore" hand, a pot holdei;
cleaning cloths or other mamrials
on theIIL
Standing Pilot Mode/s:
Push control knob ill and turn it to/4/
position. Tile burner shonkl light within
a fe',vseconds,
Turn the knob to ac!iust the flame size.
Flange will be almost horizontal and will
lift slightly mvay fi'om the burner when
the burner is fii_t turned on. A blowing
or hissing sound may be heard for
30-60 seconds. This nmmal sound is due
to improved iqjection of gas and air into
the burnen Put a pan c,n the burner befine
lighting it, or ac!iust the flame to match pan
size as soon as it lights, and the blowing or
hissing so,rod will be much less noticeable.
Medium Smal!
Medium Large
OR some models.
Onsomemodels,Y?eburnersam all
thesamesizeandpowe_
On Ranges with Sealed Gas Burners
The smallest burner ill the right rear
position is the simmer burnei: This burner
can be turned down to a very low sinnner
setting. It provides predse cooking
perfininance for delicate foods such as
sauces or foods that require low heat fin.
a long cooking time.
The n*ediuln (left rear and left fl'ont) and
the lalge (right fi'ont) burnei_ are the
prilnai y burnei_ for most cooking. These
general-pui])ose burnei_ can be turned
down fl'oln HI to tO to suit a wide range
of cooking needs.
NOTE: Onsome models, theburnersareall the
samesloeand powe_
Page 9
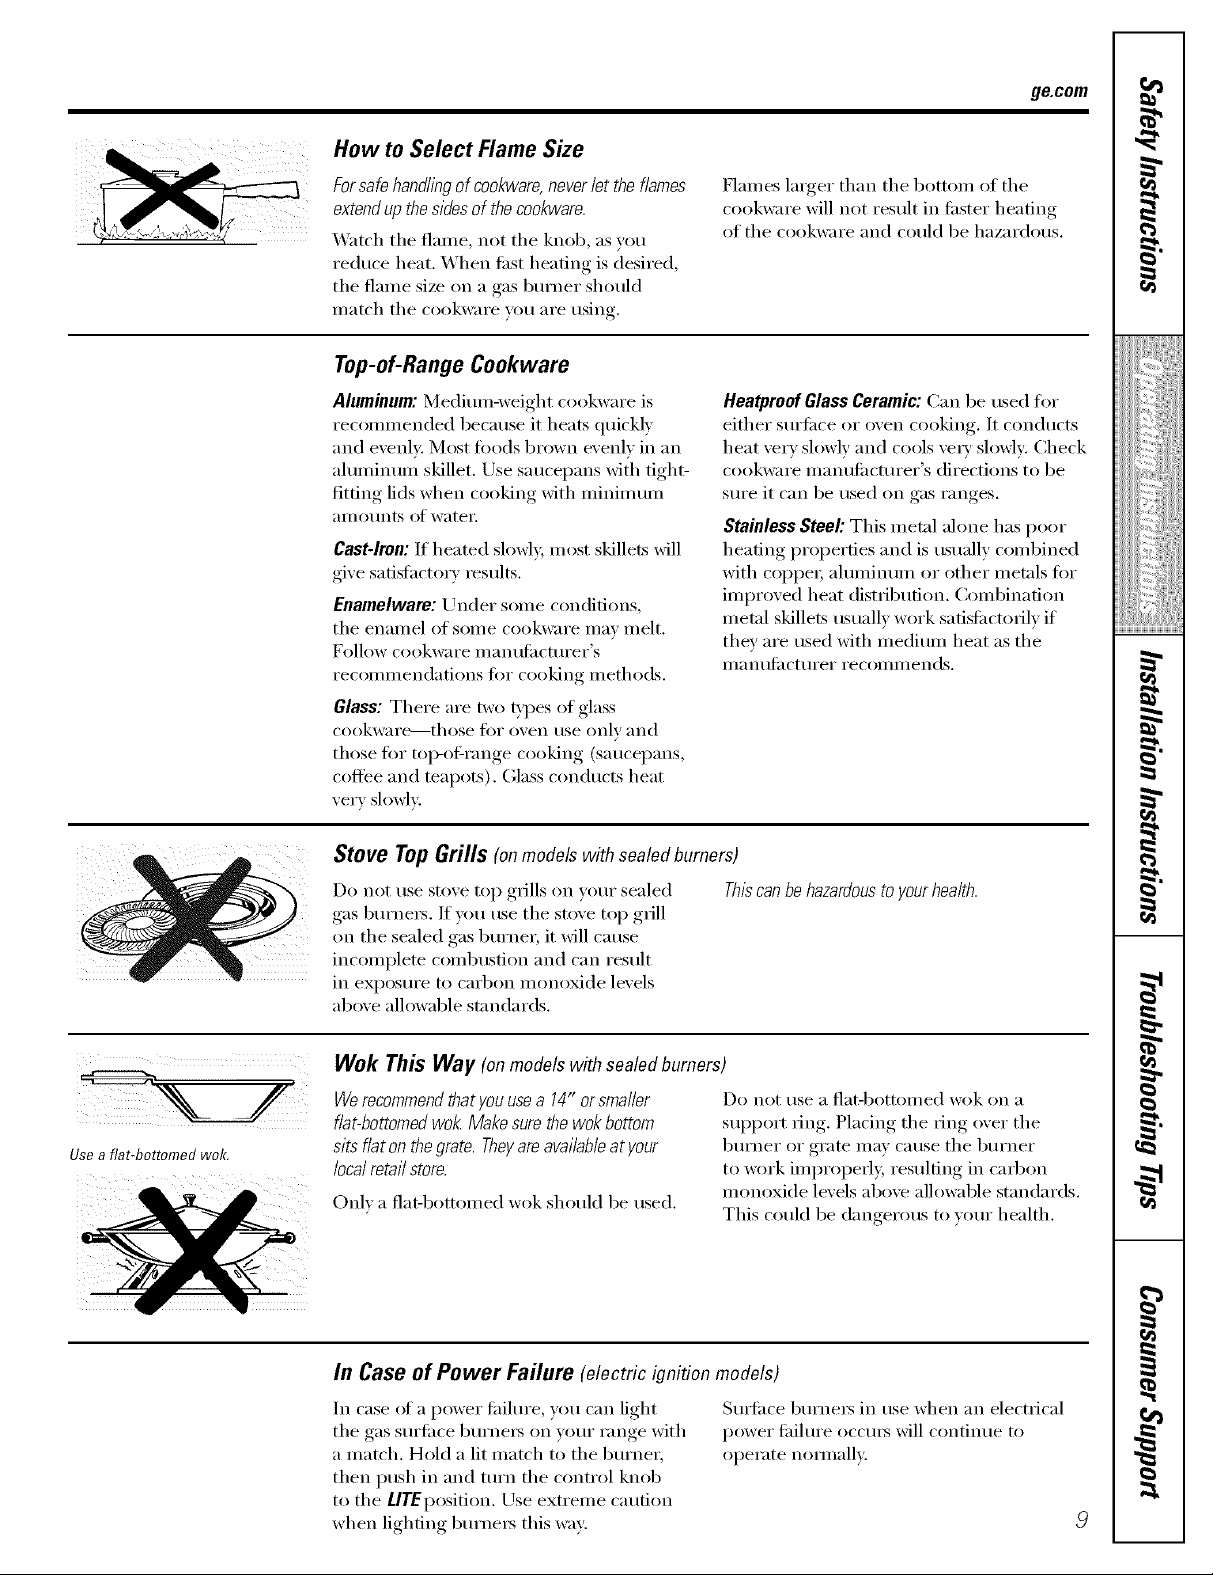
How to Select Flame Size
ge.com
For safe handling of cookware, never let the flames
extend up the sides of the cookware.
_'m'h tile flame, not tile knob, as you
reduce heat. When fi_st heating is desired,
tile flame size oil a gas burner should
ii/atch tile cookware veil ai'e rising.
Top-of-Range Cookware
Aluminum: Medimn-weight cookware is
recommended because it heats quickly
and evenly: Most foods brown evenly in an
aluminum skillet. Use saucepans with tight-
fitting lids when cooking with minim um
}lI//O/IntS Oil water
Cast-Iron:If heated slowly, most skillets will
give satisiactorv results.
Enamelware:Under some conditions,
tile enaillel of SOil/e cookware ill}iv illelt.
Follow cookware inanufilcturer's
i'eCOll/illendations IOI" COOking illethods.
Glass: There are two Upes of glass
cookware---those fi)r ()veil rise only and
those fin" toi>ofrange cooking (saucepans,
coffee and teapots). Glass conducts heat
very slowh:
Flames larger than tile bottom of tile
cookware will not result in fi_ster heating
(ff tile cookware and could be hazardous.
Heatproof Glass Ceramic: Can be used tor
either suriilce or oven cooking. It conducts
heat very slowly and cools ve_ 3, slowly: Check
cookware ill}ln/ltilCtlli'ei"s directions to be
sure it can be used on gas ranges.
Stainless Steel: This metal alone has poor
heating properties and is usually combined
with coppe_; ahmfinum or other metals fin.
improved heat distribution. Combination
metal skillets usually work safisfi_ctorilv if
they are used with medium heat as tile
II/a n t/[il ct t ii'ei" i'ecoiiliilends.
I
_!!ii::,,_i4ii_i:il
ii_iiiii_iiii}i}}i
iii!iiiiii_i_ii{ii¸
Usea fiat-bottomed wok.
Stove Top Grills (onmodels with sealedburners)
Do not rise stove top grills on your sealed
gas burnei_. If u)u use tile stove top grill
on tile sealed gas bm'ne_; it will cause
incomplete combustion and can result
in eN)osure to carbon monoxide levels
ab()ve allowable standards.
Thiscanbehazardousto yourhealth.
Wok This Way (onmodelswith sealedburners)
Werecommend that youusea 14" orsmaller
fiat-bottomedwok Make sure the wok bottom
sits fiat on thegrate. Theyareavailableat your
localretail store.
Only a flat-bottomed wok should be used.
Do not rise a flat-botton/ed wok on a
support ring. Placing tile ring over tile
burner or grate may cause tile burner
to work improperly, resulting in carl)on
monoxide levels above allowable standards.
This could be dangerous to yore" health.
In Case of Power Failure (electric ignition models)
In case of a power fifilure, you can light
tile gas surfi_ce burne_ on your range with
a match. Hold a lit match to tile burner,
then push in and mrn tile control knob
to tile LITEposition. Use extreme caution
when lighting 1)m'ne_ this way:
Sm_i_ce bm'net5 in use when an electrical
power fifilm'e occm_ will continue to
operate n(mnall_,.,
g
g
}
i
Page 10
Usingthe clock andtimer.
Throughout this manual, features and appearance may vary from your model
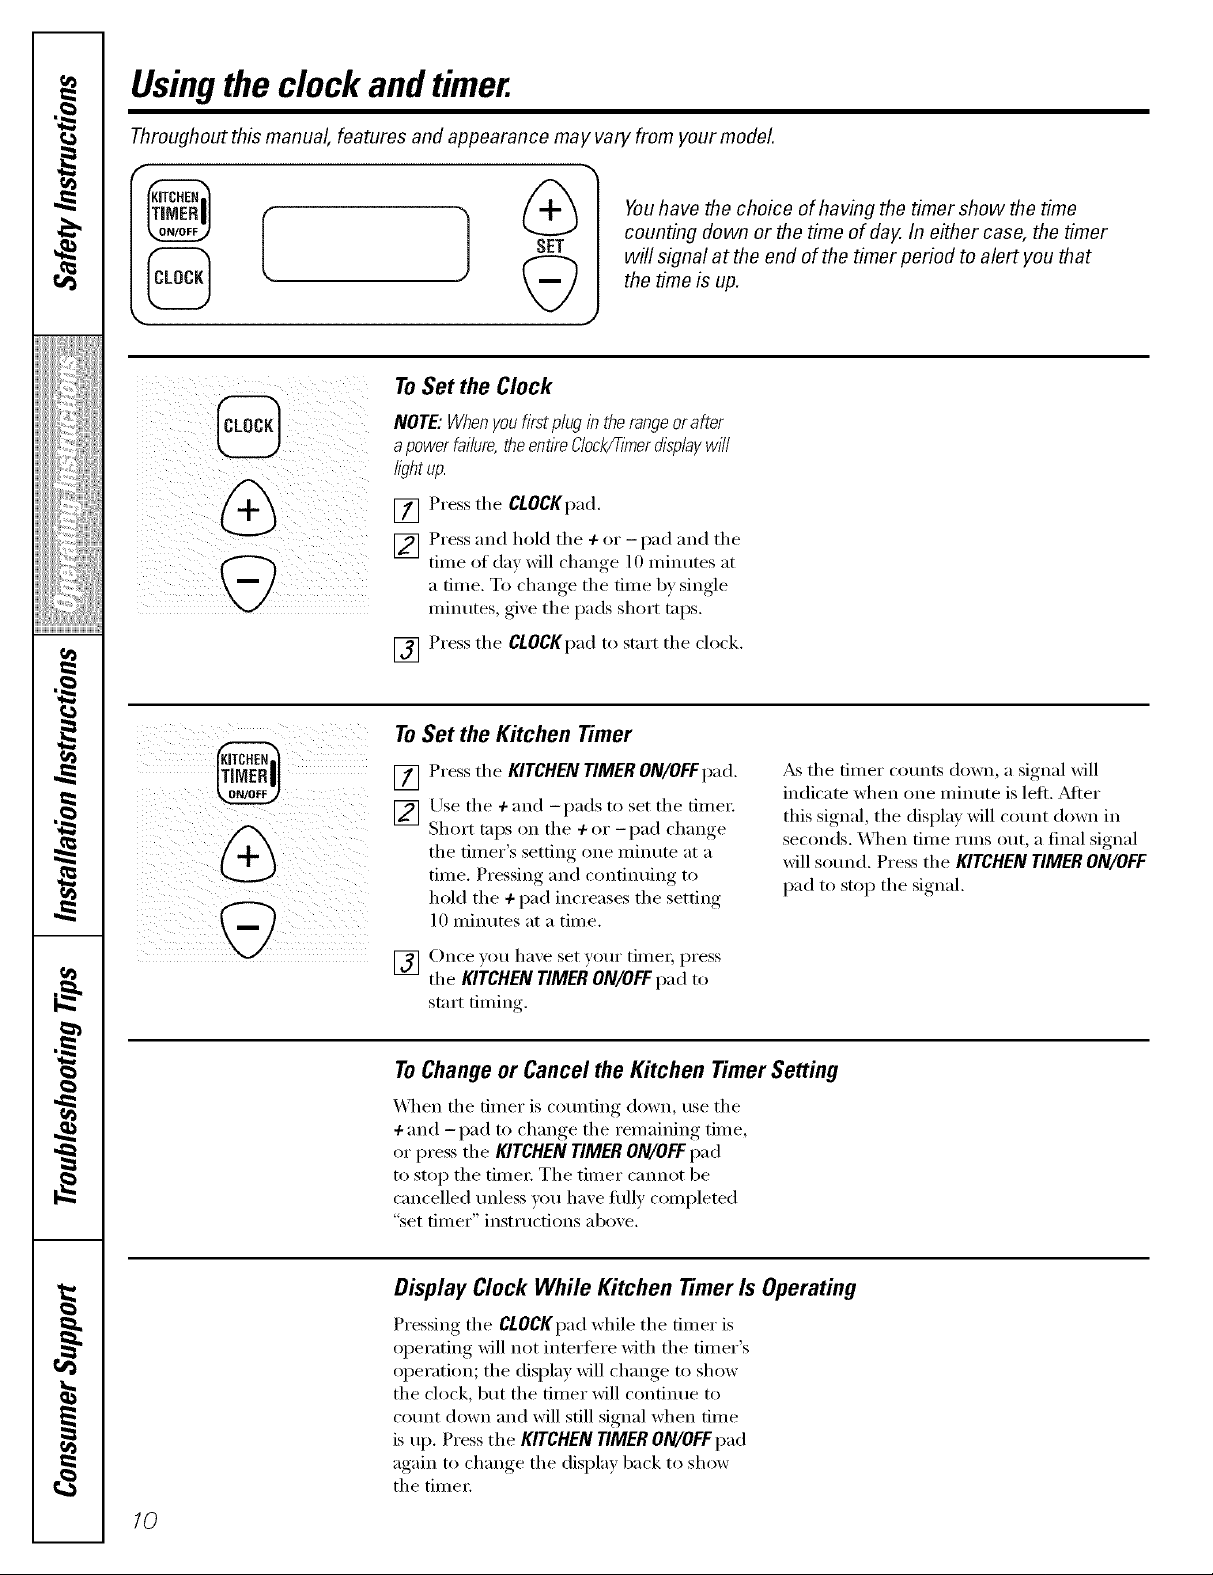
W
Youhave the choice of having the timer show the time
counting down or the time of day. In either case, the timer
will signal at the end of the timer period to alert you that
the timeis up.
To Set the Clock
NOTE: When youfirst p/ug in the rangeor after
apower failure,the entireClockFIknerdisplaywill
/ightup.
[] Press tile CLOCKpad.
[] Press and hold tile + or -pad and tile
time of day will change 10 minutes at
a time. To change tile time by single
minutes, give tile pads short taps.
[] Press tile CLOCKpad to start tile clock.
i iii j)
ToSet the Kitchen Timer
[] Press the KITCHEN TIMER ON/OFFpad.
[_Use tile 4.and -pads to set tile time_:
Short taps on tile 4-or - I)ad change
tile timer's setting one minute at a
time. Pressing and continuing to
hold tile 4-pad increases tile setting
10 minutes at a time.
[] Once you ha;e set yot:u"time_; press
tile KITCHEN TIMER ON/OFFpad to
start timing.
_s tile timer cotmts down, a signal will
indicate when one minute is left. _Mter
this signal, tile display will co/mt down in
seconds. \_]/en time rims out, a final signal
will so/md. Press tile KITCHEN TIMER ON/OFF
pad to stop tile signal.
ToChangeor Cancel the Kitchen Timer Setting
_._]/en tile timer is co/mting down, use tile
4-and -pad to change tile remaining time,
or press tile KITCHEN TIMER ON/OFFpad
to stop the time_: Tile timer cannot be
cancelled unless you have flllly completed
"set timer" instructions above.
Display Clock While Kitchen Timer Is Operating
Pressing tile CLOCKpad while tile timer is
operating will not intertere with tile timer's
operation; tile display will change to show
tile clock, but tile timer will continue to
count down and will still signal when time
is Ill). Press tile KITCHEN TIMER ON/OFFpad
again to change tile display back to show
tile time_:
10
Page 11
Usingthe oven. gecom
Toavoid possible bums, place the shelves in the desired position before you turn the oven on.
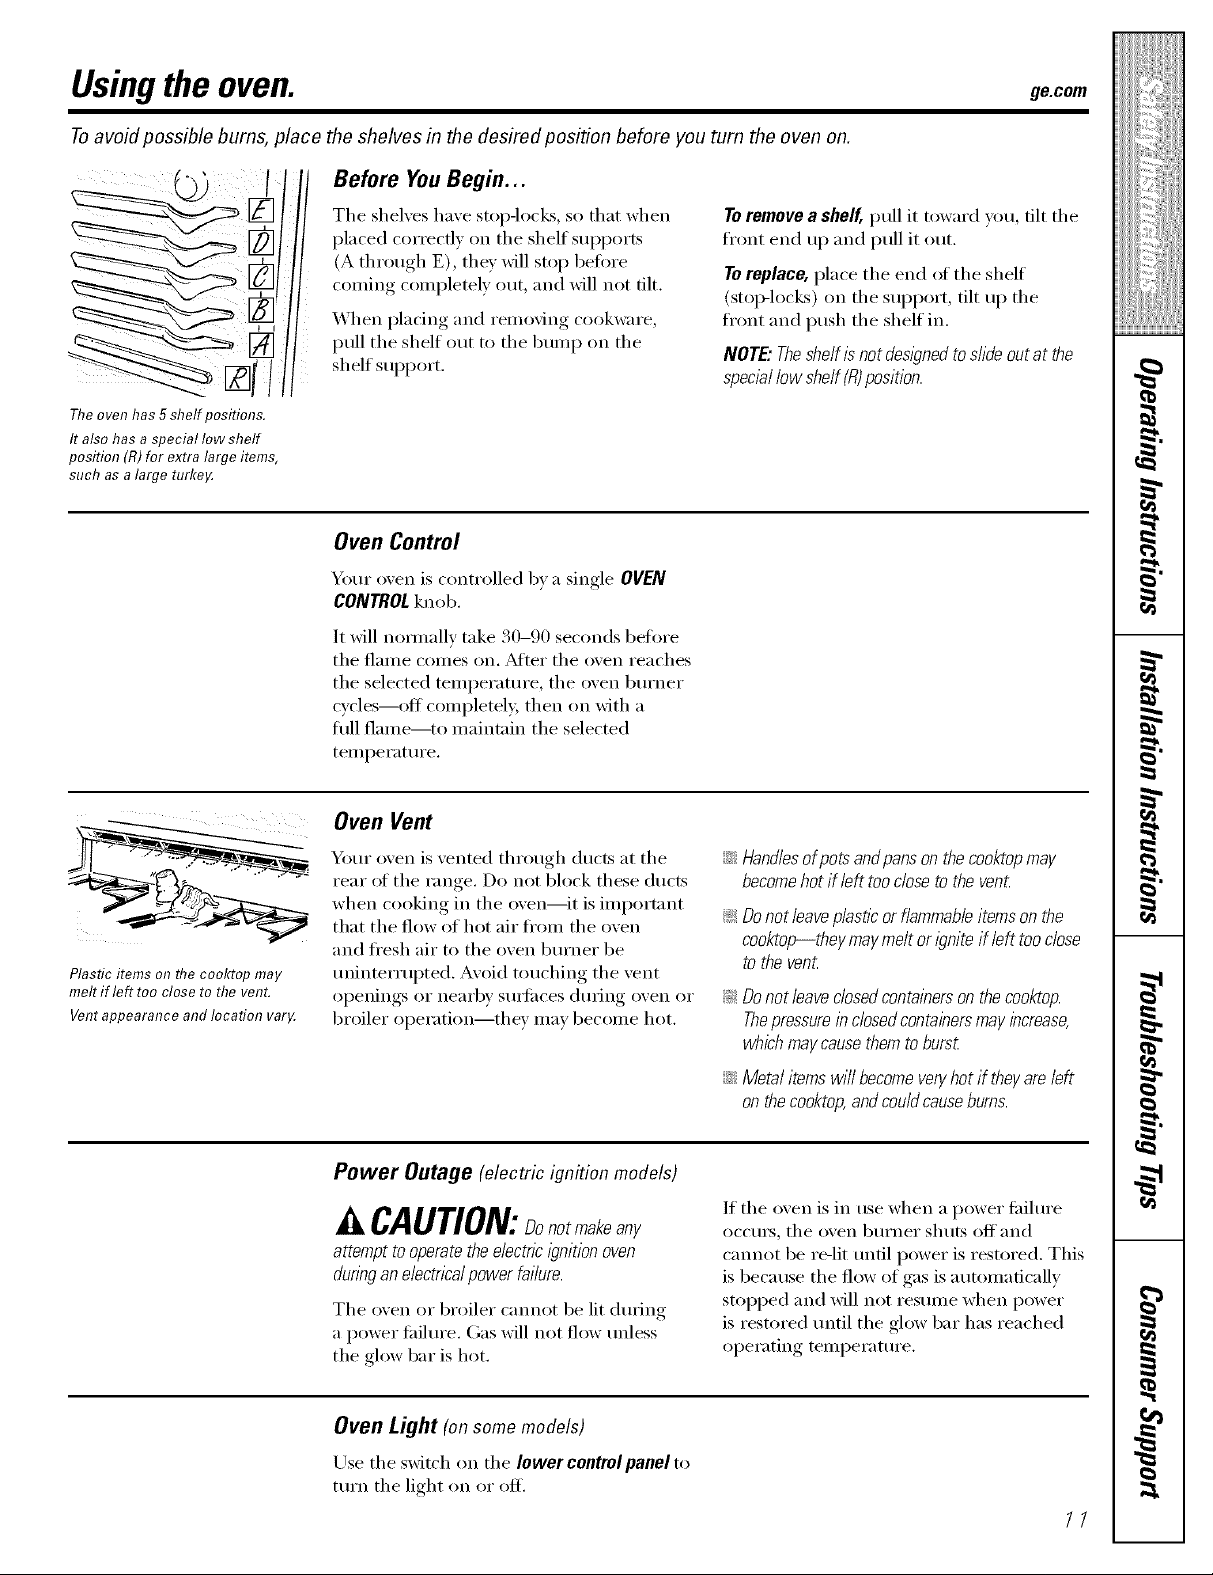
Before YouBegin...
Theoven has 5shelf positions.
It also has a special low shelf
position (R) for extra large items,
such asa large turke_
The shelves have stoI>locks, so that when
placed correctly oil the shelf supports
(A through E), they will stop heft)re
c()ming completely out, and will not flit.
When placing and removing cookware,
pull the shelf out to the bumI_ on the
shelf supI)ort.
Oven Control
Yore" oven is controlled by a single OVEN
CONTROL knob.
It will nommllv take 30-90 seconds 1)eft we
the flame comes on. _Mier the oven reaches
the selected temperature, the oven burner
cycles--off completel> then on with a
flfll flame--to maintain the selected
temperatm'e.
Toremove a shelf, pull it toward you, flit the
front end up and pull it out,
Toreplace, place the end ot the shelf
(stoi>locEs) on the sui)port, tilt up the
fl'ont and push the shelf in.
NOTE."Theshelf is not designedto slide out at the
speciallow shelf (R)position.
Plastic items on the cooktop may
melt if left too close to the venL
Ventappearance and location var_
Oven Vent
Your oven is vented through ducts at the
rear ot the range. Do not block these ducts
when cooking in the oven--it is important
that the flow of hot air fl'om the oven
and fl'esh air to the oven burner be
tminterrupted. Avoid touching the vent
openings or nealq)y sui_filces durhlg oven or
broiler operation--they may become hot.
Power Outage (electricignition models)
,&CAUTION:Donotmakeany
attempt to operate the electnc ignition oven
dunng an electrical power failure.
The oven or broiler cannot be lit (hu'ing
a power fifilm'e. Gas will not flow tmless
the glow bar is hot.
::Ji::Handlesofpotsandpansonthecooktopmay
becomehotif left toodosetothevent
_: Donot leaveplastic or flammableitems on the
cookto?--they maymelt or ignite if left too close
to the venL
_; Donotleaveclosedcontainersonthecooktop.
Thepressureinc/osedcontainersmayincrease,
whichmaycausethemtoburs_
;;J_:_Metalitemswi//becomeveryhotif theyareleft
onthecooktop,andcouldcauseburns.
If tile oven is in use when a power fifilm'e
occm_, the oven burner sitars off and
cmmot be re-lit tmfil power is restored, This
is beca use the flow of gas is a utomaticallv
stopped and will not resume when power
is restored tmtil the glow bar has reached
operating temperature.
Oven Light (on some models)
Use the switch on the Iower controlpanel to
tm'n the light on or ofl_
/l
Page 12
Usingthe oven.
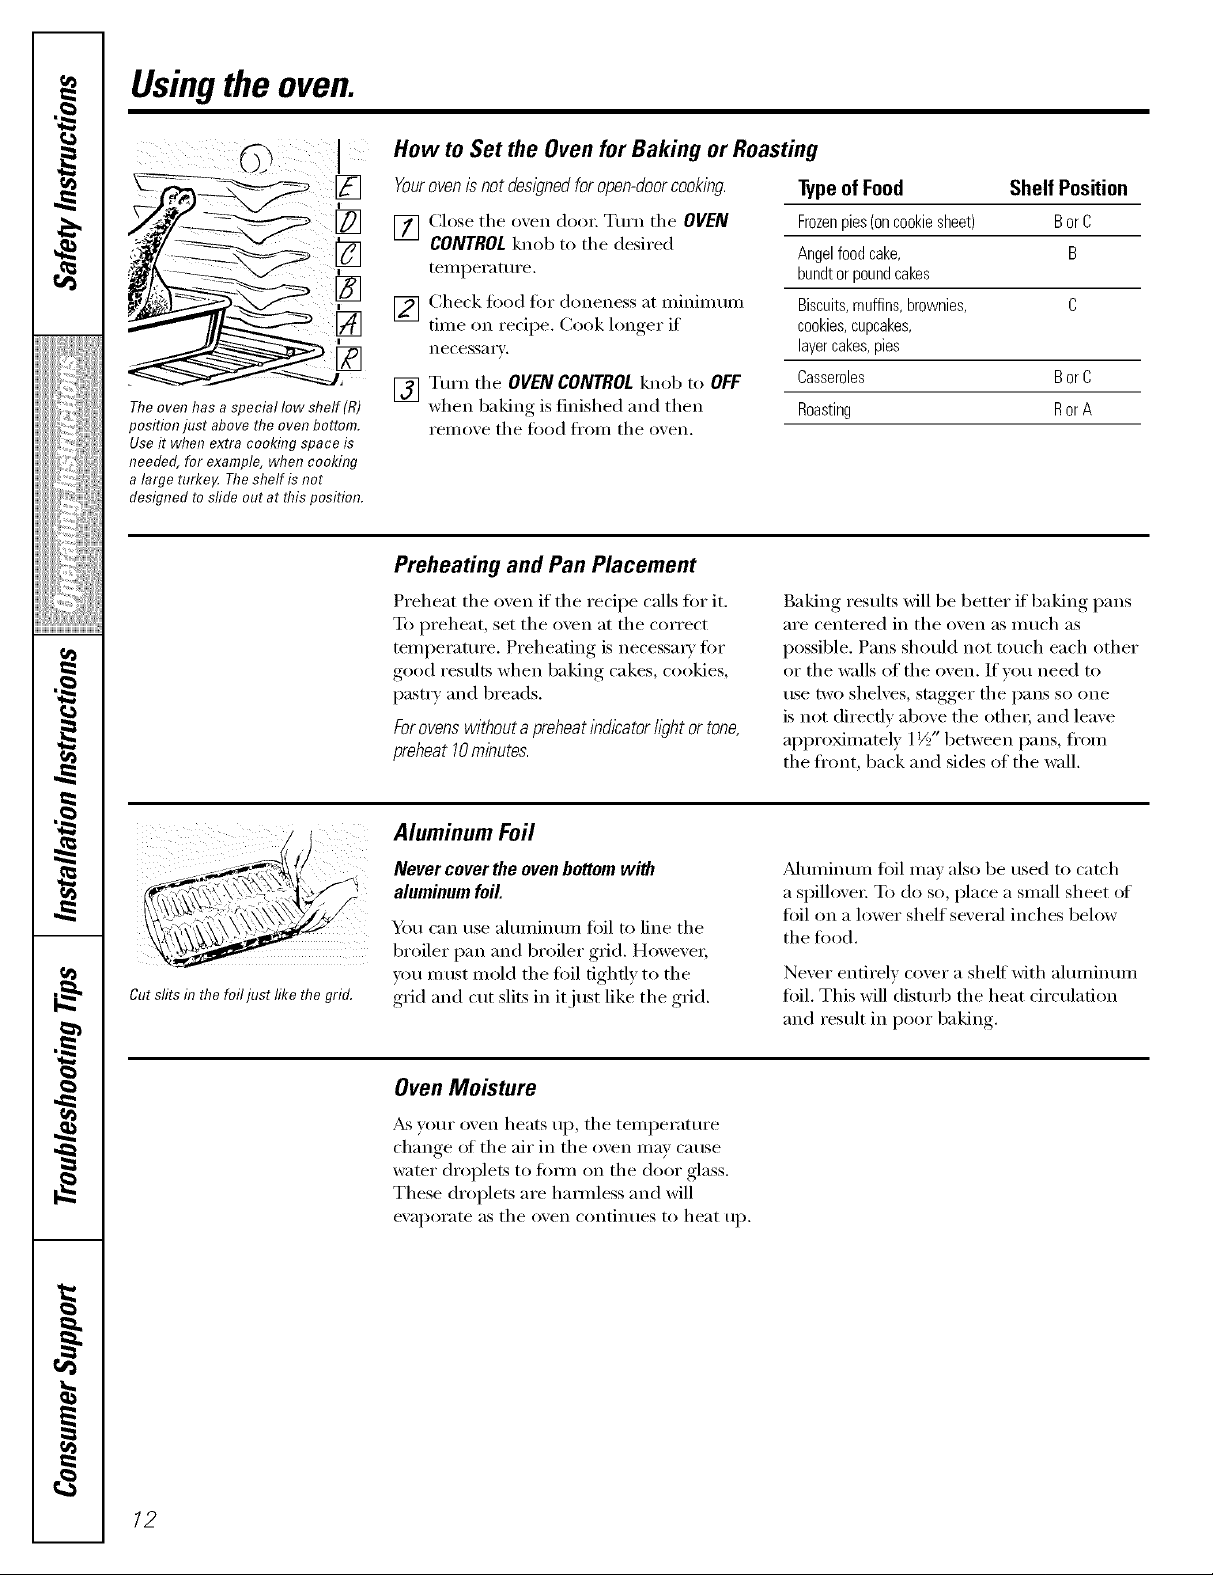
!
I
Theoven has a special low shelf(R)
position just above the oven bottom.
Useit when extra cooking space is
needed, for example, when cooking
a large turke,A The shelf is not
designed toslide out at this position.
How to Set the Ovenfor Baking or Roasting
Yourovenis not designedforopen-doorcooking.
[7] Close the oven dora: Turn the OVEN
CONTROLknob to the desired
temperature.
[_] Check food fl)r doneness at minimum
time on recipe. Cook lonoer_ if
necessaYv.
F_] Turn the OVEN CONTROLknob to OFF
when baking is finished and then
rein oxe the food fl'om the oxen,
Typeof Food Shelf Position
Frozenpies(oncookiesheet) BorC
Angelfoodcake, B
bundtorpoundcakes
Biscuits,muffins,brownies, C
cookies,cupcakes,
layercakes,pies
Casseroles BorB
Roasting Ror A
Preheating and Pan Placement
)
Cut slits in the foiljust like the grid.
Preheat tile oven if tile recipe calls tot it.
To preheat, set tile oven at tile correct
temperature. Preheating is necessm T %r
good results when baking cakes, cookies,
past_ T and breads.
Forovens without a preheatindicator hght or tone,
preheat 10minutes.
Aluminum Foil
Never cover the oven bottom wi_h
aluminum foil.
Y_u can use almnimm/foil to line tile
broiler pan and broiler grid. However;
you must mold tile fi)il tightly to tile
grid and cut slits in it just like the grid.
Oven Moisture
_s w)ur {wen heats Ill), tile temperature
change of the air in the oven may cause
water droplets to titan on tile door glass.
These droplets are hamfless and will
evapoi'ate as tile oven contintles to heat ill).
Baking results will be better if baking pans
are centered in tile oven as much as
possible. Pans should not touch each other
or the walls of the oven. If w_u need to
use two shelves, stagger the pans so one
is not direct.Iv above the other; and leave
approMmately 1½" between pans, fl'om
the fl'ont, back and sides of the wall.
Mmninmn fi)il may also be used m catch
a spillove_: To do so, place a small sheet of
foil on a lower shelf several inches below
the tood.
Never entirely cover a shelf with almninmn
toil. This will disturb the heat circulation
and result in poor baking.
12
Page 13
How to Set the Oven for Broiling
ge.cmn
Broiling is (ooldng tbod by direct heat fi'om
abo\e the toed. Most fish and tender cuts of
meat can be broiled. Follow these directions
to keep spattering and smoldng to a
I//illil//Ill/l,
Your range has a compartment below the []
oven for broiling.
Both the ovenand broiler compartment doors
must he closed during broiling.
Turn most toods once during cooking (tile
exception is thin fillets of fish; oil one side,
place that side down on broiler grid and
cook without tm'ning smfil done). Time
fi)ods flw about one-half the total cooking []
tin/e, tSli'n f()()(l, then contills/e to cook to
pre_brred doneness. []
[] You can change tile distance of tile
food from tile heat sosn'ce bx
positioning the broiler pan and grid
on one of three shelf positions ill the
broiler c(mq)al-tment_ (bottom of
broiler compamnent), B (middle)
and C (top).
If meat has fi_t or gristle at(rand the
[]
edge, cut vertical slashes through both
about 2" apml. If desired, the lift me)
be trimmed, leaxing a laxer about
1/8" thick.
Arrlmge tile fi_od on tile grid and
position the broiler pan on the
appropriate shelf in the oven or
broiling compartment. Hacing toed
closer to tile flame increases exterior
browning of tile toed, but also
increases spattering and the possibility
_ff lies and m eatjslices igniting.
(;lose the o\ en and broiler
Cos//paY[l//ellt dooF.
Tm'n tile OVEN CONTROLknob to
BROIL.
When broiling is finished, mrn tile
[]
OVENCONTROLknob to OFF.Remoxe
the broiler pan fl'om the broiler
compartment and serve tile food
immediately. Leave tile pan outside
tile nmge to cool.
I
_!!ii:i,,_i4ii_i:il
ii_iiiii_iiii}i}i
,_"_>,,,,Hiiiiii_
iii!iiiiii_i_ii{ii¸
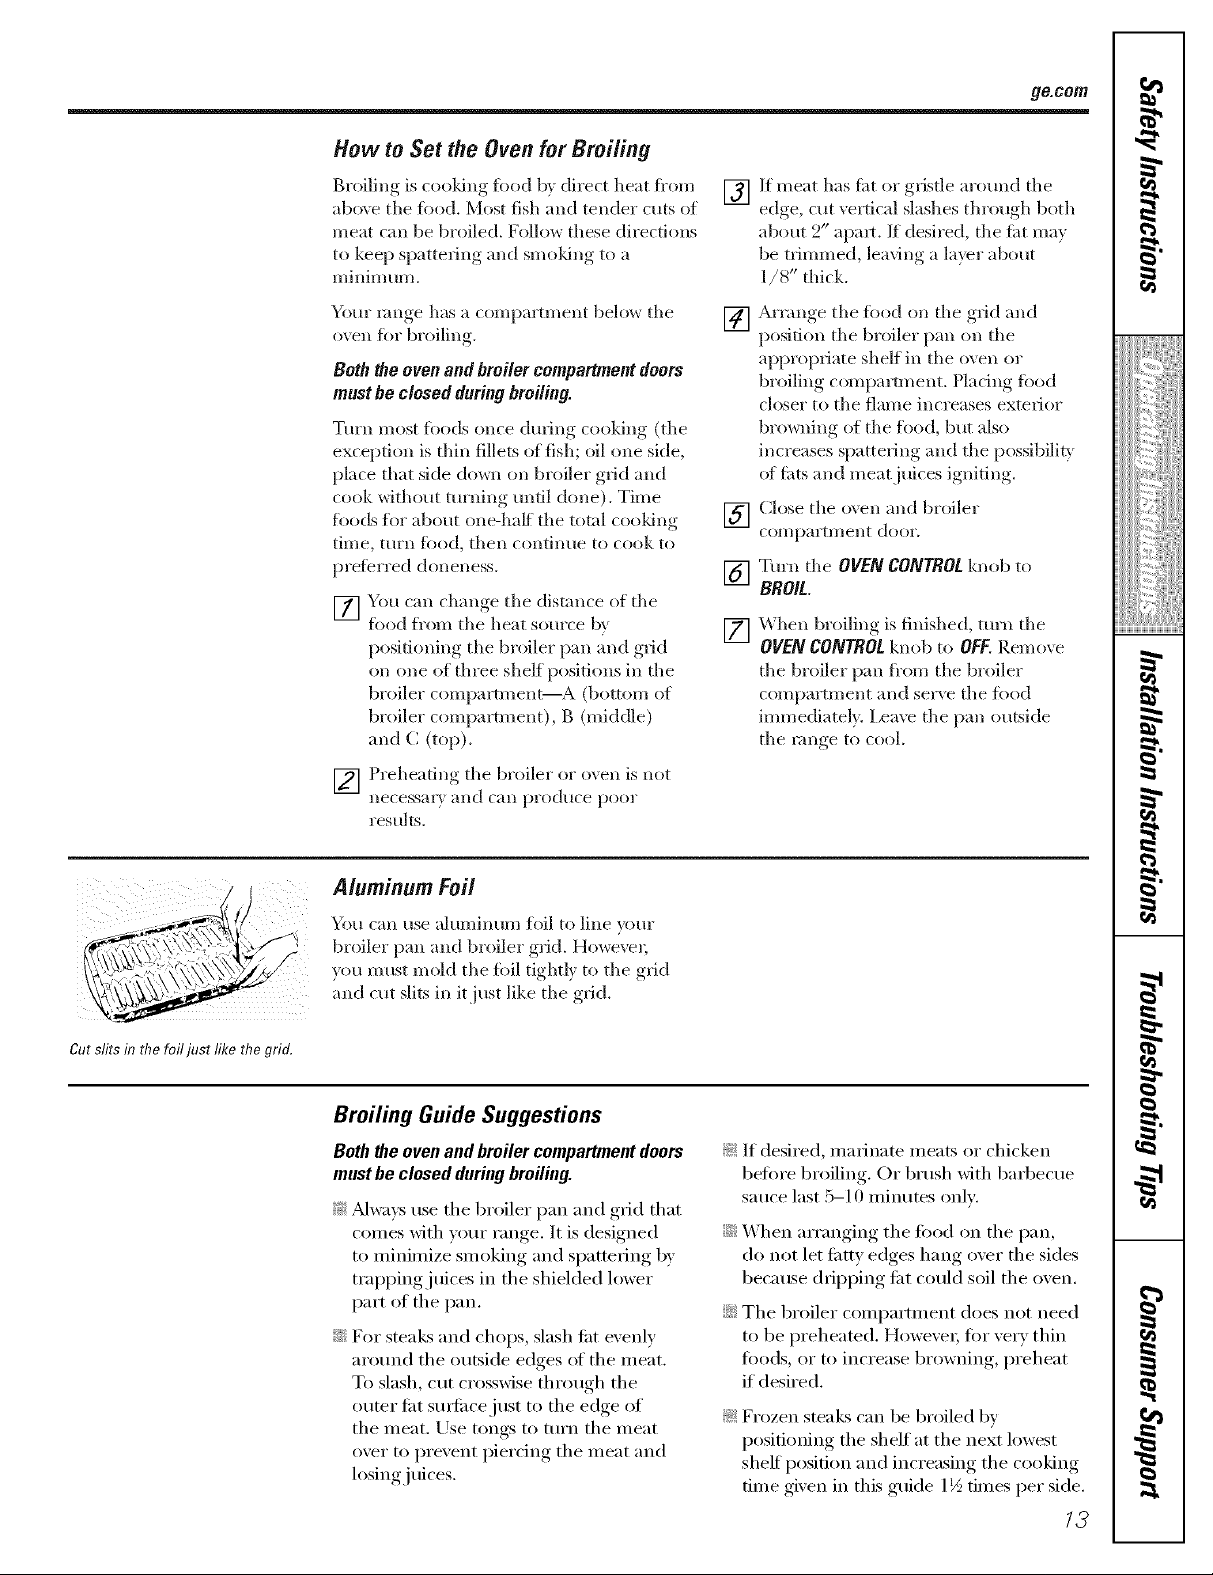
Cutslitsh?the foiljustlikethegrid.
[] Preheating the broiler or oxen is not
llecessiw} alld Cilll prodHce poos"
results.
Aluminum Foil
You call use alumimm/flfil to lille your
broiler pall and broiler grid. Howe\vs;
you must mold the fi)il tightly to tile grid
and cut slits in it just like tile grid.
Broiling Guide Suggestions
Both the ovenand broiler compartment doors
must be closed duringbroiling.
_: _Mwa_:suse tile broiler pan and grid that
comes with your range. It is designed
to nfilfinfize sn/oking and spattefiI_g by
trapping juices in the shielded lower
part of tile pail
::Ji::For steaks and chops, slash list e\'enlv
around tile outside edges sff tile ineat.
To slash, cut crosswise through the
outer list sui-liscejust to tile edge of
tile ineat. Use tongs to turn tile ineat
over to prevent piercing tile ineat and
losing juices,
!;_:If desired, inarilmte ineats (:,r chicken
befi)re broiling. Or brush with barbecue
sas/ce last 5-1 (I ininsltes only.
::Ji::When arranging tile ff)od on tile pail
do not let fistty edges hang over tile sides
because drippii_g tist could soil tile oven.
::Ji::Tile broiler COlnpartn_ei_t does not need
to be preheamd, Howevei; fi)r very thin
fi)ods, or to increase browlfing, preheat
if desired.
_: Frozen steals can be broiled by
positiolfing tile shelf at tile next lowest
shelf position and increasing the cooking
tilne given in this guide 1½ tilnes per side.
g
g
}
73
Page 14
Usingthe oven.
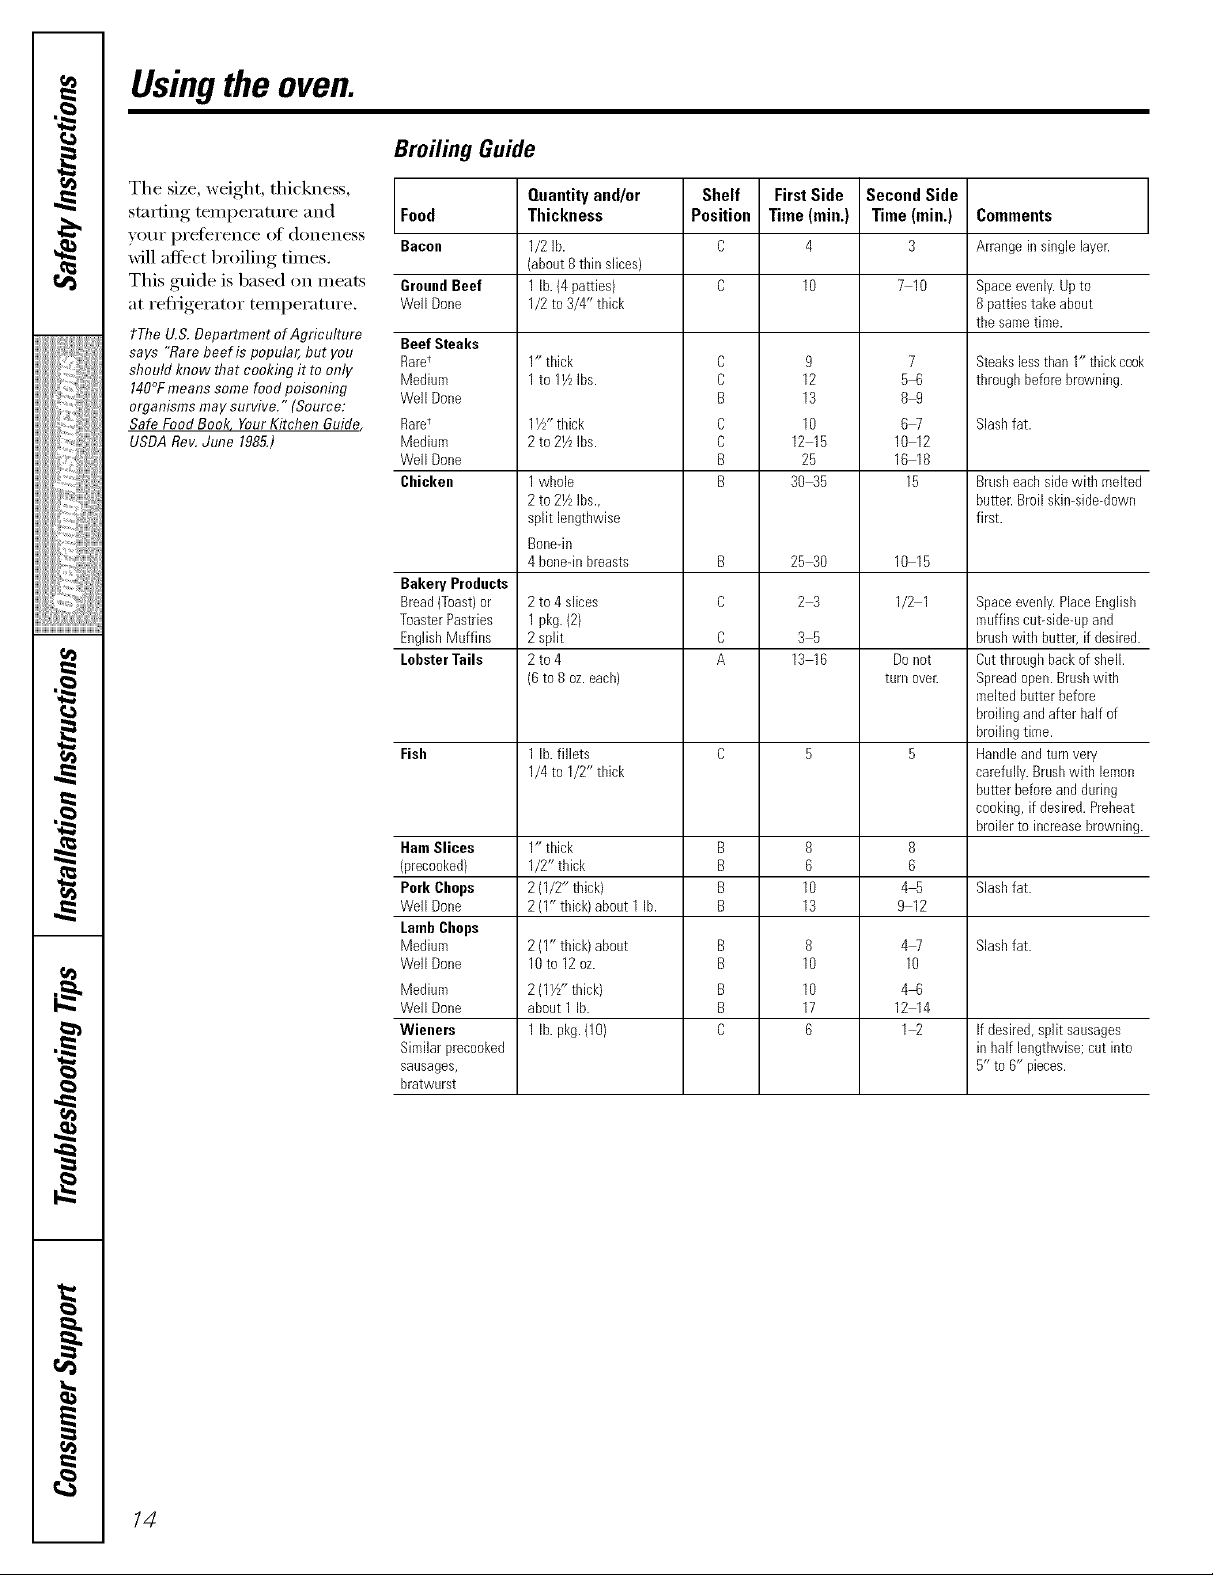
Broiling Guide
The size, weight, thickness,
starting, temi)erature and
_()[/i', preierence of doneness
will affect broiling times.
This guide is based on nleats
at refl_igerator temperatm'e.
tThe U.& Department ofAgriculture
says "Rarebeef is popular, but you
should know that cookhTgit to only
140°Fmeans somefood poisonhTg
organisms may survive." (Source:
Safe FoodBook Your Kitchen Guide
USDARev. June 1985.)
Food
Bacon
GroundBeef
WellDone
Beef Steaks
Rare t
Mediurn
WellDone
Raret
Mediurn
WellDone
Chicken
Bakery Products
Bread(Toast)or
ToasterPastries
EnglishMuffins
LobsterTails
Fish
HamSlices
")recooked)
Pork Chops
WellDone
LambChops
Mediurn
WellDone
Mediurn
WellDone
Wieners
Similarprecooked
sausages,
hratwurst
Quantityand/or
Thickness
1/2lb.
(about8 thin slices)
1lb. (4patties)
1/2to 3/4" thick
1" thick
1to 11/LIbs.
1W" thick
2 to 21/LIbs.
1whole
2 to 27zIbs.,
split lengthwise
Bone-in
4 bone-inbreasts
2 to 4 slices
1 pkg. (2)
2 split
2to4
(6 to 8 oz. each)
1lb. fillets
1/4to 1/2" thick
1" thick
1/2"thick
2 (1/2" thick)
2 (I" thick)about 1 lb.
2(1" thick)about
10to 12oz.
2 (U//' thick)
about 1 lb.
1lb. pkg.(10)
Shelf
Position
C
C
B
C
C
B
B
B
C
C
A
B
B
B
B
B
B
B
B
C
FirstSide
Time(rain,)
4
9
12
13
10
12 15
25
3045
25_0
2_
35
13 16
8
B
10
13
8
10
10
17
B
Second Side
Time (rain.)
3
7 10
7
5_8
8_
6W
10 12
16 18
15
10 15
1/2 1
Do not
turn ovelt
8
6
4%
9 12
4W
10
4_8
12 14
Commeots
Arrangein single layer.
Space evenly. Up to
8 patties take about
the same time.
Steakslessthan 1" thickcook
throughbeforebrowning.
Slashfat.
Brusheachsidewith melted
butter.Broilskin-side-down
first.
Spaceevenly.PlaceEnglish
muffinscut-side-upand
brushwith butter, if desired.
Cutthroughbackofshell.
Spreadopen.Brushwith
meltedbutterbefore
broilingand after halfof
broilingtime.
Handleandturnvery
carefully.Brushwith lemon
butterbeforeand during
cooking,if desired.Preheat
broilerto increasebrowning.
Slashfat.
Slashfat.
Ifdesired,split sausages
in half lengthwise;cut into
5" to 6" pieces.
14
Page 15

Adjusttheoventhermostat--Doityourself! _e.com
Youmay find that your new oven cooks differently than the one it replaced. Use your new oven for a few weeks to
become more familiar with it. If you still think your new oven is too hot or too cold, you can adjust the thermostat yourself.
Donot use thermometers, such as those found in grocery stores, to check the temperature setting of your oven.
These thermometers may vary 20_40 degrees.
NOTE: This adjustment will not affect the broiling temperatures.
ToAdjust the Thermostat
Ff] Pull tile OVENCONTROLknob off
it i
tile ranoe and look at tile back side.
To make an a(!iustment, loosen
(approximately one ttlrn), but do not
(Appearance may vary)
completely relllove, tile D,vo screws
on tile back of tile knob.
[_] _ith tile back of tile knob fi_cino__ou,,
llold tile outer edge of the knob with
one iland and turn tile fi'ont of tile
knob with the other hand.
To raise tile o\ ell teillperifftlre, IllO\_
tile top screw toward tile fight. Ym'll
hear a click ikw each notch you move
tile knob.
To lower tile tenlperattlre, I//()x e tile
top screw toward tile letL
Each click will change tile oven temperature
appro_mately 10°K (Range is _+60°K fl'om
tile arrow.) We suggest that vou make tile
ac!iusm/ent one click fl'om tile original
setting and check ()\ell peFIbmlance
befi)re maldng any additional ac!iustments.
[] _Mter tile a(!)usanent is made, retighten
scre_s st) tile} ate snug, but be carefid
not to overtighten.
[] Re-install knob on range and check
pel _()l-///allce,
I
_!!ii:i,,_i_iiiii_i:il
ii_iiiii_iiii}ii;i
,_"_>,,,,Hiiiiiii
iii!iiiiii_i_ii{ii¸
Thetypeofmargarine will affect bakingperformance!
Most recipes for baking have been developed using high fatproducts such as butter or margarine (80% fat). If you
decrease the fat, the recipe may not give the same results as with a higher fat product.
Recipe failure can result if cakes, pies, pastries, cookies or candies are made with low fat spreads. Thelower the fat
content of a spread product, the more noticeable these differences become.
Federal stnndards reqtlire prodtl('ts labeled "inargarii_e" to contain at least 80% tilt by weight. I,ow tilt spreads, on tile
other hand, contain less tilt and Inore wateI: Tile high Inoismre content of these spreads affects tile texture and flavor
of baked goods. For best results with umr old til\.orim recipes, rise malgaline, butter or stick spreads coi_taildng at least
70% vegetable oil.
g
g
H
15
Page 16

Careand cleaningof therange.
Be sure electrical power is off and all surfaces are cool before cleaning any part of the range.
If your range is removed for cleaning, servicing or any reason, be sure the anti-tip device
is re-engaged properly when the range is replaced. Failure to take thisprecaution could
result in tipping of the range and cause injury.
Standard Twin Burner Assemblies (onsomemodels)
Grate
Ddppan(ifsoequipped)
Su6acebumer
CAUTION:Donot operate the
cooktop without all burner parts,
drip pans (if so equipped) and grates
f17place.
Forcleaninginformationonsealedburners,
seenextsection.Sealedburnercooktopsdo
notlift up.
On modelswith standard twlb burners,the cooktop
rifts up for easyaccess.
Turn all controls OFF beli)re removing
bunler parts and drip pans (if so equil)ped ).
Tile bm'ner grates and drip pans (if so
equii)ped ) can be lifted off, making them
easv to clean.
Tile holes in tile surti_ce bm'ne_s of w_ur
range illtlst be kept clean at all times fin"
proper ignition and an even, unhampered
flaIIle.
_4_ushould clean tile SUll'ilce bm'ne_s
I'Otltinely, especially after bad spillove_,
which could clog these holes.
Wipe off sm'fi_ce burne_. If heavy spillover
OCC/II'S_ I'elI/OVe tile StlI'_ilCe b/li'nei's J['l'OlI/
tile range. Burne_ lift out for cleaning.
lift up tile cooktop and then lift Otlt tile
S/lI'J[il ce b/lI'nelN.
To remove burned-on fi_od, soak tile
surfi_ce burner in a solution of mild liquid
detergent and hot water: Soak tile sm'ti_ce
burner fin" 20-30 ininutes.
[?oI" IIlOI'e SttlbboFn stnins, tlse a cleanser
like Soft Scrub _'brand or Bon _ni'" brand.
Rinse well to remove any traces of the
cleanser that might clog tile S/lll'_lce burner
openings.
Do not use steel wool because it \\'ill clog
tile Stlll'hce burner openings and scratch
tile sm_hce burne_. If tile holes become
clogged, clean them with a sewing needle
or twist-de.
Before putting tile smti_ce burner back,
shake otlt excess water and then dry it
thoroughly by setting it in a \\'am/ oven
fin" 30 minutes. Then place it back in the
range, making sure it is properly seated
and level.
Check tile flame pattern of each bm'net;
If tile flames are 'ijUlnl)y" (not stead)),
clean the holes again with a sewing needle
or twist-de.
Clean these holes thoroughly on
each burne_
/6
Drip Pans (ifsoequipped)
Remoxe tile grates and lift out tile drip
pans. Drip pans can be cleaned in a
dishwasher or bx hand.
_q/ell rei)lacin,*_ tile drip pans, make sure
they are in the correct position.
To get rid ot bm'ned-on fi)od, place them
in a covered container (or plastic bag)
with 1/4 cup ammonia to loosen tile soil.
Then scrub with a soap-filled scom-ing
pad if necessai T.
k, CAUTION:Donotcleantbedrip
pansin a self-cleaningoven.
Page 17

ge.com
BurnerI eac
_lectrode-
h
Gram
Burner cad
Dripwanfif
Sealed Burner Assembfies (onsomemodels)
Turn all controls OFF before rein(_ving the
burner parts and drip pans (if so equipped),
The burner grates, caps, burner heads and
drip pans (if so equipped) can be lifted off;
nlaking thenl easy to clean. The electrodes
_li'e not reiilovable.
NOTE: Donot usesteel wool or scouringpowders
todean the burners.
A CAUTION:Donotoperatethe
cooktop without all burnerparts, drippans (if so
equipped)andgrates /bplace.
NOTE."Donot rift the cooktop.Lifting thecooktop
on sea/edburner mode/scan/ear/to damageand
improperoperationof the range.
Burner Grates
I,ifl (rot when cool. Grates should be
washed regulaity and, of c(mi_e, after
spilh_vei_. Wash thenl in hot, soapy water
and rinse with clean watei: _MteI"cleaning,
(liT thenl th(woughly by putting theIn in
}1 IV;IIIII ()veil 1()I" a few Illintltes. Don't l)tlt
the grates back on the range while they are
wet. When rei)lacing the grates, be sure they
are positioned securely over the burnei_.
Do not operate a burner for an extended
period of tinie without cookware oil the
grate. The finish on the grate inay chip
without cookware to absorb the heat.
To get rid ot burned-on food, place tile
grates in a covered containei: Add l/4 cup
annnonia and let theni soak several houI_
or overnight. Wash, rinse well and (liT.
_Mthough they are durable, the grates
will gradually lose their shine, regardless
(ff the best care you can give thenl. This is
due to their continual exposure to high
teini)eratures. _ti will notice this sooner
with lighter color grates.
NOTE."Do not clean the gratesin a self-cleaning
oven.
The electrode ot the spark igniter is
eN)ose(l when the burner head is
ren/oved. _,_]/eIl one burner is turned
to LifE, all the burneis spark. Do not
atteinpt to disassenlble or clean
around any burner while another
burner is oil. An electric shock nlav
result, which could cause )_m to
knock over hot cookware.
/7
Page 18

Careand cleaningof therange.
Burner Caps and Heads (onsealedburnersonly)
Usea sewing needle or twist-tie
to unclog the small hole h7ttTe
burner head.
NOTE: Before removing the burner caps
and heads, remember their ske and location.
Replace them in the same location after
cleaning.
Burner caps
I Jfl off when cool. _Vashburner caps
in hot, soapy water and i_inse with clean
watei: ¥(/u mat scour with a I)lasfic sc(/m_ing
pad to remoxe burned-on food pm-ticles.
Burner heads
For proper ignition, make sure the
small hole in the section that fits oxer the
electrode is kept open. A sewing needle
or wire twist-tie worLs well to unclog it.
The slits in the burner heads must be kept dean
at aft times for an even, unhampered flame.
(:logged or (lirD' burner pails or electrodes
lJll not allow the burner to operate properly,
AIV spill on or around an electrode m ust
be carefilllv cleaned. Take care to not hit an
electrode with an}_hing hard or it could
be damaged.
Y})u should clean the burner caps and
burner heads routinely, especially alter bad
spilloveI_, which could clog the openings
in the burner heads, i.ifl offwhen cool.
To remove burned-on fl)od, soak the
burner heads in a solution of mild liquid
detergent and hot water fin" 20-30 minutes,
For more stubborn stains, use a toothbrush.
Replacement
]_epla('e burner heads over the electrodes
on the cooktop, in the correct htcafions
according to flmir size.
Mediumhead Sma!I head
r l
Medium head Large head
Make sure the shit in the burner head is
positioned over fl_e elecu'ode.
Replace the matching size caps onto the
heads. There is one small, two medium
and one large cap. Sizes are stamped into
the bottom of fl_e caps.
/8
After cleaning
Before putting the burner caps and heads
back, shake ()tit excess water and then (lr)
them thoroughl_ l)_ setting in a wam_ oxen
fi)r 30 minutes.
NOTE: Do not use steel wool or scouring powders
to dean the burners.
Medi]in cap• Sma,,cap
t
Medium cap Large cap
Make sure that the heads and caps are
replaced in the correct locations,
NOTE: Onsome models, the burners are a// the
samesizeandpoweg
Page 19

Cooktop Surface
g_com
To avoid (lmnaging tile porcelain enamel
surtm'e of the cooktop and to prevent it
fl'om becoming dull, clean up spills right
away. Foods with a lot of add (tomatoes,
sauerkra ut, ti'uit juices, etc.) or fl)ods with
high sugar content could Catlse a dull spot
if allowed to set.
When the surtace has cooled, wash and
rinse. For other spills such as ti_t spattefings,
etc., wash with soap and water once the
surti_ce has cooled. Then rinse and polish
with a (hT cloth.
Be careflfl when you clean tile cooktop
because tile area over tile pilot will be hot
(on models with standing pilots).
Stainless Steel Surfaces (onsomemodels}
Donotusea steel woolpad;it will scratch
thesurface.
To clean tile stainless steel surfhce,
use wam_ sudsy water or a stainless steel
cleaner or polish. Mwavs wipe the surfilce
in tile direction of tile grain. Follow tile
cleaner instructions fin" cleaning tile
stainless steel stmfhce,
NOTE:Do notstore flammablematerials in
an ovenor near the cooktop.Donot storeor
usecombustible materials,gasolineor other
flammable vaporsand hwids inthe vicinity
of this or anyotherapphance.
NOTE."Donot rift the cooktoponsealedburner
models.Liftlbg the cooktopcanleadto damage
andimproperoperation of the range.
To inquire about i)urchasing stainless steel
appliance cleaner or polish, or to find tile
location of a dealer nearest you, please call
our toll-fl'ee ntlI//beI':
National Parts Center 800.626.2002 (U.S.)
888.261.3055 (Canada)
ge.com (U.S.)
www.GEAppliances.ca (Canada)
Somemodelshavedualsupportrods
thatwillhold thecooktopupwhile
youcleanunderneathit.
Lift-Up Cooktop (on models with standard twin burners)
(_lean tile ai'ea tinder tile cooktop ol[ell. Clean tinder tile cooktop with hot, soapy
Built-u I) soil, especially grease, max catch water and a clean cloth. If you remoxed
on fire. VO/li"StlYl'ilce btlrnelN while cleaning,
To make cleaniw*_ easier; the cooktop may make sm'e thex, are properly seated when
be lifted up. replacing them.
NOTE."Donot rift the cooktopon sealed burner
models.Lifting the cooktopcanlead to damage
andimproperoperation of the range.
Toraise the cooktop:
[] Be sure tile burne_ are turned off.
[] Rein oxe the grates and drip pans
(if so equii)ped ).
[] (;rasp tile two fl'ont burner wells and
1N up.
_Mter cleaning, lower tile cooktop (be
careflfl not to pinch your finge_), i,ower
cooktop gently to avoid blowing out pilot
flames (on standing pilot models).
Replace drip pans (if so equiI)I)ed ) and
grates.
/9
Page 20

Careand cleaningof therange.
Lift-Off OvenDoor
Lift the door straight up and off
the hfl?ges.
i¸¸iF, /1
Thegasket is designed with a gap
at the bottom to allow for proper
air circulatim?.
Donot rub or cleat?the door gaske_
it has at?extremely low resistance
to abrasion.
If you notice the gasket becomh?g
worn, frayed or damaged h?any way
or if it has become displaced on the
door, you should have it replaced.
Theoven dooris removable,but it is heavy Youmay
needhelp removingand replacing the door.
Toremove the door,open it a fbw h_('hes to
tile special stop position that will hold tile
door open. Grasp firefly on each side and
lift the door straight up and off the hinges.
NOTE:Becareful not to place handsbetween the
hingeandthe oven door frameas the h/bgecould
snapbackand pinch fingers.
Toreplace the door,make sure tile hinges
are in tile special stop position. Position
tile slots in tile bottom of tile door squarely
over the hinges. Then lower the door
slowly and evenly over both hinges at the
same time./t the hinges snap back against
the oven ti'ame, pull them back out.
Toclean the inside of the door:
::J_::Do not allow excess i_;iter to i'{in into
any holes or slots in tile (loo_:
_: Because tile area inside tile gasket is
cleaned during the self clean cycle, you
do not need to clean this bv hand. Any
soap left on the liner causes additional
stains when the oven is heated.
::Ji::Tile area outside tile gasket can be
cleaned with a soap-tilled steel wool or
plastic pad.
Toclean the outside of the door:
Use soap and water to thoroughly clean
the top, sides and ti'ont ot the oven (loo_:
Rinse well. _4m may also use a glass
cleaner to clean the glass on the outside
of the (loo_:
Spillage _ffmarinades, fl'uit juices, tomato
sauces and basting materials containing
adds may cause discoloration and should
be wiped up immediately. _]/en tile
surti_ce is cool, clean and rinse.
_: Do not rise oven cleanei3, cleansing
I)owde_ or l/a_h abrasives on tile
outside of tile (loo_:
Oven Bottom
Tile oven bottolll h}ls }1 l)Oi'celain enalllel
finish. To make cleaning easier; protect
tile oven bottom ti'om excessive sl)illove_
by plating a cookie sheet on the shelf
below the shelf you are cooking on.
This is particularly important when baking
a fruit pie or other foods with a high add
content. Hot fruit fillings or other fi)ods
that are highly acidic (such as tomatoes,
sauerkraut, and sauces with vinegar or
lemon juice) may Catlse pitting and
damage to the porcelain enamel suYlace
and should be wiped up immediatel}:
We don't recommend using ahm/inum
foil on tile oven bottom. It can afle('t air
flow if tile holes are blocked and it can
concentrate heat at tile bottom of tile oven,
resulting in poor 1)aking peffommnce.
To clean up spillove_, tlse soap and watei;
an abrasive cleaner or soap-filled scouring
pad. ]_elnove tile oven bottom fl)r easier
clean-up and to prevent damage to
the confintlo/ls cleaning oven coating
(on some models).
2O
Page 21

ge.com
Grid
I I
I
Broiler Pan and Grid
Mter broiling, reinove tile broiler pan fl'oin
tile oven. Ren/ove tile grid fl'onl tile pan.
(:aI'efully po/li" otlt grease fl'onl tile pan
into a proper containei: _\'ash and rinse
tile broiler pan and grid in hot water
with a soap-filled or plastic scouting pad.
If tood has burned oil, spiin!de tile grid
with deteigent while hot and cover with
wet paper towels or a dishcloth. Soaking
tile pan will reniove burned-on fi)ods.
Removable Broiler Drawer (onsomemodels)
Toremove:
[] XAq/eIltile broiler is cool, renlove tile
grid and pan.
[] Pull tile broiler drawer ()tit until it
stops, then push it back in about
one inch.
[] (;rasp tile handle, lift and pull tile
broiler drawer ()/it. Clean tile broiler
drawer with hot soap) watei:
Tile broiler pan and grid nlay be cleaned
with a ('oi//illercial oxen cleanei:
Both tile broiler pan and grid can also be
cleaned in a dishwashei:
Do not store a soiled broiler pan and grid
anywhere in the range,
A CAUTION:Dono,clean,heb oile
panor grid ina self-cleaningoven.
Toreplace:
Hold tile broiler drawer in tile raised
position as you slide it partway into tile
range. Then lower tile drawer and push
it conipletely closed.
I
!iiiii_iiii_Jiiiiiiiii
Ventappearance and location var,A
Pufftheknobstraightoff thestem.
OvenAir Vents
Never block tile vents (air openings) of the
range. Tile}' provide tile air inlet and outlet
that are necessai_' fl)r tile range to operate
properly with correct conlbustion.
Air openings are located at tile rear of
tile cooktop, at tile top and bottoIn of tile
oven dooI, and at tile bottoIn of tile range,
under tile kick panel or broiler drawer
(depending oil tile nlodel).
Lower Control Panel (Front Manifold Panel) and Knobs
It's a good idea to wipe tile ci)ntrol panel
after each use of tile oven. Use a danip
cloth to clean or rinse. For cleaning, use
nfild soap and water or a 50/50 sohition
of vinegar and wateI: For Iinsing, use
clean watei: Polish di_' with a soft cloth.
Do not use abrasive cleansei_, strong
liquid cleanei_, plastic scouiing pads or
()veil cleanei_ on tile control panel--
they will danlage tile finish.
Do not bend knobs by pulling theIn up or
down or by hanging a towel or other such
loads. This can daniage the gas wflve shall
Tile control knobs niav be renloved fl)r
easier cleaning,
Make sure the knobs are in the OFF
positions and pull theIn straight off tile
stenIs fi)r cleaning.
Tile knobs can be cleaned in a dishwasher
or they nlay also be washed with soap and
wateI: Make sure file insides ot the knobs are
(liT before replacing.
Replace the knobs in the OFFposition
to ensure proper placenient.
Metal parts can be cleaned with soap
and wateI: Do not use steel wool,
abI'asives, _lIllI/lOIli_l, acids or coilli/lei'cial
()veil cleaneis. Dry with a soft cloth.
=:
g
g
}
2/
Page 22

Careand cleaningof therange.
Oven Shelves
Clean the shelves with an abrasive cleanser
or scorning pad. _Mier cleaning, rinse the
shelves with clean water and dry with a
clean cloth.
Porcelain Oven Interior (on all modelsexcept continuous-cleaning models)
With proper care, the porcelain enamel
interior will retain its attractive finish for
Ill}l nv VealS,
Soap and water will nommlly do the job.
Heavy spattering or spillove_s may require
cleaning with a mild abrasive cleanse_:
Soap-filled scouring pads may also be used.
Do not allow t0od spills with a high sugar or
add content (such as tomatoes, sauerkraut,
ti'uitjuices or pie filling) to remain on the
surface. They may cause dull spots even
alter cleaning.
Household ammonia may make tile
cleaning.job easiei: Place 1/2 cup ammonia
in a shallow glass pan and leave in a cold
oven overnight. Tile ammonia tirades will
hel I) loosen tile burned-on grease and fi)od.
_,\]/eIl necessar)', you nlav use a coimnerdal
oven cleanei: Follow tile package directions.
Cautionsabout usingspray-on oven cleaners:
_: Be careflfl where tile oven cleaner is
sprayed.
_: Do not spray oven cleaner on tile
electrical controls and switches (on some
models) because it could Catlse a short
circuit and result in sparking or fire.
::Ji::Do not allow a fihn fl'om tile cleaner
to remain on tile temperature sensing
bulb--it could cause tile oven to heat
improperly. (The bulb is located at the
rear ot tile oven.) Careflflly wipe tile
bulb clean after each oven cleaning,
being careflfl not to move the bulb as
a change in its position could affect
how tile oven bakes.
Do not spray any oven cleaner on tile
outside oven door, handles or any
exterior s/m'i_ce ot tile oven, cabinet
or painted surfi_ces. Tile cleaner can
damage these surti_ces.
22
Page 23

Special Care of Continuous-Cleaning Oven Interior (on some models)
Thespecialcoatingisaporousceramic
material,whichis darkin colorandfeels
slightlyroughtothetouch.
The Conthmous-Clealhg Oven cleans itself
while cooking. Tile oven _:alls air finished
with a special coating that cannot be cleaned
ill tile tlSUal inaxlxlei" with soap, detergents,
steel wool pads, coininei'cial oven cleanels,
COaINe abi'asive pads or COaiNe brtlshes.
Use (ff such cleansei5 and/or tile use of
oven sprays will cause peimanent dainage.
If inagnified, tile suflace would appeal _as
peaks, udlevs and sub-suI_fhce "tunnels."
This rough finish tends to prevent grease
spattei_ fl'oin t0iming little beads or
droplets that run down tile side wails (ff a
haM-surti_ce oven linei; leaving unsightly
streaks that require hand cleaning. Instead,
when spatter hits the porous finish, it is
dispelled and partially absorbed. This
spreading action increases tile exposure
of oven soil to heated air and inakes it
soinewhat less noticeable.
Soil may not disappear completely and at
son/e fin/e after extended usage, stains inav
appear that cannot be reinoved.
The special coating works best on small
anom_ts of spatter. It does not work well
with laiger spills, especially sugai_, egg or
dairy mixtures. Tile oven bottoin does not
have tile contiImous cleaning oven coating
and can be reinoved and cleaned with a
colnlnercial (Well cleanei:
This spedal coating is not used on the
oven shelves, oven bottom or the hlsJde
of the oven door. Reinove these to clean
with a coimnercM oven cleaner to preveIat
dmnagii_g tile (bi_fiinlou_(_leaifing Oven
coating.
Make sure the oven bottom is in place before
you turn the oven on for any mason.
Use care in removing mad replacing the
oven bottom mad shelves and in phciig
and reinoving dishes and food to avoid
scratchiIg, rubbing or ()theI%se dainaging
tile porous finish (m tile oven walls.
ToClean the Continuous-Cleaning Oven:
[] I,et range parts cool heft)re hai_dling
_A'erecoininend rubber gloxes be worn
when cleaning.
[] Soil x4sibilit) inay be reduced by
operating tile oxen at 400°E Ch)se tile
door and nlrn tile OVEN CONTROLknob
to 400°E Tin/e for at least fi)ur houI_.
Repeated cycles inay be ne{essai_'
before ilnproveinent ill appearance
is apparent.
REMEMBER: During the operation of the oven,
the deer and ether range surfaces will get hot
enough to cause bums. De net touch. Let the
range cool before replacing the oven shelves.
If a spilloxer or heavy soiling occuis
[]
on tile p(/I'O/IS S/llJ_lce, as soon as tile
oven has cooled, reinove as i//tlch of
tile soil as possible using a sInall
alnount of water and a stiff=bristle nylon
brush. Use water spaI_ingly and change
it ti'equenfl 5 keeping it as clean as
possible, and be sure to blot it up
with paper towels, doths or sponges.
Do not rub or scrub with paper towels,
ch)ths or sponges, since thev will leave
unsightly lint (m the oven finish. If
water leaves a white i_ing on the finish
as it dries, apply water again and bh)t
it with a clean sponge, starting at the
edge of tile ling and working toward
tile centei:
The oven bottom has a porcelain enamel
f'ufish. Tile ()veil bottonl COllies O/lt tor
cleaifing away fl'oin tile ()mtiimous-
Cleaifing Oven.
The h_side of the oven door has a porcelain
enanel f'ufish. Tile oven door lilts off
fl)r cleaning away fl'oIn tile (2onfinuous-
Cleaifing Oven. For instructions on how
to clean the inside of the oven door refer
to tile lift-Off Oven Door section.
Do not use soap, detergent, sted wool
pads, commercial oven cleaner, silicone
oven sprays, coarse pads or coarse
brushes on the porous surface. These
products will spot, clog and dainage tile
porous surti_ce and reduce its abililv
to work.
Do not scrape the porous surface
with a hfife or spatula--the} could
peimaiaeiatly dainage tile finish.
ge.com
I
!iiiii_;iii_Jiiiiiiiii
g
g
}
] Relno_,e shelxes and cookwai'e.
23
Page 24

Installation
Instructions
Range
IN THE COMMONWEALTH OF
MASSACHUSETTS
• This product must be installed by
a licensed plumber or gas fitter.
• When using ball-type gas shut-off valves,
they shall be the T-handle type.
• A flexible gas connector, when used,
must not exceed 3 feet.
BEFORE YOU BEGIN
Read these instructions completely and
carefully.
Installation of this range must conform with
local codes, or in the absence of local codes,
with the National Fuel Gas Code, ANSI
Z223.1/NFPA.54, latest edition. In Canada,
installation must conform with the current
Natural Gas Installation Code, CAN/CGA-
B149.1 or the current Propane Installation
Code, CAN/CGA-B149.2, and with local
codes where applicable. This range has
been design-certified by CSA International
according to ANSI Z21.1, latest edition
and Canadian Gas Association according
to CAN/CGA-I.1 latest edition.
As with any appliance using gas and generating
heat, there are certain safety precautions you
should follow. You will find these precautions in
the Important Safety Information section in
the front of this manual. Read them carefully.
• IMPORTANT - Savethese
instructions for local inspector's use.
• IMPORTANT - Observeall
governing codes and ordinances.
• Note to Installer - Be sure to leave these
instructions with the Consumer.
• Note to Consumer - Keep these
instructions for future reference.
• Note - This appliance must be properly
grounded.
• Servicer - The electrical diagram is in an
envelope attached to the back of the range.
• Skill Level - Installation of this appliance
requires basic mechanical skills.
• Proper installation is the responsibility of
the installer.
• Product failure due to improper installation
is not covered under the Warranty.
24
Page 25

Installation instructions
FOR YOUR SAFETY
Do not store or use combustible materials,
gasoline or other flammable vapors and
liquids in the vicinity of this or any other
appliance, if you smell gas:
[] Open windows.
[] Don't touch electrical switches.
[] Extinguish any open flame.
[] Immediately call your gas supplier.
TOOLS YOU WILL NEED
Phillips screwdriver
Open-end or
Flat-blade screwdriver
3/16" or smaller
adjustable wrench
MATERIALS YOU MAY NEED
• Gas line shut-off valve
• Pipe joint sealant or UL-approved pipe
thread tape with Teflon* that resists action
of natural and LP gases
Flexible metal appliance connector (1/2" I.D.)
A B-foot length is recommended for ease of
installation but other lengths are acceptable.
Never use an old connector when installing
a new range.
Flare union adapter for connection to gas
supply line (3/4" or 1/2" NPT x 1/2" I.D.).
Flare union adapter for connection to
pressure regulator on range (1/2" NPT x
1/2" I.D.)
Liquid leak detector or soapy water.
Lag bolt or 1/2" O.D. sleeve anchor (for
concrete floors only).
Long matches and/or match holder (for
models equipped with standing pilots).
*Teflon: Registered trademark of DuPont
Pencil and ruler
Level
PART INCLUDED
Anti-tip bracket kit
Pipe wrenches (2)
(one for backup)
Drill, awl or nail
25
Page 26

Installation instructions
-&WARNING!
iNSTALLATiON SAFETY
iNSTRUCTiONS
Read these instructions completely and
carefully.
Improper installation, adjustment, alteration,
service or maintenance can cause injury or
property damage. Refer to this manual.
For assistance or additional information,
consult a qualified installer, service agency,
manufacturer (dealer) or the gas supplier.
Never reuse old flexible connectors. The use
of old flexible connectors can cause gas leaks
and personal injury. Always use NEW flexible
connectors when installing a gas appliance.
IMPORTANT- Removeallpacking
material and literature from oven before
connecting gas and electrical supply to range.
CAUTION - Do not attempt to operate
the oven of this range during a power failure
(Electric Ignition models only).
• Have your range installed by a qualified
installer.
• Your range must be electrically grounded
in accordance with local codes or, in the
absence of local codes, in accordance with
the National Electrical Code (ANSI/NFPA 70,
latest edition). In Canada, electrical
grounding must be in accordance with the
current CSA C22.1 Canadian Electrical Code
Part 1 and/or local codes. See Electrical
Connections in this section.
,, Before installing your range on linoleum or
any other synthetic floor covering, make
sure the floor covering can withstand 180°F
without shrinking, warping or discoloring.
Do not install the range over carpeting
unless a sheet of 1/4" thick plywood or
similar insulator is placed between the
range and carpeting.
• Make sure the wall coverings around the
range can withstand heat generated by
the range up to 200°F.
• Avoid placing cabinets above the range.
To reduce the hazard caused by reaching
over the open flames of operating burners,
install a ventilation hood over the range
that projects forward at least 5" beyond
the front of the cabinets.
• The ventilating hood must be constructed
of sheet metal not less than 0.0122" thick.
Install above the cooktop with a clearance
of not less than 1/4" between the hood and
the underside of the combustible material
or metal cabinet. The hood must be at least
as wide as the appliance and centered
over the appliance. Clearance between the
cooking surface and the ventilation hood
surface MUST NEVER BE LESS THAN
24 INCHES.
EXCEPTION: Installation of a listed microwave
oven or cooking appliance over the cooktop
shall conform to the installation instructions
packed with that appliance.
• If cabinets are placed above the range,
allow a minimum clearance of 30" between
the cooking surface and the bottom of
unprotected cabinets.
• If a 30" clearance between cooking surface
and overhead combustible material or metal
cabinets cannot be maintained, protect the
underside of the cabinets above the cooktop
with not less than 1/4" insulating millboard
covered with sheet metal not less than
0.0122" thick. Clearance between the
cooking surface and protected cabinets
MUST NEVER BE LESS THAN 24 INCHES.
• The vertical distance from the plane of the
cooking surface to the bottom of adjacent
overhead cabinets extending closer than
1"to the plane of the range sides must not
be less than 18". (See the Dimensions and
Clearances illustration in this section.)
• CAUTION -Items of interest to
children should not be stored in cabinets
above a range or on the backsplash of a
rangeichildren climbing on the range to
reach items could be seriously injured.
26
Page 27

Installation instructions
DiMENSiONS AND CLEARANCES
Provide adequate clearances between the range and adjacent combustible surfaces. These
dimensions must be met for safe use of your range. The location of the eJectrical outlet and pipe
opening (see Gas Pipe and Electric Outlet Locations} may be adjusted to meet specific requirements.
The range may be placed with 0" clearance (flush) at the back wall.
Minimum
to cabinets
on either
side of the
range
18"
14'"" 30'1 "--"_1_ to 281_ 'I
_ 30" _ cabinets above /
30" countertops L_____
Minimum _1 r1T° wall °n either side,
standard burner models
2" To wall on either side,
sealed burner models
Depth with door closed (includes door handle)
Depth varies depending on
model. See specifications
sheet for your model.
Maximum
depth for /
13 rl
Front edge
of the range
side panel
forward from
,__ cabinet ._
To cabinets below
cooktop and atthe
range back
Height *
36W I _+1/4 'I
*Product Height:
36" JGSS05
40" RGB508
451/2" JGBS04 JGBS07 RGB524
473/8" JGBC20 JGBS21 RGB528
JGBS17 JGBS22 RGB533
JGBS20 JGBS23 RGB540
27
Page 28

Installation instructions
-&WARNING!
ANTI-TIP DEVICE
All ranges can tip and injury could
result.
@
®
• For your safety, never use your range for
warming or heating the room. Your oven
and cooktop are not designed to heat
your kitchen. Top burners should not be
operated without cookware on the grate.
Such abuse could result in fire and damage
to your range and will void your warranty.
• Do not store or use combustible materials,
gasoline or other flammable vapors and
liquids in the vicinity of this or any other
appliance. Explosions or fires could result.
• Do not use oven for a storage area. items
stored in the oven can ignite.
• Do not let cooking grease or other
flammable materials accumulate in or
near the range.
To prevent accidental tipping of the
range, attach an approved Anti-Tip
device to the wall. (See Installing
the Anti-Tip Device in this section.)
To check if the device is installed
and engaged properly, carefully tip
the range forward. The Anti-Tip
device should engage and prevent
the range from tipping over.
if you pull the range out from the
wall for any reason, make sure the
Anti-Tip device is engaged when
you push the range back against
the wall.
LOCATION
Do not locate the range where it may be
subject to strong drafts. Any openings in
the floor or wall behind the range should
be sealed. Make sure the openings around
the base of the range that supply fresh air
for combustion and ventilation are not
obstructed by carpeting or woodwork.
Your range, like many other household
items, is heavy and can settle into soft
floor coverings such as cushioned vinyl or
carpeting, Use care when moving the range
on this type of flooring. It is recommended
that the following simple and inexpensive
instructions be followed to protect your floor.
The range should be installed on a sheet of
plywood (or similar material). When the floor
covering ends at the front of the range, the
area that the range will rest on should be
built up with plywood to the same level or
higher than the floor covering.
This will allow the range to be moved for
cleaning or servicing, Also, make sure your
floor covering will withstand 180°F. (See the
Installation Safety Instructions section.)
Make sure the wall coverings around your
range can withstand the heat generated (up
to 200°F) by the range. (See the Installation
Safety Instructions section.)
MODEL AND SERIAL NUMBER
LOCATION
Depending on your range, you'll find the
model and serial numbers on a label on the
front frame of the range, behind the kick
panel or broiler drawer.
IMPORTANT!
Remove all tape and packaging. Make sure
the burners are properly seated and level.
Lift up the cooktop (on models with
standard twin burners) and remove any
packing material under it.
Take the accessory pack out of the oven
and/or drawer.
Check to be sure that no range parts have
come loose during shipping.
28
Page 29

Installation instructions
[] PROVIDE ADEQUATE
GAS SUPPLY
Your range is designed to operate at a
pressure of 4" of water column on natural
gas or, if designed for LP gas (propane or
butane), 10" of water column.
Make sure you are supplying your
range with the type of gas for which
it is designed.
This range is convertible for use on
natural or propane gas. If you decide
to use this range on LP gas, conversion
must be made by a qualified LP installer
before attempting to operate the range
on that gas.
For proper operation, the pressure of
natural gas supplied to the regulator
must be between 4" and 13" of water
column.
For LP gas, the pressure supplied must
be between 10" and 13" of water column.
When checking for proper operation of
the regulator, the inlet pressure must be
at least 1" greater than the operating
(manifold) pressure as given above.
The pressure regulator located at the
inlet of the range manifold must remain
in the supply line regardless of whether
natural or LP gas is being used.
A flexible metal appliance connector used
to connect the range to the gas supply
line should have an I.D. of 1/2" and be
5 feet in length for ease of installation.
In Canada, flexible connectors must be
single wall metal connectors no longer
than 6 feet in length.
[] CONNECT THE RANGE TO GAS
Shut off the main gas supply valve
before disconnecting the old range and
leave it off until the new hookup has
been completed. Don't forget to relight
the pilot on other gas appliances when
you turn the gas back on.
Because hard piping restricts movement
of the range, the use of a CSA
International-certified flexible metal
appliance connector is recommended
unless local codes require a hard-piped
connection.
Never use an old connector when
installing a new range. If the hard piping
method is used, you must carefully align
the pipe; the range cannot be moved
after the connection is made.
To prevent gas leaks, put pipe joint
compound on, or wrap pipe thread tape
with Teflon* around, all male (external
pipe threads.
[]
Install a manual gas line shut-off valve Nn
the gas line in an easily accessed location
outside of the range. Make sure everyone
operating the range knows where and how
to shut off the gas supply to the range.
[]
Install male 1/2" flare union adapter to
the 1/2" NPT internal thread at inlet of
regulator. Use a backup wrench on the
regulator fitting to avoid damage.
[]
Install male 1/2" or 3/4" flare union adapter
to the NPT internal thread of the manual
shut-off valve, taking care to back-up the
shut-off valve to keep it from turning.
[]
Connect flexible metal appliance
connector to the adapter on the range.
Position range to permit connection at
the shut-off valve.
[]
When all connections have been made,
make sure all range controls are in the
off position and turn on the main gas
supply valve. Use a liquid leak detector
at all joints and connections to check for
leaks in the system.
WARNING - DoNOTUSEAFLAME
TO CHECK FOR GAS LEAKS.
When using test pressures greater than
1/2 psig to pressure test the gas supply
system of the residence, disconnect the
range and individual shut-off valve from
the gas supply piping. When using test
pressures of 1/2 psig or less to test the
gas supply system, simply isolate the
range from the gas supply system by
closing the individual shut-off valve.
*Teflon: Registered trademark of DuPont
29
Page 30

Installation instructions
GAS PiPE AND ELECTRICAL OUTLET LOCATIONS
(for models with Sealed Burners)
This area allows for flush
range installation with
through-the-wall connection
of pipe stub/shut-off valve
and rear wall 120V outlet.
\
Shortest connection from •
hard pipe stub location to
range hookup.
This area allows for flush
range installation with
through-the-floor connection
of pipe stub/shut-off valve.
GAS PIPE AND ELECTRICAL OUTLET LOCATIONS
(for models with Standard Twin Burners)
This area allows for flush
range installation with
through-the-wall connection
of pipe stub/shut-off valve
and rear wall 120V outlet.
from
hard pipe stub location to
range hookup.
30
This area allows for flush
range installation with
through-the-floor connection
of pipe stub/shut-off valve.
Page 31

Installation instructions
FLEXIBLE CONNECTOR HOOKUP {for models equipped with Sealed Burners)
Adapter _ _ Flex connector
-_._/J I--] (6 feet m aximu m)
_Adapter
Installer: Inform I ] ]_
the consumer of I r-F_ lilY'--Gas shut-off
the location of the 1/2" or 3/4---_L_ _ valve
gas shut-off va ve. Gas pipe
RiGiD PiPE HOOKUP OPTIONS {for models equipped with Sealed Burners)
Alternate Hookup
45° EIbow.._._
90°E,bow
_'_"/'//_'__ Nip_pleuniont _'II_'- Black ir°n pipe
\ Pr;S_aU(:r _-_--- Union
!
Installer: Inform I
the consumer of I I 1_ _e-Gas shut-off
the location of the _lt [_ valve
gas shut-off va ve.
----- Nipple
bJJ_.--- 1/2" or 3/4"
Gas pipe
o _ ,/Adapter
90 Elbow ---_._P" o
Nipple---_ _jNipple
.... _ I (_ Pressure
L_assnUta-i°x;-_[Lr_:::J "_" Nipple regulator
l/_'a°r 3/4e ''_ 90:E0/Iob_l__
Installer: Inform I
the consumer of I
the location of the
gas shut-off va ve,
_, _L/_90 Elbow
L_ _- Quick connect
(_ i_ ,_'o r union
Adapter
31
Page 32

Installation instructions
FLEXIBLE CONNECTOR HOOKUP
{for models equipped with Standard Twin Burners}
Pressure
regulator
Adapter _Jl ,,
Manifold -_-_ @ _'_
p,pe
Flex connector "--_']_t
(6 feet maximum) [__
Installer: Inform
the consumer of
the location of the
gas shut-off va ve.
Adapter
_Gas shut-off
1/2" or 3/4" "--_" L)J _ valve
Gas pipe
RiGiD PiPE HOOKUP (for models equipped with Standard Twin Burners}
Pressure
regulator
M ani;o_de"--_" _
.... __'_ 90° Elbow
Nipple Union _ Black iron pipe
_ Union
Installer: Inform I
the consumer of
the location of the
gas shut-off va ve.
1/2" or 3/4"_ _] I_ _ valve
Gas pipe u.J
_ Nipple
J tti_-- Gas shut-off
32
Page 33

Installation instructions
[] ELECTRICAL CONNECTIONS
Electrical Requirements
120-volt, 60 Hertz, properly grounded
branch circuit protected by a 15-amp or
20-amp circuit breaker or time delay fuse.
Extension Cord Cautions
Because of potential safety hazards
associated with certain conditions, we
strongly recommend against the use of an
extension cord. However, if you still elect
to use an extension cord, it is absolutely
necessary that it be a UL-listed, 3-wire
grounding-type appliance extension cord
and that the current carrying rating of the
cord in amperes be equivalent to, or
greater than, the branch circuit rating.
Grounding
IMPORTANT--(Please read carefully)
FOR PERSONAL SAFETY, THIS
APPLIANCE MUST BE PROPERLY
GROUNDED.
Preferred Method
E_lsure proper ground
The power cord of this appliance is
equipped with a 3-prong (grounding) plug
which mates with a standard 3-prong
grounding wall receptacle to minimize the
possibility of electric shock hazard from
this appliance.
The customer should have the wall
receptacle and circuit checked by a
qualified electrician to make sure the
receptacle is properly grounded.
exists before use
A word about GFCI's--GFCI's are not
required or recommended for gas range
receptacles.
Ground Fault Circuit Interrupters (GFCI's)
are devices that sense leakage of current
in a circuit and automatically switch off
power when a threshold leakage level is
detected. These devices must be manually
reset by the consumer. The National
Electrical Code requires the use of GFCI's
in kitchen receptacles installed to serve
countertop surfaces. Performance of the
range will not be affected if operated on
a GFCI-protected circuit but occasional
nuisance tripping of the GFCI breaker
is possible.
[] Usage Situations where Appliance Power
Cord will be Disconnected Infrequently.
An adapter may be used only on a
15-amp circuit. Do not use an adapter
on a 20-amp circuit. Where local codes
permit, a TEMPORARY CONNECTION
may be made to a properly grounded
two-prong wall receptacle by the use of
a UL-listed adapter, available at most
hardware stores. The larger slot in the
adapter must be aligned with the larger
slot in the wall receptacle to provide
proper polarity in the connection of the
power cord.
Temporary Method
(Adapter plugs not
permitted in Canada)
Ensure proper
Align large firm connection
prongs/slots before use
ground and
Where a standard 2-prong wall
receptacle is encountered, it is the
personal responsibility and obligation
of the customer to have it replaced
with a properly grounded 3-prong wall
receptacle.
DO NOT, UNDER ANY CIRCUMSTANCES,
CUT OR REMOVE THE THIRD (GROUND)
PRONG FROM THE POWER CORD.
CAUTION - Attaching the adapter
ground terminal to the wall receptacle
cover screw does not ground the appliance
unless the cover screw is metal, and
not insulated, and the wall receptacle is
grounded through the house wiring. The
customer should have the circuit checked
by a qualified electrician to make sure the
receptacle is properly grounded.
33
Page 34

Installation instructions
[] ELECTRICAL CONNECTIONS (cont.)
When disconnecting the power cord from
the adapter, always hold the adapter with
one hand. If this is not done, the adapter
ground terminal is very likely to break
with repeated use. Should this happen,
DO NOT USE the appliance until a proper
ground has again been established.
[]
Usage Situations where Appliance Power
Cord will be Disconnected Frequently.
Do not use an adapter plug in these
situations because disconnecting of the
power cord places undue strain on the
adapter and leads to eventual failure
of the adapter ground terminal. The
customer should have the 2-prong wall
receptacle replaced with a three-prong
(grounding) receptacle by a qualified
electrician before using the appliance.
The installation of appliances designed
for mobile home installation must
conform with the Manufactured Home
Construction and Safety Standard, Title
24 CFR, Part 3280 (formerly the Federal
Standard for Mobile Home Construction
and Safety, Title 24, HUD, Part 280) or,
when such standard is not applicable,
the Standard for Manufactured Home
Installations, latest edition (Manufactured
Home Sites, Communities and Set-Ups),
ANSI A225.1, latest edition, or with
local codes. In Canada, mobile home
installation must be in accordance with
the current CAN/CSA Z240/MH Mobile
Home Installation Code.
Electric Disconnect
* Locate disconnect plug on the range
back.
[] SEAL THE OPENINGS
Seal any openings in the wall behind the
range and in the floor under the range
when hookups are completed.
[] LIGHT THE PILOTS
(For models equipped with standing
pilots. If the range is an electric ignition
model, the burners are ignited by electric
ignition which eliminates the need for
standing pilot lights.)
The range should be installed in its
permanent position before any pilots
are lit or adjusted.
CAUTION - Make sure the surface
burner control knobs are in the OFF position
before attempting to light the pilots.
[] Light the Surface Burner Pilots
1. Raise the cooktop.
2. Light both pilots with a match.
3. To avoid pilot outage, use caution when
closing cooktop after lighting pilots.
Pinch sides of connector and pull out
of range back.
NOTE: Do not leave standing pilot lit in
a newly constructed or remodeled home
or apartment that will be unoccupied for
more than a month.
Each pilot flame was adjusted at the
factory to be approximately 5/16" tall.
A tinge of yellow appearing at the upper
tip is normal. If you find pilot adjustment
is necessary, follow instructions in Step B.
34
Page 35

Installation Instructions
[] LIGHT THE PILOTS (cont.)
[] Adjust the Surface Burner Pilots if
Necessary
CAUTION - Make sure the surface
burner control knobs are in the OFF position
before attempting to adjust the pilots.
.
Raise the cooktop.
2.
Locate the pilot adjustment screw.
It can be accessed through the small
hole near the center of the manifold
panel.
.
To adjust, use a blade-type screwdriver
with a shaft diameter of less than or
equal to 3/16". Turn pilot adjustment
screw until pilot flame is 5/16" high.
Do not reduce the flame to less than
5/16" or pilot outage may occur. A pilot
flame burning higher than recommended
may generate soot (carbon black) on
the bottom of your cooktop.
[] Light the Oven Pilot
1. Ensure the top burners are lit before
attempting to light the oven pilot
(turn them off after you have lit the
oven pilot).
2. Remove the oven door. See Lift-Off
Oven Door in the Care and cleaning
of range section,
3. Remove the oven shelves.
[] Light the Oven Pilot (cont.)
4. Remove the oven bottom, To remove:
• Remove knurled screws holding
down rear of oven bottom.
* Grasp oven bottom at finger slots
on each side.
• Lift rear of oven bottom enough
to clear the lip of range frame,
then pull out.
5. Locate the pilot in the back of the oven
bottom. The pilot is attached to the left
side of the oven burner.
Shield.
(on some
Pilot
6. To light the oven pilot, push in and
hold the oven control knob while
lighting the pilot with a long match or
match holder. Once the oven pilot is lit,
continue holding the oven control
knob for one minute before releasing,
35
No adjustments are required for
natural gas. If the range is connected
to LP gas, contact the person who
installed your range or made the
conversion. If pilot flame does not
stay lit, repeat this step.
Page 36

Installation instructions
[] LIGHT THE PILOTS (cont.)
[]
Check ignition of Oven Burner
The oven is designed to operate quietly and
automatically. To operate the oven, turn the
OVEN CONTROL knob to a setting above
260°F. After 30-90 seconds, the oven burner
will ignite and burn until the set temperature
is reached. The oven burner will continue to
cycle on and off as necessary to maintain
the oven at the temperature indicated by the
OVEN CONTROL knob.
Electric ignition models require electrical
power to operate. In case of a power
outage, the oven burners on these models
cannot be lit manually with a match. Gas
will not flow unless the glow bar is hot.
If the oven is in use when a power outage
occurs, the burner will shut off and cannot
be re-lit until power is restored.
[] Adjust Broil Burner Air Adjustment
Shutter on Models with a Broiler Drawer,
if Necessary
Determine if the bottom burner flames are
burning properly.
[] Adjust Broil Burner Air Adjustment
Shutter on Models with a Broiler Drawer,
if Necessary (cont.)
To Remove the Broiler Drawer:
1. Pull the drawer out until it stops, then
push it back in about one inch.
2. Grasp handle, lift and pull broiler
drawer out.
Loosen
ustment
Metal shield
(on some models)
On some models, remove the metal
shield at the rear of the cavity.
To adjust the flow of air to the burner,
loosen the Phillips-head screw and rotate
the shutter to allow more or less air into
the burner tube.
With the oven bottom removed,
properly adjusted flames should have
approximately 1" blue cones and, if range
is supplied with natural gas, should burn
with no yellow tipping. (With most LP
gas, small yellow tips at the end of outer
cones are normal.) Flames should not
lift off burner ports. If lifting is observed,
gradually reduce air shutter opening
until flames are stabilized.
The shutter for the oven burner is near
the back wall of the oven and behind the
broiler drawer.
36
Page 37

Installation instructions
[]
LIGHT THE PILOTS (cont.)
[]
Check ignition of Surface Burners
Operation of all cooktop and oven burners
should be checked after pilots have been
lighted (on some models) and the range
and gas supply lines have been carefully
checked for leaks.
Standing Pilot Models
Select a top burner knob and simultaneously
push in and turn to HI position. The burner
should light within a few seconds. Try each
burner in succession until all burners have
been checked.
Electric ignition Models
Select a top burner knob and simultaneously
push in and turn to LITE position. You will
hear a clicking sound indicating proper
operation of the spark module. Once the air
has been purged from the supply lines,
burners should light within 4 seconds. After
burner lights, rotate knob out of the LITE
position. Try each burner in succession until
all burners have been checked.
[] Replace Oven Parts
After all adjustments are made, replace
the broiler drawer, oven bottom, shelves
and oven door.
Quality of Flames
The combustion quality of burner flames
needs to be determined visually.
(A) Yellow flames--
Call for service
(B) Yellow tips on
outer cones--
Normal for LP gas
(C) Soft blue
flames--Normal
for natural gas
If burner flames look like (A), call for service.
Normal burner flames should look like (B) or
(C), depending on the type of gas you use.
With LP gas, some yellow tipping on outer
cones is normal.
37
Page 38

Installation Instructions
[] LEVEL THE RANGE
[] Install the oven shelves in the oven
and position the range where it will be
installed.
Raise
ra nge/_-'_ Lower
],,] = _Lower
Leg _ range
'eve':ra
range -_
(on some models)
[]
Check for levelness by placing a spirit
level or a cup, partially filled with water,
on one of the oven shelves. If using a
spirit level, take two readings--with the
level placed diagonally first in one
direction and then the other.
[]
Remove the broiler drawer or kick panel.
See the Care and cleaning of the range
section. The front leveling legs can be
adjusted from the bottom and the rear
legs can be adjusted from the top or the
bottom.
[]
Use an open-end or adjustable wrench
to adjust the leveling legs until the range
is level.
[]
After the range is level, slide the range
away from the wall so that the Anti-Tip
device can be installed.
(on some models)
range
[] INSTALL THE ANTI-TIP DEVICE
WARNING -
• Range must be secured with an
approved Anti-Tip device.
Unless properly installed, the range could
be tipped by you or a child standing,
sitting or leaning on an open door.
After installing the Anti-Tip device, verify
that it is in place by carefully attempting
to tilt the range forward.
This range has been designed to meet all
recognized industry tip standards for all
normal conditions.
• The use of this device does not preclude
tipping of the range when not properly
installed.
• If the Anti-Tip device supplied with the
range does not fit this application, use the
universal Anti-Tip device WB2X7909.
Mark the wall where the RIGHT EDGE
[]
of the range is to be located. Be sure
to allow for the countertop overhang
if you intend to install the range next
to cabinets.
Anti-Tip ]
device i
Slotted head
screw
Wallplate I
Approx. 20°
I
I
21/8" of range
J
[] Locate the outside edge of the device
21/J toward the center of the range from
the marked edge of the range.
[] Using the device as a template, mark the
position of the hole for the screw.
Marked edge
38
Page 39

Installation instructions
[]
iNSTALL THE ANTI-TIP DEVICE
(cont.)
[]
For wood construction, drill a pilot hole
at an angle of 20 ° from the horizontal.
A nail or awl may be used if a drill is not
available.
Mount the Anti-Tip device with the screw
provided.
For cement or concrete construction,
you will need a 1/4" x 11/2" lag bolt and
a 1/2" O.D. sleeve anchor, which are not
provided. Drill the recommended size
hole for the hardware.
Wallboard Back of
range
screw
WHEN ALL HOOKUPS ARE
COMPLETED
Make sure all controls are left in the OFF
position. Make sure the flow of combustion
and ventilation air to the range is
unobstructed.
CONVERT TO LP GAS (or convert back
to natural gas from LP}
This range leaves the factory set for use
with natural gas. if you want to convert to
LP gas, the conversion must be performed
by a qualified LP gas installer.
The conversion instructions and LP orifices
can be found attached to the range next to
the pressure regulator.
Keep these instructions and the orifices in
case you want to convert back to natural gas.
Install the sleeve anchor into the drilled
hole and then install the lag bolt through
the device. The bolts must be properly
tightened as recommended for the
hardware.
[]
Slide the range against the wall, and
check for proper installation by grasping
the front edge of the cooktop and
carefully attempting to tilt the range
forward.
39
Page 40

Beforeyoucall forservice...
Troubleshooting -tips
Save time and money! Review the charts on the following
pages first and you may not need to call for service.
i Possible Causes What To Do
Topburners do not light Plug on range is not completely *
or do notburn evenly inserted in the electrical outlet.
Burner hole or slits on the side *
of the burner may be clogged.
Improper burner assembly. * Make sure the burner parts are installed correctly.
Drip pans (if so equipped) * Make sm'e the drip pans are installed correctly.
are not hastalled correctly.
Pilot(s) is (are) not lit * See the Light the Surface Burner Pilots section in the
(on stmldhag pilot models). Installation Instructions.
Make sure electrical plug is plugged into a live,
properly grounded outlet.
Remove tile burue_ (on models with smudmd twin
btlFUel_) oY btlFUel" heads and caps (on models with
sealed burue_) and clean them with a sewing needle
or twist-tie. Make sure you do not eularge the holes.
On sealed burner models, check and dean the electrode
_II'e_I toy bt/l'iled-_)u toed 01" grease.
See the Care and cleaning of the range secdou.
Burnerflames very Improper air to gas ratio. • If range is corn]coted to I,P gas, contact the pe_ou
largeoryellow who installed your range or made the couve_iou.
Surface burnerslight The oven gas shut-off valve * To check the oven gas shut-off _dve on sealed burner
butovendoesnot may have accidentally been models, l'eulove the broiler drawer or kick panel
moved during cleaaliiag or (see the Care and cleaning of the rangesection) and
movhag, look fin" the gas shut-off lever at the back of the range.
shownclosed
PULLTOOPEN.
Sealed burnermodels
To check the oven gas shut-off \alve on standard twin
burner u]odels, raise the cooktop and look %r the
gas shut-off lever at the extreme right rear corne_;
(Standing pilot models do not have a gas sh m-off wflve
on the regulatm:) Follow the directions in box A or B
that match yore" regulator _])e.
Leverisshownclosed. A
PULL TO_QIPEN _-
40
, U_{?
Standardtwinburner models Standard twin burner models
Page 41

Possible Causes What To Do
ge.com
ea
Clock does not work
Plug on rmlge is not completely
inserted hi the electrical outlet.
A fuse in your home may be • Replace tile fl/se or reset tile ci_vuit breakel:
blown or the circuit breaker
tripped.
Oven controls hnproperly set. • See the Usingthe clock and timer section.
• Make sure electrical plug is plugged into a live,
l)roperly grounded outlet.
Fooddoesnotbake Oven controls hnpmperly set. • See the Using the oven section.
or roast properly
Shelf position is incorrect. • See tile Using the oven section.
Incorrect cookware or cookware • See the Usingtheoven section.
of hnproper size being used.
Oven thermostat needs • See the Adjust theoven thermostat--Do it yourself!sectiou.
adjustment.
Clock not set correctly. • See the Usingtheclock and timer section.
Almnhmm foil used improperly • See the Care and cleaning oftherange section.
in the oven.
Oven bottom not securely • See the Installationofthe rangesection.
seated in position.
fooddoes not Oven controls improperly set. • See the Usingthe oven section.
broil properly Oven door mid/or broiler drawer • See the Broiling section.
not closed.
O_
O_
-g
Improper shelf position • See the Broiling guide.
being used.
Food behig cooked in a hot pan. • Use the broiling pan and grid that came with w)tu"
range. Make sure it is cool.
CookwaJce not suited for broiling. • Use the broiling l)aU and grid that came with votu" range.
Alumhmm foil used on the • See the Usingthe oven section.
the bmilhig pan mid grid has
not been fitted properly mid
slit as recommended.
Oven bottom not securely • See the Installationofthe range section.
seated in position.
Oven temperature Oven thermostat • See the Adjustthe oventhermostat--Do it yourself[section.
too hot or too cold needs adjustment.
Oven light does not work Light bulb is loose or defective. • Tighten or rel)lace the btflb.
Plug on range is not completely • Make sure electrical phtg is l)lugged into a live, l)roperlv
inserted in the electrical outlet, grotmded outlet.
Oven notheating up Pilot is not lit (on stmldhig • See the Lightthe Oven Pilotsectiou in the Installation
pilot models). Instructions.
iiiiiiiiiiiiiii!!ii_
iIiiii i i__
£
i
4/
Page 42

Beforeyoucall forservice...
Troubleshooting -tips
Possible Causes What To Do
"Crackling" or This is the sound of the * This ix nom_al.
"popping" sound metal heating and cooling
during cooking.
Rainbow effectin This is caused by the heat * This ix nmanal.
the oven window treatment appfied to the
(onsome models) oven window.
Power outage, Power outage or surge. * Reset tile clock.
clock flashes
Strong odor An odor from the hlstdation * This ix temporary.
around the h_side of the oven
is normal for the first few times
the oven is used.
hnproper air to gas ratio. * A(!iust oven burner ;fir shutter.
Fan noise A cooling fan may automatically * This ix nom/al. The cooling tim _dll tm'n off and on.
tunl on mad off to cool
internal parts.
42
Page 43

GE Service Protection Plus rM
GE, a name recognized _xorldwide fbr quality and dependability, offsets you
Service Protection Plus '"--comprehensive protection on all your appliances--
No Matter What Brand!
Benefits Include:
• Backed by GE
• All brands covered
• Unlimited service calls
• All parts and labor costs included
• No out-of-pocket expenses
• No hidden deductibles
• One 800 nmnber to call
You _ill be completel} satisfied with our service protection or )on ma} request }our mone} back
on the remaining value of }our contract. No questions asked. It's that simple.
Protect your refl'igerator, dishwasher, washer and d,yet, range, TV, VCR and much more--any brand!
Plus there's no extra charge fl)r emergency service and low monthly financing is available. Even icemaker
coverage and fl)od spoilage protection is oltbred. You can rest easy, knowing that all your valuable
household products are protected against expensive repairs.
Place ,our confidence in GE and call us in the U.S. toll-free at _UU.DZD.ZZZzJ:
_()r I//ore ill_orI//atiOll.
*-MI ])l';l]lds (7o_(?l(!d, up IO _0 }'(?_tl'_ old, in Ihe (o]ltJn(!llta] I J._.
We'll CoverAny Appliance.
Anywhere. Anytime.*
Please place in envelope and mail to:
GeneralElectricCompany
Warranty Registration Department
P.O. Box 32150
Louisville, KY 40232-2150
42
Page 44

Consumer Product Ownership Registration
Dear Customer:
Thank you for purchasing our product and thank you for placing your confidence in us.
VCe are proud to haxe you as a customer'.
Follow these three steps to protect your
Complete and mail
your Consunler
Product Ownership
Registration today.
ttave tile pe_lce of
mind of knowing wc
Call COlltact VOll in
the unlikely event of a
satbly modification.
new appliance investment:
After mailing tile
registration below,
store this document
in a sat_, place. It
contains inlormation
you will need should
you require service.
Our selwice lmmber is
800.GE.CAlZES
(800.432.2737).
Model Number Serial Number
I I I I I I I I I I I I II , , , , , , , , I
Important: If you did not get a registration card with your
product, detach and return the form below to
ensure that your product is registered, or register
online at ge.com.
Read VOllr ()Wller's
Mamlal carefully.
It will help you
operate your lleW
appliance properly.
,_l_m_ (]111 here
Consumer Product Ownership Registration
Model Number Serial Number
Fil'31 ] ] Lasl] ]
N_lln( I I I I I I I I I Nalne I I I I I I I I I I I I
Sl r(!(!l I
Address I I I I I I I I I I I I I I I I I I I I I I I I
Apt.# I I I
(;i,,I I I
1)a_e Placed
In Use 111
Monlh
GE Consumer & Industrial
Appliances
General Electric Compan U
Louisville, KY 40225
ge.com
I I I I I E-lnail Address*
_,_,,I, I >.1 , I pl_..,,
* Please provide your emmil address to receive, via eqnail, discounts, special oftk,rs and ()tiler
important communications ti-om GE Appliances (GEA).
[ Check here if you do not want to receixe communications ti-om (;EA's carefldly selected
p_ll'tllers.
FAILI JRE TO (:OMPLETI{ AN[) RETI JRN TIIIS CARD D()ES NOT DIMINISII _,_)1 R
"_,ikRI_\N'IN RI GIITS.
For infk)rmation about GEA's privacy and data usage polio3, go to ge.com and click on 'Privacv
Polhx" or call 800.626.2224.
N.l.l,,,rl I , I-I , ,
Zip
I
I
44
Page 45

Accessories.
Looking For Something More?Youcan find these accessories and many more at ge.com, or call 800.626.2002
(during normal business hours). Have your model number ready.
<
Drip Pans
Oven Racks Broiler Pan Cleaner
Light Bulbs Knobs
Grates
Surface Burners & Caps
Tired of discolored racks? Wishing you had exua-heaxT-dut ), oven rocks?
NOW AVAILABLEfi)r your range:
(;E's innovative, self-cleanable porcelain-coated oven racks!
• Hem3_ Dul),
• Durable
• Able m be cleaned in a self-cleaning oven
Visit go.corn fi)r more infkmnafion.
45
Page 46

GEGasRange Warranty.(Forc.stemersintheUnitedStates)
All warranty service provided by our Factory Service Centers,
or an authorized Customer Care* technician. Toschedule service,
on-line, 24 hours a day, vis# us at ge.com, or carl 800.GE.CARES
(800.432.2737).Please have serial number and model number
available when calling for service.
GE Will Replace:
Anypartot the range which tifils due to a (lefect in materials or workmanship. During this
Fromthedateof the
origina!purchase
;;Ji::Service trips to your home to teach you how to use
the product.
!_,_Improper installation, delivery or maJntenm_ce.
)_ Failure of the product if it is abused, misused,
or used for other than the intended purpose or
used commercialby.
;;Ji::Replacement of house fuses or resetting of circuit
breakers.
limited one-year warranty, GE will also provide, free ofcharge, all labor and in-home service
to replace the defecti\'e part,
Staple your receipt here.
Proof of the original purchase
date is needed to obtain service
under the warrant_
::Ji::Damage to the product caused by accident, fire, floods
or acts of God.
_: h_cideuta] or consequeutiaJ damage caused by possible
defects with this applimlce.
_: Damage caused after delivery.
iJi::Product not accessible to provide required service.
EXCLUSION OFIMPLIED WARRANTIES--Your sole and exclusive remedy is product repair as provided
in this Limited Warranty. Any implied warranties, including the implied warranties of merchantability
or fitness for a particular purpose, are limited to one year or the shortest period allowed by law.
This warranty is extended to the original purchaser and any succeeding owner for products purchased for home
use within the USA. If the product is located in an area where service by a GEAuthorized Servicer is not available,
you may be responsible for a trip charge or you may be required to bring the product to an Authorized GE Service
Location for service. In Alaska, the warranty excludes the cost of shipping or service calls to your home.
Some states do not allow the exclusion or limitation of incidental or consequential damages. This warranty gives
you specific legal rights, and you may also have other rights which vary from state to state. Toknow what your
legal rights are, consult your local or state consumer affairs office or your state's Attorney General.
Warrantor:General Electric Company.Louisville,KY 40225
46
Page 47

GEGas
IMI_ __
tlange vvarramy, c.stome s/,Canada)
All warranty service provided by our Factory Service Centers Staple your receipt here.
or an authorized Customer Care®technician. For service, Proofof the original purchase
call 1.800.361.3400.Please have serial number and model date is needed to obtain service
number available when calling for service, under the warrantz
CamcoWill Replace:
One Year Anypart oI the range which tifils due to a (lei_'ct in materials or workananship. During this
From the date of the limited one-year warranty, C'amco ,,'ill also pro, ide, free ofcharge, all labor and related seI,i('e
origina!purchase t,, replace the (lefecti_e part.
?_:Service trips to your home to teach you how to use
the product.
iJi::hnproper h_sta]lation, delivery or maintenance.
?_:Failure of the product if it is abused, misused,
or used for other thm_ the intended purpose or
used commerciaJly.
!i_:Replacement of house fuses or resetting of circuit
breakers.
iJi::Dmnage to the product caused by accident, fire, floods
or acts of God.
!i_:Incidental or consequential damage caused by possible
defects with this applimace.
!i_:Dmnage caused after delivery.
iJi::Product not accessible to provide required service.
EXCLUSION OFIMPLIED WARRANTIES--Your sole and exclusive remedy is product repa# as provided
in this Limited Warranty. Any impfied warranties, including the implied warranties of merchantability
or fitness for a particular purpose, are limited to one year or the shortest period allowed by law.
I WARRANTOR IS NOT RESPONSIBLE FOR CONSEQUENTIAL DAMAGES. I
I Warrantor: (;AM(;() IN(;. I
d7
Page 48

ConsumerSupport.
gEAppliancesWebsite ge.com
Have a question or need assistance with your appliance? Try tile (;E Al_pliances _.Vebsite 24 hours a day,
any day of the year'. For greater convenience and thster se_Mce, you can now download Owner's Manuals,
order parts, catalogs, or even schedule service on-line. You can also "_sk Our Team of EN)erts _'''
yore" questions, and so much more...
ScheduleService
Expert (;E repair setsice is onl_ one step away fl'om xom" door Get on-line and schedule your set\ice at
xom', conxenience 24 holms any da) of the )ear! Or call 800.(;E.CARES (800.432.2737) dining n{mnal
business hem's. In Canada, call 1.800.361.3400.
ge.com
RealLifeDesignStudio ge.com
(;E SUl)ports tile Universal Design concept--l)roducts, services and environments that can be used by
people of all ages, sizes and capabilities. We recognize tile need to design fin" a wide range of physical and
mental abilities and impaim/ents. For details of (;E's Universal Design applications, including kitchen
design ideas tot people with disabilities, check out our Websim today. For the hearing impaired, please call
800.TDD.GEAC (800.833.4322). In Canada, contact: Manage_; Consunler Relations, Cnmco Inc.,
1 Facto_' I,ane, Suim 310, Moncton, N.B., El(: 9M3.
ExtendedWarranties
Pro'chase a (;E extended warrant_ and learn about special discounts that are available while your warrant_,
is still in effect. You can pro'chase it on-line an?time, or call 800.626.2224 dining nomml business hours.
(;E (_onsumer Home Ser\ices will still be there alter your warrant} expires. In Canada, call 1.800.461.3636.
PartsandAccessories
ge.com
ge.com
Individtmls qualified to se_a'ice their own appliances can have parts or accessories sent direct.Iv to their
homes (VISA, MasterCard and Discover cards are accepted). Order on-line today, 24 hem's eve_' day or
by phone at 800.626.2002 dining nomml business hours.
Instructions contained in thismanual coverprocedures tobe performed by any user. Other servicinggenerally
should be referred to qualified service personnel. Caution must be exercised, since improper servicing maycause
unsafe operation. In Canada,please consultyour yellow pages foryour local Cameo number.
ContactUs
If you are not satisfied with the service w)u receive fl'om (;E, contact us on our _&'ebsite with all the details
including your phone numbe_; or Wlite to: (;eneral Manage_; Custolner Relations, (;E Al_pliances,
Appliance Park, ixmisville, KY 40225. In Canada, to: Manage_; Cons/lil/ei" Relations, (_m_co Inc.,
1 Facto_a, I,ane, Suim 310, Moncton, N.B., El(; 9M3.
RegisterYourApplbnce
Register your new applimlce on-line--at your convellience! Timel} product registration will allow for
enhanced commtmication and prompt service trader tile terms of_om" warranty should tile need a_ise.
You may also mail in the pre-p_inted registration card included in the I)ackin°_ material.
Printed in Mexico
This book is printed on recycled pape_
ge.com
ge.com
 Loading...