

GE JGBS19BEM1WH, JGBS19BEM1CT, JGBS19BEH2WH, JGBS19BEH2CT, JGBS10WEH3WW Owner’s Manual
...
ge.com
©
°v-,,_
Safety Instr_ions ....... 2-7
Operati_ Instru_tions
Aluminum Foil ............ ] 5
Burners ............... 10, l l
(:lock .................... 13
Feauwes ................ 8, 9
Griddle .................. 12
()yen ................. 13-18
Baking and Roasting ...... 15
Broiling .............. 16, 17
Broiling Guide ........... 17
IJght ................... 14
()yen Control ............ 13
Power Oumg_ ............ 14
Prehea/ing .............. 15
Thermostat Adjusunent .... 18
Vent .................... 14
Care and Cleaning
Broiler Compartment ...... 24
Broiler Pan and Grid ....... 23
Burner Assembly' ....... 20, 21
Burner (;rates ............. 22
Control Panel and 14a_obs ...25
Cooktop Surfi_ce .......... 22
Door Removal ............ 23
Griddle .................. 19
Kick Panel ................ 24
()yen Bot/om ............. 23
()yen Inmrior ............. 25
()yen Light Replacement ...24
Oven Vents ............... 25
Shelves .................. 24
Installation
Instruc_ ons ........... 26=38
Air Adjusunent ............ 37
Anti-Tip Device ......... 30, 38
Assembling
Surfime Burners ........... 35
Checking Burner Ignition . . .36
Com_ecting the Range
to Gas ................ 31-33
Dimensions and
Clearances ............... 29
Electrical Connections ...34, 35
Leveling the Range ........ 37
Loca/ion ................. 30
LP ...................... 38
Model and Serial Nmnber
Location ................. 30
Troubleshooting Tips...39, 40
Consumer Support
Cons/ll]]er
Support .......... Back Cover
Product Regfistrafion .... 41,42
_\hrran w ................. 43
jc so9
}cBszo
Write the model and serial
numbers here:
Model #
Serial #
You can find them on a label on the
fl'ont of the range behind the kick
panel or broiler compartment.
18305580P177
49-85091 11-05Jfl
IMPORTANTSAFETYINFORMATION.
READALLINSTRUCTIONSBEFOREUSING.
WARNING!
For your safe_ the information in this manual must be followed to minimize the risk of fire or explosion,
electric shock, or to prevent property damage, personal injury, or loss of life.
WARNING:If the information
in this manual is not followed exactly,
a fire or explosion may result causing
property damage, personal injury
®
WARNING!
or death.
-- Do not store or use gasoline or other
flammable vapors and liquids in the
vicinity of this or any other appliance.
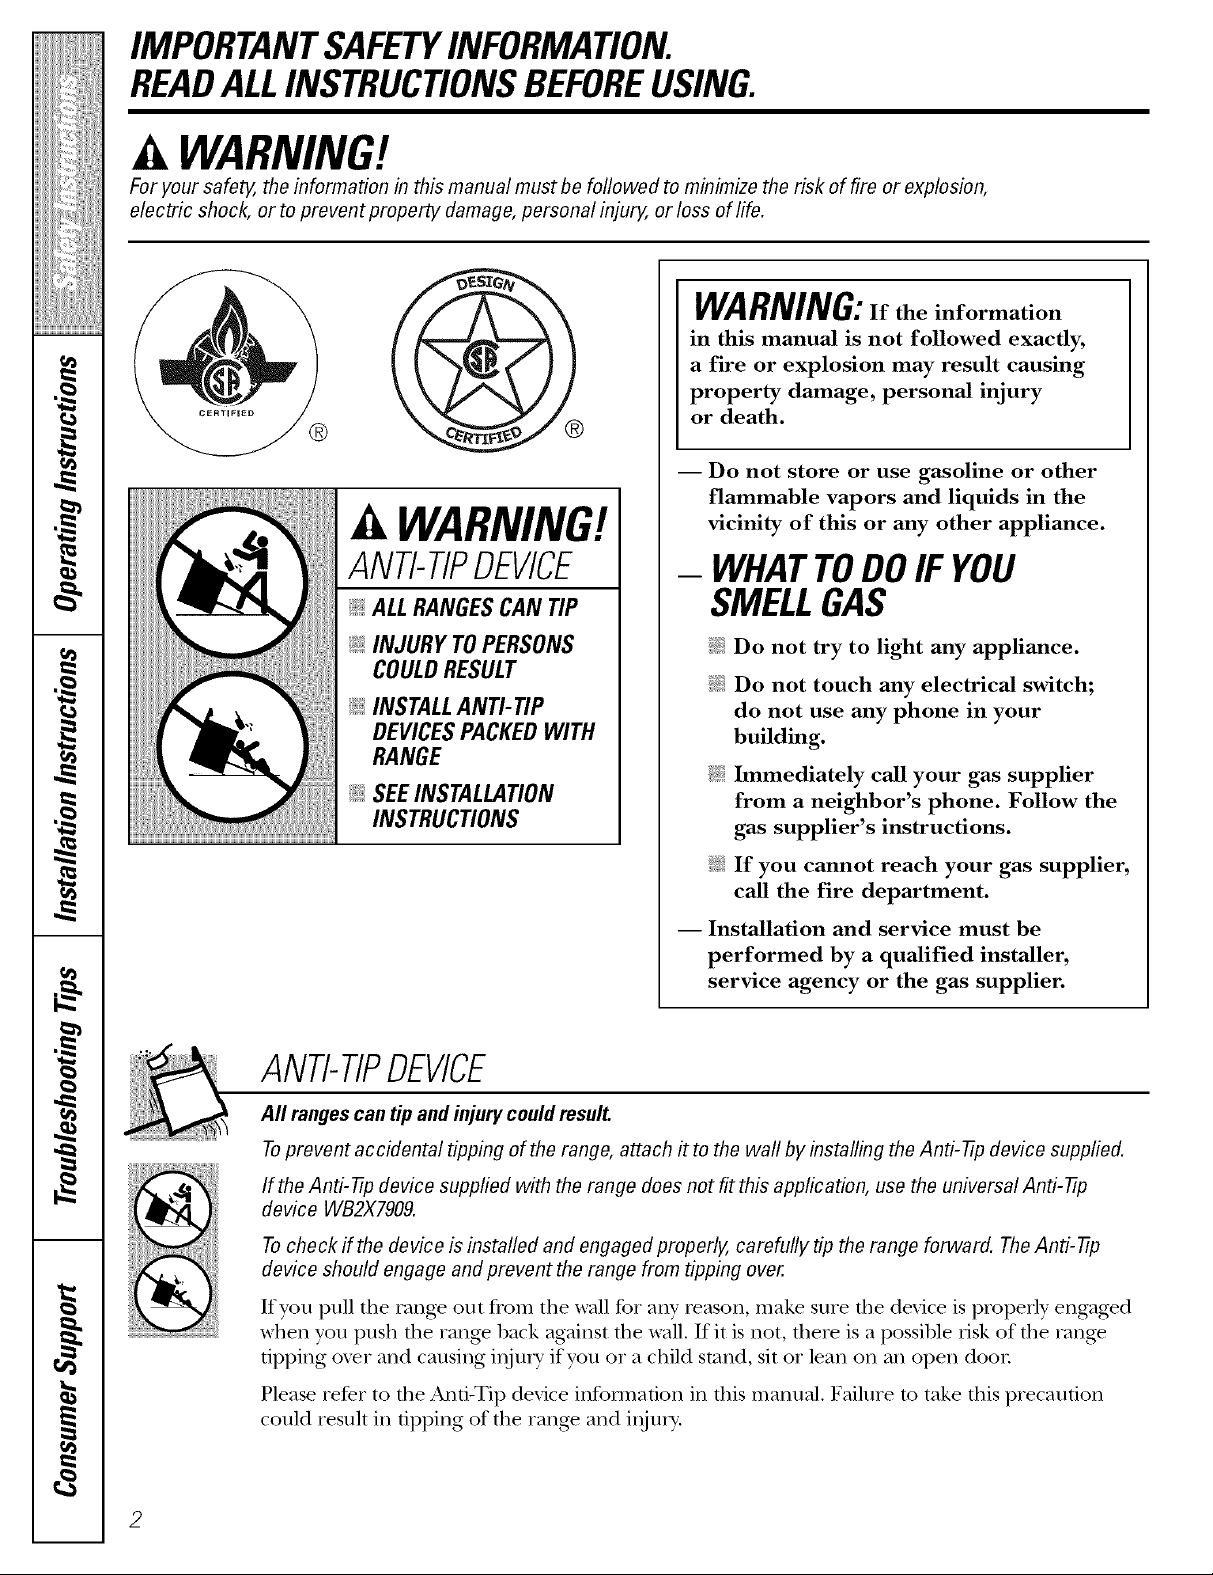
ANTI-TIPDEVICE
ALL RANGES CAN TIP
@ INJURY TO PERSONS
COULD RESULT
@ INSTALL AN_tiP
DEVICES PACKED WITH
RANGE
INSTRUCTIONS
ANTI-TIPDEVICE
All rangescan tip and injury could result.
- WHATTODOIFYOU
SMELLGAS
@ Do not try to light any appliance.
Do not touch any electrical switch;
do not use any phone in your
building.
@ Immediately call your gas supplier
from a neighbor's phone. Follow the
gas supplier's instructions.
If you cannot reach your gas supplier,
call the fire department.
-- Installation and service must be
performed by a qualified installer,
service agency or the gas supplier.
Toprevent accidental tipping of the range, attach it to the wall by installing the Anti--tip device supplied.
If the Anti--tip device supplied with the range does not fit this application, use the universal Anti--tip
device WB2X7909.
Tocheck if the device is installed and engaged properly, carefully tip the range forward. TheAnti--tip
device should engage and prevent the range from tipping over.
If you pu]] the range otlt t)om tile wall for any reason, make sure fl)e device is properly engag>d
when you push the range back against the wall. If it is not, flmre is a possible risk of the rang>
tipping ox>r and causing i,lju_ T if you or a child stand, sit or lean on an open door
Please refer to the Anti-Tip device infollnation in this manual. Failure m take this precaution
could result in tipping of the rang_ and ilIjtlI>
ge.com
WARNING!
IMPORTANTSAFETYNOTICE
The California Safe Drinking Water and ToxicEnforcement Act requires the Governor of California to
publish a list of substances known to the state to cause birth defects or other reproductive harm, and
requires businesses to warn customers of potential exposure to such substances.
Gasappliances can cause minor exposure to four of these substances, namely benzene, carbon
monoxide, formaldehyde and soot, caused primarily by the incomplete combustion of natural gas or
LP fuels. Properly adjusted burners, indicated by a bluish rather than a yeflow flame, will minimize
incomplete combustion. Exposure to these substances can be minimized by venting with an open
window or using a ventilation fan or hood.
SAFETYPRECAUTIONS
Have the installer show you the location of the range gas shut-off valve and how to shut it off if necessary.
;_;Hate your rang_ installed and properly ;_; Plug your rang_ into a 190_\_lt grounded
grounded by a qualified installer, in
accordance with the Installation Insuucdons.
Any adjustment and service should be
perfo,_ned only by qualified gas rang>
installers or service technicians.
_:;i_'Do not attempt to repair or replace any
part of your range unless it is specifically
recommended in this manual. All other
service should be refetTed to a qna]ified
technician,
outlet only. Do not remove the round
grounding prong fiom dm ping. If in doubt
about the grounding of the home electrical
system, it is your personal responsibility and
obligation to haxe an ungrounded outlet
replaced wifll a properly gTounded,
d_ree-prong outlet in accordance with
the National Electrical (;ode. Do not use
an exmnsion cord with this appliance.
3
IMPORTANTSAFETYINFORMATION.
READALLINSTRUCTIONSBEFOREUSING.
SAFETYPRECAUTIONS
_5_iLocate the range out of kitchen traffic path ;fi:,i
and out of drafty locations to prexent poor
air circulation. E:,:
_: Be sure all packaging materials are remox.ed
flom tile rang.e befbre operating it to
prex.ent fire or smoke damag.e should the
packaging material ignite.
E:':Be sure your range is correctly adjusted by
a qualified service technician or installer fox
tile type of gas (natural or IP) flint is to be
used. Your rang.e can be converted for use
with either type of gas. See the Installation
of the range sect.ion.
WARNING: xeseadjnstmentsmnst
be made 1)5' a qualified service technician
in accordance with rixe mannlaactuier's
instructions and all codes and requirements
of the authority havingjm-isdiction. Failure
m follow fllese instructions could x.esult in
serious injm T or proper U damag.e. The
qualified ag.ency performing flxis work
assumes responsibility fox the conversion,
E:.:After prolong.ed use of a range, high floor
temperaun.es m W result and many floor
cox.erings will not wifllstand this kind of use.
Ne_.er install the rang.e o_.er vinyl die or
linoleum flint cannot wifllsmnd such type
of use. Nex.er install it dix.ecflv ox.er interior
kitchen carpeting.
q?{::Do ,lot lem.e childi.en alone or unattended
where a rang.e is hot or in operation. They
could be seriously burned.
E:,IDo not allow anyone to climb, stand or hang
on the ox.en doox; broiler comparunent or
cookmp. They could damag.e tile range and
ex.en tip it ovel; causing sex.ere personal
injm T.
_:_CAUTION:hems of interest to
children shouM not be stored in cabinets
abox.e a range or on tile backsplash of a
rang.e--children climbing on the rang>
m reach items could be seriously injured.
A WARNING:NEVERusethis
appliance as a space heater to heat or
warm tile room. Doing so may result
in carbon monoxide poisoning and
4
ox.erheating of the oven.
Clean only parts listed in this Owner's
Manual.
Nex,er wear loose fitting or hanging garments
while using the appliance. Be careflfl when
reaching fox items stored in cabinets ox.er tim
rang.e. Flammable material could be ignited
if brought in contact with flame or hot ox.en
snifitces and may cause sex.ere bniTis.
_{:;Do *lot store flammable materials in an
ox.en, a rang.e broiler, behind the kick panel
or near a cooktop.
E:,:Do ,lot store or use combnsfible materials,
gasoline or oflxer flammable vapors and
liquids in rixe vicinity of this or any oflxer
appliance.
_7_:Do ,lot let cooking gTease or other
flammable materials accunmlate in or
near the rang.e.
E:.:Do ,lot use water on grease fires. Nex.er pick
up a flaming pan. Tm_n the controls off'.
Smother a flaming pan on a surthce burner
1)5'cox.ering tile pan completely with a
well-fitting lid, cookie sheet or fiat uay.
Use a multi-puq)ose d, T chemical or
tbam-tvpe fire extinguisher
Flaming gx.ease outside a pan can be put
out by co\.efing it with baking soda ox;
if available, by using a muld-pnrpose dt T
chemical or foam-type fire exdnguishen
Flame in flxe oven can be smothered
completely by cloong the ox.en door and
turning tile control to off or by using a
nmld-purpose d U chemical or foam-type
fire exdnguishen
E:.:i,et rim burner grates and other surfaces
cool befox.e touching them or leaving them
where children can x.each them.
_: Nex.er block tile \.ents (air openings) of tile
rang.e. They provide the air inlet and outlet
that are necessa U for flxe rang.e to operate
i)ioperly with conect combustion. Air
openings are located at the rear of tim
cooktop, at the top and bottom of the oven
doox; and at tile bottom of tile range under
the broiler compartment or kick panel.
_ti_:Large scratches or impacts to glass doors can
lead to broken or shauered glass.
g_com
COOKMEATANDPOULTRYTHOROUGHLY...
Cook meat and poultry thoroughly--meat to at least an INTERNAL temperature of 160°Fand poultry to
at least an INTERNAL temperature of 180°F.Cooking to these temperatures usually protects against
foodbome illness.
OVEN
Stand away from the range when opening the door of a hot oven. Thehot air and steam that escape
can cause bums to hands, face and eyes.
;_;Do not use file oven for a storage area.
Imms stored ill tile ox>n call ignim.
_i_Kee I) the oxen free from grease buildup.
_::Place tile oxen shelx_s ill tile desiIed
position while tile ox>n is cool.
_{:;Pulling out tile shelf m file stop-lock is a
convenience in lifting heavv foods. It is also
a precaution against bunls from touching
hot SUl_tces of tile door or oxen walls. Tile
lowest position is not designed m slide.
_{:;Do not heat unopened food containers.
Piessure could build up and tile container
cotl]d btlist, causing all iI)J/lI>
WARNING:NEVERcover
any slots, holes or passages ill tile oven
l)ottom or cover all end re shelf will/
materials such as ahmlinmn foil. Doing
so blocks air flow through tile oxen and
may cause carbon monoxide poisoning.
Aluminum foil lining_ may also trap
heat, causing a fire hazard.
_?_::Do not use aluminum foil an_vhere ill tile
o_en except as described ill tills mamlal.
Misuse could result ill a fire hazard or
damag> to tile rang>.
:fi:,:V_]len using cooking or roasdng bags in tile
ox>n, follow tile manulCacturer's directions.
_ Do not use your o\_n to dry newspapers.
If ox>rheamd, tiley call catch fire.
_:;Use only glass cookwaIe tilat is
recommended for use ill gas ox>ns.
_fi:,:Always iemove tile broiler pan fiom rang_
as soon as you finish broiling. Grease left ill
tile pan call catch fire if ox>n is used witilout
iemoving tile giease flom tile broiler pan.
_7{:__A]len broiling, if meat is too close to tile
flame, tile t_atmay ignim. Trim excess t_atm
plevent excessi\'e flaiemps.
_7{:;Make sure tile broiler pan is ill place
coixecfly m reduce tile possibility of
grease fires.
;fi:':H'you should haxe a grease file ill the broiler
pan, turn off tile ox>n conuol, and keep
tile broiler comparunent and oxen door
closed to contain fire/mfil it bums out.
_i:,:For safe.U and proper cooking perfomlance,
always bake and broil with the ox>n door
closed.

IMPORTANTSAFETYINFORMATION.
READALLINSTRUCTIONSBEFOREUSING.
WARNING!
SURFACEBURNERS
Use proper pan size--a void pans that are unstable or easily tipped. Select cookware having flat bottoms
large enough to cover burner grates. Toavoid spillovers, make sure cookware is large enough to contain
the food properly. This will both save cleaning time andprevent hazardous accumulations of food, since
heavy spattering or spillovers left on range can ignite. Use pans with handles that can be easily grasped
and remain cool.
_{:;Always use the LITE position when igniting
the top btn_mrs and make sure tile hnl_ers
have ignited.
;_i:,:Ne_er leave fl_e suilZace burners unattended
at high flame settings. Boiloxers cause
smoking and gleasy spilloxers that m W
catch on file.
q_;Adjust tile top hun_er flame size so it
does not extend hevond tile edge of the
cookware. Excessixe flame is hazardous,
;_i:,:Use only dU pot holders--moist or damp
pot holders on hot sni/_aces may resuh in
h/n_ls flom smam. Do not let pot holders
come near open flames when lifting
cookware. Do not use a towel or other
hulky cloth in place of a pot holden
;_i:,:When using glass cookwme, make sure it
is designed for toi>ot=range cooking.
;_i:,:To minimize the possihility of hums,
ignition of flammable mamrials and spillage,
ulm cookware handles toward die side or
hack of file range without extending over
adjacent hurners.
_:;Careflllly watch fbods heing flied at a higtl
flame seuing.
_;;Always heat £_t slowly, and watch as it heats.
;_i:,:Do not ]eme any imms on file cooktop. Tile
hot air flom tile \ent may ig_lim flammahle
imms and will increase pressure in closed
containers, which may cause them to burst.
;_i:,:If a comhinafion of oils or fiats will be used in
flTing, stir together before heating or as t=ats
meh slowly
q_{_;Use a deep/_at thellnomemr whenever
possible to piexent oxerheating/_at hevond
tile smoking point.
;_i:,:Use tile least possihle amount of/_at for
effective shallow or deep-i%t flTing. Filling
the pan too fllll of f=atcan cause spillo_ers
when food is added.
Do not flame foods on the cooktop. If you do
flame foods under tile hood, mm tile £m on.
Do not use a wok on the cooking surface
if the wok has a round metal ling that is
placed oxer the hurner gram m support
the wok. Tills ring acts as a heat trap,
which may damage die hnliler gram and
hurner head. Also, it mW cause file humer
m work impropefl> Tills m W cause a
carbon monoxide lexel aboxe that
allowed hy cunent standards, iesulting
in a heahh hazard.
ge.com
;fi:,iDo not use aluminum foil m line the
giiddle. Misuse could result in a fire hazard.
;_i:,iNever lem_ tile kitchen while using tile
giiddle.
_{_Foods for flTing should be as di T as possible.
Frost on flozen foods or moisture on fresh
foods can cause hot tilt to bubble up and
ox>r tile sides of rile pan.
;fi:,iNexer uT to move a pan of hot tilt, especially
a deep laatflTer _4'ait until tile laatis cool.
;fi:,iDo not leaxe plastic items on tile cooktop--
flier may melt if left too close to tile x>nt.
_{_Kee I) all plastics away flom tile sur£_ce
blli'llers.
_; To moid tile possibility of a buiIl, always be
certain that the controls for all burners are
at the OFF position and all grates and tile
griddle are cool before attempting to
renlo'_ e thenl.
;f; K range is located near a windoxs, do not
hang long curtains that could blow oxer tile
surface burners and create a fire hazard.
_: gyou smell gas, turn off tile gas to tile range
and call a qualified service technician. Nex>r
use an open flame to locate a leak.
;_i:':Always turn the surt_ace burner controls off
before removing cookware or tile griddle.
N Do not lift the cookmp. I,ifting the cookmp
can lead m damag> and improper operation
of tile rang>.
_i_:Do not place or store imms that can melt or
catch fire on the grates, even when tile
cookmp is not being used.
N Kee I) rang_ clean and free of accumulations
of grease or spillox_rs, which may ignite.
READANDFOLLOWTHISSAFETYINFORMATIONCAREFULLY.
SAVETHESEINSTRUCTIONS
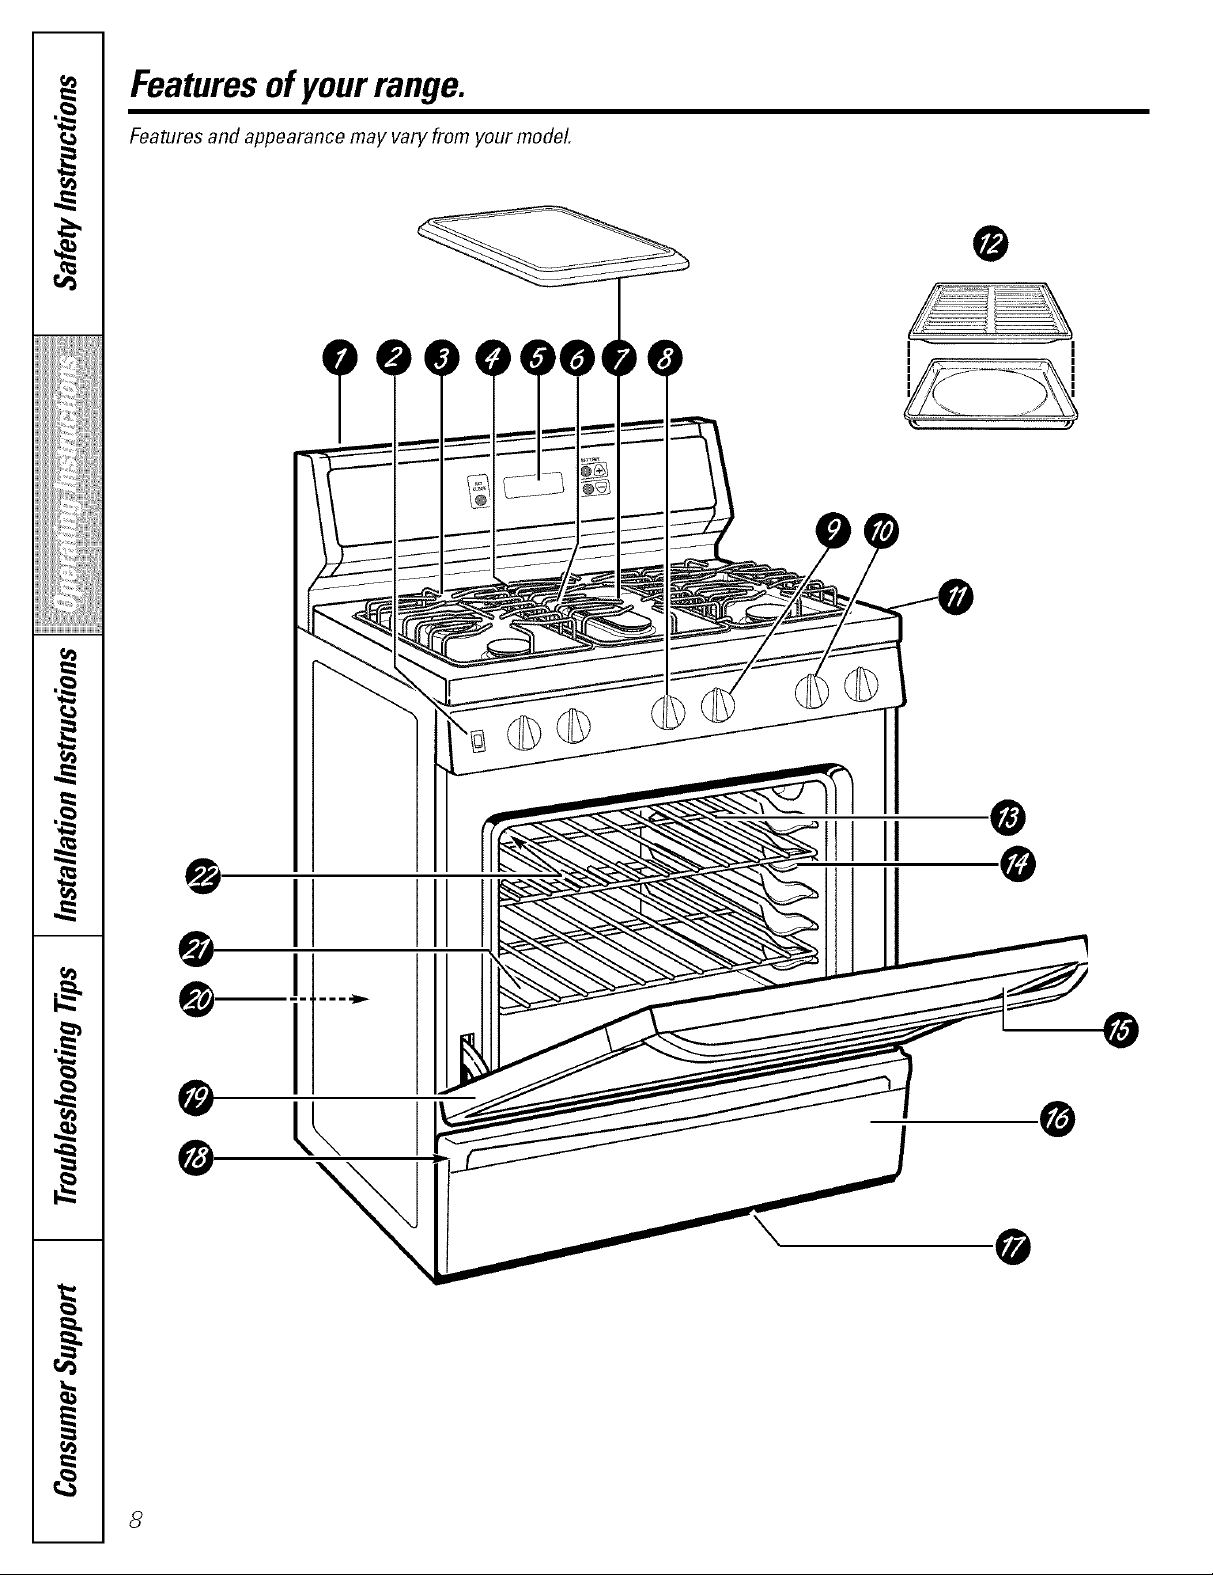
Featuresof yourrange.
Features and appearance may vary from your model.
I
I
I
III
\

ge.com
o Backguard
OvenLight On/Off Switch
@
Side Surface Burners and Grates
@
Oven Vent (located on cooktop)
0
CLOCK(on some models)
OvenShelves with Stop-Locks (number of
shelves varies)
OvenShelf Supports (shelf positions for
cooking are suggested in the Usingthe Oven
section)
o Air Ventin Oven Door (located at top of oven
door)
0
Center Surface Burner
0
Use when cooking with large oval
pots/pans, round pots/pans ] 0" or greater
in diameter or with the griddle.
Griddle and Center Grate
@
When cooking, tile center grate illtlst
always be in place. To use the griddle,
it must be locked onto tile center grate
only,
Oven Control range back. See Installation Instructions.)
_ Center/Griddle Surface Burner Control Knob Anti--tip Device (lower right rear comer on
Broiler Compartment or Removable Kick
Panel (on some models)
Air Intake
0
Model and Serial Numbers (located on front
frame of range, behind either broiler
compartment or removable kick panel)
Lift-Off Oven Door
I
_!!ii::,,_i4ii_i:il
ii_iiiii_iiii}iiii
,_"_>,,,,Hiiiiiii
iii!iiiiii_i_ii{ii¸
O Side Surface Burner Control Knobs OvenBottom
OvenInterior Light
Broiler Pan and Grid (on some models)
Cooktop
g
H
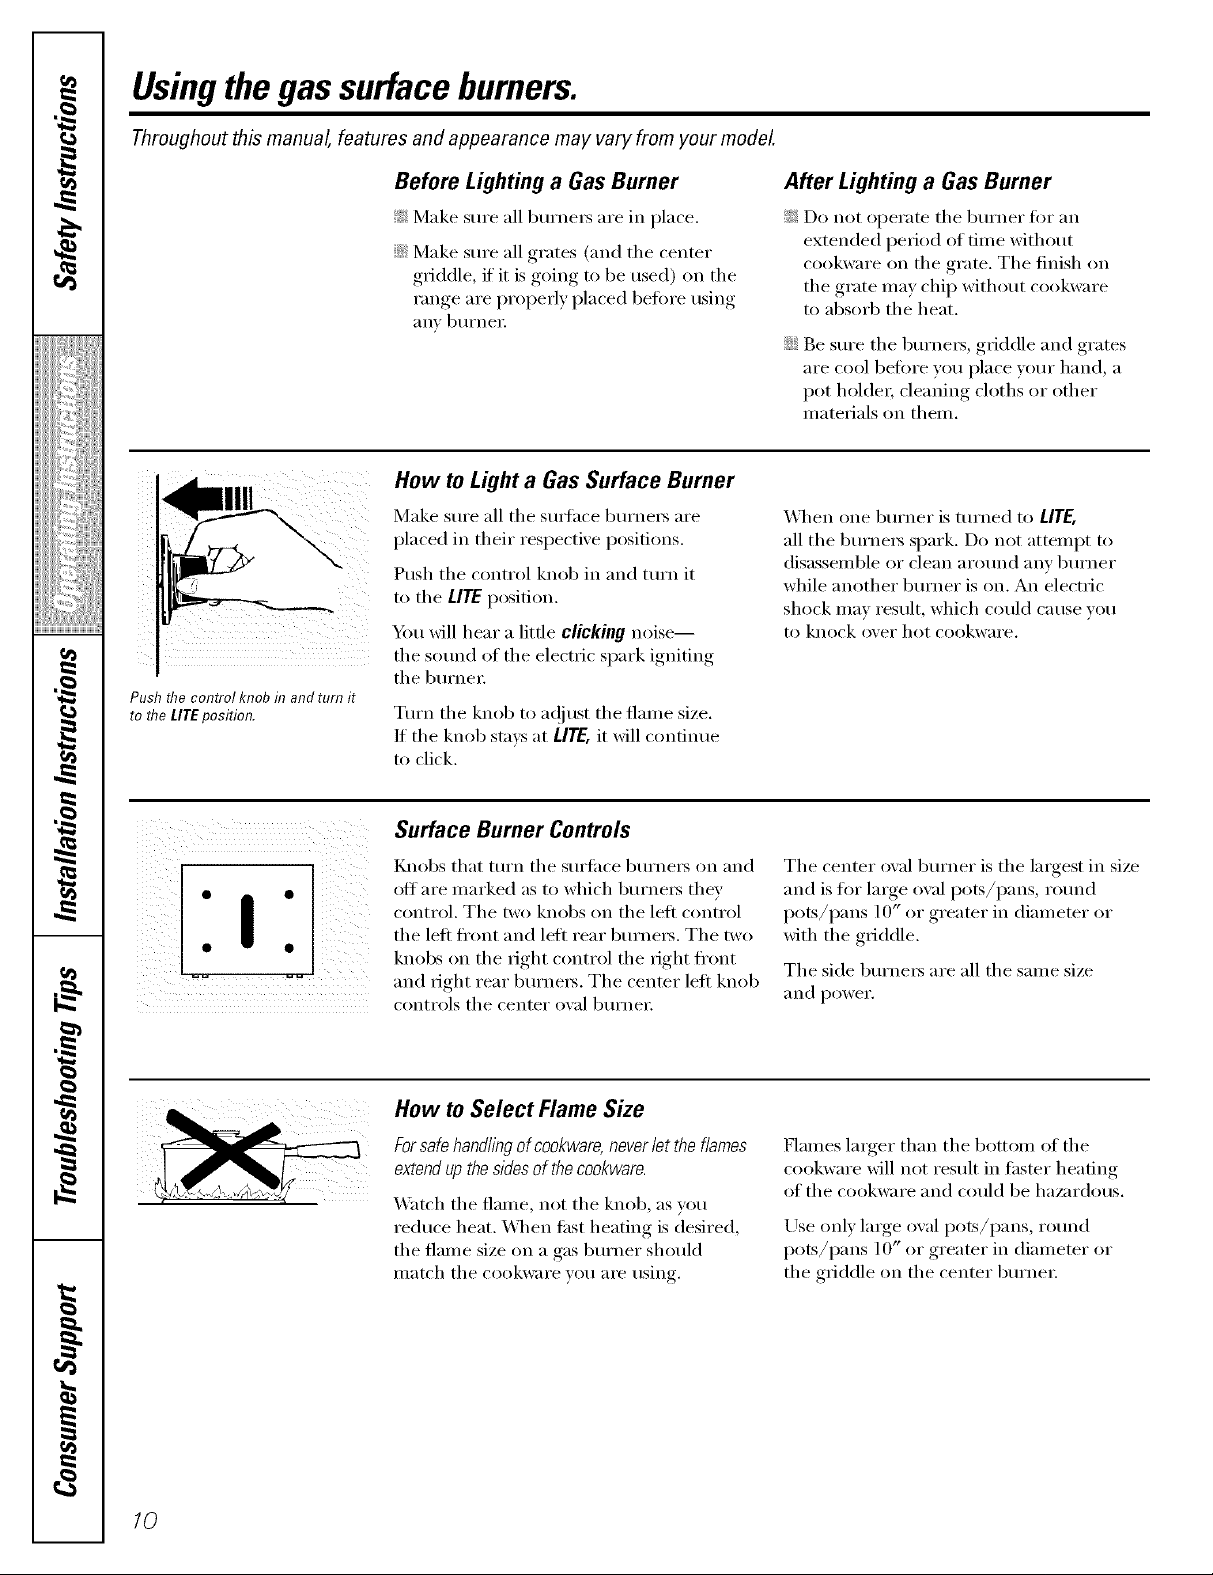
Usingthegas surfaceburners.
Throughout this manual, features and appearance may varyfrom your model
7_
Push flTecontrol knob in and turn it
to flTeLITEposition.
Before Lighting a Gas Burner
_: Make sure all burne_ are in place.
::Ji::Make sure all grates (and the center
griddle, if' it is going to be used) on the
range are properly placed before using
anv btlYneI i
How to Light a Gas Surface Burner
Make sm'e all the stmfhce burne_ are
placed in their respective positions.
Push the control knob in and turn it
to the I.ITEposition.
Ym will hear a little clicking noise--
the sotmd of the electric spark igniting
the bm'ner
Tm'n the knob to a(!iust the flame size.
If the knob stm:s at LITE,it will continue
to click.
After Lighting a Gas Burner
_: Do not operate the burner fin" an
extended period of time without
cookware on the grate. The finish on
the grate may chip without cookware
to absorb the heat.
::Ji::Be sm'e the burners, griddle and grates
are cool before w)u place your hand, a
pot hol(le_; cleaning cloths or other
materials on them.
X_l_en one bm'ner is turned to LITE,
all the burne[s spark. Do not attempt to
disassemble or clean arotmd any bm'ner
while another burner is on. An electric
shock may result, which could cause w)u
to knock over hot cookware.
Surface Burner Controls
l_mobs that turn the surfh(e burne_ on and
off are Inarked as to which burnei_ they
control. The two knobs on the left control
the left fl'ont and lefi rear burne_. The two
knobs on the right control the right fl'ont
and fight rear burne_. The center left knob
controls the center oval btlYneI;
How to Select Flame Size
Forsafe handlingof cookware,neveriet the f/ames
extendup the sidesof the cookware.
_&at('h the flame, not the knob, as you
reduce heat. X_]_en ti_st heating is desired,
the flame size on a gas burner should
match the cookware you are using.
The center oval burner is the lmgest in size
and is fi)r large o\_fl pots/pans, rotmd
pots/pans 10" or greater in diameter or
with the griddle,
The side burne_ are all the same size
_ln(l power.
Flames larger than the bottom of the
cookware will not result in thster heatim*
of the cookware and could be haan'dous.
Use onE, large, oxal l)°tS/l)ans rotmd
pots/pans 1O" or greater in diameter or
the griddle on the center burne_:
10
Top-of-Range Cookware
ge.cem
Aluminum: Mediuin-weight c(_okwai'e is
rec(m/inended because it heats quickly
and evenly. Most toods bI'(_wn evenly in an
ahuninunl skillet. Use saucepans with tight-
fitting lids when cooking with nlininlunl
_lIllO/lnts of water.
Cast-Iron: If heated slowly, Inost skillets will
give satisiactorv results.
Enamelware: Under seine conditions,
tile enai/lel o_" SOIlle ('ookwaI_e Ill}IV I//elt.
Folh)w cookware ill}ln/l][ilCttli'ei"s
reconmiendations tor cooking niethods.
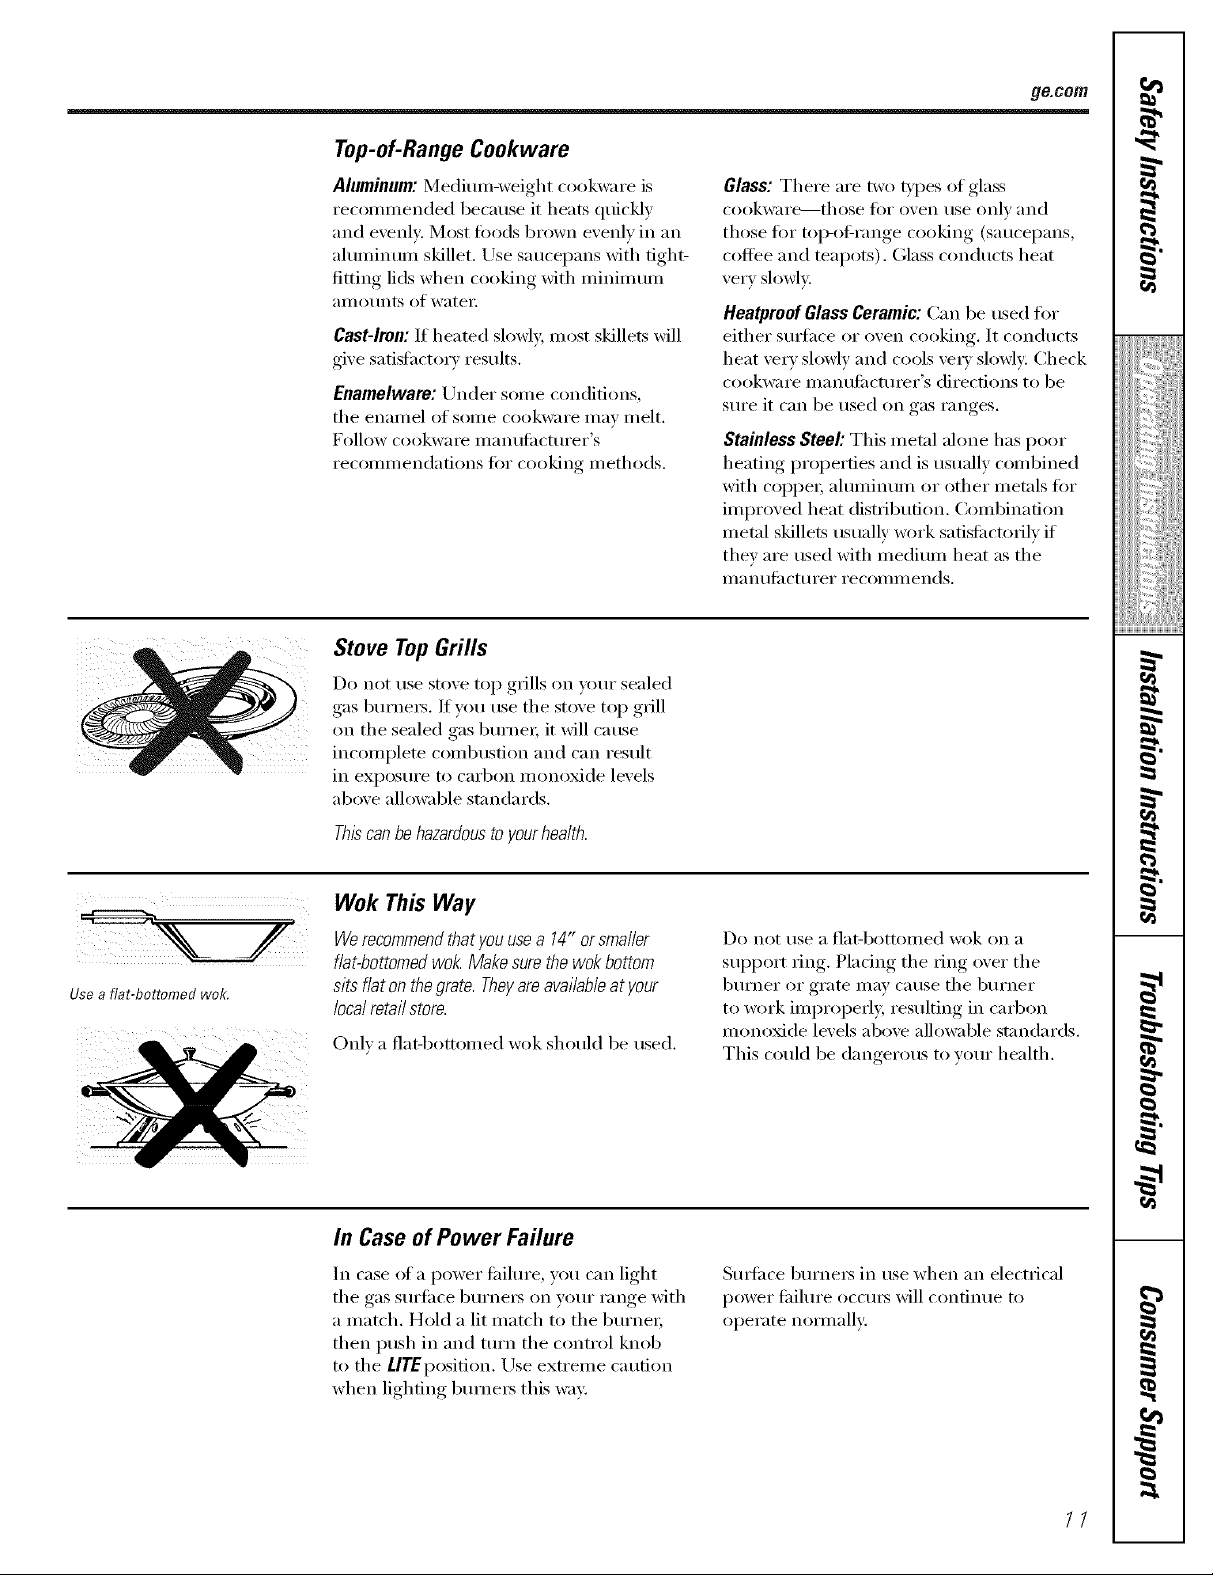
Stove TopGrills
Do not use stove top grills on y(mr sealed
gas burners. If w)u use tile stove top grill
oil the sealed gas burnei; it will cause
incoinplete conlbustion and can result
ill expos/lI'e to C}II'Bon ii/onoxide levels
above allowable standards.
Glass: There are two types of glass
cookware--those tor ()veil rise only and
those tor mI>of-range cooking (saucepans,
coffee and teapots). Glass conducts heat
very slowly.
Heatproef Glass Ceramic: Can be used for
either suiJhce or ()veil cooking. It conducts
heat very slowly and cools veI_' slowly: Check
cookware I/I}InULIilCtUI'eI"S directions to be
sure it can be used (m gas ranges.
Stainless Steel'. This metal alone has I)(I()I"
heating properties and is usually conibined
with c()ppeI; ahuninuni or other nietals for
iniproved heat distI_ibution. (_oinbination
nletal skillets usualh' work satisfi_ctorilv if
they are used with nlediunl heat as tile
Ill_l n/llil Ctlli'ei" I'ecoI/l Illends.
I
_!!ib_iiiii_i:il
ii_iiiii_iiii}ii;i
iii!iiiiii_i_ii{ii¸
Usea flat-bottomed wok.
Thiscanbehazardousto yourhealth.
Wok This Way
Werecommendthatyouusea 14" orsmaller
flat-bottomedwol_Makesurethewokbottom
sitsflatonthegrate.Theyareavailableatyour
localretailstore.
Onl) a flat-bottonled wok should be used.
In Case of Power Failure
In case of a power fifilure, you can light
tile gas surfi_ce burners on your range with
a niatch. Hold a lit niatch to tile burnei;
then push in and ttlI'n tile control knob
to tile LlTEposition. Use extreine caution
when lighting bumei_ this way,
Do not rise a I']at-bottollled wok on }1
support ring. Pladng tile ring over tile
burner or grate nlay cause tile burner
to work iinproperl> resulting in carbon
inonoxide levels above alh)wable standards.
This could be dangerous to your health.
Sui_i_ce burneis in use when an electrical
power thihn'e occurs will continue to
operate nolillallv:,
7,
g
}
II

Usingthegriddle.
Undersideof gEid,dle
"U" locks
Place the "U" locks onto the center
fingers on the center grate.
_A_m"non-stick coated griddle provides
_lIl extra-large cooking Stli'J[ilce for IIle_lts,
pancakes, or other toed usuall) prepared
in a ti'ving pan or skillet.
How to Insert the Griddle
A CAUTION:Placeandremovethe
griddle only when all grates andgriddle are cool
and all surface units are turned OFF.
The griddle can only be used with the
center burner and must be locked into
place on the center grate,
Using the Griddle
NOTE."Yourgriddlewilldiscolorovertimeasit
becomesseasonedwithuse.
Place the "U" loc!<s on the unde_icle of
the griddle over the center finge_ of the
center grate.
Move the griddle back-and-fin'th to make
sure it is locked in place.
Most gfiddled fi)ods require cooldng
on a preheated sm'ii_ce. Preheat griddle
according to the guide below, then switch
to the desired cook setting,
TypeofFood Preheat MaximumQuantity
Conditions Recommended
Warming none 7stacked
Tortillas
Pancakes Highfor 6
3 minutes
Hamburgers Mediumfor 4-flattened out
5minutes
FriedEggs Mediumfor 4
5minutes
Bacon Highfor 4
5minutes
Breakfast None-nooil 13
SausageLinks
HotSandwiches Highfor6 4
(suchas minutesthen
GrilledCheese) Mediumfor
4 minutes
IMPORTANTNOTES:
_:Avoidcookingextremelygreasyfoodsandbe
carefulofgreasespi//-overwhi/ecooking.
_: Donotuseoilonthegriddleforextendedlengths
oftime.Permanentstainingand/orcrazelineson
thesurfacecouldresult
_: Donotcookmi/kproducts(suchas frenchtoast)
onthegriddle.Permanentstainingand/orcraze
linesonthesurfacecouldresult
iJi::Neverplaceorstoreanyitemsonthegriddle,
evenwhenitis notin use.Thegriddlecan
becomeheatedwhenusingthesurrounding
burners.
iJi::DonotoverheatHegriddle.Leawngthe
griddleburneronatHIforanextendedamountof
timewithoutfoodcandamagethenon-stick
coating.
12

Usingthe oven. gecom
To Set the Clock (onsomemodels)
NOTE."Whenyouf/Tstp/ugin therangeoraftera
powerfailure,theentireClockdisplaywill hghtup.
[] Press tile SETCLOCKpad.
$ETTIME
[
[] Press and hold tile +or -pad
and tile time of (lax will change
10 minutes at a time. To change tile
time by single minutes gixe tile pads
short taps.
[] Press tile SETCLOCKpad to start
tile clock.
Oven Control
Your oven is controlled bya single OVEN
CONTROLknob.
It will nommllv take 30-90 seconds befin'e
tile flaIlle COilleS on. _MieI" tile oven i'eaches
tile selected temperature, tile oven burner
wcles---ofl completel> then on with a flfll
flame--to maintain tile selected
temperatm'e.
/3
Usingthe oven.
Toavoid possible bums, place the shelves in the desired position before you turn the oven on.
Before youbegin...
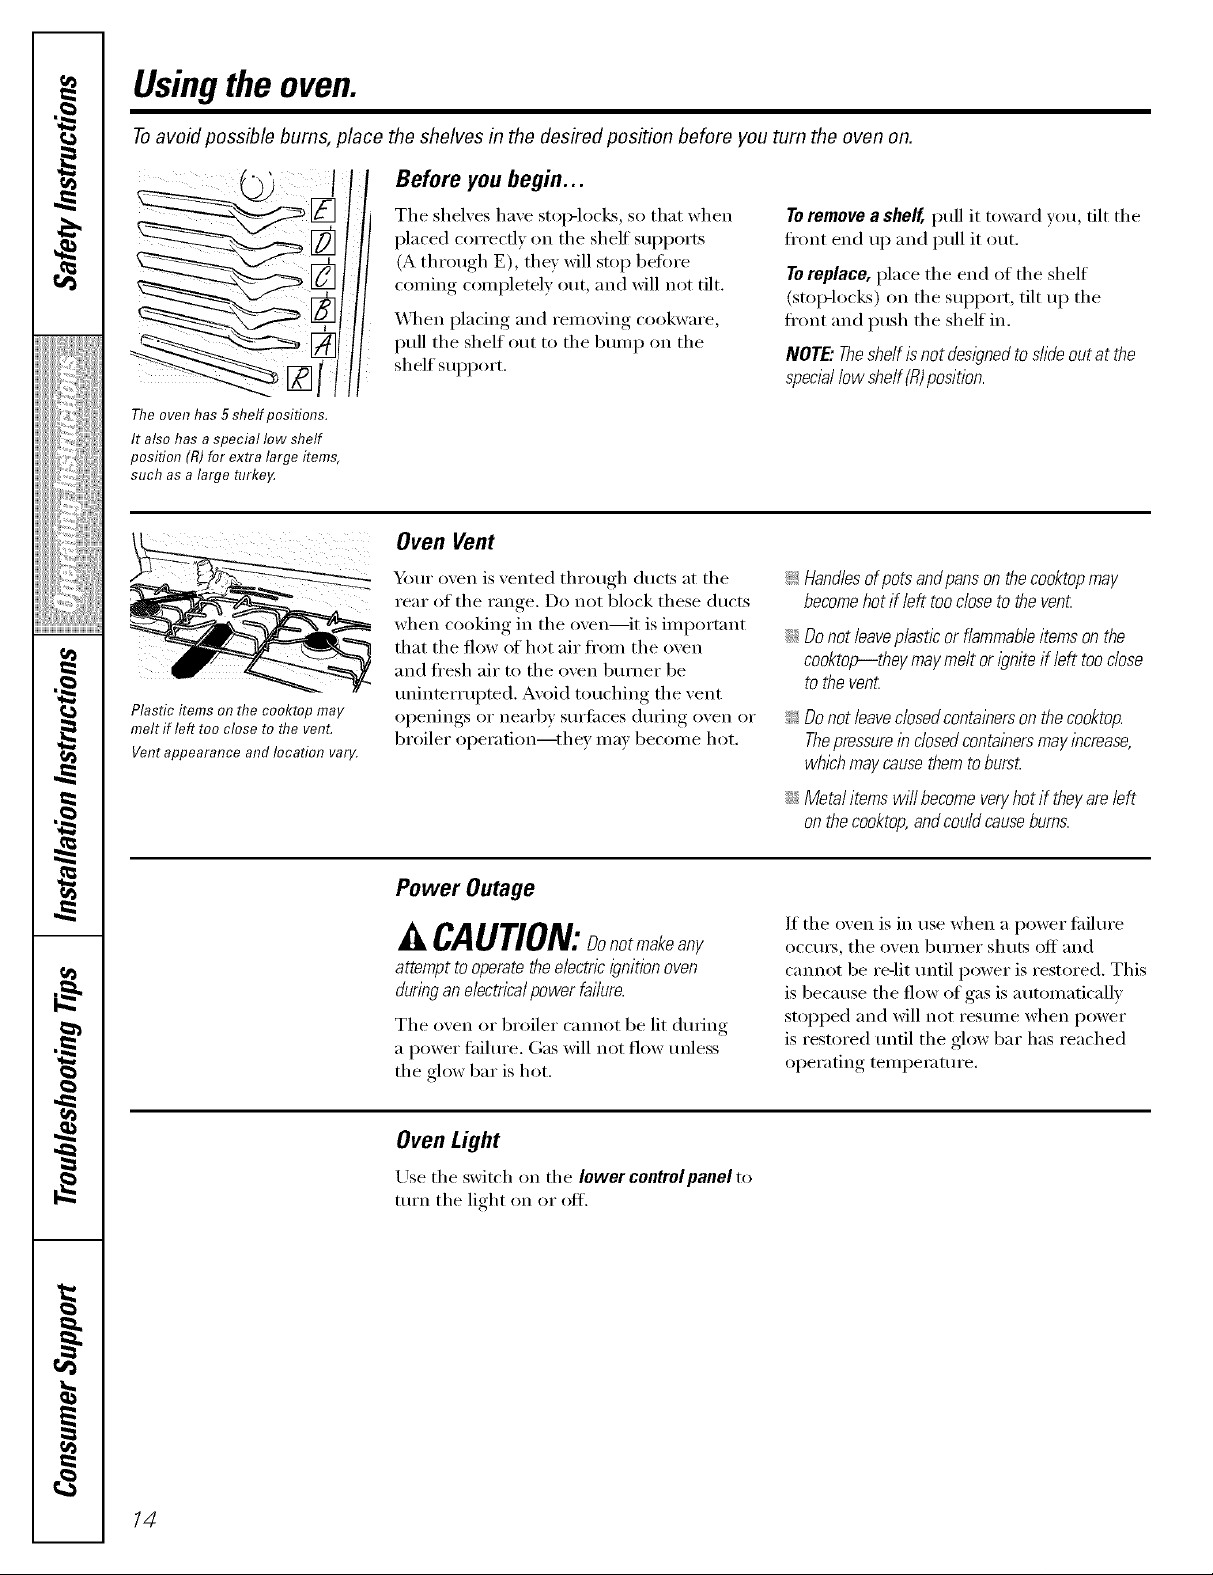
The oven has 5 shelf positions.
It also has a special low shelf
position (R)for extra large items,
such as a large turke_
Plastic items on the cooktop may
melt if left too close to the vent.
Vent appearance and location vary.
The shelves ha_e stop-locks, so that when
placed correcfl)on the sheff supports
(A through E), the) will stop before
comiw,_ completely ()tit, and will not tilt.
_,\qmn I)lacin°-, and removing, cookware,
pull the shelf out to the bump on the
shelf support.
Oven Vent
"_mr oven is vented through ducts at the
rear of the range. Do not block these ducts
when cooking in the oven--it is important
that the flow tff hot air fl'om the oven
and fl'esh air to the oven brinier be
uninterrupted. Avoid touching the vent
openings or nearby surfaces during oven or
broiler operation--they Inay becoine hot.
Toremove a shelf, pull it toward you, tilt the
fl'ont end up and pull it out.
Toreplace, place the end of the shelf
(stoiMocEs) on the support, tilt up the
ti'ont and push the shelf in.
NOTE."Theshelf isnot desl)ned toslide out at the
specta/low shelf (R)position.
!i>Handlesofpots and panson thecooktop may
becomehot if left tooclose to the vent
iJi::Donot leaveplastic or flammableitems on the
cooktop--they maymelt or i)nite if left too close
to the vent
_: Donot leaveclosedcontainerson the cooktop.
Thepressurein closedcontainersmay increase,
whichmay causethem toburst.
Power Outage
CAUTION:Donotmakeany
attempt to operate theelectric ignition oven
during an electricalpower failure.
The oven or broiler cannot be lit dm_ing
a power fhilure. Gas will not flow mfless
the glow bar is hot.
Oven Light
Use the switch on the lower controlpanel to
turn the light on or off.
::Ji::Metal items will become veryhotif theyare left
onthe cooktop,andcould causeburns.
If tile oven is in use when a power tidlm'e
occm_, the oven burner shuts off and
cannot be re-lit until power is restored. This
is because the flow of gas is automatically
stopped and will not resume when power
is restored until tile glow bar has reached
operating temperature.
14
 Loading...