

GE JGBP34WEL4WW, JGBP34WEL3WW, JGBP34SEL4SS, JGBP34SEL3SS, JGBP34BEL4BB Owner’s Manual
...
_l_ Safety Instru_tions ....... 2-7
Operating Imlru_ions
'Aluminum Foil ........... 13
Clock and Timer ....... ] 5, ]6
()\'e n ................ ]0-3 ]
Baking and Roasting ...... 13
Broiling, Broiling Guide . .. 14
Oven Control ........ 10, 11
Power Outag> ........ 12, 16
Preheating .............. 13
Sabbath Feaune ...... 19, 20
Self-Cleaning ......... 22, 23
Special Features ......... 18
Thermostat Adjusunent ...21
Timed Baking
and Roasting ............ 17
Smthce Cooking ......... 8, 9
Care and Cleaning
Burner Assembly ....... 24-26
Bnliler Grams ............ 27
Control Panel and I{aaobs ...30
Cooktop Surface .......... 27
Door Removal ............ 28
Kick Panel ............... 29
I,ift-up Cooktop ........... 29
Oven Bottom ............. 98
Oven i,ight Replacement ...31
Oven Vents .............. 30
Self-Cleaning .......... 99, 93
Shel_>s .................. 31
Stainless Smel Surfl_ces ..... 27
Storag> Drawer . .......... 99
_e.COIB
Ins'udlation
Instructions ........... 32-43
Air Adjustment ........... 42
Ai_ti-Tip Device ........ 35, 43
Checking Burner Ignition...41
Connecting the Rang_
to Gas ............... 36-39
Dimensions and Clearances .34
Electrical Connections . .40, 41
I,e_>ling the Rang> ........ 42
I,ocation ................. 35
I,P ...................... 43
Troubleshooting
Tips ................. 44-47
Accessories .............. 53
Consumer Support
Consumer
Support .......... Back Coxer
Product Registration .... 49, 50
_'arrantv for Customers
in Canada ............... 55
V(arranw tbr Custon_ers
in the U.S.A .............. 54
rGBP24
r(;BP25
r(;BP26
rGBP27
r(;BP28
rGBP2 9
rGBP30
r(;BP32
r(;B P _ 3
rGBP34
R (;t37_5
R(;B 740
R(;t3745
R(;B746
R(;B790
Write the model and serial
numbers here:
Model #
Serial #
You can find them on a label on
the front ot the range behind the
storage drawer or kick panel.
18305580P210
49-85126 03-07JR
IMPORTANTSAFETYINFORMATION.
READALLINSTRUCTIONSBEFOREUSING.
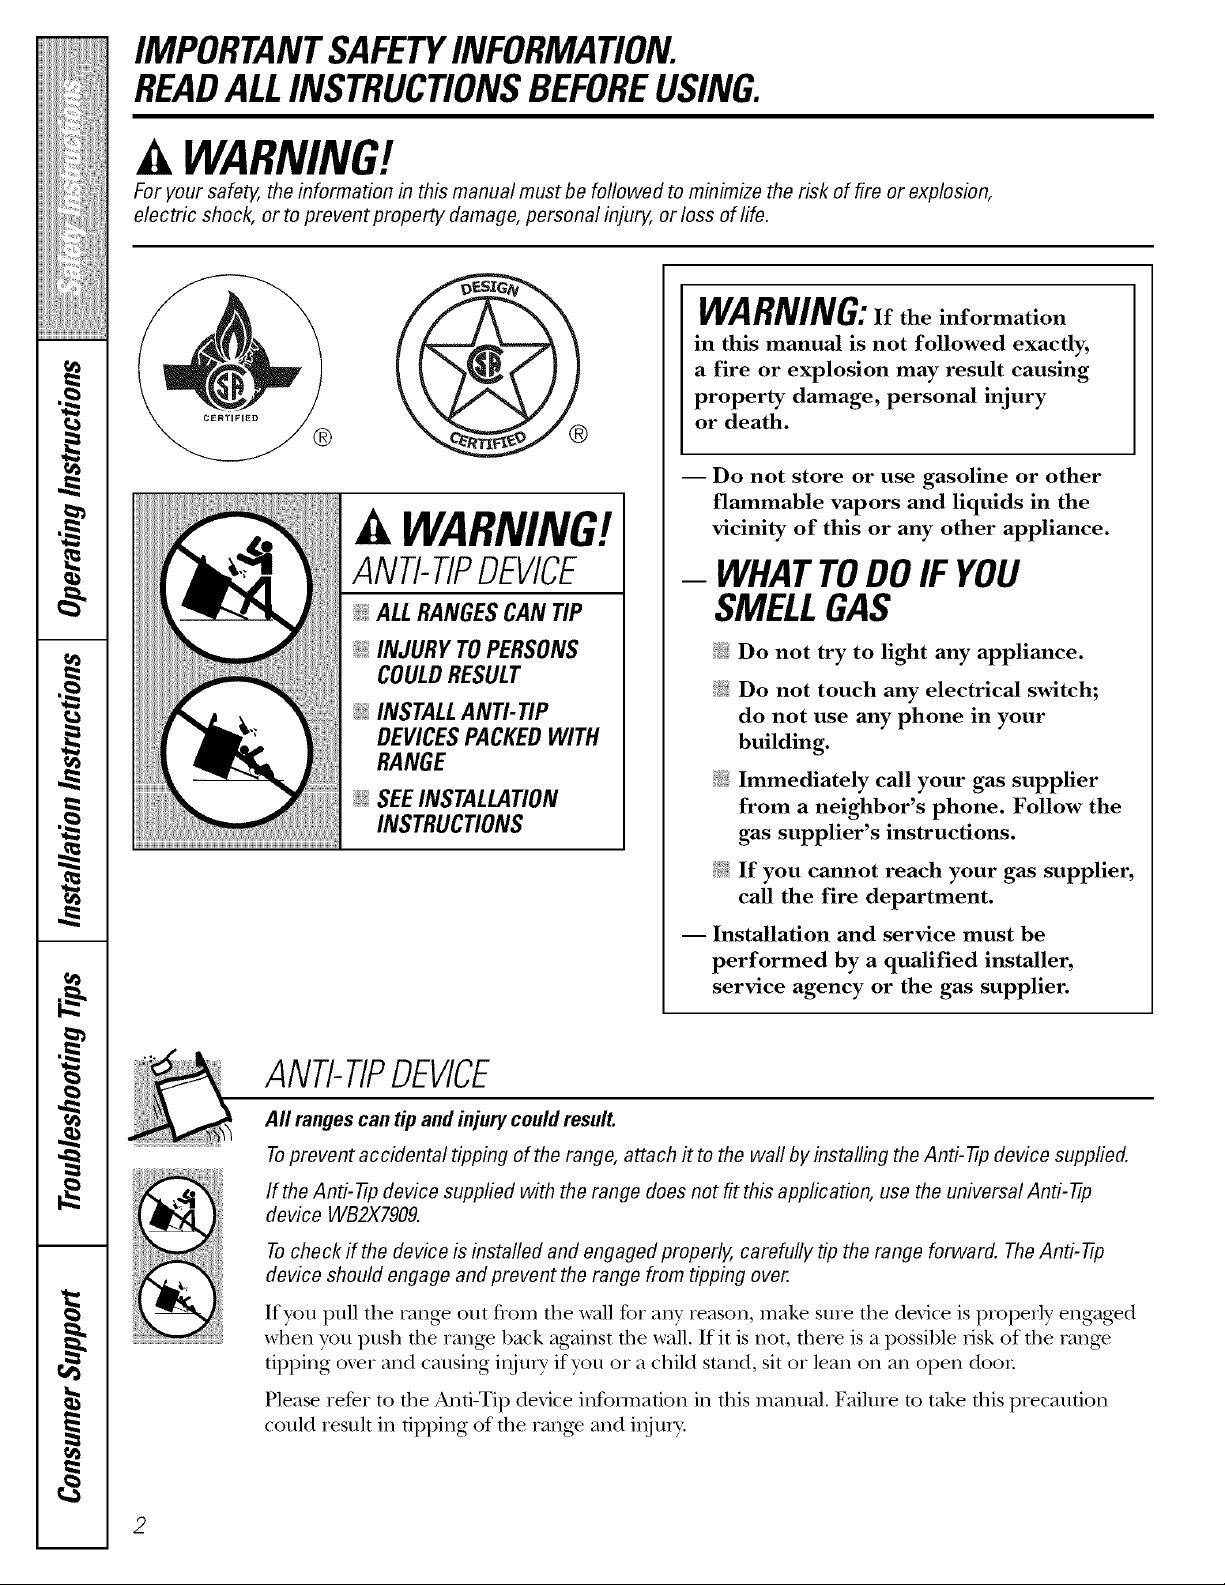
WARNING!
For your safe_ the information in this manual must be followed to minimize the risk of fire or explosion,
electric shock, or to prevent property damage, personal injury, or loss of life.
WARNING:If the information
in this manual is not followed exactly,
a fire or explosion may result causing
property damage, personal injury
®
WARNING!
or death.
-- Do not store or use gasoline or other
flammable vapors and liquids in the
vicinity of this or any other appliance.
ANTI-TIPDEVICE
ALL RANGES CAN TIP
@ INJURY TO PERSONS
COULD RESULT
@ INSTALL AN_tiP
DEVICES PACKED WITH
RANGE
@ SEE INSTALLATION
INSTRUCtiONS
ANTI-TIPDEVICE
All ranges can tip andinjury could result.
- WHATTODOIF YOU
SMELLGAS
!:_i_Do not try to light any appliance.
!:_i:Do not touch any electrical switch;
do not use any phone in your
building.
!:_i_Immediately call your gas supplier
from a neighbor's phone. Follow the
gas supplier's instructions.
!:_i_If you cannot reach your gas supplier,
call the fire department.
-- Installation and service must be
performed by a qualified installer,
service agency or the gas supplier.
Toprevent accidental tipping of the range, attach it to the wall by installing the Anti--tip device supplied.
If the Anti--tip device supplied with the range does not fit this application, use the universal Anti--17p
device WB2X7909.
Tocheck if the device is installed and engaged properly, carefully tip the range forward. TheAnti--tip
device should engage and prevent the range from tipping over.
If you pu]] tile range otlt t)om tile wall for any reason, make sure fl)e device is properly engag>d
when you push the range back against the wall. If it is not, flmre is a possible risk of the rang>
tipping ox_r and causing ii_u_ T if you or a child stand, sit or lean on all open door
Please refer to the Anti-Tip device information in this manual. Failure m take this precaution
could result ill tipping of the rang> and iI_tlITv'.
2
WARNING!
IMPORTANTSAFETYNOTICE
The California Safe Drinking Water and ToxicEnforcement Act requires the Governor of California to
publish a list of substances known to the state to cause birth defects or other reproductive harm, and
requires businesses to warn customers ofpotential exposure tosuch substances.
Gasappliances can cause minor exposure to four of these substances, namely benzene, carbon
monoxide, formaldehyde and soot, caused primarily by the incomplete combustion of natural gas or
LP fuels. Properly adjusted burners, indicated by a bluish rather than a yeflow flame, will minimize
incomplete combustion. Exposure to these substances can be minimized by venting with an open
window or using a ventilation fan orhood.
AFETYPRECAUTIONS
SAFETYPRECAUTIONS
,ve the installer show you the location of the sh_ft-off valve _nd how tc shu it off if nec_
Have the ins)after show you the location of the range gas
Hme your range installed and properly Pit g your rm ige into a 190-ioh gToun(
;_;Ha_ your rang_ installed and i)roi)erly
grounded by a qualified installer, it) ou :let only. [ _onot ten oxe tile round
grounded by a qualified installer, in
accordance with tile Installation Insuucdons.
accordance with tile Installation Instruct gr( amding p ong from tile plug. If ill,
Any adjustment and service should be ab, mt tile gr_rending o 7th_ llome ele(
Any adjustment and service should be
perfom)ed only by qualified gas range sysell), it is y )ur persoI Lalr _sponsibilit
i)erfo,_ned only by qualified gas rang>
installers or service technicians.
installers or service technicians, ob igation to hme all u agr_ rended O111
Do not attempt to repauor replace any , , . _ ' , " .,
_:_11Do not attemi)t to rei)air or rei)lace any
Dart oIVO/ll- range tlnless it 1s sDeclilCallV • . _' . ¢
i)art of your range unless it is specifically
• _ , ,.' ,. ,•. , , _ th_ NauonalElectncal,;ode. Donott
recoll/illentle(1 in tillS 1))antlal. All otller ........
........... all extension cord Wltl] tillS aDDllance.
service sllOtll(t/)e retelTed to a qualltmO • •
technician.
• reI ,laced witl a I)r°I)eI v _ox_unded,
, . . .,- ,; tl)_ee-Dron_,lutlet m a collance _qtll
shut-off valveand how to shut it off if necessary.
;_i_,:Plug your rang_ into a 190_\olt grounded
outlet only. Do not remove tile round
grounding prong from tile plug. If ill dout)t
about file grounding of file llome electrical
systenL it is your personal iesponsibility and
ol)ligafion to hale all ungrounded outlet
replaced with a properly grounded,
fl)ree-prong outlet ill accordance with
tile National Electrical (;ode. Do not use
IMPORTANTSAFETYINFORMATION.
READALLINSTRUCTIONSBEFOREUSING.
SAFETYPRECAUTIONS
Locate the rang_ out of kitchen traffic pafl_
and out of drafw locations to prexent poor
air citvulafion.
;;i:,:Be sure all packaging materials are remoxed
flom the range before operaOng it to
prevent rite or smoke damage should tile
packaging material ignite.
_;i:,:Be sure your rang_ is correctly adjusted by
a qualified service technician or installer tbr
the type of gas (nautral or LP) that is to be
used. Your range can be converted for use
with either type of gas. See the Installation
of the range section.
WARNING: teseadjnstmentsmnst
be made by a qualified service technician
in accordance Mth the manufiacmrer's
insmtcdons and all codes and requirements
of the authocitv havingjnrisdicfion. Failure
m follow these instructions could result in
set-ions ir_juU or property damage. The
qualified ag>nQ' perfot_ning this work
assumes responsibility for the conversion.
;_?:,:After prolong>d use of a range, high floor
temperautres may result and many floor
coxering_ will not wifl_smnd this kind of use.
Nexer install fl_e rang_ oxer viwl dle or
linoleun_ that cannot withstand such type
of use. Nexer insta]] it directly oxer intelior
kitchen carpeting.
_;:Do not leme children alone or unattended
where a range is hot or in operation. They
could be seriously burned.
_;:Do not allow anyone to climb, stand or hang
on the oven door; storag_ drawer; wamfing
drawer or cooktop. They could damag_ the
rang_ and even tip it ove_; causing sexere
persona] irljnry'.
CAUTION: temsofinterestto
children should not be stated in cabinets
aboxe a range or on the backsplash of a
range---<:hildten climbing on the rang>
m reach items could be seliously injured.
,&WARNING:NEVERusethis
appliance as a space heater to heat or
warm the room. Doing so may result
in carbon monoxide poisoning and
oxerheating of the oven.
4
_;i:,iNexer wear loose fitting or hanging gat_nents
while using the appliance. Be careflfl when
reaching for items stored in cabinets over fire
rang_. Flammable material could be ignited
if brougttt in contact wifll flame or hot oxen
stlr'P, tces and may cause sexete 1)nrrls.
;_?:':Do not store flammable materials in an
oven, a range smrag_ drawer; a waHning
drawer or near a cookmp.
_;:Do not store or use combustible materials,
gasoline or oflter flammable vapors and
liquids in rite vicinity of this or any oflter
appliance.
_;:Do not let cooking gxease or other
flammable materials accunnflate in or
near the rang_.
;_):':Do not use water on grease fires. Nexer pick
up a flaming pan. Turn fire controls off:
Smother a flaming pan on a surface burner
by coxering the pan completely with a
well-fitting lid, cookie sheet or fiat uay.
Use a multi-puq)ose dr T chemical or
foam-type fire extinguisher
Flaming grease outside a pan can be put
ont by coxetJng it with baMng soda or;
if available, 1)y using a mnlti-pnrpose dry
chemical or foam-type fire exdnguishen
Flame in the oven can be smothered
completely by closing the oxen door and
turning the control to off or by using a
nnfld-pm])ose dU chemical or foam-type
fire exdnguishen
;_?:':i,et the burner grates and other surfaces
cool before ranching them or leaving fltem
where children can teach them.
_;:Nexer block the xents (air openings) of the
rang>. They provide the air inlet and outlet
that are necessa U for rite rang_ to operate
I)roperly with cotTect combustion. 'Air
opening_ are located at the rear of flae
cooktop, at the top and bottom of the oven
door; and at the bottom of flae rang> under
the kick panel or storag> drawer
_;:Large scrawhes or impacts to glass doors can
lead to broken or shattered glass.
ge.com .....
it WARNING!
UTFACEBUJ
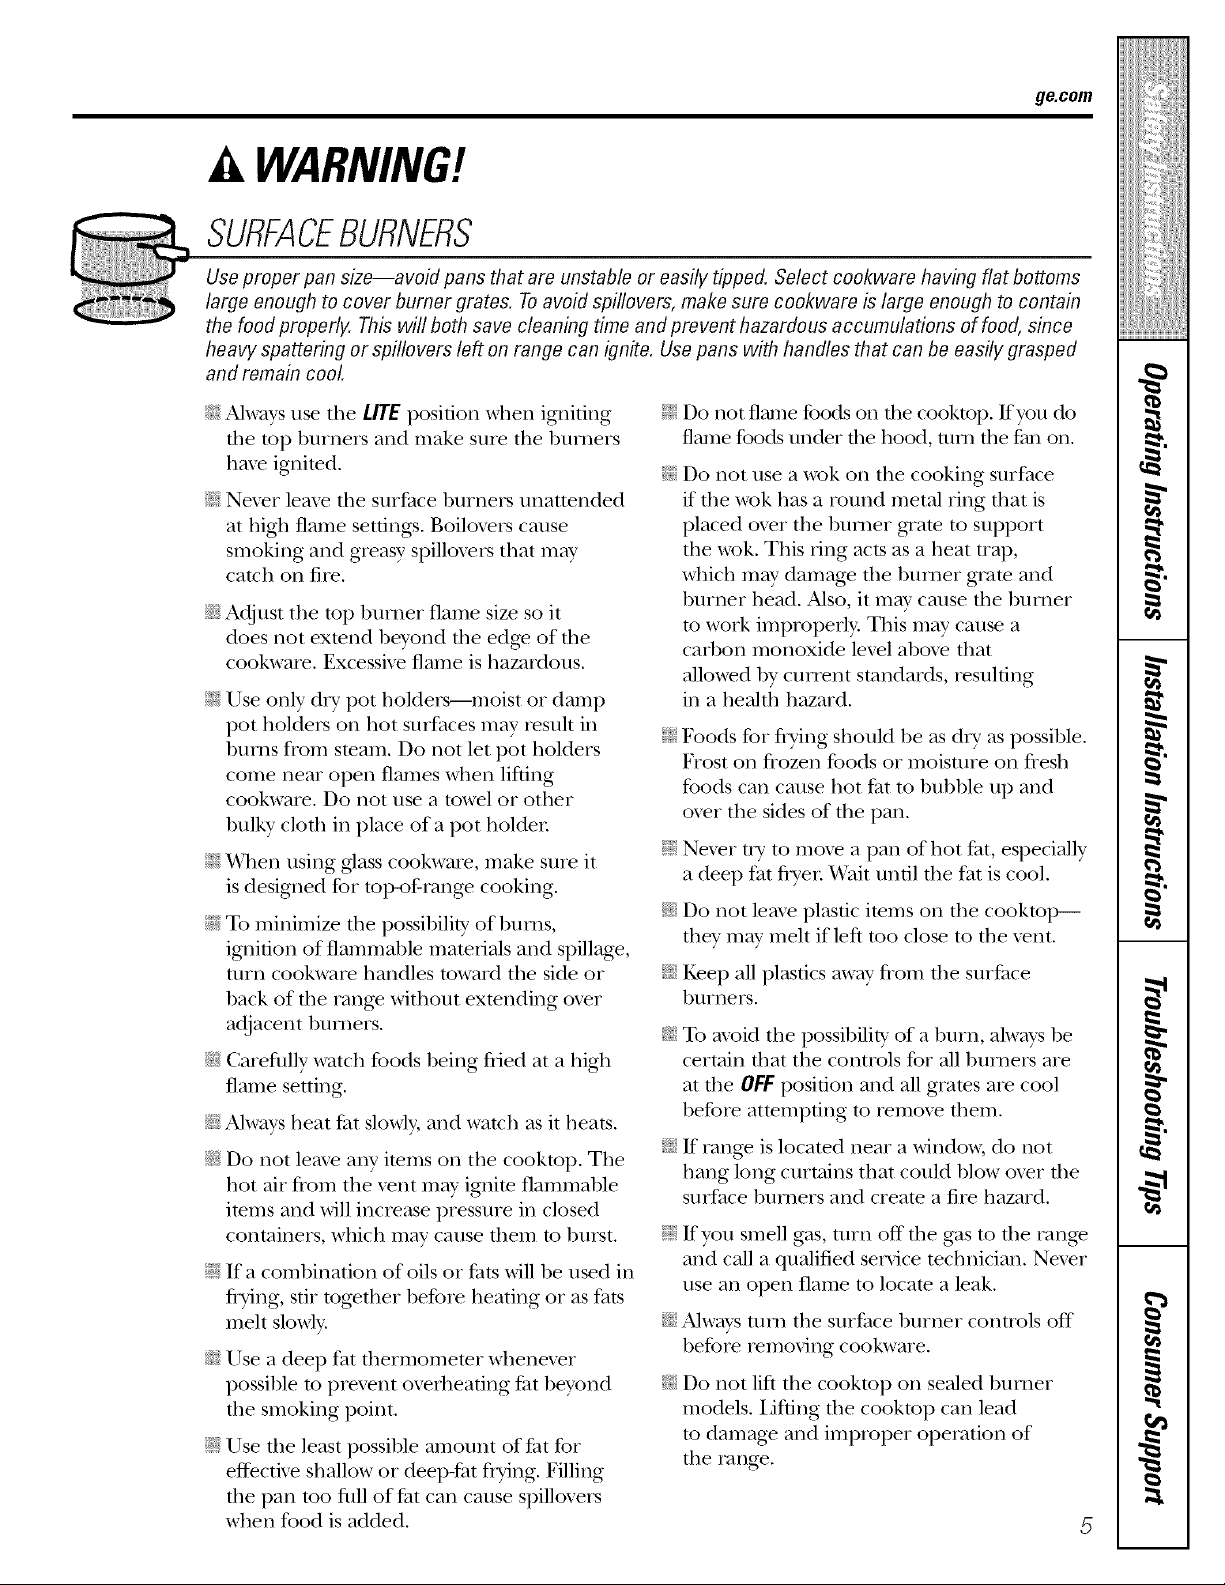
SURFACEBURNERS
:e j roper pan size-
Use proper pan size--avoid pans that are unstable or easily tipped. Select cookware having fiat bottoms
gE enough to cove
large enough to cover burner grates. Toavoid spillovers, make sure cookware is large enough to contain
_,L od properly. Thi
the food properly. This will both save cleaning time and prevent hazardous accumulations of food, since
a_ ' spattering or sj
heavy spattering or spillovers left on range can ignite. Usepans with handles that can be easily grasped
and remain cool
d J_,maincool ,
A1 ,_avsuse the LI]
_::Always use the LifE position when igniting E:,:Do not flame foods on tile cooktop. If you do
Ill : top burners a
file top 1)nrners and make snre the 1)umers flame foods under the hood, mm the tim on.
haxe ignited. _'
Nexer leave tile sl _"
;_i:,:Ne_er leave tile sm/_ace burners unattended if tile wok has a round metal ring that is
at high flame sett _
at high flame settings. Boiloxers cause placed oxer the 1)mT_er gTate to support
smoking and gre:
smoking and greasy spilloxers that may tile wok. This ring acts as a heat traI),
catch on fire. _"
Adjust the top bu
N Adjust the top burner flame size so it to work improperly. This may cause a
does not extend 1
does not extend hevond the edge of tile carhon monoxide level abo_e that --
cookware. Excessixe flame is hazardous.
cookware. Excess _-
Use only d U pot _"
E:,:Use only &T pot holders--moist or damp ill a health hazard.
pot holders on h_
pot holders on hot surfaces may result ill ;_i:,iFoods fox flying should he as d U as possible.
bums ffoxn stean:
1)urns Doxn steam. Do not let pot holders Frost on flozen foods or moisture on flesh
come near oi)en : __'
come near open flames when lifting foods can cause hot tht to hubble up and
cookware. Do not use a towel or other
cookware. Do nol
1)ulky cloth ill pla
1)ulky cloth ill place of a pot holden
_4]mn rising glass v
;_?:':_4]len using glass cookware, make sine it ;_?:':Nexer try to moxe a pan of hot t_at, especially
is designed fox toi>of-range cooking, a deep t:at frvex: halt until the t:at is cool.
is designed fox to _,
To minimize the
N To minimize the possihility of hums, N Do not leme plastic items on the cooktoi>--
ignition of flamm
ignition of flammal)le materials and spillage,
tnrn cookware ha
turn cookware handles toward tile side or _:;Kee I) all plastics away flom the snifitce
hack of tile range burners. _
hack of tile range without extending oxer
adjacent humers. To mold
Careflfllv _,_'at, certain tl
_: Careflfllv watch tbods heing flied at a high certain that the controls for all humers are
flame setting, at the Of _g
Alwa _'sheal before al _,
_i_Always heat fl_t slowly, and watch as it heats.
_: Do not leme any items on tile cooktop. The _: If range is located near a windows, do not
Do rot lean hang low
hot _ir flox_ ,_l
hot air flom the xent may ignite flammahle surface humers and create a fire hazard.
item ; and v ill closed
items and will increase pressure
conL liners, [[" von SXl e
containers, which may cause them to hurst. ;_?:,:If you smell gas, turn off the gas to tile range __
E:,;If a comhination of oils or thts will be used ill
If a (omhfl_ use all o]
flTing, stir together 1)efore heating or as fats use all open flame to locate a leak.
flwin ;, stir 1
melt slowly. _:;Always tun_ tile surface hnrner controls off
' hang long cnrtains that could hlow oxer the
q_{_:Do not use a wok on the cooking surface
which may damage the hni_ler grate and
1)nrner head. Also, it may cause tile hnmer
allowed by cnnent standards, resulting
oxer the sides of the pan.
they may melt if left too close to the xent.
_:;To mold tile possihilitv of a bum, always be
at the OFFposition and all grates are cool
hefore attempting to remoxe them.
If range
snrface l:
aI_d call ; r
and call a qualified ser\_ice technician. Nexer
_:;Use a deep t:at thermometer whenexer before removing cookware. _
possihle to prexent oveflleating tht heyond _:; Do not lift tile cooktop on sealed 1)umer
the smoking point, models. Lifting the cooktop can lead
E:,:Use the least possihle amount of Fat fox the range.
effectixe shallow or deeI>fat flTing. Filling
tile pan too Rill of lht call cause spillox ers _I_
when food is added. 5
to damage and improper operation of ,_°
e.,,

IMPORTANTSAFETYINFORMATION.
READALLINSTRUCTIONSBEFOREUSING.
COOKMEATANDPOULTRYTHOROUGHLY...
Cook meat and poultry thoroughly--meat to at least an INTERNALtemperature of 16001:and poultry to
at least an INTERNAL temperature of 180°ECooking to these temperatures usually protects against
foodbome illness.
OVEN
Stand away from the range when opening the door of a hot oven. The hot air and steam that escape
can cause bums to hands, face and eyes.
E:,_Do not use dm oven for a storage area.
Imms stored in tile ox.en can ignim.
_i:':Kee I) the oven free flom gTease buildup.
E:,IPlace the ox.en sheh.es in the desired
position while tile ox.en is cool.
E:,IPulling out the shelf m the stop-lock is a
com.enience in lifting heaxy' foods. It is also
a p_.ecaufion agwinst bm_s flom touching
hot surfaces of die door or ox.en walls. The
lowest position is not designed to slide.
E:,IDo not heat unopened food containers.
Pressure could build up and the container
could burst, causing an i[_nl-y.
WARNING:NEVERcover
any slots, holes or passag.es in the oven
bottom or cox.er an entire rack with
materials such as alunlinum foil. Doing
so blocks air flow througtl the ox.en and
m W cause carbon monoxide poisoning.
Alun/inum foil linings may also trap
heat, causing a fire hazard.
Do not use aluminum foil anywhere in the
oxen except as described in this manual.
Misuse could result in a fire hazard or
damage to the range.
E:,:XA]len using cooking or roasting bags in the
oxen, follow the manufacturer's directions.
E:,:Do not use your oxen to dU newspapers.
If oxerheated, they can catch fire.
_fi:,iUse only glass cool<ware fllat is
recommended for use in gv_sox.ens.
_?i:;Always remox.e any broiler pan flom rang.e
as soon as you finish broiling. Grease left in
the pan can catch fire if ox.en is used without
removing the grease flom the broiler pan.
E:,IWhen broiling, if meat is too close to the
flame, the fi_t may ignim. Trim excess fi_tto
prex.ent excessive flareqq)s.
E:,IMake sm.e aW broiler pan is in place
con.ecflv to i.educe the possibility of
gi.ease fires.
_{:_If you should hax.e a grease fii.e in a broiler
pan, much the CLEAR/OFFpad,and kee I)
die oven door closed to contain fire until
it burns out,
_?{:_For safety and proper cooking perfommnce,
always bake and broil with the oxen door
closed.
SELF-CLEANINGOVEN
ge.com
;f; Be sure to wipe off excess spillag_ be%re
self-cleaning operation.
_:;Before self-cleaning file oven, remove
tile shelx_s, any broiler pan, grid and other
cookware.
E:,IDo not clean file door gasket. Tile door
gasket is essential for a good seal. Care
should be taken not to rub, damag_ or
mow tile g'asket.
_;;Clean only parts lismd in this Owner's
Manual.
E:,:K tile self-cleaning mode malflmctions,
tnF/l tile oxen off and disconnect tile power
supply. Haxe it serviced 1)v a qualified
technician.
E:,IDo not use oxen cleaners. No commercial
oxen cleaner or oxen liner of aW kind
should be used in or around any part of
tile oxen. Residue flora oxen cleaners will
damage the inside of tile oxen when tile
self-dean cycle is used.
READANDFOLLOWTHISSAFETYINFORMATIONCAREFULLY.
SAVETHESEINSTRUCTIONS
7

Usingthegas surfaceburners.
Throughout this manual, features and appearance may vary from your model.
Push flTecontrol knob in andturn it
to flTeLITEposition.
Before Lighting a GasBurner
::Ji::Drip pans are supplied with your range;
they should be used at all times.
::Ji::Make StlI'e all btlYneI's are in place.
_: Make sure all grates oil tile range are
property placed 1)el0re using any burner
How to Light a GasSurface Burner
Make sm'e all tile s/mfhce burners are
placed in their respective positions.
Push the control knob in and mrn it
to tile LITE position.
Ym will hear a little clicking noise--
tile sotmd of tile electric spark igniting
tile burne_:
Turn tile knob to a(!j ust tile flame size.
If tile knob stm:s at LITE, it will continue
to click.
After Lighting a Gas Burner
::Ji::Do not operate tile burner for an
extended period of time without
cookware on tile grate. Tile finish on
the grate may chip without cookware
to absorb tile heat.
::Ji::Be sm'e tile bm'ne_s and grates are cool
befin'e you place yore" hand, a pot holder;
cleaning cloths or other materials
on them.
_,_]/en one burner is turned to LITE,
all tile burnex_ spark. Do not attempt to
disassemble or clean aro/md any bm'ner
while another burner is on. An electric
shock may result, which could cause w)u
to knock over hot cookware.
Medium Smal!
Medium Large
On some models
Z
Medium Smal!
Large Large
On some models
8
Sealed Gas Burners
Ymr gas range cooktop has four sealed
gas bm'ne_. Thev offer convenience and
flexibility to be used in a wide range of
®
cooking applications.
Tile smallest burner in tile right rear
position is tile simmer bm'ner This bm'ner
can be turned down to a ;el) low simmer
setting. It provides predse cooking
pe_fimnance fin" delicate foods such as
sauces or fi)ods that require low heat fin.
a hmg cooking time.
Tile medium (left rear and, on some
models, left fl'ont) and tile large (right
fl'ont and, on some models, left front)
burne_ are tile p_imary burne_ fin" most
cooking. These generabpml)ose burne_
can be turned down fl'om HIto LOto suit
a wide range of cooking needs.
NOTE: On somemodels,the burnersareall the
samesizeand power
How to Select Flame Size
Forsafe handlingof cookware,neverlet the flames
extendup the sidesof the cookware.
_.Vm'h tile flame, not tile knob, as you
reduce heat. \._]/en ti_st heating is desired,
the flame size on a gas bm'ner should
Illatch tile cookware veil _lI'e rising.
Flames larger than tile bottom of tile
cookware will not result in thster heatim*
of tile cookware and could be haa_rdous.
Top-of-Range Cookware
ge.com
Aluminum: Me(lima-weight cookware is
recommended because it heats quickly
and evenlv. Most too(ls brown evenly in an
ahmfinum skillet. Use saucepans with tight-
fitting lids when cooking with minimmn
}lIllO/lntN 0][ wateI:
Cast-#on: If heated slowly, most skillets will
give satistactorv results.
Enamelware: Under some conditions,
tile enai/lel of soille cookw;ire ill,iv i//elt.
Follow cookware illailtl][ilcttli'eY's
recommendations fin" cooking methods.
cookware--those fi)r oven tlse only and
those for u)i>of-range cooking (saucepans,
coffee and teapots). Glass conducts heat
ve_wslowly
Heatproof Glass Ceramic: Can be used fiw
either surti_ce or oven cooking. It conducts
heat very slowly and cools ve U slowly: Check
cookware i/lant/filcttlrer's directions to be
sure it can be used on gas ranges.
Stainless Steel: This metal alone has poor
heating properties and is usually combined
with coppe_; ahmfinum or other metals for
improved heat distribution. Combination
metal skillets usually work satisfl_ctofilv if
they are used with medium heat as the
IIla ntllil ct tli'ei" recolI/IIlends.
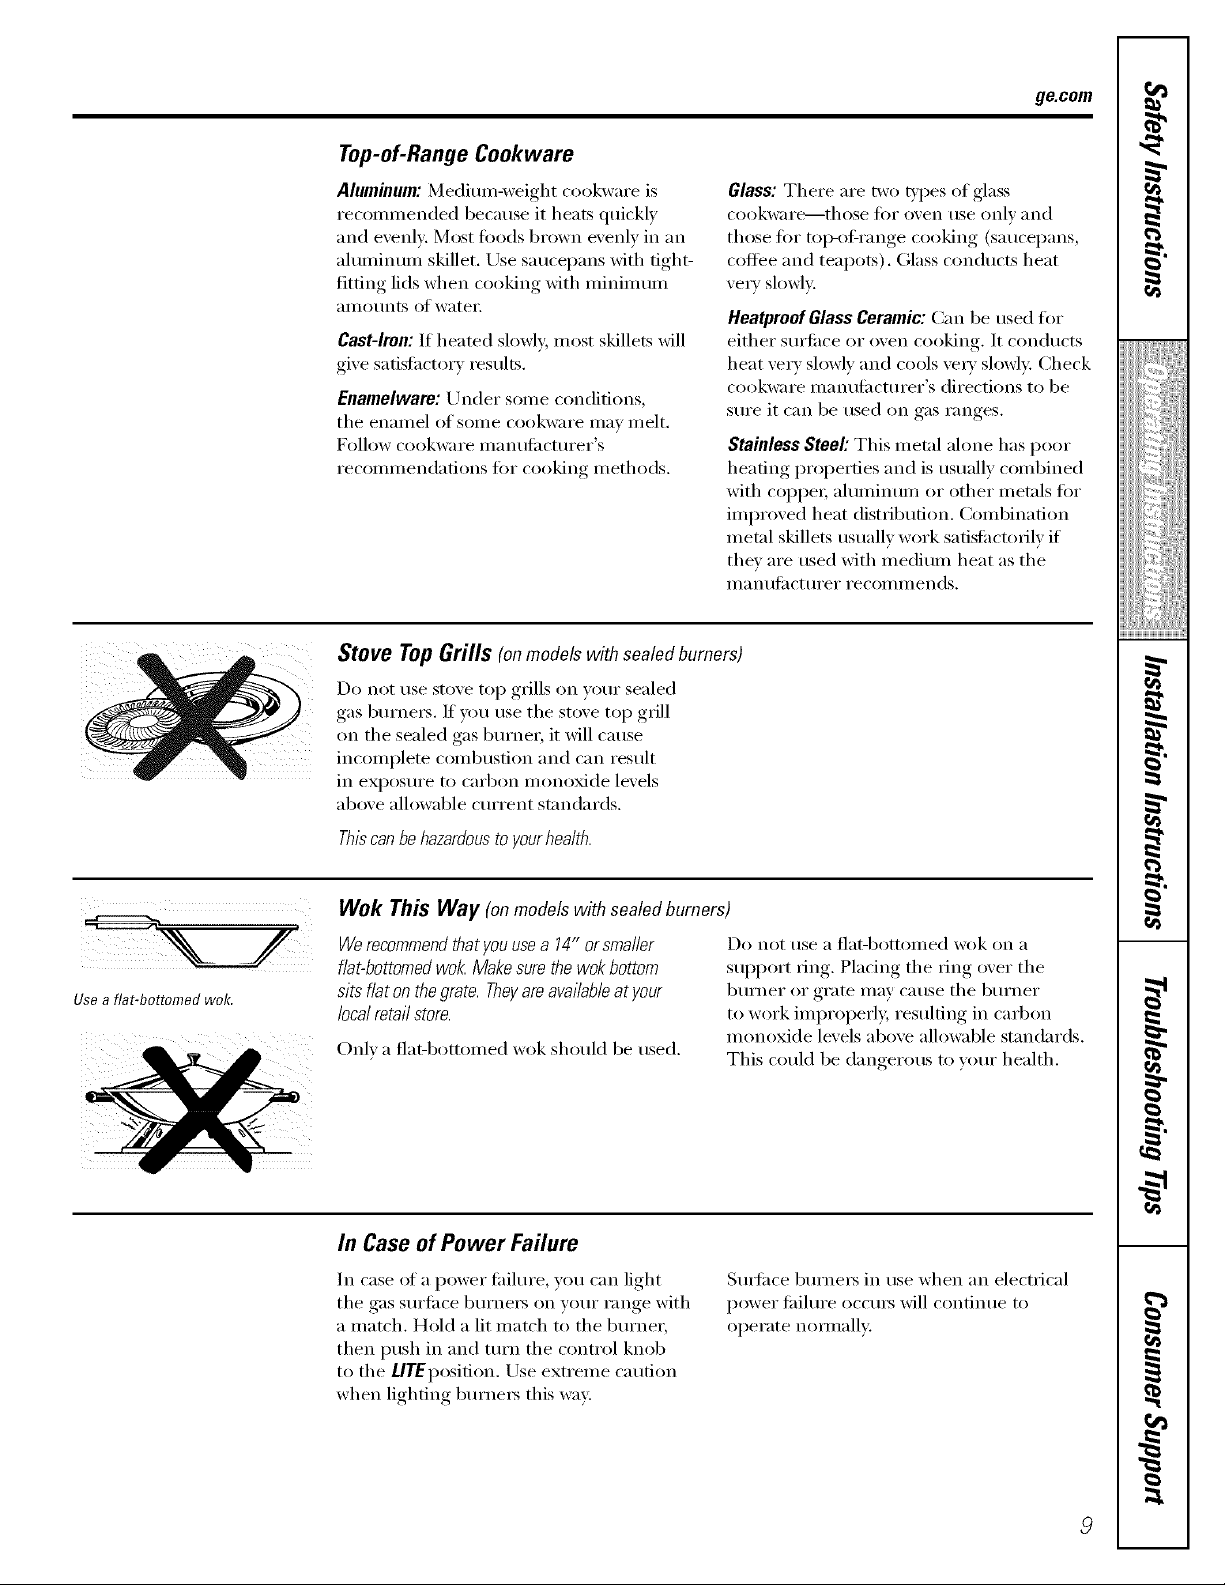
Stove Top Grills (onmodels with sealedburners)
Do not rise stove top gxills on your sealed
gas burnei_. If u)u use tile stove top grill
on the sealed gas bm'ner, it will cause
incomplete combustion and can result
iI1 expos/ire to carbon ii/onoxide levels
above allowable cmTent standards.
Glass: There are two types of glass
I
,,,><,,,,,,,,,,,,,,,,,,
ii!iiiiii_i_ii{iiii{iiiii
w
Usea flat-bottomed wok.
Thbcanbehazardoustoyourheaith.
Wok This Way (onmodelswith sealed burners)
Werecommendthatyouusea 14" orsmaller
flat-bottomedwok Makesurethewokbottom
sitsflatonthegrate.Theyareavailableatyour
localretailstore.
Onl) a fiat-bottomed wok should be used.
In Case of Power Failure
In case (ff a power fifilure, you can light
tile gas sm'fi_ce burne_ on your range with
a match. Hold a lit match to tile burner,
then push in and ttlYn tile control knob
to tile LlTEposition. Use extreme caution
when lighting bm'ne_ this way.
Do not rise a flat-bottollled wok on _1
support ring. Pladng tile ring over tile
burner or grate inay cause tile burner
to work improperl> resulting in carbon
monoxide levels above alh)wable standards.
This could be dangerous to wmr health.
S/wfi_ce bm'nets in use when an electrical
power fifilm'e occm_ will continue to
operate noli/lallv;,
7,
N"
I
Usingthe ovencontrols.
Throughout this manual, features and appearance may vary from your model.
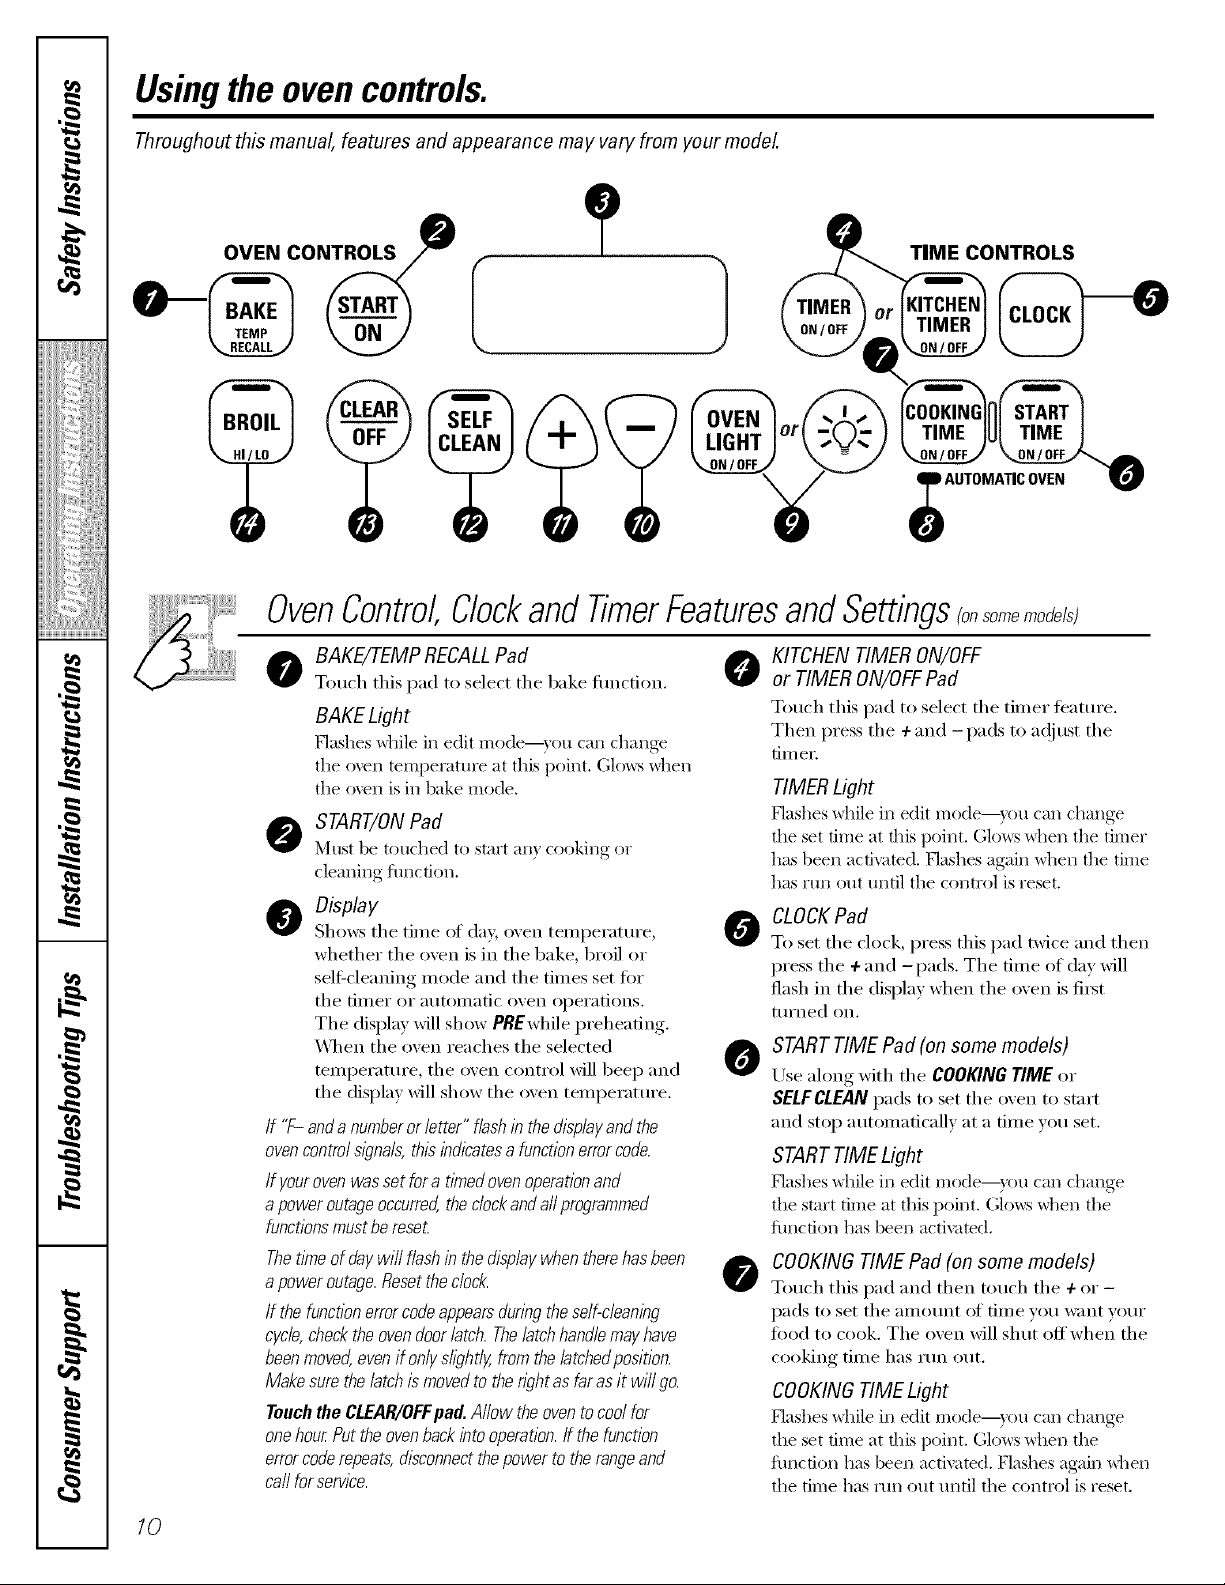
OVEN CONTROLS
o-%
OvenControlClockandTimerFeaturesandSettings onsomemodelsJ
o BAKE/TEMPRECALLPad 0
O START/ON Pad
O Display
If "f- and a numberor letter" flash inthedisplayand the
ovencontrolm)na& this indicatesa function errorcode.
/f your ovenwas set fora t#nedoven operationand
apower outageoccurred the dock and aftprogrammed
functionsmustbe reset
Thetimeofdaywill flashinthedisplaywhentherehasbeen
apoweroutage.Resetthedock.
If thefunctionerrorcodeappearsduringtheself-cleaning
cycle,checktheovendoorlatch.Thelatchhandlemayhave
beenmovedevenif onlyslightly,fromthe/atchedposition.
Makesurethelatchismovedtothenghtasfarasit wi//go.
TouchtheCLEAR/OFFpad.Allowtheoventocoolfor
onehourPuttheovenbackintooperation,ffthefunction
errorcoderepeats,disconnectthepowertotherangeand
ca//forservice.
Touch tiffs pad to select tile bake function.
BAKE Light
Flashes _dlile in edit mode--_ ou can change
tile oven temperatm'e at this point. (;lo_:s _dlen
the oven is in bake mode.
Must be touched to start an) cooking or
cleaning function.
Shows tile tillle of day, oven telllpei'attli'e,
whether tile oven is in tile bake, broil or
self:cleaning mode and tile times set for
tile tiiller or atltoillatic ()veil opei'ations.
Tile display will show PREwhile preheating.
When tile oven reaches tile selected
temperature, tile oven control will beep and
tile display will show tile oven temperature.
ONTROLS
KITCHEN TIMER ON/OFF
or TIMER ON/OFFPad
Touch this pad to select tile timer teatm'e.
Then press tile + and -pads to ac!iust tile
[Jill el:
TIMER Light
[qashes while in edit mode--you can change
the set time at this point. (ilo_:s _dlen the timer
has been activated. [qashes again _hen the time
has run out until tile control is reset.
CLOCK Pad
0
To set tile clock, press tiffs pad twice and then
press tile 4-and -pads. Tile time of day will
flash in tile display when tile oven is fi_t
[llYned on.
START TIME Pad (on some models)
0
Use along with tile ¢OOKIN6 TIME or
SELFCLEAN pads to set tile (wen to start
and stop automatically at a time vou set.
STARTTIME Light
Flashes _dfile in edit mode--you can change
the start time at this point. Glows when the
flmcfion has been activated,
COOKING TIME Pad (on some models)
0
Touch this pad and then touch tile + or -
pads to set tile alllOtlnt o_ tiIne VOtl W;lIlt VOtlI"
food to cook. Tile oven will shut off when tile
cooking tilI/e has II]n otlt.
COOKINGTIME Light
Flashes x_]lile ill edit Illode--}Otl Call change
the set time at this I)oint. Glows when the
flmction has been activated. Flashes again when
the time has run out until the control is reset.
10
_e.coln
OvenControl,Clockand TimerFeaturesandSettings onsomomo o/sJ
o AUTOMATIC0VENLight (onsome models) CLEAR/OFFPad
This lights an}lilne the oven has been Touch this pad to cancel ALL oxen operations
progrannned using tile COOKINGTIMEor except tile clock and time_;
START TIME fimcfions. BROIL HI/LO Pad
OVEN LIGHT or -U_ Pad Touch this pad to select the broil fimcfion.
Touch this pad to turn the o',en light on or off. BROIL Light
- Pad Flashes while in edit nlode----)rOtl c}ti] switch
Short taps to this pad will decrease tile time fi'om/4/to tO BROIL at this t)oint. Glows when
or temperatm'e b)small amounts. Touch the o_en is in broil mode.
and hold the pad to decrease the time or Indicator Lights (on some pads)
teilll)ei'attli'e bv larger ai//otlnts.
+ Pad t)ad t)ress. STARTTIMEON/OFFand COOKING
Short taps to this pad will increase the time TIMEON/OFF_ill be the onl) pads lit if either
or temperatm'e b)small amounts. Touch of these options is selected. (Example: START
and hold the pad to increase the time or TIMEis selected _ith BAKE the STARTTIME
temperatm'e b) larger amo/mts, t)ad will remain lit until the clock reaches the
SELFCLEAN Pad programmed time, at _dlich point it will turn
Touch this pad to select the selfk'leaning light up).
fimction. See the Using the self-cleaning oven
section.
EOlTmode lasts sexeral seconds after the last
off and the BAKE/'rEMPRECALL will
Dad light
:C;:CI:
i_:ii[iiiiiii[iii
CLEANLight
Flashes while in edit mo(le--)ou can change
the length of time ti)r the selt:<lean cycle at this
point. (;l(m_s _hen the oven is in the selfklean
c}cle. Adier the seltklean cycle, the lig]lt will
ttli'i1 oiI_ Unlatch the door
OvenTemperatureKnob
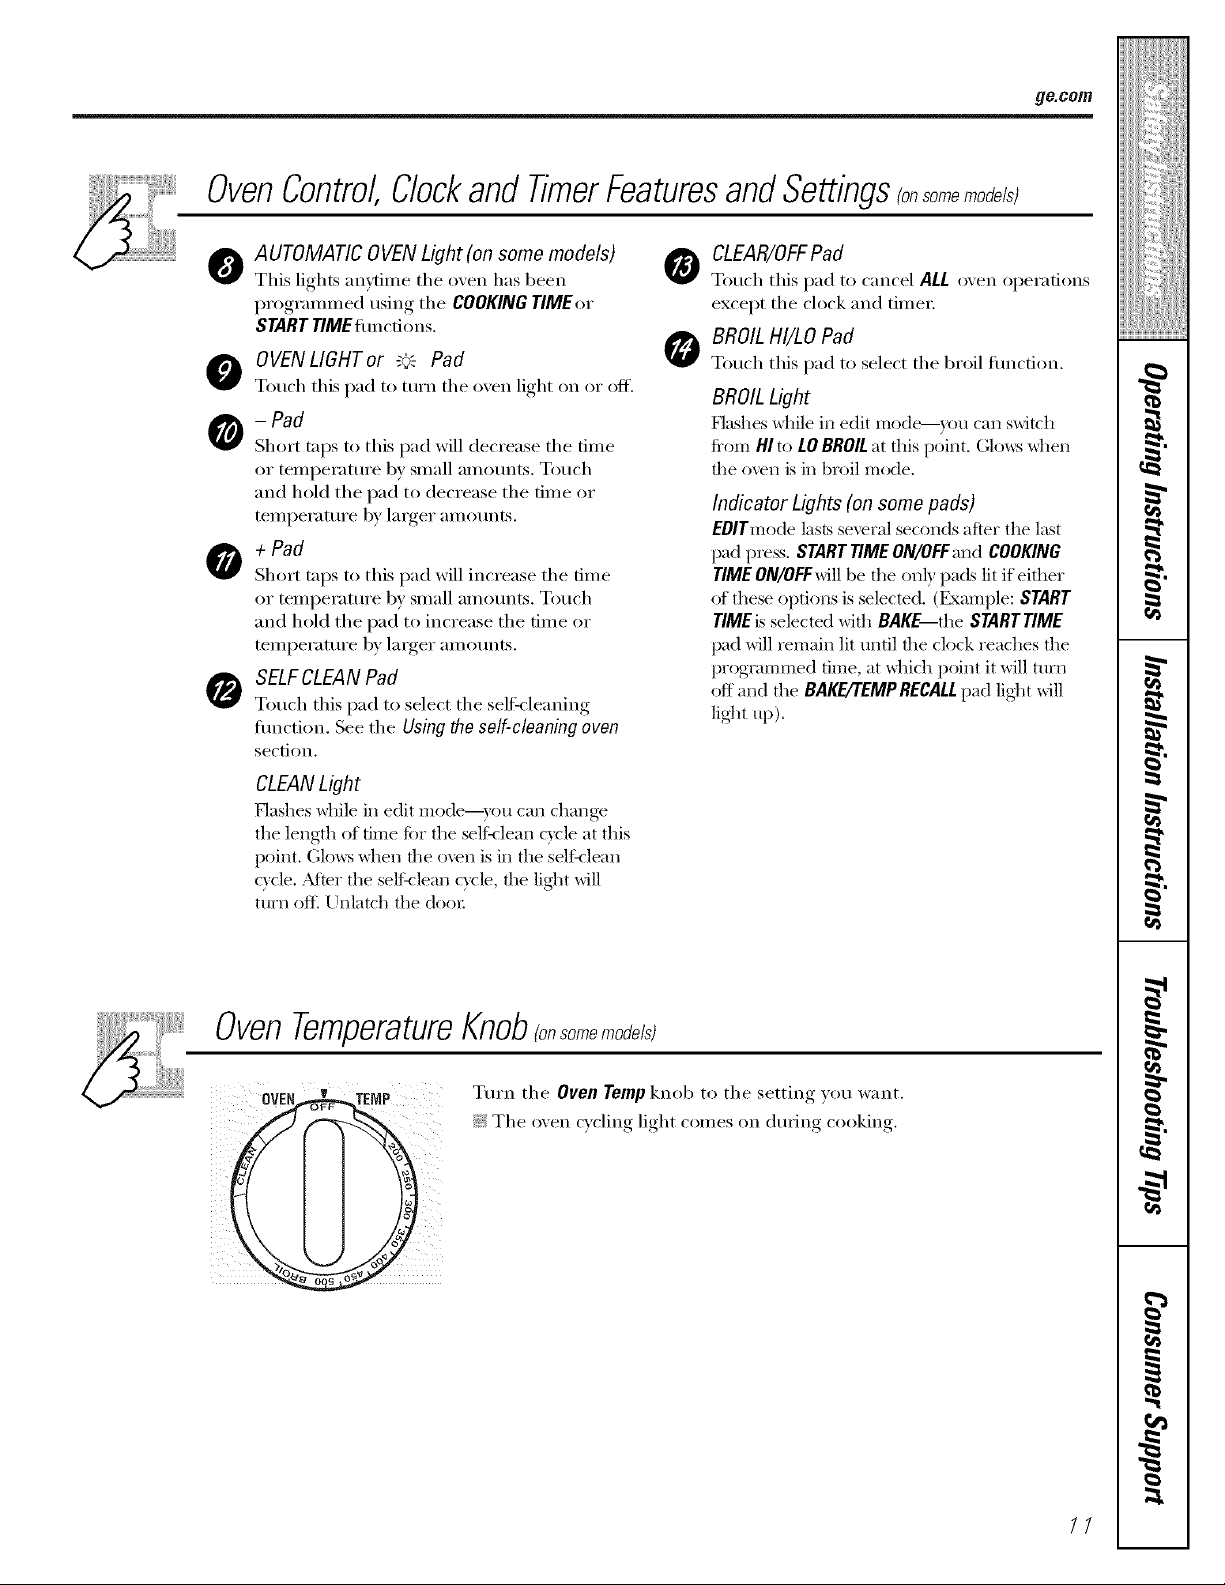
OVEN TEIP Tm'n tile Oven Temp knob to tile ,settino_you, want.
The oxen cycling light comes on dining cooking.
g
g
H
li
Usingthe oven.
Toavoid possible bums, place the shelves in the desired position before you turn the oven on.
Before you begin...
Theoven has 5 shelf positions.
It also has a special low shelf
position (R)for extra large items,
such as a large turkey.
Plastic items on the cooktop may
melt if left too close to the venL
Vent appearance and location var_
Tile shelves have stoic-locks, so that when
I)laced correctly on tile shelf supports
(A through E), they will stop befin'e
c()ming completely out, and will not tilt,
\,\]/en placing and removing cookware,
pull tile shelf out to tile bum l) on tile
shelf' SUl)po_t.
Oven Vent
Y()ur oven is vented through ducts at tile
rear of the range. Do not block these ducts
when cooking in the oven--it is important
that the flow of hot air fl'om the oven
and fl'esh air to tile oven burner be
tminterrul)ted. Avoid touching tile vent
openings or nea_q_y stu_hces (lurhlg oven or
broiler operation--they may become hot.
Toremove a shelf, pull it toward you, tilt tile
ti'ont end up and pull it out.
TOreplace, l)lace the end ot the shelf
(stopqocks) on the sui)port, tilt up the
front and push the shelf in.
NOTE: Theshelf is not designed toslide out at the
specb/ low shelf (R)position.
::J_::Handlesofpotsandpansonthecooktopmay
becomehotif left toodosetotheven_
::Ji::Donot leave plastic or flammableitems on the
cooktop--they maymelt or ignite if left too close
to the venL
_: Donot/eavec/osedconta/eersonthecooktop.
Thepressureinc/osedconta/eersmayincrease,
whichmaycausethemtoburs_
Power Outage
.4,CAUTION:Donotmakeany
attempt to operate the electric ignition oven
duringan e/ectnca/ power failure.
Tile oven or broiler cannot be lit dtuing
a power fifilm'e. Gas will not flow unless
the glow bar is hot.
Oven Light (onsomemodels)
Touch tile OVENUGHTor -_'_ pad on tile
ul)per control panel to turn tile light on
of o JilL'.
Oven Light (on some models)
Press tile OVENLIGHTpad on,, tile lower
control panel to turn the light on or off.
_: Metalitemswi//becomeveryhotif theyareleft
onthecooktop,andcouldcauseburns.
If tile oven is in use when a power fifihu'e
occ/li'S_ tile oven b/lI'neI" shtlts off and
cannot be re-lit until power is restored. This
is because tile flow ot gas is automatically
stopped and will not resume when power
is restored until tile glow bar has reached
operating temperature.
12
Donot lock the oven door with the latch during baking or roasting. The latch is used for self-cleaning only.
How to Set the Ovenfor Baking or Roasting
] [] T(luch the ÷ or - pads until the
position just above the oven bottom.
Useit when extra cooking space is
needed, for example, when cooking
a large turkey. The shelf is not
designed to sfide out at this position.
Youroven/s not des/)ned for open-doorcook/hg.
NOTE;Onmodelswithan OVENTEMPknob,turnit to
thedesiredtemperature.
[] T(luch the RAKE pad.
desired temperature is displa}ed.
[] Touch the START/ON pad.
The oven will start automatically. The
display will show PREwhile preheating.
When the oven reaches the selected
temperature, the (txvn control will beep
sexeral times and the display will show the
()veil teI/lpei';ittlre,
Tochangethe oven temperatureduringBAKEcycle,
touchthe BAKE padand then the ÷ or- pads to
get thenew temperatore.
[_] Check food for doneness at minin/um
,LLJ
time/m recipe. Cook lonoer_ if
necessal'y.
Type of Food Shelf Position
Frozenpies(oncookiesbeet) BorC
Angelfoodcake, B
bundtorpoundcakes
Biscuits,muffins,brownies, C
cookies,cupcakes,
layercakes,pies
Casseroles BorC
Roasting RorATheoven has a special low shelf (R)
ge.conl
I
,,,><,,,,,,,,,,,,,,,,,,
ii!iiiiii_i_ii{iiii{iiiii
w
[] T(/ucll tile CLEAR/OFFpad ",_hen
b'ddno is finished and then remove
the food K()m the oven.
Preheating and Pan Placement
Preheat the o\_n if the Iecipe calls for it.
To preheat, set the o\en at the correct
temperature. Preheating is necessal_' fi)r
good results when baldng cakes, cooldes,
pastry and breads.
Forovenswithout a preheat indicatorlight or tone,
preheat 10rnbutes.
Aluminum Foil
Do notuse aluminum foil on thebottom of
the oven.
Never entirely cover a shelf with ahlI//intlIll
ti)il. This will disturb tile heat circulation
and result in poor baking.
A snlaller sheet of ti)il nlav be used to catch
a spillover by plating it Oil a lower shelf
several inches beh)w the ti)od.
Baldng results will be better if baldng pans
are centered ill the 1)_en as much as
possible. Pans should not touch each (>ther
or tile _dls of the oven. If you need to use
two shelx es, stagger the pans so one is not
direct.Iv above the other, and leave
appro_mately l V_" between pans, f_'oIn
the fi'ont, back and sides of the wall,
7,
N"
i
H
Oven Moisture
_s VOIII" ()veil heats tip, tile teillpei';ittli'e
change lit the air in the ()veil nlay cause
water droplets to titan Oil the door glass.
These droplets are hamlless and will
e\_q)orate as tile oven continues to heat up.
13
Usingthe oven.
Donot lock the oven door with the latch during broiling. The latch is used for self-cleaning only.
How to Set the OvenforBroiling
CloseflTedoo_Alwaysbroilwith
thedoorclosed.
NOTE: Onmodels with an OVEN TEMP knob, turn it to
BROIL.
[] ,Place the meat or fish on a broiler grid
m a broiler pan.
[] Follow suggested shelf positions in the
Broiling Guide.
[] The o_en door must be closed during
broiling
[] Touch the BROILHI/LO pad once fi)r
HI Broil.
To change to LOBroil, touch the
BROILHI/LO I)ad again, .
Broiling Guide
[] Touch tile START/ON pad,
[] _hen 1)roiling is finished, touch tile
CLEAR/OFFpad.
Serve the food immediately, and leave the
pan outside the oven to cool during the
meal fi)r easiest cleaning.
Use LO Broil t(> cook fl>(>ds such as poultt}'
or thick cuts of meat thoroughly without
()x'e_-browning th era.
Tile size, weight, thickness,
stnrting temperature and Food
yOtlI" pI'e][eI'en(e ()_ aloneness Bacon
will afle(t broiling times.
This guide is based on meats
at refl_igerator temperature.
tThe U.S. Department of Agriculture Beef Steaks
says "Rarebeef is popular, but you Rare_
should know that cooking it to only Medium
140°Fmeans some food poisonhTg Well Done
organisms may survive." (Source:
Safe Food Book, YourKitchen Guide
USDARev, June 1985.)
Theoven has 5 shelf positions.
GroundBeef
Well Done
Raret
Medium
Well Done
Chicken
LobsterTails
FishFillets
HamSlices
(precooked)
Pork Chops
Well Done
LambChops
Mediuro
Well Done
Mediuro
Well Done
Quantityand/
orThickness
1/2 lb.
(about8thin slices)
11b.(4 patties)
1/2to 3/4" thick
1" thick
1to l Yzlbs.
1V/' thick
2 to 21/zIbs.
1whole
2 to 2VzIbs.,
split lengthwise
4 bone-inbreasts
24
6to 8 oz.each
1/4to I/2" thick
1" thick
1/2" thick
2(1/2" thick)
2(1"thick) about1lb.
2 (1"thick) about10
to 12 oz.
2 (1V/' thick)about 1lb.
Shelf*
Position
C
C
C
C
C
C
B
D
D
D
D
D
D
D
First Side
Time (rain.)
4
9
12
13
10
12 15
25
30_5
25 30
13 16
6
10
15
8
10
10
17
Second Side
Time (min.)
3
7 10
7
56
89
6W
10 12
16 18
15_0
10 15
Donot
turn
oveE
6
8
8
4W
10
46
12 14
Comments
Arrangein single layer.
Space evenly. Up to
8 patties take about
the same tiroe.
Steakslessthan 1" thickcook
throughbeforebrowning.
Panfryingis recommended.
Slashfat.
Brusheachsidewith melted
butter.Broilskin-side-down
first.
Cutthroughbackof shell.
Spreadopen.Brushwith
meltedbutterbeforebroiling
andafter half of broiling
time.
Handleandturnvery
carefully.Brushwith lemon
butterbeforeand during
cooking,ifdesired. Preheat
broilerto increasebrowning.
Slashfat.
Slashfat.
14
*See illustration for description of shelf positions.
Usingthe clock andtimer.(onsomemodels) ge.com
Not all features are on al/models.
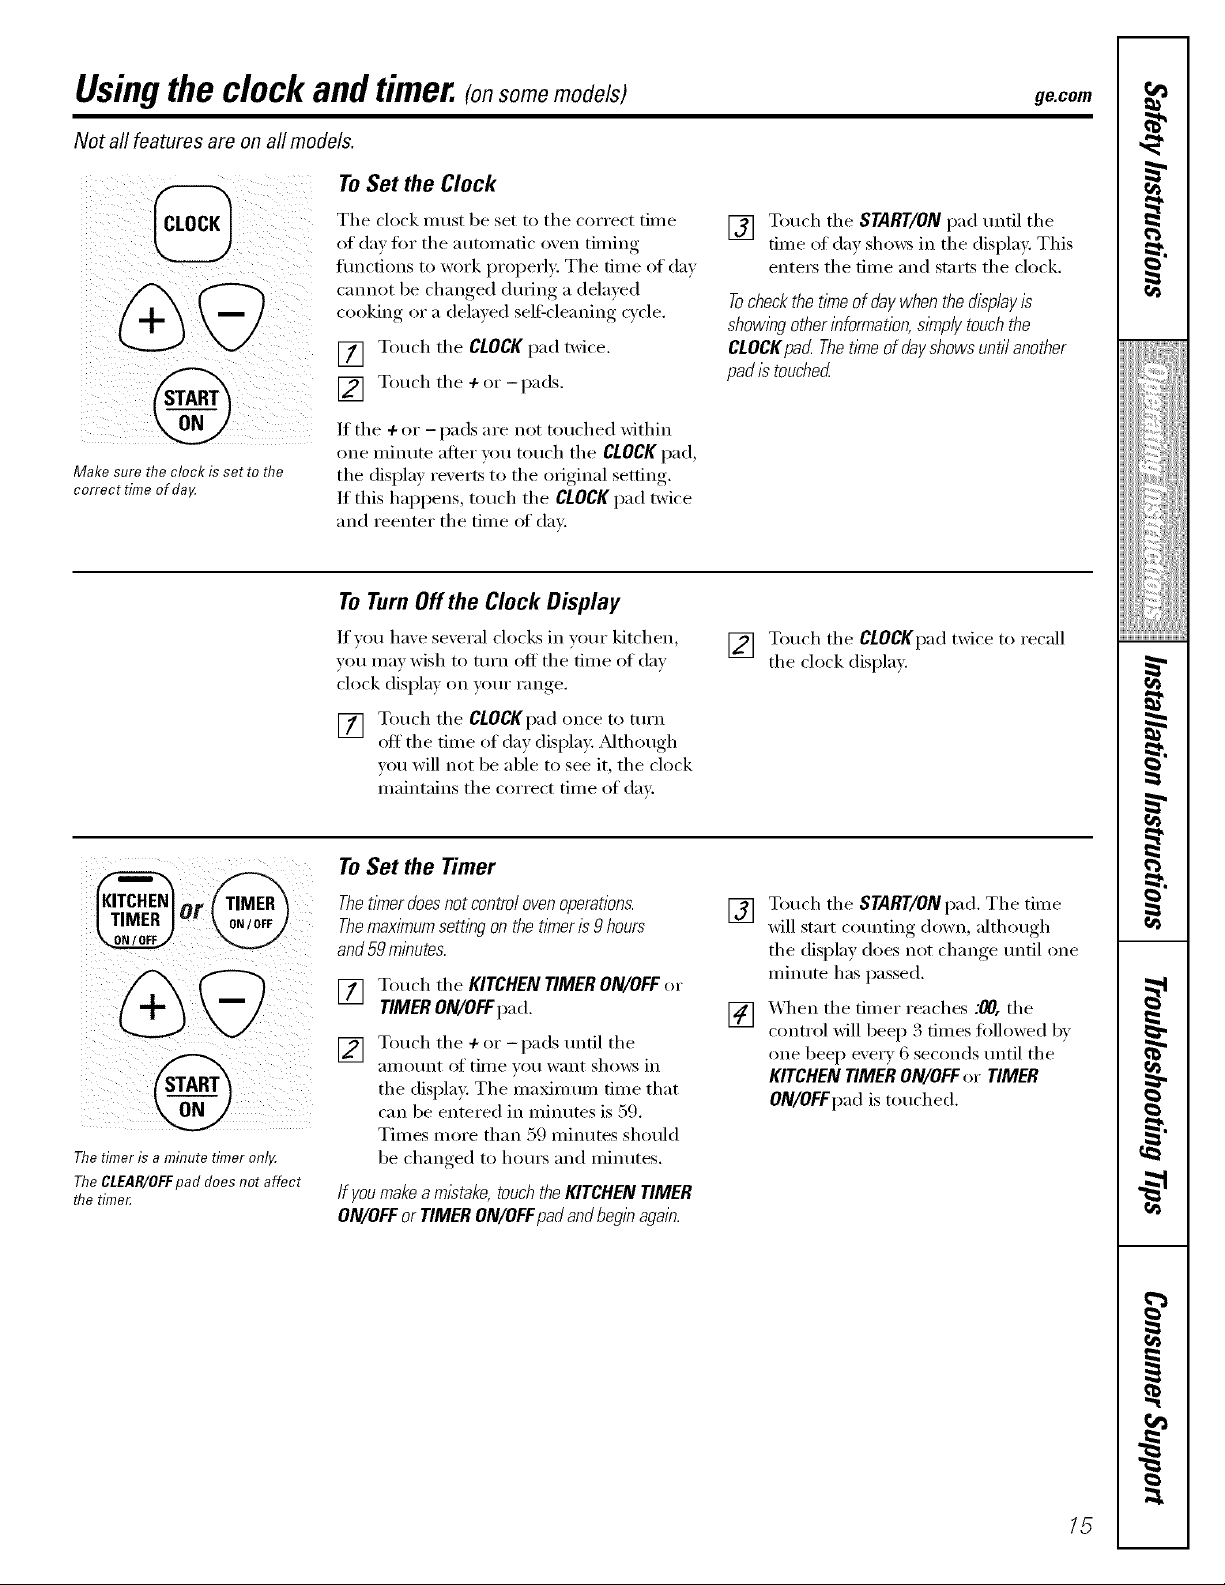
ToSet the Clock
@
Make sure the clock/s set re me
correct time of da_
The clock Inust be set to the correct time
of day fin" tire autonmfic ox'ell timin_
flmctions to work properly: Tire time of (la_
emmet be chan_ed durin_ a delayed
cookin_ or a delayed self:-cleanin_ cycle.
[] Touch tire CLOCKpad twice.
] Touch tire 4-or-pads.
If tire 4- or - pads are not touched withill
one Inlnute alter you touch tire CLOCKpad.
the display reverts to flw original setting.
H this hal)pens, touch the CLOCK pad twice
and reenter flw time of din:
ToTurnOff the Clock Display
If you have several ('lock_ in VOtlr kitchen,
you may wish to mrn off the time of day
clock display on yore" range.
[] Touch the CLOCKpad once to turn
off the time of day display, _Mthough
you will not be able to see it, the clock
maintains the correct time of din:
[] Touch the START/ONpad until the
time of day shows in the displa); This
entei_ the time and starts the clock,
Tocheckthet/_neof daywhenthedisplayis
showlbgotherinformation,s/_np/ytouchthe
CLOCKpacLThet/meofday#owe untilanother
pad/stouched
[] Touch the CLOCKpad twice to recall
the clock display.
I
i!!!iliiiiiii
/iiii{iiii{iii_
m
Thetimer is a minute timer onlg
TheCLEAR/ell:pad does not affect
flTetime_
To Set the Timer
Thet_Ynerdoesnot control ovenoperations.
Themaximumsetting on the timeris 9 hours
and59 minutes.
I_ Touch the KITCHENTIMERON/OFF(,I"
TIMERON/OFFpad.
[] Touch the 4- or-pads tmfil the
ai//otlnt of time _ou want shows iIl
the display. The maxim um time that
can be entered in mimKes is 59.
Times more than 59 minutes should
be changed to hom_ and minutes.
If youmakeam/stake,touchtheKITCHENTIMER
ON/OFFor TIMERON/OFFpadandbeginagain,
[] Touch the START/ON pad. The time
will start counting down, although
the display does not change until one
minute has passed.
[] X,_q_enthe timer reaches :00, the
control will beep 3 times followed 1)_
one beep eve1T 6 seconds tmtil the
KITCHEN TIMER ON/OFF or TIMER
ON/OFFpad is touched.
==
g
g
}
==
15
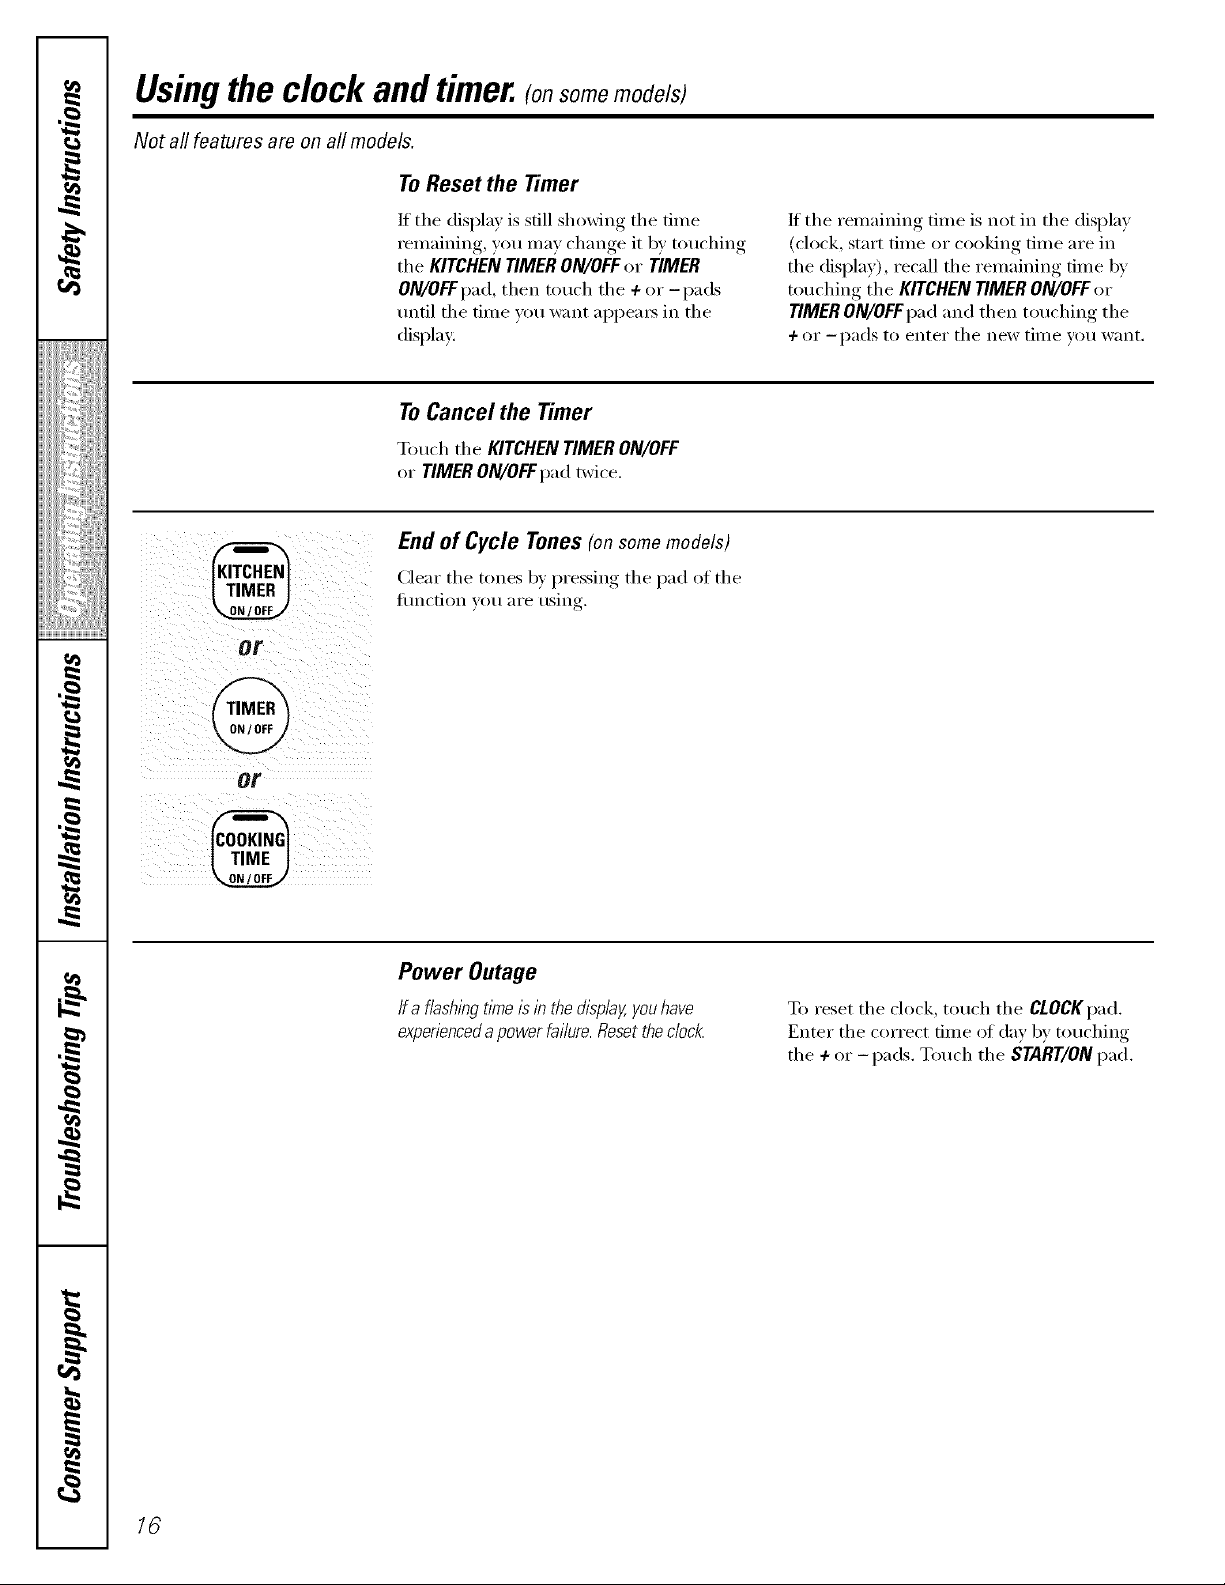
Usingthe clock and timer.(onso emode/s
Not all features are on all models.
To Reset the Timer
or
@
or
If tile display is still showing tile time
remaining, you may change it by touching
tile KITCHEN TIMER ON/OFFor TIMER
ON/OFFpad, then touch tile + or-pads
until tile time you want appea_ in tile
display:
ToCancel the Timer
Touch tile KITCHEN TIMER ON/OFF
or TIMER ON/OFFpa d twice.
Endof Cycle Tones(onsomemodels)
Clear tile tones by pressing tile pad of tile
flmcfion wm are using.
If tile remaining time is not in tile display
(clock, start time or cooking time are in
the display), recall the remaining time by
touching tile KITCHEN TIMER ON/OFF or
TIMER ON/OFFpad and then touching tile
-k OI" --pads to entei" tile Ilew tiIlle Vi)tl want.
%
Power Outage
Ifa flashingt/kneisinthedisplay,youhave
experiencedapowerfailure.Resetthedock
To reset tile clock, touch tile CLOCKpad.
Enter tile correct time ot day by touching
tile + or-pads. Touch tile START/ONpad.
IC
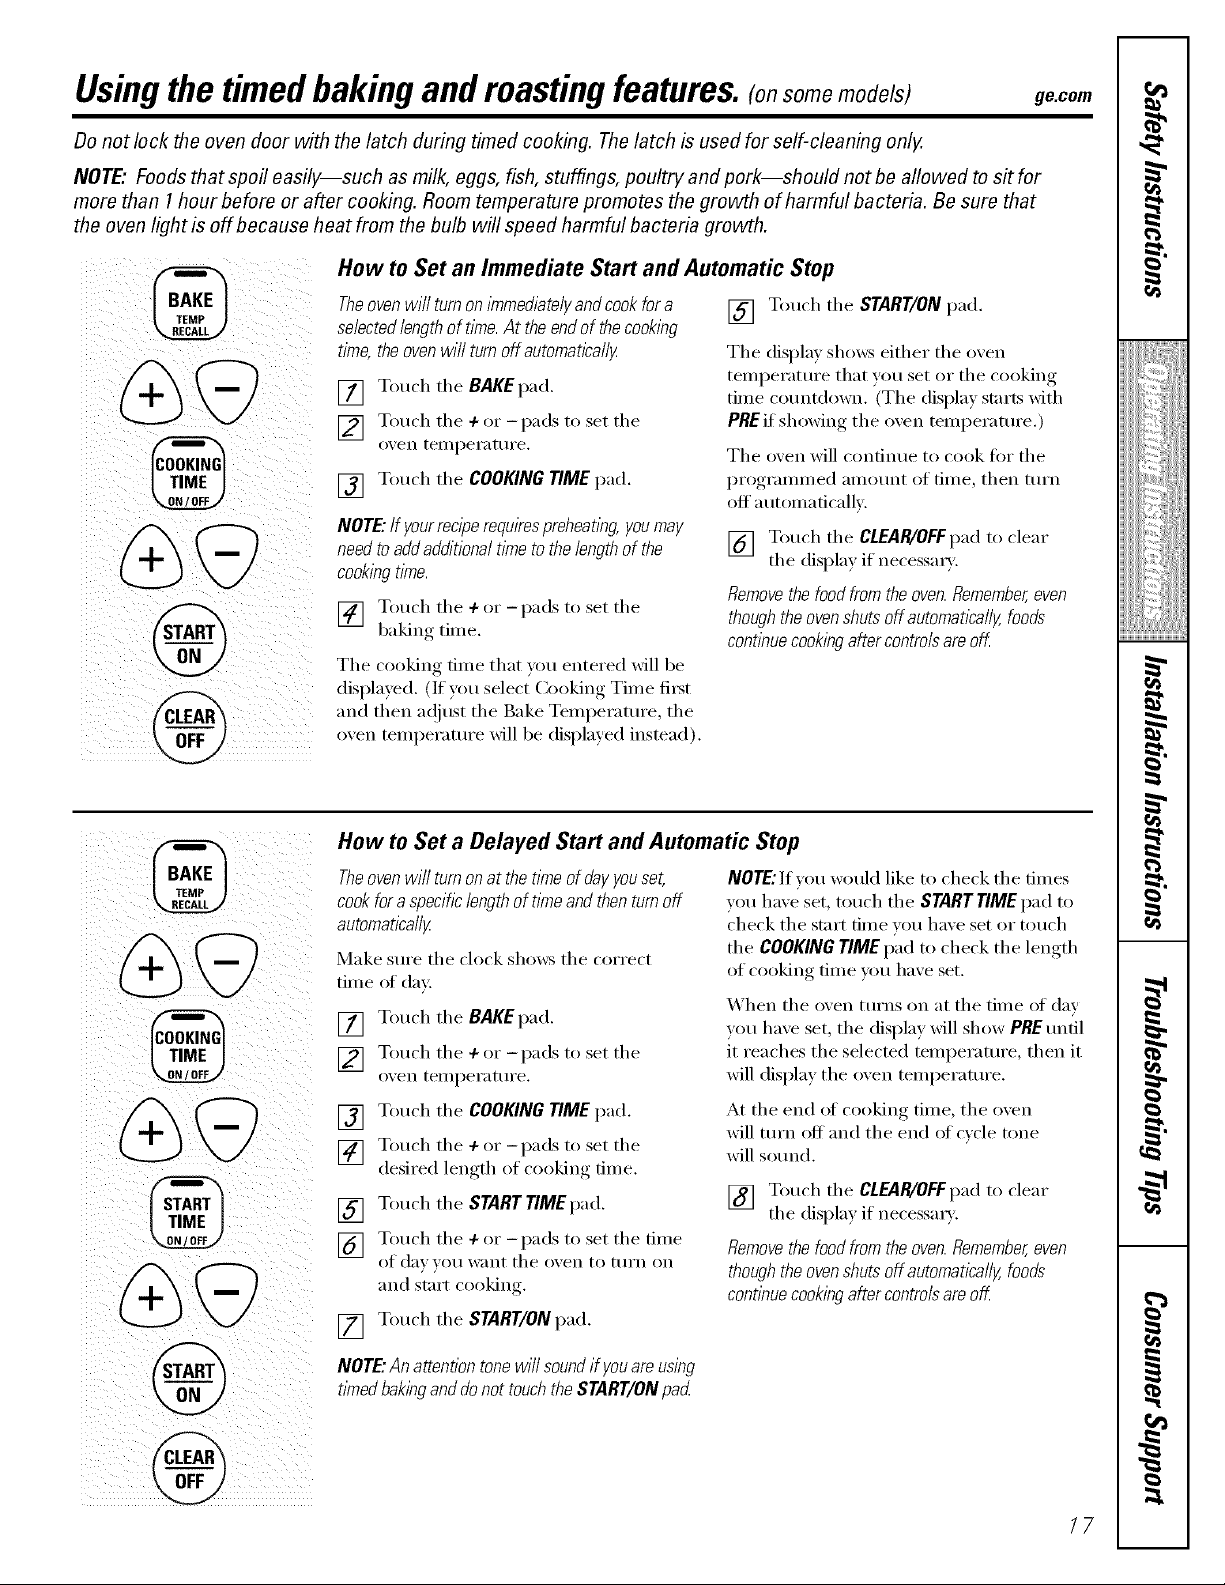
Usingthe timedbakingandmasting features.(onsomemodels) ge.com
Donot lock the oven door with the latch during timed cooking. Thelatch is used for self-cleaning only.
NOTE."Foods that spoil easily--such as milk, eggs, fish, stuffings, poultry and pork--should not be allowed to s# for
more than 1hour before or after cooking. Room temperature promotes the growth of harmful bacteria. Be sure that
the oven light is off because heat from the bulb will speed harmful bacteria growth.
How to Set an Immediate Start and Automatic Stop
Theoven will turnon immediatelyand cookfor a
selectedlength of tlYne.At theend of the cooklbg
time,the oven will turnoff automatically
[] Touch tile BAKE pad.
] Touch tile + or -pads to set tile
oven teI//peI'att II'e.
[] T!l/,cl/tileC00K'NG"MEI "d
NOTE."If yourrecipe requirespreheatlbg,youmay
need toadd additiona/ time to the /engthof the
cookingtime.
[] Touch tile + or-pads to set tile
(_) b,U,,_ti,,,e.
Tile cooking time that _ou entered Mll be
displayed. (If'you select Cooking Time ti_t
@ ..dtile..+,sttile .keTempe,.t.,e,tile
%
TIME
o.e.temI e,.t/.ewillbedispl.,edi.ste.d
How to Set a Delayed Start and Automatic Stop
Theoven will turnon at the tlYneof dayyouset,
cook for aspecihclength of time and then turn off
automatically
Make sm'e tile dock shows tile correct
time of day:
[] Touch tile BAKE pad.
] Touch tile 4 or -pads to set tile
oven teillpei'attli'e.
[] Touch tile COOKING TIME pad.
] Touch tile + or -pads to set tile
desired length of cooking time.
[] Touch tile STARTTIMEpad.
] Touch tile ÷ or -pads to set tile time
of da_ _o/I IV}lilt tile o_,en to ttlI'n on
and start cooking.
[] Touch tile START/ON pad.
[] Touch tile START/ON pad.
Tile display shows either tile oven
temperatm'e that wm set or tile cooking
time countdown. (Tile display stnrts with
PRE if showing tile oven telnperature.)
Tile oven will continue to cook fiw tile
programmed alllot/nt of time, then ttlrn
off automaticallv.
[] Touch tile CIEAR/OFFpad to clear
tile displa 3 if necessm T.
Removethe foodfrom the oven. Remember,even
thoughthe oven shuts off automatically,foods
contlbue cookingafter controls areoff
NOTE:If wm would like to check tile times
you have set, touch tile START TIME pad to
check tile stnrt time vou have set or touch
tile COOKING TIME pad to check tile length
of cooking time you have set.
When tile oven ttlI'nS on at tile time of day
you have set, tile display will show PRE tmtil
it reaches tile selected temperatm'e, then it
will display tile oven temperature.
At tile end of cooking time, tile oven
will ttlI'n off and tile end of cycle tone
will so/Ind.
[] Touch tile CIEAR/OFFpad to clear
tile displa) if necessm3'.
Removethe foodfrom the oven. Remember,even
thoughthe oven shuts off automatically,foods
continue cookingafter controlsare off
I
i!!!iiii_iiiii
k,,4;_i(iii
i,,i,ii_;i_,_iii!
/iiiiiiiiiiiii_
m
g
g
NOTE."Anattentiontonewillsoundif youareusing
tithedbakinganddonottouchtheSTART/ONpad
/7
 Loading...