

GE JGBS12GER, JGBS02EN, JGBS04ER, JGBS15GER, JGBS04PR Use And Care & Installation Manual
...Page 1
~afe~ instructions ....................2-5
Anti-TipDevice ... ..............................
3,30,40
Problem Solver
More questions?...call
..... ..........................
GEAnswerCenterm80~626.2000
46
.
operatingInstructions, mps
Aluminum Foil...... ......................
Features....... .................................................
Oven .....................................................
Baking.. ................................................15, 16
Broiling,BroilingGuide.. ..................19,20
ClockandTimer ..... ............................
ControlSettings..... ..............12, 15, 17, 19
Light;BulbReplacement... ..............14,24
Preheating..... ......................................
Roasting,RoastingGuide ... .............17. 18
Shelves
SurfaceCooking....... ...............................8-10
ControlSettings
ElectricIgnition.............. ..............................8
Standing PilotModels
.... .....................................
.... ......................................8
Care and Cleaning ....................2l-28
AirAdjustmentShutter. ....................................28
ContinuousClean. ..............................................
BroilerDrawer....................... ...............................27
BroilerPanand Rack
BurnerAssembly......... .................................21,22
Door Removal. ..............................................25
Lift-upCooktop....... ......................................28
Oven Bottom.... .............................................23
OvenVents.... ................................4,5, 13,28
Storage Drawer
....... ...........................
... .........................................
5, 16, 19,23
6,7
12-20
11,12
15, 18
13-15,23
...... ..........................8
26
19,23
27
Preparation
Flame Size
FlooringUnderthe Range
InstallationInstructions....... ................29-45
Leveling.... ......................................................
Thermostat Adjustment .... .........................14
~o~~~m~~ ~~~w~c~s .... ...............47
Appliance Registration
Model andSerial Number Location....... ....2
Warranty ... .....................................BackCover
.................................
... .............................
.... ......................31
.... ..............................
10,34,35,46
29-45
40
Standard-CleanModels:
JGBS02EN JGBS06PR
JGBS02PN JGBS12GER
JGBS04ER JGBS15GER
JGBS04PR JGBS16GEP
JGBS04GER JGBS17GER
JGBS04GPR JGBS19GEP
JGBS06ER JGSS05GER
Continuous-CleanModels:
JGBC75GER JGBC16GEP
JGBC17GER
2
—
Page 2
m~pusmLP You
s
It is intendedtohelpyouoperate
andmaintainyournewrange
properly.
Keepithandyfor answersto your
questions.
If youdon’tunderstandsomething
or needmorehelp,write(include
yourphonenumber):
ConsumerAffairs
GEAppliances
ApplianceP&k
Louisville,KY 40225
Wtitedown the model
and Setid nmbers.
Dependingon yourrange,you’ll
findthemodelandserialnumbers
on a labelonthefront of therange,
behindthekickpanel,storage
drawerorbroilerdrawer.
Thesenumbersarealsoonthe
ConsumerProductOwnership
RegistrationCardthatcame
withyourrange.Beforesending
in thiscard,pleasewritethese
numbershere:
ModelNumber
SefialNumber
Usethesenumbersin any
correspondenceor servicecalls
concerningyourrange.
If Ou received
1a amaged range.* e
Immediatelycontactthedealer(or
builder)thatsoldyoutherange.
Save the and money.
Before you
service.. s
ChecktheProblemSolverinthe
backofthisbook.It listscauses of
minoroperatingproblemsthatyou
cancorrectyourself.
APPROVEO
o
@
request
mYou rdEEDSERWCE*..
Toobtainservice,seethe Consumer
Servicespage in thebackof this
book.
Toobtainreplacementparts,contact
G~otpoint ServiceCenters.
We’reproudofourserviceand
wantyouto bepleased.If for some
reasonyouarenothappy with the
serviceyoureceive,herearethree
stepstofollowfor furtherhelp.
notstem or w gmtine or other
—Do
flmable vapm mdIiqti* inthevicitity
of$Mormyotherapptimce,
—mT To m mYou
smLLGAS
~ST, contactthepeoplewho
servicedyourappliance.Explain
whyyou arenotpleased.Inmost
cases,thiswillsolvetheproblem.
NEXT,if you arestillnotpleased,
writeallthedetails-including
yourphonenumber-to:
Manager,ConsumerRelations
GEAppliances
AppliancePark
Louisville,KY40225
~ALLY, if yourproblemis still
notresolved,write:
MajorApplianceConsumer
ActionPanel
20NorthWackerDrive
Chicago,~ 60606
~bdately d yourgwsupplierfmma
nei@bor9sphone.FoUowtie gassuppMer9s
htmctiom.
eH
youmnnotreachyowgasSupptier,w
e
—
Page 3
—
—
—
—
e–
WORTANT SAFETY NOTICE
~
Besureyourrangeiscorrectlyadjusti bya‘
TheCtifornia SafeDrinkingWaterandToxic
qualifiedservicetecMcianorinstilerforthe
Enfo~cementActrequirestheGovernorof
typeofgas
(na@rdorLP).thatistobe@d.
Californiatopublishalistofsubstancesknown
Yourrangecanbeconvertedforusewitheither
typeofgas,Seehstallationk5tructi0ris0
tothestatetocausecancer,birthdefectsorother
reproductiveharm,andrequiresbusinessesto warn
o
Afterprolongeduse-ofarange9ti@,,flwi
customersofpotentialexposuretosuchsubstances.
temperaturesmayresdt’ah~ti*yf100k - .-
Gasappliancescankauseminorexposureto
coveringstil notwithstid this~”~-oftiea..
Neverinstalltherangeovervinyltileoi”.~noleum
fourof thesesubstances,namelybenzene,carbon
monoxide,formaldehydearidsoot,causedprimarily
thatcannotwithstandsuch~@--tifkse:Never
bytheincompletecombustionofnaturalgasor
installitdirectlyoverinteriorkitchen,-c~ting,
.l. ,:---
LPfuels:Roperlyadjustedburners,indicatedby
..
-,;., -..
,.
.,.. . . .
-“..,..-,--
.,.
abluishratherthanayellowflame,willminifize
.,:,
~~~g ~~~
~~~g~, ‘ ‘-’.:.,‘‘“::::,““~-,..,,.
incomplete
combustion.Exp,osuretothese
,. .-,
,., ., ,,-..f,>,>-.
substancescanbeminimizedbyventingwithan
~
Do”n9t,leavec~dre~done6r*Wh~~wh.6fi ~.
openwindoworusinga ventilationfanorhood.
~
arangeishotorinoperati6~iTheyeQuId ~ “
seriouslybtied. -, ~~;,:-.:. ~,::.::.,.;~..:-.,>,.... :: I
.,
.7“,
,:.-.~.‘.,).‘~.
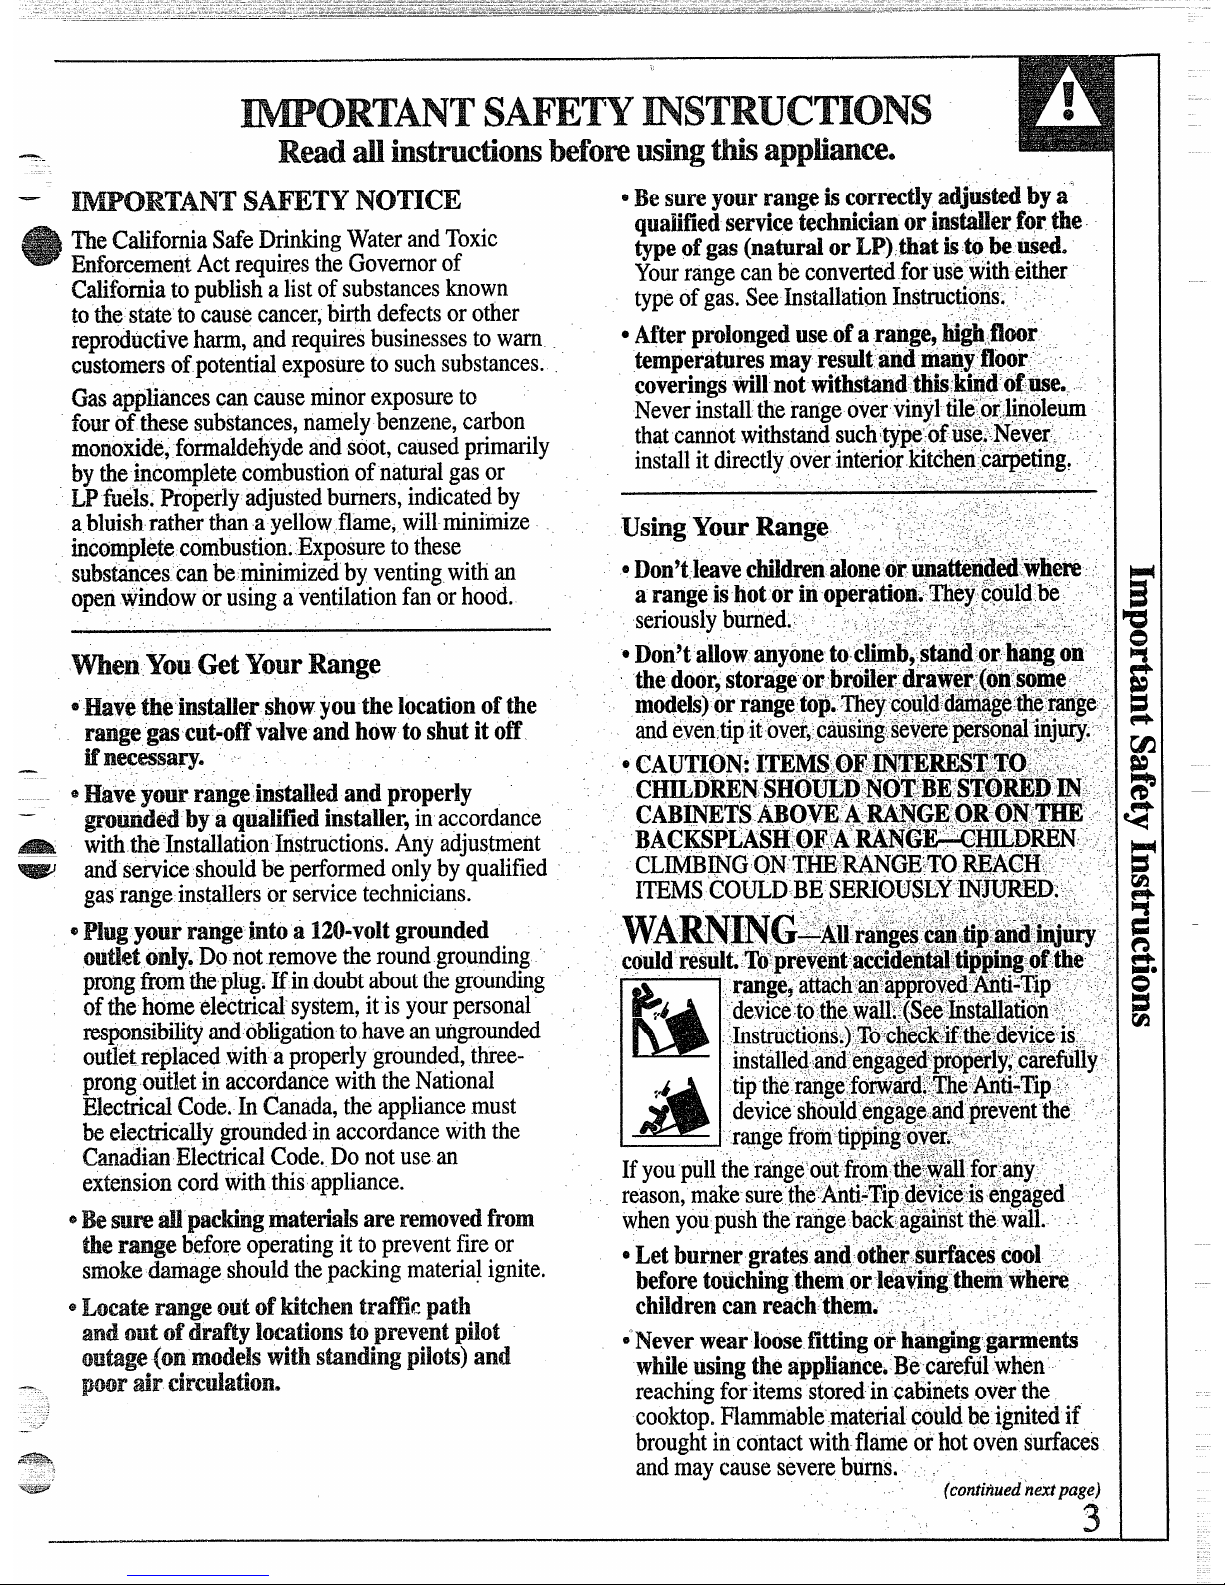
~H*v6the instilershowyouthelocationofthe
rmgegascut-offvalveandhowtoshutitoff
Mnee=ary.
~Wve”yourrange‘inStaMedandproperly
&omdd byaqualifiedinsti~er,
inaccordance
withthe‘hstallationkstructions.Anyadjustment
andserviceshouldbeperformedonlybyqualified
gasrangeinstallersorservicetechnicians.
*P#ugyo~r rmge kto a
120=voItgrounded
outletady,Do
notremovetheroundgrounding
prongtim theplug.fiin doubtaboutthegrounding
ofthehime electrical’system,itisyourpersonal
msp~ibility md obligationtohavean~grounded
outletreplacedwithaproperlygrounded,threeprongoutletinaccordancewiththeNational
ElectricalCode.h Canada,theappliancemust
beelectrica~ygroundedinaccordancewiththe
CanadianElectricalCode.Donotusean
extensioncordwiththisappliance.
s* m * pachg materialsareremovedfrO~
ther-e
beforeoperatingit topreventfireor
smokedamageshouldthepackingmaterialignite.
whenyoupushthe“rangebae~agtist’ke ~di. ~
.2, .
.,-.
eNeverwearloosefitig otih~n@nggamenk
whtieusingtheapptiance.Be
caretil‘when
reachingforitemsstoredincabinetsoverthe
cooktop.Nammablematerialcouldbeignitedif
broughtin contactwithflameorhotovensurfaces
andmaycauseseverebums.
(cotiitiuedhextpage)
3
Page 4
~For ~ow ~afe~,~~~~~US~yoar appiiancefor
s~~~ays~rn surfaceburnerto0~ before
wartingorheatingthemom*
removingCookwaree
. .
sDOnotuse
water on greasefi~o ~~verpickUP ‘
~
~~efi~]y w~~c~food$ beh~ ftid at ~ M@ ,
aflamingpan.Turnoff burner,thensrno~er “ ,
flme
setting.
.,
flamingpan
bycoveringpan
..
e ~e~er~~~~kt~~f~nts(airopetings)Ofthe -~,
completelywithwell-fittingEd,cookie
sh~t orflattray.H-tig,grease outside
range,Theyprovidetheairinletandoutletth~i .-
apancanbeputoutbyc@v&ringwith ~‘
menecessaryfortherangetooperate.propbrl~-:”~
bakingsodaor,ifavailable,amulti-purposedry -
withcorrectcombustion.Airopenings,ti~l*aM”
attherearofthecooktop>at~e
toPWd:bOttO@OfZ~
chemicalorfoam-typefireexting~sh?ro’” ~ :
theovendoor,,wd’atthebottomofthei~gb? ~~...-.
.:
@Donotstoreflammabiemtit6iE*-k”an oven9; ~; , .
underthetick panel,storagedraweror,br?~ler}~,.;
a range
storagedrawerokneara:coq~$op~-_ -”, ,‘
drawer(depetidingonthemode]). r”.,:... ~~~~s
.,
,,-,_-
....” .:>-.,,-----
,“ - -,.,
~Do
not storeorusecotibtitiblematGrids9.~.:,.:.
~~-~not~ ~~o~‘On~tiels tith ~~ ~~s~- :‘
iftheWokhas.~round~g~ .$pg:~~t~~’P~~@-:
gasoheorotherflmtitibl~Yapors.~nd~~tiqs~ ~~-,~~
h theticbityofttiisorak~ti!hirapp~ancee‘.”-. ~
OVerthebkrnir@atetosuP@o~’~e’Jwo%o.@$‘,’;~
,-
-
ringactsasa heattrap,w~ch may’d~tige~q;:.’~,.
~Do~~t~~t
CooMg gretie oroier flti~ab~~ ,
burnergratetid’burnerhead,Alibi:itmaydauie
materialsaccmulateinorneartherange.
ti&
burnerto-workimproperly.This,@ay.cause.[ai ~
,, :,,
!-. ,
~Whentooting
pork9followtie directions -,,..:.” ,~
carbon monoxid~.levelabovethat-
~owd-by(;;~..:
‘currentstandardsresulting-inahealt~~~~d.~<~~t.‘
exactlyandalwayscookthe:fieattoq i.nte.m~‘ L, “~~-~,,.
temperatureofatleast170°F.’tis @surGsthat,’ih’. ,
e~~od~‘fir
frfi~gs~~~d.be:~-dfy- ~:!po#;~~~~-~,;:
theremotepossibilitythatxc~na:wajbe ~reseS$“ ~~‘
Fiost-on,froienfoods‘ormoisture,o~’’tie$h’food~;~..
in themeat,it wiHbeWledaridtie m~atwillbe .6.
.,
, .
.. ~.’,.... ,
‘ ‘,cti causehot.fatto,bubbleup’tid 6ver$id~~{:~~,“.:.:
safetoeat,
,,. .
.4,’
-. ,. ”’. -,.
..
,.
.....,,: ~
,,
.~f
pm.~~‘,-: . , , - ‘“.‘;::’}:-:,.’::.;:,;:::
)’.
,.
.-
,.
Stiace Cooting
..,
~:.Use..leaitpos&blimount
‘of “fitfOr:+ffiC@Ve~’.;:;;::-
,.
. .
ShaNOWor deep-fatfryifig.~i~g thep“ti:tod”::,:f’~
,’
~
ti,bffat cancatiies~i!over~when.fo@-is@d~O _ -
e
AIwaysusetheLITEposition(o~;~ode~stith,
.
.,.
electricignition)orthe~ posi~on(onmodels”- -~
::ii coibiniiiQnif Qils6k:’fap’”wiub@’bd::#::;-:::; _
withs~ntig
~flOt$) when i@ti~g ~~p ~~~e~~ - ‘.. ,:-:.
sn-f~itig; stirto~etherb~foreheating.tir-asfats;~;~‘~
.,.
,.\--
,.
...’
.~elt
SIOWlyj: --- , ~~,, -”-, .’”-“‘ -‘:, -; -, ;,;; i::,~: ~
and
makesurethe.burnershaveig@ted. ‘ -- ~,, ~,
. .
!’
*Neverleave~~~’~eb~~~ersuna~tefided
it’ ~‘-- -
~
‘Altiays.”iiatiii ~lowly~-am~”~at$hWjthm~ j::,:.-
~~g~flame
set~ings.Boilovercausessmok.ing -”, ~~.- ..
.-.i..
>,-
,...,... ,
*‘~~ea deepfa~,~~er&o@e~~ry,b~neve~‘:,i‘~I ‘::“,’.,-,“
andgreasyspilloverkthatm?ycatch
0~fire. ~-
,,
‘possible
topreventoverheating’fat-beyond.~e~;-:’..,
e ~~j~s~top b~~er fl~e ske soit~OeSnot
extendbeyondtheedgeofthecookw~ri.
.}.
Excessiveflameis htiardous.
~‘~~eProP~r‘P~”,
$ize-Avoid p-ms th~t.ti&:.“j:~,--.,
u~stableoreas.fiy-tipptid.Selectcookwyehav~qg
~~$e~n~Ydv pot holders-moist
or d~p ‘
flatbottomslargeenoughtoproperlycontti.fdod”.
potholdersonhotsurfacesmayresultin burns
md avoidbdiloversWdspi~ld~ers’‘wdl~g? - ~‘,-.
fromsteam.DQnotletpotholders
enough,to’coverburnergrqte;~s will-boths?ve; 1,
comenearopenflameswhen ~ ~ ‘
liftingcookware.Donotusea
cletig timewd preventh~tidous accmtil?ions.”
- offood,sinceheavyspatteri~g’or
SPi~OVerSlefi -.
towelorotherbulkyclothin place
onrangecanignite.Usepanswithharidlesthat
ofapotholder.
canbe easilygraspedandremaincool.
8Tominimizethe p~~sib~ii~yofburns9ignition
~When
~s~~gg~~sc~okwam9make sure itis .,
offlammablematerials,andspillage,turn
designedfortop-of-rangecooking.
cookwarehandlestowardthe sideorbackofthe
rangewithoutextendingoveradjacentburners.
e~e~pa~~p~~sticsaway fromtO~bU~~a~S.
Page 5
—
*
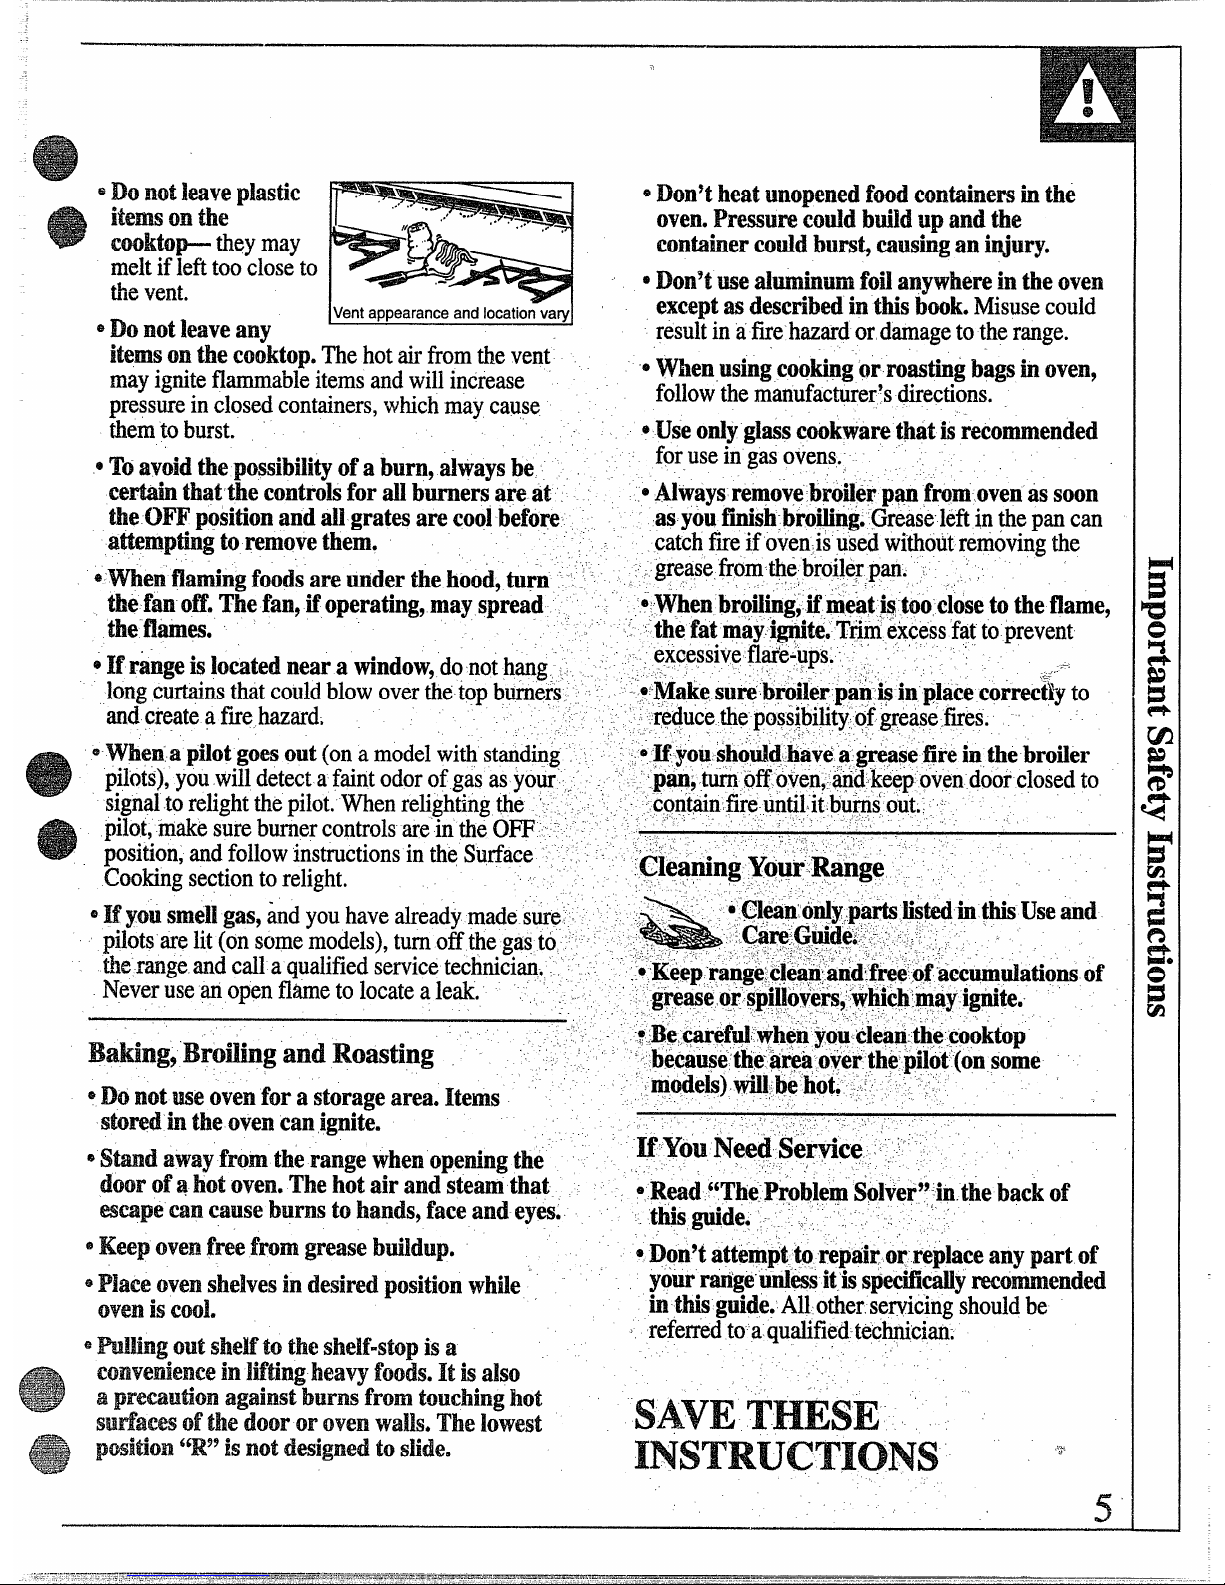
Donotleavepkastic
itemsonthe
cooktop
theymay
meltiflefttoocloseto
thevent.
.
3
~
Don$theatunopenedfood containersinthe
oven. Pressure
codd buildup andthe
contatierco~dburst,causinganinjury.
eDon9twe alwhum foflanywhereintheoven
Ventappearanceandlocationvary
exceptasdescribedin thisbook. Msusecould
resultmafire hazardordamagetotherange.
itemsonthecoiktop.me hotairfromthevent
$
Whenusingcookingorroastingbagsinoven9
mayigniteflammableitems andwillincrease
followthemanufacturer’sdirections.
pressureinclosedcontainers,whichmaycause
themtoburste
@Useody @ass
cookwarethatisrecommended
foruseingasovens..- .
eTI avoid
thepossibilityofaburn,alwaysbe
certainthat-thecontrohforWburnersareat.”
0Alwaysremove-brotie~pan~romovenassoon
the0~ poiitionpndallgratesarecoolbefore
asyoufiih broilifi~.
Gr~aseleftinthepancan
atiemptig to remove
them.
.“
,.
catchfne if ovenisusedwitioutremovingthe
,..
,, grease.fromti~ broilerpan. ~ ~,
~men flfig
foodsareunderthehood,tu~-n- ‘
,7
.,
,.,
thefanoH.Thefan,ifoperating,mayspread , ~
.-O,Whenbroilkg,if&&t,iqtooclosetotheflame,
theflames. ~
i ‘thefatmtiyigriiti.Ttirnexeess
fattoprevent
,,
excessivefl~e-up$l~ ‘‘ ‘- ~
@
Ifr~~geislocatednearawindow,donothang ~~ ‘ j:. , . . ~ .;~
longcurtainsthatcouldblowoverthetopburners ~~ ~
..~-
@--Makesurebroilerpan-winplaceco~rwfi~to
and
createa f~ehazard;
,.
‘‘’-r~qucetheposs~bilityof g~ease.fwes.
!$
,-
~-men ~
pilotgoesout(on a modelwithstanding‘,..
A~~U
youshotid-~aveagreasefireinthebrofler
pilots),youwilldetectafaintodorofgasasyour’ . ~~”
~~an~ti ofi.oven9-fidkeepovendoorclosedto
signal.torelightthepilot.Whenrelightingthe ~.‘“ ‘ ‘--,., - .,,. , -., , ,containfire,untilit.bu~sout.
pilot,m~e sureburnercontrolsareintheOW~~-‘ - - ~~”
...,
position,andfollowinstructionsintheSurface~, ~ - ~~~ ““ ‘~‘c~ “’‘‘: ‘“
CooKngsectiontorelight.
,CleaningYOurRange
\$-”.
,,
..~.~-~
.’
0.~~~”~~~~.pfi tis~@iuthisUseand
eHyousmellgas,
andyouhavealreadymades~e ‘
G$$&----... ;-~ .
pilotsarelit (onsomemodels),turnoffthe
gas to ; ~
.:,. ,,-, -’ ~~ : .r
therangeandcallaqualifiedservicetechnician,, ~.‘
“~tiee~
r~;ge::i~~~-~~tid~fre;.bf~ccumdationsof
Neveruseanopenfi~e tolocatealeak. .’. ~-.
,. .%maskqr
sptilbvefs~:wtich:hayiflte.
.-
,-. .
,-- ;.,
,.
.,
~:~~,~~ti: whenyo’~-dlea~.th~~o;ktop
B*i~g9 BrOfingandRoasting , ~~
,-
,.’
~-b.w~tisetfiehre%over.thgpilot(onsome
~‘~pdeb)filb~ ‘hot,-..:,-~ .’
@Donotuseovenforastoragearea.Items
,,
,,,
storedk theovencan~gnite.
.,.
.. .-.
w Y6uNeei Se;tice.”~~~“”
@~md awayfromtherangewhenopefingthi
doorof~hotoven.Thehotairand steamthat ‘
,.. ,r
‘~~ead!6TheP~objem$~lvef’!;in.thebackof
=capecancauseburnstohands,faceandeyes.
,.
ttis@de. -.., “.-.’.. ‘ .
@Keepovenfreefromgreasebddup.
@
tion’t attem~tto;eptiirorreplaceanypartof
@Placeovenshelvesindesiredpositionwhileo,
yourrtige:udti itiss-my recommended
ovenisCOOI.
htM guide?
Allotherse~iiiug shouldbe
J
refereedtoa.qu~led-techniciani
~~~ng outshelf
totheshelf-stopisa
convenienceinIiftingheavyfoods.Itisalso
apremutionagainstburnsfromtouchinghot
suflaeesofthedoororovenwalls.Thelowest
SAVE T.HisE L‘
pwition6gR99isnotdesignedtostide.
INSTRUCTIONS “
5
Page 6
——
FEP.TURESOFYOURMNGE
r 1
II
Ill
II
Ill -
$, -
\
BurnerCap
\fi
[-~.
\J
.—
(onsome
II I
\
., models)
// @ “
.
u
\!
BurnerBase
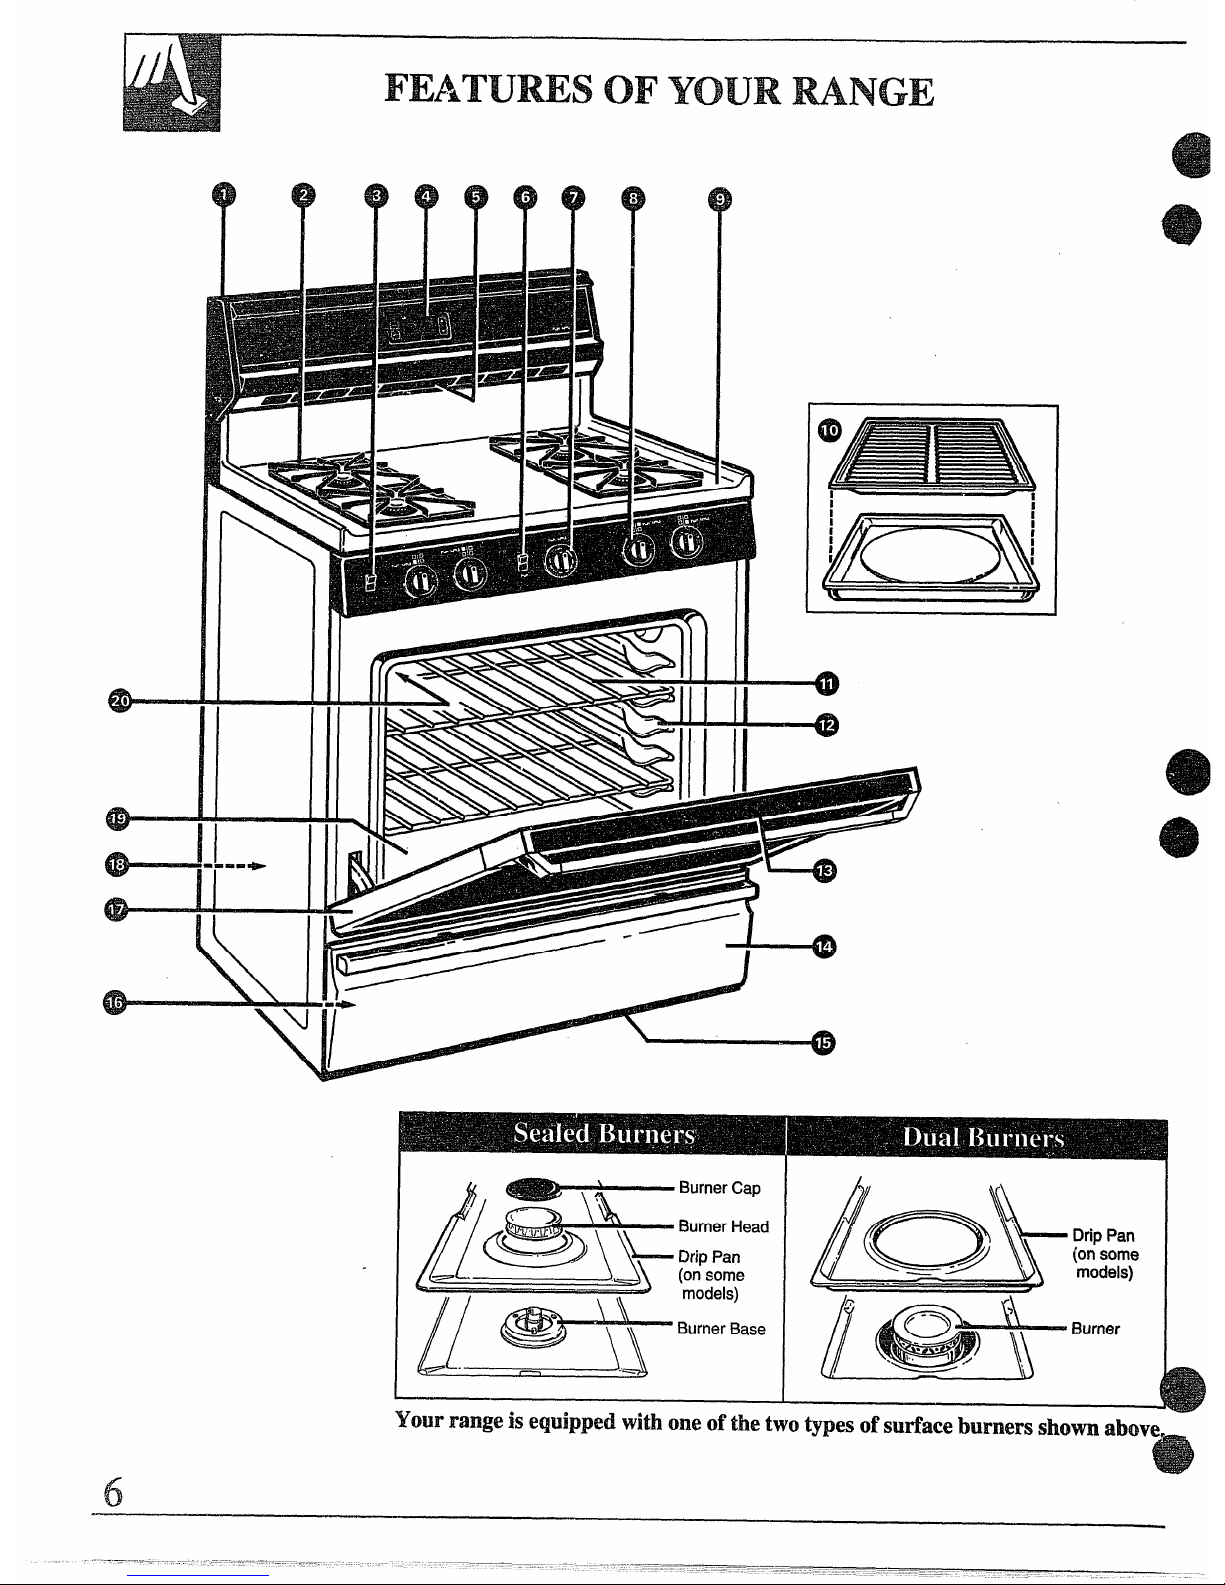
Your range is equipped with one ofthe two types ofsutiace burners shorn above
Page 7

—
Feature Index (Notallmodelshaveallfeatures.Appearanceof featuresvaries.) I Seepage
1 Backguard(onsomemodels)
2 SurfaceBurners,DripPans(on somemodels)andGrates I 21,22
3 OvenLampOn/OffSwitch(onsomemodels)
14
4 ClockandTimer(onsomemodels)
11,12
5 OvenVent(locatedoncooktoponsomemodels)
I 4,5,13,28
6 Bake/BroilSwitch(onsomemodels)
I
12
7 OvenControl
12
8 SurfaceBurnerControls
8
9 Cooktop
23,28
10 BroilerPanandRack
19,23
11 OvenShelves(numberofshelvesvaries) I 13-15,23
12 OvenShelfSupports 13,14
13 AirVentin OvenDoor(locatedat topof OvenDoor) 4,28
14 BroilerDraweror StorageDrawer(dependingon model) 27
15 Air Intake 4,28
16 Modeland SerialNumbers(locatedon frontframeof range, 2,31
behindeitherBroilerDrawerorStorageDrawer)
17 RemovableOvenDoor
25
18 Anti-TipDevice(Lowerrightrear-comeron rangeback.
3,30,40
SeeInstallationInstructions.)
19 OvenBottom
23
20 OvenInteriorLight(onsomemodels)
14,24
NOTE:
Allmodelshavestandard oveninteriors, exceptfor JGBC15GER,JGBC16GEP,and
JG~Cl~GE~ w~ic~havecontinuous-cleaningoven
interiors.SeeCareandCleaningfor
instructions.
7
Page 8
.
.-
Yoursurfaceburnersarelightedby electricignition,
eliminatingtheneedforstandingpilotlightswith
constantlyburningflames.
In case ofa power failure, youcan lightthesurface
burnerson yourrangewitha match.Holda lighted
matchtotheburner,thenturntheknobto theLITE
position.UseextremecautionwhenE@tingburners
this way.
Surfaceburnersinusewhenan electricalpower
failureoccurswillcontinueto operatenormally.
Theelectrodeofthesparkigniterisexposed.
Whenone burneristurnedtoLITE,alltheburners
spark.Donot attempttodisassembleorclean
aroundanyburnerwhileanotherburnerison.
Anelectricshockmayresult,whichcouldcause
youtoknockoverhotcookware.
Stinding Blot Models
Thesurfaceburnerson tiese rangeshavestanding
pilots thatmustbelitinitially.Tolightthem:
1.Be suresurfaceburner controlknobsarein
theOFFposition.
2. Removethegratesandliftthecooktop up
(seetheLift-UpCooktopsection).
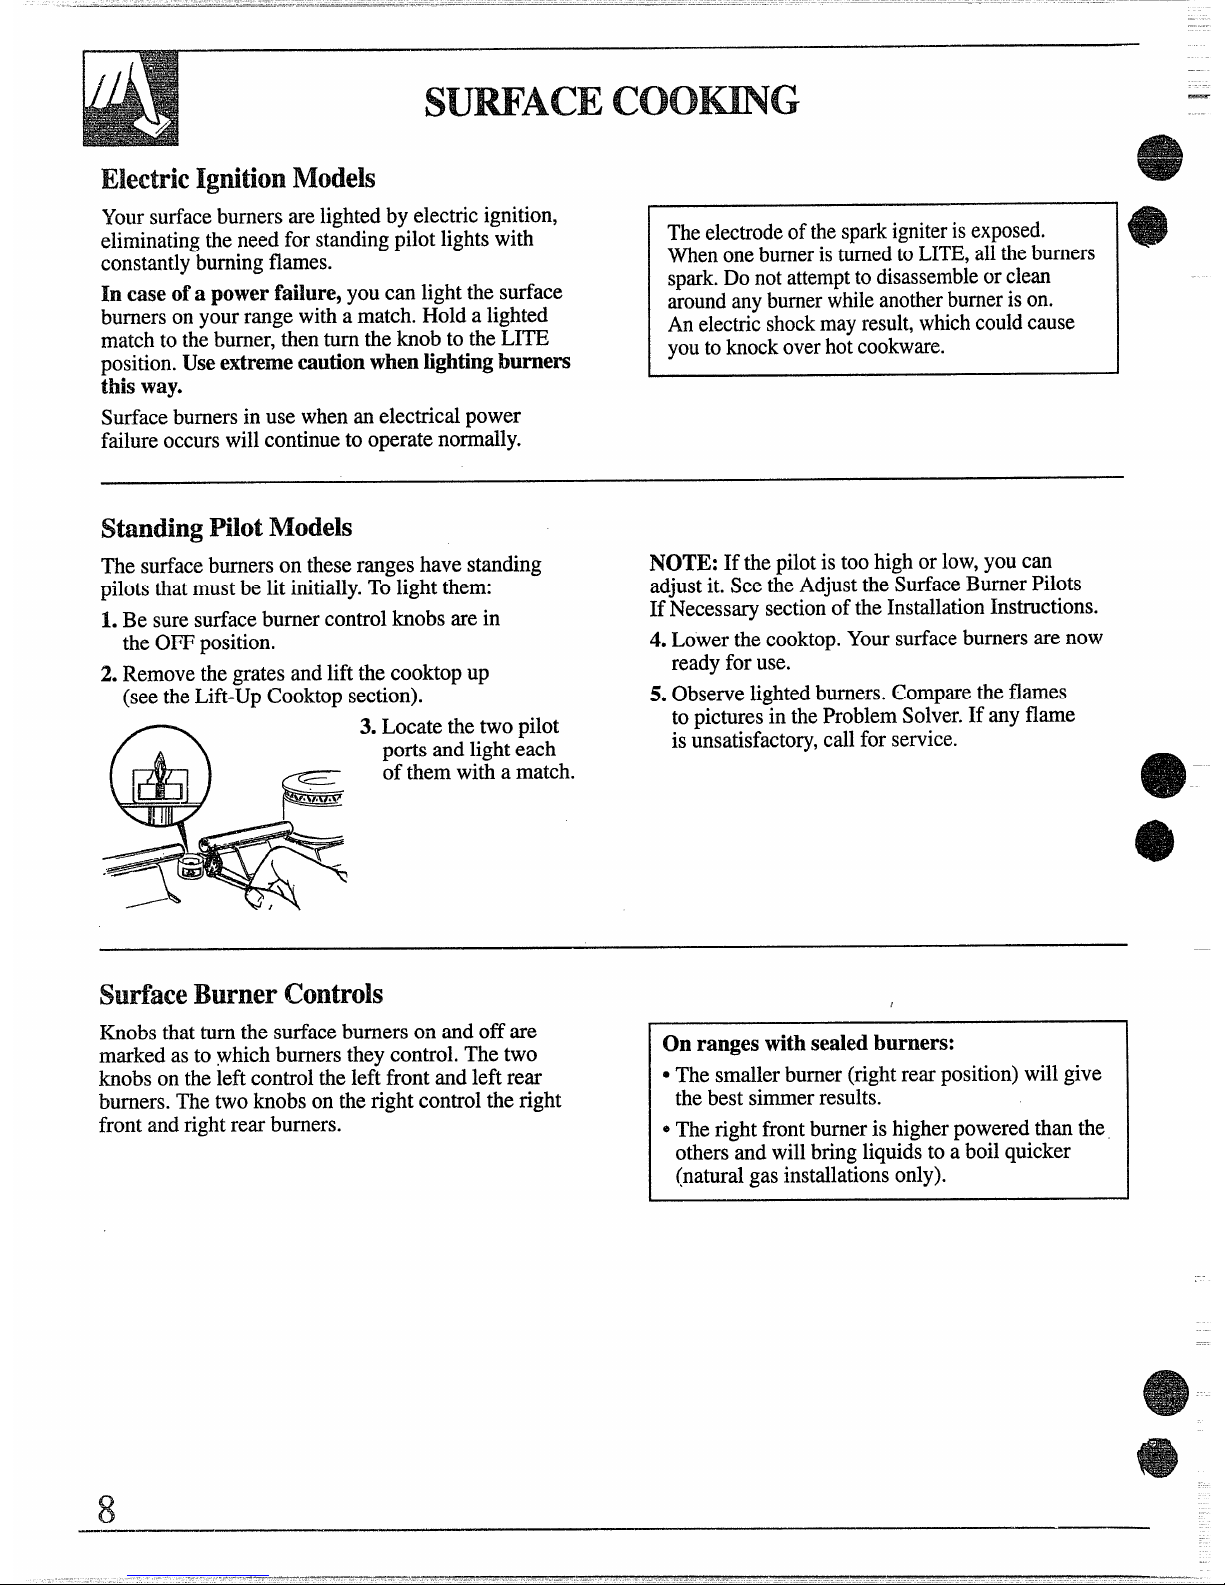
3. Locate the twopilot
portsandlight each
of themwitha match.
NOTE:If thepilotis toohighorlow,youcan
adjustit. SeetheAdjusttheSurfaceBurnerPilots
If NecessarysectionoftheInstallationInstructions.
4. Lowerthecooktop.Yoursurfaceburnersarenow
readyforuse.
5. Observelightedburners.Comparethefhirnes
topicturesin theProblemSolver.If anyflame
isunsatisfactory,callforservice.
Suflaee Burner controls
Webs thatturnthesurfaceburnerson andoff are
markedasto whichburnerstheycontrol.Thetwo
knobsontheleftcontroltheleftfrontandleft rear
burners.Thetwoknobs on therightcontroltheright
frontandrightrearburners.
8
On ranges with sealedburners:
IDThesmallerburner(rightrearposition)willgive
thebest simmerresults.
~Therightfrontburneris higherpoweredthan the,
othersandwillbringliquidstoaboilquicker
(naturalgasinstallationsonly).
Page 9
...
I
Before Lighting
a Burner
eIf drippansaresuppliedwithyow range,theyshouldbe usedat dl times.
*Makesurebothgratesononesideoftherangearein placebeforeusing
eitherburner.
To Light a Sutiace Burner
Electric I@tion Mdels:
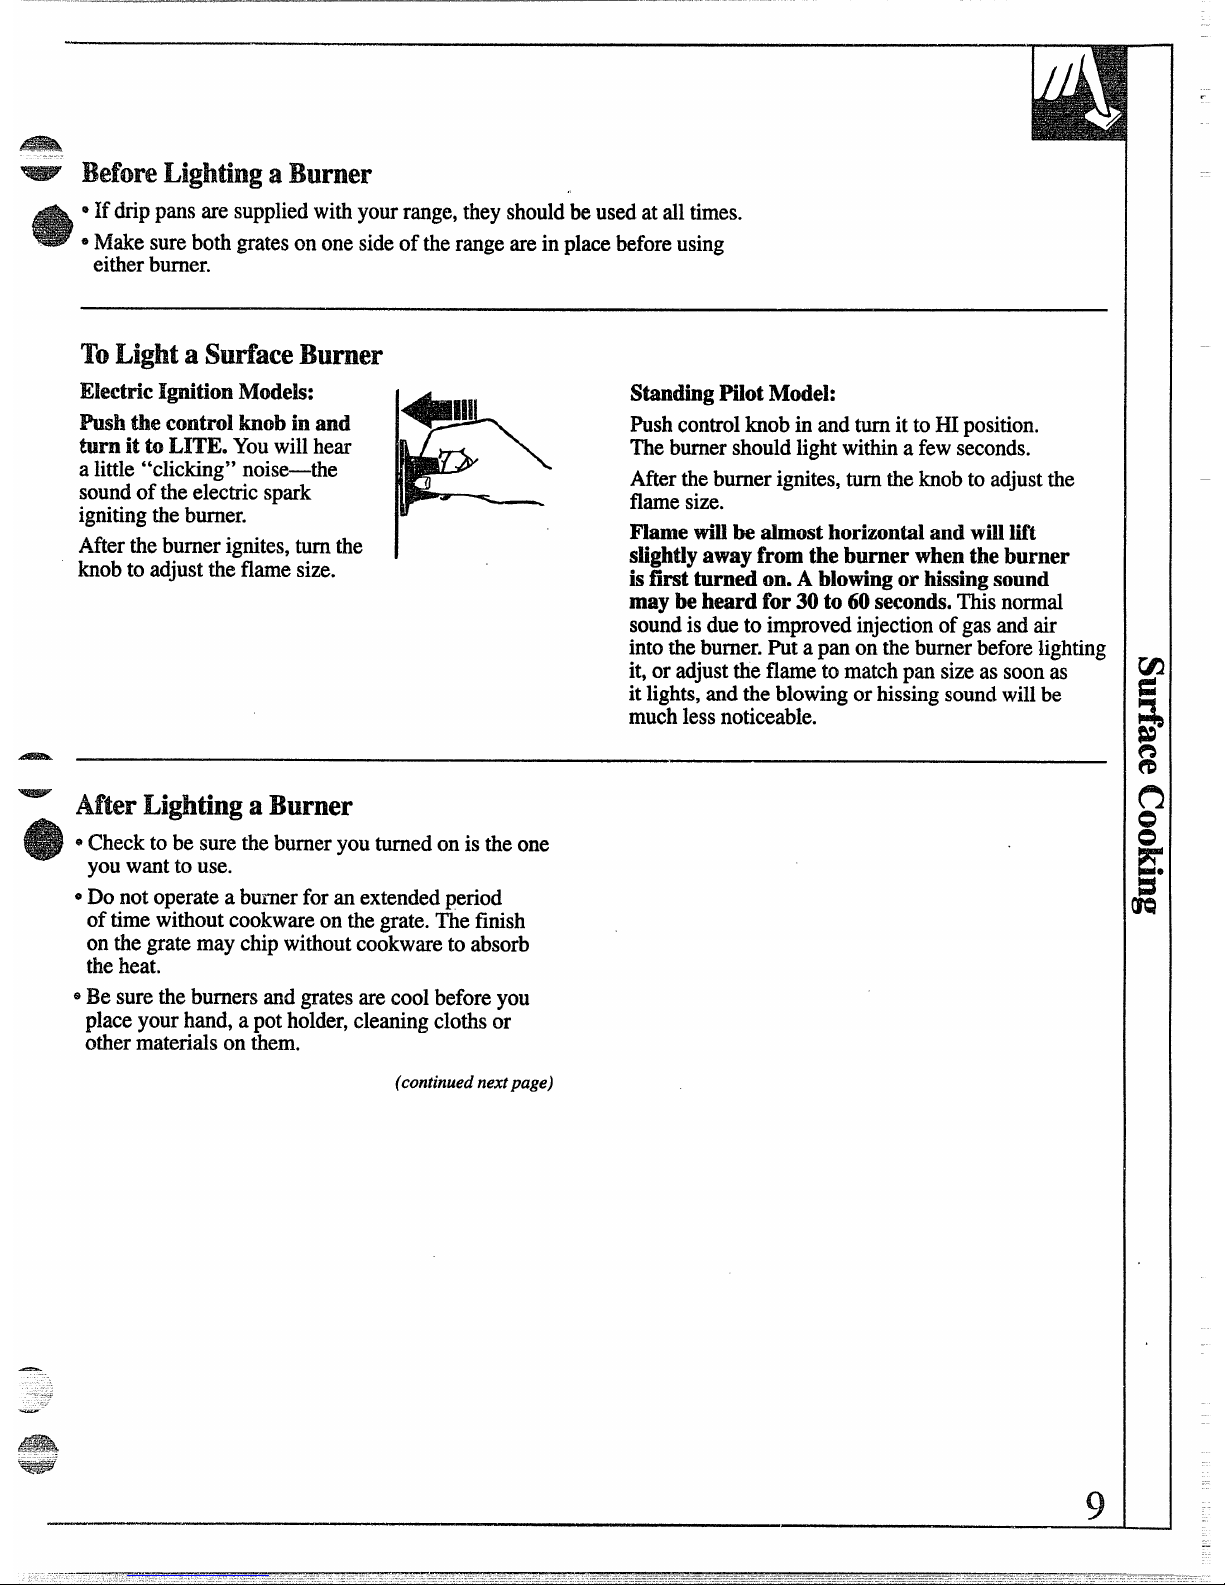
mh
tieControlbob inad
mm ittoLITE.Youwillhear
a little“clicking”noise—the
soundof theelectric spark
ignitingtheburner.
Mter theburner ignites,turnthe
knobto adjustthe flamesize.
StandingPilotMtiel:
Wsh controlknobin andturnit to HIposition.
Theburnershouldlightwithina few seconds.
Aftertheburnerignites,turntheknobto adjustthe
flamesize.
Flame
will h *ost horizontal and willlift
sM@tlyaway from the burner when the burner
is first turned on.
Ablowingor hissing sound
may beheard for 30to 60s~conds.~~s normal
soundis dueto improvedinjectionofgasandair
intotheburner.Put apanon theburnerbeforelighting
it,oradjusttheflameto matchpansizeas soonas
it lights,andtheblowingor hissingsoundwillbe
muchlessnoticeable.
- After Lighting a Burner
~Checktobesuretheburneryouturnedonis theone
youwantto use.
~Donotoperateaburnerfor an extendedperiod
oftimewithout cookwareon tie grate.Thefinish
on thegratemay chipwithoutcookwareto absorb
theheat.
@Besuretheburnersandgratesarecoolbeforeyou
placeyourhand,a potholder, cleaningclothsor
othermaterialson them.
(continuednextpage)
—
Page 10
ACEcoom~
--
(continued)
a
How toselect Flqme size
Watchtheflame,notthe knob,asyoureduceheat.
Theflamesizeonagasburnershouldmatchthe
cookwareyouareusing.
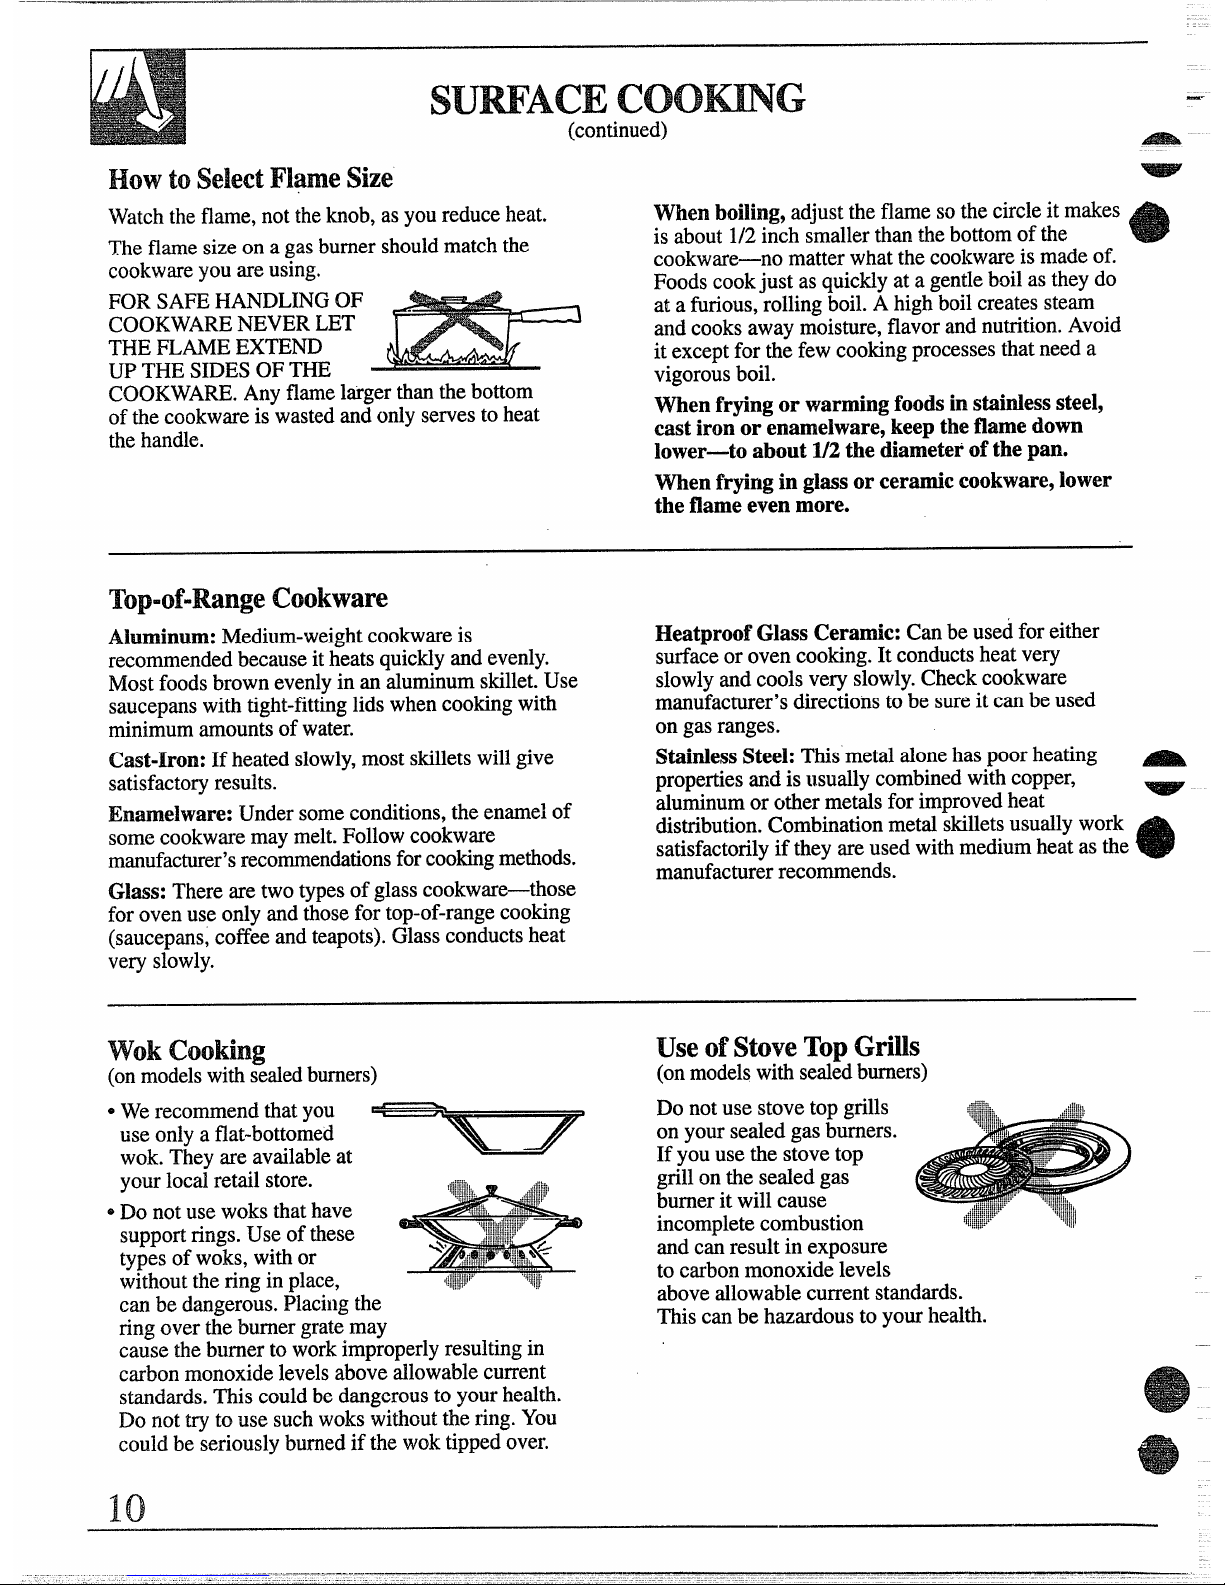
FORSAFEHANDLINGOF
COOKWARENEVERLET
THEFLAMEEXTEND
UPTHESIDESOFTHE
COOKWARE.Anyflamelargerthanthebottom
ofthecookwareiswastedandonlyservestoheat
thehandle.
Whenboiling,adjusttheflamesothecircleitmakes
is about1/2inchsmallerthanthebottomofthe
cookware-no matterwhatthecookwareismadeof.
Foodscookjust as quicklyat a gentleboilastheydo
at a furious,rolling boil.A highboilcreatessteam
andcooksawaymoisture,flavorandnutrition.Avoid
it exceptfor thefewcookingprocessesthatneeda
vigorousboil.
When frying or warming foo~ in stiidess steel,
east iron or enamelware, keep theflame down
lower—toabout 1/2the diameter of the pan.
When frying in glassor ceramic cookware,lower
the flameevenmore.
Top”of”Range cookware
Aluminum: Medium-weightcookwareis
recommendedbecauseitheatsquicklyandevenly.
Mostfoodsbrownevenlyin an aluminumskillet.Use
saucepanswithtight-fittinglidswhencookingwith
minimumamountsof water.
Cast-Iron: If heated slowly,most skilletswillgive
satisfactoryresults.
Enamelware: Undersomeconditions,the enamelof
somecookwaremaymelt.Followcookware
manufacturer’srecommendationsforcookingmethods.
Glass: Therearetwotypesof glasscookware-those
foroven use onlyandthosefortop-of-rangecooking
(saucepans,coffeeandteapots).Glassconductsheat
veryslowly.
Heatproof Glass Ceramic: Canbe usedforeither
surfaceor ovencooking.Itconductsheatvery
slowlyand cools very slowly.Checkcookware
manufacturer’sdirectionstobe sureitcanbeused
on gasranges.
StainlessSteel: Thismetalalonehaspoorheating propertiesandis~~suallycombinedwithcopper,
aluminumor othermetalsforimprovedheat
distribution.Combinationmetalskilletsusu~ly work
satisfactorilyif theyareusedwithmediumheatas the
manufacturerrecommends.
wok cooking
useofstoveTop Gflls
(onmodelswithsealedburners)
(onmodelswithsealedburners)
oWerecommendthatyou
useonlyaflat-bottomed
wok.Theyareavailableat
yourlocal retail store.
~Donotusewoksthat have
supportrings.Useof these
typesofwoks,withor
withoutthering in place,
Do notusestovetopgrills
on yoursealedgasburners.
If youusethe stovetop
grillon thesealed gas
burneritwill cause
incompletecombustion
andcanresultinexposure
to carbonmonoxidelevels
‘t~!’i.r”
,tl!g
aboveallowablecurrentstandards.
Thiscanbe hazardousto yourhealth.
canbedangero~s.placingthe
ringovertheburnergratemay
causetheburnerto workimproperlyresultingin
carbonmonoxidelevelsaboveallowablecurrent
standards.This couldbedangerousto yourhealth.
Do nottry to use suchwokswithoutthering.You
couldbe seriouslyburnedif the woktipped over.
Page 11
.
..
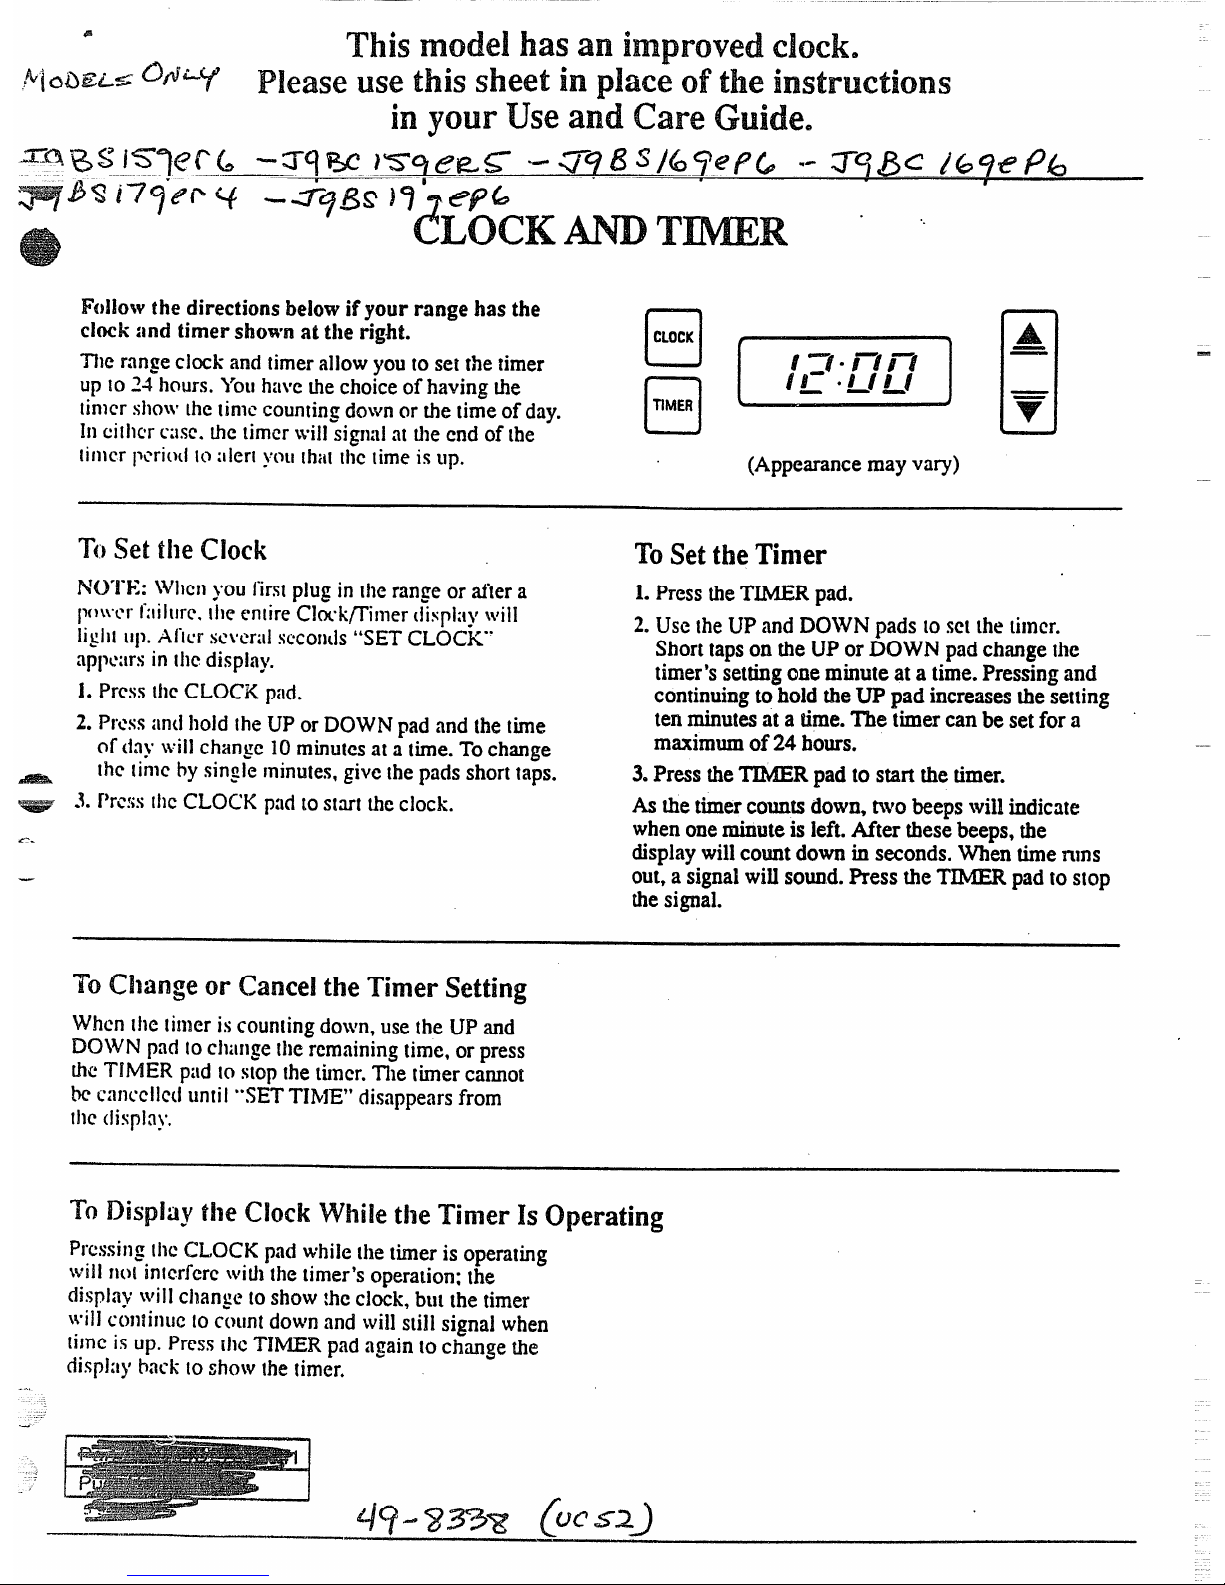
F{)llowthe directions belowif your range has the
clock and timer shown at the right.
~Ie rangeclockand timerallowyou10setthetimer
up 1024hours.Yotihave tie choiceofhavingthe
tin]crshotvthetimecountingdownor the timeofday.
:m~
111cilhcrC:ISC.tic timer\villsignalat thecnc.iof lhe
[il))cr
~lcri(l(l [t>:~icr(yoti [h:t[ Ihc time is ~Ip.
(Appearancemay vary)
T{)settile clock
NTO”i-E:Whenyou firstplugin [herangeor tiler a
lIt)i~”c*rRlil[lre.IhcentireClwkflimer (Iispl;iyl~~iil
ligi]tLip.Af[crs~~~rillSCCOIILIS
“SET CLOCK””
apl~~.:trsin(1ICdisplfiy.
1.Press (hcCLOCK
pad.
2.
Pressi}ndhold {heUP or DOWNpadand {hethe
of tiay will change 10minutesat a time.Tochange
(hc [imcbysingleminutes,givethepadsshorttaps.
= 3.Prc:;sIhcCLOCKpad tostarttheclock.
To Set the Timer
1.Pressthe TWR pad.
2.UsetheUPand DOWNpads 10set(he [imcr.
Shorttapson the UPor DOWN padchange;hc
timer’ssettingoneminuteat a time.Pressingand
continuingtohold theWPpad increases the selling
tenminutesat a time.The timercan be set for a
maximumof 24 hours.
To Cilange or cancel the Timer setting
When[hc timeriscoun[ingdown,usethe UP and
DOWNpflci(oCllilIlgetheremainingtime,or press
tic TIMER
Pild10stop(hetimer.Thetimercannot
k Cane-cllcdLinti1•*SETTIhlE” disappearsfrom
lhc(iispln)”.
3,Pressthe MR pad to start the timer.
As thetimercountsdown, twobeepswillindicate
whenoneminute is left.After thesebeeps,the
displaywillcomt down ti seconds. men timenms
out,a signalwillsound.Ress the T- padto stop
thesignal.
To Display tl~e Clock While tl~eTimer Is Operating
w
PressingIhcCLOCKpadwhilethetimer is operating
wi]1II()[ intcrfcrcwithlhctimer’soperation:Ihe
displaywillcl~ange[oshow:hcclock,bl]tthetimer
\villCOIIIinllc10ct)llntdownand willstillsignalwhen
li~ncis up.Press[hcTI~R pad againto changethe
displ;iyback[oshow !hetimer.
....
—-
Page 12
CLOCKAm TMR
----—-—
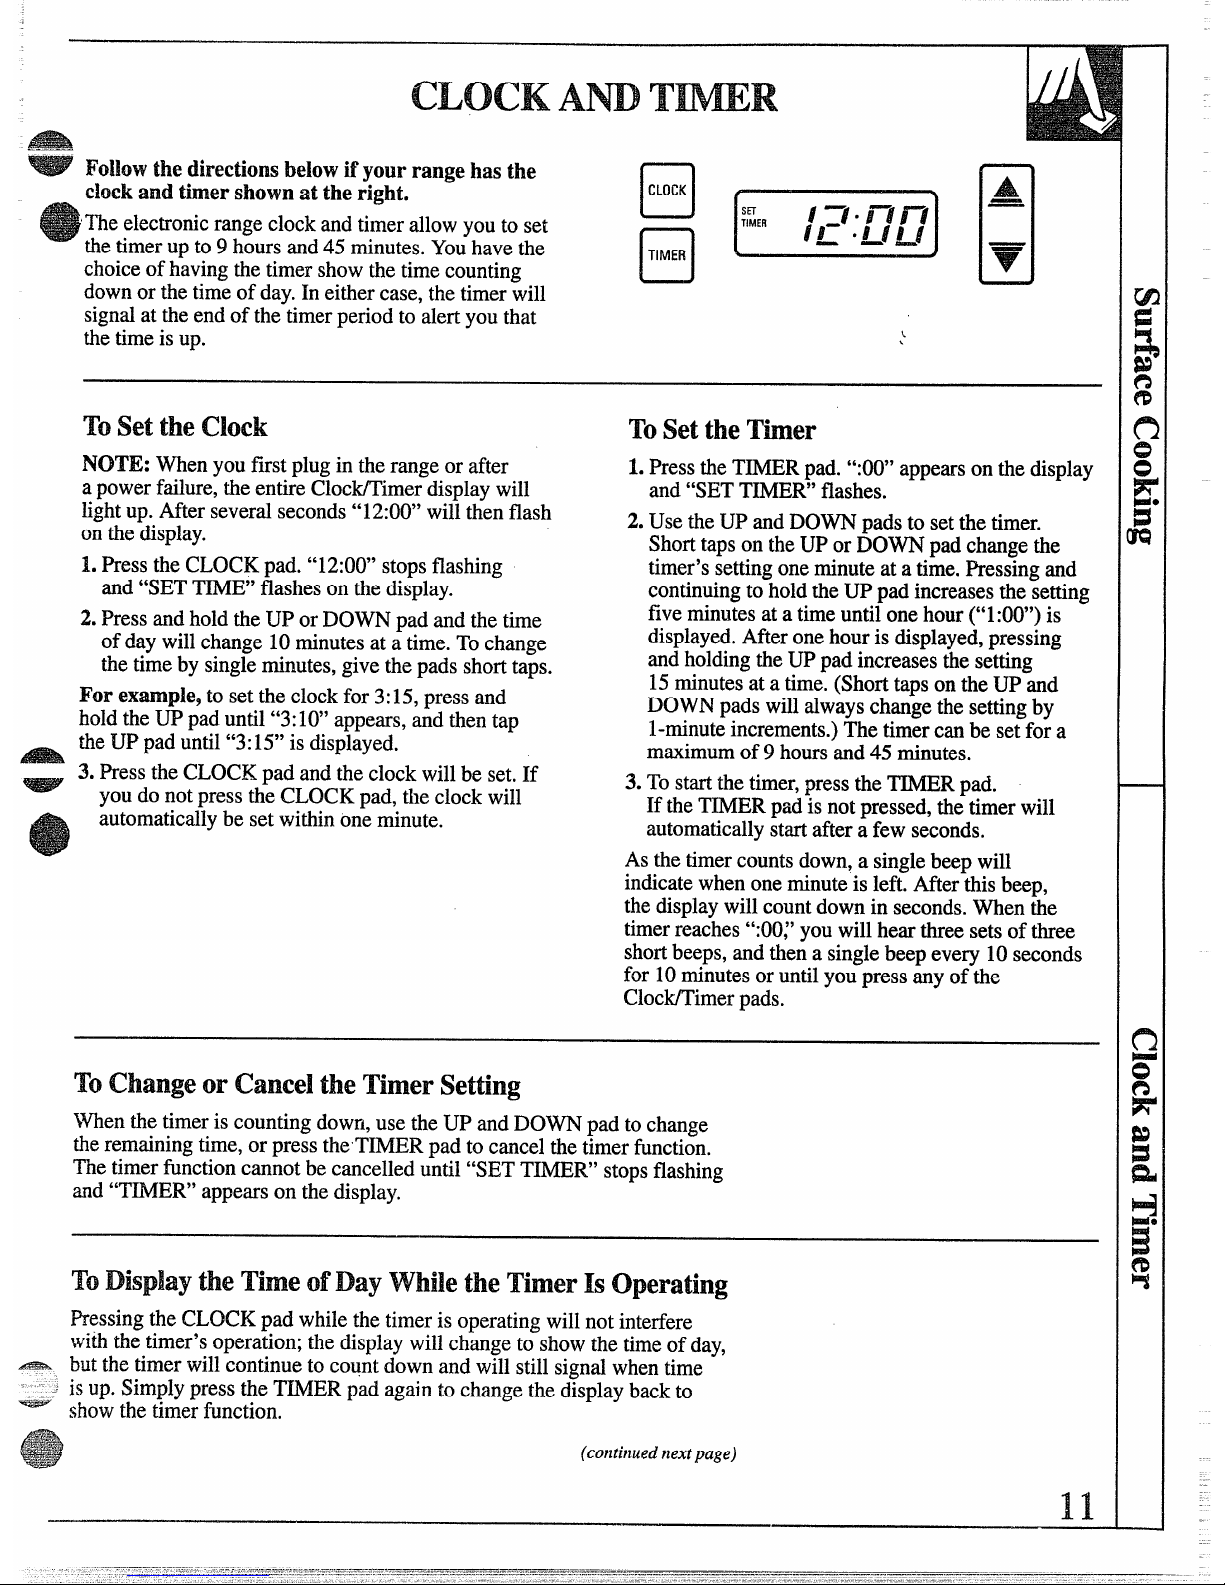
= Followthe directionsbelowifyour range has the
clockand timer shownat the right.
a
me electronicrangeclockandtimerallowyouto set
c1
thetimerupto9 hoursand45minutes.Youhavethe
choiceofhavingthe timershowthe time counting
[;] m
downor thetimeof day. In eithercase,thetimerwill
signalattheendofthetimerperiodto alertyouthat
thetimeisup.
L
\
To setthe clock To setthe Ther
NOTE: Whenyoufirstplugin therangeor after 1.PresstheTIMERpad.“:00”appearsonthe display
apowerfailure,theentireClock/Timerdisplaywill and“SETTIMER’flashes.
fightup.Afterseveralseconds“12:00”willthenflash
2.UsetheUPandDOWNpadsto setthetimer.
onthedisplay.
Shorttapson theUPor DOWNpadchange the
1.PresstheCLOCKpad.“12:00”stopsflashing
timer’ssettingoneminuteatatime.Pressingand
and“SETME’ flasheson thedisplay.
continuingtoholdtheUPpadincreasesthesetting
. .
2.Pressandhold theUPorDOWNpadandthe time
fiveminu~esatatimeunti~onehour(“1:00”)is -
ofdaywillchange10minutesat a time.Tochange
displayed.Afteronehour is displayed,pressing
thetimeby singleminutes,givethe padsshort taps.
andholdingtheUPpadincreasesthesetting
15minutesat a time.(ShorttapsontheUPand
For exmple, to settheclockfor3:15,pressand
DOWNpadswillalwayschangethesettingby
holdtheUPpaduntil“3:10”appears,and thentap
l-minuteincrements.)Thetimercanbe setfor a
- theUPpaduntil“3:15”is displayed.
maximumof 9 hoursand45minutes.
_ 3.Press
the CLOCKpad andtheclockwill be set.If
3.Tostart thetimer,presstheTIMERpad.
youdo notpresstheCLOCKpad,theclockwill
If theTIMERpadisnotpressed,thetimerwill
automaticallybe setwithinoneminute.
automaticallystartafterafewseconds.
Asthetimercountsdown, a singlebeepwill
indicatewhenoneminute”is lefi~After-thisbeep,
thedisplaywillcountdownin seconds.Whenthe
timerreaches“:00~’youwillhearthreesetsofthree
shortbeeps,andthenasinglebeepevery10seconds
for 10minutesoruntilyoupressanyofthe
Clock/Timerpads.
To Change or Cancel the Timer Setting
Whenthe timeris countingdown,use theUPandDOWNpad tochange
theremainingtime,or presstheTIMERpadto cancelthetimerfunction.
Thetimerfinctioncannot be cancelleduntil“SETTIMER”stopsflashing
and“TIMER”appearson thedisplay.
To Display the Time of Day While the Timer Is Operating
PressingtheCLOCKpad whilethetimeris operatingwillnotinterfere
withthetimer’soperation;thedisplaywillchange to showthetimeofday,
butthetimerwillcontinuetocountdownandwillstillsignalwhentime
isup.Simplypressthe TMER padagaintochangethedisplaybackto
showthetimerfunction.
(continuednextpage)
Page 13
CLOCKAm TMR
(continued)
a.
-“
clock
\
12 ,
@
,t~OFFII,
~ s+’o
4 /,, ,
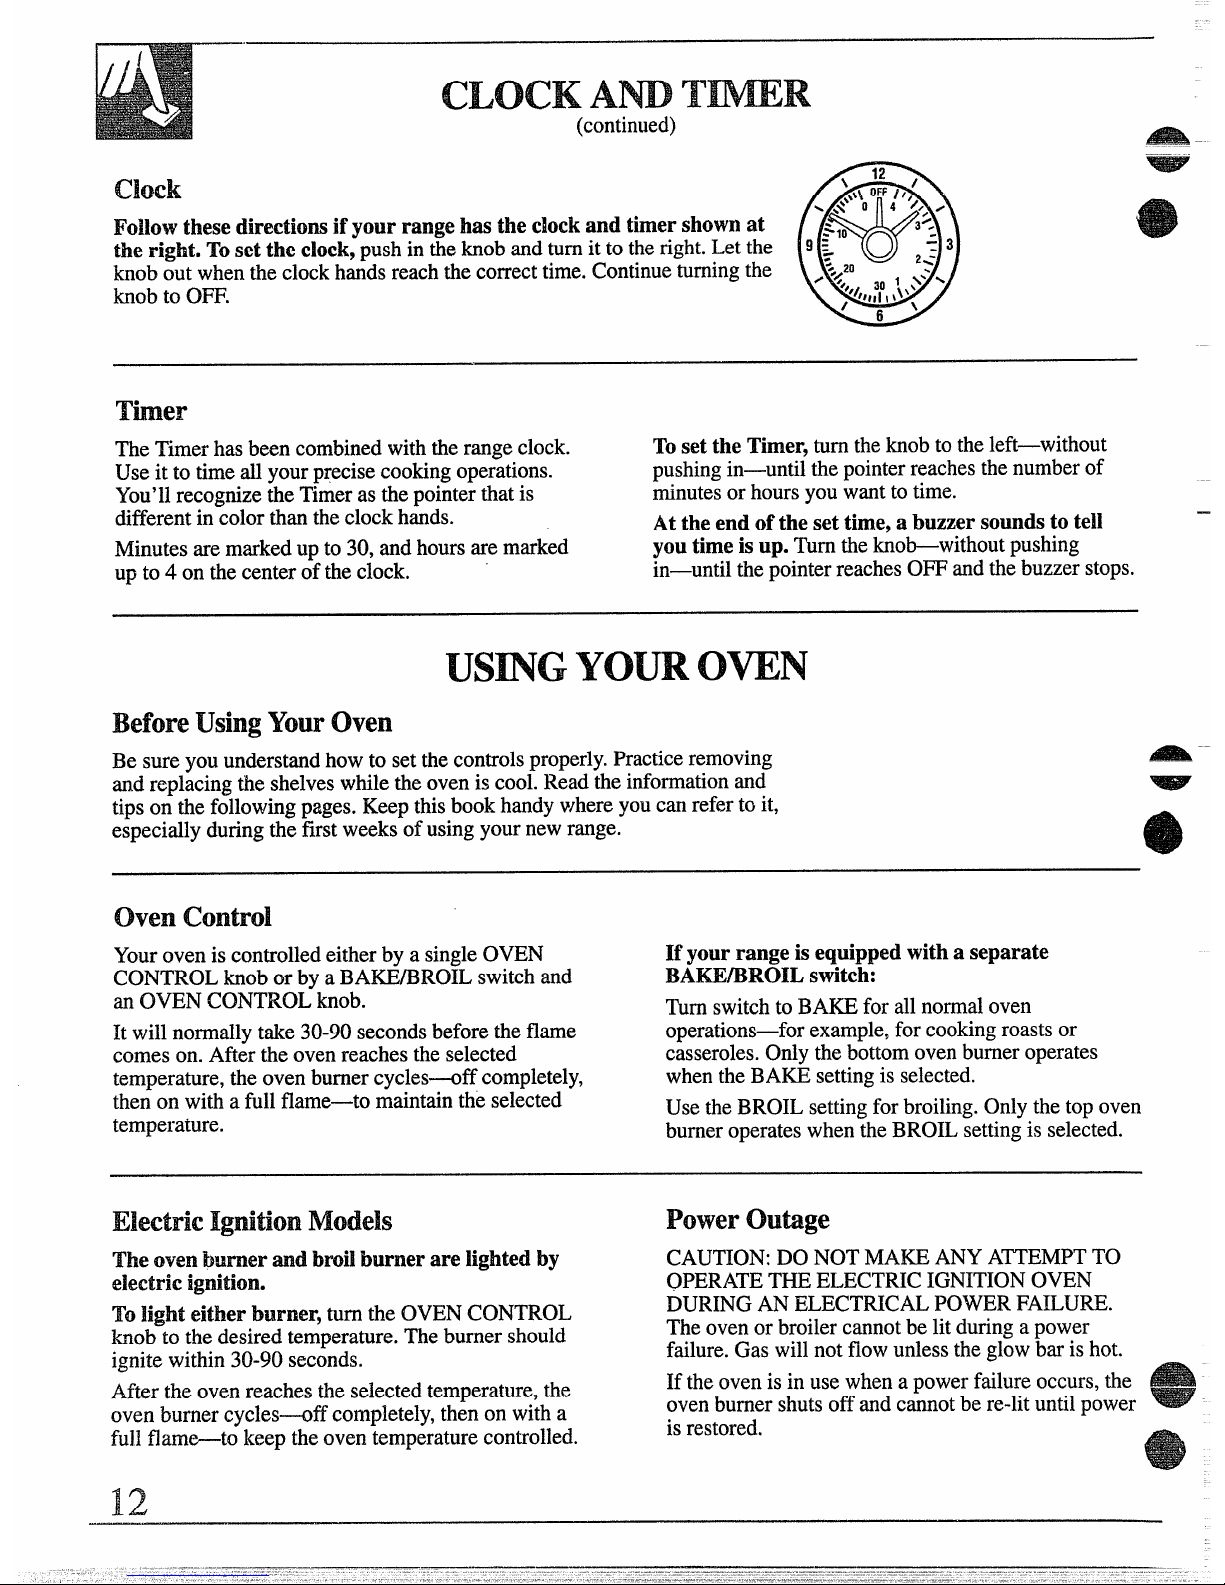
Followthese directiom if your range has the clockand timer shownat
:~lo
3H.
e
the right. TO
set the clock, pushintheknobandturnit to theright.Letthe g ~ O ~~ a
knoboutwhenthe clockhandsreachthecorrect time.Continueturningthe
-,
20
/<
knobto OFF.
301 ,%”-
4“1//,,! ,\\’
1
6’
TheTimerhasbeencombinedwiththerangeclock.
Toset the Timer,turntheknobto theleft—without
Useit totimeallyourprecisecookingoperations. pushingin—untilthepointerreachesthenumberof
You’llrecognizetheTimeras thepointerthatis
minutesorhoursyouwanttotime.
differentin colorthantheclockhands.
At the end of the set time, a buzzer soundsto tell
Minutesaremarkedup to 30, andhoursaremarked
you time isup. Turntheknob-without pushing
up to 4 on thecenterof theclock.
in—untilthepointerreachesOFFandthebuzzerstops.
usmG YOUROVEN
Before using Your oven
Be sureyou understandhowto setthecontrolsproperly.Practiceremoving
.-.
md replacingtheshelveswhiletheoveniscool.Readtheinformationand
tipson thefollowingpages.Keepthisbookhandywhere youcanreferto it,
especiallyduringthefirstweeksofusingyour newrange.
oven control
Youroveniscontrolledeitherby a singleOVEN
CONTROLknobor by a BAKE/BROILswitchand
an OVENCONTROLknob.
It willnormallytake30-90 seconds beforetheflame
comeson.Aftertheovenreaches the selected
temperature,the ovenburnercycles-off completely,
thenon witha fullflame-to maintainthe selected
temperature.
If your range is equipped with a separate
BA~BROILswitch:
TurnswitchtoBAKEforallnormaloven
operations—forexample,forcookingroastsor
casseroles.Onlythe bottomovenburneroperates
whentheBAKEsettingis selected.
UsetheBROILsettingforbroiling.Onlythetopoven
burneroperateswhentheBROILsettingis selected.
Electric Ignition Models Power Outige
The ovenburner =d bmti burner are lighted by
electric ignition.
Tolight either burner, turn the OVENCONTROL
hob to thedesiredtemperature.Theburnershould
ignitewithin30-90seconds.
Aftertheovenreachestheselectedtemperature,the
ovenburnercycles-off completely,thenon with a
full flam~to keeptheoventemperaturecontrolled.
CAUTION:DONOTMAKEANYA~EMPT TO
OPERATETHEELECTRICIGNITIONOVEN
DURINGAN ELECTRICALPOWERFAILURE.
Theovenor broilercannotbelitduringapower
failure.Gas willnotflowunlessthe glow bar is hot.
If theovenisin usewhena powerfailureoccurs,the
ovenburnershutsoff andcannotbere-lituntilpower =
is restored.
Page 14
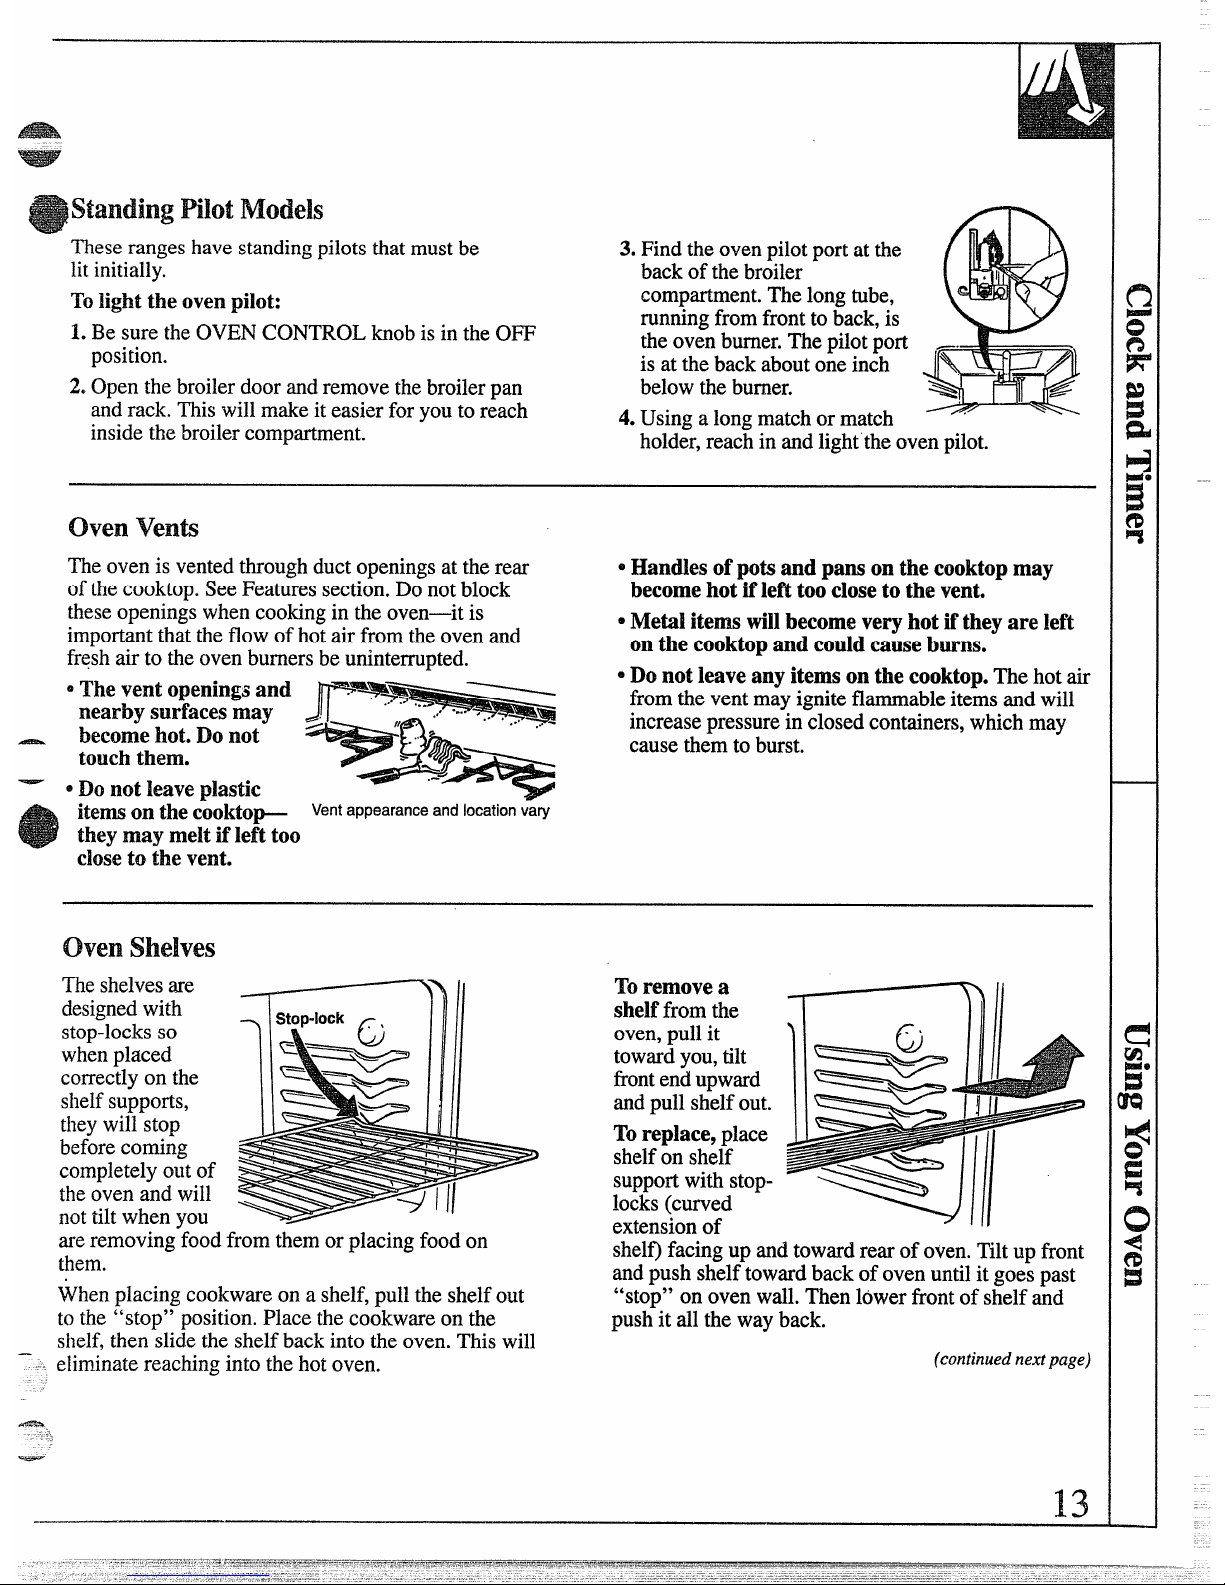
standing Pilot Models
Theserangeshavestandingpilotsthatmustbe
litinitially.
Tolight the ovenpilot:
1.
Be sure theOVENCONTROLknobis in theOFF
position.
2.Openthebroilerdoorand removethebroilerpan
andrack.Thiswillmakeiteasierforyoutoreach
inside thebroilercompartment.
3.Findtheovenpilotportatthe
backof thebroiler
compartment.Thelongtube,
runningfromfrontto back,is
theovenburner.Thepilotport
is at thebackaboutoneinch
belowtheburner.
4.Usingalongmatchor match
hold~r,reachin andlighttheovenpilot.
—
oven
Venb
Theovenis vented throughductopeningsat therear
ofthecooktop.SeeFeaturessection.Do notblock
theseopeningswhencookingin theoven—itis
importantthattheflowof hotair fromtheovenand
freshair to theovenburnersbe uninterrupted.
~Thevent openingsand
nearby surfaces may
~“.>~
becomehot. Do not ~
touch them.
~Donot leaveplastic
item on the cooktop--
Ventappearanceand locationvary
they may melt if left too
close to the vent.
oHandles ofpotsand pans on the cooktopmay
becomehot if left too closeto the vent.
oMetal items willbecomevery hot ifthey are left
on the cooktopand could cause burns.
oDo not leaveany items on the cooktop.Thehotair
fromthevent mayigniteflammableitemsandwill
increasepressurein closedcontainers,whichmay
causethemto burst.
oven shelves
me shelvesare
~n II
Toremove a
designedwith
stop-locks
SO
whenplaced
correctlyon the
shelfsupports,
they willstop
beforecoming
completelyoutof
theovenand will
nottiltwhen you
.-.
..- -
shelffrom the
oven,pullit
toward
YOU, tilt
frontendupward
andpullshelf out.
Toreplace, place
shelfon shelf
supportwithstop-
Iocks(curved
extensionof
I
areremovingtood irom themorplacing foodon
shelf)facingup and towardrearofoven.Tiltup front
them.
andpushshelftowardbackof oven untilit goes~ast
Whenplacingcookwareon a shelf,pulltheshelfout
“stop” on ovenwall.Thenlowerfrontofs~elf&d
to the “stop” position.Place
the cookware on the pushit all theway back.
shelf,thenslidetheshelfbackintotheoven.Thiswill
—
eliminatereachingintothehotoven.
(continuednextpage)
~
-.
—
13
Page 15

shelf Positions
Theovenhasfiveshelf
supportsfornormal
bakingandroasting
identifiedin this
illustrationasA
(bottom),B, C, D andE
(top).It alsohasa
speciallowshelf
1
position(R)forroasting extralargeitems,such
asa large turkey-the
usm~YOUR owN
shelfisnotdesignedto slide outat thisposition.Shell
positionsforcookingaresuggestedonBakingand
(continued)
a
oven Moistire
-
~
Asyourovenheats up,thetemperaturechangeof the
airintheoven maycausewaterdropletstoformon
thedoorglass.Thesedropletsareharmlessandwill
evaporateastheovencontinuesto heatup.
~v~~ ~i~~~ (onsomemodels)
Theovenlightcomesonautomaticallywhenthedoor
is opened.Somemodelshavea switchon thelower
.Alc
controlpanelthatallowsyoutoturnthelightonor off
Roastingpages.
whenthedoorisclosed.
Oven Temperature Adjustment
Thetemperatureselectedonthethemostatdial
determinestheaverageofthemaximumandminimum
temperaturesreachedduringthecyclingoftheoven
burner.Thethermostatcontrolinyournewovenhas
beencarefu~ydesignedandmanufacturedtoprovide
accuratetemperatures.Hyournewovenis replacing
oneyou haveusedfor severalyears,youmaynotice
a differenceinthedegreeofbrowningor thelengthof
timerequiredwhenusingyour favoriterecipes.This
is becauseoventemperaturecontrolshavea tendency
to “drift” overaperiodofyears.
Beforeattemptingto havethetemperatureof your
newovenchanged,besureyouhavecarefully
followedthebakingtimeandtemperature
recommendedby therecipe.Then,afteryouhaveused
theovenafewtimesandyoufeeltheovenistoohotor
toocool,thereisa simpleadjustmentyoucanmake
yourselfontheOVENCO~OL knob.
Pulltheknobofftherangeandlookatthebackside. -
Tomakeadjustment,loosen(approximatelyoneturn),
butdo notcompletelyremove,thetwo screwsonthe
backof theknob. Withthebackof theknobfacing
you,holdtie outeredgeof theknobwithonehand
andturnthefrontoftheknobwiththeotherhand.
Toraisetheoventemperature,movetie top screw
towardtheright. You’llheara clickforeach notch
youmovetheknob. Tolowerthetemperature,move
thetop screwtowardtheleft.Eachclickwillchange
theoventemperatureapproximately10”F.(Rangeis
plusor minus 60°F.fromthe arrow.)
Wesuggestthatyoumake the adjustmentoneclick
fromtheoriginalsettingandcheckovenperformance
beforemakinganyadditionaladjustments.
Afterthe adjustmentis made,retightenscrewsso they
aresnug,butbe careful notto overtighten.Reinstall
knobonrange andcheckperformance.
Page 16

BA
m~
.—.
=
How To setYour Range For Bating
1.Toavoidpossibleburro, placetheshelvesinthe
3.Checkfoodfordonenessatminimumtimeon
correctpositionbeforeyouturntheovenon.
recipe.Cooklongerif necessary.TurnOVEN
2.Close ovendoor.If yourmodelhasa separate
CONTROLknobto OFFandr~movefood.
BAKE/BROILswitch,turnitto BAKE.Turn
Forbestbakingresults,followthese suggestions:
OVENCONTROLknobtodesiredtemperature.
ovenshelves
Arrangethe oven
shelfor shelves
inthedesired
locationswhile
theoveniscool.
Thecorrectshelf
positiondepends
onthekindof
foodandthe
browningdesired.
As
a generalrule,
placemostfoodsin themiddleoftheoven,oneither
thesecondorthirdshelffromthebottom.Seethe
chartfor suggestedshelfpositions.
~peofFood
I ShelfPosition
Angelfoodcake
1A
Biscuitsormuffins
I BorC
Cooties orcupcakes
I BorC
Brownies
I Bor C
Layercakes
I BorC
I Bundtor poundcakes
I AorB
I
Piesorpieshells
I BorC
I
Frozenpies
I A (oncookiesheet) I
Casseroles
Bor C
Preheating
Preheatthe ovenif therecipecallsforit.Preheat
meansbringingtheovenupto thespecified
temperaturebeforeputtinginthefood.Topreheat, set
theovenatthecorrect temperature-selecting a
highertemperaturedoesnotshortenpreheattime.
Preheatingis necessaryforgoodresultswhenbaking
cakes,cookies,pastryandbreads.Formostcasseroles
androasts,preheatingis notnecessary.Forovens
withouta preheatindicatorlightor tone,preheat10
minutes.Aftertheovenis preheatedplacethefood
intheovenasquicklyaspossibletopreventheat
fromescaping.
Roasting
I AorB
I
Forevencookingandproperbrowning,theremustbe
enoughroomforair circulationin the oven.Baking
resultswillbebetterif bting pansarecenteredas
muchaspossibleratherthanbeing placedto the front
ortothebackofthe oven.
Pansshouldnottoucheachotherorthewallsof the
oven.Allow 1to 1%inchspacebetweenpans aswell
as fromthebackoftheoven,thedoorandthesides.
If youusetwoshelves, staggerthe panssooneis not
directlyabovetheother.
(continuednextpage)
h.
—-
——..
15
Page 17

BAm G
Bating Guides
Whenusingpreparedbakingmixes,followpackagerecipeor instructions
for bestbakingresults.
Cooties
Whenbaking
cookies,flatcookie
sheets(without
sides)produce
better-looking
cookies.Cookies
bakedinajelly roll
pan (shortsidesdl
around)mayhave
@
o
:
Nevercovera shelf
entirelywithalarge
cookiesheetor
aluminumfoil.~s
willdisturbtheheat
circulationandresults
inpoor baking.A
smallersheetof foil
maybeusedto catcha
darkeredgesandpaleor lightbrowningmayoccur.
spilloverby placingit
Do notuseacookiesheetsolargethatittouchesthe
on alowershelfseveral inchesbelow
wallsorthedooroftheoven.
thefood.
Forbestresults,useonlyonecookiesheetin theoven
at a time.
Res
cakes
Forbestresults,b~e piesin dark,roughordull
Whenbakingcakes,warpedorbentpanswillcause
pansto producea browner,crispercrust.Frozen
unevenbakingresultsand poorlyshapedproducts.
piesinfoilpansshouldbeplacedonan aluminum
A cake bakedin a panlargerthantherecipe
cookiesheetforbakingsincetheshinyfoilpanreflects
recommendswillusuallybe crisper,thinnermd drier
heatawayfromthepiecrust;thecookiesheethelps
thanit shouldbe.If bakedin a pansmallerthan
retainit.
recommended,it maybe undercookedandbattermay
ovefflow.Checktherecipetomakesurethepan size
usedis theonerecommended.
Bating Pans
Usetheproper bakingpan.Thetypeoffinishon the
pandeterminestheamountof browningthatwilloccur.
~Dark,roughordull pansabsorbheatresultingina
browner,crispercrust.Usethistype for pies.
~Shiny,brightandsmoothpansreflectheat,resulting
in a lighter,moredelicatebrowning.Cakesand
cookiesrequirethistype of pan.
~Glassbaking dishesdso absorbheat.Whenbaking
in glassbaking dishes,lowerthetemperatureby
25°F.anduse therecommendedcookingtimein
therecipe.Thisis notnecessarywhenbakingpies
or casseroles.
16
.
Dom9tPeek
Setthetimerfortheestimatedcookingtimeanddo
notopenthedoortolookatyourfood.Mostrecipes
provideminimumandmaximumbakingtimessuch
as
“bake 30-40mintites.”
DONOTopenthedoortocheckuntiltheminimum
time.Openingtheovendoorfrequentlyduring
cookingallowsheattoescapeandm~es baking
timeslonger.Yourbakingresultsmayalsobe
affected.
Page 18

Roastingis cookingbydryheat.Tendermeator
poultrycanbe roasteduncoveredin youroven.
m
Roastingtemperatures,wl~ichshou~dbelowand
steady,keepspatteringto aminimum.
Theovenhasaspecial
lowshelf(R)position
just abovetheoven
bottom.Use it when
extracookingspaceis
needed,forexample,
whenroastingalarge
turkey.The shelfisnot
designedto slideout at
thisposition.
Roastingis redly a bakingprocedureusedformeats.
Roastingiseasy;just followthesesteps:
1.Positionovenshelf
at (B)positionfor
smallsizeroast
1-
(3to 5 lbs.)and ~
at (R)positionfor ~~
largerroasts.
@
2.Checkthe weight
$
ofthemeat.Place
3
themeatfat-side-up
orthepoultrybrea~t-side-upon theroastingrack in
a shallowpan.Themeltingfatwillbastethemeat.
Selectapan asclosetothe sizeof meataspossible.
(Broilerpanwithrackis a goodpanforthis.)
Linebroilerpanwithaluminumfoilwhenusingpan
formarinating,cookingwithfruits,cookingheavily
curedmeats,orbastingfoodduringcooking,Avoid
spillingthesematerialsinsidetheovenor insidethe
ovendoor.
3.Ifyourmodelhasa separateBAKE/BROILswitch,
turnit toBA~. TurntheOVENCO~OL knob
to desiredtemperature.ChecktheRoastingGuide
fortemperaturesandapproximatecookingtimes.
4.Mostmeatscontinueto cookslightlywhile
standingafterbeingremovedhorn theoven.
Recommendedstandingtimeforroastsis 10to20
minutes.Thisallowsroaststo fii upandmakes
themeasierto carve.Internaltemperaturewillrise
about5° to 10°F.If youwishtocompensatefor
temperaturerise,removetheroastfromtheoven
whenitsinternaltemperatureis 5°to 10°F.less
thantemperatureshownintheRoastingGuide.
NOTE: Rememberthatfoodwillcontinueto cookin
thehotovenandthereforeshouldberemovedwhen
thedesiredinternaltemperaturehasbeenreached.
Frozen Roask
QFrozenroastsof beef,pork,lamb,etc.,canbe started
withoutthawing,butallow15to 25minutesper
poundadditionaltime(15minutesper poundfor
roastsunder5 pounds,moretimeforlargerroasts).
s
Thaw mostfrozenpoultrybeforeroastingtoensure
evendoneness.Somecommercialfrozenpoultrycan
becookedsuccessfullywithoutthawing.Follow
directionsgivenon packagelabel.
Thisallowsmorethanonefoodtobecookedat the
sametime.For example:Whileroastinga20-lb.
turkeyon shelfpositionR,a secondshelf(ifso
equipped)maybe addedon positionD sothat
scallopedpotatoescanbecookedatthesametime.
Calculatethetotalcookingtimeto enablebothdishes
tocompletecookingat thesametime.Allow15-20
minutesofadditionalcookingtimeforthepotatoes.
(continuednextpage)
17
—
Page 19

Q. h it !necessa~tocheck for donenesswith a
Q, Do I need to preheat my oveneach time I cook
meat thermometer? a roast or poultry?
A. Checkingthefinishedinternaltemperatureat the
completionof cookingtimeis recommended.
Temperaturesare shownin RoastingGuide.For
roastsover8lbs.,check withthermometerat halfhourintervalsafterhalfthetimehaspassed.
Q. Why ismy roast crumbling when I try to
carve it?
A. Roasts areeasierto sliceif allowedto cool10to
20minutestier removingfromoven.Be sureto
cutacrossthegrainofthemeat.
A. It is unnecessarytopreheat youroven.
Q. When buyinga roast, are there any specialtips
that wouldhelp me cookit more evedy?
A. Yes.Buyaroastas eveninthicknessaspossible,
orbuyrolledroasts.
Q. Can I seal the sidesof my foil‘tent” when
roasting a turkey?
A. Sealingthefoilwillsteamthemeat.Leaving
it unsealedallowstheairtocirculateandbrown
themeat.
ROAST~GGWE
,
I
Oven
Type
Temperature
I
ApproximateRoastingTime
I
hternal
Doneness in MinutesperPound Temperatum“W.
Meat
Tendercuts;rib,highqualitysirloin
tip,rumportopround~
Lamblegorbone-inshoulder?
Vealshoulder,legorloin~
Porkloin,riborshoulder?
Ham,precooked
Podtry
ChickenorDuck
Chickenpieces
Turkey
325°
325°
325°
325°
325°
325°
350°
325°
Rare:
Medium:
WellDone:
Rare:
Medium:
WellDone:
WellDone:
WellDone:
ToWarm:
WellDone:
WellDone:
WellDone:
3to5lbs. 6to8 ~bS.
24-35
18-25
35-39
25-31
39-45 31-33
21-25 20-23
25-30 24-28
30-35
28-33
35-45
30-40
35-45
30-40
18-23
minutesperpound(anyweight)
3to5lbs. Over5lbs.
35-40 30-35
35-40
10to15lbs. Over15Ibs,
16-22 12-19
140°-1500* 15(?0-1600
170°-1850 w
140°-1500*
150°-1600
170°-1850
*
1700-180°
170°-180°
115°-1250
185°-1900
185°-1900
In thigh:
185°-1900
TForbonelessrolledroastsover6inchesthick,add5 to10minutesperpoundtotimesgivenabove.
*TheU.S.DepartmentofAgriculturesays“Rarebeefispopular,butyoushouldknowthatcookingittoonly140°F.means
somefoodpoisoningorganismsmaysurvive.”(Source:SafeFoodBook.YourKitchenGuide.USDARev.June1985.)
Page 20

Broilingis cookingfoodbydirect heatfromabovethe
3. Arrangefoodonrackandpositionthebroilerpan
food.Yourrangehaseithera broilerin theovenora
ontheappropriateshelfintheovenor broiling
—
—
compartmentbelowthe ovenforbroiling.A specially
designedbroilerpanandrackallowsdrippingfatto
drainawayfromthefoodsandbekept awayfromthe
highheatofthegasflame.
Both the ovenand broiler compartment doors (on
somemodels)should be closedduring broiling.
Dependingon whetheryourrangeis equippedwitha
separatebroilerdrawerorisequippedforin-oven -
broiling,youcanchangethe distanceof thefoodfrom
theheatsourceby positioningthebroilerpanandrack
ononeoftheovenshelvesor oneof thethreeshelf
positionsin thebroilercompartment-A (bottomof
broilercompartment),B (middle)andC(top).
1.Reheatingthebroiler or ovenisnotnecessaryand
canproducepoor results.
2.If meathasfator gristleneartheedge,cutvertical
slashesthroughitabout2inchesapart,butdon’t
cutintomeat.Werecommendthatyoutrimfatto
preventexcessivesmoking,leavinga layerabout
1/8inchthick.
compartment.Placingfoodcloserto flame
increasesexteriorbrowningoffood,butalso
increasesspatteringandthepossibilityof fatsand
meatjuicesigniting.
4.Closetheovenorbroilerdoor.
5.TurnOVENCONTROLknobandBAKE/BROIL
switch(onmodelssoequipped)to BROIL.
6.Turnmostfoodsonceduringcooking(the
exceptionis thinfilletsoffish;oiloneside,place
thatsidedownonbroilerrackandcookwithout
turninguntil done).Timefoodsfor aboutone-half
thetotal cookingtime,turnfood,thencontinueto
cooktopreferreddoneness.
7.TurnOVENCONTROLknobtoOFF.Remove
broilerpanhorn ovenand servefoodimmediately.
Leavepanoutsidetheoventocool.
use ofAldnum Fofl
Youcanusealuminumfoilto
he yourbroilerpanand
broilerrack.However,you
mustmoldthefoiltightlyto
therackmd cutslitsin itjust
like therack.
Broiling Tips
/J
1.Alwaysuse broilerpanandrackthatcomeswith
1,,
youroven.It is designedto minimizesmokingand
spatteringby trappingjuicesinthe shieldedlower
partof thepan.
2. Forsteaksandchops,slashfatevenlyaround
outsideedgesof meat.Toslash,cut crosswise
W’ithouttheslits,thefoilwillpreventfatandmeat
throughouterfatsurfacejustto theedgeofthe
juicesfromdrainingtothebroilerpan.Thejuices
meat.Usetongsto turnmeat overto prevent
couldbecomehotenoughto catchon fire.If youdo
piercingmeatandlosingjuices.
notcutthe slits,you arefrying, not broiling.
Questions & Answers
Q. When broiling,is it necessaryto aiwaysusea
Q. Should I salt the meat before broiting?
rack in the pan?
A. No. Saltdrawsoutthejuices andallowsthemto
A.Yes.Usingtheracksuspendsthemeatoverthe
evaporate.Alwayssaltaftertooting. firn meat
pan.As themeatcooks,thejuicesfallintothepan,
withtongs;piercingmeatwitha fork alsoallows
thuskeepingmeatdrier.Juicesareprotectedbythe
juicesto escape. Whenbroilingpoultry or fish,
rackand staycooler,thusp~eventingexcessive
brusheachsideoftenwithbutter.
spatterandsmoking.
- Q. Why are my meats not turning out as brown as
(continuednextpage)
A. Checkto seeif youareusingtherecommended
.-
shelfposition.Broilfor longestperiodoftime
.
indicatedintheBroilingGuide.Turnfoodonly
onceduringbroiling.
19
Page 21

BROm~G GmE
Modelswithout
BroilerCompartment
Modelswith
BroilerCompartment
IstSide
Minutes
2nd Side
Minutes
Quantityand/or
ThicknessI
OvenSheti
Position
Ist Side
Minutti
2ndSide
Minutes
BroilerShelf
Position
Comments
Yood
B 3!4 3 Arrangeinsinglelayer.
Bacon 1/2lb.(about8
thinslices)
c 3%
3
4-5
7
5-6
8-9
6-7
9-12
16-18
10-11
9
12
13
10
12-15
25
Spaceevenly.Upto9
pattiestakeaboutsame
time.
1lb, (4patties)
1/2to3/4
in.thic
c 10-11
A 4-5
GroundBeef
BeefSteaks
Rare
Medium
WellDone
7
5-6
8-9
Steakslessthan1inch
thickcookthroughbefore
browning.Panfryingis
recommended.
1in.thick
(1
tO 1Xlbs.)
B
B
B
B
B
B
9
12
13
10
12-15
25
B
B
A
B,C
B
A
6-7
10-12
16-18
Slashfat.
Rare
Medium
WellDone
1in.thick
(2to2%lbs.)
30-35 25-30
Reducetimesabout5to
10minutespersidefor
cut-upchicken.Brush
eachsidewithmelted
butter.Broilskin-sidedownfirst.
Chicken
1whole
(2to2XIbs.),
splitlengthwise
B
30-35
25-30 A
BakeryProduct
Bread(Toast)or
ToasterPastries
c
c
2-3
3-5
1/2-1
c
c
2-3
3-5
1/2-1 Spaceevenly.Place
Englishmuffinscut-side-a
upandbrushwithbutter _
ifdesired.
2to4slices
1pkg.(2)
EnglishMuffins 2,
split
Cutthroughbackofshell
*
13-16 Donot
turnover.
LobsterTails 2t04
(6to 8oz.each)
c 13-16
5
Donot
turnover.
5
8
A
andspreadopen.Brush
withmeltedbutterbefore
broilingandafterhalfof
time.
Hsh
l-lb.fillets
1/4to1/2in.thick
B B,C 5
5
Handleandturnvery
carefully.Brushwith
lemonbutterbefore
broilingandduring
broilingifdesired.
Preheatbroilerto
increasebrowning.
8
10
13
8
10
10
17
Wm Slices
Precooked
1in. thick
c 8 B
8
Increase5to10
minutesper sidefor
‘inchthickorhomecured.
2(1/2in.thick)
2(1in. thick),
ibout1lb.
B
B
10
13
:72
4-7
10
4-6
12-14
1-2
B
B
4-5
9-12
Slashfat.PorkChops
WellDone
LambChops
Medium
WellDone
Medium
WellDone
1(1in.),
10to 12oz.
1(1X
in.),
~bout1lb.
B
B
B
B
8
10
10
17
B
B
B
B
4-7
10
4-6
12-14
Slashfat.
Wieners
similarprecooked
sausages,bratwurs
l-lb.pkg.(10)
c 6 B,C 6 1-2 Ifdesired,splitsausages
inhalflengthwise;cut into5-to6-inchpieces. ‘--
‘v
20
Page 22

CAm Am CLEAmG
Propercare andcleaningareimportantsoyourrangewill giveyoueffleient
andsatisfactoryservice.Followthesedirectionscarefullyin caringforitto
elpassuresafeandpropermaintenance.
BESUW ELECTKCAL POWER IS DISCONNECTEDBEFO~
CLEANING
ANY PART OF YOUR WNGE.
~ea~ed Burner ~ssemb~ies (onsomemodels)
~ua~ ~urners (onsomemodels)
CAUTION: DO NOT OPEWTE T~
BU~ER WITHOUT ALL BU-R
PARTS AND DW PANS (~ SO EQU~PED)
~ PLACE.
Grate
fi. - \i
BurnerCap
BurnerHead
DripPan
(onsomemodels)
z //
.
\\
.
=~’urner’ase
The burner assemblies shouldbe cleaned thoroughly
after spillovers.
Turn all
controlsOFFbeforeremovingburnerparts
anddrippans(ifsoequipped).
The burner grates, caps, burner heads and drip pans
(if so equipped) can be lifted off, making them easy
to clean.
The electrodeof the
Electrode
sparkigniteris
exposed.When
oneburner is turned
toLIT~, all the bume
spark.Do not attemptto
disassembleorclean around any burner while
anotherburnerison. An electricshock may result,
whichcouldcauseyou to knock over hot cookware.
Grate
u
—
w
Onmodelswithdualburners,thecooktoplifisup for
easyaccess.
Theholesin thesurfaceburnersof your rangemustbe
keptcleanatalltimesforproperignitionandaneven,
unhamperedflame.
Youshouldcleanthesurfaceburnersroutinely,
especiallyafterbad spillovers,whichcouldclogthese
holes.Wipeoff sutiaceburners.If heavyspillover
occurs,removethesurfaceburnersfromrange.
Burnersliftoutfor cleaning.Lifiup thecooktopand
thenliftoutthesurface burners.
Toremoveburned-onfood,soakthesurfaceburnerin
a solutionof mildliquiddetergentandhotwater.Soak
thesurfaceburnerfor 20 to 30minutes.Formore
stubbornstains,use a cleanserlikeSoftScrub”brand
orBonAmi”brand.Rinsewelltoremoveanytraces
oftie cleanserthatmightclogthesurfaceburner
openings.Do notuse steelwool becauseit will clog
thesurfaceburneropeningsand scratchthesurface
burners.Iftheholes becomeclogged,cleanthemwith
a toothpick.
Beforeputtingthesurfaceburnerback,shakeout
excesswaterandthendry it thoroughlyby setting it in
a warmovenfor 30minutes.Thenplace it backinthe
range,makingsureitis properlyseatedandlevel.
(continue~nextpage)
—
—-
Page 23

Liftoff whencool.Washburner capsin Theburnerbase(thepartof’theburner
hot,soapywaterandrinsewithclean fastenedto thecooktop)maybe
water.If desired,soakupto 30 minutes
cleanedwitha softbrushanda mild
andscourwitha plastic scouringpadtoremove cleanser.Cleanallfoodresiduesfrom
burned-onfoodparticles.Dry themin a warmovenor
aroundsparkelectrode.Do notusesteelwool;small
witha cloth-don’t reassemblethemwet. bitsof steelwoolwillshortouttheelectrode.Rinse
well.
Theholesin theburnersof yourrange, ~--- >
andthe sparkelectrodes,mustbekept
a
.
“/.\.\,, . “
cleanat alltimesfor properignition
and~ even,unhamperedflame.
Youshouldcleantheburnerheadsroutinely,especially
afterbadspi~overs,whichcouldclogtheseholes.
Wipeoffburner heads.Ifheavyspilloveroccurs,
removeburnerheadsfromrange.
Removetheburnergrateandburner cap.Thenliftthe
burnerheadsfiaightup.
Toremoveburned-onfood,soaktheburnerhead
upside-downin a solutionof mildliquiddetergentand
hotwater.Soaktheburnerheadfor 20to 30minutes.
If the fooddoesn’trinseoffcompletely,scrubitwith
soapandwaterandasoftbrushorplasticscoutingpad.
Formorestubbornstains,usea cleanserlike Soft
ScrubQbrandorBonAmiQbrand.Wnsewellto
removeanytracesofthecleanserthatmight clogthe
—
burneropenings.Do notusesteel woolbecauseitwill
clogtheburneropeningsandscratchtheburners.If
theholesbecomeclogged,cleanthemwithatoothpick.
Beforeputtingtheburnerheadback,shakeoutexcess
wateranddryit thoroughlyby settingitin a warm
ovenfor30 minutes.Thenplaceitbackin therange,
makingsurethepinintheburnerbasegoesin the
holein theburnerhead,andthattheburnerheadsare
properlyseatedandlevel.
.~~~~~~~$ (onsomemodels)
Removethe grates
andliftoutthedrip
pans.Drippanscan
becleanedin
dishwasheror by
hand.Placethemina
[~-~
%
coveredcontainer(or
~plasticbag)with 1/4cupammoniatoloosenthesoil.
Thenscrubwithasoap-filledscouringpadifnecess~.
Burner Grates
Liftoutwhencool.
Gratesshouldbe
washedregularly
and,of course,
afterspillovers.
Washthemin hot,soapywaterand rinsewithclean
water.Aftercleaning,dry themthoroughlybyputting
themin awarmovenfora few minutes.Don’tputthe
gratesbackontherangewhiletheyarewet.When
replacingthegrates,be surethey’repositioned
securelyovertheburners.
Togetrid ofburned-onfood,placethegrates in a
coveredcontainer(orplasticbag)with 1/4cup
ammoniatoloosenthesoil.Thenscrubwitha
soap-filledscouringpadif necessary.
Althoughthey’redurable,thegrateswillgradually
losetheirshine,regardlessof thebestcareyoucan
givethem.This is duetotheircontinualexposureto _-
hightemperatures.
Donotoperatea burnerforan extendedperiodof -
timewithoutcookwmeonthegrate.Thefinishonthe
gratemaychipwithoutcookwaretoabsorbtheheat.
22
Page 24

Cooktop Suflace
Toavoid damagingtheporcelainenamelsurfaceof
thecooktopandto preventitfrombecomingdull,
cleanup spillsrightaway.Foodswitha lotof acid
(tomatoes,sauerkraut,fruitjuices,etc,)orfoodswith
highsugarcontentcouldcause a dullspotif allowed
toset.
Whenthesurfacehascooled,washandrinse.For
other spillssuchasfatsmatterings,etc.,washwith
soapandwateronce thesurfacehascooled.Then
rinseandpolish withadrycloth.
Donot storeflammablema@fids in an ovenor
near thecwhp. Donotstoreorusecombustible
materials,gasolineorotherflammablevaporsand
liquidsinthevicinityofthisoranyotherappliance.
ovenBottom
The ovenbottom has a porcelain enamelfitish.
Tomakecleaningeasier,protecttheovenbottom
fromexcessivespilloversbyplacinga cookie sheet
onthe shelfbelowthe shelf you arecookingon.You
canusealuminumfoilif youdonotcoverthewhole
shelf.Thisis particularlyimportantwhenbakinga
fruitpieor otherfoods withahighacidcontent.Hot
fruitfillingsor otherfoodsthatare highlyacidic
(suchasmilk,tomatoesor sauerkraut,andsauces
withvinegaror lemonjuice)maycausepittingand
damageto theporcelainenmel surfaceandshould
bewipedup immediately.Takecarenottotouchhot
portionof oven.
If a spilloverdoesoccuron theovenbottom,allow
theovento coolfirst.Youcan thencleantheoven
bottomwithsoapand water,an abrasivecleanseror
scouringpads.
Broiler Pan and Rack
Afterbroiling,removethebroiler
panandrack fromtheoven.
Removetherackfrom thepan.
Carefullypour outthegreasein
thepaninto a propercontainer.
If foodhasburnedon,sprinkle
D
therackwith detergentwhilehot
—
andcoverwithwe~Dat)ertowelsor a dishcloth.That
~-w-av.burned-onfoods‘willsoakloosewhilethe meal
ovenshelves
Shelvescanbecleanedby
handusingsoapandwateror
withanabrasivecleanser.
Aftercleaning,rinsethe
shelveswithcleanwaterand
dry.Toremoveheavy,
burned-onsoil,youmayuse
scouringpads.After
scrubbing,washwith soapy
-“~isij~ingserved.Wash;scour if necessary.Rinseand
water,rinseanddry.
——
–+ dr>~.The broiierpanandrack mayalsobecleanedin a
(continuednextpage)
‘“-L----”-’=
Do notstorea soiledbroilerpanandrack
:j?<l!w~~ll~lo
‘-” anywherein therange.
23
Page 25

c~mAm CLEAMG
(continued)
~ve~ ~~~~ ~e~~a~e~e~~ (onsomemodels) =
CAUTION:Beforereplacing your oven bulb,
disconnectelectricalpower to the range at the
@
main fuseor circuit breaker panel. Besure to let
the lamp coverand bulb coolcompletely.
Theovenlamp(bulb)is coveredwitha removable
glasscoverthatisheldinplacewithabail-shaped
wire.Removeovendoor,ifdesired,to reachcover
easily.
Toremove:
1.Holdhandundercoversoitdoesn’tfallwhen
released.Withfingersof samehand,firmlypush
backwirebailuntil it clearscover.Lifioffcover.
DONOTREMOVEANYSCREWSTO
REMOVECOVER.
2. Donottouchhotbulbwitha wetcloth.Replace
bulbwitha40-watthouseholdappliancebulb.
Toreplace cover:
1.Placeit intogrooveof lampreceptacle.Pullwire
bailforwardto centerof cover untilit snapsinto
place.Whenin place,wireholdscoverfirmly.Be
certainwirebailis in depressionincenterofcover.
2. Connectelectricalpowerto therange.
~ontrol Panel andKnobs
It’sa goodideatowipethecontrolpanelaftereach
useof theoven.Cleanwithmildsoapandwateror
vinegarandwater,rinsewithcleanwaterandpolish
drywithasoftcloth.
Donotuseabrasivecleansers,strongliquidcleaners,
‘plasticscouringpadsorovencleanersonthecontrol
panel-they willdamagethefinish.A 50/50solution
ofvinegarandhotwaterworkswell.
Thecontrolknobs mayberemovedforeasier
cleaning.Toremoveknob,pullit straightoff the
stem.Ifknob is difficultto remove,placea towel
or dishclothbetweenthe knobandcontrolpanel
andpullgently.Washtheknobsinsoapandwater
or a vinegarandhotwatersolutionbutdonotsoak.
Tocleanoutsideglassfinish,use a glasscleaner.Do
notallowthewaterorcleanerto run downinside
openingsin theglasswhile cleaning.
Metalpartscan becleanedwithsoapandwater.Do
notuse steel wool,abrasives,ammonia,acidsor
commercialovencleaners.Dry witha softcloth.
----
Page 26

The oven door is removable but it is heavy. You may
need help removing and replacing the door.
TO REMOVE THE \ \
~00~, open it a few
inches to the special
stop position that will
hold the door open.
Grasp firmly on each
side and lift the door
straight up and off
the hinges.
NOTE: Becarefil not
to place hands between
thehinge and the oven
door frame as the hinge
could snap back and
pinch fingers.
TO REPLACE THE DOOR, make
sure the hinges are in the special stop position.
Position the-slotsin the bo~tomof tie door squarely
overthehinges.Thenlowerthedoorslowly~d evenlyoverboth hingesat thesametime.Ifhinges
snap back against th{ oven frame, pull them bat-k out.
TO CLEAN THE DOOR:
(Donotimmersedoorin water.)
Inside ofdoor:
oAllowto cool beforecleaning.Forlightsoil,wipe
frequentlywithmildsoapandwater(especiallyafter
cookingmeat).Thjswillprolongthetimebetween
majorcleaning.Rinsethoroughly.
NOTE: Soap left
on the ovendoor causesadditional stains when
the ovenisreheated.
● Forheavysoil,choosean ovencleaner(for
ContinuousCleaningoven,beforeapplying
commercialovencleaner,removetheovendoor)
andfollowlabelinstructions.Rinsewell.
Outside ofdoor:
sUse soapandwatertothoroughlycleanthetop,
sidesandfrontoftheovendoor.Rinsewell.You
mayalsouse a glasscleanertocleanthe glasson
theoutsideof thedoor.
eSpillageof marinades,fruitjuices,tomatosauces
andbastingmaterialscontainingacidsmaycause
discolorationandshouldbe wipedupimmediately.
Whensurfaceis cool,cleanandrinse.
eDonotuseovencleaners,cleansingpowdersor
harshabrasiveson theoutsideofthe door.
Porcelain ovenInterior
(on all models except Continuous-Cleaning Models)
With proper care, the porcelain enamel interior will
retain its attractive finish for many years.
Soap and water will normally do the job. Heavy
spattering or spillovers may require cleaning with a
mild abrasive cleanser. Soapy,wet pads may also be
used. Do not allow food spills with a high sugar or
acid content (such as milk, tomatoes, sauertiaut, fruit
juicesor pie filling) to remain on the surface. They
may cause dull spots even after cleaning.
Household ammonia may make the cleaning job
easier. Place 1/2 cup ammonia in a shallow glass pan
and leave in a cold oven overnight. The ammonia
fumes will help loosen the burned-on grease and
food.
Whennecessary,youmayusea commercialoven
cleaner.FO11OWthepackagedirections.
Cautions about usingspray-on ovencleaners:
● Becareful wheretheovencleaneris sprayed,
SIDonotsprayovencleanerontheelectricalcontrols
andswitches(onsomemodels)becauseit could
causea short circuitandresultin sparkingorf~e.
e Donot allowafilm fromthecleanerto remainon
thetemperaturesensingbulb—itcouldcausethe
ovento heatimproperly.(Thebulbislocated at the
rearof theoven.)Carefullywipethebulbcleanafter
eachovencleaning,beingcarefulnottomovethe
bulbas a changein itspositioncouldafiecthowthe
ovenbakes.
~Do notsprayanyovencleaneron theoutsideoven
door,handlesor any exteriorsurfaceof the oven,
woodorpaintedsurfaces.Thecleanercan damage
thesesurfaces.
(continuednextpage)
25
—
Page 27

I
The Continuous-CleaningOvencleansitselfwhile
tooting. Theovenwallsarefinishedwithaspecial
coatingthatcannotbecleanedin theusualmannerwith
soap,detergents,steelwoolpads,commercialoven
cleaners,coarseabrasivepadsor coarsebrushes.Useof
suchcleansersand/ortheuseofoven sprays willcause
permanentdarnage.
The specialcoating isa porous ceramic material,
whichisdarkin colorandfeelsslightlyroughtothe
touch.If magnified,thesurfacewouldappearaspeaks,
valleysandsub-stiace “tunnels.”Thisroughfinish
tendsto preventgreasespattersfromforminglittle
beads or dropletsthatrundownthesidewallsofa
‘hard-surfaceovenliner,leavingunsightlystreaksthat
requirehandcleaning.Instead,whenspatterhitsthe
porousfinish,it is dispersedandpartiallyabsorbed.
Thisspreadingactionincreasestheexposureof oven
soiltoheatedairandmakesit somewhatlessnoticeable.
Sotimaynotdisappearcompletelyandat sometime
afterextendedusage,stainsmayappearthatcannot
beremoved.
The specialcoating works best on small arnounk of
spatter. Itdoes notworkwellwithlargerspills,
especiallysugars,eggordairymixtures.
This specialcoatingisnotused OXIovenshelves,
ovenbottom or door liner.Removethesetoclean
witha commercialovencleanertopreventdamaging
theContinuous-CleaningOvencoating.
ToC1eanthe Continuous-CleaningOven:
1.Letrangepartscoolbeforehandling.Werecommend
rubberglovesbe wornwhencleaning.
2. Removeshelvesandcookware.
3. Soilvisibilitymaybe reducedbyoperatingtheoven
at400”F.Closethedoor andturnOVENCONTROL
knobto400”F.Timefor at leastfour hours.Repeated
cyclesmaybenecessarybeforeimprovementin
appearanceis apparent.
Remember: During the operation of the oven,the
door and other range surfaces willgethot enoughto
causeburns. Do not touch. Let the range coolbefore
replacing ovenshelves.
~.If a spilloverorheavysoilingoccursontheporous
surface,as soonastheoven has cooled,removeas
muchof thesoilaspossibleusing a smallamountof
wateranda stiff-bristlenylonbrush.Usewater
sparinglyandchangeitfrequently,keepingit as
cleanaspossible,andbe sureto blotitupwithpaper
towels,clothsorsponges.Donotrubor scrubwith
papertowels,cloths or sponges,since theywillleave
unsightlylintontheoven finish.If waterleavesa
whiteringon thefinishasit dries,applywateragain
andblotit witha cleansponge,startingattheedge
oftheringandworkingtowardthecenter.
The ovenbottom and the insideof the oven door
havea porcelain enamelfinish. Theovendoorlifts
offandthe ovenbottomcomes outforcleaningaway
fromtheContinuous-CleaningOven.
Donot use soap, detergent, steelwoolpads,
commercialovencleaner,siliconeovensprays,
coarse pads or coarse brushes on the porous
surface. Theseproductswillspot,cloganddarnage
theporoussurfaceandreduceits abilityto work.
Donotscrapetheporous surfacewitha Imifeor
spatia— theycouldpermanentlydamagethefinish.
a---
26
Page 28

Thestoragedraweris a goodplacetostore cookware
andbakeware.Donot storeplasticsandflammable
materialinthedrawer.
Donotoverloadthestoragedrawer.If thedraweris
tooheavy,it mayslipoffthetrackwhenopened.
Thestoragedrawermayberemovedforcleaning
underthe range.Cleanthestoragedrawerwitha
dampclothorsponge.Neveruseharshabrasivesor
scouringpads
Toreplacestoragedrawer:
1.Setthestopsonthe backofthedraweroverthe
stopsin therange.
2. Slidedrawerevenlyandstraightback,so thatthe
railsin therangeareengaged.
3. ~sh drawerbackuntilsecondstopson drawerhit
stopsin therange.Tiltdrawerup andoverthese.
4. Slidedrawertherestof thewayin.
To remove
storage drawer:
1.fill drawer
straightout
untilit stops.
2.Lift drawer
untilstops on
drawerclear
stopsonrange.
If”
3. Againpulldrawerout untilithits secondsetof
stops.
4. Tiltfrontofdrawerupandfreeofrange.
Torenlove:
1.Whenbroileris cool,
removerackandpan.
2.fill thebroilerdrawer
outuntilit stops,then
pushit backin about
oneinch.
3.Grasphandle,lift and
pullbroilerdrawerout.
Cleanthebroilerdrawer
withhot soapywater.
, jc
To rep~ace:
/
~.’
1.Holdthebroilerdrawerin theraisedpositionas
youslideitpartwayintotherange. Thenlowerthe
‘.\ \~
drawerandpushit completelyclosed.
~~~ov~~~~ ~c~ ~~~~~ (onsomemodels)
Thekickpanelmaybe removedfor cleaningunder
Toreplace, insert the
therange.
twoslotsatbottomof
.
To remove, lift up bottom
of panel slightly to
disengage the panel from
- the tabs at the base of the
: range. pull bottom of
-- panel forward until spring
clips are released at top of
panel ontothetwo tabs
atbaseof rangeand
pushtopof panel
forwardto engage
springclips.
27
—
Page 29

ovenAir Venb
~~
‘mm
-+-7 >
Never block the venti (air opetigs) of the range. Theyprovidetheair
,,. .0
inletandoutletthatarenecessaryfortherangeto operateproperlywith =>
,
.. .. ,
->
It -.
.7*.R
conect combustion.Air openingsarelocatedattherearof thecooktop,at
,,
“.
thetop andbottom of theovendoor,andat thebottomof therange,under
*
‘.-<
thekickpanel, storagedrawerorbroilerdrawer(dependingonthemodel).
.-
Ventappearanceandlocationvary
~~~~-~~~00~~0~ (onmodelswithdualburners)
Cleanthe areaunderthe cooktopoften.Built-upsoil,
especiallygrease,maycatchonfire.
Tomakecleaningeasier,thecooktopmaybeliftedup.
To raise the cooktop:
1.Be sureburnersareturnedoff.
2. Removethegrates.
3. Graspthetwo frontburnerwells andlift up.
Somemodelshavedualsupportrodsthatwillholdthe
cooktopup whileyoucleanunderneathit.
After cleaningunder the cooktopwithhot,soapy
wateranda cleancloth,lowerthecooktop.Becareful
notto pinch yourfingers.
I.owercooktopgentlyto avoidblowingoutpilot
flames(onmodelswithstandingpilots).
Metil Park
Glass
$utiaces
Do notuse steelwool,abrasives,
Tocleantheoutsideglass
ammoniaor commercialoven
finish,usea glasscleaner.
cleaners.Tosafelycleansurfaces;
Rinseandpolishwitha dry
wash,rinseandthendrywitha
cloth.Do notallowthe
softcloth.
waterorcleaner to run
downinsideopeningsin
theglasswhilecleaning.
Air Adjustment Shutter(s) forOven Burner(s)
Theair adjustmentshutter(s)for theovenburner(s)regulatestheflowofair
to theflames.
Thelocationof the airadjustmentshutter(s)dependson whetheryouroven
hasa singlebottomburnerortwoseparateburners-a topburnerfor
broilinganda bottomburnerfor normalbaking.SeeInstallationSectionof
this bookfor instmctionsforlocationandproperadjustmentofshutters.
---
—..-—
.——
-
28
Page 30

- FORYOUR SAFETY
Myou smell gas:
1•open tidows.
2. Don’ttouch electicd stitches.
30Em@ish any open flame.
4. Immediatelycd yom gas suppfiere
~ FORYOUR SAFETY ~
Do not storeor USecombustible
materids9gasotie orotier flammable
vaporsad Mquidsin me victity of tis
ormy otier apptiance.
BEFOREYou BEGUN
Readtiese tistructions complete&md
Carefiuy.
IMPORTm Savetiese instructions
fortie localelectricalinspecto~s use.
- i lNmUR kave tiese instructions
4
dti tie apptiance tier initiation iS
completed.
CONS~ER KeepMS Use md Care
1
Guide and tiekstiation Instructions
forfitie use.
Ws apptiancemustbe proper~gromded.
Improperins~ation, adjustment,
alteration service ormtitenmce cause hjmy or propertydamage.Referto
his muudo Forassistice oradtitiond
itiormation9 consulta quafied kstier9
serviceagency,mmtiactier (deder) or
tie gas suppUere
j
auTioN
Do notatiemptto operatetie oven of
-- tiis rmge d~fing a powerftil~re.
—
—–
a
--”
Removeau pactig materialmd
Ukratire horn oven beforecomectig
gas and electrid supp&to range.
Provide adequate clearaces between the range
and adjacent combustible surfaces.
DepthwithDoorClosed
, (IncludesDoorHandle):
t
See
Chart
Belowfor
Height
I IIF
DepthwithDoorOpen:~.
\\
\
RangeHeight:
36” JGSS05GER
40” JGBS02ENJGBS02PN
45~~JGBS04PR JGBS04ER JGBS04GER JGBs~GpR
JGBS06ER
JGBS06PR
46Y JGBSIPGER JGBS15GERJGBSIGGERJGBS17GER
JGBS19GEPJGBC15GER JGBC16GEPJGBC17GER
18”
. . .
(conttnuednextpage)
29
Page 31

—
mSTAL~~mo~msTRucTIoNs ‘ ~
,.
,
(continued)
,.
,.
!--
BMmRTAHTsaFETY!HSWRUCTIOMS
tisMatiOn of tis rangemustcotiormtiti
Iod codes, or in tie absenceofIod codes,
tith theNationalFuelGasCode,~SI
=23.1,
kteste&tion.h Canada,instition
mustconformwiththecwrent
Natial Gas
Initiation Code,C~/CGA-B149.l ortie
mrent Propmeks-tion Code,C~/CGAB149.2,mdtith Iod codeswhereapplicable.
This
range has been design-certied by the
AmericanGasAssociationaccordingtoANSI221.1,
latest edition and CanadianGas Association
according to CANICGA-1.Ilatest edition.As with
any applianceusing gas and generating heat,
there are certain safetyprecautions you should
follow.Youwillfind these precautions in the
Important SafetyInstructions in the front ofthis
book. Read them carefully.
~ Haveyour range installed by a qua~ed
installer or service technician.
~Yourrange must be electricallygrounded in
accordance with localCO*<Sor, in the absence of
localcodes, in accordancewith the National
Electrical Code (ANS1/NFPA70,latest edition).
In Canada,electricalgrounding must be in
accordancewithtie current CSAC22.1Canadian
ElectricalCode Part 1 and/or localcodes. See
Electrical Connectionsin this section.
~ Before installingyour range on linoleum or
any other synthetic floorcovering, make sure
the floor covering can withstand 180°R without
shrinking, warpiiig or discoloring.Do not install
the range over carpeting unless a sheet of 1/4”
thick plywoodor similarinsulator is placed
between the range and carpeting.
s Make sure the wallcoverings around the
range can withstid heat generated by the
range up to 200°R
~Avoidplacing cabinets above the range. To
reduce the hazard caused by reaching over the
open flames ofoperatingburners, installa
ventilationhood over the range that projects
forwardat leastWbeyondthetiontofthe cabinets.
~The ventilatinghood must be constructed of
sheet metal not less than 0.0122”thick. Install
abovethe cooktopwith a clearance ofnot less
than 114”between the hood and the underside
ofthe combustiblematerialor metalcabinet.The
hood must beat leastaswideas the appfianceand
centered over the appliance.Clearance between
the coohg surfaceandtheventilationhood stice
mm mR BE m m 24 mcm.
30
~ If cabinets are placed above the range, allowa
minimum clearance of30”between the cooking
surface and the bottom ofunprotected cabinets.
~Ifa30”clearancebetweencookingstice and
overheadcombustiblematerialormetalcabinets
cannotbemaintained,protecttheundersideof
thecabinetsabovethe cooktopwithnotless
than1/4”insulatingmillboardcoveredwith
sheetmetalnotlessthan0.0122”thick.
~Clearancebetweenthe cookingsurfaceand
protectedca~inetsWm mR BE =
_ 24
INC=. Theverticaldistancefrom
theplaneofthe cookingsurfacetothebottom
ofadjacentoverheadcabinetsextendingcloser
than1“tothe planeoftherangesidesmustnot
belessthan 18”.(SeeDimensionsand
Clearancesi~ustrationinthis section.)
Q
Caution:Itemsofinteresttochildrenshould
notbe storedincabinetsabove
a rangeoronthe
backsplashofarange--childrenclimbingonthe
rangetoreachitemscouldbe seriouslyinjured.
Allrangescantipandinjury
couldresult.Toprevent
accidentitippingoftherange,
attachanapprovedAnti-Tip
devicetothewan.(See
Instalhg theAnti-TipDevice
inthis section.)Tocheckif
the deviceisinstalledand
engagedproperly,carefully
tipthe rangeforward.The
Anti-Tipdeviceshouldengage
andpreventtherangefrom
tippingover.
Ifyoupulltherangeoutfrom
thewallforanyreason,makesuretheAnti-Tip
deviceis engagedwhenyoupushthe rangeback
againstthewall.
~For yoursafety,neveruseyourrangeforwarming
or heating the room. Youroven and range top are
not designed to heat your kitchen. Top burners
should not be operated tithout cookware on the
grate. Such abuse could result in fire and damage
to your range and willvoidyour warranty.
~Donotstoreorusecombustiblematerials,
gasolineorotherflammablevaporsandliquids
inthe vicini~ofthis oranyotherappliance.
Explosionsor firescouldresult.
~Do
not useovenfora storagearea.Items
storedinthe ovencanignite.
@Do
not letcookinggreaseor otherflammable
materialsaccumulateinornearthe range.
o
Page 32

~ See Dimensions and Clearances in this section
for all rough-in and spacingdimensions.These
dimensionsmust bemetforsafeuseofyourrange.
Thelocationofthe electricaloutletandpipeopening
(see Gas Pipe and Electric Outlet Locations)may
be adjusted to meet spectic requirements.
~The
rangemaybe placedwith 0“clearance
(flush)atthe backwalland sidewallsofthe range.
Do not locatethe range where it may be subject
to strong drafts.Anyopeningsin the floor or wall
behind the range should be sealed. Make sure
the openings around the base ofthe range that
supplytiesh air for combustion and ventilation
are not obstructed by carpeting or woodwork.
PRoTEcrYOURFLOOR
Yourrange, likemany other household items, is
heavyand can setde intosoftfloorcoveringssuch
as cushioned vinylor carpeting. Use care when
movingthe range on this me offlooririg.It is
recommended that the followingsimple and
inexpensiveinstructions be followedtoprotect
your floor.Therangeshouldbeinstied on a sheet
ofplywood(orsimilarmaterial). men thefloor
covering
enh at thefio~~tofthera~ge,the area
that the range willrest on should be built up with
plywoodto the same levelor higher than the
floorcovering.This willallowthe range to be
movedfor cleaningor servicing.
Depending on your range, you’llfindthe model
and serial numbers on a label on the front frame
ofthe range, behind the storage drawer,kick
panel or broiler drawer.
?OOLSYouWILLNEEB
~ PhilMpsand flat-bladescrewdrivers
~ Penciland ruler
~Two pipewrenches (onefor backup)
~ lW open-endor adjustablewrench
~ Nut drivers or wrenches: 3/16” and 114”
MolTaow
mlERmLsYOMMY MEEB
~
Gas he shut-offvalve
@PipejointsealantorUnapprovedpipethread
tapewithTeflon*that resistsactionofnatural
andLPgases
@Flexiblemetalapplianceconnector(1/2”I.D.)
A5-footlengthisrecommendedforeaseof
installationbutotherlengthsareacceptable.
Neveruseanoldconnectorwheninstallinga
newrange.
@Flareunionadapterforconnectiontogas
supplyline(3/& or 1/7 NPTx 1/2”I.D.)
@Fltie l~nionadapterforconnectionto pressure
regulatoronrange(1/2”NPTx 1/2”I.D.)
Teflon:RegisteredtrademarkofDuPont
PREHMTIOW
o
Removealltapeandpackaging.Liftupthe
cooktop(onmodelswith dudburners)andremove
anypackingmaterialunderit.Makesurethe
dualburnersareproperlyseatedandlevel.
@Removeplasticfilmthatcoverssomechrome
parts (aroundovendoor,sidetrim).
@Takethe accessorypackoutofthe oven.
@Checktobe surethatnorangepartshave
comelooseduringshipping.
(continuednextpage)
Page 33

❑PR@vHoEWEQUAFEGMSUPPLY
Yourrange is designed to operate at a pressure
of4“ofwatercolumnon naturalgas or,ifdesigned
for LP gas (propane or butane), 10”ofwater
column. Make sure you are supplyingyour range
withthe typeofgas forwhich it is designed.This
range is convertible foruse onnaturalor propane
gas, ifyoudecideto use MISrange on a different
typeofgas,conversionadjustmentsmustbemade
bya servicetechnicianorotherqua~ed person
beforeattemptingtooperatetie rangeonthatgas.
Forproperoperation,the pressureofnaturalgas
suppliedtothe regulatormustbe between4“and
lY’ofwatercolumn.ForLPgas,thepressure
supptiedmustbe between10”and13”ofwater
column.Whencheckingforproperoperationof
theregulator,tie inletpressuremustbeat least
v greaterthantheoperatig (manMold)pressure
asgivenabove.The pressureregulatorlocated
atthe inletoftherangemanifoldmustremti in
the supplylineregardlessofwhethernaturalor
LPgas isbeingused.Aflexiblemetalappliance
connectorusedto connecttherangetothegas
supplylineshouldhaveanI.D.of1/2”andbe
5feetinlength(shorterandlongerlengthsare
acceptable)foreaseofinstallation.InCanada,
flexibleconnectorsmustbesinglewallmetal
connectorsnolongerthan 6feetinlength,
❑coNHEcTTHEMMGEToGM
Shutoffthe maingassupplyvalvebefore
disconnectingthe oldrangeandleaveitoffuntil
newhook-uphasbeencompleted.Don’tforget
toretightthepilotonothergasapplianceswhen
youturn thegasbackon.
Becausehardpipingrestrictsmovementofthe
range,theuseofanA.G.A-certied flexible
metalapplianceconnectoris recommended
unlesslocalcodesrequireahard-piped
connection.Neveruseanoldconnectorwhen
installinganewrange.Hthe hardpipingmethod
isused,youmustcarefullyalignthepipe;the
rangecannotbe movedafterthe connection
ismade.
Topreventgasleaks,putpipejointcompound
on,orwrappipethreadtapewithTeflon*
around,allmale(external)pipethreads.
Teflon:RegisteredtrademarkofDuPont
Thisareaallows
forflushrange
installationwith
through-the-wall
connectionof pipe
stub/shut-offvalve
and rearwall
120Voutlet.
1
J
fromhardpipe
stublocationto
rangehookup.
/
/
This areaallowsfor
flushrangeinstallation
with
through-the-floor
connectionof pipe
stub/shut-offvalve.
r/
/
This areaallows
forflushrange
installationwith
through-the-wall
connectionofpipe
stub/shut-offvalve
and rearwall
120Voutlet.
\\ ‘t
2’
This areaallows
forflushrange
installationwith
through-the-floor
connectionofpipe
stub/shut-offvalve.
Page 34

4
c-~
.....
..
..’ “
\,-
Pressure
Regulator
w-
90°Elbow~ “
(provided)
t
Flex
~ Connector
Adapte
(6ft.max.)
I I ~
Nipple Union
B
Black
~ ~ IronPipe
M
~ Union
I
.
~ Nipple
I
.
w
(continuednextpage)
33
Page 35

msTALLATIoNmSTRucTIoNs
(continued)
•~o~~~m TMEM6E TOGM (continued)
1.Installamanualgaslineshut-offvalveinthe
gaslineinaneasilyaccessedlocationoutsideof
therange.Makesureeveryoneoperatingthe
rangeknowswhereandhowtoshutoffthe gas
supplytothe range.
2. Installmale1/2”flareunionadaptertothe
1/2”N~ internalthreadelbowatinletof
regulator.On models
eqtippedAh dud
~wners, install
themalepipethreadendof
the 1/2”flareunionadaptertothe 1/2”N~
internalthreadat klqt ofpressureregulator.
Useabackupwrenchonthe regulatorfitting
toavo~ddamage.
Wheninstallingthe rangebornthefront,
removethe90°elbowforeasierinstallation.
3. Installmale1/2”or3/4”flareunionadapter
tothe N~ internalthreadofthemanualshutoffvalve,takingcaretoback-upthe shut-off
valvetokeepitfromturning.
~. Connectflexiblemetalapplianceconnector
totheadapterontherange.Positionrange
topermitconnectionat the shut-offvalve.
~. men allconnectionshavebeenmade,make
sureallrangecontrolsareintheoffpositionand
turn ontie maingassupplyvalve.Usea liquid
leakdetectorat alljointsandconnectionsto
checkforleaksinthe system.
CAmON: DO N~
USEAME TO
CHECKFORGAS~.
Whenusingtest pressures greater than 1/2 psig
to pressure test the gas supply system ofthe
residence, disconnect the range and individud
shut-offvalvefrom the gas supply piping.When
using test pressures of 1/2 psig or less to test the
gasSUpply system, simply isolate the range from
thegassupplysystembyclosingthe individual
shut-offvalve.
34*
Electid Reqdremenk
120-volt,
60Hertz,properlygroundedbranch
circuitprotectedbya I$amp or20-ampcircuit
breakerortimedelayfuse.
ExtensionCord Cautions
Because ofpotential safetyhazards associated
with certain conditions,we strongly recommend
againstthe use of an extension cord. However,
ifyou sti~ elect to use an extension cord, it is
absolutelynecessary that it be a UL-listed,
3-wiregrounding-type applianceextension cord
and that the current carrying rating ofthe cord
in amperes be equivalentto, or greater than,
the branch circuit rating.
Gmuntin$
MORTM—(Please read wetifly)
FORPERSONALSAPETY,THIS APPLIANCE
MUSI’BE PROPEWY GROUNDED.
Thepowercordofthisapplianceisequipped
withathree-prong(grounding)plugwhich
mateswitha standardthree-pronggrounding
.
wallreceptacle
II
PREFERRED f
METHOD
QQ
-\
VB
9
0
%
~,
ENSUREPROPER
GROUNDEXISTS
BEFOREUSE
to mintize
the
possibilityof
electricshock
hazardhorn
thisappliance.
Thecustomer
shouldhavethe
wallreceptacle
andcircuit
..-.
checked by a
qua~ed electrician to make sure the receptacle
is properly grounded.
Whereastandardtwo-prongwallreceptacleis
encountered,itisthepersonalresponsibilityand
obligationoftie customertohaveitreplacedwith
aproperlygroundedthree-prongwallreceptacle.
D
B
Page 36

❑Usage Sitiati.ns where Appliance
PowerCord~ be DiscomectedMquen*.
Anadapter maybe used onlyon a 15-arnp
circuit. Do not use an adapter on a 20-amp
circuit.Where localcodes permit, a
~wOwY
CONNE~ON may be
madeto aproperlygroundedtwo-prongwall
receptaclebythe use ofaULlistedadapter,
availableatmosthardwarestores.me larger
slotin the adaptermustbe alignedwiththe
largerslotinthewallreceptacletoprovide
properpolarityintheconnectionofthe
powercord.
TEMPORARY METHOD
II2T)
(ADAPTERPLUGSNOT
PERMllTEDINCANADA)
~~11
ALIGNLARGE\ ))~ ~-” ENSUREPROPER
PRONGS/SLOTS
w
GROUNDAND
FIRMCONNECTION
.,,.
BEFOREUSE
CA~ON: Attachingthe adapterground
terminaltothewallr~ceptacle-cov~rscrew
doesnotgroundthe applianceunlesstie cover
screwismetal,andnotinsulated,andthewall
receptacleisgroundedthroughthehouse
wiring.Thecustomershouldhavethe circuit
checkedbyaqualifiedelectriciantomakesure
thereceptacleisproperlygrounded.
men disconnectingthepowercordfromthe
adapter,alwaysholdtheadapterwithonehand.
Ethis is notdone,theadaptergroundterminal
isverylikelyto breakwithrepeateduse.Should
thishappen,DO NOT
USEthe appfianceuntil a
proper ground has again been established.
~ ~SW~ SatiationswhereApplia.e Power
Cordti
be Discomected Frquently.
Donot use an adapter plug in these situations
because disconnecting ofthe power cord
places undue stiain on the adapter and leads to
eventualfailure ofthe adapter ground terminal.
The customer should have the two-prong
wallreceptacle replaced with a three-prong
(grounding) receptacle by a qualifiedelectrician
before using the appfiance.
The installationofappliances designed for
mobilehome installationmust conformwith
the Manufactured Home Construction and
SafetyStandard,Title 24 CF~ P~t 3280
(formerlythe Federal Standard for Mobile
Home Construction and Safety,Title 24,HUD,
Part 280)or,when such standard is not
applicable,the Standard for Manufactured
Home Installations,latest edition (Manufactured
Home Sites, Communities and Set-Ups),ANSI
A225.1,latest edition,or with localcodes. In
Canada, mobile home installationmust be in
accordance with the current C~/CSA
Z240/MH MobileHome InstallationCode.
Elec?ricOisconttecg
1. Locatedisconnect plug on the range back.
2. P~nchsides ofconnector and pullout of
range back.
Models
EquEppedwith
ModelsEquippedwith
DuaiBurnefi
SealedBurnew
(continuednextpage)
35
Page 37

msTmLAmoN”
cmo~s
,-
(Cintiiud) -.
‘,,..
,.,.
,,
,.
,-”.
Sed anyopeningsinthewallbehindthe range
andinthefloorundertherangewhenhookups
arecompleted.
M llGHT3HEPlkom
(formodelsequippedwithstandingpilots)
Therangeshouldbe insta~edinitspermanent
positionbeforeanypilotsarelitoradjusted.
Light~heSuhae BMm$rMloh
CAUTION:Makesuretie surfaceburner
controlknobsareinthe“OFF”positionsbefore
attemptingtolightthe pilots.
1.Mse the cooktop.
2.
Lightbothpilotswitha match.
3. Toavoidpilotoutage,usecautionwhen
closingcooktopafterlightingpilots.
Note:Donotleavestandingpilotfitina newly
constructedorremodeledhomeor apartment
thatwillbe unoccupiedformorethana monti.
Eachpilotflamewasadjustedatthefactory
tobe approximately5/16”tall.Atingeofyellow
appearingattheuppertipisnormal.Myoufind
pilotadjustmentis necessary,seethefollowing
instructions.
1. Raisethecooktop.
smallholenearth~center
ofthe manifoldpanel.
3. Toadjust,useabladetypescrewdriverwitha
shaftdiameteroflessthan3/1611,Turn pilot
adjustmentscrewuntilpilotis 5/16f1high.Do
notreducetheflameto lessthan5/161’orpilot
outagemayoccur.Apilotflameburninghigher
thanrecommendedmaygeneratesoot(carbon
black)onthe bottomofyourcooktop.
E LUGHFWMEOVENPILOT
CA~ON: Makesurethe OVENCONTROL
knobisinthe “OFF positionbeforeattempting
tolightthepilot.
1. Removethe storagedrawer,broilerdraweror
kickpanel,(dependingonyourmodel),bysfiding
the drawerallthewayoutand
thenliftingslightlyto rem
itfromitstracks.
2. Locatethe pilotatthe
backwall.Thepilotis
attachedtothe left
sideoftheovenburner.
3. Light
thepilotwitha
match.Noadjustments
arerequiredfornatural
gas.ForLPgas,seeHow
toConverttheRangefor
UsewithLPGasor
NaturalGas.
Page 38

r
.(
Stand-By
PilotFlame
HeaterPilotFlame
4. Turn the OVENCONTROLknob to a setting
above2000E The pilotflamewi~increase in size
andimpingeonthe temperature-responseelement
The oven burner willlight in 30-90seconds.
Theovenburnerwilloperateunti theset
temperatureisreached.The ovenburnerwill
continuetocycleonandoffas necessaryto
maintainthe ovenat thetemperatureindicated
bythe OVENCONTROLknob.
Operation of allcooktop and ovenburners
should be checked after the pilots have been
lighted (on some models) and range and gas
supplylines have been careftdlycheckedfor leaks.
Stifig PilotModels
Selectatop burner knob and simultaneouslypush
in and turn to HI position. The burner should
light within a few seconds. Try each burner in
succession until allburners have been checked.
Electic
I@ition Mode#s
Select atop burner knob and simultaneously
push in and turn to LITEposition.Youwill hear a
snapping sound indicatingproper operation of
the spark module. Once the air has been purged
born the supply lines,burners shouldlightwithin
4 seconds. Afterburner lights, rotate knob out of
the L~E position.Try each burner in succession
until allburners have been checked.
Qwaii~ofFlames
Thecombustionquatityofburnerflamesneeds
tobe determinedvisually.
Eburnerflameslooklike(A),callforservice.
Normalburnerflamesshouldlooklike@)or
(C),dependingonthe typeofgasyouuse.
WithLPgas,someyellowtippingonouter
conesisnormal.
(A)YeMowflmesCallforservice
(B)YeMowtips
on
outercones—
NormalforLPgas
(C)Sofi
blueflmes-
Normalfornaturalgas
OvenBwrner
Ignition
Yourovenisdesignedtooperatequietlyand
automaticallyTooperatethe oven,turnthe OVEN
CONTROLknobtoasettingabove200°E After
30-90seconds,the ovenburnerwilligniteand
burnuntilthe settemperatureisreached.The
ovenburnerwillcontinueto cycleonandoffas
necessarytomainti theovenatthetemperature
indicatedbythe OVENCONTROLknob.
Electic i~tion modelsrequireelectrical
powertooperate.Theovencannotbelitduringa
poweroutage.Gaswillnotflowunlessthe glow
barishot.
“
Ethe ovenisinusewhenapoweroutageoccurs,
theburnerwillshutoffandcannotbere-lituntil
powerisrestored.
(continuednextpage)
37
Page 39

msTALLATIoNmsTRucTIoNs
~
(contitiued)
,’
The airadjustmentshutterforthe top (broil)
burnerisinthecenteroftherearwalloftheoven.
The shutterforthebottom(oven)burner is near
the backwallbehindthestoragedrawerorthe
kickpanel(dependingonthe model).Remove
the drawerorpanel.(SeeCareandCleaning
sectioninthisbook.)
To adjust the flow ofair to either burner, loosen
the Philtipshead screw and rotate the shutter
toward open or closed position as needed.
me flamesforthe top (broil)burner shouldbe
steadywithapproximately1“blueconesandshould
notextendoutovertheedgesoftheburnerbaffle.
To
determine ifthe bottom burner flames are
burning properly,remove the ovenbottom and
the burner baffle (see below). Flames should
have approximately 1“blue cones and, ifrange
is suppliedwith natural gas, should burn with no
yellow tipping. (Withmost LPgas, smallyeflow
tips at the end of outer cones are normal.)
Flames should not liftoffburner ports. Ifmg
is observed, graduallyreduce air shutter
openinguntilflames are stabitied. With the
bafflein place,the flames should burn steady
and should not extend past the edges ofthe
burner baffle.
Oven
Toremovetheovenbottom:
1.Removetheknurledscrewsholdingdownrear
oftheovenbottom.
2. Grasptheovenbottomatfingerslotson
eachside.
3. Liftthe rear ofthe ovenbottomenoughto
clearthe lipoftherangeframe,thenpullout.
BurnerBaffle
RemoveScrew
-r–F/—’
Toremovetheburner baffle(onsomemodels):
2. Pullbafflestraightout until it is free from the
slotthat holds it at rear of oven,
1. Use a nut driver to remove the 1/4” h~-hea~
screw ShOWIh tie fiustiation
above.Do
notremovemy otier screws.
Page 40

Oven
Toremovetie ovenbottom:
1. Removeknurledscrewsholdingdownrearof
ovenbottom.
2. Graspovenbottomatfingerslotsoneachside.
3. Liftrearofovenbottomenoughtoclearthe
lipofrangetiame,thenpullout.
‘“r”erB’ff’eC*’
To
removetie burner bdfle
(on somemodels):
1.
Usea nut driver to remove the 1/411hex-head
screw shorn in tie
iUustiationabove. Do
not removemy otier screws.
2. Pull baffle straight out untilit is tiee from the
slot that holds it at rear ofoven.
Withthebaffleremoved,properlyadjusted
flamesshouldhaveapproximatelyl“ bluecones
and,ifrangeissuppliedwithnaturalgas,should
burnwithnoyellowtipping.~~th mostLPgas,
sma~yellowtipsatthe endofouterconesare
normal.)FlamesshouldnotM offburnerports.
Ifliftingis observed,graduallyreduceair
shutteropeninguntilflamesarestabilized.Wlti
the baffleinplace,orwiththe ovenbottomin
place(onmodelsnotequippedwithaburner
baffle),theflmes shouldburnsteady.They
shouldnotextendpasttheedgesofthe burner
baffle(orthe ovenbottomifthereisnobaffle).
Theshutterfortheovenburnerisneartheback
walloftheovenandbehindthebroilerdrawer.
Toremovethebroilerdrawer:
1. Pullthe draweroutuntilitstops,then pushit
backinaboutoneinch.
2. Grasphandle,liftandpullbroilerdrawerout.
Removethe metalshieldattherearofthe cavity.
- Loosen
\
. I
)
- Adjustment
\ ~ Shutter
The air adjustmentshutterisbehindthis shield.
Toadjusttheflowofairtothe burner,loosenthe
Phillips-headscrewandrotatethe shutterto
allowmoreor lessairintotheburnertube.
(continuednextpage)
Page 41

mLEVELBMGTHEmGE
1. Removethe storage
drawer,broilerdraweror
kickpanel.
2. Usea 3/l& open-endor
socketwrenchtobackout
bothrearlevelinglegs
approximatelytwoturns.
3. Usea 1%”open-endor
adjustablewrenchto back
outthefrontlevelinglegs
twoturns.
4. Installthe ovenshelvesin
theovenandpositiontherange
whereitwillbe installed.
5. Checkforlevelnessbyplacingaspiritlevelor
acup,partiallyfilledwithwater,ononeofthe
ovenracks.Husinga spiritlevel,taketwo
readings-with thelevelplaceddiagondlytist
inonedirectionandthenthe other.
6. Adjustthelevelinglegsuntiltherangeislevel.
7. Aftertherangeislevel,slidethe rangeaway
fromthewallsothatthe Anti-Tipdevicecanbe
installed.
m BHSTALLIHGTHEMTU=TIPDEWHCE
W~ING:
~Rangemustbe securedwithanapproved
Anti-Tipdevice.
@Unlessproperlyinstiled, the rangecould
betippedbyyouora childstanding,sitting
orleaningonanopendoor.
@Mer instiling theAnti-Tipdevice,verify
thatitisinplacebycarefullyattemptingto
tilttherangeforward.
~Thisrangehasbeendesignedto meetall
recognizedindustrytipstandardsforall
normalconditions.
~Theuseofthis devicedoesnotpreclude
tippingoftherangewhennotproperly
installed.
~IftheAnti-Tipdevicesuppfiedwiththe
rangedoesnotfitthisapplication,use the
universalAnti-Tipdevice~02X7909.
,
*
1.MarkthewallwheretheMGHTEDGEofthe
rangeistobelocated.Besuretoallowforthe
countertopoverhangtiyouintendtoinstallthe
rangenexttocabinets.
40
Anti-Tip
Device
i
i
Slotted
I
Head
-----i--
Screw Wallplatf3I
Approx,~~”’
I
9-’
I
,/
2%
II
~’ tvlarkedEdge
/
./
ofRange
,#~
2. Locatetheoutsideedgeofthe device2Y
towardthecenteroftherangefromthemarked
edgeoftherange.
3.
U@ngthedeviceas a template,markthe
positionofthe holeforthe screw.
4. Forwoodconstruction,drilla pilotholeatan
angleof20degreesfromthehorizontal.Anail
orawlmaybeusedifa drillis notavailable.
MounttheAnti-Tipdevicewiththescrew
provided.
Forcementorconcreteconstruction,you
willneeda I/&x 1%”lagboltanda 1/2”O.D.
sleeveanchor,whicharenotprovided.Drill
therecommendedsizeholeforthe hardware.
Instil the sleeveanchorintothe drilledhole
andtheninstallthe lagboltthroughtie device.
Theboltsmustbe properlytightenedas
recommended-forthe hardware.
Backof
Range
5. Stidethe rangeagainstthe wall,andcheck
forproperinstallationbygraspingthetiont
edgesofthe rear surfaceunitopeningsand
carefullyattemptingtotilttherangeforward.
m
m
e
Page 42

TOOLS~~~u!~~m
T-10T’orxdriver(forsealed burners)
1/2” and 3/4” open-endwrench
Flatblade screwdriver (small)
Nut drivers or wrenches: 7rnmor 5/16”
(depending on the size ofthe spuds)
❑PREPMEMHGE FORCOHWERSROH
(1)Twn offgas supp~ at tie wall.
(2) Tmn offtie electicd powe;totie mgee
Ifrange has not yet been connected to gas supply,
or ifflexible connection was made, range maybe
pulled out from the wall to make conversion easier.
1s the
eina
ation.
Ifit is thisregulator:
1. Usea cointo removethe capfromthe
pressureregulator.
2. Turn the capoverandhookitintothe slots.
Thetypeofgastobe usedshouldnowbevisible
onthe topofthe cap.
W~G: Donotremovethepressure
regulatorfrom the range.
1. For models equipped with sealed burners,
remove the storage drawer, broiler drawer or
kick panel and locate the pressure regulator at
rear of the range.
RemoveScrews
AccessCover
On some models,youmayhavetoremovean
accesscoveralso.
For models equipped with dual burners, remove
the cooktop and locate the pressure regulator at
right rear ofrange.
❑ 0
2. FOUOWthe directions in ~ or ~ that match
your regulator type.
(continuednextpage)
❑
Note:Onsome modelstheshut-offvalve
maybeinadifferentlocation.
thisprotectivecap -
Cap Assembly
exceptfor conversion
Ifitisthisregulato~
1. Unscrewthe plastic-protectedhex-nutcap
fromthe regulator.
2. Carefullypry the protectiveplasticcapoff
thethreadedmetalcap.Gentlypullthe plastic
washeroffthethreadsonthe othersideofthe
metalcap.
3. Pushtheplasticcapontotheendofthe metal
capdisplayingthe typeofgasyouare converting
to.Pressthe attachedplasticwasherontothe
threadsonthe othersideofthe metalcap.
4.
Screw thehex-nutcapbackintothe regulator.
Donotovertighten.
—
Page 43

msTkLLAmoNmsTRucTIoNs ,
(continued)
a~o~~~~~l~~suRFacEBURNERSON
MOBELSEQU!PPEBWITHsmLEn BURHEB (see
sP@p4 if
ramgois@quipp@dwithdualburneK.)
BurnerCap
OrificeSpud
Gas InletTube
(( 1—, .
1.
Removegrates, burner caps and burner heads.
2. Removeburner bases by unscrewing the 3
small screws in each base. ~
bmner
strai&t out.
DO N~
disconnect the wires from the burner
bases unless the cooktopneeds to be raised.
3. Removethe brass orificespud under each
burner base by unscrewing sp~dfi-omfittingwith
a 7mm or 5/16” wrench (depending on the size of
your spuds). Applya 3/4” wrench to the hex on
the gas inlet tube as a back-upwhen removing
spud to prevent the aluminum tube from twisting.
4. Installorificespuds accordin to one ofthe
d
fol~owingdiagrams (see
❑or B), for LP
gas or natural gas, depending on which you are
converting to.
42
LPorificespuds are in a smallplastic bag packed
with this Use and Care book. LP orificespuds
have a 2-digitnumber and the Letter “L”on
one side, Each ofice spud willalsohave 1or 2
grooves on one side, denoting the location on
the range where it isto be installed.
w
II
w
‘Frontof.angw
Natural gas ofice spuds have a 3-digitnumber
on one side. Each orificespud willalso have 1,2
or 3grooves on one side, denoting the location
on the range where it is to be installed.
Front of Range
D
o
‘-
D
Page 44

5, To preventleakage,makesuretheofice
spudsare securelyscrewedintothegasinlet
tubes.Usea smallwrenchtoholdthe inlettube
hexto preventitfromtwisting.
6. Put oldofice spudsbackinthebagto save
forpossiblefutureconversion.
Note:Han orificespudisaccidentally
dropped$the cooktop
canbe raisedby
disengaging
the2 frontclips
witha largeflat
bladescrewdriver.
DO Nm attempttoraisethe cooktopwithout
removingall4burnerbases.
Ewiresweredisconnectedtoremovethe
cooktop,feedwiresthroughtheburnerholesin
thecooktop.Attachtoeachburnerelectrode
terminalcarefufly,makingsurenottobendthe
tertial. Thenlowercooktopuntilitsnaps
overthe clips.
TallScrew
Electrode
7. Carefullvinsertburnerbasesstraightdown
tith the tubeoverthe orificespud.R~placethe
screws,mtig swe tie W screw is
opposib tie bmner electrode b
each
bmner
base.
❑coHvEmlHGSURFACEBuRM~mOH
MOOELSEQUIPPEB
WITHDUALBURHEB
(Seestep 3ifrangeisequippedwithsealed burners.)
1. Lii cooktop.
2. Liftburnerassembliesstraightupandset
asidetogainaccesstosurfaceburnerspuds.
3. Witha 7mm
or5/16”wrench
(dependingonthe
sizeofyour
spuds),remove
eachofthe four
spudsonthe
surfaceburnergas
inlettubesand ‘
replacethemwith
the correctgas
spudsmountedin
aholderatthe
rightrearoftherange,abovethe regulator.
NaturalgasspudsarebrassandLPgasspuds
areredorsilver.(Mountthe spudsthatyou
removedfromtheinlettubesbackintheholder.)
Topreventleakage,makesurespudsare
securelyscrewedintogasinlettubes.
4. Replacetheburnerassemblies.
5. Keepdl spudswithyourrangesoyouhave
themifyoumoveorgeta dtiferentgashook-up.
~ AD$USFOVEM
TMEWOSFAT
(forModelsEquippedwithStandingPilots)
1. Removethe oven
controlknob.
2. Locatethe thermostat
adjustmentscrewatlefiof
thermostatshaft.Turn
screwclockwiseuntilthe
smallpointerisat LPorN,
dependingonthetypeof
gasyouare convertingto.
3. Replaceovencontrolknob.
(continuednextpage)
43
—
Page 45

ms~fi~i~~o~msTRucTIo~s
(continued)
,.’
1. Removeovendoor,storagedrawerorbroiler
drawer,ovenbottomandburnerbaffle.The
lowerburner orificespudislocatedbehindthe
storagedrawer,broilerdrawerorkickpanel.(On
somemodels,a metalshieldmustberemovedto
accessthe orifice.)
2. TOconvert to U
gas,
usea 1/2”wrenchtoturn
the lowerburnerorifice
spudcloctilse. Tightenthe
spudonlyuntilitis snug.
Topreventdamage,do
notovertightenthe spud.
To convert b na~d gas, =
loosen the spudabout2turns.
❑coHvEti4uRMJusTmEHTSHUT?E*(S)
ForU gas,loosenthe ~
Phillipsheadscrewand
rotatetheshuttertothe
Screw
fufl
openposition.With
AirShutter
baffleinplace,flames
shouldhaveapproximately
l-inchblueconesand
shouldnotextendbeyond
theedgesofthe burnerbtifle.Mer 30seconds
ofburneroperation,checkforflamesliftingoff
burnerports.Ifliftingis observed,gradually
reduceairshutteropeninguntilflamesare
stabilized.
Fornatial gas, theshutter should be open
1/2” or about 3/4 ofthe wayopen.
Whenallconnectionshavebeenmade,makesure
allrangecontrolsareinthe offpositionandturn
onthe maingassupplyvalve.Usealiquidleak
detectoratalljointsandconnectionstocheckfor
leaksinthesystem.
I
CA~ON: DON~ USEAF- ~
CHECKFORGM~.
Ii
When using test pressures greater than 1/2 psig
to pressure test the gas supplysystemofthe
residence, disconnectthe range and individual
shut-offvalvefromthe gas supplypiping.When
usingtest pressures of 1/2 psig or less to test the
gassupplysystem,simplyisolatetherangefrom
thegassupplysystembyclosingtheindividual
shut-offvalve.
B
B
TOconvertto U gas,usea 1/2”wrenchto
turn the upperburnerorificespudclockwise.
Tightenspudonlyuntilitis snugwiththe base.
TOpreventdamage,donotovertightenspud.
To
convertto na~d gas, loosenthe spud
about2turns.
1
44
..
Page 46

m
1. Turn au top burners to LOW.
2. Remove allfour knobs.
3, With a smallflatblade screwdriver,turn the
valveset screws clockwiseto decrease flame
ske, counterclockwise to increase flame size.
Adjust until the flaxneis about the same height
as the top ofthe burner.
4. Replace knobs.
~. Check for flame outage by opening and
closing the oven door several times. If the flame
goes out, increase the flame size.
MADJV$TFHESURFACEBURMERPuLom
(formodels equipped with standing pilots)
1. Raisethe cooktop.
2. hcate thepilot
adjustmentscrew.Itcan
beaccessedthroughthe
w
sma~holenearth~center
ofthe manifoldpanel.
3. Toadjust,use a blade-typescrewdriverwith
ashaftdiameteroflessthan3/16”.Turn pilot
adjustmentscrewuntilpilotis 5/16”high.Do
notreducetheflme tolessthan5/16”orpilot
outagemayoccur.Apilotflameburninghigher
tian recommendedmaygeneratesoot(carbon
black)onthe bottomofyourcooktop.
❑CHECKQUALITYOFFmEs
Thecombustionqutity ofburnerflamesneeds
tobedeterminedvisually.
Ifburnerflameslooklike(A),callforservice.
Normalburnerflamesshouldlooklike@)or
(C),dependingonthe typeofgasyouuse.
WithLPgas,someyellowtippingonoutercones
isnormal.
(A) YeUowflmes-
Callforservice
~) YeUowtipson
outercones-
NormalforLPgas
(C) %ft blueflmes-
Normalfor natural gas
45
—
Page 47

~ms~~o~s?
USE THIS PROBLEM SOLVER
OVEN wmLNOT WORK
BUWRS HAVEYELLOW
OR
YELLOW-TIPPED
KMES -
BUNER WMS VERY
LARGEORYELLOW
OWN DOES NOT
COOKPROPE~Y
CLOCKDOESNOT’WORK
OVEN LIGHT DOES NOT
COME
ON
smoNG ODOR
POSSIBLKCAUSE
~Plugonrmge isnotcompletelyinsetiedin theelectricaloqt.let,‘
~Thecircuitbre~er in ~ourhousehasbeentripped,or a fusehas beenblown.
,.
~Ovencon~olsnot~roperlyset. ‘
.
.,
,.”
. .
~An odorfromtheinsulationaroundtheoveti Iker isn’bmd ‘forthefirstfew
timesovenis used.~s is tempor~. , ‘ ‘ ~,- , <‘
.—
—
Page 48

———
.. .
W$llBeThere
Ti7iththe purchase of your new GE appliance, receive the
assurancefiat if you everneed information or assistance
from GE,we’llbe there.All you have to do is cdl—toll-free!
AGE CansumerServiceprofessional
willprovidempertrepairservice,
scheduledatatimethat’sconvenient
foryou.
ManyGEConsumerService
company+peratedlocationsofferyou
servicetodayor tomorrow,or atyour
convenience(700 a.m.to700 p.m.
weekda~9:00a.m.to2:00p.m.Saturdays).Our factory-trainedtechnicians
knowyour applianceinsideandout—
somostrepairscanbehandledinjust
onevisit.
WhateveryourquestionaboutanyGE
majorappliance,GEAnswerCente#
informationserviceisavailableto
help.Yourcall-and yourquestion—
willbe answeredpromptlyand
courteouslyAnd youcancallany
time.GEAnswerCente# serviceis
open 24hoursaday7 daysaweek.
Youcanhavetie securefeelingthat
GEConsumerServicewillstillbe
thereafteryourwarrantyexpires.PurchaseaGEcontractwhileyourwarrantyisstillin effectandyou’Ureceive
asubstantialdiscount.Withamultipleyearcontrac~you’reassuredof future
serviceattoday’sprices.
~lecommunicationDevicefortheDeaf
kdividu~ qualified to service their
own appliances canhaveneeded
partsor accessoriessentdirectlyto
theirhome.
The GEpartssystemprovides accesstoover4’7,000parts..and
allGEGenuine RenewalPartsare
fullywarranted. ‘VISA,MasterCard
and Discovercardsare accepted.
User
maintenance titructions
contained in tis booldet cover proce-
dmes ktended to be performed by
anyuser. Otier servictig generdy
shodd be referred to qutified ser-
vice personnel. Cautionmwt be
exercised, sbce improper servicing
maycame msafe operation.
Uponrequest,GEwillprovideBradle
controlsforavarietyofGEappliances,
anda brochuretoassistin planninga
barrier-fi-eekitchenfor personswith
ltiited rnobili~.Toobtaintheseitems
free
of charge,call800.626.2000.
Consumelxwithimpairedhearing
or speechwho haveaccessto a
TDD
or a conventional teletypewritermay
Cd] 800-TDD-GEAC(800-833.4322)
torequestinformationor service.
———
Page 49

YOURGEGASRANGE
WARRANTY
Saveproofof originalpurchasedatesuchasyour sales sliporcancelledchecktoestablishwarrantyperiod.
WHATIs COVERED
FULLONE-YEARWARRANTY
For one year from date of original
purchase, we will provide,free of
charge, parts and service labor in
your
home to repair or replace
~~y
paft of therangethat fails
becauseof a manufacturingdefect.
This warranty isextended to the originalpurchaserandanysucceeding
owner
for products purchased for
ordinatyhomeuseinthe48mainland
states, Hawaii and Washington,D.C.
in Alaskathe warranty isthe same
exceptthat itis LIMITEDbecause you
must payto ship the product to the
servieeshop or forth-e service
technician’stravelcoststo your home.
All warranty service will be provided
by our Factory Service Centers or by
our authorized Customer Care@
setvicersduringnormalworkinghours.
Should your appliance need service,
duringthe warrantyperiodor beyond,
call 800-GE-CARES (800-432-2737).
WHATISNOTCOVERED
eService trips to your home to
teach you howto usethe product.
ReadyourUseandCarematerial.
If you then have any questions
about operating the product,
please contact your dealer or our
Consumer Affairs office at the
address below,or call, toll free:
GE Answer Cente@
800.626.2000
consumer information service
. Improper installation.
If you have an installation problem,
contact your dealer or installer,
You are responsible for providing
adequateelectrical,gas,exhausting
and other connecting facilities as
describedinthe InstallationInstructions
provided with the product.
eReplacement of house fuses or
resetting of circuit breakers.
4
eFailure of the product if it is used
for other than its intended purpose
or used commercially.
4
eDamage to product caused by
accident, fire, floods or acts of God.
WARRANTORIS /VOTRESPONSIBLE
FORCONSEQUENTIALDAMAGES.
Some states do not allow the exclusion or limitation of incidental or consequential damages, so the above limitation or exclusion
maynotapplytoyou.
This warranty gives you specificlegalrights,andyoumayalsohaveotherrightswhichvaryfromstatetostate.
To knowwhatyourlegalrightsarein yourstate,consultyour localorstateconsumeraffairsofficeoryourstate’sAttorneyGeneral.
Warrantor:GeneralElectricCompany
[ffurtherhelpisneededconcerningthiswarranty,write:
Manager—ConsumerAffairs,GEAppliances,Louisville,KY40225
Thisbook is printed on recycled paper
PartNo.164D2764P013
Pub
tiO. 49-8338
6-92CG
JGBS02EN JGBS06ER JGBSI 9GEP
JGBS02PN JGBS06PR JGSS05GER
JGBS04ER JGBS12GER JGBC15GER
JGBS04PR JGBS15GER JGBC16~JGBS04GER JGBS16GEP JGBC17GktJGBS04GPR JGBS17GER
 Loading...