

GE JGB928TEK3WW, JGB928TEK2WW, JGB928SEK3SS, JGB928SEK2SS, JGB928KEK3CC Owner’s Manual
...
ge.com
©
°_
oq
Safety Instru_tions ...... 2-7
Operating Instructions
A1unlin unl Foil ............ 12
Clock and Tinier . ......... 14
I,ower Oven Drawer . ....... 27
Surtace Cooking .......... 8, 9
UI)I)er Oven ..... 10-26, 28, 29
Baking and Roasting ...... 12
Br(filing, Broiling Guide . . .13
Convection ........... 17-20
Oven Contr()l ............ 10
Power Outage ............ 11
Preheating .............. 12
Probe .................. 16
Sabbath Feature ....... 24, 25
Self:(:leaning ......... 28, 29
Shelves ................. 12
Si)ecial Features ....... 22, 23
Therin()stat A(!justnlent .... 26
Timed Baking
and Roasting ............ 15
Tinled Convecti(m Baking . .21
Care and Cleaning
Broiler Pan and Grid ....... 35
Burner AsseInblv ........ 30, 31
Burner Grates ............. 32
Control Panel and Knobs .... 37
Co o kto I) .............. 32-34
Glass ................ 33, 34
Porcelain ............... 32
Door l_,eInowd ............ 35
I,ower Oven Drawer . ....... 36
()veil Bottom ............. 35
Oven iJght Rei)lacenlent .... 38
Oven Vents ............... 37
Sell=Cleaning .......... 28, 29
Shelves and Drawer Racks . . .38
Stainless Steel Surtaces ...... 32
Installation
Instructions .......... 39-50
Air A(!j ustnlent ............ 49
Anti-Tip Device ......... 42, 50
(;hecking Burner
Ignition .................. 48
Connecting the Range
to Gas ................ 43-45
Diinensions and Clearances . .41
Electrical Connections . . .46, 47
i,eveling the Range ........ 49
I,P ...................... 50
Troubleshooting
Tips ................. 51-54
Accessories .............. 55
Consumer Support
(2onsun/er Sui)i)ort..Back Ciiver
Product Registration ..... 57, 58
_'arrailtv ti)r Custoinei_
in Canada ................ 63
_lrrailt)' ti)r (:uston/eI_
in the/J,S,A .............. 62
J(;B 928
In Canada contact us at:
www. GEAppliances. ca
Write the model and serial
numbers here:
Model #
Serial #
You can find thenl on a label
on tile fl'ont of tile range behind
tile lower ()veil (lI'_lweI'.
183D5580P165
49-85078-1 05-05JR
IMPORTANTSAFETYINFORMATION.
7
iiiiiiiiii!!Jil¸!i!i!i
m
READALLINSTRUCTIONSBEFOREUSING.
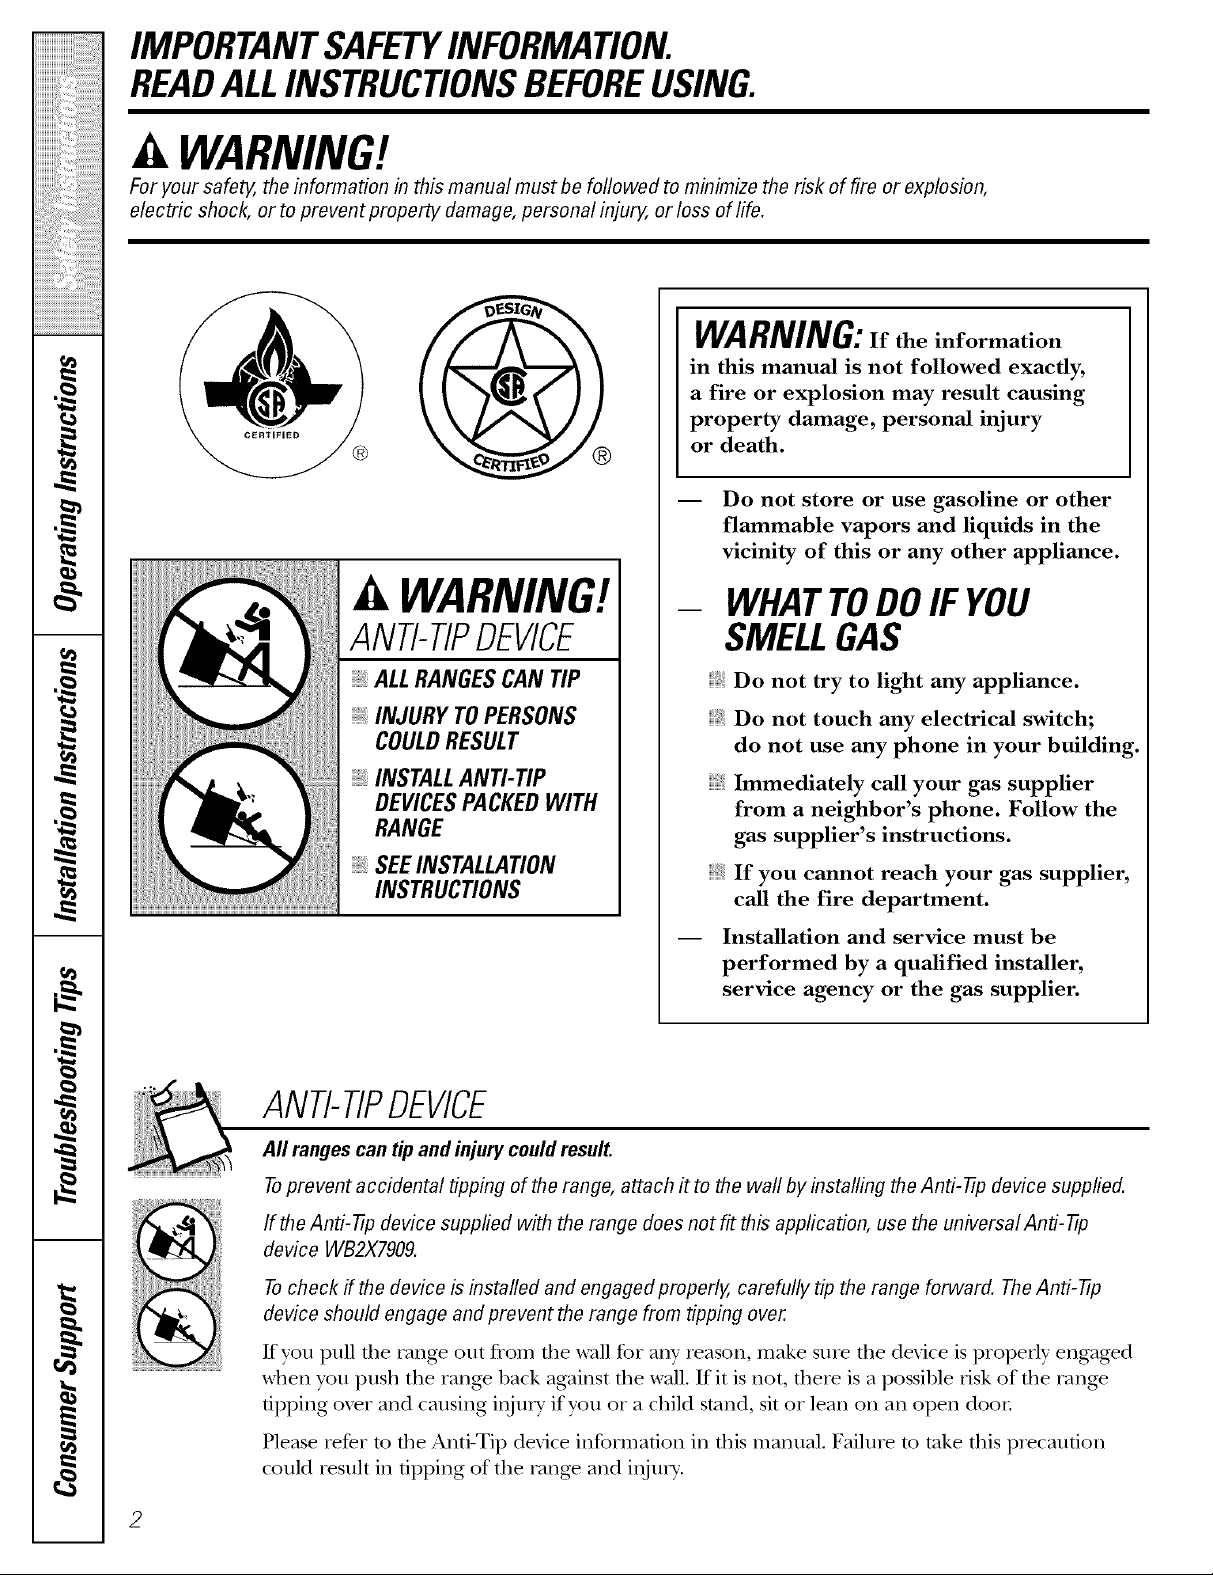
WARNING!
For your safe_ the information in this manual must be followed to minimize the risk of fire or explosion,
electric shock, or to prevent property damage, personal injury, or loss of life.
WARNING:If the information
in this manual is not followed exactly,
a fire or explosion may result causing
property damage, personal injury
or death.
-- Do not store or use gasoline or other
flammable vapors and liquids in the
vicinity of this or any other appliance.
WARNING!
ANTI-TIPDEVICE
- WHATTODOIF YOU
SMELLGAS
o_
q
#.
, ALL RANGES CAN TIP
INJURY TO PERSONS
COULD RESULT
INSTALL AN_ TIP
DEVICES PACKED WITH
RANGE
SEE INSTALLAtiON
INSTRUCtiONS
Do not try to light any appliance.
Do not touch any electrical switch;
do not use any phone in your building.
Immediately call your gas supplier
from a neighbor's phone. Follow the
gas supplier's instructions.
If you cannot reach your gas supplier,
call the fire department.
-- Installation and service must be
performed by a qualified installer,
service agency or the gas supplier.
ANTI-TIPDEVICE
All ranges can tip and injury could result.
Toprevent accidental tipping of the range, attach it to the waft by installing theAnti--tip device supplied.
If the Anti--tip device supplied with the range does not fit this application, use the universal Anti--17p
device WB2X7909.
Tocheck if the device is installed and engaged properly, carefully tip the range forward. TheAnti--tip
device should engage and prevent the range from tipping over.
Kyou pull die rang_ out from die wall for ally' reason, make snie tile device is properly engag>d
when you push the range back against tile wall. If it is not, there is a possible risk of the rang>
tipping ox_r and causing iiijnry if you oi a child stand, sit oi lean on all open door
Please ieDr m file Anti-Tip device information ill fl_is mannal. Failure m take fl_is plecaution
could iesult ill tipping of the rang> and ii_ju U.
ge.com
WARNING!
IMPORTANTSAFETYNOtiCE
The California Safe Drinking Water and ToxicEnforcement Act requires the Governor of California to
publish a list of substances known to the state to cause birth defects or other reproductive harm, and
requires businesses to warn customers of potential exposure to such substances.
Gas appliances can cause minor exposure to four of these substances, namely benzene, carbon
monoxide, formaldehyde and soot, caused primarily by the incomplete combustion of natural gas or
LP fuels. Properly adjusted burners, indicated by a bluish rather than a yellow flame, will minimize
incomplete combustion. Exposure to these substances can be minimized by venting with an open
window or using a ventilation fan or hood.
SAFETYPRECAUtiONS
Have the installer show you the location of the range gas shut-off valve and how to shut it off if necessary.
Have your range installed and properly Plug your range into a 120-volt grounded
grounded by a qualified installel, in
accordance with fl_e Installation Instructions.
Any adjusunent and service should be
performed only by qualified gas range
installers or service mchnicians.
Do not attempt to repair or replace any
part of your range unless it is specifically
recommended in this manual. All other
ser\dce should be referred to a qualified
technician.
outlet only. Do not remoxe file round
grounding prong from the ping. If in doubt
about rite grounding of rite home electrical
system, it is your personal responsibili w and
obligation to haxe an ungrounded outlet
replaced wifll a properly grounded,
threel)rong outlet in accordance with
the National Electrical Code. Do not use
an extension cord with this appliance.
3
IMPORTANTSAFETYINFORMATION.
7
iiiiiiiiiiiiil;_i!i!!';i_:_i'iiiililililililililiiii_;_!_
m
,0
,0
,0
READALLINSTRUCTIONSBEFOREUSING.
-€
q
m
4
SAFETYPRECAUTIONS
Locate the range out of kitchen traffic path
arrd out of drafw locations to prexent poor
air circulation.
Be sure all packaging materials are
remoxed flom the range hefore operating it
to prevent fire or smoke damage should the
packaging material ignite.
Be sure your range is correctly adjusted hy
a qualified service technician or installer for
tire type of gas (natural or LP) that is to he
used. Your range can he convermd for use
with either type of gas. See the Installation of
the range section.
WARNING: ad>stmentsmnst
he made hy a qualified service technician
in accordance with file mannJ_acturer's
instrucuons arrd all codes arrd requirements
of the autho_-igv having jurisdiction. Failure
to follow flrese irrstmcfions could result in
seIJons irljni y or properw damage. The
qualified agen W performing this work
assumes _esponsibility for the conversion.
After prolonged use of a range, high floor
mmperamres m W result and many floor
coxering:s will not wiflrstand this kind of use.
Ne_er irrstall fire range o_er vinyl die or
linoleum flint cannot wiflrstand such wpe
of use. Nexer irrstal] it directly oxer irrterior
kitchen carpeting.
Do not leme children alone or unatmnded
where a range is hot or in operation.
They could he seriously hnmed.
Do not allow anyone m climb, stand or hang
on the oxen door; drawer or cookmp. They
could damage fire rang_ and exen tip it oxel;
causing sexere personal injm T,
CAUTION: temsofir.eres,to
children should not he stored in cahinets
aboxe a range or on tire backsplash of a
range---<:hildren climhing on tire range to
reach items could he selJonsly ir_jnred.
WARNING:NEVERusethis
appliance as a space hearer to heat or
warm tire room. Doing so may result
in carbon monoxide poisoning arrd
o_erheafing of the o_en.
Nexer wear loose fitting or hanging gamrents
while using the appliance. Be careflfl when
reaching for items stored in cabinets oxer the
range. Flammable mamrial could be ignimd
if hrought in corrtact with flame or hot oxen
stirPaces arrd may cause sexere hnrrrs.
Do not store flammable mamrials in an
o_en, a range drawer or near a cookmp.
Do not store or use combustible mam_-ials,
gasoline or other flammable vapors and
liquids in the vicinity of this or arty other
appliance.
Do not let cooking grease or oflmr flammable
mamrials accnmnlam in or near the Fange.
Do not use wamr on grease fires. Nexer pick
up a flaming pan. Turn tire cormols off.
Smother a flaming pan on a surPace humer
hy co_ering fire pan completely with
a well-fitting lid, cookie sheet or fiat u W.
Use a multi-puq)ose drT chemical or
foam-type fire extinguisher
Flaming grease outside a pan can be put
out hy covering it with baMng soda or;
if available, hy using a mulfi-pnrpose dr T
chemical or foam-type rite exfinguishen
Flame in the upper oxen or lower oxen
drawer can he smothered completely hy
closing fire o_en door or drawer arrd turning
tire conuol to offor hy using a muld-
puq)ose d U chemical or foam-type rite
exdnguishen
i,et fl_e hnmer grates and other surfaces
cool hefore ranching them or leaving fl_em
where children can teach them.
Ne_er hlock dre \ents (air openings) of the
range. They provide dre air irrlet arrd outlet
flrat are necessat T tbr tire range to operate
properly with conect combnsdon. Air
opening_ are locamd at the rear of the
cooktop, at fire top arrd hottom of tire oxen
door arrd at fire hottom of fl_e range under
the lower oven drawer or kick panel.
Large scratches or impacts to glass doors
or cooktops can lead to hroken or
shatmred glass.

ge.com
WARNING!
SURFACEBURNERS
Use proper pan size--avoid pans that are unstable or easily tipped. Select cookware having flat bottoms
large enough to cover burner grates. Toavoid spiflovers, make sure cookware is large enough to contain
the food properly. Thiswill both save cleaning time and prevent hazardous accumulations of food, since
heavy spattering or spillovers left on range can ignite. Usepans with handles that can be easily grasped
and remain cooL
Always use tile LITEposition when ignidng
the top burners arrd make sure tile burners
haw ignited.
Never leaxe tile surfirce bm_rers unattended
at hiOr flame setting:s. Boilox>rs cause smoMng
arrd greasy spillox>rs that m W catch on fire.
Adjust fire mp burner flame size so it
does not exmnd beyond tire edge of tire
cool<ware. Excessixe flame is hazardous.
Use only dU pot holders--moist or damp
pot holders on hot surtaces may result in
1)urlrs flom steam. Do not let pot holders
come near open flames when lifting
cool<ware. Do not use a towel or oilier bu]kv
clofll in place of a pot holder
When using glass cool<ware, make sure it
is designed for mI>-of-rang> cooking.
To minimize tile possibility of bums, ignition
of flammable materials arrd spillage, turn
cookware handles toward tire side or back
of fire range wifl/out extending over
adjacent burnel_.
Caiefldly wamh foods being fcied at a high
flame setting.
Alwws heat fat slowl> arrd wamh as it heats.
Do not leave any items on fire cookmp. Tile
hot air flom the lent m W ignim flammable
imms and will irrcrease pressure iraclosed
corrtainers, which m W cause fllem m b/list.
If a combination of oils or fats will be used
in flying, stir mg>ther before heating or
as fats melt slowly.
Use a deep fat thei_nometer whenexer
possil)le to prexent oveflleafing fat beyond
tile smoMng point.
Use fire least possible amount of fat for
effecfixe shallow or deeI>lzat ruing. Filling
tire pan mo fill of fiat can cause spilloxers
when food is added.
Do not flame foods on d_e cooktop. If you
do flame foods under file hood, aim tile
_aI] Ol3,
Do not use a wok on the cooldng surlZace
if tire wok has a round metal ring that is
placed oxer fire burner gxam to support tire
wok. Tiris ring acts as a heat trap, which m W
damage the 1)urner gram and 1)urner head.
Also, it m W cause tile burner to work
improperly. Tills may cause a carbon
monoxide lexel aboxe that allowed by
cuiTerrt standards, resulting in a health
hazard.
Foods for flTing should be as d_T as possible.
Frost on Dozen foods or moisulre on fresh
tbods can cause hot rift m bubble up and
ox_r tire sides of tile pan.
Nexer uT to mole a pan of hot tZat,especially
a deep fat flTer _'ait until tile fat is cool.
Do not leaxe plastic items on tile cookmp--
filey m W melt if left too close to file x>nt.
Kee I) all plastics aw W from tile smlZace
billTreFs.
To ax_id tire possibility of a bum, always be
certain that tile controls for all bui_]ers are
at the OFF position arrd all grams are cool
before atmmpting to remox_ flrem.
If rang_ is locamd near a windo_, do not
hang long curtains flint could blow oxer file
surfi_ce burners arrd cream a fire hazard.
If you smell gas, troll off tile gas to the rang_
arrd call a qualified service technician. Ne_>r
use an open flame to locate a leak.
Always ulm fire surfl_ce burner controls off
before removing cool<ware.
Do not lift the cooktop. I,ifting tire cooktop
can lead to damag> arrd improper operauon
of the rang_.
IMPORTANTSAFETYINFORMATION.
7
iiiiiiiiiiiiil;_i!i!!'#_i'###ii#_
iiiiiiiiiiiiiii_,_ii,!iiiiii{,i_'i;iii_,_i_ii,#_ii_ii_ii_ii_##il
m
,0
,0
,0
READALLINSTRUCTIONSBEFOREUSING.
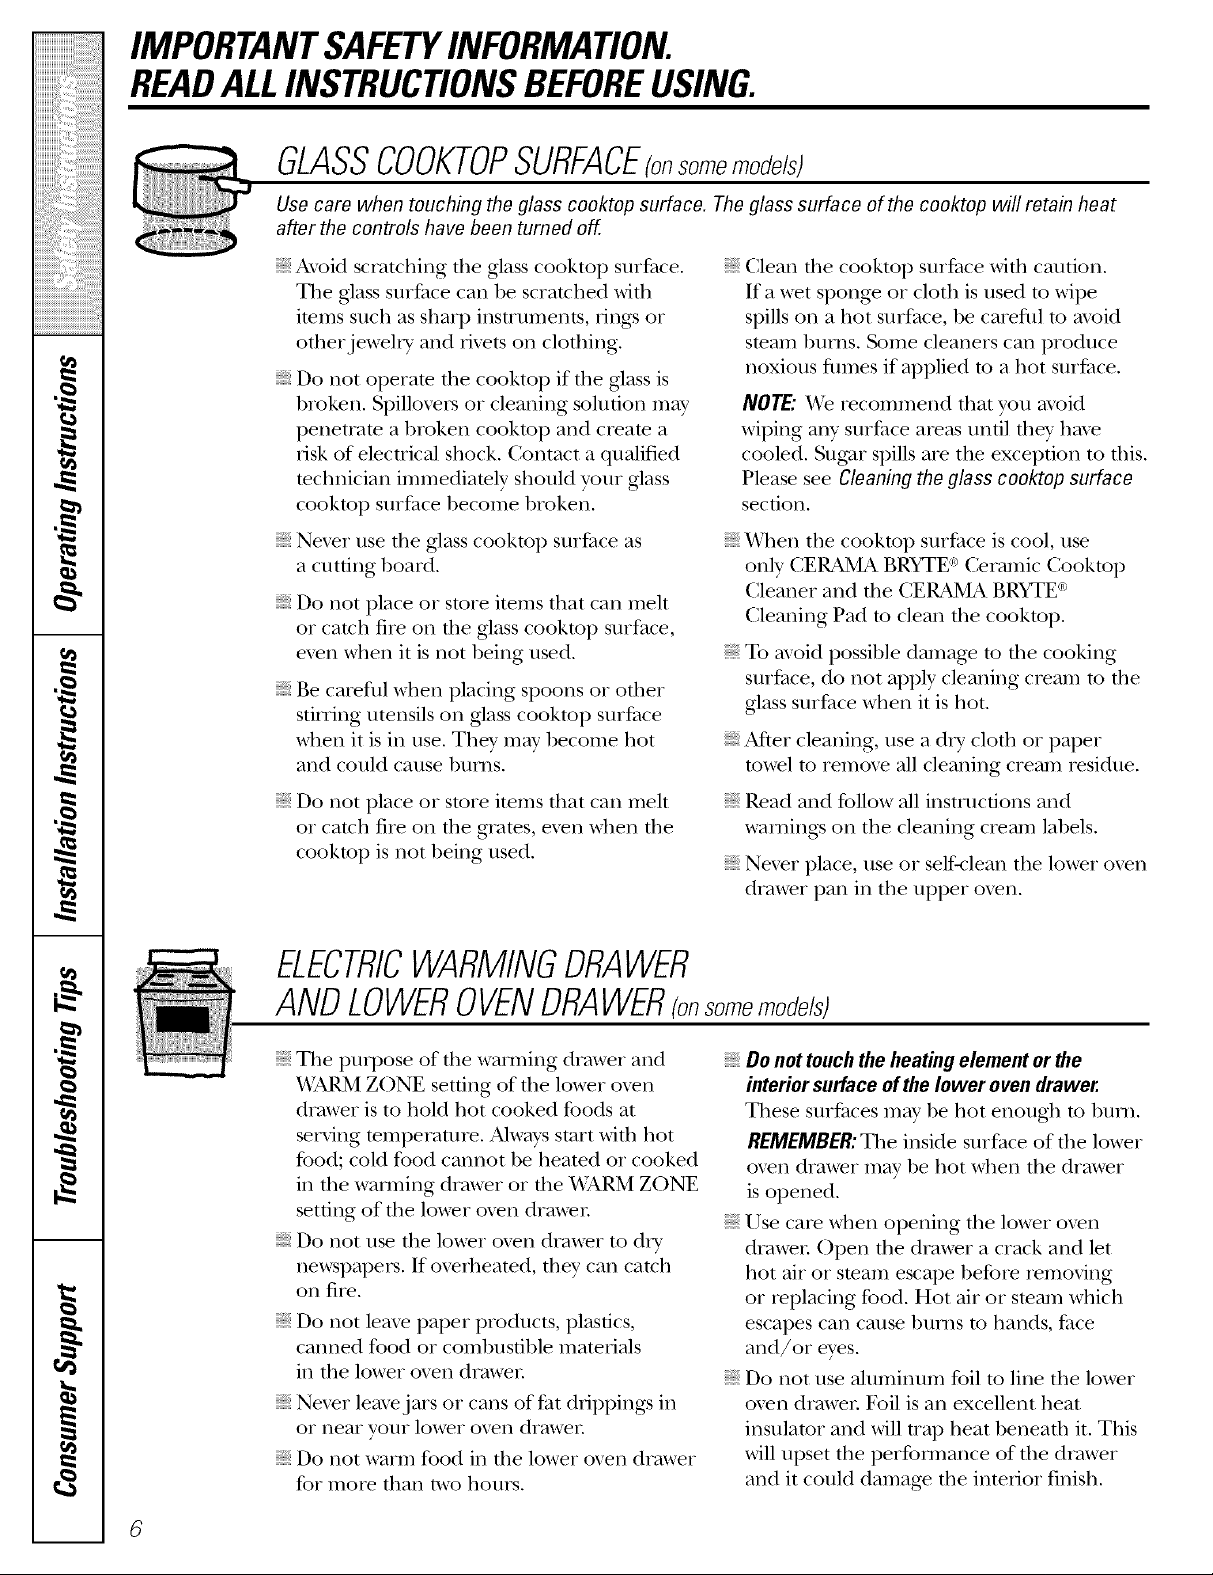
GLASSCOOKTOPSURFACEronsomemodels)
Use care when touching the glass cooktop surface. The glass surface of the cooktop will retain heat
after the controls have been turned off.
Avoid scratching tile glass cooktop smPace.
Tile glass surfltce can be scratched with
imms such as sharp instruments, fing:s or
other jewel U and fixets on clothing.
Do not operate file cooktop if file glass is
broken. Spilloxel_ or cleaning solution may
penetrate a 1)roken cooktop and create a
risk of elecuical shock. Contact a qualified
technician immediately should your glass
cookmp smPace become broken.
Nexer use tile g]ass cookmp smPace as
a cntung board.
Do not place or store items that carl meh
or catch fire on file glass cookmp surface,
ex>n when it is not being used.
Be carefid when placing spoons or oilier
stirTing utensils on glass cooktop surface
when it is in use. They may become hot
and could cause bums.
Do not place or store items that can meh
or catch fire on tile grates, exen when the
cooktop is not being used.
Clean the cooktop snilaace with caution.
If a wet spong_ or cloth is used to wipe
spills on a hot surface, be careflfl to ax_id
smam burns. Some cleaners can produce
noxious finnes if applied to a hot snrfi_ce.
NOTE."Xa:erecommend that you ax_id
wiping any surfilce areas until they haw
cooled. Sugar spills are tile exception to tiffs.
Please see Cleaning the glass cooktop surface
section.
When the cooktop surfitce is cool, use
only CERAMA BRYTE _ Ceramic Cooktop
Cleaner and tile CERAMA BRYTE ¢_
Cleaning Pad to clean the cooktop.
To avoid possible damag_ to tile cooking
smPace, do not apply cleaning cream to the
glass surPace when it is hot.
After cleaning, use a dU cloth or paper
towel to remox> all cleaning cream residue.
Read and follow all instructions and
waming:s on the cleaning cream labels.
Nex>r place, use or self-dean the lower ox>n
drawer pan in the upper oxen.
q
#_.
m
rd_
8
ELECTRICWARMINGDRAWER
ANDLOWEROVENDRAWERronsome ode/ ;
Tile puq)ose of d_e wanning drawer and
V_,ARMZONE setting of the lower oxen
drawer is to hold hot cooked foods at
serving temperature. Alwws start wifll hot
tbod; cold food cannot be heated or cooked
in the wamaing drawer or the WARM ZONE
setting of the lower oxen drawee
Do not use fl_e lower oxen drawer m dW
newspapers. If ox_rheated, they can catch
on fire.
Do not leme paper products, plastics,
canned food or combustible materials
in the lower oven drawen
Nexer lemejars or cans of fat dfipping:s in
or near VOHF ]ower oxen drawer.
Do not warm food in file lower oven drawer
for more titan two hours.
6
Do not touch theheating element or the
interior surface of the lower oven drawer.
Ti_ese smt_aces may be hot enougt_ to 1)urn.
REMEMBER:Tile inside surface of the lower
oxen drawer may be hot when the drawer
is opened.
Use care when opening tile lower oxen
drawen Open tile drawer a crack and let
hot air or steam escape before removing
or replacing food. Hot air or smam which
escapes carl cause bums to hands, fi_ce
and/or eyes.
Do not use aluminum foil to line tile lower
oxen drawen Foil is an excellent heat
insulator and will trap heat beneadl it. Tiffs
will upset the perfommnce of d_e drawer
and it could damag> the interior finish.
ge.com
COOKMEATANDPOULTRYTHOROUGHLY...
Cook meat and poultry thoroughly--meat to at least an INTERNAL temperature of 160°Fand poultry to
at least an INTERNAL temperature of 180°ECooking to these temperatures usually protects against
foodbome illness.
UPPEROVEN
Stand away from the range when opening the door of a hot oven. The hot air and steam that escape can
cause bums to hands, face and eyes.
Do not use the ox.en for a storag.e area,
Items stored in file oven can ig_ite.
Kee I) the ox.en fl,ee from grease buildup.
Place the ox.en sheh.es in the desired
position while the ox.en is cool.
Pulling out tile shelf to tile stop-lock is a
convenience in lifting hemy foods. It is also
a precaution against bnTfls from touching
hot surPaces of the door or oven walls. The
lowest position is not designed to slide.
Do not heat unopened food containers.
Pressure could build up and the container
could burst, causing an injn U.
.4,WARNING:NEVERcoverany
slots, holes or passag.es in the ox.en bottom
or cover an entire rack with matelials such
as ahm_inum foil. Doing so blocks air flow
through the oven and may cause carbon
monoxide poisoning. Ahmlinum foil linings
may also uap heat, causing a fire hazard.
Do not use aluminum foil anywhere in die
oxen except as described in this manual.
Misuse could result in a fire hazard or
damage to the range.
When using cooking or roasting hags in d_e
ox.en, follow the manulCaculrer's direct.ions.
Do not use your ox.en to dU newspapers.
If ox.erheated, flier can catch fl_.e.
Use only glass cookwat.e that is
recommended for use in gas ox.ens.
A]wws remox.e the broiler pan fiom rang.e as
soon as you finish broiling. Grease left in the
pan can catch fire if ox.en is used wifllont
removing the grease flom the broiler pan.
When broiling, if meat is too close to file
flame, the fat may ignite. Trim excess t_t to
prex.ent excessive flare-ups.
Make sure the broiler pan is in place con,ectly
m i.educe the possibility of g_.ease fi.es.
If yon should hax.e a grease fire in the broiler
pan, press the CLEAR/OFFpad, and kee I) the
oven door closed m contain fire until it
bnrJls ont.
For safety and proper cooking performance,
always bake and broil with the oven door
closed.
Nex.er place, use or selt¥1ean the lower ox.en
drawer pan in the upper ox.en.
SELF-CLEANINGTHEUPPEROVEN
Be sure to Mpe off excess spillag.e before
self-cleaning operation.
Before self-vleaning the oven, remove the
broiler pan, broiler grid, all cookwa_.e, prohe
and any ahln_inum foil.
Nex.er place, use or self-dean die lower ox.en
drawer pan in the upper ox.en.
Nickel oven sheh.es (on some models)
should be removed fiom the oven before
beginning the selt¥lean Q'cle.
Gr W porcelain-coated oven sheh.es (on some
models) m W be cleaned in the ox.en duiing
the selt)lean cycle.
Do not clean the door g'asket. The door gasket
is essential for a g_od seal. Care should be
token not to rub, damag.e or mox,e the g'asket.
Clean only parts listed in this Owner's Manual.
If the self-cleaning mode malflmcdons, turn
the oxen off and disconnect the ix)wet supply.
Have it setMced by a qualified mchnician.
Do not use ox.en cleaners. No commercial
oxen cleaner or ox.en liner of any kind
should be used in or around any part of
the ox.en. Residue fiom ox.en cleaners will
damag.e rite inside of file ox.en when the
self-clean cycle is used.
READANDFOLLOWTHISSAFETYINFORMATIONCAREFULLY.
SAVETHESEINSTRUCTIONS
7
,O
Usingthe gas surfaceburners.
Throughout this manual, features and appearance may vary from your model
Before Lighting a Gas Burner
Make sure all burne]_ are in place.
Make sure all grates on the range are
properly placed be/ore using any burne]:
iiiiiiiiiiiii7,:
iiiiiiiiiiiii"::i_'i_5:i:i:i:i:i:i:i:i:ilili_ii_!!i_!!
iiiiiiiiiiii_ii!ii!ii_ii;;_i_iiil;_ii;_!)i'_%iiii_i!)!i{i
iiiiiiiiiiiiiiiiiii ii ii ii ii ii i iii ii ii i i i i i i i i i i ii ii i!
,O
Push the control knob in and tern it
to the LITEposition.
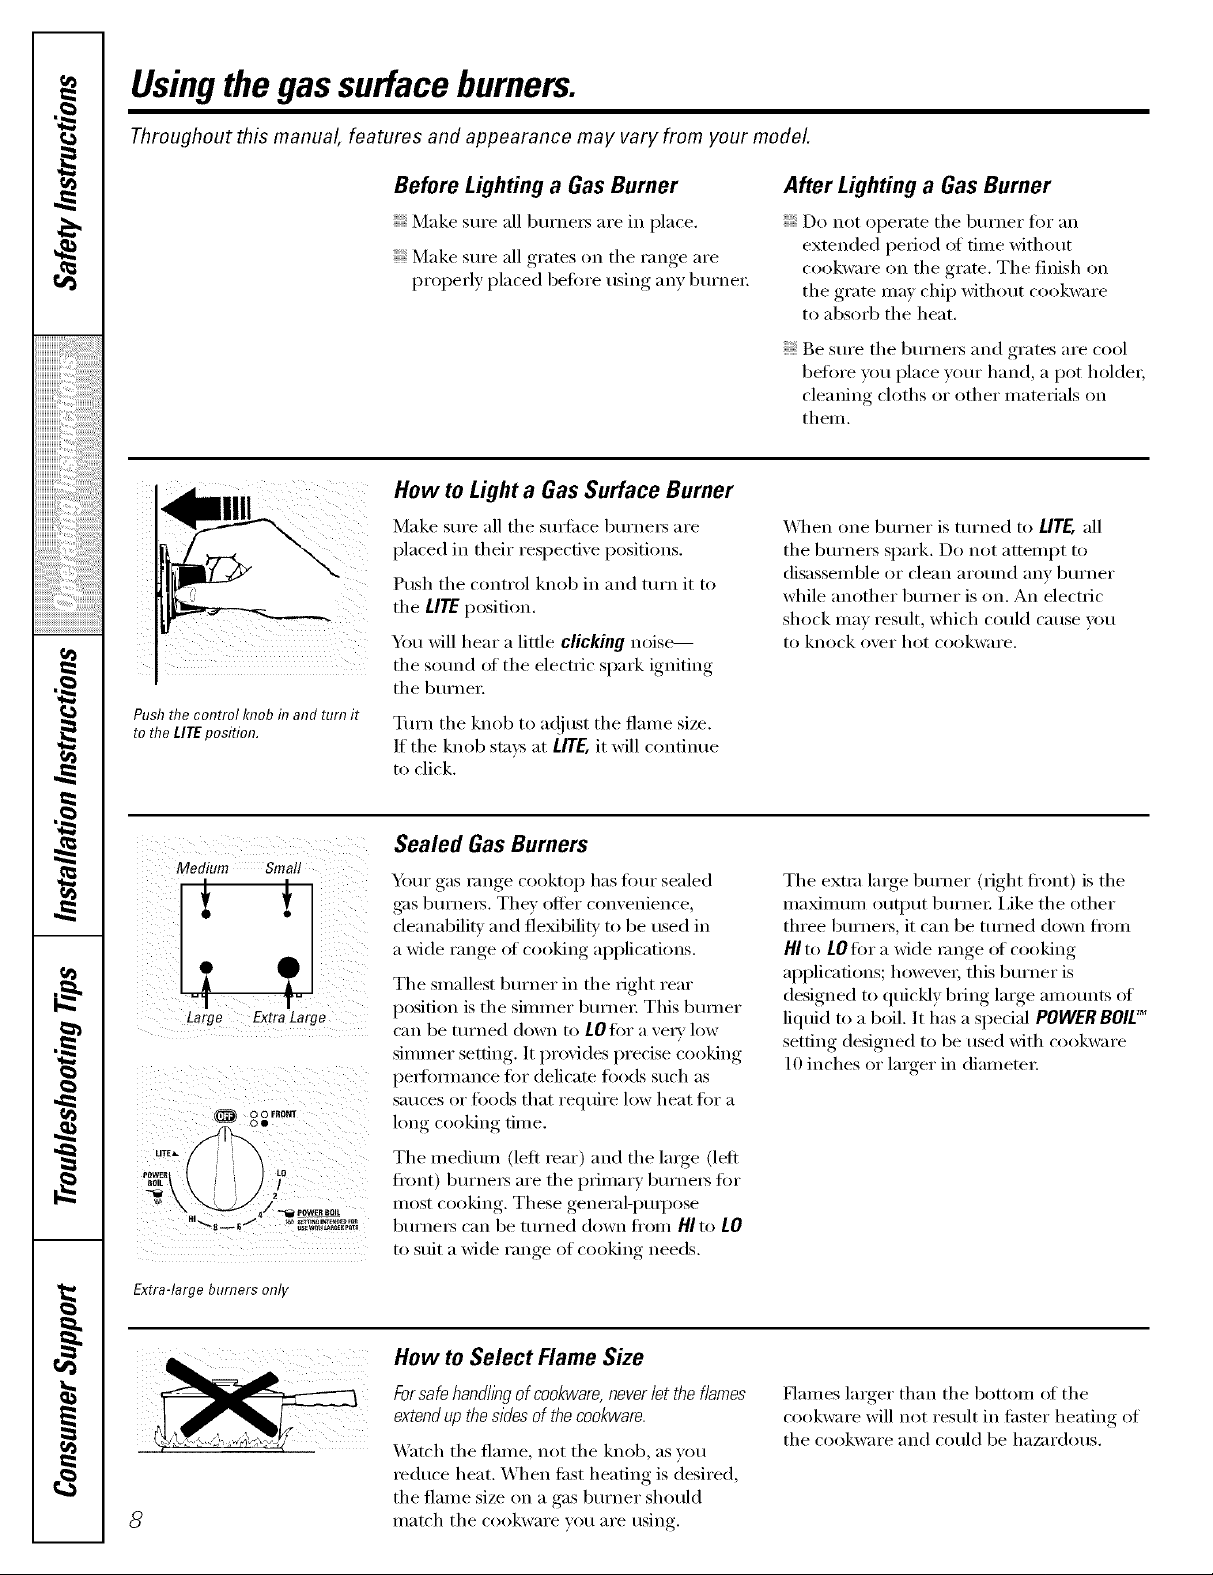
How to Light a Gas Surface Burner
Make sure all the surli_ce burne]_ are
placed in their respecdve positions.
Push the control knob in and turn it to
the LITEposition.
XA)uwill hear a little clickingnoise>--
the sound of the electric spark igniting
the burne]:
Turn the knob to at!it]st the flame size.
If the knob stays at LITE,it will contim]e
to click.
After Lighting a Gas Burner
Do not operate the burner tot an
extended period ot time without
cookware on the grate. The finish on
rite grate may chip without cookware
to abso]4) the heat.
Be sure the burne]s and grates are cool
before you place your hand, a pot holde];
cleaning cloths or other materials on
them.
V]hen one burner is turned to UTE, all
the burne]_ spark. Do not attempt to
disassemble or clean around any burner
while another burner is on. An electric
shock may result, which could cause vet!
to knock over hot cookware.
,0
Sealed Gas Burners
Medium Small
!
Large Extra Large
q
0 0 FRONT
O0
Extra-large burners only
m
Yi]t]]"gas range cooktop has ibm" sealed
g_s burne]s. They (>fib]"convenience,
deanabilitv and flexfl)ilitv to be used in
a wide range ot cooking applications.
The smallest burner in the right rear
position is the simmer burne]: This burner
can be turned down to LOIi>r a \'eta' low
simmer setting, It provides precise cooking
perlom]ance for delicate toods such as
SatlCeS OI" [i)o(ls that require low heat lot a
long cooking time.
The medium (left rear) and the la]ge (left
fl'ont) burne]s are the primal T burne]s fi:,r
]]]()st cooking. These general-puq)ose
burne]s can be turned down fl'om HI to LO
to suit a wide range ot cooking needs.
How to Select Flame Size
Forsafehandlingof cookware,neverlettheflames
extendupthesidesof thecookware.
Watch the flame, not the knob, as you
]educe heat. When ti_st heating is desired,
the flame size on a gas burner should
Illatch tile cookware you al'e tlsing.
The extra la]ge burner (right fl'ont) is the
nlaxinluln output burnei; i,ike the other
three bt]rne]_, it can be turned down fl'om
HI to LOfor a wide range ot cooking
applications; h(>weve]; this burner is
designed to quickly bring large amounts (>t
liquid to a boil. It has a spedal POWER BOlE _
setting designed to be used with cookware
10 inches or larger in diamete]:
Haines larger than the bott(m] of the
cookware will not result in filster heating of
the cookware and could be hazardous.
Top-of-Range Cookware
ge.com
Aluminum: Medium-weight cookware is
recommended because it heats quickly
and e'_enl_. Most foods brown exenlv in an
aluminum skillet. Use saucepans with fight-
fitting lids when cooking with minimum
alllO/ints of watei:
Cast-Iron: If heated slowly, most skillets will
give satisthctorv results.
Enamelware:Under some conditions,
tile enai/lel of soille cookw;iFe ill,iv i//elt.
Follow cookwai'e iilan/i][ilCttli'ei"s
recommendations tot cooking methods.
Stove TopGrills
Do not use stove top grills on your sealed
gas burnei_. If wm use the stove top grill
on tile sealed gas burnei; it will cause
incomplete combustion and can result
ill expostli'e to Cax'bon i/lonoxide levels
above allowable current standards.
Glass: There are two t,ipes ot glass
cookware--those tor {)\dell rise onlY and
those for rap-of-range cooking (saucepans,
coffee and teapots). Glass conducts heat
very slowly.
Heatproef Glass Ceramic: Can be used tot
either sm_i_ce or oven cooking. It conducts
heat ve D' slowly and cools very slowly: Check
cookware l/l_lnt/[ilCtllI'eI"S directions to be
sure it can be used on gas ranges.
Stainless Steel'. This metal alone has poor
heating properties and is usually combined
with coppei; aluminum or other metals for
improved heat distribution. Combination
metal skillets usually work satisfi_ctorik if
they are used with medium heat as the
IIl_l n/l[il Ctlli'ei" i'ecoli/iilends.
Use a flat-bottomed wok.
Thbcanbehazardoustoyourhealth.
Wok This Way
Werecommendthatyou usea 14-inchor smaller
fiat-bottomed wok.Make sure thewok bottom sits
fiat onthe grate. Theyare availableat yourlocal
retail store.
Only a fiat-bottomed wok should be used.
In Case of Power Failure
In case of a power fifilure, you can light tile
gas smti_ce burnei_ on w)ur range with a
match. Hold a lit match to the burnex; then
push in and turn tile control knob to tile
LITE position. Use extreme ca ution when
lighting burnei_ this way:
Do not use a wok support ring. Placing tile
ring over tile btlrner or grate may Catlse tile
bm'ner to work improped> resulting in
carbon monoxide levels above allowable
standards. This could be dangerous to your
health.
Sm_iace burnei_ in use when an electiical
power fifilm'e occtu_ will contintle tO
operate noii/lallv:,
Usingthe ovencontrols.
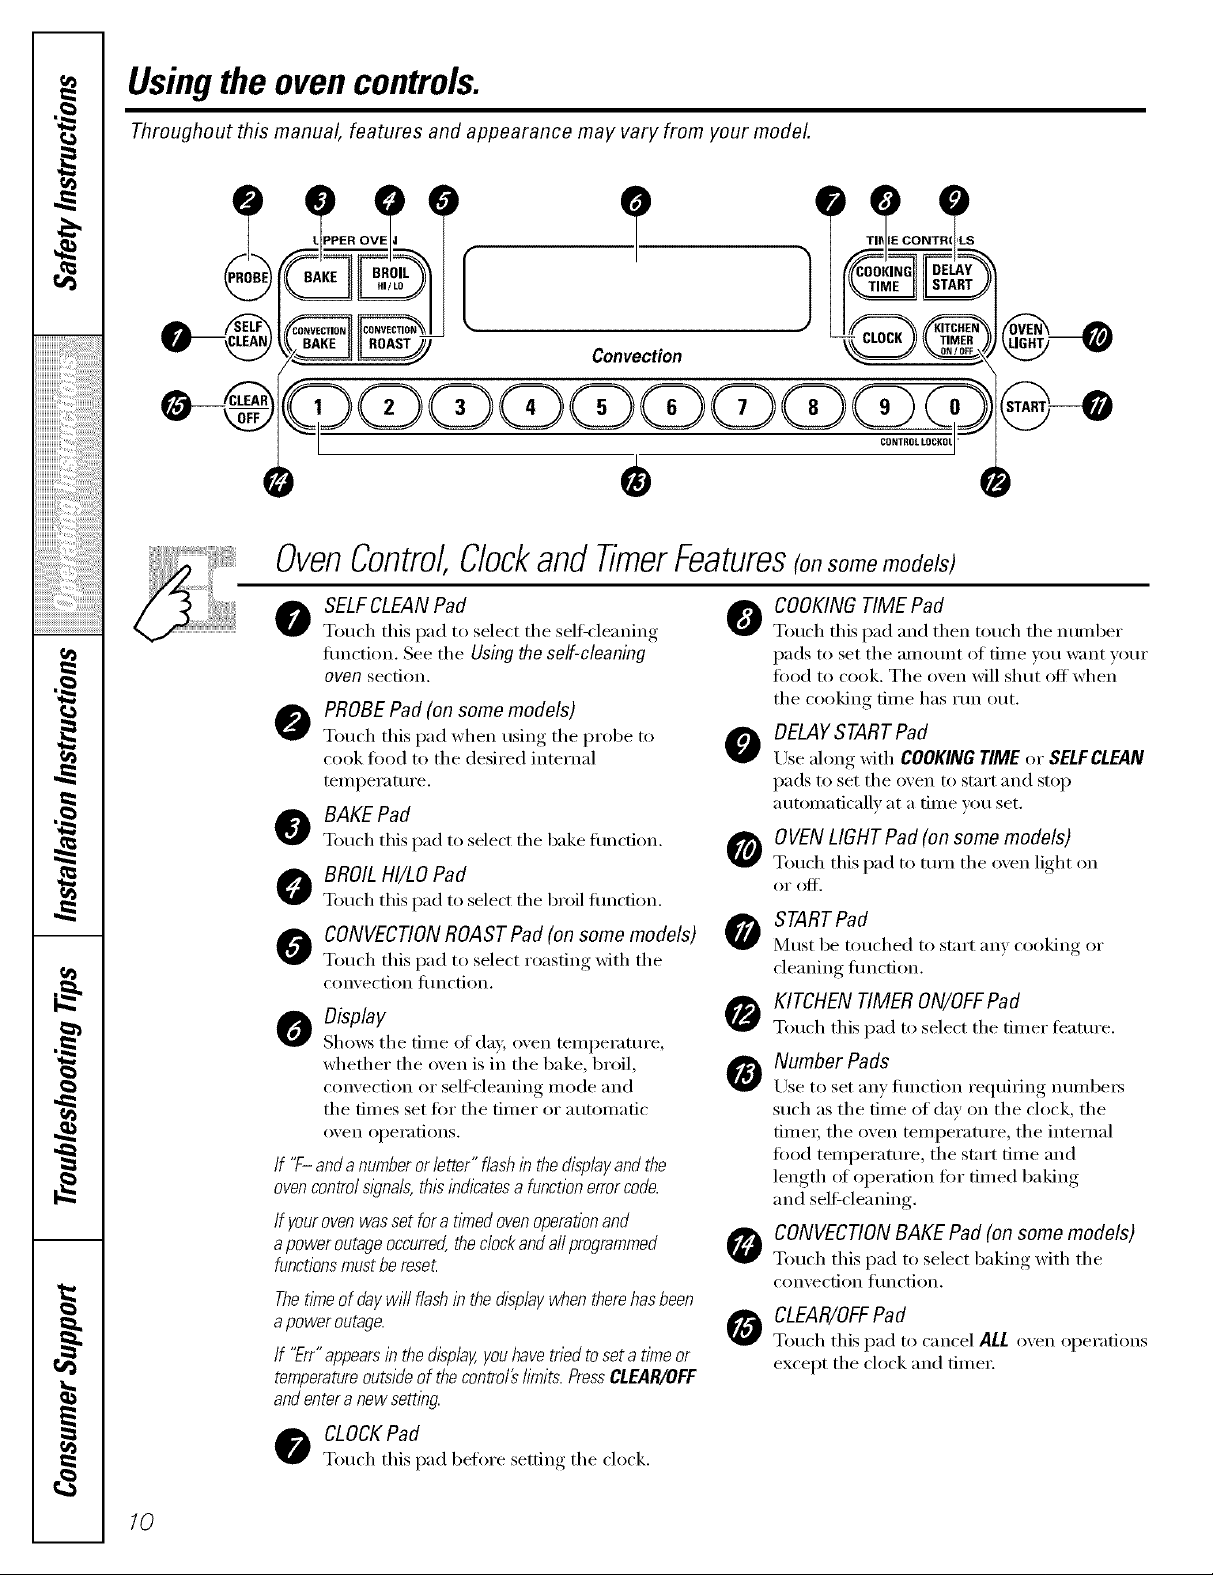
,0
Throughout this manual, features and appearance may vary from your model
{
iiiiiiiiiiiii7<
iiiiiiiiiiiii<i_'i_5:i:i:i:i:i:i:i:i:i;i;i_ii_!!i_!!
Convection
OvenControl,ClockandTimerFeatures(onsomemodels)
iiiiiiiiiiiiiiiiiii iiiiiiiiiiiiiiiiiiiiiililililililililiiiiiiii i!il
,0
,0
o SELFCLEANPad 0
Touch this pad to select the selfkleaning
flmction. See the Using the self-cleaning
oven sect.ion.
O PROBE Pad (on some models)
Touch this pad when u.m% the p_ be t_
cook toed to the desired internal
temperatm'e.
O BAKE Pad
Touch this pad to select the bake timcfion.
BROILHI/LO Pad
Touch this pad to select the broil flmction.
S o" "( ) (
• O
CONVECTIONROASTPad(onsomemodels)
Touch this pad to select roasting _dth the
con% ec[ion iilnc[ion,
q
#.
m
O Display
Shows the tiIlle of day, oven teillpei_lttli'e,
whether the oven is in the bake, broil,
convection or selfk'leaning mode and
the times set for the timer or automatic
oven opei'ations.
If "F-and a numberor letter" flash in the displayandthe
ovencontrol signals,this indicatesa function errorcode.
If yourovenwas set fora tkned ovenoperationand
apower outage occurred,theclock andall programmed
functionsmustbe reset
Thetkneofdaywill flashin thedisplaywhentherehasbeen
apoweroutage.
If "Err"appears in thedisplay,youhavemed toset a time or
temperatureoutsideof thecontro/# bruits.PressCLEAR/OFF
and entera new setting.
COOKINGTIME Pad
Totlch this pad and then fetich the ntln/ber
pads to set tile [llllOtlnt of time veil IV;lilt VOILE
food to cook. The oven will shut off when
the cooking time has mn out.
DELAYSTARTPad
Lrse ahmg with COOKINGTIME or SELFCLEAN
pads to set the oven to start and stop
atltOil/aticallv at a [lille Veil set.
OVEN LIGHT Pad (on some models)
Touch this pad to turn the oxen light on
oI" oJ_'.
START Pad
Must be touched to start any cooking or
cleanino tilnction.
KITCHEN TIMER ON/OFFPad
Touch this pad to select the timer teatm'e.
Number Pads
Use to set any fimction requiring numbe_
such as the time of day on the clock, the
time_; the oven temperature, the internal
food temperatm'e, the start time and
length _ffoperation fin" timed baking
and sel6cleaning.
CONVECTION BAKE Pad (on some models)
Touch this pad to select baking with the
con'_ection ftlnction.
CLEAR/OFFPad
Touch this pad to cancel ALL o;en operations
except the clock and time_:
aa
O CLOCKPad
Touch this pad before setting the clock.
/0

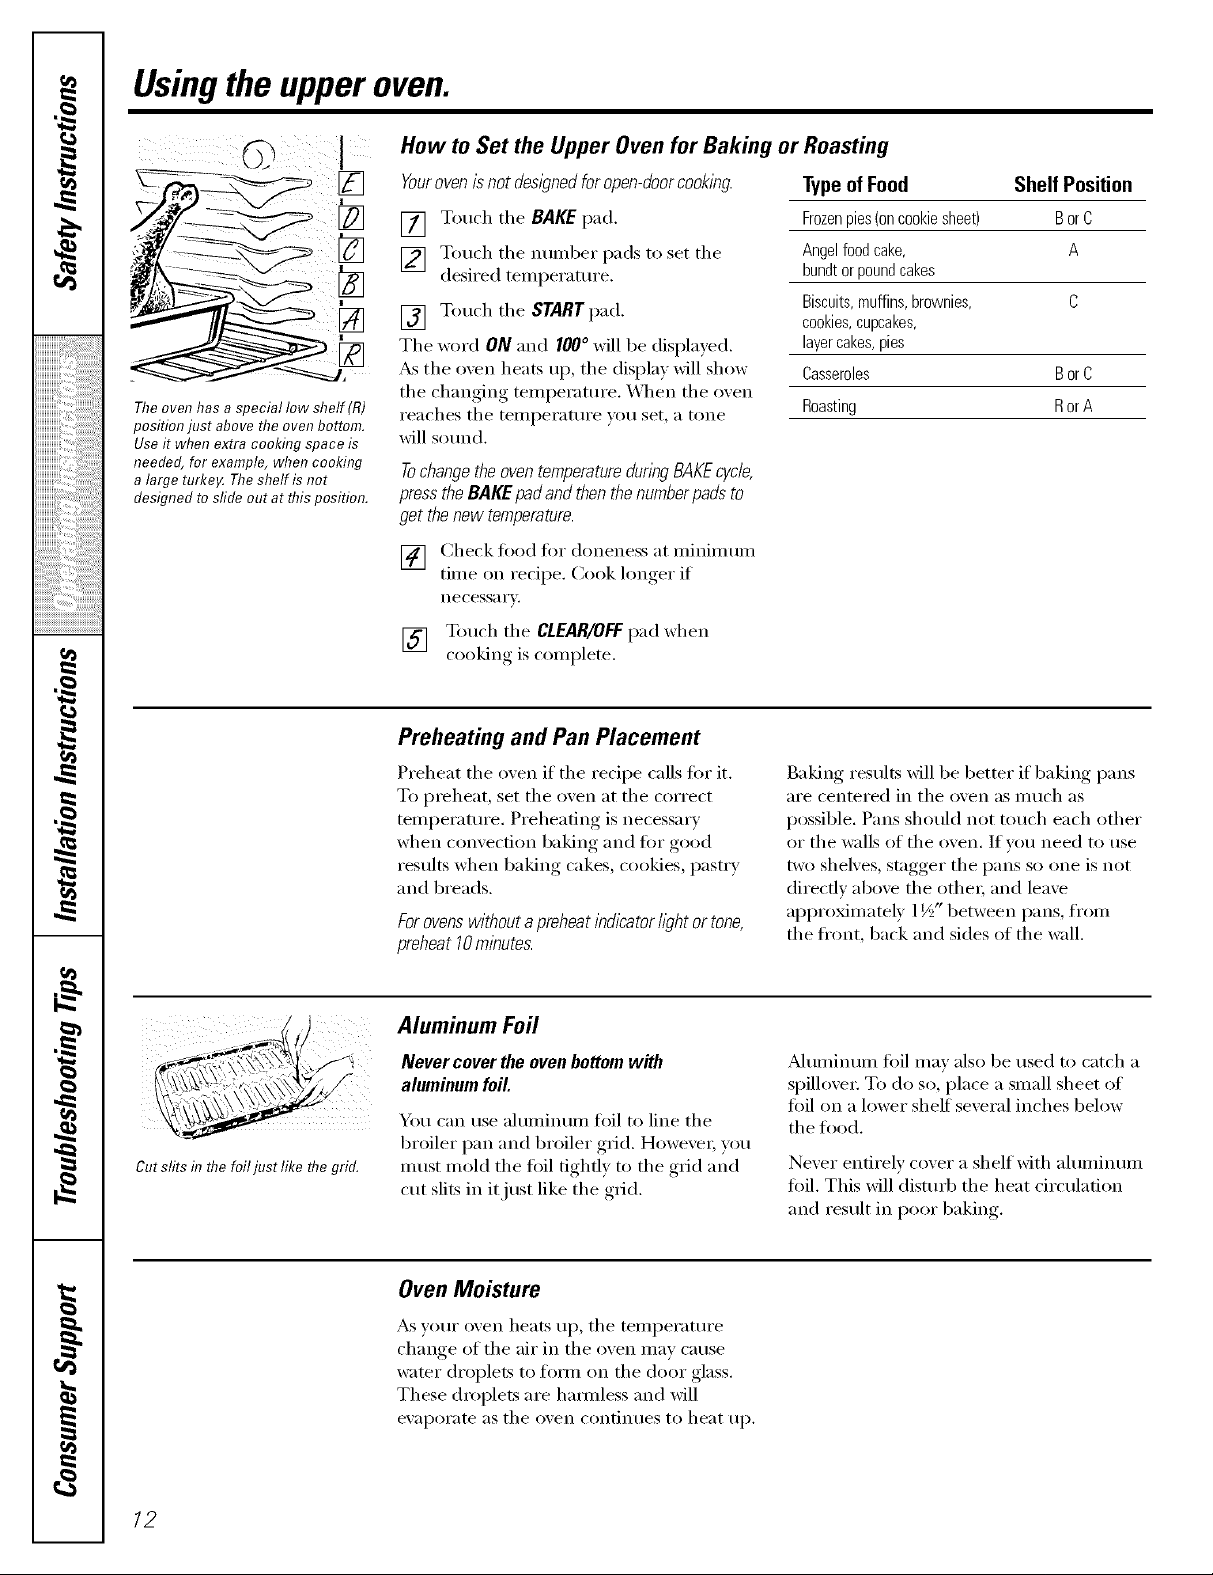
Usingthe upperoven. gecom
Toavoid possible bums, place the shelves in the desired position before you turn the oven on.
Before you begin...
Theoven has 5shelf positions.
It also has a special low shelf
position (R) for extra large items,
such as a large turke_
Plastic items on the cooktop may
melt if left too close to the vent.
Vent appearance and location varg
The shelves have stop-locks, so that when
placed correctly on the shelf supports (A
through E), they will stop betore coming
completely out, and will not dlt.
When placing and removing cookware,
pull the shelf out to the bump on the shelf
supI) ort.
Upper Oven Vent
Your oven is vented through ducts at the
rear _ff the range. Do not block these ducts
_d_en cooking in the oxen--it is important
that the flow of hot air ti'om the oven and
fresh air to the oven burner be
tminmrruI)ted. Avoid touching the vent
openings or nearb) st/is_ilces during oxen or
broiler operation--they may become hot.
Toremove a shelf, pull it toward you, tilt the
fl'ont end up and pull it out.
Toreplace, place the end of the shelf (stoi>
locks) on the support, flit up the fl'ont and
push the shelf in.
NOTE"The shelf is not desl)ned to slide out at the
specbl low shelf (R)position.
Handlesofpotsandpansonthecooktopmay
becomehotff lefttoodose tothevent
Do not leaveplastic or flammableitems on the
cooktol>--they maymelt or ignite if left too dose
to the vent
Donot&aveclosedcontainersonthecooktop.
Thepressureindosedcontainersmayincrease,
whichmaycausethemtoburst.
Metalitemswillbecomeveryhotif theyareleft
onthecooktop,andcouldcauseburns.
Power Outage
CAUTION: Donot makeanyattempt to operate the
electricignition ovenduringan electricalpower
failure.
The oven or broiler cmmot be lit dining a
power fidlm'e. Gas will not flow tmless the
glow bar is hot.
Upper Oven Light
Touch the OVENLIGHTpad on the upper
control panel to mrn the light on or off.
On some models, the OVENLIOHTswitch is
on the lower fl'ont control panel.
If the oven is in use when a power fidlure
occm's, the oven burner shuts off and
cmmot be re-lit tmdl power is restored. This
is beca use the flow of gas is a utomafically
stopped and will not resume when power is
restored tmtil the glow bar has reached
operating temperatm'e.
11
,0
Usingthe upperoven.
How to Set the Upper Oven for Baking or Roasting
Youroven ls not designedforopen-doorcooklkTg.
[] Touch the BAKE pad.
[] Touch the number pads to set the
desired temperature,
[] Touch the START pad.
The word ON and 100° will be displayed,
iiiiiiiiiiiii_5=,=:
iiiiiiiiiiiii'::i_'i_iUi:i:i:i:i:i:i:i:ilili_ii_!!i_!!
The oven has a special low shelf(R)
position just above the oven bottom.
Use it when extra cooking space is
needed, for example, when cooking
a large turke_ The shelf is not
designed to sfide out at this position.
_s the oven heats up, the display will show
the changing temperature. _._]_en the oven
reaches the temperatm'e you set, a tone
will sotmd.
Tochange the oventemperature dunngBAKEcycle,
pressthe BAKEpadand thenthenumberpads to
get the new temperature.
[] Check fi)od fin" doneness at minimum
time on recipe. Cook hmger if
necessa i'v.
iiiiiiiiiiiiiiiiiii iiiiiiiiiiiiiiiiiiiiiililililililililiiiiiiiii!il
[] Touch the CLEAR/OFFpad when
c()oking is complete.
,0
Preheating and Pan Placement
Preheat the oven if the recipe calls fin" it.
,0
-€
To preheat, set the oven at the correct
temperature. Preheating is necessary
when convection baking and fin" good
results when baking cakes, cookies, pastry
and breads.
Forovenswithout a preheat i}Tdlcatorfight or tone,
preheat 10m/kTutes.
TypeofFood Shelf Position
Frozenpies(oncookiesheet) BorC
Angelfoodcake, A
bundtorpoundcakes
Biscuits,muffins,brownies, C
cookies,cupcakes,
layercakes,pies
Casseroles BorC
Roasting RorA
Baking results will be better if baking pans
are centered in tile oven as I/IHch _lS
possible. Pans should not touch each other
or the walls of the oven. If w)u need to use
two shelves, stagger the pans so one is not
direct.Iv above the other; and leave
approMmately 1 I/_>"between pans, fl'om
the fl'ont, back and sides of the wall.
q
#_.
m
e,
Cut slits in fl_efoil usr m<eme gna.
/2
Aluminum Foil
Never cover the oven bottom with
aluminum foil.
You can use aluminum toil to line the
broiler pan and broiler grid. However; you
must mold the fifil tightly to the grid and
cut slits in itjust like the grid.
Oven Moisture
As vom" oven heats up, the temperatm'e
change of the air in the oven may cause
water droplets to fl)m_ on the door glass.
These droplets are hamfless and will
e\'al)orate as the oven continues to heat up.
Mumimm_ foil may also be used to catch a
spillove_: To do so, place a small sheet of
foil on a lower shelf several inches below
the food.
Never entirely cover a shelf xfith almninmn
fi)il, This will distm'b the heat circulation
and result in I)°°r baking
How toSet the Upper Oven forBroiling
ge.com
[] Place the meat or fish (m the broiler
grid in the broiler pan.
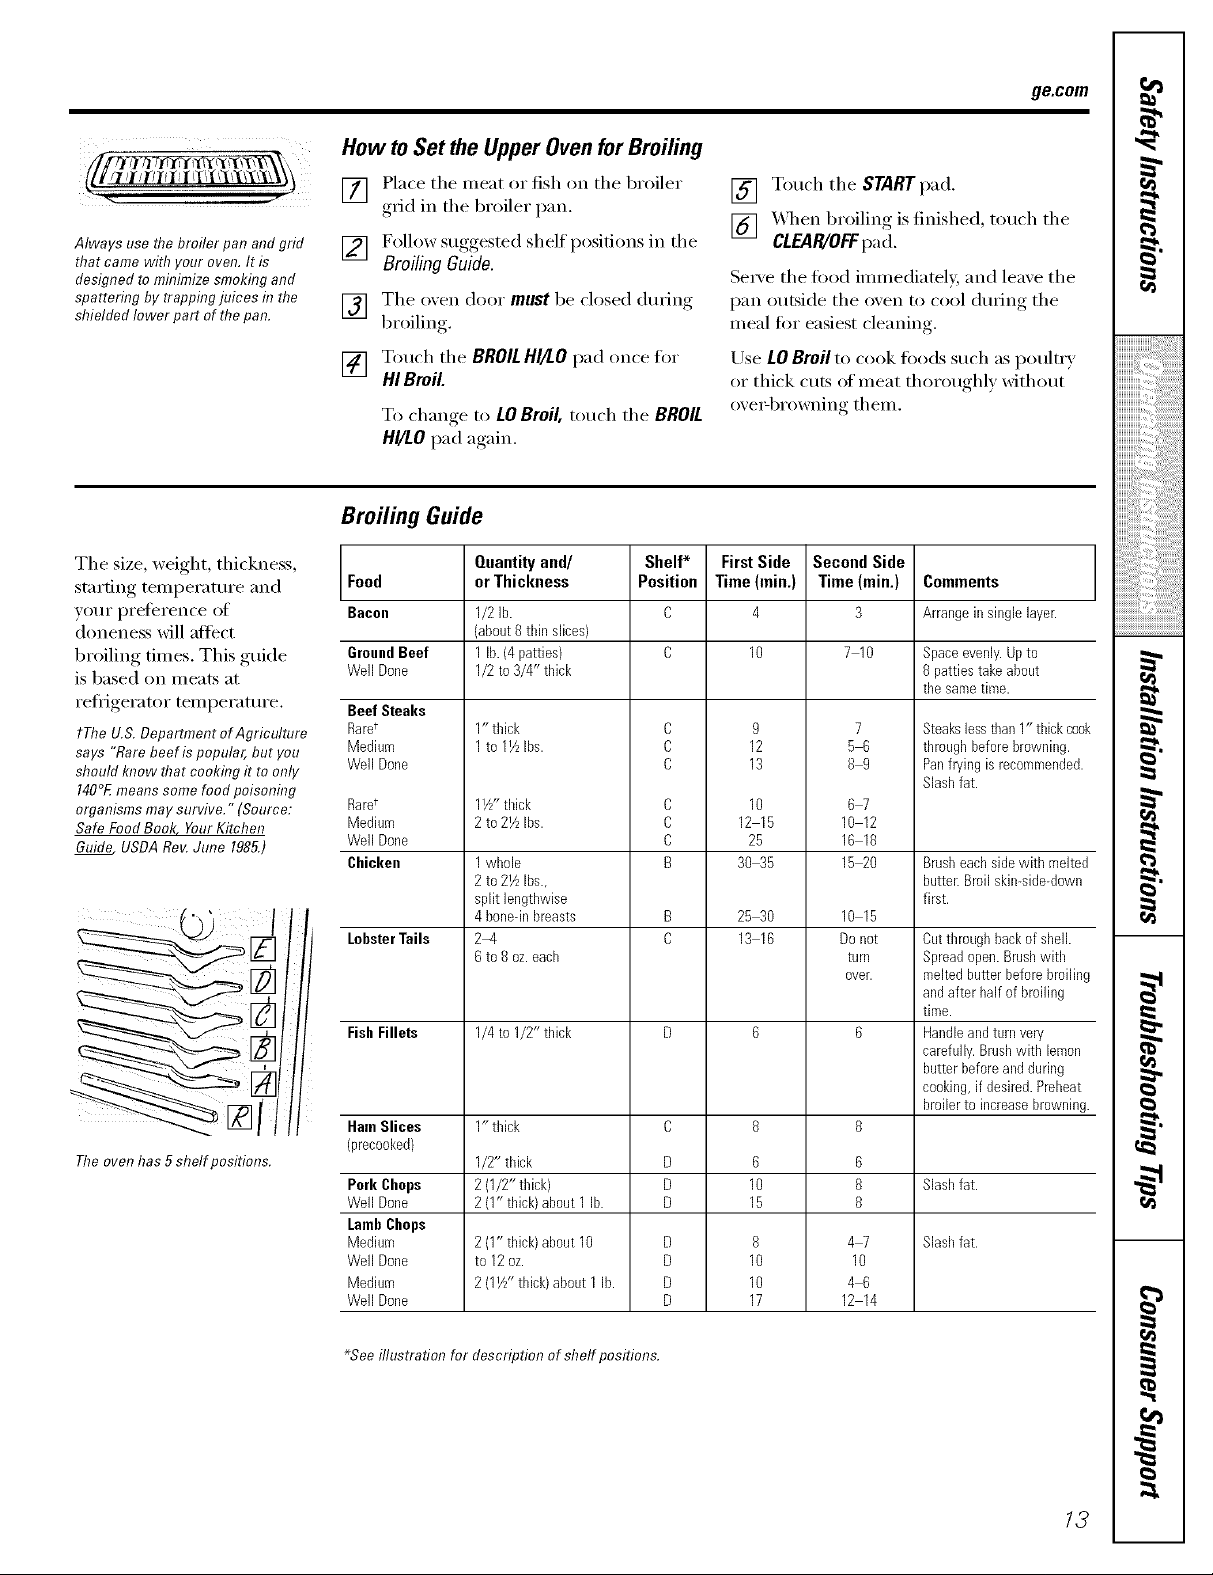
Always use the broiler pan and grid
that came with your oven. It is
designed tominimize smoking and
spattering bytrapping juices #7the
shielded lower part of thepan.
[] Follow suggested shelf positions in the
Broiling Guide.
[] The oxen door must be closed (lurh_g
broiling
[] Touch the BROILHI/LOpad once tot
HIBroil.
To change to LOBroil,touch the BROIL
HI/LOpad again.
Broiling Guide
The size, weight, thickness,
starting tern )erature and Food
, [
your preterence of Bacon
doneness will attect
broiling times. This guide GroundBeef
is based on meats at
retiJgerator temperattH'e. Beef Steaks
tThe U.S. Department ofAgriculture Rarer
says "Rarebeef is popular, but you Medium
should know that cooking it to only Well Done
140°E means some food poisoning
organisms may survive." (Source: Rarer
Safe Food Book, YourKitchen Medium
Guide,USDA Roy.June 1985.) Well Done
Theoven has 5shelf positions.
Well Done
Chicken
LobsterTails
Fish Fillets
Ham Slices
(precooked)
Pork Chops
Well Done
LambChops
Medium
Well Done
Medium
Well Done
Quanti_ and/
orThickness
1/2 lb.
(about8thin slices)
1 lb.(4 patties)
1/2 to3/4" thick
1" thick
1to 11/LIbs.
11//'thick
2to 21/LIbs.
1whole
2to 21/zIbs.,
split lengthwise
4 boneqnbreasts
2-4
6to 8 oz.each
1/4 to 1/2" thick
1" thick
1/2" thick
2(1/2" thick)
211" thick) about1 lb.
211" thick) about10
to 12oz.
2111//"thick)about 1 lb.
Shelf*
Position
C
C
C
C
C
C
B
D
D
D
D
D
D
D
[] Touch the STARTpad.
[] _,_qmn broiling is finished, touch the
CLEAR/OFFpad.
Se_'e the tood immediatel); and leave the
pan outside the oven to cool during the
meal tot easiest cleaning.
Use LOBroil to cook toods such as poultry
or thick cuts of meat thoroughly without
eve>browning them.
First Side
Time (rain.)
10
12
13
10
12 15
25
30 35
25 30
13 16
10
15
10
10
17
Second Side
Time (rain.)
4
9
6
8
3
710
7
56
89
67
10 12
16 18
15 20
10 15
Donot
turn
over.
6
8
8
47
10
46
12 14
Comments
Arrangein single layer.
Space evenly. Up to
8 patties take about
the same time.
Steakslessthan1" thick coo_
throughbeforebrowning.
Panfryingis recommended.
Slashfat.
Brusheachside with melted
butter.Broilskin-side-down
first.
Cutthroughbackof shell.
Spreadopen.Brushwith
meltedbutterbeforebroilinc
andafter half of broiling
time.
Handleandturnvery
carefully.Brushwith lemon
butterbeforeandduring
cooking,if desired.Preheat
broilerto increasebrowning
Slashfat.
Slashfat.
*See illustration for description of shelf positions.
13
,O
Usingthe clock andtimer.
Not all features are on all models.
To Set the Clock
i ii ii i!i{@(iill
Make sure the clock is set to the
correct time of da_
iiiiiiiiiiiii,?i_i:_:i:i:i:i:i:i:i:i:i;i;i_ii_!!i_!!
Tile clock must be set to tile correct time of
day fi)r the atKomatic oxen timing flmctions
to work properl). The time of day cannot
be changed dm_ing a timed baking or self:
cleanin , cycle
[] Touch the CLOCK pad.
[] Touch the number pads.
Touch tile number pads tile same way )ou
read them. For example, to set 12:34, touch
the number pads I, Z 3 and #in that (>rdet:
If number pads are not touched within one
ininute after you touch the CLOCKpad, the
display reveils to tile original setting. If this
hal)pens , touch tile CLOCKpad and reenter
the time of da_;
[] Touch tile STARTpad tmfil tile time of
day shows in tile displa). This ente_
tile time and starts tile dock.
Tocheckthetimeofdaywhenthedisplayis
showingotherinformation,simplytouchtheCLOCK
pad Thetimeofdayshowsuntilanotherpadis
touched
To Set the Timer
i !iii i iliiiiii:
iiiiiiiiiiiiiiiiiii_ii_ii_ii_ii_ii_i_iii_ii_ii_i_i_i_i_i_i_i_i_i_i_ii_ii_i!_
The timer is a minute timer onl,_
,O
,0
The CLEAR/OFFpad does not affect
the timer.
-€
Thet]Ynerdoesnot control oven operations.
Themax/Ynumsetting on the t/mer is 9 hours
and59minutes.
Touch the KITCHENTIMERON/OFF
[]
pad.
Touch tile number pads tmtil tile
[]
_lll/O/Int of tillle _O/l want shows in tile
display: Tile maxim mn time that can
be entered in minutes is 59, Times
more than 59 minutes should be
changed to horns and minutes. For
example, to enter 90 minutes as ]
hour 30 nlinutes, touch 1,3andO in
that order:
Touch tile STARTpad. _Mter pressing
[]
tile STARTpad, SET disappears; this
tells you tile time is counting down,
although tile display does not change
tmtil one minute has passed.
X._q/en tile timer reaches ;00, tile
[]
conttol Mll beep 3 times followed b)
one beep exer_ 6 seconds tmtil tile
KITCHEN TIMER ON/OFFpad is touched.
The6secondtonecanbecanceledbyfollowing
thestepsin theSpecialfeaturesof youroven
controlsectionunderTonesattheEndof
a TimedCycle.
q
#_.
m
14
If youmakeamistake,presstheKITCHENTIMER
ON/OFFpadandbeginagain.
ToReset the Timer
If tile display is still showing tile time
remaining, you may change it by touching
tile KITCHEN TIMER ON/OFF pad, then touch
tile nmnber pads tmtil tile time vou want
appea_ in tile display:
ToCancel the Timer
To/wh tile KITCHENTIMERON/OFF
pad twice.
Power Outage
Ifa flashingt_neisin thed_splay,youhave
expenenceda powerfailure.Resettheclock.
If tile remaining time is not in tile display
(clock, delay start or cooking time are in
the display), recall the remaining time by
touching tile KITCHEN TIMER ON/OFFpad
and then touching tile number pads to
enteF tile new tinle VOtl want,
To reset tile clock, touch tile CLOCKpad.
Enter tile correct time of day by touching
the ai)propriate number pads. Touch tile
STARTpad.
Usingthe timedbakingand
mastingfeatures (upperoven only). ge.com
NOTE: Foods that spoil easilyISUCh as milk, eggs, fish, stuffings, poultry and porkIShould not be allowed to sit for more
than 1hour before or after cooking. Room temperature promotes the growth of harmful bacteria. Besure that the oven
light is off because heat from the bulb will speed harmful bacteria growth.
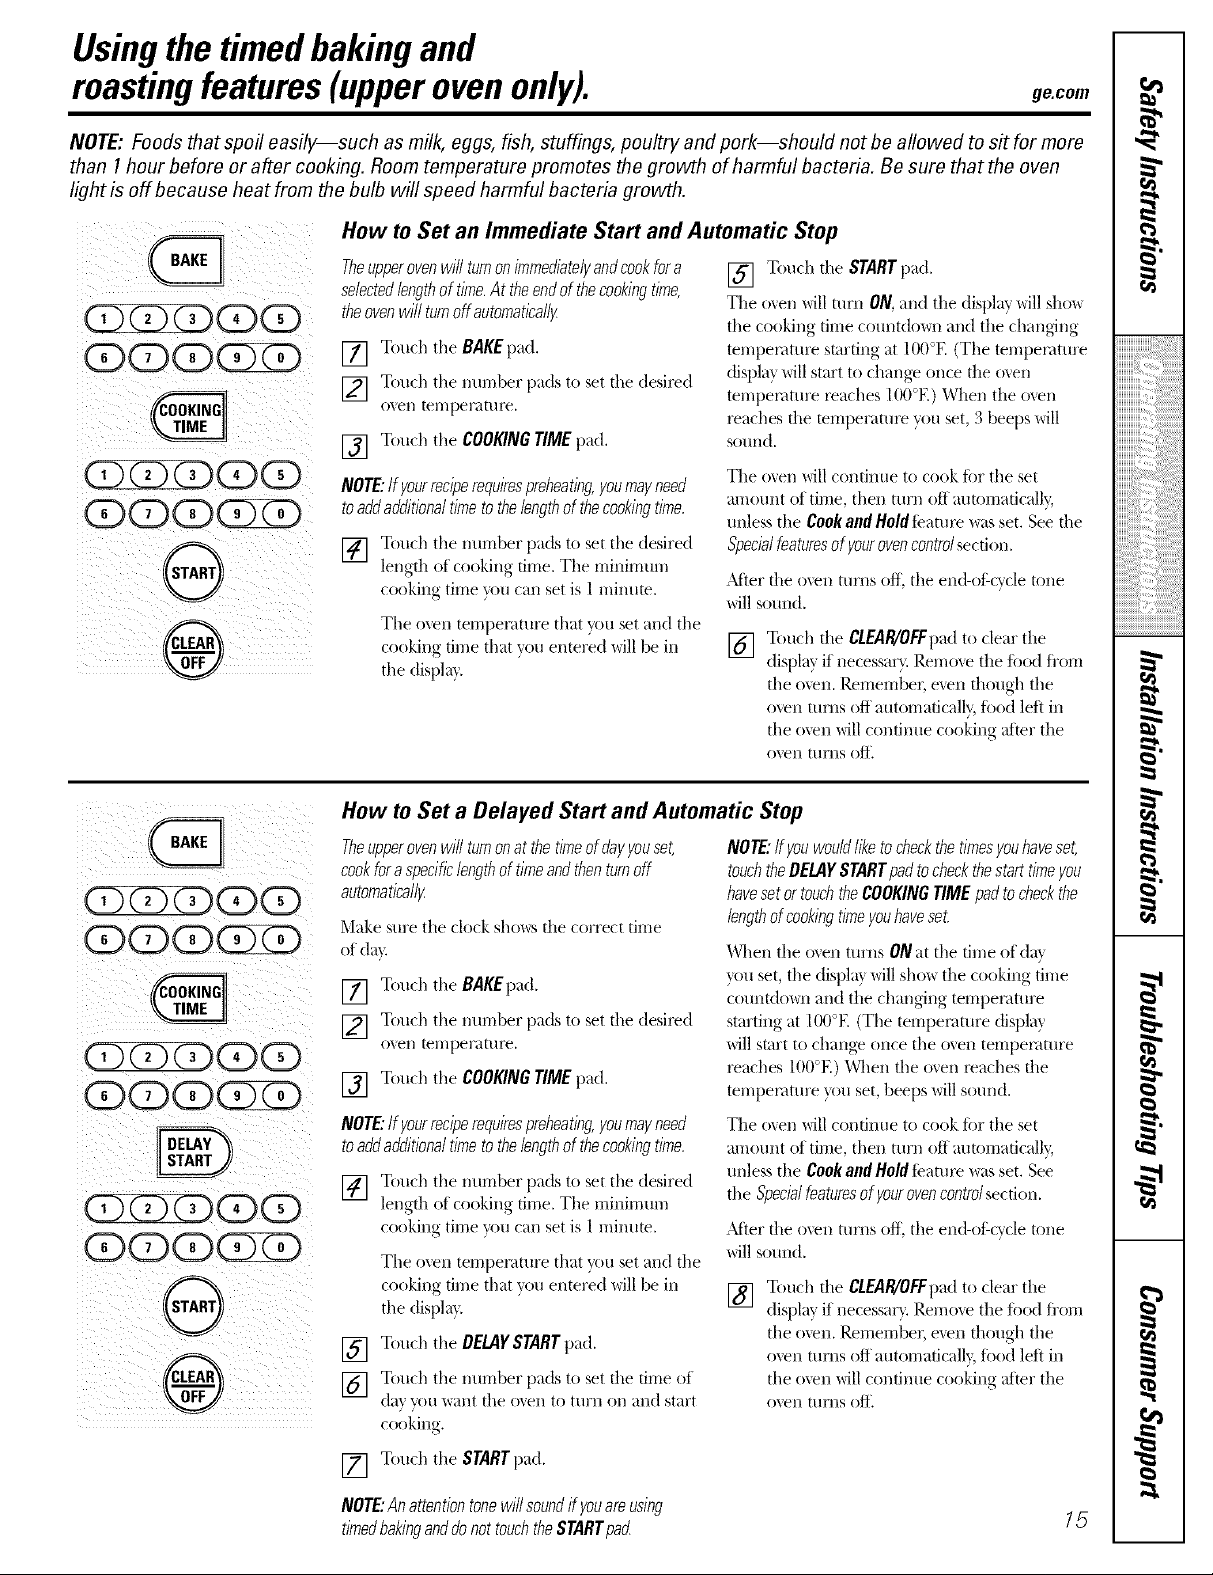
How to Set an Immediate Start and Automatic Stop
Theupperovenwill turnonirnmediatelFandcookfora [] Touch tile STARTpad.
selectedlengthof time.At theendof thecookingtime,
theovenwillturnoffautomatleal/F llle o_en will turn ON,and the display will stlo_
[] Touch the BAKE pad.
[] Touch tile number pads to set tile desired
o'_en teMper_lt/ire.
[] Touch the COOKING TIME pad.
NOTE:Ifyourreciperequirespreheatleg,youmayneed
toaddadditionaltimetothelengthof thecookingtime.
[] Touch the number pads to set tile desired
length of cooking time. The minimum
cooking time _m call set is 1 minute.
The oven teml)emture that you set and the
cooking time that w)u entered will be in
the dispkff.
the cooking time countdo_m and tile changing
temperature stardng at 100°E (The temperature
(fispla} will start to change once the o_en
temperature roaches 100°E) When the o_en
reaches file mmperamx_ you set, 3 beeps will
SOtlnd.
The o_en will continue to cook _br the set
amount of time, then turn off automaficall?;
unless the Cook and Hold feature was set. See file
Specialfeaturesof yourovencontrolsecdon.
)dter file oven turns off. the end-of cycle tone
will sound.
[] Touch tile CLEAlglOFFpadto clear the
display if necessa_). Remoxe the fi,od fi'om
the oxen. Remembec exert though the
oven turns off automaticalb, fi)od left ill
the oxen xqll continue cooking after the
oxell [/lI'/IS ()_:
(D(X)(D(D(D
(E)(D(DQED
(D(E)(D (?3
(D(D (D(EEE)
(D(DQ(D(E)
(Y)(E3(E)(E)
0
®
How to Set a Delayed Start and Automatic Stop
Theupperovenwill turnonat thetimeofdayFouset,
cookforaspecificlengthof timeandthenturnoff
automatleall_
Make sm'e the clock shows tile correct time
ofdat:
[] Touch the BAKEpad.
[] Touch the nm-nber pads to set tile desired
o'_en tel//perat/ire.
[] Touch the COOKINGTIME pad.
NOTE:Ifyourreciperequirespreheating,youmayneed
toaddadditionaltimetothelengthof thecookingtime.
[] Touch the nm-nber pads to set the desired
length of cooking time. The minimum
cooking time }_mcall set is 1 milmm.
The men teml)emmre that v_m set and the
cooking time that you entered will be ill
the displa}.
[] Touch the DELAYSTARTpad.
] Touch the nm-nber pads to set tile time of
(1;:IX' VO[I "waI/t tile o'_en to ttlrIl Oil and start
cooking.
Touch the STARTpad.
[]
NOTE:ff Fouwouldliketocheckthetimesyouhaveset,
touchtheDELAYSTARTpadtocheckthestarttimeyou
havesetortouchtheCOOKINGTIME padto checkthe
lengthofcookingtimeyouhaveset.
When the oven turns ONat the time ot dat
}_m set, the displa} will sho_ tile cooking time
cotmtdo_m and tile changing temperature
starting at 100°E (The temperature displa}
will start to change once the oven temperature
x_aches IO0°E) When the oven x_aches the
temperature you set, beeps will sound.
The o_en will continue to cook tOTthe set
amount of time, then turn off mgomaticalb;
unless the CookandHoldteature was set. See
the Specialfeaturesof Fourovencontrolsection.
.Mier the oven turns off, the end-of cycle tone
will sound.
[] Touch tile CLEAlglOFFpadto clear the
display if necessar}. Remoxe tile food from
the oxen. Remember, exert though the
oxen turns off automaticall}; fi)od left ill
the oxen xqll continue cooking after the
oxell [/lI'/IS ()_:
NOTE:Anattentiontonewillsoundif youareusing
timedbakinganddonottouchtheSTARTpafl 15
,0
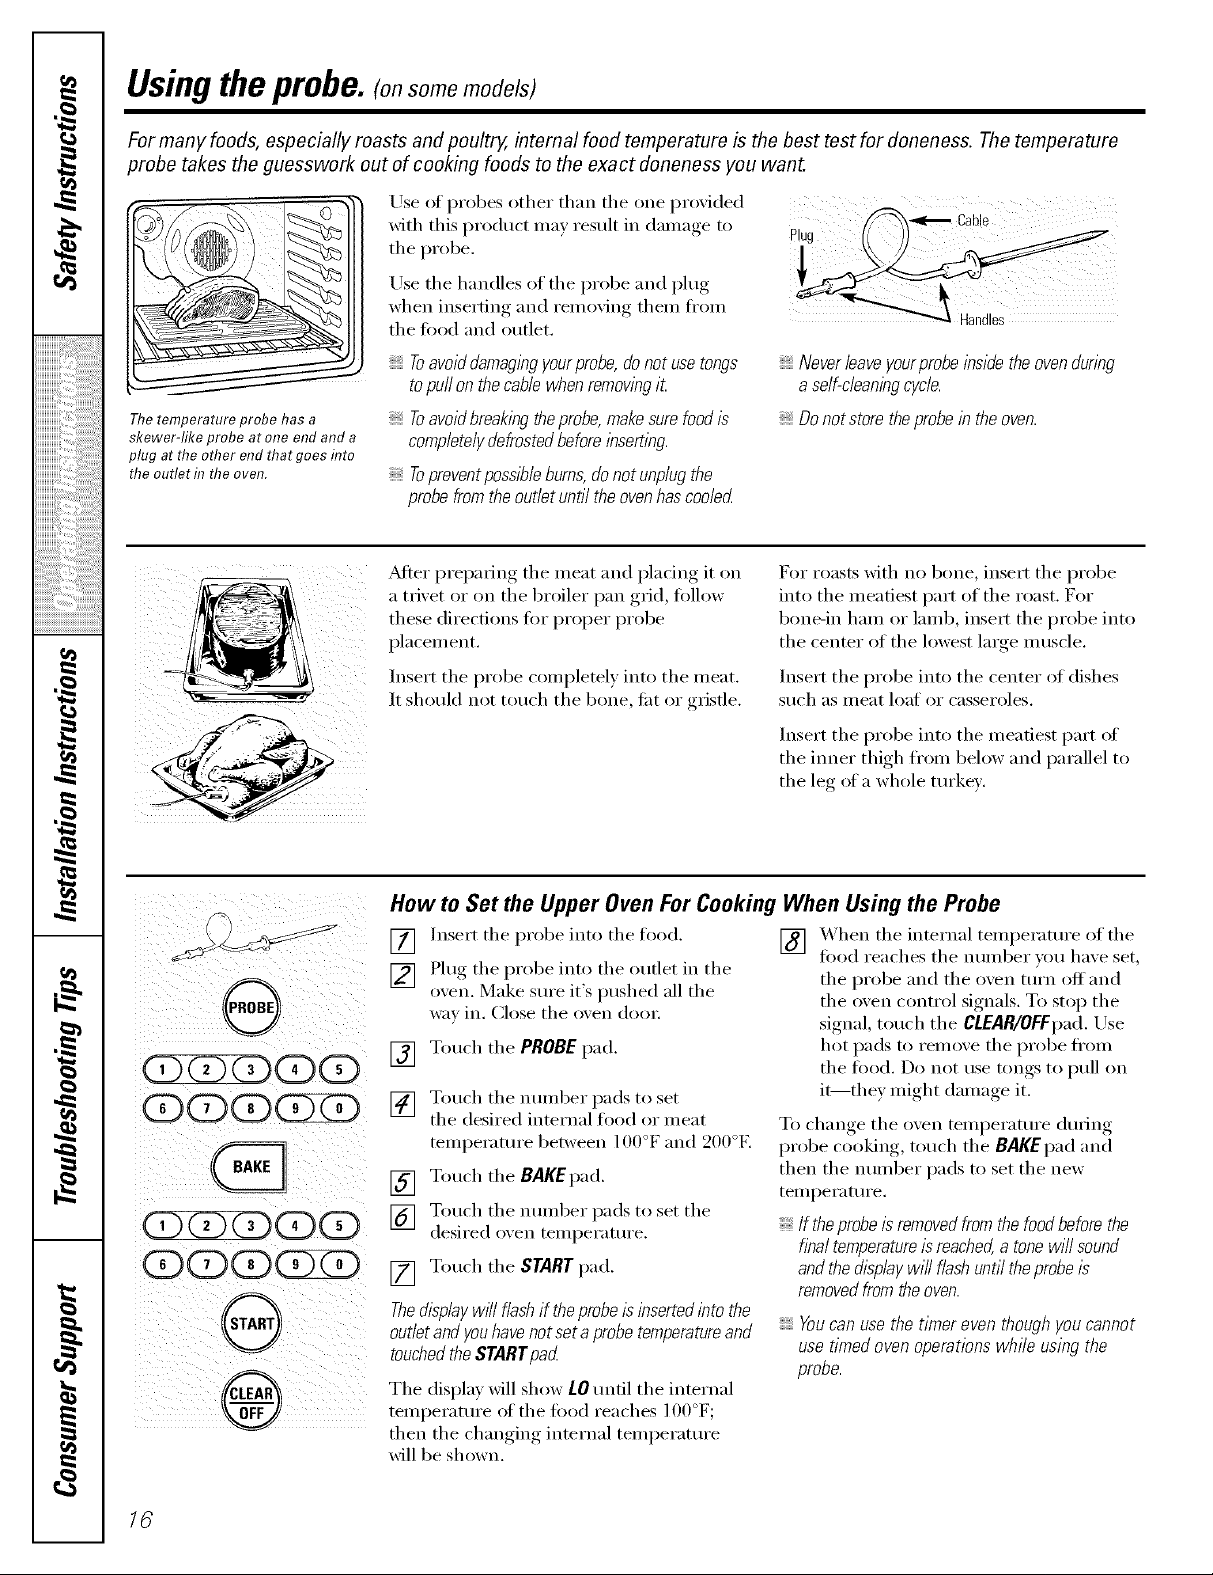
Usingtheprobe.(onsomemodels)
For many foods, especially roasts and poultry, internal food temperature is the best test for doneness. The temperature
probe takes the guesswork out of cooking foods to the exact doneness you wan_
Use ot probes other than the one pr(wided
with this product may result in damage to
tile probe.
!!ii
iiiiiiiiiiiii7,:
iiiiiiiiiiiii'?i_5:i:i:i:i:i:i:i:i:i;i;i_ii_!!i_!!
skewer-likeprobeat oneendanda
plug attheotherendthatgoesinto
theoutletin theoven.
iiiiiiiiiiiiiiiiiii iiiiiiiiiiiiiii ii, iiiiililililililililiiiiii ii i!il
,0
,0
Use tile handles of tile probe and plug
when inserting and removing them fl'om
tile toed and outlet.
Toavoiddamaglbgyourprobe, donot usetongs
to puff on thecable whenremovingiL
Toavoidbreaking the probe,make sure foodis
completelydefrostedbeforelbserting.
Toprevent possible burns,donot unplug the
probe from the outlet until the ovenhascooled
_Mter preparh_g tile meat and placing it on
a trivet or on tile broiler pan grid, follow
these directions fi)r proper probe
placem ent.
Insert the probe completely into the meat.
It should not touch tile bone, tilt or gristle.
-€
Neverleaveyourprobeinsidetheovenduring
aself-cleaningcycle.
Donot stora theprobe/b the oven.
For roasts with no bone, insert tile probe
into the meatiest part of the roast. For
bone-in ham or lamb, inseit tile probe into
the center of the lowest laige muscle.
Insert the probe into the center of dishes
stlch as meat loat or casseroles.
Insert tile probe into tile meatiest part of
the inner thigh fi'om below and parallel to
the leg of a whole turkey.
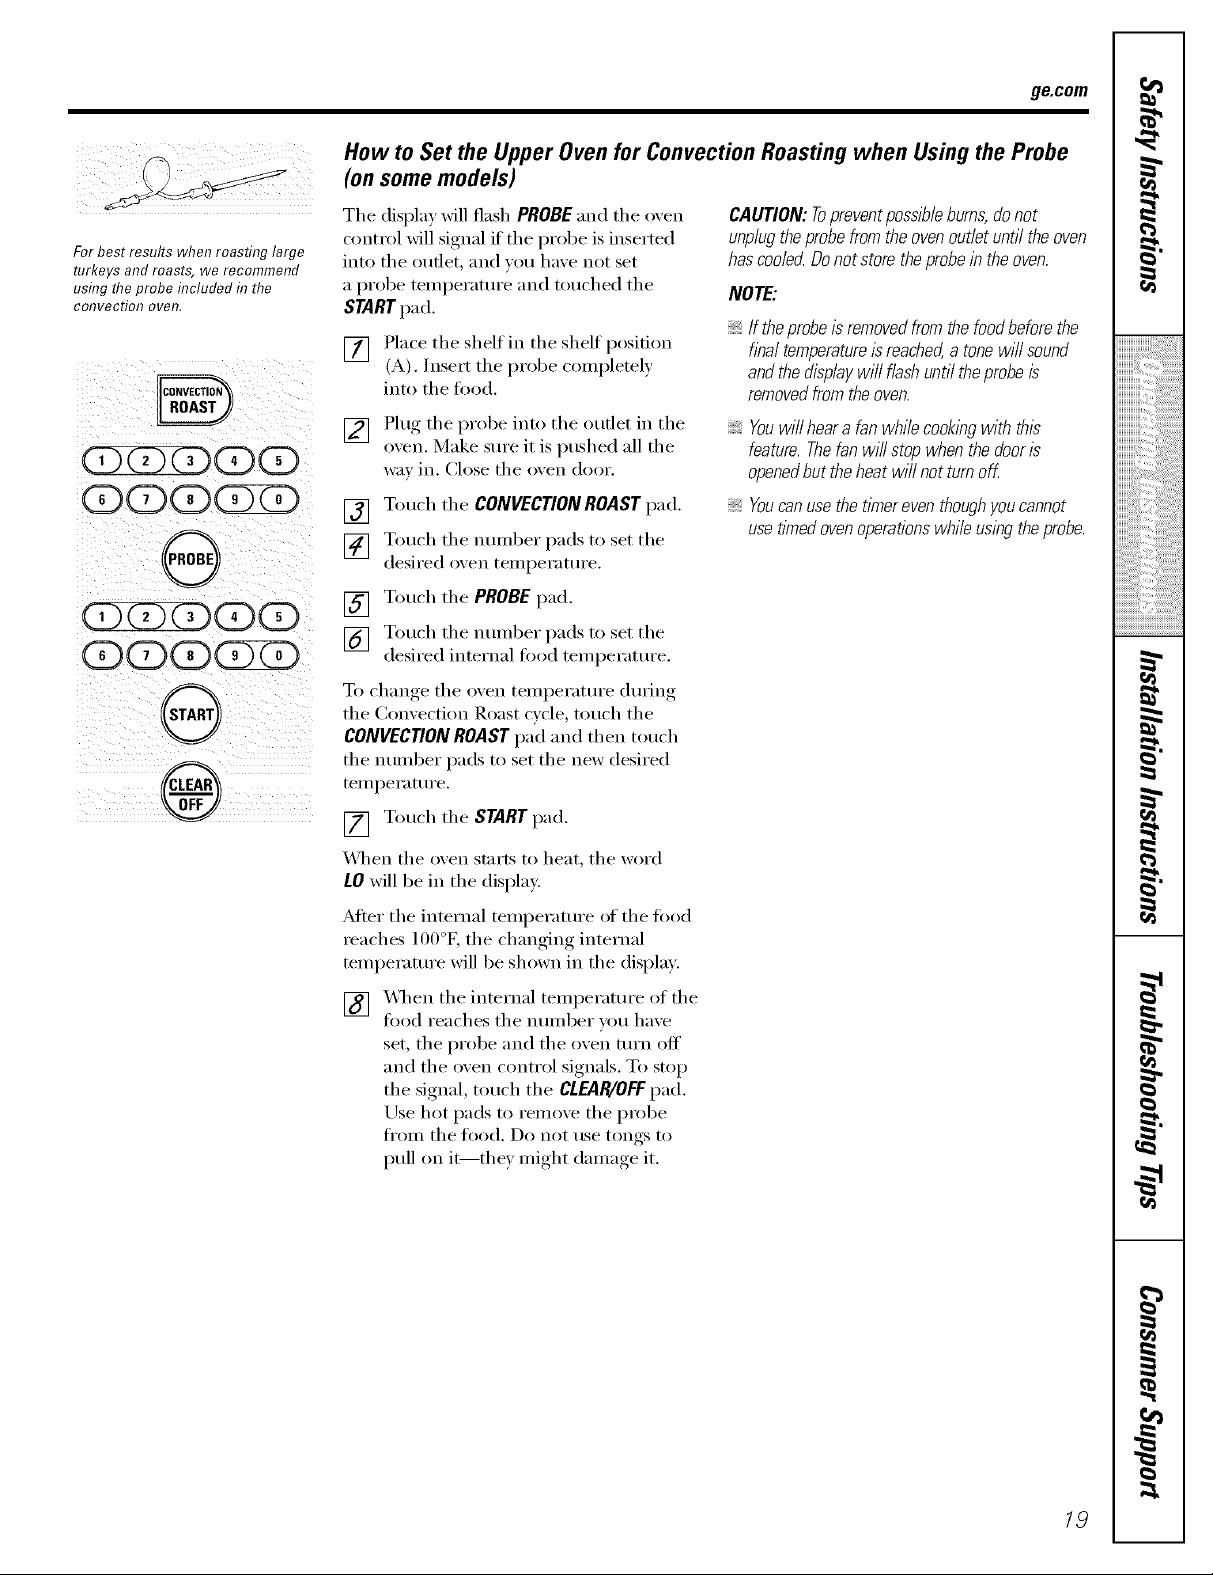
How to Set the Upper Oven For Cooking When Using the Probe
__ [] .. ei tthepi.obe,.othe [] ,'he.the,.ei'..,tempei*.i'e. .le
f'_ _ I_1 " , ......... tile probe and tile o_en turn o_ aria
,_ // \\ o_,en, Fv/aKe S/lI'e Its p/Islle(l _111 tile , , , , m ,
II_ll tile oxen conti'ol signals, 1o stop tile
V_l Phlg the probe into the out|et in the . , ' _ _ ' . _,
(Z)C dD(E (3) [] ,,l.h hePBOBEp. ,.
iiQ(DQ ¸ []
[]
Thedisplay wff/flash if theprobe _sinsertedinto the
@
outlet and youhavenot set aprobe temperatureand
touchedthe $TABT pad
@
then the changing, , internal temi_erature
will be shown.
,- tood reaches the number _ m ha'_e set
,,,.; m.C_.,_ethe.,,e. d.,..i:
Touch tile number pads to set
the desired internal food or meat
temperature between l()()°F and 200°F.
Touch tile BAKEpad.
Touch tile number pads to set tile
desired oxen temperature.
signal, touch tile CLEAB/OFFpad. Use
tile flied. Do not use tongs to pull on
it--the) might d'm/ao-e,_ it.
To change tile oven temperature during
probe cooking, touch tile BAKEpad and
then the number pads to set the new
temperature.
If theprobeis removedfrom the food before the
final temperatureisreached,a tone will sound
and the displaywill flash until theprobeis
removed from theoven.
Youcanusethetimereventhoughyoucannot
usetimedovenoperationswhile usingthe
probe.
16
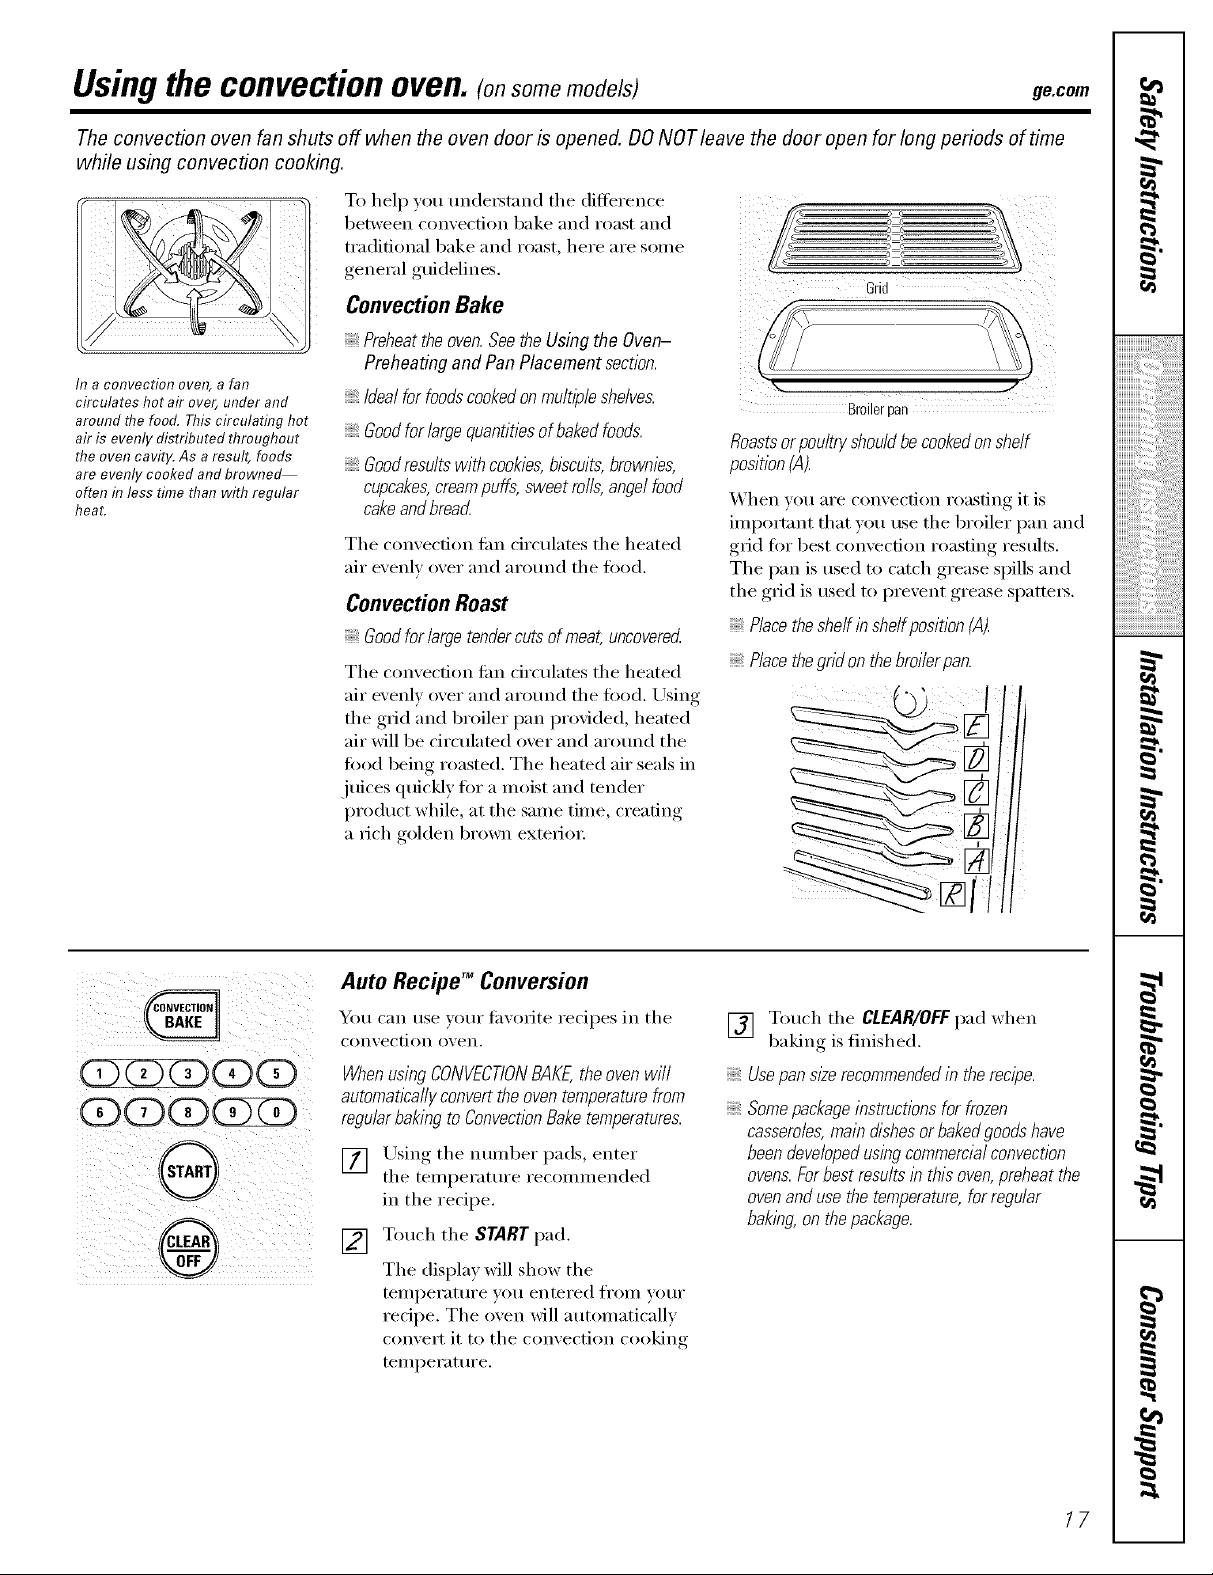
Usingthe convectionoven.(onsome models) ge.com
The convection oven fan shuts off when the oven door is opened. DO NOTleave the door open for long periods of time
while using convection cooking.
To help you unde_stnnd the difference
i ii i
h7 a COITVectiol? oveR, a far
circulates hot air over, under and
around the food. This circulating hot
air is evenly distributed throughout
the oven cavity. As aresult, foods
are evenly cooked and browne_
often in less time than with regular
heat.
between comection bake and roast and
traditional bake and roast, here are some
general guidelines.
ConvectionBake
Preheattheoven.SeetheUsingthe Oven-
PreheatingandPanPlacementsection.
Idealforfoodscookedonmultipleshe/vex
Goodforlargequantitiesofbakedfoods.
Goodresultswithcookies,biscuits,brownies,
cupcakes,creampuffs,sweetroils,angelfood
cakeandbreacL
Tile comecfion tim circulates tile heated
air exenl_ oxer and arotmd the ti)o(1.
ConvectionRoast
Good for large tender cuts of meat, uncoverecL
Tile convection tim circulates tile heated
air evenly over and around tile food. Lrsing
tile grid and broiler pan provided, heated
air will be circulamd over and aro/md tile
fi)od being roasted. The heated air seals in
juices qtfickly fi)r a moist and tender
i)roduct while, at the same time, creating
a rich golden brown exterim:
?N
Roastsorpouitryshou/dbe cookedonsheif
position(A).
_'_hen you are convection roasting it is
importnnt that )ou use tile broiler pan and
grid fiw best conxecfion roasting results.
Tile pan is used to catch grease spills and
the grid is used to prexent grease spatteis.
Placetheshelfinshelfposition(A).
P/acethe gridonthe broiierpan.
Z
Grid
Broilerpan
CD(D(DCDOD
(DODOD(DZD
@
r®
Auto Recipe TM Conversion
You can use yam" fhxorite recipes in tile
con_,ection o_,eil.
WhenusingCONVECTIONBAKE,theovenwiil
automatlcaflyconverttheoventemperaturefrom
regular baking to Convection Bake temperatures.
[] LTsing tile nmnber pads, enter
the temperatm'e recommended
in the recipe.
[] Touch the STARTpad.
The display will show the
temi)erature you entered from your
redpe. The oven will automatically
convert it to tile convection cooking
temperatm'e.
[] Touch tile CLEAR/OFFpad when
baking is finished.
Usepans/#erecommendedin the recipe.
Somepackageinstructions for frozen
casseroles,main dishesor bakedgoods have
been developedusing commercial convection
ovens.Forbest results in this oven, preheat the
ovenand use the temperature,for regular
baking, on the package.
17
Usingthe convectionoven.(onsome models)
,O
iiiiiiiiiiiii'::i_'i_5:i:i:i:i:i:i:i:i:ilili_ii_!!i_!!
Cookware for Convection Cooking
gefi)re using your convection oven, check
to see if w_ur cookware leaves room fin" air
circulation in the oven. If you are baking
with several pans, leave space between
them. _Mso, be sm'e the pans do not touch
each other or the walls of the oven.
Paper and Plastic
Heat-resistant paper and plastic ('ontaine_
that are recommended fin" use in regular
ovens C[lIl be tlsed in convection ovens.
Plastic cookware that is heat-resistant to
temperatures of 400°F can also be used,
when oven is below 400°E
Metal and Glass
Any type of cookware will work in ,,'our
con;'ection oven. Howevei; i//etal l)ans heat
the ti_smst and are recommended fi)r
convection baking,
Darkenedormatte-finlshed pans will bakefaster
thanshinypans.
Glassorceramicpanscookmore slowly
_l/ell baking cookies, you will get the best
results if you use a fiat cookie sheet instead
at a pan with low sides.
For recipes like oven-baked chicken,
use a pan with low sides. Hot air cmmot
circulate well arotmd toad in a pan with
high sides.
iiiiiiiiiiiiiiiiiii iiiiiiiiiiiiiiiiiiiiiililililililililiiiiiiii i!il
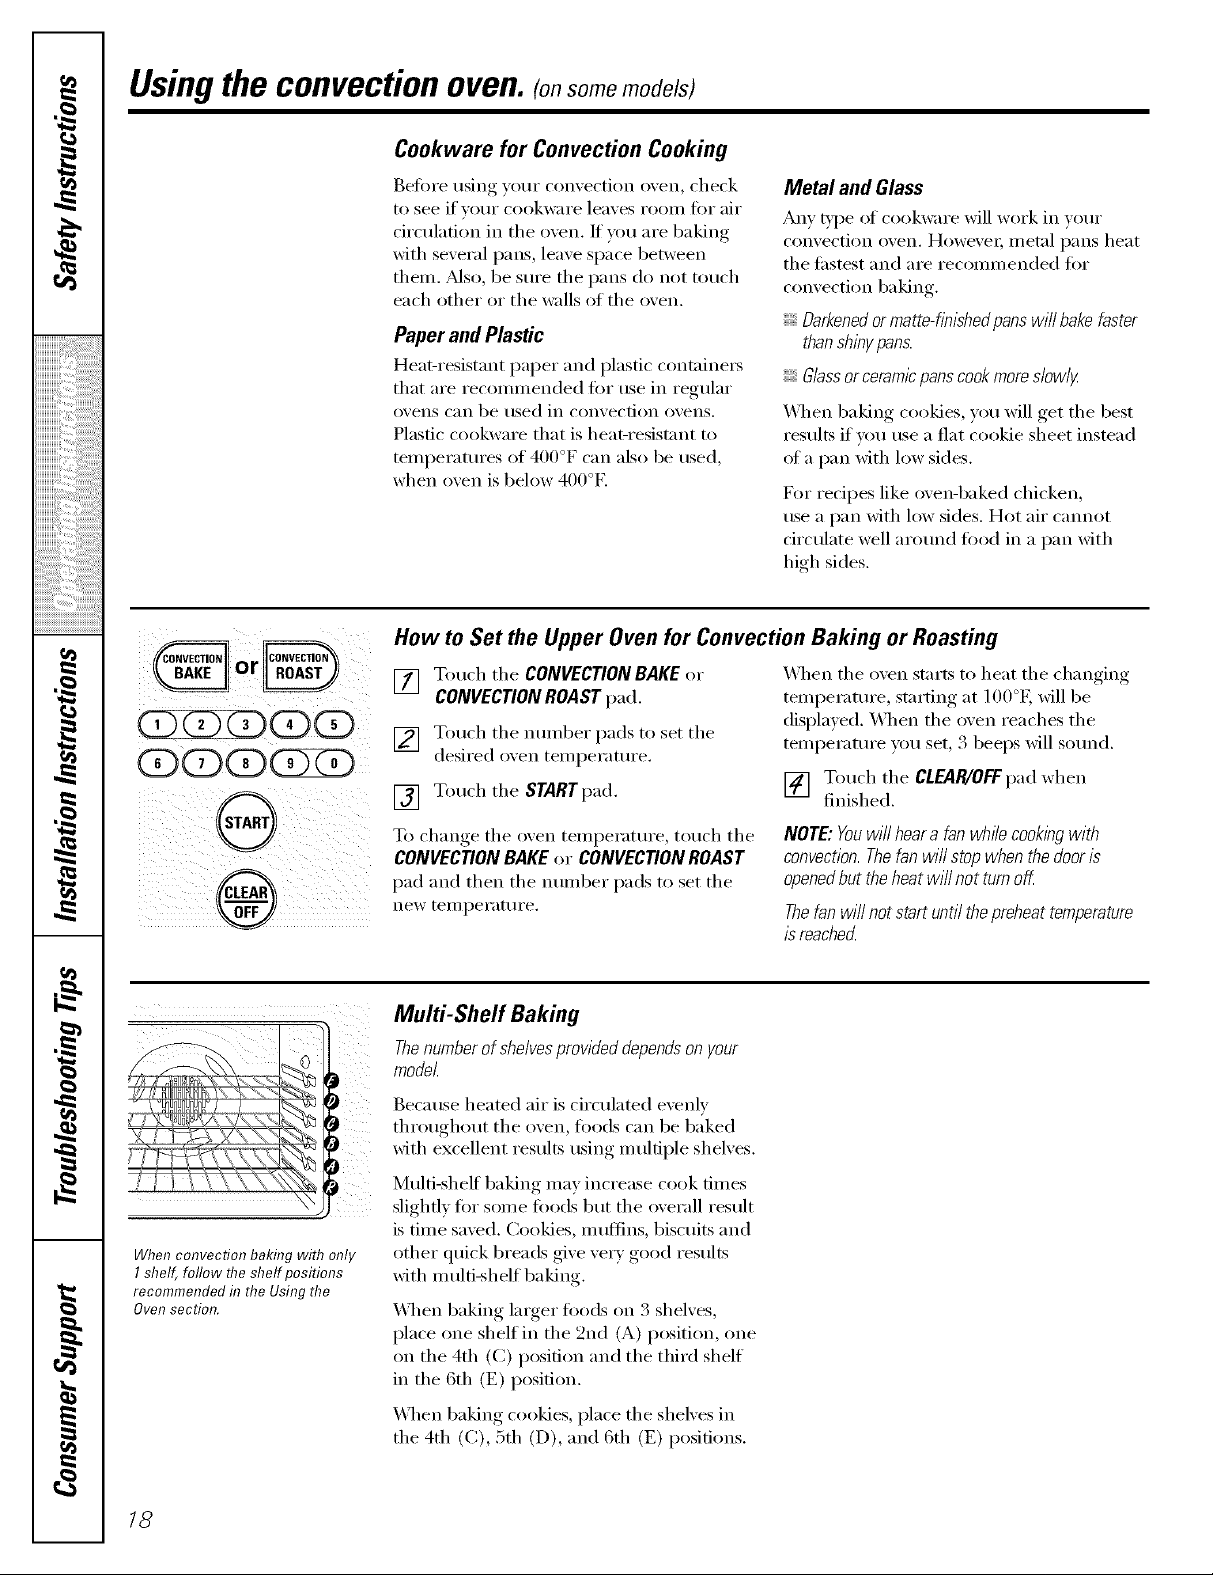
How to Set the Upper Oven for Convection Baking or Roasting
,O
,0
q
#_.
m
Gor
When convection baking with only
I shelf, follow the shelf positions
recommended fl?the Using the
Ovensection.
[] Touch the CONVECTIONBAKE or
CONVECTION ROAST pad.
[] Touch the nmnber pads to set the
desired oxen temperature.
[] Touch the STARTpad.
To cham,e,_ the oxen temperatm'e, touch the
CONVECTIONBAKE or CONVECTIONBOAST
pad and then the number pads to set the
new teI//l)ei'attli'e.
Multi-Shelf Baking
Thenumber of shelvesprowtied dependson your
model.
Because heated air is circulated evenly
throughout the oven, fi)ods can be baked
with excellent results using m ulfiple shelves.
Multi-shelf baking may increase cook times
slightly fin" some toads but the overall result
is time saved. Cookies, muffins, biscuits and
other quick breads give ve_T good results
with multi-shelf baking.
_]_en baking linger foods on 3 shelves,
place one shelf in the 2rid (A) position, one
on the 4th (C) position and the third shelf
in the 6th (E) position.
\4]_en baking cookies, place the shelves in
the 4th (C), 5th (D), and 6th (E) positions.
_A]mn the oven starts to heat the changing
temperature, starting at 100°E will be
disl)layed. _A]_en the oven reaches the
temperatm'e you set, 3 beeps will sound.
[] Touch the CLEAR/OFFpad when
finished.
NOTE:Youwi//hearafanwhilecookingwith
convection.Thefanwillstopwhenthedoor is
openedbuttheheatwi//notturnoK
Thefanwi//notstartuntilthepreheattemperature
isreached
a__,
18
) ii i
For best results when roasting large
turkeys and roasts, we recommend
ushTgthe probe hTcludedh7the
COtTvect/oI7 oveR.
ge.com
How to Set the Upper Oven for Convection Roasting when Using the Probe
(onsome models)
The displa)' will flash PROBE and the oven
control will signal if the probe is inserted
into the outlet, and you have not set
a probe temperature and touched the
STARTpad.
[] Place the shelf in the shelf position
(A). Insert the probe completely
into the food.
CAUTION: Toprevent possible burns,donot
unplugtheprobe from the oven outlet until the oven
hascoolecLDonot store theprobein the oven.
NOTE:
If theprobeis removedfrom the food before the
flbal temperatureisreached,a tone will sound
and the displaywill flashuntil theprobe is
removed from theoven.
CD(D(D(D(D
(D(3>Q
®
CD(DCD(D(3
(D(D(D
[] Plug the probe into the outlet in the
oxen. Make sure it is pushed all the
wm in. Close the oxen door.
[] Touch the CONVECTION ROAST pad.
[] Touch the number pads to set the
desired oxen temperature.
[] Touch the PROBE pad.
[] Touch the number pads to set the
desired internal fi_od temperature.
To change the (wen temperature during
the Convection Roast cycle, touch the
CONVECTIONROAST pad and then touch
the number pads to set the new desired
teml)erature.
[] Touch the START pad.
_]_en the oven starts to heat, the word
LOwill be in the display.
_Mter the internal temperature of the toed
reaches 100°g the changing internal
temperature will be shown in the display.
] _q_en the internal temperature of the
food reaches the number you haxe
set, the probe and the oven turn off
and the oven control signals. To stop
the signal, much the CLEAR/OFFpad.
Use hot pads to reI/lO\.'e the probe
fl'om the toed. Do not use tongs to
pull on it--they might damage it.
Youwi//heara fan while cooklbgwith this
feature. Thefan wl// stop when the dooris
openedbut theheat will not turn off.
YoucanusethetlYnereventhoughyoucannot
usetimedovenoperationswhi/euslbgtheprobe.
19
Usingthe convectionoven.(onsome models)
,0
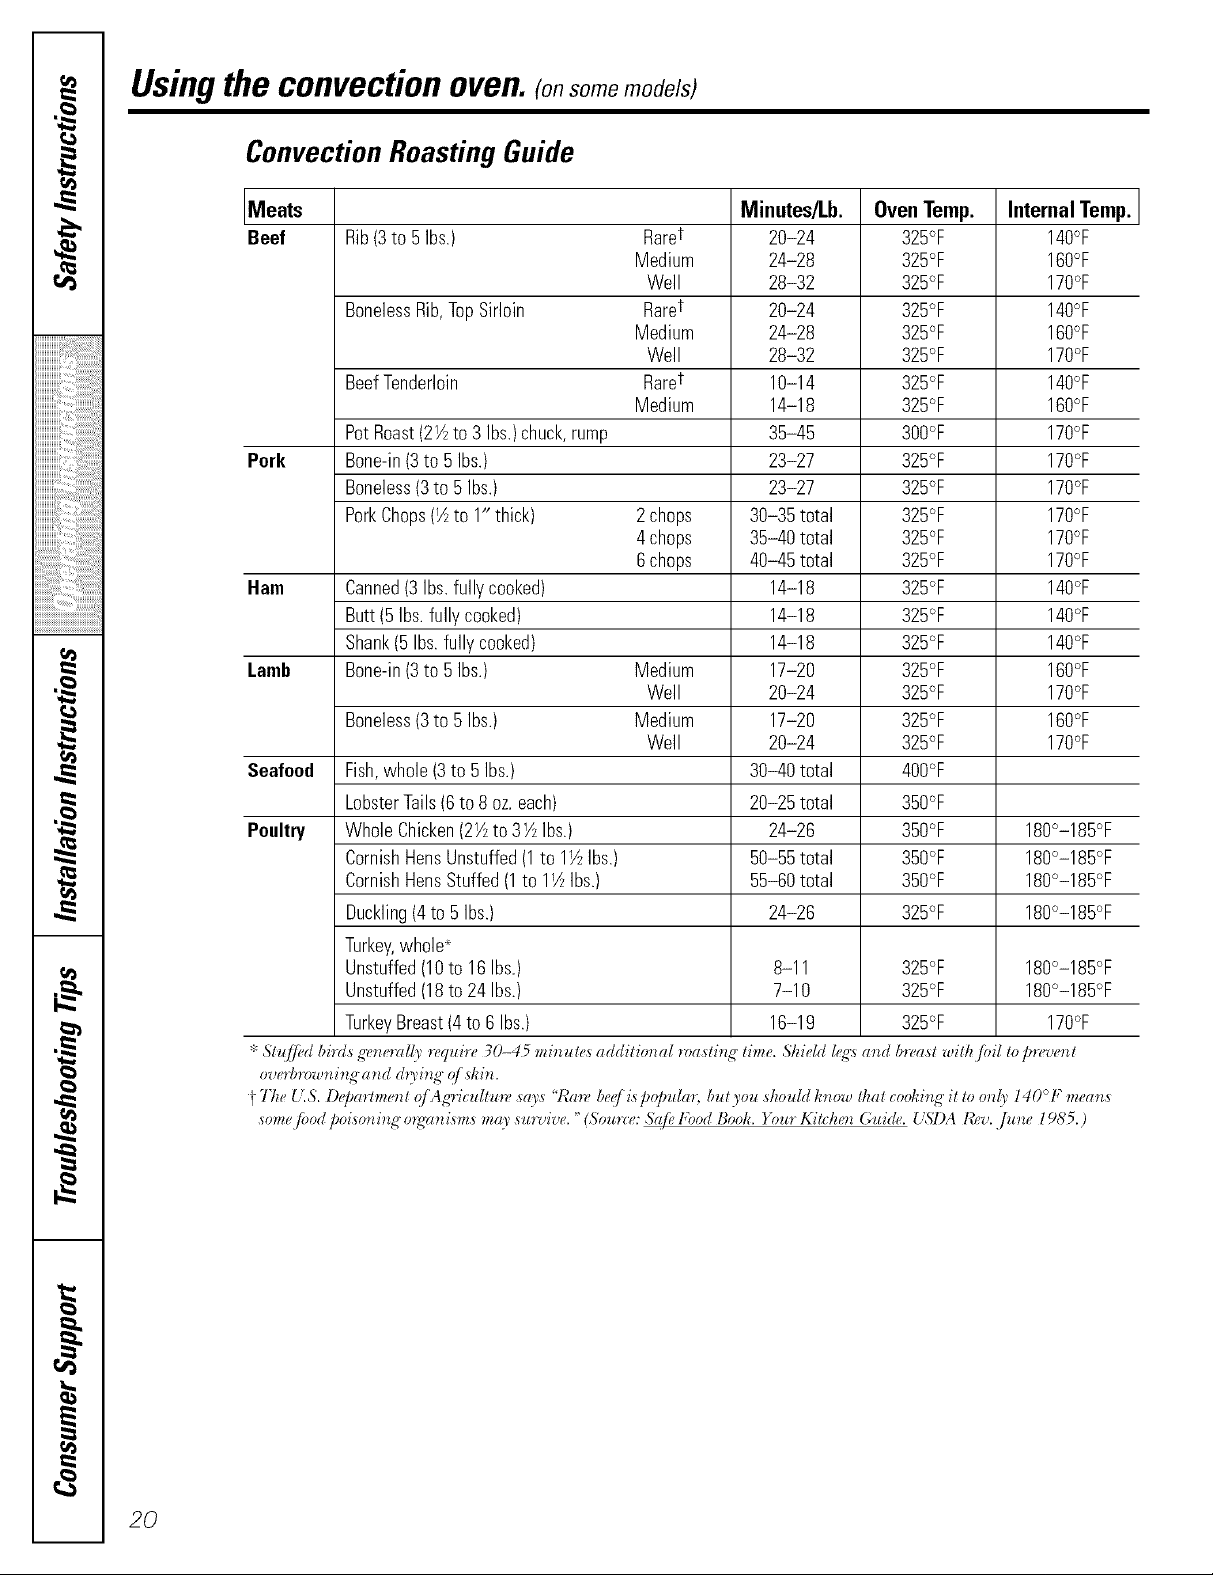
Convection Roasting Guide
Meats Minutes/Lb. OvenTemp. Internal Temp.
Beef Rib(3to 5 Ibs.) Raret 20-24 325°F 140°F
BonelessRib,TopSirloin Raret 20-24 325°F 140°F
BeefTenderloin Raret 10-14 325°F 14O°F
iiiiiiiiiiiii_":,'i_'i_5:i:i:i:i:i:i:i:i:ilili_ii_!!i_!!
PotRoast(2V_to 3 Ibs.)chuck,rump 35-45 3OO°F 170°F
Pork Bone-in(3to 5Ibs.) 23-27 325°F 170°F
Boneless(3to 5 Ibs.) 23-27 325°F 170°F
PorkChops(½to 1" thick) 2chops 30-35 total 325°F 170°F
Ham Canned(3Ibs.fullycooked) 14-18 325°F 140°F
iiiiiiiiiiiiiiiiiii iiiiiiiiiiiiiii iiiiiiiililililililililiiiiii ii i!il
,0
,0
q
Lamb Bone-in(3to 5Ibs.) Medium 17-20 325°F 160°F
Seafood Fish,whole (3to 5 Ibs.) 30-40total 4OO°F
Poultry WholeChicken(2VJto 3VJIbs.) 24-26 350°F 180°-185°F
_ Sh([/i_d birds g'ener_d(_' requh-e 30-45 minute,_ additional roasting time. Shield k%_ and breast with jbil topn,vent
overh_w_mi_t_" _nd d_)'ing" _/ skin.
}-The _ 'IS. D_JmHment _!/iAg'_'icultm'e s_3's 'Wm'e be( i,spo/)u/m, hut you should know Ik_t cooki_l_" it to on(_' 140° F me_ns
somej_od /)oi,soni_" o_wni,sms m_t)' sm_,ive. "(Source: Sq/i_ Food Book. )+mr Kia_hen Gui&. L',ST)A I¢_v. June l 9S5.)
Butt(5Ibs.fully cooked) 14-18 325°F 14O°F
Shank(5 Ibs.fullycooked) 14-18 325°F 14O°F
Boneless(3to 5 Ibs.) Medium 17-20 325°F 160°F
LobsterTails(6to 8 oz.each) 20-25 total 350°F
CornishHensUnstuffed(1to 1½ Ibs.) 50-55total 350°F 180°-185°F
CornishHensStuffed(1to 1_ Ibs.) 55-60total 350°F 180°-185°F
Duckling(4to 5 Ibs.) 24-26 325°F 180°-185°F
Turkey,whole*
Unstuffed(10to 16Ibs.) 8-11 325°F 180°-185°F
Unstuffed(18to24 Ibs.) 7-10 325°F 180°-185°F
TurkeyBreast(4to 6 Ibs.) 16-19 325°F 17O°F
Medium 24-28 325°F 160°F
Well 28-32 325°F 170°F
Medium 24-28 325°F 160°F
Well 28-32 325°F 170°F
Medium 14-18 325°F 160°F
4chops 35-40total 325°F 170°F
6chops 40-45total 325°F 170°F
Well 20-24 325°F 170°F
Well 20-24 325°F 170°F
#_.
m
2O
 Loading...