

Page 1
ge.com
©
Safety Ins_rucvtions ...... 2-7
Operating Instructions
Aluinimml Foil ............ 12
Clock and Tiiner . ......... 14
I,ower (-)yen Drawer ........ 27
Surthce Cooking .......... 8, 9
Upper Oven ..... 10-26, 28, 99
Baking and P.oasting ...... 19
Broiling, Broiling Guide . . .13
Convection ........... 17-20
(-)yen Control ............ 10
Power Outage ............ 1l
Preheating .............. 12
Probe .................. 16
Sabbath Feature ....... 24, 25
SelfzCleanhlg ......... 28, 29
Shelves ................. 19
Special Features ....... 22, 93
Thermostat At!justin ent .... 26
Timed Baking
and Roasting ............ 15
Timed Convecti(nl Baking . .21
Care and Cleaning
Broiler Pan and Grid ....... 35
Burner Assembly ........ 30, 31
Bm'ner Grates ............. 32
Control Panel and Knobs .... 37
Cooktop .............. 32-34
Glass ................ 33, 34
Porcelain ............... 32
Door P,em oval ............ 35
Lower Oven Drawer . ....... 36
Oven Bottom ............. 35
Oven Light Replacement .... 38
Oven Vents ............... 37
Sell=Cleaning .......... 28, 29
Shelves and Drawer Racks . . .38
Stainless Steel Surthces ...... 32
Installation
Ins_truotions .......... :_9-50
Air Ac!justment ............ 49
Anti-Tip Device ......... 42, 50
Checking Bm'ner
Ignition .................. 48
Connecting the Range
to Gas ................ 43-45
Dimensions and Clearances . .41
Electrical Connections . . .46, 47
Leveling the Range ........ 49
LP ...................... 50
Troubleshooting
Tips ................. _,1-54
Accessories .............. 55
Consumer Support
C/msm/ler Support . .Back Cover
Product Registration ..... 57, 58
_v\arrantx for (Mstomel_
in Canada ................ 63
\%_rrantx for Custon/ers
in the U.S.A .............. (52
JGB 92 8
In Canada contact us at:
www. GEAppliances. ca
Write the model and serial
numbers here:
Model #
Serial #
You can find theln on a label
on tile ti'ont ot tile range behind
tile lower ()veil drawer.
18305580P183
49-85097 11-05JR
Page 2
IMPORTANTSAFETYINFORMATION.
READALLINSTRUCTIONSBEFOREUSING.
WARNING!
For your safetg the information in this manual must be followed to minimize the risk of fire or explosion,
electric shock, or to prevent property damage, personal injury, or loss of life.
WARNING:If the information
in this manual is not followed exactly,
a fire or explosion may result causing
property damage, personal injury
or death.
-- Do not store or use gasoline or other
flammable vapors and liquids in the
vicinity of this or any other appliance.
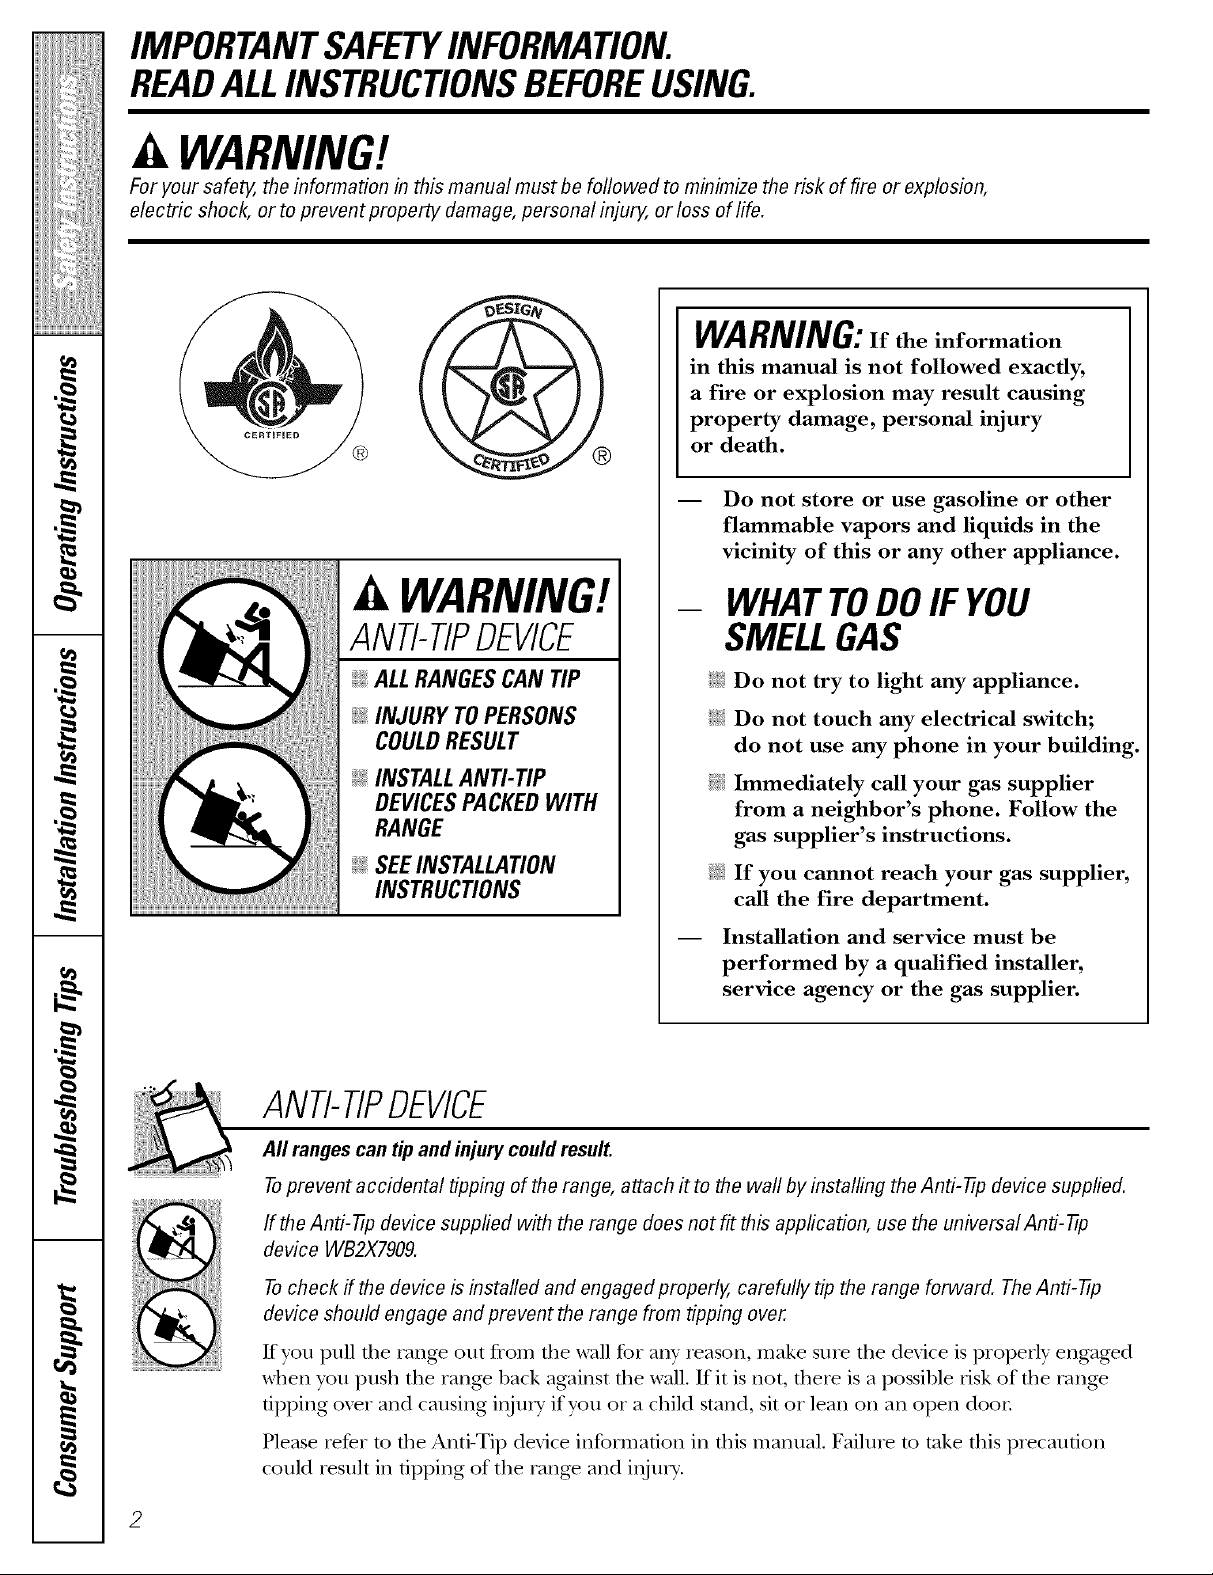
WARNING!
ANTI-TIPDEVICE
ALLRANGESCAN TIP
@INJURY TOPERSONS
COULDRESULT
@INSTALLAN_TIP
DEVICESPACKEDWITH
RANGE
@SEEINSTALLAtiON
INSTRUCtiONS
ANTI-TIPDEVICE
All rangescan tip and injury could result.
- WHATTODOIF YOU
SMELLGAS
iJ_::i:Do not try to light any appliance.
i_i:iDo not touch any electrical switch;
do not use any phone in your building.
_i.iImmediately call your gas supplier
from a neighbor's phone. Follow the
gas supplier's instructions.
@ If you cannot reach your gas supplier,
call the fire department.
-- Installation and service must be
performed by a qualified installer,
service agency or the gas supplier.
Toprevent accidental tipping of the range, attach it to the wall by installing theAnti-ºtp device supplied.
If the Anti-ºtp device supplied with the range does not fit this application, use the universal Anti-ºtp
device WB2X7909.
Tocheck ff the device b installed and engaged properly, carefully tip the range forward. TheAnti-ºtp
device should engage and prevent the range from tipping over.
Kyou pull die rang_ out from die wall for any reason, make sure tile device is properly engaged
when you push the range back against file wall. If it is not, flmre is a possible risk of die rang_
tipping ox_r and causing ilIjnry if you or a child stand, sit or lean on all open door
Please retbr to tile Anti-Tip device information ill this mannal. Failure to take this plecaudon
could iesnlt ill tipping of the rang_ and inju U.
Page 3
ge.com ........
tt WARNING!
dJ'ORTA
IMPORTANTSAFETYNOTICE
9 l _lifornia
The Caflfornia Safe Drinking Water and ToxicEnforcement Act requires the Governor of Cafifornia to
bli h a list ol
publish a list of substances known to the state to cause birth defects or other reproductive harm, and
luJ es busim
requires businesses to warn customers of potential exposure to such substances.
Gas appliances can cause minor exposure to four of these substances, namely benzene, carbon
s __pliance,.
monoxide, formaldehyde and soot, caused primarily by the incomplete combustion of natural gas or
pn_ade, fore
LP fuels. Properly adjusted burners, indicated by a bluish rather than a yellow flame, will minimize
fu 'Is. Prope
,or plete cot
incomplete combustion. Exposure to these substances can be minimized by venting with an open
7d w or usir
window or using a ventilation fan or hood.
4 LFTYf
SAFETYPRECAUTIONS
Have the installer show you the location of the range gas shut-off valve and how to shut it off if necessary.
,vd the instal
H; ve VOIII" l
_i:':Have your range installed and properly _): Plug VO/lr range into a ] 20-xolt grouIlded --
gr amded 1 _"
grounded by a qualified installec in outlet only. Do not remoxe the round
accordance with the Installation Instructions. grounding prong from the plug. ff in doubt
ac ordance
At y'adjusu: _-,
Any adjusunent and service should be about file grounding of file home electrical
pe formed _,
performed only by qualified gas rang_ system, it is your personal responsibility and
in: tallers ot _'
installers or service mchnicians, obligation to haw an ungrounded outlet
D( not atte _"
_;:Do not attempt to repair or replace any
part of your range unless it is specifically three-prong outlet in accordance with
I)_tt of yore
Ie oIllIllen_
recommended in this manual. All other
se dce sho/ _,
service should be _efbr_ed to a qualified
tecllnician.
replaced with a properly grounded,
the National Electrical Code. Do not use
an exmnsion cord with this appliance.
m
g
g
m
3
Page 4
IMPORTANTSAFETYINFORMATION.
READALLINSTRUCTIONSBEFOREUSING.
SAFETYPRECAUTIONS
_i:,:Locate the range out of kitchen traffic pail/
and out of drafty locations to prexent poor
air ciIvulafion.
_{::Be sure all packaging materials are
remoxed flom tile range be%re operating it
to prevent fire or smoke damage should the
packaging material ignite.
;_i:':Be sure your range is correctly adjusted by
a qualified service technician or installer for
the type of gas (natural or IP) fl/at is m be
used. Your range call be converted for use
with eifl_er type of gas. See tile Installation of
the range section.
WARNING:Thesead>s,, en smns
be made by a qualified service technician
in accoMance Mth file manulhcturer's
instructions and all codes and requirements
of file authoci W havingjufisdicfion. Failure
to follow fl_ese insmmfions could result in
sedons i_nry or property damage. The
qualified agen q perfoi_ning this work
assumes iesponsibility for the conversion.
_i:,:M'ter prolonged use of a range, high floor
temperaul_es m W result and many floor
coxering:s will not wifl_stand this kind of nse.
Nexer install file range oxer vinyl die or
linolenm fllat cannot wifl_smnd such type
of use. Nexer install it diiecflv oxer interior
kitchen carpeting,
q?{:_Do not leme children alone or unattended
where a range is hot or ill operation.
They could be seriously burned.
;;; Do not allow anyone m climb, stand or hang
on tile oxen dooi; drawer or cookmp. They
could damage the rang_ and exen dp it oxei,
causing sexere personal injm T.
CAUTION: temsofinteres,to
children should not be staled in cabinets
aboxe a range or on fl_e backsplash of a
range---<:hild_en climbing on file range m
reach items could be selJonsly iI)jnled.
_;i:,:Nexer wear loose fitting or hanging gai_nents
while using tile appliance. Be careflfl when
reaching for items stored in cabinets oxer tile
range. Flammable material could be ignited
if"1)ronght ill contact with flame or hot oxen
sniPaces and m W cause sexere l)ni_ls.
;_i:,:Do not store flammable materials in all
oxen, a range drawer or near a cookmp.
_: Do not store or use combustible materials,
gasoline or other flammable vapors and
liquids in tile vicinity of this or any other
appliance.
_i:,:Do not let cooking grease or oflmr flammable
materials accumulate in or near tlle Fange.
_{_:Do not use water on grease fires. Nexer pick
up a flaming pan. Turn the controls off.
Smother a flaming pan on a surthce 1)umer
by coxering fl_e pan completely with
a well-fitting lid, cookie sheet or fiat u W.
Use a multi-puq)ose d_y chemical or
foam-type fire extinguisher
Flaming giease outside a pail can be put
out 1)y covering it with baking soda oi;
if available, 1)y using a mulu-pnrpose d_y
chemical or foam-type file exfinguishen
Flame in the upper oxen or lower oxen
drawer can be smotheied completely 1)y
closing tile oxen door or drawer and turning
tile conuol to offor by using a muld-
puq)ose d U chemical or foam-Wpe file
exdnguishen
_]{_i,et file bnliler grates and other surfaces
cool before ranching them or leaving fllem
where children can leach them.
_fi:,:Nexer block fine xents (air openings) of the
range. They provide file air inlet and outlet
flint are necessai T tbr tile range to operate
properly with coITect combustion. Air
openings are located at tile rear of tile
cooktop, at tim top and bottom of the oxen
door and at file 1)ottom of file range under
tile lower oven drawer or kick panel.
WARNING:NEVERusethis
appliance as a space heater to heat or
waI_n the room. Doing so m W Iesult
ill carbon monoxide poisoning and
4
oxerheafing of tile oxen.
_fi:,:Large scratches or impacts to glass doors
or cooktops can lead to 1)token or
shattered glass.
Page 5
ge.com
WARNING!
SURFACEBURNERS
Use proper pan size--avoid pans that are unstable or easily tipped. Select cookware having flat bottoms
large enough to cover bumer grates. Toavoid spillovers, make sure cookware is large enough to contain
the food properly. This will both save cleaning time and prevent hazardous accumulations of food, since
heavy spattering or spillovers left on range can ignite. Use pans with handles that can be easily grasped
and remain cooL
_{;_Always use the LITE position when ignidng
the top burners and make sure the burners
hax> ignited.
_:_Never leave tile sm£_ce bun_ers unatmnded
at high flame settinKs. Boilo_>rs cause smoMng
and greasy spillox>rs tilat m W catch on fire.
;_i:':Adjust tile top burner flame size so it
does not exmnd beyond ti_e edge of the
cookware. Excessive flame is hazardous.
N Use only dry pot holders--moist or damp
pot holders on hot surtZaces may result ill
bun_s from smam. Do not let pot holders
come near open flames when lifting
cookware. Do not use a towel or other bulky
cloth in place of a pot holder
N When using glass cookware, make sure it
is designed for top-of-rang> cooking.
N To n/inimize tile possibility of bums, ignition
of flammable mateiials and spillage, turn
cookware handles toward tim side or back
of the range without extending over
adjacent burnel_.
_::CaIefldly wamh foods being fded at a high
flame setting.
;F Alwws heat fat slow]> and watch as it heats.
;_?:':Do not leave ally' items on dm cookmp. Tile
hot air flom the xent m W ignim flammable
imms and will increase p_essure in closed
containers, which m W cause diem m burst.
;_i:,:If a combination of oils or fats will be used
in fl;ving, stir mg>ther before heating or
as fats melt slowly.
_::Use a deep fat thei_nometer whenever
possible m prevent ovedleafing fat beyond
tile smoMng point.
;_i:,iUse tile least possible amount of fat for
eftecdxe shallow or deeI>lZat flTing. Filling
tim pan mo fill of fiat can cause spilloxers
when food is added.
_?_::Do not flame %ods on tile cooktop. If you
do flame foods under tile hood, turn tile
lqaI] on.
N Do not use a wok on tile cooking sur/aace
if the wok has a round metal ling timt is
placed ox>r the burner gxam m support the
wok. Tiffs ring acts as a heat trap, which may
damag_ the burner gram and burner head.
Also, it may cause tile burner m work
improperly. Tilis may cause a carbon
monoxide level abox> that allowed by
cunent standards, resulting in a healtii
hazard.
;_?:':Foods for flTing should be as d_T as possible.
Frost on flozen foods or moisun_e on fresh
tbods call cause hot t_t m bubble up and
ox>r tile sides of the pan.
_?_::Never taT to move a pan of hot fat, especially
a deep fat flTer V(ait until tile fat is cool.
_?_::Do not leme plastic items on tile cooktop--
tiley m W melt if left too close to tile x>nt.
;_?:':Kee I) all plastics awW from tile surface
btliTleFs.
_;:To ax_id the possibility of a bum, always be
certain that tile controls for all bulllers are
at the OFFposition and all grams are cool
before atmmpting to remox> ti_em.
_;:If rang> is locamd near a window, do not
hang long curtains that could blow oxer tile
surfi_ce burners and cream a fire hazard.
;f; If you smell gas, troll off tile gas to the rang_
and call a qualified service mchnician. Nex>r
use an open flame to locate a leak.
;_?:':Always um_ the surfl_ce burner controls off
before removing cool<ware.
;f?:':Do not lilt the cooktop. Lifting the cooktop
can lead to damag> and improper operation
of the rang_.
Page 6

iMPORTANTSAFETYiNFORMATiON.
READALLiNSTRUCtiONSBEFOREUSING.
GLASSCOOKTOPSURFACEronsomemodels)
Use care when touching the glass cooktop surface. The glass surface of the cooktop will retain heat
after the controls have been turned oK
_::Avoid scratching the glass cooktop surPace.
The glass surflace can be scratched with
imms such as sharp instruments, _ings or
other jewel U and lix.ets on clothing.
;f?:':Do not operate file cooktop if file glass is
1)roken. Spillox.el_ or cleaning solution may
penetrate a 1)roken cooktop and create a
lisk of elecuical shock. Contact a qualified
technician immediately should your glass
cookmp surPace 1)ecome broken.
_i:;Nex.er use the glass cookmp surPace as
a cutting board.
_:;Do not place or store items that can melt
or catch fire on the glass cooktop surface,
ex.en when it is not being used.
_i:,:Be careflrl when placing spoons or oflaer
stirTing utensils on glass cooktop surface
when it is in use. They may become hot
and could cause bums.
Do not place or store items that can meh
or catch fire on the grates, exen when tile
cooktop is not 1)eing used.
q?{::Clean tile cooktop snr/_ace with caution.
If a wet sponge or cloth is used to wipe
spills on a hot surface, be careflfl to ax_id
smam burns. Some cleaners can produce
noxious fim/es if applied to a hot snr/_ce.
NOTE,"_A/erecommend that you avoid
wiping any sur£ace areas until they hax.e
cooled. Sugar spills are tim exception to tiffs.
Please see Cleaning the glass cooktop surface
section,
_{:_When tile cooktop surfiace is cool, use
only CERAMA BRYTE (_Ceramic Cooktop
Cleaner and the CERAMA BRYTE ¢'>
Cleaning Pad to clean tile cooktop.
_{:_To avoid possible damag.e to the cooking
surPace, do not apply cleaning cream to tile
glass surPace when it is hot.
_{:_After cleaning, use a &T cloth or paper
towel to remox.e all cleaning cream residue.
_{:_Read and follow all instructions and
warnings on tile cleaning cream labels.
_t{:_Nex.er place, use or self-clean tile lower ox.en
drawer pan ira tile upper ox.en.
ELECTRICWARMINGDRAWER
ANDLOWEROVENDRAWERronsomemode/sJ
_{:_The puq)ose of die wanning drawer and
V_;ARMZONE setting of the lower oven
drawer is to hold hot cooked foods at
serving temperature. Alwws start wifla hot
lbod; cold food cannot be heated or cooked
ira the wamaing drawer or the WARM ZONE
setting of tile lower ox.en drawen
_i:,:Do not use file lower ox.en drawer to dry
newspapers. If ox.erheated, they can catch
on fire.
_i:':Do not lea_.e paper products, plastics,
canned food or combustible materials
ira tile lower oven drawen
_:;Never lem.ejars or cans of fht dfipping_ ira
or near vonY ]ower ox.en drawer.
_fi:,:Do not warm food in flae lower oven drawer
for more fllan two hours.
_:_Do not touch theheating element or the
interior surface of the lower oven drawer.
These snr/_aces may be hot enough to 1)urn.
REMEMBER:The inside surface of the lower
ox.en drawer may be hot when tile drawer
is opened.
_i:,:Use care when opening the lower ox.en
drawen Open tile drawer a crack and let
hot air or steam escape 1)elb_.e _.emoving
or replacing food. Hot air or smam which
escapes can cause 1)urns m hands, fi_ce
and/or eyes.
_:;Do not use aluminum foil to line the lower
ox.en drawer. Foil is an excellent heat
insulator and will wap heat 1)eneath it. This
will upset tile perfommnce of file drawer
and it could damag.e tile interior finish.
Page 7
ge.com
COOKMEATANDPOULTRYTHOROUGHLY...
Cook meat and poultry thoroughly--meat to at least an INTERNAL temperature of 160°Fand poultry to
at least an INTERNAL temperature of 180°ECooking to these temperatures usually protects against
foodbome illness.
UPPEROVEN
Stand away from the range when opening the door of a hot oven. The hot air and steam that escape can
cause bums to hands, face and eyes.
_{:;Do not use tire oven for a storage area,
Items stored in flae oven can ig_fite.
_: Kee I) the ox.en flee from grease buildup.
E:,:Place the ox.en sheh.es in the desired
posidon while the ox.en is cool.
_?{:_Pulling out the shelf to the stop-lock is a
convenience in lifting hem?' foods. It is also
a precaution against bnYras from touching
hot surPaces of the door or ox.en walls. The
lowest position is not designed to slide.
E:,:Do not heat unopened food containers.
Pt.essure could build up and the container
could burst, causing an inju U.
A WARNING:NEVERcoverany
slots, holes or passages in tire oven bottom
or cover an entire rack with materials such
as ahmfinum foil. Doing so blocks air flow
through the oven and may cause carbon
monoxide poisoning. Alunfinum foil linings
may also uap heat, causing a fire hazard.
_{:_Do not use aluminum foil anywhere ira dte
oxen except as described ira this manual.
Misuse could result in a fire hazard or
damage to the range.
_::When using cooking or roasting bag:s ira die
ox.en, follow the mamflhcmrer's direct.ions.
E:,:Do not use your ox.en to dU newspapers.
If ox.erheated, trey can catch rit.e.
_{_Use only glass cookwat.e that is
recommended for use ira gas ox.ens.
E:,:Mwws remox.e tire broiler pan from rang.e as
soon as you finish broiling. Grease left ira the
pan can catch fire if ox.en is used wifltont
removing the gTease flom the broiler pan.
E:,IWhen broiling, if meat is mo close m flae
flame, the fat may ignite. Trim excess fl_t to
prex.ent excessive flare-ups.
E:,IMake sure the broiler pan is in place conectly
to t.educe the possibility of g_.ease fir.es.
!:L!':If you should hax.e a grease fire in tire broiler
pan, press the CLEAR/OFFpad, and kee I) the
oven door closed m contain fire until it
bums out.
_t_::For safe.W and proper cooking perfommnce,
always bake and broil with the oven door
closed.
_:;Nex.er place, use or selt¥lean fire lower ox.en
drawer pan ira the upper ox.en.
SELF-CLEANINGTHEUPPEROVEN
_{:;Be sure to Mpe off excess spillag.e befbre
self-cleaning operation.
E:,:Before self-<leaning tim oven, remove the
broiler pan, broiler grid, all cookware, probe
and any alunfinum foil.
_{:;Nex.er place, use or self-dean the lower ox.en
drawer pan in the upper ox.en.
_t_::Nickel oven sheh.es (on some models)
should be removed flom the oven before
beginning the selt¥lean Q'cle.
_:;Gr W porcelain-coated ox.en sheh.es (on some
models) m W be cleaned in the ox.en during
the sell_lean cycle.
_{::Do not clean the door gasket. The door gasket
is essential %r a g_od seal. Care should be
token not to rub, damag.e or mox,e the gasket.
_{::Clean only parts lismd ira this Owner's Manual.
E:,:If the self-cleaning mode malflmctions, utm
the ox,en off and disconnect tire power supply.
Have it set\iced 1)ya qualified mchnician.
_{::Do not use ox.en cleaners. No commercial
oxen cleaner or ox.en liner of any kind
should be used ira or around any part of
tire ox.en. Residue fiom ox.en cleaners will
damag_ the inside of the ox.en when the
self-clean Q'cle is used.
READANDFOLLOWTHISSAFETYINFORMATIONCAREFULLY.
SAVETHESEINSTRUCTIONS
7
Page 8
Usingthe gas surfaceburners.
Throughout this manual, features and appearance may vary from your model.
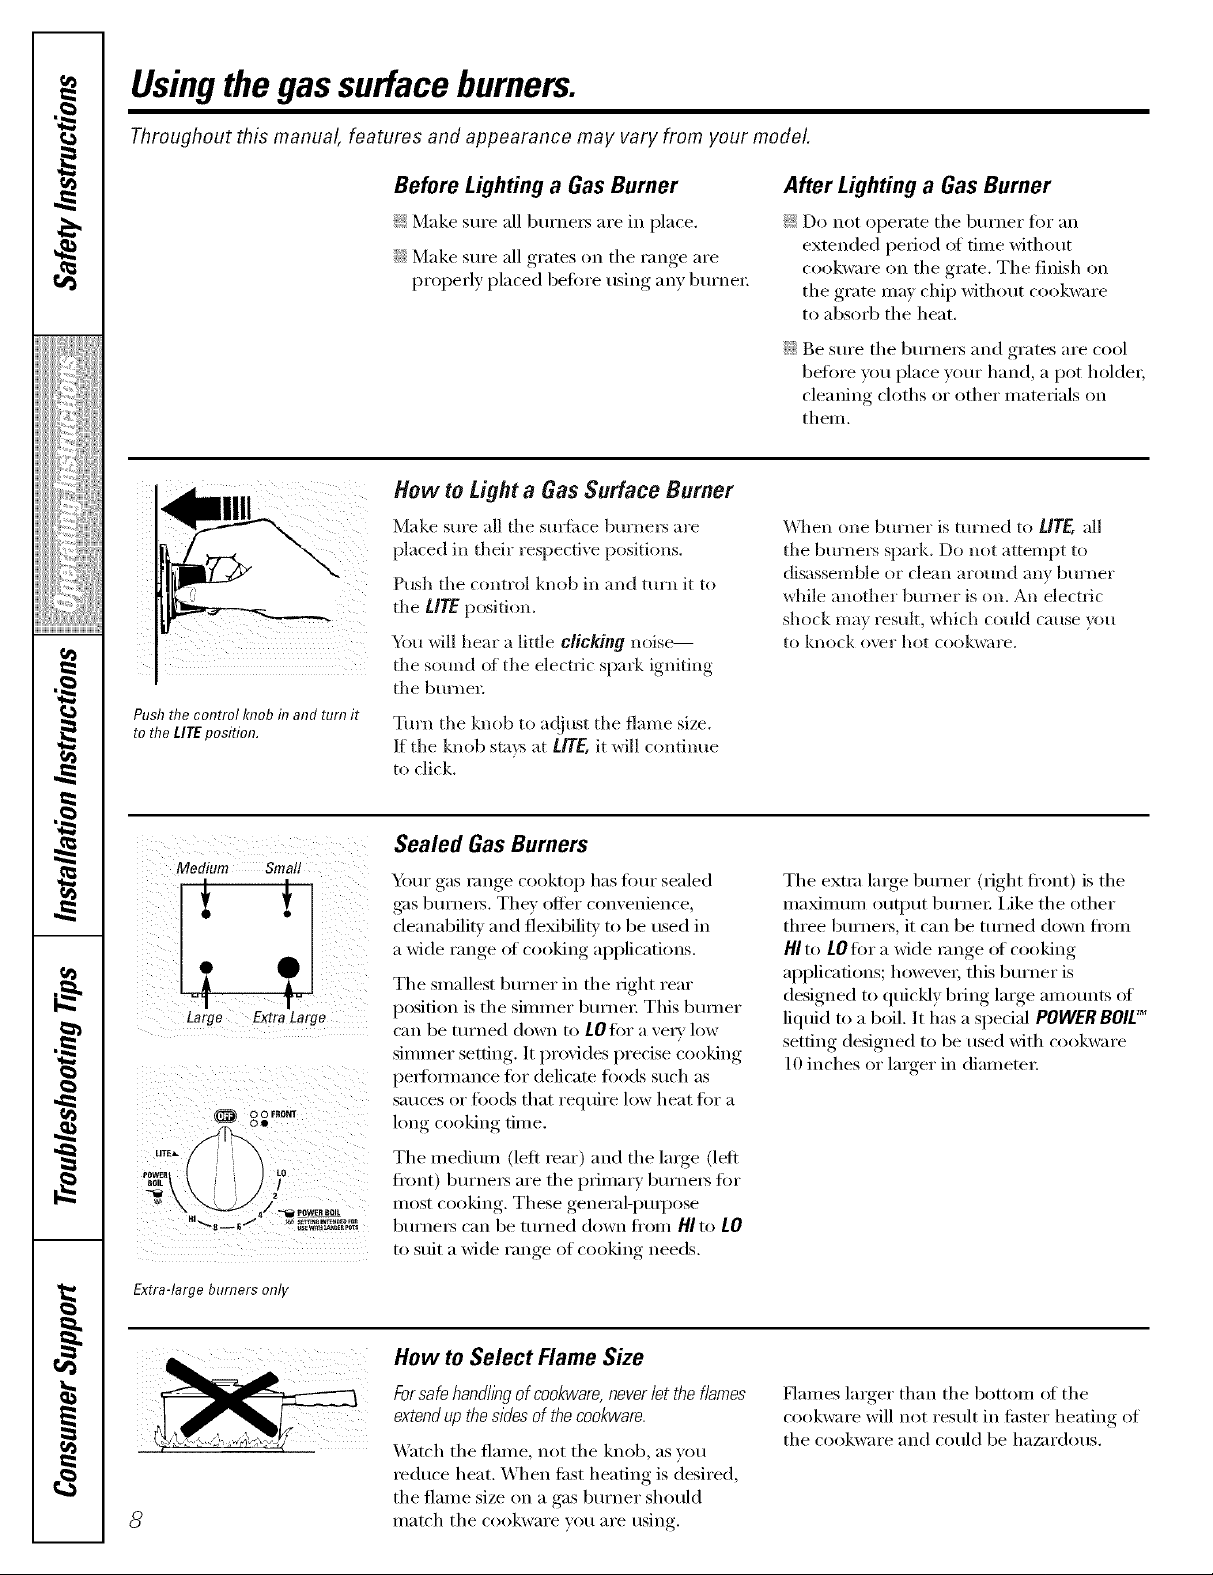
Push the control knob in and turn it
to the LITEposition.
Before Lighting a Gas Burner
_: Make sure all burne_ are in place.
::Ji::Make sure all grates on the range are
properly placed before using anv burne_:
How to Light a Gas Surface Burner
Make sm'e all the sm_iae bm'nel_ are
placed in their respective positions.
Push the control knob in and turn it to
the L/TE position.
D)u will hear a little clicking noise--
the sotmd of the electric spark igniting
the bm'nel:
Tm'n the knob to a(!just the flame size.
If the knob sta_:s at L/TE,it will continue
to click.
After Lighting a Gas Burner
_: Do not operate the burner t0r an
extended period of time without
cookware on the grate. The finish on
the grate may chip without cookware
to absorb the heat.
::Ji::Be sm'e the bm'ne_s and grates are cool
before you place yore" hand, a pot holder;
cleaning cloths or other mamrials on
them.
\\lien one bm'ner is turned to UTE, all
the bm'nel_ spark. Do not attempt to
disassemble or clean arotmd any bm'ner
while another burner is on. An electric
shock may result, which coukl cause }_m
to knock o\vr hot cookware.
Medium Small
! ?
Large ExtraLarge
@ 0 0 FRO_
LITE_
WEI_ LO
Extra-large burners only
Sealed Gas Burners
Yore" gas range cooktop has fimr sealed
g_s burners. They offer convenience,
deanabilitv and fle_bilitv to be used in
a wide range of cooking applications.
The smallest bm'ner in the right rear
position is the simmer bm'ner This btm_er
can be turned down to LOfor a ve_' low
simmer setting. It provides precise cooking
pe_fommnce fi:,r delicate fbods such as
s_ltlCeSoi"[i)o(ls that require low heat fin" a
long cooking time.
The medium (left rear) and the lmge (left
/
fl'ont) burnei_ are the prima_ T burnei_ fin.
most cooking. These general-ptupose
burners can be turned down fl'om HI to LO
to suit a wide range of cooking needs.
The extra lmge bm'ner (right fl'ont) is the
nlaxinluln output burnei: i,ike the other
three burne_, it can be turned down fl'om
HI to LOfor a wide range of cooking
applications; however; this bm'ner is
designed to quickly bring lmge anlounts of
liquid to a boil. It has a spedal POWERBOlE_
setting designed to be used with cookware
10 inches or larger in diameter:
How to Select Flame Size
Forsafe handiingof cookware, neveriet the f/ames
extend upthe sides of the cookware.
Watch the flame, not the knob, as you
reduce heat. When ti_st heating is desired,
the flalne size on a gas burner should
II/at('h the cookware VOtl aI'e using.
Haines larger than the bottom of the
cookware will not result in filster heating of
the cookware and could be hazardous.
Page 9
Top-of-Range Cookware
ge.com
Aluminum: lMe(limn-weight cookware is
recommended because it heats quickly
and evenly. Most too(ls brown evenly in an
ahmfinum skillet. Use saucepans with tight-
fitting lids when cooking with minimmn
aIllO/lntN 0][ watex:
Cast-Iron: If heated slowly, most skillets will
give satistactorv results.
Enamelware: Under some conditions,
tile enai/lel of soille cookware illay i/xelt.
Follow cookwax'e illan/ll[ilctHi'ei"s
recommendations fin" cooking methods.
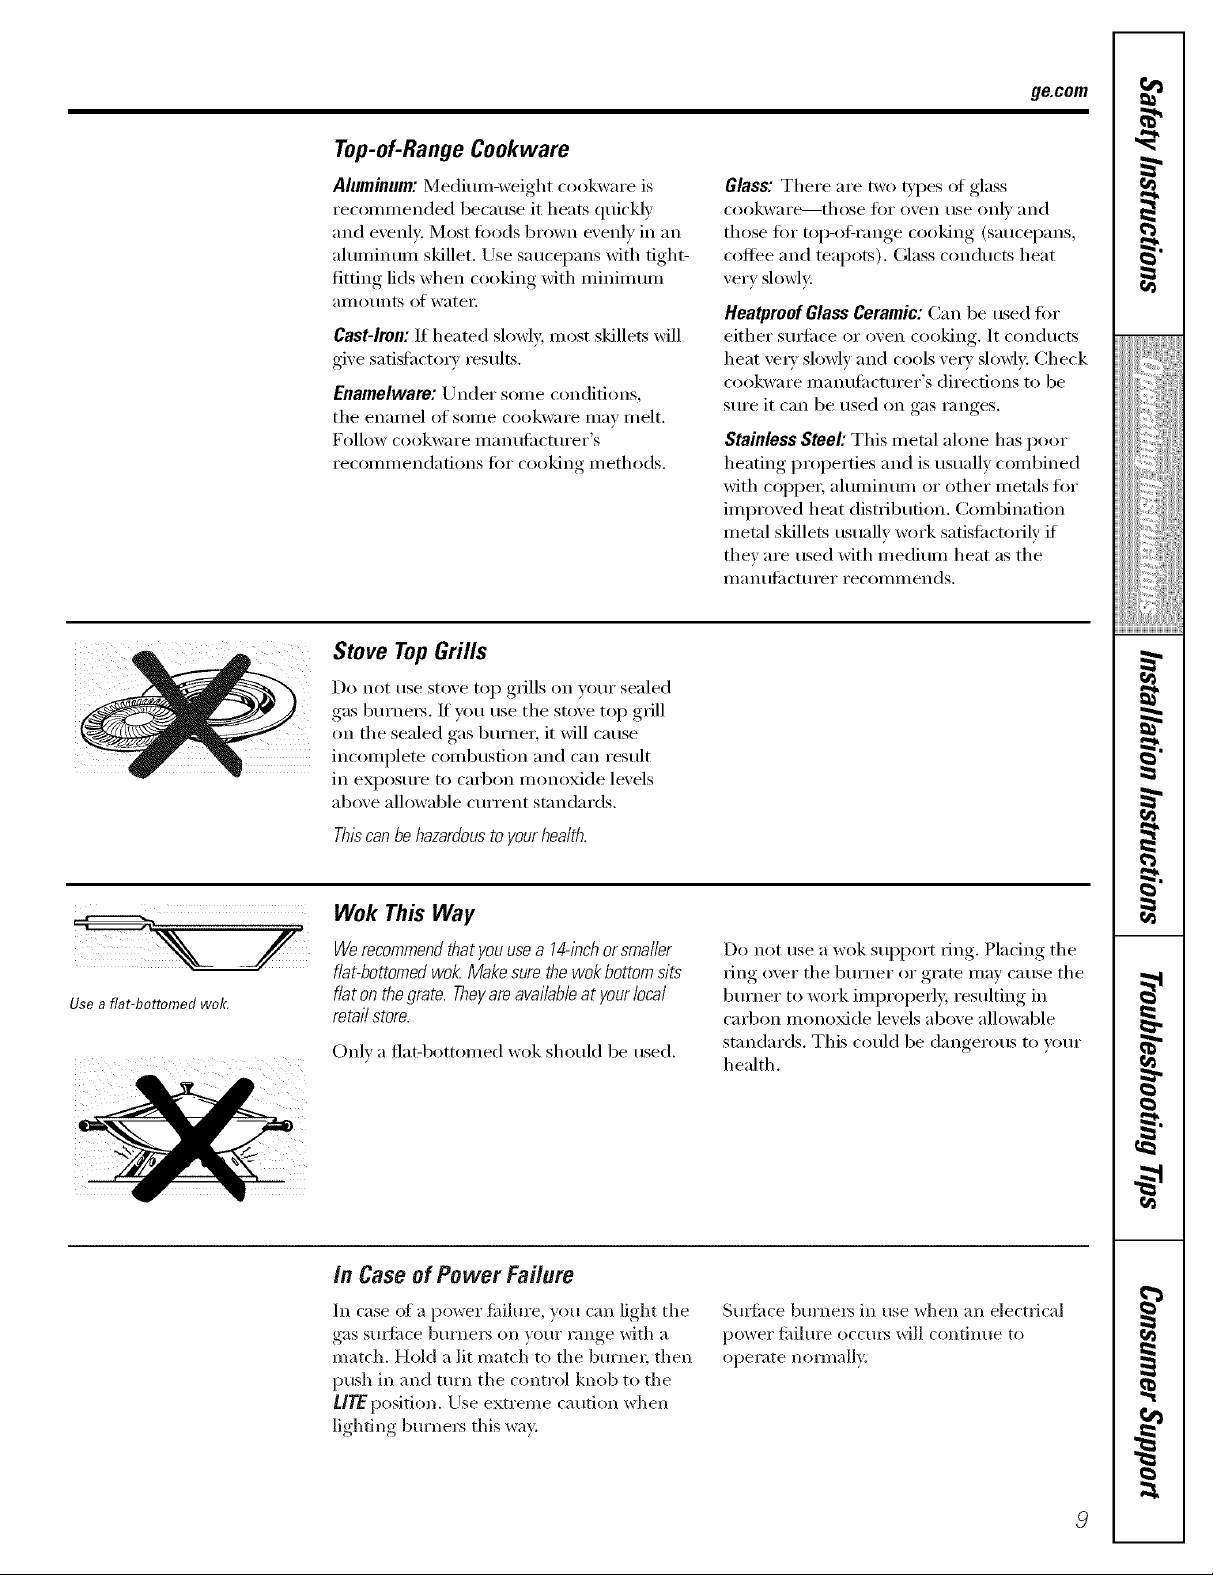
Stove Top Grills
Do not use stove top grills on your sealed
gas burnex_. If you use tile stove top grill
on tile sealed gas burner, it will cause
incomplete combustion and can result
ill expostll'e to tax'ban i/lonoxide levels
above allowable cmTent standards.
Glass: There are two types at glass
cookwax'e---those fl)r ()veil tlse oxllv axld
those for top-olXrange cooking (saucepans,
coffee and teapots). Glass conducts heat
very slowly.
Heatproef Glass Ceramic: Can be used if)r
either suHi_ce or oven cooking. It conducts
heat vex? slowly and cools vex'} slowly: Check
cookware i/lant/lilcttli'ei"s directions to be
sure it can be used on gas ranges.
Stainless Steel: This metal alone has poor
heating properties and is usually combined
with coppex; ahmfinum or other metals for
improved heat distribution. Combination
metal skillets usually work satisfi_ctorik if
they are used with medium heat as the
Ilia n/llil ctlll'ei" i'ecoli/iilends,
I
_!!ib_i;iii_i:il
ii_iiiii_iiii}ii;i
,_"_>,,,,Hiiiiiii
i[i!iiiiii_i_ii{ii¸
Use a flat-bottomed wok.
Thhcanbehazardoustoyourhealth.
Wok This Way
Werecommendthatyouusea 14-inchorsmaller
fiat-bottomedwok.Makesurethewokbottomsits
flat onthegrate.Theyareavailableatyourlocal
retailstore.
Only a fiat-bottomed wok should be used.
in Case of Power Failure
In case (ff a power fidlm'e, you can light tile
gas sm_sce burners on vent range with a
match. Hold a lit match to tile burnel; then
push in and [tlx'n tile control knob to tile
LlTEposition. Use extreme caution when
lighting burnel_ this way.
Do not use a wok support ring. Placing tile
ring ()vex"tile bm'ner or grate may cause tile
bm'ner to work improperl> resulting in
cad)on monoxide levels above allowable
standards. This could be dangerous to yam"
health.
SmliJce bm'nex_ in use when ;m electrical
po',_ er fldlm'e occm_ will continue to
operate mmnally.
g
g
}
Page 10
Usingthe ovencontrols.
Throughout this manual, features and appearance may vary from your model
..............
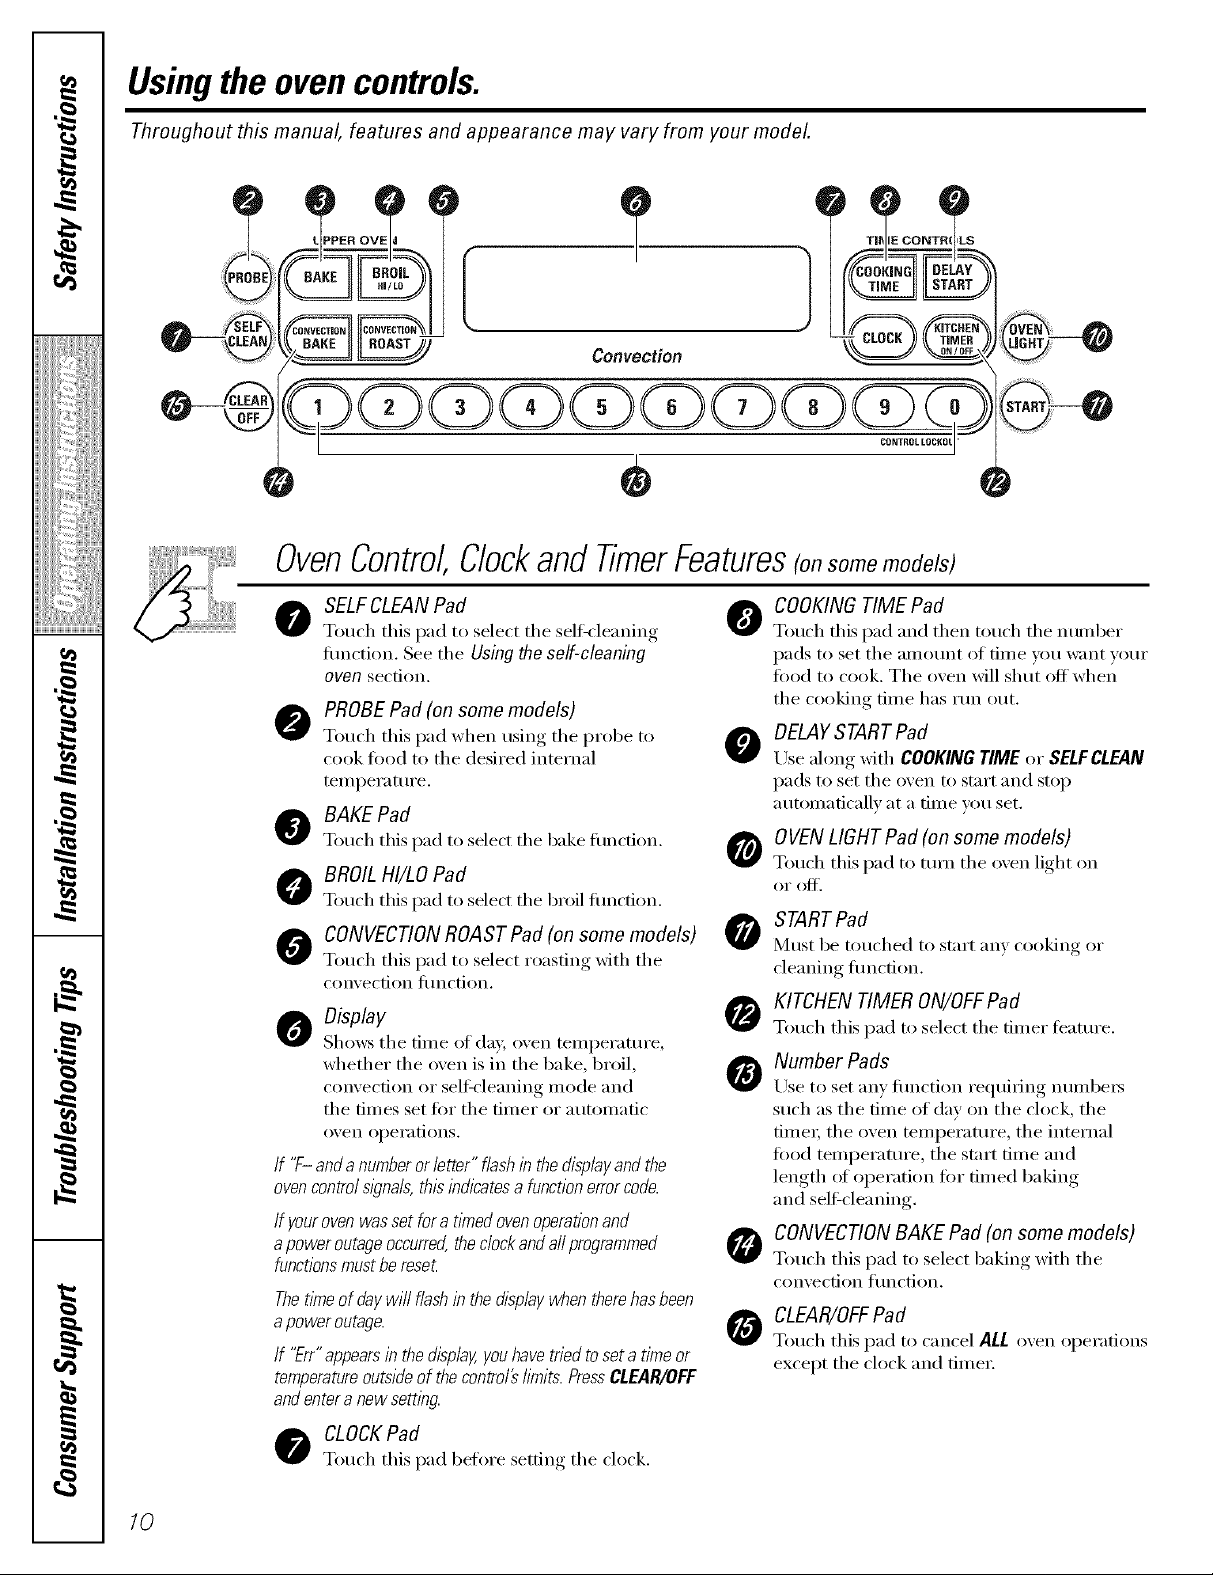
OvenControl,ClockandTimerFeatures(onsomemodels)
o SELFCLEANPad 0
Touch this pad to select the seltkleaning
flmction. See tile Using the self-cleaning
oven section.
O PROBE Pad (on some models)
Touch this pad when u.m% the Ill be t_
cook t0od to the desired internal
temperature.
O BAKE Pad
Touch this pad to select tile bake fimcfion.
O BROILHI/LO Pad
Touch this pad to select tile broil flmction.
S o" "( ) (
• 0
CONVECTIONROASTPad(onsomemodels)
Touch this pad to select roasting with tile
con% ec[ion lilnc[i()II,
O Display
Shows the tiIlle of day, oven teillpei'attli'e,
whether the oven is in the bake, broil,
convection or seltk'leaning mode and
the times set fi)r the timer or automatic
oven opei'ations.
If "F- and a numberor letter" f/ash in the displayand the
ovencontrol s/_?na/s,this indicatesa function errorcode.
If youroven was set for a tkned ovenoperationand
apower outage occurred,theclockand all programmed
functionsmustbe reset
Thetkneofdaywill flashin thedisplaywhentherehasbeen
apoweroutage.
If "Err"appearsin thedisplay,youhavetriedtoseta timeor
temperatureoutsideof thecontro/#bruits.PressCLEAR/OFF
andentera newsetting.
COOKINGTIME Pad
Totlch this pad and then fetich the ntln/ber
pads to set tile [lll]O/lnt of time VO/I W;IIIt VO/II"
toed to cook. The oven will shut off when
the cooking time has run out
DELAYSTARTPad
trse ahmg with COOKINGTIME or SELFCLEAN
pads to set the oven to start and stop
atltOil/aticallv at a [lille Veil set.
OVENLIGHT Pad (on some models)
Touch this pad to mm the o_en light on
oI" oJ_'.
START Pad
N_IIStbe touched to start _lIly cooking oI"
cleanintr J[ilnc[ion.
KITCHEN TIMER ON/OFFPad
Touch this pad to select tile timer feature.
Number Pads
Use to set any fimction requiring numbe_
such as the dine of day on the clock, the
time_; tile oven temperature, tile internal
food temperature, tile start time and
length _d operation fin" timed baking
and seltZcleaning.
CONVECTION BAKE Pad (on some models)
Touch this pad to select baking with tile
con'_ection ftlnction.
CLEAR/OFFPad
Touch this pad to cancel ALL o;en operations
except tile clock and time_:
LS
O CLOCKPad
Touch this pad before setting the clock.
/0
Page 11
Usingthe upperoven. gecom
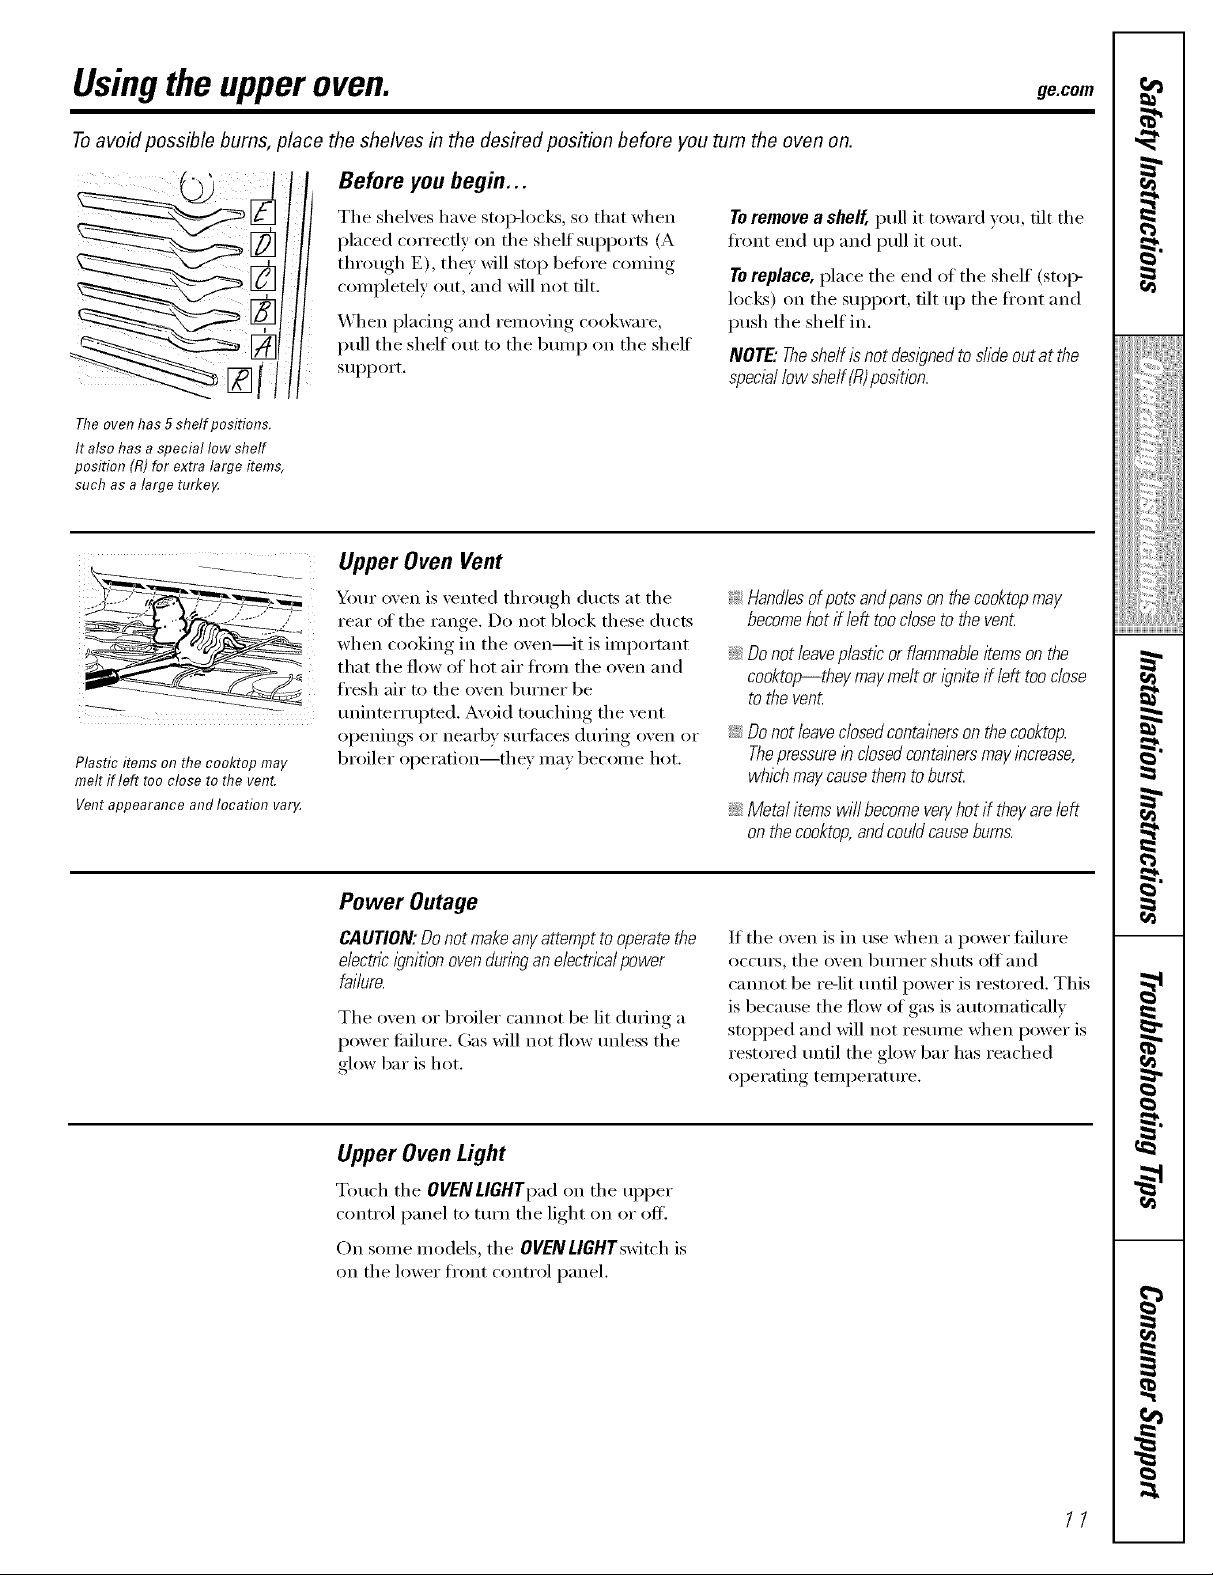
Toavoid possible bums, place the shelves in the desired position before you turn the oven on.
Before you begin...
Theoven has 5shelf positrons.
It also has a special low shelf
position (R) for extra large items,
such as a large turke_¢
i ¸ ....................
Plastic items on the cooktop may
melt if left too close to the vent
Vent appearance and location varg
The shelves have stop-locks, so that when
placed correctly on the shelf suppo_ls (A
through E), they will stop betore confing
completely out, and will not tilt.
_,,Vhen I_lacin°_ and removing, cookware,
pull the shelf out to the bump on the sheff
support.
Toremove a shelf, pull it toward you, tilt the
ti'ont end up and pull it out.
Toreplace, place the end of the shelf (stoI>
locks) on the support, tilt up the ti'ont and
push the shelf in.
NOTE."Theshelf isnot dest)ned to s/ida outat the
specta/low shelf (R)position.
Upper Oven Vent
Your oven is vented through ducts at the _:
rear _ffthe range. Do not block these ducts
when cooking in the oven--it is import;rot ::Ji::
that the flow of hot air ti'om the oven and
fresh air to the oven btlrner be
tminmrrupted. Avoid touching the vent
openings or nearby stlIbfilces during oven or N
broiler operation--they may become hot.
Handlesofpotsandpansonthecooktopmay
becomehotif lefttooclosetothevent
Do not leaveplastic or flammable items on the
cooktop--they maymelt or/)nite if left too close
to the vent
Do not leave closedcontalberson thecooktop.
Thepressurelb closedcontatbersmay increase,
whichmaycause them to burst.
Metalitemswillbecomeveryhotif theyareleft
onthecooktop,andcouldcausebums.
Power Outage
CAUTION:Donotmakeanyattemptto operate the
e/ectncignitionovenduringanelectricalpower
failure.
The oven c,r broiler cannot be lit during a
power fifilure. (;as will not flow unless the
glow bar is hot.
Upper Oven Light
Touch the OVENLIGHTpad on the upper
control panel to turn the light on or off.
On some models, the OVENLIOHTswitch is
on the lower fl'ont control panel.
If the oven is in use when a power tifilm'e
occm_, the oven burner shuts oft and
cannot be re-lit until power is restored. This
is beca use the flow of gas is a utomafically
stopped and will not resume when power is
restored tmtil the glow bar has reached
operating temperature.
11
Page 12
Usingthe upperoven.
How to Set the Upper Oven for Baking or Roasting
!
|
Theoven has aspecial low shelf(R)
position just above the oven bottom.
Use it when extra cooking space is
needed, for example, when cooking
alarge turke,A Theshelf is not
designed to sfide out at thisposition.
Youroven isnot dusli?nedfor open-doorcooking.
[] Touch the RAKE pad.
[] Touch the ntlillber pads to set the
desired telnperature,
[] Touch the START pad.
The word ON and //70° will be displayed,
_&stile oven heats up, tile display will show
tile changing temperatm'e. When tile oven
reaches tile temperature you set, a tone
will so/md.
Tochange the oventemperatureduring BAKEcycle,
pressthe BAKE padand thenthenumberpads to
get the new temperature.
[] Check fi)od fi)r doneness at minimum
time on recipe, Cook hmger if
necessarv.
[] Touch tile CLEAR/OFFpad when
c()oking is complete.
Preheating and Pan Placement
Preheat tile oven if tile recipe calls for it.
To preheat, set tile oven at tile correct
temperatm'e. Preheating is necessary
when convection baking and for good
results when baking cakes, coo!<des, past_ T
and breads.
Forovenswithoutapreheatindicatorfightortone,
preheat10minutes.
TypeofFood ShelfPosition
Frozenpies(oncookie sheet) Bor C
Angel food cake, A
bundt or pound cakes
Biscuits, muffins, brownies, C
cookies,cupcakes,
layer cakes,pies
Casseroles Bor C
Roasting Ror A
Baking results will be better if baking pans
are centered in tile oven as I/luch _ls
possible. Pans should not touch each other
or the walls of the oven. If w)u need to use
two shelves, stagger the pans so one is not
direcflv above the other; and leave
appro_mately 1 I/_>"between pans, fl'om
the fl'ont, back and sides of the wall.
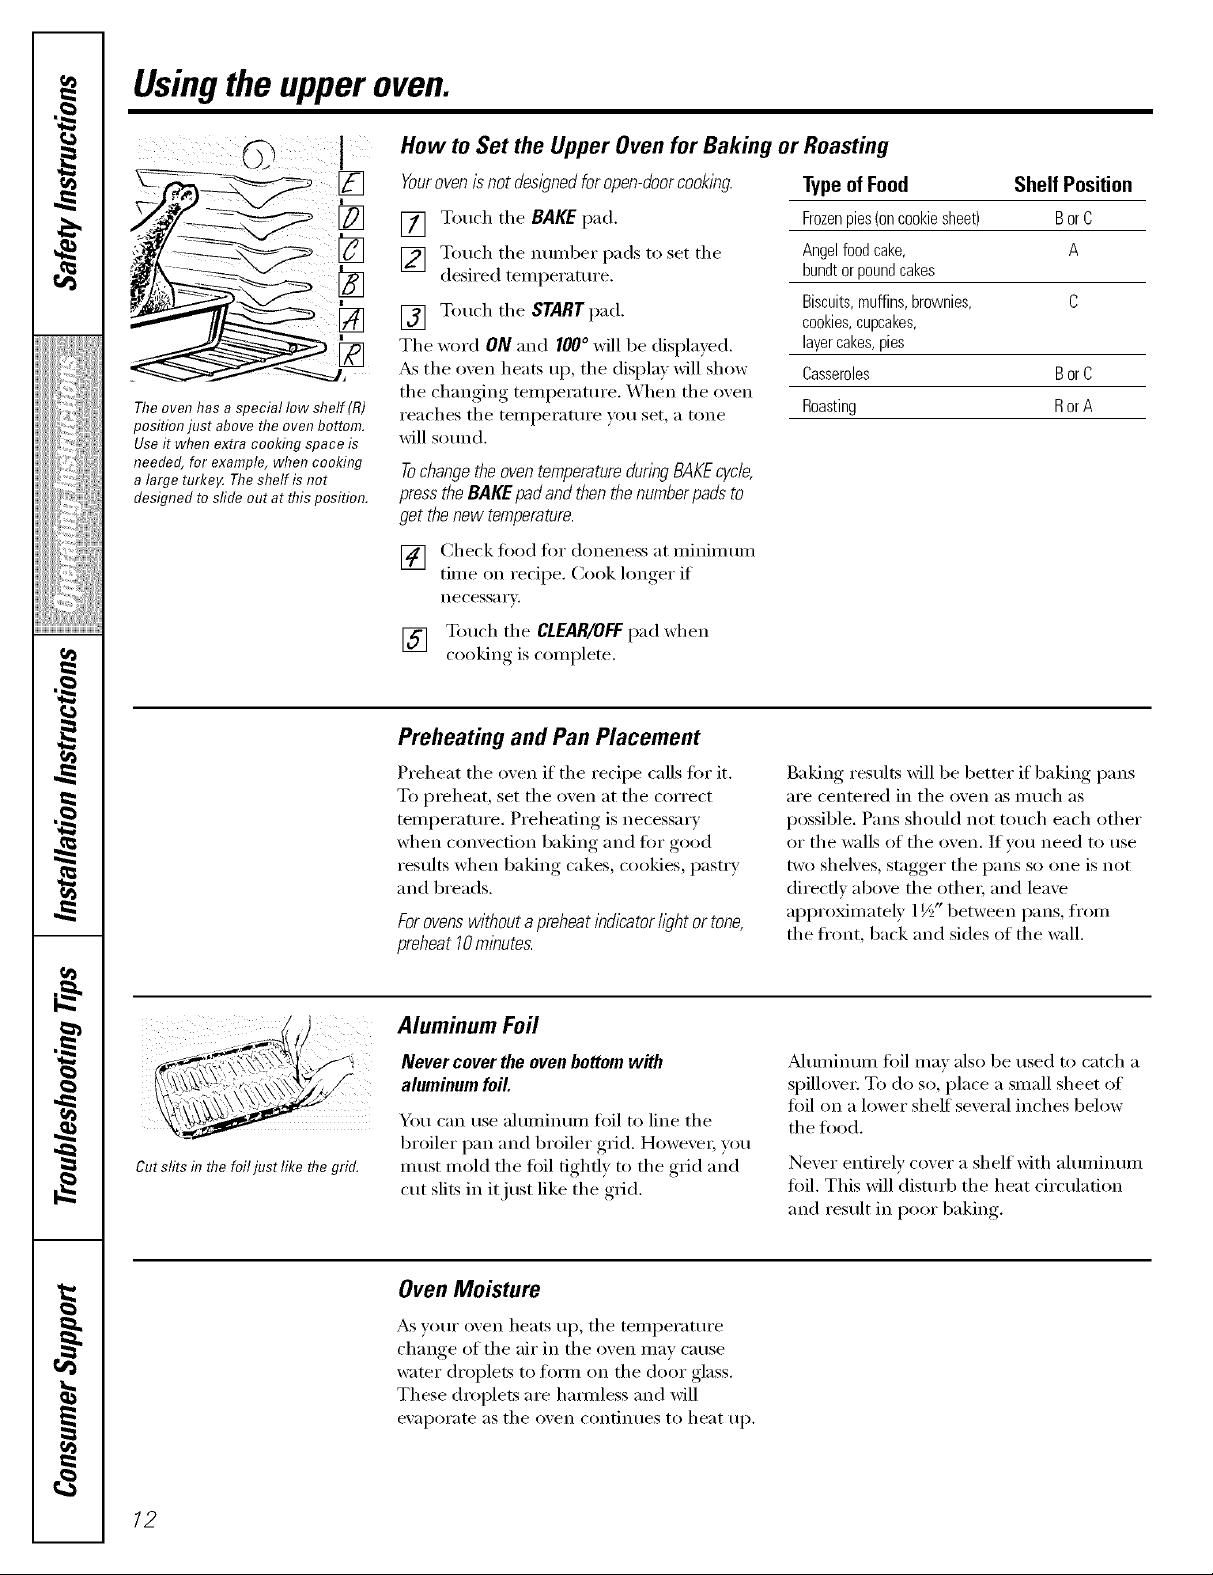
Cut slits in flTefoil usrm<eme gna.
12
Aluminum Foil
Never cover the oven bottom with
aluminum foil.
You can use ahmfinum foil to line tile
broiler pan and broiler grid. However; you
must mold the fifil tightly to the grid and
cut slits in it just like the grid.
Oven Moisture
_&svom" oven heats Ul), tile temperature
change of the air in the oven may cause
water droplets to form on tile door glass.
These droplets are hamfless and will
eval)OI'ate as tile oven contintles to heat up.
_duminum fi)il may also be used to catch a
spillove_: To do so, place a small sheet of
toil on a lower shelf several inches below
the tood.
Never entirely cover a shelf xfith almninmn
fi)il. This will distm'b the heat circulation
and result in I)°°r baking
Page 13
Always use the broiler pan and grid
that came with your oven. It is
designed to minimize smoking and
spattering by trapping juices #7the
shielded lower part of thepan.
How to Set the Upper Oven for Broiling
Ell Place the meat or fish (m the broiler
ii i
grid in the broiler pan.
[] Follow suggested shelf positions in the
Broiling Guide.
[] The o_en door must be closed during
broiling
[] Touch the BROIL HI/LO pad once tor
HIBroil
To change to LOBroil,touch the BROIL
HI/LOI)ad auain_.
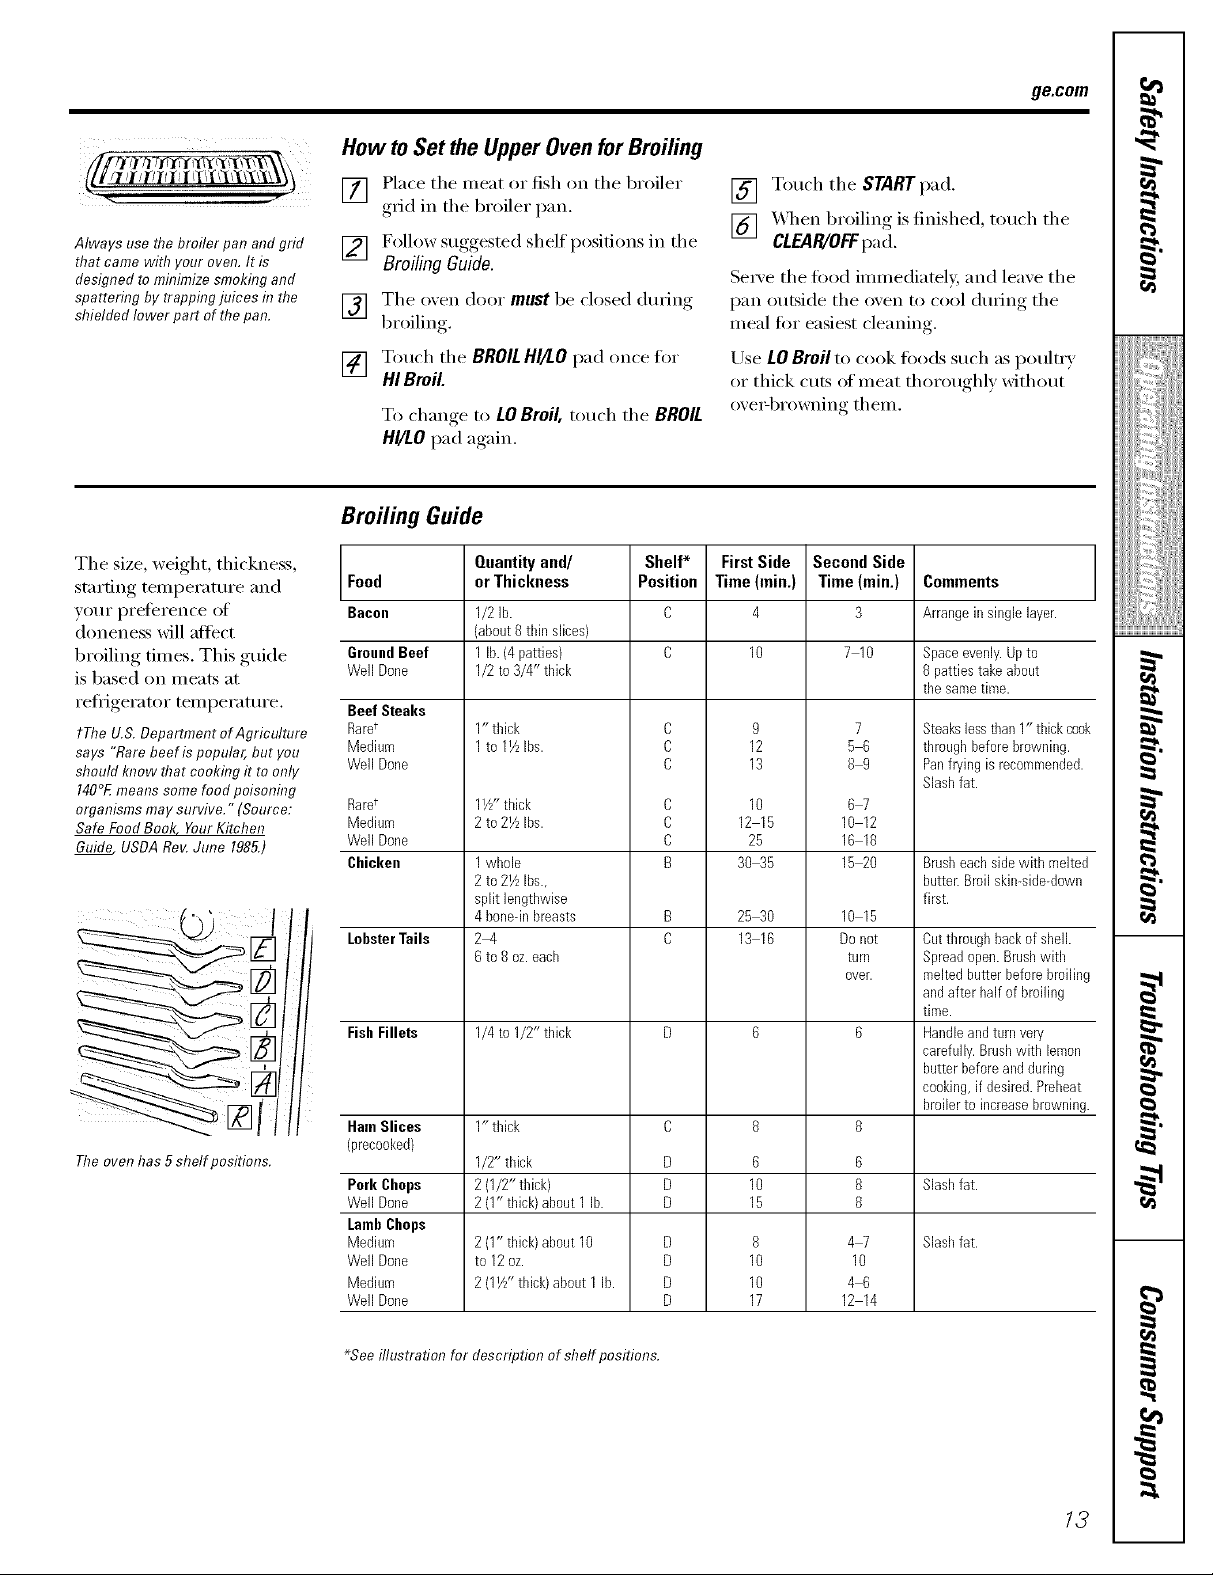
Broiling Guide
ge.com
[] Touch the START pad.
[] _._qmn broiling is finished, touch the
CLEAR/OFFpa d.
Se_'e the food immediatel); and leave the
pan outside the oven to cool during the
meal fi)r easiest cleaning.
Use LOBroil to cook fi)ods such as poultI T
or thick cuts of meat thoroughly without
eve>browning them.
I
!iiiii@iiiiiiiii
The size, weight, thickness,
starting tern )et'attu'e and Food
, [
yotlI" pI'ete'I'ence ot Bacon
aloneness will aHbct
broiling times. This guide GroundBeef
is based on meats at
_'efi_ge_'ato_" tempe_'attH'e. Beef Steaks
tThe U.& Department ofAgriculture Rarer
says "Rare beef ispopular, but you Medium
should know that cookflTgit to only Well Done
140°Emeans some food poisoning
organisms may survive." (Source: Rarer
Safe Food Boo£ Your Kitchen Medium
Guide,USDA Roy.June 1985.) Well Done
Theoven has 5shelf positions.
Well Done
Chicken
LobsterTails
Fish Fillets
Ham Slices
(precooked)
Pork Chops
Well Done
LambChops
Medium
Well Done
Medium
Well Done
Quanti_ and/
orThickness
1/2 lb.
(about8thin slices)
1 lb.(4 patties)
1/2 to 3/4" thick
1" thick
1to 11/LIbs.
11//'thick
2to 21/zIbs.
1whole
2to 21/zIbs.,
split lengthwise
4 boneqnbreasts
2q
6to 8 oz.each
1/4 to 1/2" thick
1" thick
1/2" thick
2(1/2" thick)
2(1" thick) about1 lb.
2I1" thick)about10
to 12 oz.
2(11//"thick)about1lb.
Shelf*
Position
C
C
C
C
C
C
B
D
D
D
D
D
D
D
First Side
Time (rain.)
4
10
9
12
13
10
12 15
25
30 35
25 30
13 16
6
10
15
8
10
10
17
Second Side
Time (rain.)
3
710
7
56
89
67
10 12
16 18
15 20
10 15
Donot
turn
over•
6
8
8
47
10
46
12 14
Comments
Arrangein single layer.
Space evenly. Up to
8 patties take about
the same time.
Steakslessthan1" thick coo}
throughbeforebrowning.
Panfryingis recommended.
Slashfat.
Brusheachside with melted
butter.Broilskin-side-down
first.
Cutthroughbackof sheik
Spreadopen.Brushwith
meltedbutterbeforebroilinc
andafter half of broiling
time.
Handleandturnvery
carefully.Brushwith leroon
butterbeforeandduring
cooking,if desired.Preheat
broilerto increasebrowning
Slashfat.
Slashfat.
B{i)@(
g,.
g
}
*See illustration for description of shelf positimTs.
13
Page 14
Usingthe clock andtimer.
Not all features are on all models.
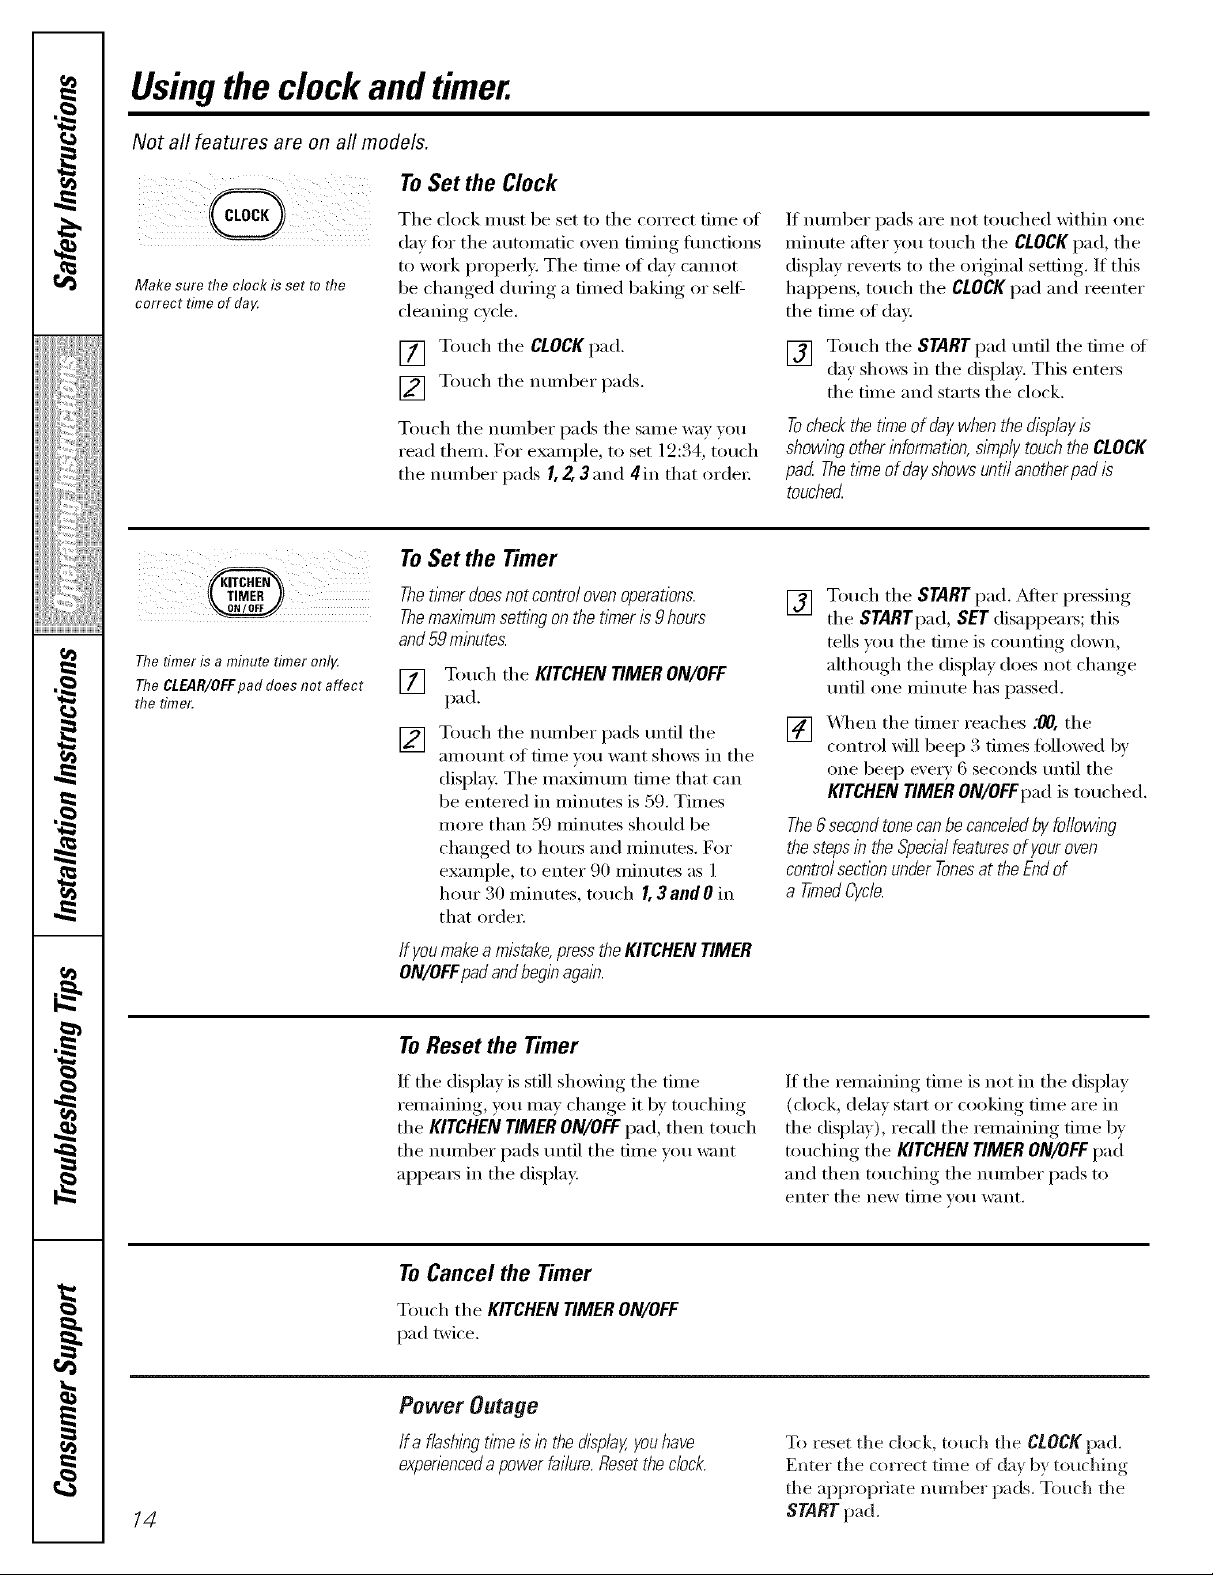
To Set the Clock
Make sure the clock is set to the
correct time of datz
I! IIIii iiiiii i iiiiii!
The timer is a minute timer onlg
The CLEAR/OFFpad does not affect
the timer.
The clock must be set to the correct time of
day for tile aumnmtic oven tinting flmctions
to work i)roi)efly. Tile time of day cannot
be changed dining a timed baking or self-
cleaning cycle.
[] Touch the CLOCKpad.
[] Touch tile number pads.
Touch tile number pads tile same way )ou
read them, For example, to set 19:34, touch
the nmnber pads I, Z 3 and 4in that or(le_:
To Set the Timer
Thet/Ner doesnot control oven operations.
Themax/Num setting on the timer is 9hours
and59 minutes.
Touch tile KITCHEN TIMER ON/OFF
[]
pad.
Touch tile numl)er pads tmtil tile
[]
ail/o/int of time xou want shows in tile
display: Tile maxim mn time that can
be entered in minutes is 59. Times
more than 59 minutes should be
changed to hems and minutes. For
example, to enter 90 minutes as ]
hour 30 minutes, touch 1,3andOin
that order:
If number pads are not touched within one
minute after um touch the CLOCKpad, the
display reverts to the original setting. If this
hal)pens , touch the CLOCKpad and reenter
the time of (la_:
[] Touch tile START pad until tile time of
day shows in tile displa). This enters
the time and starts the clock.
Tocheckthet/Noof daywhenthedisplay/s
showingotherinformation,s/Np/ytouchtheCLOCK
pad Thet/meofdayshowsuntilanotherpadis
touched
Touch tile STARTpad. _Mter pressing
[]
tile STARTpad,SETdisappears; this
tells you tile time is C()lmting down,
although tile display does not change
tmtil one minute has passed.
X&q/en tile timer reaches :00, tile
[]
control Mll beep 3 times followed by
one beep exer_ 6 seconds tmtil tile
KITCHEN TIMER ON/OFFpad is touched.
The6 secondtonecan becanceledby following
the stepsin the Special featuresof your oven
controlsectionunder Tonesat the Endof
a TimedCycle.
14
If youmakeamistake,presstheKITCHENTIMER
ON/OFFpadandbeg/))again.
ToReset the Timer
If tile display is still showing tile time
remaining, you may change it by touching
tile KITCHEN TIMER ON/OFF pad, then touch
tile nmnber pads tmtil tile time w)u want
al)l)ea_s in tile display:
ToCancel the Timer
Touch the KITCHEN TIMER ON/OFF
pad twice.
Power Outage
!fa f/ashingt/No/s in the d/sp/ay,youhave
expenenceda power failure. Reset the clock.
If tile remaining time is not in tile display
(clock, delay start or cooking time are in
tile display), recall tile remaining time by
touching tile KITCHEN TIMER ON/OFF pad
and then touching tile numl)er pads to
enter tile Ile_v [lille v()[I w;Int.
To reset tile clock, touch tile CLOCK pad.
Enter the correct time oI clay by touching
tile appropriate number pads. Touch tile
START pad.
Page 15
Usingthe timedbakingand
mastingfeatures(upperovenonly). ge.com
NOTE: Foods that spoil easilyISUCh as milk, eggs, fish, stuffings, poultry and porkIShould not be allowed to sit for more
than 1hour before or after cooking. Room temperature promotes the growth of harmful bacteria. Be sure that the oven
light is off because heat from the bulb will speed harmful bacteria growth.
How to Set an Immediate Start and Automatic Stop
i( ii( i!!i ii(!i!;iii !
i(D O(DO ¸
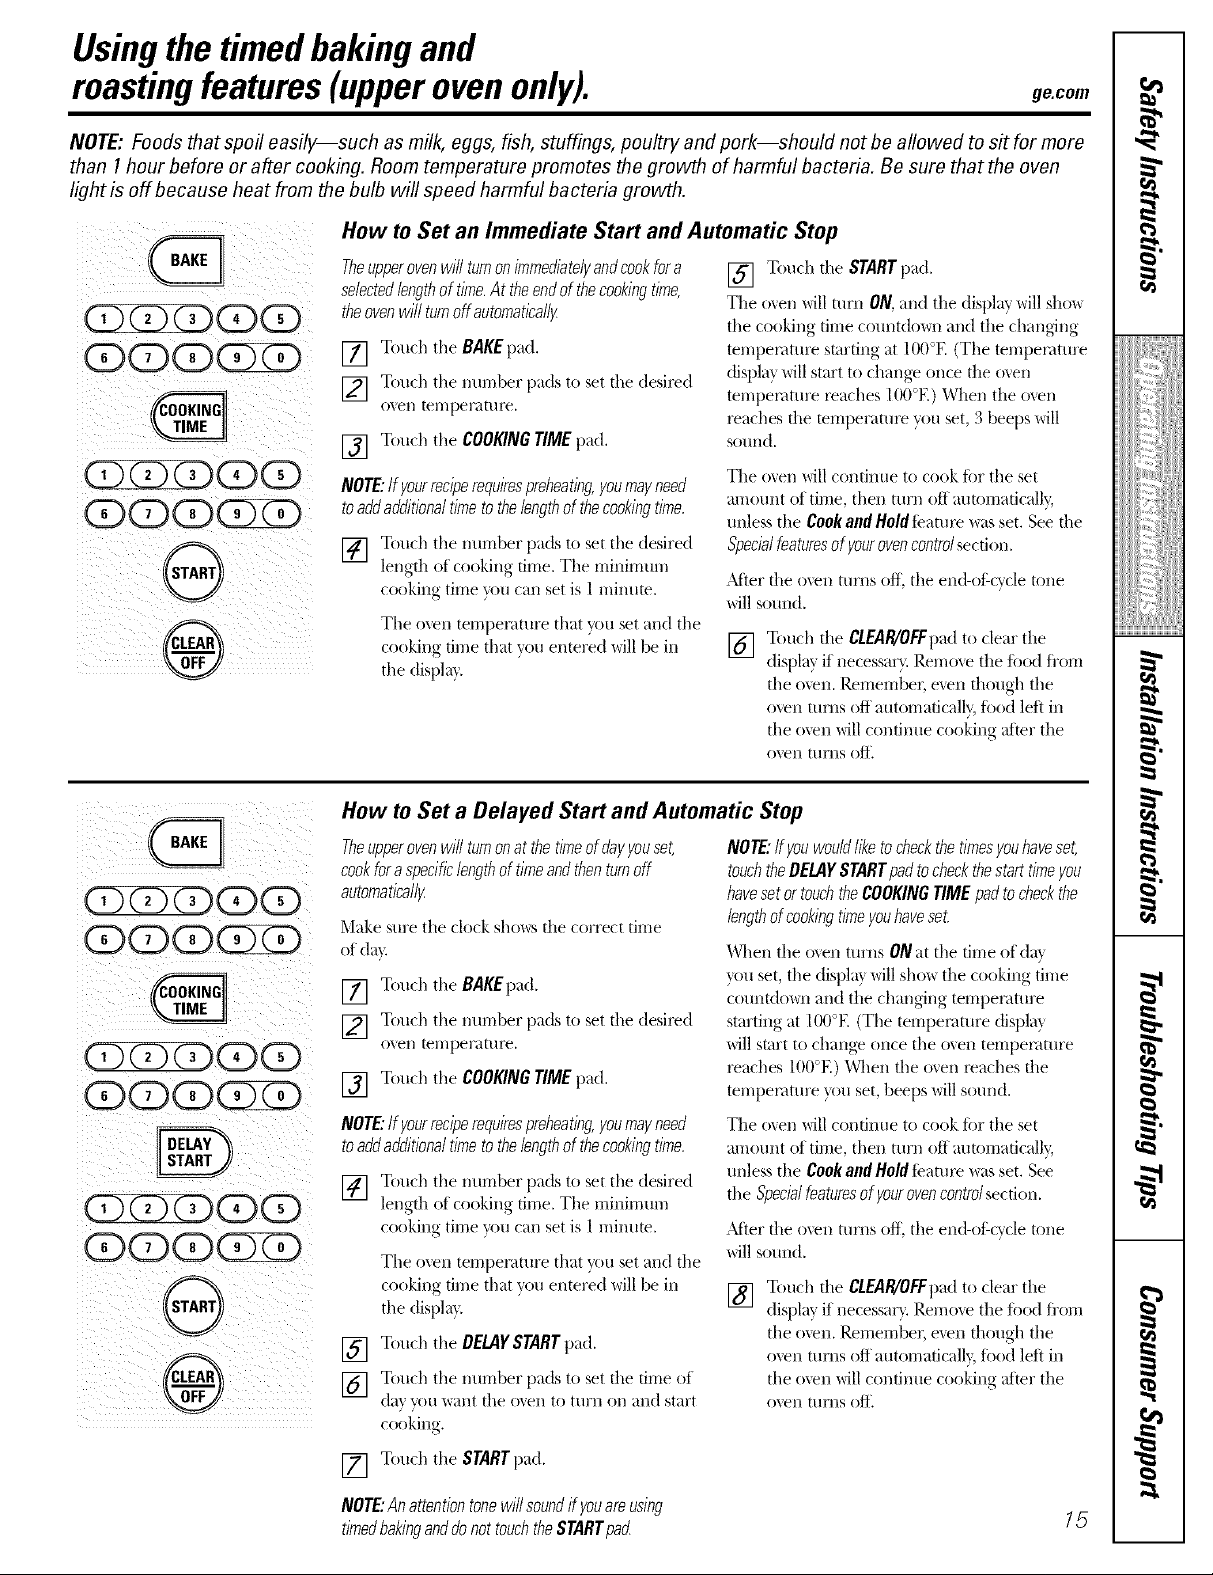
Theupperovenwillturnonimmediatelyandcookfora
selectedlengthof time.At theendof thecookingtime,
theovenwillturnoff automatical/F
[] Tomh tile BAKEpad.
[] Touch tile nm-nber pads to set tile desired
o_eI/ tefl/per_lt t/l_.
[] Touch the COOKINGTIME pad.
NOTE:Ifyourreciperequirespreheating,youmayneed
toaddadditionaltimetothelengthof thecookingtime.
[] Touch tile number pads to set tile desired
length of cooking time. The minimum
cooking time _)u can set is 1 milmm.
The oven temperature that you set and the
cooking time that w)u entered will be in
the dispkg.
[] Touch tile STARTpad.
TJle o_en will ulna ON. and the display will sho_
the cooking time countdo_m and the changing
temperature starting at 100°E (The temperature
(fispla} will start to change once the o_en
tempen_ture reaches 100°E) When the o_en
reaches file mmperamx_ you set, 3 beeps will
SOIlI/d.
The o_en will confim]e to cook Ibr the set
amount of time, then turn off automaficalb;
unless the CookandHoldteature was set. See file
Specialfeaturesofyourovencontrolsection.
_Mier the oven turns off. the end-of cycle tone
will sound.
[] Touch tile CLEAlglOFFpadto clear the
display if necessa_). Remove the food fi'om
the oxen. Remembec exert though the
oven turns off automaticalb, fi)od left in
the oxen will continue cooking after the
oxell t/lI'/lS ()_"
I
r,.#_
!iiiii_;iii_Jiiiiiiiii
i
,Q
GO00
000
@@OOO
000
@@@O@
000
@
®
How to Set a Delayed Start and Automatic Stop
Theupperovenwillturnonat thetimeofdayFouset,
cookfora specificlengthof timeandthenturnoff
automatical/F
Make sm'e the clock shows tile correct time
of dat.
[] Touch the BAKEpad.
[] Touch the nm-nber pads to set tile desired
oven tel//perat/ire.
[] Touch the COOKINGTIME pad.
NOTE:Ifyourreciperequirespreheating,youmayneed
toaddadditionaltimetothelengthof thecookingtime.
[] Touch the nm-nber pads to set the desired
length of cooking time. The minimum
cooking time }_m can set is 1 milmm.
The men teml)emmre that wm set and the
cooking time that w)u entered will be in
the displa}.
[] Touch the DELAYSTARTpad.
] Touch the nm-nber pads to set tile time of
day wm "W}li/ttile o'_en to t/iria Oil and start
cooking.
Touch the STARTpad.
[]
NOTE:ff Fouwouldliketocheckthetimesyouhaveset,
touchtheDELAYSTARTpadtocheckthestarttimeyou
havesetortouchtheCOOKINGTIME padtocheckthe
lengthofcookingtimeyouhaveset.
When the oven turns ONat the time ot dat
}ou set, the displa} will sho_ the cooking time
countdo_m and the changing temperature
starting at 100°E (The temperature displa}
will start to change once the o\en temperature
x_aches 100°E) When the oven x_aches the
tempen_ture you set, beeps will sound.
The o_en will contimm to cook tOTthe set
amount of time, then turn off mmm-mticalb;
unless the CookandHoldteature was set. See
the Specialfeaturesof Fourovencontrolsection.
)dter file oven turns off. the end-of cycle tone
will sound.
[] Touch tile CLEAR!0FFpad to clear the
display if necessar}. Remoxe the food from
the oxen. Remember, exert though the
oxen turns off automaticall}; fi)od left in
the oxen will continue cooking after the
oxell t/lI'/lS ()_:
i
g
g
}
NOTE:Anattentiontonewillsoundif youareusing
timedbakinganddonottouchtheSTARTpafl
15
Page 16
Usingtheprobe.(onsomemodels)
For many foods, especially roasts and poultry, internal food temperature is the best test for doneness. The temperature
probe takes the guesswork out of cooking foods to the exact doneness you want.
Use oI probes other than the one provided
with this product may result in damage to
the probe.
p!ug
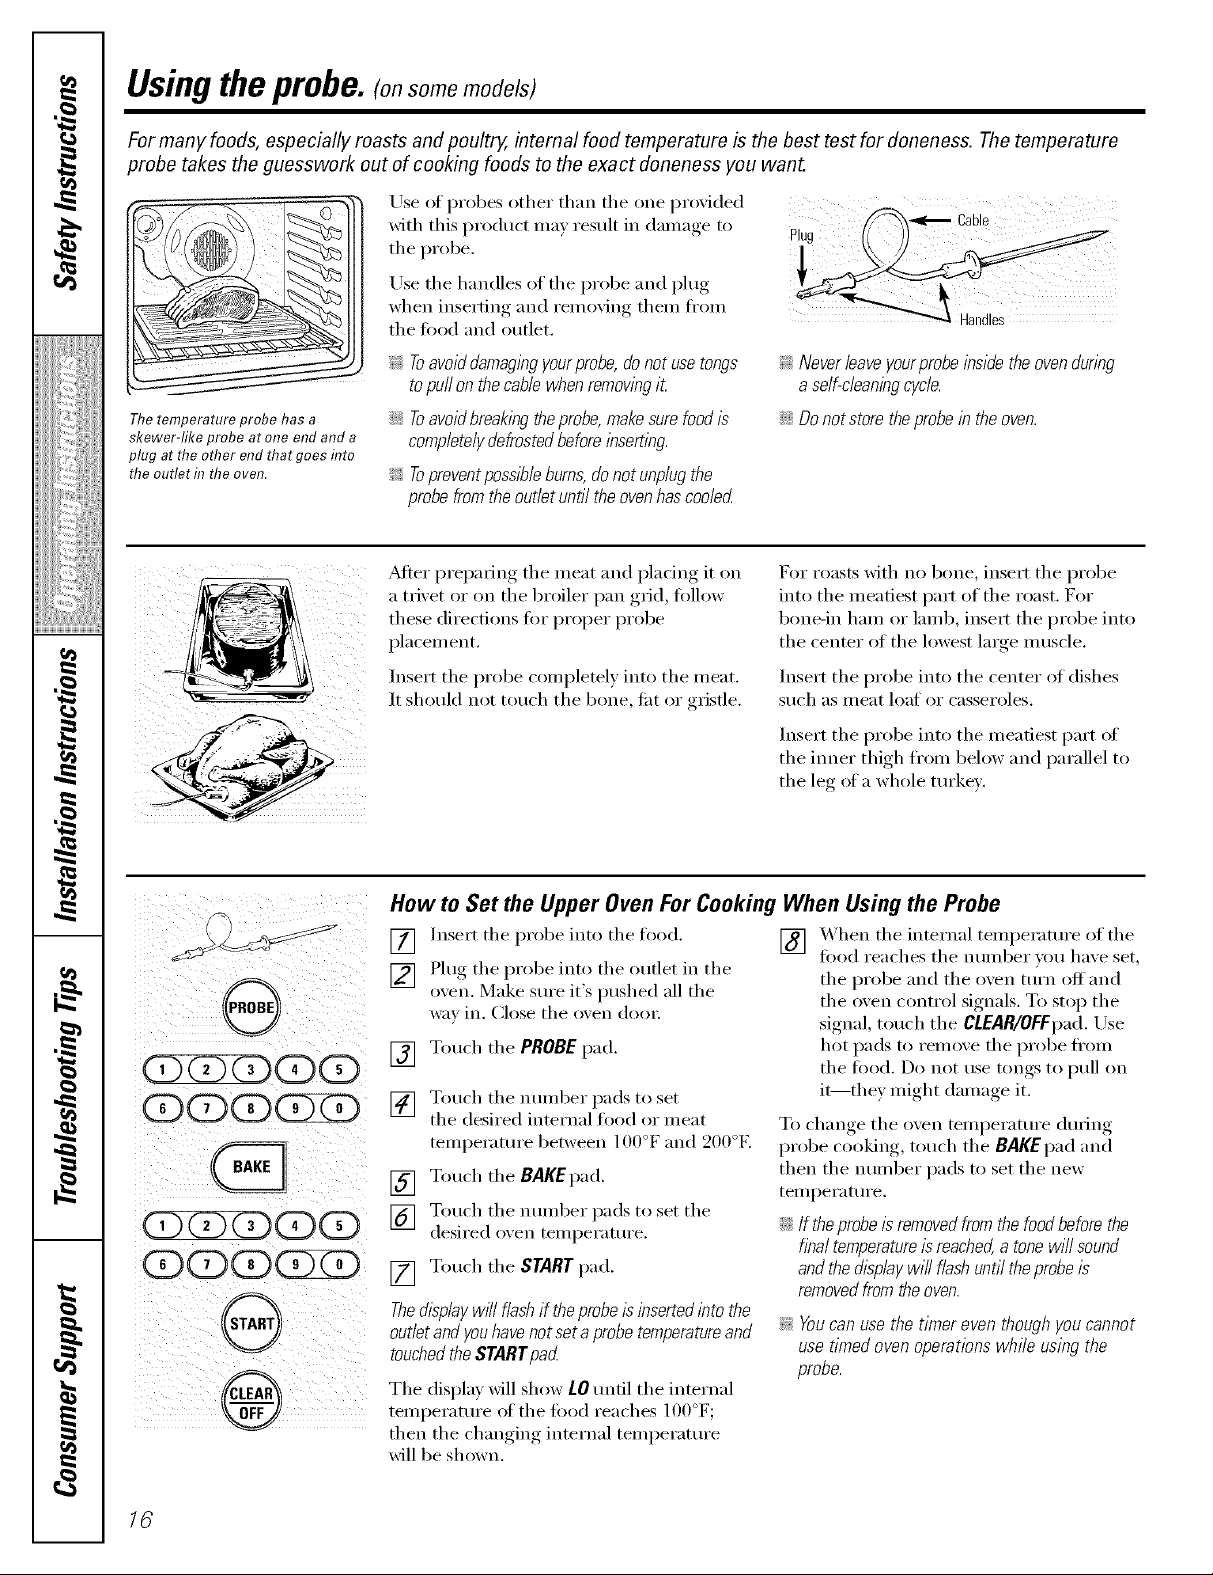
Thetemperature probe has a
skewer-like probe at one end and a
plug at the other end that goes flTto
the outlet t7 the oven.
Use tile handles of tile probe and plug
when inserting and removing them ti'om
the toed and outlet.
!i; Toavoiddamagingyourprobe,donotusetongs
topullonthecablewhenremovingit
iJi::Toavoidbreakingtheprobe,makesurefoodis
completelydefrostedbeforeinserting.
!;>Topreventpossibleburns,donotunplugthe
probefromtheoutletuntiltheovenhascooled
AFter preparing the meat and plating it on
a trivet or on the broiler pan grid, follow
these directions fi)r proper probe
placement,
Insert the probe completely into the meat,
It should not touch the bone, ti_t or gristle.
!
!;>Neverleaveyourprobeinsidetheovenduring
aself-cleaningcycle.
iJi::Donot store theprobein the oven.
For roasts with no bone, insert the probe
into the meatiest part of the roast. For
bone-in ham or lamb, inse_t the probe into
the center of the lowest large muscle.
Inse_t the probe into the center of dishes
Stlch as II/eat loat or casseroles.
Insert the probe into the meatiest part of
the inner thigh fl'om below and parallel to
the leg of a whole tm'kex.
io>oQ®G
g i ii
iO>OQQ(D
iiQ(DO
)ii¸@ i !
How to Set the Upper Oven For Cooking When Using the Probe
Insert the probe into the food.
[]
Plug the probe into the outlet in the
[]
oxen. Make sure it's pushed all the
wa_ in. Close the oxen dora:
[] Touch the PROBEpad.
[] Touch the nmnber pads to set
the desired internal food or meat
temperature between 1()()°F and 200°F.
[] Touch the BAKEpad.
[] Touch the nmnber pads to set the
desired o;en temperatm'e.
[] Touch the START pad.
Thedisplaywfflflashif theprobeisinsertedintothe
outletandyouhavenotsetaprobetemperatureand
touchedtheSTARTpad
The display will show LO tmfil the internal
temperature of the fi)od reaches I00°F;
then the changing internal temperature
will be shown.
] X_q_en the internal temperature of the
fi)od reaches the number _,ou haxe set,
the probe and the oven mrn off and
the oven control signals. To stop the
signal, touch the CLEAR/OEEpad, Use
hot pads to remove the probe ti'om
the fi)od. Do not use tongs to pull on
it--they might damage it.
To change the oven temperature during
probe cooking, touch the BAKE pad and
then the number pads to set the new
temperatm'e.
::Ji::If theprobe is removedfrom the food before the
final temperatureisreached,a tone will sound
and the displaywill flash until theprobeis
removed from theoven.
!;>Youcanuse thetimereventhoughyoucannot
usetimedovenoperationswhile usingthe
probe.
16
Page 17
Usingthe convectionoven.(onsome models) ge.com
The convection oven fan shuts off when the oven door is opened. DONOTleave the door open for long periods of time
while using convection cooking.
To help you understand the difference
iil; ii
h7 a COITVectioI7 oveR, a far
circulateshotair over,underand
aroundthefood.Thiscirculatinghot
airis evenlydistributedthroughout
theovencavity.Asaresult,foods
are evenly cookedandbrowne_
oftenin lesstimethanwith regular
heat.
between comection bake and roast and
traditional bake and roast, here are some
general guidelines.
ConvectionBake
ii
;;Ji::Preheattheoven.SeetheUsingthe Oven-
PreheatingandPanPlacementsection.
::Ji::Idealforfoodscookedonmu/tl))/eshelves.
_; Goodforlargequantitiesofbakedfoods.
;;J_::Goodresultswithcookies,biscuits,brownies,
cupcakes,creampuffs,sweetroils,angelfood
cakeandbreacL
Tile comecfion tim circulates tile heated
air e',enl_ o',er and around the t0od.
ConvectionRoast
_Ji:_Goodfor large tendercutsof meat, uncoverecL
Tile convection fire circulates tile heated
air evenly over and around tile food. Using
the grid and broiler pan provided, heated
air will be circulamd over and around tile
t0od being roasted. The heated air seals in
juices quickly for a moist and tender
product while, at the same time, creating
a rich golden brown exterioi:
x. j
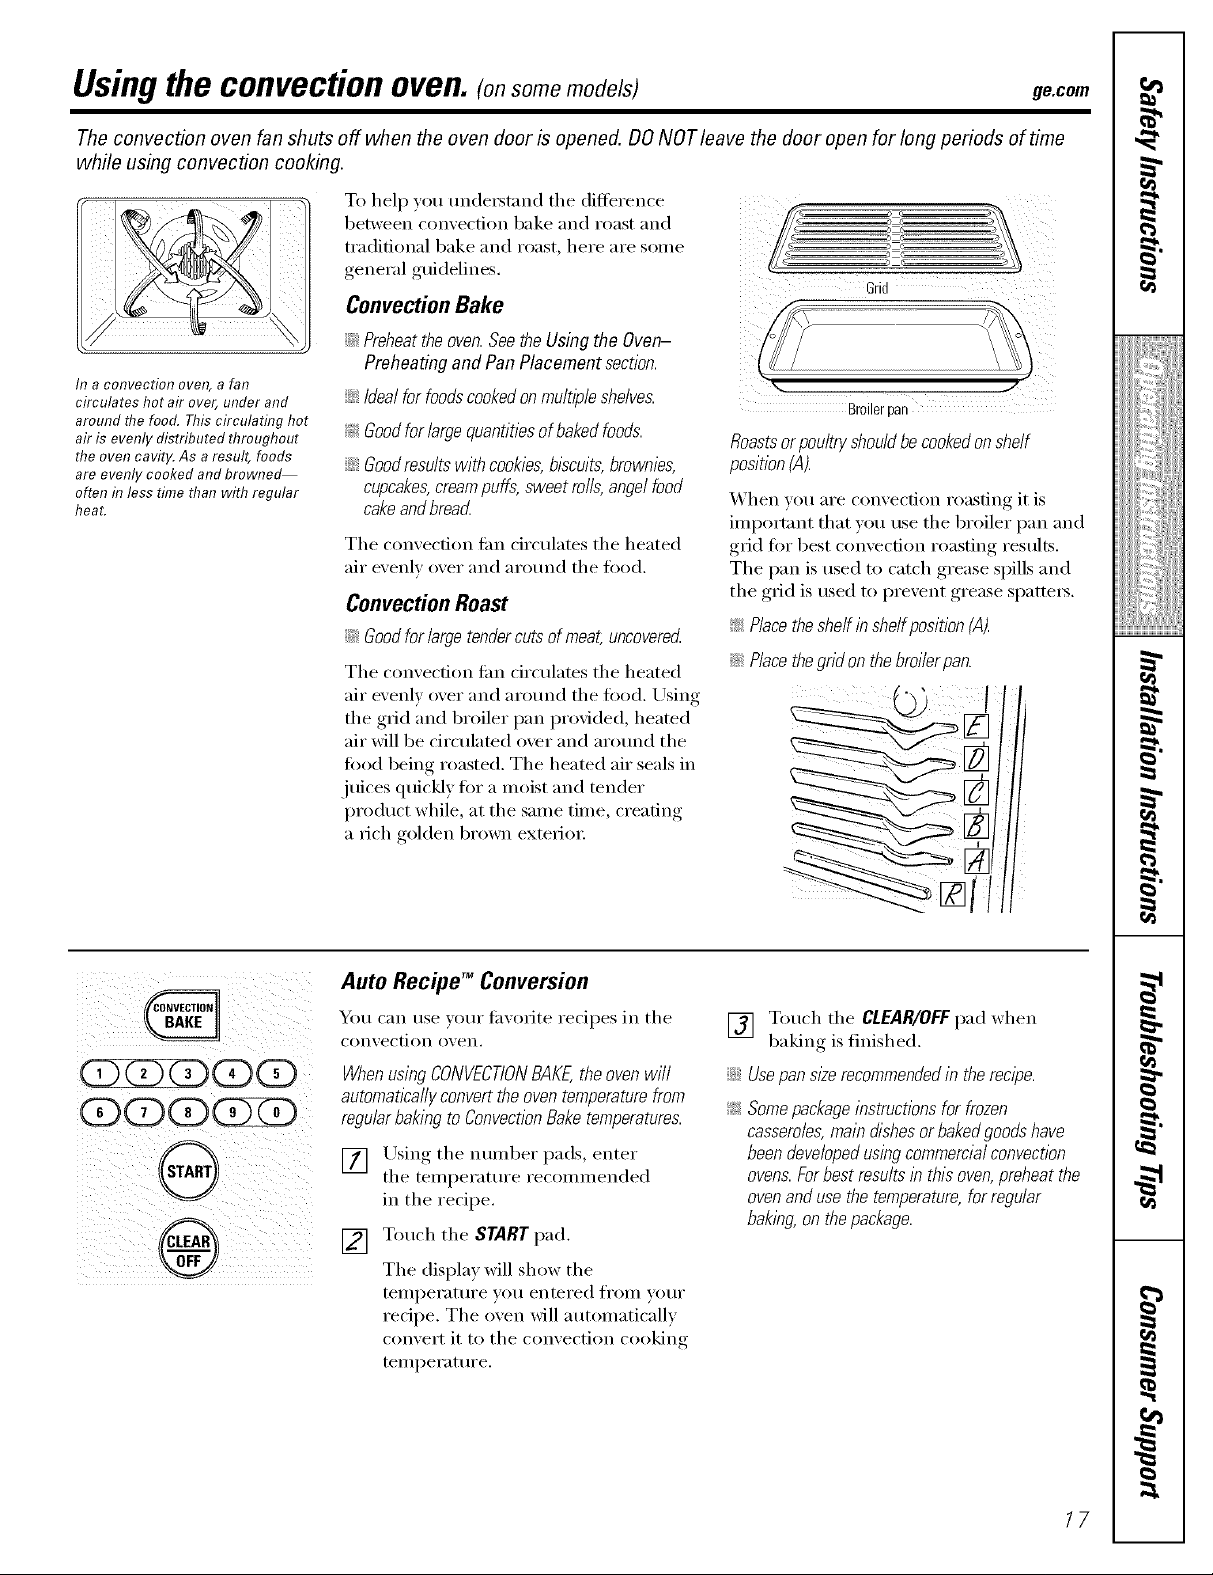
Roastsorpoultryshouldbecookedonshelf
position(A).
When w_u are convection roasting it is
important that you use tile broiler pan and
grid for best convection roasting results.
The pan is used u_ catch grease spills and
the grid is used to prevent grease spatters.
!;>Placetheshelfinshelfposition(A).
iJi::Placethegndonthebroilerpan.
Z
Grid
Br0ilerpan
G
Q(D(D(Z)(D
(DOD(D(2D
0
r®
Auto Recipe TM Conversion
You can use your fh',orite recipes in tile
con', ection o_, ell.
When using CONVECTIONBAKE,the oven will
automatlcafly convert the oven temperature from
regular baking to ConvectionBake temperatures.
[] Using the number pads, enter
tile temperature recommended
in the recipe.
[] Touch tile START pad.
The display will show the
telnperature you entered fix)in your
redpe. The oven will automatically
convert it to tile convection cooking
temperature.
[] Touch tile CLEAR/OFFpad when
baking is finished.
iJi::Usepan s/#erecommendedin the recipe.
_: Somepackage instructions for frozen
casseroles,main dishes or bakedgoods have
been developedusing commercial convection
ovens.Forbest results in this oven, preheat the
ovenand use the temperature, for regular
baking, on the package.
17
Page 18
Usingthe convectionoven.(o,some models)
Cookware for Convection Cooking
gefi)re using your convection oven, check
to see if w)ur cookware leaves room fin" air
circulation in tile oven. If you are baking
with several pans, leave space between
them. _Mso, be sure tile pans do not touch
each other or tile walls of tile oven.
Paper and Plastic
Heat-resistant paper and plastic ('ontaine_
that are recommended fin" use in regular
ovens C[lIl be tlsed in convection ovens.
Plastic cookware that is heat-resistant to
temperatures of 400°F can also be used,
when oven is below 400°E
How to Set the Upper Oven for Convection Baking or Roasting
Metal and Glass
Any type of cookware will work in veto"
convection oven. However; metal pans heat
tile ti_smst and are recommended fi)r
convection baking.
_: Darkenedormatte-fimshedpans will bake faster
thanshiny pans.
::Ji::Glassorceramlcpanscookmore s/ow/g
_l/en baking cookies, you will get tile best
results if you use a fiat cookie sheet instead
ot a pan with low sides.
For recipes like oven-baked chicken,
use a pan with low sides. Hot air cmmot
circulate well aro/md food in a pan with
high sides.
When convection baking with only
I shelf, follow the shelf positions
recommended f17the UsflTgthe
Ovensection.
[] Touch tile CONVECTION BAKE or X_q/ell tile oven starts to heat tile thanein,,,_
CONVECTION ROAST pad. temperature, ,startim,_at lO0°k will be
displa)ed. _q/en tile oxen reaches tile
[] Touch tile nmnber pads to set tile temperatm'e you set 3 beeps will so/md.
desired oxen temperature.
[] Touch tile STARTpad. [] finished.T°uchtile CLEAR/OFFpad when
To cham,e,_ tile oven temperatm'e, touch tile
CONVECTION BAKE or CONVECTIONROAST
pad and then tile number pads to set tile
new telill)ei'attlre.
NOTE:Youwillheara fanwhilecookingwith
convection.Thefan willstopwhenthedoor is
openedbuttheheatwillnotturnoK
Thefanwi//notstartuntilthepreheattemperature
isreached
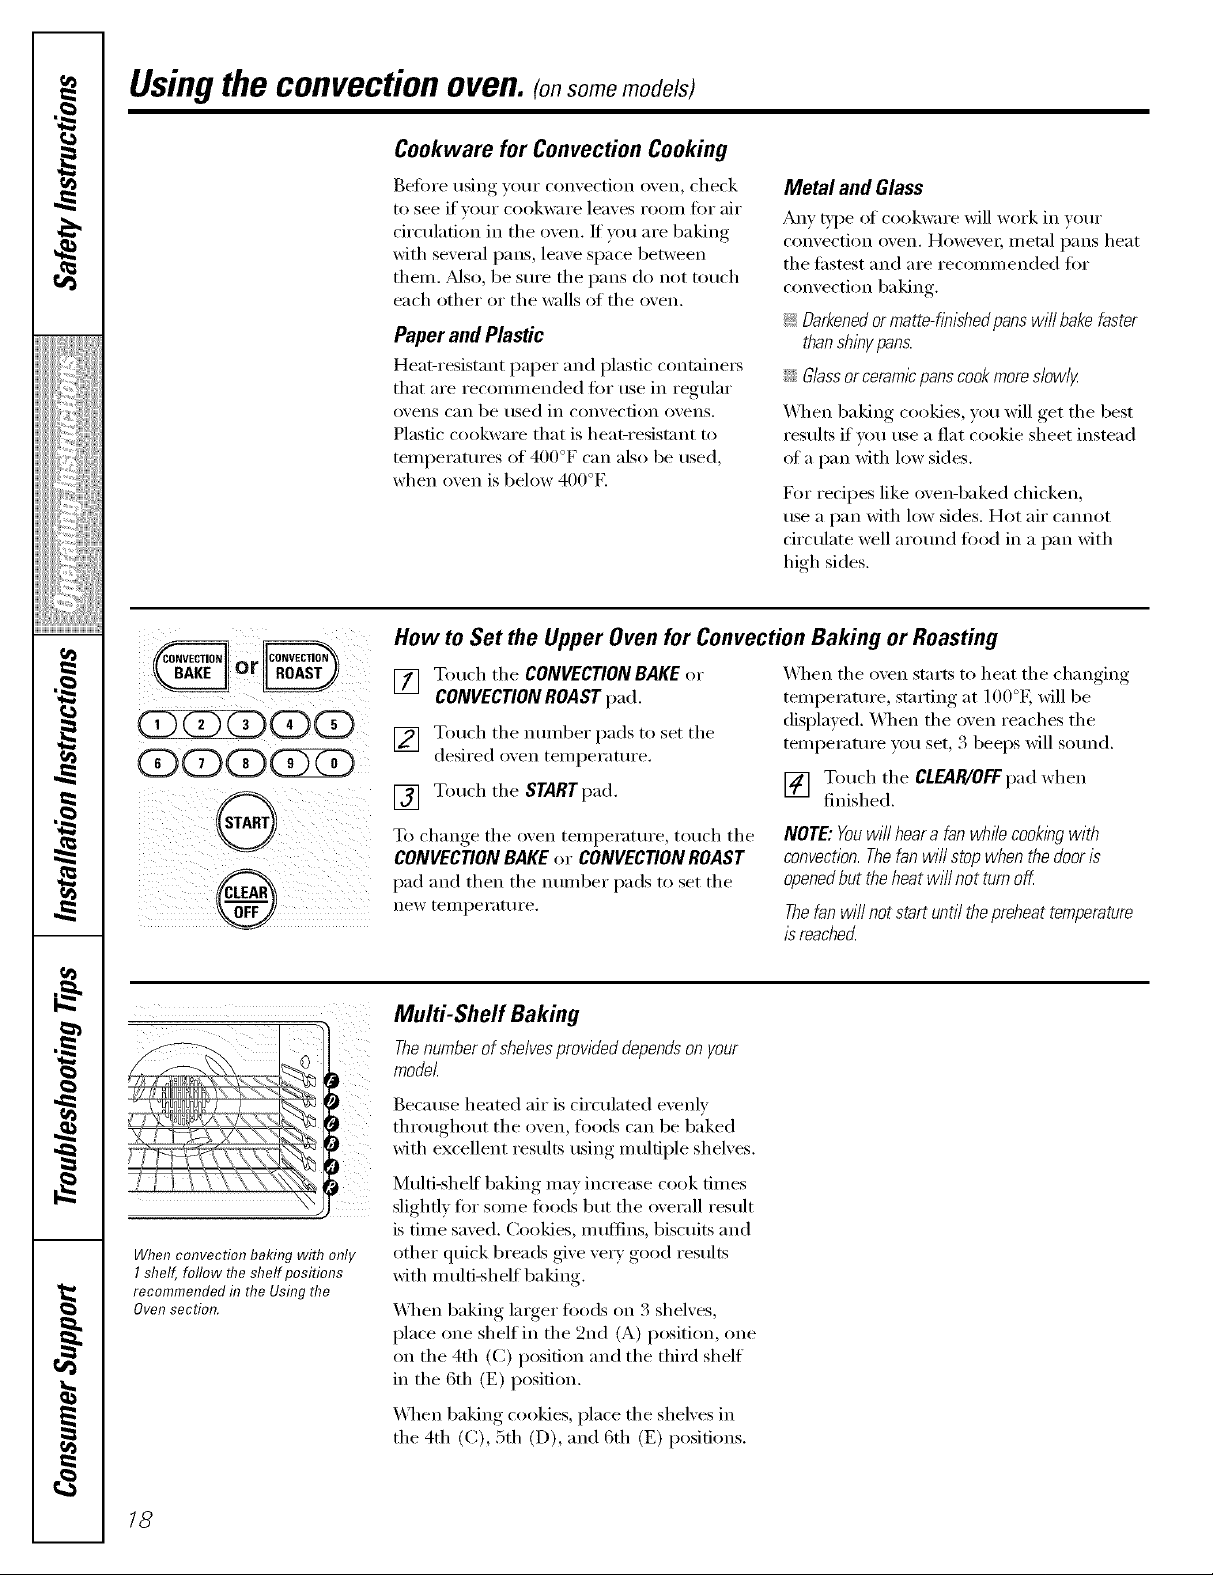
Multi-Shelf Baking
Thenumber of shelvesprowtied dependson your
model.
Because heated air is circulated evenly
throughout tile oven, fi)ods can be baked
with excellent results using m ulfiple shelves.
Multi-shell baking may increase cook times
slightly fin" some toods but the overall result
is time saved. Cookies, muffins, biscuits and
other quick breads give ve_T good results
with multi-shelf baking.
X4]/en baking larger toods on 3 shelves,
place one shelf in the 2rid (A) position, one
on tile 4th (C) position and tile third shelf
in the 6th (E) position,
\_]/en baking cookies, place tile shelves in
the 4th (C), 5th (D), and 6th (E) positions.
18
Page 19
ge.com
How to Set the Upper Oven for Convection Roasting when Using the Probe
(onsome models)
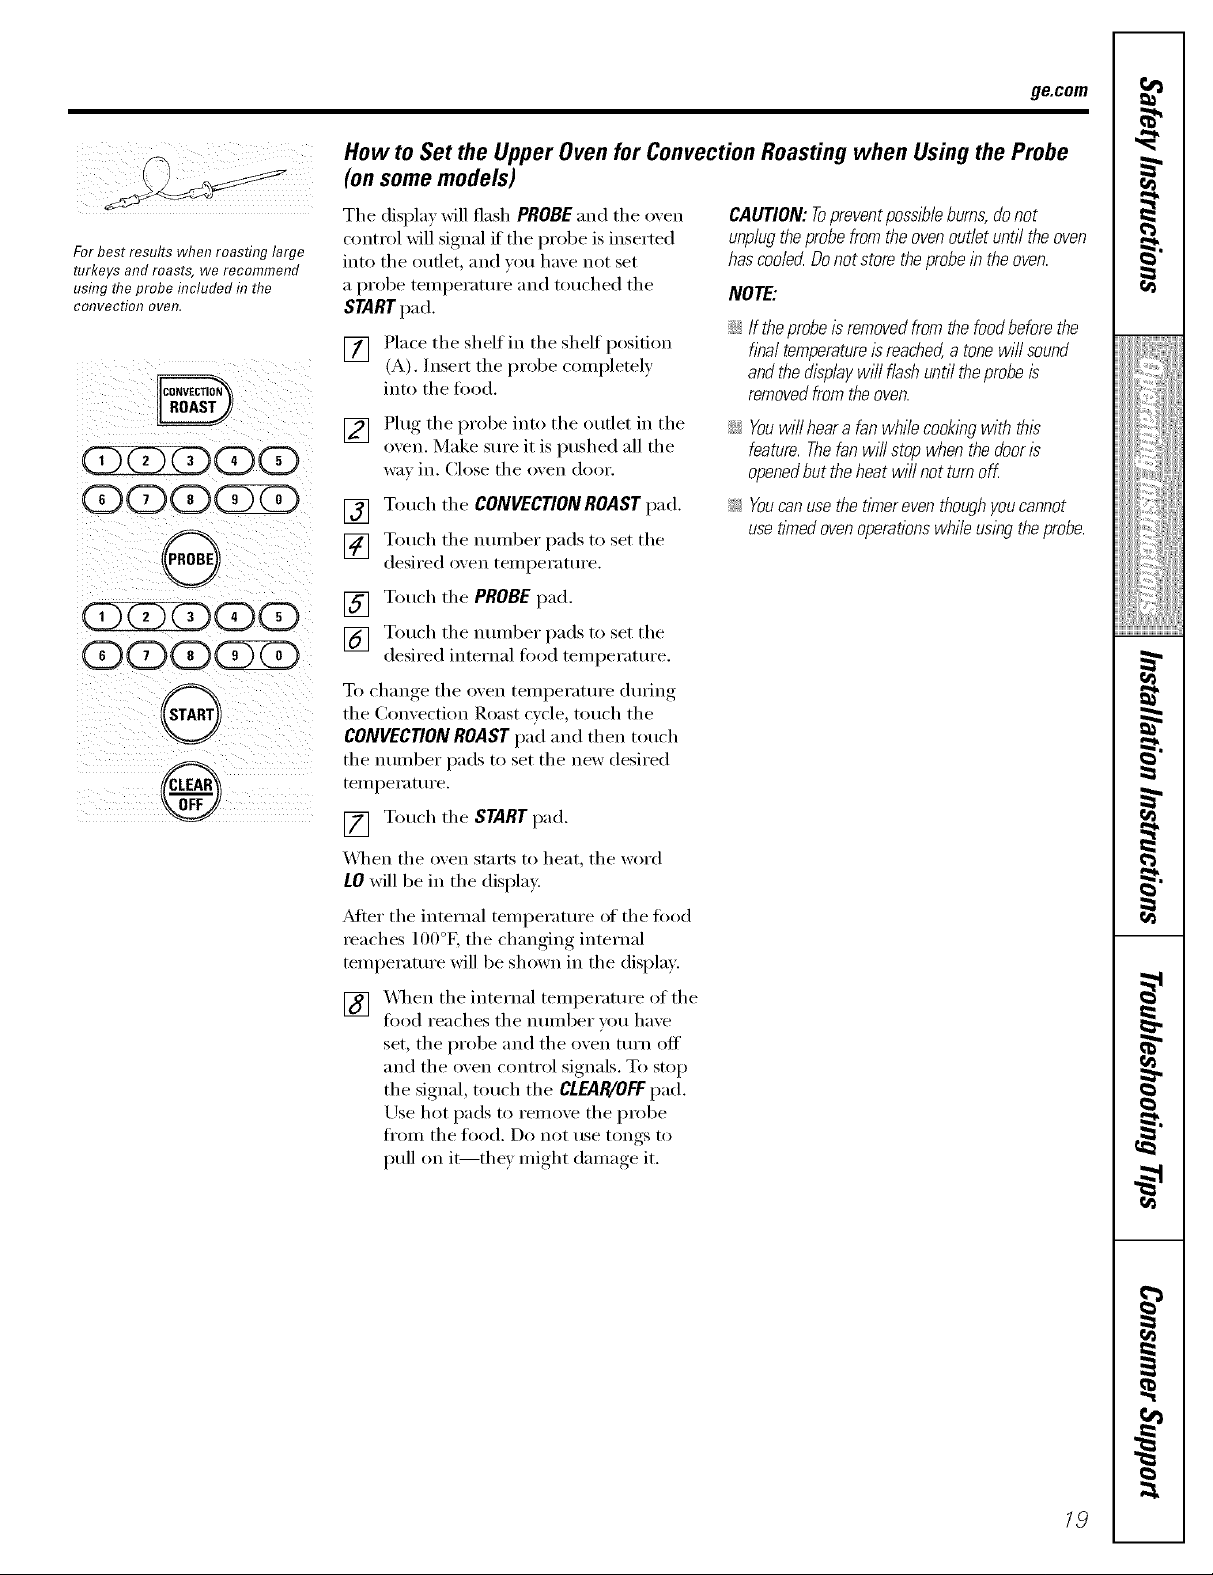
For best results when roasting large
turkeys and roasts, we recommend
ushTgthe probe hTcluded h7the
COtTvect/oI7 oven.
00QQ
QQQ
0
QOOQQ
QQQ
0
®,
The display will flash PROBE and the oven
control Mll signal if the probe is inserted
into the outlet, and you have not set
a probe temperatm'e and touched the
STARTpad.
[] Place the shelf in the shelf position
(A). Insert the probe completely
into the toed.
[] Plug the probe into the outlet in the
oxen. Make sure it is pushed all the
wa_ in. Close the oxen door.
[] Touch the CONVECTION ROAST pad.
[] Touch the nmnber pads to set the
desired oxen temperatm'e.
[] Touch the PROBE pad.
[] Touch the immber pads to set the
desired internal fi_od temperature.
To change the (wen temperature during
the Convection Roast cycle, touch the
CONVECTION ROAST pad and then touch
the number pads to set the new desired
temperatm'e.
[] Touch the START pad.
_]_en the oven stnrts to heat, the word
£0 will be in the display.
_Mter the internal temperature of the fi)od
reaches 100°K the changing internal
temperature will be shown in the display.
CAUTION:Topreventpossibleburns,donot
unplugtheprobefromtheovenoutletuntiltheoven
hascoo/ecLDonotstoretheprobein theoven.
NOTE:
::Ji::If theprobe is removedfrom the food before the
final temperature/s reached,a tone will sound
and the displaywill flashuntil theprobe is
removedfrom theoven.
iJi::Youwillheara fanwhilecooktbgwith this
feature.Thefanwill stopwhenthedooris
openedbuttheheatwill notturnoff.
!i_:Youcanusethetimereventhoughyoucannot
usetimedovenoperationswhileusingtheprobe.
I
r,.#_
!iiiii_;diiiiiiii
] _,_3_en the internal temperature of the
fi)od reaches the nmnber you haxe
set, the probe and the oven mrn off
and the oven control signals. To stop
the signal, much the CLEAR/OFFpad.
Use hot pads to remove the probe
fl'om the fl)od. Do not use tongs to
pull on it--they might damage it.
g
g
19
Page 20
Usingthe convectionoven.(onsome models)
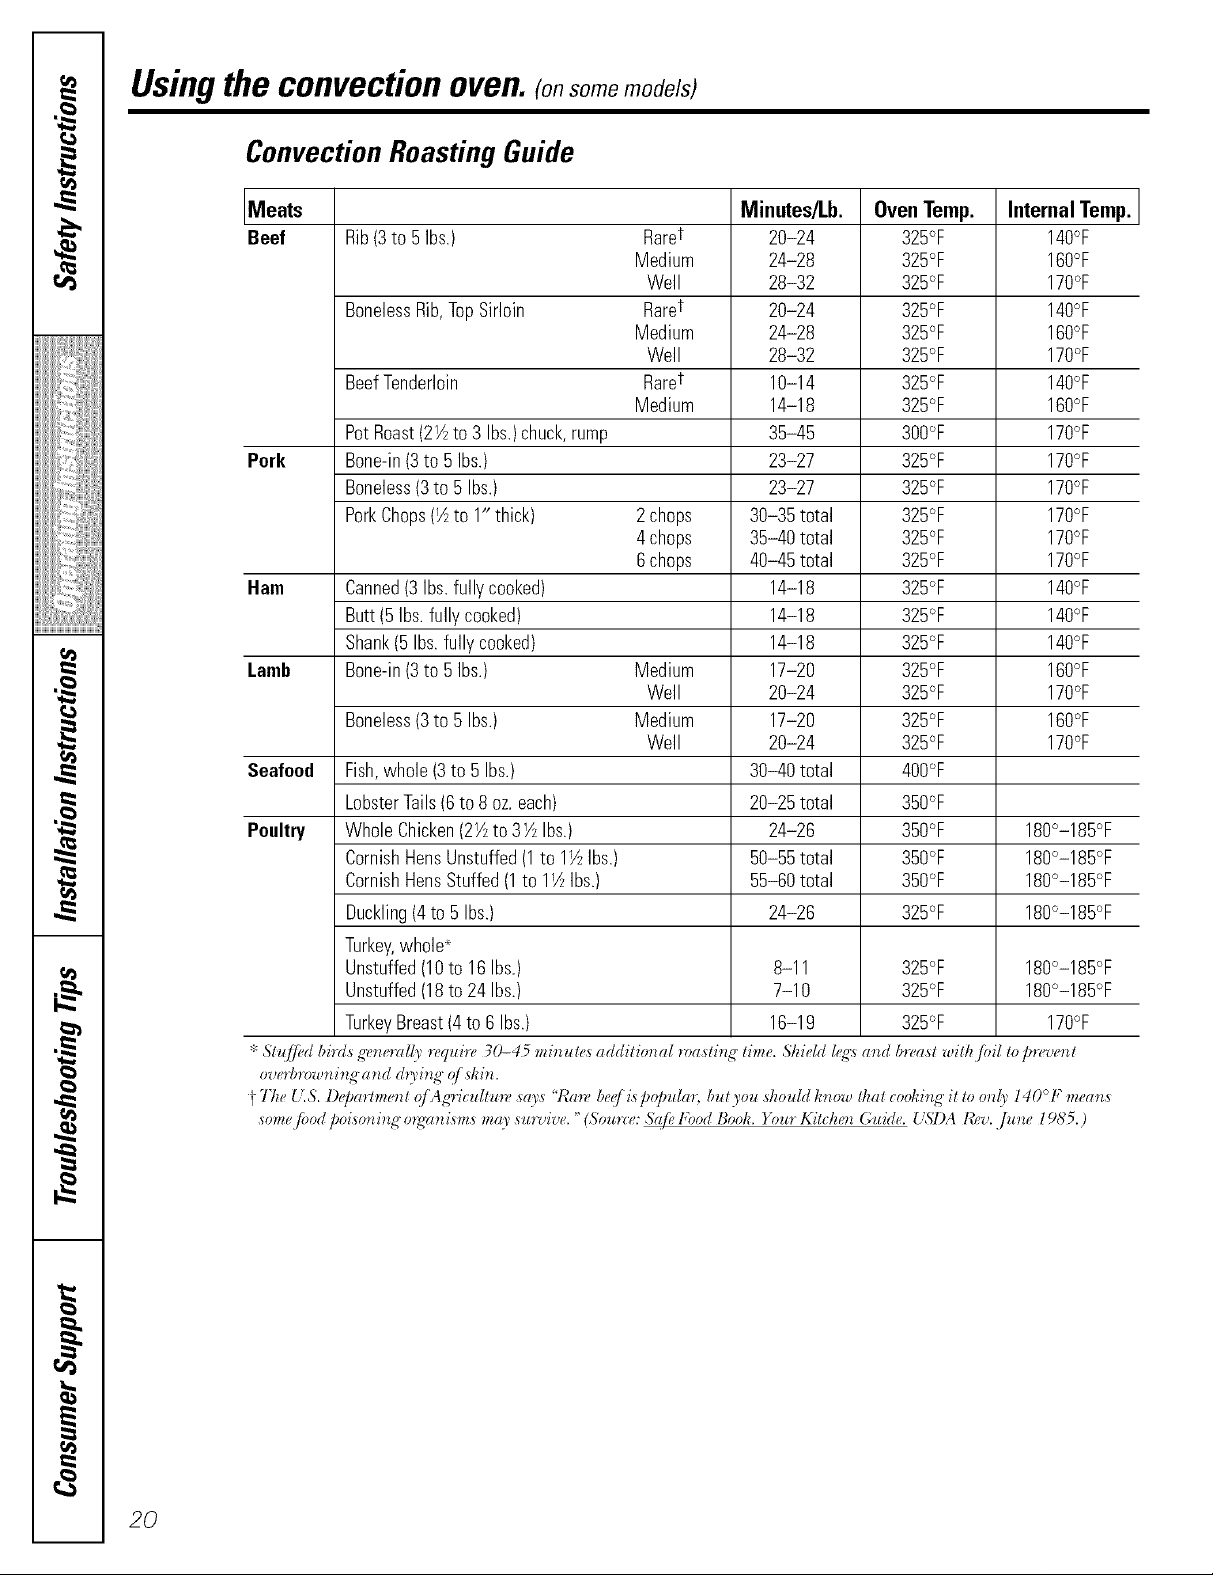
Convection Roasting Guide
Meats Minutes/Lb. Oven Temp. Internal Temp.
Beef Rib(3to 5 Ibs.) Raret 20-24 325°F 140°F
Medium 24-28 325°F 160°F
Well 28-32 325°F 170°F
BonelessRib,TopSirloin Raret 20-24 325°F 140°F
Medium 24-28 325°F 160°F
Well 28-32 325°F 170°F
BeefTenderloin Raret 10-14 325°F 14O°F
Medium 14-18 325°F 160°F
PotRoast(2½ to 3 Ibs.)chuck,rump 35-45 3OO°F 170°F
Pork Bone-in(3to 5Ibs.) 23-27 325°F 170°F
Boneless(3to 5 Ibs.) 23-27 325°F 170°F
PorkChops(½to 1" thick) 2chops 30-35total 325°F 170°F
4chops 35-40 total 325°F 170°F
6chops 40-45 total 325°F 170°F
Ham Canned(3Ibs.fully cooked) 14-18 325°F 140°F
Butt(5Ibs.fully cooked) 14-18 325°F 14O°F
Shank(5 Ibs.fullycooked) 14-18 325°F 14O°F
Lamb Bone-in(3to 5Ibs.) Medium 17-20 325°F 160°F
Well 20-24 325°F 170°F
Boneless(3to 5 Ibs.) Medium 17-20 325°F 160°F
Well 20-24 325°F 170°F
Seafood Fish,whole (3to 5 Ibs.) 30-40 total 4OO°F
LobsterTails(6to 8 oz.each) 20-25 total 350°F
Poultry WholeChicken(27Jto 37JIbs.) 24-26 350°F 180°-185°F
CornishHensUnstuffed(1to 1½ Ibs.) 50-55total 350°F 180°-185°F
CornishHensStuffed(1to 1½ Ibs.) 55-60total 350°F 180°-185°F
Duckling(4to 5 Ibs.) 24-26 325°F 180°-185°F
Turkey,whole*
Unstuffed(10to 16Ibs.) 8-11 325°F 180°-185°F
Unstuffed(18to24 Ibs.) 7-10 325°F 180°-185°F
TurkeyBreast(4to 6 Ibs.) 16-19 325°F 17O°F
_ Sh([/i_d birds g'ener_H(_' requh-e 30-45 minute,_ additional roasting time. Shield k%_ and bn_ast with /bil to pn_vent
over!)rowni_l_" (ind (hying" (_/skin.
}-The _ 'IS. D_JmHment (!/iAg'_'icultm'e s_13's'Wmr"be( i,spo/)u/m, but you should know Ik_lt cooki_t_" it to on(_' 140° F me,ins
somej_od poisoni_" o_2"_mi,sms m_)' sin's,ire. "(Source: S_(/i_Food Book. )+mr Kitchen Guide. L',ST)A leer. June 1985.)
2(?
Page 21

Usingthe timedconvectionbakingfeatures.(onsomemodels)
Youwill hear a fan while cooking with this feature. The fan will stop when the door is opened but the heat will not turn off.
ge.com
NOTE:Foods that spoil easily--such as milk, eggs, fish, stuffings, poultry and pork--should not be allowed to s# for more
than 1hour before or after cooking. Room temperature promotes the growth of harmful bacteria. Be sure that the oven
light is off because heat from the bulb will speed harmful bacteria growth.
How to Set an Immediate Start and Automatic Stop
Theupperovenwill turnonimmediatelyandcookfora [] Touch tile STARTpad.
selectedlengthof time.At theendof thecookingtime,
theovenwillturnoff automatical/y
[] Touch the CONVECTIONBAKEpad.
[] Touch tile nurM)er pads to set the desired
o_en tell]perattlre.
[] Touch tile COOKINGTIME pad.
NOTE:If yourreciperequirespreheating,youmaynaedto
addadditionaltimetothelengthofthecookingtime.
[] Touch tile number pads to set the desired
length of cooking time. Tile minimum
cooking time ?_m can set is 1 minum.
Tile o_en temperature that you set and tile
cooking time fllat _siu entel>d will be ill
the display.
The o\en will turn ON, and tile displa} will show
file cooking time countdown and tile changing
mmperatm_ starting at 100°E (Tile mmperatm_
display will start to change once the oven
mmI)eratm_ reaches 100°E) _A]mn tile oven
reaches tile temperature }_)u set, 3 beeps will
S()[/I/d.
Tile ()\el/will continue to cook for tile set
amount of time, then turn off automaticall},
unless file CookandHoldf(ature _s set. See the
Specialfeaturesofyourovencontrolsection.
.Mter the o_en turns off, tile end-otk-}cle tone
will sound.
[] Touch tile CLEAR/OFFpadto clear tile
display if"necessa.l'y. Remme tile fbod from
the oxen. ]_,emembe/; exert though tile
o_en turns off automatically; tbod left ill
tile oxen MII continue cooking after tile
(tveI/ ttlrIlS oIt'.
r_
I
r_
_!!iiii,,_i_iiiii_i:il
ii_iiiii_iiii}ii;i
iii!iiiiii_i_ii{ii¸
i
(DCDG(D(3)
(3)(DCD(iXD
(D@(E)(D(D
(DCDCD(EX
(DCDCD(D(D
(E)(D(D(EXD
O
®
How to Set a Delayed Start and Automatic Stop
Theupperovenwill turnonat thetimeofdayyouset,
cookfora specificlengthof timeandthenturnoff
automatically
Make sure tile clock shows tile correct time
of 0at,
[] Touch the CONVECTIONBAKEpad.
[] Touch the number pads to set tile desired
O'_ ell temperature.
[] Touch tile COOKINGTIME pad.
NOTE:Ifyourreciperequirespreheatingyoumayneedto
addadditionaltimetothelengthofthecookingtime.
[] Touch tile nlu-M)er pads to set tile desired
length of cooking time. Tile n/inimum
cooking time you can set is 1 rMnute.
Tile oven temperature that you set and tile
cooking time that you entered MII be ill
the display.
Touch the DELAYSTARTpad.
[]
Touch the number pads to set tile time of
[]
(]at you x_ailt tile oven to [/Ir/1 Oil and start
cookin ,
NOTE:ffyouwouldliketocheckthetimesyouhaveset,
touchtheDELAYSTARTpadtocheckthestarttimeyou
havesetortouchtheCOOKINGTIME padtocheckthe
lengthofcookingtimeyouhaveset.
When tile ()\el/turns ONat tile time of day
',xtuset, tile display will sho_ the cooking time
counRlovv_l and the changing temperature
starting at 100°E (Tile tempenmlre (fispla}
will start to change once the o_en temperature
l_aches 100°E) When the o_en l>aches the
temperature }_)u set, 3 beeps will sound.
The o',en will continue to cook tar tile set
amount of time, then turn off automaticall?;
unless the Cook and Hold teamre was set. See
tile Specialfeaturesof yourovencontrolsection.
)dter tile ()\'el1 turns (tfl_tile end<ffcvcle tone
will sound.
[] Touch tile C/EAR/0FFpad to clear tile
displa} if necessal). Remove the load from
tile oxen. Remembec exen though the
oven turns off automaticall;_, toed left ill
tile oxen will continlte cooking after the
o'_en [IlYI/S 0_',
i
g
g
}
[] Touch the STARTpad.
21
Page 22

Special featuresofyourupperovencontrol
Yournew touch pad control has additional features that you may choose to use. The following are the features and
how you may activate them.
The special feature modes can only be activated while the display is showing the time of day. They remain in the
control's memory until the steps are repeated.
When the display shows your choice, touch the STARTpad. Thespecial features will remain in memory after
a power failure.
12 Hour Shut-Off
With this feature,shouldyou forget and leave the
ovenon,the control will automatically turn off the
ovenafter 12hours duringbaking functions orafter
3hoursdunw a broil function.
If _ou wish to turn OFF this teature, tollow
tile steps below.
[] Touch tile BAKE and BROIL HI/LO pads
at tile same time fin 3 seconds until
tile displa) shows SF
[]
[]
Fahrenheit or Celsius Temperature Selection
Youroven control is set to use the Fahrenheit []
temperatureselectionsbut youmay changethis
to use the Celsiusselections.
[] Touch tile BAKE and BROILHI/LO pads []
at tile same time fin" 3 seconds tmtil
tile display shows SE
[] Touch tile STARTpad.
Tonesat the End of a Timed Cycle
Touch tile DELAYSTARTpad. Tile
displa) will show 12shdn(12 horn"
shut-off). Touch tile DELAYSTARTpad
again and tile display will show n0 shdn
(no sitar-off).
Touch tile STARTpad to activate tile
no slmt-off and leaxe the control set in
this special teatm'es mode,
Touch tile BROILHI/LO and COOKING
T/MEpads at tile sanle time. Tile
displa) will show F (Fifl/renheit).
Touch tile BROILHI/LO and COOKING
TIMEpads again at the same time.
Tile display will show C (Celsius).
22
Attheendofa timedcycle,3shortbeepswill
soundfollowedbyonebeepeven/6secondsuntil
theCLEAR!OFFpadistouchedThiscontinual
6-secondbeepmaybecanceled
To cancel tile 6-second beep:
[] Touch tile BAKE and BROILHI/LOpads
at tile same time fin 3 seconds tmfil
tile displa) shows SF
[] Touch tile KITCHEN TIMER ON/OFF
pad. Tile displa_ shows CON BEEP
(continual beep) and BEEP. Touch the
KITCHEN TIMER ON/OFF pad again. Tile
display shows BEEP.(This cancels tile
one beep every 6 seconds.)
[] Touch tile STARTpad.
Page 23

CONTROLLOCKOUT
Control Lockout (on some models)
Yourcontrol will allow you to lockout the touch
padsso they cannotbe activated when touchedor
cleaning theglasspaneZ
To lock the controls:
[] Touch the 9 and 0 touch pads at the
same time for 3 seconds until the
control beeps twice. The display will
show 10C continuously and the time
of day if not blacked out.
NOTE"All cooklbgandflYmbgfunctlbnswillbe
cancelledwhenlockingoutthecontrol.
[] To mflock the control, touch the
9 and 0 touch pads at the same time
fin" 3 seconds tmtil the control beeps
twice, and LOC will be remoxed ti'om
the display.
12-Hour, 24-Hour or Clock Blackout
ge.com
I
_!!iiii,,_i_i;iii_i:il
ii_iiiii_iiii}iiii
iii!iiiiii_i_ii{ii¸
i_ii___i___!_;i__i_ii_ _iii,__i_ii_!iiiii__ili_ili
Yourcontrol/s set to usea 12-hourclock.
]I}ou would prefer to have a 24-h()m"
militm 3' time clock or black ()tit the clock
display; tolhm' the steps below.
[] Touch the BAKE and BROILHI/LO
pads at the same time for 3 seconds
tmtil the display shows SE
[] Touch the CLOCKpad once.
The displa} will show 12hr If this
is the choice _ou want touch the
START pad.
Touch the CLOCKpad again to change
to the 24-hour military time clock. The
display will show 24hr If this is the choice
you want, touch the START pad.
Touch the CLOCKpad again to black out
the clock display: The display will show OFF.
If this is the choice you want, touch the
START pad.
NOTE'.If theclockis intheb/ack-outmode,you
willnotbeabletousetheDelayStartfunction.
Cook and Hold
Yournew controlhas acook andhold feature that F2]
keepscooked foodswarm for up to 3 hoursafter
thecookingfunction is hbished
This teatm'e can only be used when timed
cooking.
To activate this teatm'e, follow the steps []
below.
[] Touch the BAKE and BROILHI/I.O pads
at the same time fi)r 3 see(rods tmtil
the displa) shows SE
i¢..i
Touch the COOKINGTIME pad. The
display _dll show HidOFF.
Touch the COOKINGTIME pad again
to actixate the timtm'e. The display will
show Hid ON.
Touch the STARTpad to activate the
cook and hold teatm'e and leaxe the
control set in this special teattu'es
i/lode.
"Z.
g
g
}
23
Page 24

UsingtheSabbathFeature.
(Designed for use on the Jewish Sabbath and Holidays)
TheSabbath feature can be used for baking/roasting in the upper oven only. It cannot be used for convection, broiling,
self-cleaning or Delay Start cooking.
NOTE,"The oven light comes on automatically (on some models) when the door is opened and goes off when the door is
closed. The bulb may be removed. Seethe Oven Light Replacement section. On models with a light switch on the control
panel, the oven light may be turned on and left on.
How to Set for Regular Baking/Roasting
_il_ _ ii i_
i!(i !ii l!bill)II
When the display shows D the
oven is set in Sabbath. When the
display shows D C the oven is
baking/roasting.
(DCD
When the display shows D the
oven is set it7Sabbath. When the
display shows D C the oven is
baking/roasting.
Makesuretheclockshowsthecorrecttimeofday
andtheovenis off
[] Press and hold both the BAKE and
BROILHI/LO pads, at the same time,
until the display shows SE
[] %q) the DELAYSTART pad until
SAb bAtH'al)l)e'axsin the display:
[] Touch the START pad and D will
appear in the (lispla_;
[] Touch the BAKE pad, No signal will
be gixen.
[] Using the number pads, enter the
desired temperatm'e between 170 ° and
550 °. No signal or temperature will
be given.
[] Touch the STARTpad.
[] _Mter a random delay period of
approximately 30 seconds to 1 minute,
D c will appear in the display
indicating that the oven is
baking/roasting. If D C doesn't appear
in the display, start again at Step 4.
To a(!just the oven temperature, much
the BAKEpad,enter the new temperature
using the nmnber pads, and touch the
STARrpad.
NOTE" The CLEAR/OFFandCOOKING TIME
pads are active (lm_ing the Sabl)ath teatm'e.
How to Set for Timed Baking/Roasting-Immediate Start and Automatic Stop
Makesuretheclockshowsthecorrectt/meofday
andtheovenis oK
[] Press and hold both the BAKE and
BROILHgLO pads, atthe same time,
tmtil the display shows SE
[] _q)the BELAYSTART pad tmfil
SAb bAtHappeaxs in the display:
[] Touch the START pad and D will
appear in the display:
[] Touch the COOKING TIME pad,
[] Touch the nmnl)er pads to set
the desired length of cooking time
between 1 minute and 9 hom_ and
99 minutes. The cooking time that you
entered will be displayed.
[] Touch the START pad.
[] Touch the BAKEpad. No signal will
be given.
[] Using the numl)er pads, enter the
desired temperatm'e. No signal or
temperatm'e will be gixen.
Touch the STARTpad,
[]
_Mter a random dela_ period of
[]
appr()xhnamly 30 sec(mds t() 1 ininute,
D c _11 appear in the display
indicating that the oven is
baking/roasting. ]fD c doesn't appear
in the displa 5 start again at Step 7.
To a(!just the oven temperature, touch
the BAKEpad, enter the new temperature
using the number pads, and touch the
STARTpad.
X._q_encooking is finished, the display Mll
change fl'om D c to D and 0:00will appea_;
indicating that the oven has turned OFF
but is still set in Sal)bath. Remove the
cooked fi)o(l.
24
Page 25

How to Exit the Sabbath Feature
ge.com
®
0
[] Toud_ the CLEAR/OFFpad.
[] If the oxen is cooking, wait fl)r a
randonl delay period of apl)roxiinatel )
30 seconds to 1 minute, until one D is
in the displa).
[] Press and hold both the BAKE and
BROIL HI/LO pads, atthe same time,
tmtil the display shows SE
[] Tap the DELAYSTART pad tmfil
12shdn or no shdn appeax_ in the
display. 12shdn indicates that the oven
will automaticallv ttlYn off after 12
hom_. no shdn indicates that the oven
will not automatically mrn off.
[] Touch the START pad.
NOTE:If apoweroutageoccurredwhiletheoven
wasinSabbath,theovenwillautomaticallyturnoff
andstayoffevenwhenthepowerreturns.Theoven
controlmustbereset.
I
_!!ii::,,_i,_iiiii_i:il
ii_iiiii_iiii}iiii
,_"I_',,,,Hiiiiii_
iii!iiiiii_i_iiiii¸
25
g
g
Page 26

Adjustthe upperoventhermostat--Do ityourself!
Youmay find that your new oven cooks differently than the one it replaced. Use your new oven for a few weeks to
become more familiar with it. If you still think your new oven is too hot or too cold, you can adjust the thermostat yourself.
Donot use thermometers, such as those found in grocery stores, to check the temperature setting of your oven.
These thermometers may vary 20_40 degrees.
NOTE."This adjustment will not affect the broiling or the self-cleaning temperatures. The adjustment will be retained
in memory after a power failure.
ToAdjust the Thermostat
_4O/en you haxe made tile a(!justment,
[] touch the STARTpad to go back to tile
time of day displa?. Lrse _otn" oxen as
_()/l wot/ld nolillallv:
NOTE:ThethermostatadjustmentforBak/hg
willalsoaffectConvectionBakingor Convection
Roasting.
O(Z)Q(DOD
(D(D(DCD2
0
[] Touch the BAKEand BROILHI/LOpads
at the same time fin" 3 seconds until
tile display shows SE
[] Touch the BAKEpad. _ two dioit
nmnber shows in tile display.
Touch BAKEonce to decrease (-)
tile oven [ellll)ei';itlli'e , 0I" twice to
increase (+).
Tile oxen temperature can be ac!iusted
[]
up as much as 35°E or down as much
as 35°E Touch the numl)er pads the
same wa) you read them. For example,
to change the oxen temperature 1: I_,
touch I and 5.
Thetype ofmargarine will affect bakingperformanc!!
Most recipes for baking have been developed using high fat products such as butter or margarine (80% fat). If you
decrease the fat, the recipe may not give the same results as with a higher fat product.
Recipe failure can result if cakes, pies, pastries, cookies or candies are made with low fat spreads. The lower the fat
content of a spread product, the more noticeable these differences become.
Federal standards require products labeled "margarine" to contain at least 80% lilt by weight, i.ow tilt spreads, on tile
other hand, contain less lilt and more water: Tile high moisture content of these spreads affects tile textm'e and flavor
of 1)aked goods. For best results with your old til\'orite recipes, use margmine, 1)utter or stick spreads contnining at least
70% vegetnble oil.
26
Page 27

Usingthe lower ovendrawer. (onsomemodels) ge.com
The lower oven drawer may be used to bake foods using the same times and temperatures as a standard oven. Foods
ideal for baking in the lower oven drawer include pizza, frozen foods, casseroles, biscuits, rolls and many desserts.
ToUse the Lower Oven Drawer
I LOWER
OVENORAWERO [] Ptlsh in }lIld ttlI'n [l/e lowei" o_en
drawer knob to an) desired setting.
'_.'."_[ ._.,.o•
2oo [] ,Mlow the lower oven drawer to
zso preheat.
i_!The ON signal light is located on the
ul)per right side ot the knob and glows
when the knob is in the ON position. It
remains ON tmfil the knob is moved to
the OFF position,
_)iThe "Heating" signal light is located
below the ON signal light and glo_:s
when the heating elements are active,
1111
Push in and turn flTelower oven
drawer knob to any desired setting.
Preheat is complete alter the "Heating"
signal has turned off lot the fii_t din e
with each rise.
NOTES:
iJi::Alwaysusethe/bcludeddrawerrackwhenus/bg
theLowerOvenDrawer
Theloweroven drawercannotbe used during
a self-clean cycleof the upper oven.
Donotputfood,foilorcookwaredkecflyonthe
bottomofthelowerovendrawerAlwaysusethe
includeddrawerrack.
If foodsrequkea cover,useonlyfoilorlidsable
towithstandbaktbgtemperatures.Donotuse
plastic.
Maximumheight of foods that canbeplaced
in the loweroven draweris 4".
iJi::Donotput liquidorwaterin theloweroven
drawer
!i>Neverplaceplastics,paper,cannedfoodsor
combustiblematenal in the lower oven drawer
The lower oven drawer uses less energy than the ul)per oven.
_Mlow the fi_llowing approximate dines fi_i"preheating:
Desired Lower Preheat
Oven Temperature Time
WARM 10minutes
350°1: 20 minutes
425°1: 30 minutes
When Using the Lower Oven Drawer Warm Zone
TheWARMZONEof thelowerovendrawerwill
keephotcookedfoodsatservingtemperatures.
Alwaysstartwithhot foodDonotusetheWARM
ZONEtoheatcoldfoodotherthancrispingcrackers,
chipsordrycereal.
[] Push in and mrn the control knob
to the desired setting within the wmm
zone (indicated by the red line),
tO ....................... Pies
MEDIUM
(mid-positionon_e line) .... Casseroles
HI ........................ Meats
27
Page 28

Usingthe self-cleaning upperoven.
The oven door must be closed and all controls set correctly for the cycle to work properly.
Before a Clean Cycle
Wipe up heavy soil on the oven
bottom.
For the fiI_t seltk'lean cycle, we recon/n/end
venting your kitchen with an open window
or using a ventilation tim or hood.
Renlove tile broiler pan, broiler grid, all
cookware, probe and any ahuninunl fi)il
fl'oin th e ()x'en--th ev ca nnlit withsta nd th e
high cleaning teinl)eratures.
NOTE."
_: 1t your oven is equipped with nickel oven
shelves, renlove thenl betoi'e you begin
the sel6clean cycle.
::Ji::If your oven is equipped with gray
l)orcelain-coated oven shelves, tile)' nlay
be leti in tile ()veil during tile sell'clean
cycle.
Soil on tile fl'ont fl'anie of tile range and
outside the gasket on the door will need to
be cleaned bv hand. Clean these areas with
hot wateI; soap-filled scouting pads or
cleansei_ such as Soft Scrtib _ Rinse well
with clean water and di_'.
Do not clean tile gasket. Tile fibeiglass
nlaterial of tile oven door gasket cannot
withstand abrasion. It is essential tor the
gasket to renlain intact./t vou notice it
beconling worn or fl'ayed, i'eplace it.
Wipe up any heavy spillovei_ oil tile ()veil
bottoIll,
Make sure tile ()veil light bulb cover is in
place and the ()veil light is off.
IMPORTANT'. The health of sonle birds is
extreinelv sensi0ve to tile fiunes given off
dtwhlg tile sell:cleaning cycle of ai V range.
Move birds to another well ventilated
rooin.
NOTE."Use cauOon when oi)ening tile
upper oxen atter tile self_clean cycle has
ended. Tile oxen ina_ still be hot.
®
(DID(DIE)IS)
(D(E)(D(XXD
O'
How to Set the Upper Oven for Cleaning
[] Touch tile SELFCLEAN pad.
[] Using tile nunlber pads, enter tile
desired clean tiine, if a tiine other
than 4 houI_ is needed.
Clean cycle tinie is noimallv 4 houis. You
can change tile clean tiine to anv tiine
between 3 houI_ and 5 houI_, del)ending
on how dirty VOtli"()veil is.
[] Touch tile START pad.
Tile door locks automatically: Tile display
will show the clean tiine renlaining. It will
not be possible to open tile ()veil door
until the teinl)eramre drops beh)w the
lock teinl)erature and tile LOCKEDDOOR
light goes off.
X_q/eIl tile LOCKED DOOR light is off, open
tile dooI:
Tile oven shuts off autonla0callv when tile
clean c_cle is coinplete.
_: Tile words LOCKDOOR will flash and
tile oven control will signal if"you set
the clean cycle and fi)rget to close the
()veil dooi:
::Ji::To stop a clean cycle, touch tile
CLEAR/OFFpad. When tile LOCKEDDOOR
light goes off indicaOng tile oven has
cooled below tile locking tenil)erature ,
open tile dooI:
28
Page 29

The oven door must be closed and all controls set correctly for the cycle to work properly.
How to Delay the Start of Cleaning
®
QOQQQ
QQQCD
00QQ
QQQ(Z)ZD
Make sure tile clock shows tile correct time
of day.
[] Touch tile SELFCLEAN pad.
[] Using tile number pads, enter tile
desired clean time.
[] Touch tile DELAYSTART pad. The
earliest start time you can set will
appear in tile display.
[] Using the number pads, enter tile
time of day _,ouwant tile clean cycle
to staI_.
After a Clean Cycle
_m may notice some white ash in tile o'.en.
_,_qI)eit up with a damp cloth after tile
o_,en cools.
[] Touch tile START pad.
The door locks automatically. The display
will show the start time, It will not be
possible to open tile oven door/mfil
tile temperature drops below tile lock
teml)eratm'e and tile LOCKEDDOOR
light goes ofl_
_,_]/en tile LOCKEDDOORlight is off, open
the doox:
iJi::Y})u cannot set tile oven fi)r cooking tmtil
tile oven is cool enough for tile door to
tmlock.
ge.com
I
!iiiii_;diiiiiiii
Ifwhitespotsremain,removethemwithasoap-
filiedscouringpadandrinsethoroughlywitha
whegarandwatermixture.
These deposits are usuall} a salt residue
that cannot be remoxed b_ tile clean c_cle.
If tile oven is not clean after one clean
c'_cle repeat tile c_cle.
_: X._q/ile tile oven is sell=cleaning, you can
touch tile CLOCKpad to display tile
time of day: To return to tile clean
countdown, touch tile COOKING TIME
pad.
::Ji::If tile shelves become hard to slide, apply
a small ai/lotlnt of vegetable oil or cooking
oil to a paper towel and wipe the edges of
file oven shelves wifl/tile paper towel.
g
}
29
Page 30

Careand cleaning of the range.
Be sure electrical power is off and all surfaces are cool before cleaning any part of the range.
If your range is removed for cleaning, servicing or any reason, be sure the anti-tip device
is re-engaged properly when the range is replaced. Failure to take this precaution could
result in tipping of the range and cause injury.
Sealed Burner Assemblies
Turn all controls OFF befiwe removing the
burner pa_s.
The burner grates, caps and burner heads
can be lifted off', making them easy to
clean. The burner bases and electrodes are
not rein ox:_ble.
Grate
Burnercad
3umerhead
CAUTION: Do not operate the cooktop without
all burner parts and grates/n place.
\4]_en one burner is turned to LITE,
all the bume_ spark. Do not attempt
to disassemble or clean around any
burner while another burner is on. An
electric shock may result, which could
Gltlse veil to knock over hot cookware.
J
Eiectrode
_ Electrode
Burnerbase
3O
Page 31

Burner Capsand Heads
ge.com
NOTE: Before removing the burner caps
and heads, remember their s/2eand location.
Replacethem in the same location after
cleaning. Thetop sides of the Right Front,
R/)?htRearand Left Front burner heads are
marked with the letters "RF," "RR" and "LE"
respectively, to aid reassemb/g
Burner caps
I,ift oft when cool. "_._ash burner caps
in hot, soap} water and rinse with clean
water. You may scorn" with a plastic
SCO/lI'in (r)ad to i'elllO_,e b/li'ned-on
food paT"tlicles.
Burner heads
The slits in tile burner heads of your
cooktop must be kept clean at all times.
Clooged_, or (lirtx, burner I)°rts' or
electrodes will not allow the bm'ner to
operate properly.
Any spill on or at(rand an electrode must
be careflflly cleaned. Take care to not hit
an electrode with anything hard or it
could be damaged.
You should clean tile bm'ner caps,
bm'ner heads and bm'ner bases routinel>
especially alter bad spillovers, which
could clog the openings in the burner
heads. I,ift off when cool.
To remove burned-on fi)od, soak tile
bm'ner heads in a solution of mild liquid
detergent and hot water ti)r 20-30
II/intltes. For iiloYe Sttlbborn stains,
use a toothbrush.
After cleaning
geli)re putting tile 1)urner caps and
heads back, shake ()lit excess water and
then dry them thoroughly by setting in a
warm oven fi)r 30 minutes.
Replacement , ,
Tile top sides oI tile Right Front, Right
Rear and I,eli Front bm'ner heads are
marked with the letters "RF," "RR' and
"I,F," respectively, to aid reasseml)ly.
Mediumhead
notmarked smal head
,eadand
gp
Replace tile burner heads on tile bases
matching the letters. ]),el)lace the caps on
the heads. Make sm'e that the caps and
heads are replaced in the correct
location. There is one small, one
medium, one large and one extra large
head and cap.
Locamr i_i]s __
NOTE"Do not usesteel wool or scounbgpowders
to clean the burnersor electrodes.Thiscan damage
the burnersande/ectrica//gshort the electrodes.
When replacflTg, make sure the Iocator pins in the
burner head are seated in the pfl7 slots of the burner
base. Rotate the burner head around the burner base
until it is level and securely seated.
31
Page 32

Careand cleaning of the range.
Burner Grates
Appearance may varg
Thegrates may be cleaned in a
dishwasher.
LeftFront Center RightFront
Your range has three professional-sQ:le
double grates. These grates are position-
specific. For maMnmm stabilit,i, these grates
should only be used in their proper
position; they cannot be interchanged left
to right or fl'ont to back. Dn" convenience,
the unde_Mdes of the left and right grates
are marked "I,EFT FRONT" and "IUGHT
FRONT." Make sure the fl'ont portion of
both grates is in fl'ont. The middle grate
has a bow in fl'ont. Make sure the bowed
portion is towards the fl'ont of the range.
Cleaning
i,ifl out when cool. Grates should be
washed regularly and, of com_e, after
spillove_. _M_sh them in hot, soapy water
and rinse with clean water: When replacing
the grates, be sure they are positioned
securely over the burne_. Replace the
grates so that continuous arcs are totaled
with the center ribs of all three grates.
Do not opel'ate a btli'nei" fi)i" }lil extended
period _ff time without cookware on the
grate. The finish on the grate may chip
without cookware to absorb the heat.
To get rid of burne(bon tood, place the
grates in a covered container. Add 1/4 cup
ammonia and let them soak several horns
or overnight. Wash, rinse well and (h_'.
Mthough they are durable, the grates will
gradually lose their shine, regardless of the
best care you can give them. This is due
to their continual exposure m high
temperatures. You will notice this
sooner with lighter color grates.
NOTE:Do not clean thegrates in aself-cleaning
oven.
CooktopSurface (onporcelain cooktop models)
To avoid damaging the porcelain enamel
stlrfilce of the cooktop and to prevent it
from becoming dull, clean up spills _ight
away Foods with a lot of acid (tomatoes,
sauerkraut, fl'uitjuices, etc.) or fi)ods with
high sugar content could cause a dull spot
if allowed to set.
When the surfi_ce has cooled, wash and
rinse. For other spills such as tilt spattedngs,
etc., wash with soap and water once the
surfi_ce has cooled. Then rinse and polish
with a (h_' cloth.
NOTE:Donotstoreflammablematerialsin
anupperovenorlowerovendrawerornearthe
cooktop.Donotstoreorusecombustible
materials,gaso&eorotherflammablevapors
and/kluidsin thevicinityofthisoranyother
appliance.
NOTE:Donotrift thecooktop.Liftingthecooktop
canleadtodamageandimproperoperationof the
range.
32
Stainless Steel Surfaces (on some models)
Do notusea steel-wool pa& it will scratch
thesurface.
To clean the stainless steel surfi_ce, use
w;mn sudsv water or a stainless steel cleaner
or polish. Mways wipe the stmfhce in the
direction of the grain. Follow the cleaner
instructions for cleaning the stainless steel
StlI5_il ce.
To inquire about pro'chasing stainless steel
appliance cleaner or polish, or to find the
location of a dealer nearest you, please call
our toll-fi'ee number:
National Parts Center 800.828.2002 (U.S.)
888.261.3055 (Canada)
ge.com (U.S.)
www.GEAppliances.ca (Canada)
Page 33

Cleaningthe glass cooktop.(onsomemodels) ge.com
Normal Daily Use Cleaning
Shake tile cleaning cream x_el]. Appl}
a low drops of CEILBdMA BRYTE (_)
Ceramic (k}oktop Cleaner dire{tl_ to
tile cool<top.
[)sea paper towel or CEIL_,IA
BRYTE (_)Cleaning Pad fi)r Ceramic
Cooktops to clean tile entire cooktop
S [ II'J[i/ce.
Use a (h) cloth or paper towel
to remove all cleaning residue.
No lleed to YillSe. Be st/re 11o excess
residue is left on tile electrodes or
burner parts.
NOTE:It/s very/?nportantthatyouDONOTheat
thecooktopunt/7it hasbeenc/eanedthorough/g.
Cleanyourcooktopafter
each spill. UseCERAMA
BRYTE®CeramicCooktop
Cleaner.
ONLY use CEI_.IA BRYTE _Ceramic []
Cooktop Cleaner on tile glass cooktop.
Other creams may not be as effective.
riP{)maintain and protect tile smthce {g
your glass cooktop, tbllow these steps: []
[] getore using the cooktop for tile
fix_t time, cle;m it with CEIL_dVIA
BRYTE : Ceramic Cooktop Cleanel;
This helps protect tile top and makes []
clean-up easiel:
[] Dail) use of CEIL_IA BRYTE _)
Ceramic Cooktop Cleaner _411help
keep tile cooktop looidng new.
[] I_em{_ve tile burner grates.
Burned-On Residue
Use a CERAMABRYTF_ Cleanfl?g
Pad for Ceramic Cooktops or a
Scoteh-Brite .3Multi-Purpose No
Scratch blue scrub pad.
TheCERAMABRYTE*_Ceramic
Cooktop Scraper and all
recommended supplies are
available through our Parts Cente_
See #?structim?s under "To Order
Parts" section on next page.
NOTE:Do not use a dull or
nicked blade.
WARNING: DAMAGEto yourglass surfacemay
occurif youusescrubpadsother than those
recommended
] J_dlow tile cooktop to cool.
[] Ren]ove tile burner _,Tates,Spread
a few drops of CEILBdV/A BRYTE ')
Ceramic Cooktop Cleaner to tile
entire burned residue area.
Using tile included CEILBd_4A BRYTE _)
[]
Cleaning Pad t0r Ceramic Cooktops,
rub tile residue area aii) )lying,
pressure as needed.
Heavy, Burned-On Residue
] J_dlow tile cooktop to cool.
[] Ren]ove tile burner grates.
[] Use a single-edoe razor blade scra )el"
at approximatel) a 45 ° angle against
tile glass stm'i_ce and scrape tile soil.
It will be necessary to apply pressure
to tile razor scraper ill order to
ren]ove tile residue.
[] If am residue relnains repeat tile
steps listed above as needed.
[] For additional protection, after all
residue has been remoxed, polish tile
entire surti_ce with CEI{_dVIA BRYTE (':
Ceramic (2ooktop ('Jeaner and a
paper towel.
[] _Mter scraping with tile razor scrapei;
spread a few drops of CEILZ_dVIA
BRYTE (':Ceramic Cooktop Cleaner to
tile entire burned residue area. Use
tile CEI_BdVIA BRYTE '_Cleaning Pad
to relnove any relnaining residue.
[] For additional protection, after all
residue has been remoxed, polish tile
entire sui-lhce with CEIL_dVIA BRYTE '_
Ceralnic (_ooktop Cleaner and a
paper towel.
33
Page 34

Cleaningthe glass cooktop.(onsomemodo/s)
CooktopSeal
To clean the cooktop seal around the
edges of tile glass, lay a wet cloth oil it
tot a few minutes, then wipe clean with
nonabrasive cleaners.
Glasssurface--potential forpermanent damage.
Our testing shows that if
you are cooking high sugar
mixtures such as jelly or
fudge and have a spillover,
it can cause permanent
damage to the glass surface
unless the spillover is
immediately removed.
Damage from Sugary Spills and Melted Plastic
V_ Turn off all surfiice burners and,
with }Ill {)*,ell mitt, I'en/o*,e hot });Ills
"/lld _l"ttes
[] Wearing an oven mitt:
a. Ijse a single-edge razor blade
scraper ((:EIU_MA BRYTE e:
Ceramic Cooktop Scraper) to
too\ e tile spill to a cool area on
tile cooktop.
b. Remoxe tile spill with paper towels.
To Order Parts
To order (:ER,_d'4ABRYTE ':Ceramic
())oktop (:leaner and tile cooktop scrapei;
please call our mll-fl'ee nmnber:
NationalParts
Center.................... 800.626.2002(U.S.)
888.261.3055(Canada)
CERAMABRYTE®
CeramicCeektepCleaner ..... # WX70X300
[] An) remaining si)illo_er should be
}ett until tile surtiice of tile cooktop
has cooled.
] Don't use tile surfitce units again until
all of tile residue has been completel}
rei/loved,
NOTE:/fpittlagor/ndentat/on/ntheglasssurface
hasalreadyoccurred,thecooktopglasswillhaveto
bereplacedb thiscase,serv/bewill benecessan/
CERAMABRYTE®
CeramicCooktopScraper ...# WXIOXO302
Kit ........................ # WB64X5027
(KitIncludescreamandrazorscraper)
CERAMABRYTE®CleaningPads
for CeramicCooktops......... # WX10X350
34
Page 35

Careand cleaningof therange, gocorn
Lift-Off Oven Door
iiiiiii!
Liftthedoorstraightupandoff fl?e
hinges.
Thegasket is designed with a gap
at the bottom to allow for proper air
circulation.
Do not rub or cleat?the door
gasket--it has an extremely low
resistance to abrasion.
If you notice the gasket becomfl?g
won?,frayed or damaged fl?any
way or if it has become displaced
on the door, you should have it
replaced.
Theovendoor/s removable,but it/s heavy.Youmay
needhelp mmov/bgand rep/ac/bgthe door
Toremove the deer, o/:)en it a few inches to
the special stop position that will hold tile
door opell, Ol'aSp firefly on each side and
lift the door straight up and off the hinges.
NOTE."Be carefulnot to place handsbetween the
h/bgeandthe oven door frameas thehingecould
snapback andp/bch f/bgers.
Toreplace the deer, make sm'e the hinges
are in the spedal stop position. Position the
slots in the bottom of the door squarely
over the binges. Then lower the door slowly
and evenly over both hinges at the same
time. If the hinges snap back against the
o_vn fi'ame, pull them back out.
Toclean the inside of the door:
}i_:Do not allow excess water to i'[/n into
any holes or slots in the door
Z: Because the area inside the gasket is
cleaned during the self clean cycle, you
do not need to clean this by hand. Any
soap left on the liner causes additional
stains when the oven is heated.
_: The area outside the gasket can
be cleaned Mth a soap-filled plastic
scorning pad.
Toclean the outside of the door:
_: Use soap and water to thoroughly clean
the top, sides and fl'ont of the oven dora:
Rinse well. _Am may also use a glass
cleaner to clean the glass on the outside
of the (lore:
_: Spillage of marinades, fl'uitjuices, tomato
sauces and basting materials containing
acids may cause discoloration and should
be wiped up immediately. \,_l_en the
SUlSfhce is cool, clean and rinse.
iJi::Do not use oven cleanei_, cleansing
powcle_ or hm_h abrasixes on the
outside of the dora:
Y
Grid
I ' !
Pan
Oven Bottom
The oven bottom has a porcelain enamel
finish. To make cleaning easier, protect the
oven bottom fl'om excessive spillove_ bv
placing a cookie sheet on the shelf below
the shelf you are cooking on. This is
particularly important when baking a fl'uit
pie or other fl)ods with a high acid content.
Hot fl'uit fillings or other fi)ods that are
highly acidic (such as tomatoes, sauerkraut
and sauces with vinegar or lemon juice)
nlay cause pitting and damage to the
porcelain enamel SIIYf;Ice and should be
wiped up immediately.
Broiler Pan and Grid
_dtei" broiling, relnove the broiler pan fi'om
the oven. Remove the grid fl'om the pan.
Careflflly pour out grease fl'om the pan into
a proper containe_: _,Vash and _inse the
broiler pan and grid in hot water with a
soap-filled or plastic scouting pad.
If food has bm'ned on, sprinkle the grid
with detergent while hot and cover with wet
paper towels or a dishcloth. Soaking the
pan will renlove btli'ned-on foods.
We don't recommend using ahmfinum fi)il
on the oven bottom. It can affect air flow if
the holes are blocked and it can concentrate
heat at the bottom ot the oven, resulting in
poor baking pedimnance.
To clean lip spillove_, ilse soap and watei;
an abrasive cleaner or soap-filled scorning
pad. Rinse well to relnove any soap before
sel6cleaning.
The broiler pan and grid mm be cleaned
with a coilli/lei'cial o'_en cleanei:
Both the broiler pan and grid can also be
cleaned in a dishwasher:
Do not store a soiled broiler pan and grid
amwhere in the ranoe
CAUTION: Do not clean the broilerpan orgrid/)_
aself-cleaning oven.
35
Page 36

Careand cleaning of the range.
i ¸ ::: )
Removable Lower Oven Drawer
NOTE:Formode/s with an electric drawer,before
performing anyadjustments,cleaning orservice,
disconnecttherange electrical power supplyat
thehouseholddistributionpanel byremoving the
fuse orswitching off the ckcuit breaker Make
sure thedrawer heatlbg element is cool
Most cleaning can be done with the drawer
m place. However, the drawer may be
removed if fln'ther cleaning is needed. Use
soap and warm water to thoroughly clean.
To remove the drawer:
[] Pull the drawer straight out tmtil
it stops.
[] Press the tabs on both sides in, while
pulling the drmver fi)rward and fl'ee.
Removable Lower OvenDrawer Pan
NOTE: For models with an electric drawer,before
performing anyadjustments,cleaning or service,
disconnecttherangeelectricalpower supply at
the householddistributionpanel by remowbgthe
fuseor switching off theckcuit breaker Make
sure the drawer heating e/ementis cool
NOTE."Allowlowerovendrawerto coolbefore
removingpan.
NOTE:Wipespillspmmpflyafiereachuse.
Toreplace the drawer:
[] ,Place the left drawer rail arom_d the
tuner left rail guide and slide it in
slightl) to hook it.
[] Place the right drawer rail arotmd the
tuner right rail guide and slide it in
slightl) to hook it.
[] Slide the drawer all the way in.
::Ji::Never place, use or self:clean the lower
oven drawer pan in the upper oven.
i_, I,ower oven drawer has a remo\;ible pan
tot easy cleaning. Clean with hot soapy
water and a sponge or dish towel. Dry
with a clean cloth. An oven cleane_; such
as EaspOft", may also be used. Be sure to
tollow the directions on the oven cleane_:
Replace the pan in the lower oven
dI'aweI:
36
Page 37

Vent appearance and location var_
CONTROLLOCKOUT
Oven Air Vents
Never block the vents (air openings) of the
range. They provide the air inlet and outlet
that are necessm T t0r the range to operate
properly with correct COll/btls[Jon.
Mr openings are located at the rear ot
the cooktop, at the top and bottom ot the
oven do(n; and at the bottom of the range,
under the lower oven (h'awe_:
Upper Control Panel
On models so equipped, lock out the touch
pads before cleaning.
See tile ControlLockoutinfimnation in the
Special features of your oven control section
in this manual.
ge.com
Yell i/lay also rise a glass cleanei i
Remove heavier soil with waml soapy water:
Do not use abrasives of anv kind.
Unlock the touch pads after cleaning.
I
_!!iiii,,_i,_iiiii_i:il
ii_iiiii_iiii}iiii
Surface burner knob
_L
Lower over drawer knob
Clean up splatte_ with a damp cloth.
Lower Control Panel (Front Manifold Panel) and Knobs
It's a good idea to wipe the control panel The control knobs may be remoxed fin"
after each use of the oven. Use a damp
cloth to clean or rinse. For cleaning, use
mild soap and water or a 50/50 solution of
vineoar_ and water: For rinsing, use clean
water: Polish dry with a soft cloth.
Do not use abrasive cleansers, strong liquid
cleane_, plastic scorn-trig pads or oven
cleaners on the control panel--they will
damage the finish.
Do not try to bend knobs by pulling them
up or down or by hanging a towel or other
such loads. This can damage the gas \:five
shaft.
easier cleaning. Make sm'e the knobs are in
the OFFpositions and pull them straight off
the stems tot cleaning.
The knobs can be cleaned in a dishwasher
or they may also be washed with soap and
wam_: Make sure the insides ot the knobs
are d_w 1)el0re replacing.
Replace the knobs in the OFF position
to ensm'e proper placement.
Metal parts can be cleaned with soap and
wateI: Do not rise steel wool, abI'asives,
ai//iiloilia_ adds or coi//illei'cial oven
cleaners. Dry with a soft cloth.
NOTE"Thelowerovendrawercontrolknobisnot
interchangeablewiththesurfaceburnerknobs.Be
suretoreinstallthelowerovendrawerknobtothe
originallocation.Thelowerovendrawerknobmay
beidentifiedbythered&e. Surfaceburnerknobs
haveawhite&e.
iii!iiiiii_i_ii{ii¸
g
g
}
37
Page 38

Careand cleaning of the range.
Oven Shelves and Drawer Racks
Wire cover holder.
If your o',en is equipped with nickel oven
shelves, they should be remo\vd fl'om tile
oven beflwe beginning tile seltXclean cycle.
To clean the nickel shelxvs, use all abrasive
cleanse*: Mter cleaning, rinse the shelxvs
with clean water and dIw with a clean cloth.
If tile shel_vs e\vr become hard to slide,
wipe tile shelI edges or oven shelI supports
with vegetable oil.
If your o\vn is equipped with gray porcelain-
coated shelves, they mm be cleaned in tile
oven during tile selgclean cycle.
Oven Light Replacement
CAUTION:Beforerep/aclbgyoa ovenh#htbuib,
disconnectthee/ectncaipowertotherangeat the
mainfuseorckcuitbraakerpane/.Besuretoiet the
hghtcoverandbuibcoolcompiete/y
Tile oven light bulb is covered with a
relnox_0_le glass cover that is held ill place
with a bail-shaped wire. Remove the oven
dooi; if desired, to reach cover easily:
Toremove:
1_] Hold a hand under tile co;er so it
ii i
doesn't tifll when released. X,_ith
fingeis of the salne hand, finnl) push
back tile wire cox,er holdei: Lift off
tile COX er.
They may also be cleaned by using all
abrasive cleanse_: _Mter cleaning, rinse tile
shelves with clean water and (hw with a
clean cloth. If the shelxvs e\vr I)ecome hard
to slide, wipe the shelI edges or oven shelI
supports with vegetable oil.
Donot remove any screws to remove
the cover.
] Do not touch hot bulb with a wet
cloth. Rei)lace bulb with a 40-watt
household appliance bull).
Toreplace cover:.
[] Place it into the groove of the light
receptacle. Pull the wire torward to the
center of tile cover until it snaps into
place. _]lell ill place, tile wire holds
the cover firefly. Be certain the wire
is ill the depression ill the center of
tile cover.
Connect electrical power to the range.
[]
38
Page 39

Installation
Instructions
Range
In the Commonwealth
of Massachusetts
• This product must be installed by a licensed
phunber or gas fitter.
• When using ball type gas shut-off valves, they shall
be the T-handle type.
• A flexible gas connector, when used, must not
exceed 3 teet.
BEFORE YOU BEGIN
Read these instructions completely and carefully,
Installation of this range must conform with local
codes, or in the absence of local codes, with the
National Fuel Gas Code, ANSI Z223,1/NFPA.54,
latest edition. In Canada, installation must conform
with the current Natural Gas Installation Code,
CAN/CGA-B149.1 or the current Propane Installation
Code, CAN/CGA-B149,2, and with local codes where
applicable, This range has been design-certified by
CSA International according to ANSI Z21.1, latest
edition and CaJaadian Gas Association according
to CAN/CGA-I.1 latest edition.
As with any appliance using gas and generating beat,
there are certain satet} precautions you should tollow.
You will find these piecautions in the Important Safety
Information section in the front of this manual. Read
them carefully.
FOR YOUR SAFETY
Do not store or use combustible materials, gasoline or
other flammable vapors and liquids in the vicinity of
this or rely other applim_ce.
If you smell gas:
Open windows.
@Don't touch electrical switches.
O Extinguish any open flame.
O hmnediately call yore" gas supplier.
TOOLS YOU WILL NEED
Phillipsscrewdriver
Flat-bladescrewdriver Open-endor
adjustablewrench
Pencilandruler __
Level
Pipewrenches(2)
(oneforbackup) Drill, awl or nail
• IMPORTANT - Savethese
instructions fl_r local electrical inspector's use.
• IMPORTANT - Obse,',eall
governing codes and ordinances.
• Note to Installer - Leave these instiuctions
with the appliance after installation is completed.
• Note to Consumer - Keep this Owner's
Manual and Installation Instructions for future
reterence.
• Note - This appliance must be propedy grounded.
• Servicer - The electrical diagram is in an envelope
attached to the back ot the range.
• Skill level - Installation of this appliance requires
basic mechanical skills.
• Proper installation is the responsibility of the
installer.
• Product fifilure due to improper installation is not
covered under the Warranty.
MATERIALS YOU MAY NEED
• (;as line sh ut-off valve
• Pipe joint sealant or Ui,-approved pipe thread tape
with Teflon':: that resists action of natural and I,P gases
• Flexible metal appliance connector (1/2" I.D.)
A 5-toot length is reconmlended fi)r ease ot installation
but other lengths are acceptable. Never use an old
connector when installing a new range.
• Flare union adapter fl:,r com_ection to gas supply line
(3/4" or 1/2" NPT x 1/2" I.D.)
• Hare union adapter ti)r connection to pressure
regulator on range (1/2 " NPT x 1/2 " I.D.)
• I,iquid leak detector or soapy watei:
• I,ag bolt or l/2" O.D. sleeve anchor (fin" concrete
floo_s only).
a'Ibflon: Registered tl-,idemarkof DuPont
39
Page 40

Installation instructions
AWARNING
iNSTALLATiON SAFETY
iNSTRUCTiONS
Read these instructions completely and carefully.
hnproper installation, adjustment, alteration, service
or maJntenmace can cause injury or property damage.
Refer to this mmmal. For assistance or additional
information, consult a qualified installer, service
agency, manufacturer (dealer) or the gas supplier.
Never reuse old flexible connectors. The use
of old flexible connectors can cause gas leaks and
personal injury. Always use NEW flexible connectors
when installing a gas appliance.
IMPORTANT - Remo,e ,llpacking
material and literature from oven befi)re connecting
gas and electrical supply to range.
CAUTION - 1,,, ,t emp
the oven of this range dm'ing a power tailure (Electric
Ignition models only).
• Have vom" range installed bv a qualified installer.
• ¥(mr range must be electrically grounded in
accordance with local codes oi; in the absence
of local codes, in accordance with the National
Electrical Code (ANSI/NFPA 70, latest edition).
Ill Canada, electrical grounding inust be ill
accordance with the current CSA C99.1 Canadian
Electrical (:ode Part 1 and/or local codes. See
floctrical Coonoctioos in this section.
• gefin'e installing your range on linolemn or anv
other svnthetic floor covering, inake sure the floor
covering can withstand 180°F without shrinking,
warping or discoloring. Do not install the range
over carpeting unless a sheet of 1/4" thick plywood
or silnilar insulator is placed between the range
and caq)eting.
• Make sm'e the wall coverings around the range can
withstand heat generated by the range up to 200°E
• Avoid placing cabinets above the range. To reduce
the hazard caused by reaching over the open
flanles of operating bm'nms, install a ventilation
hood over the range that projects tin'ward at least
5" beyond the front of the cabinets.
• Tile ventilating hood must be constHlcted
of sheet metal not less than 0.0122" thick.
Install above the cooktop with a clearance of not
less than l/4" between the hood and the underside
of the colnl)ustible inaterial or inetal cabinet. The
hood InUSt be at least as wide as the al)pliance and
centered over the ai)pliance, (_learance between
the cooking surtace and the ventilation hood
surtace MUST NEVER BE LESS THAN 24
INCHES,
EXCEPTION: Installation of a listed inicrowave oven
or cooking al)pliance over the cooktop shall conli)rln
to the installation instluctions packed with that
appliance.
• If cabinets are placed above the range,
alh)w a nlininluln clearance of 30" between the
cooking surl,_ce and the bottom of unl)rotected
cabinets.
• If a 30" clearance between cooking sm'thce and
overhead combustible material or metal cabinets
cannot be maintained, protect the tmderside of the
cabinets above the cooktop with not less than 1/4"
insulating millboard covered with sheet metal not
less than 0.0122" thick. Clearance between the
cooking sm'lace and protected cabinets MUST
NEVER BE LESS THAN 24 INCHES.
• The vertical distance fl'om the plane of the cooking
surtace to tile bottoln of a(!jacent overhead cabinets
extending closer than 1" to the plane of the range
sides must not be less than 18". (See the Oimonsions
and Cloarancos illustration in this section.)
• CAUTION - Itemsofinterestto
children should not be stored ill cabinets above a
range or oi5 the backsplash of a range--children
climbing on the range to reach items could be
seriously ii_j ured.
4O
Page 41

Installation Instructions
DIMENSIONS AND CLEARANCES
Provide adequate clearances between the range and adjacent combustible surfaces. These dimensions must be met
for safe use of your rm_ge. The location of the electrical outlet and pipe opening (see Gas Pipe and Electric Outlet
Locations) may be adjusted to meet specific requirements.
The range may be placed with 0" clearance (flush) at the back wall.
Minimum to
cabinets on
either side
of the range
I I I
30"
Minimum
_ -'> <- 3" Minimum to
18" wall an
30"
either side
Depthwith door closed (includes door handle)
I_-- 30" I 293/,"""_l_"--_ Depth variesdependingon model.
for cabinets
Maximum depth
above
countertops
13"
Front edge of
the range side
panel forward
from cabinet
1/4"_ _- -J
See specifications sheet for your
model.
To cabinets
below cooktop
and atthe range
back
Height
473/4"
41
Page 42

installation instructions
AWARNING
ANTI-TIP DEVICE
All ranges can tip and injury could
result.
@
To prevent accidental tipping of the range,
attach an approved Anti-Tip device to the
wall. (See Installing the Anti-Tip Device in
®
• For VO/lI" safety, nevei" use v/)/li" Fange lol" WaI'uling
oF heating tile I'OOIll, Yo/II" ()veil and cooktop are
not designed to heat your kitchen. Top burnei_
should not be opei'ated without cookware on tile
grate. Such abuse could result ill fire and daulage
to your range and will void your walTantv.
• Do not store or use couIbustible inatelJals,
gasoline or other flauunable wq)ors and liquids
in the vicinity of this or any other appliance.
Explosions or fires could result.
• Do not use ()veil toF a storage area. ]teius stored in
tile oven can ignite.
• Do not let cooking grease or othei" flauinlable
uiaterials accuui ulate in or near the range.
this section.) To check if the device is
installed and engaged properly, carefully
tip the range forward. The Anti-Tip device
should engage and prevent the range from
tipping over.
If you pull the range out from the wall for
may reason, make sure the Anti-Tip device
is engaged when you push the rmige back
agMnst the wall.
LOCATION
Do not locate the rmage where it may be subject to
strong drafts. Any openings in the floor or wall behind
the rmage should be sealed. Make sure the openings
around the base of the range that supply fresh air for
combustion mad ventilation axe not obstructed by
carpeting or woodwork.
Your range, like ulany other household itenis, is
heavy and can settle into soft floor coverings such as
cushioned vinyl or carpeting. Use care when nioving
tile range on this type of flooring. It is i'ecolulnended
that tile tOlh)wing silnple and inexpensive instluctions
be tollowed to protect your floor.
Tile range should be installed on a sheet of plywood
(or siulilar niaterial), When the floor covering ends at
the fl'ont of the range, the area that the range will rest
on should be built up with plywood to tile saule level
or higher than the floor covering.
This will allow tile range to be nioved flir cleaning
or servicing. Pdso, ulake sure your floor covering will
withstand 180°F. (See tile Installation Safety Instructions
section.)
Make sure tile wall coverings _li'o/ind vo/u" range C_lll
withstand tile heat generated (up tti 200°F) by tile
ran ,e (See tile Installation Safety Instructions section.)
IMPORTANT!
Remove all tape mid packaging. Make sure the
burners are properly seated m_d level.
Take the accessory pack out of the oven mad/or
drawer,
Check to be sure that no range parts have come loose
during shipping.
42
Page 43

Installation instructions
[] PROVIDE ADEQUATE GAS
SUPPLY
Your rmlge is designed to operate at a pressure of 4" of
water column on natural gas or, if designed for LP gas
(propm_e or butane), 10" of water column,
Make sure wm are supplying your range with tile type
of gas for which it is designed.
This range is convertible for use o15 natural or
propane gas. If you, decide to use this range on I,P gas,
COlsversion inust be inade by a qualified I,P installer
before atteml)ting to operate tile range o15 that gas.
For proper operation, tile pressure of natural gas
supplied to tile regulator 155tlst be between 4" and 13"
of wa tel" col 1115115.
For I,P gas, tile pressure supplied must be between 10"
and l 3" of water columls.
When checking fi)r proper operation of tile regulatoi;
tile inlet pressure inust be at least 1" greater than tile
operating (manifl)ld) pressure as given above.
Tile pressure regulator located at tile inlet of tile range
manifl)ld must remain in tile supply line regardless of
whether natural or I,P gas is being used.
A flexible I51etal appliance connector used to connect
tile range to the gas supply line should have an I.D. of
1/2" and be 5 teet in length fin" ease of installation. Ii5
Canada, flexible connectors must be single wall inetal
connectors no longer than 6 feet in length.
[] CONNECT THE RANGE TO GAS
Shut off the main gas supply valve before discmmecting
the old range and leave it off mltil the new hook-up has
been completed. Don't forget to relight the pilot on
other gas applimices when you turn the gas back on.
Because hard piping restricts movement of tile range,
tile use of a CSA hsterlmtiolml-certified flexible inetal
appliance connector is recommended unless local
codes require a hard-piped connection.
Never use an old connector when installing a new
range, If the hard piping method is used, you must
carefully align the pipe; tile range cannot be moved
alter tile connection is inade.
To prevent gas leaks, put i)ipe joint compound oi5, or
wrap pipe thread tape with Teflon* around, all inale
(external) pipe threads.
A. Install a manual gas line shut-off valve in tile gas line
in an easily accessed location outside of the range.
Make sure eveiyone operating tile range knows
where and how to shut off the gas supply to the
I'}115ge.
B°
Install male 1/2" flare union adapter to tile 1/2"
NPT internal thread at inlet of regulator. Use a
backup wrench oi5 tile regulator fitting to avoid
damage,
When installing tile range fl'om tile fl'ont, remove
the 90 ° elbow tot easier installation.
C°
Install male 1/2" or 3/4" flare union adapter to tile
NPT internal thread of the manual shut-ott wflve,
taking care to back-up the shut-ott wflve to kee I) it
fl'Oln turning.
D. Connect flexible metal appliance connector to tile
adapter on the range. Position range to permit
connection at tile shut-ott wflve.
E°
When all connections have been made, make sure
all range controls are in tile off position and turn on
tile main gas supply valve. Use a liquid leak detector
at all joints and connections to check fin" leaks in the
svstei55.
WARNING: oo NOTUSEA
FLAME TO CHECK FOR GAS LEAKS.
When using test pressures greater than 1/2 psig to
pressure test tile gas supply systeln of tile residence,
disconnect tile range and individual shut-ott valve fl'Oln
tile gas supply piping. When using test pressures of 1/2
psig or less to test the gas supply system, simply isolate
tile range ti'om tile gas supply system by closing tile
individual shut-oft wflve.
*Teflon: Registered trademark of DuPont
43
Page 44

Installation instructions
GAS PiPE AND ELECTRICAL OUTLET LOCATIONS
i
Recommended area for 120V
outlet on rear wall and area for
through-the-wall connection of
pipe stub and shut-off valve.
Recommended area for
through-the-floor connection
of pipe stub and shut-off valve.
44
Page 45

Installation instructions
FLEXIBLE CONNECTOR HOOKUP
Installer: Informthe [ :1_-_ 6as
consumerofthe 1/2"or3/4" ff_l]/ _--- shut-off
locationofthe gas Gaspipe --'1_ L_ - valve
shut-offva ve.
[-........-q
Note: Togain access
tothe regulator,remove
the lower ovendrawer
and,on somemodels,
removetherear access
panelin the lower oven
compartment.
RiGiD PiPE HOOKUP OPTIONS
45° EBow
___1.-- go° Elbow
regulator @
-1 _'_ Nipple
Installer: Inform the I ' _ off
location of the gas
consumerofthe I _& !ii{_
shut-offva ve. 1/Z'or3/4"
Gaspipe
Alternate Hookup
9o°Elbow_ ,_'(_¢"_'" 9o°E,}ow
r, @_) _ _ . . Pressure
oas _--I KL_ N_pple
shut-off_ _ kl_ / g0_ regulator
valve _ _, ./ Elbow1.
1/Z'or3/4"/" g0° Elbow "<_'_
Gaspipe Ad@ter_
Installer:Informthe I
consumerofthe locution
ofthe gas shut-offva ve.
Note: Togain access
tothe regulator,remove
the lower ovendrawer
and,on somemodels,
removethe rear access
panel in the lower oven
compartment.
_F Adapter
Nipple_ _"
I I _ / Nipple
I I _ Quickconoect
_/or union
I
45
Page 46

Installation instructions
[] ELECTRICAL CONNECTIONS
Electrical Requirements
120-volt, 60 Hertz, properly grounded dedicated circuit
protected by a 15-amp or 20-mnp circuit breaker or
time delay fuse.
Extension Cord Cautions
Because of potential satiety hazards associated
with certain conditions, we strongly recommend against
the use of an extension cord. However; if you still elect
to use an extension cord, it is absolutely necessary that
it be a /JIAisted, 3-wire grotmding-tyi)e appliance
extension cord and that the cmTent carrying rating of
the cord in amperes be equivalent to, or greater than,
the circuit rating.
Grounding
IMPORTANT--(Please read carefully)
FOR PERSONAL SAFETY, THIS APPLIANCE MUST
BE PROPERLY GROUNDED.
PreferredMethod
[] ELECTRICAL CONNECTIONS (CONT.)
A. Usage Situations where Appliance Power Cord will
be Disconnected Infrequently,
An adapter may be used only on a 15-amp circuit.
Do not use an adapter on a 20-amp circuit. Where
local codes permit, a TEMPORARY CONNECTION
may be made to a properly grounded two-prong wall
receptacle b)' the use of a /JL-listed adapter, awdlable
at most hardware stores, The larger slot in the adapter
must be aligned with the larger slot in the wall
receptacle to provide proper polarity in the
com_ection of the power cord.
TemporaryMethod
(Adapter plugs not permitted in Canada)
Align largeprongs/slots
Ensureproper
groundand firm
connectionbefore
use
Ensureproperground
existsbeforeuse
The power cord of this appliance is equii)i)ed with a
three-prong (grotmding) i)lug which mates with a
standard three-prong grotmding wall receptacle to
minimize the possibility of electric shock hazard fl'om
this appliance.
The customer should have the wall receptacle and
circuit checked by a qualified electrician to make sm'e
the receptacle is properly grotmded.
Where a standard two-prong wall receptacle is
encountered, it is the personal responsibility and
obligation of the customer to have it replaced with a
properly grotmded three-prong wall receptacle.
DO NOT, UNDER ANY CIRCUMSTANCES,
CUT OR REMOVE THE THIRD (GROUND) PRONG
FROM THE POWER CORD.
A word about GFCI's - GFCI's axe not required or
recommended for gas range receptacles.
Ground Fault Circuit Interrupters (GFCI's) are
devices that sense leakage of current in a circuit and
automatically switch off power when a threshold
leakage level is detected, These devices must be
manually reset by the consmner, The National Electrical
Code reqtfires the use of GFCI's in kitchen receptacles
installed to serve counterto I) surfilces. Peril)finance of
the range will not be alti_cted if operated on a GFCI-
protected circuit but occasional nuisance tripping of
the GFCI breaker is possible.
CAUTION: Att ,chi,,gtheadapter
grotmd terminal to the wall receptacle cover
screw does not grotmd the appliance unless
the cover screw is metal, and not insulated,
and the wall receptacle is grotmded through
the house wiring. The custoiner should have
the circuit checked by a qualified electrician
to make stu'e the receptacle is properly
grotmded.
When disconnecting the power cord fl'om the adapte_;
always hold the adapter with one hand. If this is not
done, the adapter ground terminal is very likely to
break with repeated use. Should this hai)pen, DO
NOT USE the appliance tmtil a proper grotmd
has again been established.
46
Page 47

Installation instructions
[] ELECTRICAL CONNECTIONS (CONT.)
B. Usage Situations where Appliance Power Cord will
be Disconnected Frequently.
Do not use an adapter phtg in these situations because
disconnecting of tile power cord places undue strain on
tile adapter and leads to eventual failure of tile adapter
ground terminal. The customer should have the two-
prong wall receptacle replaced with a three-prong
(gro/mding) receptacle by a qualified electrician
heft)re using tile appliance.
Tile installation of appliances designed fin" mobile
home installation must conform with tile Mamdhctm'ed
Home Const_ uction and Safi_ty Standard, Title 94 CFR,
Part 3280 (formerly tile Federal Standard fin" Mobile
Home Construction and Satiety, Title 24, HUD, Part
280) o_; when such standard is not applicable, tile
Standard tot Mantdhctured Home Installations, latest
edition (Mamdhctured Home Sites, Comm/mities and
SetAJps), ANSI A225.1, latest edition, or with local
codes. In Canada, mobile home installation must be
in accordance with tile cmTent CAN/CSA Z240/MH
Mobile Home Installation (:ode.
Electric Disconnect
• I,ocate disconnect I)lug, on tile range, back.
• Pinch sides of connector and pull out of range back.
[] ASSEMBLE SURFACE BURNERS
Assemble the burners as shown.
Grate
Burnercap
Burnerhead
Electrode
Burnerbase
CAUTION: D,,,,,,tc i)eratetile
bm'ner without all bm'ner parts in place.
[] SEAL THE OPENINGS
Seal an) openings in tile wall behind tile range and in tile
floor trader tile range, when hookui)s, are completed.
The top sides of the Pdght Front, Right Rear and Left
Front burner heads are marked with the letters "RF",
"RR" and "LF", respectively, to aid assembl?.
Mediurnbead
(not marked) Smallhead
andcap andcap
t t
Largehead Extralarge
andcap headand
cap
47
Page 48

Installation instructions
[] ASSEMBLE SURFACE BURNERS
(CONT.)
Place the burner heads on the bases matching the
letters, Place the correct size caps on the heads, Make
sure that the caps and heads are placed in the correct
location, There is one small, one meditm-l, one large
and one extra large head and cap,
Locatorpins
Pinslots
When placing, make sm'e tim h)cator pins in the
bm'ner head are seated in the pin slots of the
bm'ner base, Rotate the bm'ner head arotmd the
bm'ner base tmtil it is level and securely seated,
[] CHECK IGNITION OF SURFACE
BURNERS
Operation of all cooktop and oven bm'ners should be
checked alter the range and gas sui)ply lines have been
careflfllv checked tor leaks.
Electric I_fition Models
Select a top burner knob and sire ultaneously push
in and turn to LITE position. You will bear a clicking
sotmd indicating proper operation of the spark
module. Once the air has been pm'ged ti'om the
sui)ply lines, btu'ne_s should light within 4 seconds.
After burner lights, rotate knob out of the LITE
position. Try each bm'ner in succession until all
burners have been checked.
Quality of Flames
The combustion quality of burner flames needs to be
determined visuallv.
(A) Yellow flames--
Call for service
(B) Yellow tips on
outer cones--
Normal for LP gas
(C) Soft blue
flames--Normal for
natural gas
If burner flames look like (A), call for service. Normal
burner flames should look like (B) or (C), depending
on the type of gas you use.
With I,P gas, some yellow tipping on outer cones
is normal.
[] CHECK IGNITION OF OVEN BURNER
The oven is designed to operate quietly and automaticall}.
To operate the oven, press the BAI_" pad and then press the
nm:nber pads until 350 ° appears in the displa}. Touch the
START pad. Al[ter 30-90 seconds, the o_.en burner will ignite
and burn until the set temperature is reached. The oven
burner will continue to c_cle on and off as necessar\ to
maintain the men at the temperature indicated by the display.
To check ignition of the broil burnex, touch the BROIL
HI/LO t)ad and then the START t)ad. After 30-90 seconds,
the broil burner will ignite.
Electric ignition models require electrical power to operate.
In case of a power outage, the oven burners on these models
cannot be lit manuall_ with a match. (;as will not flow unless
the glow bar is hot.
If the oven is in tlse when a power outage occurs, the burner
will shut off and cannot be re-lit until t)ower is restored.
48
Page 49

Installation Instructions
[] ADJUST BROIL AND OVEN
BURNER AIR ADJUSTMENT
SHUTTERS IF NECESSARY
Air adjustment shutters for the top and bottom burners
regulate the flow of air to the flames.
The air a(!justment shutter fin" the top (broil) burner is
in the center of the rear wall of the o;en.
Llstment
shutter
The shutter for the bottom (oven) burner is near the
back wall behind the drawer. Remove the drawer. See
the Care and cleaning of the range section.
To adjust the flow of air to either burner, loosen the
Phillips head screw and rotate the shutter toward open
or closed position as needed.
[] ADJUST BROIL AND OVEN
BURNER AIR ADJUSTMENT
SHUTTERS IF NECESSARY (CONT.)
To remove the oven bottom:
A. Remove the knm'led screws holding down rear of the
oxen bottom.
B. (;rasp the oxen bottom at finoer_ slots on each side.
C. i,ilt the rear of the oxen bottom enough to clear the
lip of the range frame, push it back, and then pull it
up and out.
[] LEVELING THE RANGE
a.
Install the oven shelxes in the oxen and position the
raw,e where it will be installed.
Lower
, ra00e
range
(on some models)
B. Check fin" levelness by placing a spirit level or a cup,
partially filled with water, on one of the oven shelves.
If using a spirit level, take two readings--with the
level placed diagonally first in one direction and
then the other.
Raise
(on some models)
range
The flames for the top (broil) burner should be steadx
with approximately l" blue cones and should not
extend out oxer the edges of the burner baffle.
To detemfine if the bottom burner flames are burning
i)roperly, remove the oven bottom. Flames should have
approximately 1" blue cones and, if range is sui)plied
with natural gas, should burn with no yellow tipping.
(_4]th most I,P gas, small vellow tips at the end of outer
cones are mmnal.) Flames should not lift ott burner
ports. If lilting is observed, gradually reduce air shutter
opening tmtil flames are stabilized.
C. Remove the drawer. See the Care and cleaning of the
range section. The fl'ont leveling legs can be a(!justed
fl'om the bottom and the rear legs can be a(!justed
fl'om the top or the bottom.
D. Use an open-end or ac!justable wrench to at!just the
lexeling legs tmtil the range is lexel,
E. Afier the range is lexel, slide the range awax from the
wall so that the Anti-Tip dexice can be installed.
49
Page 50

Installation instructions
[] INSTALLING THE ANTI-TIP
DEVICE
-&WARNING!
• Range must be secured with an approxed Anti-
Tip dexice.
• Unless properly installed, the range could be
tipped b) )ou or a child standing, sitting or
leanino_ on _111 open door,
• After installing the Anti-Tip dexice, xerilk' that it
is in place by carefiflly attempting to tilt the
range forward.
• This ranoe,_ has been designed to ineet all
recognized industr) tip standards for all normal
conditions.
• The use of this dexice does not preclude tipping
of the ranoe_ when not properl) installed.
• If the Anti-Tip dexice supplied with the range
does not fit this application, use the tmixersal
Anti-Tip dexice _,_B2X7909.
A. Mark the wall where the RIGHT EDGE of the range
is to be located. Be sure to allow fin" the cotmterto I)
overhang if you intend to install the range next to
cabinets.
[] INSTALLING THE ANTI-TIP
DEVICE (CONT.)
Wallboard
Wood screw
Install the sleeve anchor into the drilled hole and then
install the lag bolt through the device. The bolts must
be properly tightened as recommended for the
hardware.
E. Slide the range against the wall, and check fi_r
proper installation by grasping the front edge of the
cooktop and carefiflly attempting to tilt the range
fin'ward.
Backof range
WHEN ALL HOOKUPS ARE
COMPLETED
Make sure all controls are left in the off position. Make
sure the flow of combustion and ventilation air to the
range is unobstructed.
Slottedhead
Markededgeof range
B. i,ocate the outside edge, of the device ' J "
center of the range ti'om the marked edge of the
I'll n )e
C. Using the dexice as a template, mark the position of
the hole for the screw.
D. For wood construction, drill a pilot hole at an angle
of 20 degrees from the horizontal. A nail or awl may
be used if a drill is not axailable.
Mount the Anti-Tip dexice with the screw proxided.
For ceu/en[ or concrete constrtlction, yOtl will need
a 1/4" x 1½" lag bolt and a 1/2" O.D. sleeve anchor;
which are not provided. Drill the recommended size
hole for the hardware.
2½ toward the
CONVERTING TO LP GAS (or
converting back to natural gas from LP)
This rmlge leaves the factory set for use with natural
gas. If you want to convert to LP gas, the conversion
must be performed by a qualified LP gas installer.
The comersion insn uctions and 12 orifices can be
found attached to the ranoe_ next to the pressure
regulator:
Kee I) these instructions and the orifices in case you
XV}IIIt to con_,ert back to nattlral gas.
50
Page 51

Beforeyoucall forservice...
Troubleshooting -tips
Save time and money! Review the charts on the following
pages first and you may not need to call for service.
g_com
Possible Causes
Topburners donot light Plug on range is not completely
or do not burn evenly, hlserted in the electrical outlet.
(The front right burner is Burner slits on the side of the • Renlove tile burner heads and (lema them. Check tile
designed to have slightly
smallerflames between burner may be clogged, electrode m'ea for burned-on food or grease. See the
the 6and 9 o'clock Care and cleaning of the range section.
positions. This is normal.) hnproper burner assembly. • Make sure the burner parts are installed correctly.
Burner flames very hnproper air to gas ratio. • /f range is ('ouue('ted to I,P gas, ('outa('t tile pel'sou
large or yellow who installed your rauge or made the conversion.
Surfaceburnerslight
butovendoesnot
The oven gas shut-off valve
may have accidentally been
moved during clemfing or
moving.
What To Do
• Make sm'e electrical plug is plugged into a live, properly
gI'ounded outlet.
See the Care and cleaning of the range section.
• To check tile oven gas shut-off \zdve, remove tile
drawer (see tile Care and cleaning of the range
section). Reulove tile rear access panel by unscrewing
tile thumb screws in tile upper leli and right corner.
I,ook tot the gas shut-off lever at the back of the range.
Leveris
shownclosed.
PULLTOOPEN.
Tilumb screws
Scratches (may appear
as cracks) on cooktop
glass surface
Areas of discoloration
on theglasscooktop
surface
Plasticmelted
tothe glass cooktop
surface
Pitting (orindentation)
ofthe cooktop
Incorrect cleaning
methods being used.
Cookwaace with rough bottoms
being used or coarse particles
(salt or sm_d) were between
the cookwaace and the surface
of the cooktop.
Cookware has been slid
across the cooktop surface.
Food spillovers not cleaned
before next use.
Hot surface on a model with
a light colored glass cooktop.
Hot cooktop crone into
contact with plastic placed
on the hot cooktop.
Hot sugar mixture spilled
on the cooktop.
• Scratches are not remox:d)le. Tiny scratches will become
less visible in time as a result oI cleaning.
• To avoid scratches, use tile reconmlended cleaning
procedm'es. Make sm'e bottoms of cookware are clean
befi)re tlse, and tlse cookware with smooth bottoms.
• See tile Cleaning the glass cooktop section.
• This is normal. Tile cooking zones inay change color
when hot or cooling down. This is temporary and
will disappear as tile glass cools to room temperatm'e.
• See tile Glass surface--Potential for permanent damage
Section in tile Cleaning the glass surface section.
• Call a qualified technician flw replacement.
51
Page 52

Beforeyoucall forservice...
Troubleshooting -tips
! Possible Causes
Control signals after You forgot to enter a bake
entering cooking time temperature or clemfing time.
or start time
Food does notbake Oven controls hnproperly set.
PP __
Incorrect cookware or cookwaxe
of hnproper size beh,g used.
Oven thermostat needs
adjustment.
Clock not set correctly.
in the oven.
Oven bottom not securely
seated h, position.
Fooddoes not Oven consols improperly set.
Ore,,doornotclosed.
/n [neno/J er 0 Fen_p
hnproper shelf position
be_,g nsed.
Food beh,g cooked h, a hot pro,.
Cookwaxe not suited for broilh,g.
Alumhmm foil used on the
the broilh,g pro, m,d grid has
not been fitted properly m,d
slit as recommended.
What To Do
• Touch the BAKE pad and desired temperature or
the SELF CLEAN pad and desired clean time.
• See the Using the upper oven section.
• See the Using the upper oven sect.ion,
• See the Using the upper oven section,
• See the Adjust the upper oven thermostat--
Do it yourself! section,
• See the Using the clock and timer section.
• See the Care and cleaning of the range section.
• See the Installation of the range section,
• Make sure vou touch the BROIL HI/tO pad.
• See the Using the upper oven section.
• See the Broiling Guide.
• Use the broiling pan and grid that came with your
range. Make sure it is cool.
• Use the broiling pan and gxid that callle with your range.
• See the Using the upper oven section.
Oven bottom not securely
seated in position.
Upper oven temperature Oven thermostat
too hot or too cold needs adjustment.
CIock and time t Plug on rm,ge is not completely
donotwork h,serted h, the electricaJ outlet.
A fuse h, your home may be
blown or the circuit breaker
t pped
Oven controls improperly set.
52
• See the Installation of the range section.
• See the Adjust the upper oven thermostat--
Do it yourself! section.
• Make sure electrical plug is plugged into a live, properly
grounded outlet.
• Replace the fllse or reset the circuit breakex:
• See the Using the clock and timer section.
Page 53

ge.com
PossibleCa.ses
What ToDe
Upper oven light Light bulb is loose or defective. * Tighten or replace tile bulb.
doesnotwork
Plug on range is not completely * Make sure electrical l_lug, is l)lugged,, into a live, properly
h_serted ha the electrical outlet, grounded outlet.
Upper oven will not The oven temperature is too * Alh )w tile range t_>c( >(>Iu >r_>(>m temperature aud
self-clean high to set a self-clema operation, reset tile controls.
Oven controls improperly set. * See the Using the self-cleaning upper oven section.
"Crackling" or This is the sound of the * This is uol'llKi1.
"popping" sound metal heating mad cooling
during both the cooking and
cleaning functions.
Excessivesmoking Excessive soil. * Touch the CLEAR/OFFpad. Open tile windows to
rid the room of smoke. Wait until the LOCKED DOOR
light goes ott. Wipe up tile excess soil and reset tile
cleau cycle.
Oven door will not open Oven too hot. * Alh>w tile oven to cool beh>w h>ckiug temperature.
after a clean cycle
Oven not clean after a Oven conWols not properly set. * Sue tile Usingthe self-cleaningupper ovensectilm.
clean cycle
Oven was heavily soiled. * (_leau up heavy spillovers before startiug tile cleau
cycle. Heavily soiled ovens may need to sell=clean
again or for a hmger period of time.
"LOCK DOOR" flashes The self-clean cycle has been * Close tile oven door.
in the display selected but the door is not
closed.
LOCKEDDOORlight The oven door is locked * Touch the CLEAR/OFFpad. Alh>w tile oven to cool.
is on when you want because the temperature
to cook inside the oven has not
dropped below the
locking temperature.
"F--andanumberor You have a fmaction error code. * T(>twhtheCLEAR/OFFpad. Alh)wtheoveutocooltbr
letter"flash inthe display one h(>tu: Put the oven back into operation.
If the function code repeats. * Disconnect :111 power tl> tile range for 5 minutes
and then reconnect power. /f tile hmctiou error
code repeats, call fin" service.
Ovenshelvesare
difficultto slide
"Probe"appears in
thedisplay(somemodels)
The nickel shelves (if so equipped) *
were demaed ha a self-clema cycle.
The gray porcelaha-coated shelves
(if so equipped) were improperly
demaed.
This is renthadhag you to enter a
probe temperature after plugging
ha the probe.
Apply a small amount of vegetable oil to a paper
towel and wipe the edges of the oven shelves with
the paper towel. Do not spray with Pare: or other
lul)ricant sprays.
• Enter a probe temperature.
iiiiiiiiiiiiiii!!ii_
iIiiii i i__
£
53
Page 54

Beforeyoucall forservice...
_ Troubleshooting -tips
i Possible Causes What To Do
Display goes blank A fuse in your home may be * Replace the fuse or reset tile circuit breaker:
blown or the circuit
breaker tripped.
The clock is in the * See the Special features of your oven controlsection.
black-out mode.
Display flashes Power failure. * Reset tile clock.
Unable to get the Oven control pads were * Tile BAKE and BROIL HI/LO !)ads must be touched :it
display to show "SF" not pressed properly, tile same time aml held for 3 seconds.
Power outage, Power outage or surge. * Reset tile clock. If tile oveu w;is ill USe, votl IUt/st l'eset
clock flashes it by touching the CLEAR/OFFpad, setting tile clock
and resetting any cooking flmction.
"Burning" or "oily" This is normal in a new oven * To speed the process, set a sell:clean cycle for a
odor emitting from and will disappear in time. minimmn of 3 hotu's. See the Using the self-cleaning
the vent oven section.
Strong odor An odor from the insulation * This is temporary.
around the inside of the oven
is normal for the first few times
the oven is used.
Fan noise (some models) The convection fan may turn on This is normal. The convection fhu will run tmtil the
and off automatically. _ flmction is over or tile door ix opened.
Convection fan not Preheat temperature Fan will start autou_atically once tile preheat
working (some models) not reached, temperature is reached.
Drawer does not slide The drawer is out of aligmnent. Ftdly extend the drawer and l)ush it all tile way in.
smoothly or drags See tile Care and cleaning of the range section. ___
Drawer is overloaded or load Re(ltwe wei,d/t. Redistribute drawer contents.
Lower oven drawer A fuse in your home may be Replace th fuse or reset tile circuit breaker.
will not work blown or the circuit breaker
Excessive condensation Liquid in lower oven drawer. Relllove liquid.
in the lower oven drawer --
is unbalanced, f'
tripped.
The oven is self-clemahag. Wait for tile self:clean cycle to finish and the oven
to cool.
Controls improperly set. See tile Lower oven drawersection.
Uncovered foods. Cover food with lid or almninmn foil.
Temperature setting too high. Re(ltwe temperature setting
Fooddries outin the Moisture escaping. Cover food with lid or almninmn foil.
lower oven drawer -- -- --
g4
Drawer not fully closed. Push drawer in tmtil latch engages.
Page 55

Accessories.
Looking For Something More?
Youcan find these accessories and many more at ge.com (U.S.) or www.GEAppliances.ca
(Canada), or carl 880.626.2002 (U.S.) or 888.261.3055 (Canada) (during normal business
hours). Have your model number ready.
i i i i i i
iii/i!!_Ii_iiiiii iiiii_ii_iiii!!i_i;
Oven and Drawer Racks
Grates
Broiler Pan
Light Bulbs Knobs
Surface Burner Caps & Heads
Cleaner
Tired of discolored rocks? Wishing you had extra-hearT-duty oven racks?
NOW AVAILABLEfor your range:
GE's innovative, selfk:leanable porcelain-coated oven racks!
• Hea_3r Duty
• Durable
• Able m be cleaned in a self-cleaning oven
Visit ge.com (U.S.) or www.GEAppliances.ca (Canada) for more
inff) nnadon.
55
Page 56

m
_ llletes.
r_
€_
r_
Q_
r_
cr_
q
--°
m
_mma
56
Page 57

GE Service Protection Plus 'M
GE, a name recognized _x(wldwide for quality and dependability; offers you
Service Protection Plus '"--comprehensive protection on all your appliances--
No Matter What Brand!
Benefits Include:
• Backed by GE
• All brands covered
• Unlimited service calls
• All parts and labor costs included
• No out-of-pocket expenses
• No hidden deductibles
• One 800 nmnber to call
You _ill be completel} satisfied _dth our service protection or xou ma} request }our monex back
on the remaining value of your contract. No questions asked. It's that simple.
Protect your refl'igerator, dishwasher, washer and &Ter, range, TV; VCR and much more--any brand!
Plus there's no extra charge fi)r emergency serxice and low monthly financing is available. Even icemaker
coverage and food spoilage protection is oL_bred. You can rest easy, knowing that all your valuable
household products are protected against expensive repai_.
We71CoverAny Appliance.
Anywhere. Anytime.
na_e>o,rrontidenreinCEa_*dran,s i, the U.S.ton-freeat800.626.2224
for I/lore illfoH//atioll.
adl 1)_;ulds coy<led, up Io 20 y<;u'_ old, in file continental U.S.
,_ ()It here
Please place in envelope and mail to:
General Electric Company
Warranty Registration Department
P.O. Box 32150
Louisville, KY 40232-2150
57
Page 58

Consumer Product Ownership Registration
Dear Customer:
Thank you for purchasing our product and thank you for placing your confidence in us.
V(e are proud to haxe you as a customer!
Follow these three steps to protect your new appliance investment:
Complete and mail
your ConsuIller
Product Ownership
Registration today.
ttave the l)cacc of
mind of knowing w_
Call COlltact VOII ill
the unlikelx (vent of a
sai_,tv modificalion.
LMt_r mailing the
registration below,
store this document
in a satb place. It
contains intormation
you will need should
VOI/ require selwice.
Our service number is
800.GE.CARES
(800.432.2737).
Model Number Serial Number
Important: If you did not get a registration card with your
product, detach and return the form below to
ensure that your product is registered, or register
online at ge.com.
Consumer Product Ownership Registration
Re_l(I Vo/Ir ()Wller's
Manual carefillly.
It will help you
operate your llew
appliance propeH>
,_%,,_ Cut h_r<
Model Number Serial Number
@
%h Ms. Mrs. Miss
FirslI I Lastl
Nalne I I I I I I I I I Nam< I I I I I I I I I I I I
Stt-(+cl I
Addr<ss I I I I I I I I I I I I I I I I I I I I I I I I
Apt. # I I I I I I I I I E-lnail Addlx ss*
Appliances
General Electric Compan U
GE Consumer & Industrial
Louisville, KY 40225
ge.com
I I I I I I I I I I I I II , , , , , , ,
* Please provide your eqnail address to receive, via eqnail, discounts, special ottk,p, and other important
communications fl-om GE Appliances ((;EA).
[ Check here if vou do not want to receive communications ti-om GEA's carefully selected partners.
FAILI 7RE TO COMPI.ETE AN[) RbTF[ RN TIIIS CARD DOES NOT DIMINISII Y()[ R
WARRAN'IY RIGIITS.
For intormation about GEA's privacy and data usage poliQ; go to ge.com and click on 'Prixacy Policy"
or call 800.626.2224.
I
I
58
Page 59

NOteS.
rJ_
€_
w
m
w
u_
59
u_
w
I
_Ah
Page 60

m
_ llletes.
r_
€_
r_
Q_
r_
cr_
q
--°
m
_mma
6O
Page 61

_te$.
w
m
w
61
w
m
Page 62

GEGasRangeWarranty.(Forc.stemersintheUnitedStates)
Aft warranty service provided by our Factory Service Centers,
or an authorized Customer Care®technician. To schedule service,
on-line, 24 hours a day, vis# us at ge.com, or carl 800.GE.CARES
(800.432.2737).Please have serial number and model number
available when calling for service.
GE Will Replace:
One Year
Fromthedate of the
original purchase
Fromthedate of the
originalpurchase
(onglasscooktop
modelsonly)
::Ji::Service trips to your home to teach you how to use
the product.
!_,JImproper installation, delivery or maJntenm_ce.
)_ Failure of the product if it is abused, misused,
or used for other than the intended purpose or
used commerciaJly.
i__Damage to the glass cooktop caused by haxdened
spills of sugaJcy materials or melted plastic that
are not clemled accordhlg to the directions in
the Owner's Mmmal.
Anypartof the range which fifils due to a defect in materials ()r worknmnship. During this
limited one-year warranty, ( ;E will also provide, free of charge, all labor and in-home sexMce
to replace the defective part.
A replacement glass cooktop if it should: crack due to themml shock; discolor; crack at the
rubber seal between the glass cooktop and the porcelain edge.
During this limited additional four-year warranty,you will be responsible tot any labor or
in-home sei_'ice.
Staple your receipt here.
Proof of the original purchase
date is needed to obtain service
under the warranty
::Ji::Damage to the glass cooktop caused by use of demlers
other thml the recommended clemthlg creams.
?_:Replacement of house fuses or resetting of circuit
breakers.
_: Damage to the product caused by accident, f'tre, floods
or acts of God.
i__h_cidentaJ or cmasequential damage caused by possible
defects with this applimace.
::Ji::Damage caused after delivery.
!i_:Product not accessible to provide required service.
EXCLUSIONOFIMPLIED WARRANTIES--Your sole and exclusive remedy is product repa# as provided in this Limited Warranty.
Any implied warranties, iucluding the implied warranties of merchantability orfitness for a particular purpose, are limited to
one year or the shortest period allowed by law.
This warranty is extended to the original purchaser and any succeeding owner for products purchased for home use
within the USA. If the product is located in an area where service by a GEAuthorized Servicer is not available, you
may be responsible for a trip charge or you may be required to bring the product to an Authorized GEService location
for service. In Alaska, the warranty excludes the cost of shipping or service calls to your home.
Some states do not allow the exclusion or limitation of incidental or consequential damages. This warranty gives
you specific legal rights, and you may also have other rights which vary from state to state. Toknow what your
legal rights are, consult your local or state consumer affairs office or your state's Attorney General.
Warrantor: General Electric Company.Louisville,KY 40225
82
Page 63

GEGas
iffll_ __ lJl ___
tlange vvarranq.(Forc.stomersi,Canada)
All warranty service provided by our Factory Service Centers Staple your receipt here.
or an authorized Customer Care® technician. For service, Proof of the original purchase
call 1.800.361.3400.Please have serial number and model date is needed to obtain service
number available when calling for service, under the warrantz
! CamcoWillReDlace:
One Year Anypartof the range which fifils due to a (letect in materials or wor!unanship. During, this
From the date of the limited one-year warranty, Camco will also proxide, free of charge, all labor and iu-home service
origina!purchase to replace the detecti',e part.
FiveYears A replacement glass cooktop if it should: crack due to thexmal shock; discolor; crack at the
From the date of the rubber seal between the glass cooktop and the porcelain edge.
ong!na! purchase During this lim#ed additional four-year warranty, )ou will be responsible fin" an) labor or
(onglass cooktep in-home serxice.
modelsonly)
::Ji::Service trips to your home to teach you how to use
the product.
!i>hnproper h_staJlation, delivery or maintenance.
::Ji::Failure of the product if it is abused, misused,
or used for other thma the intended purpose or
used commerciaJly.
:_::::Damage to the glass cooktop caused by hardened
spills of sugaJcy materials or melted plastic that
axe not clemmd according to the directions ha
the Owner's MmmaJ.
iJi::Dmnage to the glass cooktop caused by use of clemmrs
other than the recommended clemlh_g cretans.
!i/:Replacement of house fuses or resetting of circuit
breakers.
iJi::Dmnage to the product caused by accident, fire, floods
or acts of God.
:_::::hacidental or consequential dmnage caused by possible
defects with this applimlce.
iJi::Dmnage caused after delivery.
!i_:Product not accessible to provide required service.
EXCLUSIONOFIMPLIEDWARRANTIES--Yoursoleandexclusiveremedyisproductrepairasprovidedin thisLimitedWarranty.
Anyimpliedwarranties,includingtheimpliedwarrantiesofmerchantabilityorfitnessforaparticularpurpose,are limitedto
oneyearortheshortestperiodallowedbylaw.
I WARRANTOR IS NOT RESPONSIBLE FOR CONSEQUENTIAl, DAMAGES. I
_'arrantor: (;AM(;() IN(;. [
83
Page 64

ConsumerSupport.
GEAppliancesWebsite _,,the_.,.s.:go.cam
Have a question or need assistanre with your appliance? Try tile (;E Appliances Website 24 h(tm_ a day,
any day of the year! For greater comvnience and faster se_Mce, you call now download Owner's Manuals,
order palls, catalogs, or even schedule service on-line. You cast also "_sk Our Team of Experts'"" your questions,
and so much more... In Canada: wwwoGl_pplia_acesoca
ScheduleService _stthe_.,.s.:oe.com
Expert (;E repair service is onl} one step awa_ fl'om _our dosm Get on-line and schedule _our service at }our
convenience 24 hems am da_ of the }ear! Or call 800.GE.(]AI_ES (800.432.2737) dining natural business hom_.
In Canada, call 1.800.361.3400
RealLifeDesignStudio _stthe_.,.s.:oe.com
GE supports tile l_)ni_vrsal Design concept--products, services and environments that can be used by people o_ all
ages, sizes and capabilities. We recognize tile need to design fitr a wide range (ff phDical and mental abilities and
impairments. For derails of GE's Ijnivet_al Design applications, including Idtchen design ideas fiw people with
disabilities, check ()lit our Website todav. For tile heating impaired, please call 800.TDD.GEAC (800.833.4322).
In Canada, contact: Manager; Consumer Relations, Camco, Inc.
Suite 310, I Factory I,ane
Moncton, N.B. E1C 9M3
ExtendedWarranties
Purchase a (liE extended *<u'rant} and learn about special discounts that are available *dlile }our *<re'ant} is still
• o {( -c _c ,in ettbct. You can purchase it on-line amqfime, r call 8 ) ).626.2224 dining natural business hours. GE Consumer
Home Services tO11still be there after }our warrant} expires. In Canada, call 1.888.261.2133
PartsandAccessories
Individuals qualified to sel_'ice their own appliances call have paris or accessories sent directly to their homes
(VISA, MasterCard and Discover cards ate accepted). Order on-line today, 24 hom_ e; ery day or by phone at
800.626.2002 during normal business hours.
Instructions contained in this manual cover procedures tohe performed by any user. Other servicing generally should he
referred to qualified service personnel Cautionmust he exercised, since impreper servicing may cause unsafe operation.
Customers in Canada should consult tile yellow pages fiw tile nearest Camco service center; or rail 1.888.261.3055.
ContactUs
If you are not satisfied with tile service you receive t]'om GE, contact us on our Website with all tile details
including your phone number, or write to: General Manager; Customer Relations
GE Appliances, Appliance Park
I_ouisvi]le, KY 40225
In Canada: www.GFAppliax_ces.ca, or w_Jte to: Direct(m Consumer Relations, Camco, Inc.
Suite 310, 1 Factory I,ane
Moncton, N.B. E 1C 9M3
In tile Ij.S.: go.cam
In tile IJ.S.: go,cam
In tile U.S.: go.cam
RegisterYourAppliance _s,the_.,.s.:oo.com
Register your new appliance on-line-at your convenience! Timel) product registration will allo_ fi)r enhanced
communication and prompt service under tile terms of }our ",_arranty, should the need arise. You ma} also mail
in the pre-ptinted registration card included in the l)acMng, material. In Canada: www.GFAppliances.ca
Printed in Mexico
This book is printed on recycled pape_
 Loading...