

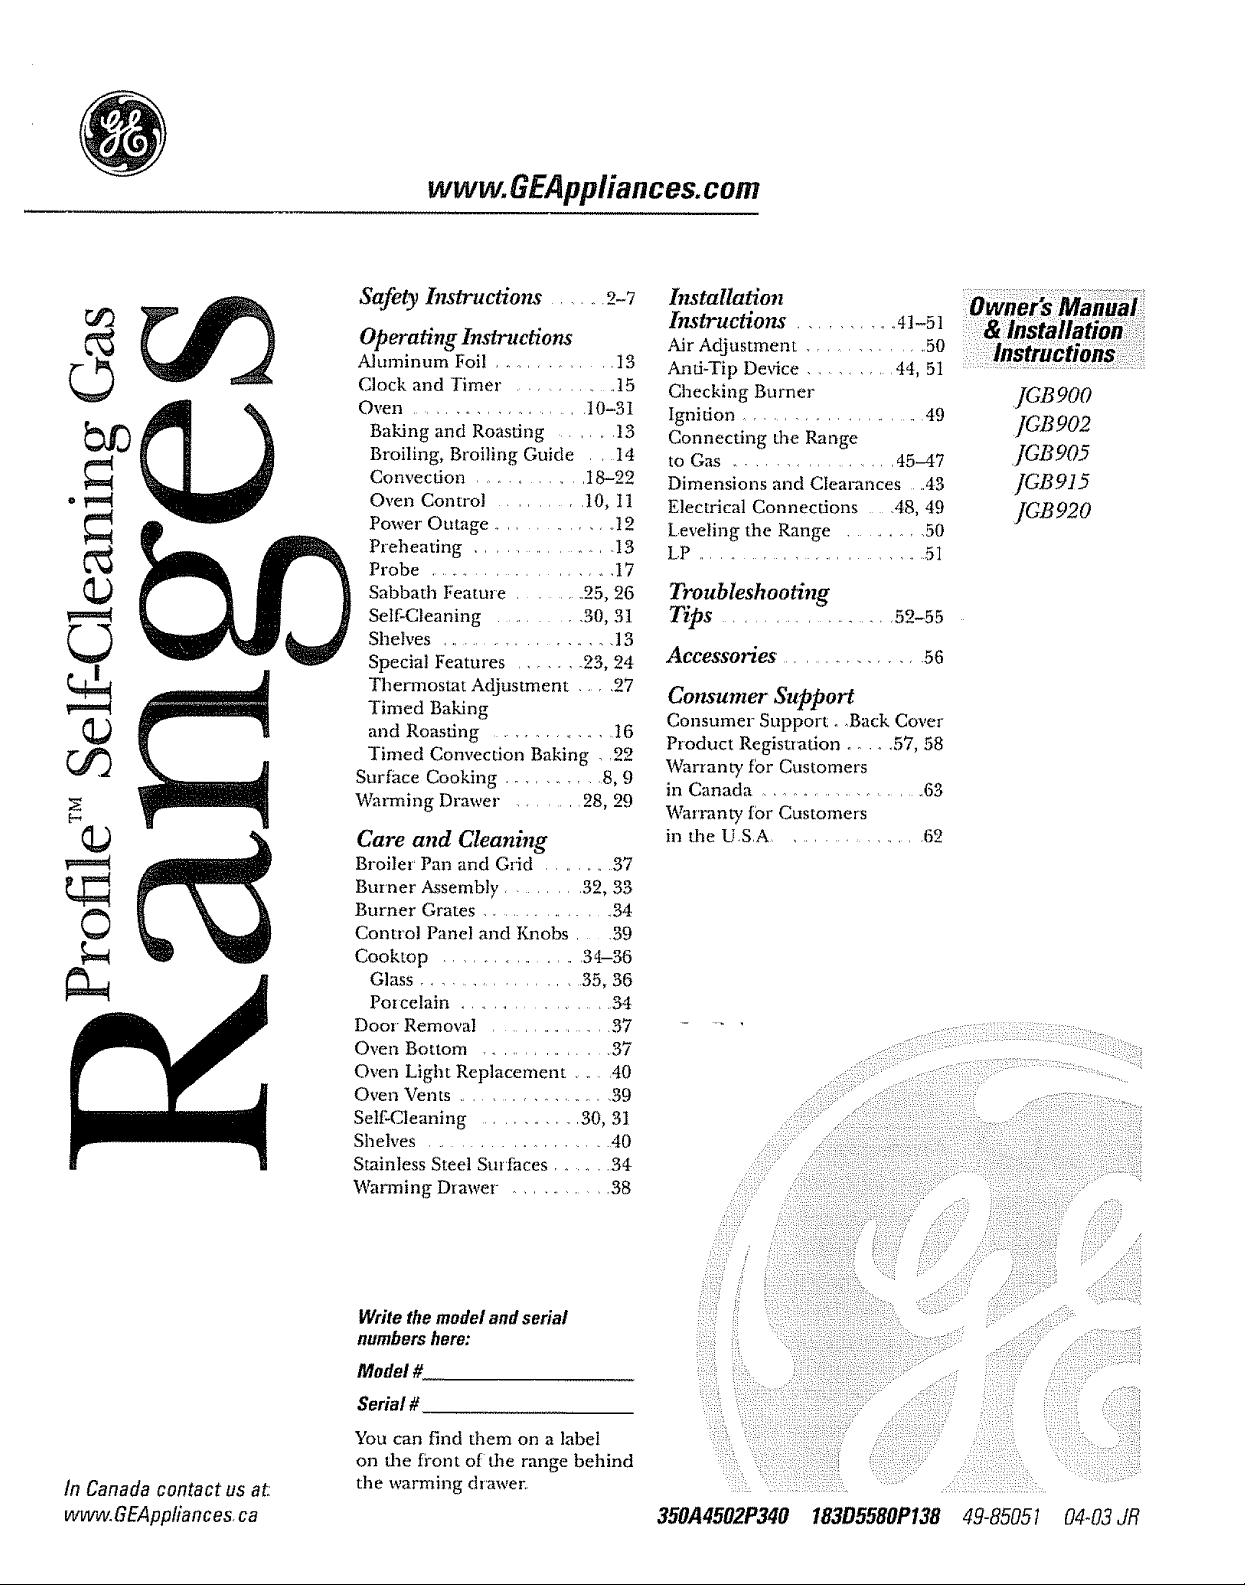
GE JGB920SEF2SS, JGB915BEF2BB, JGB905BEF2BB, JGB902BEH2BB, JGB900BEF2BB Owner’s Manual
www.GEPppliances.com
Safety hTstructions ...... 2-7
Operating Instructions
Aiuminum Foi! ............. 13
Clock and Timer .............. 15
Oven ...................... 10-31
Baking and Roasting ........ 13
Broiling, Broiling Guide . , I4
Convection ............. I8-22
Oven Control .......... 10, t 1
Power Outage .............. 12
Preheating .............. 13
Probe ....................... 17
Sabbath Feature .......... 25, 26
Self-Cleaning ......... 30, 3I
Shelves ....................... 13
Special Features ....... 23, 24
Ttaermostat Adjustment ..... 27
Timed Baldng
and Roasting ................. 16
Timed Convection Baking , ,22
Surface Cooking ........... 8, 9
Warming Drawer ........ 28, 29
Care and Cleaning
Broiler Pan and Grid ........... 37
Burner Assembly ........ 32, 33
Burner Grates ................. 34
Control Panel and t_qobs ..... 39
Cooktop .................... 34-36
Glass ................... 35, 36
Porcelain ..................... 34
Door Removal ................ 37
Oven Bottom ................ 37
Oven Light Replacement ....... 40
Oven Vents ..................... 39
Self Cleaning ........... 30, 31
Shelves ..................... 40
Stainless Steel Surfaces ......... 34
Wan_aing Drawer _ ........... 38
h_stallation
Instructions .......... 41-5 ]
Air Adjustment .............. 50
kaati-Tip De_dce ......... 44, 5I
Checking Burner
Ignidon ...................... 49
Connecting the Range
to Gas .................... 45-47
Dimensions and Clearances ....43
Electrical Connections ..... 48, 49
Leveling the Range .......... 50
LP .............................. 5I
Troubleshooting
Tips ..................... 52-55
Accessories ............... 56
Consumer Support
Consumer Support ° ,Back Cover
Product Registration ..... 57, 58
Warranty for Customers
in Canada ....................... 63
Warranty for Customers
in the US,A .................... 62
::ow.a$:Maaaa:i::
:i:::i &::lnstallation ::::: :i
JGB900
]cB9o2
JGBg05
JGB915
IcB92o
in Canada contact us at,'.
wvvvv.GEAppfiances,ca
Write the model and serial
numbem hero:
Model #
Serial #
You can find them on a label
on the fi'ont of the range behind
the warming drawm:.
350A4502P340 183D5580P138 49-85051 04-03JR
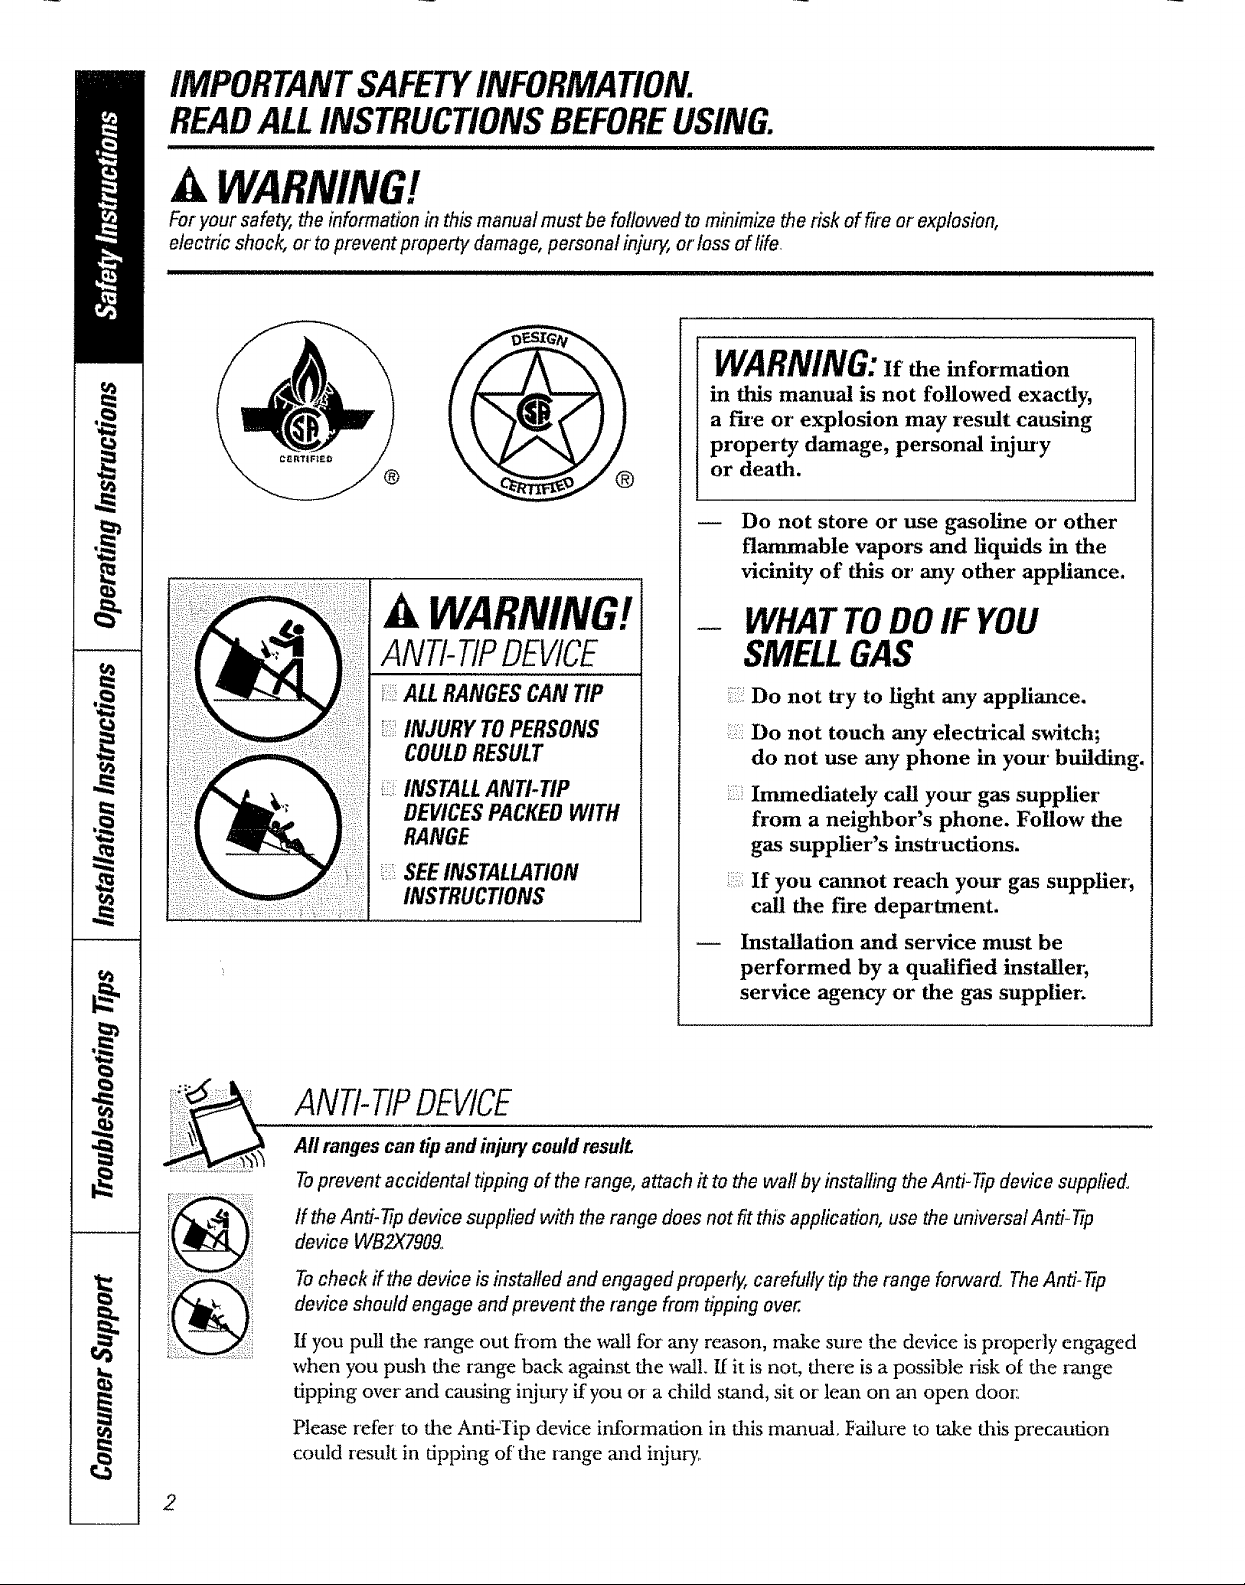
iMPORTANTSAFETYINFORMATION.
READALLINSTRUCTIONSBEFOREUSING.
A WARNING!
Foryour safety, the information in this manual must be followed to minimize therisk of fire or explosion,
electric shock, or toprevent property damage,personal injury,or loss of life.
WARNING:if theinfo,'mation
in this manual is not followed exactly,
a fire oi" explosion may result causing
property damage, personal injm T
or death.
Do not store or use gasoline oz' other
flammable vapors and liquids in the
vicinity of this or any other appliance.
WARNING!
ANTI-TIPDEVICE
i::::i::iALLRANGESCANTIP
INJURY TOPERSONS
COULDRESULT
INSTALLANTI-TIP
DEVICESPACKEDWITH
RANGE
i::iSEEINSTALLATION
INSTRUCTIONS
WHATTODOIF YOU
SMELLGAS
v._.,woGEAppliancesocom
& WARNING!
IMPORTANTSAFETYNOTICE
TheCalifornia Safe Drinking Water and ToxicEnforcementAct requires the Governor of Cafifomia to
publish a list of substances known to the state to cause birth defects or other reproductive harm, and
requires businesses to warn customers ofpotential exposure to such substances,
Gasappliances can cause minor exposure to four of these substances, namely benzene, carbon
monoxide, formaldehyde and soot, caused primarily by the incomplete combustion of natural gas or
LPfuels.,Properly adjusted burners, indicated by a bluish rather than a yellow flame, will mirfimize
incomplete combustion, Exposure to these substances can be minirrfizedby venting with an open
window or using a ventilation fan or hood
SAFETYPRECAUTIONS
Have the installer show you the location of the range gas shut-off valveand how to shut # off if necessan/
Have your range installed and properly
grounded by a qualified installer; in
accordance x'fid_ dae Installation Instructions,,
Any adjustment and se_a_iceshould be
perIbrmed only by qualified gas range
installers or service technicians°
Do not attempt to repair or replace ,any
part of your range unless it is specifically
recommended in dais m_-muaL All other
set€ice should be refer_ed to a qualified
technician
:;i::Plug your range into a 120-voh grounded
outlet only, Do not remove flae round
gr'ounding prong fiom dae plug, If in doubt
about tlae grounding of flae home electrical
system, it is your personal responsibility mad
obligation to have an ungrounded outlet
replaced witla a properly grounded,
d_ree-prong outlet in accordance x_ddl
flae National Elecuical Code° Do not use
an extension cord _dd_ this appliance,
3
IMPORTANTSAFETYINFORMATION.
READALLINSTRUCTIONSBEFOREUSING.
SAFETYPRECAUTIONS
i::,iLocate the range out of kitchen uaffic path
and out of drafty locations to prevent poor
air circulation.
Be sure all packaging mateiials me
removed fiom the range before operating it
to prevent fire or smoke damage should the
packaging material ignite.
Be sure your range is correcdy adjusted by
a qualified service technician or installer for
the type of gas (natural or LP) that is to be
used. Your range carl be converted for use
with either type of gas. See the Installation of
the range section,
WARNING:Theseadjus en must
be made by a qualified service technician
in accordance with the manufacturer's
instructions and all codes and requirements
of the authority ha\_ngjurisdicdon. Failure
to follow these instructions could result in
serious i_ury or property damage_ ][he
qualified agency performing this work
assumes responsibility 3[brthe conversion,
i:i:iAfter' prolonged use of a range, high floor
temperatures may result and many floor'
coverings will not withstand this kind of use.
Never install the range over _nyl dle or
linoleum that cannot withstand such type
of use,. Never install it directly over interior
kitchen carpeting
:):=iiDo not leave children alone or' unattended
where a range is hot or in operation.
They could be seriously burned.
i:::::Do not allow anyone to climb, stand or' hang
on the oven door; storage drawer; warming
drmver or cooktop They could damage the
range and even tip it over; causing severe
per_onat injury.
___:CAUTION:Items of interest to
children should not be stored in cabinets
above a range or on the backsplash of a
range--children climbing on the range to
reach items could be seriously injured,
5:_For your safety, never use your appliance
for warming or headng the room
Never wear loose fitting or hanging garments
while using the appliance, Be careful when
reaching for items stored in cabinets over the
range. Flammable material could be ignited
if brought in contact with flame or hot oven
surfaces and may cause severe burns.
Do not store flammable materials in an
oven, a range storage drawer; a waaming
drawer oi near a cooktop.
=::::Do not store or use combustible materials,
gasoline or other flammable -vapors and
liquids in the _4cinity of this or any odaer
apptiance_
i:i:::iDo not let cooking grease or other flammable
materials accumulate in or' near the range.
,::2
Do not use water' on grease fires_ Never pick
up a flaming pan_ Turn the conuols off;
Smother a flaming pan on a surface burner
by covering tt_e pan completely with
a well-fitting lid, cookie sheet or flat tray.
Use a multi-purpose dry chemical or
foam-type fire extinguisher;
Flaming grease outside a pan can be put
out by covering it with baking soda or;
if m_lable, by using a multi-purpose dry
chemical or foam-type fire extinguisher:
Flame in the oven or' warming drawer can be
smothered completely by closing the oven
door or drawer mad turning the control to
off or by using a multi-purpose dry chemical
or foam-type fire extingaaisher:
Let tim burner grates and other surfaces
cool before touching them or leaving them
where children can reach them,
ii_iNever block the vents (air openings) of the
range. They provide the air' inlet and outlet
that are necessary for t_herange to operate
properly with correct combustion. Air
openings are located at the rear of the
cooktop, at the top mad bottom of the oven
door; and at the bottom of the range under
the _<arming drawer; storage drawer or
kick panel.
:=:Large scratches or impacts to glass doois
or cooktops can lead to broken or'
shattered glass,
4
ww-m.GEAppliances.com
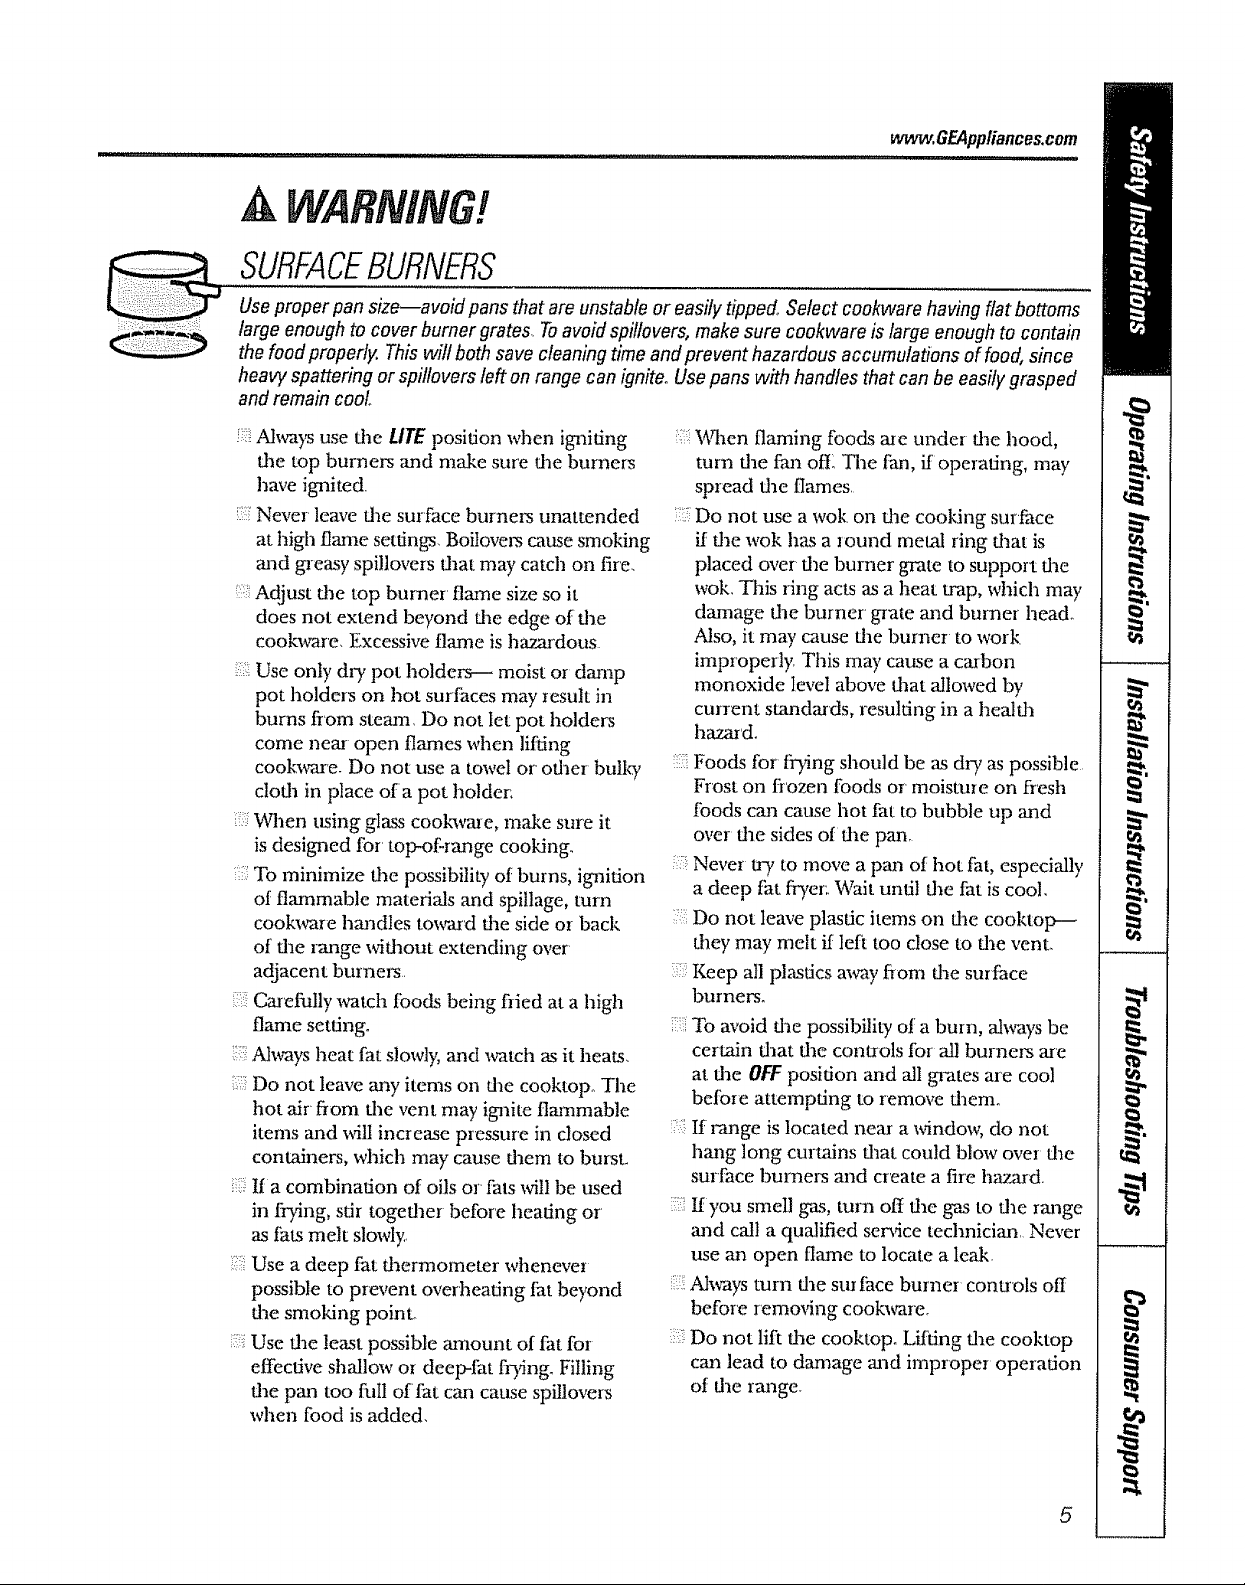
WARNING!
SURFACEBURNERS
Use proper pan size--avoid pans that are unstable or easily tipped. Select cookware having flat bottoms
large enough to cover burner grates..Toavoidspillovers, make sure cookware is large enough to contain
the food properly. This will both save cleaning time and prevent hazardous accumulations of food, since
heavy spattering or spi!!overs left on range can ignite. Usepans with handles that can be easily grasped
and remain cooL.
Ahvays use Ore LITEposition when igniting
tim top burners and make sure dae burners
have ignited.
Never leave fire surface burners unattended
at high flame settings. Boitovers came smoking
and gneasy spillovers flaat may catch on fire.
Adjust d_e top burner flame size so it
does not extend beyond fire edge of dae
cookware. Excessive flame is hazardous
:.:::;:: Use only dr,i pot holders-- moist or damp
pot holders on hot surfaces may result in
burns from steatn. Do not let pot holders
come near open flames when lifting
cookware. Do not use a towel or oflaer bt, llW
clotta in place ofa pot holder:
When ttsing glass cook_vare, make sure it
is designed for top-ofrmlge cooking.
::' To minimize Ore possibility of burns, igmition
of flammable materials and spillage, turn
cookware bandies to_ard fire side or back
of dae range widmut extending over
adjacent burners.
Catefially watch foods being flied at a high
flame setting.
Always heat fat slowly, mad watch as it heats.
Do not leave any items on dae cooktopo The
hot air from the vent may ignite flammable
items and will increase pressure in closed
containers, which may cause daem to bursL
It a combination of oils or fats will be used
in frying, stir together before heating or
as lats melt slowly,.
;:: Use a deep fat daermometer whenever
possible to prevent overheating fat beyond
dae smoking poinL
:_:::iUse the least possible amount of fat for
etfective shallow or deep-fat hying. Filling
the pan too full of fat can cause spillovers
when food is added.
_A,q_enflaming foods ate under dae hood,
turn dae fan offl The fan, if operating, may
spread dae flames.
':! Do not use a wok. on dae cooking surface
if d_e wok has a round metal ring daat is
placed over tim burner grate to support dae
wok. This ring acts as a heat trap, which may
damage dae burner' grate and burner head_
Also, it may cause tire burner to work
improperly. This may cause a carbon
monoxide level above dmt allowed by
current standards, resulting in a healda
hazard.
Foods for frying should be as dr), as possible
Frost on frozen foods or moisture on fresh
foods cma cause hot fat to bubble up and
over dae sides of die pan.
Never try to move a pan of hot fat, especially
a deep fat fryer:. Wait until fire fat is cool.
Do not leave plastic items on die cooktop--
they m W melt if left too close to fire vent.
_( Keep all plastics mvay fiom d_e surface
burners.
:_:To avoid dae possibility of a burn, al_,ays be
certain drat d_e controls for all burners are
at fire OFFposition and all grates are cool
belbre attempting to remove flaem.
:::::If range is located near a _4ndo_; do not
haa_g long curtains d_at could blow over dm
surface burners and create a fire hazard
7:::lIyou smell gas, turn off dre gas to dae range
and call a qualitied service technician Never
use an open flame to locate a leak
Ahvays turn dae sur face burner conu"ols off
before remm_ng cook'_re.
:i::!Do not lift fire cooktop. Lifting dre cool<top
can lead to damage and improper operation
of fire range.
5
IMPORTANTSAFETYINFORMATION.
READALLINSTRUCTIONSBEFOREUSING.
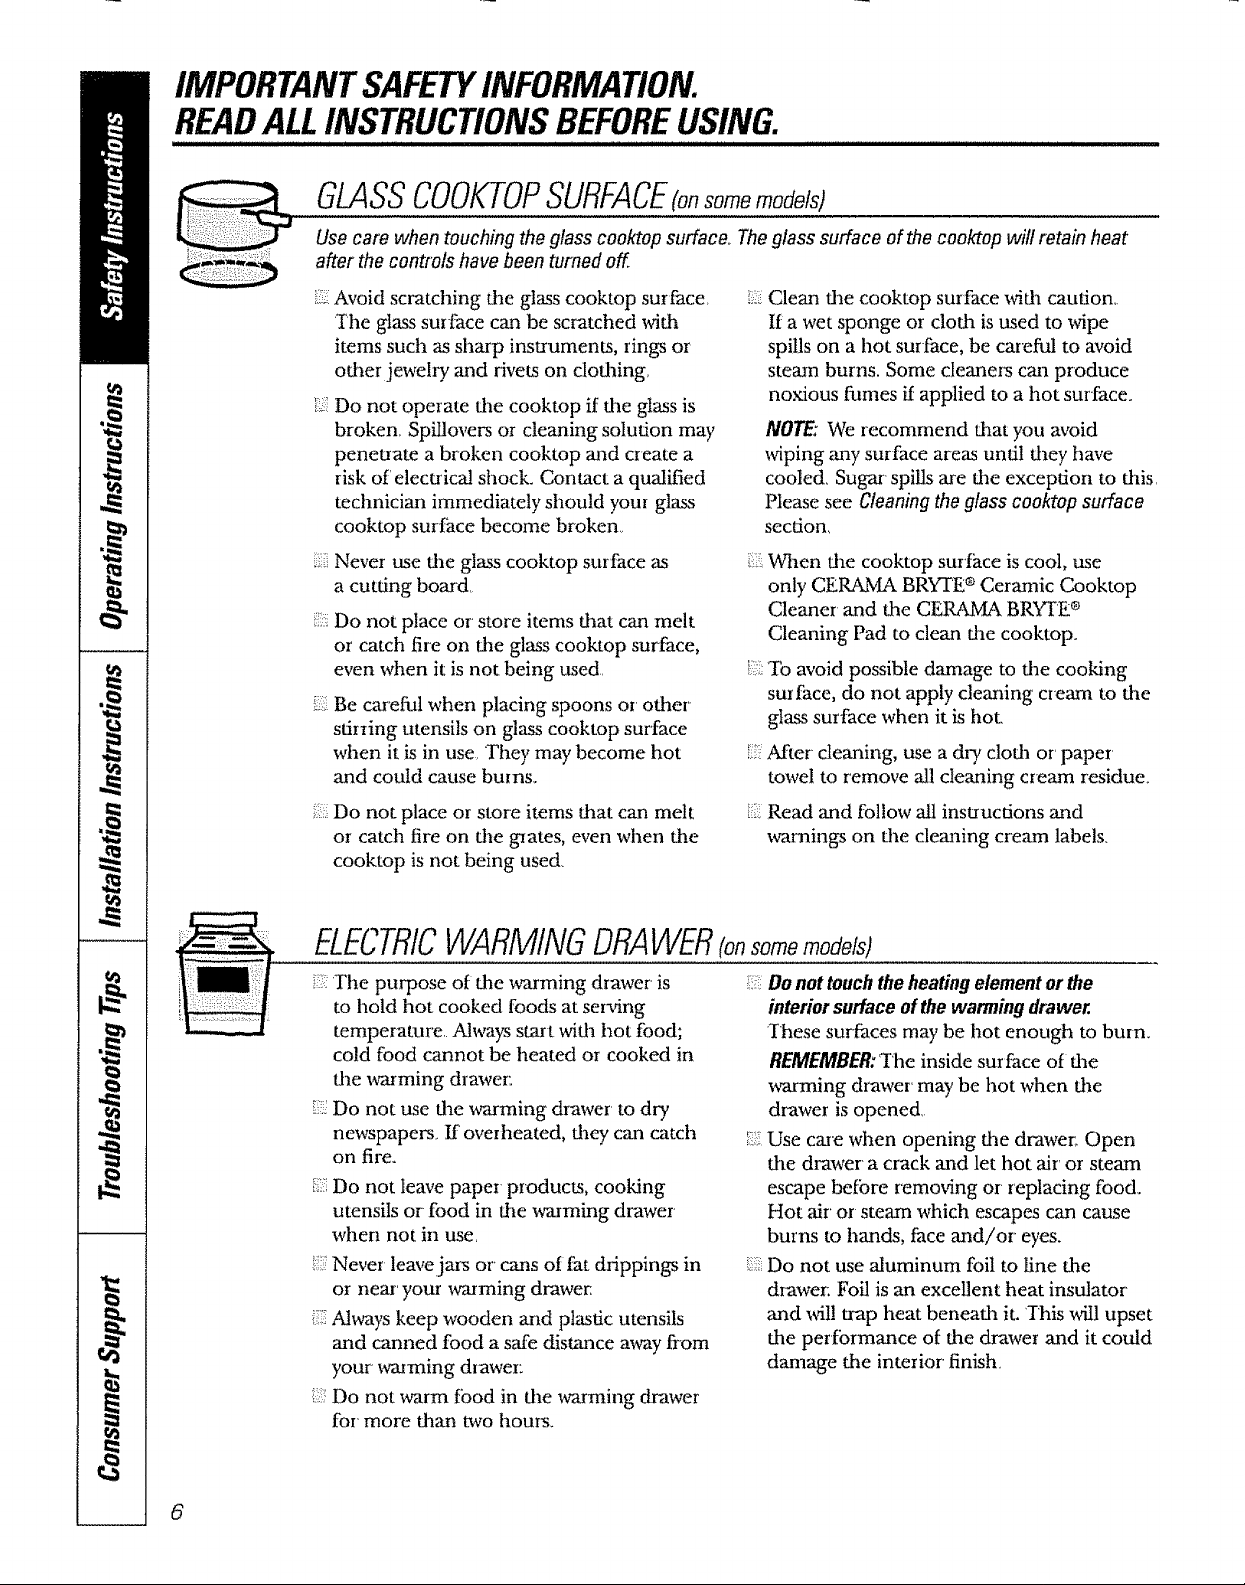
GLASSCOOKTOPSURFACE(onsomemodelsJ
Use care when touching the glass cooktop surface_Theglass surface of the cooktop will retain heat
after the controls have been turned off
_:,i:i:iAvoid scratching the glass cooktop surface, 2_i
The glass surface can be scratched with
items such as sharp instruments, rings or
other jewelry and rivets on clothing,
Do not operate the cooktop if the glass is
broken, Spillovers or cleaning solution may
penetrate a broken cooktop and create a
risk of' electrica! shock. Contact a qualified
technician immediately should your glass
cooktop surfitce become broken,
Never use the glass cooktop surface as
a cutting board
!!!i%:
Do not place or store items that can melt
or catch fire on the glass cooktop surface,
even when it is not being used.
Be cardiA when placing spoons or other
stiiring utensils on glass cooktop surface
when it is in use. They may become hot
and could cause bums.
ilL:Do not place or store items that can melt
or catch fire on the grates, even when the
cooktop is not being used,
!:::i_To avoid possible danaage to fire cooking
!_:::After cleaning, use a dr,i cloth or' paper
i::?Read and follow all insuucfions and
Clean the cooktop surface with caution,.
Ira wet sponge or cloth is used to wipe
spills on a hot surface, be careful to avoid
steam burns. Some cleaners can produce
noxious flames if applied to a hot surface.
NOTE: We recommend that you avoid
wiping ,any surface areas until they have
cooled. Sugar` spills are the exception to this.
Please see Cleaning theglass cooktop surface
section,
When die cooktop sur'fb,ce is cool, use
only CERaXJvIABRYTE ®Ceramic Cooktop
Cleaner and the CERAM2k BRYrE ®
Cleaning Pad to clean dae cooktop.
surface, do not apply cleaning cream to the
glass surface when it is hot.
towel to remove all cleaning cream residue_
warnings on the cleaning cretan labels.
ELECTRICWARMINGDRAWER(onsome models}
i::2The purpose of the warming drawer is
to hold hot cooked foods at serving
temperature. Always start with hot food;
cold food c_'mnot be heated or cooked in
the warming drawe_:
_1_._Do not use the warming drawer to dry
newspapers. If overheated, they can catch
on fire.
i_i'ilDo not leave paper products, cooking
utensils or food in the warming drawer
when not in use,
_:',:Never leave jars or cans of fat drippings in
or near` your warming drawer,
_i7Always keep wooden and plastic utensils
and canned food a safe distance away from
your warming dlawer:
;2:Do not warm fbod in the warming drawer
for more than two horns.
6
Donot touchthe heatingelementor the
interiorsurface ofthe warming drawer.
These surfaces may be hot enough to bum.
REMEMBER:The inside surface of fl_e
warming drawer may be hot when the
drawer is opened,
ii.:_Use ca_e when opening the drawer,. Open
the drawer a crack and let hot air' or steam
escape be[bre removing or replacing food.
Hot air or steam which escapes can cause
burns to hands, face and/or eyes.
ill Do not use aluminum foil to line the
drawer: Foil is art excellent heat insulator
and wil! trap heat beneath it. ]-his will upset
the perfbrmance of the drawer and it could
damage the interior finish
www.GEAppliances.com
COOKMEATANDPOULTRYTHOROUGHLY...
Cook meat and poultry thoroughly--meat to atleast an INTERNALtemperature of 160°Fand poultry to
at least an INTERNALtemperature of 180°F.Cooking to these temperatures usually protects against
foodbome illness,,
OVEN
Standaway from the range when opening the door of a hot oven, The hot air and steam that escape can
cause burns to hands, face and eyes,.
Do not use the oven for a storage area..
Items stored in dae oven carl ignite°
-:iKeep dm oven flee ftom gTease buildup.
Place file oven sheh,es in fl_e desired
position while dae oven is cool.
Pulling out flae shelf to die stop-lock is a
convenience in lifting hea W foods, It is also
a precaution against burns from touching
hot surfaces of flae door or oven walls, The
lowest position is not designed to slide,.
i!::Do not heat unopened food containers,
Pressure could build up and the container
could burst, causing an injuD,.
:7:Never use aluminum foil to line fl_e oven
bottom. Improper" use of foil could start
a fire and resutt in high cmbon monoxide_
Do not use aluminum foil anDvbere in fl_e
oven except as described in this manual,
Misuse could result in a fire hazard or
damage to flae range.
When using cooking or roasting bags in file
oven, follow file manufacturer's directions,
::':::Do not use your oven to dry newspapers.
If overheated, dmy can catch fire,
:iii::Use only glass cookware fllat is
recommended for use in gas ovens.
Ah_,aysremove the broiler' pan from rvmge as
soon as you finish broiling. Grease left in d_e
pan can catch fire if oven is used widmut
removing the grease from fl_e broiler pan,,
hrhen broiling, if meat is too close to dae
flame, flae fat may ignite Trim excess fat to
prevent excessive flare-ups,,
Make sure flae broiler pan is in place colrectly
to reduce tim possibility of' gaease fires,
_::If you should have a grease fire in flae broiler
pan, press fl_e CLFa4B/Offpad, mad keep
dm oven door closed to contain fire until
it burns out.
For safety and proper cooking performance,
al_,ays bake and broil with d_e oven door
closed.
SELF-CLEANINGTHEOVEN
Be sure to x_dpe off excess spillage before
self-cleaning operation.
_:::Before self-cleaning fl_e oven, remove file
broiler pan, broiler grid, all cookware, probe
and any aluminum foil
Nickel oven shelves (on some models)
should be removed from file oven before
beginning tim self<lean cycle.
!I':' Gray porcelain-coated oven shelves (on some
models) may be cleaned in tim oven during
fl_e self-clean cycle
Do not ctema the door gasket, The door gasket
is essential for a good seal, Care should be
Laken not to rub, damage or move file gasket,
i:_Clean only par'ks listed in dais O_mer's Manual
:'::If flae self-cleaning mode malfunctions, turn
flae oven off and disconnect file power supply.
Have it serviced by a qualified technician°
Do not use oven cleaners, No commercial
oven cleaner or oven liner ofany kind
should be used in or around any part of
the oven. Residue fTom oven cleaners will
damage the inside of the oven when tim
self-dean cycle is used,
READANDFOLLOWTHISSAFETYINFORMATIONCAREFULLY.
SAVETHESEIIVSTRUCTIONS
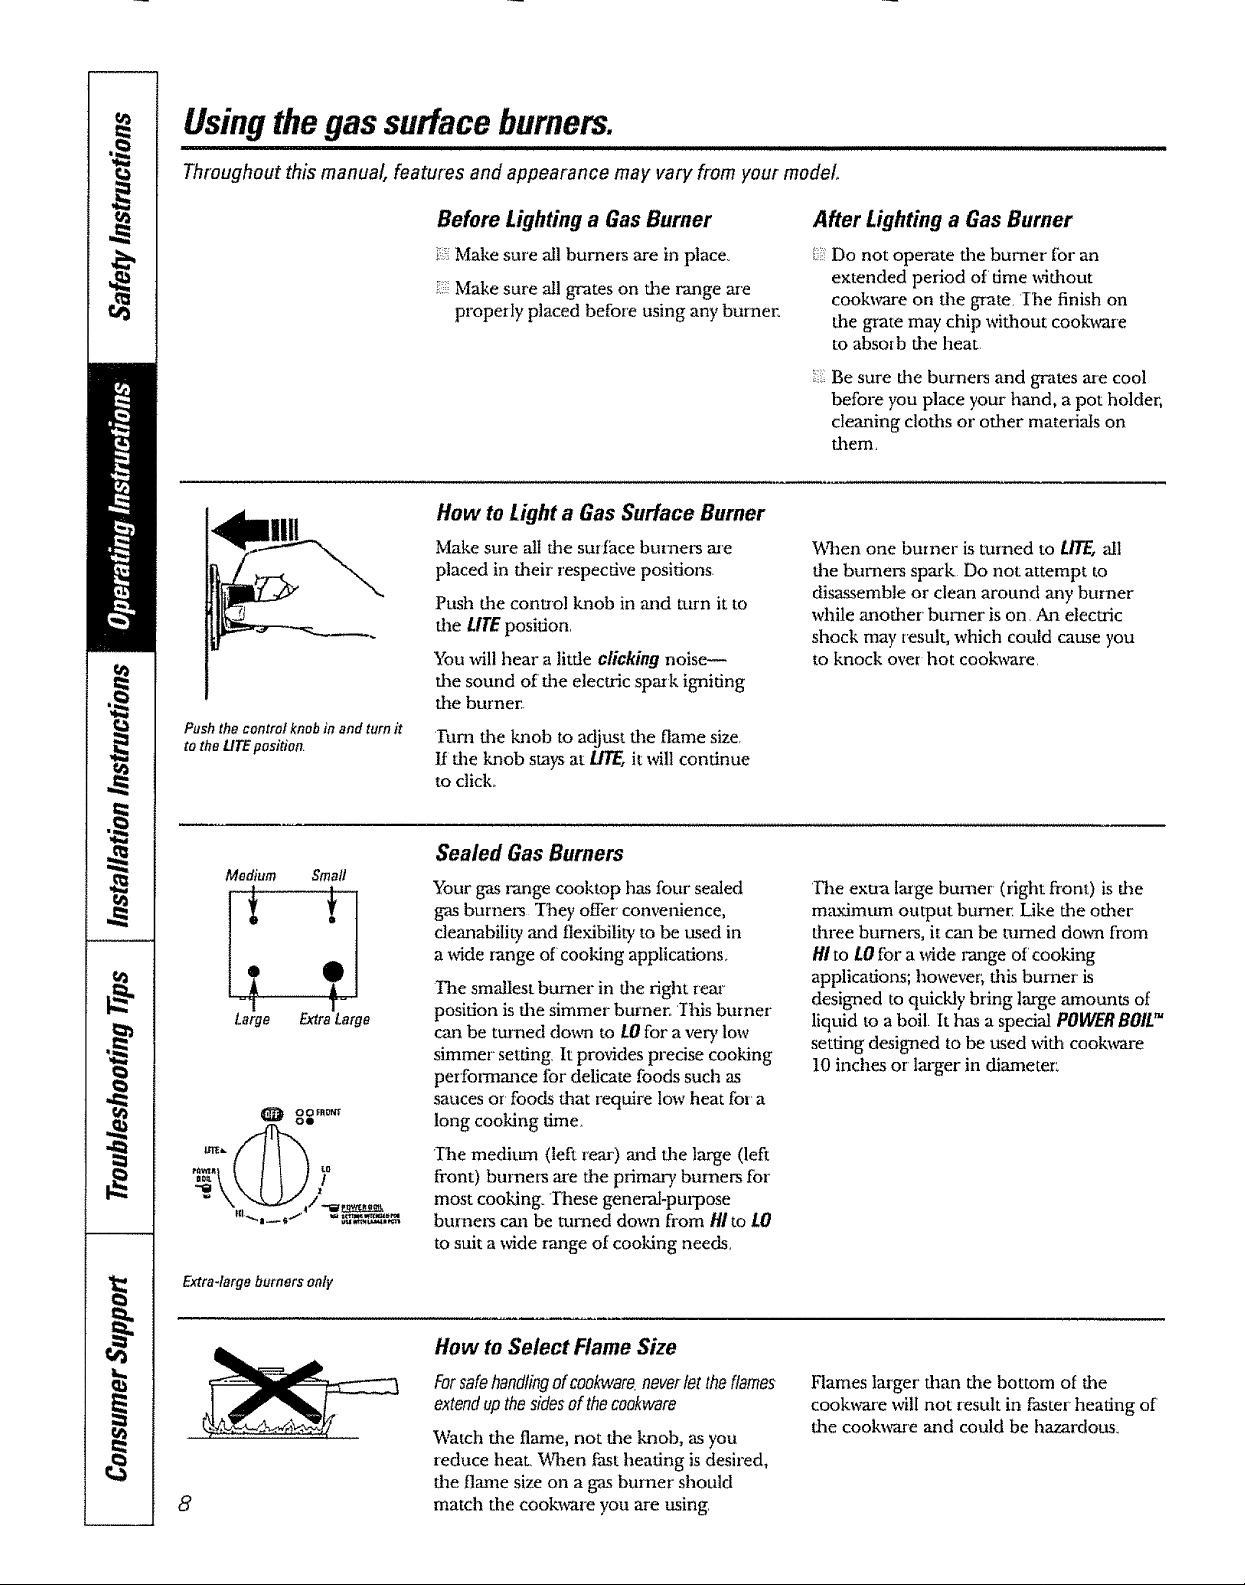
Usingthe gas surface burners.
Throughout this manual, features and appearance may vary from your model
Pushthe control knob in and turn it
tothe LIFEposition.
Before Lighting a Gas Burner
_i,;iMake sure all burner_ are in place_
i_!:;Make sure all grates on the range are
properly placed before using any burner,
How to Light a Gas Surface Burner
Make sure all the surf_tce burners are
placed in their" respective positions
Push the control knob in and mrn it to
the LIFE position,
You will hear a little clicking noise_
the sound of tim electric spark igniting
the burner_
rum the knob to adjtLst the flame size.
If the knob stays at LifE, it will continue
to ctick..
After Lighting a Gas Burner
Do not operate the burner [br an
extended period of' time without
cook_are on the grate. Ihe finish on
the grate may chip without cookware
to abso[b the heat
Be sure the burners and grates are cool
before you place your hand, a pot holder,
cleaning cloths or other materials on
them,
P,qaen one burner is turned to/JTE, all
the burners spm'k Do not attempt to
disassemble or clean around any burner
while another burner is on Aaaelectric
shock may result, which could cause you
to knock over hot cookware,
Medium Small
Large ExtraLarge
%0_
,,_, }0
,.. ".v_J ,/__=,=
Extra-largo burners only
,9
Sealed Gas Burners
Your gas range cooktop has four sealed
gas burners "l'heyoffer' convenience,
cleanabitity and flexibility to be used in
a wide range of cooking applications.
The smallest burner in the right rear'
position is the simmer burner_ Ihis burner
can be turned dram to LOfor a very low
simmer' setting tt provides precise cooking
performance for" delicate foods such as
sauces or foods that require low heat for a
long cooking time.
_Ihe medium (left rear) and the large (left
front) burners are the primary burners for'
most cooking. These general-purpose
burne,_ can be mined down from HI to LO
to suit a wide range of cooking needs.
How to Select Flame Size
Forsafehandlingof cookware,neverlet the flames
extendup thesidesof thecookware
Watch the flame, not the knob, as you
reduce heat. When fast heating is desired,
the flame size on a gas burner" should
match the cookware you are using.
the exua large burner (right front) is the
maximttm output burner. Like the other
tllree burners, it can be turned down from
HIto tO for a ",vide r,mge of cooking
applications; however, this burner is
designed to quickly bring large arnounts of
liquid to a boil. It has a special POWER BOILTM
setting designed to be used with cookware
10 inches or larger in diameter:
Hames larger than the bottom of the
cook_e will not result in faster heating of
the cookware and could be hazardous.
Top-of-Range Cookware
wwwoGEAppliancesoeom
_,H q'II I
Aluminum:'Medium-weight coolavare is
recommended becattse it heats quickly
and evenly Most foods bro_l evenly in an
aluminum skillet, Use saucepans wifl_ tight-
fitting lids when cooldng with mininmm
amounts of water:
Cast-Iron:If heated sloMy, most skillets will
give sadsfactoxT results
Enamelware:Under some conditions,
flaeenamel of some cookx_re may melt,
Follow cookware manufacturer's
recommendations for cooking methods.
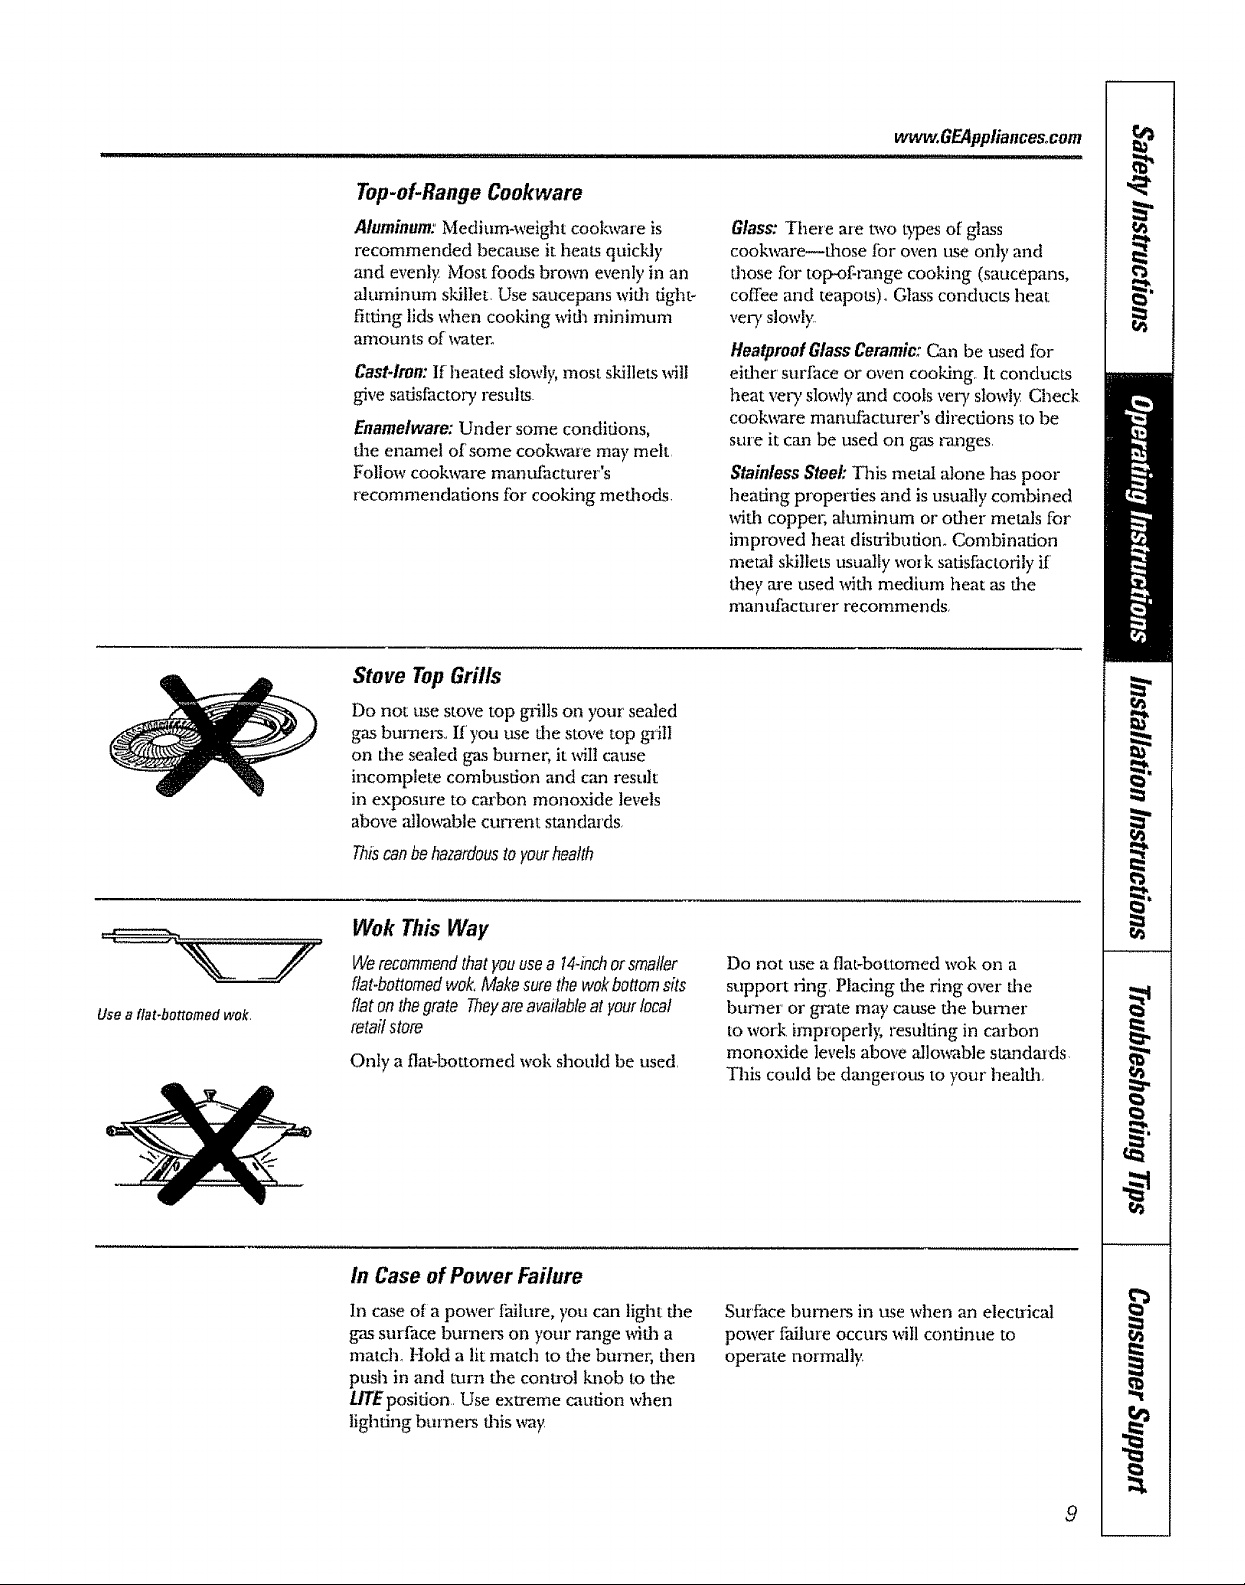
Stove Top Grills
Do not use stove top gTillson your sealed
gas burnel_., If you use d_e stove top gq'ilt
on dae sealed gas bumen it _It cause
incomplete combustion and can result
in exposure to cm'bon monoxide levels
above ailing,ablecunent standards.
Th_canbehazardoustoyourhealth
Glass: There are two b_es of glass
cookware_those for oven use only and
dmse tbr top-of-z,qnge cooking (saucepans,
coffee and teapots). Glass conducts heat
very s!owly
HeatproofGlass Ceramic: Can be used for
either surface or oven cooking It conducts
heat veW slowly and cools vmT slowly Check
cook\<are manufacturer's directions to be
sure it can be used on gas _anges,
StainlessSteel: This metal alone has poor
heating properties and is usually combined
_4th coppm, aluminum or oilier metals for
improved heat distribution_ Combination
metal skillets usually work satisfactorily if
they are used wid_ medium heat as flae
naantffacmrer recommends,
Use a flat-bottomed wok,
Wok This Way
Werecommendthatyouusea 144nchorsmaller
flat-bottomedwok, Makesurethe wok bottomsits
flat onthe grate Theyareavailableat yourlocal
retailstore
Only a flat-bottomed wok should be used,
in Case of Power Failure
In case era power fhiture, you can light dae
gas surface bumms on your range wid_a
matrix., Hold a lit match to d_e bumez; fl]en
push in and turn the control "lmobto the
UTEposition. Use extreme caution when
lighting burners daisway
Do not tksea flat-bottomed wok on a
support ring Placing dae ring over die
burner or grate mW cause fire burner
to work improperl); resulting in carbon
monoxide levels above allm_ble sumdaa'ds.
This could be dmagerom to your heatfll,
Surface bumm_ in ttse when an electrical
power failure occm_, will continue to
operate normally_
9
Using the oven controls.
IIIlll I I II I Illll I Ill]l
Throughout this manual, features and appearance may vary from your model.
() ,)
0 ENCONT! tLS
I !' 1"
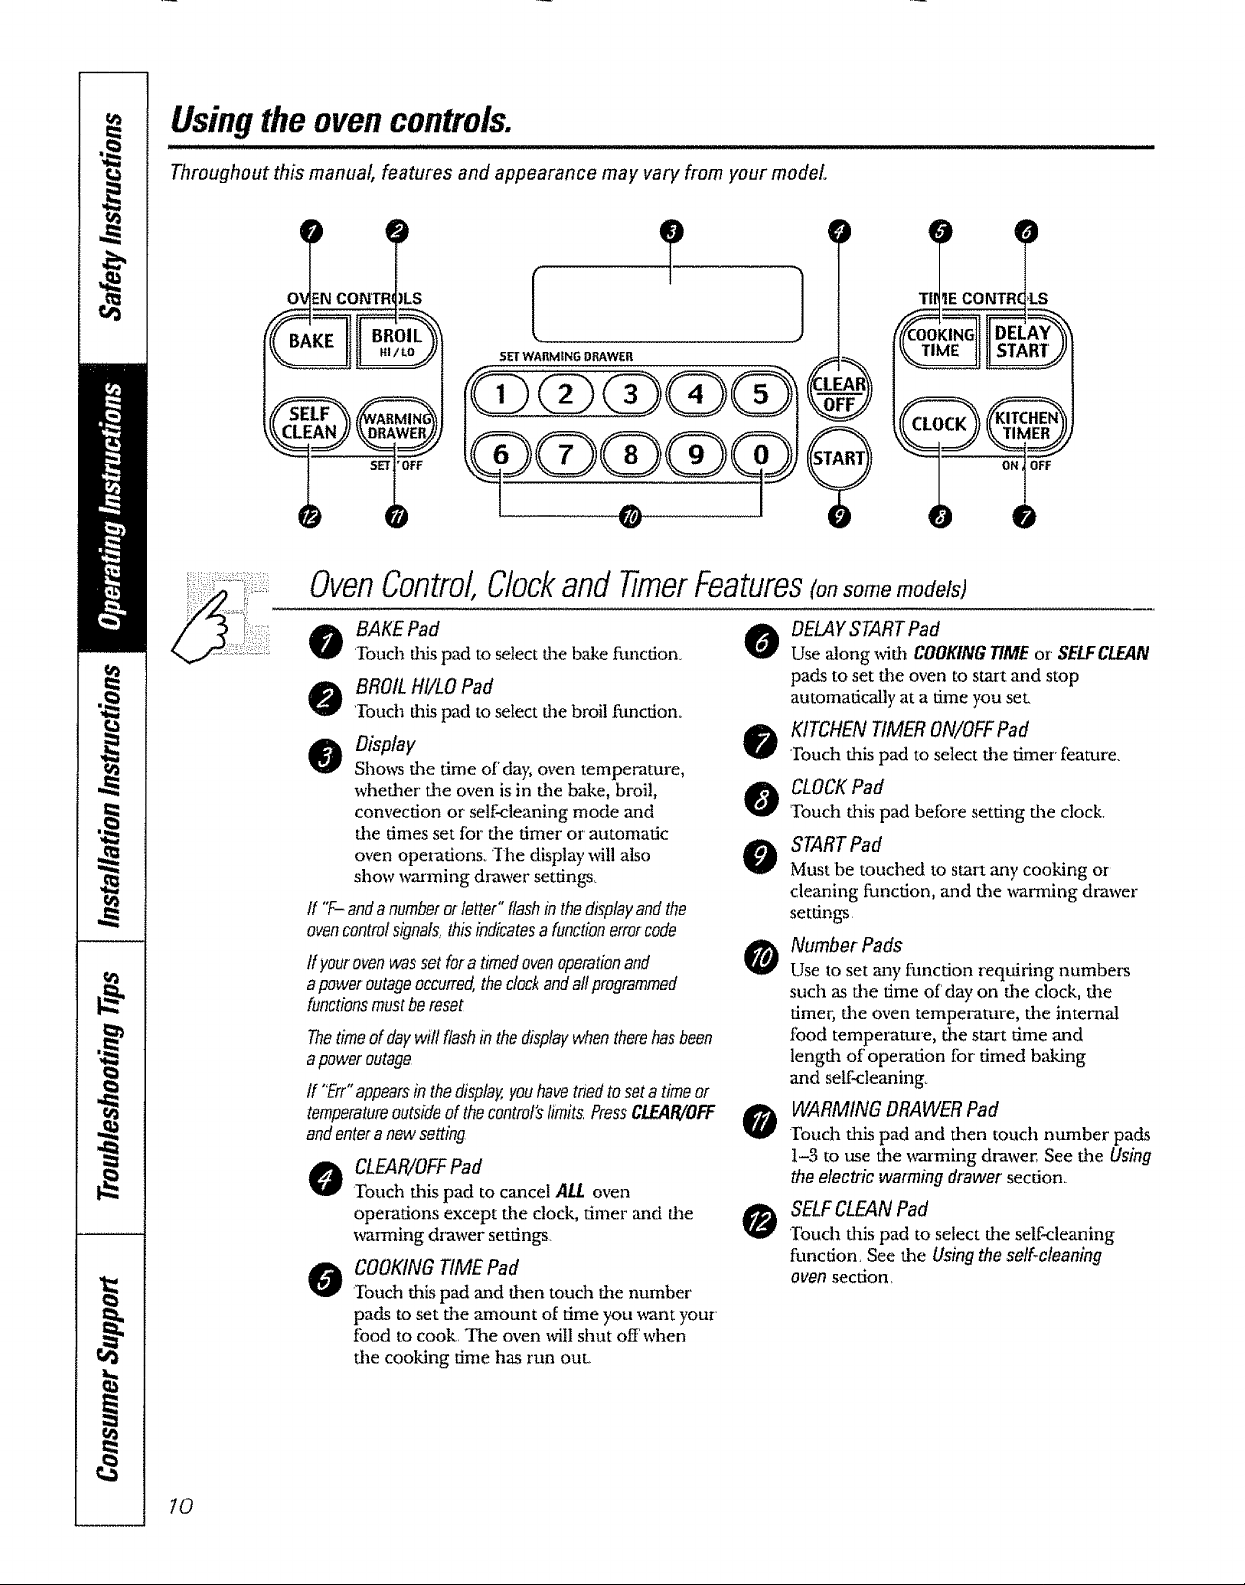
OvenControl,ClockandtimerFeatures(on some models)
o AKEPad 0
Touch this pad to select d_ebake fm_ction
o BROILHI/LOPad
'Touch dfis pad to select the broil ftmction_
o Oisplay $
Shows the time ofday, oven temperature,
whether" the oven is in the bake, broil, A
convection or"self-cleaning mode and
the dines set for the timer or' automatic
oven operations_ "Ihe display will also
show warming drawer settings_
ff 'T- andanumberorletter"flashin thedisplayandthe
ovencontrolsignal&thisindicatesafunctionerrorcode
ffyour ovenwas setfor a timedovenoperationand
apoweroutageoccurred theclockandallprogrammed
functionsmustbereset
Thetimeofdaywillflashinthedisplaywhentherehasbeen
apoweroutage
tf "Err"appearsinthedisplay,youhavetriedto setatimeor
temperatureoutsideof thecontrorslimits,PressCLEAR/OFF
andenteranewsetting
CLEAR/OFFPad
@
Touch this pad to cancel ALL oven
operations except the clock, timer and the
wazming d_awer settings
COOKINGTIME Pad
0
Touch this pad and then tout1 the number
pads to set the amount of time you _nt your
food to cook. The oven will shut off' when
the cooking time has run OuL
DELAYSTARTPad
Use along _dth COOKINGTIME or SELFCLEAN
pads to set fl_e oven to start and stop
automatically at a time you set.
KITCHENTIMERON/OFFPad
Touch this pad to select fl_etimer' feature.
CLOCKPad
Touch this pad before setting the clock,
STARTPad
Must be touched to start any cooking or
cleaning function, and the warming drawer
setdngs
Atumber Pads
Use to set may function requiring numbers
such as the time of' day on the clock, the
timer, the oven temperature, the internal
food temperature, the start time and
length of operation for timed baking
and self<leaning.
WARMINGDRAWERPad
Touch tiffs pad and then touch number pads
1-3 to use the warming drawer,. See fine Using
the electric warming drawer' section_
SELFCLEANPad
O
'Ibuch this pad to select the self-cleaning
function, Seethe Usingtheself-cleaning
oven section,
T|r _ECONTR _LS
10
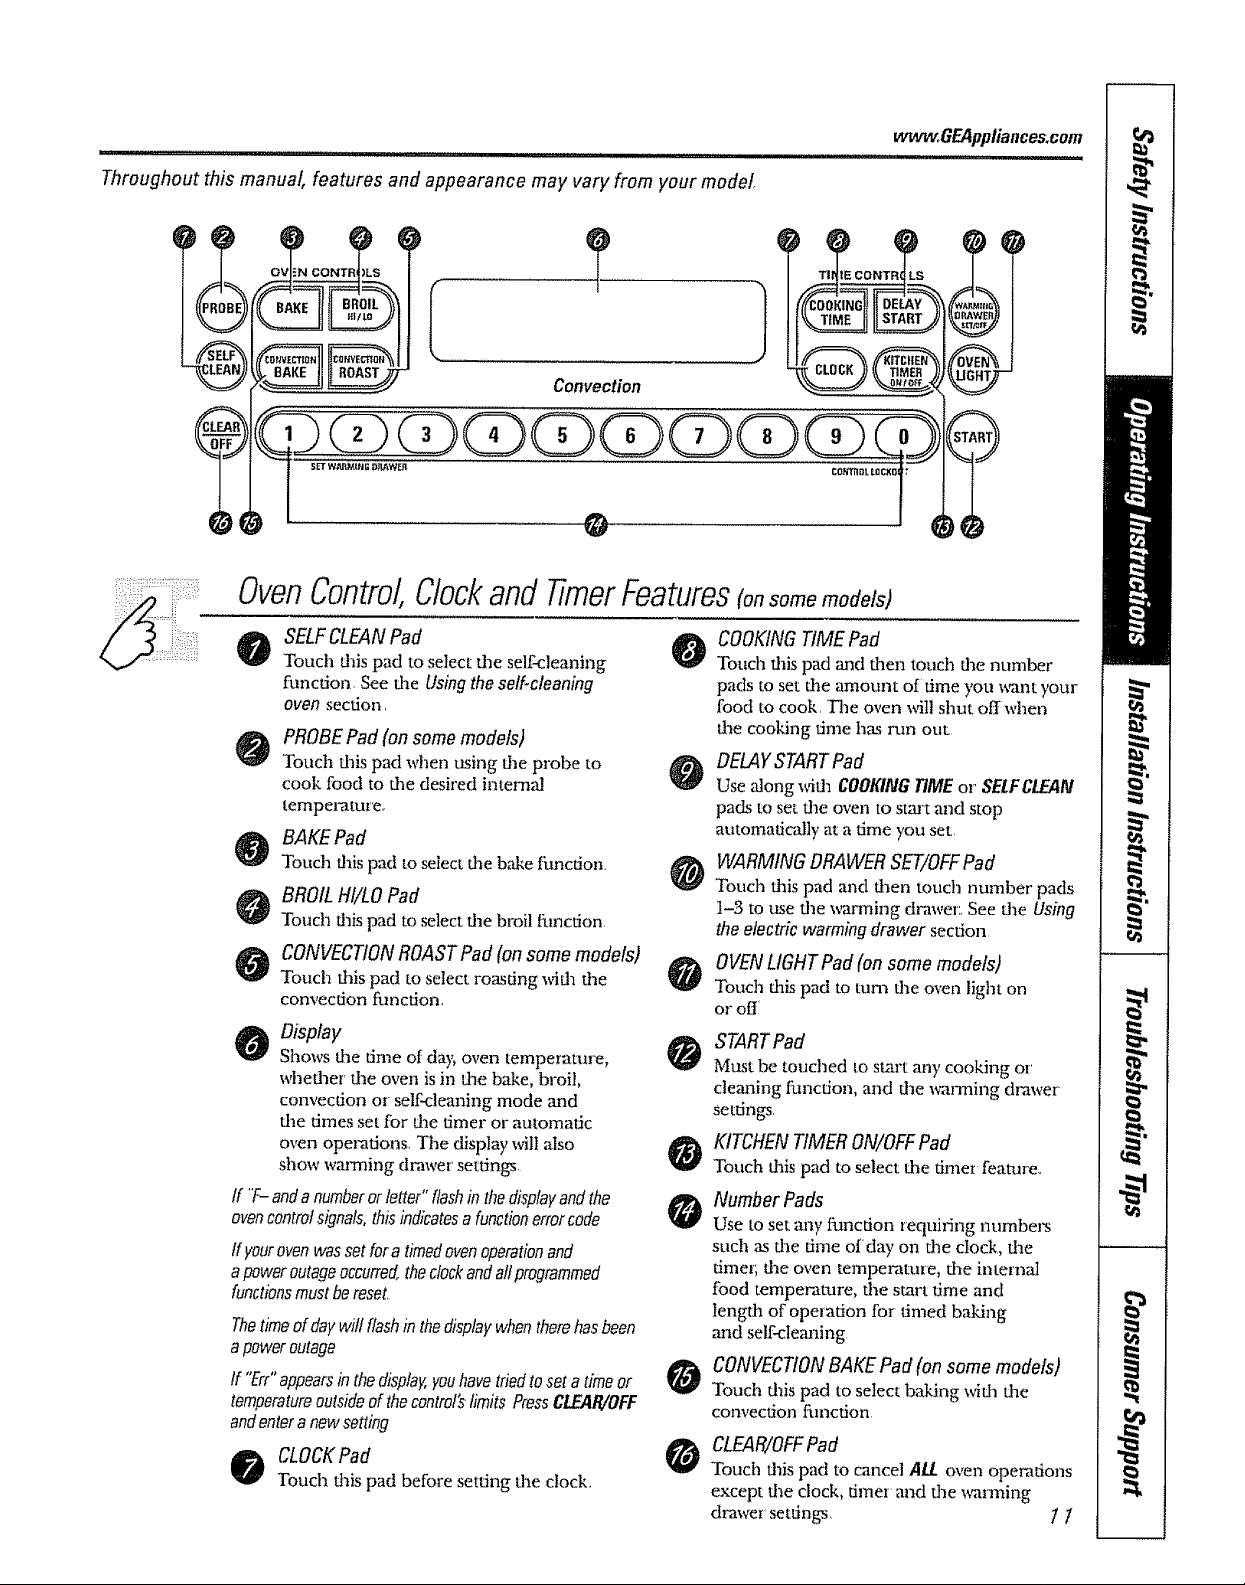
Throughout this manual, features and appearance may vary from your model.
Convection
OvenControl,Clockand timer Features(onsondemodels)
wvvvv,,GEAppliances,com
?
SELFCLEANPad
Touch this pad to select the self-cleaning
function. See dm Using the self-cleaning
oven section,
PROBEPad {on somemodels)
Touch dfis pad when using the probe to
cook food to fleedesired internal
temperature,
BAKE Pad
Touch daispad to select tim b_e function.
BROILH!/LOPad
Touch daispad to select deebroil I:unction
CONVECTIONROASTPad (on some models)
Touch dfis pad to select roasting _dl die
convection function,
Display
Shows d_e time of da); oven temperature,
whedaer flae oven is in dae bake, broil,
convection or self-cleaning mode and
the times set for flae timer or automatic
oven operations, The display will also
show warming drawer settings
If T-- andanumberor letter" flashmthe displayand the
ovencontrolsignals,thisindicatesa functionerrorcode
If yourovenwas setfor a timedovenoperationand
apoweroutageoccurred,theclockandallprogrammed
functionsmustbereset,
Thetime of daywifl flashin the displaywhentherehasbeen
apoweroutage
If "Err"appearsinthe display,youhavetriedtoset atime or
temperatureoutsideof thecontrol'slimits PressCLEAR/OFF
andentera new setting
o CLOCKPad
Touch dais pad before setting dae clock.
COOKINGTIME Pad
Touch dfis pad and flaen touch die number
pads to set dae amount of time you _nt your
food to cook. The oven will shut off when
d_e cooking time has run out
DELAYSTARTPad
Use alongwide COOKINGtiME or SELFCLEAN
pads to set d_e oven to stm_tand stop
automaticNly at a time you set,
WARMING DRAWER SET/OFF Pad
Touch dais pad and dmn touch number pads
1-3 to use dm wanning dl,'awer:, See dae Using
the electric warming drawer section
OVENLIGHTPad(onsome models)
Touch daispad to turn d_eoven light on
or off
STARTPad
Must be touched to start any cooking or
cleaning function, and d_e wanning di,'awer
settings.
KITCHENtiMER ON/OFFPad
Touch daispad to select d_e timer feature,
Number Pads
Use to set any fi.mction requiting numbers
such as dae time of day on dae clock, dae
dmel; dae oven temperature, d_e internal
food temperature, dae start time and
tengda of operation for timed baking
and self-cleaning
CONVECtiON BAKE Pad (on some models)
Touch tiffs pad to select baking widl dae
comection fmacdon
CLEAR/OFF Pad
Touch tiffs pad to cancel A//oven operations
except d_e clock, timer and die warming
&,-awer settings, t 1

Usingthe oven.
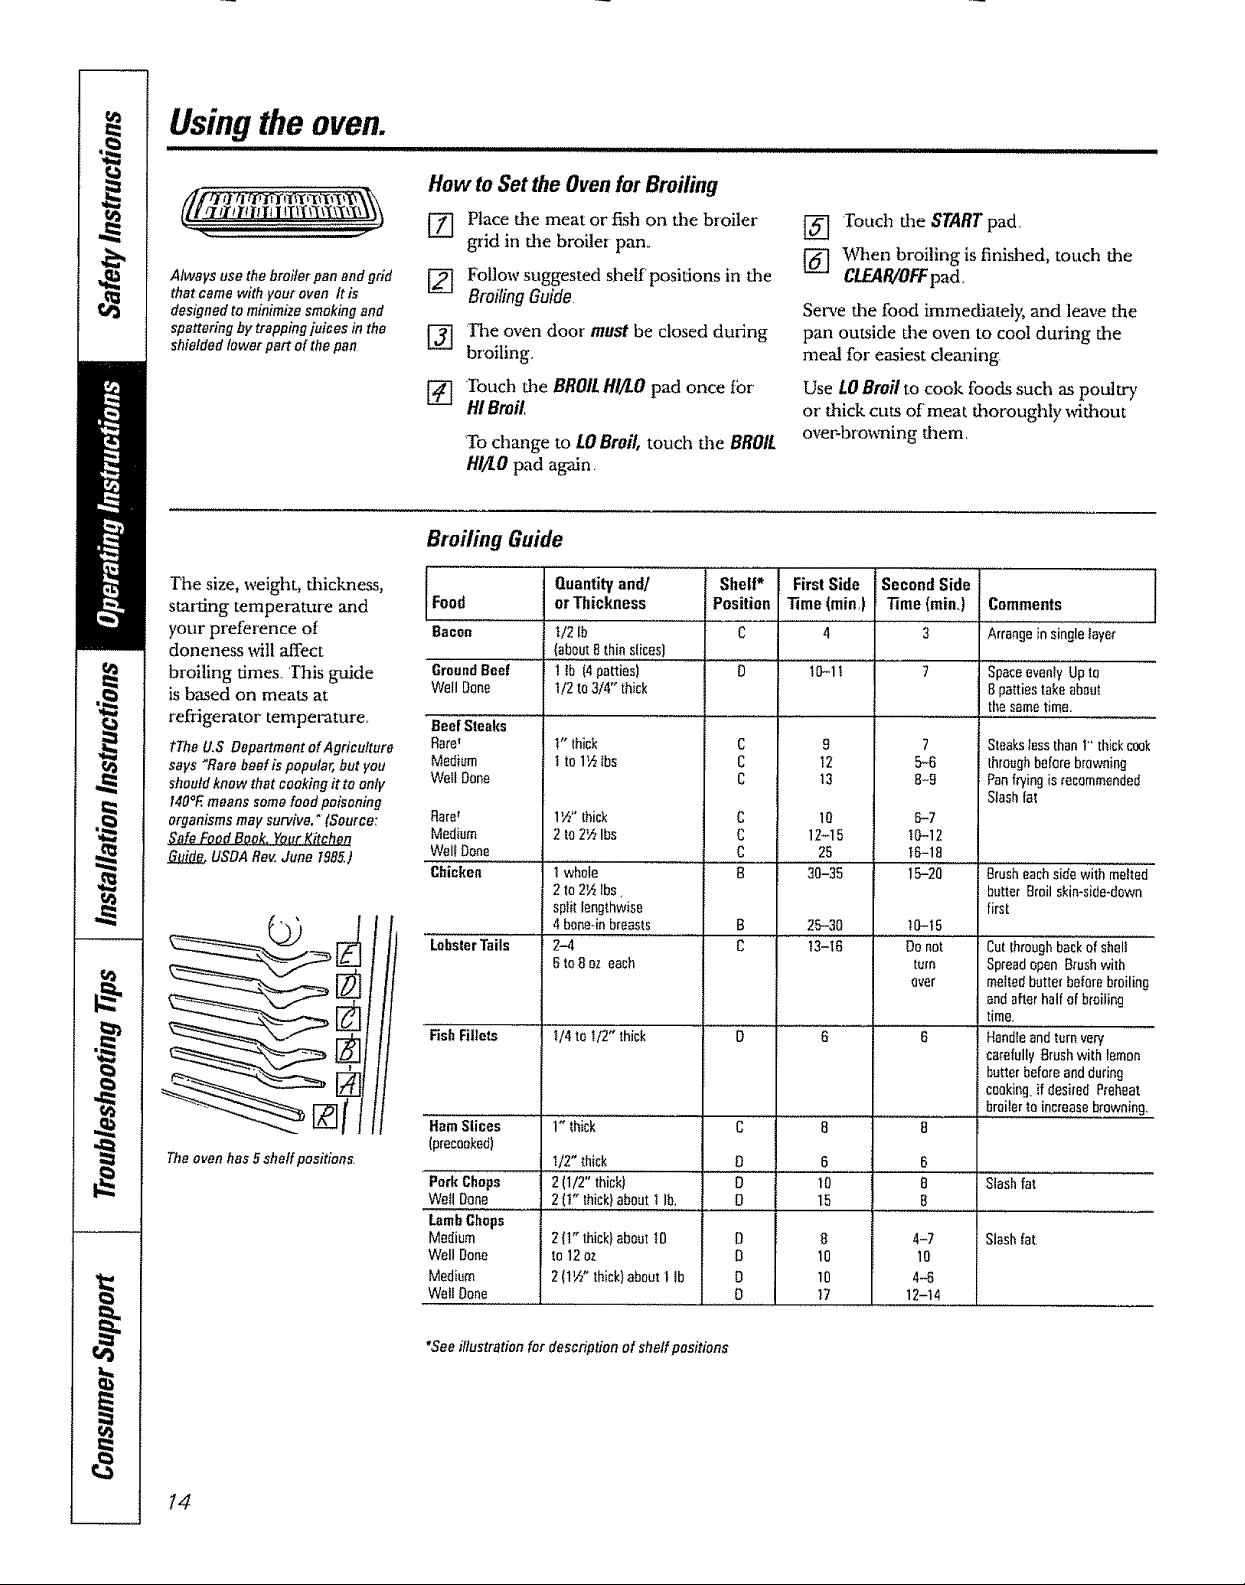
Toavoidpossible bums, place the shelves in the desired position before you turn the oven on.
Before you begin...
Theoven has 5 sheffpositians
It also has a special low sheff
pesitien tR) for extra large items,
such as a large turkey.
Plasticitems on the cooktop may
molt ff left teo close tothe vent.
Ventappearance and location va_
l?lae shelves have stop-locks, so that when
placed con'ectly on flae shelf supports (A
through E). they will stop betbre coming
completely out, and _.il! not till
When placing mad remo\_ing cookware,
pull the shelf out to the bump on the sheff
support
Oven Vent
"four oven is vented through ducts at the
rear of the range. Do not block these ducts
when cooking in the oven--it is important
that the flow of' hot ,air from the oven and
fresh air"to the oven burner be
unintemapted Avoid touching the vent
openings or nearby surfaces during oven or
broiler operation_they may become hot.
To removea shelf, pull it toward you, tilt the
front end up and pull it out,
To replace, place the end of dae shelf (stop-
locks) on the support, tilt up the front mad
push the shelf in,
NOTE:Theshetfisnotdesignedtoslideoutatthe
speciallowsheff[R)position
i,_,:Handlesof petsandpansonthecooktepmay
becomehotifteft toocloseto thevent.
i_7Donotleaveplasticorflammableitemsonthe
cooktop--theymaymeltorigniteff left tooclose
tothevent
t::71Donotleaveclosedcontainersonthecooktop
Thepressureinclosedcontainersmayincrease.
whichmaycausethemtoburst
Metalitemswiltbecomeveryhotif theyareleft
onthecooktopoandcouldcausebums
Power Outage
CAUTION:Donot makeanyattempt to operatethe
electricignitionovenduringanelectricalpower
failure
'The oven or broile_ cannot be lit during a
power failure. Gas wiU not flow unless the
glow bar is hot.
If the oven is in use when a power failure
occurs, the oven burner shuts off and
cannot be re-lit until power is restored Ibis
is because the flow of gas is automatically
stopped ,and will not _esume when power is
restored until the glow bar has reached
operating temperature
Oven Light
Ibuch the OVENtlGHTpad on the upper
control panel to turn the light on or off_
On some models, the OllENLiaHTswitch is
on the lower front control panel,
t2
_] _y] Touch die BAKE
_] [_ Touch die number pads to set tile
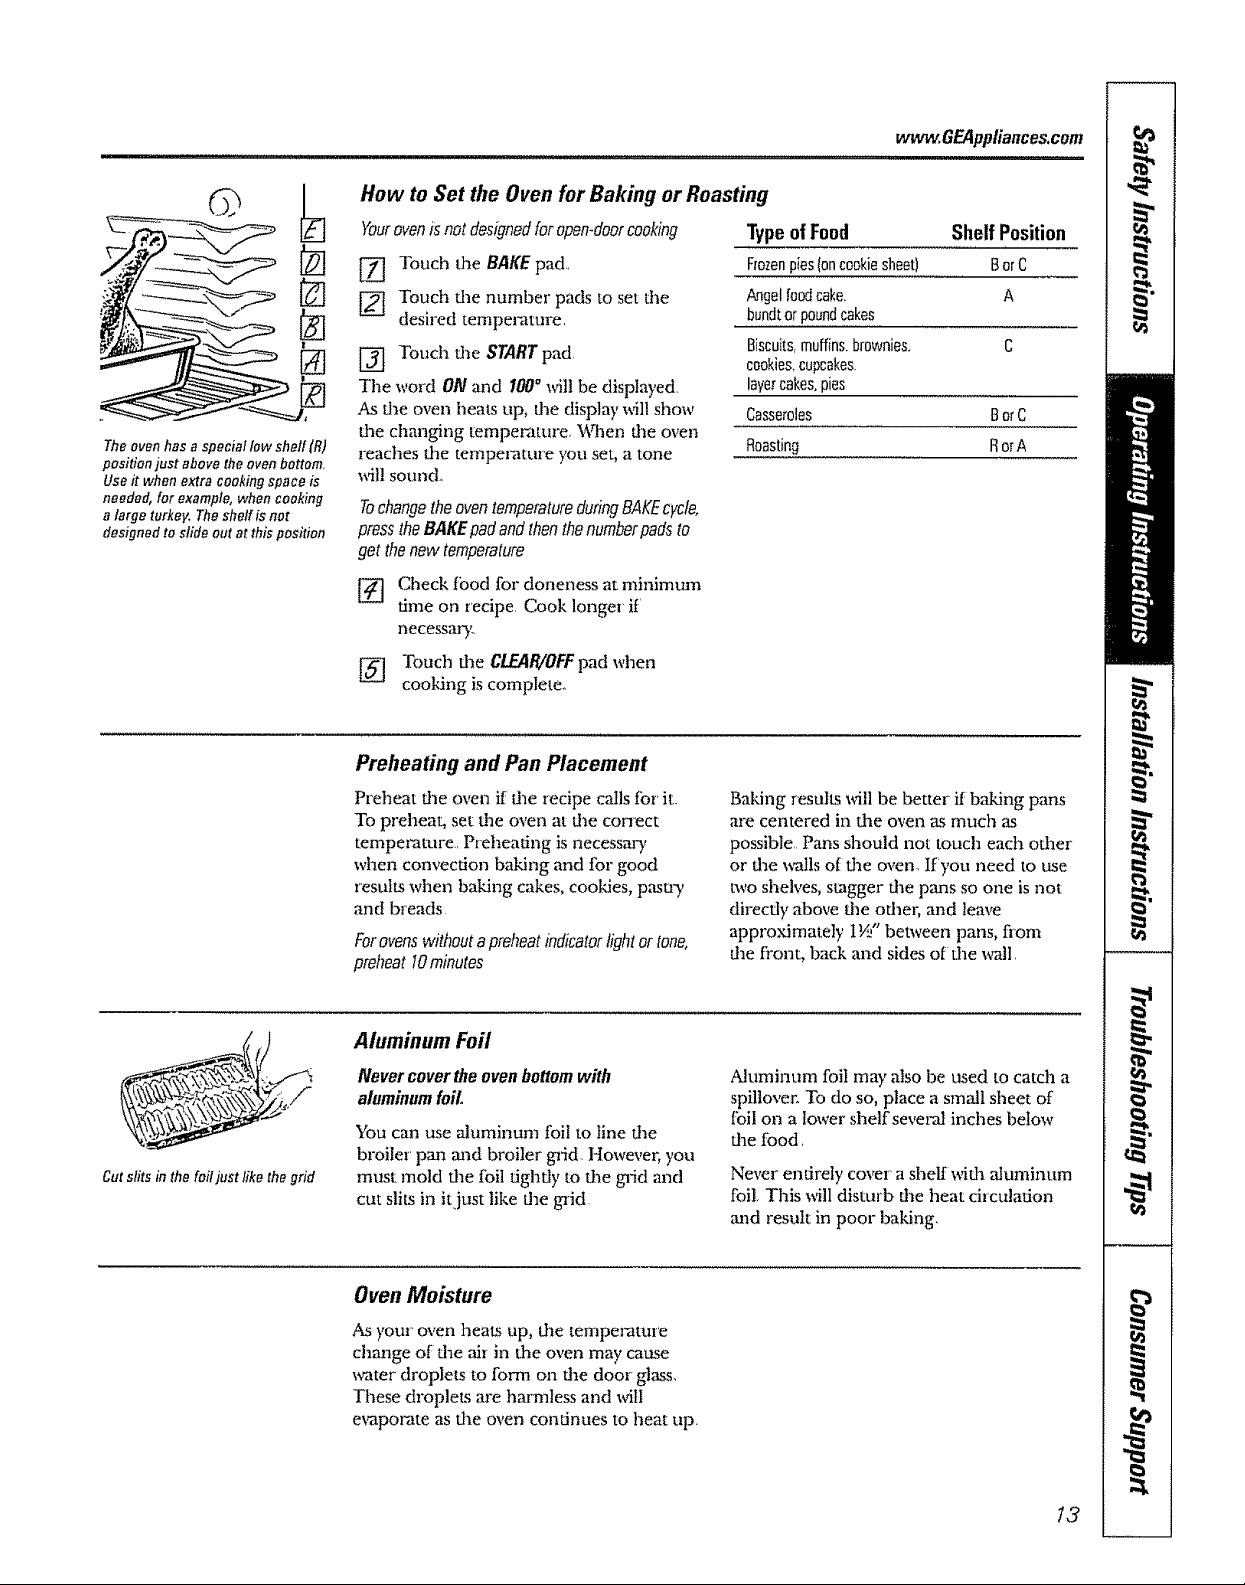
Theoven has aspecial low shelf(R)
position just abovethe ovenbottom,
Use it when extra cookingspace is
needed, for example, when cooking
a large turkey, Theshelf#; net
designed to slide out at thisposition
How to Set the Oven for Baking or Roasting
YouroveniSnotdesignedforopen.doorcooking
pad,,
desired tempel,'ature,
[[_] Touch die STARTpad
Tile word ON and i00" will be displayed,
As the oven heats up, file display will show
dae changing temperature, V_qlen tile oven
reaches die tempel_tur'e you set, a tone
wil! sound_
TochangetheoventemperatureduringBAKEcycle.
presstheBAKEpad and then thenumberpadsto
get thenew temperature
Check fbod for doneness at minimum
@
ume on recipe Cook longer if
necessm3:,
[_ Touch die CIE!IR/OFFpad when
cooking is complete.
www.GEApptiances.eom
TypeofFood Shelf Position
Frozenpies(oncookiesheet) BorC
Angelfoodcake, A
bundtor poundcakes
Biscuits,muffins,brownies. C
cookies,cupcakes.
layercakes,pies
Casseroles BorC
Roasting RorA
Cut slits in the foil just like the grid
Preheating and Pan Placement
Preheat tile oven if die recipe ca!is for' it.
To preheat, set file oven at dae conect
temperature. Preheating is necessary
when convection baking and for good
results when ba "Idng cakes, cookdes, pasta 3,
and breads
Forovenswithout a preheatindicatorlightor tone,
preheat 10minutes
Aluminum Foil
Never cover the even bottomwith
aluminumfoil.
You can use aluminum foil to line d_e
broiler pan mad broiler grid However, you
must mold file foil fighdy to file gTid and
cut slits in it just like the gTid
Oven Moisture
As your oven heats up, file temperature
change of file air in file oven may cause
water droplets to form on dae door glass.
These droplets are harmtess and will
e_pol_te as dae oven continues to heat up
Baidng results will be better if baking pans
are centered in dae oven as much ,as
possible, Pans should not touch each other
or dae _-alls of dae oven. If you need to use
two sheh,es, stagger ttle pans so one is not
direcdy above the odlel; and leave
approximately IW' between pans, flora
file fi'ont, back mad sides of die wall.
Aluminum foil may also be used to catda a
spillover. To do so, place a sma/1 sheet of
Ibil on a lower shelf several inches below
dae food.
Never entirely cover a shelf widaaluminum
foil, This _ll disturb the heat circulation
mad result in poor ba"ldng,
t3
Using the oven.
How to Set the Oven for Broiling
Always use thebroilerpan andgrid
that came with your oven It is
designed to minimize smoking and
spattering by trapping juices in the
shielded lower part of the pen
The size, weight, thickness,
starting temperature and
your preference of
doneness will affect
broiling times,, lhis gmide
is based on meats at
refrigerator temperature,,
tThe U,S Department ofAgricufture
says "Rare beefis popular, but you
shouldknow that cooking it to only
140*Emeans somefood poisoning
organisms may survive." {Source:
Safe Fond Book, YourKitchen
USDA Rev,June t985.)
Theoven has 5sheff positions,
[Z] Place the meat or fish on the broiler
grid in the broiler pan_
[] Follow suggested shelf' positions in the
Broiling Guide.
[_] 'The oven door must be closed during
broiling,
[] Ibuch the BROILHi/LO pad once tbr
HI Broil,
'Tochange to LOBroil, touch the BROIL
HI/LOpad ag-An,
Broiling Guide
Food
Bacon
GroundBeef
Well Done
Beef Steaks
Raret
Medium
WellDone
Rare_
Medium
Wel!Done
Chicken
.....L'abs'ie'iTa'ils' '
FishFillets
HamSlices
(precooked)
Pork Chops
WellDone
LambChops
Medium
WellDone
Medium
WeliDone
Quantityand/
orThickness
U2 lb
(about8thin slices)
! +b(4patties)
1/2to3/4" thick
V"thick
t to1_ lbs
1W' thick
2 to 2_ Ibs
t whole
2to2fi Ibs
sptitlengthwise
4bene4nbreasts
2-4
Bto8 ozeach
!/4 to 1/2" thick
1" thick
I/2" thick
2 (112"thick)
2 (t" thick}aboutlib,
2{1"thick}abouttO
to 12oz
2(1½"thick)aboutf tb
Shelf*
Position
| .......
c
c
c
C
C
C
B
B
C
C
D
D
O
D
D
O
O
[_] Touch the STARTpad
l_ When broiling is finished, touch the
CLEAR/OFFpad,
Serve the food immediately, and leave doe
pan outside the oven to cool during the
meal for easiest cleaning.
Use LOBroilto cook foods such as poultry
or thick cuts of meat thoroughly without
over-browning them,
FirstSide
Time(min,)
t0-1t
12
13
10
12-15
25
a0-35
25-30
13-I6
10
15
8
10
10
17
Second Side ...................]
Time (rain.) Comments
3 Arrangein singlelayer
Spaceevenly Upto
8 pattiestakeabout
thesametime.
9
6
7
5-6
8-9
8-7
t0-12
t8-18
15-20 Brusheachsidewith melted
_0-15
Donot
turn
aver
6
B
B
4-7
10
4-6
12-14
SteaksIessthant' thickcook
throughbeforebrowning
Panfryingis recommended
Slashfat
butter Broilskin-side-down
first
Cutthroughbackof sheii
Spreadopen Brushwith
meitedbutterbetorebroiling
andafterhalf ofbroiling
time.
Handle"and'{uln'vew
eaefully Brushwithlemon
butterbeforeandduring
cooking_if desired Preheat
bmiterte increasebrowning.
Slashfat
Slash(at
I
*See illustration for descriptionof shelfpositions
t4
Using the clock and timer.
Ill:t....................................................
Not all features are on all models,
To Set the Clock
_t.arw.GEAppliances_com
,'" ,,i,,,i,u ul, ,,,i, ill
@
Make sure the clock is set to the
correct time of dayo
The timer is a minute timer only.
TheCLEAR/OFFpaddoes not affect
the timer.
The clock must be set m dye co_rect time of
day for the automatic oven timing functions
to work properly. The time of day cannot
be changed during a timed b_ing or self-
cleaning cycle
[_ Touch dm CLOCKpad.
[_ Touch the number pads.
Touch dae number pads dae stone way you
read daem For example, to set 12:34, touch
fl_enumber pads/, 2,3and 4in daat order:
ToSet the 77mer
Thetimerdoesnotcontrolovenoperations.
Themaxtmumsetting onthe timer is9 hours
and59minutes.
[_ Touch die KITCHENTIMERON/OFF
pad
[_ Touch the number pads until fl_e
amount of time you want shows in dae
display..The maximum time that can
be entered in minutes is 59. Times
more d_an 59 minutes should be
changed to hou,'s and minutes For
example, to enter 90 minutes ,as1
hour 30 minutes, touch/, 3andO in
that ordm:
tf youmakeamistake°presstheKITCHENTIMER
ON/OFFpadandbeginagain
If number pads are not touched widfin one
minute 'afteryou touch d_e CLOCKpad, the
display reverts to dae original setting If dais
happens, touch dm CLOCKpad and reenter
d_e time of day.
[_ Touch dae STARTpad until ttle time of'
day shows in die display., This enters
dae time and starts the clock
Tocheckthetimeof day when thedisplayis
,showingotherinformation,simplytouchtheCLOCK
pad Thetimeof day shows untilanotherpadis
touched
Touch dye START pad After pressing
@
the STARTpad, SET disappears; dais
tells you the time is counting do_al,
aldmugh fl_e display does not change
until one minute has passed,
When dae timer reaches :00,die
conu'ol will beep 3 times followed by
one beep evel T 6 seconds until flae
KITCHENTIMER ON/OFFpad is touched,
The6 secondtonecanbecanceledby following
the stepsin theSpecialfeaturesof youroven
controlsectionunder Tonesat the Endof
a timed Cycle
To Reset the timer
If fl_e display is still sho_ing dae time
remaining, you may change it by touching
dae KITCHEN TIMERON/OFFpad, then touch
flae number pads until dm time you __nt
appears in flae display.
To Cancel the timer
Touch d=eKITCHENTIMERON/OFF
pad twice.
Power Outage
lfa flashingtimeisinthedisplay,youhave
experiencedapowerfailureResettheclock,
If fine remaining time is not in dae display
(clock, delay start or cooking time are in
flaedisplw), recall flae remaining dme by
touching the KITCHENTIMERON/OFFpad
and daen touching d_e number pads to
enter d_e new time you _nt
To reset dye clock, touch die CLOCKpad
Enter dye correct time of day by touching
d_e appr'opriate number pads Touch the
STARTpad.. 15
Using the timed baking and masting features.
/VOTE:Foodsthat spoil easily--such as milk, eggs, fish,stuffings, poultry and pork--should not be allowed to sit for more
than ! hour before or after cooking Room temperature promotes the growth of harmful bacteria. Be sure that the oven
light is off because heat from the bulb will speed harmful bacteria growth.
How to Set an Immediate Start and Automatic Stop
®
®
Theovenwill turnonimmediatelyandcookforasefected
lengthoftimeAt theendofthecookingtime,theoven
wltlturnoffautomatically
[_ Ibuch the BAKEpad
[] Ibuch the number pads to set die desired
oven temperature
[_ Ibuch the COOKINGtiME pad
NOTE:Ifyourreciperequirespreheating,youmayneed
toaddadditionaltimetothelengthofthecookingtime
l'_ I'ouch the number pads to set the desired
length of cooking time 'Ihe minimum
cooking time you can set is 1 minute,
The oven temperature thatyou set and the
cooking time that you entered will be in
the disptay_
1_ 'Ibuch the START'pad
the ovenwillturn ON,and die displaywillshow
the cooking time countdm_ and the ch_mging
temperatme starting at IO0°F (File temperaaue
displaywillstart to change once the oven
temperature reaches IO0°F)V_qlenthe oven
reaches the temperature you set, 3 beeps x_411
sound,
The oven will continue to cook for the set
amount at time, d_en turn off automadcall);
unless the Cookand Holdfeature was set See the
Specialfeaturesofyourovencontrolsection.
Afterfile oven turns off, the end-of-cycletone
willsound
"Ibuch the C/.EAR/OFFpadto clear the
display if necessary Remove die tbod fiom
tlaeoven Remember; even though die
oven turns off automatically, food left in
the oven will continue cooking after the
oven turns o_
®
®
How to Set a Delayed Start and Automatic Stop
Theovenwillturnonatthetimeofdayyouset.coakfor
aspecificlengthoftimeandthentumoffautomatically
Makesure fileclockshowsthe con'ect time
ot day
ranch file BAKEpad
[_ Ibuch the number packsto set the desired
oven temperature
[_ Ibuch the COOKINGTIMEpad
NOTE:ffyourreciperequirespreheating,youmayneed
toaddadditionaltimetothelengthofthecookingtime
Fouch the number pads to set the desired
length of cooking dme The minimum
cooking time you can set is t minute
The oven temperature that you set and the
cooking time that you entered will be in
the display
[_ Ibuch the DELAYSTARTpad,
['_ Iouch the number pads to set the time of
day you want file oven to turn on and start
cooking
NOTE'.ffyouwouldliketocheckthetimesyouhaveset.
touchtheDELAYSTARTpadtocheckthestarttimeyou
havesetortouchtheCOOKINGTIMEpadto checkthe
lengthofcookingtimeyouhaveset
When file oven turns ONat die time of day
you set, the display wilt show the cooking time
countdoml and the changing temperature
suu'ting at IO0°E ('ihe temperature display
_l start to change once the oven tempezamre
reaches ]O0°F) When the oven reaches the
temperature you set, beeps will sound
the oven MI1 continue to cook for the set
amount of time, dlen turn offantomatic;dly,
unless the Cook and Hold feature was set See
the Specia!featuresofyourovencontrolsecdon
Afier the oven turns off, the end.oikyde tone
will sound
rouch die CLEAR/OFFpadto clear' file
display if'necessa o, Remove the food from
file oven Remember; even though the
oven turns off automatically, food left in
the oven will continue cooking "after the
oven turns off
[_ touch d_e STARTpad
t6
NOTE:Anattentiontonewillsoundffyouareusing
timedbakinganddonottouchtheSTARTpad
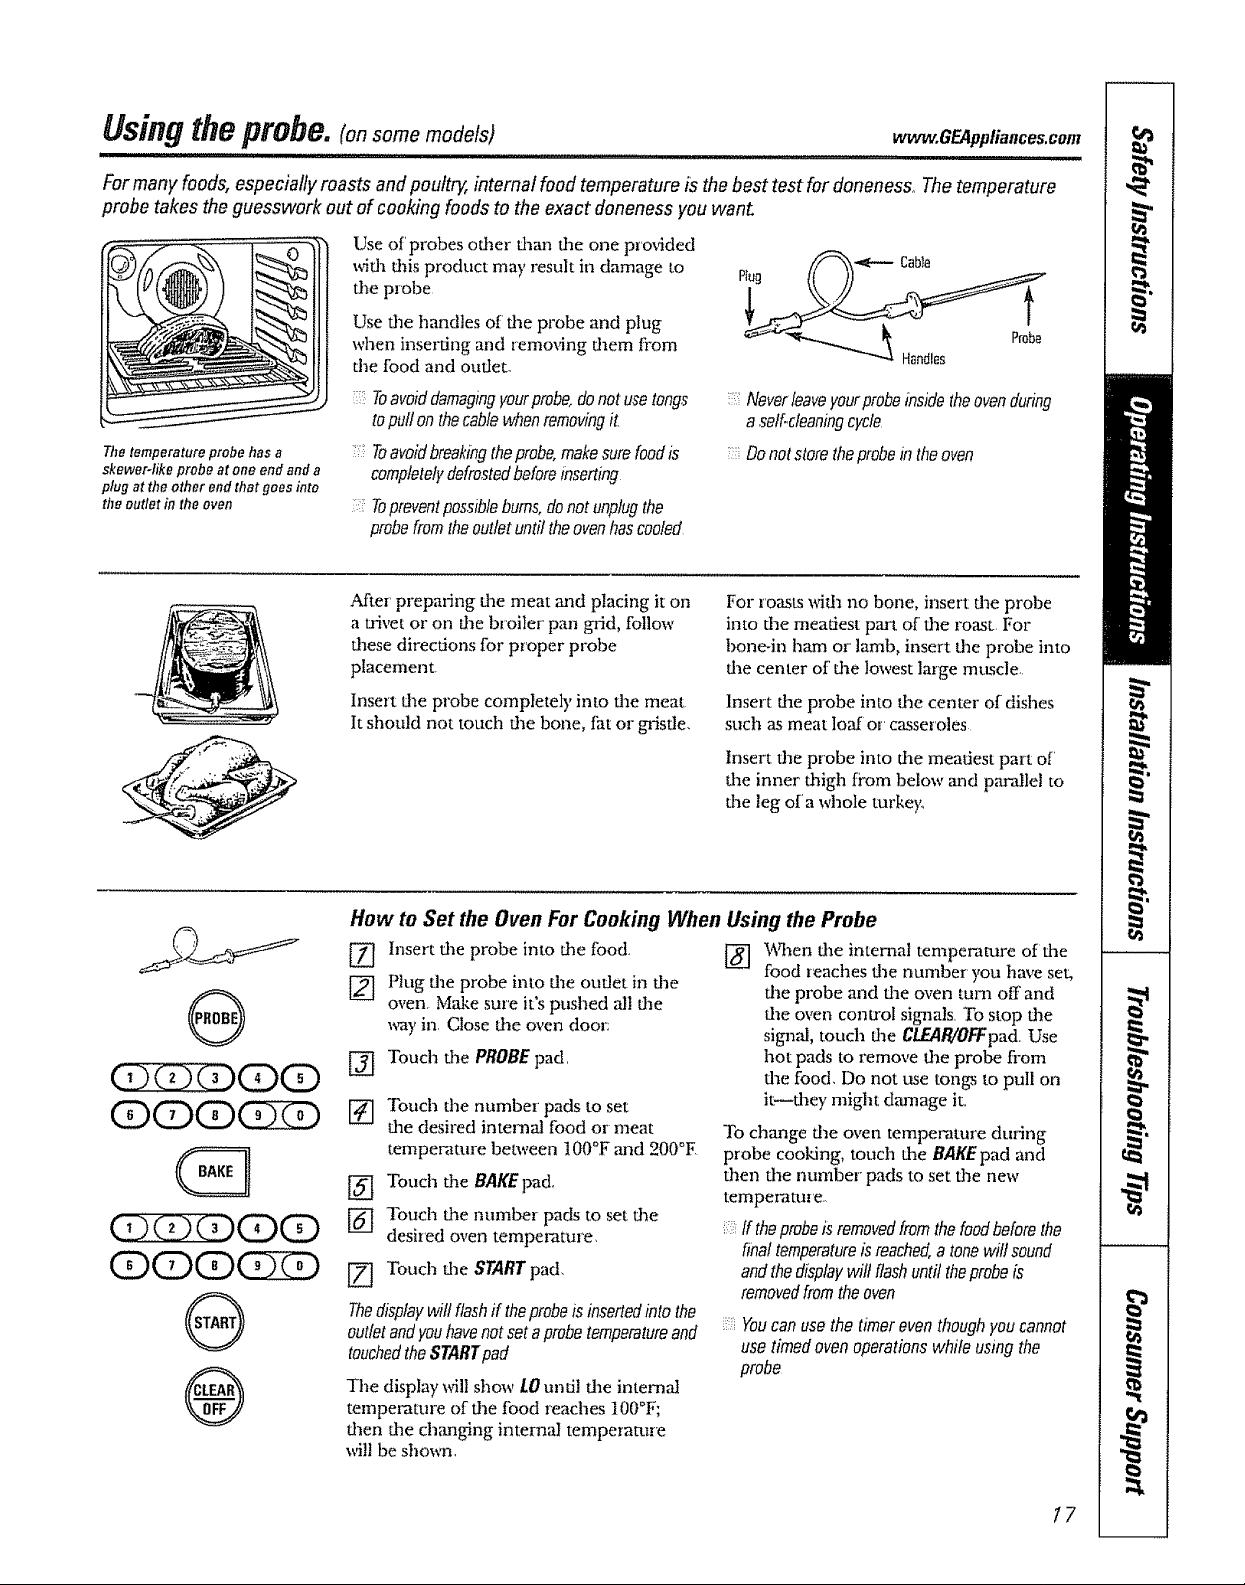
Usingtheprobe.(onsomemode/s)
I,"II"IWI,'I"II"'H'II'lUU'II " I I
Formany foods, especially roasts and poultry, internal food temperature is thebest test for doneness, The temperature
probe takes the guesswork out of cooking foods to the exact alonenessyou wahl
Use of'probes other than the one prm4ded
with this product may result in damage to
the probe
Use dm handles of the probe and plug
when inserting and removing diem fi'om
the food and outlet,
www, GEAppliances,com
,,,i ,11..., I ,111 ii
The temperature probe has a
skewer-like probe at one end and a
plug at the other end that goes into
the outlet in the oven
®
@
(3X3XDCDCD
(D(DCD(3Z)
0
®
Toavoiddamagingyourprobe,donot usetongs
topull on thecablewhenremovingit_
Toavoidbreakingtheprobe,makesurefoodis
completelydefrostedbeforeinserting
Topreventpossiblebums,donot unplugthe
probefromthe outlet until theovenhas cooled
After' preparing the meat mid placing it on
a trivet or on the broiler' pan grid, follow
these directions for proper probe
placement
Insert the probe completely into file meat
It should not touch the bone, tht or gristle,
How to Set the Oven For CookingWhen Using the Probe
Insert the p,'obe into the food.
Plug the probe into flae outlet in die
oven, Mzd_esure it's pushed all tim
way in Close the oven door:
[_] Touch the PROBEpad,
r4] Touch tile number pads to set
the desired internal food or meat
temperature between 100°F ,and 200°E
_] Touch the BAKEpad,
Touch the number pads to set the
desired oven tempel_ture,
[_ Touch the STARTpad,
Thedisplaywill flashif theprobeis insertedinto the
outletand youhavenotseta probetemperatureand
touchedtheSTARTpad
The display will show LO und! die intemat
temperature of die food reaches 100°F;
then the changing internal temperature
will be shox_a,
i:::Neverleaveyourprobeinsidetheovenduring
a self.cleaningcycle
Do notstore theprobeinthe oven
For roasts wifll no bone, insert the probe
into the meatiest part of file roast For
bone-in ham or lamb, insert the probe into
dae center of the lowest large muscle,
Insert the probe into the center of dishes
such as meat loaf or casseroles
Insert the pr'obe into the meatiest part of
dae inner thigh from below and pandlel to
the leg of a whole turke)<
[_ hen dae internal temperature of the
food reaches the number you have set,
d_e probe and the oven tuna off and
the oven control signals To stop the
signal, touch file CLEAB/OFFpad Use
hot pads to remove the probe fiom
file food, Do not use tongs to pull on
it_dley might dt_age it,,
To change die oven temperature during
probe cooking, touch the BAKEpad and
then the number" pads to set the new
temperature,
ff theprobeisremovedfromthefoodbeforethe
finaltemperatureisreached,a tonewiltsound
andthedisplaywiltflashuntiltheprobeis
removedfromtheoven
Youcan usethe timer even thoughyou cannot
use timed oven operations while using the
probe
I7
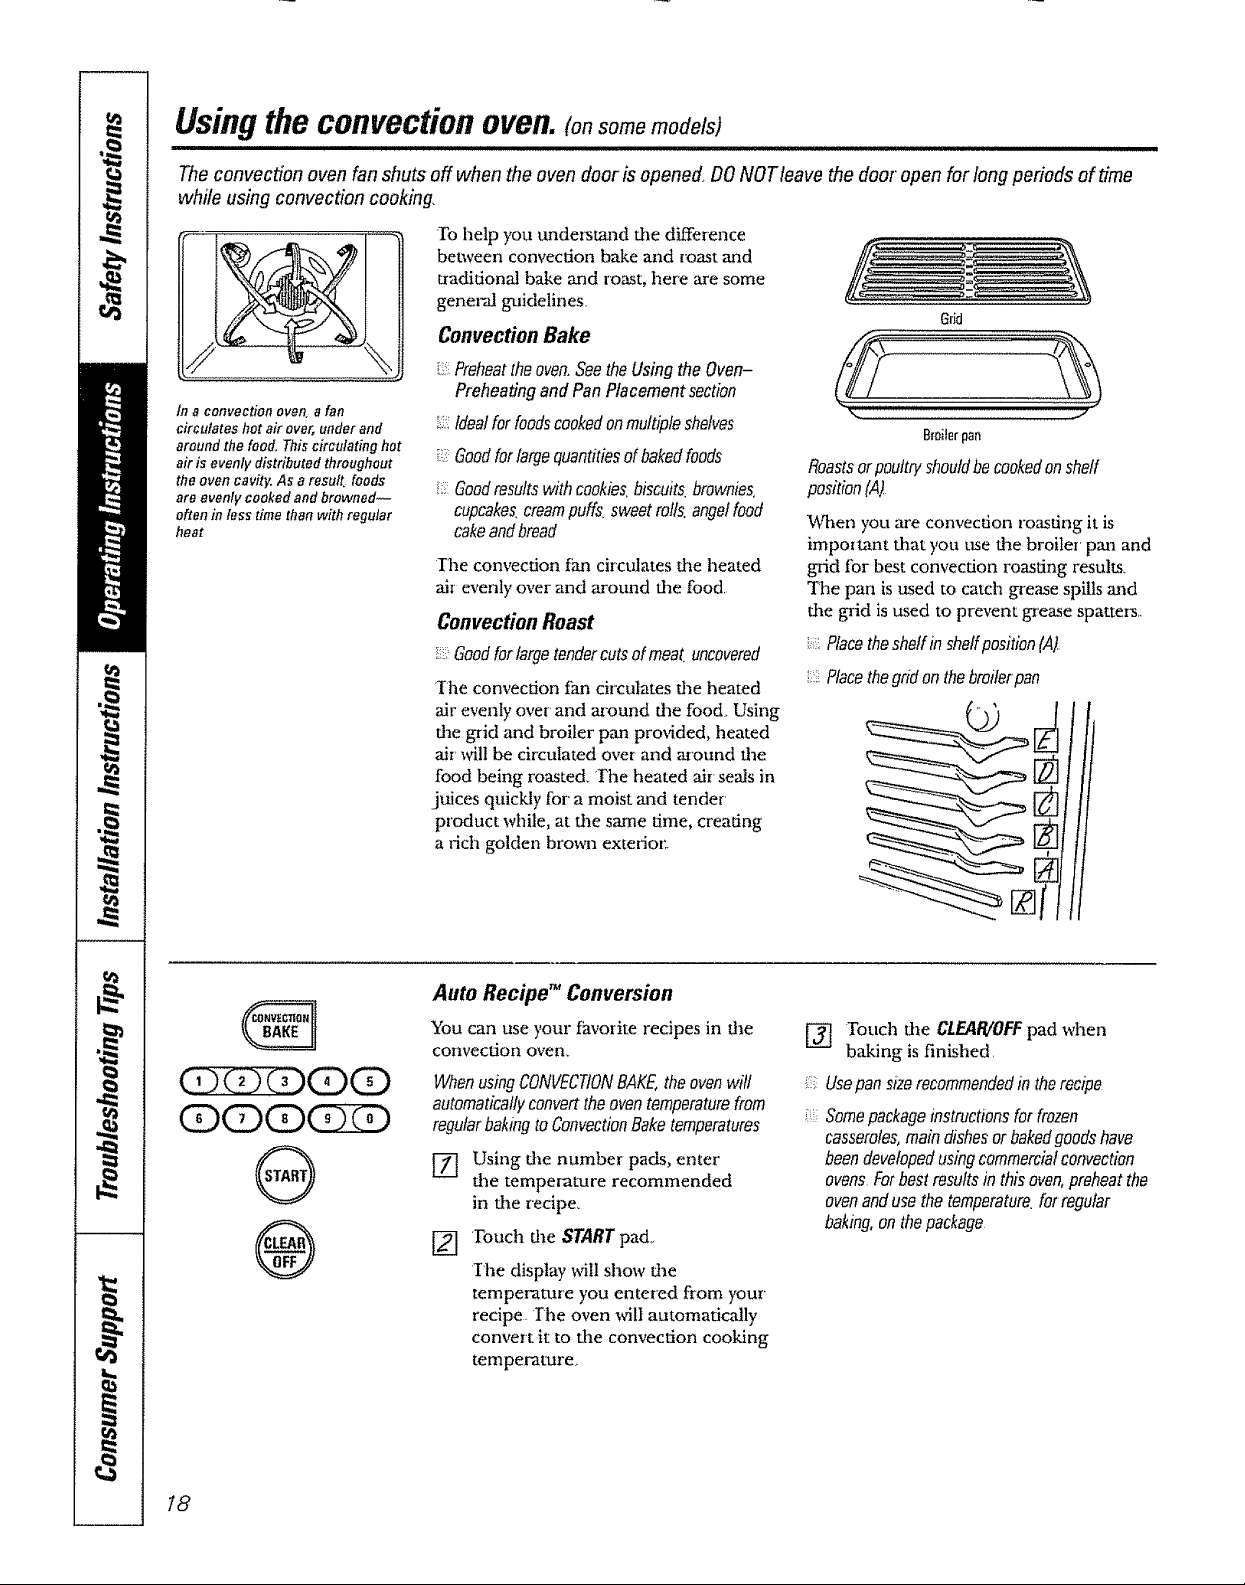
Using the colTvectioH ovell. (onsome models)
Theconvection oven fan shuts off when the oven door is opened. DONOTleave the door'open for long periods of time
while using convection cookin#
To help you understand the difference
between convection bake and roast and
traditional bake and roast, here are some
tn aconvection oven a fan
circulates hot air over, under and
aroundthe food, Thiscirculating hot
airis evenly distributed throughout
theoven cavity. As a result foods
are evenly cookedand browned--
often in tesstime than with regular
heat
genelx-1 guidelines_
Convection Bake
i/ Preheattheoven,Seethe Using the Oven-
Preheating and Pan Placement section
_::::Idealfor foodscookedonmultiple shelves
i_:Goodforlargequantitiesof bakedfoods
Goodresultswith cookies,biscuits,brownies,
cupcakes,creampuffs, sweetrolls,angelfood
cakeandbread
Ihe convection fan circulates the heated
air evenly over and around the food.
Convection Roast
_:_-.Goodforlargetendercutsofmeat.uncovered
The convection fan circulates the heated
air evenly over and around the food. Using
the grid and broiler pan provided, heated
air' vail be circulated over and around the
food being roasted. The heated air seals in
.juices quickly for a moist and tender'
product while, at the same time, creating
a rich golden brown exterior.
Roastsor pouttfyshouldbecookedonshelf
position(,4)
When you are convection roasting it is
important that you ttse the broiler pan and
grid tbr best convection roasdng results.
The pan is used to catch grease spills and
the grid is used to prevent grease spatters..
Placethesheffin sheffposition(At
:::iPlacethegrid on the breiferpan
Grid
Bmiterpan
G
(Z22ZZ)(Z)(Z)
®
®
Auto Recipe TM Conversion
You can use your favorite recipes in the
convection oven,
When usingCONVECTIONBAKE,the oven will
automaticallyconvertthe oven temperaturefrom
regularbakingto ConvectionBaketemperatures
Using the number pads, enter
the temperature recommended
in the recipe.
[_ Touch the START pa&
Ihe display will show the
temperature you entered from your'
recipe The oven will automatically
convert it to the convection cooking
temperature_
/
['_ Touch the CLEAIVOFFpad when
baking is finished.
UsepansiZerecommendedin therecipe
Somepackageinstructionsforfrozen
casseroles,maindishesorbakedgoodshave
beendevelopedusingcommercialconvection
ovensForbestresultsinthisoven,preheatthe
ovenandusethetemperature,fatregular
bakmg,onthepackage
18
Cool(ware for Convection Cooking
Before rising your convection oven, check
to see if your cookware lem,es room for air
circulation in die oven lfyou are baldng
wifll several pans, leave space between
diem, Also, be sure die pans do not touch
each odler or die walls of the oven,,
Paper andPlastic
Heat-resistant paper and plastic containe_
d]at are recommended for use in regular
ovens can be used in convection ovens_
Plastic cook,s"are flaat is heat-resistant to
temperatures of 400°F can also be used,
when oven is below 400°E
How to Set the Oven for Convection Baking or Roasting
Metal and Glass
Any type of' coolm.are x_II work in your
convection oven, However. metal pans heat
die fastest and are recommended fbr
convection baking
!:i Darkenedormatte4inishedpanswillbakefaster
thanshinypans
Glassorceramicpanscookmoreslowly,
When baking cookies, you will get d_e best
results if you use a flat cookie sheet instead
era pan wida low sides
For recipes like oven-baked chicken,
use a pan wida low sides, Hot air cannot
circulate well around tbod in a pan wifla
high sides
www.GEAppliances_com
(DOD(D(3Z)
®
®
When convection baking with only
1 shelf, follow the sheffpositions
recommendedin the Using the
Ovensection.
_-[ Touch file CONVECTIONBAKE or
CONVECTIONROASTpad,
Touch die number pads to set die
desired oven temperature
[_ Touch die STARTpad,
To change die oven temperatm-e, touch fide
CONVECTIONBAKEor CONVECTIONROAST
pad and fl]en the number pads to set die
new temperature
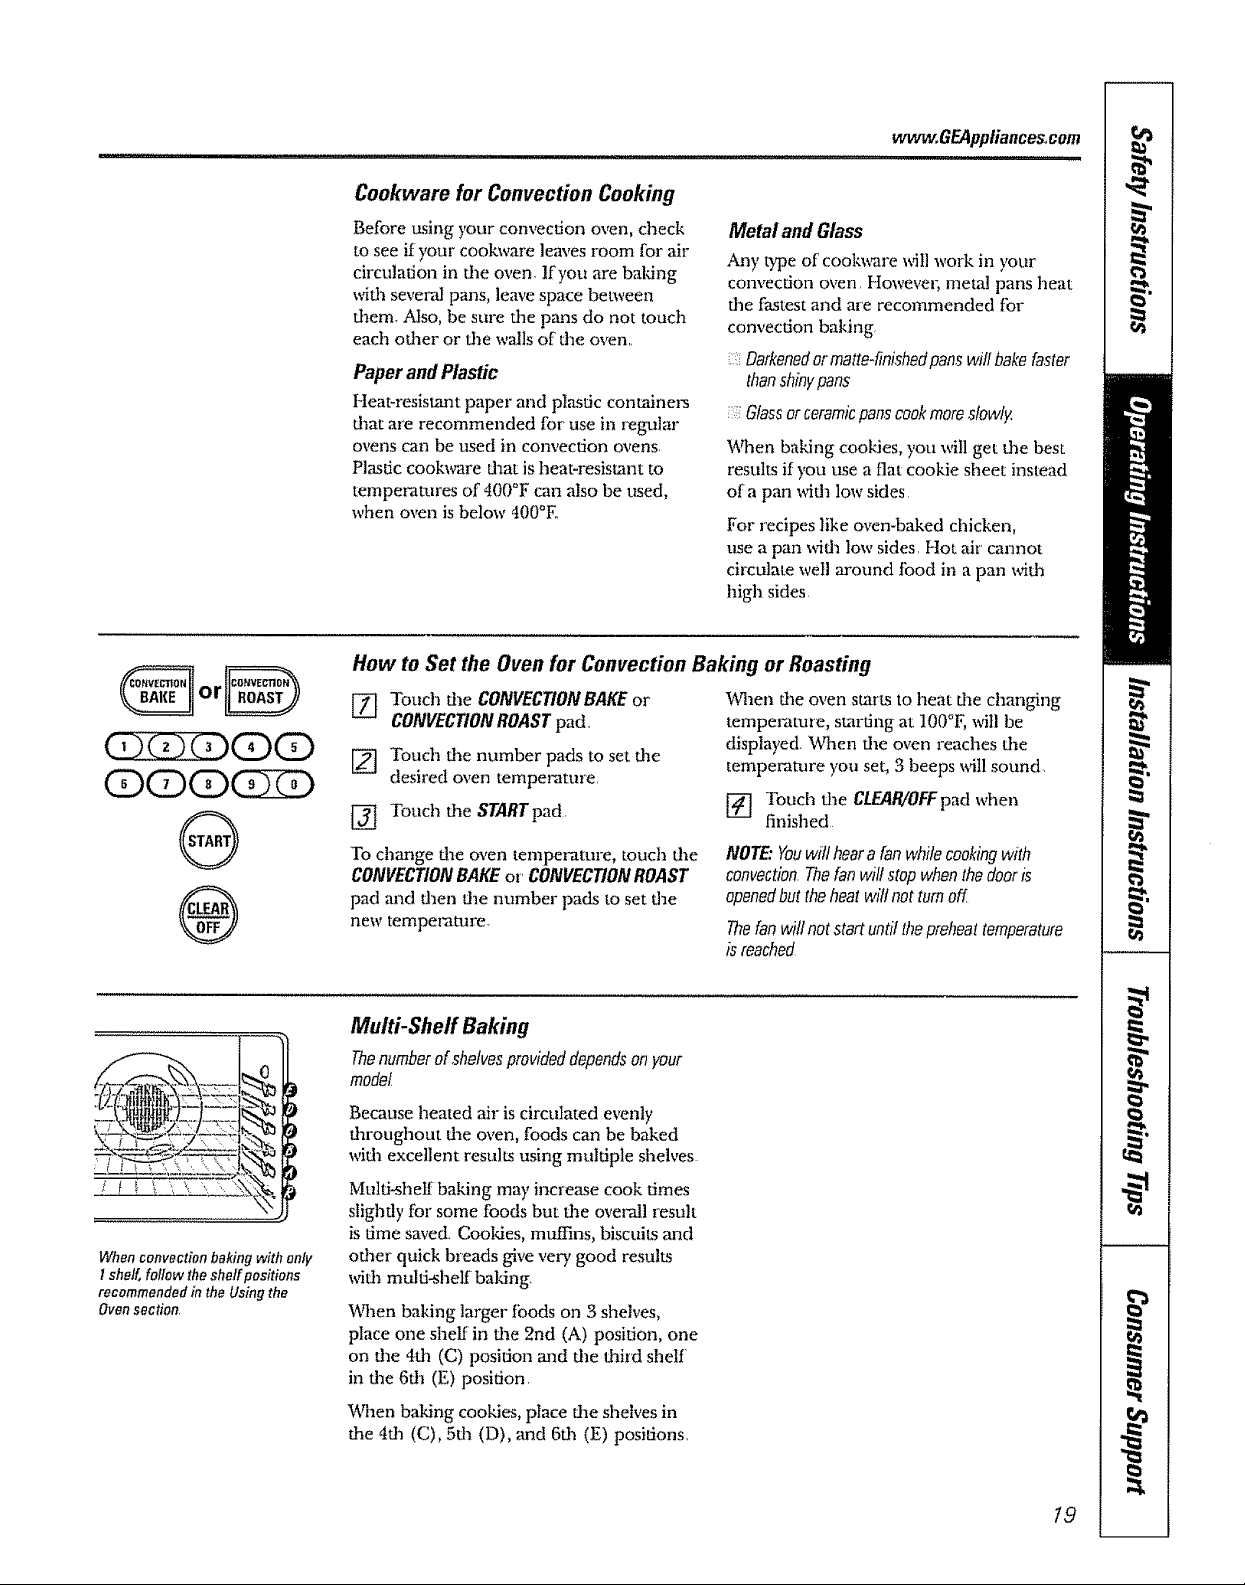
Multi-Sheff Baking
Thenumberof .shelvesprovideddependsonyour
model
Because heated air is circulated evenly
flaroughout die oven, foods can be baked
wifla excellent resuhs using muhiple shelves
Multi-slieR baking may increase cook times
slightly for some foods but die overall resuh
is time saved Cooldes, muffins, biscuits and
odler quick breads give very good results
wifll multi-shelf baking
When baking larger foods on 3 shelves,
place one shel_ in the 2nd (A) position, one
on die 4fll (C) position and die thi,d shelf
in the 6dl (E) position,
IAqaenbaking cookies, place fineshelves in
die 4dl (C), 5da (D), and 6dl (E) positions,
V_qaendie oven starts to heat die changing
temperature, starting at IO0°F,_8tl be
displayed. When die oven reaches die
temperature you set, 3 beeps will sound
Touch file CLEAR/OFFpad when
finished
NOTE."Youwit heara fan while cooking with
convection Thefanwill stop whenthe dooris
openedbut theheat wilt notturn off
Thefanwillnotstartuntilthepreheattemperature
isreached
t9
Usingthe convection oven.(on some models)
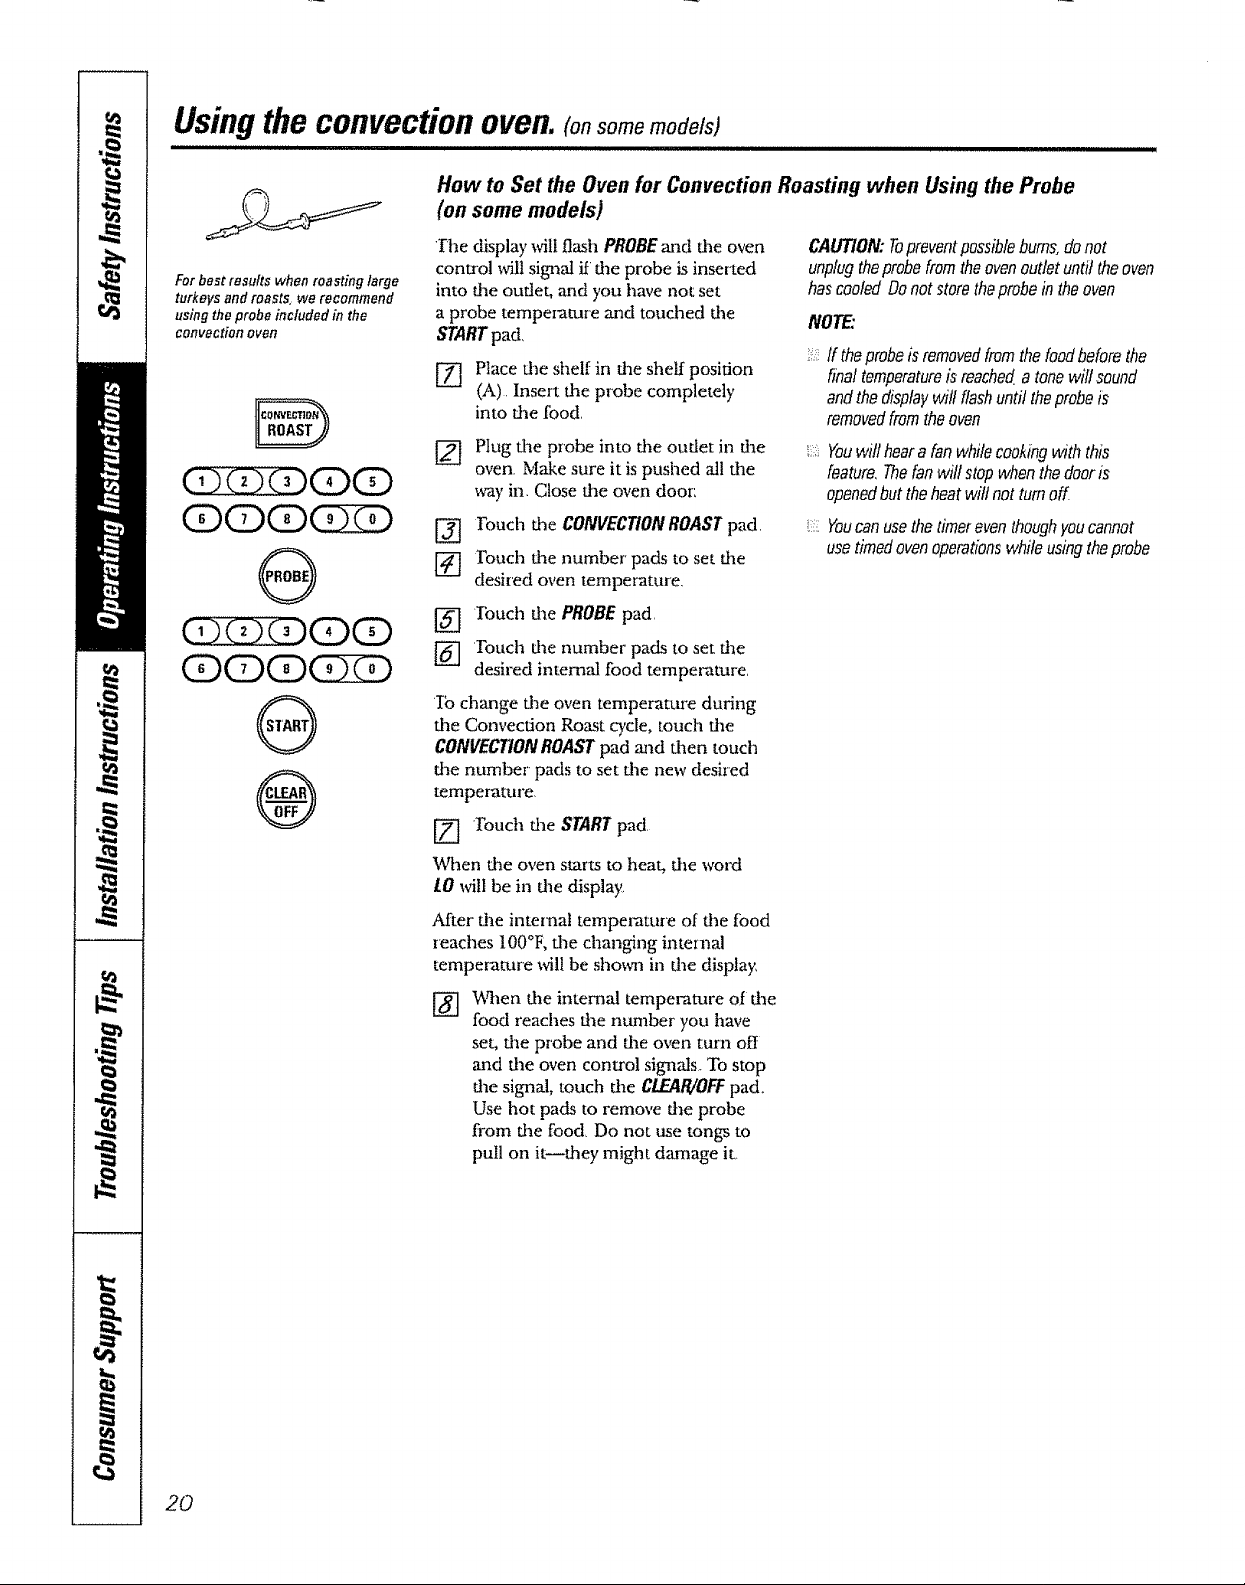
How to Set the Oven for Convection Roasting when Using the Probe
(on some models)
,,,,,,,,,,,,,,,,, ,,, ,,,,,,,,
For bestresults when roasting large
turkeysand roasts, we recommend
usingthe probe included in the
convection oven
(DO(D(DZD
®
®
1"he display x_illflash PROBEand the oven
control will signal if the probe is inserted
into the outlet, and you have not set
a probe tempezature and touched the
STARTpad,
[] Place the shelf in the shelf position
(A). Insert the probe completely
into tile food,
[] Plug the probe into d_e outlet in tlae
oven. Make sure it is pushed all the
way in, Close fl_e oven door:
[_ Ibuch tile CONVECTIONROASTpad,
[] Fouch the number pads to set tl_e
desired oven temperature,
[_] 'Ibuch tire PROBE pad,
[] 'Touch tim number pads to set the
desired internal food temperature,
Ib change the oven temperature during
the Convection Roast cycle, touch the
CONVECTIONROASTpad and d_en touch
the number pads to set the new desired
temperature
Touch the START pad,
When the oven starts to heat, fire word
10 wilt be in die display,
After"the internal temperature of the tbod
reaches !00°F; die changing internal
tempe_'amre will he shown in dee display,
CAUTION:Topreventpossiblebums,donot
unplugtheprobefromthe ovenoutlet until theoven
hascooled Do not storetheprobein theoven
NOTE:
!:,::z:If theprobeis removedfromthefoodbeforethe
final temperatureis reacherla tonewilt sound
andthe displaywill flashuntil theprobeiS
removedfromtheoven
',:::::Youwill heara fanwhile cookingwith this
feature,Thefan will stopwhenthedooriS
openedbut the heatwilt not turnoff
,::::;Youcanusethetimereventhoughyoucannot
usetimedovenoperationswhileusingtheprobe
2O
When the internal temperature of the
food reaches the ntmlber you have
set, the probe and tile oven turn ott
and the oven control signals. To stop
the signal, touch the CLEAR/0FFpa&
Use hot pads to remove the probe
from the food Do not use tongs to
pull on it_they might damage iL
 Loading...