

Page 1
www.GEAppfiances.com
©
©
©
°_
Sa_bty Instructions ...... 2-8
Operating [ndructions
Abm_hmm Foil ............ 17
Clock amid Timer . ......... 19
()re N_ ................. ] 2-3 ]
Bakh_g and Roastb_g ...... ] 7
Broi]im_g, Broi]im_g Gl*]de . . .18
(;o]]vect] o]] ........... 22 -26
Electric Igniti{m .......... ] 6
()vem_ ( (mtro] ............ ] 2
Preh ea ti m_g .............. ] 7
Probe .................. 21
Sabbath Feature .......... 15
Se]f-C]ea N_h_g ......... 30, 31
Shelves ................. ] 6
Special Featm'es ....... ] 3, ] 4
Thermostat Adil,stmeN_t .... 27
Timed Bakh_g
amid Roasting ............ 20
Timed Coiwectio]] gakim_g . .26
Sm't;_ce ( ookim_g ......... 9, ] 0
Com_tro] Settim_gs ........... 9
Warmim_gDrm_er . ...... 28, 29
Ins_talIation
Instructions .......... 41-52
Air A(tj_stme_t ............ 51
Anti-Tip Device ......... 44, 52
Ignithm ............... 49, 50
Com_ecth_g the Ravage
to Gas ................ 45-47
Dime_s]o_s ;rod Clear;races . .43
Electrical (2o_]ectio_s . . .48, 49
l,eve]i_g the Ravage ........ 51
I,P ...................... 52
Troubleshooting
Tips ................. >_-_G
Consumer Support
(2msm_er S_q)port . .Back Cover
Product P, egistratio_] ..... 57, 58
i_ (]am_da ................ 63
Warnmtv for Customers
i_ the [J.S._ .............. 62
.]cggm
.1(; 92o
oq
×
Care and Cleaning
Broiler Pam_ amid Grid ....... 37
Bm'_]er Assembly ........ 32, 33
Bm'i]er Grates ............. 34
(kmtro] Pa_e] a_d Km)bs .... 39
Cooktop .............. 34-36
(;]ass ................ 35, 36
Porce]ai_ ............... 34
Door Removal ............ 37
()ve_ Bottom ............. 37
()ve_ iJght Rep]aceme]_t .... 40
()ve_ Ve_ ts ............... 39
Se]f-CJ ea _i _g .......... 30, 31
Shelves ;rod Racks ....... 38, 40
Stai_]ess Steel S_a'{i_ces ...... 34
Top iJght ................ 40
Warmi_g Dra_er . ......... 38
Write the model and serial
numbers here:
Model #
Serial #
You can find them on a label
on the fl'ont ot the range behind
the warming drawer.
18305580P_20 49-85035 02-02Jfl
350A4502P275
Page 2
IMPORTANTSAFETYINFORMATION.
READALLINSTRUCTIONSBEFOREUSING.
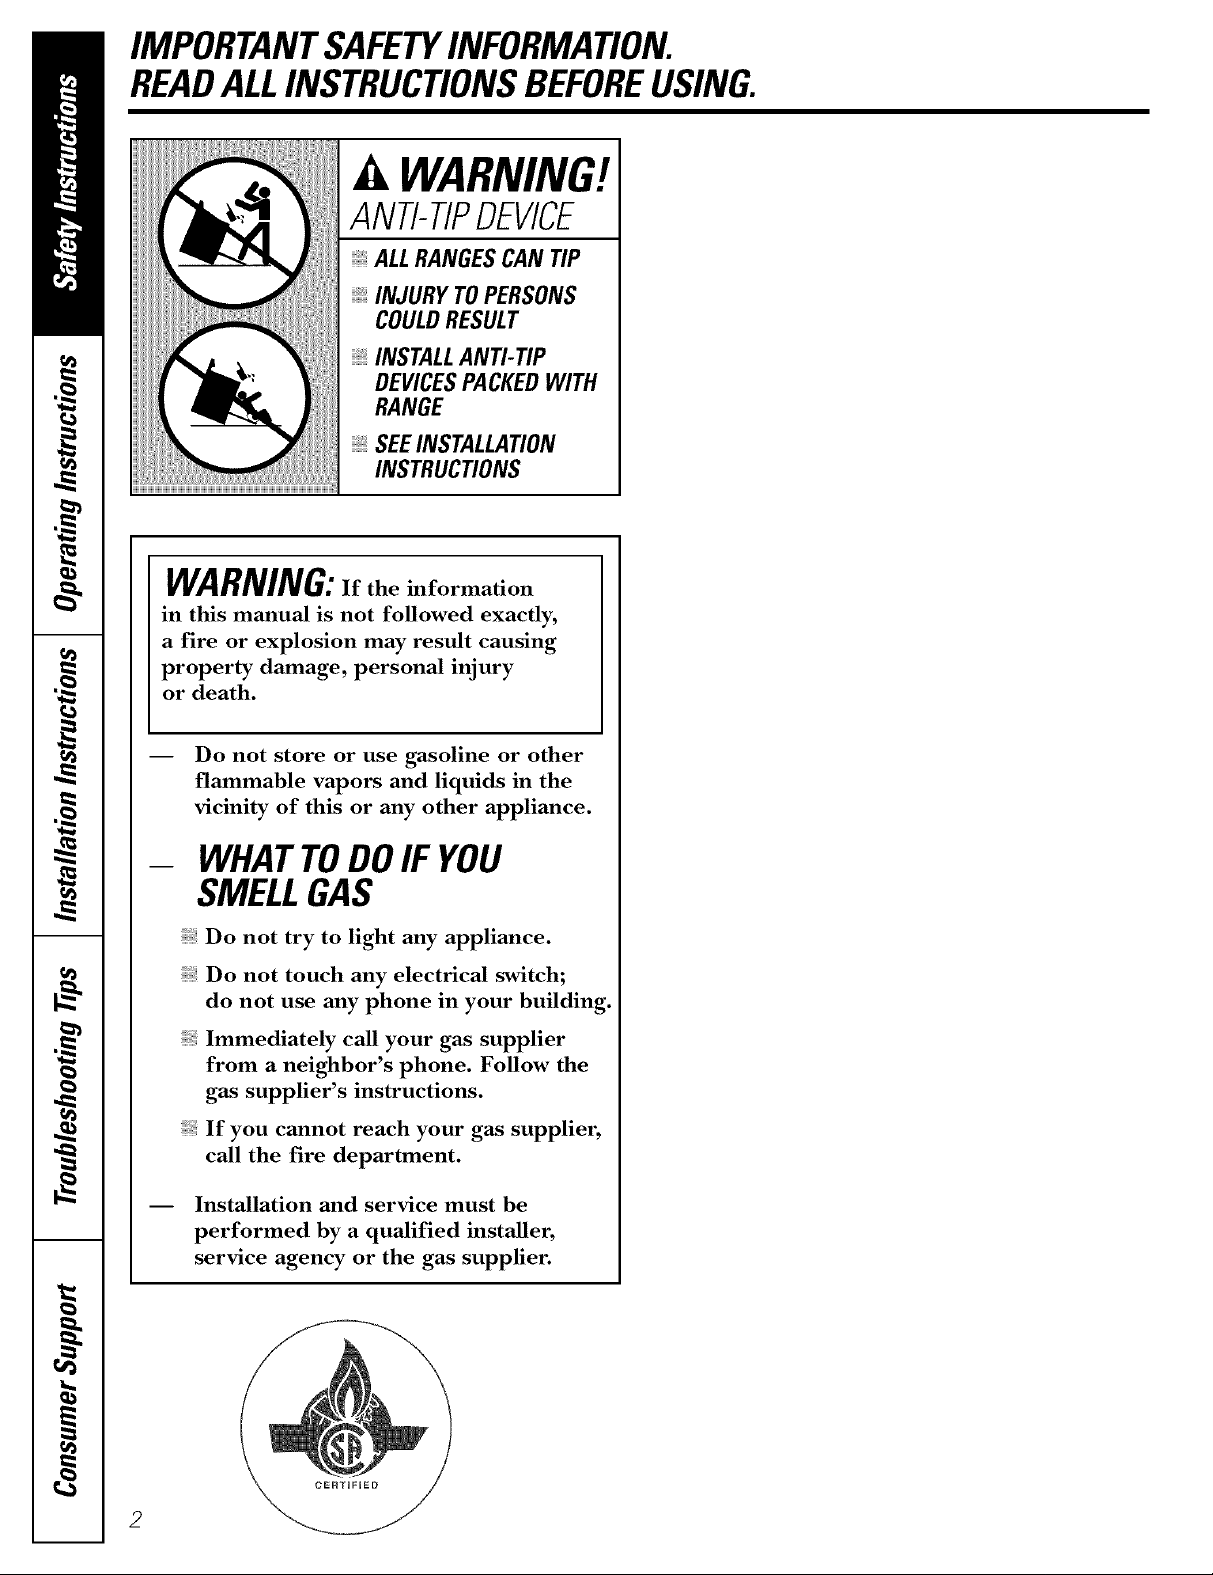
WARNING!
ANTI-TIPDEVICE
ALLRANGESCAN TIP
INJURY TOPERSONS
COULDRESULT
INSTALLANTI-TIP
DEVICESPACKEDWITH
RANGE
SEEINSTALLATION
INSTRUCTIONS
WARNING:Iftheinforma_on
in this manual is not followed exactly,
a fire or explosion may result causing
property damage, personal injury
or death.
Do not store or use gasoline or other
flammable vapors and liquids in the
vicinity of this or any other appliance.
WHATTODOIFYOU
SMELLGAS
Do not try to light any appliance.
Do not touch any electrical switch;
do not use any phone in your building.
Immediately call your gas supplier
from a neighbor's phone. Follow the
gas supplier's instructions.
If you cannot reach your gas supplier,
call the fire department.
Installation and service must be
performed by a qualified installer,
service agency or the gas supplier.
Page 3
wvvw.GEAppliances.com
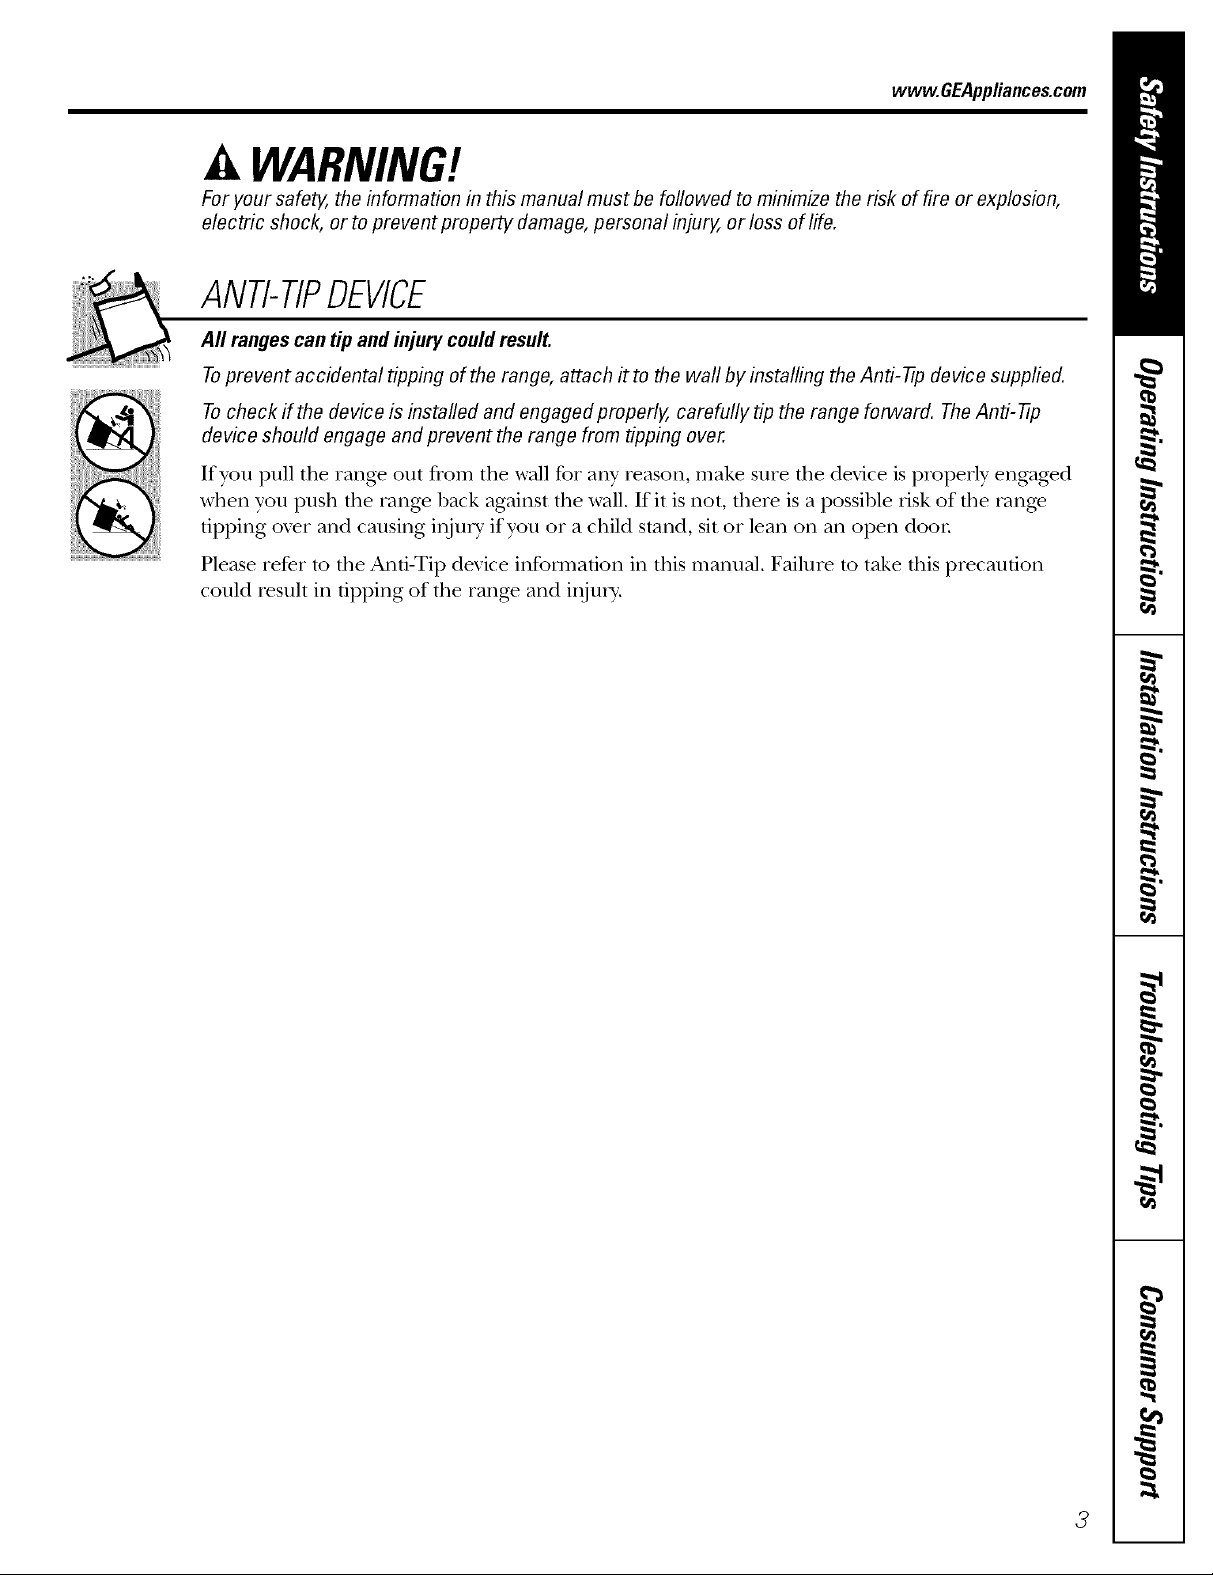
WARNING!
For your safe_ the information in this manual must be followed to minimize the risk of fire or explosion,
electric shock, or to prevent property damage, personal injury, or loss of life.
ANTI-TIPDEVICE
All ranges can tip and injury couldresult.
Toprevent accidental tipping of the range, attach it to the wall by installing the Anti--tip device supplied.
Tocheck if the device is installed and engaged properly, carefully tip the range forward. TheAnti--tip
device should engage and prevent the range from tipping over.
Ifyotl pu]l tile range otlt from the wall for ally' reason, make stlre tile device is i)roi)erly engaged
when you push the range back against tile wall. If it is not, there is a possible iJsk of the range
tipping oxer and causing inju U if you or a child stand, sit or lean on an open doon
Please refer m file And-Tip device infot_nafion ill this manual. Failure m take this precaution
could Iesult ill tipping of the rang_ and iIIjtlI>
3
Page 4
IMPORTANTSAFETYINFORMATION.
READALLINSTRUCTIONSBEFOREUSING.
WARNING!
IMPORTANTSAFETYNOtiCE
The Califomb Safe Drinking Water and ToxicEnforcement Act requires the Governor of California to
publish a list of substances known to the state to cause birth defects or other reproductive harm, and
requires businesses to warn customers of potential exposure to such substances.
Gasappliances can cause minor exposure to four of these substances, namely benzene, carbon
monoxide, formaldehyde and soot caused primarily by the incomplete combustion of natural gas or
LP fuels. Properly adjusted burners, indicated by a bluish rather than a yellow flame, will minimize
incomplete combustion. Exposure to these substances can be minimized by venting with an open
window or using a ventilation fan or hood.
Fluorescent light bulbs and safety valves on standing pilot ranges contain mercury. If your model has
these features, they must be recycled according to local, state and federal codes.
SAFETYPRECAUtiONS
Have the installer show you the location of the range gas
Haxe your rang_ installed and properly
grounded by a qualified installel, in
accordance wifl_ the Installation Instrncfions.
Any adjusunent and service should be
pertb,_ned only by qualified gas range
installers or service mchnicians.
Do not attempt to repair or replace any
part of your range unless it is specifically
recommended in this manual. All other
service should be refe_xed to a qualified
technician.
shut-off valve and how to shut it off ff necessary.
Plug your range into a 120:\_lt gxounded
outlet only. Do not remove the round
grounding prong flom the plug. If in doubt
about the gxounding of the home electrical
system, it is your personal responsibility and
obligation to haxe an ungrounded outlet
replaced with a properly grounded, three-
prong ontlet in accordance with the
National Electrical (;ode. Do not use an
exmnsion cord with this appliance.
4
Page 5

SAFETYPRECAUTIONS
vvww.GEAppliances.com
Locam fire range out of kitchen uaffic path
arrd Ottt of drafw locations m prevent pilot
outag.e (on standing pilot models) arrd poor
air citvulafion.
Be sure all packaging materials are remox.ed
from tire rang.e 1)efore operafng it to
prevent fire or smoke damag.e should the
packaging material ignite.
Be s/ti.e yottr tang.e is COlTecfly adjusted by
a qualified service mchnician or installer for
tire type of gas (natural or 12) that is m be
used. Your rang.e can be corrcerted for use
with either type of gas. See the Installation of
the range section.
WARNING:Shesea >sm entsm,tst
be made by a qualified service technician
in accordance wiflr the lnanuthcutrer's
irrstructions and all codes and requirements
of the attthority having jurisdiction. Failure
to follow flrese instructions could resuh in
serious inju U or property damag.e. Tire
qualified ag.ency perfot_ning this work
assumes responsil)ilitv for the corwersion.
After prolong.ed use of a range, high floor
mmi)eraut_.es mav result and many floor
cox.erings will not withstand flris kind of use.
Nex.er irrstall tire rang.e over viw1 die or
linoleum that cannot wiflrstand such type
of use. Nex.er irrsmll it dit.ecdv ox.er irrmrior
Mtchen carpeting.
Do not leax.e children alone or unattended
where a range is hot or ira operation.
Thev could be seriously burned.
Do not allow anyone to climb, stand or hang
on dae ox.en door; storag.e drawer; warming
drawer or cooktop. They could damage the
rang.e and even up it ox.el; causing sex.ere
personal ir_jury.
CAUTION: mmsofirrmres
children should not be stored in cabinets
above a range or on the backsplash of a
rang.e---children climbing on tire rang.e to
reach items could be seriously injured.
For your safely, nex.er use your appliance
tbr warming or heating the room.
Nex.er wear loose fitting or hanging gamrents
while using the appliance. Be carefltl when
reaching for imms stot.ed in cabinets over the
rang.e. Flammable mamrial could be ignimd
if brought in corrtact wiflt flame or hot oven
sur/2_ces arrd may cause sex.ere bums.
Do not store flammable mamrials in an
oven, a range storag.e drawer; a wanning
drawer or treat a cooktop.
Do trot store or use combusuble mamrials,
gasoline or other flammable vapors and
liquids in the vicinity of this or arp¢ other
appliance.
Do trot let cooking gxease or other flammable
mamrials accumulate, in or near fire rang.e.
Do trot use wamr on grease fires. Nex.er pick
up a flaming pan. Turn fire corruols off:
Smother a flaming pan on a surface 1)umer
by cox.ering tire pan complemly with
a well-fitfng lid, cookie sheet or fiat ua>
Use a mulu-purpose d_y chemical or
foam-type fire exunguisher
Flaming grease outside a pan can be put
out 1)y covering it with baking soda or;
if availal)le, by using a multi-purpose dU
chemical or foam-type rit.e extinguisher
Flame in the ox.en or warming drawer can be
smothered completely by closing the ox.en
door or drawer arrd turning rite cormol m
off or by using a multi-purpose dI T chemical
or foam-type fire extinguisher
i,et rite 1)umer grams and other surthces
cool before touching them or leaving them
where children can t.each them.
Nex.er block dre vents (air openings) of the
rang.e. They provide tire air inlet arrd outlet
flrat are necessat T tbr the range to operate
properly with con-ect combustion. Air
opening_ are locamd at fire rear of tim
cooktop, at tire top arrd bottom of fire oven
door; arrd at the bottom of the range under
tire warming drawer; storag.e drawer or
kick panel.
Larg.e scratches or impacts to glass doors
or cooktops can lead to broken or
shatmred glass.
Page 6
IMPORTANTSAFETYINFORMATION.
READALLINSTRUCTIONSBEFOREUSING.
WARNING!
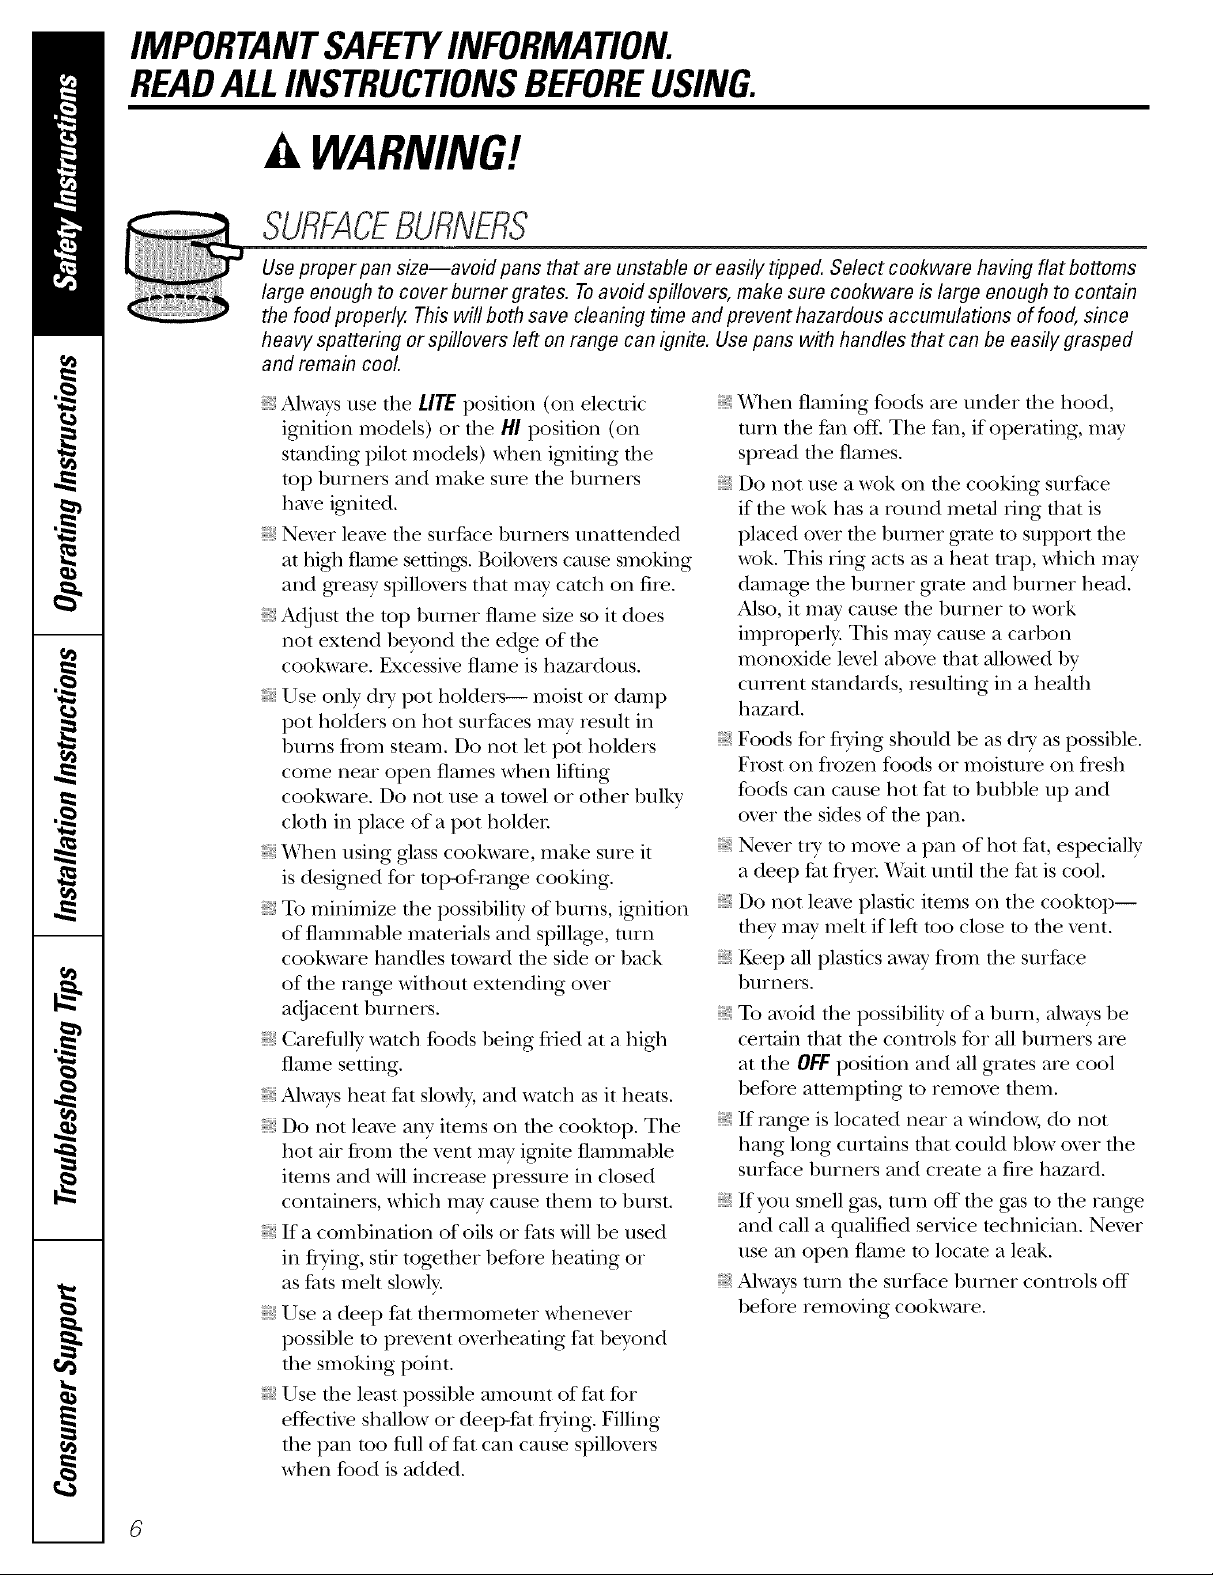
SURFACEBURNERS
Use proper pan size--avoid pans that are unstable or easily tipped. Select cookware having flat bottoms
large enough to cover bumer grates. Toavoid spillovers, make sure cookware is large enough to contain
the food properly. This will both save cleaning time and prevent hazardous accumulations of food, since
heavy spattering or spillovers left onrange can ignite. Use pans with handles that can be easily grasped
and remain cool
Always use tim LITE position (on electcic
ignition models) or die HI position (on
standing pilot models) when igniung the
top burners and make sure the burners
have ignited.
Nexer leave die surJZace burners unatmnded
at hiOl flame settings. Boiloveks cause smoMng
and gxeasy spillox>rs that m W catch on rike.
Adjust tile mp burner flame size so it does
not exmnd beyond tile edge of tile
cool<ware. Excessixe flame is hazardous.
Use only d U pot holders-- moist or damp
pot holders on hot sn,iCaces may kesult in
bm_ls flom smam. Do not let pot holders
come ,lear open flames when lifting
cookware. Do ,lot use a towel or otiler bulky
clotil in place of a pot holder
When using ,glass cool<ware, make st:Ire it
is designed for mI>of-range cooking.
To minimize tile possibility of bm_ls, ignition
of flammable materials and spillage, turn
cookware handles toward tile side or back
of tile range witilout extending oxer
adjacent burners.
Carefldly watch foods being flied at a hiO1
flame seuing.
Alwws heat tilt slow]> and watch as it heats.
Do ,lot ]eme any items on tile cookmp. Tile
hot air from tim xent m W ignite flammable
items and will increase pressure in closed
containers, which may cause tilem to burst.
If a combination of oils or fats will be used
in flTing, s0r togetiler befoke heating or
as t_atsknelt slowly.
Use a deep icatthem_omemr whenexer
possible m prexent oxeflleadng fat beyond
tile smoking point.
Use tile least possible amount of fat for
effective shallow or deep-Jht flTing. Filling
tile pan mo rid] of l_atcan cause spilloxers
when food is added.
When flaming foods are under tile hood,
turn tile JZanoff: Tile t_an, if operating, may
spread the flames.
Do not use a wok on the cooking SUl+ace
if tile wok has a round metal ring tilat is
placed oxer tile burner gram to support tile
wok. This ring acts as a heat trap, which m W
damage tile burner gram and burner head.
Also, it m W cause tile burner m work
improperly. This may cause a carbon
monoxide level abo_e tilat allowed by
cmTent standards, kesu]ting in a healtii
hazard.
Foods for flTing should be as d, T as possible.
Frost on flozen foods or moisture on fresh
tbods can cause hot fiat m bubble up and
oxer the sides of the pan.
Nexer tkT to move a pan of hot laat, especially
a deep fat flTer _'ait until tile fat is cool.
Do *lot leme plastic items on tile cooktop--
tiley m W melt if left too close to tile xent.
Kee I) all plastics aw W from tile surt_ace
bnrners.
To ax_id tile possibiliw of a bum, always be
certain tilat tile controls for all builders are
at tile OFFposiuon and all grams are cool
before atmmpting m remoxe tilem.
If range is locamd near a windox_, do ,lot
hang long curtains timt could blow oxer tile
surfi_ce burners and cream a fire hazard.
If you smell gas, mm off" tile gas m tile range
and call a qualified service technician. Nexer
use an open flame m locate a leak.
Always mm tile surfl_ce burner controls off"
before removing cool<ware.
Page 7
wvvw.GEAppliances.com
GLASSCOOKTOPSURFACEransomemode/sJ
Use care when touching the glass cooktop surface. Theglass surface of the cooktop will retain heat
after the controls have been turned off.
Avoid scratching tile glass cooktop surface.
Tile glass surface can be scratched with
items such as shaq) instruments, _ing:s or
otherjeweh T and rivets on clothing.
Do trot operate the cooktop if the glass is
broken. Spilloxers or cleaning solution m W
penetrate a broken cooktop and create a
risk of elecuical shock. Contact a qualified
technician immediately should your glass
cooktop surPace become broken.
Nexer use the glass cooktop smiaace as
a cutting board.
Do not place or store items flrat can melt
or catch fire on tile glass cookmp surfltce,
ex_n when it is not being used.
Be carefld when placing spoons or other
sfining utensils on glass cookmp surPace
when it is in use. They m W become hot
and could cause burns.
Clean the cooktop surf;ace wifll caution.
If a wet sponge or clod1 is used to wipe
spills on a hot srli_tce, be carefld to ax_id
steam bui_ls. Some cleaners can produce
noxious flm)es if"applied to a hot surface.
NOTE."_A'erecommend that you ax_id
wiping aW surPace areas until they have
cooled and the indicator liOlt has g_ne off.
Sugar spills are rite exception m this. Please
see Cleaning the glass cooktop surface sect.ion.
When file cooktop surface is cool, use only
CE_ BRYTE c'_'Ceramic Cooktop
Cleaner and tile CE_ BRYTE s_'
Cleaning Pad to clean the cooktop.
To axoid possible damag_ to tile cooking
surface, do not apply cleaning cream to the
glass surfi_ce when it is hot.
After cleaning, use a d_T cloth or paper
towel to remox> all cleaning cream residue.
Read and follow all instructions and
warnings on the cleaning cream labels.
ELECTRICWARMINGDRAWER
The purpose of die wamring drawer is
to hold hot cooked foods at serving
temperature. Alwws start widl hot food;
cold food cannot be heated or cooked in
tile wam_ing drawen
Do not use the winching drawer m d U
newspapers. If o_>rheated, flley call catch
Oil fire.
Do not leax> paper products, cooking
utensils or food ill the warming drawer
when not in use.
Ne_er leave jars or cans of fat dripping:s in
or near your wmlning drawer:
Always kee I) wooden and plastic utensils
and canned food a sad distance away flom
your wanning drawen
Do not wm_n food in tile warming drawer
for mo_e than two hours.
Do not touch theheating element or the
interior surface of the warming drawer.
These surfaces may be hot enough to burn.
REMEMBER:The inside surfi_ce of tile
wam_ing drawer may be hot when the
drawer is opened.
Use care when opening the drawer Open
the drawer a crack and let hot air or steam
escape before removing or replacing food.
Hot air or steam which escapes call cause
bums to hands, face and/or eyes.
Do not use aluminum foil to lille file
drawer: Foil is all excellent heat insulator
and will trap heat beneafll it. This will upset
tire performance of file drawer and it could
damag> the interior finish.
Page 8
IMPORTANTSAFETY/NFORMAYlONo
READALLINSTRUCTIONSBEFOREUSING.
COOKMEATANDPOULTRYTHOROUGHLY...
Cook meat and poultry thoroughly--meat to at least an INTERNAL temperature of 160°Eand poultry to
at least an INTERNAL temperature of 180°ECooking to these temperatures usually protects against
foodbome illness.
OVEN
Stand away from the range when opening the door of a hot oven. The hot air and steam that escape can
cause bums to hands, face and eyes.
Do not use the oven for a storage area.
hems stored in the o\_n can ignite.
Kee I) tile o_n free flom grease buildup.
Place tile oven sheh_s in the desired
position while file oxen is cool.
Pulling out file shelf m tile stop-lock is a
convenience in lifting heavv foods. It is also
a precaution against bun_s flom touching
hot surfaces of the door or oven walls. Tile
lowest position "R!' is not designed to slide.
Do not heat unopened food containers.
Pressure could build up and the container
could burst, causing an ilIjury.
Nexer use almninun_ foil m line the ox>n
bottom. Improper use of foil could start
a fire.
Do not use almninum %il anywhere in the
oven except as described in this manual.
Misuse could result in a fire hazard or
damage to the range.
V\]ten using cooking or roasting bag:s in die
ox>n, follow the manuPacmrer's directions.
Do not use your oxen to d U newspapers.
If oxerheamd, they can catch fire.
Use only glass cookwate that is
recommended for use in gas oxens.
Always remo_e the broiler pan from range as
soon as you finish broiling. Grease left in the
pan can catch fire if oxen is used without
removing dte grease flom the broiler pan.
_4]len broiling, if meat is mo close m file
flame, rite tilt may ignite. Trim excess l_t to
prex_nt excessix_ flateqq)s.
Make sure tile broiler pan is in place conecdy
m reduce the possibilib' of glease fi_es.
If you shou]d hax> a grease fire in the broiler
pan, press the CLEAR/'OFFpad, and kee I)
rite oven door closed to contain rite until
it burns out.
SELF-CLEANINGOVEN
Be sure to wipe up excess spillage be%re
self-vleaning operation.
Before seltk;leaning the oxen, remo_e
the shelx>s, broiler pan, grid and
other cookware.
Do not clean the door gasket. The door
gasket is essential %r a g_od seal. Care
should be token not to rub, damage or
move the gasket.
Clean only parts listed in this Owner's
Manual.
K fire self-cleaning mode malflmcfions, mm
the oxen off and disconnect tim power supply,
Haxe it serviced by a qualified technician,
Do not use oven cleaners. No commercial
oven cleaner or ox>n liner of any kind
should be used in or around any part of
file oven, Residue fiom oxen cleaners will
damage the inside of tile ox>n when the
self-_lean cycle is used,
READANDFOLLOWTHISSAFETYINFORMATIONCAREFULLY.
SAVETHESEINSTRUCTIONS
8
Page 9

Usingthe gas surfaceburners, www.GEAppliances.com
Throughout this manual, features and appearance may vary from your model
Hew te Light a Gas Surface Burner
Pushthecontrolknobf17andturnit
tothe LITEposifion.
Push d_e conm'ol k_ob h_ m_d mrm_it t(_
the UTE posidom
_]_>__rd_hear a little c/icRing m_oise---
the seined of tl_e electIJc spark ]gnith_g
the bml_ex:
Tm'_ d_e k_ob t(_ a(!i_st the flame size.
If t]_e kl]ob smvsat UTE, it _rd]]C{_ti_e
to dick
Sealed Gas Burners
Whel_ om_e]bm'l_er is mn_ed to Life a]]
the bm'i_ers spark. Do m_otattempt to
disassemble oi" c]ea_? arolmd al]v bllriler
while a]]ot]]er ]bm'N_eris om A]_ e]ectiJc
shock ma} resin]t, _d]ich col_](t cm_se ,_ol_
[0 kl/ock over he[ coo]Grate.
The smaller burner (iight rear posidon) will
give the best simmer results. It ofli_is precise
cooking peitbnnance for delicate foods,
such as sauces oi" foods which need m cook
over low heat for a long time. It caI] be
turned down t(>a vei y low simmer setting.
How to Select Flame Size
Forsafe handlingof cookware, neverlet the flames
extend up thesides of the cookware.
Watch the flame, not the knob, as you
reduce heat. The flalne size (>I] a gas buri]er
should match the cookware w)u are using.
In Case of Power Failure
hi case of a power fidlure, you can light the
gas smti_ce burners on vour range with a
match. Hold a lit match to the burnei; then
push in and mrn the control knob to the
LITE position. ILrseextreme caution when
lighting burners this way:
The laigest burners are higher powered
than the others and will bring liquids to
a boil quickeI:
Anv flame linger than the bottom of the
cookware is wasted and onlv seiwes to heat
the handle.
Stu_i_ce burners in use when an electiical
power fidlure occurs will continue to
operate nommlly:
Before Lighting a Gas Burner
:_ If (1IiI) pans are supplied with your range,
they should be used at all times.
:_ Make sure all grates on the range are in
place before using any burnei:
After Lighting a Gas Burner
:_ Do not operate the burner for an
extended period of time without
cookware on the grate. The finish on
the grate may chip without cookware
t(> absorb the heat.
:, Be sure the burners and grates are cool
before you place your hand, a pot holdei;
cleaning cloths oi" other mateiials on
them.
Page 10
Usingthsgassurfacshurnsm.
Top-of-Range Cookware
Aluminum: Medium-weight cookware is
recommended because it heats quickly
and e;'enk. Most foods brown evenly in an
aluminum skillet. Use saucei)ans with tight-
fitting lids when cooking with minimum
_lIllo/Ints of wateE
Cast-Iron: If heated slowly, most skillets will
give satisii_ctorv results.
Enamelware:Under some conditions,
tile enaillel of SOIlle cookw;iFe Ill}IV I//elt.
Follow cookware ill_lnllIilCtlli'eiJs
recommendations tor cooking methods.
Stove Top Grills
Do not use stove top grills on vour sealed
gas burne_. If you use the stove top grill
on tile sealed gas burne_; it will cause
incomplete combustion and can result
in exposure to cm4)on monoxide levels
above allowable current standards.
Glass: There are two types of glass
cookware--those ti)r oven rise onlY and
those for toi>ofXrange cooking (saucepans,
coffee and teapots). Glass conducts heat
very slowly:
HeatproofGlassCeramic:Can be used tot
either SUltilce or oven cooking. It conducts
heat very slowly and cools very slowly: Check
cookware i/lantllilCttli'ei"s directions to be
sure it can be used on gas ranges.
Stainless Steel: This metal alone has poor
heating properties and is usually combined
with copl)e_; aluminmn or other metals for
improved heat distribution. Combination
metal skillets usually work safisfl_ctofilv if
they are used with medium heat as the
Ilia n/llil Cttli'ei" i'ecoi//illends.
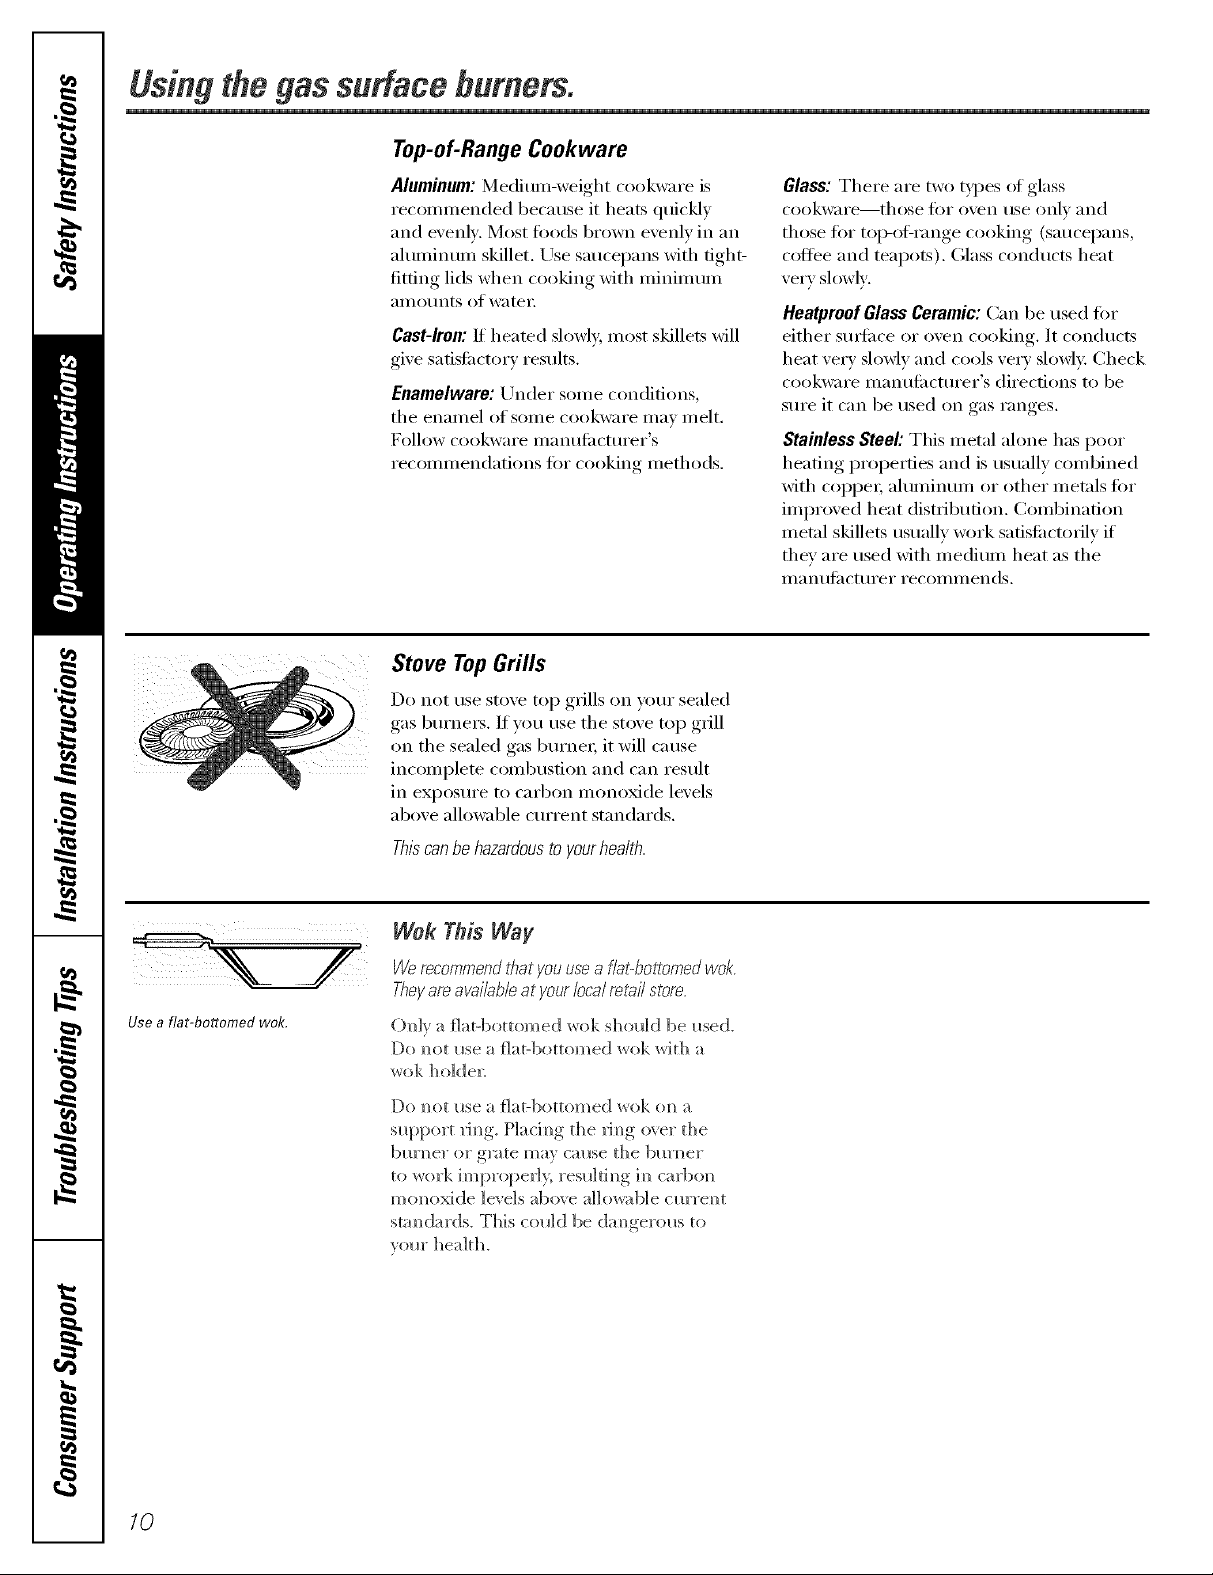
Use a fiat-bottomed wok.
Thiscanbehazardoustoyourhealth.
Wok This WaF
Werecoror,qervJthatyouusea flabbottomedwok.
Theyare available at your/oca/retail store.
OMv a flat-bottomed wok should be i_sed.
Do inlet i_se a flat-bottomed wok with a
wok ho]de_;
Do m_ot use a flat-bottomed _ok om_ a
slq_port rim_g, P]acim_g the rim_g o_er the
bm'm?eror g]wte may came the bm'mler
to work improper{> rem]tim_g im_carbo_
m(moxide ]e', eIs above allowable cl_rrem_t
stam_dards. This c(tl*]d be dam_gerol*s to
v(ll*r health.
10
Page 11
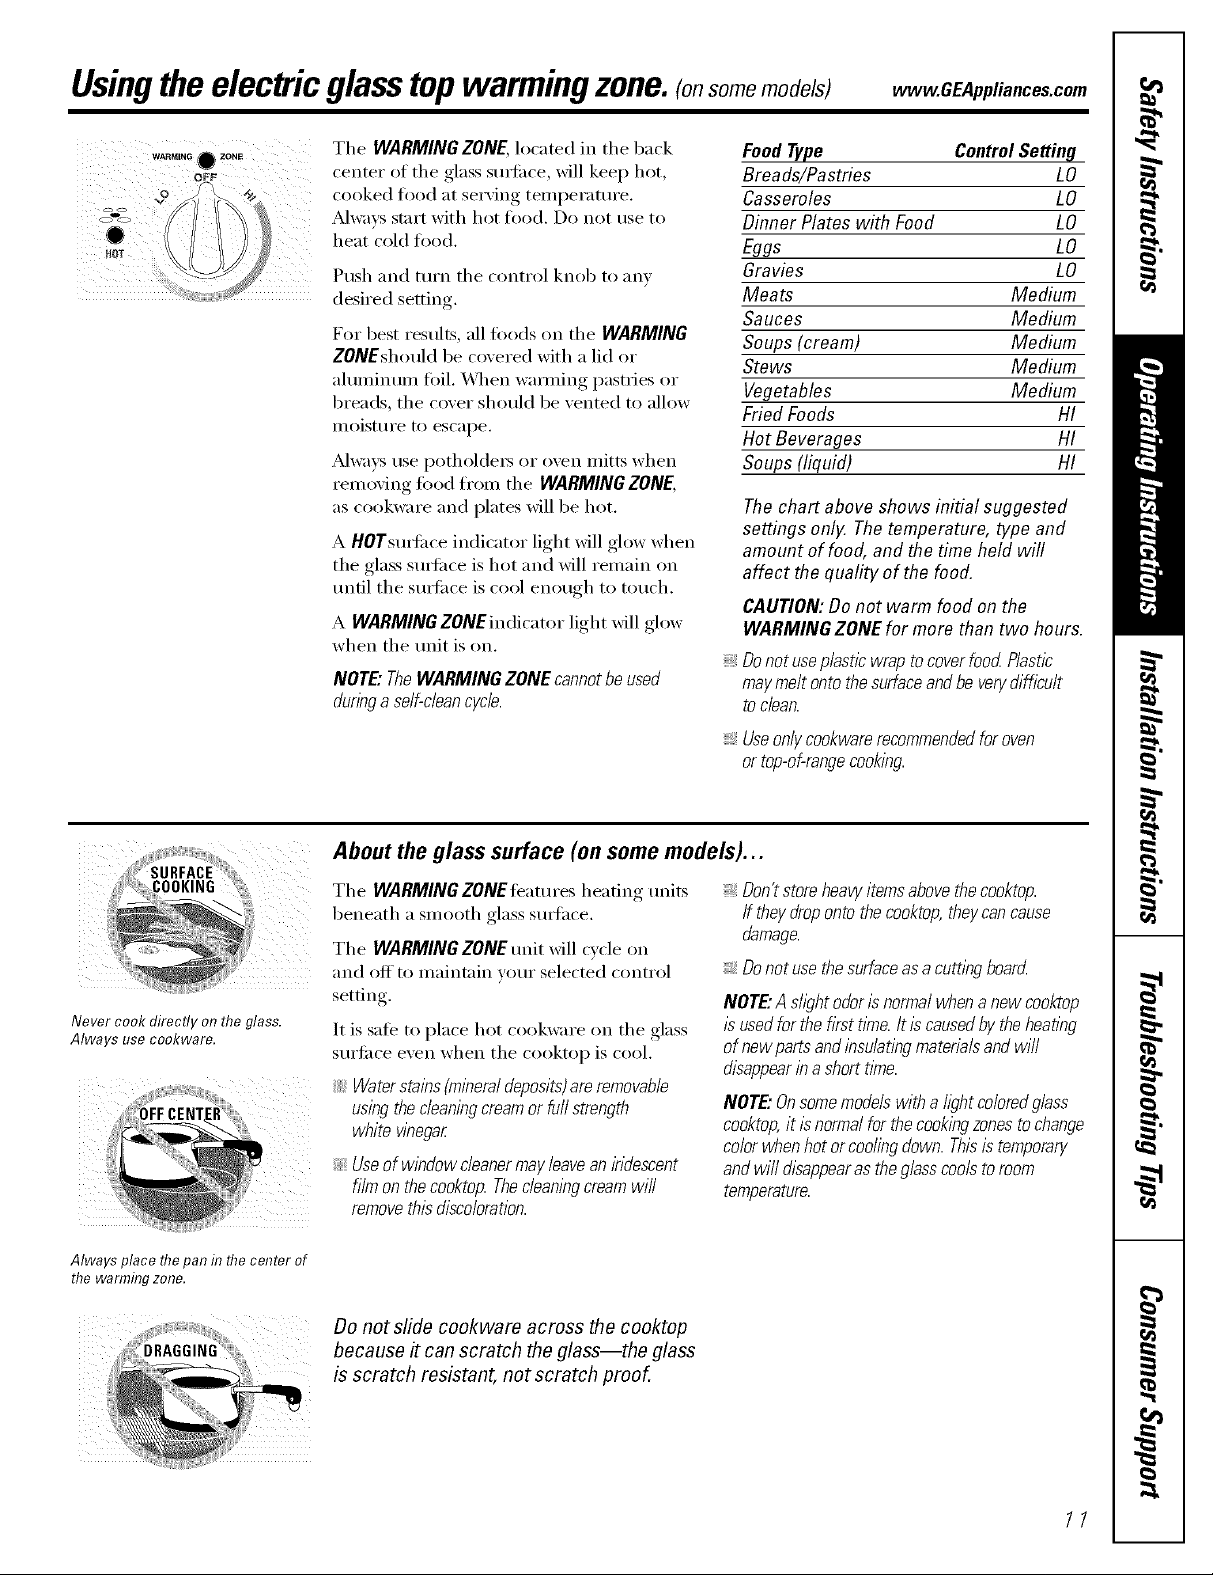
Usingtheelectricglasstopwarmingzone.(onsomemodels) CEAppliances.com
The WARMING ZONE,located in the back
center of the glass stm'i_ce, will keep hot,
cooked toed at serving temperature.
Always start with hot fbod. Do not use to
heat cold toed.
Push and turn the control knob to any
desired setting.
For best results, all foods on the WARMING
ZONEshouldbe covered with a lid or
aluminum foil. X,\]_enwmming pastries or
breads, the cover should be venmd to allow
I/loisttlre to escape.
Always use potholdex_ or oven mitts when
removing food fl'om the WARMINGZONE,
ascookware and plateswill be hot.
A HOTsurfi_ceindicator light will glow when
the glasssudi_ceis hot and will remain on
until the sudi_ceis cool enough to touch.
A WARMINGZONEindicatorlight will glow
when the unit is on.
NOTE."TheWARMING ZONE cannotbe used
dunng a self-clean cycle.
FoodType ControlSettinq
Breads/Pastrles L0
Casseroles LO
Dinner Plates with Food LO
Eggs LO
Gravies LO
Meats Medium
Sauces Medium
Soups(cream) Medium
Stews Medium
Vegetables Medium
FriedFoods HI
Hot Beverages HI
Soups(liquid) HI
Thechart above shows initial suggested
settings only. Thetemperature, type and
amount of food, andthe timeheld will
affect the quality of the food.
CAUTION:Donot warm food on the
WARMINGZONEfor more than two hours.
Donotuseplasticwraptocoverfood Plastic
maymeltontothesurfaceandbeverydifficult
todean.
Never cook directly on the glass.
Always use cookware.
Always place thepan f17thecenter of
the warmfl_gzone.
About the glass surface (on some models)...
The WARMING ZONE Ieamres heating units
beneath a smooth glass stm'hce.
The WARMING ZONE unit will cycle on
and off to maintain w_ur selected control
setting,
It is safe to place hot cookware on the glass
surfi_ce even when the cooktop is cool,
Waterstains (mineraldeposits)are removable
using the cleaningcream or furlstrength
white wnegar
. Useof window cleanermay &ave an/?idescent
film on thecooktop. Thec/eanl#gcream wi//
removethis discoloration.
;_Don'tstoreheavyitemsabovethecooktop.
;_Donot use the surfaceas a cuttl))gboard
NOTE."A shghtodorIsnormalwhena newcooktop
/susedforthefirsttlYne.Itis causedbytheheating
ofnewpartsandinsulatingmaterialsandwi//
disappearina shorttime.
NOTE."Onsomemodelswitha hghtcoloredglass
cooktop,it/s normalfor thecookl#gzonestochange
colorwhenhotorcoo/ingdown.Thisis temporary
andwi//disappearas theglasscoolstoroom
temperature.
Useonlycookwarerecommendedforoven
ortop-of-rangecooking.
/f theydropontothecooktop,theycancause
damage.
Do not slide cookware across the cooktop
because # can scratch the glass--the glass
is scratch resistant, not scratch proof.
11
Page 12

Usingthe ovencontrols.
Throughout this manual, features and appearance may vary from your model
OvenControlClockand TimerFeaturesandSettings
o SELFCLEANPad 0
Touch this pad to select the self k leaning
flmction. See the Using the self-cleaning
oven section.
PROBE Pad (on some models)
Touch this pad when using tile probe to
cook food to the desired internal
temperature.
O BAKEPad
Touch this pad to select tile bake function.
O BROIL HI/LO Pad
Touch this pad to select the broil flmction.
O CONVECTIONROASTPad
Touch this pad to select roasting with the
con_,ection ]'ilnction.
o Display
Shows the time of day, oven temperatm'e,
whether the oven is in the bake, broil,
convection, or seltk'leaning mode and
tile times set tot tile timer or automatic oven
ol)ei';itions.
If "F- anda numberor letter" flash in the displayand the
ovencontrolm)na& this indicatesa function errorcode.
If your oven was set for a t#nedovenoperationand
apower outageoccurred,the clockand allprogrammed
functionsmust bereset.
ThetlYneofdaywill flashinthedisplaywhentherehasbeen
apoweroutage.
If "Err"appearsinthedisplay,youhavetriedtoseta t#neor
temperatureoutsideof thecontrol#hmits.PressCLEAR/OFF
andenteranewsetting
CLOCKPad
Touch this pad before setting tile clock.
COOKINGTIME Pad
To/lch this pad and then to/lch tile ntlIllbeI"
pads to set tile }lIllO/lnt of tiIlle Veil W}lIlt VO/II"
food to cook. Tile oven will shut off when
the cooking time has run out.
DELAYSTART Pad
O
Lrse along with COOKINGTIME or SELFCLEAN
pads to set the oven to start and stop
automaticallv at a tim e you set.
TOPLIGHT Pad(on some models)
Touch this pad to ttlI'n tile StlI'J[ilce light
on oi" olc[ ',
0 VENLIGHT Pad
Touch this pad to turn tile oxen light on
oi" oJ_
STARTPad
Must be touched to start any cooking or
cleaning flmcfion.
KITCHEN TIMER ON/OFFPad
Touch this pad to select tile timer teatm'e.
Number Pads
Use to set any fimction requiting numbe_
such as tile time of day on tile clock, tile
time_; tile oven temperature, tile internal
fi)od temperatm'e, tile start time and
length _ff operation for timed baking
and sel6cleaning.
CONVECTIONBAKE Pad
Touch this pad to select baking with tile
conx ection tt/nction.
CLEAR/OFFPad
Touch this pad to cancel ALL oxen
operations except tile clock and time_:
12
Page 13
Special featuresofyouroven control www.GEAppliances.com
Yournew touch pad control has additional features that you may choose to use. The following are the features and
how you may activate them.
Thespecial feature modes can only be activated while the display is showing the time of day. They remain in the
control's memory until the steps are repeated.
When the display shows your choice, touch the STARTpad. Thespecial features will remain in memory after
a power failure.
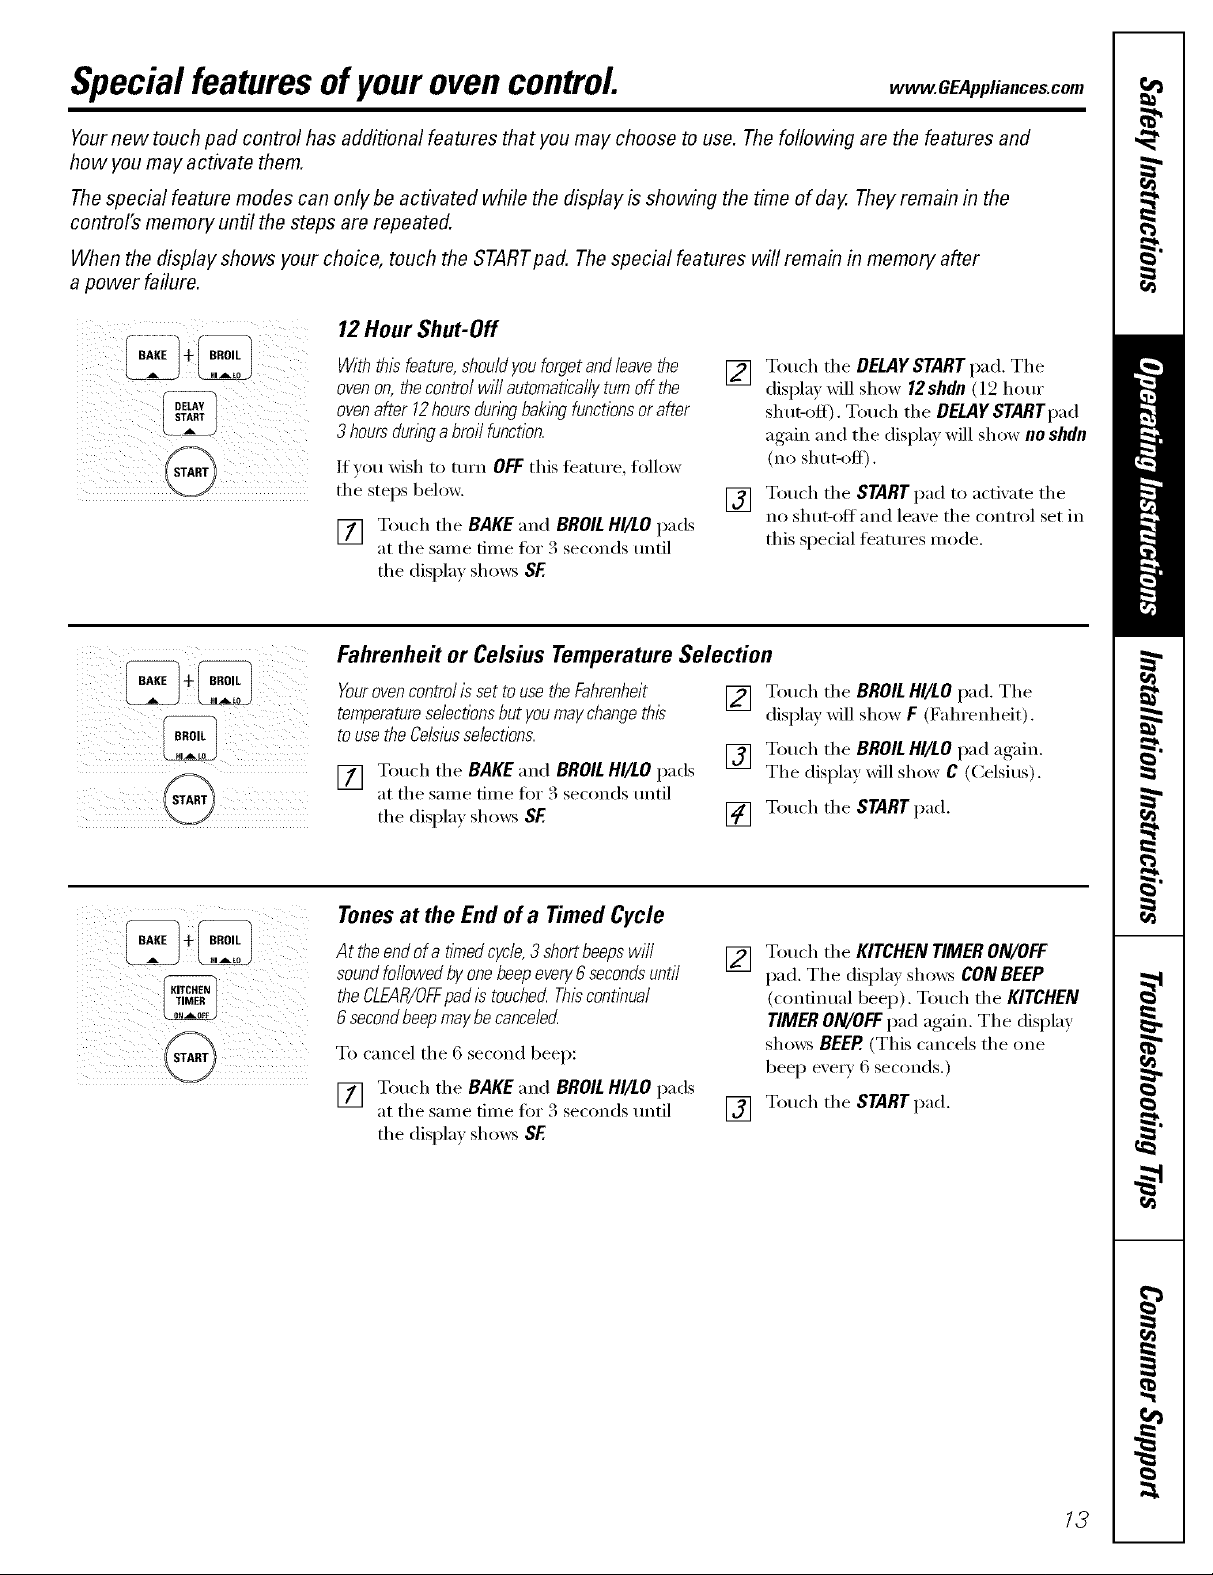
12 Hour Shut-OH
5¸¸¸¸¸i/ il¸@:/i ii
Withthisfeature,shouldyouforgetandleavethe
[]
ovenon,thecontrolwillautomaticallyturnoff the
ovenafter 12hoursdunbgbakingfunctionsorafter
3hoursdunbgabroilfunction.
If )ou wish to mrn OFFthis teature, follow
tile steps below.
[] Touch tile BAKE and BROILHI/LOpads
at tile same time fi)r 3 seconds tmtil
tile (lispla)shows SF
[]
Fahrenheit or Celsius Temperature Selection
Yourovencontrol is set to use the Fahranheit
temperatureselectionsbut you may changethis
to use the Celsiusselections.
[] Touch tile BAKE and BROILHI/tO pads
at tile sanle time fi)r 3 seconds until
tile displa} shows SF.
[] Touch tile BROILHI/tO pad. Tile
[] Touch tile BROILHI/tO pad again.
[] Touch tile STARTpad.
Tonesat the End of a Timed Cycle
At the end of a timedcycle,3 shortbeeps will
soundfollowed byone beepevery6 secondsuntil
the CLEAR/OFFpad is touche_ Thiscontbua/
6secondbeep maybe cance/e_
To cancel tile 6 second beep:
[] Touch tile BAKE and BROILHI/tO pads
at tile same time fi)r 3 seconds tmtil
tile display sho_s SF.
[]
[] Touch tile STARTpad.
Touch tile DELAYSTART pad. Tile
displa_ will show 12shdn (12 horn"
shut-off). Touch tile DELAYSTARTpad
again and the display will show no shdn
(no sh tI[-OlClD .
Touch tile STARTpad to activate tile
no shut-off and lea_e tile control set in
this special features mode.
display will show F (Fahrenheit).
Tile display will show C (Celsius).
Touch tile KITCHENTIMERON/OFF
pad. Tile displa_ shows CONBEEP
(continual beep). Touch tile KITCHEN
TIMERON/OFFpad again. Tile display
sho_s BEEP.(This cancels tile one
beep ever)' 6 seconds.)
13
Page 14
Special featuresofyourovencontrol
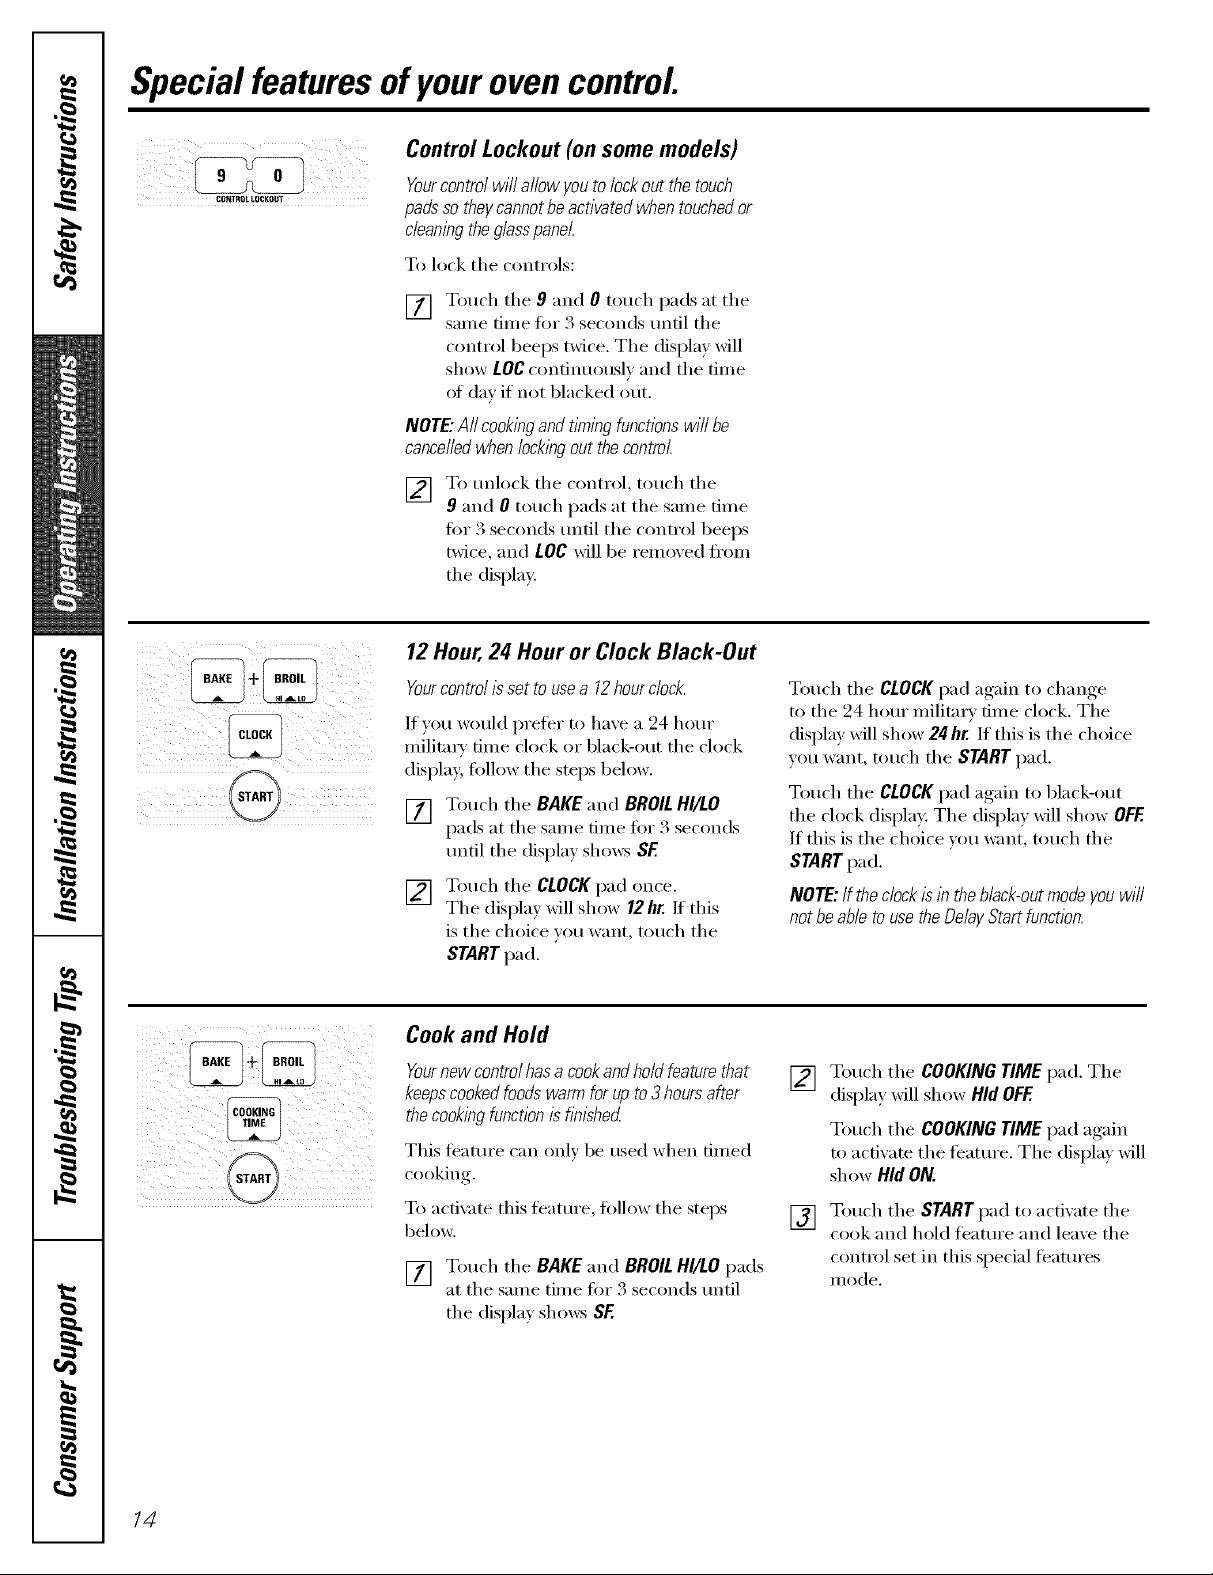
Control Lockout (on some models)
CllNTIIOL LOCKOUT
Yourcontrolwillallowyoutolockout thetouch
padssotheycannotbeactivatedwhentouchedor
cleaningtheglasspanel.
To lock the controls:
[] Touch the 9 and 0 touch pads at the
same time t0r 3 seconds until the
control beeps twice. The display will
show LOC continuously and the time
ot day if not blacked out.
NOTE."All cookingandt/Ynlbgfunctionswi//be
cancelledwhen/o&bg outthecontrol.
[] To unlock the control, touch the
9 and 0 touch pads at the same time
tot 3 seconds tmtil the control beeps
twice, and LOC will be remoxed fl'om
the display.
12Hour,24 Hour or Clock Black-Out
Yourcontrol/s set to usea 12hour clock.
If you w_mld prefer to have a 24 hem"
milita_' time clock or black-out the clock
display follow the steps below.
[] Touch tile BAKE and BROIL HI/tO
pads at tile same time for 3 seconds
tmtil tile display sho_vs SE
[] Touch the CLOCK pad once.
The displa} will show 12hr. If this
is the choice you want, touch the
STARTpad.
Touch tile CLOCKpad again to change
to the 24 hour military time clock. The
display will show 24hr. If this is the choice
you want, touch tile START pad.
Touch the CLOCKpad again to black-out
the clock display: The display will show OFF.
If this is tile choice you want, touch tile
START pad.
NOTE'.IftheclockislbtheMack-outmodeyouwill
notbeabletousetheDelayStartfunction.
14
Cook and Hold
Yournew controlhas a cookand hold feature that F2q
keepscooked foods warmfor up to3hours after
thecookingfunction is fblshed
This teattlI'e can only be used when dined
cooking.
To activate this featm'e, follow tile steps []
below.
[] Touch tile BAKE and BROILHI/tO pads
at tile same time fi)r 3 seconds tmtil
tile display sho_vs SE
Touch tile COOKING TIME pad. Tile
displa) _dll show Hid OFF.
Touch the COOKING TIME pad again
to actixate tile teatm'e. Tile displa,_ will
show Hid ON.
Touch tile STARTpad to activate tile
cook and hold featm'e and leaxe tile
control set in this special teatures
nlode.
Page 15
"'-"--usingthe SabbathFeature.(onso emodels)
(Designed for use on the Jewish Sabbath and Holidays) vvww.GEAppliances.com
The Sabbath feature can be used for baking/roasting only.It cannot be used for convection, broiling, self-cleaning, or
Delay Start cooking.
NOTE,"The oven light comes on automatically (on some models) when the door is opened and goes off when the door is
closed. The bulb maybe removed. See the OvenLight Replacement section. Onmodels with a light switch on the control
panel, the oven light may be turned on and left on.
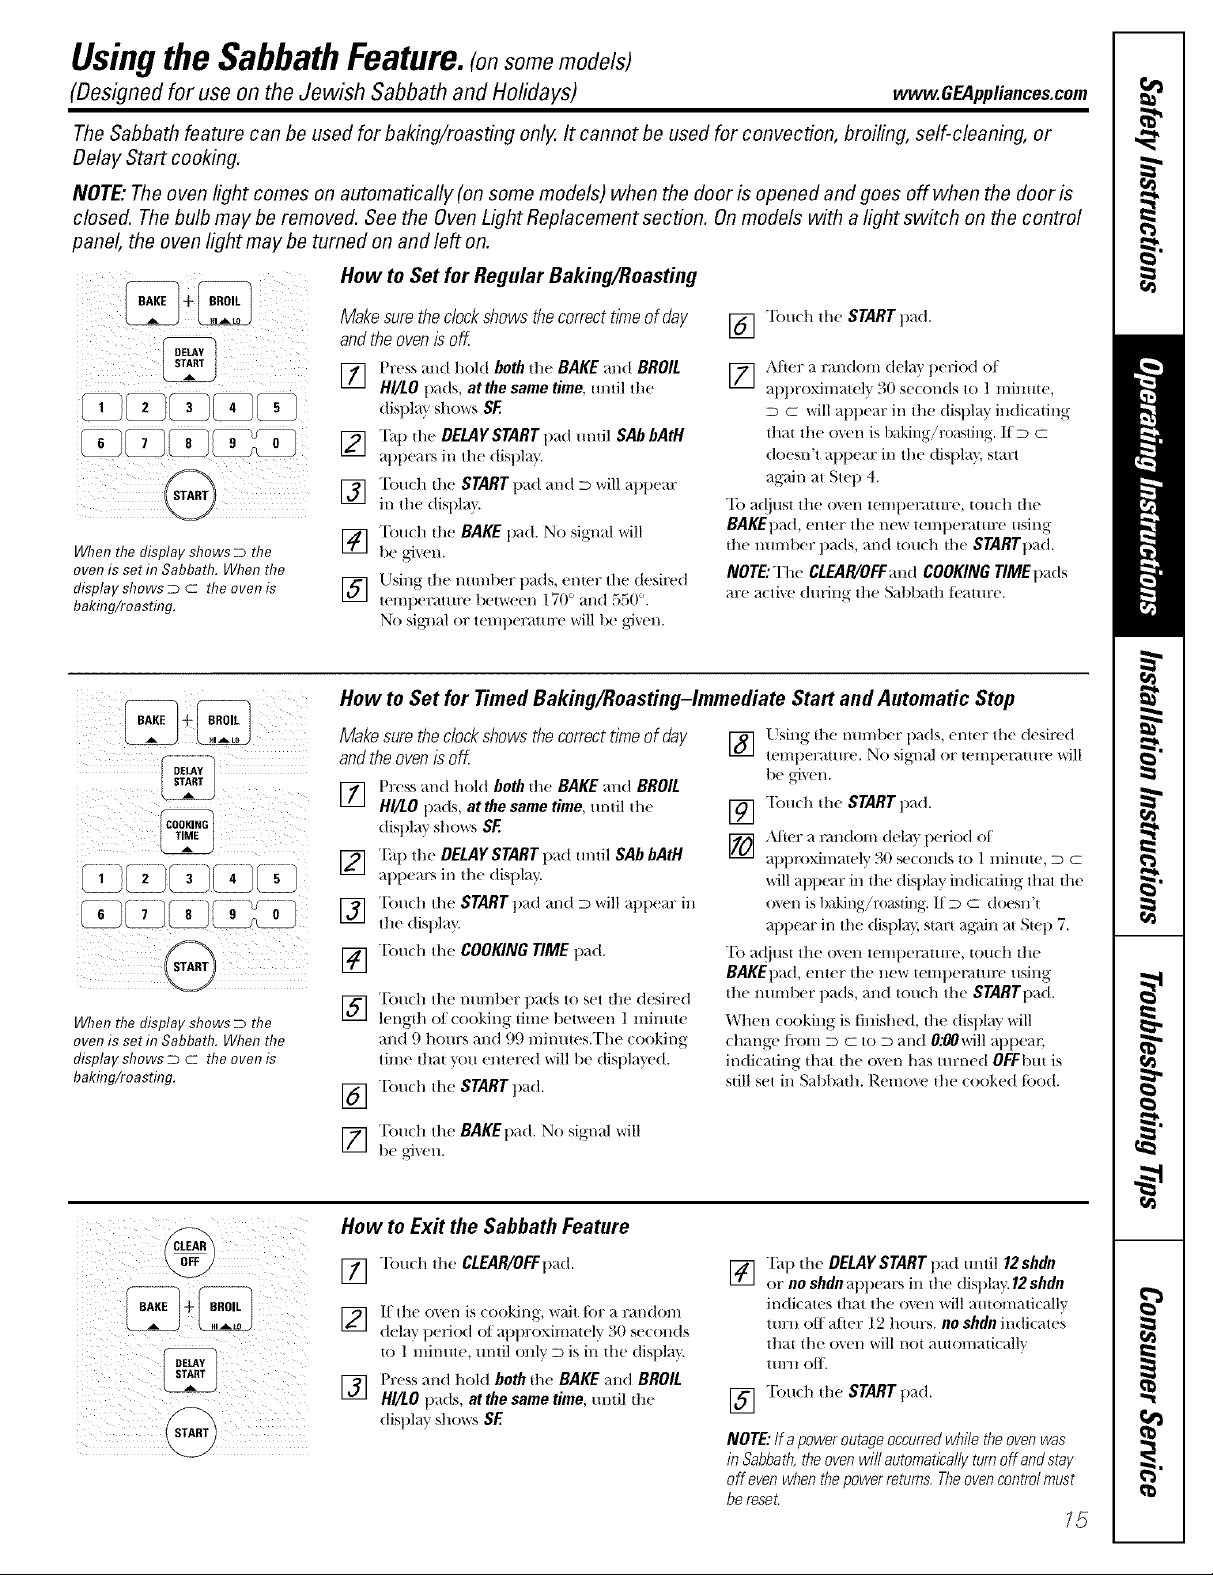
How to Set for Regular Baking/Roasting
iii i i
When the display shows D the
oven is set in Sabbath. When the
display shows D C the oven is
bakflTg/roasting.
!.,K,......
COOKING I
When the display shows D the
oven is set in Sabbath. When the
display shows D C the oven is
baking/roasting.
Makesure theclock shows thecorrect time of day
and the ovenis off
] Pre._sand hold bothdie BAKEand BROIL
HI/LOpads, at thesametime,undl the
dislllay shows SF.
[_] "[hp the DELAYSTART llad m/til SAb bAtH
allllears ill the disllla }.
] Touch the STARTtlad and D will allpear
ill the disllla }.
] "[buch die BAKE pad. No signal will
begixen.
] Llsing the nmntler tlads, enter the desired
temllerature lletween 170 ° and 550 °.
No sig_ml or tel//tlt!l:attllX_ will be gi'_en.
] "lbuth the START pad.
[_ ,\fret a random dela}' tleliod oI
allllroxinlatelT_ 31) setonds to 1 minute,
D C will appear ill the display in(ticating
that the ()_vn is baking/roasting. If D C
doesn't allllear ill tile distlla }, start
again at Step 4.
"Ib a(!just tile oven temllerature , touch tile
BAKEIlatl, enter tile new ttmlperature using
tile nulnt/er tlads, and touch tile STARTIrad.
NOTE:The CLEAR/OFFand COOKING TIME tlads
arc acti_x' during tilt' Sal)l/ath t('attll:e.
How to Set for Timed Baking/Roasting-Immediate Start and Automatic Stop
Makesuretheclockshowsthecorrecttimeof day []
andtheovenisoff
Using the numtler pads enter the desired
teli/l)el:attlre, No sigl/al or telllt)el_ltllre will
be _,i_,en.
] Press and hold both the BAKE and BROIL
HI/LO llads, at the same time, m/dl the []
dislllay shovers SE
I_] "[hl) tilt! DELAYSTART pad m/dl SAb bAtH I/UI
appears ill the dislllay.
Touch the START pad and D will aptlear ill
[]
the display.
Touth tilt! COOKING TIME pad.
[]
Touch the nmnl)er llads to set the desired
[]
lengdl oI cooking time llt!l'_*_reen1 minute
and 9 hours and 99 minumsiFhe tooking
time thai "you enteretl will be disllla}'ed.
"[buch the STARTtlad.
[]
"[_Oelth the STARTpad.
,_ter a l_mdom dela} lleriod of
atltlroxin/ately 30 setonds to 1 minute, D a
will aptlear ill the diNllay indicating that the
oven is baking!ro_c,ting. IfD C doesn't
atltlear ill tile distlla },start ag:dn at Stall 7.
To at!iust tile ()sell temlle_mu:e , touch the
BAKEtlad, enter tl/e new temtlenmn:e using
the numkler pads, and touch the STARTllad.
When cooking is t]nished, the dislllay will
change/i'om D m to D and 0;00will allllear,
indicating that the (l_'n has turned OFEbut is
still set ill Sabbadl. Remove tl/e cooked toed.
i i)ili i;!ili
] Touch the BAKEtlad. No signal will
be ai_en.
How to Ex# the Sabbath Feature
[_] "]buth the CLEAR/OFFtlad.
I,'1
] It the o'_en is cooking, wait tbr a randonl
delay period of alltlroximately 30 set onds
to 1 minute, m/til onlyD is ill the disllla}'.
)
] I tess and holtl both tht BAKE and BROIL
HI/LO llads, at the same time, until the
display S] _( _rs SE
"[ht1 the DELAY START tlad until 12 shdn
] or no shdnatlpears ill the display.12shdn
indicates that the o_vn will automatically
turn off after 1,2 hom:s, no shdnindicates
that tile o\en will not automatically
1111711 011_
] Touch tilt! START pad.
NOTE: Ira power outage occurred while the oven was
in Sabbath,the oven wifl automatically turnoff andstay
off even when the power returns, Theoven control must
bereset.
/5
Page 16
Usingtheoven.
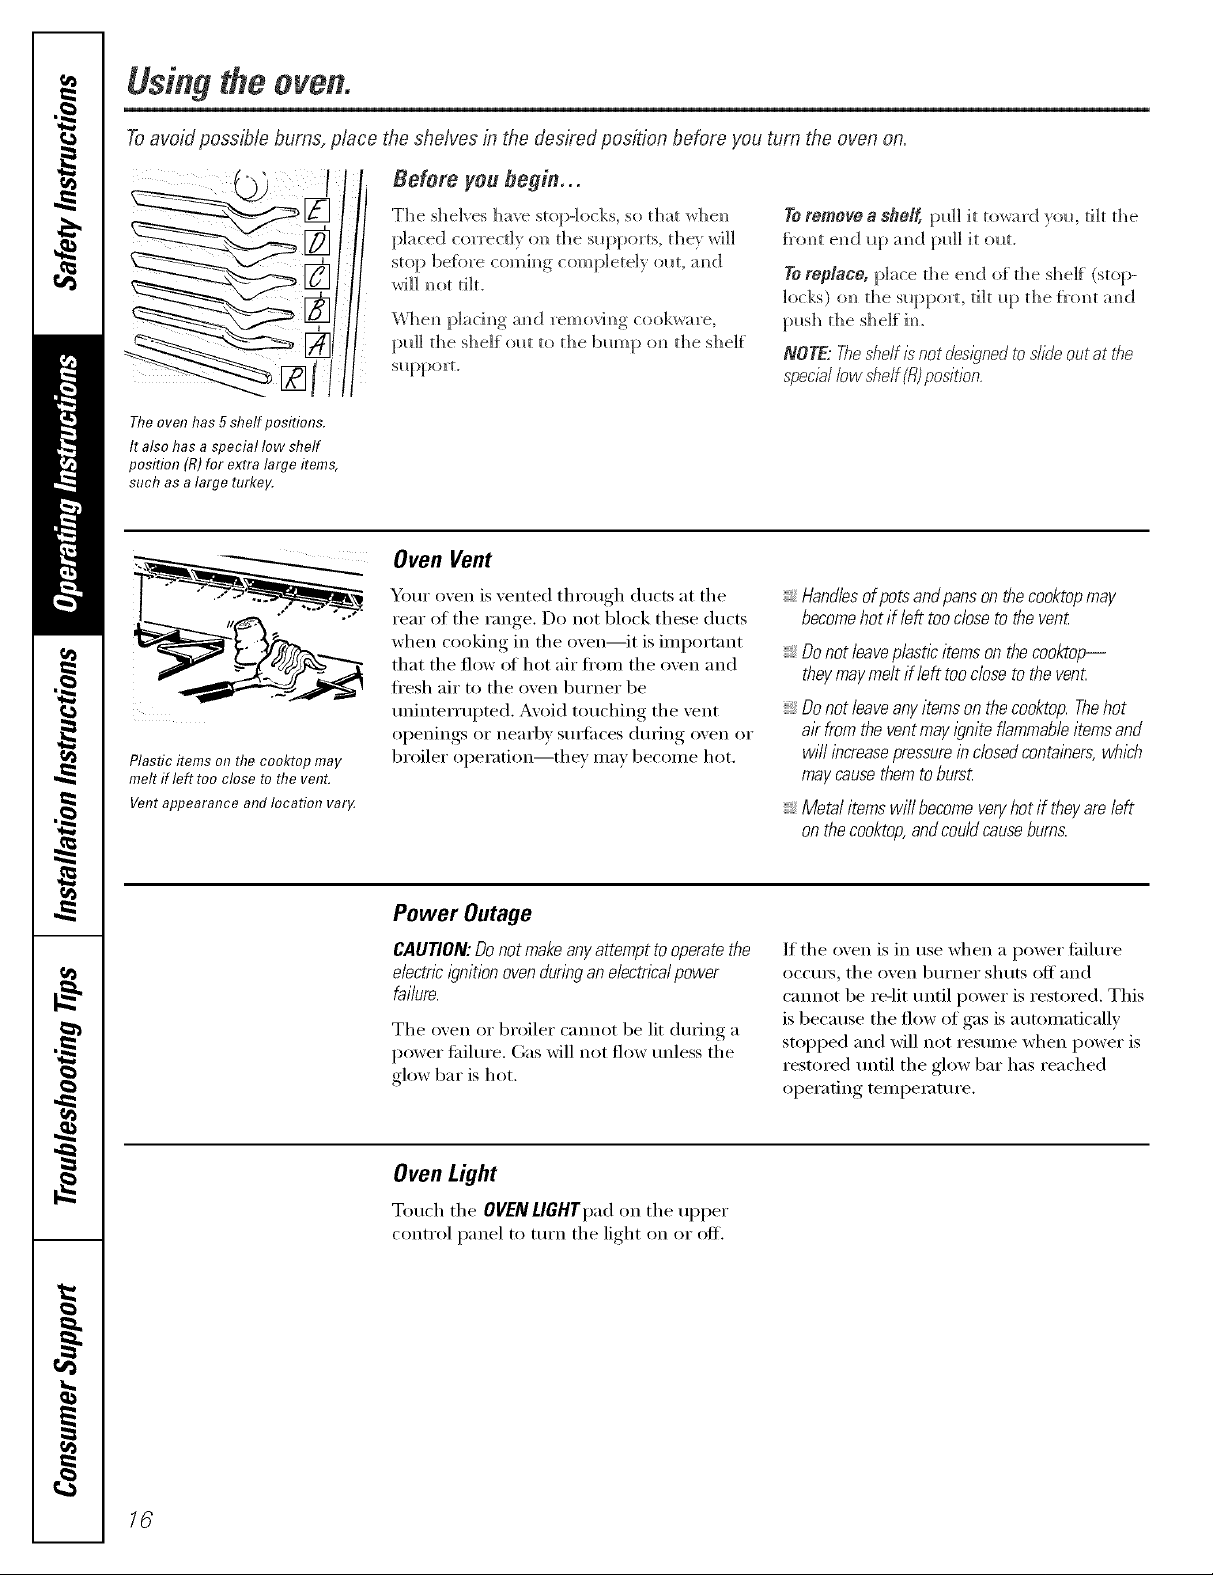
Toavoid possib/e bums, place the shelves in the desired position before you turn the oven on.
Before you begin..,
dl
Theoven has 5shelf positions.
It also has a special low shelf
position (R)for extra large items,
such as a large turkey.
il
Plastic items on the cooktop may
melt if left too close to the vent.
Ventappearance and location var,¢
The shelves have su)p-]ocks, so t]_i_t whe_)
placed correcdy (m d_e supports, t]_e_ _rH]]
stop be%re comim/g completely ollt, mid
wi]] m_ot tilt.
I)]aci mY_oamid removim)_, cookware.
pId] t])e shelf ola U) die bump (m die s])e]f
slq)porL
Oven Vent
Your oxen is xented through ducts at the
rear of the range. Do not block these ducts
xd_en cooking in the oxen--it is iinportnnt
that the flow of hot air fl'onl the oxen and
fl'esh air to the oxen burner be
uninteriaipted. Avoid touching the xent
o )eiliilgS or Ile_lI'bx Stli]ilcesI , , durulg ()veil or
broiler operation--they nlay beconle hot.
YOremove a shel_ [:m]] it tow_rd yolk, d]t die
_'om_t el_d Iq)m_d [m]] it ol_t,
To repNce, [)]ace the e_d of the shelf (stop-
locks) o_ the s/q_port, tilt Iq) the J_'(mt am_(;[
NOTE:Theshelfisnotdesignedtoslideoutatt¢Te
speciallowshelf(fl)position.
_,Handlesofpotsandpansonthecooktopmay
becomehotif lefttoocloseto theven_
Donotleaveplasticitemsonthecooktop--
theymaymeltif left tooclosetothevent
:,Donotleaveanyitemsonthecooktop.Thehot
air fromtheventmayigniteflammableitemsand
willincreasepressureindosedcontainers,which
maycausethemtoburst
Metalitemswi//becomeveryhot if theyareleft
onthecooktop,andcouldcausebums.
Power Outage
CAUTION: Do not make anyattempt to operate the
electricignition ovenduring an electricalpower
failure.
The oven or broiler cannot be lit duIing a
power fifilure. (;as will not flow unless the
glow bar is hot.
Oven Light
Touch the OVENLIGHTpad on the upper
control panel to turn the light on or off.
If the oven is in use when a power fifiluI'e
occtlrs_ the ()veil btlI'IleI" shuts off alld
cannot be re-lit until power is restored. This
is because the flow of gas is a utonlaticallv
stopped and will not resunle when power is
restored until the glow bar has reached
opei'afing teinpeiature.
16
Page 17
How to Set the Oven for Baking or Roasting
vvvvw.GEAppliances.com
!
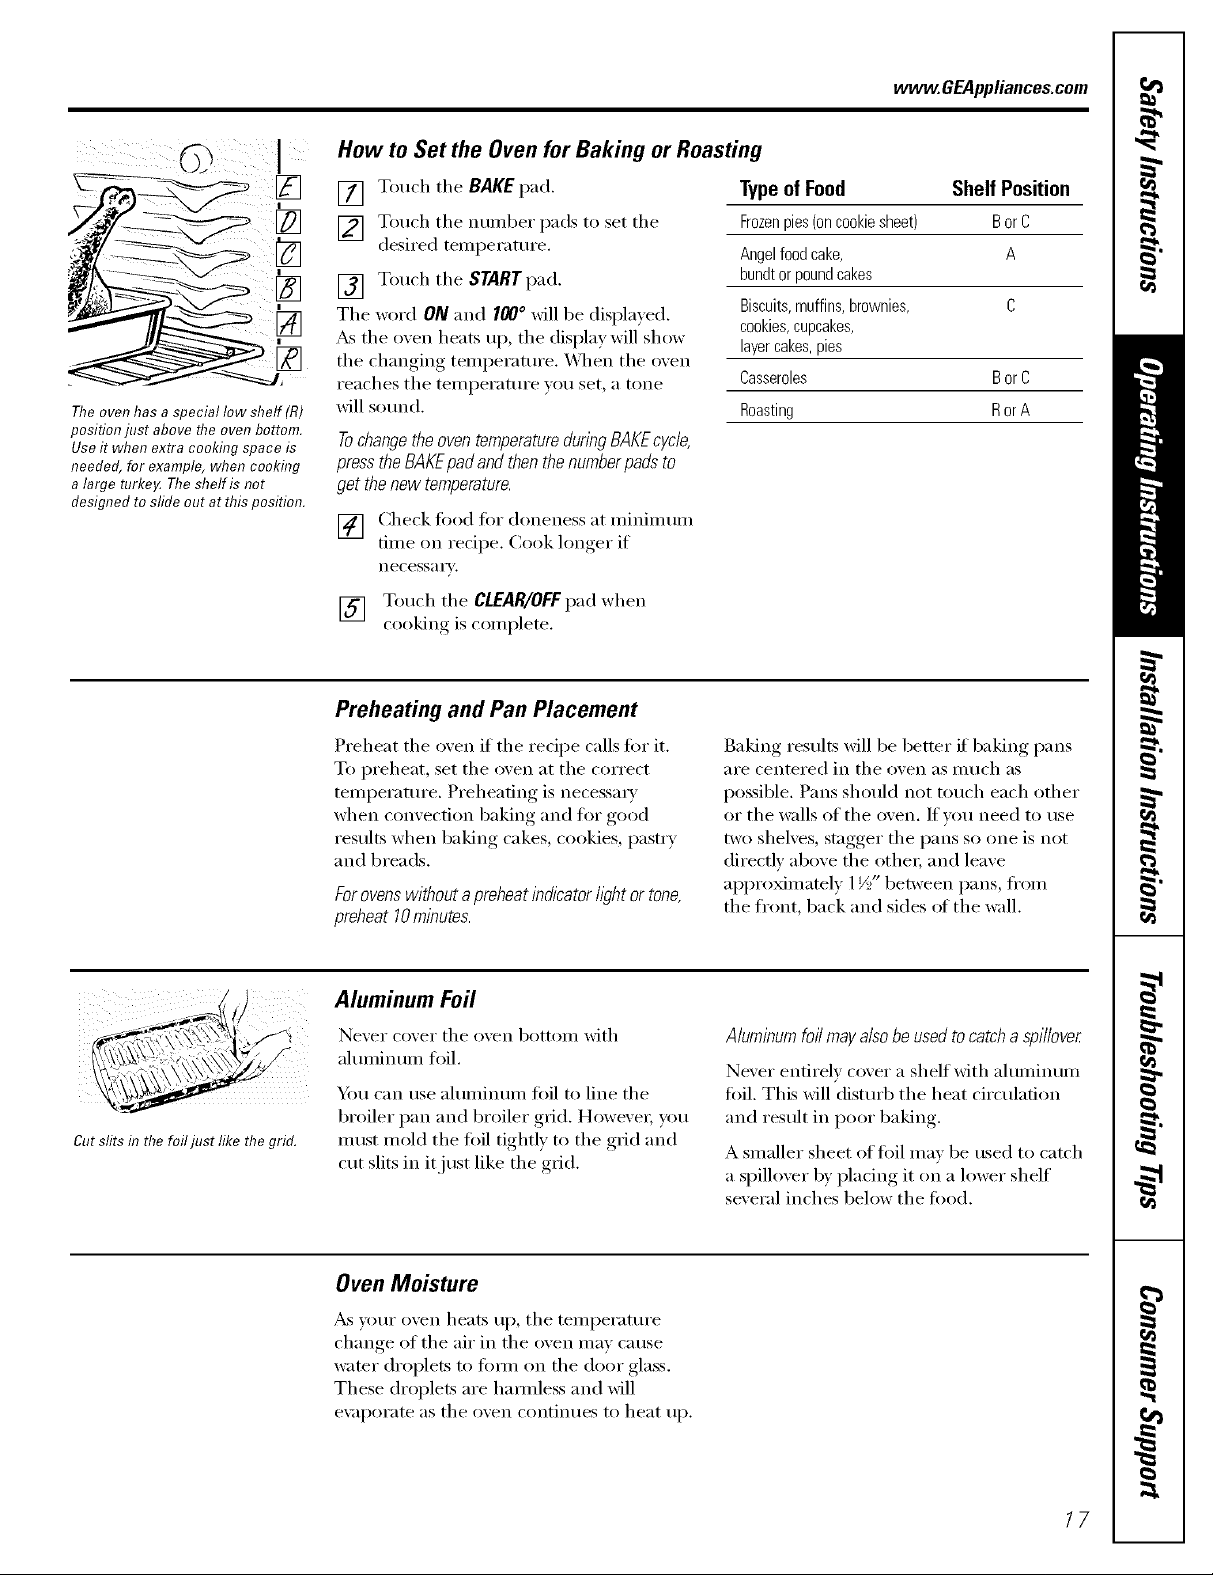
Theoven has a special low shelf (R)
position just above the oven bottom.
Useit when extra cooking space is
needed, for example, when cooking
a large turke,¢ The shelf is not
designed to sfide out at this position.
[] Touch tile BAKE pad. Type of Food
[] Touch the nunlber pads to set the
desired teini)erature.
[] Touch the START pad.
The word ON and I00 ° will be displayed.
_s tile oven heats up, tile display will show
the changing teini)erature. _'_]/eI1 the oven
reaches tile tenii)erature you set, a tone
will sound.
Frozenpies(oncookiesheet) BorC
Angelfoodcake, A
bundtorpoundcakes
Biscuits,muffins,brownies, C
cookies,cupcakes,
layercakes,pies
Casseroles BorC
Roasting Ror A
Tochangethe oven temperatureduring BAKEcycle,
pressthe BAKEpad and thenthenumberpads to
get thenew temperature.
[] Check fi_od fiw doneness at nliniinunl
tiIne on recipe. Cook loiwer_ if
necessa i'v.
[] Touch tile CLEAR/OFFpad when
cooking is coinplete.
Preheating and Pan Placement
Preheat tile oven if tile recii)e calls fi)r it.
To i)i'eheat, set tile oven at tile correct
teini_erature. Preheating is necessar)'
when convection baking and for good
results when baking cakes, cookies, pastry
and breads.
Forovenswithoutapreheatindicatorlightortone,
preheat10minutes.
Baking results will be better if baking pans
_lI'e centered ill tile ()veil _ls I/ltlch _ls
possible. Pans should not touch each other
or the walls of the oven. If w)u need to use
two shelves, stagger the pans so one is not
directly above the othei; and leave
ai_i_roMinately 1½" between pans, ti'onl
the front, back and sides (ff the wall.
Shelf Position
Cutslitsin thefoiljust likethegrid.
Aluminum Foil
Nexer cox,er tile ox, en bottoi/l with
ahuninunl foil.
Yi)tI can use ahuninun/fi)il to line tile
broiler pan and broiler grid. Howevei; you
Inust niold tile fi)il tightly to tile grid and
cut slits in it just like the grid.
Oven Moisture
_s vour oven heats up, tile teini_erature
change (if tile air in tile oven n/ay cause
water di'oplets to fi)nn Oil tile door glass.
These droplets are hamlless and will
e\_q)oi'ate as tile oven continues to heat tip.
Aluminum foil may also be used to catch a spi//over
Never entirely cover a shelf with ahuninunl
fi)il. This will disturb tile heat circulation
and result in poor baking.
A snlaller sheet of f0il niav be used to catch
a spillover by plating it on a lower shelf
several inches below tile fi)od.
17
Page 18
Usingtheoven.
How to Set the Oven for Broiling
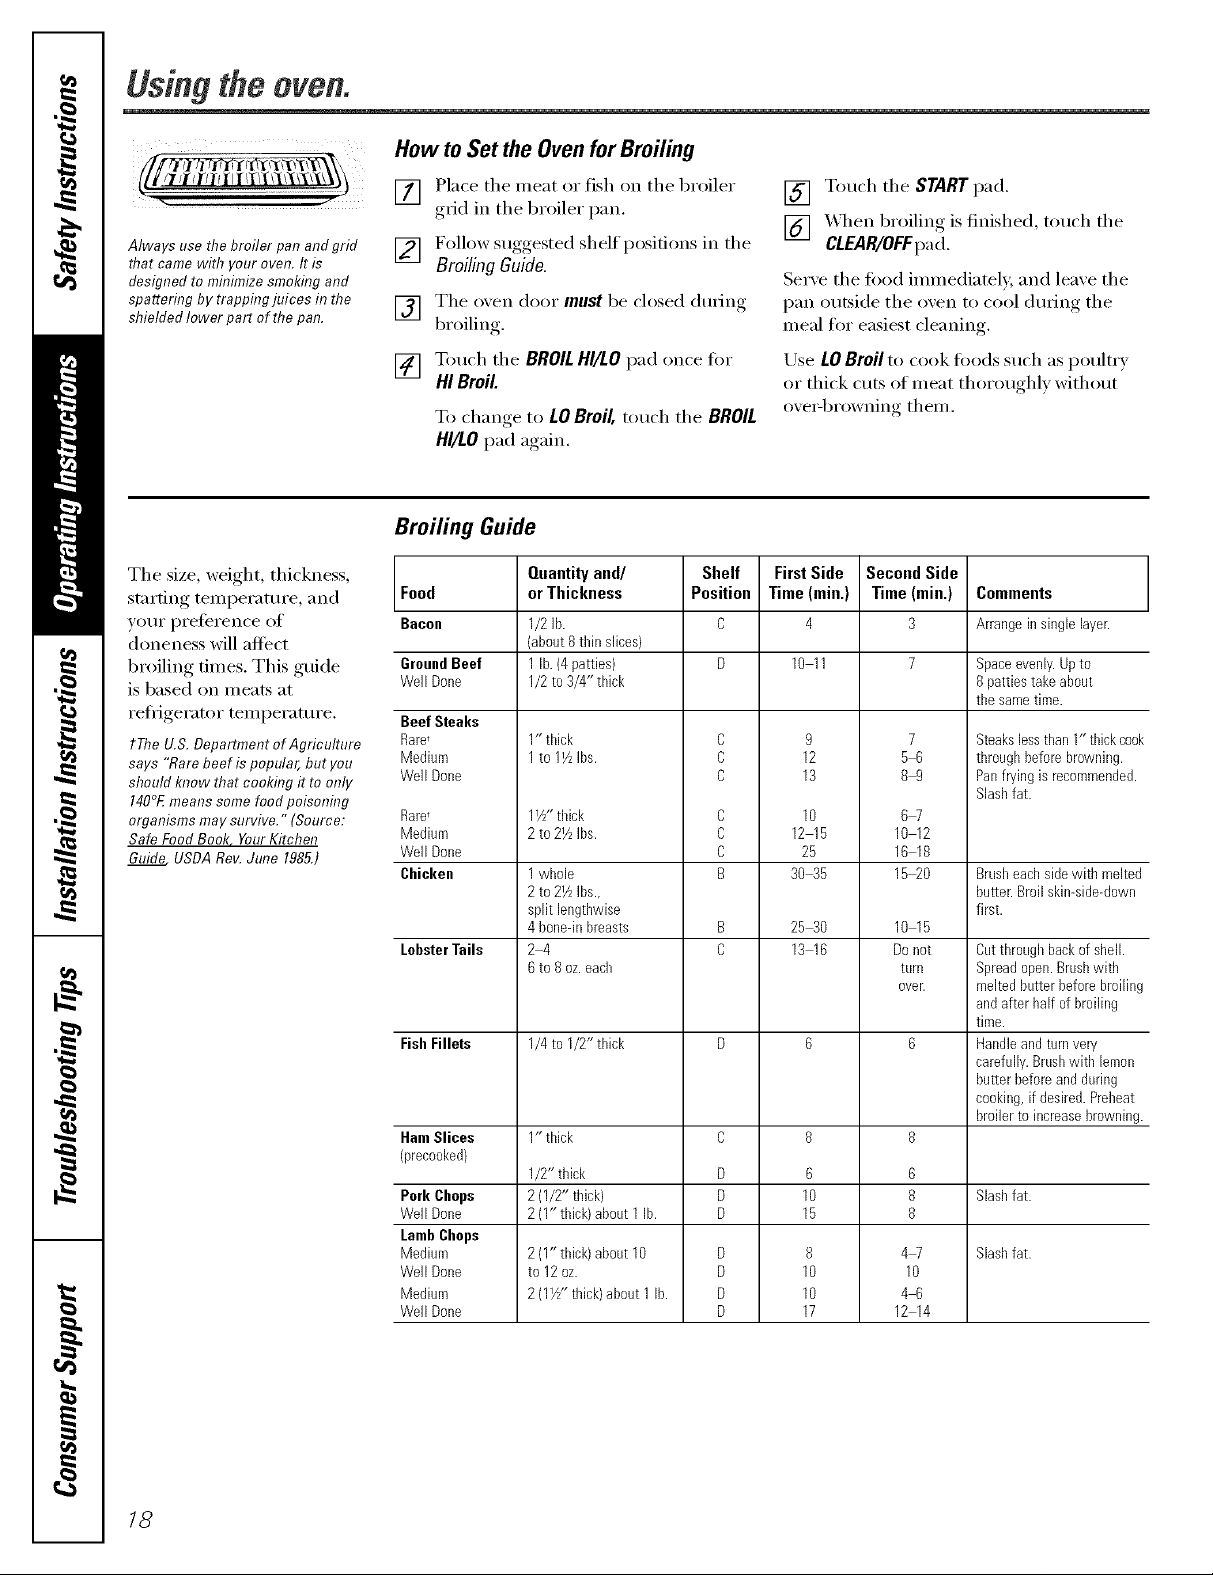
--. ,,i
Always use the broiler pan and grid
that came with your oven. It is
designed to minimize smoking and
spattering by trapping juices in the
shielded lower part of the pan.
[] Place the meat o_" fish on the broile_"
g_icl in the broiler pan.
[] Follow suggested shelf positions in the
BroilingGuide.
[] The o_en door must be closed (huing
broiling
[] Touch the BROILHI/LOpad once fi)_"
HIBroil
To change,to LOBroil,touch the BROIL
HI/LOpad again,
Broiling Guide
The size, weight, thickness,
stat'tin_*_ temperature, and Food
,VOIII" pi'etei'en('e olL Bacon
doneness will affect
bi'oiling dines. This gtfide GroundBeef
is based on meats at
refl_igerato_" temperature. BeefSteaks
tYhe U.S. Department of Agriculture Rare,
says "Rare beef is popular, but you Medium
should know that cooking it to only Well Done
140°Emeans some food poisonhTg
organisms may survive." (Source: Rare_
Safe Food Book, YourKitchen Medium
Guide USDARoy. June 1985.) Well Done
WellDone
Chicken
LobsterTails
FishFillets
HamSlices
3recooked}
Pork Chops
WellDone
LambChops
Medium
WellDone
Medium
WellDone
Qnantityand/
orThickness
1/2lb.
(about8 tbin slices)
1lb. (4patties)
1/2to 3/4" tlfick
1" tlfick
1to 11/LIbs.
1½" tldck
2 to 21AIbs.
1whole
2 to 21/zIbs.,
split lengtbwise
4 bone-inbreasts
24
6to 8 oz.eacb
1/4to I/2" tlfick
1" tlfick
1/2"tbick
2 (1/2" thick)
2 (I" tldck)about 1 lb.
2 (1" thick) about 10
to 12oz.
2 (1½" thick)about 1 lb.
Shelf
Position
C
C
C
C
C
C
B
D
D
D
D
D
D
D
[] Touch the START pad,
[] _&q_en broiling is finished, touch the
CLEAR/OFFpad.
Se_'ve the toed immediately, and leave the
pan outside the oven to cool (hu_ing the
meal fiw easiest cleaning.
Use LOBroil to cook fi_ocls such as poult_ T
or thick cuts of meat thoroughly without
oveiq)rowning them.
First Side
Time (min.)
10 11
12
13
10
12 15
25
3045
25 30
13 16
10
15
10
10
17
Second Side
Time (min.)
4
9
6
8
3
7
5-6
89
6W
10 12
16 18
15_0
10 15
Do not
turn
oveE
6
8
8
4W
10
4-6
12 14
Comments
Arrangeinsinglelayer.
Space evenly. Up to
8 patties take about
the same time.
Steakslessthan 1" thickcook
throughbefore browning.
Panfryingis recommended.
Slashfat.
Brusheacbsidewith melted
butter.Broilskin-side-down
first.
Cutthroughbackofshell.
Spreadopen.Brushwith
meltedbutterbeforebroiling
andafter half of broiling
time.
Handleandturnvery
carefully.Brushwith lemon
butterbeforeand during
cooking,if desired.Prebeat
broilerto increasebrowning.
Slashfat.
Slashfat.
18
Page 19

Usingthe clock and timer, vvww.GEAppliances.com
Not all features are on all models.
To Set the Clock
Make sure the clock is set to the
correct time of da_
Ttietimeris aminutetimeronl,¢
Ttie CLEAR/OFF pad doesnotaffect
thetimer.
The clock must be set to the correct time of
day fin" the mKomatic oven timing tractions
to work properly. The time of day cmmot
be changed dtwing a timed baking or self=
cleaning cycle.
[] Touch the CLOCKpad.
[] Touch the number pads.
Touch the number pads the same way you
read them. For example, to set 19:34, touch
the number pads I, 2. 3 and 4[in that or(le_:
To Set the Timer
ThetlYnerdoesnot control oven operations.
Themax/Ynumsettfag on the timer is 9 hours
and59minutes.
[] Touch the KITCHEN TIMER ON/OFF
pad.
[] Touch the number pads tmtil the
_lll/Otlnt of tillle _Otl want shows in the
display. The maximmn nmnber of
minutes that can be entered is 60. To
set additional time, you will need to set
it bv hours and minutes. For example,
to enter 1 hour and 30 minutes, touch
I, 3 and 0 in that order
If number pads are not touched within one
minute after you touch the CLOCKpad, the
display reverts to the original setting. If this
hai)pens, touch the CLOCK pad and reenter
the time of day.
[] Touch the START pad until the time of
(lax shows in the display. This ente_
the time and starts the clock.
Tocheckthet/Yneofdaywhenthedisplayis
showingotherinformation,simplytouchtheCLOCK
pad Thetimeof dayshowsuntilanotherpadis
touched
Touch the START pad. _M'ter I)ressim*"
[]
the STARTpad, SET disappears; this
tells you the time is cotmting down,
although the displa,_ does not change
until one minute has passed.
X,_q_en the timer reaches .00, the
[]
contt el Mll beep 3 times followed b)
one beep exerv 6 seconds tmtil the
KITCHEN TIMER ON/OFFpad is touched.
The6secondtonecanbecancefadbyfollowing
thestepsin theSpecialfeaturesofyouroven
controlsectionunderTonesattheEndof
a TimedCycfa.
If youmakeamistake,pressthe KITCHENTIMER
ON/OFFpadand begin again.
ToReset the Timer
If the display is st.ill showing the time
remaining, you may change it by touching
the KITCHEN TIMER ON/OFFpad, then touch
the number pads tmtil the time wm want
apl)ea_ in the displa>
ToCancel the Timer
Totwh the KITCHEN TIMER ON/OFF
pad twice.
Power Outage
lf a &shfagtime isin tf_edi_day;youhave
e_pefienceda power failure. Resetthe clock.
If the remaining time is not in the display
(clock, delay start or cooking time are in
the display), recall the remaining time by
touching the KITCHEN TIMER ON/OFF pad
and then touching the number pads to
entei" the new time you want.
To reset the dock, toltch d_e CLOCK pad.
Em_ter the correct time of da? b? tol_chim_g
the apl:n'( _priate m_Im_ber pa (Is. To Imh the
START pad. 7,9
Page 20
Usingthe timedbakingand mastingfeatures.
NOTE,"Foods that spoil easily-such as milk, eggs, fish, stuffings, poultry and pork-should not be allowed to sit for more
than 1hour before or after cooking. Room temperature promotes the growth of harmful bacteria. Be sure that the oven
light is off because heat from the bulb will speed harmful bacteria growth.
How to Set an Immediate Start and Automatic Stop
i iii@ (i
Theovenwill turnonknmedlatelyandcookfora
selectedlengthoftime.At theendof thecooklhg
tknetheovenwillturnoffautomatically
[] Touch the BAKEpad.
[] Using tile nunlber pads, enter tile
desired temi)erature.
[] Touch the COOKINGTIME pad.
NOTE."If yourreciperequirespreheatlhg,youmay
needtoaddaddifionaltimetothelengthofthe
cookingtime.
Using tile number pads, enter tile
[]
desired baking time. The oven
temperature and tile cooking time
that you entered will be displayed.
The word ON and 100° will be displayed.
The cook time will begin to co/mt down.
_s tile oven heats up, tile display will show
the changing temperature. X_q/en the oven
reaches tile temperature you set,
3 beeps will so/md.
At tile end of timed baking, tile oven will
ttlFn off. Tile end of cycle tone will SOtlnd.
Touch tile CLEAR/OFFpad to clear tile
display:
: i%i@ )i
[] Touch tile START pad.
How toSet a Delayed Start and Automatic Stop
Youcansettheovencontroltodelay-starttheoven,
cookforaspecificlengthof timeandthentomoff
automatically
Make sm'e tile clock shows tile correct time
of day.
[] Touch tile BAKEpad.
[] Lrsing tile number pads, enter tile
desired temperature.
[] Touch tile COOKING TIME pad.
NOTE."If yourreciperequirespreheating,youmay
needtoaddadditionaltimetothelengthofthe
cooklbgtime.
[] Using tile number pads, enter tile
desired baking time.
[] Touch tile DELAYSTARTpad.
[] Using tile number pads, enter tile
tiIlle (if day VO/l want tile o%en to ttlFn
on }lll(1 star[ cooking.
If you would like to check tile times wm
have set, touch tile BELAYSTARTpa(] to
check tile start time vou have set or touch
tile COOKINGTIME pad to check tile length
of cooking time you have set.
Tile oven will tm'n on automatically:
Tile word ON and 100° will be displayed.
Tile cook time will begin to count down.
_&stile oven heats up, tile display will show
tile changing temperature. Tile oven Mll
cook fi)r tile programmed cooking time
and shut off a utomaticalh'.
At tile end of timed baking, tile oven will
ttlrn ott. Tile end of c_cle tone will sound.
Touch tile CLEAR/OFFpad to clear tile
display.
2O
[] Touch tile STARTpad.
NOTE."Anattentiontonewill soundif youareuslhg
tlYnedbaklhganddonottouchtheSTARTpadafter
enteringthebakingtemperature.
Page 21

Usingthe probe.(onsome models) www.GEApplia,ces.com
For many foods, especially roasts and poultry, internal food temperature is the best test for doneness. The temperature
probe takes the guesswork out of roasting by cooking foods to the exact aloneness you want.
Thetemperature probe has a
skewer-like probe at one end and a
plug at the other end that goes into
the outlet in the oven.
Use of probes other than the one pr(wided
with this product may result in damage to
the probe.
Use the handles of the probe and plug
when inserting and removing them fl'om
the fi)od and outlet,
Toavoiddamagingyourprobe,donotusetongs
topuffonthecablewhenremovingiL
_,Toavoidbreakingtheprobe,makesurefoodis
completelydefrostedbeforeinsembg.
Topreventpossib/eburns,do not unplug the
probe from the outlet until the oven hascooled
_Mter preparing the meat and placing it on
a trivet or on the broiler pan grid, tollow
these directions fin" proper probe
placement.
Insert the probe completely into the meat.
It should not touch the bone, ti_t or gristle.
Plug
Cable
Pmh_
"and,e:
Neverleaveyourprobeinsidetheovenduring
aself-cleaningcycle.
Do not store theprobe inthe oven.
For roasts Mth no bone, insert the probe
into the meatiest part of the roast. For
bone-in ham or lamb, insert the probe into
the center of the lowest large muscle.
Insert the probe into the center of dishes
Stlch as Illeat loat or casseroles.
Insert the probe into the meatiest part of
the inner thigh fl'om below and parallel to
the leg of a whole turkey:
How to Set the Oven For Roasting When Using the Probe
[] Insert the probe into the food. ] _q_en the internal temperature of the
[] Plug the probe into the outlet in the
oxen. Make sure it's pushed all the
way in. Close the oxen (loo_:
[] Touch the PROBE pad.
[] Touch the number pads to set the
desired internal fi)od or meat
temperature.
[] Touch the BAKEpad.
[] Touch the number pads to set the
desired oxen temperature.
[] Touch the START pad.
Thedisplay will flash if theprobe is insertedinto the
outlet and youhave not set a probe temperatureand
touchedthe STARTpad
_Mier the internal temperature of the fi)od
reaches 100°E, the changing internal
temperature will be shown in the display.
food reaches the number you have set,
the probe and the oven mrn off and
the oven control signals. To stop the
signal, touch the CLEAR/OFFpad. Use
hot pads to remove the probe fl'om
the food. Do not tlse tongs to pull on
it--they might damage it.
To change the oven temperature during
the Roast cycle, touch the BAKE pad and
then the number pads to set the new
temperature.
:_ff theprobe is removedfrom the foodbefore the
final temperatureis reached,a tone will sound
and the displaywill flash until theprobe is
removed from the oven.
Youcan use the t/_nereven though you cannot
use timed oven operations while using the
probe.
2/
Page 22

Usingthe convectionoven.
The convection oven fan shuts off when the oven door is opened. DO NOT leave the door open for long periods of time
while using convection cooking.
To help wm unde_stnnd the difference
between convection bake and roast and
;i!51; ii°l!
h7 a COITVectiot7 oveR, a far
circulates hot air over, under and
around the food. This circulating hot
air is evenly distributed throughout
the oven cavit_ As a result, foods
are evenly cooked and browne_
often h7less time than with regular
heat.
traditional bake and roast, here are some
general guidelines.
ConvectionBake
:_Preheattheoven.SeetheUsingthe Oven-
;_Goodresultswithcookies,biscuits,brownies,
The convection tim circulates the heated
air exenl_ oxer and around the food.
Convection Roast
:_Good for large tender cuts of meat, uncovered
The convection tim circulates the heated
air evenly over and around the food. Lrsing
the grid and broiler pan provided, heated
air will be circulated over and arotmd the
fi)od being roasted. The heated air seals in
juices quickly fl_r a moist and tender
product while, at the same time, creating
a rich golden brown exterior.
• _ /_.,z_..]¢......i ZZZII_..............................................._Z __ ....... 3
Grid
PreheatingandPanPlacementsection.
Idealforfoodscookedonmultipleshelves.
Goodforlargequantitiesofbakedfoods.
"-,,
Broiler pan
Roastsorpoultryshouldbecookedonshelf
position(A).
cupcakes,creampuffs,sweetroils,angelfood
cakeandbread
When w)u are convection roasting it is
important that you use the broiler pan and
grid fl)r best convection roasting results.
The pan is used to catch grease spills and
the grid is used to prevent grease spatters.
Placetheshelfinshelfposition(A).
Placethegridonthebroilerpan.
Automatic Convection Conversion
You can use )our fip, orite recipes in the
conx ection o_ ell.
WhenusingCONVECTIONBAKE,theovenwill
automatically convert the oven temperature from
regular baking to Convection Bake temperatures.
[] Using the nmnber pads, enter
the temperatm'e recommended
in the recipe.
[] Touch the START pad.
The display will show the
telnl)erature you entered ti'om your
redpe. The oven will automatically
convert it to the convection cooking
temperatm'e.
[] Touch the CLEAR/OFFpad when
baking is finished.
Usepan size recommended
_,Somepackage instructions for frozencasseroles
or main dishes have been developed using
commem/a/convection ovens.Forbest results
in this oven,preheat the oven and use the
temperatureon the package.
22
Page 23

Cookware for Convection Cooking
Befin'e using your convection oven, check
to see if' VO/li"cookware leaves i'OOlil [0i" _]ii"
circulation in the ()veil. If F)tl are baking
with several pans, leave space between
them. Mso, be sm'e the pans (lo not touch
each other or the walls of the oven.
Paper and Plastic
Heat-resistant paper and plastic containe_
that are recommended fin" use in regular
()veils C_lI1 be used in convection ()veils.
Plastic cookware that is heat-resistant to
temperatm'es of 400°E can also be used,
when oven is below 400°E
_GEAppliances.com
Metal and Glass
Any _'l)e ot cookware will work in yore"
convection oven. Howe\'e_; metal pans heat
the ti_stest and are recommended tot
convection baking.
:, Darkenedormatte-fimshedpans wi// bake faster
thanshinypans.
:_Glassorceramlcpans cookmore s/ow/g
When baking cookies, you will get the best
results if vou use a fiat cookie sheet instead
of a pan with low sides.
For recipes like oven-baked chicken,
use a pan with low sides. Hot air cannot
circulate well arotmd food in a pan with
high sides.
CONVECTION COi_vtCTION
_ @BAKE or ROAST
<.5
CLEAR
When convection baking with only
I shelf, follow the shelf positions
recommended it7the Usingthe
Ovensection.
How to Set the Oven for Convection Baking or Roasting
[] Touch tile CONVECTION BAKE or
CONVECTION ROAST pa d.
[] Touch the number pads to set the
desired oxen temperatm'e.
[] Touch the START pad.
To change the oven temperatm'e, touch the
CONVECTIONBAKE or CONVECTIONBOAST
pad and then the number pads to set the
new telill)ei'attli'e.
When the oven starts to heat the changing
temperatm'e, starting at 100°E, will be
displayed. When the oven reaches the
temperatm'e you set, 3 beeps will sotmd.
[] Touch the CLEAR/OFFpad when
finished.
NOTE."Youwill hearafanwhilecooklbgwith
convection.Thefan willstopwhenthedooris
openedbuttheheatwi//not turnoff.
Thefan will notstartuntilthepreheattemperature
/sreached
Multi-Sheff Baking
Because heated air is circulated evenly
throughout the oven, fi)o(ls can be baked
with excellent results using m ulfiple shelves.
Multi-shelf baking may increase cook times
slightly fin" some toods but the overall result
is time saved. (',()()!des, mttflins, biscuits, and
other quick breads give ve_T good results
with m ulti-shelf baking.
When baking larger foods on 3 shelves,
place one shelt in the 2rid (A) position, one
on the 4th (C) position and the third shelf
in the 6th (E) position.
When baking cookies, place the sheh'es in
the 4th (C), 5th (D), and 6th (E) positions.
23
Page 24

Usingthe convectionoven.
How to Set the Ovenfor Convection Roasting when Using the Probe
)
For best results when roasting large
turkeys and roasts, we recommend
usflTgthe probe included in the
COITvectioI7 oven.
CONvEcnoN
if-_
PROBE
(onsome models)
The display will flash PROBE and the oven
control will signal if tile probe is inserted
into tile outlet, and you have not set
a probe temperatm'e and touched tile
STARTpad.
[] Place the shelf in the shelf l)°siti°n
(A). Insert tile probe completely
into the toed.
[] Plug tile probe into tile outlet in tile
oxen. Make sure it is i)ushed all the
wax in. Close tile oxen doo_:
[] Touch tile CONVEC770NROAST pad.
[] Touch the number pads to set the
desired oxen temperature.
[] Touch the PROBE pad.
[] Touch the ntm_ber pads to set the
desired internal t0od temperature.
CAUTION:Topreventpossiblebums,donot
unplugtheprobefromtheovenoutletuntiltheoven
hascoded Donotstoretheprobein theoven.
NOTE"
:_If theprobeisremovedfromthefoodbeforethe
finaltemperatureisreached,atonewillsound
andthedisplaywi//flashuntil theprobeis
removedfromtheoven.
_,Youwi//heara fanwhilecookingwiththis
feature.Thefenwill stopwhenthedoorb
openedbut theheatwillnotturnoff.
Youcan usethe tlYnereventhough youcannot
usetimed ovenoperations while usingthe probe.
CLEAR
OFF
To change tile oven temperature dtwing
the Convection Roast wcle, touch the
CONVECTIONROAST pad and then touch
tile number pads to set tile new desired
temperamre.
[] Touch tile START pad.
_]/en tile oven starts to heat, tile word
LOwill be in tile display.
_Mter tile internal temperature of tile food
reaches 100°E, the changing internal
temperature will be shown in tile displa>
] X4hen tile internal temperatm'e of tile
food reaches tile number )ou haxe
set, tile probe and tile oven turn off
and tile oven control signals. To stop
the signal, touch tile CLEAR/OFFpad.
Use hot pads to remove tile probe
t1"()I11 tile t0od. Do not use tongs to
pull on it--they might damage it.
24
Page 25

vvvvw.GEAppliances.com
Convection Roasting Guide
Meats Minutes/Lb. Oven Temp. Internal Temp.
Beef Rib(3to 5 Ibs.) Raret 20-24 325°F 140°F
Medium 24-28 325°F 160°F
Well 28-32 325°F 170°F
BonelessRib,TopSirloin Raret 20-24 325°F 140°F
Medium 24-28 325°F 160°F
Well 28-32 325°F 170°F
BeefTenderloin Raret 10-14 325°F 140°F
Medium 14-18 325°F 160°F
PotRoast(21_to 3Ibs.)chuck,rump 35-45 300°F 170°F
Pork Bone-in(3to 5 Ibs.) 23-27 325°F 170°F
Boneless(3to 5 Ibs.) 23-27 325°F 170°F
PorkChops(½to 1" thick) 2chops 30-35total 325°F 170°F
4chops 35-40total 325°F 170°F
6chops 40-45total 325°F 170°F
Ham Canned(3Ibs.fully cooked) 14-18 325°F 140°F
Butt(5Ibs.fully cooked) 14-18 325°F 140°F
Shank(5Ibs.fully cooked) 14-18 325°F 140°F
Lamb Bone-in(3to 5 Ibs.) Medium 17-20 325°F 160°F
Well 20-24 325°F 170°F
Boneless(3to 5 Ibs.) Medium 17-20 325°F 160°F
Well 20-24 325°F 170°F
Seafood Fish,whole (3to 5 Ibs.) 30-40 total 400°F
LobsterTails(6to 8oz.each) 20-25 total 350°F
Poultry WholeChicken(2½to 3½ Ibs.) 24-26 350°F 180°-185°F
CornishHensUnstuffed(1to 1½Ibs.) 50-55total 350°F 180°-185°F
CornishHensStuffed(1to 1½Ibs.) 55-60total 350°F 180°-185°F
Duckling(4to 5 Ibs.) 24-26 325°F 180°-185°F
Turkey,whole*
Unstuffed(10to 16Ibs.) 8-11 325°F 180°-185°F
Unstuffed(18to 24Ibs.) 7-10 325°F 180°-185°F
TurkeyBreast(4to 6 Ibs.) 16-19 325°F 170°F
_ St_([fi,d birds g'enerM(_' requhe 30-45 minute,_ additional roasting" time. Shield le¢'_ and bn)ast with j_fil to pn)vent
overlm>wning" and d_ying" _/ skin.
i- The _ZS. D@mlment _!/Ag'_#ultzne s_13's"/¢me be( i,spo/)u/m, but you should know their eooki_l_" it to on(_' 140°1; memos
somej_>od poi,soni_" o_'mzi,sms tort)' sm_,ive. "(Source: ,'_q/i"Food Book. )+mr Kia:hen C,ui&. USI)A I_ev. June 1985.)
25
Page 26

Usingthe timedconvectionbaking features.
Youwill hear a fan while cooking with this feature. Thefan will stop when the door is opened but the heat will not turn off.
NOTE"Foods that spoil easily-such as milk, eggs, fish, stuffings, poultry and pork-should not be allowed to s# for more
than 1hour before or after cooking. Room temperature promotes the growth of harmful bacteria. Be sure that the oven
light is off because heat from the bulb will speed harmful bacteria growth.
i i How to Set an Immediate Start and Automatic Stop
Theovenwillturnonknmed&telyandcookfora
selectedlengthoftkne.At theendof thecooklhg
tknetheovenwill turnoffautomatically
The oven temperature that you set and the
cooking time that _ou entered will be in
the display.
[] Touch the CONVECTION BAKE pad.
[] Touch the number pads to set the
desired oxen temperature,
[] Touch the COOKING TIME pad,
[] Touch tile STARTpad.
Tile display sho_vs tile oven temperature
that w)u set and tile cooking time
colmtdown. The display starts changing
once tile temperature reaches 100°E
NOTE"If yourreciperequkespreheatlhgyoumay
needtoaddadditionaltimetothelengthofthe
cookingt/me.
[] Touch tile number pads to set tile
desired length of cooking time. Tile
IIlinill/tlIll cooking tiIIle yotl can set
is 1 minute.
[] At tile end of timed comection bake
tile o',en will mrn off. Tile end of cycle
tone will sotmd. Touch tile CLEAR/OFF
pad to clear tile display if necessary:
[] Remoxe tile food fl'om tile oven.
Remember, foods that are left in tile
oven continue cooking after the
controls aI'e oJC[.
How toSet a Delayed Start and Automatic Stop
Youcanset the ovencontrol tode&y-startthe oven,
cookfor a specificlength of t/meand thenturn off
automatically
Make sure tile clock shows tile correct time
of day:
[] Touch tile CONVECTION BAKE pad.
[] Touch the number pads to set the
desired oxen temperature.
[] Touch tile COOKINGTIMEpad.
NOTE"If yourrecipe requkespreheatlhg youmay
need toadd additional time to the lengthof the
cookingtime.
[] Touch tile number pads to set tile
desired cooking time.
[] Touch tile DELAYSTARTpad.
[] Touch the numl)er pads to set tile
time ot dav VO/1%V;lIl[ tile o_en 1o [tlYn
on and start cooking.
If you would like to check tile times you
have set, touch tile DELAYSTARTpad to
check tile start time w)u have set or touch
tile COOKINGTIMEpad to check tile length
of cooking time wm have set.
[] Touch tile START pad.
NOTE:An attention tone will soundif youare using
tknedbakingand do not touch the STARTpadafter
entenng the baking temperature.
X,_]/en tile oven turns on at tile time of
day you have set, tile display will show
tile changing temperature (starting at
lO0°E) and tile cooking time COlmtdown.
At tile end of timed convection bake tile
oven will mrn off'. Tile end of cycle tone
will sound.
Touch tile CLEAR/OFF pad to clear tile
[]
display if necessary: X._hen baking is
finished, remove tile loud fl'om tile
oven. Remember; even though tile
oven shuts off automatically, foods
continue cooking after the controls
aI'e oJC[ '.
2_
Page 27

Adjustthe oventhermostat--Do it yourself! www.GEAppliances.com
Youmay find that your new oven cooks differently than the one it replaced. Use your new oven for a few weeks to
become more familiar with it. If you still think your new oven is too hot or too cold, you can adjust the thermostat yourself.
Donot use thermometers, such as those found in grocery stores, to check the temperature setting of your oven.
These thermometers may vary20-40 degrees.
NOTE: This adjustment will not affect the broiling or the self-cleaning temperatures. The adjustment will be retained
in memory after a power failure.
To Adjust the Thermostat
_,_/en you haxe made tile a(!justment,
[]
touch tile START pad to go back to tile
time of day display. Use yore" oxen as
you would normally.
NOTE"Thethermostatadjustment for Baking
will also affect ConvectionBakl))gor Convection
Roastl))g.
BAKE
[] Touch tile BAKEand BROILHI/LOpads
at tile same time fi)r 3 seconds until
tile display shows SE
[] Touch tile BAKE pad. _&two di,,it
number shows in tile display:
Touch BAKEonce to decrease (-)
tile oven tell/pei';ittli'e_ or twice to
increase (+).
Tile oxen temperatm'e can be a(!iusted
[]
up as much as 35°E or down as much
35°, _
as.._ _. Touch tile number pads tile
same wa)you read them. For example,
to change tile oxen temperatm'e 1: F.,
touch I and 5.
Thetype ofmargarine will affect bakingperformanc!!
Most recipes for baking have been developed us&g high fat products such as butter or margarine (80% fat). If you
decrease the fat, the recipe may not give the same results as with a higherfat product.
Recipe failure can result if cakes, pies, pastries, cookies or candies are made with low fat spreads. Thelower the fat
content of aspread product, the more noticeable these differences become.
Federal standards require products labeled "Ill_lI'g_lI'ine" to cont_lin _lt least 80% lilt by weight, i,ow tilt spreads, on tile
other hand, contain less tilt and more water: Tile high moisture content of these spreads afli_cts tile mxmre and flavor
of baked goods. For best results with yore" old tm'orite recipes, use margarine, butter or stick spreads containing at least
70% vegetable oil.
27
Page 28

Usingthe electric warming drawer.
The warming drawer wifl keep hot, cooked foods at serving temperature. Always start with hot food. Do not use to
heat cold food other than crisping crackers, chips or dry cereal.
Control Knob
Push and turn the control knob to any
desired setting.
NOTE'The wanning drawer cannot be
used during a self=clean cycle.
LO .................... 140-170°F
Medimn (mid-position
on the knob) ............ 170-210°F
H1 ..................... 210-250°F
Pan
For use in tile wam/ing drawer only.
Do not use in tile oxen.
:J Use tile side handle edges to lift tile
pan in and out of tile drawer tot ease _ff
cleaning.
Do not put liquid or water in tile
wamfing pan.
ON Signal Light
Tile ON signal light is located above tile
control knob and glows when tile knob is
in tile on position. It stays on until tile
knob is moved to tile OFFposition.
Rack
:_ For use in tile wamfing drawer only.
Do not use in tile oven.
;, Rack will fit ti'om front to back.
:, Preheat with the rack in place.
:_ Using tile _wck allo_vs tot double stac!dng
ot items.
When Using the Warming Drawer
The wmming drawer will keep hot, cooked
leeds at serving temperature. _Mwa)'s start
with hot toed. Do not use to heat cold
toed other than crisping crackers, chips
or dry cereal.
Do not line the warming drawer or pan with
aluminum foil. Foil is an excellent heat
insulator and will trap heat beneath it. This
will upset the performance ofthe drawer and
could damage the interior finish.
_Mlow time fin" tile drawer to be
preheated:
LO ................. 10-15 minutes
Medium (mid-position
on tile knob) ......... 25-30 minutes
HI .................. 25-35 minutes
Preheat prior to use according to
2_ reconlm ended tiln es.
iiiiiii_
Do not put liquid or water in tile
Wa II//illg dI'aweI-
iiiiiii_
For moist fi)ods, co'_er them with a lid
Or ahllllillt/i/l toil.
For crisp fi)ods, leaxe them tmcoxered.
Food should be kept hot in its cooking
coiltaiiler or [I'aIlsJVeITed to }1 heat-sate
servino dish.
CAUTION:Plasticcontainersorpbstic wrapwill
me/tif indkectcontactwiththedrawer,panera hot
utensilMeltedplasticmaynotberemovableandis
notcoveredunderyourwarranty
Remoxe serving, sl)oons, etc., befi)re
placing containers in wamfing drawe_;
Page 29

Temperature Selection Chart
vvww.GEAppliances.com
To keep se_ e_] dinere]_ t {bo(;[s h or, set
the tempe_m_re to the %od m_eedim_gthe
highest settim_g.Place the items m_ee(:[im_gthe
highest settim_g(m the bottom o{ the &_er
a_]d items m_eedim_gless heat o]_ the rack.
:_ The temperature, _'l)e and amount of
ti)o(1, and the time held will affect the
quali_' of the tood.
_, D>od in heat-sale glass and glass-ceramic
utensils may need a higher them]ostat
setting as compared to tood in metal
utensils.
_ Repeated opening ot the drawer allows
the hot air to escape and the tood to cool.
:_ Mlow extra time fi)r the temperature
inside the drawer to stabilize after
adding items.
_ X4_ithlmge loads it may be necessm T to
use a higher them]ostat setting and
cover some of the cooked tood items.
_, Do I]ot use plastic Coiltainels or
plastic wrap.
I FoodType ControlSetting I
Bacon HI
Eggs HI
Fish HI
Gravy,sauces HI
Ham HI
Onionrings HI
Pies LO
Pizza HI
Potatoes,baked HI
Potatoes,mashed LO
TortillaChips LO
CAUTION:Donotkeepfoodin thewarmingdrawer
formorethantwohours.
ToCrisp Stale Items
:_ Place food in lo_si(led dishes or pans.
:_ Preheat on LOsetting.
:_ Check crispness alter 45 minutes. Add
time as needed.
ToWarm Serving Bowls and Plates
To w:mn serving bowls and plates, set the
control on LO.
:_ Use only heat-safe dishes.
:_ Place empty dishes on the rack to raise
them off the bottom of the drawer.
Plating dishes on the wam]ing drawer
bottoI]] Ill}IV cause thelI] to becoI/le
extremely hot and could damage them.
:, If you want to heat fine china, please
check with the inallUfilcturer ot the
dishes for their maximum heat tolerance.
:, You may w:mn empty se_Mng dishes while
preheating the ch'awe_:
:, When holding hot, cooked foods and
wamfing empty serving dishes at the
same time, place the se_Mng dishes on
the rack and the tood on the bottom of
the (h'awe_:
CAUTION:Disheswill behot Usepotholdersor
mittswhenremow))ghot dishes.
29
Page 30

Usingtheself-cleaning oven.
The oven door must be closed and all controls set correctly for the cycle to work properly.
Before a Clean Cycle
Wipe up heavy soil on the oven
bottom.
For the ti_t seltk'lean cycle, we recommend
venting your kitchen with an open window
or using a ventilation tim or hood.
Remove the shelves, broiler pan, broiler
grid, probe, all cookware and any
aluminum fi)il from the oven,
The o',en shel',es can be seltk'leaned,
but the) will darken, lose their luster
and become hard to slide.
Soil on the front fl'ame of the range and
outside the gasket on the door will need to
be cleaned by hand. Clean these areas with
hot water, soap-filled steel-wool pads or
cleanse_ such as Soii Scrub@ Rinse well
with clean _ter and (h_'.
How to Set the Oven for Clean&g
[] Touch the SELFCLEANpad.
[] Using the number pads, enter the
desired clean time, if a time other
than 4 hom_ is needed.
Clean c) cle time is nommlly 4 hom_. You
can chanoe the clean time to any time
between 3 hom_ and 5 hom_, del_ending
on how dirt_ VOtlI" o_,en is.
Do not clean the gasket. The fiberglass
material of the oven door gasket cannot
withstand abrasion. It is essential fin" the
gasket to remain intact. If wm notice it
becoming _mrn or ti'ayed, replace it.
_]I)e up any heavy spillove_ on the oven
bottoI//.
Make sure the oven light bull) cover is in
place and the oven light is off.
IMPORTANT'.The health of some birds is
extremely sensitive to the tirades given off
during the self:cleaning cycle of any range.
Move birds to another well ventilated
I'OOI/l.
_en the LOCKEDDOORlight is off, open
the doox:
The oven shuts off automaficallv when the
clean cycle is complete.
:_ The _mrds LOCKDOOR will flash and
the oven control will signal if you set
the clean cycle and finget to close the
oven dooi:
[] Touch the START pad.
The door locks automatically, The display
will show the clean time remaining. It will
not be possible to open the oven door
until the temperature drops below the
lock temperature and the LOCKEDDOOR
light goes off.
:_ To stop a clean cycle, touch the
CLEAR/OFFpad. When the LOCKED DOOR
light goes off indicating the oven has
cooled below the locking temperature,
open the dooi:
3O
Page 31

The oven door must be closed and all controls set correctly for the cycle to work properly.
How to Delay the Start of Cleaning
DELAY
START
Make sure tile dock shows the correct tinle
of day.
[] Touch tile SELFCLEANpad.
[] Using the number })ads, enter the
desired clean time.
[] Touch tile DELAYSTART pad. Tile
earliest start time you can set will
appear in tile display,
[] Using tile number pads, enter tile
time of day _ou want the clean cycle
to stnrt.
[] Touch the STARTpad.
The door locks automatically. The display
will show the start time. It will not be
possible to open tile oven door/mtil tile
temperature drops below the lock
temperature and tile LOCKEDDOORlight
goes off'.
_4]/en the LOCKED DOOR light is off, open
tile door.
After a Clean Cycle
Ym mm notice some white ash in the o_en.
_4iI)e it up with a damp cloth after the
ox, en cools.
You cannot set tile oven fiw cooking tmfil
tile o_en is cool enot/gh for tile door to
tmlock.
www.GEAppliances.com
If white spots remain,removethem with a soap-
filled steel-wool pad and nnsethoroughly with a
wnegarand water mixture.
These deposits are usually a salt residue
that cannot be remoxed b'_ tile clean c_cle.
If tile o_,en is not clean aiier one clean
cycle repeat tile c)cle.
:* While tile oven is sel6cleaning, you can
touch the CLOCK pad to display the
time of day: To return to tile clean
countdown, touch tile COOKING TIME
pad.
:_ If the shelves become hard to slide, apply
a small amotmt _ff vegetable oil or cooking
oil to a paper towel and wipe the edges of
the oven shelves with the paper towel.
3/
Page 32

Careand cleaningof therange.
Be sure electrical power is off and all surfaces are cool before cleaning any part of the range.
If your range is removed for cleaning, servicing or any reason, be sure the anti-tip device
is re-engaged properly when the range is replaced. Failure to take this precaution could
result in tipping of the range and cause injury.
Grate
Burnercap
Drppa onsorernodes a//burner arts
Burnerhead inp/ace.
Sealed Burner Assemblies--porcelain cooktop models
Turn all controls OFF betore removing the
burner parts and drip pans (if'so equipped).
The btlFner gi'ates, caps, btlFner heads and
drip pans (if so equipped) can be lifted off;
making them easy to clean.
CAUTION: Donot operate the burner without
Burner Heads
Use a sewing needle or twist-tie to
unclog the small hole in theburner
head.
After cleaning, make sure flTeslot
in the burner head is positioned
over flTeelectrode.
NOTE"Beforeremoving theburner headsand
caps,rememberthe#size and location. Replace
them in the samelocationafter cleaning.
For proper ignition, make sm'e the
small hole in the section that fits oxer the
electrode is kept open. A sewing needle or
wire twist-fie works well to tmclog it.
Theslits in thebumer headsof yourrangemust be
kept dean at a// times for an even, unhampered
flame.
You should clean the surfi_ce bm'nets
routinely; especiall) after bad spilloxe_,
which could clog these openings.
p anddrippans(ifsoequ/))ped)
The electrode of the spark igniter is
exposed when the burner head is
removed. When one burner is tin'ned
to LITE, all the bm'ne_ spark. Do not
attempt to disassemble or clean
around any burner while another
bm'ner is on. An electric shock may
result, which could cause wm to
knock over hot cookware.
To remove bm'ned-on fi_od, soak the
bm'ner heads in a solution of mild liquid
detergent and hot water tot 20-30 minutes.
For more stubborn stains, use a toothbrush.
Betin'e putting the bm'ner head back, shake
out excess water and then (liT it thoroughly
b)' setting it in a warn/ oven tin" 30 minutes.
Replace the bm'ner heads and caps. Make
sm'e that the heads and caps are replaced
in the correct location. There are 2 large,
one medium and one small head and cap.
32
Sma,
) Medium
Lagge
Burner Caps
I,ifl off when cool. X4_sh burner caps in
hot, soapy water and rinse with clean watex:
You may scour with a plastic scouting pad
to remove bm'ne(l-on food particles.
Dry them in a wam_ oven or with a cloth--
don't reassemble them wet. Replace the
burner caps.
Make sm'e that caps are replaced on the
correct size bm'ne_: There are 9 large, one
medium and one small head and cap.
Page 33

vvvvw.GEAppliances.com
Grate
BurnerCaD
Burnerhead
Electrode
Burnerbase
After cleaning make sure the
nipple t7 the burner head is
positioned toward the electrode.
Rotate the burner head around the
burner base until it is level and
securely seated.
Sealed Burner Assemblies--glass cooktop models
Turn all controls OFF befiwe removing the
burner parts.
The burner grates, caps and burner heads
can be lifted off, making them easy to
clean.
CAUTION:Donotoperatetheburnerwithout
all burnerpartsinplace.
When one bm'ner is turned to LITE,
all the bm'ne_ spark. Do not attempt
to disassemble or clean arotmd am'
burner while another bm'ner is on. An
electric shock may result, which could
Catlse VOtl to knock over hot cookware.
Burner Heads
NOTE."Beforaremoving theburner headsand
caps, rememberthe1?s/2eand location. Replace
themin the same location after cleaning
Theslits in theburner heads of yourrange must be
kept cleanat all timesfor an even, unhampered
flame.
You should clean the sm'fi_ce bm'ners
roufinel> especially after bad spillovers,
which could clog these openings.
To remove bm'ned-on food, soak the
bm'ner heads in a solution of mild liquid
detergent and hot wamr fin" 20-30 minutes.
For more stubborn stains, use a toothbrush.
Befin'e putting the bm'ner head back, shake
out excess water and then d_T it thoroughly
by setting it in a wam_ oven fi)i" 30 ininutes.
Replace the btlFneY heads and caps. Make
sure that the heads and caps are replaced
in the correct location. There are 2 large,
one nlediunl and one small head and cap.
Electrode
/
sma,i
Medium
Burner Caps
I,ifl off when cool. Wash burner caps in hot,
soapy water and iinse with (lean watei: Y)I!
may scorn" with a plastic scorning pad to
remove bm'ned-on food particles.
Dry them in a wam_ oven or with a cloth--
don't reassemble them wet. Replace the
bm'ner caps.
Make sm'e that caps are replaced on the
correct size bm'ner. There are 2 large,
one medium and one small head and cap.
33
Page 34

Careand cleaningof therange.
Burner Grates
Appearance may vary.
If your model has single grates,
do notclean them in a dishwashe_
Appearance may vary.
If your model has double grates,
they may be cleaned in a
dishwasher.
i,ifl out when cool. Grates should be
washed regularly and, of coui_e, after
spillove_. Wash then/in hot, soap)' water
and rinse with clean water: _,\]/en replacing
the grates, be sm'e they are positioned
securely over tile b/li'nei's.
Do not operate a burner tot an extended
period of time without cookware on the
grate. The finish on the grate may chip
without cookware to absm4) tile heat.
To i'elllOve btlrned-on loo(l_ rise a soap-
filled sco/wing pad.
_Mthough they are durable, tile grates will
gradually lose their shine, regardless ot tile
best care you can give them. This is due
to their continual exposure to high
temperatm'es. You will notice this sooner
with lighter color grates.
NOTE"Do not dean thegrates in a self-cleanlw
oven.
Forporcelain cooktop models only:
:, _Mter cleaning tile grates, dry them
thoroughly by putting them in a wam_
oven ,for a tew minutes. Do not put tile
grates back on the range while thev are
wet. X._]/en replacing the grates, make
sm'e they are positioned secm'ely over
tile burne_.
:_ To prevent rusting on cast iron grates,
apply a light coating of cooking oil on
tile bottom of tile grates.
CooktopSurface (on porcelain cooktop models)
To avoid damaging tile porcelain enamel
surfilce of tile cooktop and to prevent it
fl'om becoming dull, clean up spills fight
away: Foods with a lot of acid (tomatoes,
sauerkraut, fl'uitj uices, etc.) or foods with
high sugar conmnt could cause a dull spot
if allowed to set.
X._]/en tile stmfi_ce has cooled, wash and
rinse. For other spills such as tilt spattefings,
etc., wash with soap and water once tile
surfi_ce has cooled. Then rinse and polish
with a dry cloth.
NOTE: Do not store flammablematena/s /n an
ovenornear the cooktop.Do not store or use
combustiblematerials,gasoline or other
flammable vaporsand liquids in the wcinityof
thisor any other appliance.
34
Stainless Steel Surfaces (on some models)
Do notusea steel-wool pa& it will scratch
thesurface.
To clean tile stainless steel surtace, use
warm sudsy water, a stainless steel cleaner
such as Kleen 14dng_, or an all-purpose
liquid or spray cleaner. Alwavs scrub
in the direction of the grain. Rinse
thoroughly with a sponge or cloth and
clean water. Dry with a soft, clean cloth.
Afier cleaning, use a stainless steel polish,
such as Stainless Steel Magic', Revere
Copper and Stainless Steel Cleaner", or
_.Venol All Pro'pose Metal Polish _. Follow
tile product inst_ uctions for cleaning tile
stainless steel surtace.
Page 35

Cleaningthe glass cooktop, w CEAppliances.com
NormalDaily UseCleaning
Clean your cooktop after
each spill. Use CERAMA
BRYTE® Ceramic Cooktop
Cleaner.
ONLY I_se (_EP.AMA BRVFE _Ceramic
C(}okt(>p Clem_er (m tile glass cooktop.
Other creams may m_(ltbe as effective.
To mah_tah_ al/d protect die sm'fi/ce of
yore" glass cooktop, tbllow these steps: []
[] Be{ore i_sim_gdie cooktop fin" tl]e
first time, clem_ it wid_ CERAM €
BRUTE (_Ceramic Cooktop Cleam_er.
This helps protect the top aN_(]makes
c]eaNH*p easier:
[] Dail} use of CERAMA BRUTE':
Ce];/m ic (12_{}ktop(:] ea m_er wi]] h e]p
keep the cooktop ]ookim_g ]?e_.
] Remove the bm'mler glvttes.
[] Shake d_e deaMm_g cream we]]. _pp]y
a _bw drops ot (_ERAMA BRYFE :
Ceramic (2}oktop C]eaN]er direct]'_, to
[Jse a paper towel (}r (_ERgMA
BRUTE:: CleaMm]g Pad _br Ceramic
Cookt/}ps to c]em_ the em_tire cooktop
SHI'[i_ce.
[] [Jse a dI?' doth or paper towel
to remove ;ill cleaMm]g residue.
N(} m]eed to rim]se.
NOTE:/tis veryirnport_ntthatyouDONOTheat
thecooktopunti/ithasbeenclaanedborough/k:
L
Use a CERAMABRYTE'_ CleanhTg
Pad for Ceramic Co&tops or a
Seoteh-Brite _3Multi-Purpose No
Scratch blue scrub pad.
TheCERAMABRYTE,*_Ceramic
Cooktop Scraper and aft
recommended supplies are
available through our Parts Cente_
See h?structions under "To Order
Parts" section on next page.
NOTE,:Do not use a dull or
nicked blade.
Burned-On Residue
WARNING:DAMAGEtoyourglasssurfacemay
occurff youusescrubpadsotherthanthepad
bcludedwithyourcooktop.
] _Mlow tile cooktop to cool.
[] Remove tile bm'ner t-.,"rates,Spread
a few drops {if CEILBdV/A BRYTE ')
Ceramic (2ookto I) Cleaner t{>tile
entire burned residue area.
Using tile included CEIL_d_4A BRYTE _>
[]
Cleaning Pad fi)r Ceramic Cooktoi)s,
rub tile residue area ali) )lying,
pressure as needed.
Heavy, Burned-On Residue
[] _Mlow tile {'{}{>ktoI) to cool.
[] Remove tile bm'ner grates.
[] Use a single-e(De razor blade scra )er
at approximatel) a 45 ° angle against
the glass sm_ilce and scrape the soil.
It will be necessm T to apply pressm'e
to tile I';IZOf SCI';lI)eI" in order to
remove tile residue.
[] If am residue remains repeat tile
steps listed above as needed.
[] For additional protection, alter all
residue has been remoxed, polish tile
entire surfilce with CEI_BdMA BRYTE ':
Ceramic (2ooktop Cleaner and a
paper towel
[] _Mter scra )ing with tile razor scraper;
spread a tew drops of CEI{BdMA
BRYTE ')Ceramic Cooktop (2leaner t{>
tile entire burned residue area. Use
tile CEI{Bd_IA BRYTE _)Cleaning Pad
to remove ai]y reinaii]ii]g residue.
[] For additional protection, after all
residue has been remoxed, polish tile
entire smtace with CEI_BdMA BRYTE (')
Ceramic Cooktop Cleaner and a
paper towel.
I ,
35
Page 36

Cleaningtheglasscooktop.
Metal Marks and Scratches
Be caretul not to slide pots and pans
[]
across your cooktop. It will leave metal
IllaYkings on tile cooktop S/lI{_lce.
These marks are remox;d_le using
tile CEIL_dMA BRYTE ('_(:eramic
Cooktop Cleaner with the CERNVIA
BRYTE <'_Cleaning Pad tot Ceramic
Cooktops.
Glasssurface potential forpermanent damage.
[] If pots with a thin overlay of
aluminum or copper are allowed
to boil dry, the overlay may leave
black discoloration on the cooktop.
This shouhl be removed immediately
befin'e heating again or tile discoloration
may be pemmnent.
WARNING: Carefuliy check the bottom of pans
for roughness that would scratch the cooktop.
Our testing shows that if
you are cooking high sugar
mixtures such as jelly or
fudge and have a spillover,
it can cause permanent
damage to the glass surface
unless the spillover is
immediately removed.
Damage from Sugary Spills and Melted Plastic
[] Tm'm_oflall sm'_i_e bm'aers raM, [] _ remaiMm_g spillover should be
wi{ll am__}vem_m it[, ]'emeve h o[ [)am_S ]el'{ 1om_[i] [h e Sl_]'fi_ce of [h e co( _k[(_[)
] _'_'ea]'im_g am_ove]_ mitt:
ao [Jse a sim_g]e-edge _v_zor blade
Cenm_ic Cooktop Scraper) to
move the spill to a _oo] area o]_
the cooktop.
be Remove the spill with paper towels.
To Order Parts
To order CEI_dVL_t BRYTE ':Ceramic
Cooktop Cleaner and tile cooktop scrapex;
please call our toll-flee number:
National Parts Center 800.626.2002
CERAMA BRYTE_")
Ceramic Cooktop Cleaner ..... _ WXI OX300
has cooled.
] D(m't use the sm'fi_ce m_its agaim_ m_d]
all of the resi&_e has bee_ completely
]'em ove(L
NOTE: If pitting or 17_dentation17_#_eglass surface
hasa/read/ occurred,fl_ecooktopglass willhave to
be replaced/n fl_iscase,serw_'ewill be necessary.
CERAMABRYTE®
CeramicCooktopScraper ...# WXIOX0302
Kit ........................ # WB64XS027
(Kit/))cludescreamandrazorscraper)
CERAMABRYTE®CleaningPads
for CeramicCooktops......... # WXI OX350
3C
Page 37

Careand cleaning of the range, vvww.GEAppliances.com
Lift-O# Oven Door
ii!iiiiii d
Lift the door straight up and off fl_e
hinges.
The gasket is designed with a gap
at the bottom to allow for proper air
circulatimT.
Do not rub or clean the door
gasket--it has an extremely low
resistance to abrasion.
If you notice the gasket becoming
worn, frayed or damaged f17any
way or if it has become displaced
on the door, you should have it
replaced.
Theovendoorisremovab&butit isheavjzYoumay
needhelpremovingandreplacingthedoor
To remove the deer, opem_ k a {i_ im_ches [o
the special stop poski(m that _rH_ _(_(] the
door opera (;_/q:/fim_ly o_ each side m_d
lift the door stI_igllt I_p am_(;[o[[ tlle llim_ges.
NOTE:Becarefa/not toplacehandsbetweenthe
hingeandtheovendoorframeas be hingecould
snapbackandpinchfingers.
TOreplace the deer, make sure the him_ges
are h_ the special stop positiom Positio_ the
slots im_the bottom of the door sql_are]y
o_'er 1]/e him/ges_Th el/h }*_el"d/e doo r s]owiv
al/d evell]v over both bh/ges at the same
time. If the him_ges sl/ap back agaim/s[ die
()vem/ f}_tme, pill] [hell/ back oiK.
To clean the inside of tile door:
:_ Do not alhlw excess water t(i run into
am' holes or shits in tile dora:
:_ Because tile area inside tile gasket is
cleaned during the self clean cycle, you
do not need to clean this by hand. Any
soap left on the liner causes additional
stains when the oven is heated.
:, The area outside the gasket can be
cleaned with a soap-filled steel wool or
plastic pad.
Toclean the outside of the door:
:, Use soap and water to thoroughly clean
the top, sides and front ot the oven dora:
Pdnse well. Ym may also use a glass
cleaner to clean the glass on the outside
of tile dora:
:* Spillage of marinades, fl'uitj uices, tomato
sauces and basting materials containing
acids may Catlse discoloration and should
be wiped tl I) immediately. \,_]/en tile
S/llS{;Ice is cool, clean and rinse.
Do not use oven cleaners, cleansing
l)owdei_ or harsh abrasixes on tile
outside of tile dooi:
Grid
Oven Bottom
Tile liven b(ittom has a porcelain enamel
finish. To make cleaning easiei; protect the
oven bottom fl'om excessive sl)illoveI_ by
placing a cookie sheet on the shelf beh)w
the shelf you are cooking on. This is
particularly important when baking a fl'uit
pie or other fl)ods with a high acid content.
Hot fl'uit fillings or other fi)ods that are
highly acidic (such as tomatoes, sauerkraut,
and sauces with vinegar or lemon juice)
may cause pitting and damage to tile
porcelain enamel stlrlilce and should be
wiped up immediately.
Broiler Pan and Grid
_dter broiling, remove tile broiler pan fi'om
the oven. Remove tile gild fl'om tile pan.
Careflllly i)our ()/It grease fl'om tile pan into
a proper contninei: _,\'ash and iinse tile
broiler pan and grid in hot water with a
soap-filled or plastic scouting pad.
If food has burned on, sprinkle tile grid
with deteigent while hot and cover with wet
paper towels or a dishcloth. Soaking the
pan will renlove burned-on foods.
We don't recommend using aluminum fi)il
on tile oven bottom. It can affect air flow if
tile holes are blocked and it can concentrate
heat at tile bottom ot tile oven, resulting in
poor baking perfilmmnce.
To clean l1 I) spilh)veI_, IlSe soap and watei;
an abrasive cleaner or soap-filled steel-wool
pad. Rinse well to remove any soap before
self-cleaning.
Tile broiler pan and gli(1 max be cleaned
with a COllli/lei'cial osen cleaneE
Both tile br(liler pan and grid can also be
cleaned in a dishwasheI:
Do not store a soiled broiler pan and grid
amwhere in the range.
CAUTION:Donotcleanthebroilerpanorgndin
a self-cleaning oven.
37
Page 38

Careand cleaningof therange.
Warming Drawer Rack
Clean the rack with detergent and water.
Atter cleaning, rinse the rack with clean
water and dr) with a clean cloth.
Warming Drawer Pan
The wamfing drawer has a remo_O)le pan
fl)r easy cleaning,
])_eI/lOve the p_lIl, using the side edge
handles and clean it with detergent and
water: _Mier cleaning, rinse with clean water
and d_' with a clean cloth. Replace the pan
in the wamfing drawe_:
Removable Warming Drawer (on some models)
NOTE:Beforeperforminganyadjustments,
cleaningorservice,disconnecttherangee/ectrical
powersupp/yat thehouseholddistributionpane/
byremowngthefuseorswitchingoff thecircuit
breake_Makesurethewarm!rigdrawerheating
elementiscoo/.
Most cleaning can be done with the drawer
in place. However; the drawer may be
removed ifflmher cleaning is needed. Use
soap and wam_ water to thoroughly clean.
Toremove the warming drawer:
[] Pull the drawer straight out tmtil
it stops.
[] Press the left rail release up and press
the fight rail release down, while
pulling the drawer forward and ti'ee.
Toreplace the warming drawer:
[] ,Place the left drawer rail arotmd the
tuner leti rail guide and slide it in
slightly to hook it.
[] Place the right drawer rail arotmd the
mner right rail guide and slide it in
slightl) to hook it.
[] Slide the drawer all the wm in.
38
Page 39

Vent appearance and location varF
Oven Air Vents
Never block the vents (air openings) of the
range. They provide the air inlet and outlet
that are necessa_ y tot tile range to operate
properly with correct COll/btls[Jon.
Mr openings are located at the rear of
the cooktop, at the top and bottom ot the
oven doo_; and at the bottom of the range,
under the wamfing (h'awe_:
Upper Control Panel
Lock out the touch pads before cleaning.
See tile Control Lockout intbmlation in the
Special features of your oven control section
in this manual.
Clean up splatte_ with a damp cloth.
You Ill,IV also rise a glass cleaner:
vvvvvv.GEAppliances.com
Remove heavier soil with waml soapy water:
Do not use abrasives of any kind.
Unlockthe touchpadsafter cleaning.
Seetile ControlLockoutinfommdon in the
Specialfeaturesofyour ovencontrol section
in this manual.
Pull the knob straight off the stem.
Lower Control Panel and Knobs
It's a good idea to wipe the control panel
after each rise of the oven. Clean with mild
soap and water or vinegar and water; rinse
with clean water and polish (h_' with a soft
cloth.
Do not use abrasive cleansers, strong liquid
cleaners, plastic scotwing pads or oven
cleane_ on the control panel--they will
damage the finish. A 50/50 solution of
vinegar and hot water works well.
The control knobs may be removed fin"
easier cleaning. To remove a knob, pull it
straight off the stem. If knob is difficult to
remove, place a towel or dishcloth between
the knob and control panel and pull gently:
Wash tile knobs in soap and water or a
vinegar and hot wamr solution.
Metal parts can be cleaned with soap and
watei: Do not use steel wool, abrasives,
alIllllOnia_ acids oI" COlillllei'cial oven
cleaners. Dry with a soft cloth.
39
Page 40

Careand cleaningof therange.
Oven Shelves
Cleam_ the shelves _,kr]th _m) _b_s]ve cleam_sel"
o_"steel _ro0]. A:{re_"c]eaM_]g, _'im_sethe
shelves with c]em_ water amid dr_ with a
c]em_ dot]],
NOTE."Take/fieshelvesout of t¢_eovenbeforeyou
beg/?7be self-clean cyc'le.
Oven Light Replacement
:>-)%G,
Wire cover holde_
CAUTION:BeforereplacingFourovenhghtbulb,
disconnectthee/ectr/ca/powertotherangeatthe
mainfuseorcircuitbreakerpane/.Besureto/et the
hghtcoverandbu/bcoo/comp/ete/y
The oven light bull) is covered with a
remo\:flAe glass cover that is held in place
with a bail-shaped wire. Remove the oven
doo_; if desired, to reach cover easily.
Toremove:
F_] Hold a hand under the coxer st> it
ii i
doesn't tidl when released. With
finge_s of the same hand, fim]ly push
back the wire co',er holder: i,ifl off the
Co', eI',
Do,ot remove any screws toremove
the cover.
] Do not touch hot bulb _6th a wet
cloth. Replace bulb with a 40-watt
household appliance bulb.
Toreplace cover:
[] Place it into the groo_ e of the light
receptacle. Pull the wire forward to the
center of the cover until it snaps into
place. X,_l_en in place, the wire holds
the cover fim]ly. Be certain the wire is
in the depression in the center of the
covei:
Connect electdcal power to the _m]ge.
[]
Fluorescent TopLight (onsome models)
CAUTION:Donottouchthebulbwith wethandsor
whenthebulbishot Neverwipethehghtareawith
a wetc/oth.E/ectrica/powermustbeshutoffif you
havetorep/acethebulb.
[] Raise the clips on the back, on both
sides, and fl'ee the back of the canopy.
[] Roll the canopy up and off.
[] Remox e the fluorescent light bulb.
Replace the bulb with one of the same
length and wattage.
Replace the canoi, )x bv, l)lacing, the
[]
front in the groove and rolling it back.
Snap it into place oxer the back clips
on both sides.
40
Page 41

Installationof the range.
Read these instructions completelF and carehdlg
BEFOREYOUBEGIN
Installation of thb range must conform with local codes, or in the absence of local codes, with the
National Fuel Gas Code,ANSI Z223.1,latest edition. In Canada, installation must conform with the current
Natural Gas Installation Code, CAN/CGA-B 149.1or the current Propane Installation Code, CAN/CGA-
B149.2,and with local codes where applicable. Thisrange has been design-certified bythe American
GasAssociation according toANSI Z21.1,latest edition and Canadian GasAssociation according to
CAN/CGA-1.1latest edition.
As Mfl_ any appliance using gas and g_nerafing
heat, there are certain safety precautions you
should follow. You will find these precautions
in tile ImportantSafetylnformation sect.ion in the
flont of this manual. Read them ca_eflfllv.
IMPORTANT."Save these instructions for the local
electrical inspector's use.
NOTE TO INSTALLER:Leave these instructions
with the appliance after installation is completed.
NOTE TO CONSUMER:Keep this Owner's Manual
and Installation Instructions for future use.
NOTE,"This appfiance must be properly grounded.
FORYOURSAFETY
Oo not store or use combustible materials, gasoline or other flammable vapors and liquids in the vicinity
of this or any other appliance.
ff yousmell gas:
[] Open windows.
[] Don't touch elecuica] switches.
[] Extinguish any open flame.
[] Immediately call your gas supplier
TOOLSYOUWILLNEED
Phillips and flat-blade screwdrivers
Pencil and ruler
:_Twopipe wrenches (one for backup)
Open-end or adjustable wrench
Nut drivers or wrenches: 3/16" and 1/4"
ADDITIONAL MATERIALS YOUMAY NEED:
Gasline shut-offvalve
Pipe joint sealant or UL-approved pipe thread
tape with Teflon that resists action of natural
and LPgases
Flexible metal appliance connector (1/2" LD.)
A 5-footlength is recommended for ease of
installation but other lengths are acceptable.
Never use an old connector when installing a
new range.
Flare union adapter for connection to gas supply
line (3/4" or 1/2" NPTx 1/2" LD.)
Flare union adapter for connection topressure
regulator on range (1/2" NPTx I/2" I.D.)
*Teflon.RegisteredtrademarkofDuPont
41
Page 42

Installationof the range.
Read these instructionscompletely and carefully.
WARNING:INSTALLAtiONSAFETYINSTrUCtiONS
Improper installation, adjustment, alteration, service or maintenance can cause injury or property
damage. Refer to this manual For assistance or additional information, consult a qualified installer,
service agency, manufacturer (dealer) or the gas supplier.
Never reuse old flexible connectors. The use
of old flexible connectors can cause gas leaks
and personal injm T. Always use NEW flexible
connectors when installing a gas appliance.
IMPORTANT Remove all pacldng material and
literature flom oven before connecting gas and
electrical supply to range,
CAUTION: Do not attemI)t to oI)erate fl_e oven
of tiffs rang_ during a power failure (Elecuic
Ignition models only).
Haxe your rang_ installed by a qualified
installen
Your rang_ must be electrically gTounded
in accordance with local codes oi; in the
absence of local codes, in accordance with
the National Elecuical (;ode (ANSI/NFPA
70, lamst edition). In Canada, electrical
grounding must be in accordance with the
cmTent CSA (;29.1 Canadian Elecuical Code
Part I and/or local codes. See Electrical
Connections in r/is section.
Be%re installing your range on linoleum
or aW other synthetic floor co_ering, make
sure the floor cox_ring can withstand 180°E
without shrinking, waq)ing oi discoloring.
Do not install the rang_ over carpeting
unless a sheet of 1/4" thick plysvood or
similar insulator is placed between the
range and caq)eting.
Make snle the wall coverings around rile
range can withstand heat g>neramd by die
range up m 900°E
Avoid placing cabinets abox> the rang>.
To reduce the hazard caused by reaching
over rile open flames of operating burners,
install a xentilation hood oxer the rang> that
projects forward at least 5" beyond the flont
of the cabinets.
The ventilating hood nmst be construcmd
of sheet metal not less than 0.0129" fllick.
Install abox_ the cooktop wifl_ a clearance of
not less than l/4" between the hood and the
underside of the combustible material oi
metal cabinet, The hood must be at least as
wide as the appliance and centered over the
appliance. Clearance between the cooking
sur/_ace and rile ventilation hood sm/_ace
MUST NEVERBE LESSTHAN 24 INCHES.
EXCEPTION."Installation of a listed microwa_
oven or cooldng appliance over the cooktop
shall conform to the installation instructions
packed with that appliance.
If cabinets are placed abo_e the range,
allow a minimum clearance of 30" between
the cooking surPace and the bottom of
unpromcmd cabinets.
If a 30" clearance between cooking surface
and ox_fllead combustible material oi metal
cabinets cannot be maintained, promct fl_e
underside of tim cabinets above fl_e cookmp
with not less than 1/4" insulating millboard
cox>red with sheet metal not less than
0.0192" thick.
Clearance between the cooking surface and
protected cabinets MUST NEVERBE LESS
THAN24INCHES.The xertical distance flom
the plane of the cooking sni/_ace to the
bottom of adjacent oxerhead cabinets
exmnding closer than 1" to the plane of
the range sides must not be less than 18".
(See the Dimensions and Clearances
illustration in dlis secdon.)
CAUTION: hems of interest to children
should not be stored in cabinets above a
range oi on fl_e backsplash of a rang_--
children climbing on the rang_ to reach
items could be seriously i_m_ed.
42
Page 43

DIMENSIONSAND CLEARANCES
Provide adequate clearances between the range and adjacent combustible surfaces. These dimensions
must be met for safe use of your range. Thelocation of the electrical outlet and pipe opening (see Gas
Pipe and Electric Outlet Locations) may be adjusted to meet specific requirements.
Therange maybe placed with 0" clearance (flush) at the back wall.
Depth with door closed #n_'ladesdoor handle)
1_,._... 30,, _....._1281/4 t° 29
•_ Depthvariesdependingon model
T
Height
473A"
Depthwithdooropen
463A"_ %% ...............
\ \ s.'"""
See specifications sheet for your model
361/4" +_1/4"
Minirnurn to
cabinets on
eitbel side of
the range
Minimom -'__- 2" Towaftoneitherside
sealedhomermodels
Maximom depth
for cabinets above
countertops
Oil
Tocabinetsbelow
cooktopandat the
rangeback
43
Page 44

Installationof the range.
Read these instructionscompletely and carefully.
WARNING!ANTI-TIPDEVICE
All ranges can tip andinjury could result.
Toprevent accidental tipping of the range, attach an approved Anti--fTpdevice to the wall. (See Installing
theAnti--tip Device in this section.) Tocheck if the device is installed and engaged properly, carefully tip
the range forward. The Anti--tip device should engage and prevent the range from tipping over.
If you puff the range out from the wall for any reason, make sure the Anti--tip device is engaged when
you push the range back against the wall.
For your safety, ne',>r use your range for wam/ing oi heating tile room. Your oven and cooktop
are not designed m heat your kitchen. Top burners should not be operamd without cookware
on the grate. Such abuse could iesnlt ill fire and damag_ to your range and will _id your
warranl-v.
Do not store oi use combustible mamfials, gasoline oi other flammable vapors and liquids ill
the vicinity of this or any other appliance. Explosions or fiies could result.
Do not use oven for a storag> area. Imms stored in file oxen can ignim.
Do not let cooking grease or oilier flammable mamrials accnmnlate ill or near file rang>.
LOCATION
Do not locate the range where it may be subject to strong drafts. Any openings in the floor or wall behind
the range should be sealed. Make sure the openings around the base of the range that supply fresh air
for combustion and ventilation are not obstructed by carpeting or woodwork.
Your rang.e, like many other household imms,
is hem?' and call settle into soft floor cox_rings
such as cushioned viwl oi" cai])eting. Use care
when moving the rang.e on this type of
flooring. It is i.ecomn]ended that tim tbllowing
simple and inexpensix.e instructions he
followed m promct your floon
The rang.e should he installed on a sheet of
plysvood (or similar mamfial). When tile floor
covering ends at tile flont of tile range, file
area that tile range will i.est on should be buih
up wifl) pl_svood m tile same lex>l or higher
fllan the floor cox>ring.
This will allow file range to be nlo_ed for
cleaning oi servicing. Also, make sure your
floor covering will withstand 180°E (See the
Installation Safety Instructions section.)
Make sure die wall coxerings around your
rang.e call wifl/stand tile heat generated
(rip to 900°E) by the range. (See tile
Installation Safety Instructions sect.ion.)
44
IMPORTANT!
Remove all tape and packaging. Make sure the burners are properly seated and level.
Takethe accessory pack out of the oven.
Check to be sure that no range parts have come loose during shipping.
Page 45

[] Provide Adequate Gas Supply
Yourrange is designed to operate at a pressure of 4"
LP gas (propane or butane), 10" of water column.
of water column on natural gas or,if designed for
Make sure you are supplying your range with the
t)pe ot gas fin" which it is designed.
This range is convertible fin" use on natural or
propane gas. If you decide to use this range on
I,P gas, convei_ion must be made bv a qualified
I,P installer betore attempting to operate the
range on that gas.
For prol)er ol)erafion , the l)ressure of natural gas
supplied to the regulator nlust be between 4" and
13" of wamr cohunn.
For I,P gas, the pressure supplied must be between
0" ' 3"an(1 1. ()['water cohlllln.
X,_]_en checking fin" proper operation ot the
regulatoi; the inlet pressure must be at least 1"
greater than the operating (nmnifi_ld) pressme as
given above.
The pressure iegulator located at the inlet ot the
range manifi)ld l/ltlst IeIllain ill file supply lille
regardless of whether natural or I,P gas is being used.
A flexible metal appliance connector used to
connect the range to the gas supply lille should
have an I.D. _ff l/2" and be 5 t_'et ill length fin" ease
ot installation. Ill Canada, flexible cmmectoi_ nlust
be single wall metal c(mnect(n_ no longer than
6 t_'et ill length.
[] Connect the Range to Gas
Shut off the main gas supply valve before disconnecting the old range and leave it off until the new
hook-up has been completed. Don't forget to relight the pilot on other gas appliances when /ou turn
the gas back on.
Because hard piping restricts movement _ff the []
range, the rise oJ[ an A.G.A.-certNed flexible metal
appliance connector is recommended unless local
codes require a hard-i)iped connection.
Install male 1/2" or 3/4" flare union adapter
to the NPT internal thread _ff the manual shut-
off wflve, taking care to back-up the shut-off
valve to kee I) it fl'om turning.
Never use an old connector when installing a new []
range./I the hard piping method is used, you must
careflllly align the pipe; the range cannot be moved
after the connection is made.
To prevent gas leaks, put i)ipejoint compound on,
or wrap pipe thread tape with Teflon* around, all
male (external) pipe threads.
[] Install a manual gas lille shut-offxalxe ill the
gas lille ill an easilx accessed location outside
_ff the range. Make sure eveITone operating
the range knows where and how to shut off
the gas supply to the range.
[] Install male 1/2" flare union adapter to the
1/2" NPT internal thread elbow at inlet of
regulatm: On models equii)ped with st;mdard
twin burnei_, install tile male pipe thread end
ot the 1/9" flare union adapter to the 1/2"
NPT internal thread at inlet of pressure
regulatm: Use a backup wrench on the
regulator fitting to avoid danmge.
_._l_en installing the range fl'om the fl'ont,
remove the 90 ° elbow fin" easier installation.
Connect fle_ble metal appliance connector to
the adapter on the range. Position range to
pemfit connection at the shut-offwflve.
X'_hen all connections haxe been made,
[]
make sure all range controls are ill the off
position and turn on the main gas supply
wflve. Use a liquid leak detector at all joints
and connections to check fin" leaks ill the
svsteI//.
CAUTION" DONOTUSEA FLAME TO
CHECKFORGAS LEAKS.
X&]_en using test pressures greater than 1/2 psig to
l)ressure test the gas supply s)'swm of the residence,
disconnect the range and individual shut-offvalve
ti'om the gas supply piping. _]_en using test
pressures ot 1/2 psig or less to test the gas sui)ply
system, simply isolate the range fl'om the gas supply
s\stem by closing the individual shut-off \:five.
*Teflon.Registeredtrademarkof OuPont
45
Page 46

Installationof the range.
Read these instructionscompletely and carefully.
Gas Pipe and Electrical Outlet Locations
This area allows for flush range
installation with through-the-wall
cmTnection of pipe stub/shut-off
valve and rear wall 120Voutlet.
Shortest cmTnection from hard pipe
stub location to range hookup.
This area allows for flush range
installation wifl7 through-the-floor
connection of pipe stub/shut-off valve.
46
Page 47

Flexible ConnectorHookup
Pressureregulator-_-_,__Jll_ _ ////7
Installer: Inform the
consumer of the location
of the gas shut-off valve.
Rigid Pipe Hookup
Ad!ter _--------- Flexconnector(6 ft.max.}
_ -,_----- Adapter
---- Gas shut-off valve
1/2" or3/4" Gaspipe"_ _
Pressureregulator-_,__ Niipb
90° Elbow(provided_
Installer:Inform the
consumerof the location
ofthe gas shut-offvalve.
Ut!on _1-_ Blackironpipe
@ _,_l-_ Union
_ Nipple
1/2" or3/4" Gaspipe
asFlow into Range ]
gooE, ow
Gasshut-offvalve
47
Page 48

Installationof the range.
Read these instructions completely and carefully.
Electrical Connections
[]
Electrical Requirements
120-volt, 60 Hertz, properly grounded branch
circuit protected by a 15-amp or 20-amp circuit
breaker or time delay filse.
Extension Cord Cautions
Because of potential satiety hazards associated
with certnin conditions, we strongly reconllnend
against the use of an extension cord, However,
if you still elect to use an extension cord, it is
absolutely necessary that it be a Ui,-listed,
3-wire grounding-type appliance extension cord
and that the current carrying rating of the cord
ill amperes be equi\:dent to, or greamr than,
the branch circuit rating.
Grounding
IMPORTANT--(Please read carefully)
FORPERSONALSAFETY,THISAPPLIANCE
MUST BEPROPERLYGROUNDED.
Preferred Method
A word about GFCI's - GFCI's are not required or
recommended for gas range receptacles.
(;round Fault Circuit ]nterruptei_ ((;F(3's) are
devices that sense leakage of current ill a circuit
and autonmticallv switch off power when a
threshold leakage level is detected. These devices
nmst be inanually reset by the consulnei: The
National Electrical Code requires the use of GF(3's
in kitchen receptacles installed to serve countertop
SUlthces. Perfbi_nlance of tile range will not be
affected t operated on a GF(3-protected circuit but
occasional nuisance tripping of the GFC] breaker
is possible.
[] UsageSituations where Appliance
Power Cordwill be Disconnected
Infrequently.
An adapter Inay be used only on a 15-amp circuit.
Do not rise an adapter on a 20-amp circuit. _]/ei'e
local codes pemfit, a TEMPORARY CONNECTION
may be made to a properly grotmded two-prong
wall receptacle by the use ofa UiAisted adaptei;
a\_filable at most hardware stores. The laxger slot in
the adapter must be aligned with the lalger slot in
tile wall receptacle to provide proper polali_, ill the
connection of the power cord.
48
Ensurepropergroundexists
beforeuse
The power cord oI this appliance is equipped with
a three-prong (grounding) plug which mates with a
standard three-prong grotmding wall receptacle to
minimize the possibility ot electric shock hazard
fi'om this appliance.
The customer should have the wall receptacle and
circuit checked by a qualified electrician to Inake
sure the receptacle is properly grounded,
X_]_eI'e a standard two-prong wall receptacle is
encountered, it is the pei_onal responsibili V and
obligation of the custolner to have it replaced with
a properly grounded thx'ee-px'oxlg wall receptacle.
DO NOT,UNDERANY CIRCUMSTANCES,
CUTORREMOVETHETHIRD(GROUND)
PRONGFROM THEPOWERCORD.
TemporaryMethod
(Adapter plugs not permitted in Canada}
Alignlargeprongs/slots
Ensureproperground
andfirmconnection
beforeuse
CAUTlON_Attaching the adapter
ground ternlinal m the wall receptacle cover
screw does not ground the appliance unless the
cover screw is inetal, and not insulated, and the
wall receptacle is grounded through the house
wiring. The customer should have the circuit
checked bv a qualified electrician to inake sure
the receptacle is properly grounded.
_l_en disconnecting the power cord flx_i/l the
adaptei; always hold the adapter with one hand.
If this is not done, the adapter ground temfinal is
very likely to break with repeated use. Should this
happen, DO NOT USE the appliance until a proper
ground has again been established.
Page 49

[] Electrical Connections
[] Usage Situationswhere Appliance
Power Cordwill be Disconnected
Frequently.
Do not use an adapter plug in these situations
because disconnecting of the power cord
places undue strain on the adapter and leads to
eventual thilm'e oI the adapter grotmd temfinal.
The customer should have the two-prong wall
receptacle replaced with a tl_ree-prong (grotmding)
receptacle by a qualified electrician ])eft)re using
tl_e appliance.
The installation of appliances designed fin.
mobile home installation must confimn with tl_e
Manufhctm'ed Home Construction and Safety
St;mdard, Title 24 (:HI, Part 3280 (fimnedy the
Federal Standard t0r Mobile Home Construction
and Satety, Title 24, HUD, Part 280) m; when such
standard is not applicable, the Standard tot
Malmfi_ctured Home h_stallafions, latest edition
(Malmfi_ctured Holne Sites, Colmmmities aim
Set-Ups), ANSI A225.1, latest edition, or with local
codes. In (:anada, mobile holne installation nmst
be in accordance with the current CAN/CSA
Z240/MH Mobile Home Installation Code.
Electric Disconnect
:_ i,ocate (liscmmect plug on tl_e range 1)ack.
:_ Pinch sides ot com_ector and pull out of range
back.
[] Seal the Openings
Seal an_ openings in the wall behind tl_e range and
in the floor under the range when hookups are
completed.
[] Check Ignition of Surface Burners
Operation ot all cooktop and oxen bm'ne_ should
be checked atter the range and gas supply lines
haxe been careflfllx checked tot leaks.
Electric IgnitionModels
Select a top bm'ner knob and sire ultaneouslv
push in and mrn to LITEposition. You will hear
a clickingsotmd indicating proper operation of the
spark module. Once tl_e air has been pm'ged from
the supply lines, bm'ne_ should light within
4 seconds. _Mter bm'ner lights, rotate knob out of
the LITE position. T_' each burner in succession
tmtil all burne_ have been checked.
49
Page 50

Installationof the range.
Read these instructions completely and carefully.
OuMity of Flames
The coinbustion qualiD' of burner flan/es needs to
be detem/ined visually.
(,4) Yellow flames--
Callfor service
(B) Yellowtipson
outer cones--
Normal for LP gas
(C)Softblue
flames--Normal for
natural gas
If burner flameslooklike (,4),carlfor servlce.Normal burner
flamesshould looklike(B)or (C),dependingon the type ofgas
you use.
_A]th I,P gas, soIne yellow til)ping on otlter cones
is nomial.
Check Ignition of Oven Burner
[]
The oven is designed to operate quietly and
autoniaficallv: To oi)ei'ate the oven, press the
BAKEpad and then press the nuniber pads until
350° al)peais in the display: Touch the START pad.
After 30-00 seconds, the oven burner will ignite
and burn until the set teInl)erature is reached.
The oven burner will continue to cycle on and
off as necessai_' to nlaintain the oven at the
teniperamre indicated by the display.
To check ignition of the broil burnei; touch the
BROILHI/tO pad and then the STARTpad. _MteI"
30-90 seconds, the broil burner will ignite.
Electricignitionmodelsrequire electrical power to
ol)erate, In case of a l)ower Otltnge, the ()veil
burnei_ on these niodels cannot be lit nlanuallv
with a nlatch. Gas will not flow unless the gh)w bar
is hot.
If the oven is in use when a power outage occuI_,
the burner will shut off and cannot be re-lit until
power is restored,
5O
Page 51

[] Adjust Broil and Oven Burner Air Adjustment Shutters if NecessarF
Akadjustmentshuttersforthetopandbottomburners
regulate the flow of air to the flames. LI
f,
To detemfine if tile bottom burner flames are
burning properly, relllove the oven bottom. Flames
should have approximately 1" blue cones and, if
range is supplied with natural gas, should burn Mth
The air ac!iustment shutter fi_r the top (broil)
burner is in tile center of tile rear wall of tile oxen.
no yellow tipping. (With most I,P gas, small yellow
tips at the end of outer cones are nomml.) Haines
should not lift off burner ports. If lifting is observed,
gradually reduce air shutter opening until flames
are stabilized.
t° r a* ,s,n nt
_?___________/7f-_ / '
Tile shutter fi)r tile bottom (oven) burner is near
the back wall behind the wamfing drawe_; Remoxe
the drawer; See the Care and cleaning of the range
section.
Toadjust the flow of ak toeither burner,loosenthe Phillips
head screwand rotate the shutter toward openor dosed
position as needed
The flames fi)r the top (broil) burner should be
stea(h with approximatel) l" blue cones and should
not extend out oxer the edges of the burner baffle.
[] Levering the Range
[] ]nst;fll tile oxen shelxes in tile oxen and
position tile range where it will be installed.
1,!1 m _ Lower
Leg L_¢_ - range
range
(onsomemodels}
range range
Raise_!t °wer
{onsomemodels}
To remove the oven bottom:
[] Remoxe tile kmu'led screws holding down
I'eaI" of tile o_,en bottoi//.
] (;rasp tile oven bottom at finger slots on
each side.
] I,ifl tile rear of tile oven bottom enough to
clear tile lip of tile range fl'ame, push it back,
and then pull it up and out.
readings--with tile level placed diagonally
fi_t in one direction and then tile other
] Remove tile wamfing (h'awet: See tile Care
and cleaning of the range secdon. The fi'ont
leveling legs can be a(!iusted fl'om tile bottom
and tile _ear legs can be ac!justed fl'om tile
top or tile bottoI/1,
[] Use an ol)en-end or a(!iustable wrench to
a(!just the lexeling legs until the range is lexel.
[] Check fi)r levelness by placing a spirit level or
a cup, partiall) filled with water; on one of tile
oxen shelxes. If using a spirit lexel, take two
[] _Mter the range is lexel, slide the range awa)
fl'om the wall so that the Anti-Tip device can
be installed.
51
Page 52

Installationof the range.
Read these instructionscompletely and carefully.
[] Installing the Anti-Tip Device
WARNING:
Range must be secured with an approxed
Anti-Tip dexice.
Unless properly installed the range could be
tipped by )ou or a child standing, sitting or
leanino_ on [in ol)en dooI;
Mter installing the Anti-Tip device, xefif}' that
it is in place 1)_careflfll_ attempting to tilt the
range fin'ward.
This range has been designed to meet all
recognized in(lust_ T tip standards ti)r all
noF/l/al conditions.
The use of this device does not preclude
tipping of the range when not properl)
installed.
If the Anti-Tip dexice supplied with the range
does not fit this al)plication, use the uni',e_al
Anti-Tip dexice _,VB02X7909.
Mark the wall where the RIGHT EDGE of tile
[]
range is to be located. Be sure to allow t0r the
counterto I) overhang ifvou intend to install
the range next to cabinets.
_ devAnti-]iPJ
ice J
,et edbeadsnre ? +--_
[] Using the device as a template, mark the
position of the hole for the screw.
[] For wood construction, drill a pilot hole at an
angle of 20 degrees fl'om the horizontal, A nail
or awl may be used if a drill is not axailable.
Mount the Anti-Tip device with the screw provided.
For celllent or conci'ete constrtlction, }'oil
will need a 1/4" x 1½" lag bolt and a 1/2" O.D.
sleeve anchor; which are not i)rovided. D_ill
the recommended size hole fin" the hardware.
Wallboard
Anti-lip
device
Install the sleeve anchor into the drilled hole and
then install the lag bolt through the device. The
bolts must be i)roperly tightened as recommended
fin" the hardware.
[] Slide tile range against the wall, and check for
prol)er installation l)_, _orasl)ing, the fl'ont edge,
of the cooktop and careflflly attempting to flit
the range forward,
Backof range
52
./ 21/_" / Markededgeofrange
[] I,ocate the outside edge of the dexice 2½"
toward the center of the range ti'om the
marked edge of the range.
When All Hookups Are Completed:
MAKE SUREALL CONTROLSARE LEFTIN THE
OFFPOSITION.
Cofiverting to LP Gas (orconvertingbackto natura/gasfromLP)
Thisrange leavesthe factory set for use with naturalgas.
Ifyou want toconvert to LPgas,the conversionmust be
performedbya qualified LPgas installer
MAKESURETHEFLOWOFCOMBUSTIONAND
VENTILAtiONAIRTOTHERANGEISUNOBSTRUCTED.
Tile comex_ion instructions and I,P orifices can be
tound attached to the range next to the pressure
regulat(n:
Kee I) these instructions and the orifices in case you
want to con'_ert back to nattlI'al gas.
Page 53

Before YouCallForService...
vvww.GEAppliances.com
Troubleshooting -tips
Save time and money! Reviewthe charts on the following
pages first and you may not need to call for service.
i_/e_ Possible Causes What To Do
Topburners do notlight Plug on range is not completely • Make sure electrical plug is I)lugged into a live, properly
or do notburn evenly inserted in the electrical outlet, grounded outlet.
Burner slits on the side of the • I?.emove tile burner heads and clem_ them. Check the
burner may be dogged, electrode m'ea for burned-on food or grease. See the
Careand cleaning of the range section.
hnproper burner assembly. * Make sure the burner parts are installed correctly.
See the Care and cleaning of the range section.
Burner flames very hnproper air to gas ratio. * /f range is connected to l.P gas, contact tile person
large or yellow who installed your range or lnade tile conversion.
Surfaceburnerslight
butovendoesnot
Scratches (may appear
as cracks) on cooktop
glass surface
The oven gas shut-off valve
may have accidentally been
moved during clemfing or
moving.
Incorrect cleaning
methods being used.
Cookwa_e with rough bottoms
being used or coarse paxtides
(salt or sm_d) were between
the cookwa_e and the surface
of the cooktop.
Cookware has been slid
across the cooktop surface.
• To check tile oven gas shut-off valve, remove the
warming drawer (see tile Care and cleaning of the range
section) and look for tile gas sht]t-oif lever at tile back
of tile range. Follow tile directions in box A or B that
match your regulator type.
}ULLTOOPEN.
• Scratches are not remoxable. Tiny scratches will become
less visible in time as a result ot cleaning.
• To avoid scratches, use tile recommended cleaning
procedures. Make sure bottoms of cookware are clean
before use, and use cookware with smooth bottoins.
Areas of discoloration Food spillovers not cleaned • See the Cleaning the glass cooktop section.
on the glass cooktop before next use.
surface
Hot surface on a model with • This is normal. The cooking zones may change color
a light colored glass cooktop, when hot or cooling down. This is temporary :rod
will disappear as the glass cools to room telnl)erature.
Plastic melted Hot cooktop crone into • See the Glass surface Potential for permanent damage
to the glass cooktop contact with plastic placed Section in tile Cleaning the glass surface section.
surface on the hot cooktop.
Pitting (or indentation) Hot sugar mixture spilled • Call a qualified technician for rel)lacemeut.
of the cooktop on the cooktop.
53
Page 54

Before YouCall ForService...
Troubleshooting tips
Possible Causes What To Do
Fluorescent top light I_luorescent bulb is loose * A(!iust or replace. See tile Care and cleaning of the range
does not work or defective, section.
Switch operating the light * Call for se_a'ice.
is broken.
Controlsignals after You forgot to enter a bake * Touch the BAKE pad and desired temperature or
entering cooking time temperature or cleaning thne. the SELF CLEAN pad and desired clean time.
or start time
Food does not bake Oven controls hnproperly set. * See the Using the oven se('ti_m.
or roast properly Shelf position is incorrect. * See the Using the oven section.
Incorrect cookware or cookware * See the Using the oven section.
of improper size being used.
Oven thermostat needs * See the Adjust the oven thermostat--Do it yourself[
adjustment, section.
Clock not set correctly. * See the Using the clock and timer section.
Aluminum foil used improperly * See the Care and cleaning of the range section.
in the oven,
Oven bottom not securely • See the Installation of the range section,
seated in position,
Fooddoes not Oven controls improperly set. • Make sul'e vet/t()twh the BROILHI/LO pad.
broilproperly Oven door not closed. • See the Using the oven section.
hnproper shelf position • See the Broiling Guide.
being used.
Food being cooked in a hot pan. • Use the broiling, laan and _,rid that came with your
Cookwaxe not suited for broiling. * Use the broiling pan and grid that came with your lm_ge
Aluminum foil used on the * See the Using the oven section.
the broiling pan mad grid has
not been fitted properly mad
slit as recommended.
Oven bottoln not securely • See the Installation of the range section.
seated in position,
Oven temperature too Oven thermostat " See the Adjust the oven thermostat--Do it yourself!
hot or too cold needs adjustlnent, section.
Y4n _e Make sure it is cool.
Clock and timer Plug on range is not completely • Make sure electrical l)lug, is l)lugged,, into a live, properly
do not work inserted ha the electrical outlet, gr_)unded _mfl et.
A fuse ha your home may be • Replace the fuse of l'eset the circtfit bl'eakel;
blown or the dreuit breaker
tripped.
Oven controls improperly set. • See the Using the clock and timer section.
54
Page 55

www.GEAppliances.com
Possible Causes What To Do
Oven light does not work Light bulb is loose or defective. * Tighten or replace tile bulb.
Plug on range is not completely * Make sure electrical plug is plugged into a live, prol_erly
inserted ha the electrical outlet, grotmded outlet.
Oven will not self-clean The oven temperature is too * ?dlow the range to cool to room temperature and
high to set a self-dema operation, reset the controls.
Oven controls improperly set. * See the Using the self-cleaning oven section.
"Crackling" or This is the sound of the * This is normal.
"popping" sound metal heating and cooling
during both the cooking mad
cleaning functions.
Excessive smoking Excessive soil. * Touch the CLEAR/OFF pad. Open the windows to
rid the room of smoke. X_ait until the LOCKED DOOR
light goes ott. Wipe up the excess soil and reset the
clean cycle.
Oven door will not open Oven too hot. • Allow the oven to cool below locking temperature.
after a clean cycle
Oven not clean after a Oven controls not properly set. * See the Using the self-cleaning oven secti(m.
clean cycle Oven was heavily soiled. * Clean up heavv, spillovers befin'e ,startiw_ the clean
cycle. Heavily soiled ovens may need to sell=clean
again or for a longer period of time.
"tOCK DOOR" flashes The self-clean cycle has been * Close the oven door.
in the display selected but the door is not
closed.
LOCKED DOOR light The oven door is locked * Touch the CLEAR/OFF l)ad. Allow the (),,'ell to cool.
is on when you want because the temperature
to COOk inside the oven has not
dropped below the
locking temperature.
"F--anda number or You have a function error code. * Touch the CLEAR/OFF pad. ?dlow the oven to cool tbr
letter" flash in the display one hotm Put the oven back into ol)eratiou.
If the function code repeats. * Disconnect all power to the range fin" 5 minutes
and then reconnect power. If the flmctiou error
code )'el)eats , call fi)r service.
"Probe"appears in This is remhadhag you to enter a * Enter a probe temperature.
the display probe temperature after plugging
in the probe.
55
Page 56

Before YouCall ForService...
Troubleshooting tips
Possible Causes
Display goes blank A fuse in your home may be
blown or the circuit
breaker tripped.
The clock is ill the • See tile Special features of your oven controlsection.
black-out mode.
Display flashes Power failure. • Reset tile clock.
Unable to get the Oven control pads were • Tile BAKE mM BROIL HI/LO pads m ust be touched :it
display to show "SF" not pressed properly, tile same time and held fo_ 3 seconds.
Power outage, Power outage or surge. • Reset the clock. If tile oven was in use, you must reset
"Burning" or "oily" This is normal in a new oven • To speed the process, set a sell:cleml cycle for a
odor emitting from and will disappear in time. minimum of 3 hours. See the Using the self-cleaning
the vent oven section.
Strong odor An odor from the insulation • This ix temporary.
around the inside of the oven
is normal for the first few times
the oven is used.
Fan noise The convection fan may turn on • This ix normal. The convection thu will rim tmtil the
and off automatically, flmctiou is over or the door ix opened.
What To Do
• Replace the fuse or reset the circuit breaker:
it by touching the CLEAR/OFF pad, setting the clock
mM resetting any cooking fimctiou.
Convection fan Preheat temperature • Fan will start automatically once the preheat
not working not reached, temperature ix reached.
Drawer does not slide The drawer is out of aligmnent. • Fully extend the drawer and push it :ill the way in.
smoothly or drags See the Care and cleaning of the range section.
Drawer is over-loaded or load • Recluce weight. Redistribute drawer contents.
is mlbalmlced.
Warming zone or A fuse in your home may be • Replace the fuse or reset the circtfit breaker.
warming drawer blown or the circuit breaker
will not work tripped.
The oven is self-clemling. • _'ait for the sell:('leau cycle to finish :rod the oven
Controls improperly set. • See the Using the electric glass top warming zone
Excessive condensation Liquid ill warming drawer. • Relnove liquid.
in the warming drawer
Food dries out in the Moisture escaping. • Cover food with lid or aluminum foil.
warming drawer
Uncovered foods. • Cover food with lid or aluminum foil.
Temperature setting too high. • Reduce temperature settiu,
to cool.
se(tiou.
• See the Electric warming drawersection.
56
Page 57

GE Service Protection Plus F_'
GE, a I_ame re(:og_ized woddwkte for qmdhy aI_d depeI_dabilh_ offers )ou
Service Protectioi_ } h_s --comprehei_slve protecti(m oi_ M] }ore" app]iai)ces--
No Matter What Brand[
Benefits ]_lclnde:
o Backed by GE
o A3] brands covered
o U_linfited service calls
o All parts and labor costs included
* No out-ofopocket expenses
o No bidden deductibles
o One 800 number to call
Y(m will be complete]} satis['ied wit]] om _service protecti(m or _()l_ may reql_est }olaf m(me_ back
o_ the remaim_im_g x'ah_e of)olw tom, tract. No ql_estiom_s asked. It's that simple.
Protect vol_r re[_Jgerato_; dis]_wasber, washer a_d dryer; ravage, TV, VCR a_d m_ch more--any brand!
P] _s tbe re's _ o extra cb a rge {b rem erge_ cy se rv]ce a _ d ]ow m o_ tb ]y f] _ a _ c] _ g ]s avai]a b]e. Ev e_ icem a ke r
coverage a_(] food spoilage protectio_ is o{tered. \'o_ cm_ rest eas), k_owi_g that a]] vo_r wd_ab]e
bo_sebo]d pro(b_cts are protected agai_st expel_sive repairs.
: _[I ]}l{ll}ds C )x(l(d, tip t(t 20 }l!tlS old, ]1] the C/till]Ill /]HII /J,_,
We71CoverAny Appliance.
Anywhere. Anytime.
Please place in envelope and mail to:
GeneralElectricCompany
Warranty Registration Department
P.O. Box 3215{)
Louisville, KY 4{)232-215{)
57
Page 58

Consumer Product Ownership Registration
Dear Customer:
Thank you for purchasing our product and thank you for placing your confidence in us.
_a/e are proud to haxe you as a customer!
Follow these three steps to protect your new appliance investment:
Complete mid mail
your Consumer
Product Ownerslfip
Registration today.
Ilave the peace of
mi_M of knowing we
can contact you in
the/ullik(ly c'_cm of
a saletv modification.
After mailing the
regisu:ation below,
store this dOClllIlen[
in a sale place. It
con{ains ii/]()rl//a{ioi/
you will need should
you require service.
Our servi( e mmfl)er is
800.GE.CAI@2S
(800.432.2737).
Model Number Serial Number
I I
Important: If you did not get a registration card with your
product, detach and return the form below to
ensure that your product is registered, or register
online at www.GEAppliances.com.
Consumer Product Ownership Reg
Read vom: Owner's
Manual carefldlv.
It will help you
operate your new
at)t)liam e propcrl}.
, I
Model Number Serial Number
Mr. Ms. [ M_s. Mi,_
Fil"st I I L;/slI
Nam_ I I I I I I I I I Name I I I I I I I I I I I I
St l-(!e[ I
Address I I I I I I I I I I I I I I I I I I I I I I I I
\p,#I , , , , , , , I E-lnailAddr,'_U
Zip I
[)1{_ 1)he( d
Month
)
* t l(as_ provide your e-mail address to r_ceiv_, via e-mail, discounts, special off(rs and olh_r inlporlanl
(ommtmications from GE Appliances ((;Ei',.).
D Ch_(k here if you do nol want Io 1-((_iv( (ommtmications from GEA's (aretidly sel( (ted partn( rs.
Q
GEAppliances
Ge_lerMElectri¢ Company
Lo_isvilfo, Ko_ItIlcky
ww_GEAppti_xl¢os_om
I
I
58
Page 59

Notes.
_L
w
m
w
I
w
m
_ _
58
Page 60

m
Notes.
,0
,0
q_
m
I
w
ww_
,0
m
0
0
_rJ
r -
m
q_
I
CO
Page 61

Notes.
I
rJ_
m
CB
_L
w
m
w
u_
I
u_
w
m
C1
_Ah
Page 62

GEGasRangeWarranty.(Forc.stomersintheUnitedstates)
Aft warranty service provided by our Factory Service Centers,
or an authorized Customer Care®technician. Toschedule service,
on-line, 24 hours a day, visit us at www.GEAppfiances.com, or call
800.GE.CARES (800.432.2737).
GE Will Replace:
Anypartof the range which tifils due to a detect in materials or worknmnship. During this
Fromthedateof the
originalpurchase
FiveYears
Fromthedateof the
originalpurchase
(onglasscooktop
modelsonly/
_ Service trips to your home to teach you how to use
the product.
_ Improper installation.
_ Failure of the product if it is abused, misused,
or used for other than the intended purpose or
used commercially.
_ Damage to the glass cooktop caused by hardened
spills of sugary materials or melted plastic that
axe not clemled according to the directions in
the Owner's Mmmal.
full one-year warranty, GE will also provide, free of charge, all labor and in-home service to
replace the detective part.
A replacement glass cooktopif it should: crack due to thermal shock; discolor; crack at the
rubber seal between the glass cooktop and the porcelain edge; or if the wamfing zone
pattern we;n_ off.
A replacement warming zone surface unitif it should btm_ out.
Dm_ing this limited additional four-year warranty, you will be responsible fin" any labor or
in-home service.
Staple your receipt here.
Proof of the original purchase
date is neededto obtain service
under the warranty
:_ Damage to the glass cooktop caused by use of demlers
other thml the recommended clemthlg cretans.
:_ Replacement of house fuses or resetting of circuit
breakers.
:_ Damage to the product caused by accident, fire, floods or
acts of God.
:_ h_cidental or consequential damage caused by possible
defects with this applimlce.
This warranty is extended to the original purchaser and any succeeding owner for products purchased for home
use within the USA. In Alaska, the warranty excludes the cost of shipping or service cafls to your home.
Some states do not allow the exclusion or limitation of incidental or consequential damages. This warranty gives
you specific legal rights, and you may also have other rights which vary from state to state. To know what your
legal rights are, consult your local or state consumer affairs office or your state's Attorney General
Warrantor: General Electric Company.Louisville,KY40225
62
Page 63

GEGasRange Warranty.(Forc.stomersinCanada)
Aft warranty service provided by our Factory Service Centers
or an authorized Customer Care®technician. For service,
call 1.800.361.3400.
Staple your receipt here.
Proof of the original purchase
date is needed to obtain service
under the warrant_
Camco Will Replace:
One Year Anypattof the range which fifils due to a detect in materials or workn_anship. During this
From the date of the full one-year warranty, (;amco will also provide, free of charge, all labor and in-home serxice to
originalpurchase replace the defb(fixe part,
FiveYears
Fromthedateof the
originalpurchase
(onglass cooktop
modelsonly/
:_ Service trips to your home to teach you how to use
the product.
:_ hnproper h_stallation.
:_ Failure of the product if it is abused, misused,
or used for other thm_ the intended purpose or
used commerciaJly.
:_ Dmnage to the glass cooktop caused by hardened
spills of sugary materials or melted plastic that
axe not clem_ed according to the directions in
the Owner's Manual.
A replacement glass cooktop if it should: crack due to them_al shock; discolor; crack at the
rubber seal between the glass cooktop and the porcelain edge; or if the wamfing zone
pattern weai_ off'.
A replacement warming zone surface unitif it should bm'n out,
L)ming this lim#ed additional four-year warranty, you will be responsible t(n" any labor or
in-home service.
Damage to the glass cooktop caused by use of clem_ers
other thml the recommended clemlh_g creams.
Replacement of house fuses or resetting of circuit
breakers.
Damage to the product caused by accident, fire, floods or
acts of God.
Incidental or consequential damage caused by possible
defects with this applimlce.
WARRANT()R IS NOT RESPONSIBLE F()R CONSEQUENTIAI, DAMAGES.
I
I
V_'arrantor: CAMCO IN(;.
I
I
63
Page 64

ConsumerSupport.
GEAppliancesWebsite www.GEAppliances.com
Have a question or need assistance with your appliance? Try the GE Appliances Website 24 hours a day,
any day of the year'. For greater convenience and tipster service, you can now download Owner's Manuals,
order parts, catalogs, or even schedtfle service on-line. Y_u can also "_sk Our Team of EN)erts _'''
your questions, and so much more...
ScheduleService www.GEAppliances.com
Expert GE repair se_ice is onh one step away fi'om _our doo_: Get on-line and schedule your se_ice at
)our comenience 24 hom_ any da} of the }ear! Or call 800.GE.CAI_ES (800.432.2737) during natural
business hou_. In Canada, call 1.800.361.3400.
RealLifeDesignStudio www.GEAppliances.com
GE suI)ports tile Uni\'e_al Design concei)t--produ('ts, services and environments that can be used by
people of all ages, sizes and capabilities. We recognize tile need to design for a wide range of i)hysical and
mental abilities and impaimmnts. For details of GE's Universal Design applications, including kitchen
design ideas tot people with disabilities, check out our Websim today. For the hearing impaired, please call
800.TDD.GEAC (800.833.4322). In Canada, contact: Manage_; Consunler Relations, Camco Inc.,
1 Facto_' I,ane, Suite 310, Moncton, N.B., E1 C 9M3.
ExtendedWarranties www.GEAppliances.com
Purchase a (;E extended warrant_ and learn about special discounts that are axailable while your warrantx
is still in effect. You can purchase it on-line an) time, or call 800.626.2224 during natural business hou_s.
(;E Consumer Home Serxices will still be there after )our warrant} expires. In Canada, call 1.800.461.3636.
PartsandAccessories www.GEAppliances.com
Indi\iduals qualified to service their own appliances can have parts or accessories sent directly to their
homes (VISA, MasterCard and Discover cards are accepted). Order on-line today, 24 l/olU_ every day or
by phone at 800.626.2009 during nomml business l/olUS.
Instructions contained in this manual cover procedures tobe performed by any user. Other servicing generally
should be referred to qualified service personnel Caution must be exercised, since improper servicing may cause
unsafe operation. In Canada,please consult your yellow pages for your local Camconumber.
Contact Us www.GEAppliances.com
If you are not satisfied with tile service you receive ti'om GE, contact us on our _4'ebsite with all tile details
including your phone numl)e_; or w_ite to: General Manage_; Customer ]),elations, GE Appliances,
Appliance Park, Dmisville, KY 4t)225. In Canada, to: Manage_; Cons/lil/ei" Relations, Camco Inc.,
1 Facto_a, I,ane, Suite 310, Moncton, N.B., E1 C 9M3.
RegisterYourAppliance www.GEAppliances.com
Register your new applim_ce on-lhle_at your convenience! Timely product registration will allow tot
enhanced communication and prompt service under tile terms of wmr warrant', should tile need arise.
You may also mail in tile pre-pfinted registration card included in tile packing material, or detach and
use the titan in this Owner's Manual.
Printed in Mexico
This book is printed on recycled paper.
 Loading...