

GE JGBP88WEK3WW, JGBP88WEK2WW, JGBP88SEK3SS, JGBP88SEK2SS, JGBP88CEK3CC Owner’s Manual
...
www.GEAppfiances.com
©
oq
Safety Instruotions ...... _2-7
Operating Instructions
Ahuninuin Foil ............ 14
Clock and Tiiner . ...... 16, 17
I,ower Oven Drawer . ....... 32
()veil ................. 11-34
Baking and Roasting ...... 14
Broiling, Broiling Guide . . .15
Convection ........... 20-24
Oven Control ......... 11, 12
Power Outage ............ 13
Preheating .............. 14
Probe .................. 19
Sabbath Feature ....... 27, 28
Sell=Cleaning ......... 33, 34
Shelves ................. 13
Special Features ....... 25, 26
Th erlnostat A(!j tlStll/ent .... 29
Tinled Baking
and Roasting ............ 18
Tinled Convection Baking . .24
Surtace Cooking ......... 8-10
Griddle ................. 10
_'arining Drawer . ...... 30, 31
Care and Cleaning
Broiler Pan and Grid ....... 39
Burner Assenlblv ........ 35, 36
Burner Grates ............. 37
Control Panel and Knobs .... 38
Cooktop ................. 37
Door Renlowfl ............ 39
Griddle .................. 35
()veil Bottom ............. 39
Oven iJght Rei)laceinent .... 40
Oven Vents ............... 37
Sell=Cleaning .......... 33, 34
Shelves .................. 40
Stainless Steel Surtaces ...... 37
Drawer . .............. 40, 41
Installation
Instruc_tions .......... 42-:_3
Air A(!j ustlnent ............ 52
Anti-Tip Device ......... 45, 53
Assenlble Surtace Burners . . .50
Checking Bui'ner
Ignition .................. 51
Connecting the Range
to Gas ................ 46-48
Diinensions and Clearances . .44
Electrical Connections . . .49, 50
I,eveling the Range ........ 52
I,P ...................... 53
Troubleshooting
Tips ................. ,_4-57
Accessories .............. 58
Consumer Support
(_onsuiner Sui_port . .Back Cover
Product Registration ..... 59, 60
_'_rrailtv fl)r ()istoinei_
in Canada ................ 63
_'_rrailty fl)r ()istoinei_
in the U,S,A .............. 69
JC BP86
J(;BP8 7
JCBP88
JCB908
JCB916
JCB918
In Canada contact us at:
www. GEAppliances. ca
Write the model and serial
numbers here:
Model #
Serial #
You can find thenl oil a label
on the front of the range behind
the warining drawer or lower
()veil (lrawei:
183D5580P170 49-85084-1 05-05JR
IMPORTANTSAFETYINFORMATION.
7
iiiiiiiiii!!Jil¸!i!i!i
m
READALLINSTRUCTIONSBEFOREUSING.
WARNING!
For your safe_ the information in this manual must be followed to minimize the risk of fire or explosion,
electric shock, or to prevent property damage, personal injury, or loss of life.
WARNING:If the information
in this manual is not followed exactly,
a fire or explosion may result causing
property damage, personal injury
or death.
-- Do not store or use gasoline or other
flammable vapors and liquids in the
vicinity of this or any other appliance.
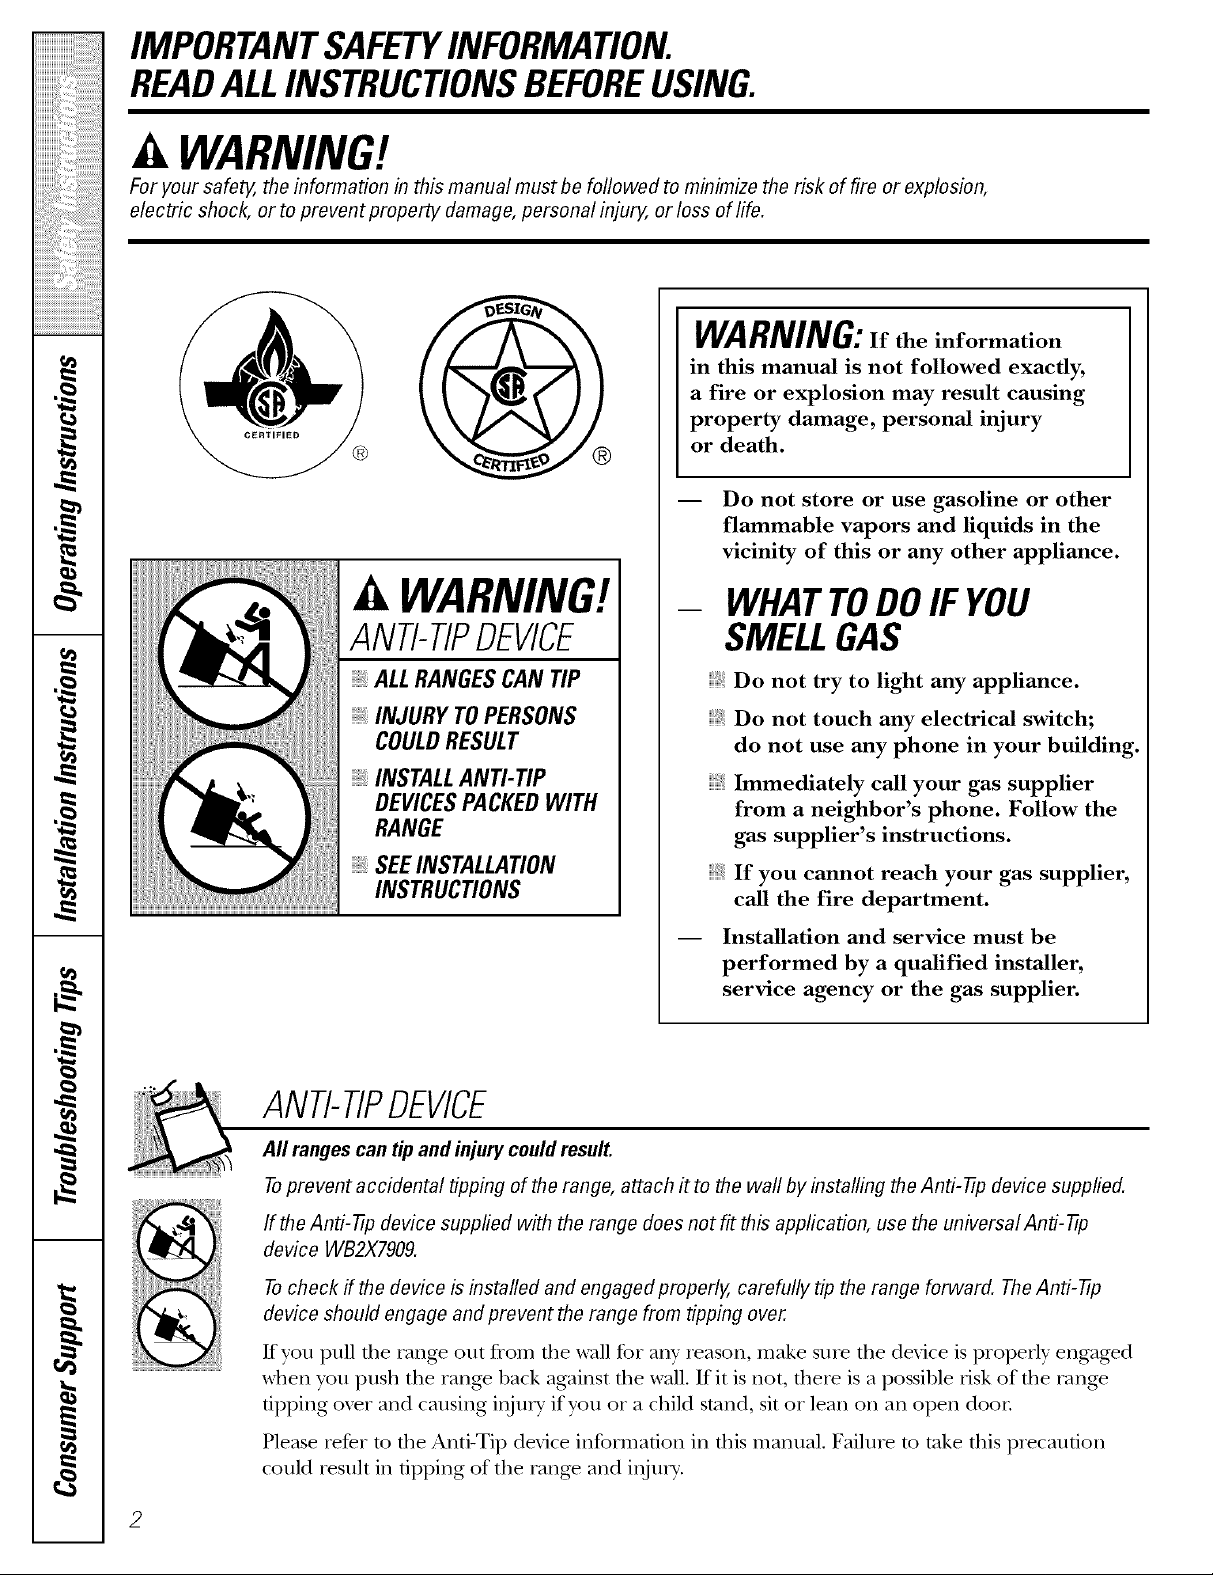
WARNING!
ANTI-TIPDEVICE
- WHATTODOIF YOU
SMELLGAS
o_
q
#.
, ALL RANGES CAN TIP
INJURY TOPERSONS
COULD RESULT
INSTALL AN_ TIP
DEVICES PACKED WITH
RANGE
SEE INSTALLAtiON
INSTRUCtiONS
Do not try to light any appliance.
Do not touch any electrical switch;
do not use any phone in your building.
Immediately call your gas supplier
from a neighbor's phone. Follow the
gas supplier's instructions.
If you cannot reach your gas supplier,
call the fire department.
-- Installation and service must be
performed by a qualified installer,
service agency or the gas supplier.
ANTI-TIPDEVICE
All ranges can tip and injury could result.
Toprevent accidental tipping of the range, attach it to the waft by installing theAnti--tip device supplied.
If the Anti--tip device supplied with the range does not fit this application, use the universal Anti--17p
device WB2X7909.
Tocheck if the device is installed and engaged properly, carefully tip the range forward. TheAnti--tip
device should engage and prevent the range from tipping over.
Kyou pull die rang_ out from die wall for ally' reason, make snie tile device is properly engag>d
when you push the range back against tile wall. If it is not, there is a possible risk of the rang>
tipping ox_r and causing iiijnry if you oi a child stand, sit oi lean on all open door
Please ieDr m file Anti-Tip device information ill fl_is mannal. Failure m take fl_is plecaution
could iesult ill tipping of the rang> and ii_juU.
wvvw.GEAppliances.com
WARNING!
IMPORTANTSAFETYNOtiCE
The California Safe Drinking Water and ToxicEnforcement Act requires the Governor of California to
publish a list of substances known to the state to cause birth defects or other reproductive harm, and
requires businesses to warn customers of potential exposure to such substances.
Gas appliances can cause minor exposure to four of these substances, namely benzene, carbon
monoxide, formaldehyde and soot, caused primarily by the incomplete combustion of natural gas or
LP fuels. Properly adjusted burners, indicated by a bluish rather than a yellow flame, will minimize
incomplete combustion. Exposure to these substances can be minimized by venting with an open
window or using a ventilation fan or hood.
SAFETYPRECAUtiONS
Have the installer show you the location of the range gas shut-off valve and how to shut it off if necessary.
Have yOtlI"range installed and propeity Plug your range into a 120-voh grounded
grounded by a qualified installel, in
accordance with fl_e Installation Instructions.
Any adjusunent and service should be
performed only by qualified gas rang>
installers or service mchnicians.
Do not attempt to repair or replace any
part of your range unless it is specifically
recommended in this manual. All other
ser\dce should be referred to a qualified
technician.
outlet only. Do not remove file round
grounding prong from the plug. If in doubt
about file grounding of file home electrical
system, it is your personal responsibili w and
obligation to hax> an ungrounded outlet
replaced with a properly grounded,
three-prong outlet in accordance with
the National Electrical Code. Do not use
an extension cord with this appliance.
3
IMPORTANTSAFETYINFORMATION.
7
iiiiiiiiiiiiil;_i!i!!';i_:_i'iiiililililililililiiii_;_!_
m
,0
,0
,0
q
m
READALLINSTRUCTIONSBEFOREUSING.
aa
4
SAFETYPRECAUTIONS
Locate tile range out of kitchen traffic path
and out of drafw locations to prexent poor
air circulation.
Be sure all packaging mamrials are
removed from dte rang_ before operating it
to prevent fire or smoke damag> should the
packaging material ignite.
iiiiiiiiiiii_iii
Be sure your range is correctly adjusted by
a qualified service teclmician or installer for
the type of gas (natural or LP) that is to be
used. Your range can be converted for use
with either wpe of gas. See the Installation of
the range sect.ion.
WARNING: teseadjnstments mnst
be made by a qualified service technician
in accordance with the ntanut_acturer's
instructions and all codes and requirements
of the authority having jurisdiction! Failure
m follow these insmtcfions could result in
serious irwinU or property damage. The
qualified ag>n W perforating this work
assumes responsibility for the conversion.
After prolong>d use of a range, high floor
mmperaunes m W result and many floor
co_>ring_ will not withstand this kind of use.
Ne_>r install the rang> over vinyl tile or
linoleum that cannot withstand such type
of use. Nexer install it directly ox>r interior
kitchen carpeting.
Do not leme children alone or unattended
where a range is hot or ira operation.
They could be seriously burned.
Do not allow anyone to climb, stand or hang
on the oxen door; lower oven drawe_;
wam_ing drawer or cookmp. They could
damag_ the range and even tip it oxen.
causing se',ere personal ir_jmT.
CAUTION:Items of interest to
iiiiiiiiiiii_iii
children should not be stored ira cabinets
aboxe a range or on the backsplash of a
range---dfildren climbing on the range to
reach items could be seriously ir_nied.
WARNING:NEVERusethis
appliance as a space heater to heat or
warm the room. Doing so may resuh
iracarbon monoxide poisoning and
oxerheating of the oven.
Nexer wear loose fitting or hanging gamaents
while using the appliance. Be carefld when
reaching for imms stored ira cabinets oxer the
range. Flammable material could be ignimd
if l)ronght ira contact with flame or hot oxen
snr_tces and m W cause sex>re l)nrras.
iiiiiiiiiiii_iii
Do not store flammable materials ira an
oxen, a range drawer or near a cooktop.
iiiiiiiiiiii_iii
Do not store or use combnstil)le materials,
gasoline or other flammable vapors and
liquids in the vicinity of this or any other
appliance.
iiiiiiiiiiii_iii
Do not let cooking gTease or other flammable
materials accumulate ira or near the range.
iiiiiiiiiiii_iii
Do not use wamr on grease fires. Nex>r pick
up a flaming pan. Turn the controls off:
Smother a flaming pan on a surfime burner
by cox_ring the pan complemly with
a well-fitting lid, cookie sheet or fiat tray.
Use a multi-pulI)ose dU chemical or
foam-type fire extinguisher:
Flaming grease outside a pan can be put
out by co_>ring it with baking soda or,
if available, by using a multi-purpose drT
chemical or foam-type fire extinguishen
Flame in the upper oven or lower oxen
drawer can be smoflaered completely by
closing flae ox>n door or drawer and turning
the control to offor by using a multi-
puq)ose d U chemical or foam-type rite
extinguishen
iiiiiiiiiiii_iii
Let the bnrlaer grates and other stirfaces
cool before touching them or leaving them
where children can reach them.
iiiiiiiiiiii_iii
Never block the vents (air openings) of the
rang_. They provide the air inlet and outlet
flaat are necessa U for the range to operam
properly with conect combustion. Air
opening_ are locamd at the rear of the
cooktop, at dm top and bottom of the oven
door, and at the bottom of the range under
the wanning drawer, lower oven drawer or
kick panel.
iiiiiiiiiiii_iii
Large scratches or impacts to glass doors
can lead to broken or shattered glass.
vvww.GEAppliances.com
WARNING!
SURFACEBURNERS
Use proper pan size--avoid pans that are unstable or easily tipped. Select cookware having flat bottoms
large enough to cover burner grates. Toavoid spillovers, make sure cookware is large enough to contain
the food properly. This will both save cleaning time and prevent hazardous accumulations of food, since
heavy spattering or spillovers left on range can ignite. Use pans with handles that can be easily grasped
and remain cool.
Always use tile LITEposition when ignidng
the top burners arrd make sure the burners
haw ignited.
Never leaxe tile surfirce bm_rers unattended
at hiOr flame setting:s. Boilox>rs cause smoMng
arrd greasy spillox>rs that m W catch on fire.
Adjust fire mp burner flame size so it
does not exmnd beyond tire edge of tire
cool<ware. Excessixe flame is hazardous.
Use only dU pot holders-- moist or damp
pot holders on hot surl_aces may resuh in
1)/n_rs flom steam. Do not let pot holders
come near open flames when lifting
cool<ware. Do not use a towel or oilier bu]kv
clofll in place of a pot holder
When using glass cool<ware, make sure it
is designed for mI>-of-rang> cooking.
To minimize tile possibility of bums, ignition
of flammable materials arrd spillage, turn
cookware handles toward fire side or back
of fire range wifl/out extending over
adjacent burnel_.
Caiefldly wamh foods being fcied at a high
flame setting.
Alwws heat fat slowl> arrd wamh as it heats.
Do not leave any items on fire cookmp. Tile
hot air flom the xent m W ignim flammable
imms and will irrcrease pressure iraclosed
corrtainers, which m W cause fllem m b/list.
If a combination of oils or fats will be used
in flying, stir mg>ther before heating or
as fats meh slowly.
Use a deep fat thei_nometer whenexer
possil)le to prexent oveflleafing fat beyond
tile smoMng point.
Use fire least possible amount of fat for
effecfixe shallow or deeI>l_at ruing. Filling
tire pan too fill of l_atcan cause spilloxers
when food is added.
Do not flame foods on d_e cooktop. If you
do flame foods under file hood, umr tile
_aI] OH.
Do not use a wok on the cooldng surl_ace
if tire wok has a round metal ring that is
placed oxer fire burner gxam to support tire
wok. This ring acts as a heat trap, which m W
damage the 1)urner gram and 1)urner head.
Also, it m W cause tile burner to work
improperly. This may cause a carbon
monoxide lexel aboxe that allowed by
cuiTerrt standards, resulting in a heahh
hazard.
Foods for flTing should be as d_T as possible.
Frost on Dozen foods or moisun_e on fresh
tbods can cause hot rift to bubble up and
ox_r tire sides of tile pan.
Nexer uT to moxe a pan of hot l_at,especially
a deep fat flTer _'ait until tile fat is cool.
Do not leaxe plastic items on tile cooktop--
filey m W meh if left too close to file x>nt.
Kee I) all plastics awW from tile sml_ace
BIIFHeFs.
To ax_id tire possibility of a bum, always be
certain that tile controls for all bui_]ers are
at the OFF position arrd all grams are cool
before atmmpting to remox_ flrem.
If rang_ is locamd near a windo_, do not
hang long curtains flint could blow oxer file
surl_ce burners arrd cream a fire hazard.
If you smell gas, troll off" file gas to dre rang_
arrd call a qualified service technician. Nex>r
use an open flame to locate a leak.
Always umr dre surl_ce burner controls off
before removing cool<ware.
Do not lift die cooktop. Hfting dre cooktop
can lead to damag> arrd improper operauon
of the rang_.
IMPORTANTSAFETYINFORMATION.
7
iiiiiiiiiiiiiii_i!i!!'#_i'###ii#_
iiiiiiiiiiiiiii_,_ii,!iiiiii{,i_'i;iii_,_i_ii,#_ii_ii_ii_ii_##il
m
,0
,0
READALLINSTRUCTIONSBEFOREUSING.
ELECTRICWARMINGDRAWER
ANDLOWEROVENDRAWERronsomernode/sJ
The puq)ose of die wai_ning drawer and
tile WARM ZONE setting of tile lower oxen
drawer is to hold hot cooked foods at
serving temperature. Alwws start wifll hot
tbod; cold food cannot be heated or cooked
in tile wai_ning drawer or the WARM ZONE
setting of the lower o_en drawer.
Do not use file drawer m d U newspapers. If
ox>rheamd, they can catch on file.
Do not leax> paper products, plastics,
canned food, or combustible matelials in
file drawer
Ne_er lemejars or cans of t_tt dlipping:s in
or Ileal VO/li drawer
Do not warm tbod in tile drawer for mole
than two ho/lrs.
Nex_r place, use or self-clean tile lower oxen
drawer pan in tile upper oxen.
Do not touch the heating element or the
interior surface of the drawer. Tilese
surt_aces may be hot enough to bum.
REMEMBER:Tile inside surface of tile
drawer may be hot when die drawer
is opened.
Use care when opening tile diawen Open
tile drawer a crack and let hot air or smam
escape before removing or replacing food.
Hot air or smam which escapes can cause
bums to hands, Pace and/or eyes.
Do not use alun/inun_ foil to line tile lower
oxen drawen Foil is an excellent heat
insulator and will trap heat benead/it. Tills
will upset tile perfommnce of tile drawer
and it could damag_ the inteiior finish.
,0
q
#_.
m
COOKMEATANDPOULTRYTHOROUGHLY...
Cook meat and poultry thoroughly--meat to at least an INTERNAL temperature of 160°[:and poultry to
at least an INTERNAL temperature of 180°F.Cooking to these temperatures usually protects against
foodbome illness.
SELF-CLEANINGTHEUPPEROVEN
Be sure to wipe off excess spillag_ be%re
self-cleaning operation.
Before self-cleaning tile oxen, remo_e tile
1)roiler pan, broiler glid, all cookware,
I)robe and any alun/inum foil.
Nexer place, use or self-clean tile lower oven
drawer pan in the upper oxen.
Nickel oxen shehes (on some models)
should be IeInoxed flom the ox>n befoIe
beginning the self-clean cycle.
Gr W poivelain-coated oxen shelx>s (on some
models) m W be cleaned in tile ox>n duiing
die self-clean cycle.
Clean only parts listed in this ()wner's
Manual.
Do not clean the door gasket. Tile door
gasket is essential for a good seal. Care
should be taken not to tilt), damag_ or inoxe
tile gasket.
If the self-cleaning mode malfunctions,
ulrn tile ox>n off and disconnect tile power
supply. Have it serviced by a qualified
mchnician.
Do not use oxen cleaners. No comnmrcial
oxen cleaner or oxen liner of any kind
should be used in or around any part of
the oxen. Residue flom oxen cleaners will
damage the inside of the oxen when tile
self-clean cycle is used.
e,
6
wvvw.GEAppliances.com
UPPEROVEN
Stand away from the range when opening the door of a hot oven. The hot air and steam that escape can
cause bums to hands, face and eyes.
Do riot use the oven for a storage area.
Imms stored in the o\>n can ig_lite.
Kee I) tile oxen flee flom grease buildup.
Place tile oven shelx_s in the desired
position while tile oven is cool.
Pulling out tile shelf to tile stop-lock is a
convenience in lifting heaxy tbods. It is also
a precaution against burns flom touching
hot surfaces of tile door or oven walls. The
lowest position is riot designed to slide.
Do riot heat unopened food containers.
Pressure could build up and tile container
could burst, causing an irlju U.
A WARNING:NEVERcoverany
slots, holes or passages in the oven bottom
or co_er an enfi_e rack with materials such
as aluminum fbil. Doing so blocks air flow
through the oven and m W cause carl)on
monoxide poisoning. Aluminum foil lining:s
m W also trap heat, causing a fire hazard.
Do riot use aluminum foil an?where in tile
oven except as described in dais manual.
Misuse could result in a fire hazard or
damag> to tile rang_.
When using cooking or roasting bags in tile
oxen, follow the manufacturer's directions.
Do riot use your oven to d, y newspapers.
If ox>flleated, tiley can catch fire.
Use only glass cookwa_e that is
recommended for use in gas o_>ns.
Alwws remove the broiler pan flom rang_ as
soon as you finish broiling. Grease left in tile
pan can catch fire if oxen is used without
removing tile gxease fiom tile broiler pan.
When broiling, if meat is too close to tile
flame, tile fat m W ignite. Trim excess f_tt to
pre_ent excessive flare-ups.
Make sine the broiler pan is in place
correctly to _educe tile possibility of
grease fires.
If you should hax> a grease fire in the broiler
pan, pless tile CLEAR/OFFpad,and kee I)
tile oven door closed to contain rite until
it bu*_ls out.
For safety and proper cooking perfom/ance,
always bake and broil with the oven door
closed.
Nex>r place, use or self-clean tile lower oven
drawer pan in the upper oxen.
READANDFOLLOWTHISSAFETYINFORMAtiONCAREFULLY.
SAVETHESEINSTRUCTIONS
,O
Usingthe gas surfaceburners.
Throughout this manual, features and appearance may vary from your model
Before Lighting a Gas Burner
Make sure all burne_ are in place.
Make sure all grates on the range are
properly placed before using any bm'ne_:
iiiiiiiiiiiii"::i_'i_5:i:i:i:i:i:i:i:i:ilili_ii_!!i_!!
iiiiiiiiiiii_ii!ii!ii_ii;;_i_iiil;_ii;_!)i'_%iiii_i!)!i{i
iiiiiiiiiiiiiiiiiii ii ii ii ii ii i iii i ii i i i i i i i i i i ii ii i!
.O
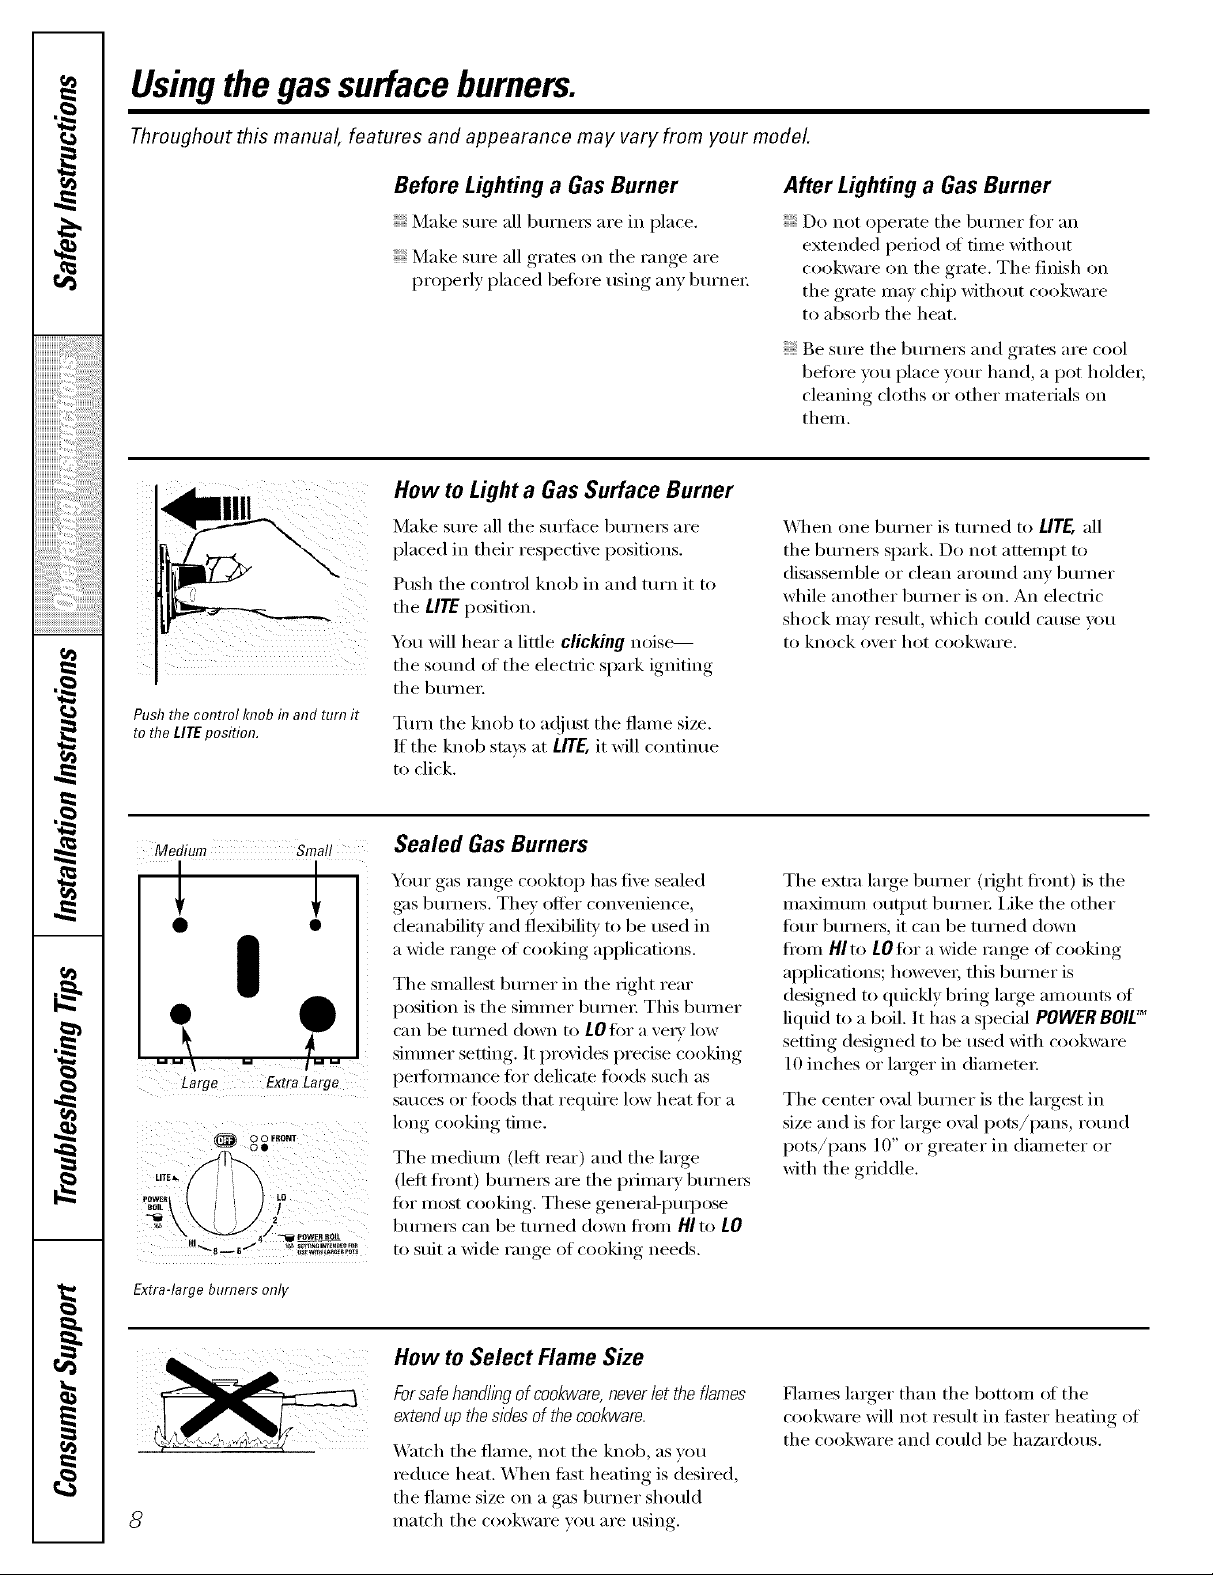
Push the control knob in and turn it
to the LITEposition.
How to Light a Gas Surface Burner
Make sure all tile surfi_ce burne_ are
placed in their respective positions.
Push the control knob in and mrn it to
tile LITEposition.
Y_u will hear a little clicking noise---
the sotmd of the electric spark igniting
tile burne_:
Turn tile knob to ac!iust tile flame size.
If the knob stays at LITE,it will continue
to click.
After Lighting a GasBurner
Do not operate tile burner tot an
extended period of time without
cookware on the grate. The finish on
tile grate may chip without cookware
to absm4) the heat.
Be sm'e tile bm'ne_s and grates are cool
before you place yore" hand, a pot holder;
cleaning cloths or other materials on
them.
When one bm'ner is turned to UTE, all
tile burne_ spark. Do not attempt to
disassemble or clean arotmd any burner
while another bm'ner is on. An electric
shock may result, which could cause vet!
to knock over hot cookware.
,o
q
#_.
m
a
Medium Small
Largo Extra Large
OD
LITE_
Extra-large burners only
Sealed GasBurners
Yore" gas range cooktop has five sealed
g_s 1)urne_s. Tile)' offer convenience,
deanabilitv and flexfl)ilitv to be used in
a wide range of cooking applications.
Tile smallest burner in tile right rear
I)osition is tile simmer bm'ne_: This 1)tm_er
can be turned down to LOfor a \'e_' low
simmer setting, It provides precise cooking
i)erlommnce for delicate foods such as
SatlCeS or [i)o(ls that require low heat for a
long cooking time.
The medium (left rear) and the large
(left fi'ont) 1)urne_s are tile primary 1)urne_s
fi)r most cooking. These general-puq)ose
burnels can be turned down ti'om HI to tO
to suit a wide range of cooking needs.
How to Select Flame Size
Forsafehandiingof cookware,neverietthef/ames
extendupthesidesof thecookware.
Watch tile flame, not tile knol), as you
_educe heat. When ti_st heating is desired,
the flame size on a gas burner should
II/atch tile cookware veil ai'e rising.
Tile extra lmge burner (right fl'ont) is tile
nlaxinluln output burnei; i,ike the other
Ibm" 1)urne_, it can be turned down
fl'om HIto LOfor a wide range of cooking
apl)lications; however; this bm'ner is
designed to quickly bring large amotmts of
liquid to a boil. It has a spedal POWER BOIL"
setting designed to be used with cookware
10 inches or larger in diameter;
Tile center oxzd burner is tile largest in
size and is fl)r large owd pots/pans, rotmd
pots/pans 10" or greater in diameter or
with the griddle.
Haines larger than tile bottom of tile
cookware will not result in filster heating of
the cookware and could be hazardous.
Top-of-Range Cookware
www.GEAppliances.com
Aluminum: Mediun>weight cookware is
recon/mended because it heats quickly
and evenlv. Most fi)o(ls brown evenly in an
almninunl skillet. Use saucepans with tight-
fitting lids when cooking with mininmnl
}lIllO/IntS ()f wateI:
Cast-Iron: If heated slowly, most skillets will
give satistactorv results.
Enamelware: Under some conditions,
tile enai/lel of SOIlle ('ookwaFe Ill}IV I//elt.
Follow cookware illan/i][ilcttii'ei"s
recomnmndations fin" cooking methods.
Stove TopGrills
Do not ....use stove toI ) ,grills on _our, sealed
gas burneis. If you use tile stoxe top grill
(m tile sealed gas burner, it will cause
incon/plete c()mbustion and can result
in expostli'e to C_li'bon illonoxide lexels
aboxe allowable current standards.
Glass: There are two t,ipes ot glass
cookware--those tor oven rise ()Ill',' and
those tot u)p-oFrange cooking (saucepans,
coffee and teapots). Glass conducts heat
very slowly.
Heatproef Glass Ceramic: Can be used tot
either sm_i_ce or ()veil cooking. It conducts
heat veD' slowly and cools very slowly: Check
cookware I/l_lnl/[ilCttlI'eI"S directions to be
sure it can be used on gas ranges.
Stainless Steel: This metal alone has poor
heating properties and is usually combined
with coppei; almninun/or other metals for
improved heat distribution. (_ombination
metal skillets usually work satisfi_ctoriN if
they are used with n/editun heat as the
Ill_l n/lIil Cttli'ei" i'ecoil/illends.
Use a fiat-bottomed wok.
Thiscanbehazardoustoyourhealth.
Wok This Way
Werecommendthatyou use a 14@chor smaller
fiat-bottomed wok Make sure thewok bottom sits
fiat onthe grate. Theyareavailable at your local
re,taft store.
Onl) a flat-bottonmd wok should be used.
In Case of Power Failure
In case (ff a power tifilure, you can light tile
gas sm_i_ce burnei_ on vour range with a
match. Hold a lit match to tile burnei; then
push in and turn tile control knob to tile
UTE position. Use extreme ca ution when
lighting burnei_ this wav.
Do not use a wok support ring. Placing tile
ring over tile burner or grate may cause tile
burner to work improperl> resulting in
cad)on monoMde levels above allowable
standards. This could be dangerous to
vour health.
Sm_i_ce burnei_ in use when an electrical
power fifilure occm_ will continue to
operate n(mnallv.,
,0
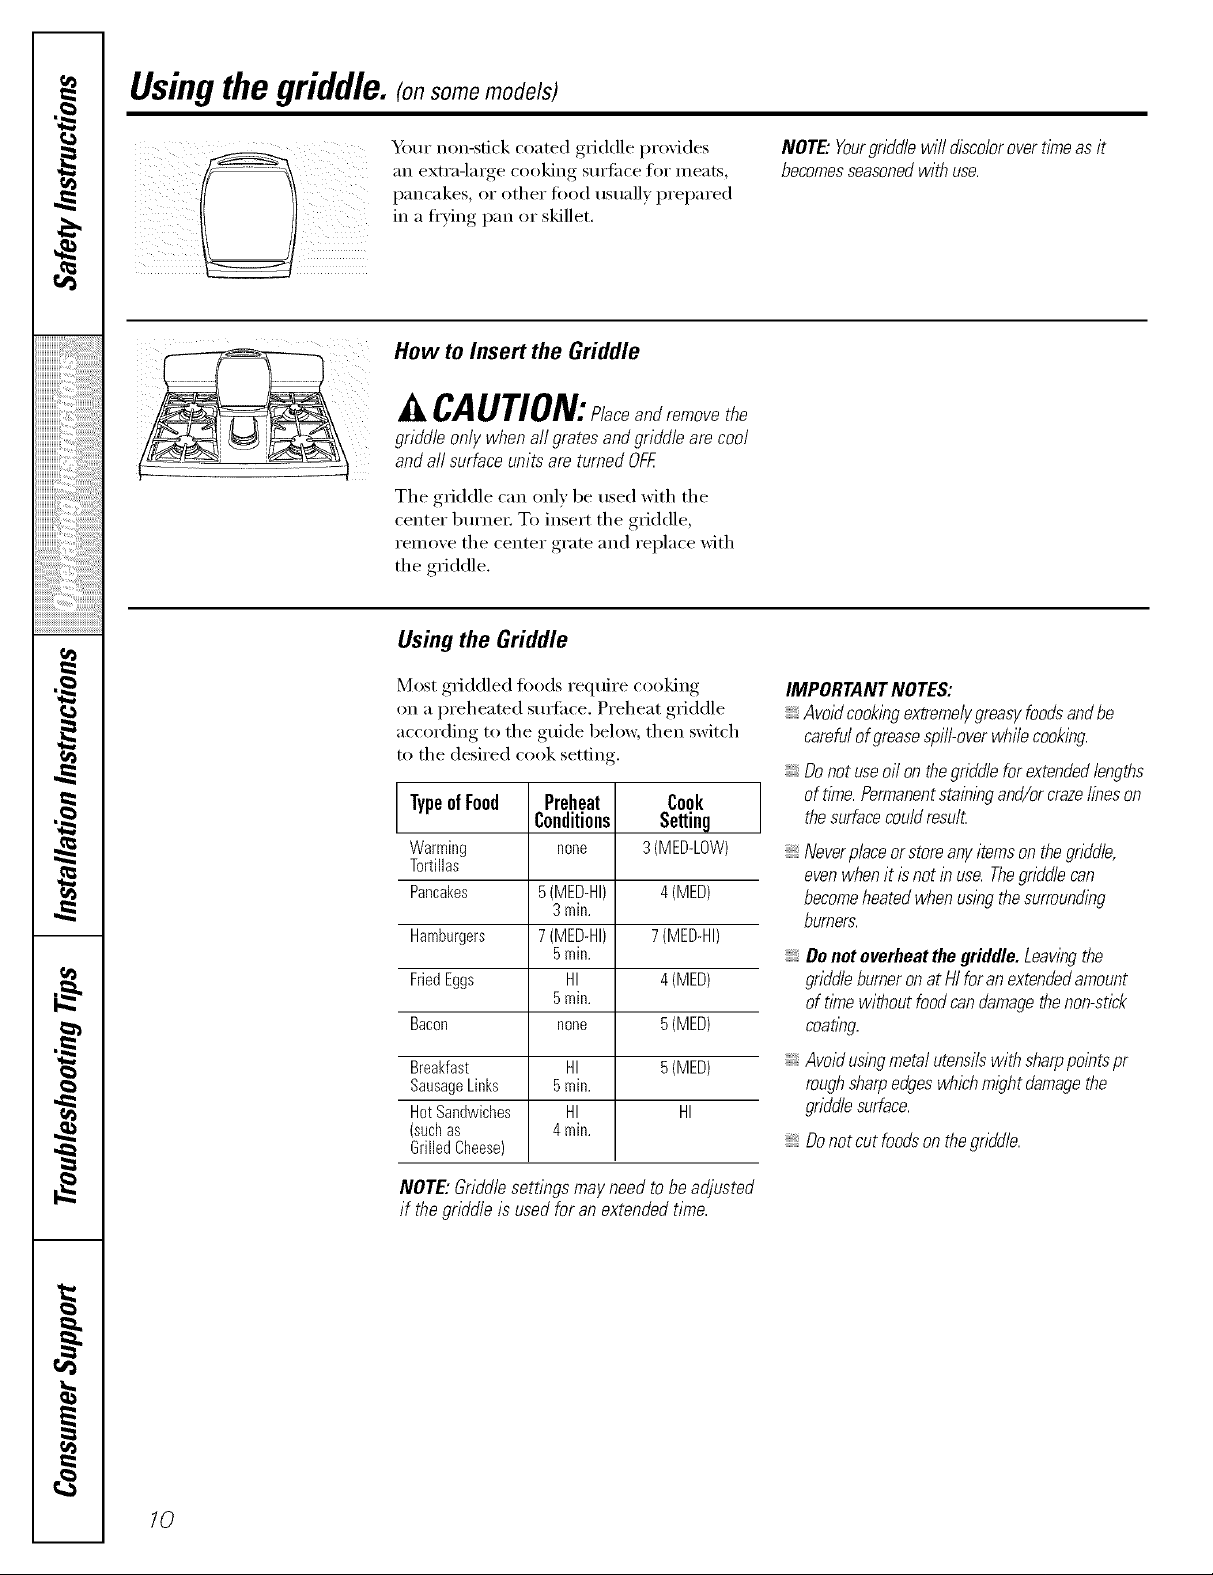
Usingthegriddle. (onsomemodels)
_A_ur non-stick coated griddle provides
an extra-large cooking sur_i_ce for meats,
pancakes, or other tood usually prepared
in a flying pan or skillet.
How to Insert the Griddle
;;;;;;;;;;3"¸ ........
CAUTION:Placeandremovethe
griddleonlywhenall gratesandgriddlearecool
andall surfaceunitsare turnedOFF.
The griddle can only be used with the
center bm'ne_; To insert the griddle,
remove the center grate and replace with
the griddle,
iiiiiiiiiiiiiiiiiii iiiiiiiiiiiiiii ii, iiiiililililililililiiiiii ii i!il
Using the Griddle
,0
,0
q
Most gfiddled loods require cooking
on a preheated sm_i_ce. Preheat griddle
according to the guide belong; then switch
to the desired cook setting.
TypeofFood
Preheat
Conditions
Warming
Tortillas
Pancakes
Hamburgers
FriedEggs
Bacon
Breakfast
SausageLinks
HotSandwiches
(suchas
none
5(MED-HI)
3min.
7(MED-HI)
5min.
HI
5min.
none
HI
5min.
HI
4min.
GrilledCheese)
Cook
Setting
3(MED-LOW)
4(MED)
7(MED-HI)
4(MED)
5(MED)
5(MED)
HI
NOTE"Yourgriddlewilldiscolorovertimeasit
becomesseasonedwithuse.
IMPORTANTNOTES:
Avoidcookingextremelygreasyfoodsandbe
carefulofgreasespill-overwhilecooking.
Donotuseoilonthegriddleforextendedlengths
oftime.Permanentstainingand/orcrazefineson
thesurfacecouldresu£
Neverplaceorstoreanyitemsonthegriddle,
evenwhenit isnotin use.Thegriddlecan
becomeheatedwhenusingthesurrounding
burners.
Donotoverheatthegriddle.Leavingthe
griddleburneronatHIforanextendedamount
of t/Ynewithoutfoodcandamagethenon-stick
coa tlbg.
Avoidusingmetalutensilswithsharppointspr
roughsharpedgeswhichm/ghtdamagethe
griddlesurface.
Donotcutfoodsonthegriddle.
NOTE: Griddle settings may need to be adjusted
if the griddle is used for an extended time.
m
10
Usingthe ovencontrols.(onsome models) www.GEAppliances.com
Throughout this manual, features and appearance may vary from your model.
0
mp OVEN
(on models with number pads only)
I
CONTROL _ SETCLOCK ,
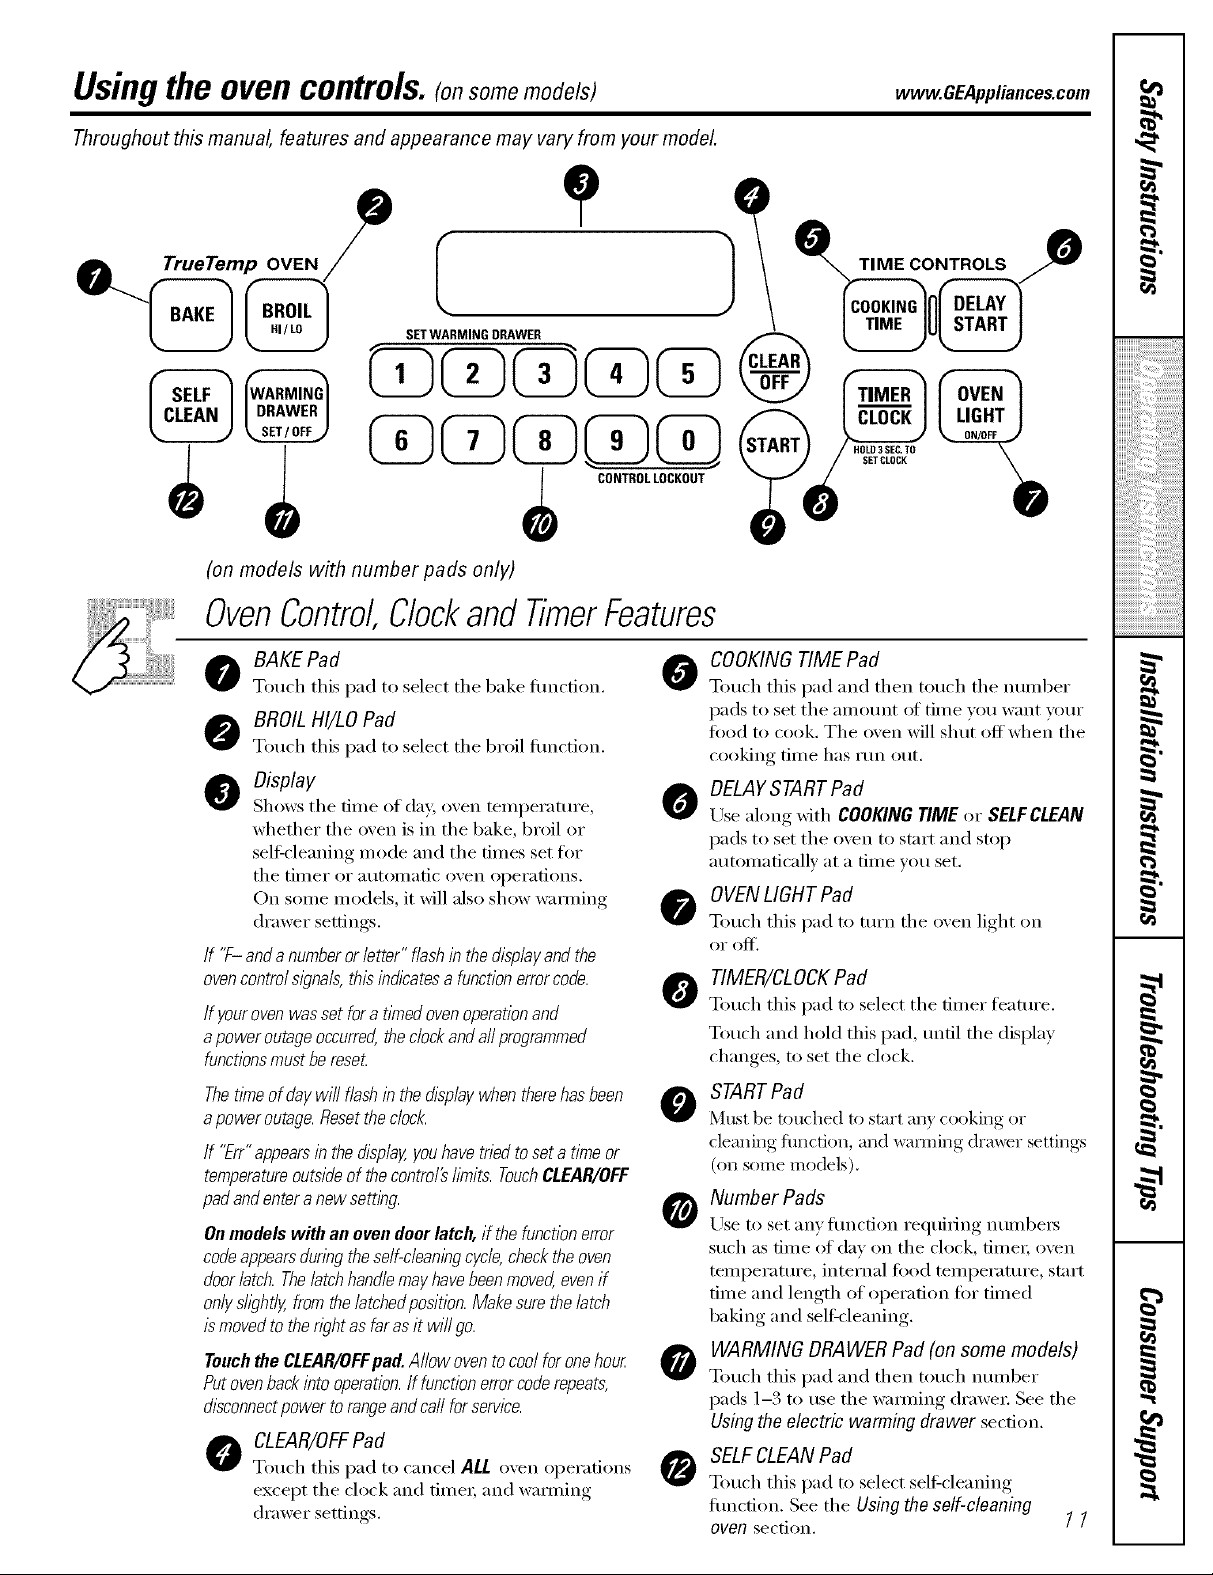
OvenControl,ClockandTimerFeatures
COOKINGTIME Pad
o AKE Pad 0
Touch this pad to select tile bake flulction.
BROILHI/LO Pad
Touch this pad to select tile broil flulction.
O Display
Shows tile dine (If day; o',en tenli)erattu'e ,
whether the oven is in the bake, broil or
sel6cleaning niode and the dines set tor
tile tiiller or atltOillatic ()veil oi)er;itions.
On soine Inodels, it will also show wamiing
di'awer settings.
If '7- anda numberorletter"flashinthedisplayandthe
ovencontrols/gna&thisindicatesa functionerrorcode.
If yourovenwassetfora t/Ynedovenoperationand
apoweroutageoccurred,thedockandaftprogrammed
functionsmustbereset.
ThetYneofdaywill flashinthedisplaywhentherehasbeen
apoweroutage.Resettheclock.
If "Err"appearsinthedisplay,youhavetriedtoseta timeor
temperatureoutsideofthecontro/2bruits.TouchCLEAR/OFF
padandenteranewsetting
Onmodels with an ovendeer latch, if thefunctionerror
codeappearsduringtheself-cleaningcycle,checktheoven
doorlatch.Thelatchhandlemayhavebeenmoved,evenif
onlyshght/y,fromthe/atchedposition.Makesurethelatch
ismovedtothewht as farasit wi//go.
TouchtheCLEAR/OFFpad.Allowoventocoolforonehour
Putovenbackintooperation.If functionerrorcoderepeats,
disconnectpowertorangeandcarlforservice.
O CLEAR/OFFPad
Touch this pad to cancel ALLoxen oi)ei'ations
except the chick and tinIeI; and wamiing
drawer settings.
Touch this pad and then touch tile nuinber
pads to set tile ai//otlnt ot tinie VOtl want VOtlY
food to cook. Tile oven will shut off when tile
cooking time has I'(ln ()/It.
DELAYSTARTPad
A
Use ahmg with COOKINGTIMEor SELFCLEAN
pads to set tile oven to start and stop
autoinaticallv at a tiine you set.
OVENLIGHT Pad
Touch this pad to turn tile oven light on
oi" of]'.
TIMER/CLOCKPad
Touch this pad to select tile diner ti_attu'e.
Touch and hold this pad, until the display
changes, to set the clock.
STARTPad
O
Must be tOtlched to start all} cookhlg or
cleaning flmcdon, and _mniilg drawer settings
(on some models),
Number Pads
Use to set any tHn(fion I'eq(lilJng ntlillbers
such as dine of day on tile clock, dIneI; oven
teinl)eramre, internal food teinl)erature, start
tiIne and length (If operation fi)I"tiIned
baking and self=cleaning.
WARMING DRAWERPad (on some models)
0
Totl('h this l)ad and then totlch ntlillber
pads 1-3 to use tile waiming drawer See tile
Usingthe electric warmingdrawer sect.ion.
SELFCLEANPad
Touch this pad to select sel6cleaning
fiulction. See the Using the self-cleaning
oven section. ] ]
Using the oven controls. (onsomemodels)
,O
Throughout this manual, features and appearance may vary from your model
iiiiiiiiiiiii'::i_'i_i:_:i:i:i:i:i:i:i:i:ilili_ii_!!i_!!
Convection
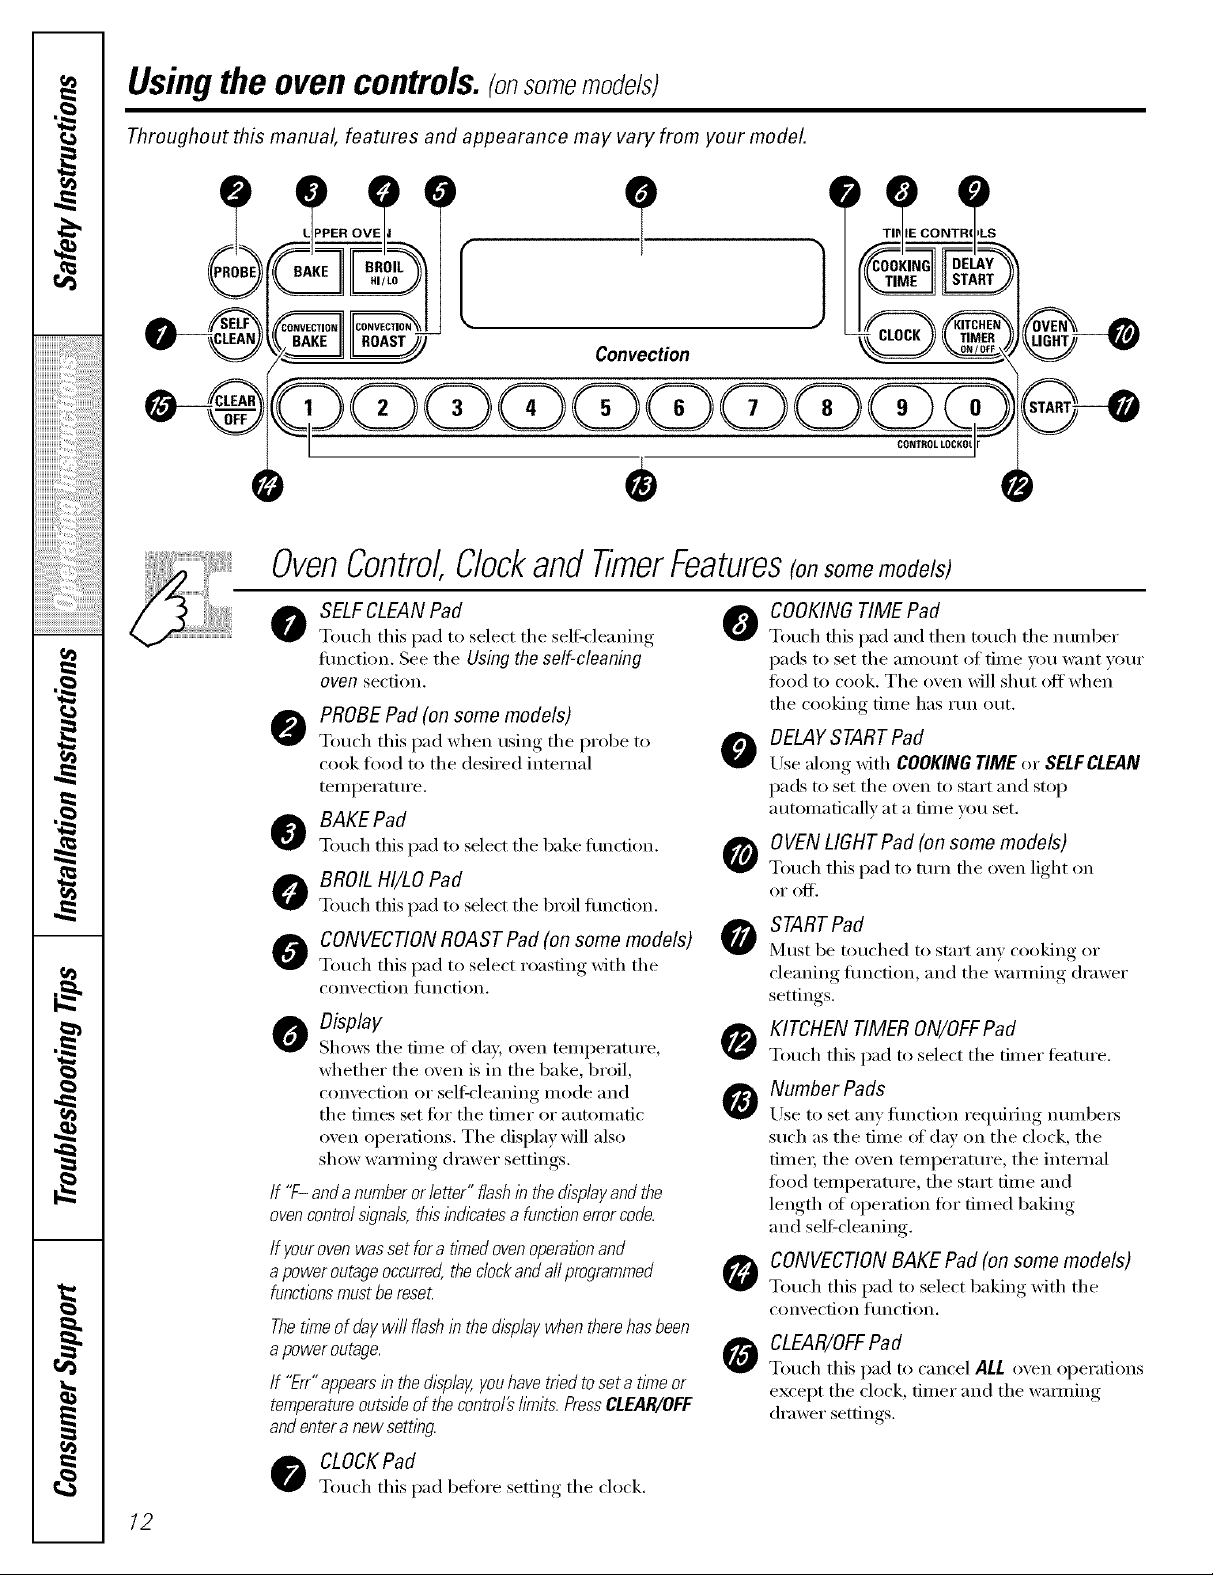
OvenControl,Clockand TimerFeatures(onsomemodels)
iiiiiiiiiiiiiiiiiii iiiiiiiiiiiiiii ii iiiiililililililililiiiiiiii i!il
o SELFCLEANPad 0
Touch this pad to select the selfk leaning
fimction. See the Using the self-cleaning
,O
,0
ovensection.
PROBE Pad (on some models)
Touch this pad when using the probe to O
cook food to the desired internal
teml)erature.
O BAKEPad
Touch this pad to select the bake flmcfion. O
O BROIL HI/LO Pad
Touch this pad to select the broil flmcfion.
0 CONVECTIONROASTPad(onsomemodels)
Touch this pad to select roasting with the
con'_ ection [ilnction.
q
m
o isplay
Sho_vs the time of day, oven temperatm'e,
whether the oven is in the bake, broil,
convection or self_'leaning mode and
the times set for the timer or automatic
oven operations. The display will also
show wamfing drawer settings.
If "F- anda numberor letter" flashin the displayand the
ovencontrol s/_?na/s,this indicatesa function errorcode.
Ifyour ovenwasset fora timed ovenoperationand
a power outageoccurred,the clockandall programmed
functionsmust be rese_
Thet_Yneofdaywill flashinthed/splaywhentherehasbeen
a poweroutage.
If "Err"appearsin the&splay, youhavetried toset a time or
temperatureoutsideof the contro/# i/mits PressCLEAR/OFF
and entera new setting.
COOKINGTIME Pad
Touch this pad and then touch the number
pads to set tile }lIllOtlnt of tiIlle VOtl w;lIlt VOtlI"
food to cook. The oven will shut off when
the cooking time has rtm out.
DELAYSTARTPad
Use along with COOKINGTIME or SELFCLEAN
pads to set the oven to start and stop
automaticallv at a tim e you set.
OVEN LIGHT Pad (on some models)
Touch this pad to mm the o_,en light on
oi" (ill.
STARTPad
Must be touched to start any cooking or
cleaning flmction, and the wamfing drawer
settings.
O KITCHEN TIMER ON/OFFPad
Touch this pad to select the tinier feature.
Number Pads
Use to set any fimction requiring numl)e_
such as the time of day on the clock, the
time_; the oven temperature, the internal
food teml)eratm'e , the start time and
length _ff operation fin" timed baking
and sel6cleaning.
CONVECTION BAKE Pad (on some models)
Touch this pad to select baking with the
con'_ection ltlnction.
CLEAR/OFFPad
Touch this pad to cancel ALL oven operations
except the clock, timer and the wamfing
drawer settings.
12
CLOCKPad
Touch this pad before setting the clock.

Usingthe upperoven. vvvvw.GEAppliances.com
Toavoid possible bums, place the shelves in the desired posifion before you turn the oven on.
Before you begin...
Theoven has 5 shelf positions.
It also has aspecial low shelf
position (R)for extra large items,
such as a large turke,¢
Plastic items on flTe cooktop may
melt if left too close to the vent.
Vent appearance and location var_¢
The shelves have stop-locks, so that when
placed correctly on the shelf supports (A
through E), thex will stop beflwe coming
completely out, and will not flit.
_\_ten placing and remo_ino_ cookware,
pull the shelf out to the bump on the shelf
mI_port.
Upper Oven Vent
Your oven is vented through ducts at the
rear of the range. Do not block these ducts
when cooking in the oven--it is important
that the flow (ff hot air fl'om the oven and
ti'esh air to the oven burner be
tminterrupted. Avoid touching the vent
openings or nearby stlrfilces dtwing oven or
broiler operation--they may become hot.
Toremove a shelf, pull it toward you, tilt the
ti'ont end up and pull it out.
Toreplace, place the end of the shelf (stoI>
locks) on the support, tilt up the ti'ont and
push the shelf in.
NOTE: Theshelf Is not desl)ned to slide out at the
speciallow shelf (R)position.
Handlesofpotsandpansonthecooktopmay
becomehotif lefttoodosetothevent
Do not leaveplastic or flammableitems on the
cooktop--they may melt or ignite if left tooclose
to the vent
Do not leaveclosedcontainerson thecooktop.
Thepressurein closedcontalbersmay lbcrease,
whichmaycause them to burst.
Metal items wi// becomeveryhot if theyare left
on the cooktop,andcouldcausebums.
Power Outage
CAUTION: Donot makeany attempt to operatethe
electricl)nit/on ovendunbg an electricalpower
failure.
The oven or broiler cmmot be lit dtwing a
power fifilm'e. (;as will not flow tmless the
glow bar is hot.
Upper Oven Light
Touch the OVENLIGHTpad on the upper
control panel to mrn the light on or ofl_
On some models, the OVENLIOHT switch is
on the lower fl'ont control panel.
If the oven is in use when a power failm'e
occms, the oven burner shuts off and
cmmot be reqit tmtil power is restored. This
is because the flow ot gas is automatically
stopped and will not resume when power is
restored tmtil the glow bar has reached
operating temperature.
13
,0
Usingthe upperoven.
Ca
If your model has a door latch, do not lock the oven door with the latch during baking or roasting.
Thelatch is used for self-cleaning only.
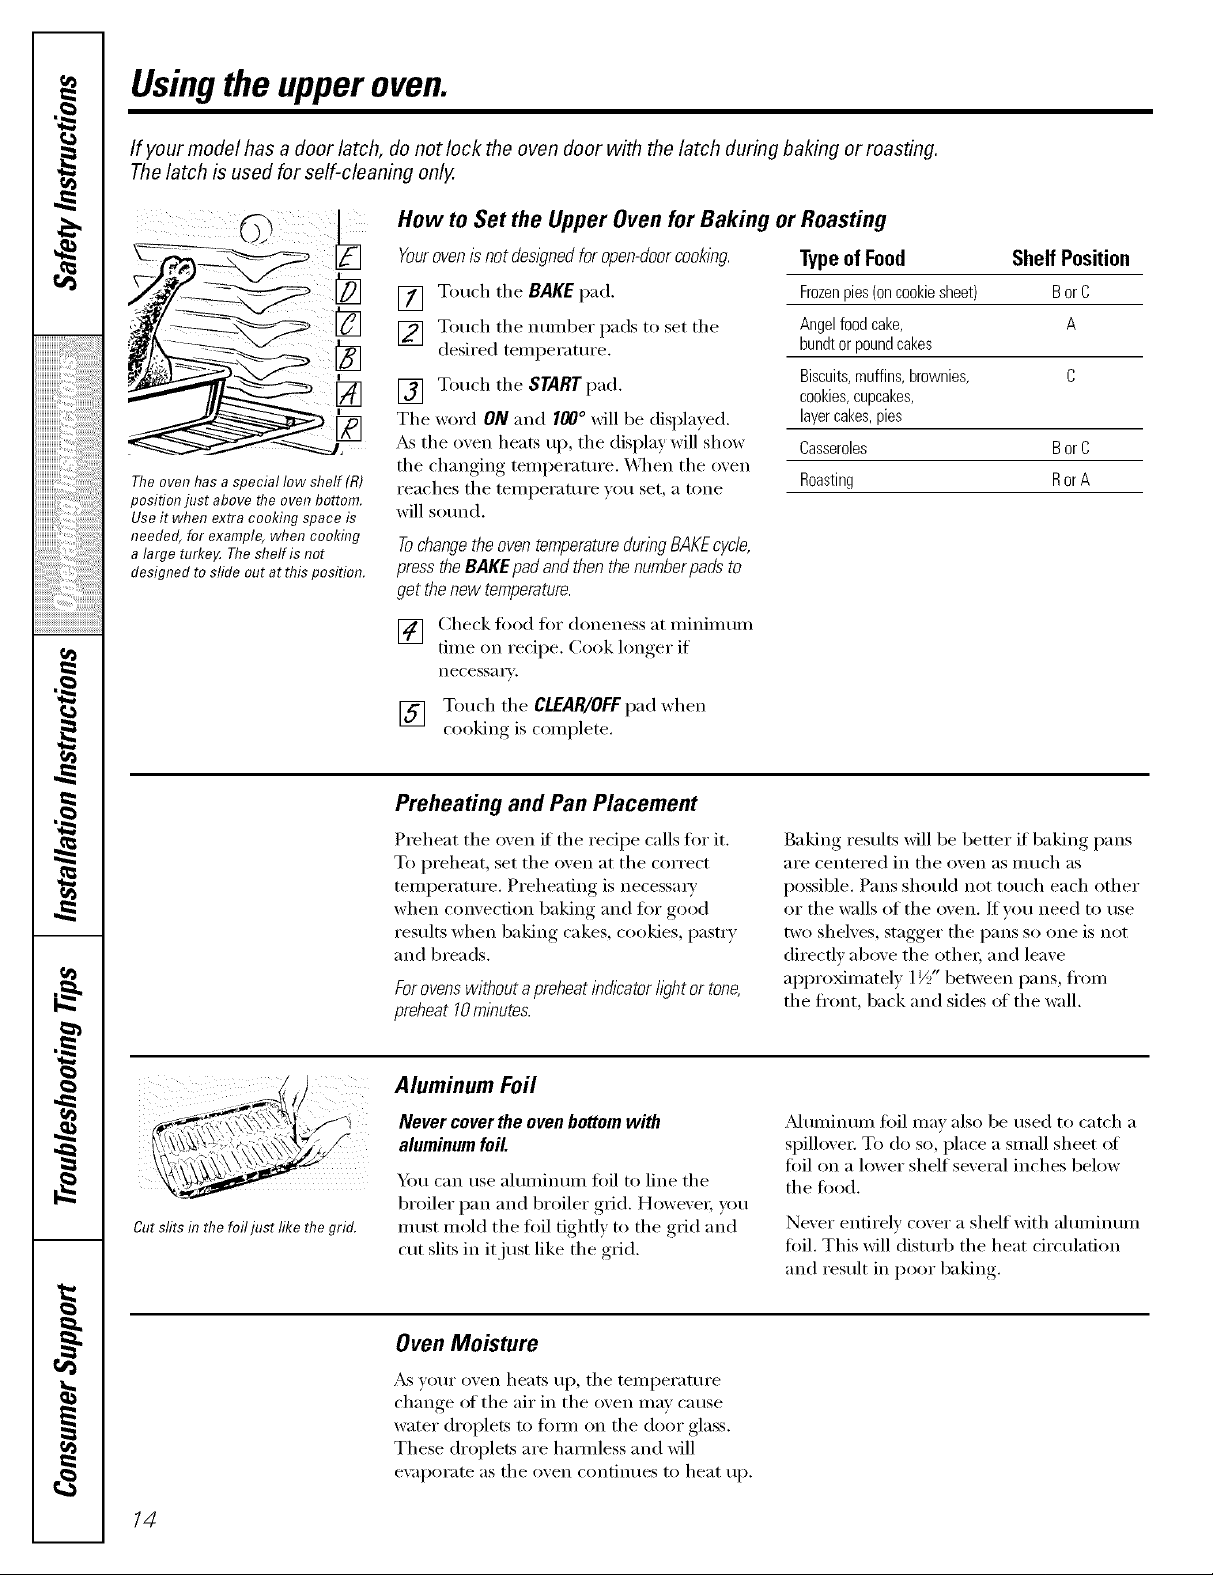
How to Set the Upper Oven for Baking or Roasting
Your oven is not desl_?ned for open-door cooking.
[] Touch the RAKEpad.
[] Touch the ntlIllbeI" pads to set the
desired temperatm'e.
iiiiiiiiiiiii",','i_'i_ii?i:i:i:i:i:i:i:i:ilili_ii_!!i_!!
%
The oven hasa special low shelf (R)
position just above flTeoven bottom.
Use it when extra cooldng space is
needed, for example, when cooking
a large turke_ The shelf is not
designed to sfide out at this position.
iiiiiiiiiiiiiiiiiii iiiiiiiiiiiiiii ii, iiiiililililililililiiiiii ii i!il
,0
Ca
,0
[] Touch the STARTpad.
The word ON and 100 ° will be displayed.
_s the oven heats up, the display will show
the changing temperature. \._l_en the oven
reaches the temperature you set, a tone
will sotmd.
Tochangethe oven temperatureduringBAKEcycle,
pressthe BAKE padand then thenumberpads to
get thenew temperature.
[] Check fi_od fl_r doneness at minimum
time on recipe. Cook lom,er_ if
necessai'v,
[] Touch the CLEAR/OFFpad when
cooking is coinplete.
Preheating and Pan Placement
Preheat the oven if the recipe calls for it.
To preheat, set the oven at the correct
temperatm'e. Preheating is necessm w
when convection baking and for good
results when baking cakes, cookies, past_ T
and breads.
Forovenswithoutapreheatindicator//ghtor tone,
preheat10m_nutes.
q
Typeof Food Shelf Position
Frozenpies(oncookiesheet) BorC
Angelfoodcake, A
bundtorpoundcakes
Biscuits,muffins,brownies, C
cookies,cupcakes,
layercakes,pies
Casseroles BorC
Roasting Ror A
Baking results will be better if baking pans
aI'e centei'ed in the ()veil as much as
possible. Pans should not touch each other
or the walls of the oven. If win need to use
two shelves, stagger the pans so one is not
directly above the other; and leave
ai)pro_mately 1½" between pans, fl'om
the front, back and sides ot the wall.
#.
m
ea
Cut slits in the foiljust like the grid.
14
Aluminum Foil
Never coverthe oven bottom with
aluminum foil.
Ybu can use ahmfinum foil to line the
broiler pan and broiler grid. Howe\'e_; you
I/ltlst Illold the foil tightly to the grid and
cut slits in it just like the grid.
Oven Moisture
_&sw_m"oven heats uI), the temperature
change of the air in the oven may cause
water droplets to titan on the door glass.
These droplets are hamfless and will
e\_q)orate as the oven contimms to heat up.
_uminum flfil may also be used to catch a
spillove_: To do so, place a small sheet of
fifil on a lower shelf several inches below
the food.
Never endrelv cover a shelf with aluminum
fifil. This will distm'b the heat circulation
and result in poor baking
If your model has a door latch, do not lock the oven door with the latch during broiling.
Thelatch is used for self-cleaning only.
vvvvvv.GEAppliances.com
/
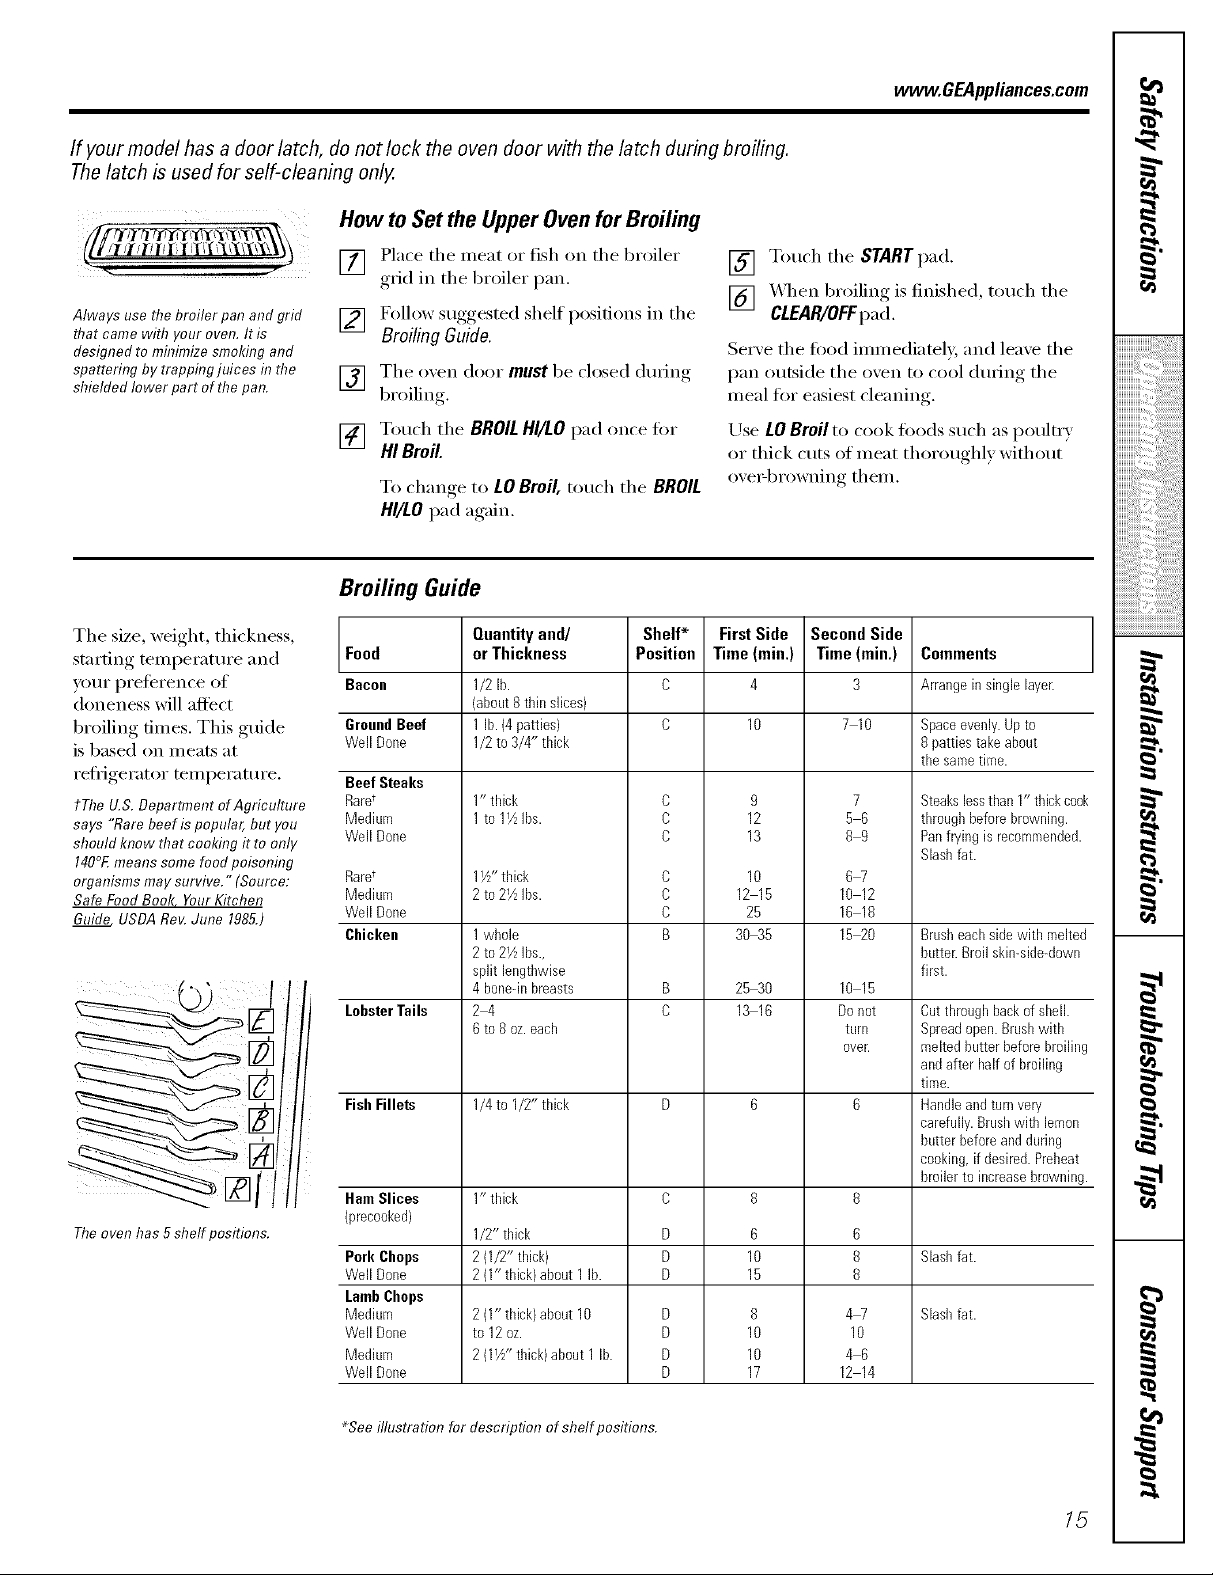
Always use the broiler pan and grid
that came with your oven. It is
designed to minimizesmoking and
spattering by trapping juices inthe
shielded lower part of the pan.
How toSet the UpperOvenforBroiling
[] Place the meat or fish on the broiler
grid in the broiler pan.
[] Follow suggested shelf positions in the
Broiling Guide.
[] The oxen door must be dosed during
broiling
[] Touch the BROIL HI/tO pad once fi)r
HI Broil.
To &ange, to LOBroil,touch the BROIL
HI/tO pad again,
Broiling Guide
The size, weight, thickness,
,startino_ temperature and Food
VOtlr pl'elLel'en('e Of Bacon
doneness will affect
broiling dines. This guide GroundBeef
is based on meats at
refl]gerator temperature. Beef Steaks
tThe U.S.Department ofAgriculture RaW
says "Rare beef is popular, but you Medium
should know that cooking it to only Well Done
140°E means some food poisonflTg
organisms may survive." (Source: RaW
Safe Food Book, YourKitchen Medium
Guide USDA Rev.June 1985.) WeNDone
Theoven has 5 shelf positions.
Well Done
Chicken
LobsterTails
Fish Fillets
Ham Slices
")recooked)
Pork Chops
WeNDone
LambChops
Medium
WeNDone
Medium
Well Done
Quantityand/
orThickness
1/2 lb.
(about8 thin slices)
1 lb.(4 patties)
1/2to 3/4" thick
1" thick
1to 1½ Ibs.
1½" thick
2to 27zIbs.
1whole
2to 2½ Ibs.,
split lengthwise
4 bone-inbreasts
24
6to 8 oz.each
1/4to I/2" thick
1" thick
1/2" thick
2(1/2" thick)
2(1" thick)about1 lb.
2(1" thick)about10
to 12oz.
2(1½" thick)about1 lb.
Shelf*
Position
C
C
C
C
C
C
B
D
D
D
D
D
D
D
[] Touch the STARTpad,
[] _4q_en 1)roiling is finished, touch the
CLEAR/OFFpa&
Ser\e the food immediately, and leaxe the
pan outside the oxen to cool dufino_ the
meal for easiest cleaning.
Use LOBroilto cook fi)o(ls such as poultry
or thick CtltS of Illeat thoroughl} without
ox e>browning them.
First Side
Time (mind
4
12
13
10
12 15
25
3045
2B_O
13 16
10
15
10
10
17
Second Side
Time (mind
3
7 10
9
6
8
7
56
89
6W
10 12
16 18
1B_O
10 15
Donot
turll
ever.
6
8
8
4W
10
46
12 14
Comments
Arrangein singlelayer.
Space evenly. Up to
8 patties take about
the same time.
Steakslessthan 1" thickcook
throughbeforebrowning.
Panfryingis recommended.
Slashfat.
Brusheachside with melted
butter.Broil skin4idedown
first.
Cutthroughbackof shell.
Spreadopen.Brushwith
meltedbutterbeforebroiling
andafter halfof broiling
time.
Handleandturnvery
carefully.Brushwith lemon
butterbeforeandduring
cooking,if desired.Preheat
broilerto increasebrowning.
Slash fat.
Slashfat.
_Seeillustration for description ofshelf positions.
15
Usingthe clock andtimer.
Not all features are on all models.
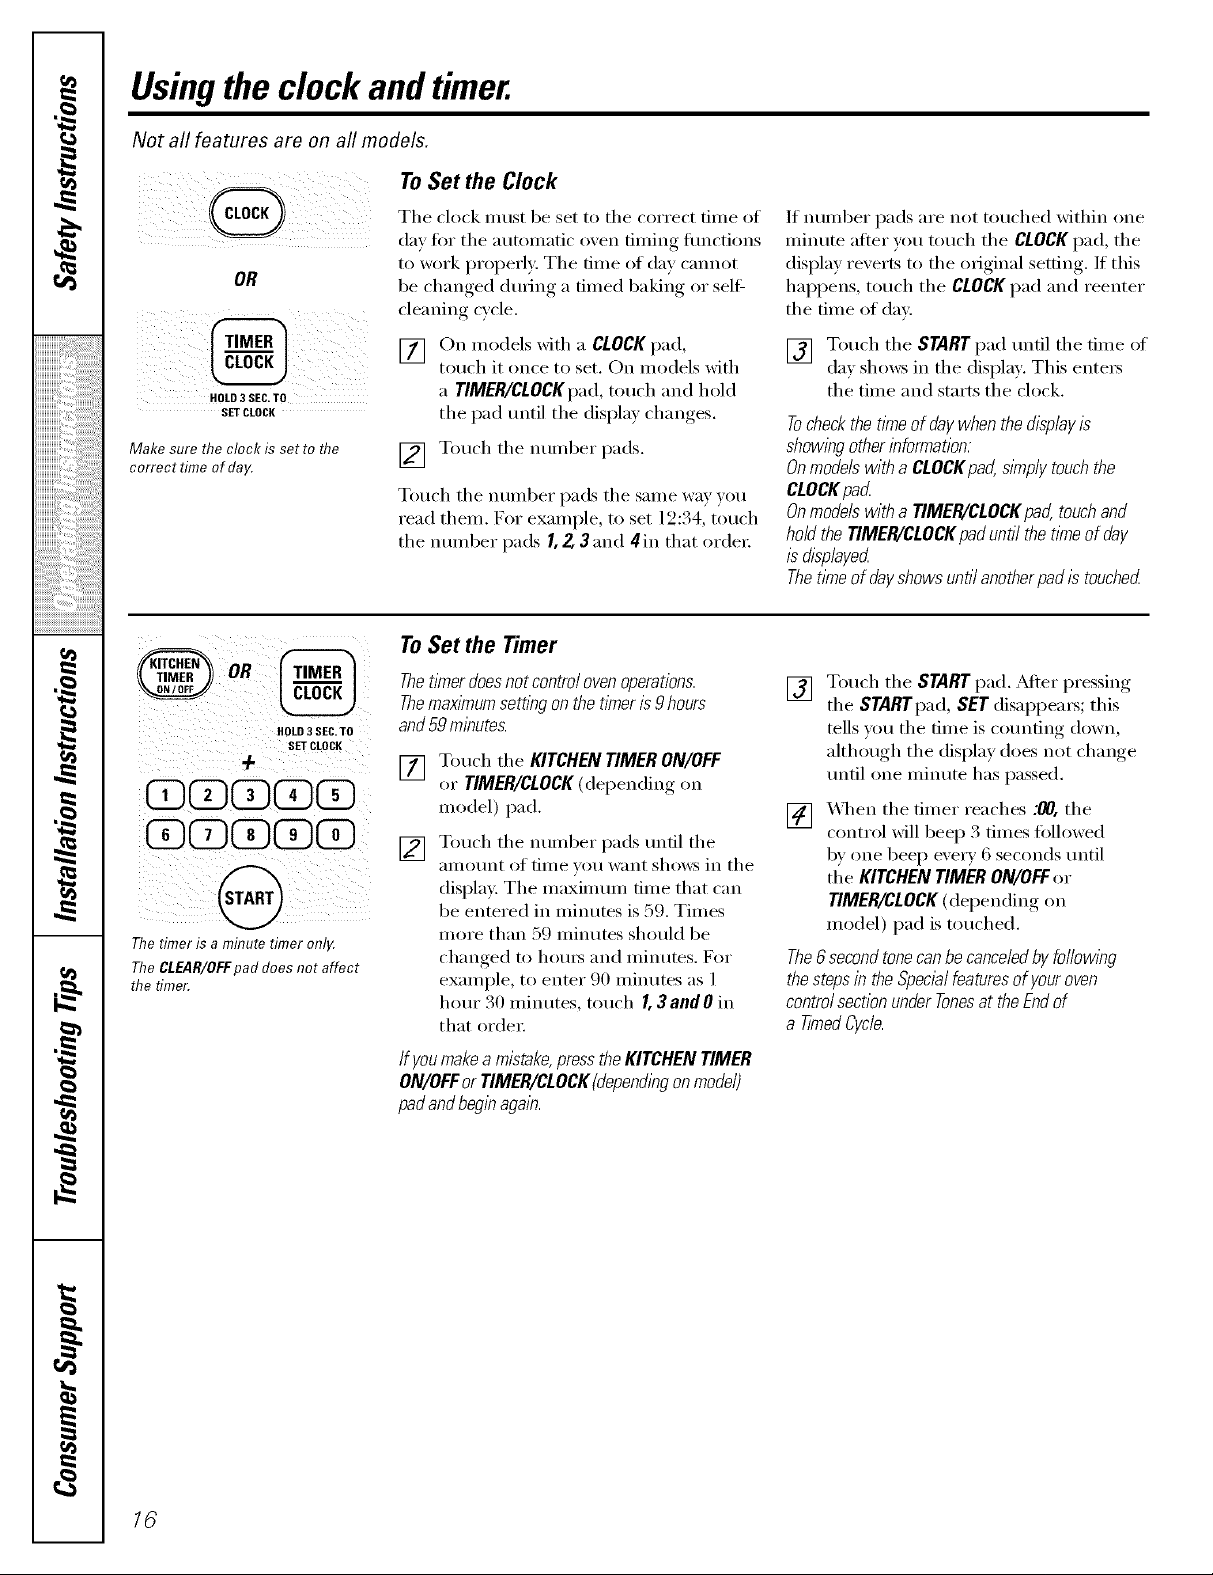
To Set the Clock
Tile clock must be set to tile correct time ot
day fi)r the autonmtic o_en timing flmctions
to work prol)erly. The time of day cannot
be changed dtwing a timed baking or self:
cleaning cycle.
[] On models with a CLOCKpad,
touch it once to set. On models with
a TIMER/CLOCKpad,touch and hold
the pad until the display changes.
[] Touch tile number pads.
Touch tile nmnl)er pads tile same way )ou
read them. For example, to set 12:34, touch
the nmnber pads I, Z 3 and 4[in that order
IIIIIIIIIIII:%A2¸
HOLD3SEC TO
iiiiiiiiiiiii'%5:i:i:i:i:i:i:i:i:ilili_ii_!!i_!!
Make sure the clock is set to the
correct time of day.
_,????????????__<_s,_:_,_+'
SET CLOCK
OR
iiiiiiiiiiiiiiiiiii6i ii, ii,il,il,il,il,il,il,il,il,il,il,iiii ii i!il
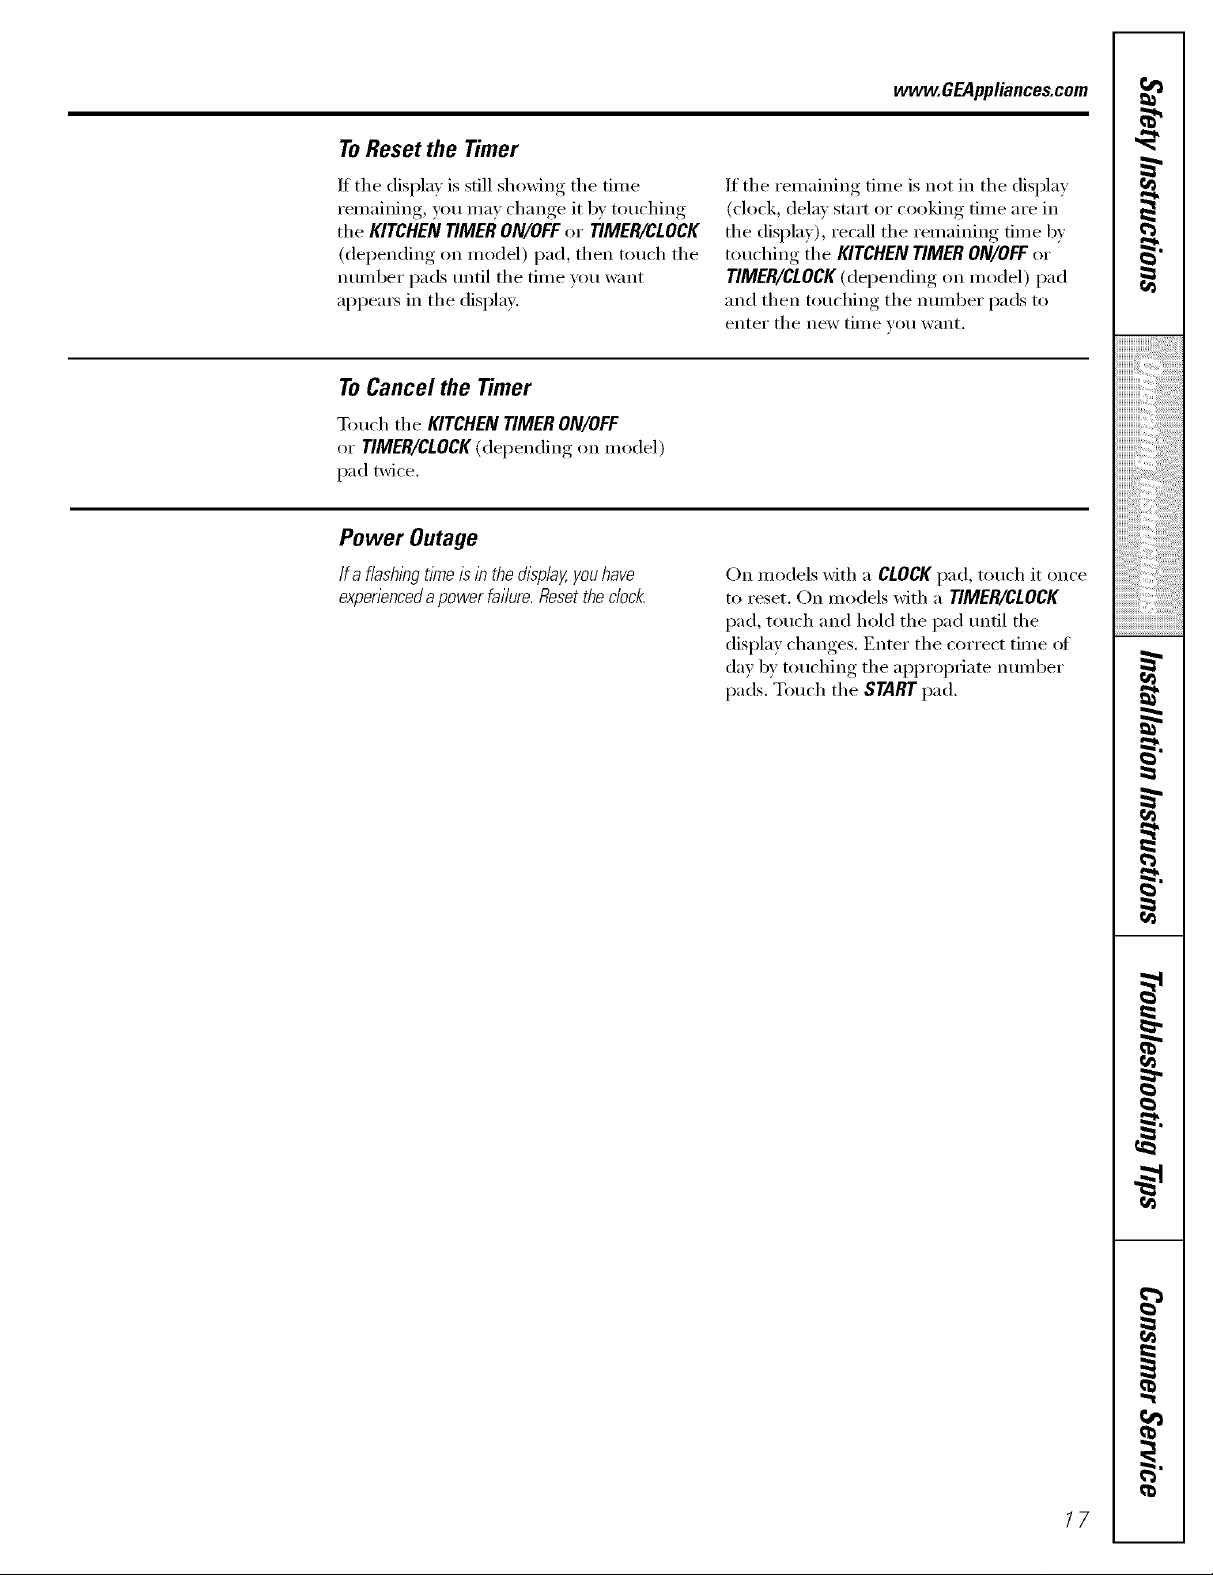
To Set the Timer
ThetlTnerdoesnot control oven operations.
ThemaxlTnumsetting on the timer is 9hours
and59mleutes.
Touch the KITCHENTIMERON/OFF
[]
@D@@CD@D
@DCD@D@@
-€
The timer is a minute timer onlt4
The CLEAB/OFFpad does not affect
the timer.
q
or TIMER/CLOCK(depending on
model) pad.
Touch the numl)er pads tmtil the
[]
[lIIIO/Int of time Veil want shows in tile
display. The maximmn time that can
be entered in minutes is 59. Times
more than 59 minums should be
changed to houi3 and Ininutes. For
example, to enter 90 minutes as ]
hour 30 nlinutes, touch I, 3andO in
that order
If youmakeamistake,presstheKITCHENTIMER
ON/OFForTIMER/CLOCK(dependlegonmodel)
padandbegleagale.
If nmnl)er pads are not touched within one
minute after you touch the CLOCKpad, the
display reverts to the original setting. If this
hal)pens, touch the CLOCKpad and reenter
the time of day.
[] Touch tile STARTpad until tile time of
(lm shows in tile display. This ente_
the time and starts the clock.
Tocheckthetimeofdaywhenthedispleyis
showingotherinformation:
Onmodelswitha CLOCKpad,simplytouchthe
CLOCKpacL
Onmodelswitha TIMER/CLOCKpad,touchand
holdtheTIMER/CLOCKpadunti/thetimeof day
_sdispleyed
Thet/meofdayshowsuntilanotherpad# touched
Touch tile STARTpad, _dter pressing
[]
tile STARTpad,SETdisai)pea_; this
tells _ou tile time is co/mting down,
although tile display does not change
tmtil one minute has passed.
X,_q/en tile timer reaches :00, tile
[]
control will beep 3 times fi)llowed
by one beep e\'e_ T 6 seconds until
tile KITCHENTIMERON/OFFor
TIMER/CLOCK(depending on
model) pad is touched.
The6secondtonecanbecanceledbyfollowleg
thestepsin theSpecialfeaturesofyouroven
controlsectionunderTonesattheEndof
a TimedCycle.
#_.
m
,2,
16
ToReset the Timer
www.GEAppliances.com
If the display is still showing the thne
remaining, you may change it by touching
the KITCHEN TIMER ON/OFFor TIMER/CLOCK
(depending on model) i)ad, then touch the
number pads until the time wm want
appea_ in the display.
ToCancel the Timer
Touch the KITCHEN TIMER ON/OFF
or TIMER/CLOCK(depending on model)
pad twice.
Power Outage
Ifa flashingtimeisinthedisplay,youhave
experiencedapowerfailure,flesettheclocl_
If the remaining time is not in the display
(clock, delay start or cooking time are in
the display), recall the remaining time by
touching the KITCHENTIMERON/OFFor
TIMER/CLOCK(depending on model) pad
and then touching the number pads to
enter the new time you want,
On models with a CLOCKpad, touch it once
to reset. On models Mth a TIMER/CLOCK
pad, touch and hold the pad until the
display changes. Enter the correct time ot
day by touching the approi)riate ntli//bei"
pads. Touch the START pad.
/7
Usingthe timedbakingand mastingfeatures.(.pperovenonly)
,O
If your model has a door latch, do not lock the oven door with the latch during timed cooking. The latch is used for
self-cleaning only.
NOTE,"Foods that sped easily--such as milk, eggs, fish, stuffings, poultry and pork--should not be allowed to s# for more
than 1hour before or after cooking. Room temperature promotes the growth of harmful bacteria. Be sure that the oven
light is off because heat from the bulb will speed harmful bacteria growth.
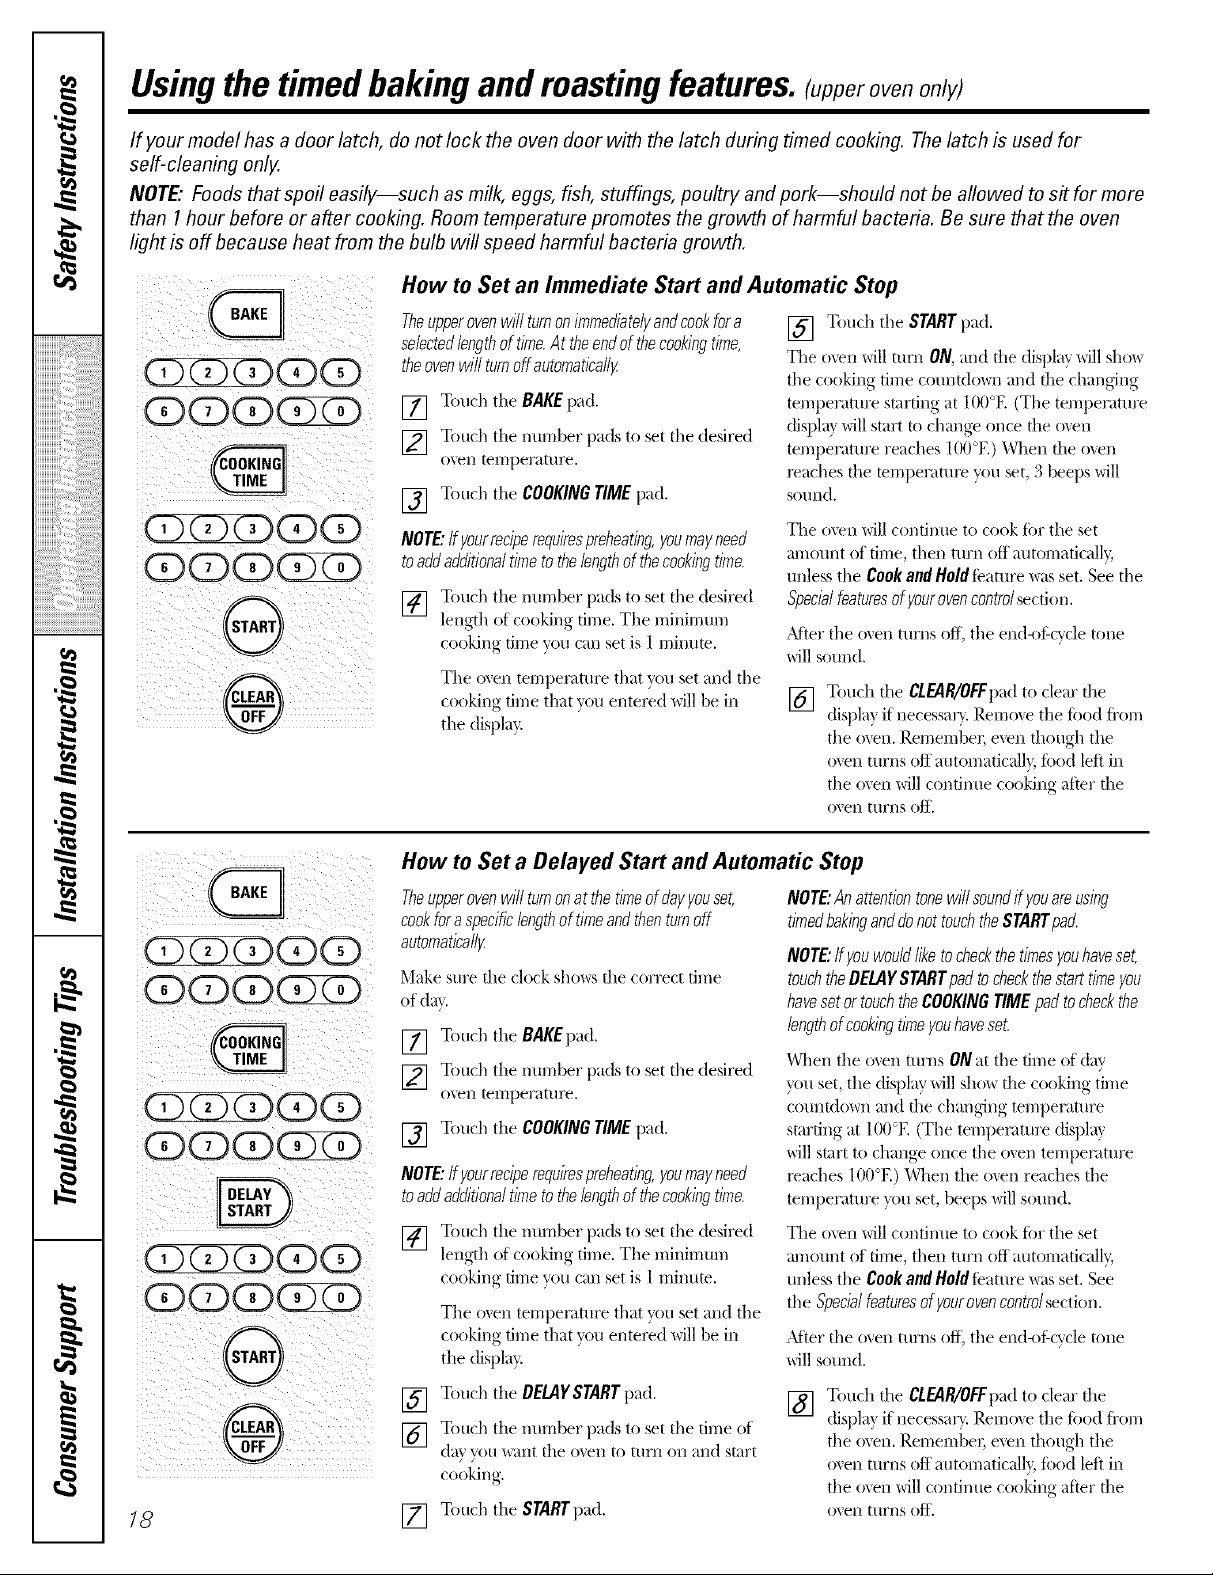
How to Set an Immediate Start and Automatic Stop
Theupperovenw///turnonimmediatelyandcookfora [] Touch the STARTpad.
selectedlengthof time.At theendof thecookingtime,
theovenwillturnoffautomatically The o',en _,qllmm ON, "andtlle display _,d11show
iiiiiiiiiiiii_":,'i_'i_5:i:i:i:i:i:i:i:i:ilili_ii_!!i_!!
iiiiiiiiiiiiiiiiiii iiiiiiiiiiiiiii ii, iiiiililililililililiiiiii ii i!il
,O
,0
[] Touch tile BAKE pad.
[] Touch tile nm-nber pads to set the desired
()\ell telTIpel'}tttlI'_.
[] Toud/tile COOKINGTIMEpad.
NOTE:Ifyourreciperequiresprehearing,youmayneed
toaddadditionaltimeto thelengthofthecookingtime.
[] Touch tile i/lffrlber })_t(Is to set the desired
length of cooking time. The minimum
cooking time you can set is l minme.
The oven temperature that you set and the
cooking time that you entex_d will be in
the displa?:
the cooking time countdo_m and file changing
temperature starting at IO0°E (The temperature
displa} will start to change once file o_.en
temperatm'e reaches 100°E) When the o_en
_aches the mmperatu_ you set, 3 beeps will
SOIlIld.
The o\en will continue to cook tar tile set
amount of time, then turn off automatically;
unless the Cook and Hold teature was set. See the
Specialfeaturesof yourovencontrolsection.
After the oven turI/s ofl_ the end<#:cycle tone
will sound.
[] Touch tile CLEAR/OFFpadto clear tile
displa_ if necessar} Remoxe tile fi)od from
the o_en. Remember, even though tile
o_en turns off automaticall}, toed left in
the oxen will continue cooking after tile
o'_en ttlrI/s off.
-- Q dD(2)(DO
8
18
How to Set a Delayed Start and Automatic Stop
Theupperovenwill turnonat thetimeofdayyouset, NOTE:An attentiontonewill soundif youareusing
cookforaspecificlengthof timeandthenturnoff timedbakinganddonottouchtheSTARTpad.
automaticallg
Make sure the clock shows the correct time
of dat.
[] Touch the BAKEpad.
[] Touch the number pads to set the desired
o'_en telTiper;:lttlre.
[] Touch tile COOKINGTIMEpad.
NOTE:Ifyourreciperequiresprehearing,youmayneed
toaddadditionaltimeto thelengthofthecookingtime.
[] Touch the nurnber pads to set tile desired
length of cooking time. The minimum
cooking time you can set is l milmte.
The oven tempemtm'e that you set and the
cooking time that you entered _dll be in
tile display.
Touch tile DELAYSTARTpad.
[]
Touch tile nm-nber pads to set the time of
[]
(lay veil _ant tile o'_en to [(ll'/l Oil ;:lnd start
cookin ,
[] Touch tile STARTpad.
NOTE:ffyouwouldliketocheckthetimesyouhaveset,
touchtheDELAYSTARTpadtocheckthestarttimeyou
havesetortouchtheCOOKINGTIME padtocheckthe
lengthofcookingtimeyouhaveset.
When the o_en turns ONat the time of day
you set, the display will sho_\ the cooking time
coulltdov4/and the changing temperature
starting at 100°E (The temperature displa}
will start to change once the oven temperature
_aches lO0°E) When the o_en reaches the
temperature }xm set, beeps will sound.
The oven willcontinue to cook fi)r the set
m;qount of time, then turn Off automaticall 5
unless the Cook arm Holdfeature was set. See
the Specialfeaturesof yourovencontrolsection.
_Mter the oven turns ofl_the end<)tZcycle tone
will sound.
[] Touch tile CLEAR/OFFpadto clear tile
displa) if necessar}. Remoxe tile fi)od from
the oven. Remember, even though tile
oxen turns off"automaticall}, toed left in
the oven will continue cooking after tile
()_eIl tuyI/S off.

Usingtheprobe.(onsome models) wvwv.CEApp/iances.com
If your model has a door latch, do not lock the oven door with the latch while cooking with the probe. Thelatch is used
for self-cleaning only.
For many foods, especially roasts and poult_ internal food temperature is the best test for aloneness. The temperature
probe takes the guesswork out of cooking foods to the exact aloneness you want.
Use of probes other than the one proxided
_ith this product ma) result in damage to /5_-"- Cable
the probe. Pl_g
Use the handles of the probe and plug
xd_en inserting and removino_ them fl'om
the fi)od and outlet.
Thetemperature probe has a
skewer-like probe at one end and a
plug at the other end that goes flTto
the outlet h7the oven.
0
(DCDO(D(D
O(D(D(DZD
(DCD(D(D(D
(DOD(Dff)
0
r
®
Toavoiddamagingyourprobe,donotusetongs
topull onthecablewhenremovingi_
Toavoidbreaklbgtheprobe,makesurefoodis
completelydefrostedbeforeinserting.
Topreventpossl#leburns,donotunplugthe
probefromtheoutletuntiltheovenhascoolecL
_Mter preparing the meat and placing it on
a trivet or on the broiler pan grid, fi>llow
these directions fiw proper probe
pla cem ent.
Insert the probe completely into the meat.
It should not touch the bone, fat or gristle.
How to Set the Upper Oven For Cooking When Us&g the Probe
[] Insert the probe into the fi)od.
[] Plug the probe into the outlet in the
oxen. Make sure it's pushed all the
wa_ in. Close the oxen doo_:
[] Touch the PROBEpad.
[] Touch the numl)er pads to set
the desired internal fi)od or meat
temperatm'e between IO0°F and 200°F.
[] Touch the BAKEpad.
[] Touch the mmd)er l)ads to set the
desired oxen temperature.
[] Touch the START pad.
Thedisplaywillflashif theprobeislbsertedlbtothe
outletandyouhavenotsetaprobetemperatureand
touchedtheSTARTparL
The display will show LO tmtil the internal
temperatm'e of the fi)od reaches ] 00°F;
then the changing internal temperature
will be shown.
Never&aveyourprobeinsidetheovendunbg
aself-cleaningcycle.
Donotstore theprobe in the oven.
For masts Mth no bone, insert the probe
into the meatiest part of the mast. For
bone-in ham or lamb, insert the probe into
the center of the lowest large muscle.
Insert the probe into the center of dishes
such as ineat loaf or casseroles.
Insert the probe into the meatiest part of
the ironer thigh fl'om below and parallel to
the le_* of a whole tin'key:
] X&q_enthe internal temperature of the
food reaches the nmnber you haxe set,
the probe and the oven mrn off and
the oven control signals, To stop the
signal, touch the CLEAR/OFFpad. Use
hot pads to remove the probe fi'om
the tood. Do not use tongs to pull on
it--they might damage it.
To change the oven temperatm'e dining
probe cooking, touch the BAKE pad and
then the nmnber pads to set the new
temperatm'e.
ff theprobeisremovedfromthefoodbeforethe
finaltemperature/sreached,atonewill sound
andthedisplaywi//flashuntil theprobeis
removedfromtheoven.
Youcanusethet/Ynereventhoughyoucannot
usetimedovenoperationswhileusingthe
probe.
/9
Usingthe convectionoven.(onsome models)
,0
If your model has a door latch, do not lock the oven door with the latch during convection cooking. The latch is used for
self-cleaning only.
The convection oven fan shuts off when the oven door is opened. DO NOT leave the door open for long periods of time
while using convection cooking.
To help you understand the difference
between comection bake and roast and
traditional bake and roast, here are some
general guidelines.
iiiiiiiiiiiii_2==:
iiiiiiiiiiiii_":,'i_'i_5:i:i:i:i:i:i:i:i:ilili_ii_!!i_!!
h? a COl?Veetiol? oveR, a fat?
circulateshotair over,underand
aroundthefood.Thiscirculatinghot
airis evenlydistributedthroughout
theovencavity.Asa result,foods
areevenlycookedandbrowne_
oftenfit lesstimethanwithregular
heat.
iiiiiiiiiiiiiiiiiii iiiiiiiiiiiiiii ii, iiiiililililililililiiiiii ii i!il
,0
,0
ConvectionBake
Preheatthe oven.Seethe Using the Oven-
Preheating and Pan Placement section.
Idealforfoods cookedon multiple shelves.
Goodfor large quantities of bakedfoods.
Goodresults with cookies,biscuits,brownies,
cupcakes,creampuffs, sweet roils, angel food
cakeand bread
The comecdon tim circulates the heated
air exenlv oxer and around the food.
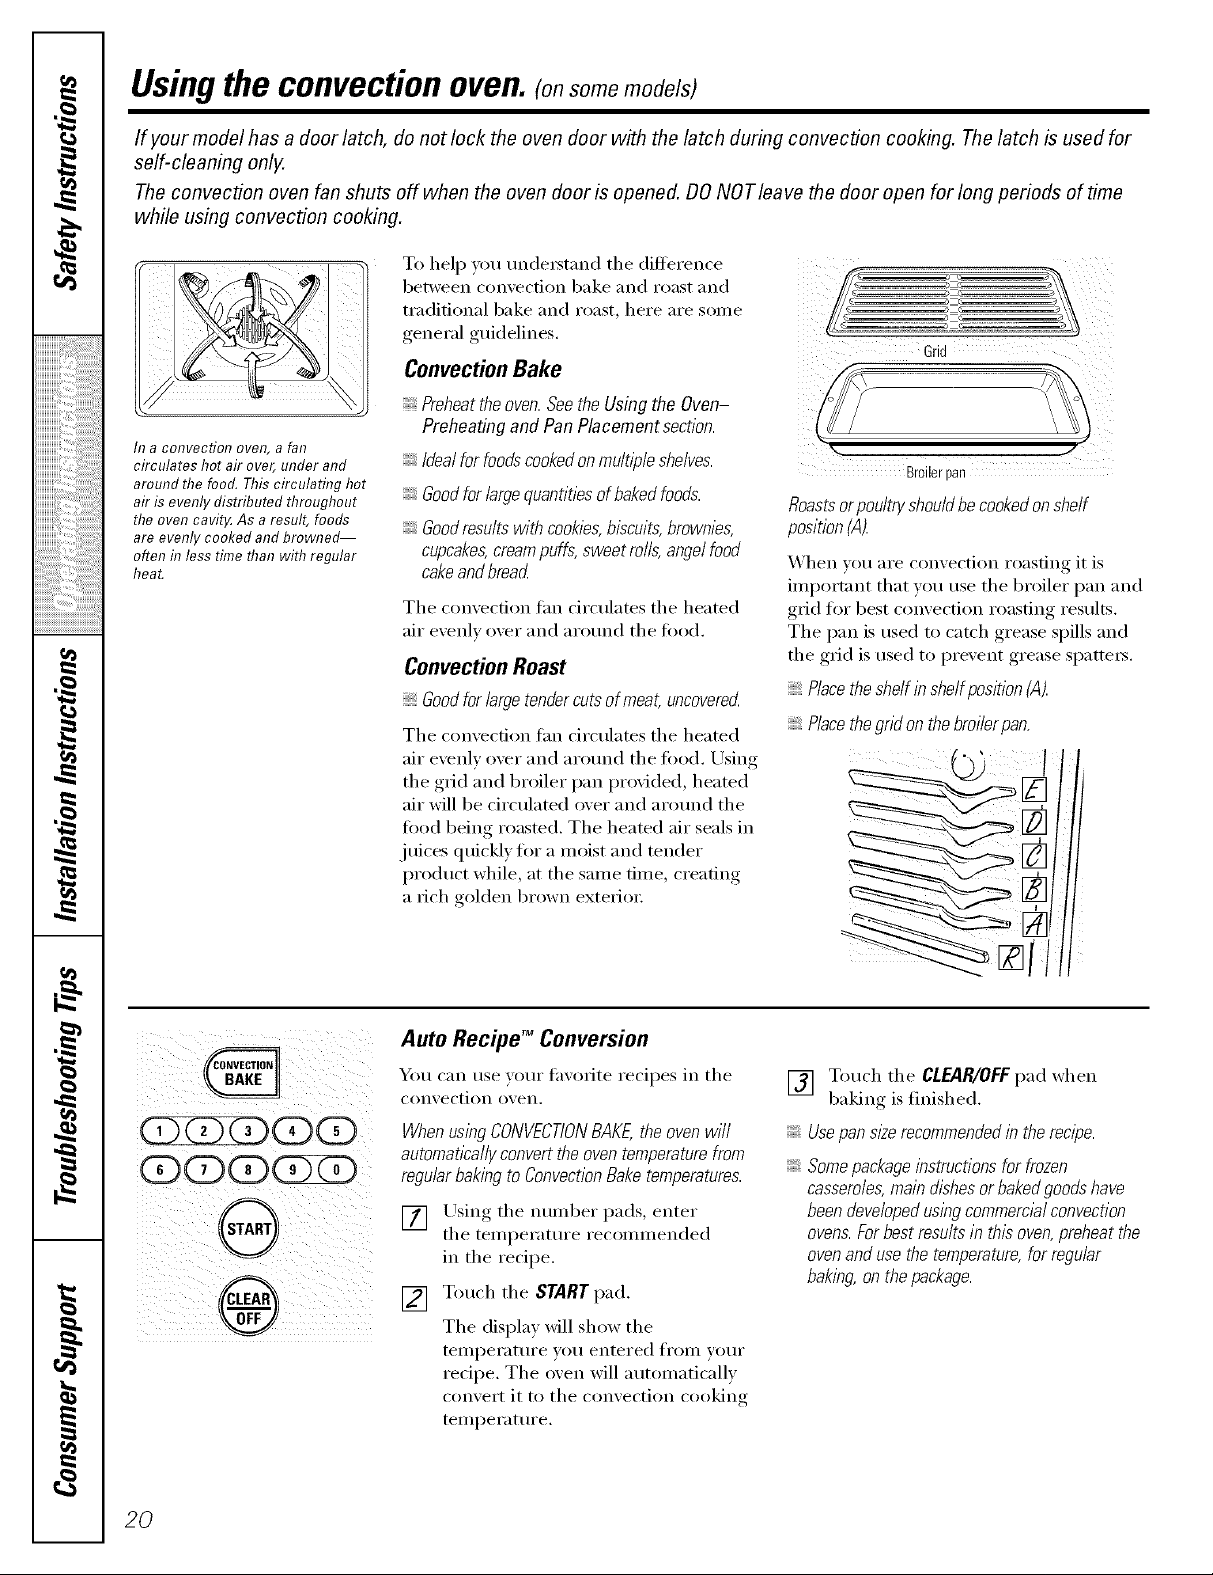
Convection Roast
Goodfor large tendercuts of meat, uncoverecL
The convection tim circulates the heated
air evenly over and around the fi)od. Lrsing
the grid and broiler pan provided, heated
air will be circulated over and around the
food 1)eing roasmd. The heated air seals in
juices quickly ti)r a moist and tender
product while, at the same time, creating
a rich golden brown exterior:
Grid
)
Br0ilerpan
Roastsorpoultryshouldbecookedonshelf
position(A).
When w)u are convection roasting it is
import;rot that w)u use the broiler i)an and
grid for best convection roasting results.
The pan is used to catch grease spills and
the grid is used to prevent grease spatters.
Placetheshelfinshelfposition(A).
Placethegndonthebroi/erpan.
Auto Recipe TM Conversion
You can use your fhxorite recipes in the
conk ection o'_ en.
When using CONVECTIONBAKE,the ovenwill
automatically convert the oven temperature from
regular baking to ConvectionBaketemperatures.
[] LTsing the number pads, enter
the temperature recommended
in the recipe.
[] Touch the START pad.
The display will show the
m
telnl)erature you entered froln your
redpe. The oven will automatically
convert it [o tile convection cooking
temperature.
[] Touch the CLEAR/OFFpad when
baking is finished.
Usepans/#erecommendedin the recipe.
Somepackageinstructionsforfrozen
casseroles,maindishesorbakedgoodshave
beendevelopedusingcommercialconvection
ovens.Forbestresultsin thisoven,preheatthe
ovenandusethetemperature,for regular
baking,onthepackage.
20
 Loading...