

GE JGB820DEP2WW, JGB820DEP2BB, JGB820DEP1WW, JGB820DEP1BB, JGB810SEP1SS Owner’s Manual
...
GEAppliances.com
0
am
U
m
0
0
Safety Instructions 2-7
Operating Instructions
Aluminum Foil ......... t4
Clock end Timer ..... 18
Lower Oven Drawer ..... 30
Oven ............... Ii-32
Baking and Roasting ..... 14
Broiling, Broiling Guide ..... 15
Control Lockout ..... 25
Convection ........ 19-23
Gas/Control Lockout 25
Oven Control .... 1L 12
Power Outage . ,l& 16
Preheating ......... 14
Probe . ,18
Racks ..... t4
Sabbath Feature .26
Self-Cleaning ..... 31, 32
Special Features .... 24, 25
Thermostat Adjustment ..... 27
Timed Baking
and Roasting ....... 17
Timed Convection Baking 23
Surface Cooking ..... 8-10
Griddle .......... i0
Warming Drawer ...... 28, 29
Installation
Instructions 4o-51
Air Adjustment _ 50
Anti-Tip Device ..... 43, 51
Assemble Surface Burners 48
Checking Burner
Ignition ............. 49
Connecting the Range
to Gas ............. 44-46
Dimensions and Clearances , 42
Electrical Connections 47, 48
Leveling the Range ...... 50
LP .......... 51
Troubleshooting
Tips .... s2-ss
Accessories ..... S7
Consumer Support
Consumer Support , Back Cover
Warranty for Customers
in Canada ......... 59
Warrantg for Customers
in the U SA ........ 58
::::::::::::::::::::::::::::::
JGB800
JGBB05
JGB810
JGB820
JGB900
In Canada contact us at
www.GEApptiances ca
Care and Cleaning
Burner Assemblg ..... 33.34
Burner Grates ..... 35
Control Panel and Knobs . 36
Cooktop ........ 35
Door Removal ........ 37
Drawer 38.39
Griddie ............. 35
Oven Bottom ......... 36
Oven Light Replacement ,, 38
Oven Vents ............. 36
Racks .............. 38
Self-Cleaning ........ 31.32
Stainless Steel Surfaces .37
Write the model and serial
numbers here:
Model #
Serial #
Youcan find them on a label
an the front of the range behind the
warming drawer or lower
oven drawer
183D5580P252 49-85170-1 06-09JR
• z ••
-: s:
IMPORTANT SAFETYINFORMATION.
READ ALL INSTRUCTIONS BEFORE USING.
:_i: i:_i:il,_
i:_:7::i,:;i'i_
:•:!i__:ii:;i!•:,i_•ii:
:!!:•!L::_iz•;:;!!:i
01
o
01
o_
oj
6
"_ :n
WARNING!
Foryour safetg, the information in this manual must be fallowed to minimize the risk of fire or
explosion, electric shock, or to prevent property damage, personal injury, or tossof tire
.4_WARNING: iftheinformation
in this manual is not followed exactlg,
a fire or explosion mag result, causing
®
propertg damage, personal injurg
or death.
Do not store or use gasoline or' other
flammable vapors and liquids in the
vicinitg of this or ang other appliance.
WHAT TO DO IF YOU
SMELL GAS
:'i_::::Do not trg to light ang appliance.
Do not touch any electrical switch;
do not use ang phone in gour building.
::_ Immediatelg call gour gas supplier
from a neighbor's phone. Follow tile
gas supplier's instructions.
01'1
o
.4::
ol i
ANTI-TIP DEVICE
@
Q
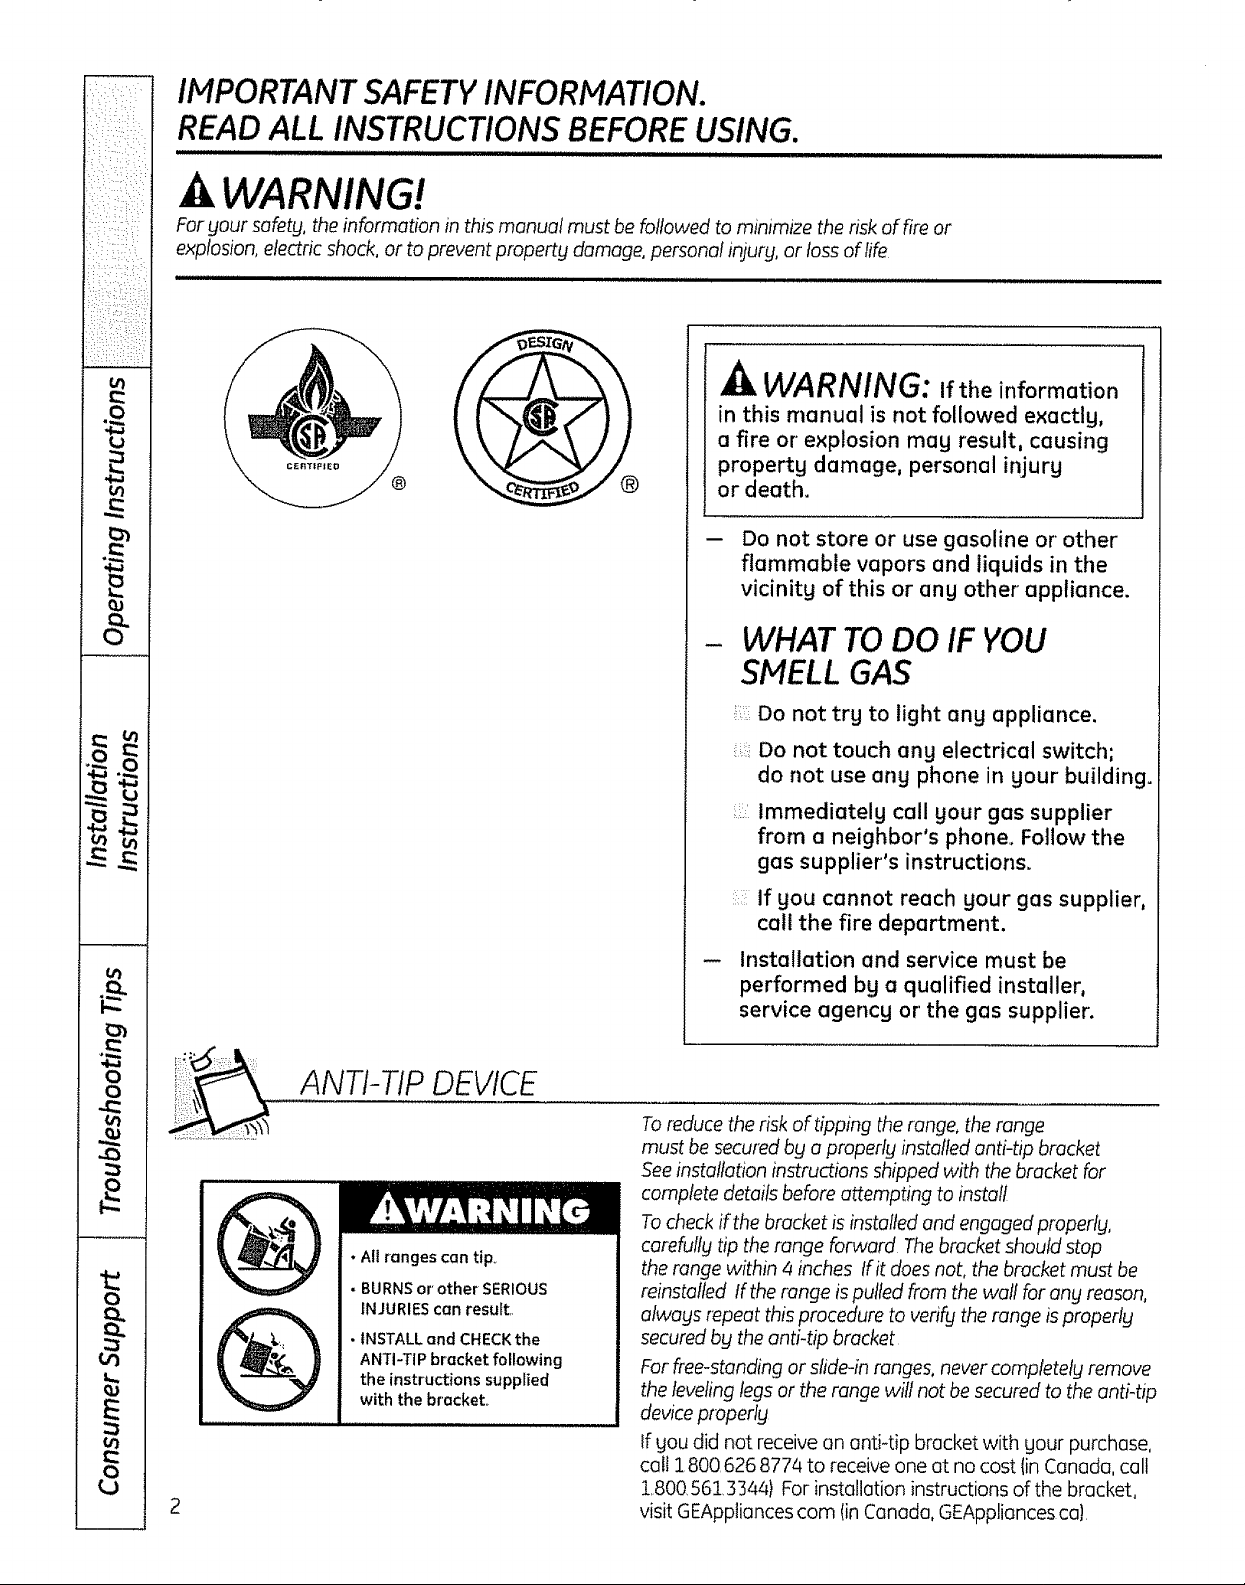
• All ranges con tip.
- BURNS or'other SERIOUS
INJURIES can result,,
• INSTALLand CHECKthe
ANTI-TIPbracket following
the instructions supplied
with the bracket,,
:::::iIf gou cannot reach your gas supplier,
call the fire department.
Installation and service must be
performed by a qualified installer,
service agencg or' the gas supplier.
To reduce the risk of tipping the range, the range
must be secured by a properlg installed anti-tip bracket
See installation instructians shipped with the bracket for
complete details before attempting to install
To check if the bracket is installed and engaged properly,
carefully tip the range forward The bracket should stop
the range within 4 inches tf it does not, the bracket must be
reinstalled tf the range is pulled from the wall for any reason,
alwaysrepeat thisprocedure to verifg the range is properly
secured by the anti-tip bracket
For free-standing or slide-in ranges, never completetg remove
the leveling legs or the range wilt not be secured to the anti-tip
device praperly
Ifgou did not receive an anti-tip bracket with gour purchase,
call 1800,626 877z4to receive one at no cost (in Canada, call
1,800,561,3344) For installation instructions of the bracket,
visit GEApptiances cam (inCanada, GEAppliances ca!,
iii, ,11,11,1iii,iii1,1111,1,1,ii ......................................
WARNING!
GEAppliancesocom
:, ::::b:, _
:4< :: ,:: :J
IMPORTANTSAFETYNOTICE
TheCafifomia Safe Drinking Water and ToxicEnforcement Act requires the Governor of California to
publish a fist of substances known to the state to cause birth defects or other reproductive harm, and
requires businessesto warn customers of potentia! exposure to such substances
Gasappliances can cause minor exposure to four of these substances, namely benzene, carbon
monoxide, formaldehyde and soot, caused primarily by the incomplete combustion of natural gas or
LP fuels. Properly adjusted burners, indicated by a bluish rather than ayellow flame, will minimize
incomplete combustion Exposure to these substances can be minimized by venting with an open
window or using a ventilation fan or hood
SAFETYPRECAUTIONS
Have the installer show you thelocation of the range gas
Have gour range installed and propertg
grounded bg a qualified installer in
accordance with the Installation Instructions.
Ang adjustment and sen,ice should be
performed ontg bg qualified gas range
installers or service technicians
Do not attempt to repair or replace ang
part of gour range unless it is specificaIlg
recommended in this manual All other service
should be referred to a qualified technician
shutooffvalve and how to shut it off if necessarg
Plug gour range into a 120-volt grounded
outlet onlg Do not remove the round
grounding prong from the plug If in doubt
about the grounding of the home electrical
sgstem0it is gour personal responsibilitg and
obligation to have an ungrounded outlet
replaced with a properlg grounded,
three-prong outlet in accordance with
the National Electrical Code Do not use
an extension cord with this appliance
:L:iI,II::II:::i:I
:::;:: i _:::
2
g
0
n _,,a,
v A
t'b
v
0
0
0
m
IMPORTANT SAFETYINFORMATION.
READ ALL INSTRUCTIONS BEFOREUSING.
SAFETYPRECAUTIONS
Locate the range out of kitchen traffic path
and out of draftg locations to prevent poor
air circulation
_:!iii:
Be sure all packaging materials are removed
from the range before operating it to prevent
fire or smoke damage should the packaging
o
material ignite
Besure gour range iscorrecttg adjusted bg
o qualified ser_Jicetechnician or'installer for
the tgpe of gas (natural or LP}that isto be
used Your range can be converted for use
with either tgpe of gas Seethe Installation
of the range section
WARNING: Theseadjustments
must be made bg a qualified service
technician in accordance with the
manufacturer's instructions and allcodes
and requirements of the authoritg having
jurisdiction, Failure to follow these instructions
could result in serious injury or propertg
damage, The qualified agency performing
this work assumes responsibility for the
conversion,
After prolonged use of a range, high floor
temperatures mag result and many floor
coverings will not withstand this kind of use
Never install the range over vinyl tile or
linoleum that cannot withstand such tgpe
of use Never install it directly over interior
kitchen carpeting
Do not leave children alone or unattended
where a range is hot or in operation
Theg could beseriouslg burned
Do not allow anyone to climb, stand or hang
on the oven door, lower' oven drawer, warming
drawer or cooktop Theg could damage the
range and even tip it over,causing severe
personal injurg
CAUTION: Items of interest to
children should not be stored in cabinets
above a range or on the backspIash of a
range-children climbing on the range to
reach items could be serioustg injured,
Never wear loose-fitting or hanging garments
while using the appliance Becareful when
reaching for items stored in cabinets over the
range. Flammable material could be ignited
if brought in contact with flame or hot oven
surfaces and mag cause severe burns
Donot store flammable materials in an oven,
a range drawer or near a cool<top
Donot store or use combustible materials,
gasoline or other flammable vapors and
liquids in the vicinitg of this or any other
appliance
Do not let cooking grease or other flammable
materials accumulate in or near the range
Do not use water on grease fires Never pick
up a flaming pan Turn the controls off
Smother a flaming pan on a surface burner
bg covering the pan completely with
a well-fitting lid,cookie sheet or flat tray,
Use a multi-purpose drg chemical or
foam-tgpe fire extinguisher
Flaming grease outside a pan can be put
out by covering it with baking soda or;
if available, by using a multi-purpose drg
chemical or foam-tgpe fire extinguisher
Flame in the upper oven or lower oven drawer
can be smothered completely bg closing the
oven door or drawer and turning the control
to off or by using a multi-purpose dry
chemical or foam-tgpe fire extinguisher
,:_:Let the burner grates and other surfaces cool
before touching them or leaving them where
children can reach them
Never block the vents (air openingsl of the
range Theg provide the air inlet and outlet
that are necessarg for the range to operate
properlg with correct combustion, Air openings
are located at the rear of the cooktop, at the
top and bottom of the oven door, and at the
bottom of the range under the warming
drawer_lower oven drawer or kick panel
Large scratches or impacts to glass doors
can lead to broken or shattered glass
El
A WARNING: NEVERuse this
appliance as a space heater to heat or
warm the room Doing so may result
in carbon monoxide poisoning and
overheating of the oven,
:/ ::L:::
GEAppliances_com
,& WARNING!
SURFACEBURNERS
Useproper pan size-avoid pans that are unstable or easily tipped Select cookware having fiat
bottoms large enough to cover burner grates Toavoid spillovers, make sure cookware is large enough
to contain the food properlg This will both savecleaning time and prevent hazardous accumulations
of food, sinceheavy spattering orspit!overs left on range can ignite, Usepans with handles that can
be easily grasped and remain cool
Alwags use the LITE position when igniting
the top burners and make sure the burners
have ignited,
Never leave the surface burners unattended
at high flame settings Boiloverscause smoking
and greasg spillovers that mug catch on fire
Adjust the top burner flame sizeso it does
not extend begond the edge of the cookware
Excessiveflame is hazardous.,
Use ontg drg pot holders- moist or damp pot
holders on hot surfaces mag result in burns
from steam Do not let pot holders come near
open flames when lifting cookware Donot use
a towel or other bulky cloth in place of a pot
holder.
When using gloss cookware, make sure it
isdesigned for top-of-range cooking,,
To minimize the possibilitg of burns, ignition
of flammable materials and spillage, turn
cookware handles toward the side or back
of the range without extending over adjacent
burners
:;_Carefullg watch foods being fried at a high
flame setting
:::Always heat fat slowly, and watch as it heats,
' Do not leave ang items on the cooktop The
hot air from the vent mug ignite flammable
items and will increase pressure in closed
containers, which mug cause them to burst
If a combination of oils or fats wil! be used
in frying, stir together before heating or
as fats melt s!owIg,
Use a deep fat thermometer whenever
possible to prevent overheating fat beyond
the smoking point,
Use the least possible amount of fat for
effective shallow or deep-fat frying Fillingthe
pan too full of fat can cause spitlovers when
food is added
:::::Do not flame foods on the cooktop If gou
do flame foods under the hood, turn the
fan on
Do not use a wok on the cooking surface
if the wok has a round metal ring that is
placed over the burner grate to support the
wok Thisring acts as u heat trap, which may
damage the burner grate and burner head
Also, it may cause the burner to work
improperlg This mug cause o carbon
monoxide Ievelabove that allowed bg current
standards, resulting in o health hazard
':i Foodsfor ffging should be as drg as possible,
Frost on frozen foods or moisture on fresh
foods can cause hot fat to bubble up and
over the sides of the pan
• Never trg to move a pan of hot fat, especiallg
a deep fat ffger. Wait until the fat iscool
Donot leave plastic items on the cooktop-
they mag melt if left too close to the vent,
: Keep all plastics owag from the surface
burners
:::To avoid the passibititg of a burn, alwags be
certain that the controls for all burners are
at the OFF position and all grates are cool
before attempting to remove them,
If range is located near a window, do not hang
long curtains that could blow over the surface
burners and create a fire hazard
If gou smell gas, turn off the gas to the range
and call a qualified service technician,, Never
use an open flame to locate a leek
Alwags turn the surface burner controls off
before removing cookware
::: Do not lift the cooktop Lifting the cooktop can
lead to damage and improper operation of the
range,
: When disabling Gas!Control Lockout, make
sure the surface controls are set to the OFF
position Thiswill preclude gas flow when
the range is turned on
!:_:C:,!:_i
:_:::d( _>: :_:
::i,,:_i::: ,,:_,_
2
g
g.
vi i1_
.
u
o
o
w
w
/!::: :ii:! ::i_
_ ,: .LL _,: •
_::_:ii!:_i::i:,:! ::_:
i•::•i_i-,:::i!!::i
o
IMPORTANT SAFETY INFORMATION.
READ ALL INSTRUCTIONS BEFOREUSING.
ELECTRICWARMING DRAWER
AND LOWEROVENDRAWER(onsome models)
!Z
The purpose of the warming drawer and the
WARH ZONEsetting of the lower oven drawer
isto hold hot cooked foods at serving
temperature Alwags star[ with hot food;
cold food cannot be heated or cooked in the
worming drawer or the WARH ZONEsetting
of the lower oven drawer:
i::iiiii
Do not use the drawer to drg newspapers,
If overheated, theg can catch on fire
Do not leave paper products, plastics, canned
food, or combustible materials in the drawer
Never leavejars or cans of fat drippings
in or near gear drawer:
L!i:i
Do not warm food in the drawer for more
than two hours
Never place, use or self-clean the lower oven
drawer pen in the upper oven.
:i::Do not touch the heating element
or the interior surface of the drawer.
These surfaces meg be hot enough to burn
REMEMBER:The inside surface of the drawer
mag be hot when the drawer isopened
Use cure when opening the drawer Open
the drawer a crack and let hot air or steam
escape before removing or replacing food
Hot air or steam which escapes can cause
burns to hands, face and/or egos,
Do not use aluminum foil to line the lower
oven drawer Foil isan excellent heat insulator
and will trap heat beneath it. Thiswill upset
the performance of the drawer and it could
damage the interior finish
v
_ u
. i
2i
e#
o
COOKMEATAND POULTRYTHOROUGHLY...
Cook meat and paultrg thoroughlg-meat to at least an INTERNAL temperature of l 60°F and poultrg
to at least an INTERNAL temperature of 180°F Cooking to these temperatures usuallg protects against
foodbome illness,
SELF-CLEANINGTHEUPPEROVEN
Besure to wipe off excess spillage before
self-cleaning operation
:::.::Before self-cleaning the oven, remove ang
broiler pan, broiler grid, atlcookware, probe
and ang aluminum foil
Never place, use or self-clean the lower oven
drawer pan in the upper oven
:_:::::Nickel oven racks (onsome models} should
be removed from the oven before beginning
the self-clean cgcle
_:::::Grog porcelain-coated oven racks (onsome
models} mag be cleaned in the oven during
the self-clean cgcle
:::::Clean onlg parts listed inthis Owner's Hanual.
Do not clean the door gasket The door gasket
isessential for a good seal. Care should be
taken not to rub, damage or move the gasket,
If the self-cleaning mode malfunctions,
turn the oven off and disconnect the power
supplg. Have it serviced bg a qualified
technician
!:,::Do not use oven cleaners No commercial
oven cleaner or oven liner of ang kind should
be used inor around ung part of the oven,
Residue from oven cleaners will damage
the inside of the oven when the self-clean
cgcle is used.
8
E
GEAppliances.,com
.i,.i, ,ll i imlll i
UPPEROVEN
Stand away from the range when opening the door of a hot oven The hot air and steam that escape
can cause burns to hands, faceand egos
::::Do not use the oven for a storage area
items stored in the oven can ignite
Keep the oven flee from grease buildup.,
:::::Placethe oven racks inthe desired position
while the oven is coo!
Pulling out the rack to the stop-lock is a
convenience in lifting heavy foods It,is also
a precaution against burns from touching hot
surfaces of the door or oven wails The lowest
position is not designed to slide
Do not heat unopened food containers
Pressure could build up and the container
cou{d burst, causing an injury
A WARNING: NEVERcoverang
slots, holes or passages in the oven bottom
or cover an entire rack with materials such
as aluminum foil Doing so blocks air flow
through the ovenand mag cause carbon
monoxide poisoning Aluminum foil linings
mag also trap heat, causing a fire hazard
Do not use aluminum foil anywhere inthe
oven except as described in this manual.
Misuse could result in a fire hazard or damage
to the range
When using cooking or roasting bags in the
oven, follow the manufacturer's directions
Do not use your oven to dry newspapers
tf overheated, they can catch fire
Use ontg glass cookware that is recommended
for use in gas ovens
::::Always remove any broiler pan from range
as soon as you finish broiling Grease left in
the pen can catch fire if oven isused without
removing the grease from the broiler pan
When broiling, if meat is too closeto the flame,
the fat may ignite. Trim excess fat to prevent
excessive flare-ups
::_Hake sure any broiler pan is in place correctly
to reduce the possibility of grease fires
: If you should have a grease fire in a broiler
pan, press the Clear/Off pad, and keep
the oven door closed to contain fire until
it burns out,
Forsafety and proper cooking performance,
alwags bake and broil with the oven door
closed
:::::Never place, use or self-clean the lower oven
drawer pan in the upper oven
READAND FOLLOWTHISSAFETYINFORMATIONCAREFULLY.
SAVETHESEINSTRUCTIONS
01
£
Using the gas surface burners.
,,,,,, ,,,,,,,,, ,,, ,,
Throughout this manual, features and appearance may vary from your model
ol
iq:_ :_2 ¸ :
•L_,/:::: :_ _ :
¸•i•i¸¸i¸•¸
:_: ,i;i_:,i:::_
n
v A
- I,,_ u
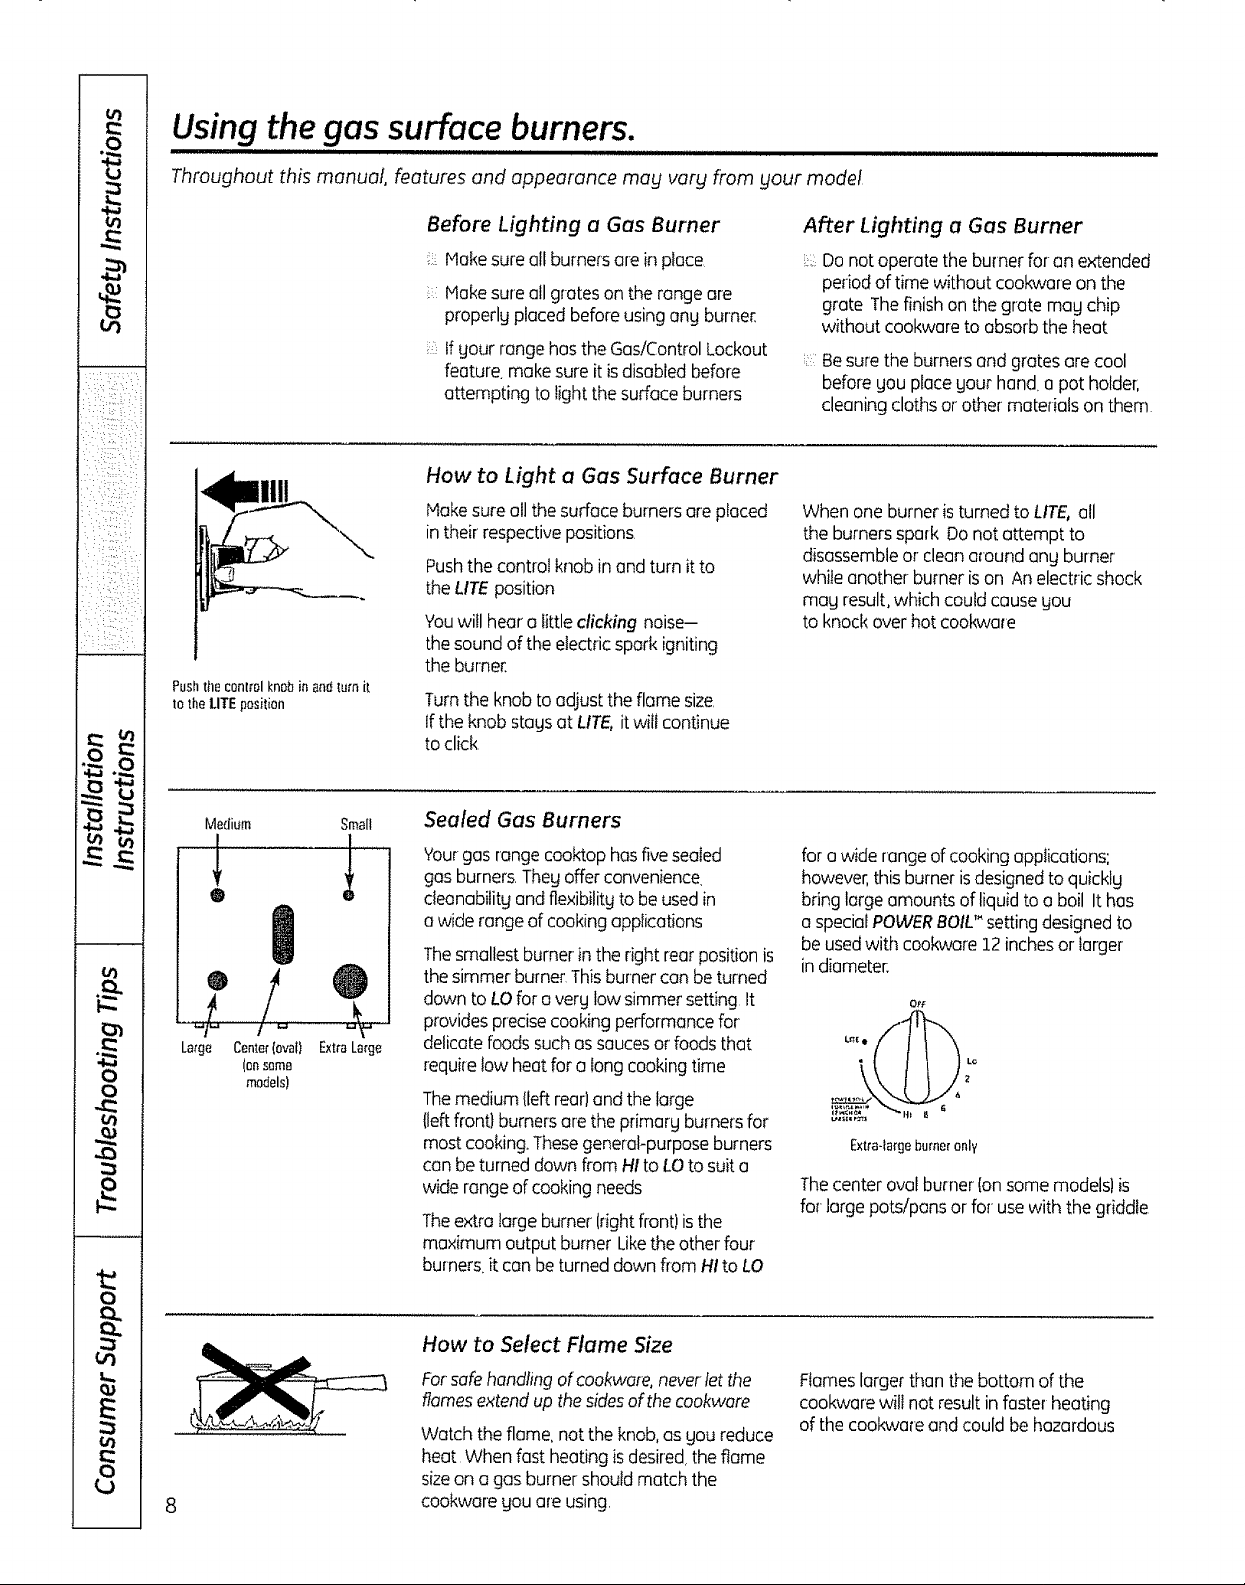
Pushthecontrolknobin andturn it
tothe LITEposition
Before Lighting a Gas Burner
Hake sureall burnersare in place,
Hake sureall grateson the range are
properly placedbeforeusingang burner,
if gourrange hasthe Gas!ControlLockout
feature,makesure it isdisabledbefore
attempting to lightthe surfaceburners
How to Light a Gas Surface Burner
Hakesureall the surface burnersareplaced
intheir'respectivepositions.
Push the control knob in and turn it to
the LITE position
Youwill heara littleclicking noise-
the soundof theelectricspark igniting
the burner.
Turnthe knob toadjust the flame size.
If the knobstags at LITE,itwilt continue
to click
After Lighting a Gas Burner
Donot operate theburner for-an extended
periodof timewithout cookwareon the
grate Thefinishon the grate mag chip
without cookwareto absorbthe heat
Besurethe burnersand gratesarecool
beforegou placegout hand.a pot holder,
cleaningcloths or'other materialson them
Whenone burneris turned to LITE,all
the burnersspark Donot attempt to
disassembleor cleanaround angburner
whileanother burner ison Anelectricshock
mag result,which could causegou
to knockoverhot cookware
v e , ."_
84
01 i
it.
0
#,
t_
E
01
0
Medium Small
Sealed Gas Burners
I
@
'four gasrange coaktophasfivesealed
gas burners.Theg offerconvenience.
deanabilitg andflexibilitgto beusedin
a wide rangeof cookingapplications
The smallest burnerin the right rear positionis
the simmerburner Thisburner canbe turned
down to LOfor a verg low simmersetting It
for awide range ofcookingapplications:
however,thisburnerisdesignedto quicklg
bring largeamountsof liquidto a boil Ithas
a specialPOWERBOIL"settingdesignedto
be usedwith cookware12inchesor larger
in diameter.
O£F
providesprecisecookingperformancefor
delicatefoods suchassaucesorfoods that
requirefow heatfor alongcookingtime
4
Themedium {leftrear)and thelarge
(leftfront} burnersaretheprimarg burnersfor
mostcooking.ThesegeneraFpurposeburners
Extra-largeburneronly
canbe turned down from HIto LOto suita
widerange ofcooking needs
Theextra largeburner (rightfront)isthe
Thecenter ovalburner[onsome models)is
for largepots/pans orfor usewith the griddle
maximum output burner Likethe otherfour
burners,it canbe turned down floraHIto LO
How to Select Name Size
Forsafe handling ofcookware, never let the
flames extend up the sides of the cookware
Watch theflame, not the knob,asgou reduce
Flameslarger than the bottom ofthe
cookwarewilt notresult in fasterheating
of the cookwareand could behazardous
heat When fast heatingisdesired,the flame
sizeon a gas burnershouldmatch the
cookwaregou areusing,
Top-of-Range Cookware
Aluminum: Medium-weightcookware is
recommendedbecauseit heatsquickly
and evenly Mostfoodsbrawn evenlgin an
aluminum skillet Usesaucepanswith tight-
fittinglidswhen cookingwith minimum
amounts ofwater.
Cast-Iron: If heated slowly,most skillets
willgive satisfactory results.
Enamelware: Under some conditions,
the enamel of some cookware mag melt.
Followcookwore manufacturer's
recommendations for cooking methods
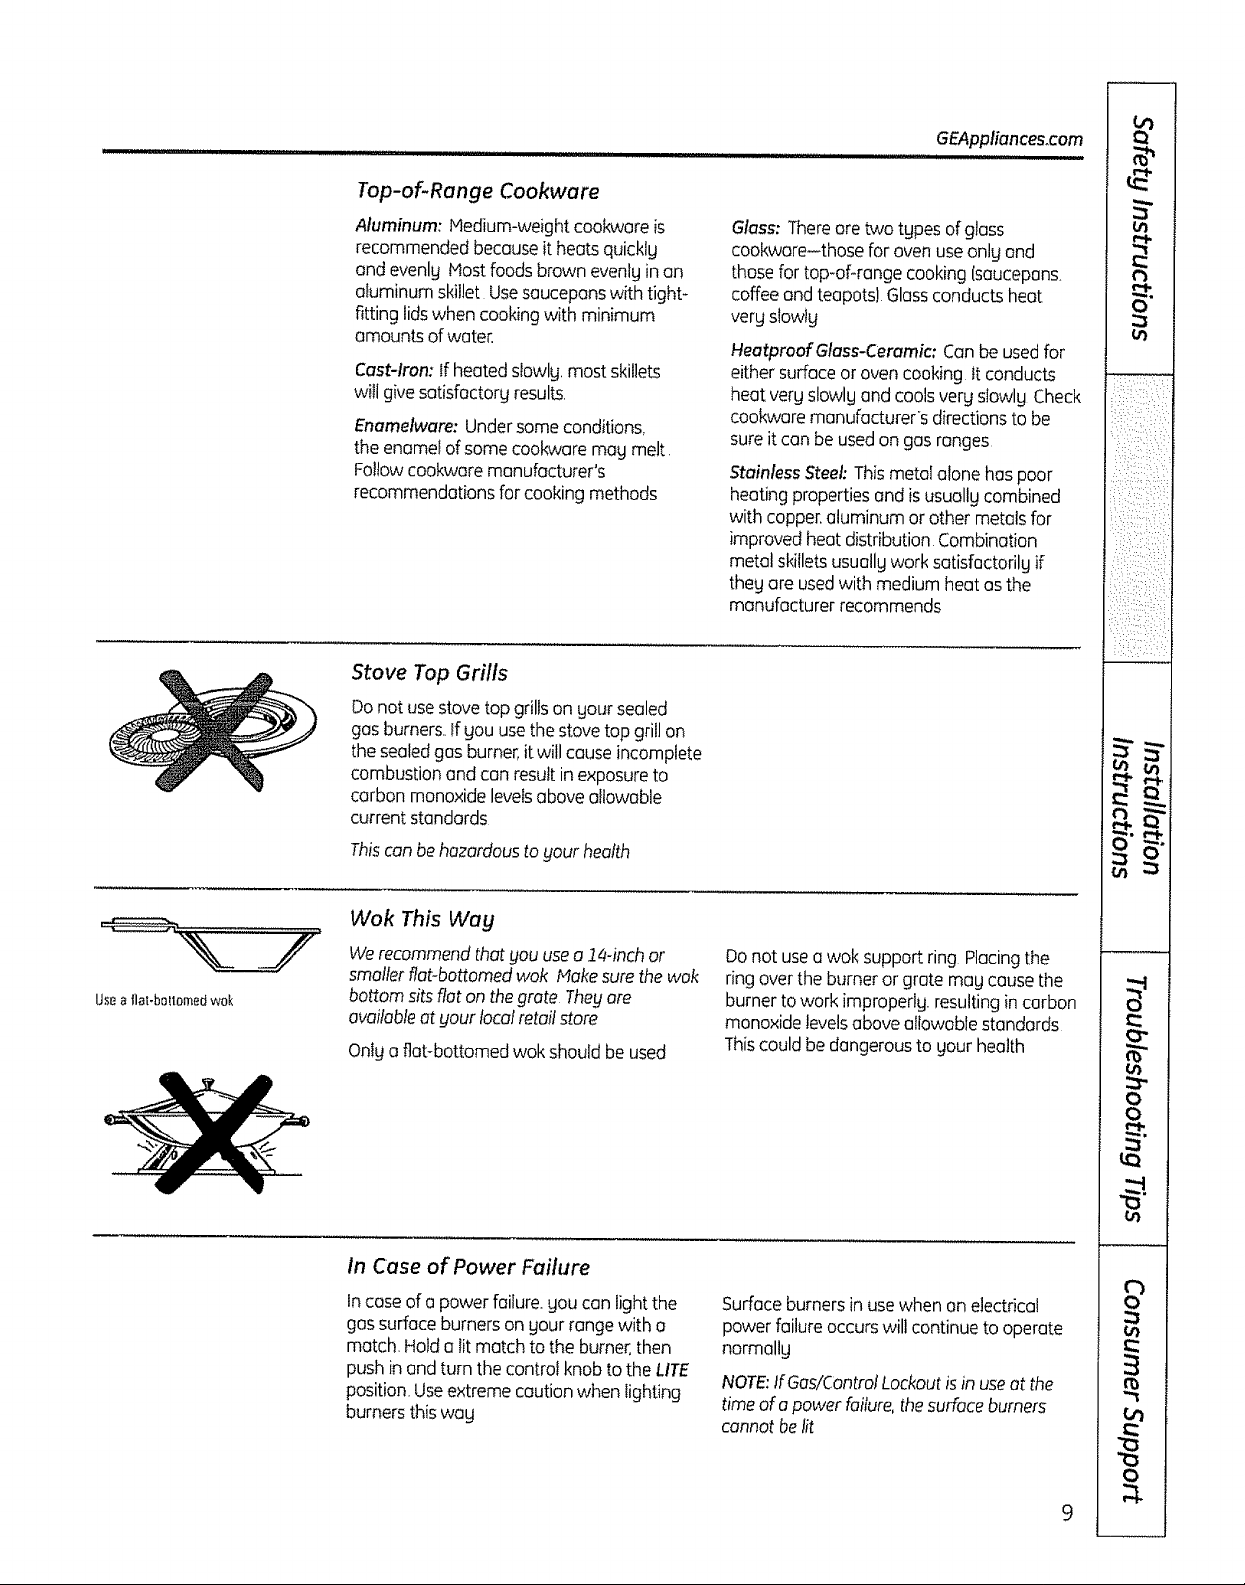
Stove Top Grills
Donot usestove top grillson your sealed
gasburners.,If you usethe stovetop grillon
the sealedgas burner,itwillcause incomplete
combustionand can resultinexposureto
carbon monoxidelevelsabove allowable
current standards
GEAppliances.com
,, illll,, i
Glass:Thereore two types ofglass
cookwore-those forovenuse only and
those fortop-of-range cooking(saucepans.
coffee and teapots)Glass conducts heat
verg s!owtg
HeatproofGlass-Ceramic: Can be used for
either surface or oven cooking tt conducts
heat very slowlg and cools very slowlg Check
cookware manufacturers directions to be
sure it can be used on gas ranges
StainlessSteel:Thismetal alonehas poor
heatingpropertiesand isusuallycombined
with copper,aluminum or other metalsfor
improved heatdistribution Combination
metal skilletsusuallgwork satisfactorilyif
themare usedwith medium heatasthe
manufacturer recommends
0
o_
•_z __ ,_._ : :;
L: :_-::x_-i ,b
i i 'iilliilI!
:_:: --,:,<7: 2_:
_,:T:_/;-_ __ _j
tn ,
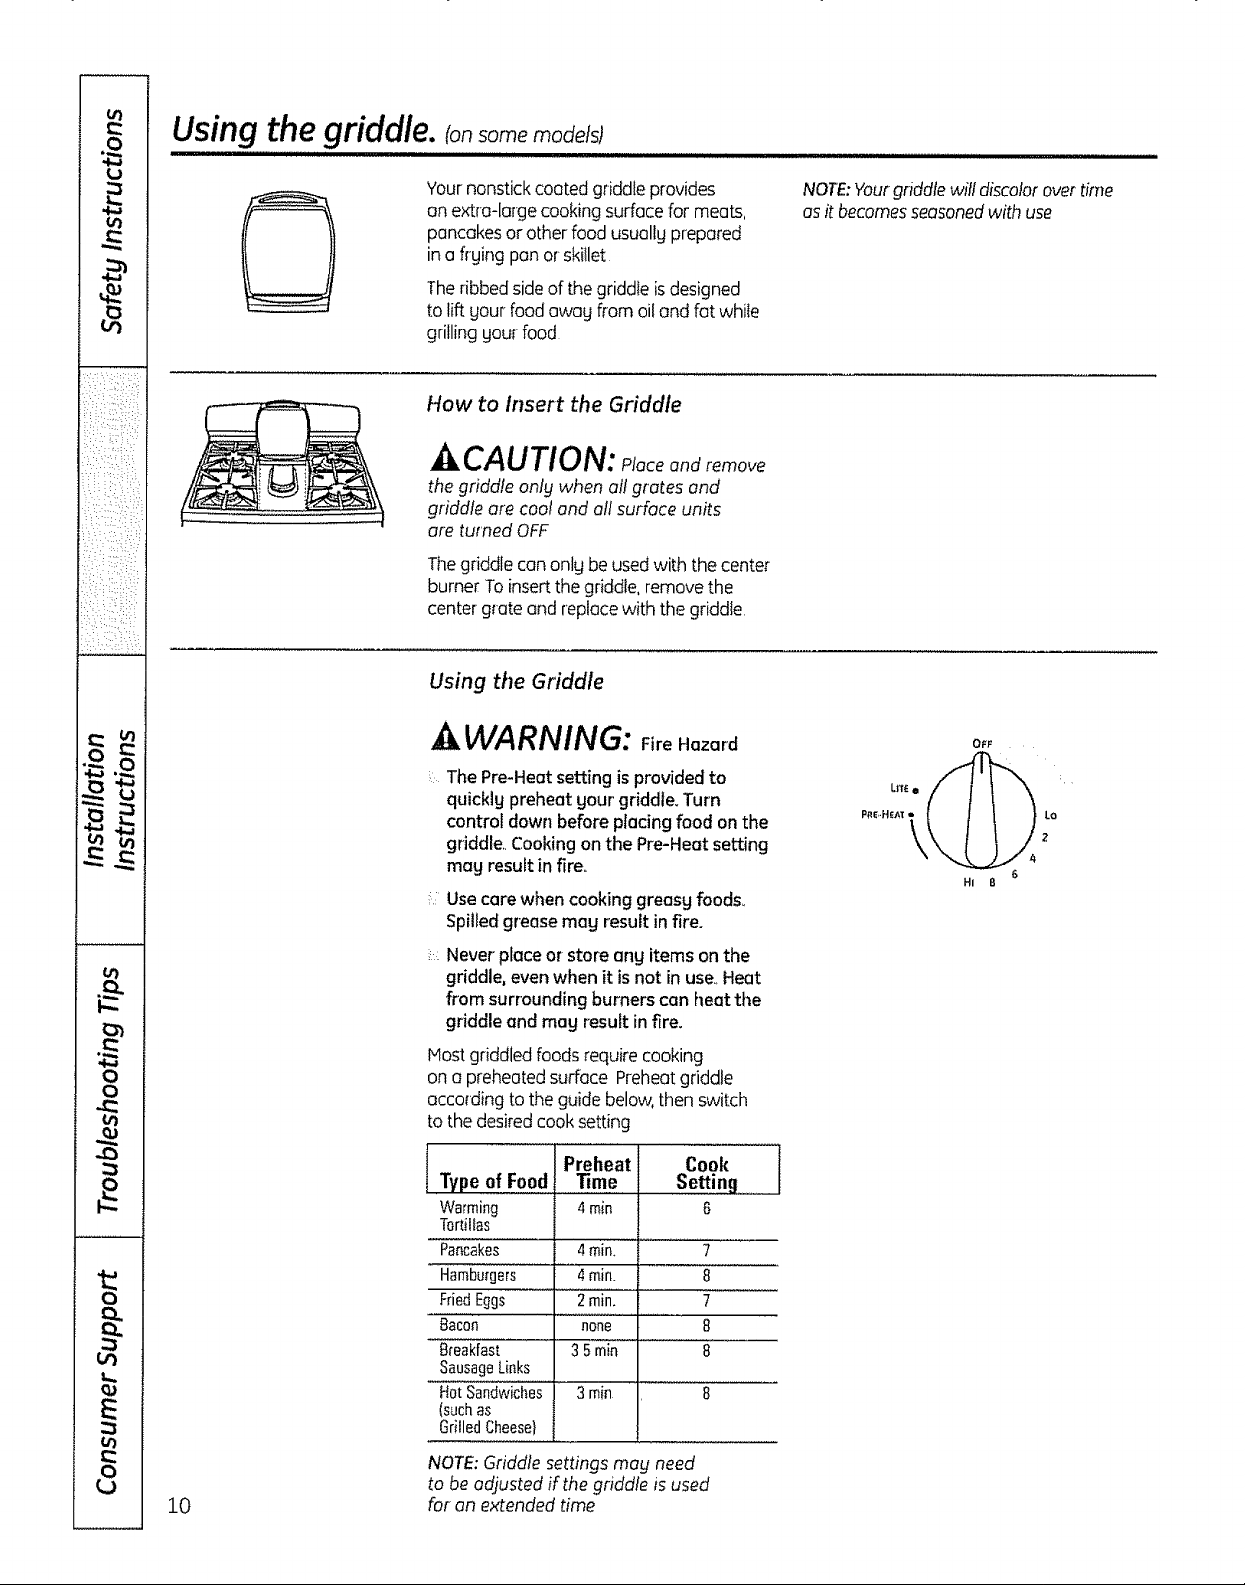
Use aflatobmlemedwok
Thiscanbehazardousta your health
Wok This Way
We recommend that you use a 14-inch or
smaller fiat-bottomed wok Make sure the wok
bottom sits flat on the grate They are
available at your local retailstare
Onlya flabbottomed wokshouldbe used
In Case of Power Failure
In case of o power failure, you can light the
gas surface burners on your range with a
match, Hold a lit match to the burner, then
push in and turn the control knob to the LITE
position, Use extreme caution when lighting
burners this wag
Donot usea woksupport ring Placingthe
ring overthe burnerorgrote maycause the
burner towork improperly,resultingincarbon
monoxidelevelsaboveallowable standards
Thiscouldbe dangerousto your health
Surface burnersinusewhen an electrical
powerfailure occurswill continueto operate
normally
NOTE:If Gas/Control Lockout is in use at the
time of a power failure, the surface burners
cannot be fit
v,.,#
i.i i
•-_ 1
0 I
m J
_ r
J
Q I
Using the griddle.
(on some models)
u_
a
:::::':%!:_'i:
{!!:_i,_,ii:ii:i
i_, _,i __ __!
Li ._.:.ii_:_,.",:
w A
vJ let
L
0
0
4::
ul
Yournonstickcoated griddleprovides
an extra-large cookingsurface for meats,
pancakesor other food usually prepared
in a flying pan orskillet
Theribbed sideof the griddle isdesigned
to liftyour food away from oil and fat while
grilling yourfood
How to Insert the Griddle
CAUTION: Ploceandremove
the griddle only when oit grates and
griddle are cool end ofl surface units
ore turned OFF
The griddle can only be used with the center
burner To insert the griddle, remove the
center grate and replace with the griddle.
Using the Griddle
-AWARNING: FireH=ord
The Pre-Heat setting is provided to
quickly preheat your' griddle. Turn
control down before placing food on the
griddle. Cooking on the Pre-Heat setting
may result in fire.,
:.::Use core when cooking greasy foods_
Spilled grease may result in fire.
.:_Never place or- store any items on the
griddle, even when it is not in use..Heat
from surrounding burners can heat the
griddle and may result in fire.
Hostgriddled foodsrequire cooking
on a preheated sudace Preheatgriddle
according to theguide below,then switch
to the desiredcooksetting
NOTE:Yourgriddlewill discolorovertime
asit becomesseasonedwith use
\
6
HI B
U3
8
0
E
u_
10
Type of Food
Warming
Tor[illas
Pancakes
Hamburgers
FriedEggs
Bacon
Breakfast
SausageLinks
HotSandwiches
(suchas
GrilledCheese}
Preheat
Time
4 rain
4rain.
4rain. i
2rain. i
none i
35min I
3min I
Cook
Setting
NOTE:Griddle settingsmay need
to beadjusted if the griddle is used
for an extended time
6
7
8
7
8
8
Using the oven controls.
(Throughout this manual, features and appearance may vary from your mode!)
GEAppliances.com
'
@i@ f °'i ';3
Featuresappearanceandpad]ocalionsmayv_ry
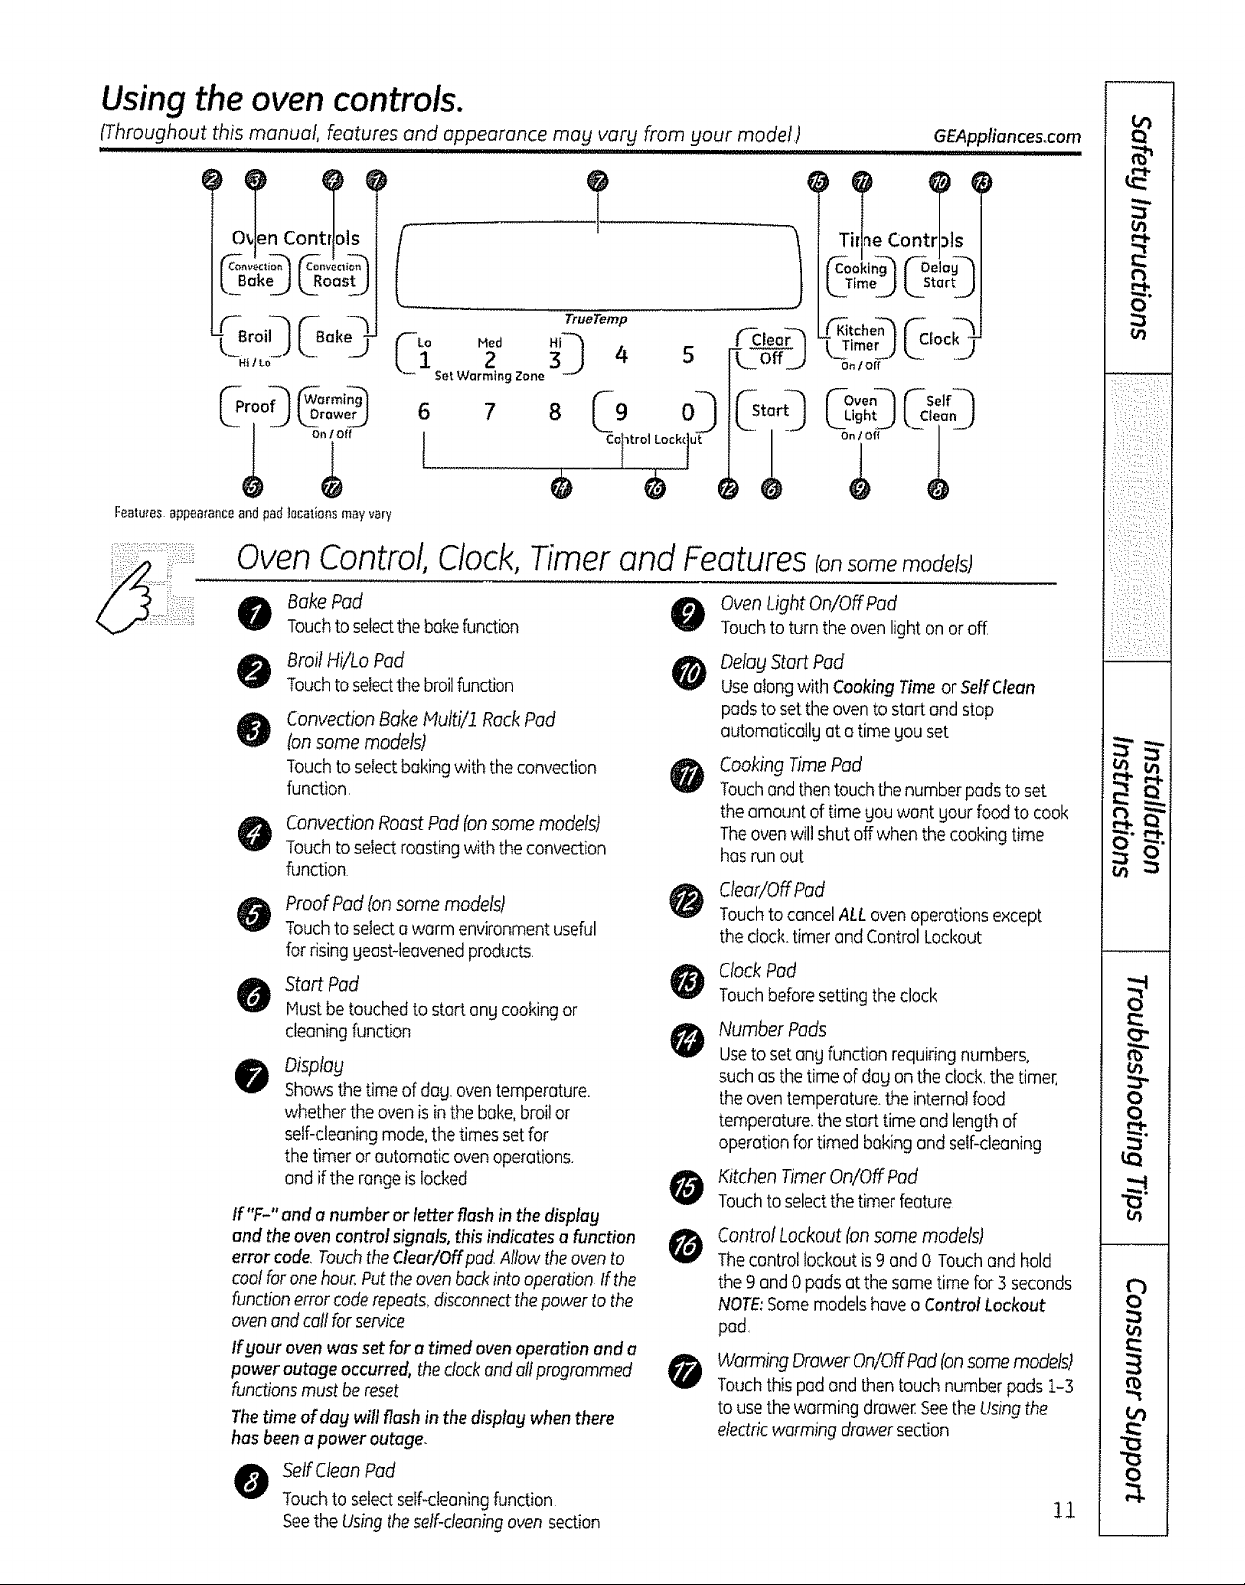
Oven Control,Clock,Timer and FeaturesIon models)
BakePad
@
Touchtoselectthebakefunction
Broil Hi/Lo Pad
@
Touchtoselectthebroilfunction
ConvectionBakeNulti/i RackPad
tonsome models)
TOuchtoselectbakingwiththe convection
function,
ConvectionRoastPad(onsome models)
Touchto selectroostingwith the convection
function
Proof Padton some models)
Touchtoselectawarm environmentuseful
for risingyeast-leavenedproducts
Start Pad
Hustbe touchedto startanycookingor
cleaningfunction
Display
Showsthetimeof dog.oventemperature.
whethertheoven isinthe bake,broilor
self-cleaningmode,thetimessetfor
thetimeror automaticovenoperations.
and ifthe rangeis locked
If"F-" and a numberor letter flashin thedisplay
and theovencontrol signals,this indicatesa function
errorcode.TouchtheClear/Offpad Allowtheovento
coolforonehour.PuttheovenbackintooperationIfthe
functionerrorcoderepeats_disconnectthepowerto the
ovenendcallforservice
If your ovenwasset fora timedovenoperationend a
poweroutage occurred,theclockandallprogrammed
functionsmustbereset
Thetime ofday willflash in thedisplaywhenthere
hasbeena power outage.
O elf CleanPad
Touchto selectself-cleaningfunction
Seethe Usingthe self-cleaningoven section
2 4
get Warming Zone
6
1
TrueTemp
°& 0
0 Co ltrol0 1 iLock( ut
@
T e Con s
LTimoj L_St.rtj
_ eoQ
k offJ
Oven LightOn/OffPad
Touchto turntheovenlighton oroff.
Delay Start Pad
Usealongwith CookingTimeorSelfClean
padsto settheovento start andstop
automaticallyata time gouset
Cooking Time Pad
Touchand thentouch the number pads to set
the amount of time you want gout food to cook
Theoven will shut off when the cooking time
has run out
Clear/OffPad
TouchtocancelALLovenoperationsexcept
theclod<,timerandControlLockout
ClockPad
Touchbeforesettingtheclock
Number Pads
Usetosetany functionrequiringnumbers,
suchasthe timeofdogon the clockthe timer,
theoventemperature,theinternalfood
temperature,thestart timeand lengthof
operationfortimedbakingandself-cleaning
Kitchen TimerOn/Off Pod
Touchtoselectthetimerfeature
Control Lockout(onsome models)
Tiqecontrollockoutis9 and0 Touchandhold
the9 and0 padsatthe sometimefor3 seconds
NOTE:Somemodelshavea ControlLockout
pad.
Warming DrawerOn/OffPad(onsomemodels)
Touchthispadandthentouchnumberpads1-3
to usethewormingdrawer SeetheUsingthe
electricwarmingdrawersection
Ot_I Off
_oveo-'1f-solf_'1
ghLJL.2,o,oL)
On 1 Off 1
!1
O
o')
O"
o_
0
0
t_
0
0_
fo
0
q-
tb
0
e,i
u
Using the ovencontrols.
(Throughout this manual, features and appearance mag vary from gout mode(,)
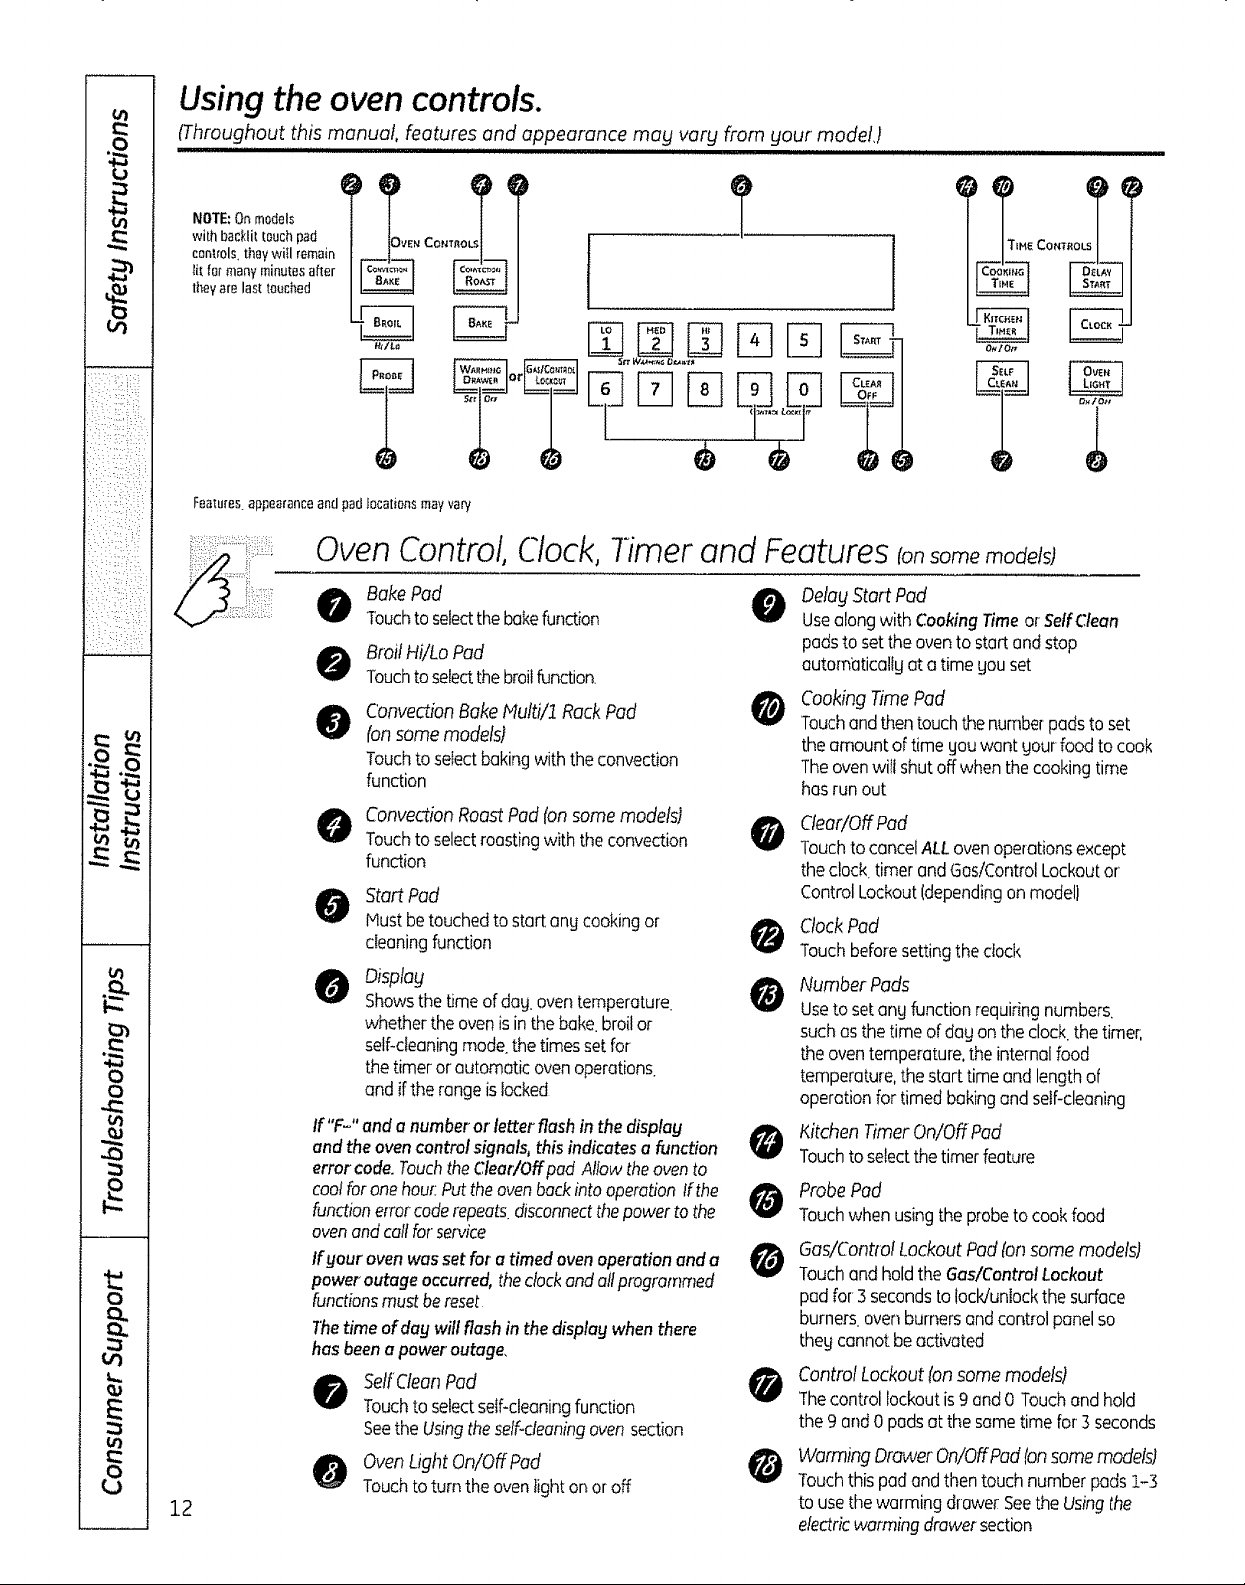
NOTE:Onmodels
with bacNit touchpad
controls,theywitl remain
Eitfe_manyminutesafter
theyatelast touched
VEN CONTRO
F
t
=MECOHTRO
): 2 :::[i:"
(_ :_ i L:,) ih
i_i)i::ii!(i:i(_):::
:U)::::I i::i:
(ii)!(_i::)ii_:i!';:ili
iii:
v
vx lt,,_
0
0
4b
o
A
E
8
12
HML_
?
Featuresappearanceandpad locationsmayvary
OvenControl, Clock,Timer and Features models)
Touchto selectthebakefunction
Broil Hi/Lo Pad
Touchto selectthebroilfunction
ConvectionBakeMulti/1 RackPad
@
(on somemodels)
Touchtoselectbakingwiththe convection
function
O onvection RoastPad (onsomemodels)
Touchtoselectroastingwith theconvection
function
Start Pad
Hustbetouchedto start angcookingor
cleaningfunction
Disptag
Showsthetimeof dog.oventemperature.
whethertheovenisinthe bake.broilor
self<leaningmodethe timessetfor
thetimeror automaticovenoperations
andifthe rangeislocked
If "F-" and anumber'orletter flashin the displag
and theovencontrol signals,this indicates a function
errorcode.TouchtheCleat/Offpad Allowtheovento
coolfor onehou_:Puttheovenbackintooperationtf the
functionerrorcoderepeatsdisconnectthe powerto the
ovenandcall forservice
If gour oven was set for a timed oven operation and a
power outage occurred, the clock and attprogrammed
functions must be reset
1hetime of dogwill flashin the disp!agwhenthere
has beenapower'outage,
SetfCfeanPad
Touchto selectselFcleaningfunction
SeetheUsingthestir-cleaningoven section
OvenLight On/OffPad
Touchtoturn theovenlight onor off
.........e
0
0
0
O_ l Ot_
??
DetagStart Pad
Usealongwith CookingTimeorSeffClean
padsto settheovento startandstop
autombticallgat atimegouset
Cooking TimePad
Touchandthentouchthe numberpadstoset
theamountof time gouwant goutfoodto cook
Theovenwiti shutoffwhenthecookingtime
hasrunout
Clear/Off Pad
Touchto cancelALLovenoperationsexcept
theclock timerandGas!cOntrolLockoutor
ControlLockout(dependingonmodel)
ClockPad
Touchbeforesettingthedock
Number Pads
Usetosetang functionrequiringnumbers.
suchasthe timeof dogonthe clock,the timer,
theoventemperature,theinternalfood
temperature,thestart timeandlengthof
operationfor timedbakingandself-cleaning
llitchen TimerOn!Off Pod
Touchtoselectthetimerfeature
Probe Pad
Touchwhen usingthe probetocookfood
Gas/Control Lockout Pad(onsome models)
TouchandholdtheGas/ControlLockout
pad for-3secondstoloclduniockthe surface
burners ovenburnersandcontrolpanelso
thegcannotbeactivated
Control Lockout(on same models)
Thecontrollockoutis9 and0 Touchand hold
the9 and0 padsat thesametime for] seconds
Warm_ngDrawer On/OffPod(onsomemodels)
Touchthis padandthentouchnumberpods1-3
to usethewarming drawerSeetheUsingthe
electricwarmingdrawersection
Using the upper oven.
n,quu! ,, ,,,,,,,,,,,u iml
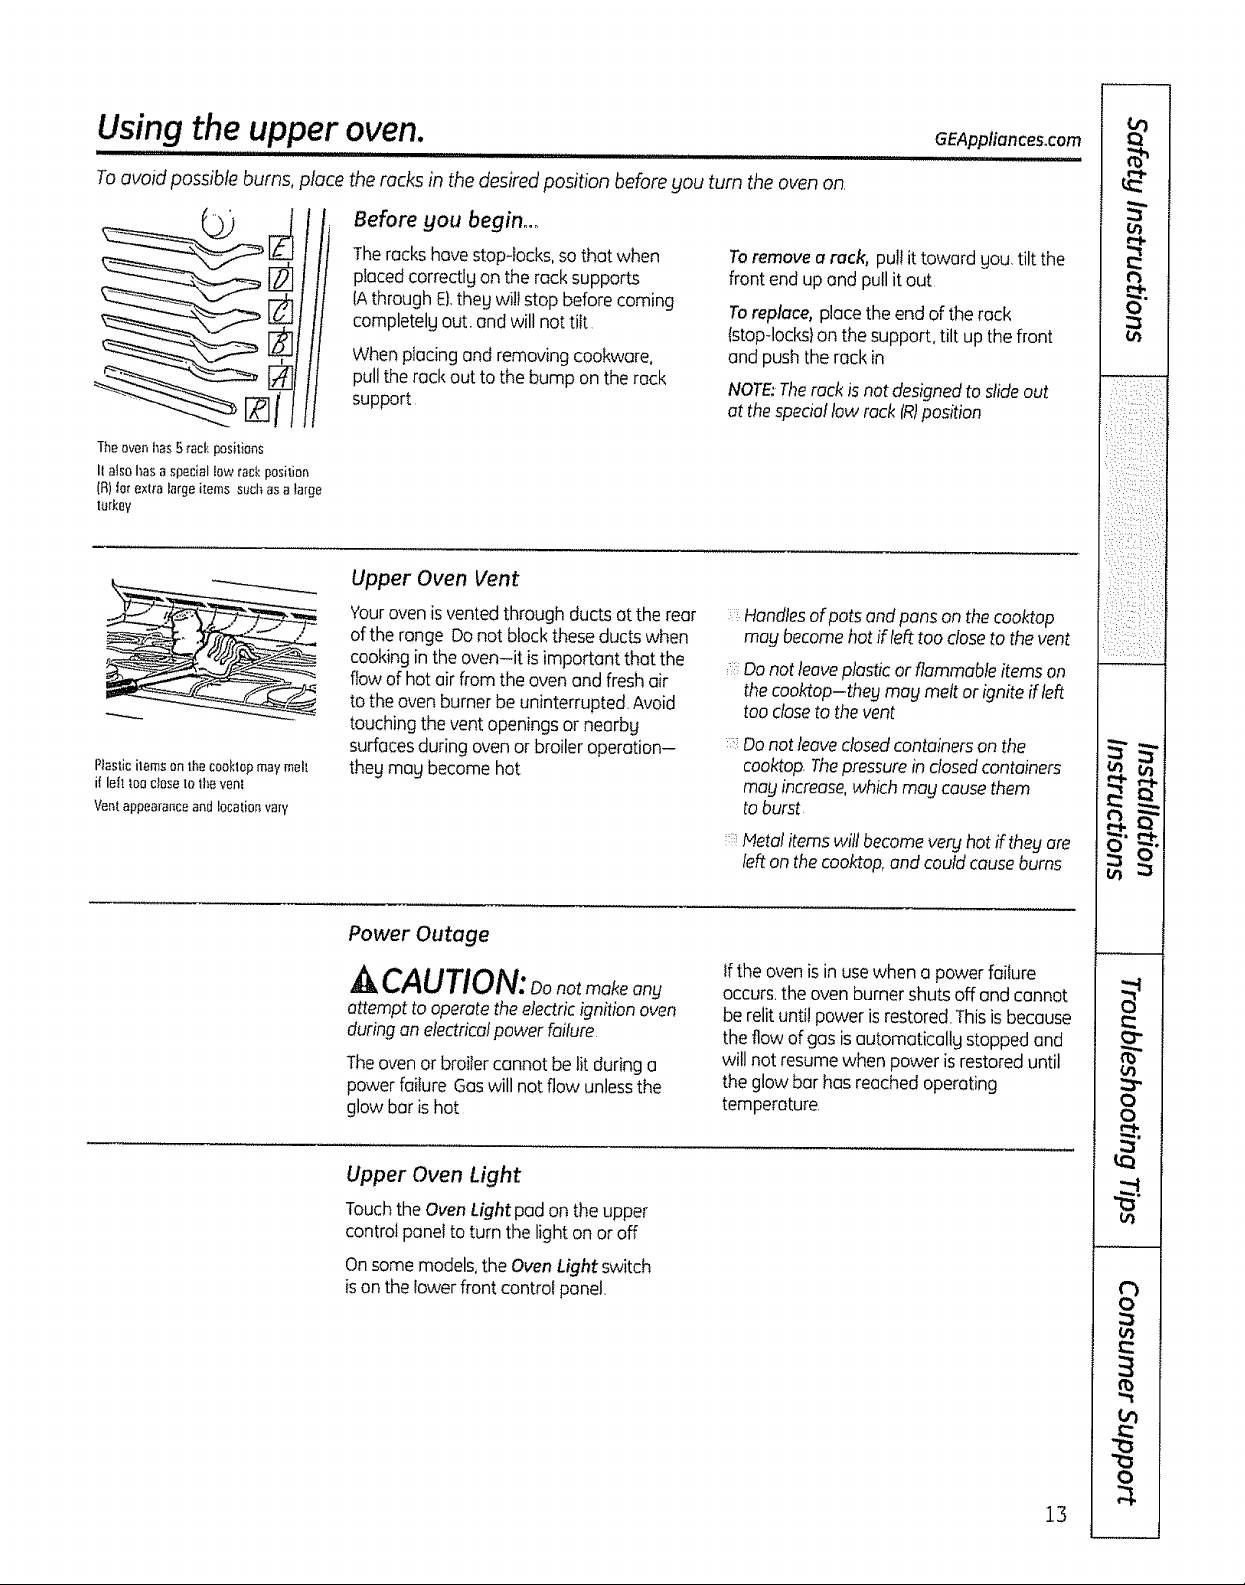
Toovoid possible burns, place the rocks in the desired position before you turn the oven on,
Before you begin°_
/
Theovenhas5 _ec£posilians
It alsohasaspe_iaIIowrackposition
(R)let extralargeitems suchasa large
turkey
Plastic ilerns on lhecooklop may mall
it left too close to the vent
Vent appearance and Iocalion vary
Theracks havestop-locks,sothat when
placedcorrectlg on the racksupports
(Athrough E).thegwill stop before coming
completelgout. andwill nottilt
Whenplacing and removingcookware,
pullthe rackout to the bump on the rack
support
Upper Oven Vent
'four oven is vented through ducts at the rear
of the range Donot block these ducts when
cooking in the oven-it is important that the
flow of hot air from the oven and fresh air
to the oven burner be uninterrupted. Avoid
touching the vent openings or nearby
surfaces during oven or broiler operation-
theg meg become hot
Toremove arack, pullit toward gou tilt the
front end up andpull it out
Toreplace, placethe endof therack
tstop4ocks}on the support,tilt up thefront
and pushthe rack in
NOTE:Therackisnot designedto slideout
at thespeciallow rock(RIposition
Handles of pots and pans on the cooktop
mag become hot ifleft too close to the vent
Donot leaveplasticor flammableitemson
thecooktop-theg ma_lmeltor igniteifleft
too closeto the vent
Do not leave closed containers on the
coaktop The pressure in closed containers
mag increase, which ma_!cause them
toburst
GEAppfiances°com
Power Outage
CAUTION: notmakeanuuy
attempt to operatetheelectricignitionoven
duringan electricalpower failure
Theoven or broilercannot belit during a
powerfailure Gaswill not flow unlessthe
glowbar ishot
Upper Oven Light
TouchtheOven Light pad on the upper
control panelto turn the light on or off
Onsome models,the Oven Light switch
ison thelowerfront controlpanel,
kletal items will become very hot iftheft are
lefton the coaktop, and could cause bums
If theovenis in usewhen apowerfailure
occurs,the ovenburnershuts offand cannot
be relituntilpower isrestored.Thisis because
theflow of gas isautomaticallg stoppedand
will not resumewhen power isrestoreduntil
the glow bar hasreachedoperating
temperature,
13
e"t
Using the upper oven.
£.1
".:X X. ":L::_':__
:_:_i;i_i:.::i:::_i,!/!_
!:,:i__,_)_!I_:!!I::I;:)I_:,::_I_:
w A
__ w .
.- L
vJ el,_
tf gour model has a door latch, do not tack the oven door with the latch during baking or roasting
Thelatch is used for self-cleaning ontg,
How to Set the Upper Oven for Baking or Roasting
'Fouroven is not designed for open-door
cooking
Tochange the oven temperature during BAKE
cycle, press the BAKE pad and then the
number pads to get the new temperature
I_] Touchthe BAKEpad
[_ Checkfood for donenessat minimum
time on recipe Cooklonger ifnecessarg
TouchtheCLEAR/OFFpad when
cookingiscomplete
Theovenhasa specialtow rack(R)
position just above the oven bottom
Use it when extra cooking space is
needed, for example, when cooking
a large turkey Tile rack is not designed
to slide out at this position
[] Touchthe number pads to setthe
desiredtemperature
[_ Touchthe STARTpad
Theword ONand1OO° willbedisplagedAs
theoven heatsup,thedisplogwillshowthe
ctlangingtemperatureWhen theovenreadies
thetemperaturegouset a tonewillsound
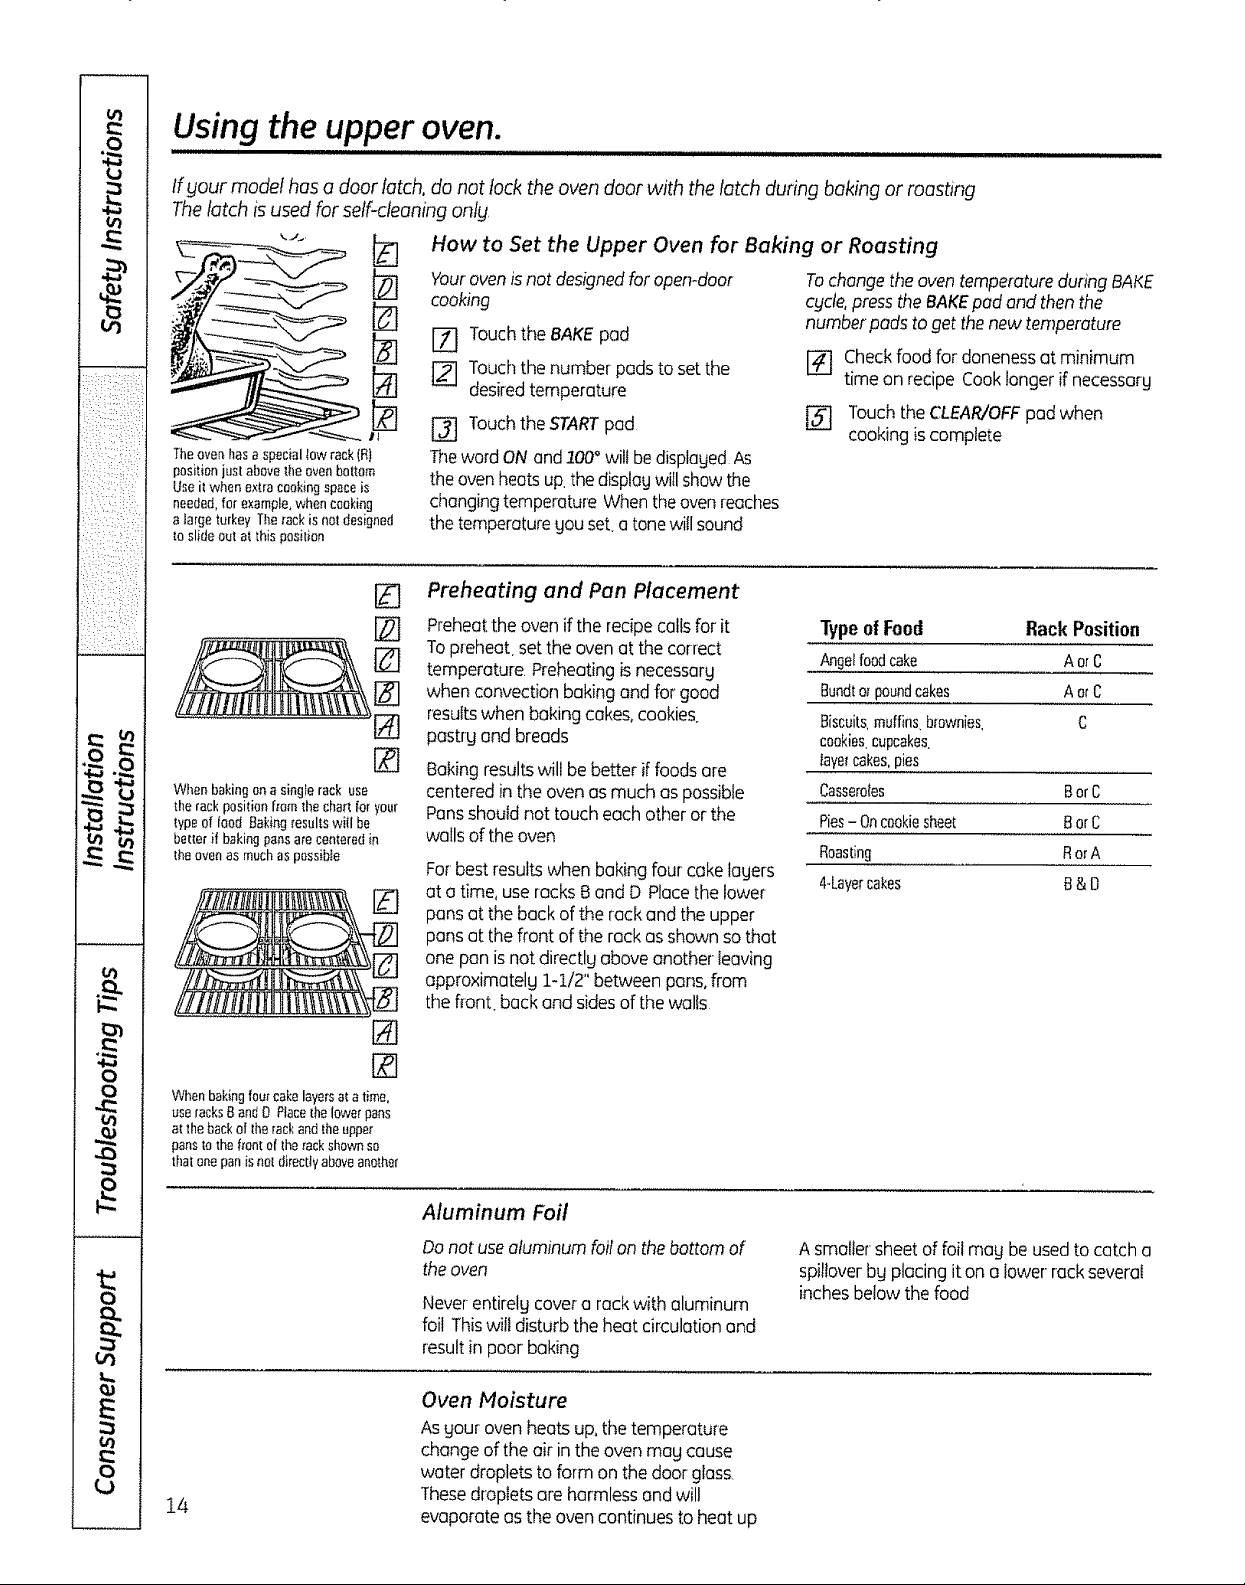
Preheating and Pan Placement
Preheatthe ovenif the recipecallsfor it
@
@
#q
Whenbakingona singlerack usa
therackpositionfromthechartfor your
typeof food Bakingresultswill be
betterif bakingpansarecenteredin
theovenasmuchaspassiNe
Topreheat, setthe ovenat the correct
temperature.Preheatingis necessarg
when convectionbaking and for good
resultswhen bakingcokes,cookies.
postrg and breads
Bakingresultswill bebetter if foodsore
centeredin the ovenas much aspossible
Pansshould not toucheachother orthe
wells of theoven
Forbest resultswhen bakingfour cakelagers
at atime, useracks8 andD Placethelower
TypeofFood Rack Position
Angelfoodcake AorC
Bundto_poundcakes AorC
Biscuits,muffins,brownies C
cookies,cupcakes.
layercakes,pies
Casserotes BorC
Pies- Oncookiesheet BorC
Roasting RorA
4*Layercakes B&D
pansat theback of the rackand theupper
pansat thefront ofthe rackasshown sothat
one pan is not directlg above anotherleaving
approximatelg 1-1/2"betweenpans,from
the flont backand sidesof the walls
%
0
L,.
E
8
o
0
When baking four cake layersat a time,
use tacks B and D Race the lower pans
at the back of the rackandthe upper
pans to _hofront el d_erack shown so
that one pan isnot directly above another
Aluminum Foil
14
Do not use aluminum foil on the bottom of
the oven
Never-entirelucovera reckwith aluminum
foil Thiswill disturb the heat circulationend
resultin poor baking
Oven Moisture
Asgout ovenheats up,the temperature
changeof the airin theoven magcause
water droplets to form on thedoor glass,
Thesedropletsare harmlessandwill
evaporate astheoven continuesto heat up
A smallersheet offoil mag be usedto catch a
spilloverbg placingit ona lower rockseveraI
inchesbelow thefood
lf gour model has a door btch, do not !ock the oven door with the latch during broiling,
The latch is used for self-cleaning onlg
How to Set the Upper Oven for Broifing
GEAppliances,,com
CloseLhedoor Alwaysbroilwith
the door closed
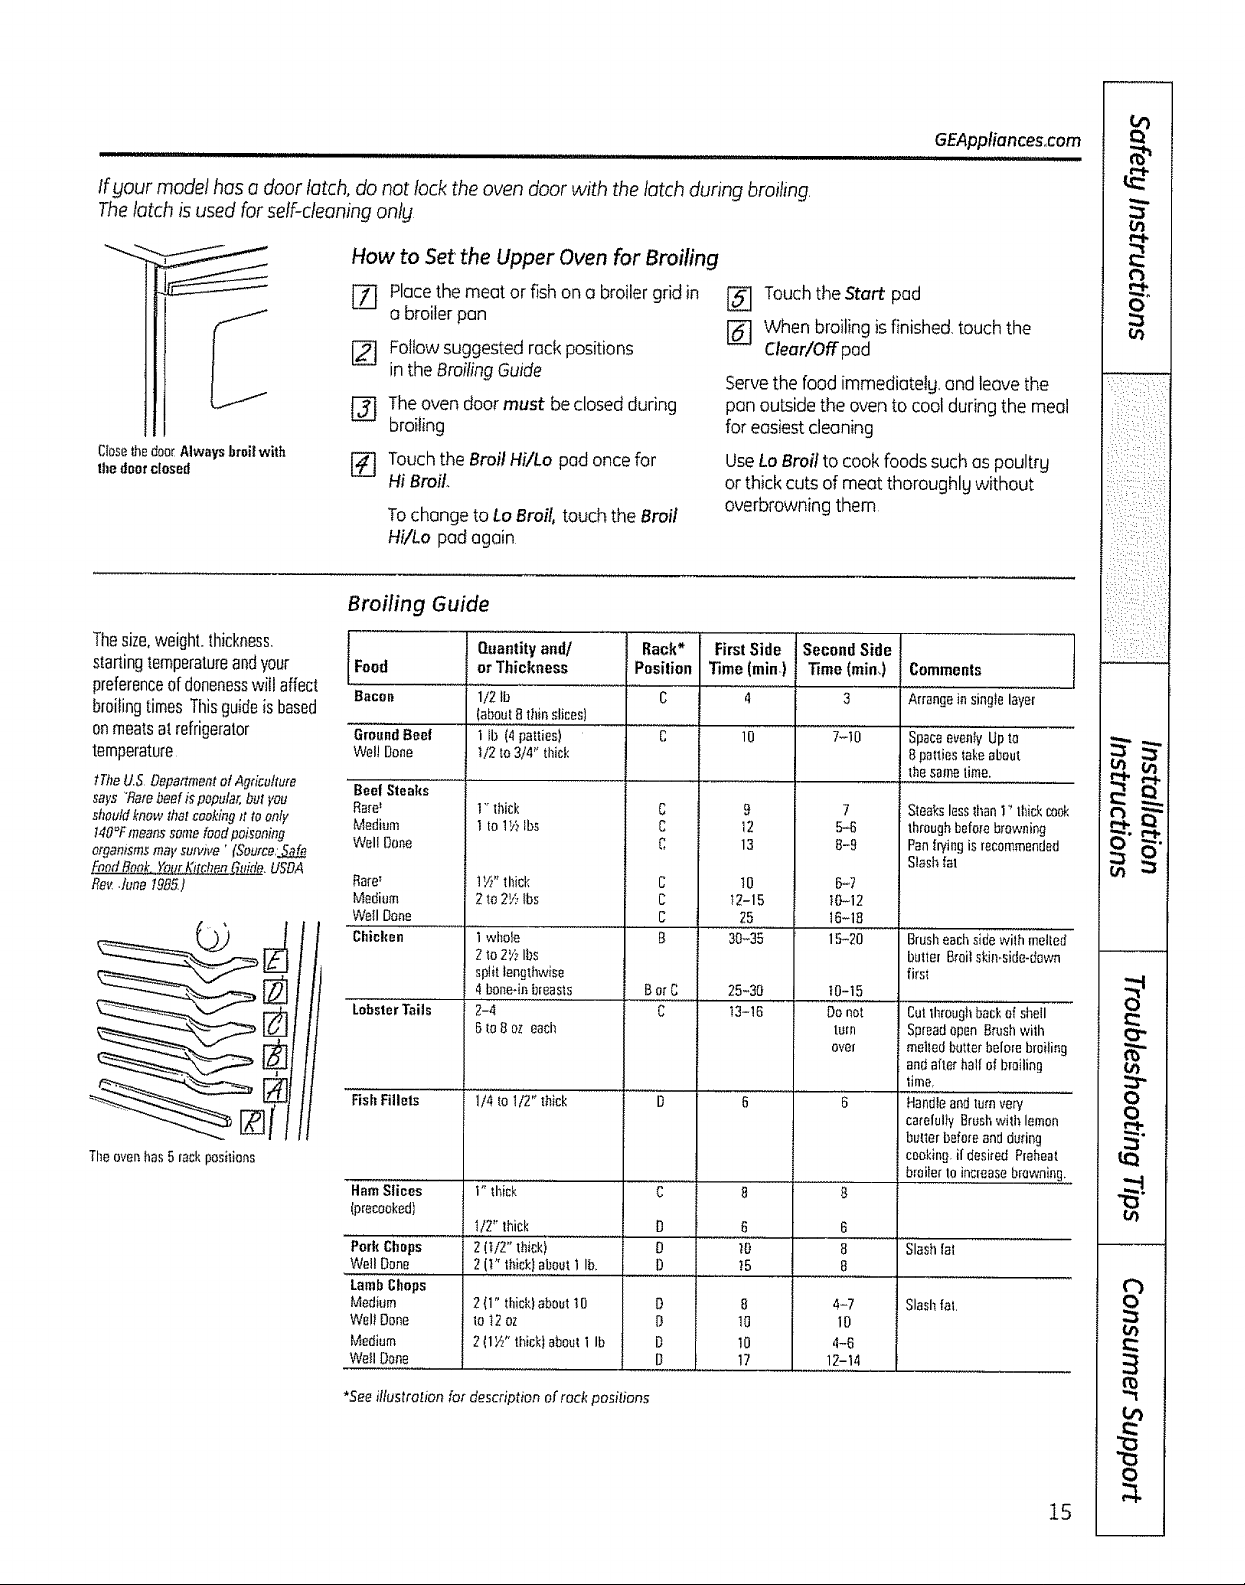
Thesize,weight,thickness.
starlingtemperatureandyour
preferenceofdonenesswill affect
broilingtimes Thisguideis based
onmeatsatrefrigerator
temperature
tThe U.5 Department of Agriculture
says "Rare beef is popular, but you
should knew that cooking _t to only
140°Fmeans some food po_soning
orgamsms may sufwve ' (Source,_
Fnett Bt_nk. _/r Kitchen C_, USDA
Re_ June 1985)
Tileovenhas5 rackpositions
[Z] Place the meat or fish on o broiler grid in
o broiler pan
[_ Followsuggested reck positions
inthe BroilingGuide
_] The oven door must be closed during
broiling
[_ Touch the BroilHi/Lo pod once for
HiBroil,
Tochange to Lo Broil, touchthe Broil
Hi/Lo pod again
Broiling Guide
Food or Thickness
Bacon 1/2 lb
G;o,,ndBeef
Well Done
Beef Steaffs
RaW I" thick
Medium I to 1_/_Ibs
WellDone
Rare_ IV/' thick
Medium 2tO2_' lbs
WailDone
Chicken I whole
LObste'r"Tails" 2-4
FishFillels
HamSlicEs
(precooked)
'PorkC'hops
Well Done
LambChaps
Medium
We!_Done
Medium
Weft Done
Quantity and/
(about8 thinslices)
1ib (4patties)
t/2 to 3/4" thick
2to 2_,_Ibs
split lengthwise
4bone-inbreasts
5to 8 ez each
"1";4'io"1'/2,'t,ick
1"thick
tl2" thick
2(U2" thicki
2(1" tt_ick)aboutI lb.
2 (1" Ihick) about 10
to t2 oz
2(1W' thick) about I Ib
Rack*
Posilion
C
C
c
c
c
C
C
C
B 30-35
Barc 25-30
C t3-!6
D
D
D
D
D
D
D
[_] Touch the Start pod
[_ When broiling is finished, touch the
Cleor/Off pod
Servethe foodimmediotelg,endleavethe
pan outsidethe ovento coolduring the meal
for easiestcleaning
UseLoBroil to cookfoodssuchas poultrg
or thickcuts of meat thoroughlgwithout
overbrowningthem
FirstSide
Time(min)
10
12
13
10
12-15
25
G G
8 8
G 6
IO 8 Slashfat
15 8
8 4-7 Slashfat,
10 1O
10 4-B
17 12-14
Second Side
Time (rain,)
3
7-111"
9
7
5-6
8-9
G-7
10-12
16-18
15-20
10-15
Donot
turn
over
Spaceevenly"LiptO
8pattiestakeabout
thesametime.
Steaks lessIhan !" thick cook
through before b,rowning
Pan |Piingis recommended
Slash ial
Brusheachsidewilh melted
butler B_oilskin-side-down
first
Cutthroughbackefshell
Spreadopen Brushwith
meltedbutterbolerobroiling
andafterhallof broiling
time,
Handle"andturn'very ......
carefully Brushwith lemon
butterbeforeandduring
ceokin_,if desiredPreheat
broilerto increasebrowning,:,
0
*Seeillustration for description of rock positions
15
ul
Usingthe clock and timer.
£
01
r_
w
w - -
vm ,_
01
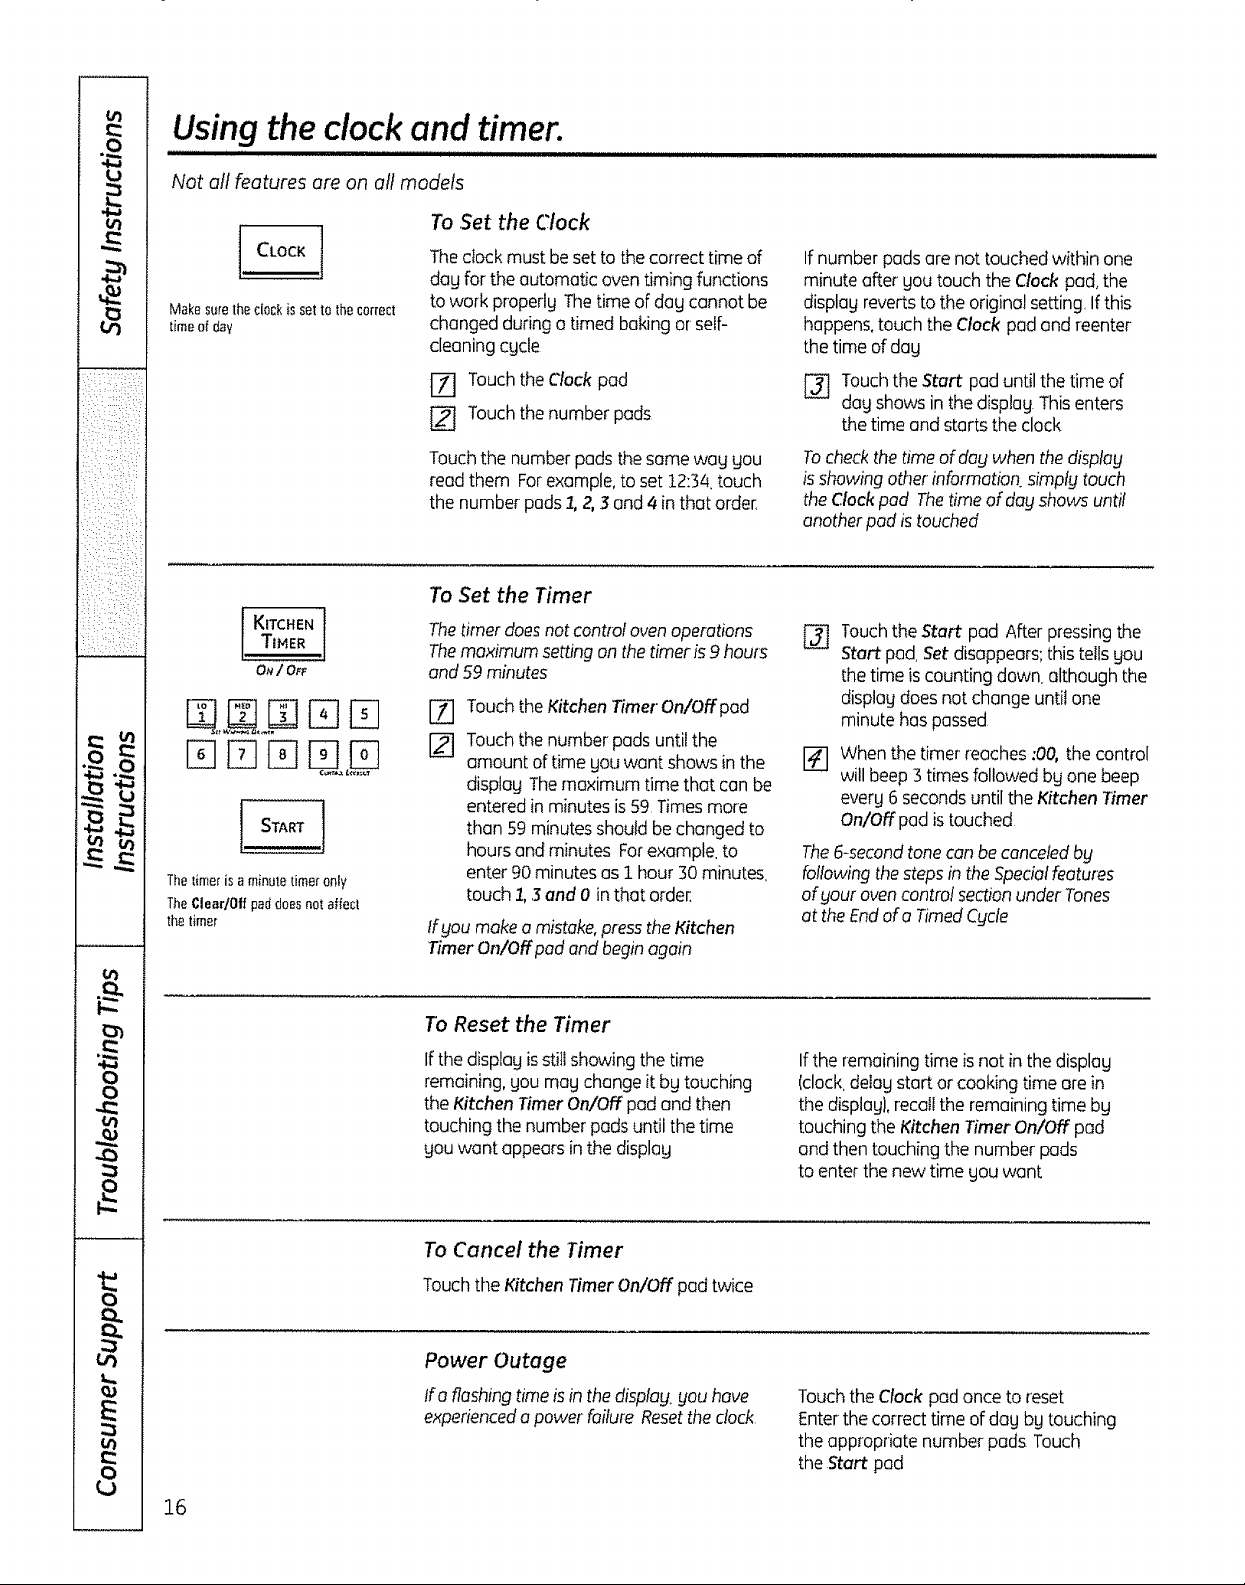
Not aft features are on all models
To Set the Clock
CLocK
Makesuretheclock is set to thecorrect
time of day
KITCHEN
[, TIMER J
0_/ OfF
START
The timer is a minute timer only
The CleadOlf pad does not affect
tl_e time[
Thedock must beset to thecorrect timeof
dog for theautomatic oven timing functions
to work properlgThetime ofdag cannot be
changed duringa timedbaking or self-
cleaningcgc[e
[Z] Touchthe Clock pad
[] Touchthe numberpads
Touchthe numberpadsthe same wag gou
read them Forexample,to set 12:34.touch
the number pads2,2,3 end 4 inthat order,
To Set the Timer
The timer does not cant{of oven operations
Themaximum setting on thetimer is 9 hours
and 59 minutes
ff you makeo mistake,presstheKitchen
Timer On/Off pad and beginagain
TouchtheKitchen TimerOn/Off pad
Touchthenumber padsuntil the
amount oftime gouwont showsin the
displag Themaximum time that con be
enteredin minutesis59 Timesmore
than 59minutes should bechanged to
hoursand minutes Forexample,to
enter90 minutesas i hour 30minutes,
touch 1,3 and 0 inthat order`
Ifnumber padsare not touchedwithin one
minute after gou touchthe Clock pad,the
display revertstothe original setting.Ifthis
happens,touch the Clock pad endreenter
the timeof dag
[_ Touchthe Start pad untilthe timeof
dag showsin the displag Thisenters
the timeand startsthe clock
Tocheckthetime ofdag whenthedisplay
isshowingother information simptgtouch
theClock pad Thetimeof dagshows until
anotherpod is touched
Touchthe Star pad After pressingthe
@
Start pad,Set disappears;this tellsgou
thetime is counting down.although the
displagdoes not change untilone
minute haspassed
Whenthe timer reaches:00, the control
willbeep 3times followed bg onebeep
ever#6seconds untilthe Kitchen Timer
On/Off padis touched
The 6-second tone can be canceled by
following the steps in the Special features
of your oven contro! section under Tones
at the End of a Timed Cycle
4=
4_
ul
8
O_
0
0
ol
A
0
oj
E
01
16
To Reset the Timer
Ifthe displagisstill showingthe time
remaining,gou moochangeit bg touching
the KitchenTimerOn/Off pad and then
touching the numberpodsuntilthe time
gou want appears in the displaLJ
To Cancel the Timer
Touchthe KitchenTimerOn/Off pad twice
Power Outage
!f a flashingtimeis in the display,you have
experienceda power failure Resettheclock
If theremainingtime isnot inthedisplag
(clock,deIag start orcooking timeare in
thedisplay),recallthe remainingtime bg
touching the Kitchen Timer On/Off pad
and thentouching the number pads
to enter the new time gou want
Touchthe Clock pad onceto reset
Enterthe correct time of dagbg touching
the appropriate number pads Touch
theStart pad
Usingthe timed baking and roasting features, tupperovenonlytG App,once com
,111,111111 ,1111 , i iiiii II ...................... .......
Ifyour model has a door latch, do not lock the oven door with the latch during timed cooking The btch is used for
self-cleaning onfg
NOTE: Foods that spoil easily-such as milk, eggs, fish, stuffings, poultry end pork-should not be allowed to sit for
more than i hour before or after cooking Room temperature promotes the growth of harmful bacteria Be sure that
the oven light is off because heat from the bulb will speed harmful bacteria growth
0
ul
:::i :::: :)7::::_7,_
!:iiI:i:!:i:::::::
:(i_ :,-.z __:::
( ::i :> _:h:__
!__}'_"?: i":(""::5
c:o_ :-, :! !_
:: ¸:•¸:::::¸¸:7
D FqD
DDD ,D
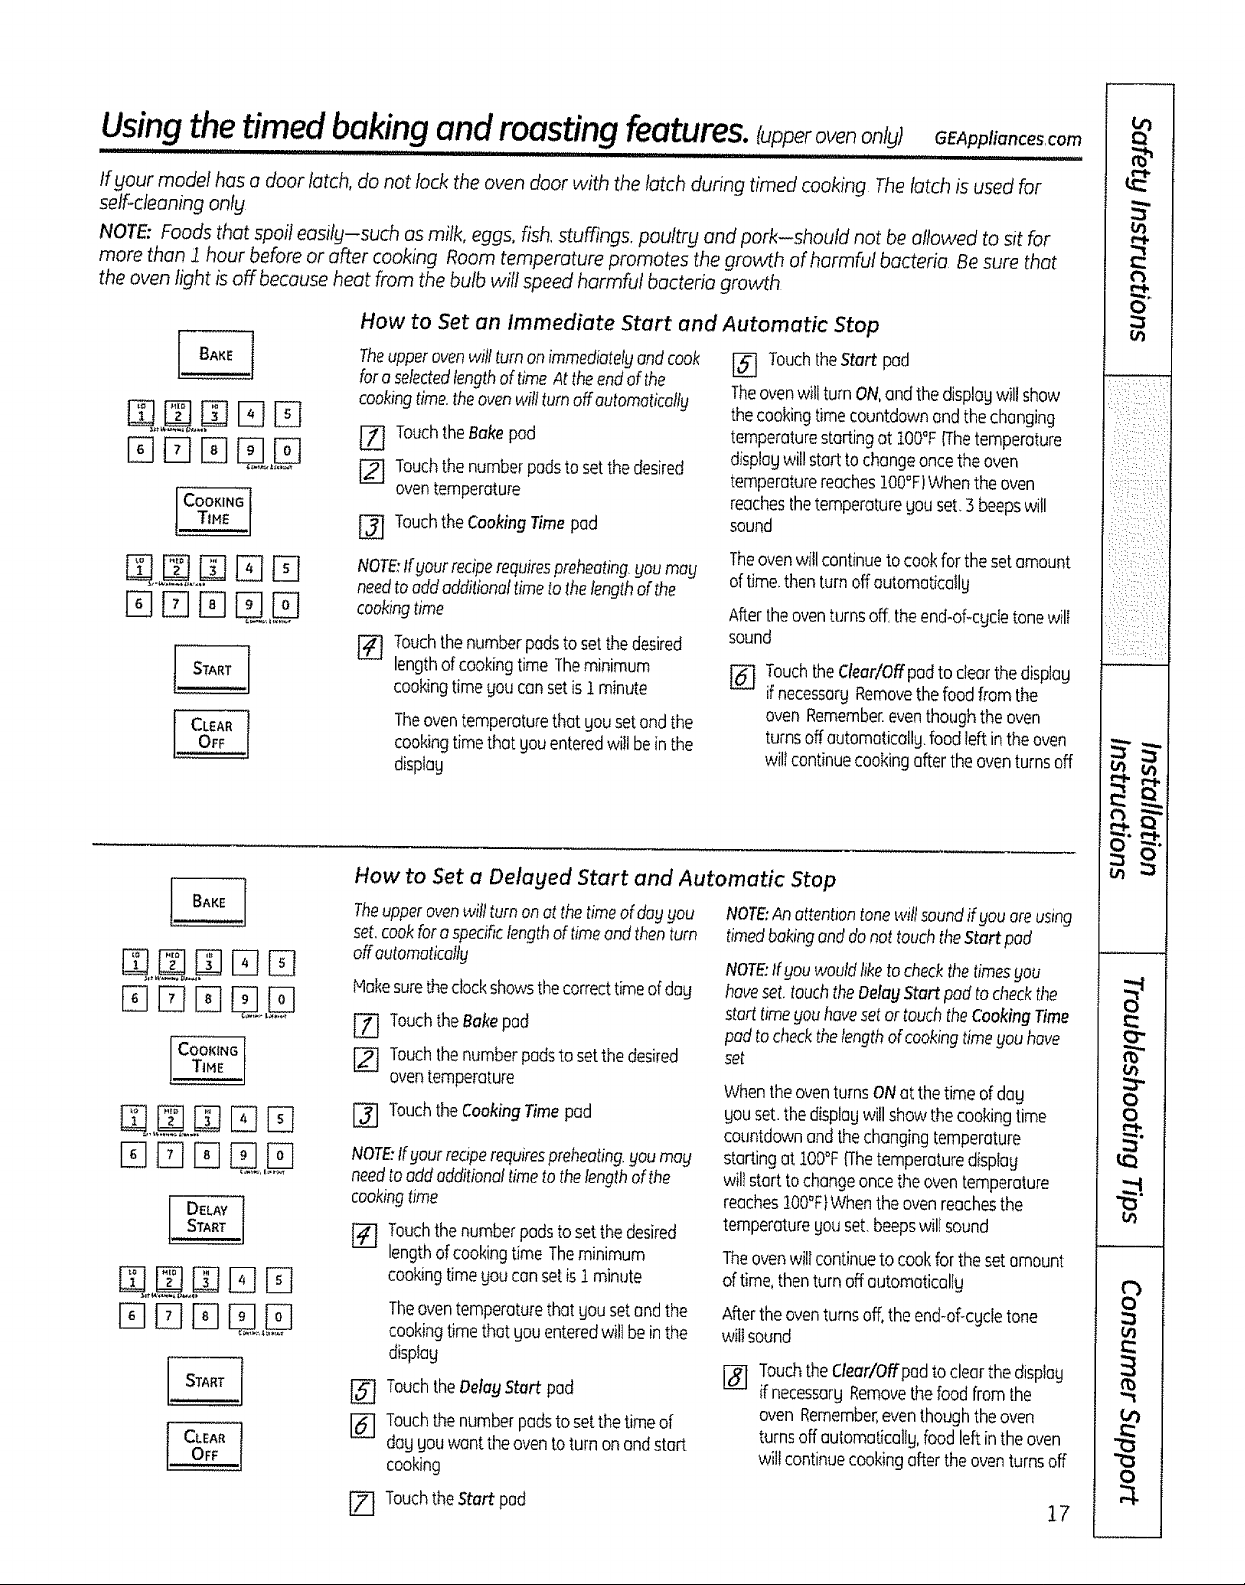
How to Set an immediate Start and
Theupper oven willturn on immediately and cook
for a selected length of time At the end of the
cooking time. the oven _41tturn off automatico!tg
[Z] Touchthe Bakepad
[] Touch the number pads to set the desired
oven temperature
[_] Touchthe Cooking Time pad
NOTE:Ifgout recipe requires preheating, you mug
need to add additional time to the length of the
cooking time
[_ Touchthenumberpadstosetthedesired
lengthof cookingtime Theminimum
cookingtimeyoucansetis1minute
Theoventemperature that you set and the
cookingtimethat you entered witibe inthe
display
Automatic Stop
[] TouchtheStart pad
TheovenwillturnON,andthedisplaywillshow
thecookingtimecountdownandthechanging
temperaturestartingat t00°F[Thetemperature
displaywil!startto changeoncetheoven
temperaturereachesIO0°F)Whentheoven
reachesthetemperatureyouset.3 beepswi!l
sound
Theovenwillcontinueto cookforthesetamount
oftime.thenturnoffautomatically
Aftertheoventurnsoff.theen&of_cgdetonewill
sound
[_ TouchtheClear/Offpadtoclearthedisplay
ifnecessaryRemovethe foodfromthe
ovenRemember.eventhoughtheoven
turnsoffautomatically,foodleftintheoven
willcontinuecookingafterthe oventurnsoff
N,,NND
DSD ,,D
DDD ,D
How to Set a Delayed Start and Automatic Stop
Theupper ovenwilt turn on at the timeof da!jyou
set,cookfor a specificlengthof timeand thenturn
off outomaticollg
NOTE:Anattentiontonewiltsoundifyouareusing
timedbakinganddonottouchtheStartpad
NOTE:Ifyou wouldliketocheckthetimesyou
Hake sure the clock shows the correct time of day
[Z] Touch the Bake pad
[_ Touch the number pads to set the desired
oventemperature
[_ Touch the Cooking Time pad
NOTE:If your reape requirespreheating,you may
needto addadditional timeto thelengthof the
cooking time
Touchthenumberpodstosetthedesired
[]
lengthof cookingtime Theminimum
cookingtimeyoucansetis.1.minute
Theoventemperaturethatyousetandthe
cookingtimethat youenteredwillbeinthe
hoveset.touchtheDelayStartpodto checkthe
starttimeyouhavesetortouchtheCookingTime
padto checkthe lengthof cookingtimeyou hove
set
When the oven turns ONat the time of day
you set.the displaywill show thecooking time
countdown and the changing temperature
starting at ].O0°F(Thetemperature display
wiltstart to changeonce the oven temperature
reaches_.O0_F}Whenthe ovenreachesthe
temperature you set.beeps wiltsound
Theovenwillcontinueto cookforthesetamount
oftime,thenturnoffautomatically
After the oven turns off,the end-of-cycletone
will sound
dispIag
[_ TouchtheDelayStart pad
[_] Touchthe number pads to set the timeof
day you want tileoven to turn on and start
cooking
[_] TouchtheClear/Offpadtoclearthedisplay
ifnecessaryRemovethefoodfromthe
ovenRemember,eventhoughtheoven
turnsoffautomatically,foodleftintheoven
willcontinuecookingafterthe oventurnsoff
TouchtheStartpad
17
r_ _
0
0
0
I/I
Using the probe, ransomemodels
,,,,,,,,,i,,,llul ,,i ,ill i
I.I
Itt
ff gour model has a door latch, do not tack the oven door with the latch while cooking with the probe Thebtch is used
for self-cleaning only
For many foods, especially roosts end poultry, internot food temperature isthe best test for doneness The temperature
probe takes the guesswork out of cooking foods to the exact doneness you wont,
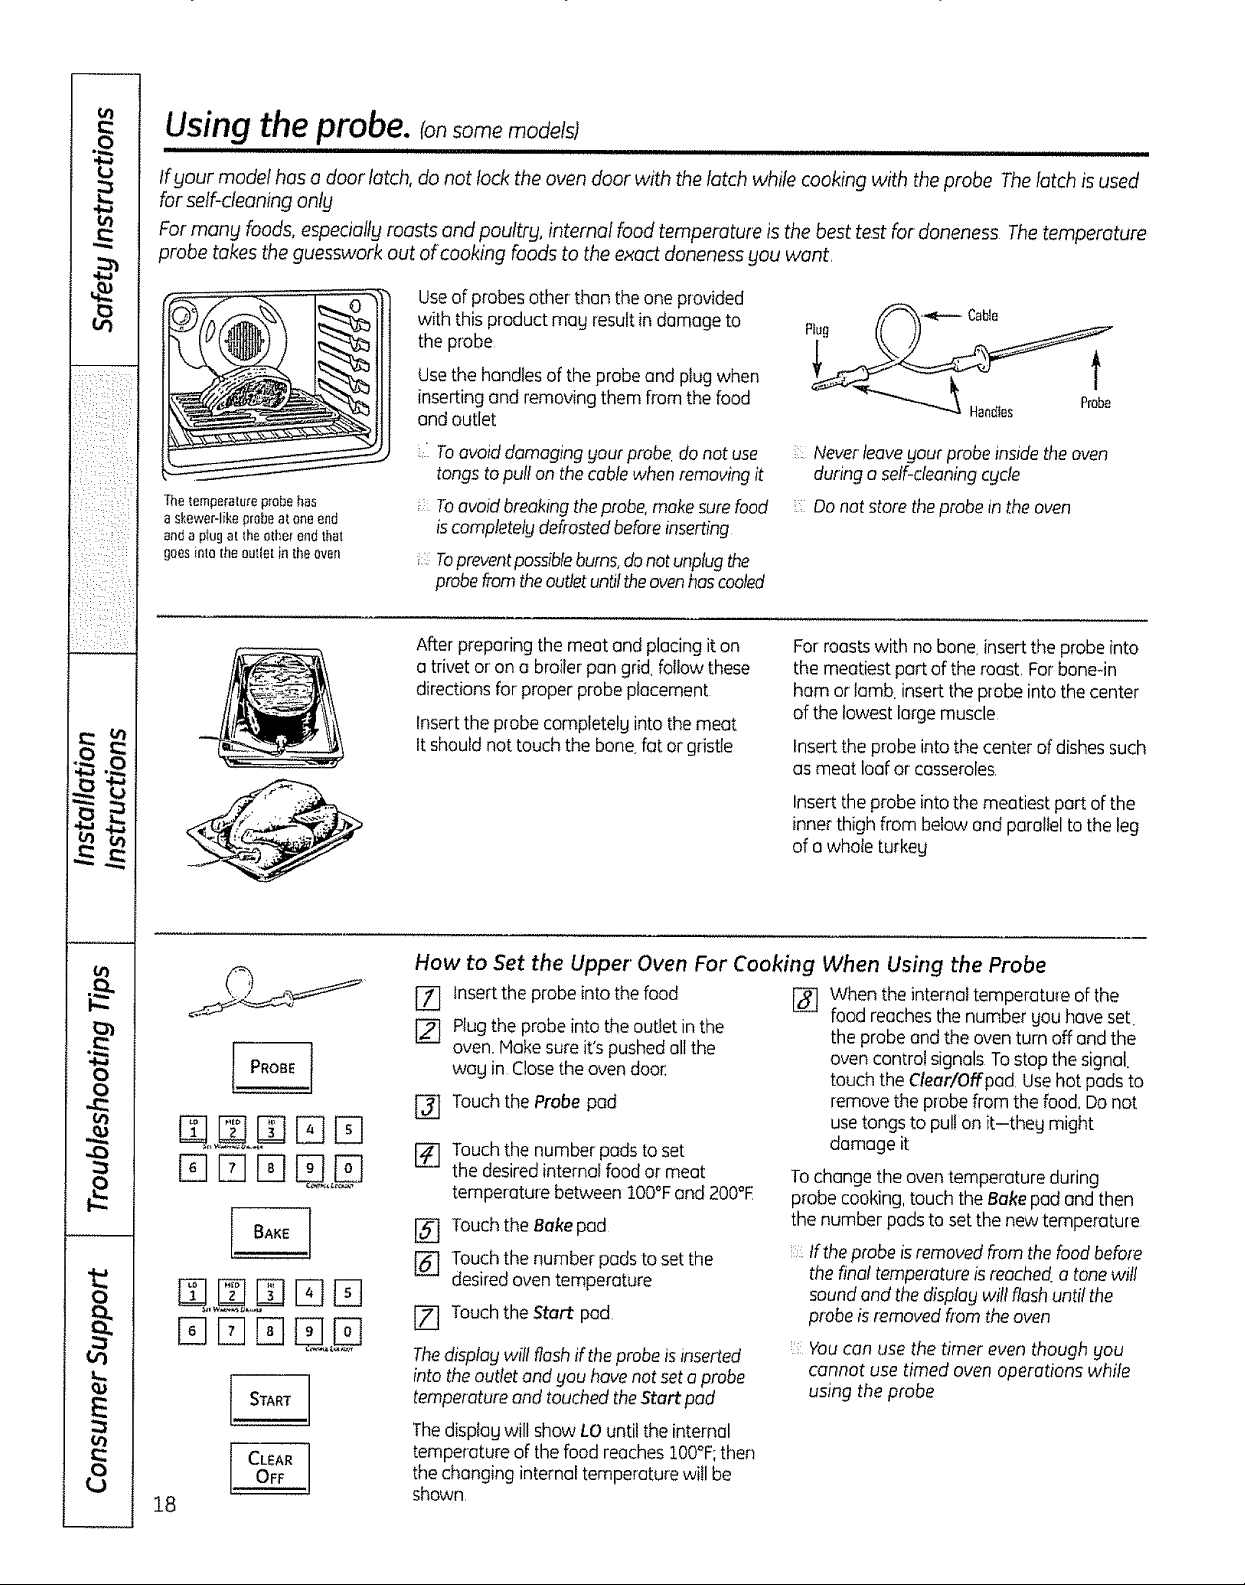
Useof probesother than the one provided
with this product mag resultin damage to
theprobe
Usethe handlesofthe probe and plugwhen
insertingand removingthem from the food
and outlet
: ii:iiii i iii!
%!_i:ii</
•:::i::i:::•_:::i ¸
l_ ,'lff,
Ill I
o I
o I
l,tl I
o t
. ll*ll t
o t
III t
o t
tj 1
Thetempe_aluteprobehas
askewer-likeplebeat oneend
anda ptugat _heo_herendthat
goesintothe outle[in _heoven
i
,NN D E]
I !
18
Toavoid damaging gout probe, do not use
tongs to pullon the cable when removing it
:, Toovoid breakingtheprobe,makesurefood
Neverleaveyour probeinsidethe oven
during a self-cleaningc_lcle
Do not store the probe in the oven
iscompleteigdefrostedbeforeinserting
Topreventpossibleburns,donot unplugthe
probefromtheoutletund theovenhascooled
Afterpreparing the meat and placingit on
a trivet or on a broilerpan grid,followthese
directionsfor proper probe placement
Insertthe probe completelg intothe meat
It shouldnot touchthe bone fat or gr ste
For roosts with no bone, insert the probe into
the meatiest part of the roast, For bone-in
ham or lomb. insert the probe into the center
of the lowest large muscle
Insertthe probe into the centerofdishessuch
asmeat loaf or casseroles,
Insertthe probe into the meatiestpart ofthe
innerthigh from below and parallelto the leg
of awhole turkeg
How to Set the Upper' Oven For Cooking When Using the Probe
Insert the probe into the food [_
When the internal temperature ofthe
food reachesthe number gou haveset.
r_ Plug the probe into the outlet in the
oven. Make sure it's pushed all the
wag in Close the oven doo_:
Touchthe Probe pad
the probeand the oven turn off and the
oven controlsignals Tostop the signal
touch the Cleur/Offpad Usehot padsto
removethe probefrom the food,Do not
usetongs to pullon it-theg might
[_ Touchthe number pads toset
the desiredinternalfood or meat
temperature between100°Fand 200°F
[_ TouchtheBake pod
[_ Touchthe number padsto setthe
desiredoven temperature
iZ] Touchthe Start pad
The displag will flash if the probe isinserted
into the outlet and you have not set a probe
temperature and touched the Start pad
damage it
Tochange the oven temperature during
probe cooking, touch the Bake pad and then
the number pads to set the new temperature
: tfthe probeisremovedfrom thefoodbefo[_
the finaltemperatureis reached a tonewill
soundand thedisp!ugwillflushuntil the
probeisremovedfiom the oven
Youcan use the timer even though _lOU
cannot use timed oven operations while
using the probe
Thedisplag will show LOuntilthe internal
temperature of the food reaches100°F;then
thechanging internaltemperature willbe
shown,
 Loading...