

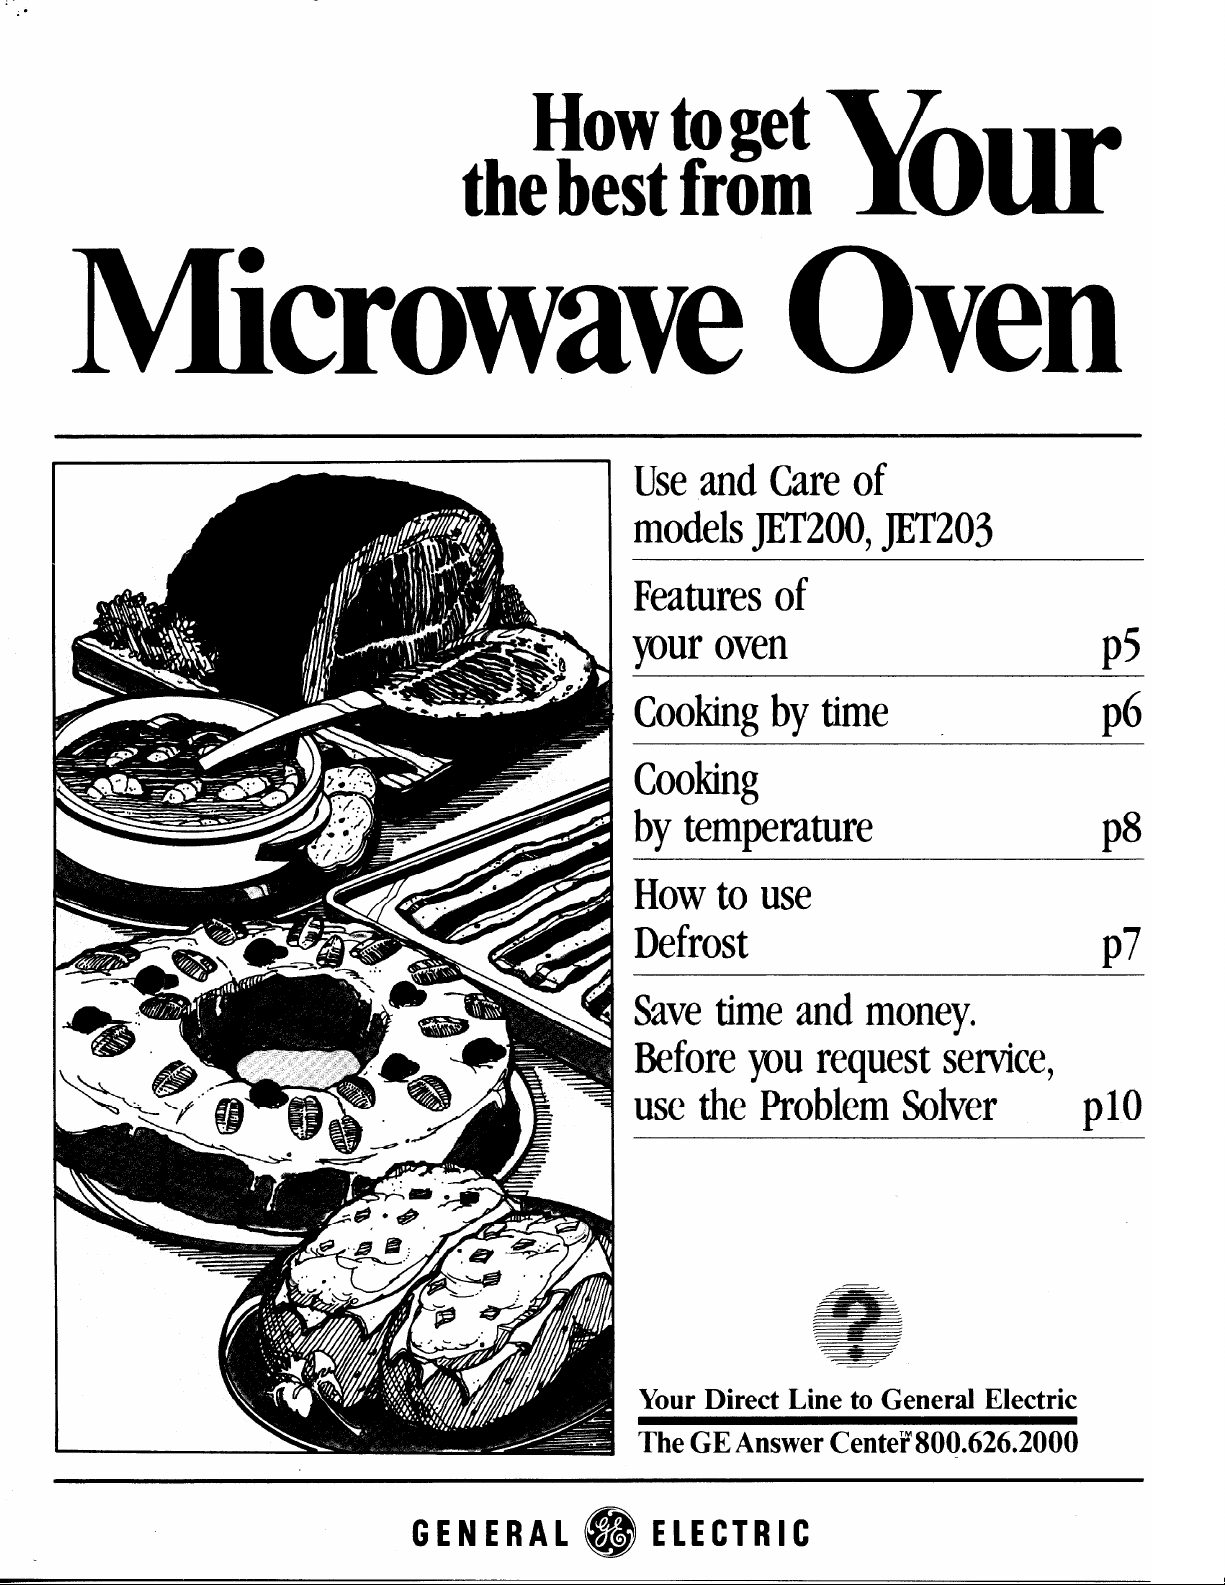
.“
Howtoget
thebestfrom
Oven
Useand Careof
modelsJET200,JET203
Featuresof
youroven
Cookingbytime
cooking
Your
p5
p6
bytemperature p8
Howto use
Defrost
Savetimeandmoney,
Beforeyourequestservice,
usethe MoblemSolver
Your Direct Line to General Electric
p7
plo
The GE Answer CenteF800.626.2000
GENE RAL@EIECTRIC
Help Us
Help You. . .
Read this book carefully.
Itwill help you operate and main-
tain your new Microwave Oven
properly.
Keep it handy for answers to your
questions.
If you don’t understand something
or need more help. . .
Call, toll free:
The GE Answer CenterTM
800.626.2000
consumer information service
or write: (include your phone
number);
Consumer Affairs
General Electric Company
Appliance Park
Louisville, KY 40225
Write down the model and
serial numbers.
You’ll find them on a label inside the
oven on the upper left side.
These numbers are also on the
Consumer Product Ownership
Registration Card that came with
your Microwave Oven. Before
sending in this card, please write
these numbers here:
Model No.
Serial No.
Be sure your Microwave
Oven is registered.
It is important that we, the manufacturer, know the location of your
Microwave Oven should a need
occur for adjustments.
Your supplier is responsible for
registering you as the owner.
Please check with your supplier to
be sure he has done so; also send
in your Consumer Product Ownership Registration Card. If you move,
or if you are not the original purchaser please write to us, stating
model and serial numbers. This
appliance must be registered.
Please be certain that it is.
Write to:
General Electric Company
Range Product Service
Appliance Park
Louisville, KY 40225
If you received a damaged
OVetlm ■ .
immediately contact the dealer (or
builder) that sold you the Microwave Oven.
Save time and money.
Before you request service, check
the Problem Solver on page 10. It
lists minor causes of operating
problems that you can correct
yourself.
Use these numbers in any
correspondence or service calls
concerning your Microwave Oven.
F====l
Contents
Before Microwaving . . . . . . . . . . . . 2
Safety Instructions . . . . . . . . . . . 3,4
Features of Your Oven . . . . . . . . . . 5
Time Cook . . . . . . . . . . . . . . . . . ...6
Defrost . . . . . . . . . . . . . . . . . . . . ...7
Temp Cook . . . . . . . . . . . . . . . . . ...8
Care of Your Oven . . . . . . . . . . ...9
The Problem Solver . . . . . . . . . . . 1(J
Grounding Instructions . . . . . . . . 11
Use of Extension Cords . . . . . . . . 11
Consumer Services . . . . . . . . . . . . 15
Warranty . . . . . . . . . . . .. Back Cover
Microwaving Tips
● Make sure all utensils used in
your microwave oven are labeled
“suitablef ormicrowaving”. Check
yourCookbook for specific test
to determine ’’microwave-safe”
utensils.
● Paper towels, waxpaper, and
plastic wrap can beused tocover
dishes in orderto retain moisture
and prevent spattering.
● Some microwaved foods require
stirring, rotating, or rearranging.
Checkyour Cookbook forspecific
instructions.
● Some foods such as unshelled
eggs and hotdogs must be pierced
toallowsteamto escape during
cooking.
IMPORTANT SAFETY INSTRUCTIONS
(continued)
* SOnw
whole eggs and sealed ccmtakers-for example, ckwii
glass jars-may explode and
should not be heated in this
oven.
@“AVVM
glass jarskeven without their
lids; &@c$ially meat and egg .
mixtures, “,
‘? CMst dMrost frozm bev4w-
ages in narrow necked bo~les;
especiafl~ carbonated roes.
%@ri if th~ Contsiner is qxm!d,
pressure Gan build up, Ttii$ can
.
cause Ma aontainer to burst;
resulting in injury.
“,
? USE m@# only as dhacted .MJ
Cooktxwk. -Metal atrip$ as used
mat, masts am Iwlpftil when
cm
used as shown in CocM.mQk,
TV dinners maybe &oked, in
metal trays, However, when
using mk%alin ‘rnicrowqve Qvw7~
kmq$)m%tddleast
frmn $iG@?C#faye?%
* C2Wkhlg utensils ma~ ‘ “
fmcom
transferred from the heated
food.
plastic Ywap has bean covering
the tqp and handles of the 17’0°. This assures that, in the
utensil. Potholders m~y be ~
rmede@@ hsndkthe utms~l.
‘~ Somqthnasr the oven ffqor
~11 fi@0ti4! b~
Be wweful touching the floor .
. during andafter cooking. shell) is not recommended for
* m- -Aa ..** a-.. aka”--
products such m
hwtlng baby food in
l-inch aljVay
hot bemuse-of heat
This is especially trpe’if =
“tiC?ttQ tQlldi
voter
flilv$uvvwilig
;
rmometer h
commended for
● Remove th$ temperature
probe from #@oven when not
using it to cook with. If you leave
the probe inside the oven without
inserting it in food or liquid, and
turn on microwave energy, it can
create electrical arcing in the
oven, and damage ov~ri walls.
* Plastic lJtensi9s-Plastic
utensils designed for microwave
cooking are very useful, but
should be used carefully, Even
microwave plastic may not be as
tolerant of overbooking conditions as are glass or ceramic
materials and may soften or
char if subjected to shart period$
of overcooking. In kmger exposures to overcooking, the fmd
and utensils could ignite. For
these reasons: 1) Use rnicrowave plastics only “and use
them” in strict compliance with
the utensil manufacturer’s
recommendations. 2) Do not
subject empty utensiis to rnicrowaving. 3) Do not permit children
to
use plastic utensils without
complete supervision.
● When Cdd?lg p(Mk fOk)W
our directions exactly and
always cook the meat tu at least
remote possibility that trichina
may be present in the meat, it
will be killed arid meat will be
safe to eat.
● Baling eggs (in and out af
microwave cooking, Pressure
can build up inside egg yolk and
may cause it to burst, resulting
in injury.
● Foods with unbroken outer
“skin”such as potatoes, hot
dogs or sausages, tomatoes,
apples, chicken livers and other
giblets, and eggs (see above)
should be pierced to allow
steam to escape during cooking
o ‘i&BoMMe” cooking pouches
and tightly closed plastic bags
shou!d be slit, pierced or vented
as directed in Cookbook. If they
are not, plastic could burst during or immediately after cooking
possibly resulting in injury. Also,
plastic storage containers shouk
beat least partially uncovered
because they form a tight seal.
When cooking with containers
tightly covered with plastic wrap
remove covering carefully and
direcf steam away from hands
and face.
SAVETHESE
INSTRUCTIONS
.

Features of
Your Microwave Oven
Model JET203
Door Handle. Oven doesn’t operate unless door
1.
is securely latched. Pull handle to open.
Inside Door Latches.
2.
Window with Metai Shieid. Screen allows cook-
3.
ing to be viewed while keeping microwaves
confined in oven.
Piastic Antenna Cover. Protects the antenna
4.
which distributes microwave energy into the
oven.
Oven Ventm
5.
Oven Light. Goes on when door is opened or
6.
when oven is operating in any function.
7.
Oven Fioor.
Timer Controi. Set timer to desired cooking
8.
time for TiME COOK.
Power Select Controi. Select setting before
9.
each use.
10.
Cooking/Defrosting Guide. Quick reference for
frequently prepared foods.
Modei and Seriai Numbers.
11.
The following features are on Model JET203 only:
MicroThermometerTM
12.
with Temperature Cook function only.
Receptacle for Temperature Probe. Tempera-
13.
ture Probe must be securely inserted into
receptacle before oven will start temperature
microwaving.
Time/Temp Switch. To cook by Time, push to
14.
right, then set timer. To cook by Temperature,
push to left, then set dial.
Temperature Control. Set desired finished tem-
15!
perature by dialing knob. If actual internal temperature of food is more than temperature set,
oven will not start.
Start Button. Push after all controls are set to
16,
start cooking operations.
Temperature Probe. Use
5

Cooking by Time
Time Cooking, or cooking your food according to a predetermined amount of time, is probably familiar to you from
conventional cooking. With your microwave oven, however,
you preset the time and the oven turns off automatically.
Using Your Oven to Time Cook
Follow the cooking steps below to
help you learn to Time Cook
properly.
Step 1: Fill a cup 2/3 full of water
and add 1 teaspoon of freeze dried
coffee. Use a cup that has no metal
decoration. Place cup in oven and
close door.
Step 6: On JET203 only, when time
is up, oven signals and shuts off
automatically.
Step 4: Set Timer Control. For
coffee set at 1 minute and 20 to 30
seconds. Timer may be reset
during cooking if needed.
Step 2: Push Power Level Switch
or button to HIGH which is the
Power Level recommended for this
cup of coffee.
Questions
and Answers
Q. I set my oven for the time called
for in the recipe but at the end of
the time allowed, my dish wasn’t
done. What happened?
A. Since house power varies due
to time or location many Time
Cook recipes give you a time range
to prevent overcooking. Set the
oven for minimum time, test the
food for doneness, and cook your
dish a little longer, if necessary.
Step 5: On JET203, push START
button. On JET200, after Timer is
set and door is closed, oven is
operating.
Q. I want to cook my dish on a
Power Level other than HIGH,
what do I need to do?
A. To change the Power Level,
simply push switch or turn knob
for new power level.
Q. Must I change the Power Control every time I cook?
A. No, if your recipe calls for the
power level that your oven is
already set on, it is not necessary
to change.
6
Q. Can I interrupt my Time Cook
function to check the food?
A. Yes. To resume cooking, simply
close the door and push START.
NOTE: Microwave power will not
come on until you are ready. You
must push START for cooking to
begin. (On JET200, after Timer is
set and door is closed, oven is
operating. )

How to Defrost
How to Defrost
The Defrost setting is designed for
even thawing necessary for large
amounts of food and is one of the
most important advantages of a
microwave oven. DEFROST Power
Level is the recommended setting
for most defrosting, but you may
use other settings for more flexibility. See your Cookbook for the
complete defrosting chart.
To become better acquainted with
defrosting in your oven, defrost
frozen pork chops by following the
steps below.
Step 1: Place package of frozen
chops in the oven and close door.
.
.
Step 3: Push TIME/TEMP Switch
on JET203 to TIME position.
Step 4: Turn Ti
8 minutes.
Defrosting Tips
● Foods frozen in paper or plastic
can be defrosted in the package.
● For even defrosting, some foods
need to be broken up or separated
part of the way through the
defrosting time.
● Pre-packaged frozen dinners
can be defrosted and microwave
cooked.
I
Step 2: Push Power Level Switch
or button to DEFROST setting.
Questions
and Answers
Q. Can I Defrost small items in a
hurry?
A. Yes, but they will need more
frequent attention than usual. Raise
the Power Level after entering the
time. Power Level MED cuts the
time in 1/2; Power Level HIGH cuts
the time to 1/3.
button. On JET200, after Timer is
set and door is closed, oven is
operating.
Step 6: When oven turns off, turn
package over, close door, and
repeat Steps 4 and 5.
Q. When I press START or close
door, I hear a dull thumping noise.
What is it?
A. This sound is normal. It is letting you know the oven is using a
Power Level lower than HIGH.
Q. Can I open the door during
defrosting to check on the progress of my food?
A. Yes. You may open the door at
any time during microwaving. To
resume defrosting, close the door
and press START.
● Check your Cookbook for other
defrosting tips.
Q. Why don’t the defrosting times
in the Cookbook seem right for my
food?
A. Cookbook times are average.
Defrosting time can vary according
to the temperature in your freezer.
Set your oven for the time indicated in your Cookbook. If your
food is still not completely thawed
at the end of that time, re-set your
oven and adjust the time accordingly.
—
7
—

Cooking by Temperature
(Model JET203 only)
For many foods, internal temperature is the best
test of doneness.
Roasts or poultry are cooked to your preference
when temperature cooking. Heating or reheating
foods accurately to a serving temperature you
desire is simple and easy.
TEMP COOK takes the guesswork out of cooking
because the oven shuts off automatically when the
food is done.
The Temperature Probe
The temperature probe is a food thermometer that
gauges the internal temperature of your food; it
must be used when using Temperature Cooking.
Check with your Cookbook for proper placement of
probe in specific foods.
HANDLE
SENSOR
How to-Temp Cook a Rolled Beef Rib Roast to Medium
Step 1: Insert temperature probe
as directed in Cookbook and attach probe securely in oven wall.
Close the door.
Step 2: Turn Power Level Control
to MED.
Step 3: Push TIME/TEMP Switch
to TEMP position.
Step 4: Turn Temperature Knob
to 130.
Step 5: Push START button. inte-
rior light and fan come on to tell
you oven is operating.
Step 6: When 130 degrees is
reached, oven automatically turns
off. Remove probe and food from
the oven.
Cooking Tips
● Use a lower Power Level set-
ting: it will heat more evenly even
though requiring more time.
. Be sure frozen food has been
completely defrosted before inserting probe. Probe may break off
if used in frozen foods.
. Always insert probe into the
center of meaty areas; take care
not to touch the fat or the bone.
● Insert probe as horizontally as
possible into foods as directed in
the recipes. Make sure the handle
does not touch the food.
. Use the clip to keep the probe in
place while heating.
. Cover foods as directed in
Cookbook for moisture control and
quick, even heating.
CABLE
CLIP
Questions
and Answers
Q. Is temperature cooking better
than time cooking for reheating
leftovers?
A. Yes, this type of food is excel-
lent to heat with the probe because
often the amount of food is not
known, therefore cooking time is
only a guess. Cooking to a preset
temperature (usually 150° ) elimi-
nates the guesswork.
Q. After setting Power Level and
temperature, I pushed START but
the oven did not come on. Why?
A. You must push the TIM E/TEMP
Switch to TEMP when temperature
cooking. Also if probe is not
securely seated or forgotten, oven
will not start. Make sure all controls are set properly.
Q. Are there any foods I can’t
Temperature Cook?
A. Yes. Delicate butter icings, ice
cream, frozen whipped toppings,
etc., soften rapidly at warm tem-
peratures. Batters and doughs as
well as frozen foods are also difficult to cook precisely with the
probe. It is best to TIME COOK
these foods.
8
Q. Can I leave my probe in the
oven if it’s not inserted in the food?
A. No. If the probe is left inside the
oven, touching the oven wall, and
not inserted in food, you may
damage the oven.
Q. How do I know what tempera- ‘
ture to set?
A. Your Cookbook contains sec-
tions on all types of foods showing
the temperatures needed to cook
the foods to different degrees of
doneness. For reheating, refer to
Reheating Charts in the front
of the Cookbook for specific
temperatures.

Care for Your Microwave Oven
Your New Microwave Oven is a
Valuable Appliance, Protect It From
Misuse By Following These Rules:
. Keep your oven clean and
sweet-smelling. Opening the oven
door a few minutes after cooking
helps “air-out” the interior. An
occasional thorough wiping with a
solution of baking soda and water
keeps the interior fresh.
● Don’t use sharp-edged utensils
with your oven. The interior and exterior oven walls can be scratched.
The control panel can be damaged.
● Don’t remove the antenna cover
at the top of the oven (microwave
feature 4 on page 5). You may
damage the oven.
BE CERTAIN POWER IS OFF
BEFORE CLEANING ANY
PART OF THIS OVEN.
How
to Clean the Inside
Walls, floor and plastic cover. Be-
cause there is little heat except in
the food, or sometimes in the utensils, spills and spatters are easy to
remove. Some spatters can be
removed with a paper towel, others
may require a damp cloth. Remove
greasy spatters with a sudsy cloth,
then rinse and dry. Do not use
abrasive cleaners on oven walls.
NEVER USE A COMMERCIAL
OVEN CLEANER ON ANY PART
OF YOUR MICROWAVE OVEN.
Door-inside. Glass: Wipe up spatters
daily, wash when soiled, with a minimum of sudsy warm water. Rinse
thoroughly and dry.
Metal and plastic parts on door:
Wipe frequently with a damp cloth
to remove all soil. DO NOT USE
ABRASIVES, SUCH AS CLEANING
POWDERS OR STEEL AND PLASTIC PADS. THEY MAY MAR THE
SURFACE.
Special note when using Brown ‘N
Sear Dish: High heat generated on
bottom of Brown ‘N Sear Dish can
cause scorched appearing stains to
bake onto the oven floor if grease is
present. These may be removed
with Bar Keepers Friend@ Cleanser
by SerVaas Laboratories, Inc.
After using Bar Keepers Friend@
Cleanser, rinse and dry thoroughly,
following instructions on can. Do
not use Bar Keepers Friend@
Cleanser on the painted surfaces
such as the walls. It may scratch the
paint.
Bar Keepers Friend@ Cleanser is
sold in many grocery, hardware,
and department stores.
Automatic Temperature Probe.
Probe is sturdy, but care should be
taken in handling. Do not twist or
bend; avoid dropping temperature
probe.
Clean as soon after using as possible. To clean, wipe with sudsy
cloth, then rub lightly with plastic
scouring ball if necessary. Rinse
and dry. (Or wash in dishwasher.)
How to Clean the Outside
Case. Clean the outside of your
oven with soap and damp cloth,
then rinse and dry. The outer pane
of the window is glass. Just wipe
clean with a damp cloth. Chrome
trim is best wiped with a damp cloth
and then with a dry towel.
Control Panel. Wipe with a damp
cloth. Dry thoroughly. Do not use
abrasives or sharp objects on the
panel. They can damage it.
Door Surface. When cleaning sur-
faces of door and oven that come
together on closing the door, use
only mild, non-abrasive soaps or
detergents applied with a sponge
or soft cloth.
Power Cord. If the cord becomes
soiled, unplug and wash with damp
cloth. For stubborn spots, sudsy
water may be used, but be certain
to rinse and dry thoroughly before
plugging cord into outlet.
Oven Lamp Replacement. First
unplug the oven. Them remove
lamp compartment cover by re-
moving screw which holds cover in
place. Cover is located at the rear
of outer case.
Replace with 40 watt appliance
bulb. (It is available in drug and
hardware stores.) Replace compartment cover. Plug in the oven.
9

The Problem Solver
To Save Time and Money—
before you request service,
check the Problem Solver
If you have a problem, it may be
minor. You may be able to correct
it yourself. Just use this Problem
Solver to locate your problem and
then follow the suggested
recommendations.
10

GROUNDING INSTRUCTIONS
This appliance must be grounded.
In the event of an electrical short
circuit, grounding reduces the risk
of electric shock by providing an
escape wire for the electric current.
This appliance is equipped with a
power cord having a grounding
wire with a grounding plug. The
plug must be plugged into an outlet
that is properly installed and
grounded. (Fig. 1)
WARNING—lmproper use of the
grounding plug can result in a risk
of electric shock.
;II;FEER;ED
‘1
●
.
Q
e
\
Fig. 1
TQ
INSURE PROPER GROUND
EXISTS BEFORE USE
Consult a qualified electrician or
serviceman if the grounding
instructions are not completely
understood, or if doubt exists as to
whether the appliance is properly
grounded.
Where a standard two-prong wall
receptacle is encountered, it is your
personal responsibility and obliga-
tion to have it replaced with a prop-
erly grounded three-prong wall
receptacle.
Do Not Under Any Circumstances Cut or Remove the
Third (Ground) Prong From
The Power Cord.
Use of Adapter Plugs
Usage Situations Where
Appliance’s Power Cord
Will Be Disconnected
Infrequently.
Because of potential safety hazards
under certain conditions, we
strongly recommend against the
use of an adapter plug. However,
if you still elect to use an adapter,
where local codes permit, a TEM-
PORARY CONNECTION may be
made to a properly grounded two-
prong wall receptacle by the use of
a UL listed adapter (Fig. 2) which is
available at most local hardware
stores.
TEMPORARY METHOD
(ADAPTER PLUGS NOT
PERMITTED IN CANADA)
ALIGN LARGE
PRONGS/SLOTSm , “
Fig. 2
9
1
●
a
@
-J
Q\’’’iNsuflE pROPER GROUND
v
~ AND FIRM cONNECTION
BEFORE USE
The larger slot in the adapter must
be aligned with the larger slot in the
wall receptacle to provide proper
polarity in the connection of the
power cord.
Caution: Attaching the adapter
ground terminal to the wall receptacle cover screw does not ground
the appliance unless the cover
screw is metal, and not insulated,
and the wall receptacle is grounded
through the house wiring. You
should have the circuit checked by
a qualified electrician to make sure
the receptacle is properly grounded.
II
Q
●
~.*
D
t
Usage Situations Where
Appliance’s Power Cord
Will Be Disconnected
Frequently.
Do not use an adapter plug in these
situations because disconnecting of
the power cord places undue strain
on the adapter and leads to eventual failure of the adapter ground
terminal. You should have the twoprong wall receptacle replaced with
a three-prong (grounding) receptacle by a qualified electrician
before using the appliance.
Use of Extension Cords
Because of potential safety hazards
under certain conditions we strongly
recommend against the use of an
extension cord. However, if it is
necessary to use an extension cord,
use only a 3-wire extension cord
that has a 3-blade grounding plug,
and a 3-slot receptacle that will
accept the plug on the appliance.
The marked rating of the extension
cord shall be equal to or greater
than the electrical rating of the
appliance (15 amperes.)
Such extension cords are obtainable
through General Electric service. If
you do use an extension cord with
your microwave oven, the interior
light may flicker and the blower
sound may vary when oven is in use.
When disconnecting the power
cord from the adapter, always hold
the adapter with one hand. If this is
not done, the adapter ground ter-
minal is very likely to break with
repeated use. Should this happen,
DO NOT USE the appliance until
a proper ground has again been
established.
11

1
●
2
●
Consumer Services
At General Electric we’re committed to providing you with the best appliances we know how to build and we know
that you want your appliances to give you many years of dependable service.
Our Consumer Services are designed with your needs and wants in mind.
Warranty Protection
Before your new appliance left the factory, it went
through rigorous tests to detect manufacturing defects.
Convenient Service
Whether your appliance is in or out of warranty, you’re
just a phone call away from our nationwide network of
Factory Trained Service professionals.
Simply call our GE service organization. Look in the
White or Yellow Pages of your telephone directory for
GENERAL ELECTRIC COMPANY, GENERAL
ELECTRIC FACTORY SERVICE, GENERAL
ELECTRIC-HOTPOINT FACTORY SERVICE or
GENERAL ELECTRIC CUSTOMER CARE”
SERVICE.
Service can normally be scheduled at your convenience
and the technician drives a fully-stocked parts service
truck so that, in most cases, the repair can be completed
in one visit.
We’re proud of our service and want you to be pleased,
but if for some reason you are not happy with the service
you receive, here are three steps to follow for further help.
And you have a written warranty to protect you. See the
warrant y on the back page of this book for details.
FIRST, contact the people who serviced your appliance.
Explain why you are not pleased. In most cases, this will
solve the problem.
NEXT, if you are still not pleased write all the
details—including your phone number to:
Manager, Consumer Relations
General Electric
Appliance Park
Louisville, Kentucky 40225
FINALLY, if your problem is still not resolved, write:
Major Appliance Consumer Action Panel
20 North Wacker Drive
Chicago, Illinois 60606
3
●
4
●
3
●
Service Contracts
For trouble-free service beyond
the written warranty period.
If you prefer to budget your repair expenditures ~
instead of being surprised by them, GE offers :----- -’ ‘ ‘“ :
service contracts for varying lengths of time on ,
all GE major appliances. With a contract, we’ll
keep your appliance in good operating condition
during the contract period at no additional
charge. 800.626.2224. (In Kentucky, call 800.292 .2057.)
The Quick Fix@System
You can save money and time
by doing it yourself.
For do-it-yourselfers who would prefer to fix
GE major appliances themselves . . . GE offers ‘ packaged replacement parts, and technical help
an industry first, the Quick Fix” System. with a toli free 800 number.
Help For You By Phone
Should you need help in the selection and The GE Answer CenterTMconsumer
purchase of new appliances, or have questions information service is open 24 hours a day,
about the operation of the GE appliances you seven days a week.
now own— or have any other questions about
GE consumer products or services, you are
only a TOLL FREE call away.
n
t
~m”,r,,---~ ,
“&”,*,.<,!.”.,,
.....1”.’”-”-
* ,?:>.?...
r
..~!
*
Service contracts let you pay today’s prices for
service a month, a year, or several years from
now. And, you’ll receive service from GE
trained service technicians using only genuine
*
GE parts. If you have any questions about
Service Contracts, call TOLL-FREE
A program for do-it-yourself appliance repair,
the system includes step-by-step repair manuals
for refrigerators, most non-microwave electric
ranges, dishwashers, and standard and large
capacity washers and dryers, plus specially
1
Our staff of experts stands ready to assist you
anytime.
- Your Direct Line to General Electric
m—
~ The GE Answer Cente~800.626.2000
15

.—.—— . ... —- .-
c?
e!!
~ YOUR GENERAL ELECTRIC MICROWAVE OVEN/RANGE ~
--— —--- -——-.—
w“RRANTy~~
Save proof of original purchase date such as your sales slip or cancelled check to establish warranty period.
WHAT IS COVERED
---
FULL ONE-YEAR WARRANTY
For one year from date of original
purchase, we will provide, free of
charge, parts and service labor in
your home to repair or replace any
part of the microwave oven/range
that fails because of a manufacturing defect.
LIMITED ADDITIONAL
FOUR-YEAR WARRANTY
For the second through fifth year
from date of original purchase,
we will provide, free of charge, a
replacement magnetron tube if the
magnetron tube fails because of a
manufacturing defect. You pay for
the service trip to your home and
service labor charges.
——
- —— ..—.—_———
WHAT IS NOT COVERED ● Service trips to your home to
teach you how to use the product.
Read your Use and Care material.
If you then have any questions
about operating the product,
please contact your dealer or our
Consumer Affairs office at the
address below, or call, toll free:
The GE Answer CenterTM
800.626.2000
consumer information service
. Improper installation.
If you have an installation problem,
contact your dealer or installer.
You are responsible for providing
adequate electrical, exhausting
and other connecting facilities.
This warranty is extended to the
original purchaser and any succeed-
ing owner for products purchased
for ordinary home use in the 48
mainland states, Hawaii and
Washington, D.C. In Alaska the
warranty is the same except that it
is LIMITED because you must pay
to ship the product to the service
shop or for the service technician’s
travel costs to your home.
All warranty service will be provided
by our Factory Service Centers or
by our authorized Customer Care@
servicers during normal working
hours.
Look in the White or Yellow Pages
of your telephone directory for
GENERAL ELECTRIC COMPANY,
GENERAL ELECTRIC FACTORY
SERVICE, GENERAL ELECTRICHOTPOINT FACTORY SERVICE or
GENERAL ELECTRIC CUSTOMER
CARE” SERVICE.
‘------- J
. Replacement of house fuses
or resetting of circuit breakers.
. Failure of the product if it is
used for other than its intended
purpose or used commercially.
● Damage to product caused
by accident, fire, floods or acts
of God.
WARRANTOR IS NOT RESPONSIBLE FOR CONSEQUENTIAL
DAMAGES.
.-—..——.
*
x
8
fl
%
#
g
Some states do not allow the exclusion or limitation of incidental or consequential damages, so the above limitation or exclusion
may not apply to you. This warranty gives you specific legal rights, and you may also have other rights which vary from state to state.
To know what your legal rights are in your state, consult your local or state consumer affairs office or your state’s Attorney General.
If further help is needed concerning this warranty, contact:
Manager–Consumer Affairs, General Electric Company, Appliance Park, Louisville, KY 40225
Part No. 862A725 PI 4 Rev. 2
Pub. No. 49-4479-2 11/84
Warrantor: General Electric Company
GENERAl@EIECTRIC
II
a
$
&
&
S
%
e
 Loading...