

GE JES922T Use and Care Manual
Iu
seand~re &Uoting
Guide
Turntable
Safe~
Precautions .................................................3.5
instructions ....................3-5
Operating Instructions, Tips
Aluminum Foil..............,...,................4, 17-19
Auto Defrost . . . . . . . . . . . . . . . . . . . . . . . . . . . . . . . . . . . . . . . . . .
Auto
Reheat ,..........................................14, 15
Auto Start . . . . . . . . . . . . . . . . . . . . . . . . . . . . . . . . . . . . . . . . . . . . . . . . . . . . . .
Auto Time Cook....,...,..,...,.., . . . . . . . . . . . . . . . . . . . . . . . . . 13
Clock ..................................................................6
Control Panel
Cooking by
Cooking Complete Reminder ......................8
Cooking Guide ..,...................................24-30
Defrosting
Delayed Cooking ............................................9
Features ...............8
Glossary of Microwave Terms ..................18
Heating or Reheating
Hold Time
Memory Cooking 12, 13
Microwave Cookware Guide 19
Microwaving Tips
Minute/Second Timer
One Touch Cook . 11
Popcorn . . . 13
Power Levels .................6, 9-14, 16,20-30
Program Cooking ............................................6
Turntable 3,4,8
...,...................,......................6-8
Time...,..,...,..,...,............,..,....9- 11
Guide...................................22, 23
Guide...............2O, 21
.........................................................9
...........,...............................5
......,............,...,..,...,...9
.
16, 17
.
10
Model JES922T
Problem
More questions ?...call
GE Answer
Care and Cleaning
Control Panel ..31
Turntable
Installation ..................................32, 33
Adapter Plugs ........................................32, 33
Extension Cords ...........................................33
Grounding Instructions .......................32, 33
Consumer Services
Appliance Registration .........................,........2
Model and Serial Number Location ...........2
Warranty ........................................Back Cover
Microwave Oven
Solver.................,...,..,......34
Centerm
........................................................3 1
800.626.2000
............................3I
.................,.35
t
Microwave power ouput
of thti oven
(IEC-705 fist
k
775
Procedure]
watts.
GE Appliances

HELP US HELP YOU...
Before using your oven,
read this book carefully.
1[
is intended to help you operate
and maintain your new microwave
oven properly.
Keep it handy for answers to your
questions.
If you don’t understand something
or need more help, write (include
your phone number):
Consumer Affairs
GE Appliances
Appliance Park
Louisville, KY 40225
Write down the model and
serial numbers.
You’ll find them on a label inside
the oven.
These numbers are also on the
Consumer Product Ownership
Registration Card that came with
your microwave oven. Before
sending in this card, please write
these numbers here:
Model Number
Serial Number
Use these numbers in any
correspondence or service calls
concerning your microwave oven.
Be sure your microwave
oven is registered.
It is important that we know the
location of your microwave oven
should
a need occur for
adjustments.
Your supplier is responsible
registering you as the owner.
Please check with your supplier to
be sure he has done so; also send
in your Consumer Product
Ownership Registration Card. If
you move, or
original purchaser, please write to
us, stating model and serial
numbers.
This appliance must be registered.
Please be certain that it is.
Write to:
GE Appliances
Range Product Service
Appliance Park
Louisville, KY 40225
if
you are not the
for
If you received a
damaged oven...
Immediately contact the dealer (or
builder) that sold you the oven.
Save time and money.
Before you request service...
Check the Problem Solver in the
back of this book. It lists causes of
minor operating problems that you
can correct yourself.
All these things are normal
with your microwave oven.
● Steam or vapor escaping from
around the door.
Q
Light reflection around door or
outer case.
●
Dimming oven 1
in blower sound may occur while
operating at power levels other
than high.
● Dull thumping sound while oven
is operating.
● Some TV-Radio interference
might be noticed while using
your microwave oven. It’s similar
to the interference caused by
other small appliances and does
not indicate a problem with
your oven.
ight
and change
IF YOU NEED SERVICE...
To obtain service, see the
Consumer Services page in the
back of this book.
We’
re
proud of our service and
want you to be pleased. If for some
reason you are not happy with the
service you receive, here are three
steps to
follow
for further help.
2
FIRST, contact the people who
serviced your appliance. Explain
why you are not pleased. In most
cases, this will solve the problem.
NEXT, if you are still not pleased,
write all the details—including
your phone number—to:
Manager, Consumer Relations
GE Appliances
Appliance Park
Louisville, KY 40225
FINALLY, if your problem is still
not resolved, write:
Major Appliance Consumer
Action Panel
20
North
Chicago, IL
Wacker
60606
Drive
WORTANT
Read dl
instmctions
SAFETY
before wing
Precautions to Avoid
Possible Exposure to
Excessive Microwave Energy
(a
Do Not
the door open since open-door operation can
result in harmful exposure to microwave energy.
It is important not to defeat or tamper with the
safety interlocks,
Do Not
(b:
face and the door or allow soil or cleaner
residue to accumulate on sealing surfaces.
Do Not Operate
(c)
particularly important that the oven door close
properly and that there is no damage to the:
(1) door (bent)
(2) hinges and latches (broken or loosened)
(3) door seals and sealing surfaces.
(d) The Oven Should Not
by anyone except properly qualified service
personnel.
When using electrical appliances, basic safety
precautions should be followed, including the
following:
A WARNING-Toreducetheriskof
●
Read and follow
Avoid Possible Exposure to Excessive Microwave
Energy” in this
●
This appliance must be grounded.
to properly grounded outlet. See “GROUNDING
INSTRUCTIONS,”
●
Use
described in this manual. Do not use corrosive
chemicals or vapors in this appliance.
microwave oven is specifically designed to heat or
cook food, and is not intended for laboratory or
industrial use.
●
For best operation, plug this appliance into its
own electrical outlet, to prevent flickering of
lights, blowing of fuse or tripping of circuit
breaker.
Attempt
Place
to operate this oven with
any object between the oven front
the oven if it is damaged. It is
be adjusted or repaired
burns, electric shock, fire, injury to persons
or exposure to excessive microwave energy:
the specific “Precautions to
book.
Connect only
this appliance
only for its intended use as
~is
~STRUCTIONS
ttis apptiance.
●
Do not
mount this appliance over a sink. Install
!
L
or locate this appliance only in accordance with
the provided Installation Instructions.
●
Be certain to place the front surface of the door
three inches or more back from the countertop
edge to avoid accidental tipping of the
appliance in normal usage.
●
Do not cover or block any openings on the
appliance.
●
Do not store this appliance outdoors. Do not
use this product near water—for example, in a
wet basement or near a swimming pool.
●
Do not immerse power cord or plug in water.
●
Keep power cord away from heated surfaces.
●
Do not let power cord hang over edge of table
or counter.
●
Do not operate this appliance if it has a
damaged power cord or plug, if it is not
working properly, or if it has been damaged
or dropped.
●
Do not operate oven without the turntable and
turntable support seated and in place.
●
Do not allow turntable to be restricted so the
turntable cannot rotate.
c
See door surface cleaning instructions in the Care
and Cleaning section(s) of your
●
This appliance should be serviced only by
book,
qualified service personnel. Contact nearest
authorized service facility for examination, repair
or adjustment.
●
As
with any appliance, close supervision is
necessary when used by children.
●
To reduce the risk of fire in the oven cavity:
—Do not overcook food. Carefully attend
appliance if paper, plastic or other combustible
materials are placed inside the oven to facilitate
cooking.
—Remove wire twist-ties from paper or plastic
bags before placing bags in oven.
—Do not use your microwave oven to dry
newspapers.
(c{~ntinued next
p~~ge)
3
~PORTANT
SAFETY
(continued)
mSTRUCTIONS
—Do not use recycled paper products. Recycled
paper towels, napkins and waxed paper can
contain metal flecks which may cause arcing
or ignite. Paper products containing nylon or
nylon filaments should be avoided, as they may
also ignite.
—Do not pop popcorn in your microwave oven
unless in a special microwave popcorn accessory
or unless you use popcorn labeled for use in
microwave ovens.
—Do not overcook potatoes. They could dehydrate
and catch fire, causing damage to your oven.
—Do not
damage to the oven and the danger of fire.
operate the oven while empty to avoid
If
by accident the oven should run empty a minute
or two, no harm is done. However, try to avoid
operating the oven empty at all times—it saves
energy and prolongs the life of the oven,
●
Do not use the oven for storage purposes. Do not
leave paper products, cooking utensils or food in
the oven when not in use.
●
If materials inside oven should ignite, keep
oven door closed, turn oven off, and disconnect
power cord, or shut off power at the fuse or circuit
breaker panel.
●
Some products such as whole eggs and sealed
containers—for example, closed jars—will
explode and should not be heated in this
microwave oven. Such use of the microwave
oven could result in injury.
●
Cookware may become hot
because of heat transferred from
the heated food. Pot holders may
be needed to handle the cookware.
●
Sometimes, the turntable can become too hot to
touch. Be careful touching the turntable during
and after cooking.
●
Foods cooked in liquids (such as pasta) may tend
to boil over more rapidly than foods containing
less moisture. Should this occur, refer to the Care
and Cleaning section(s) for instructions on how to
clean the inside of the oven.
●
Thermometer—Do not use a thermometer in
food you are microwaving unless the thermometer
is designed or recommended for use in the
microwave oven.
●
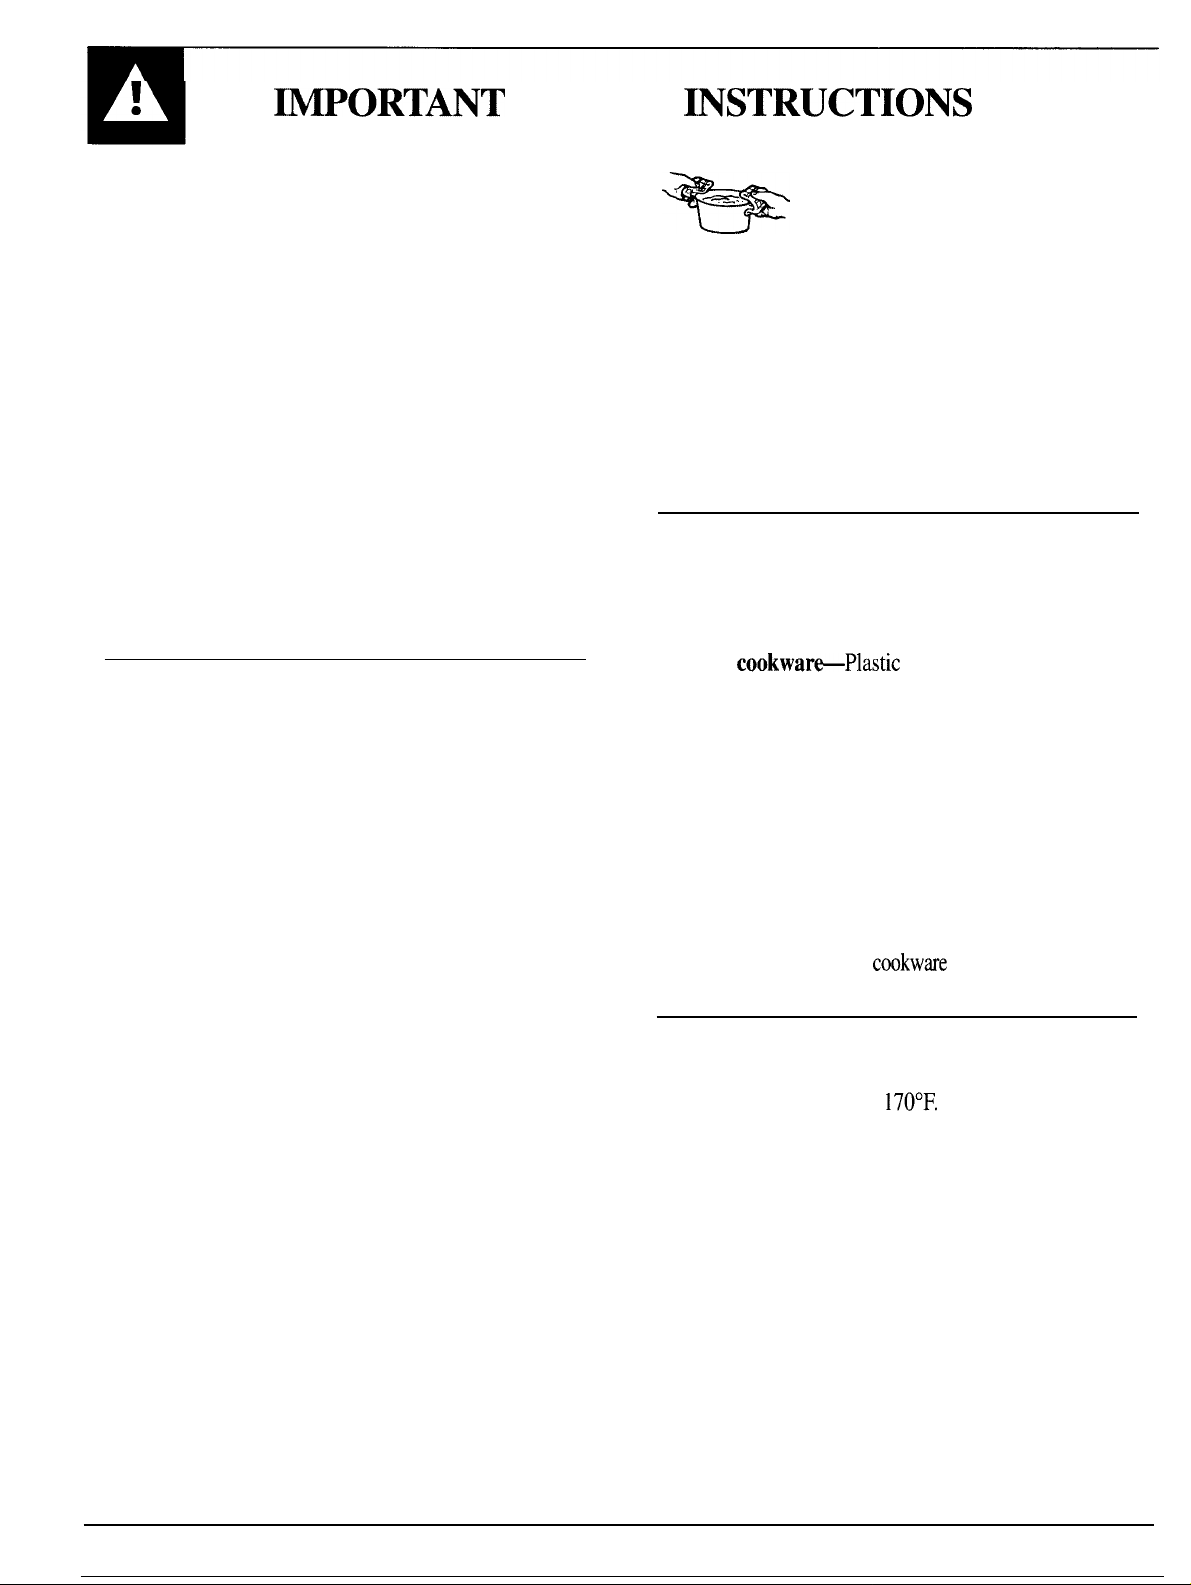
Plastic cookwar~Plastic cookware designed for
microwave cooking is very useful, but should be
used carefully, Even microwave-safe plastic may
not be as tolerant of overcooking conditions as are
glass or ceramic materials and may soften or char
if subjected to short periods of overcooking, In
longer exposures to overcooking, the food and
cookware could ignite. For these reasons: 1) Use
microwave-safe plastics only and use them in strict
compliance with the cookware manufacturer’s
recommendations. 2) Do not subject empty
cookware to microwaving, 3) Do not permit
children to use plastic
cookwae
without complete
supervision.
●
Avoid heating baby food in glass jars, even
without their lids; especially meat and egg
mixtures.
●
Don’t defrost frozen beverages in narrow
necked bottles (especially carbonated beverages).
Even if the container is opened, pressure can build
up. This can cause the container to burst, possibly
resulting in injury.
●
Use metal only as directed in this book. TV
dinners may be microwaved in foil trays less than
3/4” high; remove top foil cover and return tray
to box. When using metal in the microwave oven,
keep metal at least 1 inch away from sides
of oven.
4
●
When cooking pork, follow the directions
exactly and always cook the meat to an internal
temperature of at least
170°F.
This assures that, in
the remote possibility that trichina may be present
in the meat, it will be killed and meat will be safe
to eat.
●
Do not boil eggs in a microwave oven. Pressure
will build up inside egg yolk and will cause it to
burst, possibly resulting in injury.
●
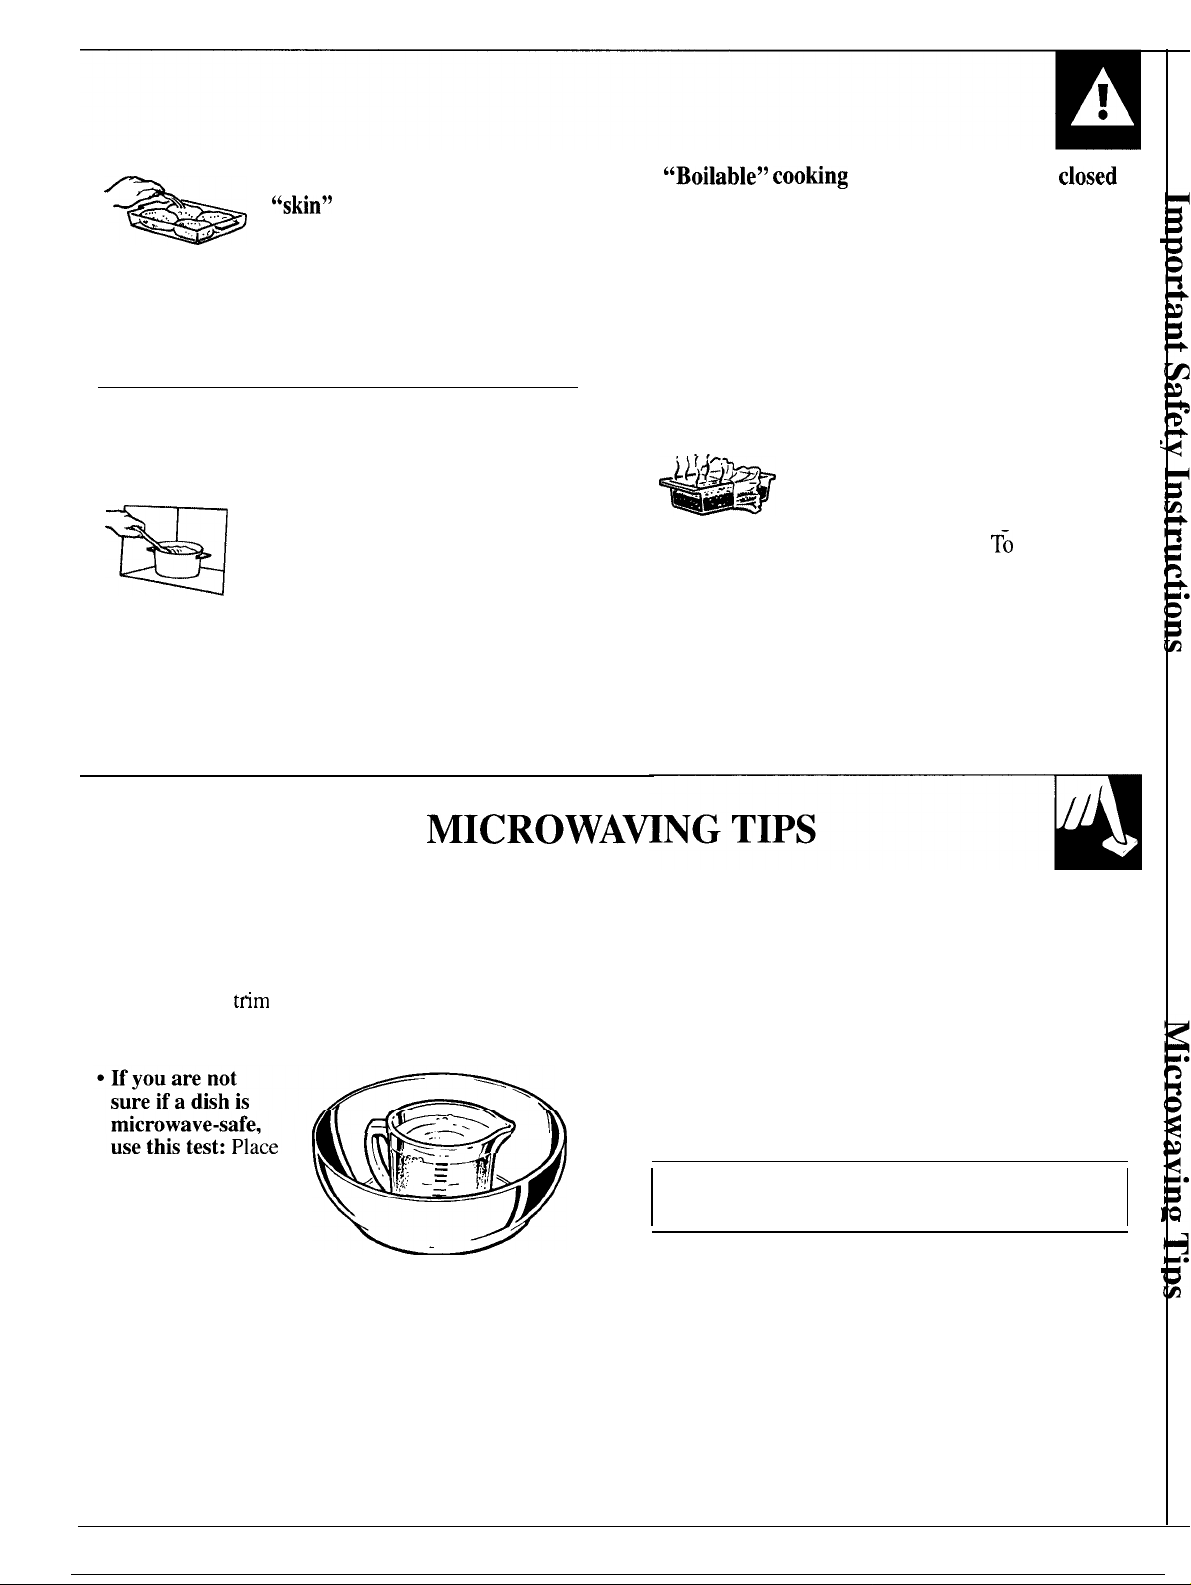
Foods with unbroken outer
“skin” such as potatoes,
sausages, tomatoes, apples,
chicken livers and other giblets,
and egg yolks (see previous
caution) should be pierced to
allow steam to escape during
cooking.
●
Not all plastic wrap is suitable for use in
microwave ovens. Check the package for
proper use.
●
Spontaneous boiling—Under
certain special circumstances,
liquids may start to boil during
w
or shortly after removal from the
microwave oven. To prevent
burns from splashing liquid, stir
the liquid briefly before removing
the container from the microwave
oven.
.
~~Boilable” coo~ng
pouches and tightly
closed
plastic bags should be slit, pierced or vented as
directed by package. If they are not, plastic could
burst during or immediately after cooking,
possibly resulting in injury. Also, plastic storage
containers should be at least partially uncovered
because they form a tight seal. When cooking
with containers tightly covered with plastic wrap,
remove covering carefully and direct steam away
from hands and face.
●
Hot
, /
*
‘P
.:.7.-.. -—
.=
foods and steam can cause
burns. Be careful when opening
any containers of hot food,
including popcorn bags, cooking
pouches-and-boxes. T6 prevent
-
possible injury, direct steam away
from hands and face.
SAVE THESE
INSTRUCTIONS
MICROWAV
● Make sure all cookware used in your microwave
oven is suitable for microwaving.
casseroles, cooking dishes, measuring cups, custard
cups, pottery or china dinnerware which does not
have metallic
be used. Some cookware is labeled “suitable for
microwaving.”
in the oven both
the dish you are
testing and a glass
measuring cup
filled with one cup
water—set the measuring cup either in or next to the
dish. Microwave 1 minute at high. If the dish heats, it
should not be used for microwaving. If the dish
remains cool and only the water in the cup heats,
then the dish is microwave-safe.
tfim
or glaze with a metallic sheen can
kg
q
,.,
L-
,f”~=
I
~,. .
Most glass
-=—
~?!
—
● Paper towels, waxed paper and plastic wrap
can be used to cover dishes in order to retain
moisture and prevent spattering. Be sure to vent
plastic wrap so steam can escape.
● Some microwaved foods require stirring, rotating
or rearranging.
● Steam builds up pressure in foods which are
tightly covered by a skin or membrane. Pierce
potatoes, egg yolks and chicken livers to prevent
bursting.
If you use a meat thermometer while cooking, make
sure it is safe for use in microwave ovens.
Check the Cooking Guide.
5

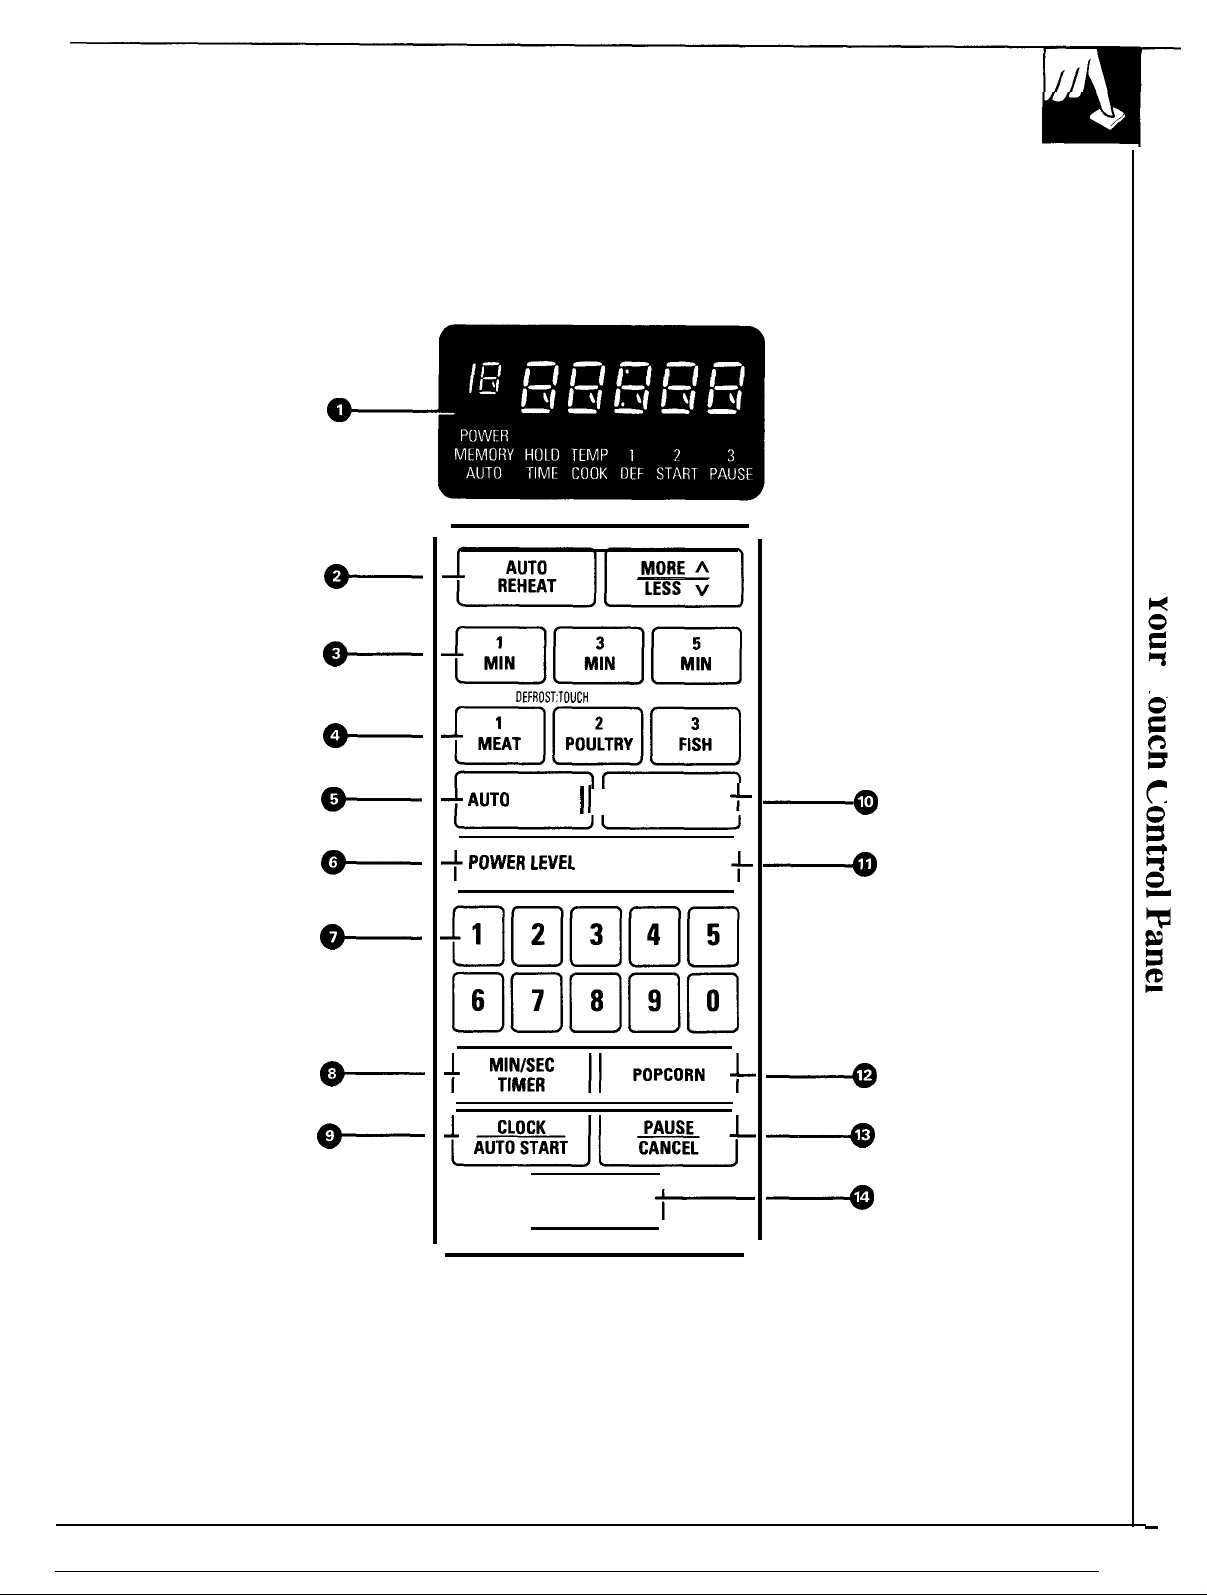
YOUR TOUCH CONTROL PANEL
The Touch Control Panel allows you to set the oven controls with the
touch of a finger.
It’s
designed to be easy to use and understand.
1.
DISPLAY.
down during cooking functions, power level,
cooking mode and instructions.
2.
AUTO REHEAT (MORE~ESS). Touch this pad
to automatically reheat most foods.
3.
ONE TOUCH COOK. Touch desired pad once
to quickly enter a short cooking program of 1, 3
or 5 minutes at power level 10 (HIGH).
4.
AUTO DEFROST. Touch the pad of the desired
food type, and then enter the food weight using
the number pads. The oven automatically sets
power levels and defrosting time.
5.
AUTO COOK. Use this pad for Auto Time
Cooking.
6.
POWER LEVEL. Touch this pad to enter a
power level if you want to change from automatic
power level 10 (HIGH) for cooking.
7.
NUMBER PADS. Touch these pads to enter
cooking time or temperature, power level, time of
day, and Auto Defrost weights.
8.
MIN/SEC TIMER. This feature uses no
microwave energy. It functions as a kitchen timer,
as a holding period after Auto Defrost or as a
delay timer before time cooking.
9.
CLOCWAUTO
enter time of day or check time of day while
microwaving. Use this pad to program your oven
to begin cooking at a desired time of day.
Displays time of day, time counting
START.
Touch this pad to
To set clock, first touch
pad and then enter time of day. For example, if time
is 1
:30,
touch number pads 1, 3, and O and “1:30”
will appear in display. Then touch
START pad. To reset or change time, simply repeat
above process.
10. TIME COOK. Program up to 3 stages of memory
cooking. Microwave for a desired amount of time
or temperature using automatic power level 10
(HIGH), or change power level after entering
cooking time.
11. MEMORY.
into the memory, or to recall your preprogrammed
memory cooking.
12. POPCORN. Cook prepackaged microwave
popcorn by just pressing this pad.
13. PAUSE/CANCEL. Touch this pad once to stop
microwave cooking. Remaining cooking time will
appear on display. Touch START to resume
cooking, or touch PAUSE/CANCEL again to
erase the cooking program. Time of day will
appear on display.
14. START.
this pad to start oven.
Touch this pad to program recipes
After time or defrost selections, touch
CLOCWAUTO START
CLOCWAUTO
Program
Use your Touch Control Panel to Time Cook with
choice of power levels from 1 (lowest) to 10 (highest);
to Auto Reheat using a preset time and power level; to
cook popcorn using a preset time and power level; to
One Touch Cook using one pad for short cooking
times; to time kitchen tasks with the Minute/Second
Timer; and to set the clock.
Cooking
6
Create your own programs to suit your individual
cooking style. For example: Use the Minute/Second
Timer to delay the start of Time Cook. Set Time Cook
for a three-stage program using different times and
power levels. Use Memory Cooking to store up to
three different programs (Time and Power Level) in
memory. Auto Time Cook automatically selects
cooking times and power levels.
Bmm
@mm
ONE TOUCH COOK
AUTO
OEFROST:TOUCH
PAD ENTER WEIGHT
+ AUTO
+
COOK I
POWER LEVEL
‘am’
I
I
TIME COOK
MEMORY
II
START
F
+
+
7
—
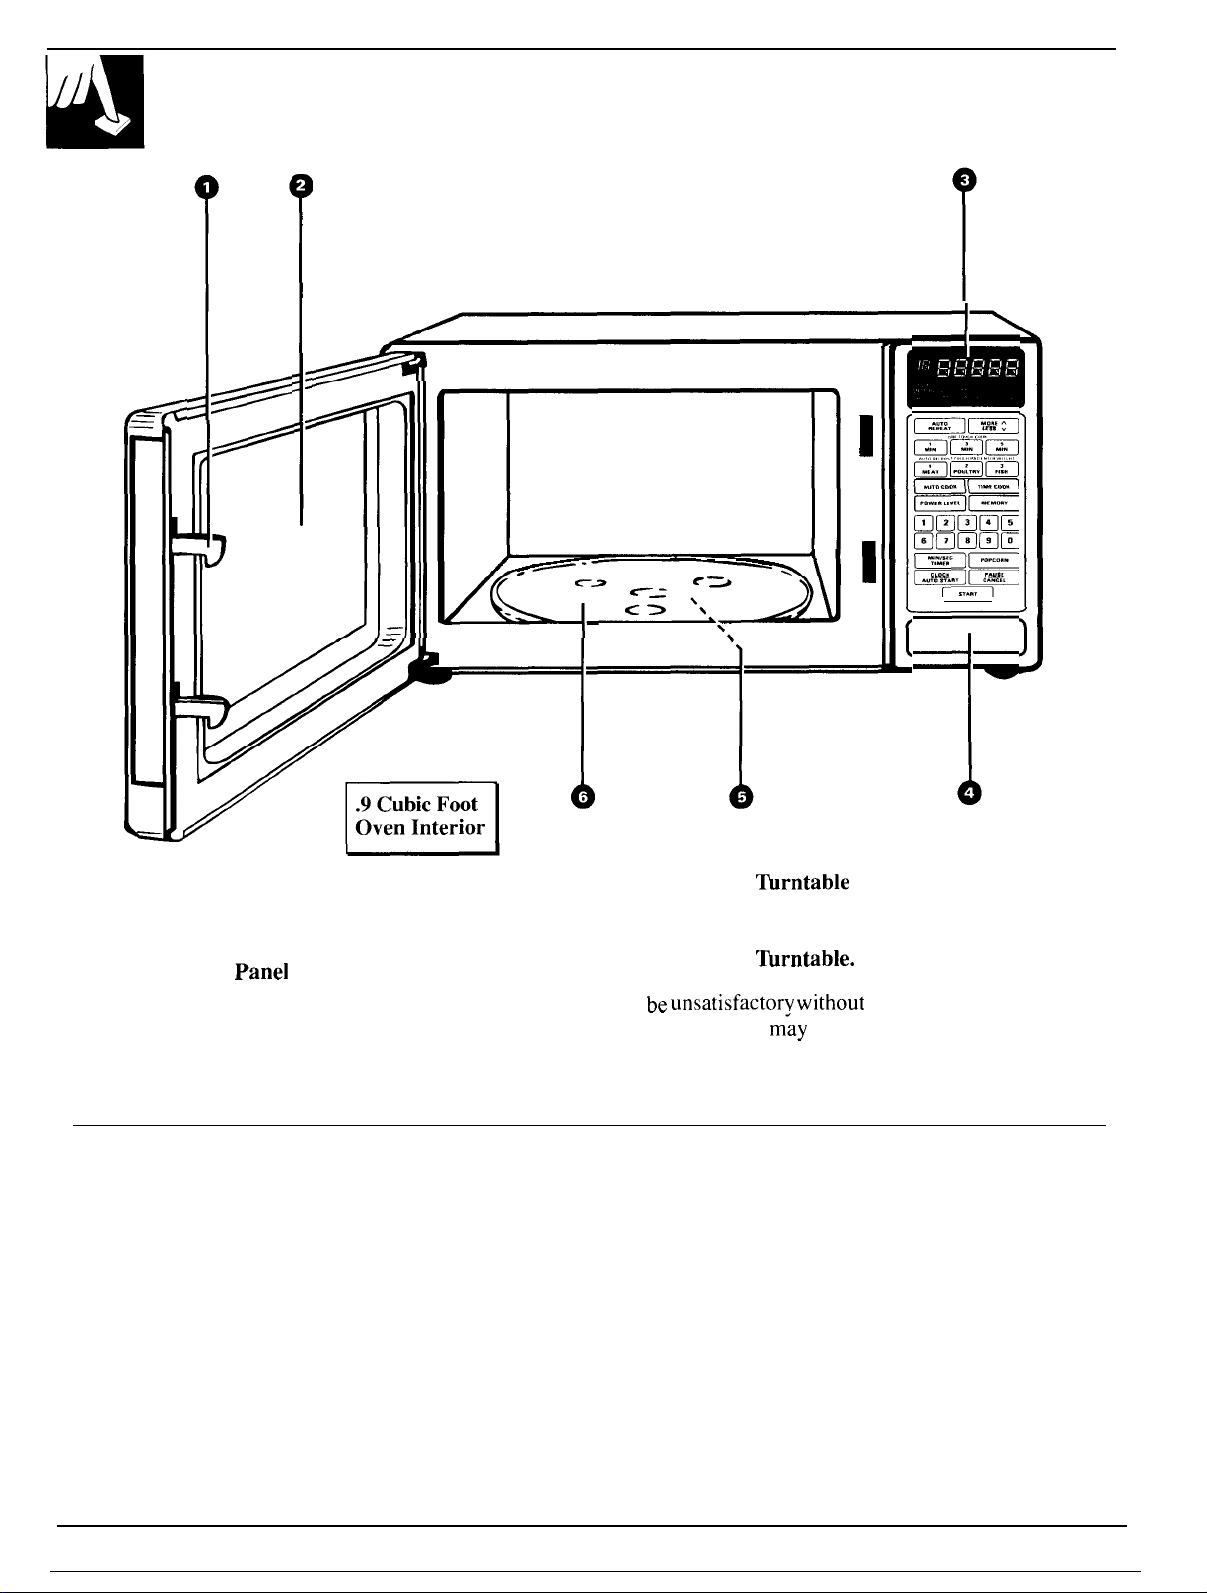
FEATURES OF YOUR OVEN
I
I
1. Door Latches.
2. Door Screen. Metal screen permits viewing of
foods and keeps microwaves confined inside oven.
3. Touch Control
Touch Control Panel section for instructions.
4. Door Latch Release. Press latch release button to
open door.
Panel
and Display. See Your
Cooking Complete Reminder
(For all cooking functions)
To remind you that you have food in the oven, the
oven will beep once a minute until you either open
the oven door or touch the PAUSE/CANCEL pad.
5. Removable
must be in place when using the turntable. The
support may be removed for cleaning.
6. Removable
when using the oven. Cooking performance will
h- llnc~tisfactorv without
““
-..”-
The turntable
NOTE: Rating plate, oven vent(s) and oven light are
located on the inside walls of the microwave oven.
~rntable
~rntable.
m~y
Support. Turntable support
Turntable must be in place
the turntable in place.
be removed for cleaning.
8
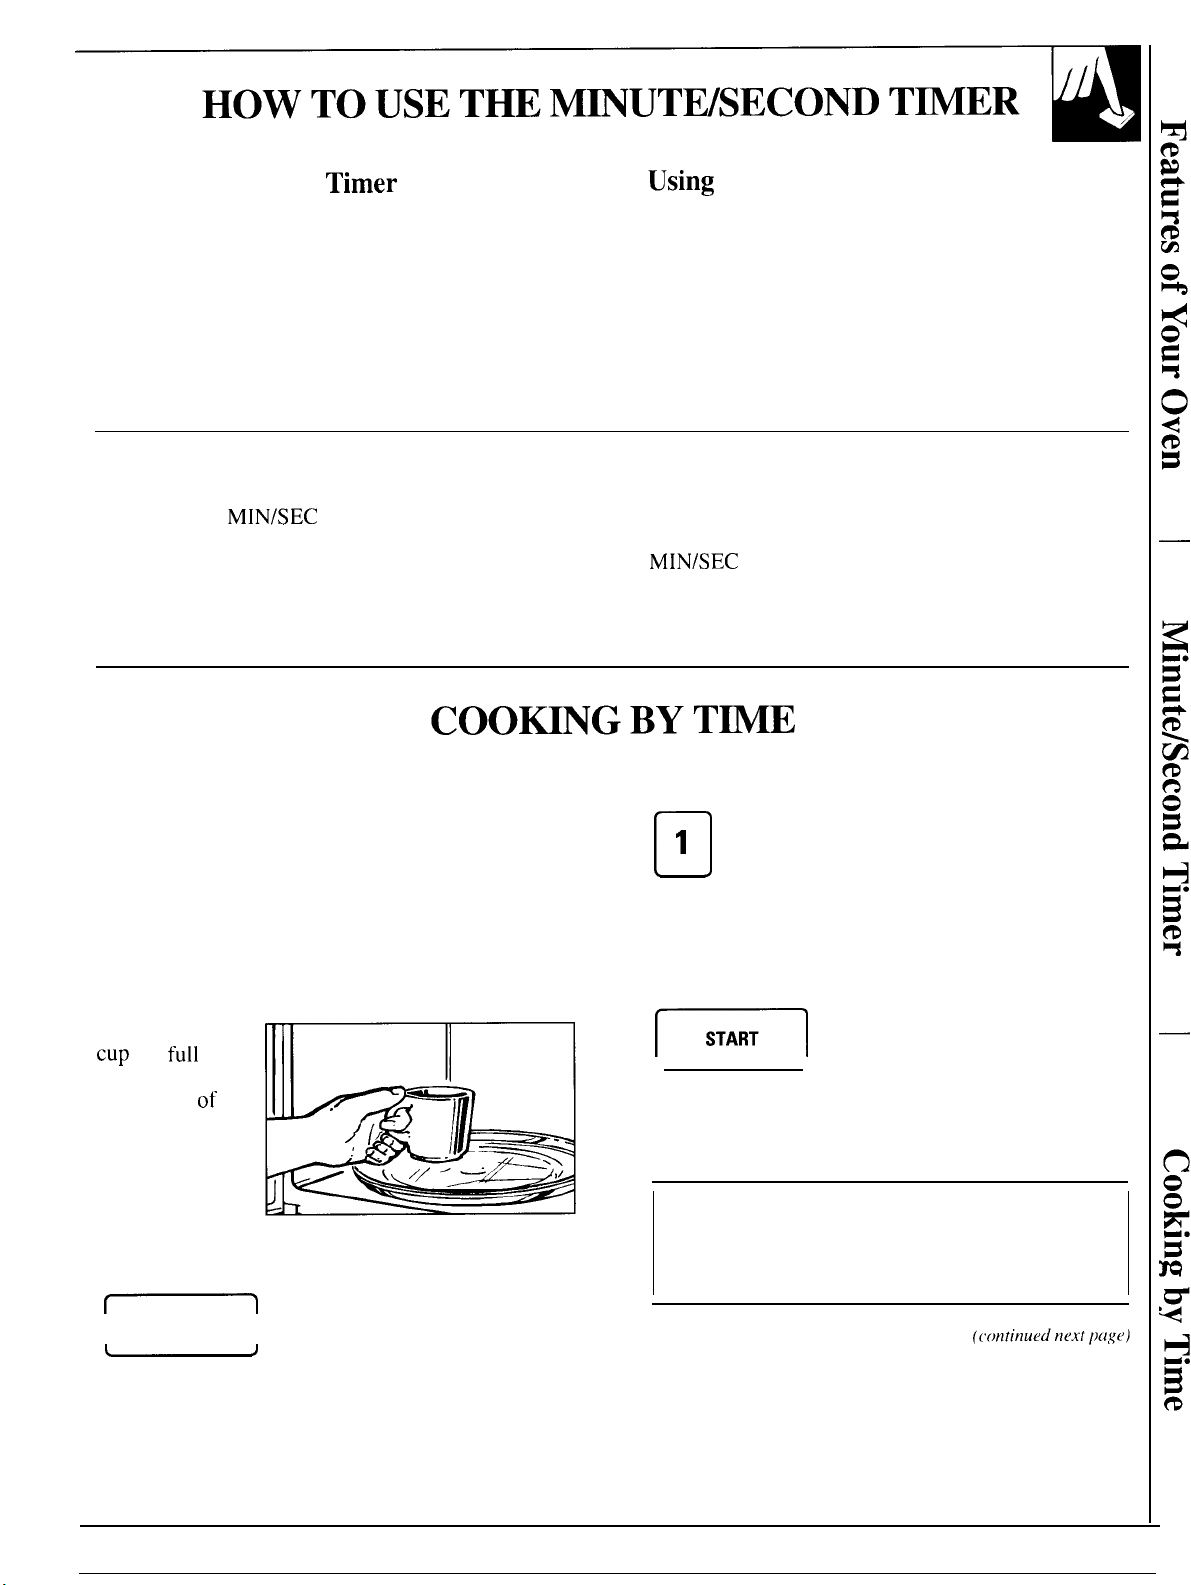
The Minute/Second Timer
The Minute/Second Timer has three timing
functions:
● It operates as a minute timer.
● It can be set to delay cooking.
● It can be used as a hold setting after defrosting.
The Minute/Second Timer operates without
microwave energy.
Using a Holding Time
The Minute/Second Timer can also be used to
program a “holding time” between microwave
cooking functions. The time can range from one
second to 99 minutes and 99 seconds. A holding or
standing time may be found in some of your own
recipes or in the Cooking Guide.
How to Time a 3-Minute Phone Call
Step 1: Touch MIN/SEC TIMER pad.
Step 2: Touch number pads 3,0 and O (for 3 minutes
and no seconds).
Step 3:
down. The timer signals when time is up.
Touch START. Display shows time counting
Time Cook
Time Cook allows you to microwave for a preset
amount of time.
Power level 10 (High) is recommended for most
cooking, but you may program up to 3 cooking stages,
varying the power level for each stage if desired. See
the Cooking Guide.
To become better acquainted with time cooking, make
a cup of coffee by following the steps below.
Step 1: Fill a
CUP
2/3
full
of
water, add
1 teaspoon
instant coffee
and stir to
dissolve. Use a
cup that has no
metal decoration
and is microwave-safe (refer to Microwaving Tips
section). Place cup in oven and close door.
(—]
TIME COOK
I I
of
Step 2: Touch TIME COOK pad.
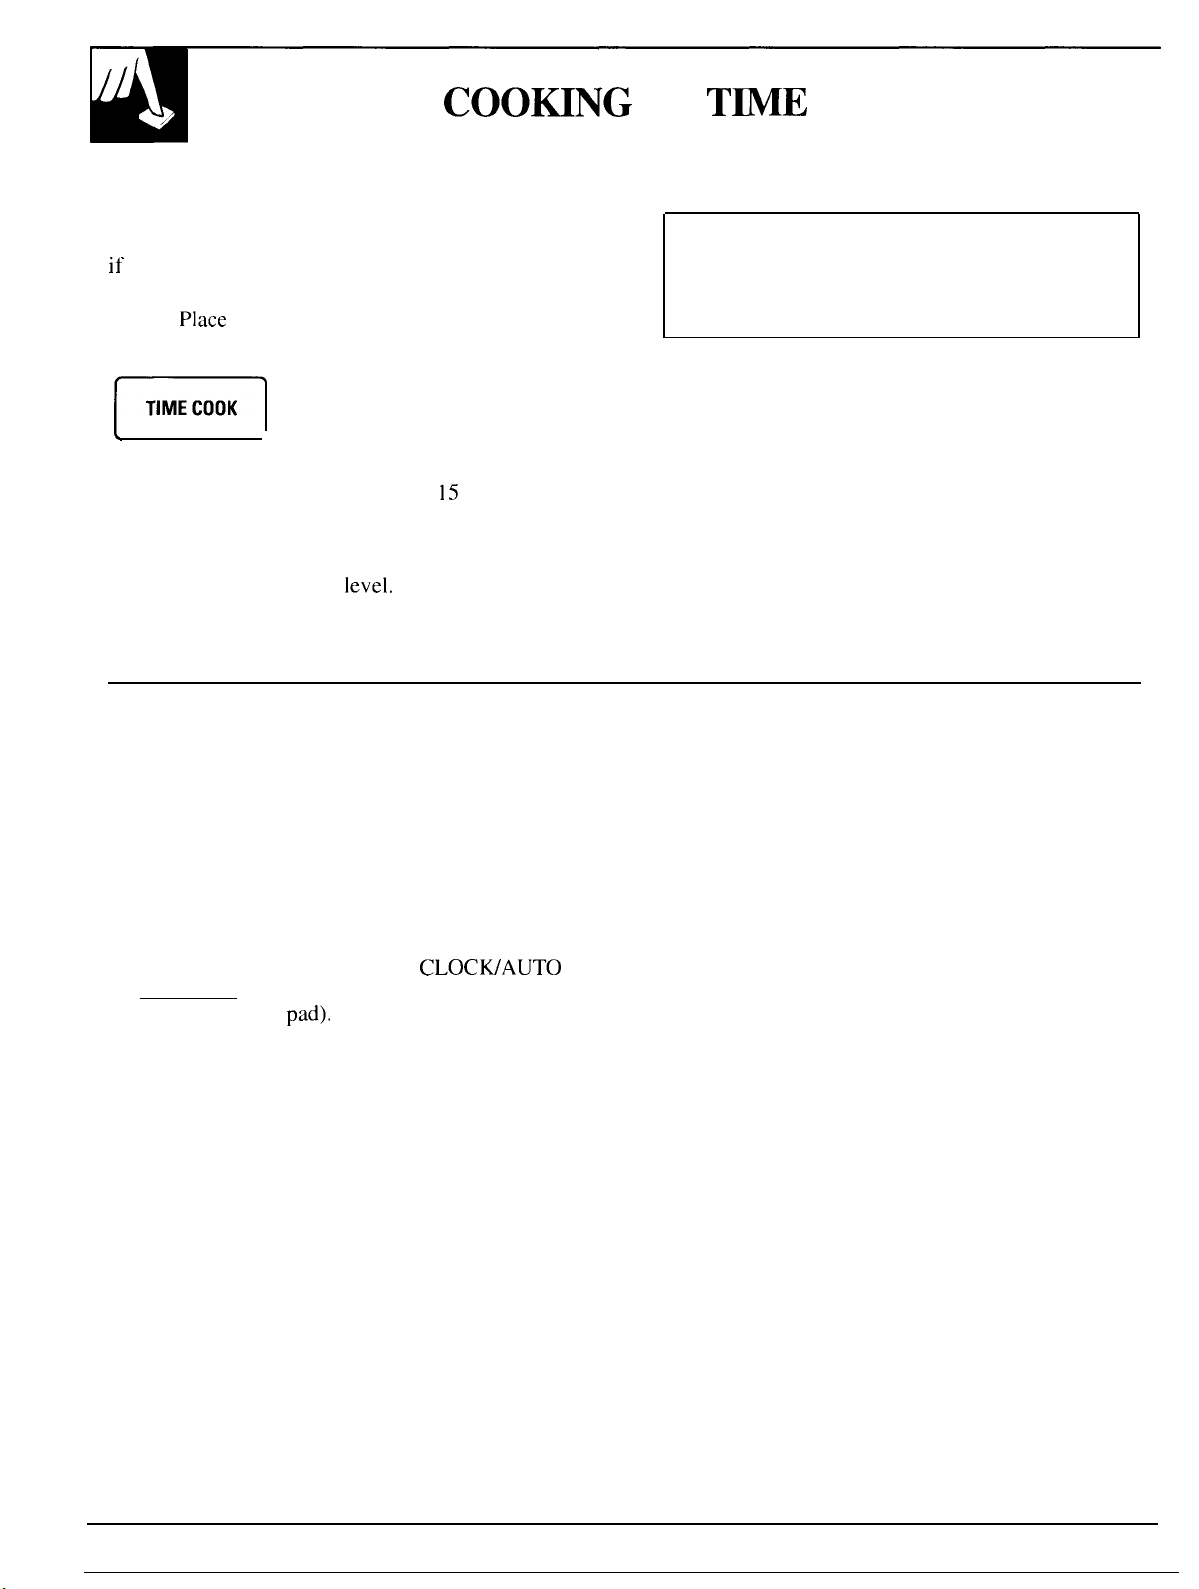
Programming Delayed Cooking
To delay cooking up to 99 minutes and 99 seconds,
touch TIME COOK and enter cook time. Touch
MIN/SEC TIMER and enter number of minutes to
delay cooking. Touch START. Timer will count down
to zero and cooking will begin.
Step 3: Select your time. Touch pads 1,0
and O for one minute.
1
n
Because automatic power level 10 is recommended
for this cup of coffee, there is no need to change the
power level. (If power level 10 is not appropriate, see
“How to Change Power Level” below.)
Step
4: Touch START.
m
Step 5: When time is up, the oven signals and flashes
“End.” The oven, light and fan shut off.
Step 6:
Open the door.
How to Change Power Level
After setting cooking time, touch POWER
LEVEL pad, then touch desired number for new
power level.
9
COOmNG
Using 2 & 3 Stage Cooking Feature
BY
(continued)
T~E
The Time Cook feature lets you set up to three time
cooking functions within one program. This is ideal
if you want to change power levels during your
cooking operations. Here’s how to do it.
Step 1:
container and close the door.
H
L
Step 3: Select your first cook time. For example,
touch 2, 1 and 5 for two minutes and
Step 4: Touch TIME COOK.
Step 5: Set your second cook time.
Step 6: Change the power
How to Use Auto Start
The Auto Start feature allows you to program your
oven to begin cooking at a later time of day—up to
a 12-hour delay.
NOTE: The Auto Start feature can only be used to
delay the start of a Time Cook program.
To Use Auto Start
Step 1: Enter your desired cooking program.
m
Step 3: Enter the time you want the oven to start. (Be
sure your microwave oven clock shows the correct
time of day.)
Place
food in oven in microwave-safe
Step 2: Touch TIME COOK.
J
level.
Step 2: Touch
START pad (instead of START
pad)
15
seconds.
CLOCWAUTO
How to Change Power Level
After setting cooking time, touch POWER
LEVEL pad, then touch desired number for new
power level.
Step
7: Touch START.
Step 8: “POWER 10” is displayed and “TIME
COOK 1“ counts down.
Step 9: At the end of “TIME COOK l,” the second
power level is displayed and “TIME COOK 2“ is
shown counting down.
Step 10: When time is up, the oven signals and
flashes “End.” The oven, light and fan shut off.
Step 11:
To program cooking stage 3, simply repeat the steps
for programming stage 2.
Step 4: Touch START pad. The oven will
automatically start at the desired time.
IMPORTANT: Any food cooked using the Auto
Start feature to delay the start time should be very
cold or frozen before it is placed into the microwave
oven. MOST UNFROZEN FOOD SHOULD NOT
STAND AT ROOM TEMPERATURE FOR MORE
THAN TWO HOURS BEFORE COOKING
STARTS. Recommended foods: vegetables, fruits,
smoked or frozen meats. Avoid foods such as milk,
eggs, cooked meats, poultry or fish, and items
containing uncooked yeast or baking powder.
Open the door.
10
One Touch Cook
With this feature, you can quickly program a short
cooking operation with the touch of one pad.
NOTE: Oven operation begins automatically, without
your having to touch the START pad.
Questions and Answers
Q. I set my oven for the time called for in the
recipe, but at the end of the time allowed,
my food was not done. What happened?
A. Since house power varies due to time or location,
many Time Cook recipes give you a time range to
prevent overcooking. Set the oven for minimum
time, test the food for doneness and cook the food
a little longer, if necessary.
Q. I touched the number pads and selected my
power level. When I touched START, however,
my oven didn’t come on. Why not?
A. The TIME COOK pad must be touched before
setting the number pads or else your oven will not
begin cooking.
To Use One Touch Cook
Step 1: Place food in oven in microwave-safe dish.
1
MIN
n
Step 3: When time is up, the oven signals and “End”
flashes.
Q. I want to cook on a power
(High). What do I need to do?
A. To change the power level, touch the POWER
LEVEL pad, then touch desired number for new
power level.
Q. Can I interrupt Time Cook to check the food?
A. Yes. To resume cooking, simply close the door and
press the START pad. The timer must be reset for
cooking to resume unless time is remaining on
timer.
Step 2: Touch the desired ONE
TOUCH COOK pad. Oven operation
will start.
level
other than 10
11
 Loading...