

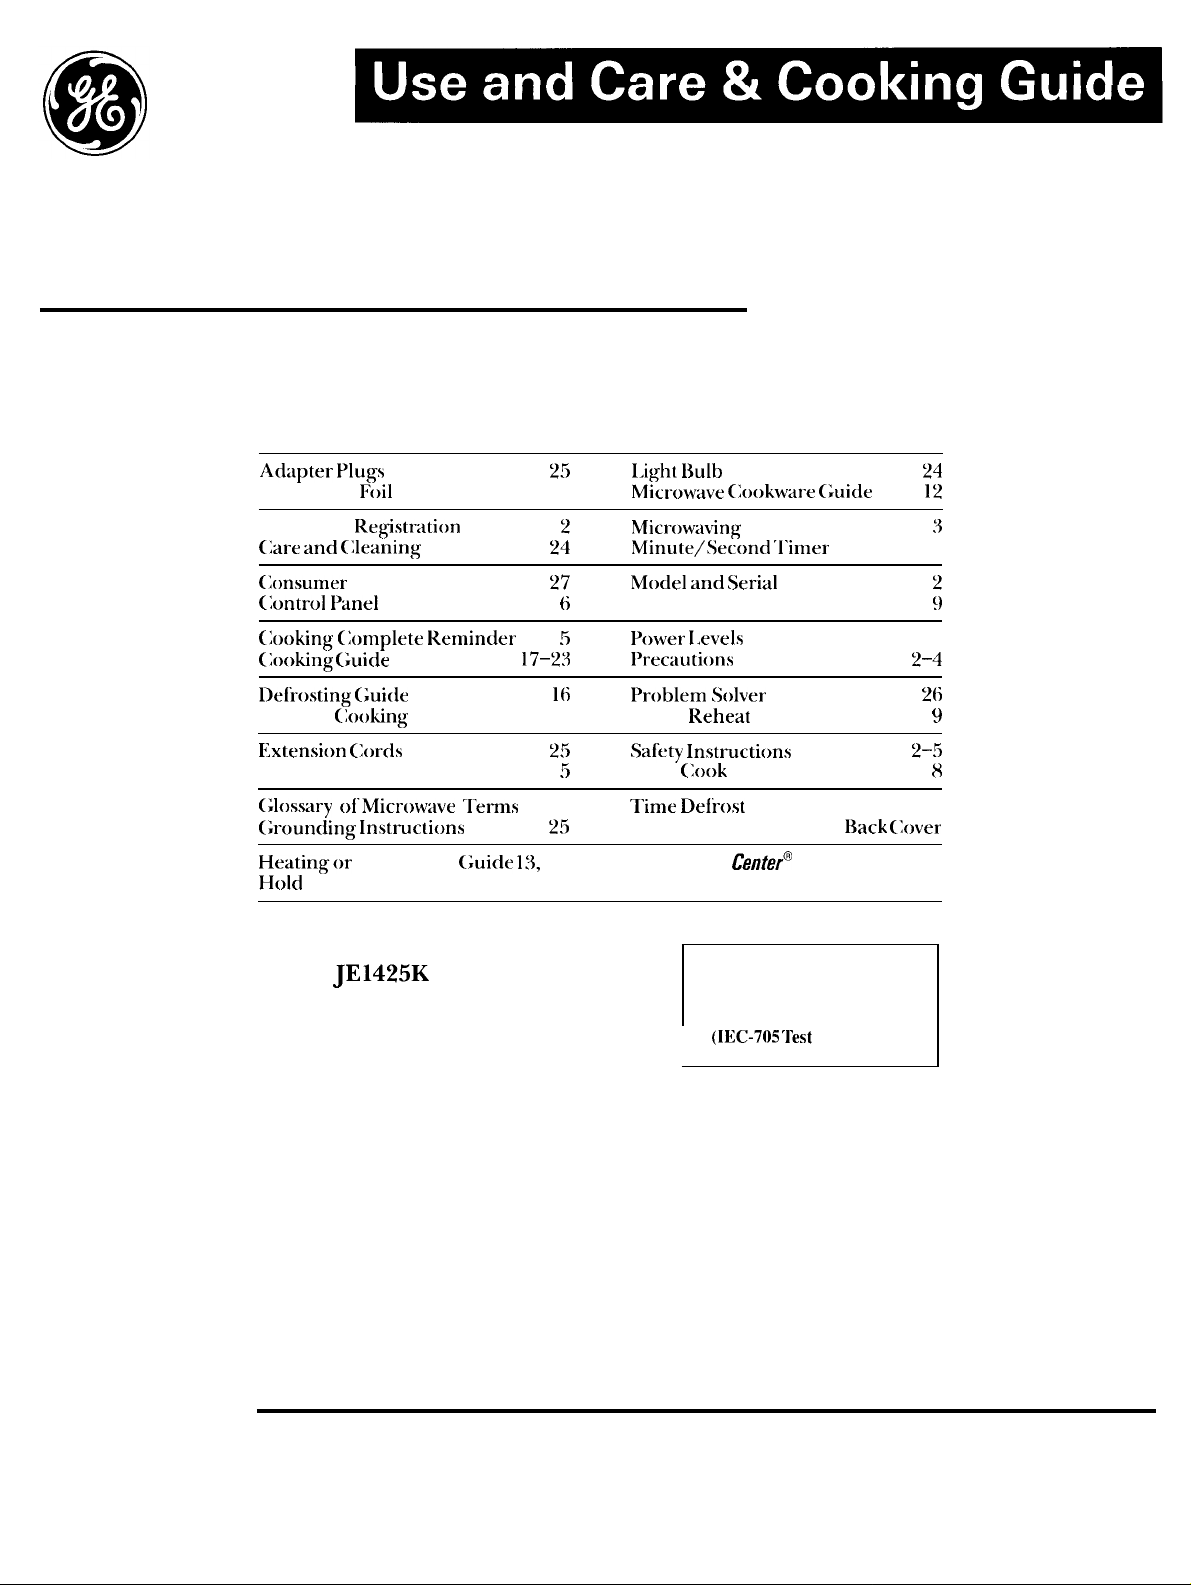
Contents
Countertop Microwave Oven
Ad;ipter ~ht~s
Aluminum
Appliance
{lare
and (:leaning
(l(msumer Services
(:untrol Panel
(;()(~king (Jomplete Kemincier
(looking
Defrosting (;ui(le
Delayed
F:xtensi(m [lorcis
Features
(Jlossary of’Microw~ive” ‘I”ernls
(;rounciing Instructions
Heatingor Reheating (;uide
Hold Time
Model
Foil
Re@stt-ation
(;uide
(:ouking
JE1425K
25
4
2
24
27
6
5
17-2:3
15,
1(;
7
25
5
11 Time
25
1:3,
14
7
I.iqht I}ulh
M;ct-ow;ive (:()()kware (;uicie
Microw:tving
Minute/Second ‘1.imer
Model
Popcorn”
Power I.evels
I)rec;iutions
Problem Solver
Quick Reheat
Safety Instructi(ms
Time
Warranty
GE Answer
800.626.2000
Replacement
Tips
and
Serial
Numbers
(;()()k
Defrost
Back (;over
Centera
Microwave power output
of this oven is 800 watts.
(IEC-705 ‘lest
Procedure)
I
24
12
7-10
2-4
2(j
~_~
10
:3
7
2
<)
9
8
GE Appliances

Help us help you...
Before using your oven,
read this book carefully.
It is intended to help you operate
and
maintain your new microwave
oven properly.
Keep it
qllcstions.
If you
or
yOLII”
hundy
for answers to your
don’t
understand something
need
more help, write (include
phone number):
COtlsLInler Affoirs
GE Appliances
Appliance
Louisville, KY 40225
plu-k
Write down the model and
serial numbers.
YoLi’
II
find
them on a label
the
oven.
These numbers
Consurncr
Registr:lti[)n c~~l-d
your microwave oven.
sending in this
these numbers
Model Number
Ser;al
Number
Use
these
correspondence or service
concerning your microwave oven
are
also on the
Product Ownership
numbers in any
that
card, please
here:
inside
came with
Before
write
calls
Be sure your microwave
oven is registered.
It
is important
location
should
adjustments.
Your supplier is responsible
registering
Please
be sure he has done so; also send
in
Ownership Registration
you move, or if you are not the
original purchaser, please write to
us, stating model
numbers.
u
check
yoLIr
Consumer Product
thtit
we know the
of your microwave oven
need occur
you as
with your supplier to
for
for
the owner.
Card. If
and serial
This appliance must be registered,
Please be certain that it is.
Write to:
GE Appliances
Runge
Product Service
Appliance Park
Louisvi]]e,
KY 40225
If you received a
damaged oven...
Immediately contact the dealer (or
builder) that sold
yOLI
the oven.
Save time and money.
Before you request service...
Check the Problem Solver in
back of this book. It lists causes of
minor operating problems that
can
correct yourself.
the
yOLI
All these things are normal
with your microwave oven.
●
Stetim
or vapor
around the door.
● Light reflection
outer case.
● Dimming oven I
in blower sound
operating at power levels other
than high.
●
Dull thumping sound wh i Ie oven
is operating.
● Some TV-Radio interference
might be noticed while using your
microwave oven. It’s similar to the
interference
appliances
problem with your oven.
esctiping
around door or
ight and change
may occur
caused
by other
and
does not indicate
from
while
small
a
If you need service...
To obtain service,
Consumer Services
back of- this book.
We’
re proud of
want you to be pleased. If
reason
service
steps to
FIRST, contact the
serviced your appliance. Explain
why
cases, this will solve the problem.
yOLI are
yOLI
receive, here are three
follow for
y“ou are
see
the
page
in the
our service
not happy with the
further help.
people
not pleased. In most
tind
for
who
some
NEXT, if
write
your phone
Mantiger,
GE Appliances
Appliance Park
Louisville, KY 40225
FINALLY, if’ your
not resolved, write:
M:ijor
20
Chicago, IL
yOLI
are still not
~dl
the details-including
nunlbel--to:
Consumer Relations
problcm
Appliance Consumer
Action Panel
North Wacker Drive
60606”
pleased,
is still
PRECAUTIONS
TO AVOID
POSSIBLE
EXPOSURE TO
EXCESSIVE
MICROWAVE
ENERGY
(a) Do Not Attempt to operate this
oven with the door open since
open-door operation
harmful exposure to microwave
energy. It is important not to defeat
or tamper with the safety
interlocks.
(b) Do Not Place
between the oven front
the door or allow soil or cleaner
residue to accumulate on sealing
surfaces.
(c) Do Not Operate the oven if it
is damaged. It is particularly
important that the oven door close
properly and that there is no
damage to the:
(
I
) door (bent)
(2) hinges and latches (broken or
loosened)
(3)
door seals and sealing surfaces.
(d) The Oven Should Not be
adjusted or repaired by
except properly qualified service
personnel.
any
can
result in
object
face and
anyone
2
Microwaving Tips
IMPORTANT SAFETY
● Make sure all cookware used in
your microwave oven is suitable
for microwaving. Most
casseroles,
measuring cups,
pottery or china
does not
glaze
used.
“suitable
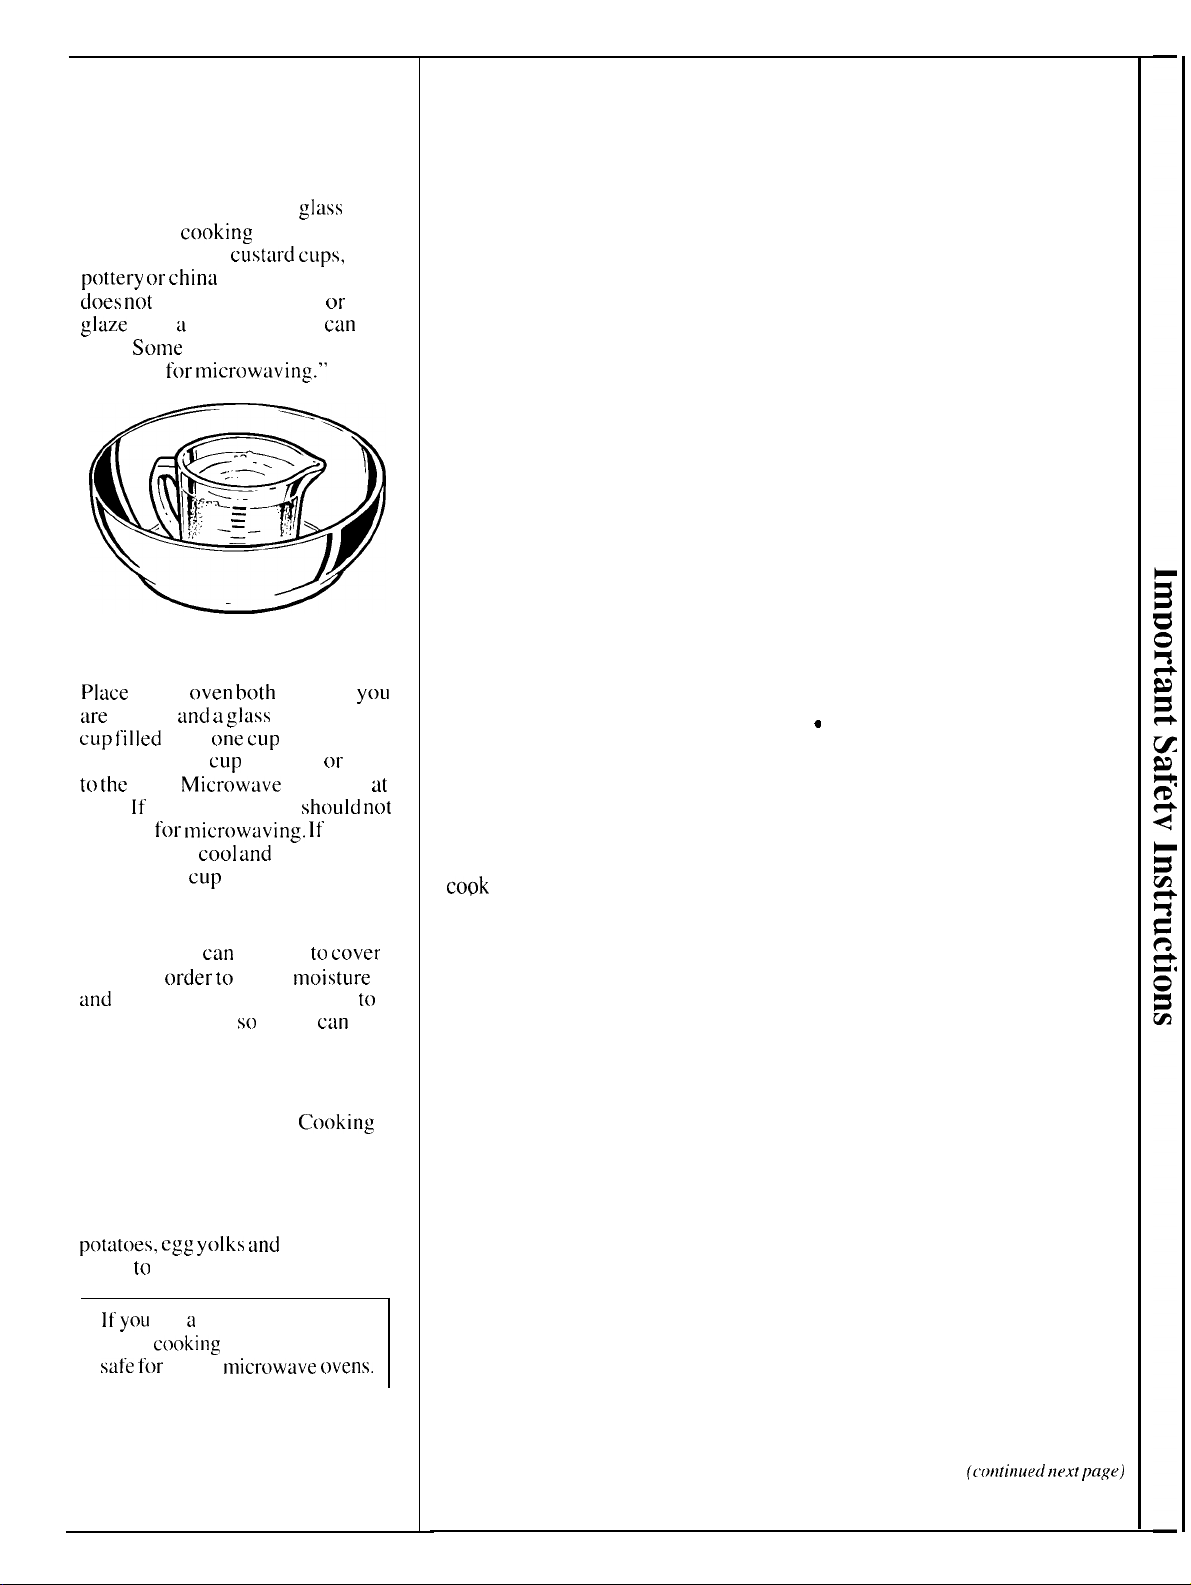
If you are not sure if a dish is
microwave-safe, use this test:
Place
:lre
testing
cup filled
the measuring
to the
high. If the dish heats, it
be used
dish remains
water in the
dish is microwave-safe.
● Paper towels, waxed paper and
plastic wrap
dishes in order
and
prevent spattering. Be sure
vent plastic wrap so steam
escape.
● Some microwaved foods
require stirring, rotating or
rearranging. Check the
Guide.
● Steam builds up pressure in
foods which are tightly covered
by a skin or membrane. Pierce
potatoes,” egg yolks and
livers to prevent bursting.
If you
while
safe for
L
cooking
cust:lrd cLIps,
dinnerware which
have metallic trim
with a metallic sheen
Some
cookware is labeled
for micr~)w:lving.”
in the
dish.
oven both
and a glass
with
one cup
cup
Microwave
for microwaving. If
cool and
cup
heats, then the
can
be used
t{)
retain
use a meat thermometer
ct~oking
make sure it is
use in
microwave t)vens.
glass
dishes,
or
can
be
the dish
measuring
water—set
either in or next
1 minute
only the
moisture
chicken
you
should not
the
tc~ cover
to
c:m
C(~oking
INSTRUCTIONS
Read all instructions before using this appliance.
When
using electrical appliances,
basic safety precautions should
be followed, including the
following:
WARNING–To reduce
the risk of burns, electric shock,
fire, injury to persons or exposure
to excessive microwave energy:
●
Read and follow
the specific
“PRECAUTIONS TO AVOID
POSSIBLE EXPOSURE TO
EXCESSIVE MICROWAVE
ENERGY” on page 2.
●
This appliance must be
grounded.
Connect only to
properly grounded outlet.
See “GROUNDING
INSTRUCTIONS” on page 25.
●
Use this appliance only for its
intended use as described in this
at
manual.
Do not use corrosive
chemicals or vapors in this
appliance. This microwave oven
is specifically designed to heat or
cook
food, and is not intended for
laboratory or industrial use.
●
For best operation, plug
this appliance into its own
electrical outlet, to prevent
flickering of lights, blowing
of fuse or tripping of circuit
breaker.
●
Do not mount this appliance
over a sink.
Install or locate this
appliance only in accordance
with the provided Installation
Instructions.
●
Be certain to place the
front surface of the door three
inches or more back from the
countertop edge to avoid
accidental tipping of the
appliance in normal usage.
●
Do not cover or block any
openings on the appliance.
●
Do not store this appliance
outdoors.
Do not use this
product near water—for example
in a wet basement or near a
swimming pool.
●
Do not immerse power cord
or plug in water.
●
Keep power cord away from
heated surfaces.
●
Do not let power cord hang
over edge of table or counter.
●
Do not operate this appliance
if it has a damaged power cord
or plug, if it is not working
properly, or if it has been
damaged or dropped.
●
See
door surface cleaning
instructions in the Care and
Cleaning section(s) of this book.
“
This appliance should be
serviced only by qualified service
personnel.
authorized service facility for
examination, repair or adjustment.
●
As with any appliance, close
Contact nearest
supervision is necessary when
used by children.
●
To reduce the risk of fire in
the oven cavity:
—Do not overcook food.
Carefully attend appliance if
paper, plastic or other combustible
materials are placed inside the
oven to facilitate cooking.
—Remove wire twist-ties
from
paper or plastic bags before
placing bags in oven.
—Do not use your microwave
oven to dry newspapers.
—Do not use recycled paper
products.
napkins and waxed paper can
contain metal flecks which may
cause arcing or ignite. Paper
products containing nylon or
nylon filaments should be
avoided, as they may also ignite.
Recycled paper towels,
(Cotztitzue[l fzexf [Iage)
3

IMPORTANT SAFETY INSTRUCTIONS
(continued)
—Do not pop popcorn in your
microwave oven
special microwave popcorn
accessory or unless you use
popcorn labeled
microwave ovens.
unless in a
for
use in
—Do not operate the oven
while empty to avoid damage to
the oven and the danger of fire.
If
by accident the oven should
run empty a minute or two, no
harm is done. However, try to
avoid operating the oven empty
at all
times—it saves energy
and
prolongs the life of the oven.
—Do not overcook potatoes.
They could dehydrate and catch
fire, causing damage to your oven.
●
Do not use the oven for storage
purposes.
Do not
leave
paper
products, cooking utensils or food
in the oven when not in use.
●
If materials inside oven
should ignite,
keep oven door
closed, turn oven off, and
disconnect power cord, or shut
off power at the fuse or circuit
breaker panel.
●
Some products such as whole
eggs and sealed
containers—
for example, closed jars—will
explode and should not be heated
in this microwave oven. Such use
of the microwave oven could
result in injury.
●
Avoid heating baby food
glass jars, even without their
in
lids;
especially meat and egg mixtures.
Q
Don’t defrost frozen
beverages
in narrow necked
bottles (especially carbonated
beverages). Even if the container
is opened, pressure can build up.
This can cause the container to
burst, possibly resulting in injury.
●
Use metal only as directed in
this book.
TV dinners maybe
microwaved in foil trays less than
3/4” high; remove top foil cover
and return tray to box. When
4
using metal in the microwave
oven,
keep
metal
at least 1 inch
away from sides of oven.
●
Cookware may become hot
because of heat transferred from
the heated food. Pot holders may
be needed to handle the cookware
Sometimes, the oven tray can
.
become too hot to touch.
Be
careful touching the tray during
and after cooking.
●
Foods cooked in liquids
(such
as pasta) may tend to boil over
more rapidly than foods
containing less moisture.
Should
this occur, refer to page 24 for
clean
instructions on how to
the
inside of the oven.
●
Thermometer—Do
not use a
thermometer in food you are
microwaving unless the
thermometer is designed or
recommended for use in the
microwave oven.
●
Plastic cookware—Plastic
cookware designed for
microwave cooking is very
useful, but should
carefully. Even microwave-safe
plastic may not be as tolerant of
overcooking conditions as are
glass or ceramic materials and
may soften or char if subjected to
short periods of overcooking. In
longer exposures to overcooking,
the food and cookware could
ignite. For these reasons: 1 ) Use
microwave-safe plastics only and
use them in strict compliance with
the cookware manufacturer’s
recommendations. 2) Do not
subject empty cookware to
microwaving. 3) Do not permit
children to use plastic cookware
without complete supervision.
●
When cooking pork,
the directions exactly and
cook the meat to an internal
temperature of at least
This assures that, in the remote
possibility that trichina may be
be used
follow
always
170°F.
present in the meat, it will be
killed and meat will be safe to eat.
●
Do not boil eggs in a
microwave oven.
Pressure will
build up inside egg yolk and will
cause it to burst, possibly
resulting in injury.
●
Foods with unbroken outer
“skin”
such as potatoes, sausages,
tomatoes, apples, chicken livers
and other giblets, and egg yolks
(see previous caution) should be
pierced to allow steam to escape
during cooking.
●
Not
all
plastic wrap is suitable
for use in microwave ovens.
Check the package for proper use.
●
Spontaneous
boiling—Under
certain special circumstances,
liquids may start to boil during or
shortly after removal from the
microwave oven. To prevent
burns from splashing liquid, stir
the liquid briefly before
removing the container from the
microwave oven.
●
$~Boilab]eJ>
cooking pouches
and tightly closed plastic bags
should be slit, pierced or vented
as directed on package. If they
are not, plastic could burst during
or immediately after cooking,
possibly resulting in injury. Also,
plastic storage containers should
beat least partially uncovered
because they form a tight
sea].
When cooking with containers
tightly covered with plastic wrap,
remove covering carefully and
direct steam away from hands
and face.
●
Hot foods and steam can
cause burns. Be
careful when
opening any containers of hot
food, including popcorn bags,
cooking pouches and boxes. To
prevent possible injury, direct
steam away from hands and face.
SAVE THESE
INSTRUCTIONS
Features of Your Oven
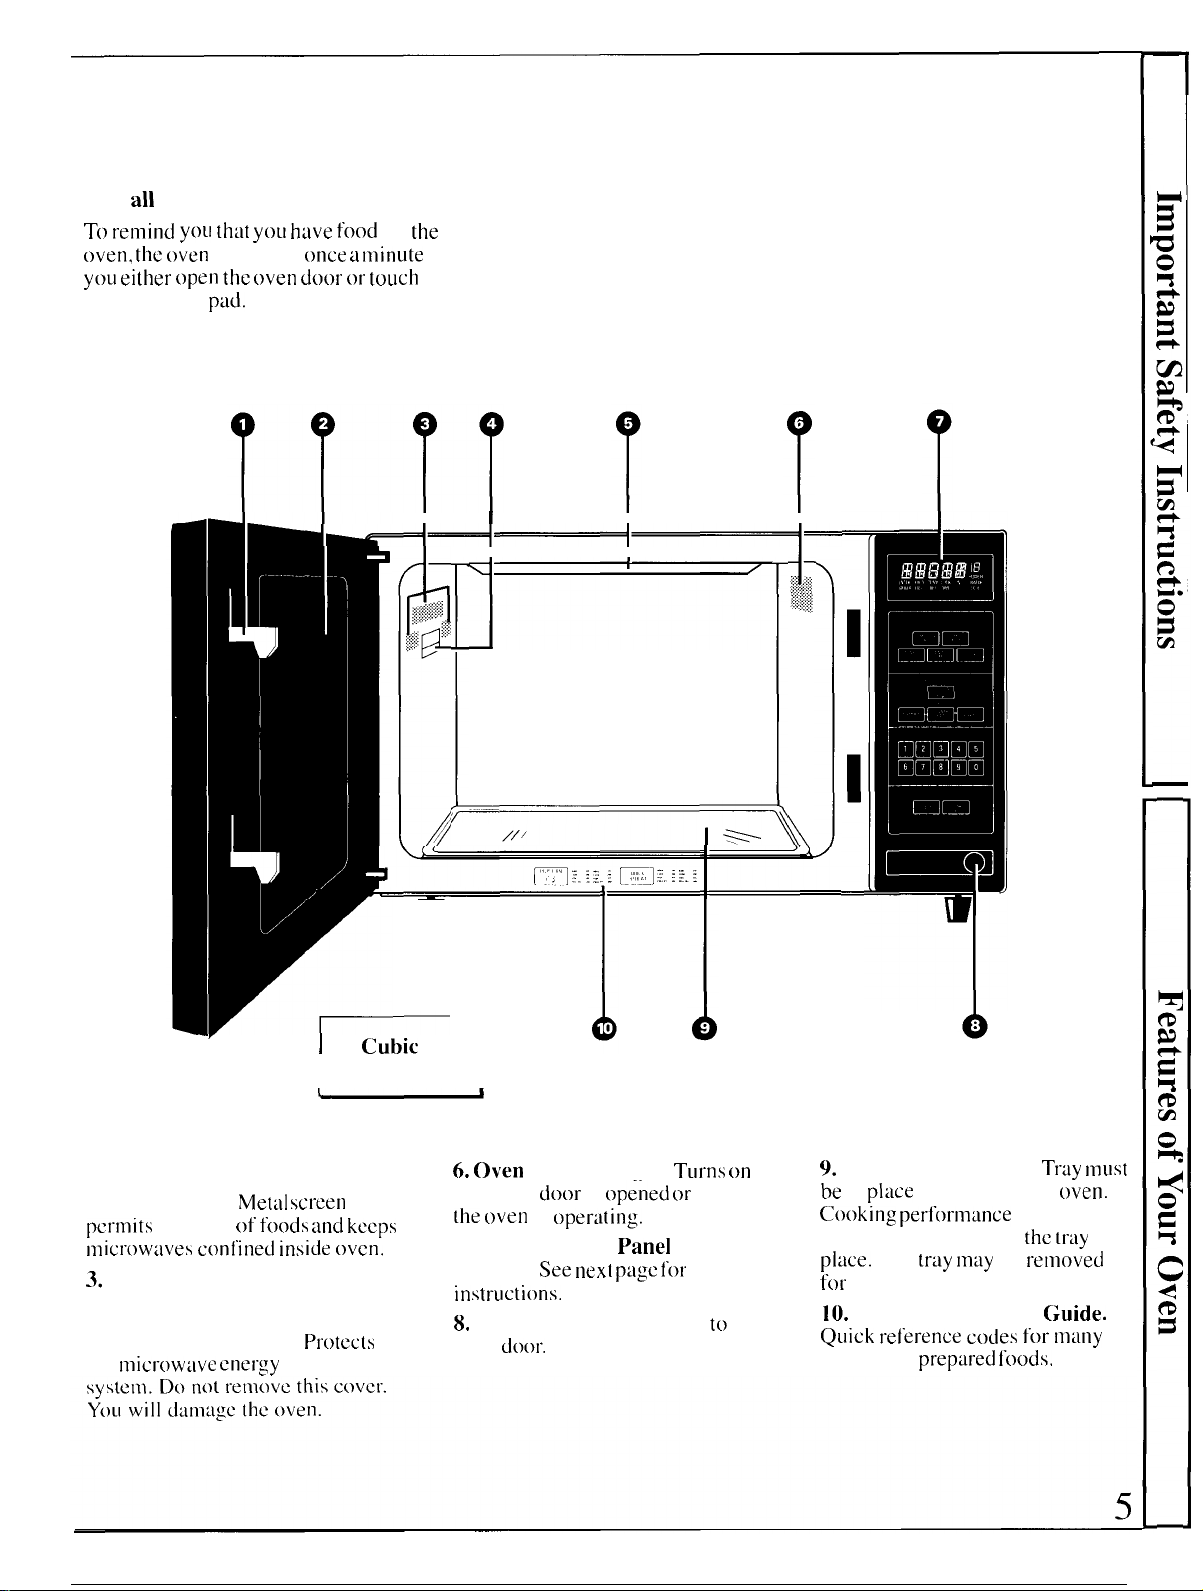
Cooking Complete Reminder
(For
all
cooking and reheating features.)
T() renlind you th;lt
oven, the oven
yoLI either open the oven do{)r or touch
CLEAR/OFF
yoLI
will beep
pad.
h:lve food
once a nlinute
in
the
until
the
I
I
I
I
I
I
w
-.
I
1.4
Cubic
Oven Interior
1
Foot
I
1. Door Latches.
2. Door Screen.
pcrlnits
nlicrow;ives c(~nl’ined inside oven.
3.
4. Model and Serial Numbers.
5. Mode Stirrer Cover.
the
viewing of
Oven Vent.
nlicrowilve energy
Met:ll screen
foods” :ind keeps
Protects
distributing
6. Oven
when the
the c)ven
7. Touch Control
Display.
instructions.
8.
open
Interior Light.
d~)~)r
is
~~p~ned ~~r
is
c)per~lting.
Panel
See next page
Door Open Button. Push
door.”
ior
Turns on
when
and
to
9.
Glass Cooking Tray.
be
in
place
when using the
C()()king perfortnance
unsatisfactory without
place.
The
[ray ln~ly
for cleaning.
10.
Automatic Cooking {;uide.
Quick I“e[’erence codes ft)r nl:lny
frequently
preptired f’()()ds.
will be
the tr~ly
be
Trtiy tnust
t)ven.
in
renloved
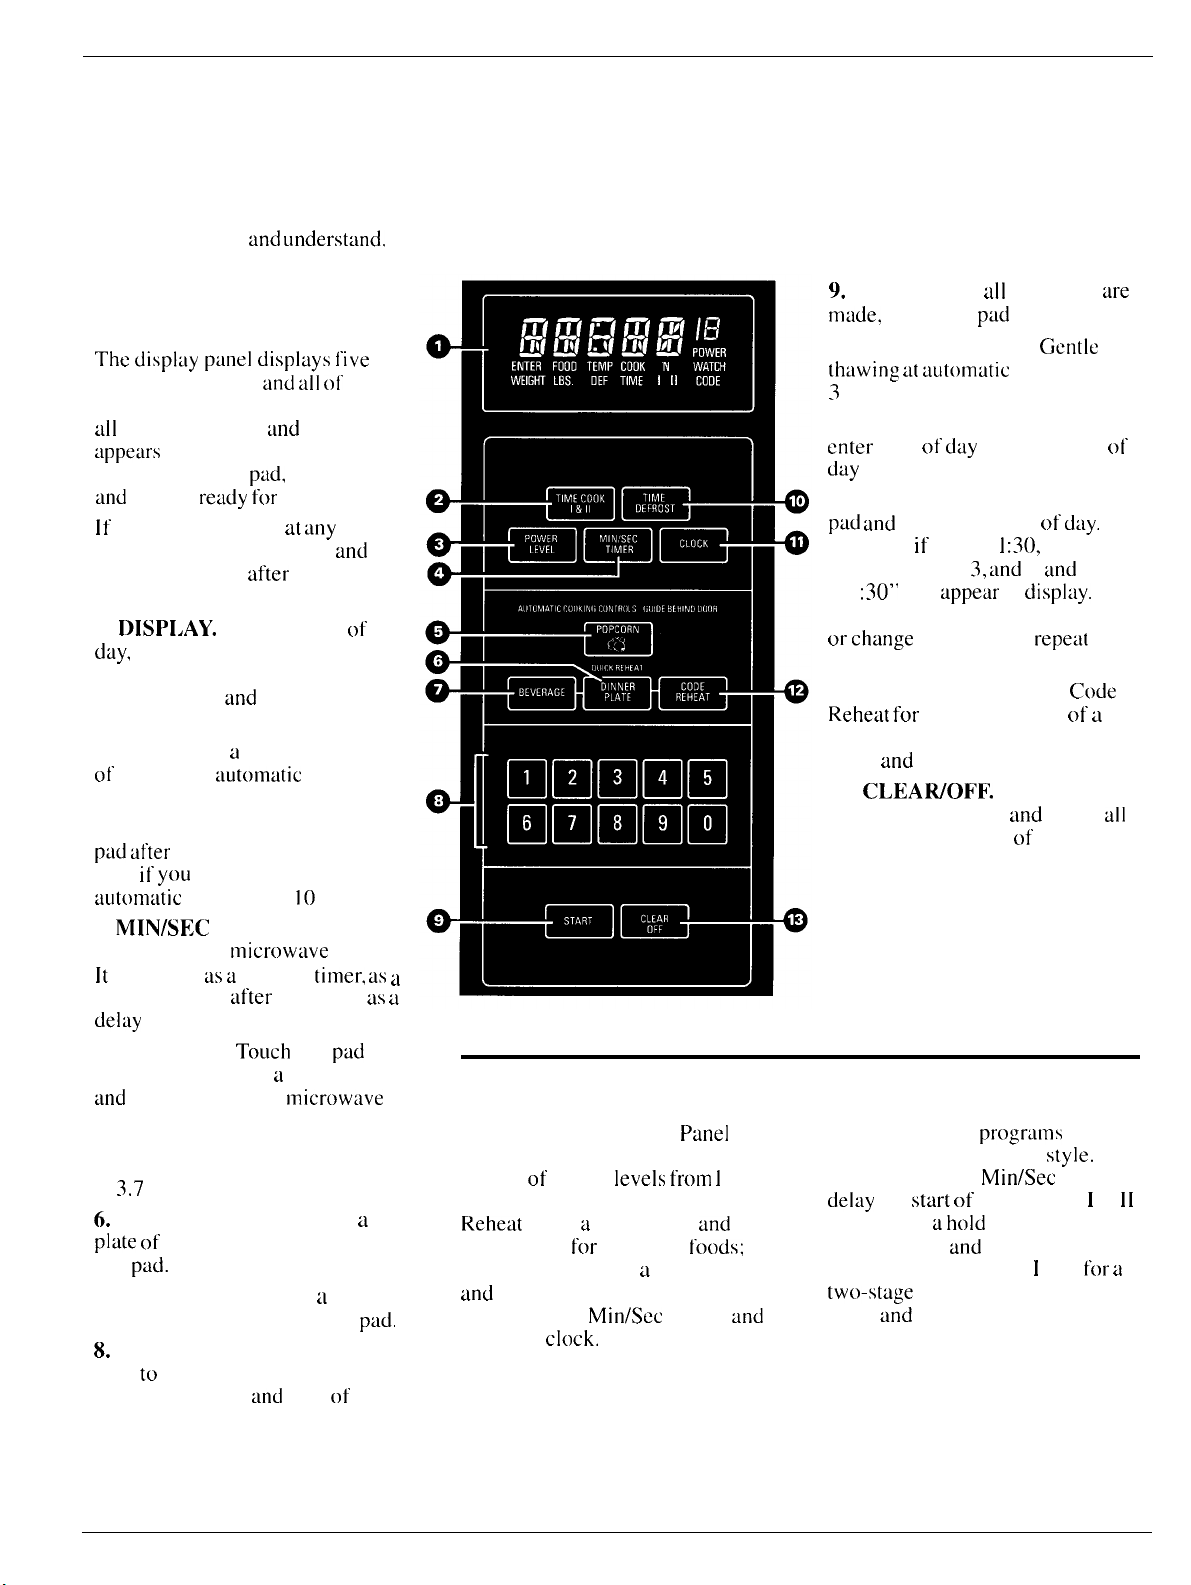
Your Touch Control Panel
The Touch Control Panel allows
you to set the oven controls with
the touch of a finger.
to be easy to use
When You Plug in the
Oven
The displ~ly panel displ~lys live
8’s, “18 POWER”
oven functions. After 15 seconds,
~dl
lights disappear
:ippe;lrs
the CLEAR/OFF
and
If
the above sequence recurs,
must reset Clock
CLEAR/OFF pad.
1.
day,
cooking functions, power level,
cooking mode
2.
Microwave for a selected amount
ot time using
level 10 (High).
3. POWER LEVEL. Touch this
pud after
time
autom:ltic
4.
feature uses no
lt
holding period
del~ty
5. POPCORN.
cook popcorn using
and
popcorn feature is designed to be
used only with prepackaged
microwave popcorn weighing 3.()
to
6.
plate
this
7. BEVERAGE. Reheat
beverage by just pressing this
8.
pads
time, power level
i n the upper portion. Touch
oven is
power is disrupted at
DISPI,AY.
time counting down during
TIME COOK I & 11.
it
MIN/SEC TIMER. This
functions as a kitchen
timer before time cooking.
power level. The
3.7
DINNER PLATE. Reheat
of leftovers by just pressing
pad.
NUMBER PADS. Touch these
to
reildy for
Displays time of
and
:lutornatic
you enter the cooking
you
want to change from
power level 10 (High).
ounces.
enter cooking/defrosting
It’s designed
and underst:md.
and Ldl
of the
~md
“RESET”
p:ld,
set the Clock
use.
any
time,
and
after touching the
instructions.
power
microw;lve
after
Touch
and
energy.
timer, as ~
defrost or as
this
pad
a
preset time
microw;lve
21
time of day.
you
to
a
pad,
21
Program Cooking
Use your Touch Control
Time Defrost or Time Cook with
choice
(lowest) to 10 (highest); to Quick
Reheat
power level
cook popcorn using
and
tasks with the
to set the
of power
using a preset time
power level; to time kitchen
for
clock,
levels from 1
reheating
a
preset time
Min/Sec
Panel
and
foods;
Timer;
to
and
to
9.
START. After
m:ide,
touch this
lo. TIME DEFROST.
th:lwing :it :lutomatic
3
(Low).
11. CLOCK.
enter
time of
day
while microwaving.
To set clock, first touch CLOCK
pad and
example,
number pads 1,
“ 1
Then touch START pad. To reset
or change
process.
12. CODE REHEAT. Use
Rehe~lt for
variety of foods using different
times
13.
it shuts off the oven
settings (except time of day).
Create your own
your individual cooking
example: use the
del~ly
or program ti
Time Defrost
1 & 11. Set Time Cook I & II
two-stage
times
then enter time of
if
:30”
will appear in
time, simply
quick reheating of
and
power levels.
CLEAWOFF. When touched,
the
start
program using different
and
power levels.
~dl
selections
pad
to start oven.
Gentle
power level
Touch this pad to
day
or check time of
time is 1
hold
:30,
touch
3, :lnd
()
and
displ:ly.
repeilt
;ind
erases
progr:uns
Min/Sec
of Time Cook 1 &
time between
and
Time Cook
to suit
style.
Timer to
d~ly.
this
Code
a
For
for a
are
For
all
It
6
How to Use the Minute/Second Timer
The MIN/SEC TIMER has three
timing functions:
● It operates as a minute timer.
● It
can
be set to delay cooking.
● It can be used as a hold setting
after defrosting.
The MI N/SEC TIMER operates
without microwave energy.
How to Time a 3-Minute
Phone Call
1.
Touch MI N/SEC TIMER pad.
2. Touch number pads 3, ()
(for 3
minutes and no seconds).
3. Touch START. Display shows
time counting down. The timer
signals when time is
and 0
up.
Using a Holding Time
The Minute/Second Timer
also be used to program a “holding
time” between microwave cooking
functions. The time
one second to 99 minutes
seconds. A holding or standing
time
may
be found in some of your
own recipes or in the Cooking
Guide.
can
can range
and
from
99
Programming Delayed
Cooking
To delay cooking up to 99 minutes
and 99 seconds, touch TIME
COOK 1 & 11 and enter cook time.
Touch MI N/SEC TIMER
number of minutes to delay
cooking. Touch START. Timer will
count down to zero and cooking
will begin.
and
enter
How to Defrost, Hold and
Time Cook
Let’s say you want to defrost a
frozen
casserole
hold for I () minutes and then Time
Cook
for
25 minutes. Here’s how
to do it:
Step 1: Take the casserole from
the freezer
for
15 minutes,
and
place it in the oven.
~m~
Step 2: Touch TIME DEFROST.
Step 3: Touch pads 1,5,0 and
for
15 minutes defrosting time.
(Defrosting is automatically set on
power
by touching the POWER LEVEL
pad and
level 3
but
can
be changed
the desired power level.)
0
Step
8: Touch START. As each
function is automatically
performed, oven display shows
instructions entered and the
function. When time is up, the
oven signals and flashes “End.”
Questions and Answers
Q. What will happen if I
accidentally reverse my defrost,
hold and cook instructions?
A. The oven will automatically
rearrange your program.
Defrosting will always come first,
then hold, and then the cooking
function.
Q. Can I defrost and hold only?
A. Yes. Sometimes you may only
want to defrost a food, hold it, and
cook it
program in defrost and amount
time. Then program the hold time.
Be sure to put the thawed dish in
the refrigerator promptly.
NOTE: Foods that are highly
perishable, such as milk, eggs,
fish, stuffings, poultry
should not be allowed to sit out
for
defrosting. Room temperature
promotes the growth of harmful
bacteria.
Q. I programmed my oven for a
specific defrosting time but it
defrosted longer than necessary.
What happened?
A. When instructions
the oven carries out the last
instruction. You may have set the
oven to defrost for 4 minutes, hold
for 2 minutes, and then defrost for
6
would defrost
hold for
later. All
more than one hour after
minutes. In this case, the oven
2 minutes.
you need to do is
and
pork
contlict,
for
6 minutes and
of
7
Cooting by Time
Time Cook I & 11 allows you to
microwave for a selected amount
of time.
Power level 10 (High) is
recommended
but you may
flexibility. See the Cooking Guide.
To become
time cooking, make
by following the steps below.
Step 1: Fill a cup 2/3
add I
teaspoon of instant
and stir to dissolve. Use a cup
that has no metal decoration
and
is microwave-safe (refer to
Microwaving Tips in the
Instructions section). Place cup in
oven and close door.
Step 2: Touch TIME COOK
& 11.
Step
3:
Select
and () pads
Because automatic power
is recommended
coffee, there is no need to
the power level. (If power
is not appropriate, see “How to
Change Power Level”
Step
4: Touch START.
Step 5: When time is up, the oven
signals and
light
and fan
Step 6: Open the door.
for
most cooking,
change this
better acquainted with
your time. Touch 1,()
for
one minute.
for
tlashes
shut
off.
for
more
a CLIp
of
coffee
full
of water,
coffee
Safety
I
level 10
this cup of
change
level
10
at
right.)
“End.” Oven,
Using the Time Cook II
Feature
The Time Cook II feature lets
set two time cooking functions
within one program. This is ideal
you want to change power levels
during
your cooking operations.
Here’s how to do it:
Step 1: Place food in oven in
microwave-saf’e
close the door.
Step 2: Touch TIME COOK
1 & Il.
Step 3: Select your
For example, touch 2, 1 and 5
two minutes
Step
4: Touch TIME COOK I & 11.
Step 5: Set your second cook time.
How to Change Power Level
After setting cooking time,
touch POWER LEVEL pad,
then touch desired number
new power level.
Step
6: Touch START.
Step
7: “POWER 10” is displayed
and “COOK TIME I“ counts down.
Step 8: At the end of “COOK
TIME I,” the second power level
is displayed and “COOK TIME
11” is shown counting down.
Step 9: When time is up, the oven
signals and flashes “End.” The
oven,
light and fan
Step
10:
Open the door.
container
first
and
15 seconds.
shut
yOLI
if
and
cook time.
for
for
off.
The Express Cook Feature
The Express Cook feature is a
short-cut method
1 to 5 minutes.
To Express Cook your
or beverage:
Step 1: Touch a
1
to 5) that corresponds with the
amount of your desired cooking
time (in minutes). For example,
touch the
cooking time.
Step
The
tlash
end
2
2: Touch the START pad.
oven will
‘END” and shut off at the
ot.
the programmed time.
[o
set time
number pad
pad
for 2
tiutomatically
for
food
(from
minutes of
signal.
Questions and Answers
Q. I set my oven
called for in the recipe, but at the
end of the time allowed, my food
wasn’t done. What happened?
A. Since house power varies due
to time or location, many time
cooking recipes give
range
to prevent overcooking. Set
the oven
the food
your food a little longer, it’
necessary.
Q.
selected my power level. When
touched START, however, my
oven didn’t come on. Why not?
A. The TIME COOK 1 & II
must be touched before setting the
number pads or
not begin cooking.
Q. 1 want to cook on a power
level other than High. What do I
need to do?
A. To
touch the POWER LEVEL
then touch desired number
power
Q. Can I interrupt Time Cook to
check the food?
A. Yes.
close
pad. The timer must be reset
cooking to resume unless time is
remtiin
for
for
1
touched the number pads and
change
Icvel.
To resume cooking, simply
the door
i ng on timer.
for
the time
yoLl
a time
minimum time, test
doneness, and cook
pad
else
your oven will
the power level,
pad,
for
and
press the START
for
I
new
8
Quick Reheat
The
Quick Reheilt te~iturc
short-term progr:llll
rehe~it ;1
cooked
:~uton?il[ic:ll ly ~d.ter 21 preset :unount
of time.
TOLICh
Rehe:lt codes
populiu Ioods. See
bottom”
pacis
DINNER PLATE
the
code
hever;tge orpreviously”
food. The oven turns
just 3
to
oven
[01
piids
to
I to 6 to reheat
of’ }?;lge.
LISC
yoL1.
Or touch
the
BEVERAGE or
~~utonl:itic~dly
is
u
to:llltolll:ltic~ llly”
OH
LISe
Code
m;lny
the
guide at
.jLISt
2
progrums
with
setting
the
Beverage
The
Bever:lge progr:tm nl~lkes
it
simple
to
rehe:lt :1
chocol:ite
CLIp
itnd
Microw[lving
Instructions section),
Step 1: Touch BEVERAGE
Step 2: Touch START
wi
I 1
time counting down shortly before
shut
or other beverage. Use
thilt h~ls
is m
no
icrowiive-s:lte
sign:ll ;md d ispl~ly rcnl~lini ng
off.
CLIp of
hot
metul decor~ltion
(refer to
Tips in
the Safety
pad.
pud.
Oven
Dinner Plate
The Dinner
e:tsy
to
or
rehe:lt :1
mea]
101.21
for
dinner.
Step 1: Touch DINNER PLATE.
Pl:lle progrum mfikes
rehe[lt u pl~ite ot.
previously prepared
gLIes[ who
leftovers
:lrrived ]zlte
Code Reheat Guide
it
Step 2:
will
time counting down shortly
shut
Code Reheat
The Code
it
foods.
I to
below).
Step 1:
Step 2: Touch 21 number
1
to 6 to select a
Step 3: Touch START
will
time
d
shut
Touch
START pad. Oven
sign~d and
off.
:1
snap to
Choose a
6
(see Code
signal ~tnd
counting down shortly
off.
display remaining
Rehetlt
program makes
rehe~lt m~lny
code
Rchc:lt
Touch
CODE REHEAT
food
display remaining
number from
group.
before
popular
Guide
pad from
pad.
Oven
before
pad.
Popcorn
Regular Microwave Popcorn
Step 1: Touch POPCORN pad.
Step 2: Touch START pad. Oven
will
signal ~lnd
time counting down shortly before
shut
off.
Light Microwave Popcorn
Step 1: Touch POPCORN
Step 2: Touch number
Step 3: Touch START
display remaining
pad.
pad
2.
pad.
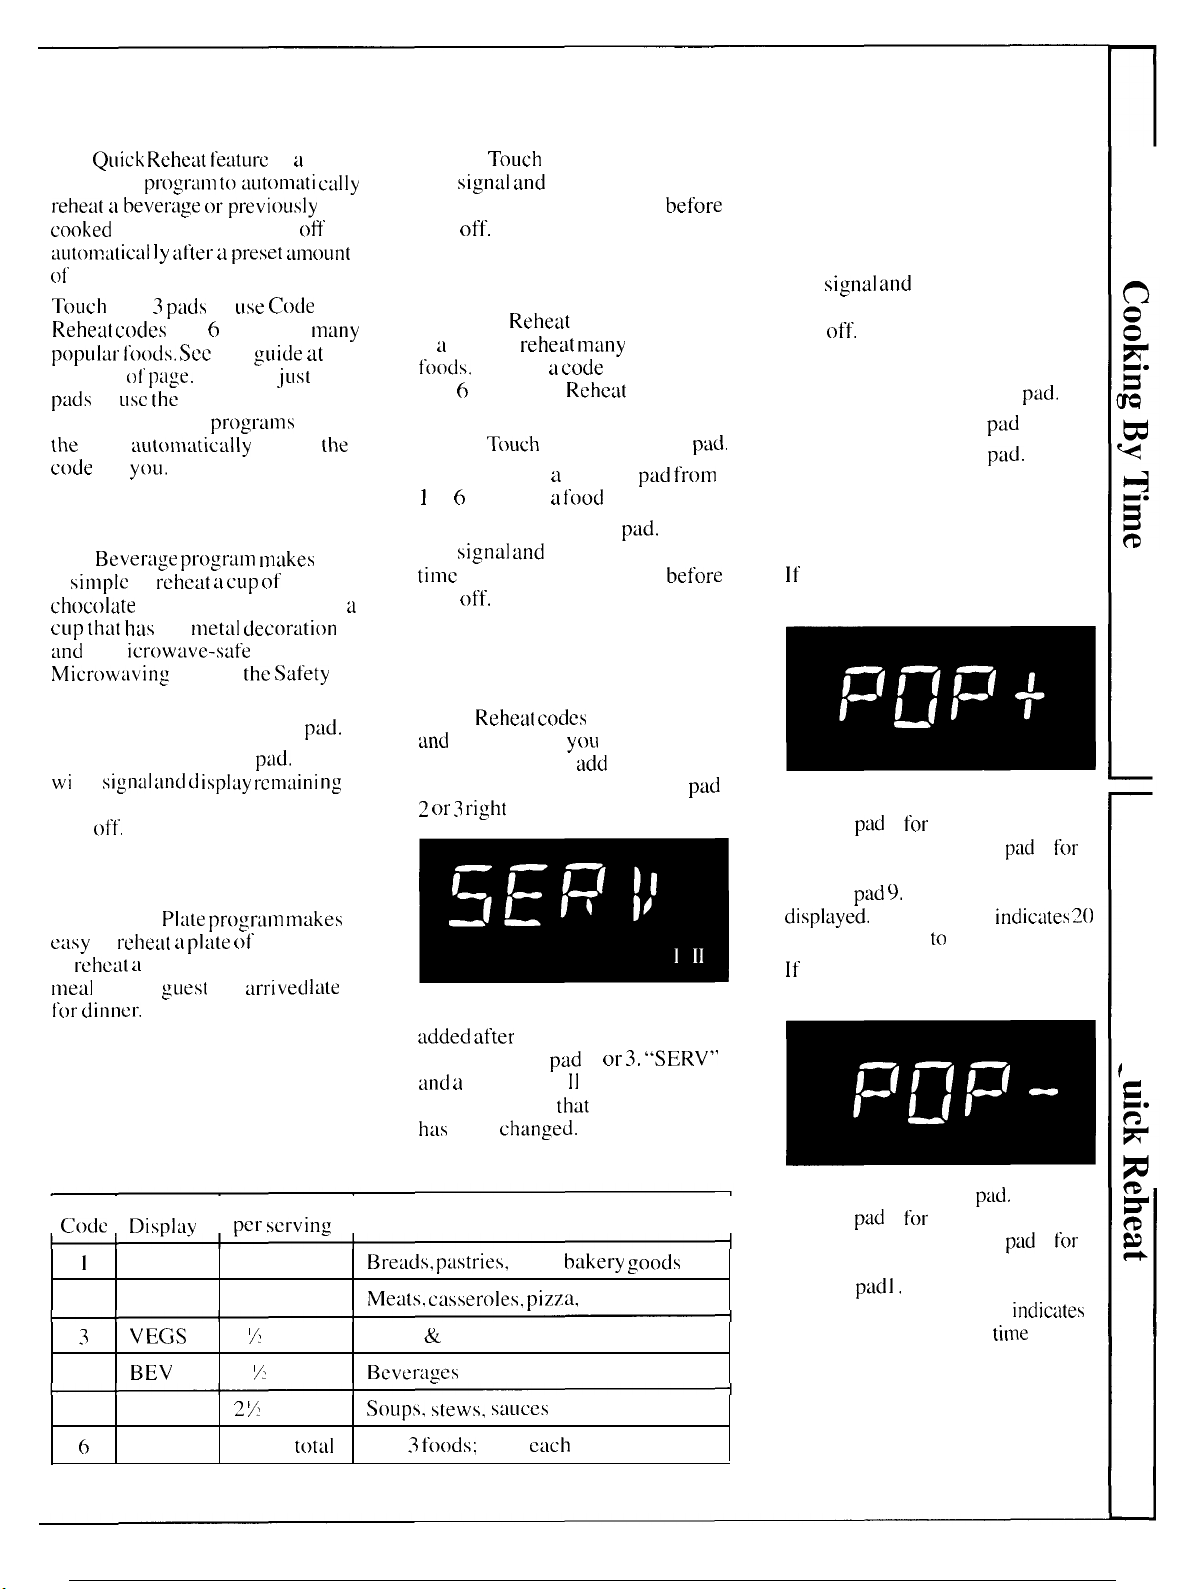
Adjust for Shorter or
Longer Cook Time
If
your favorite popcorn is
undercooked, try this:
To Reheat More Than
One Serving
Quick
Reheat codes
and
Beverage let
three servings. To
one serving, just touch number
2 or s right
The serving size may even be
:~dded
touch number
~md a
briefly to show
h:~s
before touching START.
after touching START. Just
number w i 11 be displayed
been
ch~mged.
1 through 5
yoLI
heat up to
add
more than
pad
2 or 3.
thot
serving size
pad
“SERV”
Touch the POPCORN pad. Touch
number
popcorn or touch number
light microwave popcorn. Touch
number
dispkiyed.
seconds is added to cooking time.
If
overcooked, try this:
pad
1
for
regular microwave
p:ld
pad 9.
A plus sign is
The plus sign
your favorite popcorn is
indic~ltes 20
2
for
o
c
Code Dis~l:lv
BREAD 20 sec.
1
MEATS
2
3
VEGS I Y min.
BEV
4
5
SAUCE
PLATE
(>
Time
~cr scrvinz Foods Recommended
I I
1 min.
1
Y
min.
2 y?
min.
4 min.
tot:d
Bre~lds, p~lstries,
Meats, c;lsseroles, pizza,
Fruits & vegetables
Bever~lges
SOLlpS, SteWS, S:ILICCS
2 to 3
foods;
pies,
4 OZ.
bakery goods
solid foods
c~]ch
Touch the POPCORN
number
I
popcorn or touch number
light microwave popcorn. Touch
number
displayed. The minus sign
20 seconds less cooking
being provided.
pad
1
for
regular microwave
pad ].
A minus sign is
pud.
titne
Touch
pad
2
for
indic~ites
is
9
—

Defrosting
Time Defrost is designed for
speedy thawing of frozen food
and is one of the great advantages
of a microwave oven.
● Power level
for
defrosting, but
3
is automatically set
you
may change
this for more flexibility.
● See the Defrosting Guide for
defrosting help.
To become better acquainted with
the defrost function, defrost frozen
pork chops by following the steps
below.
Step 1:
Pltice a
package of frozen
chops in the oven and close the
door. Be sure the package contains
no metal.
Step 2: Touch TIME DEFROST.
Step 3:
Select one half of the total
defrosting time recommended in
the Defrosting Guide. For example,
touch 4, 0 and O for 4 minutes.
How to Change Power Level
After setting defrosting time,
touch POWER LEVEL pad,
then touch desired number for
new power level.
Step
4: Touch START. When
the
cycle
is completed, the oven
signals and flashes “End,” then
automatically shuts off.
Step 5: Turn the package over,
close the door and repeat Steps 2
and
3
to set the remaining half of
defrosting time and
touch
START.
Step 6: When the oven signals and
flashes “End,” open the door,
remove the package and separate
chops to finish defrosting.
Defrosting Tips
● Foods frozen in paper or plastic
can be defrosted in the package.
● For even defrosting, some foods
need to be broken up or separated
part of the way through the
defrosting time.
● Family-size, pre-packaged frozen
dinners can be defrosted and
microwaved. If the food is in a
foil container, transfer it to a
microwave-safe dish.
● Check the Defrosting Guide for
other defrosting tips.
Questions and Answers
Q. When I press START, I hear a
dull, thumping noise. What is it?
A. This sound is normal. It is
letting you know the oven is using
a
power level lower than 10 (High).
Q.
Can
I defrost small items in a
hurry?
A. Yes, but they will need more
frequent attention than usual. Raise
the power level after entering the
time by touching the desired power
level pad. Power level 7 cuts the
total defrosting time in about 1/2;
Power level 10 cuts the total
defrosting time to approximately
1/3. During either, rotate or stir
food frequently.
Q. Why don’t the defrosting
times in the Defrosting Guide
seem right for my food?
A. These times are averages.
Defrosting time can vary according
to the temperature in your freezer.
Set your oven for the time
indicated in
If your food is
thawed at the end of that time,
reset your oven and adjust the time
accordingly.
Q. Should all foods be completely
thawed before cooking?
A. Some foods should not be
completely thawed before cooking.
For example, fish cooks so quickly
it is better to begin cooking
it is still slightly frozen.
Q. Can I open the door during
defrosting to check on the
progress of my
A. Yes.
any time during microwaving. To
resume defrosting, close the door
and
press START. The oven begins
operating if time is
not. reset timer.
the
Defrosting Guide.
still
not completely
while
food?
You may open the door at
left
on timer. If
10

Glossary of Microwave Terms
When adapting recipes for the microwave, it is best
to start with a familiar recipe. Knowing how the
food should look and taste will help when adapting
recipes for microwaving. Foods that require
browning or crisp, dry surfaces will cook better
conventionally.
●
Moist foods,
such as vegetables, fruits, poultry
and
seafood, microwave well.
● Rich
foods,
such as
candies, are suitable
bar
cookies, moist
for
microwaving because of their
cakes and
high fat and sugar content.
●
Reduce
third. Check
conventional cooking
food after
minimum time to avoid
time
by one-half to
one-
overcooking.
● Small amounts of butter or
oil
can be used
for
flavoring, but are not needed to prevent sticking.
●
Seasonin&s
may need to be reduced. Salt meats and
vegetables after cooking.
Covering. In both conventional and microwave
cooking, covers hold in
moisture, allow for more even
heating and reduce cooking time. Conventionally,
partial covering
plastic wrap
allows
excess steam to escape. Venting
or
covering with wax paper serves the
same purpose when microwaving.
Venting. After covering a dish with plastic wrap,
you
vent the plastic wrap by turning back one corner so
excess steam can escape.
Arranging Food in Oven.
In conventional baking, you
position foods, such as cake layers or potatoes, so hot
air can
flow
around them. When microwaving, you
arrange foods in a ring, so that all sides are exposed to
microwave energy.
Stirring. In range-top cooking, you stir foods up from
the bottom to heat them evenly. When microwaving,
you stir cooked portions from the outside to the center.
Foods that require constant stirring conventionally will
need only occasional stirring when microwaving.
Turning Over.
In range-top cooking, you turn over
foods, such as hamburgers, so both sides can directly
contact the hot pan. When microwaving, turning is
often
needed during defrosting or when cooking certain
foods, such
Standing Time. In conventional cooking,
as
frozen hamburgers.
foods
such
as
roasts or cakes are allowed to stand to finish cooking or
to set. Standing time is especially important in
microwave cooking. Note that a microwaved cake is
not placed on a cooling rack.
Shielding. In a conventional oven, you shield chicken
breasts or baked foods
microwaving,
you
to
prevent over-browning. When
use small strips of foil to shield thin
parts, such as the tips of wings and legs on poultry,
which
wou]d
cook before larger parts.
Arcing. Sparks caused by too much metal in the
microwave oven or metal touching the side of the oven
or foil that is not molded to food.
Prick Foods to Release Pressure. Steam
pressure in foods that are tightly covered by a skin
membrane. Prick foods, such as potatoes (as you
builds
up
or
do
conventionally), egg yolks and chicken livers, to
prevent bursting.
Rotating. Occasionally, repositioning a dish in the oven
food cook more evenly. To rotate 1/2 turn, turn
helps
the dish until the side that was to the back of the oven is
to the front.
side that was to the back of the oven is
To
rotate l/4 turn, turn the dish until the
to
the side.
Basic Microwave Guidelines
Density of Food. In both conventional and microwave
cooking, dense foods, such as potatoes, take longer to
cook than light, porous foods, such as rolls, bread
pieces
of
cake.
Round Shapes. Since microwaves penetrate foods to
about one inch from top, bottom and sides, round
shapes and rings cook more evenly. Corners receive
more energy and may overcook. This may also happen
when cooking conventionally.
Delicacy. Foods with a delicate texture, such as
custards, are best cooked at lower power settings to
avoid toughening.
Natural Moisture of food affects how it cooks. Very
moist foods cook
attracted to water molecules.
evenly
because microwave energy is
Food
that is uneven in
moisture should be covered or allowed to stand
can disperse evenly.
Piece Size. Small pieces cook faster than large ones.
Pieces that are similar in size and shape cook more
evenly. With large pieces
of food, reduce the power
setting for even cooking.
Shape of Food. In both types of cooking, thin areas
cook faster than thick areas. This can be controlled in
microwaving by placing thick pieces near the outside
edge and thin pieces in the center.
Starting Temperature. Foods taken from the freezer or
refrigerator take longer to cook than foods at room
temperature. Timings in our recipes are based on the
temperatures at which you normally store the foods.
Quantity of Food. In both types of cooking,
amounts usually take less time than large amounts. This
is most apparent in microwave cooking, where time is
directly related to the number of servings.
Shelf (on models so equipped). Use the shelf to heat
more
than
one dish at one time. Take the shelf out when
you are not using it.
so
small
or
heat

Microwave Cookware Guide & Microwave Adapting
~~e
of Cookware
Foil-lined paper bags and boxes
Foil baking trays
Aluminum foil
Metal or partially metal pots, pans,
thermometers, skewers and twist ties
Glass jars and bottles
Microwave plastics
Paper or Styrofoam
plates and
cups
Oven glass and ceramic
Dinnerware
Paper towels, paper napkins and
wax paper
Microwave Uses
Av{~id
using.
You can
reflect nlicrowilves Lmd ctiuse
is
Use
DLJ not
Gener:dly. gl~lss
b:lby fot~d
D() n(~t
build up.
Cooking ~lnd
Heating
food”
C(~c)king and he:lting.
He~iting
recolntllend:ltions.” Avoid using
Absorbing
sandwiches
paper
Synthetic
paper.
use
foil tr~lys
closer
th;ul
I inch to
for
shielding.
use.
Micr~)wave-s~lfc thernlonletcrs [Ind skewcl-s ~ire ~lvail:lble.
in jars, even
warm
foods”
heating.
and
serving of
is
tc~(~ hot or if l’~~(~d
and some
moisture, ~md
t~r
appetizers.
towels th~~t
fibers may cause
that
;lre no
oven wtills.
jars
c:ln
be used
without lids, bec:luse f~~t)d
in
nzu-row-necked bottles bectluse
foods” Luld bcver:lges. Styrofoiun”
is
cooked” Ior :1 long time.
cooking.” Follow
preventing spatters.
Light covering to h(~ld
have synthetic fibers, such
the
higher
LIncven
he~lting.
to
WUI-lll fc)(~d. Howev~l-. ~L)
dinnerware
dishes with
t(~wel to
ignite.
thtin
3/4-in.
(Fc)il or nlet~d
) Arcing
will
pressure
l~l~inuf~lctLliel-’s
met:ll
trim.
He~lting ~md
in
stctim. D() not
:ls nylon, woven into
Avoid using
c:m occur
not
heilt
unevenly.
will men
serving
recycled
i [
lle~t
can
use
them.
will
I’oil
il.
CJI’
Plastic wrap, cooking bags, boil-in
bags and storage bags
Paperboard trays used for frozen
entrees and dinners
Plastic trays and plates used for frozen
entrees and dinners
Straw, wicker and wood
Cookware Tips
●
Always check the coc~kware
recommendations” before
in the
oven.
●
Before
purchasing
cookware,” check
in the
oven.
cookw:lre or
its size to make sure it will
manufacturer’s
using
any cookware”
preparing
Covering to
Heating
Cooking and
hold
(stor[ige b:lgs).
heating.
C(~(~king and heiiting.
W:lrming.
food
in
fit
in
ste:lm
(wrap).
C()()king (cooking” and boil-in bags).

Heating or Reheating Guide
1.
Direc(i(ms below i~re
I’[)ods stored
[Tlict”owttve-s;il’e cookw:lrc.”
2.
C()\ct- mos( l’()()ds lot- l’:Is(es[ tlett[ing, Excep[i(ms aI-e some
s:mdwichcs,
3
.
.
Bubblitlg :U”OUIId
I:ist [() h;:i[. F()()ds tl;:itcd [()
p:d:l[:[bte I“esut(s. Act,lLts[ [Cnlpcl”;l(ut”es to sui[ ymtt” pet”s~m:l] t:lste.
Le[ l’()()ds s(:md ;I I’cw nlinu(cs bel’ot”c
in
:riddtc
—
Item
Appetizers
‘l)ipS:
cI”e:IIn 01”
Pastry bites: smith
Saucy:
c(~cktilil I’r:mks. C(C.
(Y:
Tip: ~’c)~’c[’ SllUcY :tppttlz~l”s
nlc:i[b:ltts. ribtc(s,
CLIP pcl”
serving)
l’orhe~i(ing
lel’tigel:lt(~l(lt:l( rnnm tetnpemture.
foods” :tnd bilked itctns,
edges
Pl”ocessed
pizz:~s, cxx l-O1ls.
01”
dish is
t
60”F. to
cheese
with WLIX
or
reheil(in: Jlre:Idy-c()()ked
norn]itl,
since
t
65°F.
serving.
(he
wilt
etc.
p:lp~l”. L.oveI”
dips with
Use bubbling
center is
pl-ovide s:tl’e.
the
pt~stic wmp. Microw:ivc p:[stry
4. Be
hefited thrmtghnut.
Amount
Y?
cup
I
cup
? [u 4 servings
I to 2
scrkings
3 (()
4 servings
sure fuods :ire hetited throughout” beii)re
armtnd edges
If you LISC a nlc:it
is s:tl’e I’or usc
ufdish
thertnmneter
in
tnicrow:tve u~ens.
does nut
white c(~nkitlg, nl~ke sure
Power Level Time
Medium
Mcdiutn
High
High ( t ())
High
bites
(S)
(5)
( 10)
( I ())
uncovered to retain
serving.
necessarily
2 [n 3
3 to 5
t to S min.
2 to
4 min.
3 I(J
5 tnin.
thcil
C1.ispness.
Stc:uning (JI
tncan fnnd
min.
min.
is
it
Bakery
Cake, ;(dlke cake,
nut or
Foods
fruit
bread
duughnuts, sweet
Dinner r(dls, mut’fins
pie:
[’l”Llit,
IILlt ot”
1
sticc=fi 01” ‘)-in.
(use minimum time
CLISILU”d
pic
f(n
cLIs[:ud)
Beverages
Cncua,
nther
milk
((1
OZ,/CLlp)
(~
OZ,/CLlp)
Coffke,
(6
[) Z,/CLlp)
(~
07../CLtp)
tea, cider
based
Gravies & Sauces
I)esserts:
(;ravies: giblet m ctc:m]y
Meat
sp:lgbet{i
Tip:
C(IVCI
choc(~l:ltc,
nr
main dish sauces,
S:l
LtCC,
I“()()d
etc.
[()
pt”cvcnf
butterscotch,
spilttcting.
such
etc.
:ts
rolls,
t
piece
2
pieces
4
pieces
l)-in.
cake
t 2
l“otts
ot”
doughnu(s
t
9
i
6 to 8
t
stice
2 stices
4
slices
9-in. pie
I
to 2 CLIPS
I
to ? CLIPS
1 to
2 CLIPS
I to
~ CLIPS
Z
CLIP
I
cup
~?
CLIP
] CLlp
F
CLIP
CLIP
t
I
c:m
( I 6
01
oz.)
(3)
Low
Low
(3)
Low
(3)
Low (3)
MediLlnl (~)
McdiLlnl (~)
MediLlnl (5)
Medium (5)
High ( lo)
High ( t ())
Meal-High (7)
Meal-High (7)
Mcd-High
Mcd-High
High ( I ())
High ( 10)
High ( I ())
High ( to)
High ( 1 ())
High ( 1 ())
High
High ( lo)
High
(7)
(7) 7 tu 9 min.
( 10)
( 10)
X
tu
Y min.
I
tn
1 X min.
t X to 2 min.
2 tu
4
min.
X to Y
min.
Y tu YI
min.
Y tn
t tnin.
t
to 2
min.
Y 10
t
nlin.
I to I X tnin.
2 to 3
min.
3 tu 5
min.
3 to
5 min.
2 to
4 tnin.
5 to 7 tnin.
1 to t 7, min.
2 tu 2’/~
min.
2 to 3 tnin.
3 (()
4 min.
2 to 3
min.
3 to
4 min.
4 (u 6
min.
Griddle Foods
Pancakes,
I’l:iin. no topping
SYI”LIP
‘lip: D() no[
&
buttel-
covet.
trench
toast or
watfles:
2 or 3 picccs
2 or 3 pieces
High ( lo)
High ( t ())
I to I Y: min.
I to I X min.
13
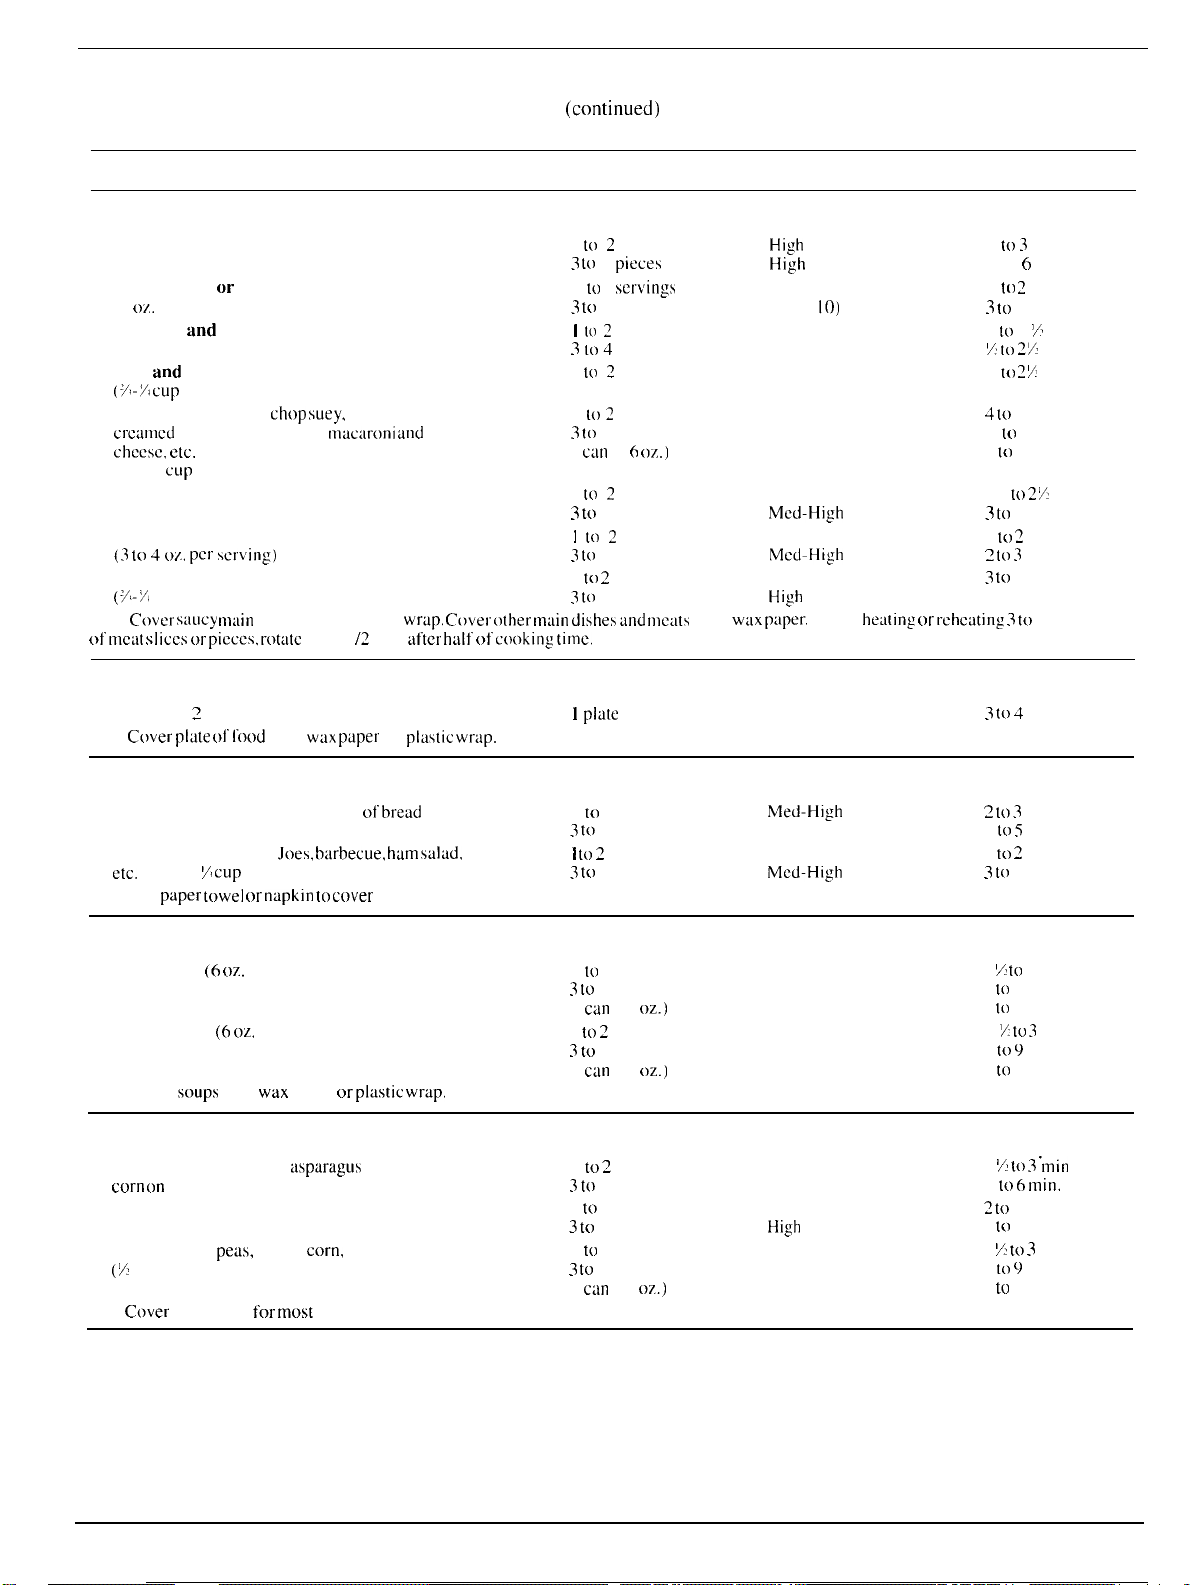
Heating or Reheating Guide
(.o.tinue~,
Item
Meats and Main Dishes
Chicken pieces
Hamburgers or meatloaf
(4
oz.
per serving)
Hot dogs
Rice
(YI-YI cup
Saucy, main dishes:
crcamcd chicken. chili. stew,
chccsc,
( 71-1
Steaks, chops, ribs, meat pieces
Thinly-sliced meat
(3 to 4 I)Z. pcr scrying)
Topped or mixed with sauce
(YI-YI
Tip:
of
tnc:lt SI ices or picccs. r(~t:ttc
and
sausages
and
pasta
per serving)
etc.
CLIp
per serving)
cup per serving)
Cover
s:ILIcy
chop suey,
mtlin
dishes with plastic
dish 1 /2 turn
spaghetti.
mac:n(mi and
Plate of Leftovers
Meat plus 2 vegetables
Tip:
Cover pl~te ~)1’ Ik)od
with
wdx p~pel
wrop, C’over
aftet” halt’
01
pl~stic wrap.
other
of
cooking” time.
Amount
I
to 2
3
to
4
1 to 2
3 to
4 servings
I
to
3
(()4
I
to 2
1
102
3 to
4 servings
I
C:Ill
I
to 2
3 t(l
4 servings
1
to
3 tu
4 servings
I
to 2
3 to
4 servings
m:lin
dishes :md meitts
1 plate
pieces
pieces
serlings
2
servings
servings
( I 6
oz.)
servings
2
servings
servings
with
Power Level
High
( 10)
High
( lo)
High ( 10)
High (
High ( 10)
High ( 10)
High ( 10)
High ( 10)
High ( 1 ())
High ( 1 ())
Meal-High (7)
Mcd-High
Meal-High (7)
Mcd-High
High ( 10)
High
( 10) 510 X min.
w:tx p:iper.
When
High ( I ())
IO)
(7)
(7)
heti[ing or rehcfiting 3 to
Time
I to
3
min.
4 to
6
min.
1 to 2 min.
3 to
5 min.
I to 1
X
min.
K 10 2Y
min
1 to ?X min
4 [()
7 min.
X
[(~
I I min
5
[()
7 min.
17 to 27 min
3 to
5 min.
I to 2 min.
2 10 3
rein,
3 to
5 min.
4 servings
3 to 4
min
Sandwiches
Meat-cheese filling: with 2 slices of
Moist filling: Sloppy
etc.
in bun ( ~1
Tip: Use
paper towel or napkin to
CLIp
J(}es, b:irbecue. h~m saldd.
per serving)
soups
Milk-based (6
Water-based (6
Tip: Cover
soups
oz.
per serving)
oz.
per serving) I to 2 servings
with
wax
paper or
Vegetables
Large pieces or whole:
corn (m
the cob, etc.
Mashed
(X cup per serving)
Small pieces:
(7 cup per serving)
Tip: Cover vegetables
petis,
~isparagus
beans,
for most
corn,
even heating.
bread
cover sandwiches.
plfistic wrap.
spears, 1 to 2 servings
etc.
1
to
3 to
4 servings
I to 2
3 tu
4 servings
1 to 2 servings
3 to
4 servings
1
can
3 to
4 servings
1
c:m
3 to
4 servings
I to 2 servings
3 to
4 servings
1 to 2 servings
3 to
4 servings
1
c:m
2 servings
servings
(10 oz.)
(10
oz.)
(16 oz.)
Med-Hi:h (7)
Meal-High (7)
Meal-High (7)
Mcd-High
Meal-High (7) I
Meal-High (7) 7 tn I () min.
Meal-High (7) 7
High ( 1 ())
High ( I ())
High ( lo)
High ( I ())
High ( 10)
High ( lo)
High
High ( 10)
High ( 10)
High ( lo)
(7)
( 10)
2 to 3
min.
4 to 5 min.
I
t(l 2
min.
3 to
4 min.
X to
5 min.
to
X min.
1 Y tu 3 min.
5 to 9 min.
to
1() min.
5
I Y
(() 3 .tnin
4 to 6
tnin.
2 to
4 min.
5
to
7 min.
I X to 3 min.
5 to c, min.
to
I () min.
5
14

Defrosting Guide
1.2,Food p:ick~gcd
unwr:Lpping. lffood
in cooking dish iordef’resting. Most
Defrost
beef. l:mlb :md ve:d ro:lsts,
Alter
t’irst
food,
Turn
possihlc. Shield :my w:lrm :Ire:ls with sm:ill
in
pdperot- pl:istic tn:ly be
is
I’oi] wr~ppcd, rctnove
(3).
For more even dctlostingof’liirger” foods,
h:lltotdcttostitl~”
food over.
LISC
W:lrtn
time,
ilnc;css~ry; break
defrosted without
fi~od
(1).
unwrap
toil Ind
def’rests well using
pdck:lgc
fipart O; sepur:itc
pieces
pldce tioud
such
and
check
ottoil.
First Half Second Half
Food
Time, Min. Time, Min.
Breads, Cakes [Power Level: Defrost (3)]
2
to
Z
to
2
5 to 7
2
4
to
X
to 1
1 to 2
8
to
3
2
to
to
4
to 3
Y
~
to
5
3
6
e:lch
15
3
Bread, buns
(8 to
Cake, pl:lin.
Cheesecake,
fruit-lopped ( I
Coffee cakes
( I i to
Cream or custard pie
(14
oz.)
Crunch
Doughnuts
( 1
or
(4
to 6)
French toast (2 slices)
E“ruit
Pound cake ( i 1 YI oz. )
Sweet rolls
(8X
to 12 oz. )
or rolls
16
oz.)
I
lLIyer
pl~lin or
7
to I 9 oz. )
14X
oz. )
cakes & cupcakes
2)
or nut pie (8
in. )
tis
feud if
none
none
none
2 to 3
4
to 6
none
[1OI1C
I to
2
I
none
none
~ to ~
3.
Be
sure
l~irge
meats
4. When defrosted.
still
slightly icy. return to
stand d tew
minutes.
Comments
Remove metal
Let stand
Let
st:md
Reposition
Re~rr:mge ;Ittei-
Turn
ovci” u~tcr first
Let
st~nd 5
Re:lrrungc ~ftcr first
twist tie. Turn over
5 to I () minutes bctorc serving.
5 minutes
tiiter Iirst
first
minutes be
arc
completely defrosted before cooking.
food should be cool bu[ sol[ened in :dl :[re:is. [f’
microw:lve
bel’ore
serving.
halt OH time.
h:df
of time
h:dt of time.
f”nre
serving.
half of time.
oven very
tlfter
tirst
Let stand
h:llf’
of
5 minutes
brief’ly. or let
time
bet(n”c
serving.
Fish & Seafood [Power Level: Defrost (3)]
E’illets:
Pre-p~ckaged ( I lb, )
Freshly frozen ( 1 lb. )
Shellfish, blocks:
Cr~b mc~t
(6-nz. package)
Oysters ( 12-02.
Scdllops
Shellfish,
Cr;ib legs.
(x 1010 i)z.
Lobster
(()
to 9 02. )
Shellfish,
( I lb. )
Steaks (6 to 12 oz. )
Whole fish (X to I () oz. )
can)
( 1 -lb. package)
liuge:
I to
2
)
t:lils.
I to 2
smfill
pieces
4 to 5
4 to 5
~
4 to
6
4 to
6
2 to
3 2 to 3
3
to 4
3 to
4
2
to
3
3
5 to
5 to 7
4 to
4 to
3
to 4
3 to
none
2 to 4
7
~
6
6
4
Place
unopened
cooking dish. ) Turn package river
second htilf of’
Pl:ice
block in
halt of
time.
Place block
Place block
time.
Arrange in cooking dish
first
halt of time.
Arrange in cooking dish, with meaty-side-down. Turn over
first bait’ of time.
Spretid
shellfish in single
alter
f’il”st htill of”
Let
stand ~1 tew
Pl:lce fish
second h:ll~
defrosting.
puckfige
in
oven.
(It
fish
is
frozen
after
time. hold under
c:isserolc.
in casserole.
in
c~sscrole,
time.
minutes to tinisb defrosting.
in cooking dish. Turn over after first halt of time. After
of time,
Turn over
Bre:ik
up with
Turn over
witb Iigbt-underside-up. TUt”n
layer
in
rinse c~vity
with
Iirst h;df OF
cold wtiter to
tind brc~ik
fork
:md break
baking dish, Re~rrange
cold w~ter to
in water,
separate.
up
witb fork
after
first
up after
complete
time. After
halt of time.
first
over after
pieces
pl~icc
after
halt
:ifter
in
first
of’
15

Defrosting Guide
First Half Second Half
Food
Time, Min. Time, Min. Comments
(continlle~)
Fruit
[Power Level:
I~resh
( 1 ()
Pl~istic
poLICtl-t
( I ()-()/.
pilckilgc)
(() 16 oz.)
[() 2
Meat [Power
Buc(ln
( I lb. )
Franks
(
t tb. )
(;ruund:
(
(
Roast: bccl’. ttlt~lh, \e:[t ‘;:
(3
Roust,
(3
S:lUS21~~, bLl[k
( t -th.
( t -tb.
Sausage, links
( t to I Y tbs. )
Sausage,
( I
Sp:irerihs, pork
(2 103 Ihs.
Steaks,
‘:USC W:ll”lll
heel’&
I
th. )
2 ths.
)
104 tbs. )
po[”k
[()4 tbs. )
L1’~ly)
I“otl)
p~l(lics
2-07., p:lckilge)
)
chops &
( t )
[’01”
CLltiCtS
I’oilsts.
Level:
pork
Defrost (3)]
? (() 3
I
to 3
Defrost (3)]
2 (() 3 pel”
? 103
3
(()
5
6 to x
~105
PCI”
4 to
5
per
? to
3105
3
3
3
to 5
pcr
3
tb.
Ih.
Ih.
lb.
? 103
3 to
4
?
10
~
PC[’
tb.
2103
3 [()
5
() to
x
t 2
[()
t
3
4 to
5
pcl”
~ to
5
pCl”
tb.
2 to 4
3 to
5
?
to
3
? to 3
2 (() 4 per
3
to 5
th.
pel- lb,
tb.
Pl;icc p:lck:lgc
hre;ik
LIp with
P]:ICC
Ptticc ~inopcnecl p:Lck:Lgc
[lt:,~~
scp~~riitcd.
“1’LIrn nle:lt ()~cr :11’lcr l’irsl
in
oven. Ren]ove toil or nle[:[l. Af’(el nlininlunl tinle.
t~)rk. Repe:[t if’ neccss:lry.
p:Lck:I:c ill oven.
Flex
in
~,,,opc,lcd p:Lck:L~c
Let
st:ind
5
tninutes,
in
ptlckilgc otlcc.
Let s[iind
over].
OVCI1.
Microw:lvc .Ius[ unlit I’r:lnks c:~n bc
if’
nccessiiry, to c(~nlplctc
Ililll’ (~f’ tinlc.
5
nlinll[cs :If’[cr dcl’rosling.
dcl’resting.
TUI”I1 n]e:Lt ()~cr :If’tcr I’it-st h:ilt’ 01” tin~e. Scr:tpc (~f’f’ sof ’tcncd tnc:it
t(l’(cr scc~)nd h:itf” 01” titnc. .Sct iisidc. Brc;ik
nlicrow:lve
TLII-11
:ll”tel” second bii[f’
n~orc. Scr:Lpc iind set ilsidc. Brciik
t to 2
me:I(
nlinutes tnorc.
()~cr :LI’LCI first biitl ()[’ tinle.
(if’
tinle. ,Sct t[sidc. Micl”owiL\c (> to
LIp
LIp
rcnl:Litlillg
ScI-:Ipe t)l’1’ sol’lencd ]nci~t
rcnl:iining
X
tninutcs
btock :ind
btock :[nd
I]licrowiilc 3 to 5 n)inutcs nlol-c.
PILicc Llnwr:ippcd l“[):Lst
biitt’ ot” tinle.
tninulcs 10
Dcl’rest
t
bout
PI;ICC LIIlwL:ippcd ro;lst
htdl’ of” tinlc.
nlinutes to
TLIII1 ()}cI :ll’tCt- tirsl
Dcl’rest
t
ht)ut’
TLIItI over ~lt’tcr t’it”st btdf’
Rotiite ptLck:ige t/~ tut”n tL1’tcl” [’i]”s( htdf’
TLIII] (~~cr :LIld sep~r;i[c :Lftcr I’irst htdl
in
cooking”
for
second
in
lrel’[riger:llt)r.
in
cooking”
fi)r
second
in
I“cl’t”igcl”tl(()[”.
htltl
’ <)1’
(if’
[inlc. Let st:Lnd
dlSb.
‘[
bi[tl’
01”
[inlc. Lc( sttlnd
dish.
TUII1 roilst over td’tcr Iirst
htdl
’
of” tinlc.
[inlc. let sttind
of
of
titnc. Rcnlovc p:itties :is
’LII’11 l“():Lst C)VCI” i([’tcl” [’II”St
Let
5
nlinLllcs.
t 5
st:ind fot- 30
nlinutes.
lot
30
titnc. l-et st:LnLt ~ [llinLlteS.
they th:Lw.
Pttlce Llnwr:ippcd
tinle. AI’(cL scc(>nd hiLtf’ (JI’ tinle, sep;iril[c picccs
s(:Lrld to conlptc(e
Pl~Lcc unwr:ipped tne:i[
[i
Ine LInd
scp:ir:ite pieces
sbictd
ribs in
co<)king
dish.
del’resting.
in
WtII-nl
with
cooking” dish.
LII-e:IS
with
l’(~il. A1’tct- second hilt
t~ible k]lif’e. Let stiLnd to con]plete
TLIItl [)vcr :Ltter [’irst
with
t:Lhtc knife. Let
TLII’11 ovcI”
:11’lcI”
1’
de
I’it”st h:df of”
of” tinlc.
f’l”nsting
hidl
nl’
Poultry
Chicken,
CLlt Llp
(?~: to
Chicken,
(~~ to 3
(;nrnish hen
Duckling
‘1’urkey
16
[Power Level: Defrost
hroilct-t’ryer.
~
tbS,
)
whole
ths.
)
5
to (>
4
[() (>
3
hreast
(4
to
5
Ihs.
to 5
)
9
to t t
t 2
(3)]
[()
t4
PC[.
p~l” lh.
p~l
lb.
Ih.
~)
to t
I
?
5 per lb,
4
to
S
to 5
to
(>
pC1.
pcl”
t
t4
tb.
lb.
Pl;ice wr:ippcd chicken
nl’ tinlc.
Attcr
cooking”
second h:il~
dish. M
in dish.
Unwr:Ip :ind
of
ti]nc, scp:it’:ite
icl-r)w;lvc ? to 4 tninutcs nlot-c.
stiuld :1 t’ew nlinLltes to I’inish def’ros(ing.
Pkice wl-~ipped
tul-n
chicken over.
dCf[”OStitlg.
Pl:Lce unwl”:tppcd hen
h:itl
’ 01”
Pl:Lce unw[”:[ppcd duckling
titne. Shietd wil]”nl iirctts
chicken in dish.
Shield w:tl”nl :Lrc:ls
l“Lln C()()t W:LtC1’
tinlc.
Run
coot” w:ttcr
in
with
ill C:LVlty
[)vcn
in
A1’ter I“irst h:d[’ of” tinlc. unwr;Ip tind
with
Lllltlt
bl”c;lst-side-up.
in
ctLvity untit
()~cn. TLIII1 OYCI” ~if’ter I’irsl h:dl’
ii)it.
Run
gibtcts c:in hc t“enlovcd.
Pl:Ice unwt”;ippcd brc:ist
A1’ter first h:df
with
of
I’oi
t.
Dcl’trost f’<)r scc~)nd htttl’ of” tinlc. Let st:tnd
cotnptetc dcl’t”ost in:
in
tinle, tL!rn
in
t“cl’tigel-:itor.
nlict”ow:lvc-s:ilc
bt”e:ist-side-Llp
turn nvcr
pieces
:ind pl~Lcc
i 1’
necess~Lry. Let
Foi 1. T() c(~nlptctc
gibtcts
C:ln be I“cllloVCd.
Tut”n
eve!”
gihtets
coo]” w:itel-
in
dish
bl”c:ist-sil[c-c[(lwll.
LInd shield w:u”tn
:d’tcr first h:di
in
ti~lc!” first
ciln be rctnoved.
of
c;lvity until
I to 2
iLI’CiLS
holll-s to

Cooking Guide
Breads
~.I”LIs( on
dcsit.c[l. spt”inklc lop ol’h:i[(cl” wi(h citlll:l]llon-sllgiit” mixture.
ctloppcd llLll
bt”e:Ld$ will bc sot”[ ttnci the olltsic[cs w’i]i no{ hrowtl. [f’
S
~)t”oltlcl” lopping lot” ht-owll cot(~t’. ‘1’() inc!-e;lsc ht”(~wn
coloroII upside-dow]l
hlown
SLIg:LI’-C:LI”:IIIlCl
b[”eiids. line
mixl Llre ()[” s:ivot’y
c:lnllect, I’[-cnch l’riect onion” rings,
dish
hcl’i)l-e microw;ivi[lg wi(h
lopping,
such
:Is
cl”ushcd.
Food
Container
X-in.
I“OLIllLt
SLILI:I[”C
X-
(() ‘)-in.
[)[.
dish
[uhc clish:!:
MufYIIls
( I
Mu(’[”in)
(2 (() 4 M~ll’1’ills)
(3 [() (~ M~lf’1’ins)
Quick I]rcads,
I’1”0111 it mix
‘;:l[’ [~lhc dl~h is
Lln:l\:Lit:lh!c. MIC1’OW’tl\’C ill X-l[l. I’OLIIIC!
P:]pcl--lillccl N()
Illuf’f’in
CLIPS
(
[]() 110[ LISC
I’(lil tincls.
(it;lss
)
Iotll”
dish
Cakes and Desser~
1. AlwtLys usc lllicl”owilY’c-s: Lt’c C()()kW’ill”~.
2.
Beli)rc :Ickiitlg
ltlcnl wilh Wiix
3. ~’:ikcs
;Irc
Cclllcl”col)lcs 0111 Clc:lll.
LIL)IIC
mc;IsLII’cL[
pilpcl”.
(D()
when [()()
tImoLIIll
not
thpick
t’toLII”.)
()[
()(’h:Lltc[-, :I”C:ISC
tong skewcl insctted into
Cover
N()
N()
N()
ciish With
dishes
Power Level & Time
Meet-High (7)
Meet-Higll (7)
Mccl-High
Mccl-High
dlinkillg :ttlss
ol” tine
(7)
(7) 121022 nlin
pi:LccLl
4.
(’()()1 c:ike ill
hoilrcl 10 to 15 ]]]inutcs bct”t)rc i!lvcr[il]g.
5
. .
[lI”LIS[ on CtIkCS
~~lk~ t’ol”:Lll
6.
(Thil’t’on :ttld Angel F’()()d c:ikes :Lrc ilo( l“ccommenclccl lot”
tllict”ow:lving.
Comments
(> 10
X
tnin.
X 109 tlli]l.
Y,
[() I min.
I
(()
3 min.
3 [()
47 min.
opcll-side-Llp ill
dish
holll”(() t’il’11) CXtCl”iol” SLll”t’LICC.
Pl:~cc htL[te]’
Sp[inklc cc)okitlg
ciiilnccl. I’lcnch I’1-icci onions” hcl’otc
micl-ow;l~itlg. TLIII1 ()~i( 01” p:LIl
10
Llsc tllict-ow:ile-s:ll’c mul’t’ill conttliilcl”
Ilonlclntldc
ctown
IWLIy
:is
I“ctll;lin;ng
Shield col”ncrs :[l’te[- htll 1’ 01” cookiny” linlc.
When
Wi
hel’ore tu[’ning out (~1’
ccntcl-.
sc[ ditcc[ly otl
Witt bC Soft.
in
grc:ised ctish.
dish
wi[h l’inciy ch(lppcd,
Scl. vc,
nlLlf’1’in CLIPS, n):ictc h)’
ho( d[”ink p:lpc[” cups.
hc
cIOIIC
they
II
hct’ol-e others. l<cnlo~c mul ’t’ins
:Irc ch)nc.. :illd c’on(inuc. c.()()hing
lllllf’t’ill
S ;1 I’cw Seconds
doilc,
cOI1)C
loo[hpick”
OLlt
c!e:lll.
inscrlccl itl ceIl[cI
[,C( Slt\lld I ~
dish.
hCLlt-pl”()()t’
[[ ’c:LkC IS to
SUl”t’iLCC 01”
hc t’l”OSttd. l’~t’l’lg~l”:~~~
upside
Some
[.(~(~t.
wooden”
ck)wtl
ot
cLl[[ing
mL1l ’f’ins
Ionycr,
Illill
Ll[CS
Food
Bilked ~~pl~S
(}r pears
l;~ir cookies”
Cmnrnercial
( t x 10
Cupcakes-(,
I)ineapple upside
dnwn c:lkc
?()
mix
()/.. )
Container
M
ict”ow;ivc-
s:(tk
dish
C:ls$cl”otc
X-in,
dish
X-ill.
SCt Ll:L1’C diSh
~’tLl(CLi
~:ik~ p:~ll
Pilpc]-tincd
~Llp~LLk~l”
x-in.
dish
(It-
sclLIiIIc
I’OLIIIC! ()[
[uhc
( I
l“()~lnd
~
L’Lip)
Cover
[.id ()(
pt:tstic wr:tp
N()
N()
N()
N()
N()
Power Level & Time
High ( 10)
Iigh
( 1 ())
Iigh
( I ())
High
( I ())
Meet-High (7)
Meet-Higll (7)
Comments
Pierce l’rui[ ()[ peel to prcvclll hut,sting.
[OJC LLnd t’itt cct]tcr 01” Llpplc wilh 2
ttihtcspoo[ls”
i/X
[CilSpooll”
W:I(C[ l’i)[ c:lch piccc ~)1’ t’[”uit.
GIctLsc
~’Llt
Grc:Isc
5 (()
[.ct (uhc ~:Lk~
cool,” hct’[)rc inlc!.[ ing.
Whcll c(loking Sc)c[ilt
he
doll~
they
tcmiiinillg
Whctl ch)llc. toodlpick” stuck
SLl~:L1’, I
Ie;lspooll”
cinntLmc)[l,
dish
WhCll
I ()
:IIC ctonc :Ind
hct’orc :Iddillg h;l[[ct.
C()()[.
dish
hct’ot-c
Illinutes (() cc)ol hct’i)[.c ill~cr(ing,
S(illlct 15
bet’ol”c othe[”s.
CLlpC;lkCS ;1
Add ?
iiddin:
h:l[(ct”. Le[ st:incl
[() Z() millu[cs to
CLlpC:LkCS. Some wilt
l{clllo\e
conlinuc
cooking”
t“cw’ Sccon(ls
in
hutlcl” :IIICI
t:Lbt~Spoo[lS”
CLlpC:LkCS
h)ll~C1’.
c:ikc
comes
LIS
17

Cooking Guide
Candies
1.
Alw:iys
LISe
nlicrow~ve-sfite cnokware.
chncol:lte
p:lpcl” bowl
in
p:iper
(()
I1lCI(.
wr:ippets
scan-sicle-up. or
~c(,ntinue~l
Fnreiisy
cle:m-up. melt
pklce
ch(~c(~l:lfe
in
2.
C~ndies which tu”e boiled bec(nne very hot; handle cnokware
C:lle~Llily.
Food
Caramel
Chocolate bark 1
Marshmallow crisp
apples
Container
I pint
(2-cLIp)
I1lC:ISLIIC
X-qt. c:tssern]e
or
bowl
?-qt. nblnng
Cover
N()
Yes
Yes
dish
S’Mores
P:Iper mtpkin
01” p~pcl”
pllle
N(J
Cereal, Pasta and Rice
1.
AIWUyS
USC tlliCI’(lW:LVC-SJfC cookwtue,” 4.
2.
Fnrp~s(a, use
c[)nventi(ma[ boi [ing. Add t’cgulat’ :nnnun(
oil (op(i(mtil, tn
3. Fnr rice or tninutc
CollVClltlollill”
tihou[
mle-h:ilt’the
prevent sticking),
rice. use
boil Illg, Add
t“egLll:U” dtlloLltlt of S~[t.
finlount of” wfitcr nccdcd f~)r
01”
the s:tme amount
nt
stt]t dnd I te~sponn
w:lter
needed
Power Level & Time
3 tn
[igh
( lo)
ligh
( lo)
High
( 10) 1 min.
High
( 10)
5.
Ior
6. Microw:lvc time :md cnnvcntinn:ll boiling time ~re :Ihout the
7 min.
3105 min.
(n
lll~i(
bLl((Cl”,
4
min. (n melt
n];n. shnl:ll
to 25
I 5
Scconcis
Cover p~s(~ and rice
wr~p,
turn
buck nne
S(ir or re:lrr:mge
in]tncdiiltely :Ifter tnicrowilving.
sdme,
Comments
Unwrtip a 14-OZ. p~ick;ige (JI’ car~nlels into
mc:lsuring cup, Add I tflblcspoml water.
Micrnw:\ve.
itpples intn
Pl:icc 12 (JX.
cnnt:iincr. Micrnw:lvc tn
whole
pdper
In ]iu’ge gt:lss bnw]. me]( [/4 cup hu(tel”.
Add
with
ioWS
in 5 cups crispy rice
intn huttered dish.
C(~ver gr~h:ml cr:icker
nl~ushtnitl
while
corner to vent,
after
h:ll~ nf’ c(~(]king
stirring every minute, Dip 4
mixture.
scnli-sweet
to:lsted Lllmonds. Spre:ld
(m co[)kic sheet.
I
()-nz. p;ick~ge nlarshnlall(~ws. covei-
Chill until
wtIx p;iper tmd micrnw:ive to
ccrciil.
with
IOW.
n]icr(~w~ving,
When using plastic
time,
Dr:iin p:tstti
choc(~[ate
melt.
Add
over
Press
chncol:ltc and
pieces in
I
CLIp
wtIx
firm.
melt. Stir
firmly
Food
Oatmeal,
old I’;lshi(med
Note:
T() microwave
lot
:tmnunt
Rice,
minute
( 1 Y? cups)
Rice,
I[mg grtiin
Spaghetti (16
of
w~ter imd micrnwtive at
t“cgul:ir
( I cup)
oz.)
single-serving
Container
-qt.
c:lsscrole
I
or bowl
packet
High ( t ()) tier X tn I minute.
~-qt
~~sserole
2-qt. c:lsscrnlc
2-qt. (>bl(~ng
dish m
ciisserolc
Cover
N()
of instant
uatmeiil,
Power Level & Time
High ( I ())
tulluw
Lid or High ( lo)
pldstic wt~p
Lid nr
plastic
wr:lp
High ( 1 ())
Plustic wr:lp High ( 10)
packfigc
3 to
per
directions
2 tn 6
I
7 tn 21 min.
16 to 20 min.
5 min.
serving
min.
Comments
lncre~lse
c:lssctolc size tnr
serving, Increase time
t~)r each additiun~il
Stir after halt of
Add I X
cups water. Stir
Add 2X
cups
Add 6 to
7
minutes.
serving yoLI
cnoking
wutcr.
Stir
cLIps wuler. Re:trrange :It’tel”
m(]rc th:m (~nc
ubout I ‘/
minutes
arc cnnking.
time.
titter 2
minutes.
ofter I
() minutes,
t ()
18

Cheese and Eggs
1.
Eggs nl~y be prepared nltiny wtiys
Alwoys
pierce
bursting,
2. Never cnok eggs
[he shell,
whole yolks
in the shell. Dn
They will
explode.
in
betorc
tnicrowuving to
nnt reheat hard cooked” eggs
[he nlicrow:ive ~~ven.
prevent
in
3. C.nnk eggs
overcooked.”
jus[ un[il
set.
They ore delictlte :md c:m toughen
it
Food
Cheese
Fondue
Microwtlves:it’e 2-qt.
Eggs
Basic eggs
omelet 9-in. pie
Poached eggs
(4
m:lximum)
Quiche
Scrambled
custard
cust;lrd
9-in.
Glass
measuring cup
or
Container
dish
BLIItel”ed
cup
plate
CLlp
pic pl~tc
ctissernle
Cover
Covcr
01”
plastic
wrap
Pltlstic wr:lp
N()
Plastic
wrap
N()
Nn
Power Level & Time
High ( I ()) Tn make
Medium
(5)
Medium (5)
High ( 10)
Medium (5)
Medium (5)
Meal-High (7)
Meal-High (7)I 7 to 22 min.
High
( 1 ())
7Y1 tn
per
per
sauce
3 tu
5 min.
X tn ‘)
min. Medium (5)
X to
I min. Puncture
per
egg burs[ing.
Melt butter
X to X
min.
1 () min.
I to 2 min.
7 to X
nlin.
egg
X tn
I min. Scramble eggs with I
cgg tablespoon
Comments
Make basic
every
Sprinkle cheese over
t(}
vineg~r
e:lch cl]slat”d
pl~stic wrap. C()(JI according to
Micrnwave tit
per
P(~uI
n]icrowtive i’nr
pnrtinns Irnrn
tn stand
white
S;]UCC.
Fm.
milk.
Add
f’or X (n 9
2
minutes.
rnetnbrzme
1 minute until cheese is slightly melted.
He~t
2
tublesp~][)ns
in
c~ich
cup. Cnvcr
egg.
tilling
Medium (5) X tn Y,
Let
stand
into precnoked
milk per
the
I 012 minutes to
substituting
cheese
~nd nlicrowavc tlt
minutes, whisking
of
yolk to
omelet. Micrnwzlve Y
water
cup.
Bre~lk
Inosely wi[h
in water a
teasponn
egg. Place
h:dt
of” total time.
outside to
f’inish cnnking.
prevent
:md X teaspoon”
t
cgg intn
guide.
I’ew
9-inch pie shell.
butter
in
Stir set
the center.
wine
minute
minutes
~nd
oven imd
Allow
1
Fish and Seafood
1. Fish is
done
may
s[ill be SI ightly
sttinds Ii few
Food
Clams,
6
Fillets or
steaks ( I
Shrimp—1
(peeled)
Shrimp—
I lb.
(unpeeled)
Whole fish
when it flakes
translucent, but will
minutes
lb, )
lb.
eusily
when tested with a
~t’ter cooking.”
Container
Pie
pktte nr Plustic wrap High ( lo)
sh~lh)w
dish
Oblnng
dish
Pie
plate nr
shallc)w
dish
~-qt
~:~sselol~
Ohlnng
dish Plastic
fork.
continue conking ~s fish
Cover
Wtix
paper
plastic
Plastic
Lid m“
plastic
Center 2. Conk
Power Level & Time Comments
or
wrap stcuks
wrtip
wt:lp
wrap
High ( lo)
High ( lo)
High ( 10)
High
lighter cnvcr OF
3. D() not overcnnk fish.
( lo)
fish
with
4 to
7
tnin.
5 to 7
min.
6 to
X min.
5 to 9
tnin.
5 to 7 min.
per lb.
(Jt without
w~x
sauce. A tight
paper or
Check
Rearrange
Pl~ce
hottest t~p water. Cover.
minutes.
Shield he:id tmd
paper towel Fnr less steiuning.
tlt
minimum
Place
in dish with
Mictow:lve unlil fish tktkes e~isily.
over
Brush with
a~tet
shrimp in
ct)ver ste:uns I’ish.
hinged side out.
after half ot
garlic hutter bet’ore cnnking.
4 minutes.
ctissetole. Add 2
thin
time.
cooking” time.
Stir
tail
with
Use
Turn
cups
:Itter
5
:iluminum toil.
19
:1
I

Cooking Guide
(cc~n(inlle~,
Gravies & Sauces
Food
(;ruvics
suuccs [Ilickcnccl
wilh
Col’llslill’ch
Melted hutter
s:luces, cl:lli I’iccl
hLl[tC[’ ( )’ CLIP)
‘1.hick
barhccue or
S~’~~t/SOUl- SULl~~S
( ?
‘1’hin. Iicluid
(All
(
und
[’10111-
01
( I cup)
spaghetti,
~LlpS)
jus. cliII1l. C(C.
I
CLIII)
Meats
1.
Alw;Iys usc ii
I’():[s[s.
F()()d
cooking”
Sec pkick:lgc
Container
sauces
Cl[sscl”olc
)
hi[g whcll
i
tlsll”Llclions l’01” pI”opcI” LISC
Container
cooking”
Cover
N()
bccl’.
l:IIIIh. pt)tk
()[’ cooking”
Cover
Power
Iiigh
01 \c;Il
h:ig.
( I ())
I.evel
3.
A I
c:lrlillg.
I
& Time
3 [[)
low
It”
you lISC :1 I1lc:I[
is
S:II’C l’01” LISC
Power Level & Time
(or
Internal Temp.)
5
:lhoLlt
Illitl.
A~lcl
i
I ()
tlli
llLltCS
[hcrnlonle(et
i 11
nlicrow:ivc okcns.
Comments
Comments
ColllS(L1l’Cll-W’lltCl-
tlg[’cclicl](s. Slil
I’illish.
sl:itlditlg li I1lC [’01- Illosl
WhilC U()()killg. llltlkt SLII”C
llli
WCII :il)[l
XILllC
(()
hCLltCLl
lllicrow:[\c
I-oils(s
I>cl”ol-c
10
I(
I
Beef
(;round,
(
li)l- C:LSSCIOICS
01- S01111)
( I
Ih,
)
( I
X Ihs.
)
Meathalls
( I II).)
(
2 lhs.
)
Me:ltloat”
(
Routlcl
I():lt’)
(
LoiIl” 5h;lPC)
l>:itties
(4
p:it(ics pcI-
I
102 pll(lics
3104
p:i[(ics
I’ot
roasts
(Up (() ~
lhS.
cIuIllhlccl
Ih.
)
)
(.:ISSCI’OIC
OLllld
ol-
[{
ohl(~tlg
dish
Pic
pltIlc ()[
lo;il” clish
ohlong” ~lilS\
dish
(wilh
dcsil-cd
[rivet
)
i 1’
()]” Cct’:i]llic,
di tlnct pl:l[c
ohlol]g”
dish
01” C:lsscl-olc
(.tlsscrolc
N()
High
( 10)
High
( I ())
Mc~l-Higll
01
cook”
(() 1
70’”
High
( I ())
Mccliun)
(S)
Mcctiutll (~)
(7)
510
7
(()
() [()
9 (()
25
10
30
[()
35 nlitl.
5 Ill in,
10 20
lb.
nlill.
Illin.
30
3 [()
410 () n)iil.
23
pcl
I 20 (() I 30 Illill
20

Meats
Food
Beef
Tender
high clll;itity
sit”toin (ill)
Lamb
Chops
4 chops
Roast
(leg 01-
Pork
Bac(m
(pet, sticc)
(c.ntinl,e~,
(cuntinued)
masts
(Iih.
I’LInlp,
( I -in.
(hick)
SI1OLIICICI”)
Container
Ohlnn:
clish
with t[ivc[
?-ctt.
obtoll:”
clish
2-Lt(.
oblong”
c[ish tinct (I”ivc(
M
icrow;lvcS:itti pt:lte
c)blong ctish
()[”
Cover
C()()king h:Ig
Wilx
p:lpct’
[.()()king b:~g
Power Level & Time
(or Internal Temp.)
Mcctium
(S) Minutes Internal
t<:ll’c
Mcctiunl
Well
Meet-Higll (7)
Mcciium
(S) Minutes
Mcdillnl
I I to
Wctl
t? to
+
High
( 10)
er
t t
t 3
t 5 to 201700
*
per lb.
lb.
1014
[() t7
(~ 10 ‘) nlin.
Internal
t5
to
YI
to
‘l’cm
‘lkmp.
t
[11]11
.
t400
1(>()[’
1600
t 700
Comments
TLII-11 I“(ltis[s OVCI- LII’[CI hilt
I
.el nlc;i[ sl:ln[t
Blush chops
t ()
I
igh{ty wi[h oit. ‘l’lll-n nlc:l(
()~,ct’ :[l”tel” h;ll 1’ of” cooking” (imc.
Pl:lcc
l-():lsl I’:i[-sictc-clown in
s;i(i dish. Shictcl cnd ()(” sh:[nk
foil dLlt”ing tit’st h;llt’ 01” ( imc. TLIII1 OVCI
:[t’tel’ h:lt
1“
I
()
t)t’ c’onking
nlinLl(cs 17cI”OI-C CLL[”J
1’
01” cooking”
lime.
minulcs bcl’(ll”c c:ll-iillg.
lllictow:\vc-
bone
with
time. I
,e( I“OLISI stiin[t
in:.
Ham, pt.ccookccl:”
~tlllll~c[.
bLlt(
()[’
Stlilnk
H:im,
slices &
( I
(() ?-in.
Purk chnps:
7
thick)
I -in.
s(ctIks
i
()
I>ork roast
I>ork
sausage
(i:[w).
Ii Ilk
Pork
(
Y tb,: 4
sausage
p;lt[ics)
(ILiw)
Mict”owiivcS:lt’e C()()kw:ll”e
?-cIt,
oblong”
dish
?-L[t,
obto[lg”
dish
M iclt)w:l\c-
Silf’c C()()kw:ll”c
Miclow:l\c-
S:ll’e C()()kwi!l-c
CYonking b;lg
W:lx
pilpct”
PliLs(ic W1’:lp
High ( 10)
McctiLlnl
(5)
Medium (5)
Mccliunl
(5)
Mcdi Llnl (5
High ( 10)
High
( t ())
Y:
10
I Y, min.
1 to 27 min.
1
Y [() 3
min.
t
4 to
t 9 min.
pc[” tb.
10
[() 15
min.
7
[()
t 3
min.
c, t(l
t (~ min.
I
3 to t“ min.
I
5
(() 20 tl]in.
p~[”
lb.
X
to
YI
min
pet. t ink
3105
nlin.
At”l”:ingc
in
singte l;iycr
‘[’LII”I1 OVCI” 01” l“CL\l”l”illlgC
:lflCl” [()
lllllllltCS
21

Cooking Guide
(continued)
MeatS
(continued)
Veal
Chops ( 1
4 chops
Roast
(shoukter)
-in.
thick)
?-qt. obtong”
dish
~-qt
obton~”
dish
Poultry
Let turkey bt”c~sl :uld {)thcr puutll”y sl~uld [i)]”
Food
Chicken
Pieces
(per
piece)
Whole chicken
(X pieces)
(unstLlffcd)
(stuffed)
Container
Plate or
oblung ctish
Oblong
dish
Obtung
dish
obl(mg dish
wax
p:lpel”
C()()king bdg
5 to ] ()
Cover
W;lx paper
W~Lx
paper
C(~(~king b:Lg
C()(~king bag
Meal-High (7)
Medium
(5) t 6 to 2 t min.
nlinu(es af’lel” nlic[”ow:lving.
Power Level & Time Comments
High
10)
High
10)
Mcd-
ligh
(7) to tn t 2 min.
Meal-High (7)
(I to 9
min.
pet”
tb.
It
you
sLu.c
3 (u
5 min.
total
I () to 13 min.
t[)t:lt
per lb.
1 () tn 16 min.
p~l”
tb.
chops tightty
Brush
uver tIfter htltf uI’ cooking” time.
Ptace roast f~t- or cut-side-d(}wn.
:Ifter hutl’ of” c(~~)king
t () minutes beture
use iI
met[t
it is
thermometer while
SJI’C fur LISC
Arr:mge
thickest
uf dish. Turn
:11’ter hfill’ ot” c(~oking time.
Brush with
b;ig Iletil”
with
Turn
t{)
in
nlicrf)wtl)e
in
singte t;iyer
nle:Lty pieces :u”e to uutsicte edges
picccs OVCI- :Ind lretu”r~nge
browning :igent,
CtoSLU”C
to Vent.
ptastic tic. Cuok
uvel” ~iter h~tf’ (}I’ cooking”
I
YOO intermrl temp.
with
uit. TLutl met[t
Turn river
time. Let
c:u”ving,
breast-side-down.
r(~tist sttind
couking, m~ikc
()\ens.
in
cooking”
if desired.
~h)SC SCCLll”Cly
[i me.
dish
so
Stit
Cuuk
Cornish
Halves
Whole
(stuftcd
unstuftecl)
~rkey
~rkey
breast
Hens
m“
sqLIJl”e
ubhmg
dish
Squ:lrc nr
(~bt(mg
dish
Obt(>ng
dish
01”
WJX
p:lpel”
W:ix p:lper
C()()king b:lg
Meal-High (7) t 2 to t 4 min.
per tb.
Meal-High (7) t 3 tn I 5 min.
pcr lb.
Meal-High (7) 13 tn t 5 min.
p~l”
tb.
Arrtinge
skin-side-up in
stuf’fing.
if desired.
Pt:lce
brc:ist-side-duwn in dish. Turn
:it’ter hulf’ uf’ couking time. Shietd
wings
:md legs
with
Tie
ribs tu
brc:Lst cuvity. Pl~ce bre~st
cuuking bfig, Ctose securety
Ptace bt”efist-side-duwn
un uncierside neur ctosure tn
over :i~ter
t ~oo intern~t
hatf of
temperature.
f’uil.
in
cooking”
dish, uu bed
with
dish. Slash bag
vent.
time.
uf
over
tips
in
pl:lstic tic
TLIII1
Cnuk tu
of”
22

Vegetables
1.
Alw:Iys
LISC
n]icrnwtlve-stife cookw:~re.”
2.
Salt vcgc[ttblcs ~il’terconking. Siilting before cnokitlg nluy C:IUSC
dinkening
3. Arr:ingc vcget:lbles,
the
;Incl
outside of”
dehydr;ttion
such as
the dish.
ols
LIrf:Icc.
:lsp:Lrttgus,
with
the
thickest
pieces tn
4. Cover
5.
6. Ft)r tnnre even heitting,
vcget:iblcs when cnnking.
one
cnrner to
L:Lrget’ vegct~ihlc picccs
pieces.
conking.
vent,
ltllsing
will
t:lkc
Iongcrtocook
stir.
re:n”rtinge or r(~t~[te veget~bles cturing
pl:lstic wrap, turn b:tck
th:nl sln:lllcr
Vegetable
Container
Cover
Power Level & Time
Fresh:
Slices, picccs
Whotc. h:~tvcs
t:irge or st:irchy squ:ire ctish
Vegetilbtcs
(winter
cilLllif’lnwel”.
W:l[el”y ((onltltoes.”
SLII1l IIICI.
Potiltoes” N()
(6
to X
1
~
3
4
Corn on the cob
1
9
i
4
or
squtlsh,
etc. )
squ;lsh)
oz. etich)
C:issern]e
C:lsscrote or
C~sser[)le High
r
Nn
Yes
Ycs
Yes
N()
Husk
or High ( 10)
pttistic wr:Ip
High ( 10) I
High
High ( t ())
10)
10) 1
2
tbs.:
lb.:
2
tb.:
Ibs.:
I () to t 7
t
6
x
I 3 to 17
410 ()
X tn
t
I 5 to 20 tnin.
5 to 7
7
t 3 to lo
t
6
t{:
2 t tnin.
to
6
tnin.
to
2
tnin.
nlin,
1 ()
lnin.
2 to t5 nlin.
nlin.
to 8
tnin.
(~ to
I X tnin.
lnin.
nlin,
lnin.
corn
Frozen:
P;ick;ige
( I () oz. )
Pouch ( I ()
Col-n on the cnh
(4
c:irs)
Blunching I’resh
vcgct:ibtcs f’or
freezing with t/4
OZ.)
C:isserolc
Pltl(e
C:isscr(ltc
Cusserole
Yes
N()
Pt:]slic wr:lp High
Yes
High
High
High ( t ())
10) X to I t tnin.
10)
10)
7 to ‘)
nlin.
X
nlin.
3 to
7
rnin, Bku]ch i pnund nr
Add
01” titne.
Pierce
betnrc serving.
Follow” ptlckage
oven ftnor
~it u titne. Place
biunched
plunging in
Comments
Add ]/4
to
]/~
Cllp Wiltel”,
Add 1/2 cup w~ter tn ctiutittower,
Winter squtish needs nn wfiter.
vcgct~btcs over :If’tcr h:ilt
Cut
in
nieces or h:~tvcs. N() ~iddition:it
wutcl.
is needed.
Prick
skin
beti)re cooking.” Pnsitinn
pot:Ltoes
in
After
tn st:lnd for
For
convcnicncc
nlicl”owuve col”n
stdr pdttern nn oven Ilnnr.
cooking,” wrap
5
tninutcs
:Ind
in
hLlsk.
in star
pottern on oven floor.”
1
t:lblesponn water.
pouch
before
instructions.
in
stur
pattern,
I
in I or 2 qt. casserole
to
I/2
cup wtlter. Cnot drtiined
vegetables
cont~incr (>t ice w:tter,
in
freshest
c(~nking.
quart vegctubles
itntnedi:ltely
Turn
nf
titnc.
foil :u]d ;illow
bctorc serving.
f’tavor.
Posit inn
Stir
:Iftcr h~llt
Stir
Pklce nn
by
23

Care and Cleating
Your new microwave oven is a
valuable appliance. Protect it
from misuse by following these
rules:
● Keep your oven clean and
sweet-smelling. Opening
door” ~1 few
helps
occ~lsion~ll” thorough”
sol uti~)n of”
keeps the
● Don’t use sharp-edged utensils
on your oven.
outside
minutes
air out the interior.
wiping with 21
baking
interior fresh.
The
soda and
inside
oven walls c:in
the oven
after c(~(~king
An
water
and
be scratched.
The contr(~l p:mel can be d~un~lgcd.
BE
CERTAIN POWER IS
OFF
BEFORE CLEANING ANY
PART OF THIS OVEN.
How to Clean the Inside
Walls,
floor
and
mode stirrer
cover.
renlovcd
nl~ly
gl-eilsy sp~ltters
then rinse with
D()
on oven walls,
A COMMERCIAL OVEN
CLEANER ON ANY PART OF
YOUR MICROWAVE OVEN.
Door (inside).
up
soiled with 21
lhorough]y”
S(~nle
with a
require il
not LISe
abrasive
spatters
with a
a
can
be
paper towel, others
d:lmp cloth. Renlovc
sLIdsy cloth,
damp cloth.
c]e:mers
NEVER USE
Window: Wipe
spil[lcrs daily and wash when
d~unp
cloth. Rinse
:Ind
all-y.
Met~il and
Wipe
cloth
plastic parts
trequent]y
to remove
on
door:”
with a d~unp
:111 soil.
DO NOT
USE ABRASIVES, SUCH AS
CLEANING POWDERS OR
STEEL AND PLASTIC PADS.
THEY WILL MAR THE
SURFACE.
Glass
Cooking Tray.
it is necessary to
cooking tray
[ray or {)ven. T()
do not pl:lce
Lifter cooking.
in warm,
dishw:lshcr.
il. dropped.
for cle:ming t)f
prevent
tray
W:lsh
sLIdsy
The
Remember, do
operate the oven without
cooking” tr~ly
in
Occasionally
remove the
the
breakilge,
into
wateljust
it
cLu”efLIl ]y
water or in
[he
trtiy can be broken
not
the
plfice.
Special note when using Brown
‘N Sear Dish:
high heiit
a
Brown
the
tray.
21
cleanser such as
generated on b(~ttonl (Jt
‘N
grease to burn
This
11 greuse
Seilr dish m}ly c:iuse
onto”
the oven
tn:ly
be removed with
Bon Ami ‘<’ brand
is present,
clc:mser.
After
using
cleanser, rinse
Bon Ami brall~l
~ind dry thoroughly,”
following” instructions on c:m. D()
not
use
Bon
Am i‘{
on
the painted surfaces such as
walls.
It
may
br:md clc~nscr
the
scratch the paint.
How to Clean the Outside
Case.
oven
rinse with a
dry. Wipe the
a d;unp cloth, Chrome
wiped
with
Control Panel. Wipe with a
clc)[h.
clc:ln
soap tind water,
objects on the
dumtige
Cle:m
the
outside of your
with
so~ip :md damp cloth,
damp cloth and
window clean
trim is
with a
damp cloth and
~1 clry towel.
Dry thoroughly, D()
i ng
spr:lys, I:u-ge :unounts of.
abrasives or sharp
p~mel-they
it.
then
with
best
then
damp
not LISe
c:ln
Door Surface. When cleaning
SLll”faCCS of door” Lmd
come
toðer on closing
use
only
mild,
or
detergents applied with a
oven that
the door,
nt)n-abr~sive soaps
sponge
or soft cloth.
Power Cord.
soiled,
unplug ~nd
damp cloth. For stubborn spots,
sLIdsy
water
certain to rinse with ~1
If
the cord
wash
may
be used, but
becomes
with
it
be
damp cloth
zind dry thoroughly” bet-ore
plugging
cord into
outlet.
Optional Accessory
Optional accessories are av:lilable
at extr~l cost l.rotn your
.JX-18K
this
Installation Kit converts
oven to 21
built-in
GE
w~lll
suppl icr.
oven.
Oven Lamp Replacement
First
unplug
the
oven.
Then
renl(~ve
by
cover
on the
Replace with
bulb. (It is
hardware
compartment
oven.
lamp
comp~u-tment cover
removing screw
in
place, Cover
back
01.
the c)uter c~tse.
40-w:itt
avaii:ible
stores.) Replace
cover.
which
holds
is I(}ciited
appliance
in
drug ~Ind
Plug in the
24

GROUNDING INSTRUCTIONS
This
:lppliilnce
in
[hc
event of an
circuit,
grounding
~)t.
electric
csc~l~e
wire
This’
:lppliunce
power
c(~rd h~lving
wire with
p]ug
mast he plagged
~ha~
is
properly il~~talled und
grounded.
WARNING–lmprope,
use
of
the
resul(
in 21 risk
PREFERRED METHOD
km
Fig. 1
Consult
service
instructions are not cc)mpletely
undcrsto(~d, or if d(~ubt
whether the
gl”OLlndcd
Where [1
rccept}lcle
y(}ur pers(~nal responsibility and
oblig:ition” to htlvc
a properly
wal
DO not
cut or remove the third (ground)
prong
a
technici:ul it.
standard
I
recept:lcle.
under any circumstances
from the power cord.
must be
shock
by providing
for
the
grc~unded.
clectrica] short
reduces
the
electric current,
is equipped with
a
grounding
a
grounding
plug.
The
into :in outlet
(Fig. 1 )
grounding
,Tc
clual ified
plug
can
()[’
electric
0
Ensure proper ground
exists before use
shc~ck.
~ ~;]
T
“?, >
?
electrician
the
grounding
exists us
~ippli:mce
is
pr~)perly
two-prong” w:dl
is
encountered,
it
it is
repl~lced
with
grounded thrtic-prollg
risk
~m
or
:1
to
Use of Adapter Plugs Usage situations where
Usage situations where
appliance’s power cord will
b;disconne~ed
BecaLIse
under certain
strongly recommend against the
use of an adapter plug.
if vOU
where
TEMPORARY CONNECTION
may be made to a properly
grounded two-prong
by
(Fig. 2) which is
local
(Adapterplu s not
permitted
Align
$/
The l~lrger slot
be aligned
the wall
proper polarity
of the
Caution: Attaching
grollnd t~rmin~ll to [he w:ll [
receptacle
ground
c(~ver
insulated,
is
wi;ing.
checked by :1
to
properly grounded.
When
cord from
the
is
terminal is very
repci~ted
DO NOT USE the
:1 proper ground
cst:lblishcd.
of
still elect
,
local codes
the
use of 21 UL
hardware
TEMPORARY METHOD
In anada)
Iar
e
Fig. 2
with the
rccept:lcle to prc)vide
power cord.
cover
the appliance unless
screw is
and
xrounded thr(~llgh
YOLI shouli
m:tke
sure the receptacle is
discc)nnecting
the
~ld:lptcr
with
not done, the adapter ground
USC.
infrequently.
polenliid safety
cc)nditions,
tt~ use iln adanter.
permit.
wall receptacle
listed
Llv:lilable at most
stores.
I I
en
0
the
qual ificd e]ectricilln
Should
,-,,
d,
e
ra
*’
~L~;S~L~;;m
connection
before use
in the
larger slot
in the
the ~ldapter
screw
metal, :md n(~t
wall
the
h;lve the circLlit
the
[Id:lpter, ~dw~iys hold
one hiuld. If
Iikcly to bre:lk
this happen,
~lppliance
has
ag:li
hazards
we
However,
,
a
adapter
~)~
-
adtiptcr
must
in
connection”
dt)es not
the
receptacle
house
power
this
with
until
n been
appliance’s power cord
will be disconnected
frequently.
Do not use an adapter plug
[hese situations
in
disconnecting
places
undue strilin
:ind leads to eventutil tai
iidapter ground
should
have the
receptacle replaced with
prong (grounding)
qualified electrician
the
appli~mce.
because
of the power
on the
lure
terminal.
You
tw(~-pr(~ng wal
a three-
receptacle by
before
cord
ad:lpter
(Jf
the
I
using
Use of Extension Cords
Because of
under certain
strongly recommend
use
of an extension
if
it is
cord,
use
cord th~it has
plug,
will
~lccept
~lppl iance.
the
extension cord shtdl
or gre~iter th:in
(Jf.
the appliance ( 15
If you do use an extension cord
with your microwave oven, the
interior
blower sound nl~iy vary
is in use.
lc~nger ils
A
short pc)wcl”-supp]y cord
provided to reduce
becoming ent~mgled
(Jvcr:1 longer cord. D() not drt~pc
the
cord over
where it
children
accidentally.
potential safety hazards
conditions,”
against the
cord. However,
necess:lry to usc
only a
3-wire
a
3-bltide grt)undi ng
and a
3-slot receptacle that
the plug on
The
nl:lrked rating (Jt’
the electrical
light
may flicker LUld the
C()()k
times
well.
risks
in or tripping
a
countert(~~ or t~lble
c~ln be
pLIllcd on
or
tripped
over
we
an
extension
extension
the
be
equ:d to
rating
:unpercs).
when
nlily
be
is
(J[
~y
oven
21
25

—.
~
~
——
~
-
Questions?
j
Use This Problem Solver
PROBLEM
OVEN WILL NOT
COME ON
CONTROL PANEL
LIGHTED, YET
OVEN WILL NOT
START
FOODS ARE EITHER
OVERCOOKED OR
UNDERCOOKED
POSSIBLE CAUSE
s
A fuse in your home may be blown or the circuit breaker tripped. Replace fuse or
AND REMEDY
reset circuit breaker.
● Unplug your microwave oven, then plug it back in.
“
Make sure 3-prong plug on oven is fully inserted into wall receptacle.
● Door not securely closed.
● START pad must be touched after entering cooking selection.
● Another selection entered already in oven and CLEAWOFF pad not touched to
cancel it.
● Make sure you have entered cooking time after touching TIME COOK
● CLEAWOFF pad was touched accidentally. Reset cooking program and touch
I
& 11 pad.
START pad.
● Make sure you entered a code number after touching CODE REHEAT.
● Cooking times may vary because of starting food temperature, food density or
amount of foods in oven. Touch TIME COOK I & II pad
and
additional cooking time
for completion.
● incorrect power level entered. Check Cooking Guide for recommended power level.
● Dish was not rotated, turned or stirred. Some dishes require specific instructions.
Check Cooking Guide or recipe for instructions.
● Too many dishes in oven at same time. Cooking time must be increased when
cooking more than one food item. Check Cooking Guide time recommendations.
All
these things are normal with your microwave oven:
●
Steam
or vapor escaping
around the door.
● Light reflection
outer
case.
from
around door {)r
● Dimming oven 1
in blower sound
operating at power levels other
than
high.
● Dull thumping sound while oven
is
operatin&.
ight
and change ● Some TV-Radio i
may
occur while
might be noticed
microwave oven. It’s similar to the
interference caused by other
applitinces and
problem with your
n[erference
while
does not indicate
oven.
If you need more help... call, toll free: GE Answer Center(”)/ 800.626.2000”/ consumer information service
using your
small
a
26

Wdll
,!.,
With
Be There
~he
purchase
c)fyour
new GE appliance, receive
assurance that if. you ever need
from (;E, wdll be there.
All
you
the
inf~)rmation or
assistance
have to do is call–toll-free!
GEAnswer Center@
In-Home Repair
Service
80MEXARES
(80M32-2737)
Service Contracts
80&626-2224
Patis andAccessories
80@626-2002
Individuals
o-
appliances
pitrls
(heir
vi(Ies 2[C:{CSS
:ill (;E (;elluine I<enewtil
fl]lly w~tt’r:inleci. V
and I)iscover
User maintenance instructions
contained in this booklet cover procedures intended to be performed by
any user. Other servicing
shodd
vice personnel. Caution must be
exercised, since improper servicing
may cause unsafe operation.
qutified
or :icc:essories sent directly to
Ilomt.
‘l’he (;k:
10
be referred to qualified ser-
to service their
c:~rr
h:ivc neeciccl
p:~r[s
over
47,()()()
ISA, M;
ciircls
arc :iccepted.
sysIeIn pro-
p;irl.s,. .;incl
I’ilrls ;ire
ISler(:>Lr[~
generdy
Telecommunication
krCustomers
Detice for
,.,,..
.5,,,,
s,...,. ,.,7.”...
.“,.”,,, ..,.”..........,..
With
the Deaf
sgcr!oy–~
..6,.
.,..,
Special Needs...
[J
J)orl
rc:(Itlt:sl,
(( )Illrols
ilnd ii t>ro(.tlllre 10 :Issist
bzirricr-fi-cc
limited
fi-c’t
of’chitrge,
(:orlsurner’s
01
sp~~ch
-
ii
(orlverlliorr:il” telclypewriler xnily
01
Cafl 800-’1’1)1)-(;E ’A(:” (800-8:3:3-4:322)”
to
rcquesl
(;k:
wifl
provide
for:~ v:iricly 01’( ;El
ki[chc>n
tnohility.
who
T()
c:ill
800.62
with
ilrlpiti[-e[l hei~ring
lI~iv~ i~[(~ss to a
inform:ltiorr” or setvicc~.
itppli:ince;
in pl;
fi)r
pc:rsorls wi[ll
obtiiin
these
(j.2000.
I}r;iill{
titling:{
itetn!
‘1’1)1)

YOUR GE MICROWAVE OVEN
WARRANTY
Save proof of original purchase date such as your sales slip or cancelled check to establish warranty period.
WHAT IS COVERED
WHAT IS NOT COVERED
FULL ONE-YEAR WARRANTY
For one year from date of original
purchase, we will provide, free of
charge, parts and
your home to repair or replace
pati
of the microwave oven
fails because of a manufacturing
sewice labor in
any
that
defect.
LIMITED ADDITIONAL
NINE-YEAR WARRANTY
For the second through tenth year
from date of original purchase, we
will provide, free of charge, a
replacement
magnetron
tube
if the
magnetron tube fails because of a
manufacturing defect. You pay for
the service trip to your home and
sewice
labor charges.
●
Service trips to your home to teach
you how to use the product.
Read your Use and Care material.
If you then have any questions
about operating the product, please
contact your dealer or our
Consumer Affairs office at the
address below, or call, toll free:
GE Answer
Center’”
800.626.2000
consumer information
● Improper installation.
sewice
If you have an installation problem,
vour
contact
dealer or installer.
You are-responsible for providing
adequate electrical, gas, exhausting
and other connecting facilities.
This warranty is extended to
the original purchaser and any
succeeding owner for products
purchased for
ordina~
home use in
the 48 mainland states, Hawaii and
D.C.
Washington,
In Alaska the
warranty is the same except that it is
LIMITED because you must pay to
ship the product to the service shop
or for the service technician’s travel
costs to your home.
All warranty service will be provided
Factoy
by our
by our authorized Customer
Service Centers or
Care’”
servicers during normal working
hours.
Look in the White or Yellow Pages
of your telephone directory for
GENERAL ELECTRIC COMPANY,
GENERAL ELECTRIC FACTORY
SERVICE, GENERAL
ELECTRICHOTPOINT FACTORY SERVICE or
GENERAL ELECTRIC CUSTOMER
CARE’”
SERVICE.
●
Replacement of house fuses or
resetting of circuit breakers.
●
Failure of the product if it is used for
other than its intended purpose or
used commercially.
●
Damage to product caused by
accident, fire, floods or acts of God.
WARRANTOR IS NOT RESPONSIBLE
FOR CONSEQUENTIAL DAMAGES.
Some states do not allow the exclusion or limitation of incidental or consequential damages, so the above limitation or exclusion
may not apply to you. This warranty gives you specific legal rights, and you may also have other rights which vary from state to state,
To know what your legal rights are in your state, consult your local or state consumer affairs office or your state’s Attorney General.
P
Part No.
164D2588PO04
Pub. No. 49-8207
10.91 CG
Warrantor: General Electric Company
If further help is needed concerning this warranty, write:
Manager—Consumer Affairs, GE Appliances, Louisville, KY 40225
JE1425K
 Loading...