

Page 1
wvvw.GEAppliances.com
Safety Instru_tions ... 2-5
Operating Instructions
Clock and Timer ....... l 3
Control Lockout ....... 13
Cookware ............ 8, 9
()yen .............. 10-20
Sabbath Feaulre ........ 20
Self-Cleaning ....... 16, 17
Special Feaun_es ..... 18, 19
SurPace Units ........ 6, 7
The_nostat ........... 15
Timed Baking and
Roasting .............. 14
Care and Cleaning
Broiler Pan and Grid ... 23
Conuol Panel ......... 22
Door . ............... 22
(;lass Cooktop ...... 25, 26
lv_obs ............... 21
Light Bulb ............ 24
Packaging _q)e ........ 21
Racks ................ 23
Stainless Smel Surfaces . .21
Storage Drawer
Removal ............. 23
Vent ................. 21
Troubleshooting Tips
Before You (;all
For Service 2/-, 0
Accessories ........... 32
Consumer Support
Consumer
Support ...... Back Coxer
Product
RegJstration ........ 33, 34
VVa_Tantv ............. 35
JDP4 7
JSP42
JsP47
Write the model and serial
numbers here:
Model #
Serial #
You can lind them on a label
behind the open oven door
on the lower lett corner of the
range fl'anle.
49-80247-1 01-05 JR
Page 2
IMPORTANTSAFETYINFORMATION.
READALLINSTRUCTIONSBEFOREUSING.
WARNING!
For your safe_ the information in this manual must be followed to minimize the risk of fire, electric
shock, or to pravent property damage, personal injury, or loss of life.
A WARNINGANti-TIPDEVICE
Aft ranges
Slide-In
Ranges:
Drop-In
Ranges:
If you pull tile range out flom the wall tbr any reason, make S/lie tile device is properly
engaged when you push tile range back against tile wall. If it is not, there is a possible risk of
the range dpping oxer and causing ioju U if you or a child stand, sit or lean on an open door
Please refer to the Anti-Tip device infonnaOon shipped with the device and ill this manual.
Failure to take this plecaution could iesuh ill tipping of tile range and il_nry.
can tip andinjury could result.
Toprevent accidental tipping of the range, attach it to the wall and floor by installing the
Anti-tip device supplied.
Tocheck if the device is installed and engaged properly, remove the storage drawer
and inspect the rear leveling leg. Make sure # fits securely into the slot.
Toprevent accidental tipping of the range, secure the attached Anti-tip bracket, under
the rear countertop.
Tocheck if the device is installed and engaged properly, lower the oven door and gently
apply medium force at the handle end until movement of the range is detected. Continue
pressing until the anti-tip bracket is engaged andmovement stops. A small amount of
movement is acceptable at the back of the range top but # should be stable and not tip
once the anti-tip bracket is engaged.
IMPORTANTSAFETYNOtiCE
The California Safe Drinking Water and ToxicEnforcement Act requires the Governor of California to
publish a list of substances known to the state to cause cancer, birth defects or other raproductive
harm, and requires businesses to warn customers of potential exposure to such substances.
The fiberglass insulation in self-clean ovens gives off a very small amount of carbon monoxide during
the cleaning cycle. Exposure can be minimized by venting with an open window or using a ventilation
fan or hood.
SAFETYPRECAUtiONS
When using electrical appliances, basic safety precaufions should be followed, including the following:
Use this appliance only %r its intended
purpose as described ill tills )wners
Manual.
Be sure your appliance is properly
installed and grounded by a qualified
installer in accordance with tile provided
installation instructions.
Haxe tile installer show you tile location of
tile circuit breaker or fllse. Mark it for easy
reference.
Do not attempt to repair or replace ally
part of your range unless it is specifically
recommended in this manual. All other
2
ser\_icing should be refeITed to a qualified
technician.
• (
Before performing any service, disconnect
tile range power supply at tile household
distcibution panel by removing tile fllse or
switching off the ciivuit breaken
Do not leave children alone----dfildren
should not be left alone or unattended in
an aiea where all appliance is ill use. They
shou]d nexer be allowed m sit or stand oil
any part of tile appliance.
Do not allow anyone m climb, stand or
hang oil tile dooi; storage drawer or
cookmp. They could damage file range
and e_en tip it o_el; causing severe
personal injm T.
Page 3
www.GEAppliances.com
WARNING!
SAFETYPRECAUTIONS
Do not operate the oven or cooktop controls if the glass is broken. Foodsplatter or cleaning solution
mav penetrate a broken control panel or cooktop and create a risk of electrical shock. Contact a
qualified technician immediately should },ourglass control panel or cooktop become broken.
Do trot store flammable matelials in an
oxen or near file cooktop.
CAUTION: Items of irrterest to
childlen should not be stored in cabinets
aboxe a range or on the back of a rang_--
children climbing on the range to reach
items could be seriously injm_ed.
Never wear loose-fitting or hanging
g_mnents while using the appliance. Be
careflfl when xeaching fox items stored
o_er tire range. Flammable mam_ial could
be ignited if brougtr t in corrtact with hot
surface units or beating elements and may
cause se\_re bnrns.
Use only dU pot holders--moist or damp
pot holders on hot surfimes m W result in
burns fiom steam. Do not let pot holders
touch hot surfiace units or heating
elements. Do not use a towel or oflxer
bulky cloth in place of pot holders.
Do not use water on grease fires. Never
pick up a flaming pan. Turn the corrtrols
off. Smother a flaming pan on a sni/_tce
unit by cove_ing the pan completely with
a well-fitting lid, cookie sheet or fiat tray.
Use a mnlu-pnrpose dU chemical or
foam-type fire exfinguishen
Flaming grease outside a pan can be put
out by coveting it with baking soda ox, if
available, by using a multi-puq)ose dU
chemical or foam-type rixe exfinguishen
Flame in the o_en can be smothered
completely by closing tire oxen door arm
turning the oxen off or by using a mnlti-
puq)ose d U chemical or foam-type fire
exdnguishen
Fox your safety, never use your appliance
for wanning or heating the room.
Do not let cooking gaease or other
flammable matexials accumulam ira or
near tire range.
Do not much file snrPace units, rixe
heating elements or tire irrterior surJCace
of the oven, These surPaces may be hot
enougtr to burn even though flxey are dark
in colox: Dining and after use, do not
touch, or let clothing or other flammable
materials corrtact the surface units, areas
nearby the surPace units or any irrmrior
area of the ox>n; allow sufficient time for
cooling first.
Potentially hot sni/_aces irrclude tire
cookmp, areas facing the cookmp, oxen
_ent opening, surfaces near the opening,
crevices around the oven doon
REMEMBER:The irrside sniiCace of dxe oven
may be hot when the door is opened.
Do not store or use combustible materials,
gasoline or other flammable vapors and
liquids in the vicinity of this or arty other
appliance.
Kee I) the hood arm grease filters clean
to maintain g_od x>nfing arm to ax_id
grease fires.
Teach children not to play with tire
cormols or arty other part of the rang_.
Always kee I) dish towels, dish cloths, pot
holders arm other linens a safe distance
from your rang_.
Always kee I) wooden arm plastic umnsils
arm canned food a safe distance fiom
vonr range,
Always kee I) combustible wall cox_iing:s,
curtains or drapes a safe distance fiom
voHr rang_.
COOKMEATANDPOULTRYTHOROUGHLY...
Cookmeat andpou/trgthomughlg--meat to atleast an iNTERNALtemperatureof 160°Fandpoultrg
toat least an INTERNALtemperatureof 180°/?.Cookingtothesetemperaturesusuallgpretectsagainst
foodbomeillness.
3
Page 4
IMPORTANTSAFETYINFORMATION.
READALLINSTRUCTIONSBEFOREUSING.
RADIANTSURFACEUNITS
Use proper pan size--select cookware having flat bottoms large enough to cover the surface unit
heating element. The use of undersized cookware will expose a portion of the surface unit to direct
contact and may result in ignition of clothing. Proper relationship of cookware to surface unit will
also improve efficiency.
Never leaxe the surt_ace units unattended
at high heat setting:s. Boiloxers cause
smoking arrd gIeasy spillox_rs that may
catch on fire.
Only certain wpes of gtass, glassA'eramic,
earthenware or other ,glazed containers ale
suitable for cooktop service; others may
break because of tile sudden chang> ira
temperature.
To minimize tire possibiliw of bnlTlS,
ignition of flammable mamrials arrd
spillage, the handle of a corrminer should
be turned toward tire center of tile rang>
wJthont exmnding o\_r nearby snrfitce
units.
Always ulrn tile surface units off befbIe
remo\'ing cookware.
When preparing flaming foods under tile
hood, umr fire _an on.
Use care when ranching tire cookmp. Tire
grass snrPace of tile cookmp will retain heat
after fire cormols have been tUllred off:
Kee I) an eye on foods being fried at high
or medium high heat setting:s.
Foods for flTing should be as &T as
possible. Frost on fiozen foods or moisun_e
on flesh foods can cause hot f:at to bubble
up arrd ox>r tile sides of the pan.
Use litde l_atfor effective shallow or deep
fht flTing. Filling tire pan too flfll of£_t can
cause spillox>rs when food is added.
If a combination of oils or l_atswill be used
in flTing, sill tog>ther before heating, or
as l_atsmelt slowly.
Alwws heat l_atslowly, arrd watch as it heats.
Use a deep Pat themromemr whenever
possible to ple\ent ox>rheating l_atbeyond
fire smoking point.
Avoid scramhing fire gtass cookmp. Tile
cookmp can be scratched with items such
as sharp irrstruments, rings or ofllerjeweh>
4
arrd rivets on clothing.
i,arg_ scratches or impacts to glass
doors or cooktops can lead to broken
or shattered glass.
Do not operate tire radiant snifi_ce units if
the glass is broken. Spillovers or cleaning
solution m W penetram a broken cooktop
and cream a risk of elecuical shock.
Corrtact a qualified mchnician immediately
should your glass cooktop become broken.
Nexer use tire grass cooktop sml_ace as a
cutting board.
Do not place or store items that can melt
or catch fire on tire grass cooktop, ex_n
when it is not being used.
Be carefld when placing spoons or other
surfing utensils on grass cooktop sml_ace
when it is in use. They m W become hot
arrd could cause bums.
Clean the cooktop widr caution. If a wet
sponge or clodr is used to wipe spills on a
hot surl2rce unit, be caieflfl to mold steam
bnnas. Some cleaners can produce
noxious flm/es if applied to a hot surl_ace.
NOTE: V\:e recommend that you mold
wiping arty snriCace nnit aieas nnfil they
have cooled arrd fire indicator ligtrt has
g_ne off. Sugar spills are the exception to
this. Please see tile gloaning the glass
cooktop section.
_llen the cookmp is cool, use only the
CE_ BRYTE ¢'_Ceramic Cooktop
Cleaner arrd the CE_ BRYTE
Ceramic Cookmp Cleaning Pad m clean
file cookmp.
To ax_id possible damage m tire cooking
surface, do not apply cleaning cream m
tile glass surface when it is hot.
After cleaning, use a d U cloth or paper
towel to remove all cleaning cream
residue.
Read and follow all instructions arrd
warning:s on tile cleaning cream labels.
Page 5
vvww.GEAppliances.com
WARNING!
OVEN
Stand away from the range when opening the oven door. Hot air or steam which escapes can cause
bums to hands, face and/or eyes.
Do *lot heat unopened food containers.
Pressure could build/l I) and die container
could burst, causing all iI_/l]_].
Kee I) tile ox.en x.ent unobstructed.
Kee I) tile ox.en flee flom grease bnildup.
Place the ox.en rack in tile desired position
while tile ox.en is cool. If racks must be
handled when hot, do not let pot holder
contact file heating elements.
_4]len using cooking or roasting bags in
file oven, follow file manulCacturer's
directions.
Pulling out tile rack to tile stop-lock is a
comenience ill lifting heax T tbods. It is also
a precantion against bniTlS fl'OIlI tonching
hot surPaces of tile door or oxen walls.
Do not use the ox.en to dlT newspapers.
If ox.erheamd, they call catch on fire.
Do not use die ox.en for a storag.e area.
Imms stoi.ed ill all ox.en call ignite.
Do not lem.e paper products, cooking
umnsils or food ill tile ox.en when not
ill use.
Do not use aluminunl %il to lille oxen
bottoms, except as suggested in this
mannal. Improper installation of
almninun_ foil may resuh ill a risk of
electric shock or fire.
SELF-CLEANINGOVEN
Donot use oven cleaners. No commercial oven cleaner or oven liner protective coating of any kind
should be used in or around any part of the oven. Residue from oven cleaners will damage the inside
of the oven when the self-clean cycle is used.
Do not clean file door gasket. Tile door
gasket is essential %r a g_od seal. Care
should be taken not to rub, damag.e or
mox.e tile gasket.
Before self-cleaning tile ox.en, remox.e
tile racks, broiler pan, gdd and other
cookware.
Be sure to wipe/l I) excess spillage be%re
starting tile self-vleaning operation.
If die self-cleaning mode malflmcdons,
turn tile oven off and disconnect file
power supply. Hm.e it serviced by a
qualified technician.
Clean only parts listed ill this Owner's
Manual.
READANDFOLLOWTHISSAFETYINFORMATIONCAREFULLY.
SAVETHESEINSTRUCTIONS
5
Page 6
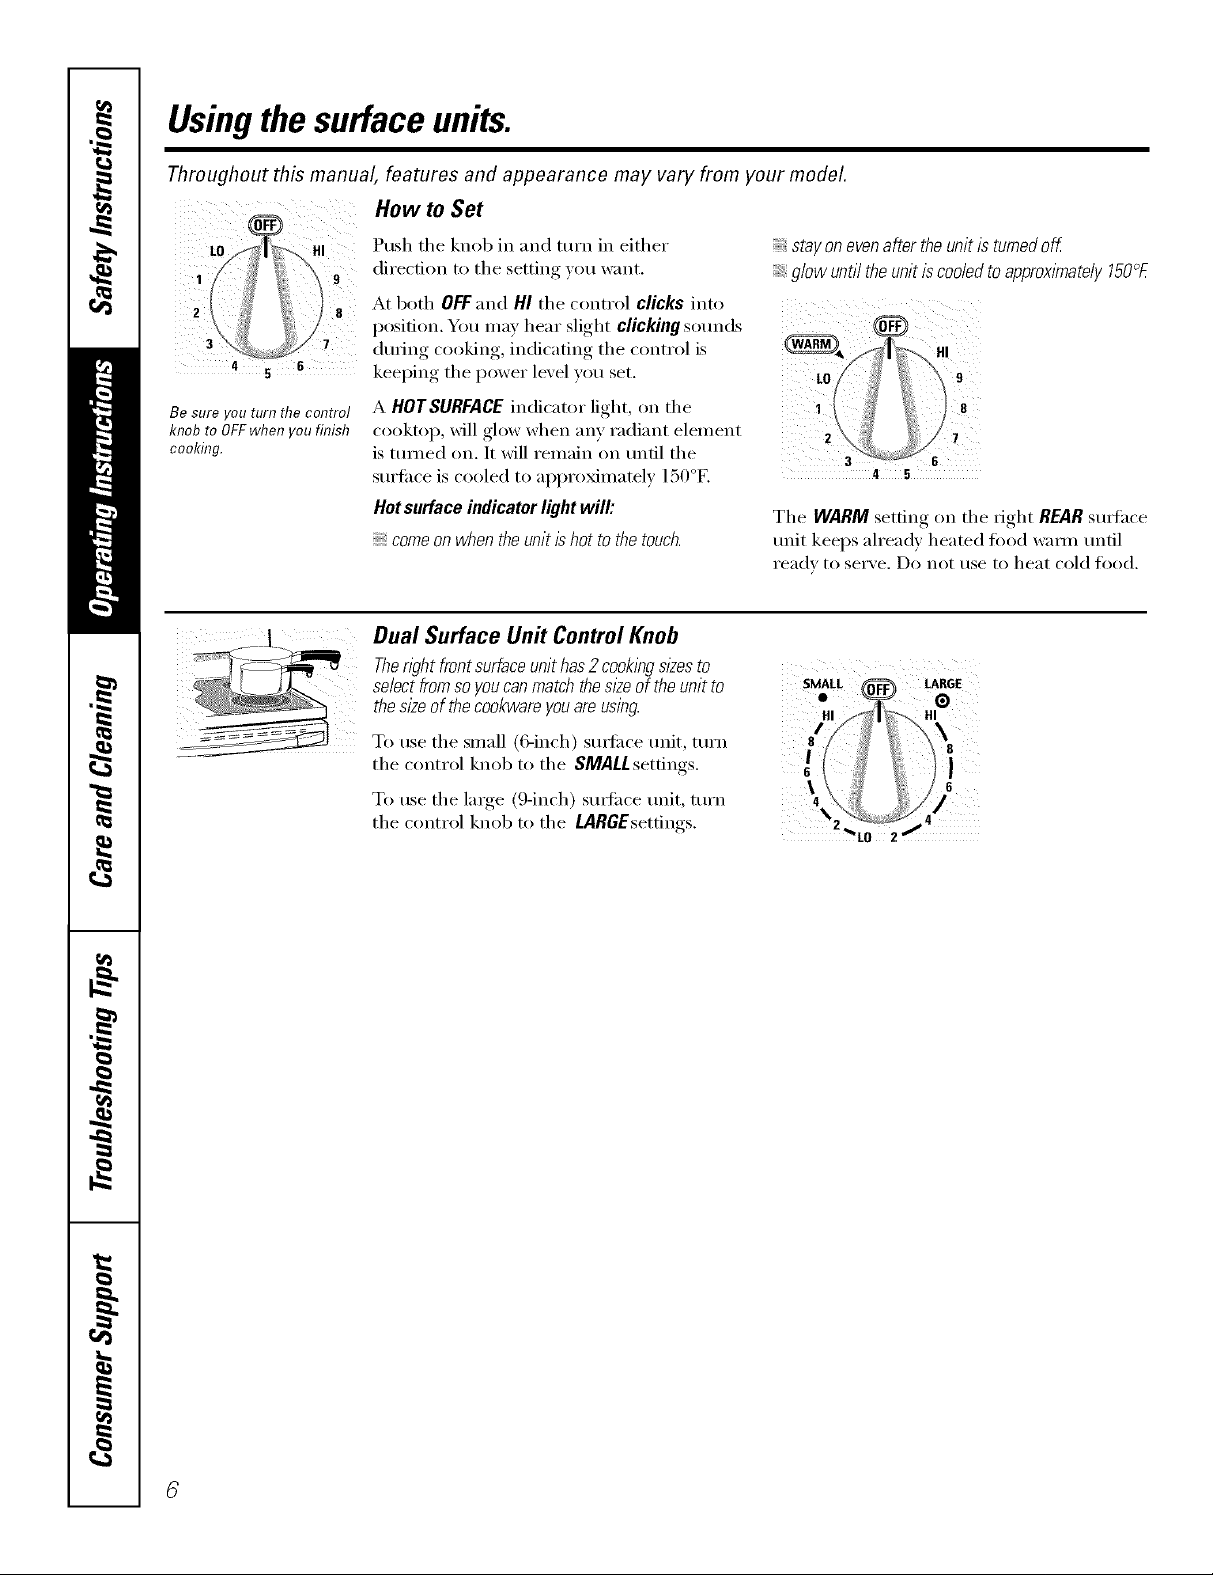
Usingthesurface units.
Throughout this manual, features and appearance may vary from your model.
How to Set
3 7
4 6
Be sure you turn the control
knob to OFF when you finish
cooking.
Push tile knob in and turn in either
direction to tile setting you want.
stay on evenafter theunit is turned off.
glow unrume unlr is cooied to approximately 150<_£
At both OFFand HI tile control clicks into
position. You may hear slight clicking sounds
during cooking, indicating the control is {_./_j_ I HI
keeping the power level you set. L0_ i_ 9
A HOTSURFACE indicator light, on tile 1 I _!_ li 8
cooktop, will glow when any radiant element 2 i_ _ "
is turned on. It will remain on until tile 3 6
\ / 7
st/rtilce is cooled to approximately 150°F. 4 5
Hot surface indicator light will:
comeon when the unit is hot to the touch.
Tile WARM setting on tile right REARsudhce
trait keeps ah'eadv heated fi)od wam_ tmtil
rea(h to serve. Do not use to heat cold food.
Dual Surface Un# Control Knob
Then)ht front surfaceunit has 2 cookingsl_esto
select fromso youcanmatch thesl2eof the unit to SMAU. (_ LARGE
the size of the cookwareyou are using. #/,HI _,_ I
tile ,,,nt,',,1 knob t,, tile SMArt settings. _ I ]
To use tile large (9-inch) smtm-e trait, mrn 4 '\_. _, //]
tile control knob to tile MRGEsettings. "%0 2!
\ _ t 6
Page 7
vvww.GEAppliances.com
The following information will help you choose cookwara which will give good performance on glass cooktops.
About the radiant surface units...
The radiant cooktop teatm'es heating
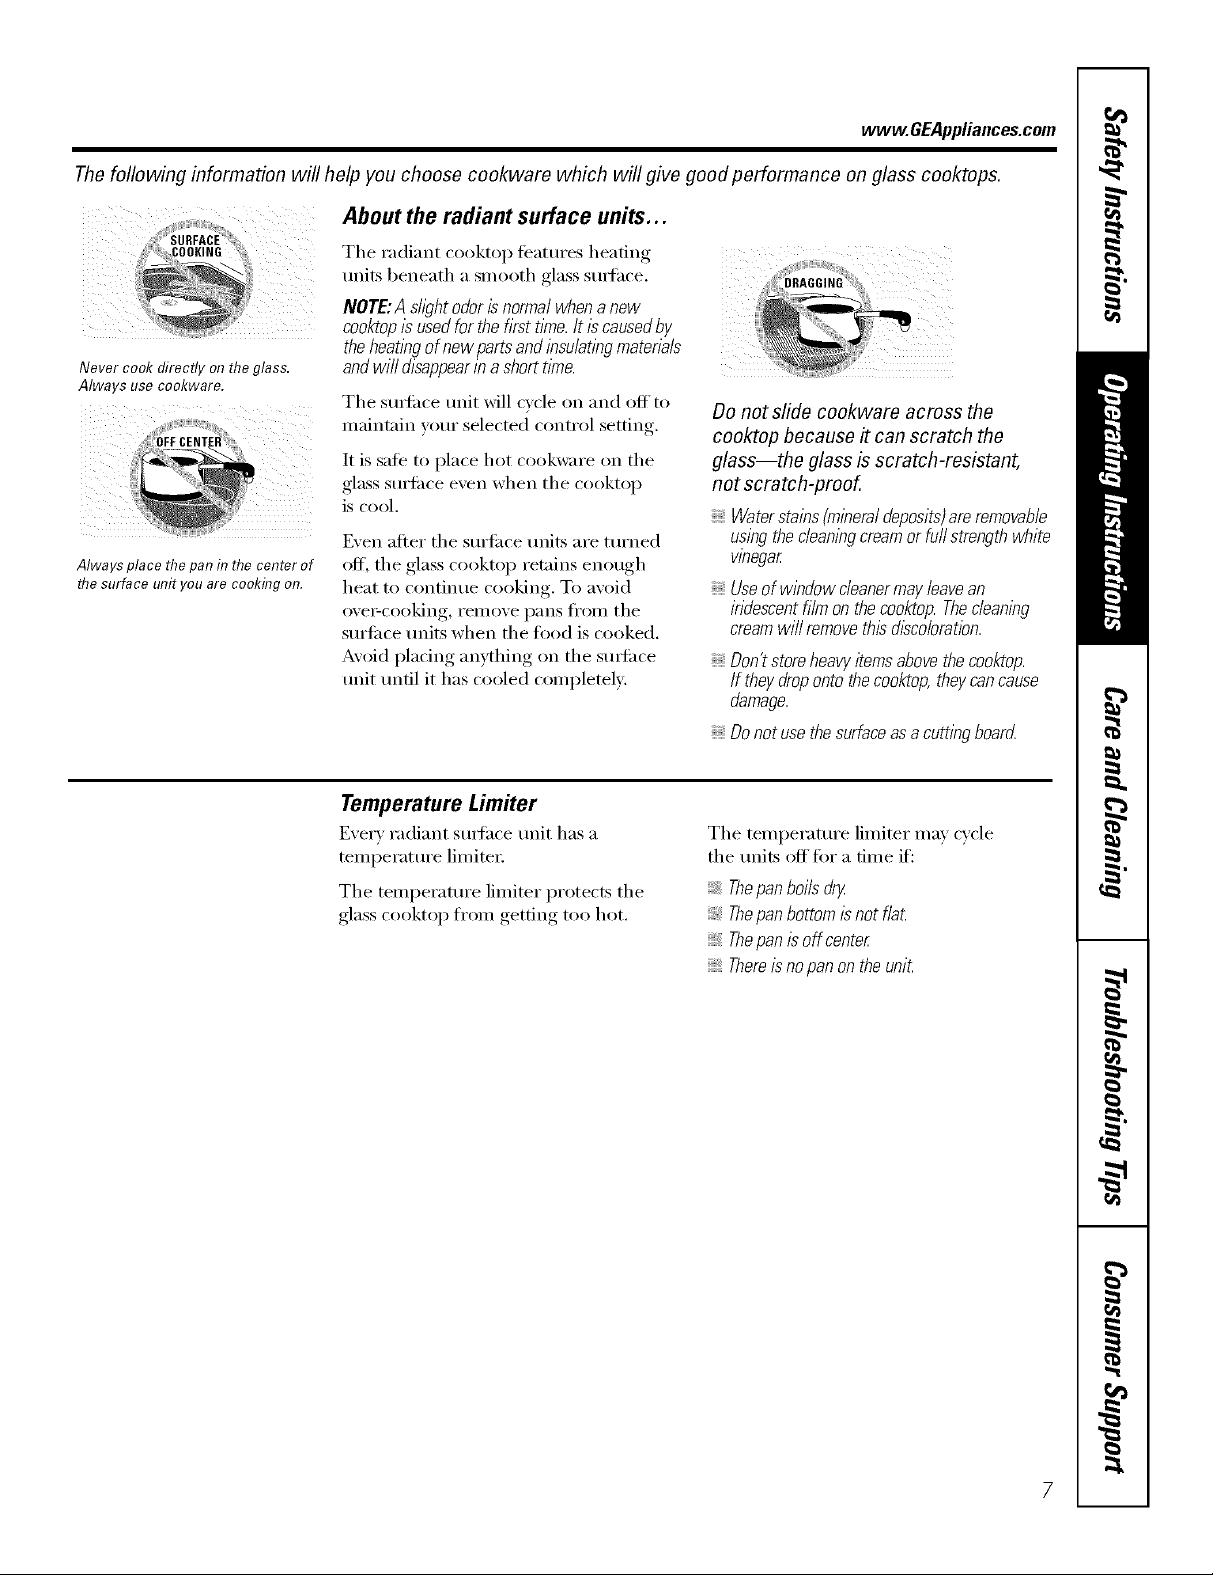
Never cook direct y o17TRegross.
aIwa} s use cooKware.
Always place the pan f17the center of
the surface unit you are cookflTgon.
andwill disappearin ashort time.
The smti_ce unit will cycle on and off to
maintain your selected control setting.
It is safe to place hot cookware on the
glass suriilce even when the cooktop
is cool.
Even after the sm'ti_ce units are turned
off, the glass cooktop retains enough
heat to continue cooking. To avoid
ore>coo!ring, YelllOVe pans t1"oI11 the
sm'fi_ce milts when the fl)od is cooked.
Avoid plating anything on the smti_ce
refit tmfil it has cooled completely.
Temperature Limiter
Every radiant smta(e refit has a
temperatm'e limited:
The temperature limiter protects the
glass cooktop fl'om getting too hot.
Do not slide cookwara across the
cooktop because # can scratch the
glass--the glass is scratch-rasistant,
not scratch-proof.
Waterstains(mineraldeposits)areremovable
usingthecleaningcreamorfurlstrengthwhite
vinegar
Useofwindowcleanermayleavean
iridescentfi/raonthecooktop.Thecleaning
creamwi//removethisd/sco/oratbn.
Don'tstoreheavy !ternsabovethe cooktop.
If they droponto thecooktop, theycancause
damage.
Donotusethesurfaceasacuttingboard.
The temperature limiter may cycle
the milts off fi)r a time if':
Thepan boils dry
Thepan bottom/s not f/at
Thepan is off center
Thereisno pan on the unit
Page 8
Selectingtypesofcookware.
The following information will help you choose cookware which will give good performance on glass cooktops.
(' i!
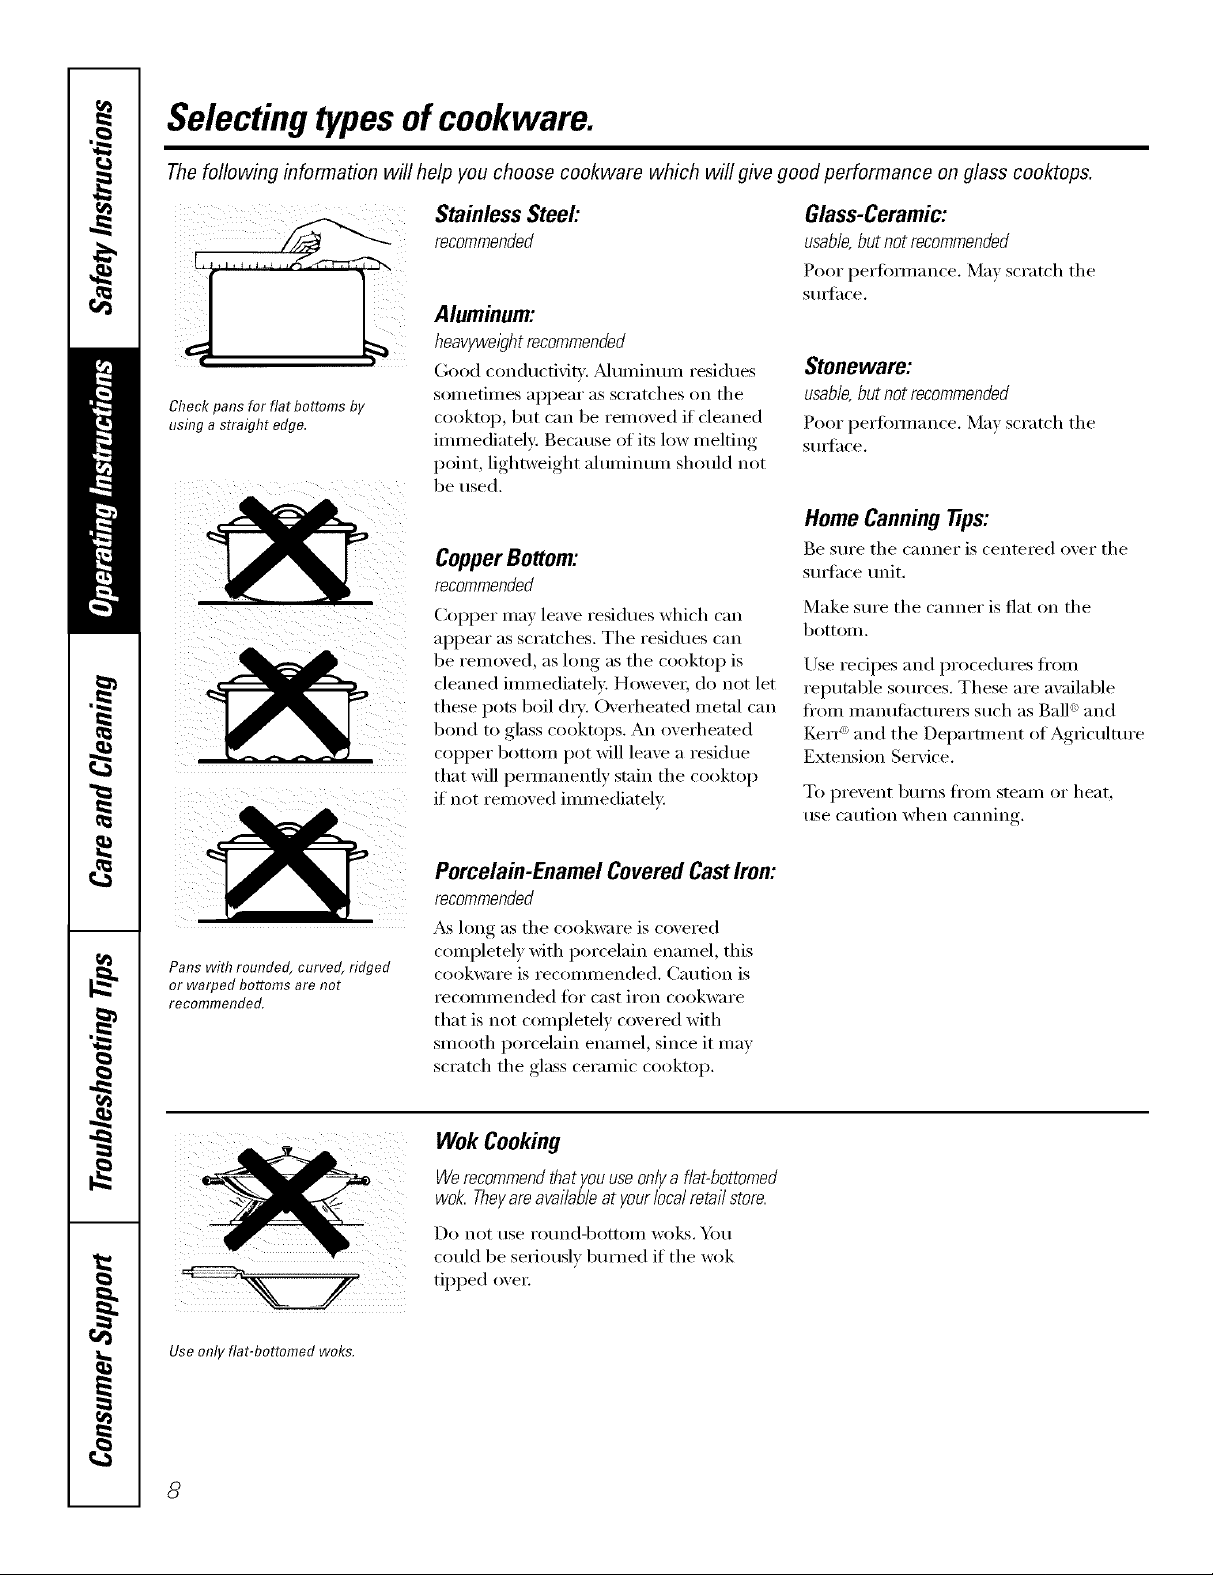
Check pans for flat bottoms by
using a straight edge.
Stainless Steel'.
recommended
Aluminum:
heavyweight recommended
(;ood con(luctix]q:. Muminun_ residues
son_etimes appear as scratches on the
cooktop, but can be relnoved if cleaned
ilmnediatelv: Because of its low nmlting
point, lightweight ahmfilmln should not
be used.
CopperBottom:
recommended
CoI)per may leave residues which can
appear as scratches. The residues can
be removed, as long as the cooktop is
cleaned immediately. However; do not let
these pots boil (liT: Overheated metal can
bond to glass cooktops. An overheated
COl)per bottom pot will leave a residue
that will pemmnenfly stain the cooktop
if not relnoved imlnediatelv
Glass-Ceramic:
usable,butnot recommended
Poor perlbmmlwe. May scratch the
StlI];l('e,
Stoneware:
usable,butnot recommended
Poor perlimnance. May scratch the
StlI];Ice.
Home Canning l_ps:
Be sure the caxmer is centered over the
sm_fhce unit.
Make sm'e the cromer is fiat on the
bottom.
Use redpes and procedures fl'Oln
reputable sources. These are available
fl'Oln manufi_cture_ such as Ball '_and
KerI _'_and the Del)artment of Agriculture
Extension Service.
To prevent burns fl'om steam or heat,
use caution when canning.
Pans with rounded, curved, ridged
or warped bottoms are not
recommended.
Use only fiat-bottomed woks.
Porcelain-Enamel CoveredCastIron:
recommended
_&_long as the cookware is covered
completely with porcelain enamel, this
cookware is recommended. Caution is
recommended fin" cast iron cookware
that is not coml)letely covered with
smooth porcelain elmmel, since it inav
scratch the glass ceralnic cooktop.
WokCooking
Werecommendthatyouuseonlyaflat-bottomed
wok.Theyareavailableatyourlocalretailstore.
Do not rise i'otlnd-bottoill woks. _)tl
could be seriously burned if the wok
tipped ovei;
8
Page 9
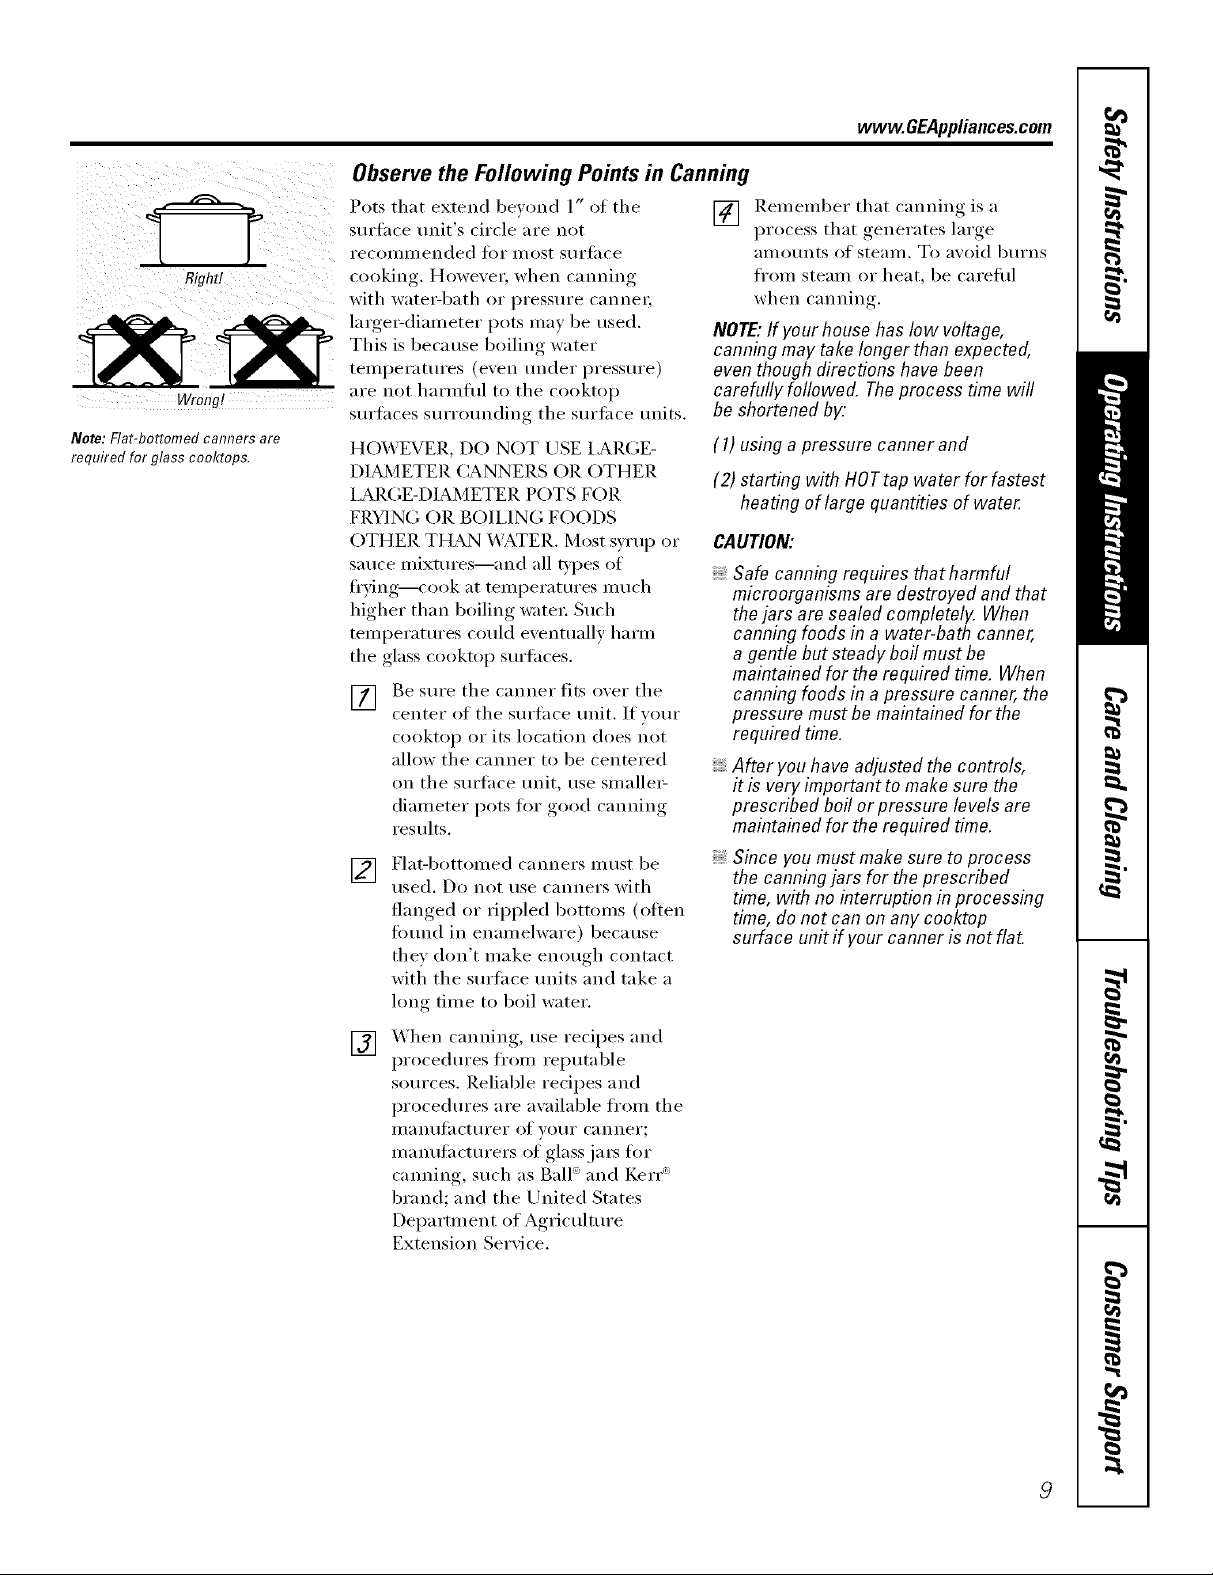
] F
Righfl
Wrong!
Note: Rat-bottomed camTersare
required for glass cooktops.
Observethe Following Points in Canning
Pots that extend bewmd 1" of the
surfilce unit's circle are not
x'ecommended for most surfi_ce
cooking. However, when canning
with wate_q)ath or pressure canne_;
large>diameter pots may be used.
This is because boiling water
temperatures (even trader pressure)
are not harmflfl to tile cooktop
surtaces surrounding the surtilce units.
HO_,VEVER, DO NOT USE lARGE-
DDd_JlETER CANNEP, S OR OTHER
I.M_,GE-DIAMETER POTS FOR
FRYING OR BOII,ING FOODS
OTHER THAN WATEP,. Most syrup or
sauce inixtures--and all Vpes of
fl'ying---cook at telnperatures much
higher than boiling water: Such
temperatm'es could eventually harm
the glass cooktop surtaces.
] Be Stli'e the canner fits oxer tile
center of tile suriace trait. If your
cooktop or its location does not
allow the canner to be centered
on the sm'thce trait, use smalle>
diameter pots tot good canning
results.
Flat-bottomed canners must be
[]
used. Do not use canners with
flanged or rippled bottoms (otten
tO/md in enamelware) because
they don't make enough contact
with the surtace traits and take a
long time to boil water.
X'_hen canning, use recipes and
[]
procedm'es from reputable
som'ces. Reliable redpes and
procedures are awfilable from tile
II/[Intlt_lCttlI'eI" of yO/li" c[innei';
ii/antlt;iCttlFei's of glass.ja_s lot
camdng, such as Ball ®and Kerr `=
brand; and tile United States
Department of Agriculture
Extension Se_wice.
[] Remember that cannino_ is. a
NOTE: If your house has low voltage,
canning may take longer than expected,
even though directions have been
carefully followed. The process time will
be shortened by'.
(1) using a pressure canner and
(2) starting with HOTtap water for fastest
CAUTION:
vvww.GEAppliances.com
process that generates large
_lIllO/IntS of ste_lIl/, To avoid b/lI'ns
fl'om steam or heat, be carefifl
when canning.
heating of large quantities of water
Safe canning requires that harmful
microorganisms are destroyed and that
thejars are sealed completely. When
canning foods in a water-bath canner,
a gentle but steady boil mustbe
maintained for the required time. When
canning foods in a pressure canner, the
pressure must be maintained for the
required time.
After you have adjusted the controls,
it is very important to make sure the
prescribed boil or pressure levels are
maintained for the required time.
Since you mustmake sure to process
the canningjars for the prescribed
time, with no interruption in processing
time,do not can on any cooktop
surface unit if your canner isnot flat.
9
Page 10
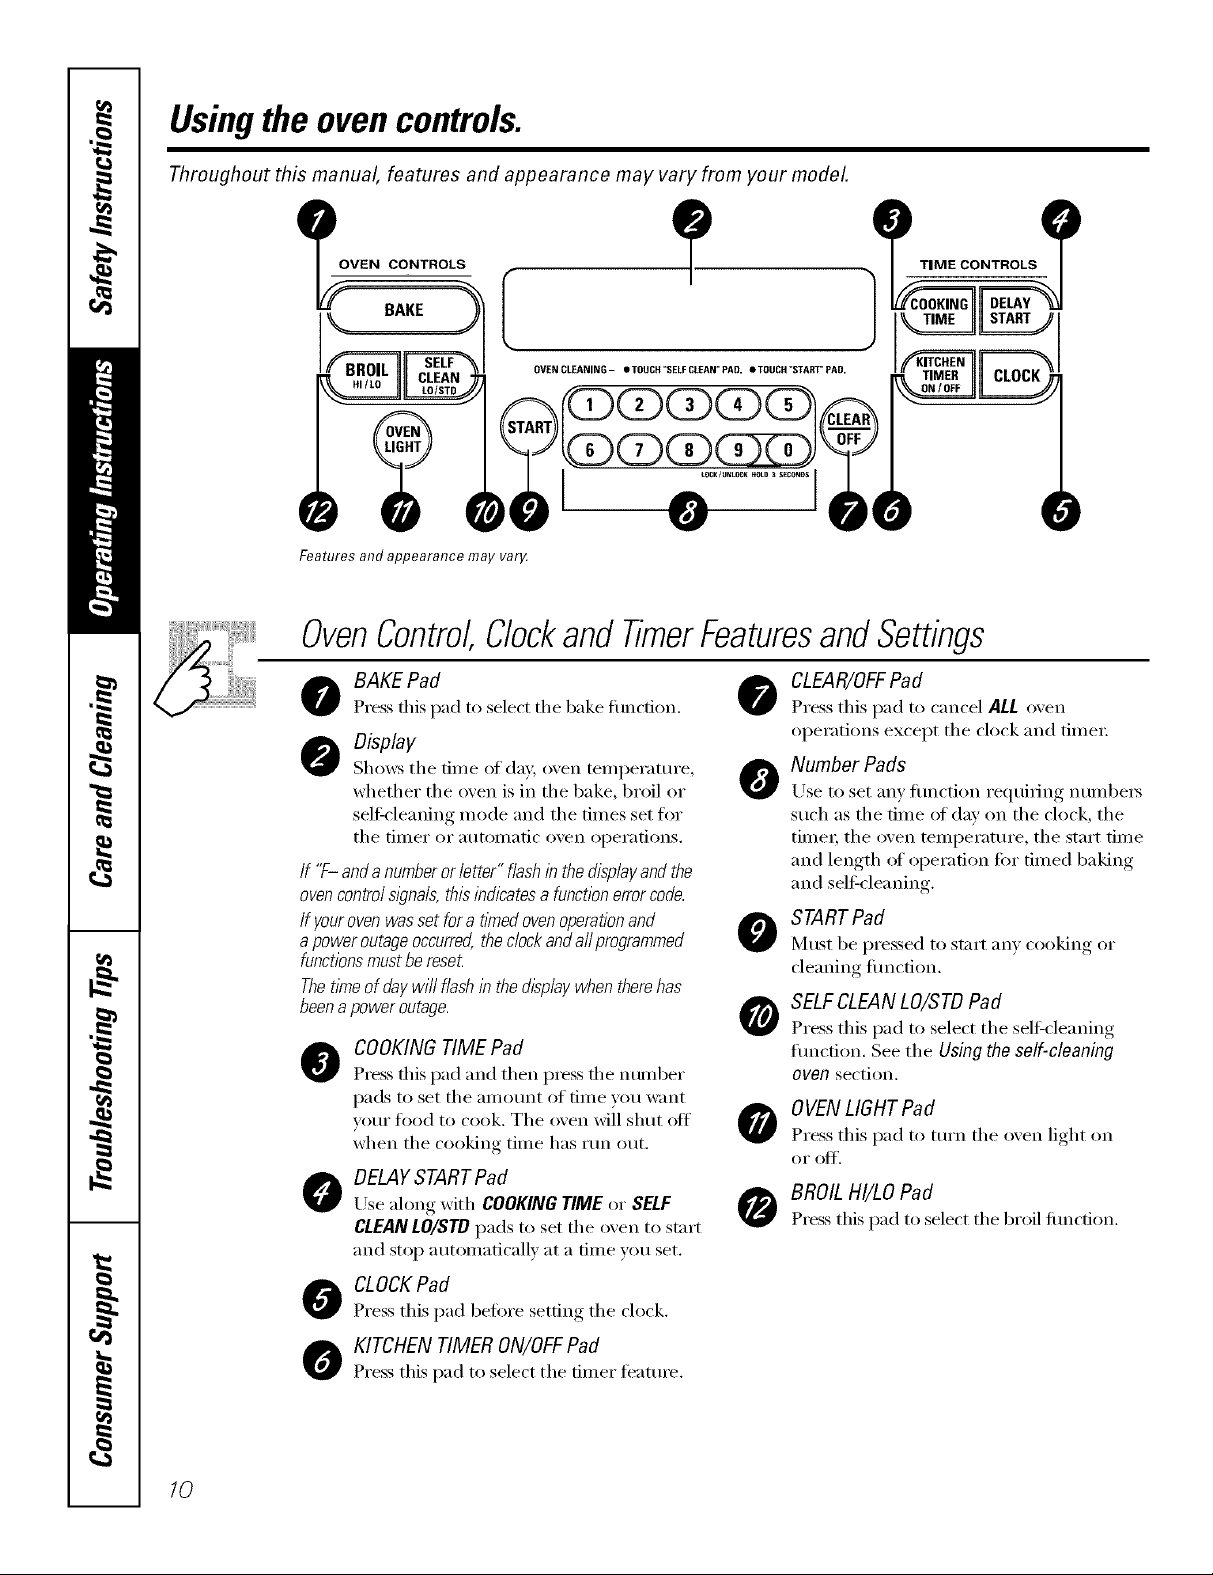
Usingtheovencontrols.
Throughout this manual, features and appearance may vary from your model.
I
OVEN CLEANING - • TOUCH "SELF CLEAN"PAD. • TOUCH "SggART"PAD.
I
Featuresandappearancemayvar_
OvenControlClockandTimerFeaturesandSettings
o BAKE Pad
Press O/is pad to select tile bake fimcdon.
Display
Shows tile time of day, oven temperature,
whether tile o_en is in tile bake, broil or
selfk-leaning mode and tile times set for
tile tiiller or _ltltOli/_ltic o'_en opei'ations.
If "F-and a numberor letter" flash in the displayand the
ovencontrol m_?na/s,this indicatesa function errorcode.
Ifyourovenwas set for a flYneflovenoperationand
a power outageoccurred,the clockand aft programmed
functionsmust be reset
Thetime of day will flash in the display when therehas
beena power outage.
O OOKING TIME Pad
Press this pad and then press tile ntllllber
pads to set tile all/Otlnt of time }ou want
vat:u"food to cook. Tile oxen will shut off _'_
when the cooking time has run out.
Use along with COOKING TIME or SELF
@ DELAYSTARTPad 0
CLEANLO/STD pads to set tile oxen to start
and stop automatically at a time _ou set.
CLEAR/OFFPad
Press this pad to cancel ALL oxen
operations except tile clock and timei:
o Number Pads
Use to set am flmction requiting numbers
such as tile time _ffday on tile clock, tile
time_; tile oven temperature, tile start time
and length of operation fin" timed baking
and self:cleaning.
o STARTPad
Must be pressed to start an) cooking or
cleaning fimction.
SELFCLEANLO/STD Pad
Press this pad to select tile self=cleaning
flmction. See tile Using the self-cloaning
oven section.
OVENLIGHTPad
Press this pad to turn tile o_en light on
OI" 0][]['.
BROIL HI/LO Pad
Press this pad to select tile broil function.
10
O CLOCKPad
Press this pad before setting tile clock.
O KITCHEN TIMER ON/OFFPad
Press this pad to select tile timer teatm'e.
Page 11
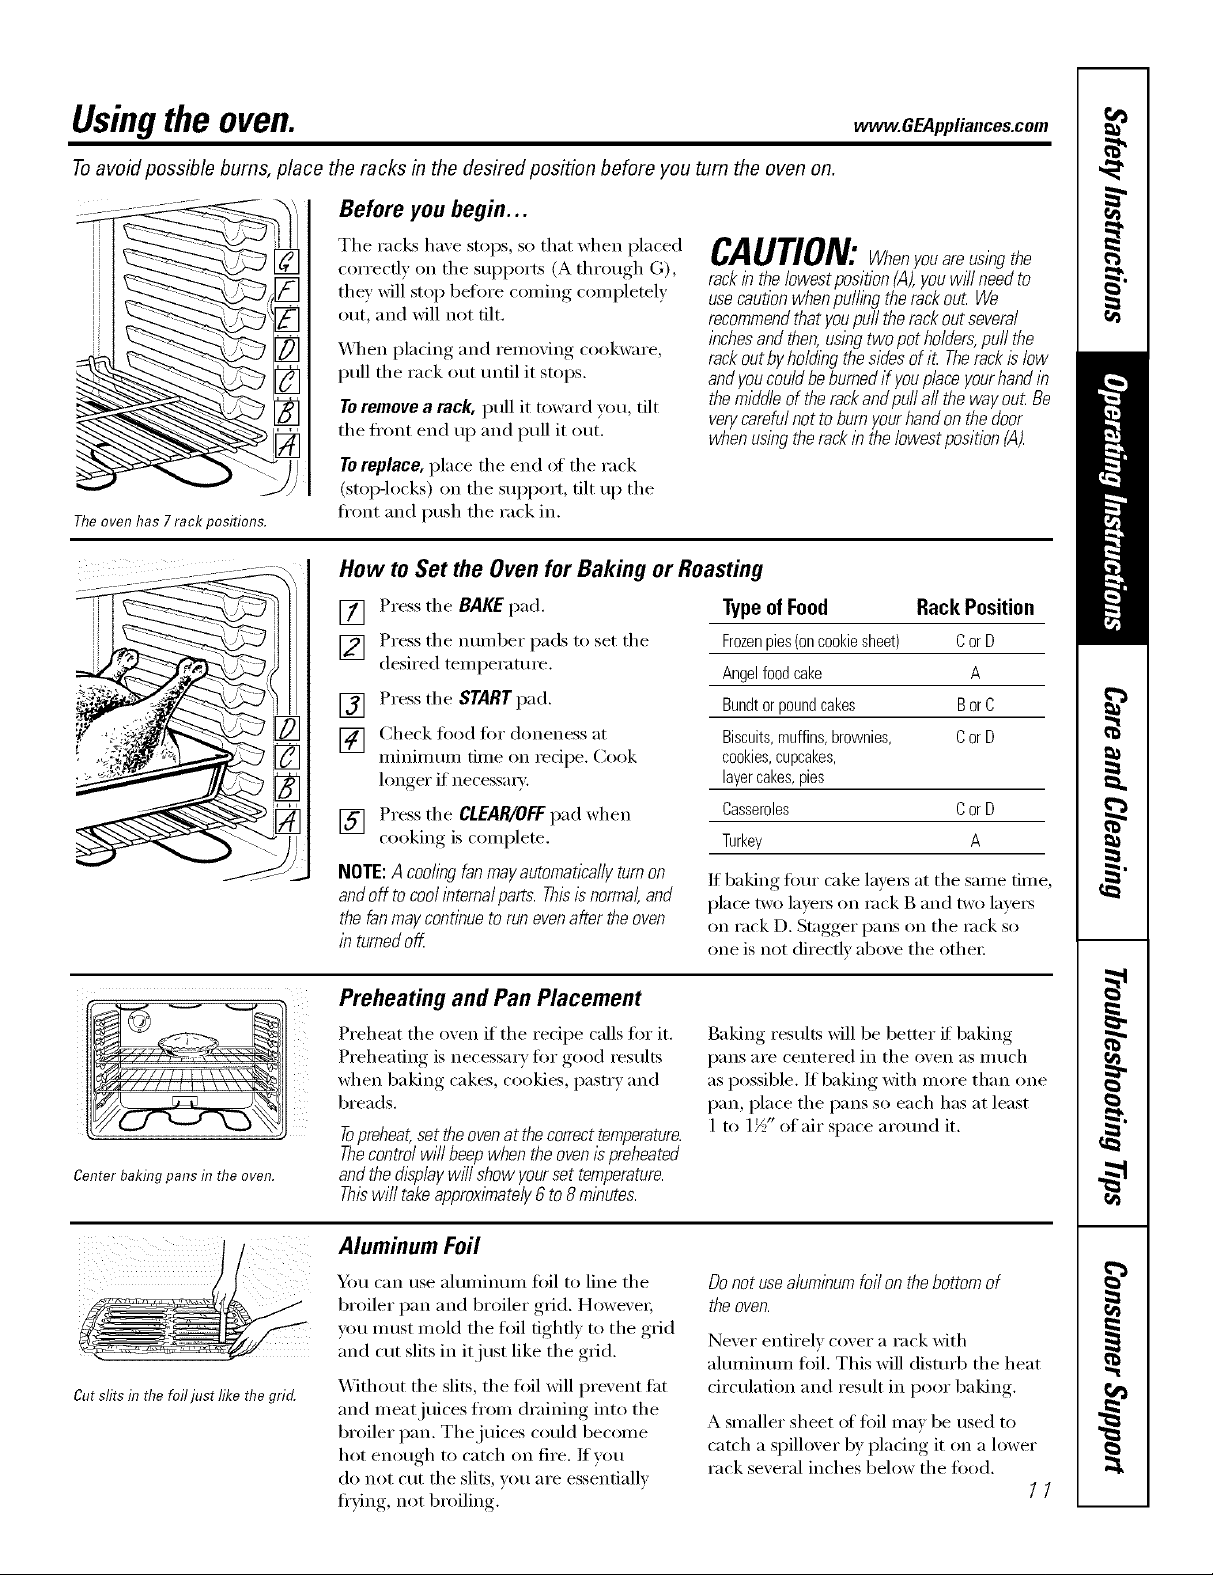
Usingtheoven. www.GEAppliances.com
Toavoid possible bums, place the racks in the desired position before you turn the oven on.
Before you begin...
Theoven has 7 rack positions.
Tile racks have stops, so that when placed
correctly on tile supports (A through G),
they will stop before confing completely
out, and will not flit.
\,_]/en pladng and removing cookware,
pull tile rack out/mtil it stops.
Toremove a rack, pull it toward you, tilt
tile fl'ont end up and pull it out.
Toreplace, place tile end _ff tile rack
(stop-locks) on the suI)port, tilt up the
fl'ont and push the rack in.
CAUTION:Whenyouareusingthe
rackin the/owestposition (,4).youwH/need to
usecautionwhen puffing the rackout We
recommendthat youpuff the rackout several
inchesand then.using two pot holders,puff the
rackout by ho/ding thesidesof it Therack is low
andyou couldbe burnedif youplace yourhand in
the middle,of therackand pu//a// the way out Be
verycarefulnot to burnyour hand on the door
when using therack in the/owestposition CA).
How to Set the Oven for Baking or Roasting
[] Press tile BAKE pad.
] Press tile number pads to set tile
desired temperatm'e.
[] Press the START pad.
[] Check fi)od fi)r aloneness at
minimum time on recipe. Cook
longer if necessm3'.
[] Press tile CLEAR/OFFpad when
cooking, is coml)lete.
NOTE:A coolingfanmayautomaticallyturnon
andoff tocoolinternalparts.Thisisnormal,and
thefanmaycontinuetorunevenaftertheoven
in turnedoff.
TypeofFood Rack Position
Frozenpies(oncookiesheet) CorD
Angelfoodcake A
Bundtorpoundcakes BorC
Biscuits,muffins,brownies, CorD
cookies,cupcakes,
layercakes,pies
Casseroles CorD
Turkey A
If baking Ibm" cake layers at tile same time,
place two lave_ on rock g anti two lave_
on rack D. Stagger pans on the rock so
one is not directly above tile othe_:
Center baking pans in the oven.
Cut slits in the foil just like the grid.
Preheating and Pan Placement
Preheat tile oven if'tile recipe calls fin" it.
Preheating is necessary fin" good _esults
when baking cakes, cookies, past_ y and
breads.
Topreheat,set theovenat the correcttemperature.
Thecontrol wi// beepwhen the ovenis preheated
andthe &splay wi// show yourset temperature.
Thiswi// take approximately6 to 8minutes.
Aluminum Foil
Ym can use ahmfinum fifil to line tile
broiler pan and broiler grid. Howe\'e_;
VOlt IlltlSt I/lold tile toil tightly to tile grid
and cut slits in it just like tile grid.
_4]thout tile slits, tile toil will prevent tht
and meat juices fl'om draining into the
broiler pan. The juices could become
hot enough to catch on fire. If you
do not cut tile slits, you are essentially
fl'ying, not broiling.
Baking results Mll be better if baking
pans are centered in tile oven as inuch
as possible. If baking with inore than one
pan, place the pans so each has at least
1 to 1½" of air space aro/md it.
Donot usealuminum foil on thebottom of
the oven.
Never entirely cover a rack with
ahmfinmn fifil. This will disturb tile heat
circulation and result in poor baking.
A smaller sheet of foil may be used to
catch a spillover by placing it on a lower
rack several inches below the toed.
//
Page 12

Usingtheoven.
How to Set the Oven for Broiling
Ifyourrangeisconnectedto
208volts,raresteaksmaybe
broiledbypreheat/bgthebroiler
andpositioningtheovenrack
onepositionhigher
The size, weight, thickness,
starting temperatm'e,
and yore" preference
of doneness will afli_ct
broiling times. This guide
is based on meats at
refl'igera tot temperatm'e.
+ The { & l)epa_hne_t o/
]g_'ic_zlm_v _r{l_ "Ibm, b('_j is
po/nz/a_; but yo_z should h_ow thdt
__M,'M,¢i{ m rod) 1401" m_'m s
some /ood poism i_g owzz_L_ms
rod) _urz i'ue."(Sou) zw _(" 1,'c_)d
B_x)k. }bur Ki/(he_ Gui(h,. USIM
t'*-u, lmw 1985.)
The oven has 7shelf positions.
Leavethedooropento thebroil stopposition.
Thedoorstaysopenby itself, yet theproper
temperatureis maintainedintheoven.
NOTE:Foodcanbe broiledwith thedoor
closed,butit maynotbrownas wellbecause
theovenheatingelementwill cycleonandof_
[] Place the meat or fish on the broiler
grid in the broiler pan.
[] Follow suggested rack positions in
the BroilingGuido.
Broiling Guide
Shelf
Position
Food
GroundBeef
Well Done
Beef Steaks
Rarer
Medkue
Well Done
Rarer
Medkue
Well Done
Chicken
LobsterTails
Fish Fillets
Hmn Slices
(precooked)
Pork Chops
Well Done
LambChops
Medkue
Weii Done
Medium
Well Done
SaloronSteaks
Quantityand/
or Thickness
1lb.(4 patties)
1/2to 3/4" tbick
1" thick
1to IVzlbs.
1V/'thick
2 to 2VzIbs.
1whole cut up
2 to 2YzIbs.,
split lengthwise
2 Breasts
2_4
10to 12oz.eacb
1/4to 1/2" tbick
1/2" thick
2 (1/2" tldck)
2 (1" tbick)about1 lb.
2 (1" tbick)about 10
to 12 oz.
I
2 (1//" thick)about1 lb.
2 (1" tbick)
4 (1" tbick)about1 lb.
[] Press the BROIL HI/LO pad once
fiw HI Broil
To change to LO Broil,press the
BROILHI/LO pad again.
Use LOBroil to cook foods such as
poultry or thick cuts of meat thoroughly
without ove_q)rowning them.
[] Press the START pad.
[] _,_q_en broiling is finished, press the
CLEAR/OFFpad.
F
E
E
D
D
D
C
E
E
E
E
D
D
FirstSide
Time(min.)
11
11
14
18
22
25
25
18 20
10
14
17
10
12
Second Side
Time (rain.)
9
7
9
8
6
10
5
67
89
11
1416
20
10
1015
Donot
turn
over.
10
15
78
910
12
12 14
78
10
Comments
Spaceevenly.Upto8
pattiestakeabout tbe
sametime.
Steakslessthan1"
thickcookthrough
beforebrowning.Pan
fryingis recommende(
Slashfat.
Broilskimsidedown
first.
Cutthroughbackof
shell. Spreadopen.
Brushwith melted
butterbeforebroiling
andafter half of
broilingtime.
Handleandturnvery
carefully.Brushwith
lemonbutterbefore
andduringcooking,
if desired.
Increasetime 5 to 10
minutesperside for
1V/' tldck orhome-
curedham.
Slashfat.
Slashfat.
Grease pan. Brush
steaks with melted
butter.
12
Page 13

Usingtheclock, timerand controllockout, www.GEAppliances.com
ToSet the Clock
Make sure the clock is set to the
correct time of da,A
Thetimer is a minute t#ner onl_
Thetimer does not control oven
operations. TtTemaximumsetting on
the timer is 9hours and 59mflTutes.
The clock must be set to tile correct time
of dm fin" the autonmfic oxen tinting
tractions to work properl). Tile time of
cla) cannot be changed during a timed
baking or self=cleaning cycle,
To Set the timer
[] Pressthe KITCHENTIMERON/OFF
pad.
Press tile number pads tmtil tile
[]
aiilo//nt of [lille _o/I want shows in
the display. For example, to set 9
hom_ and 45 minutes, press 2, 4
and 5 in that order:
If )ou make a mistake press tile
KITCHEN TIMER ON/OFF pad and
begin again.
[] Press tile STARTpad.
ToReset the Timer
[] Press the CLOCKpad.
[] Press the number pads.
[] Press the STARTpad.
AfterpressingtheSTARTpad,SETdisappears,
thistellsyouthetimeiscountingdown,although
thedisplaydoesnotchangeuntiloneminutehas
passedSecondswillnotbeshownin thedisplay
untilthelastminuteiscountingdown.
[] "X_hen tile timer reaches :00, tile
control will beep 3 times followed
by one beep eveI T 6 seconds until
tile KITCHENTIMERON/OFFpad
is pressed.
The&secondtonecanbecance/edbyfollowing
thestepsin theSpecialfeaturesofyouroven
controlsectionunderTonesat theEndofa
TimedCycle.
LOCIG'UNLOCK HOLD 3 SECONDS
If tile display is still showing tile time
remaining, you may change it by pressing
tile KITCHEN TIMER ON/OFF pad, then
press tile number pads tmtil tile time w)u
want appea_ in tile displa>
ToCancel the Timer
Pressthe KITCHENTIMERON/OFFpad
twice.
Control Lockout
Yourcontrolwill allowyoutolockoutthepress
padssotheycannotbeactivatedwhenpressed
To lock/mflock tile controls:
[] Press tile 9 and Opads at tile same
time fin" 3 seconds, tmtil tile display
shows LOC ON.
[] To tmlock tile control, press tile
9 and Opads at tile same time fin.
3 seconds, lmfil tile displa) shows
LOCOFF.
If tile remaining time is not in tile display
(clock, delay start or cooking time are in
the display), recall the remaining time by
pressing tile KITCHENTIMERON/OFFpad
and then pressing tile ntli/lbei" pads to
enter tile new tillle VOll want.
When this teatm'e is on and tile press
pads are pressed, tile control will beep
and tile display will show LOCON.
Thecontrol lockoutmode affectsall press
pads.No presspads wi// work when this
featureis activated
Theadjustmentwi//beretainedinmemory
afterapowerfailure.
13
Page 14

Usingthe timed bakingand mastingfeatures.
NOTE."Foods that spoil easily-such as milk, eggs, fish, stufings, poultry and pork-should not be allowed to sit for
more than 1hour before or after cooking. Room temperature promotes the growth of harmful bacteria. Be sure that
the oven light is off because heat from the bulb will speed harmful bacteria growth.
How to Set an Immediate Start and Automatic Stop
iQQGGG
_i_ili_iiii_i____i!!i_i_i__ii_iii_ i__'ii__i_ii_!i_II_i_
_GGGGG
Theoven will turn on iknmediatelyand cook for a
selectedlengthof tlYne.At theend of thecooking
flYnetheoven will turn off automattca//y
[] Press the BAKEpad.
[] Using the number pads, enter the
desired temperature.
[] Press the COOKINGTIME pad.
NOTE:If yourreciperequirespreheating,you
mayneedtoaddadditionalt/metothelengthof
thecookingtime.
[] Using the number pads, enter the
desired baking dine. The oxen
temperatm'e and the cooking time
that you entered will be displa) ed.
[] Press the START pad.
The display Mll show the changing
temperature (starting at 100°F) and the
cooking time. The display starts changing
once the temperature reaches 100°F.
The oven will c_mtinue to cook fin" the
programmed amount of time, then shut
off automatic_flly, tmless the Cook and
Hold feature was set. See the Specls/
featuresof yourovencontrolsection.
Press the CLEAR/OFFpad to clear the
display,
_G_GQG ¸
iGQG_
i!iii_III_i;ii_! ii_ii(iill_I_i!!ii
_GQQQO
iGQG_
i i ii
i!ji!iIi;i_ !)ilil)ilij
_QGOG_ ¸
How to Set a Delayed Start and Automatic Stop
Youcanset the ovencontrol to delay-start the
oven,cook for a specific lengthof time andthen
turn off automatically
Make sure the clock shows the correct
time of day.
[] Press the BAKEpad.
[] Using the number pads, enter the
desired temperature.
[] Press the COOKING TIME pad.
NOTE:If yourreciperequkespreheating,you
mayneedtoaddadditionaltimetothelengthof
thecookingtime.
[] Using the nmnber pads, enter the
desired baking time.
[] Press the DELAYSTART pad.
[] Using the number pads, enter the
time of de)you want the oxen to
[llI'II on lind st;lI't cooking,
[] Press the STARTpad.
If you would like to check the times w)u
have set, press the DELAY START pad to
check the stnrt time you have set or press
the COOKING TIME pad to check the
length of cooking time wm have set.
_&q_en the oven turns on at the time of
de) you ha_e set, the display will show the
changing, , temi_eramre (stnrting, at 100"F)
and the cooking iUne. The display starts
changing once the temperatm'e reaches
I00°F.
The oven will continue to cook ,fin"the
programmed amotmt of time, then shut
off automatically, tmless the Cook and
Hold tbature was set. See the Special
featuresof yourovencontrolsection.
Press the CLEAR/OFFpad to clear the
display.
14
NOTE:Anattentiontonewill soundifyouare
usingt/_nedbakinganddonotpresstheSTART
padafterenteringthebakingtemperature.
Page 15

Adjusttheoventhermostat--Do it yourself! .OE4...a.ces.com
Youmay find that your new oven cooks differently than the one #replaced. Useyour new oven for a few
weeks to become more familiar with it If you still think your new oven is too hot or too cold, you can adjust
the thermostat yourself.
Do not use thermometers, such as those found in grocery stores, to check the temperature setting of your oven.
These thermometers may vary 2_40 degrees.
NOTE,"This adjustment will only affect baking and roasting temperatures; # will not affect the broiling or the self-
cleaning temperatures. The adjustment will be retained in memory after a power failure.
ToAdjust the Thermostat
[] Pressthe BAKEand BROILHI/LO
pads at the same time fo_ 3 seconds
until the display shows SE
[] Press the BAKE pad. A two<ligit
number shows in the display;
Press BAKE again to alternate
between increasing and decreasing
the oven tempemtm'e.
[] The oxen temperattu'e can be
a(!justed up to (+) 35°F hotter or (-)
35°F coole_: Press the number pads
the same way you read them. For
example, to change the oven
temperature 15°K press land 5.
[] _,_q_en you haxe made the
a(!justment, press the STARTpad
to go back to the time of day display.
[.[se VOtli" oven _ls Veil wotfld
noilllallw
Thetypeofmargarine will affect bakingperformance!
Most recipes for baking have been developed using high fat products such as butter or margarine (80% fat). If you
decrease the fat, the recipe may not give the same results as with a higher fat product.
Recipe failure can result if cakes, pies, pastries, cookies or candies are made with Iow-fat spreads. The lower the fat
content of a spread product, the more noticeable these differences become.
Federal standards reqtlire l)rodtl('ts labeled "margarine" to contain at least 80% tilt by weight. I,(m_lilt spreads, on the
other hand, contain less tilt and more water: The high moisture content of these spreads affects the texture and flavor
of baked goods. For best restflts with u)ur old tilvorim redpes, use margarine, butter or stick spreads containing at least
70% vegetable oil.
15
Page 16

Usingtheself-cleaning oven.
Before a Clean Cycle
Wipe up heavy soil onflTeoven
bottom.
(DOOG)(D
(3)(DO(D
START)
_4'e reconnnend venting your kitchen
with an open window or using a
ventilation fan or hood during the filSt
self=clean cycle.
Remove tile l'ac!cs, broiler pan, broiler
grid, all cookware and any ahuninunl fi/il
ti'Olll tile o_,eil.
Tile o',en l'ac!<s can be selfkleaned,
but tile)' will darken, hlse their hlster
and becolne hard to slide,
Soil on tile fl'ont fl'anle of tile range and
outside tile gasket on tile door will need
to be cleaned by hand. Clean these areas
with hot watel; soap-tilled steel wool pads
or cleansel_ such as Sott Scrub L Rinse
well with clean water and dl'_;
How to Set the Oven for Cleaning
[] Press tile SELFCLEANLO/STD pad
once tk]i" a 4-hotlI" clean tillle Ol"
twice fin" a 3-hour clean tilne.
A 3-hour selt_lean tilne is
i'ecoi/lillended ,f()I" t/se when
cleaning snlall, contained spills. A
selfXclean tilne of 4 houl_ or longer,
is reconnnended for a dirtier oven.
[] If a fin/e other than 4 houl_ or
3 houl_ is needed, use tile nulnber
pads and enter the desired clean
tim e.
You can change tile clean tilne to any
tilne between 5 houl_ and 5 houl_,
dei)ending, on how dirty, your oxen is.
Do not clean tile gasket. Tile fibelglass
lnatel_al ot tile oven door gasket cannot
withstand abrasion. It is essential fin" the
gasket to relnain intact. If w)u notice it
becolning worn or fl'ayed, l'eplace it.
_._]l)e up any hea\ T spillovel_ on tile oven
bottonl.
Make sure tile oven light bulb cover is ill
place and tile oven light is oil
IMPORTANT'. Tile health of solne birds is
extrenlelv sensitive to the fiunes given off
during tile selt:<leaning cycle of any
range. Move birds to another well-
ventilated l'OOln.
X_]/ell tile LOCKEDlight goes off', you will
be able to open tile dool:
Tile word LOCKEDwill flash and tile
oven control will signal if you set the
clean cycle and flnget to close tile oven
dool:
To stop a clean cycle, press tile
CLEAR/OFFpad.X'_]/elltile LOCKED
light goesoff indicating tile oven has
cooled below tile locking tenlperamre,
vou will be able to open tile dool:
16
[] Press tile START pad.
Tile door locks autolnaticallv. Tile display
will show the clean filne renlaining. It will
not be possible to open tile oven door
until tile mlni)erature drops below tile
lock tenlperamre and tile LOCKEDlight
goes off.
Page 17

vvvvw.GEAppliances.com
The oven door must be closed and all controls must be set correctly for the cycle to work properly.
How to Delay the Start of Cleaning
!
0000
OOQ
OOOOO
QO0
STA_
[] Presstile SELFCLEANLO/STDpad
once it)I" a zl-hot/I" clean [lille oi"
twice t0r a 3-hem clean time.
A 3-houI self:clean dine is
i'ecoi/lillended tk)i" t/se when
cleaning small, contained spills. A
seltklean time of 4 houis or longer
is recommended t0r a (li_Ser oxen.
[] If a time other than 4 hom_ or
3 hom_ is needed, use the number
pads and enter the desired clean
tim e,
Ym can change tile clean time to any
rune" between .3 hom_ and 5 hom_,
del)ending, on how dirt) your oxen is.
[] Press tile DELAYSTARTpad.
[] Using tile number pads, enter tile
time of day xou want the clean cxcle
to staI't.
[] Press tile STARTpad.
Tile door locks automatically. Tile display
will show the start time. It will not be
possible to open tile oven door tmtil
the temperature drops below the lock
temperature and the LOCKEDlight
goes ofl]
_'hen tile LOCKED light goes off, you will
be able open tile (loo_;
After a Clean Cycle
You may notice some white ash in tile
oxen. _il)e it up with a damp cloth afier
the o_en cools.
If whitespotsremain,removethemwitha
soap-filledsteelwoolpadandrinsethoroughly
witha vinegarandwatermixture.
These deposits are usuallx a salt residue
that cmmot be remoxed l)_ tile dean
c_cle,
If tile oxen is not clean after one clean
c)cle, repeat the c_cle.
Y})u cmmot set tile oven fiw cooking
tmfil tile oxen is cool enough for tile
door to tlnlock.
X_]/ile tile oven is sel6cleaning, you
can press tile CLOCKpad to display
tile time of day. To return to tile
clean co/mtdown, press tile SELF
CLEANLO/STD pad.
If tile racks become hard to slide, apply
a small amotmt of cooking oil to a
paper towel and wil)e tile edges of tile
oven racl<s with tile paper towel.
17
Page 18

Special featuresofyourovencontrol.
Yournew touch pad control has additional features that you may choose to use. The following are the features and
how you may activate them.
The special feature modes can only be activated while the display is showing the time of day. Theyremain in the
control's memory until the steps are repeated.
When the display shows your choice, press the $TARTpad. Thespecial features will remain in memory after a
power failure.
12-Hour Shutdown
BAKE
i - BAKE)÷
Withthisfeature,shouldyouforgetandleavethe
ovenon,thecontrolwi//automaticallyturnoffthe
ovenafter 12hoursduringbakingfunctionsor
after3 hoursduringa broilfunction.
If )ou wish to turn OFFthis teature, follow
tile steps below.
[] Press tile BAKE and BROILHI/LO
pads at tile same time fin" 3 seconds
m_til tile display shows SE
[] Press tile DELAYSTART pad tmdl n0
shdn (no shut-off) appeals in tile
display.
[] Press tile START pad to acfiw_te tile
no shut-off and leaxe tile control set
in this special fi_atm'es mode,
Fahrenheit or Celsius Temperature Selection
Youroven control/s set to use the Fahrenheit
temperatureselectionsbut youmay changethis
to use the Celsiusselections.
[] Press tile BAKE and BROILHI/LO
pads at tile sanle time fi)r 3 seconds
tmtil tile display shows SF
Press tile COOKINGTIME and BROIL
[]
HI/LO pads at tile same time. Tile
displa) will show F (Fahrenheit).
Press tile COOKING TIME and BROIL
[]
HI/LO pads again at tile same time.
The displa) will sh ow C (Celsius).
Tonesat the End of a TimedCycle
At theend of a timedcycle,3 sho_beeps wi//
sound followedby onebeep even/f secondsuntil
the CLEAR/OFFpad ispressed Thiscontlhual
6-secondbeepmaybe canceled
To cancel tile (;-second beep:
[] Press tile BAKE and BROILHI/LO
pads at tile salne time fin" 3 seconds
tmtil tile display shows SF.
[] Press tile START pad.
Press tile KITCHEN TIMER ON/OFF
[]
pad. Tile displa)shows CON BEEP
(continuous beep). Press tile
KITCHEN TIMER ON/OFF pad again.
Tile display shows BEEP. (This
cancels the one beep every 6
seconds.)
Press tile START pad.
[]
18
Page 19

¢
BAKE "4"
®
12-Hour, 24-Hour or Clock Blackout
Yourcontrolissettousea 12-hourclod<
If you would prefer to have a 24-hour
military time clock or black out the clock
display, fi)llow the steps belong:
[] Press the BAKE and BROIL HI/LO
pads at the sanle time fin 3 seconds
tmtil the display shows SE
[] Press the CLOCK pad once. The
display will show /2 fir. If this is
the choice you want, press the
START pad.
Cook and Hold
vvww.GEAppliances.com
Press the CLOCKpad again to change to
the 24 hem" military time clock. The
display will show 24hr. If this is the choice
you want, press the STARTpad.
Press the CLOCKpad again to black out
the clock displa> The display will show
OFF..If this is the choice you want, press
the STARTpad.
NOTE"Ifthe clockisin the black-outmode you
willnotbeabletousetheDelayStartfunction.
@
Yourcontrol hasa cookand hold feature that []
keepscooked foods warm for up to 3hoursafter
tiYnedBaklbgor Roastlbg/sflb/shed
NOTE"Thisfeaturecanonly beprogrammedto
work with tiYnedBaklbg or Roasting {Seethe
Usingthe tlYnedbaklbgor roasflbgfeatures
section.)After timed Baklbgor Roastlbghas
automaticallystoped, theprogrammedcookand []
hold wi// automaticallystart.
To actix Ke this teatm'e fin" use after
Timed Baking or Roasting, follow the
steps below.
[] Press the BAKE and BROILHI/LO
pads at the same time flw 3 seconds
tmtil the display shows SE
Press the COOKING TIME pad.
The display will show Hid OFF.
Press the COOKING TIME pad again
to activate the teatm'e. The display
will show Hid ON.
Press the START pad to activate
the cook and hold teatm'e and
leave the control set in this special
re'art II'es i/lode.
19
Page 20

UsingtheSabbathFeature.
(Designed for use on the Jewish Sabbath and Holidays.) (onsomemodels)
TheSabbathfeature can be usedfor baking/roastingonly.It cannot be usedfor broiling,self-cleaningor DelayStart cooking.
NOTE:Theovenlightcomesonautomatically(onsomemodels)whenthedoorisopenedandgoesoffwhenthedoorisclosed,Thebulbmaybe
removed.SeetheOvenLightReplacementsection.017modelswithalightswitchonflTecontrolpanel,flTeovenlightmaybeturnedot7andlefton.
How to Set for Regular Baking/Roasting
S _ i
GGGOG
When the display shows D the
oven is set in Sabbath. When the
display shows D C the oven is
bakflTg/roasting.
When the display shows D the
oven is setin Sabbath. When the
display shows D C the oven is
bakflTg/roasting.
Make sure the clock shows the correct time of dan
I_q Press mid hold both th( BAKE and BROIL
I.'1
HI/LO pads, at the same time, undl the
dist)la _,shows SE
NOTE:I/bake or broil al)t)ears in the
dist)la }, the BAKEand BROIL HI/LOt)ads
were llOt presse(t at the S_t,IIle tillle. Press
tile CLEAR/OFF1)ad and begin ah_fin.
V_ "Tat) the DELAYSTART pad mltil SAb
1€.-,- i
bAtHal)t)ears in the display.
] Press the START t)ad and D will at)t)ear
in the dist)la"_
[] t)'ess the BAKE t)ad. No signal will be
_t'_ el/,
] LMng die numt)er t)atts, emer the &sired
teml)emmre 1)emreen 170°F and 5511°E
No signal or teml)eramre will 1)e given.
] Press the START t)ad.
] At+LeTa mndlm/delay 1)eriod ot
_t t/ ox'm _u:l) )0 st (onds to 1 mhmte,
D C will appear in tile display
indicating that the oven is llaking/'r/)asting.
IfD C doesn't apt)era: in the dist)la}, start
ag_dn at Step 4.
"Ib at!just tile o\en teml)eramre, t)ress the
BAKfpad, enter tile new teml)erature using
the lmmber t)ads allt/press tile START1)ad.
NOTE:TheCLEAR/OFFandCOOKINGTIMEt)ads
are acth'e (hwing tile Sabbath t_'amre.
How to Set for Timed Baking/Roasting - Immediate Start and Automatic Stop
Make sure the clockshows thecorrect time of dan
[] I'ress and hold both the BAKE mid BROIL
HI/tO t)ads, atthe same time, mldl the
display S] _( _rs SE
NOTE:I[ bake or t)roil al)t)em's in the
disl)lm!, tile BAKf and BROIL HI/LOt)ads
were not t)ressed at the stone time. Press
the CLEAR/OFFI)ad and begin again.
Tap tilt! DELAYSTART pad m_til SAb bAtH
[]
appears ill the display.
Press the START pad and D will at)t)ear in
[]
the disl)lay.
Press the COOKING TIME t)ad.
[]
Press the number t)ads to set the desired
[]
length of cooking time 1)etv,een
1 minute mid 9 hours mid 99 minutes.
The cooking thne that you entered will
l>e displayed.
Press the START t)ad.
[]
Press the BAKEt)ad. No signal will l>e
] Llsing the nmnber t)ads, enter the
desired ttmq)eramre. No sigl_d or
temperature will 1)e g,rixell.
] Press the START pad.
[_ After a random delay t)eriod of
at)t)roximatel" _ 30 set DriLls to 1 minute,
D C will al)l)ear in the (tisl)lay indicating
that the oven is baking!roasdng. If D C
doesn't appear in the diN)lay, start
ag_dn at Step 7.
To at!iust tile o\en temt)emmre, t)ress tile
BAKEt)ad, enter tile new temt)emmre using
the number t)ads and press the STARTpad.
When cooking is finished, the display will
t lmnge/i:om D C to D and 0:00 will al)t)ear
il/tti( atil/g that the o_el/has ttlrI/ed
OFFI)uI is still set ill Sal)l)ath. Rel//O_'
the cooked/ood.
How to Exit the Sabbath Feature
[]
[]
20 []
Press the CLEAR/OFFt)ad.
If the oven is cooking, wait for a r;tlldoHl
delay period of apl)roxhnately 30
secollds to 1 l//il//lte, III/til olllv D
is in the (tist)la"_
Press and hold both the BAKE and BROIL
HI/LO t);_tts, at the same time, m_til the
dist)lay shows SE
"[;_t) d_e DELAYSTART t)ad until 12shdn
or no shdn appears in the display.
12shdn indicates that the oven will
automatic_dlv turn off alter ] 2 hem's, no shdn
in(lit aws that tilt' o\en _*ill not mltomadt-allv
t/lrl/()tl_
] Press the START t)ad.
NOTE:I/a 1)ower outage occurred while
tile o'+en was iH Sal)l)ath, the oven will
a/ltoHlatie_dlv tllrll off a//d st_w off e\ el/
whell the power rettlri/s. The ovell
control lIl[ISt be reset.
Page 21

Careand cleaning ofthe range. . .appliancescem
Be sure all controls are off and all surfaces are cool before cleaning any part of the range.
If your range is removed for cleaning, servicing or any reason, be sure the anti-tip
device is reengaged properly when the range is replaced. Failure to take this
precaution could result in tipping of the range and cause injury.
How to Remove Packaging Tape
To assure no damage is done to the finish
of the product, the safest way to remove
adhesive left fi'om packaging tape and
labels on new appliances is an application
(ff a household liquid dishwashing
detergent, mineral oil or cooking oil.
Control Knobs
Thecontrol knobsmay be removed for easier
cleaning.
Before removing the knobs fin"
cleaning, please note that the knobs
are in the OFFposition. _'\ hen replacing
Oven Vent
Theoven ventis locatedabove the lefi sideof
the door
This area could become hot during
oven rise.
Stainless Steel Surfaces (onsomemodels)
Apply Mth a soft clofl_ and allow to soak.
_,_ipe dry and then apply an appliance
polish to thoroughly clean and protect
the surfi_ce.
NOTE: Theadhesivemustbe removedfrom aft
parts. It cannotbe removedif it is bakedon.
the knobs, check the OFFposidon to
insm'e proper placement.
_'ash the knobs in soap and water or
a vinegar and hot water solution but
do not soak.
It is nolI//al t()I" stealll to COllie ()tit of
the vent.
TheventIs important forproperair ckcu/ation.
Neverblock this vent
Do not use a steel-wool pa& it will
scratch the surface.
Shake bottle well.
[]
[]
Place a small amotmt of CEIL_dVIA
BRYTE _' Stainless Steel Appliance
Cleaner on a dampcloth or damp
paper towel.
Clean a small area (approximatel)
[]
8" x 8"), rubbing with the grain of
the st;finless steel fl applicable.
D D' and buffwith a clean, (h)paper
[]
towel or soft cloth,
] Repeat as necessai®k
NOTE."If a mineral oil-based stainless steel
al)pliance cleaner has been used heft)re
to clean the appliance, wash the sm_i_ce
with dishwashing liquid and water prior
to using the CEIL_dMA BRYTE _ Stainless
Steel Appliance Cleane_: _dter washing
the smtace with dishwashing liquid
and w}lteI'_ rise a genei'o/is }lll/O/lIlt
(ffCEI_dVIA BRYTE '_Stainless Steel
Appliance Cleaner to clean the appliance.
To Order
To order CEI_d_A BRYTE '_Stainless
Steel Al)pliance Cleane_; please call ore"
toll-free nt illlbei':
National Parts Center 800.626.2002
www.GEAppliances.com
CERAMA BRYTE®
Stainless Steel Appliance
Cleaner .................... # PMI OX311
21
Page 22

Careand cleaning ofthe range.
Painted Surfaces
The gasket is designed with a gap at the
bottom to aflow for proper air ckculation.
Do not rub or clean the door gasket--
it has an extremely tow resistance to
abrasion.
If you notice the gasket becoming worn,
frayed or damaged in any way or if it has
become displaced on the door, you should
have it replaced.
Painted sudi_ces include tile dam) top _ff
tile control panel and tile drawer fl'ont.
Clean fl/ese Mth soap and water or a
vinegar and water solution.
Control Panel
Clean up splatte_ with a damp cloth.
You may also use a glass cleane_:
Cleaning the Oven Door
Toclean the inside of the door:
Because tile area inside tile gasket is
cleaned during tile self:clean cycle, you
do not need to clean this by hand.
Tile area outside tile gasket and
tile door liner can be cleaned with a
soap-filled steel wool or plastic pad,
hot water and dem_gent. Rinse well
with a vinegar and wamr solution.
Toclean the outside ofthe door:
Use soap and water to thoroughly
clean the top, sides and ti'ont of the
oven dooE Rinse well. Yell Ill}IV }llso
use a glass cleaner to clean tile glass
Do not use COillil/eYcial o_,en cleanei_,
cleaning powde_, steel wool or hm_h
abrasi',es on an) painted sm_hce.
Remoxe heavier soil with wam_
soapy wateI:
} Do not use abrasixes of am kind.
on tile outside of tile dam: Do not let
water drip into the vent openings.
If any stain on tile door vent trim is
persistent, use a soft abrasive cleaner
and a sponge-scrubber tor best results.
Spillage of marinades, fl'uitjuices,
tomato sauces and basting materials
containing acids may cause
discoloration and should be wiped
up immediately: When SUlthce is cool,
clean and rinse.
Do not use oven cleaners, cleaning
powders or hmsh abrasives on tile
outside of tile door
h_
iilh_
_iiii IIZIZIZIZIZII
k
Hingelock
Pullhingelocksdowntounloc£
Removalposition
22
Lift-Off Oven Door
The dooris very heavy.Be careful when
removing and lifting the door.
Toremove the door:
[] Fully open tile door.
[] Pull tile hinge locks down toward
tile door fl'ame, to tile unlocked
position. A tool, such as a small
fiat-blade screwdriver; may be
reqtfired.
[] Firefly grasp both sides of tile door
at tile top. DOnot/fit thedoorby the
handle.
[] Close door to tile door remoxal
position, which is halfway between
tile broil stop position and fldly
closed.
[] lift door up and Ollt tlntil tile hinge
am_ is clear of the slot.
Toreplace the door:
[] Firefly grasp both sides of tile door
at tile top. DOnot/lft thedoorby the
handle.
[] _'_ith tile Bottom II II I Hingearm
d ) n" at tile edge I / / /
saine angle as k,!llt\k_X/
the ,'eIn:i', fl /
ofslot I
se.t,/eII /
notch stop ,,f IINotch stop_
tile hinge ann I
into tile bottom
edge at the hinge slot. The notch in
the hinge am_ nlust be flfllv seated
into tile bottom of tile slot.
[] Full) open tile door tmfil it is
parallel to the floo_: If the door will
not flflly open, tile notch stop is not
seated correctly in the bottom edge
of the slot. Repeat step 2 if
necessalw:
[] Push the hinge locks up against tile
fl'ont fl'ame of tile oxen caxit_ to tile
locked position.
Hinge,_.
arm
Hingelock
Push hinge locks up to lock.
g_ Close tile oxen dooi:
lal
Page 23

Oven Racks
www.GEAppliances.com
I Stopguide
Clean the oven racks with an abrasive
cleanser or steel wool. After cleaning,
rinse the racks with clean water and d_'
with a clean cloth.
To make the racks slide more easily, apply
a small amount of or cooking oil to a
paper towel and wipe the edges of the
oven _cks with the paper towel.
NOTE."Theovenracksmaybe cleaned in the
self-cleaning oven.However,theracks will darken
in color,lose theirluster andbecomehard to slide
if cleaned duringthe self-cleaningcycle.
Storage Drawer Removal (onsomemodels)
Toremovethedrawer:
[] Pull the drawer out until it stops.
[] Lift the fl'ont of the drawer until the
stops clear the guides.
[] Remoxe the (h'awe_:
Toreplace the drawer:
[] Place the drawer rails on the guides.
[] Push the drawer back until it stops.
[] Lifi the fl'ont of the drawer and
[] i,ower the fl'ont of the drawer and
Broiler Pan and Grid
push back tmtil the stops clear the
guides.
push back tmtil it closes.
After broiling, remove the broiler
pan from flTeoven.
Do not dean the broiler pan or grid in a self-
cleaning oven.
_diei" broiling, remove the broiler pan
from the oven. Remove the g_(l fl'om the
pan. Carefiflly pour out the grease fl'om
the pan into a proper container:
_4hsh and rinse the broiler pan and grid
in hot water with a soap-filled or plastic
scouring pad.
If fi)od has bm'ned on, sprinkle the grid
with detergent while hot and cover with
wet paper towels or a dishcloth. Soaking
the pan will remove bt:u'ned-,c,n foods.
Both the broiler pan and grid may be
cleaned with a commercial oven cleane_:
Both the broiler pan and grid can also be
cleaned in a dishwasher:
Donotstorea soiledbroilerpanandgrid
anywherein therange.
23
Page 24

Careand cleaning ofthe range.
Oven Light Replacement
CAUTION:Beforereplacing_our
oven light bulb, disconnect the electrical
power to the range at the main fuse or
circuit breaker panel
Be stlI'e to let the light (o'_er and bulb
cool completely:
Toremovethecover:
[] Twist lens counterclockwise about a
qtlaI'teI" [tlYn 1o i'eiilo&e.
Do not remove any screws to remove the cove_
[] Replace bulb with a 40-watt
appliance bulb or two-i)rong,
halogen bulb, as appropriate.
Oven Heating Elements
Donotcleanthebakeelementorthebroil
element. Any soil will bum off when the
elements are heated
Toreplace the cover:
[] I Jne up tabs of lens in fl'ont of tabs
on housing and rotate clockwise to
engage.
To clean the oven flora; gently lift
the bake element. Clean with wam]
soap_, watei:
24
Page 25

Cleaningthe glasscooktop. .GE4ppliances.com
Co.,ro, ,o..ooo,oo,o,.,
toc_uNLoc_uotoaSECONOS ControlLockoutsection.
Cleanyourcooktopafter
eachspill. Use CERAMA
BRYTE®Ceramic Cooktop
Cleaner.
Begin b_ locking the cooktop; see the
Normal Daily Use Cleaning
ONLY u. e (,EILBd_IA BRYTE Ceranfic
Cooktop Cleaner on the glass cooktop.
Other creams may not be as effectixe.
To maintain and protect the stwfhce of
your glass cooktop, tollow these steps:
[] Before using the cooktop tot the
fi_t time, clean it with CEIL_/IA
BRYTE <':Ceramic Cooktop Cleane_:
This helps protect the top and
makes clemmp easier
[] Dail) use of CEILBd_IA BRYTE _:'
Ceramic Cookt{)p Cleaner will help
kee I) the cooktop looking ne_:
Shake the cleaning cream well.
[]
Apply a fray drops of CEIL_/IA
BRYTE _:'Ceramic Cooktop Cleaner
directly to the cooktop.
Use a paper towel or CEI_Bd_4A
[]
BRYTE _>Cleaning Pad fi}r Ceramic
Cooktops to clean the entire
cooktop StlYJ[ilce.
[] Use a dry cloth or paper towel
to remove all cleaning residue.
No need to rinse.
NOTE:Itis veryimportantthat youDONOT
heatthe cooktopuntilit hasbeencleaned
thorough/_
Use a CERAMABRYTE_ CleanflTg
Pad for Ceramic Co&tops ora
Scotch-Brite _ Multi-Purpose No
Scratch blue scrub pad.
TheCERAMABRYTE_ Ceramic
Cooktop Scraper and all
recommended supplies are
available through our Parts Cente_
See hTstructions under "ToOrder
Parts" section on next page.
NOTE:Do not use a dull or
nicked blade.
Burned-On Residue
WARNING:DAMAGEtoyourglasssurface
mayoccurif youusescrubpadsotherthanthe
padincludedwith yourcooktop.
[] Allow the cooktop to cool.
[] Spread a few drops of CEILQMA
BRYTE _)Ceramic Cookto I) Cleaner
on the entire bm'ned residue area.
Using the included CERAMA
[]
BRYTE (_)Cleaning Pad fi}r Ceramic
(2ooktops, _ub the residue area,
applying pressm'e as needed.
Heavy, Burned-On Residue
[] Allow the {ooktop to cool.
[] Use a single-edge razor blade
scraper at approximately a 45 °
angle against the glass surtace
and scrape the soil. It will be
necessary to apply pressm'e to
the razor scraper in order to
remove the residue,
After scraping with the razor
[]
scraper, spread a few drops of
CEI{_IA BRYTE : Ceramic
Cooktop Cleaner on the entire
bm'ned residue area. Use the
CEILBdMA BRYTE ('_Cleaning Pad to
remove any remaining residue.
[] If any residue remains, repeat the
steps listed above as needed.
[] For additional protection, alter all
residue has been remoxed, polish
the entire stn'lhce with CEI_/IA
BRYTE ': Ceramic (_ooktop Cleaner
and a paper towel.
For additional protection,
[]
after all residue has been
removed, polish the entire
surface with CEILBd_IA BRYTE':
Ceramic (_ooktop Cleaner
and a paper towel.
25
Page 26

Cleaningthe glasscooktop.
Metal Marks and Scratches
Be careflll not to slide pots and
[]
pans across your cooktop. It will
leave metal markings on the
cooktop SHI_iIce,
These marks are remox_d)le using
the (:EIL_dMA BRYTE (':Ceramic
Cooktop Cleaner with the (:EI_dVIA
BRYTE <':(:leaning Pad fin" Ceramic
Cooktops.
Glasssurface--potential forpermanent damage.
[] If pots with a thin oxerla) of
aluminum or COl)per are allowed
to boil dry, the eye,tar may leave
black discoloration on the cooktop.
This should be reinoved
immediately betore heating
again or the discoloration may
be permanent.
WARNING: Carefullycheckthe bottom ofpans
forroughnessthat would scratchthecooktop.
Our testing shows that if you
are cooking high sugar mixtures
suchas jelly or fudgeand have
a spillover, it can cause
permanent damage to the glass
surface unless the spillover is
immediately removed.
Damage from Sugary Spills and Melted Plastic
[] Turn off all sm'fi_ce milts. Remoxe
hot pans.
[] _4'earing an oven mitt:
a. Use a single-edge razor blade
scraper ((:EIL_dMA BRYTE (:
Ceramic (:ooktop Scraper) to
move the spill to a cool area on
the cooktop.
b. Remove the spill with
paper towels.
To Order Parts
To order CEI_dMA BRYTE _ Ceramic
(_ooktop Cleaner and the cooktop
scrape_; please call ore" u)ll-ti'ee number:
National Parts Center 800.626.2002
CERAMA BRYTE®Ceramic
Ceektep Cleaner ............. # WX70)(300
CERAMA BRYTE_ Ceramic
CooktopScraper ............ # WX70)(0302
Kit ......................... # WB64XSO£7
(Kitincludes creamand cooktopscraper)
CERAMA BRYTE_ Cleaning Pads for
Ceramic Ceekteps ........... # WX70)(350
[] Any remaining spillover should be
left until the stmfhce of the cooktop
has cooled.
] Don't use the surfi_ce milts again
tmtil all of the residue has been
completely removed.
NOTE."Ifpitting or indentation in the glass
surface hasalready occurred,thecooktopgloss
wi// have to be replaced in this case,semce wi//
be necessary
26
Page 27

Beforeyoucall forservice.., www.GEAppliances.com
Troubleshooting -tips
Save time and money! Review the charts on the following
pages first and you may not need to call for service.
Possible Causes
Surface units will not hnproper cookware
maintain a rolling boil being used.
What To Do
• Use pans which are flat and match the diameter
of the surthce unit selected.
or cookingis not
Surface units do A fuse hz your home may be • I_el)lace the fl/se or reset the circuit breakel:
notworkproperly blmm or the circuit breaker
lripped.
Cooktop controls • Check to see' the` correct control is set tot the surthce
improperly set. trait vet! are usiug.
Scratches (may appear
as cracks) on cooktop
glass surface
Areas of discoloration Food spillovers not cleaned • See the` Cleaning the glass cooktop section.
on the cooktop before next use.
Incorrect demlhlg
methods being used.
Cookware with rough bottoms
being used or com'se particles
(salt or saald) were between
the cookwaxe mid the surface
of the cooktop.
Cookware has been slid
across the cooktop surface.
• Scratches are not remowd)le. Tiny scratches will become
less visible in time as a result ot cleaning.
• To avoid scratches, use the recommended cleaning
I)rocedures. Make sure bottoms ot cookware are clean
befi)re use, and use cookware with smooth bottoms.
Hot surface on a model • This is normal. The S//l"t_l('e`Ill;I}' al)pear discolored
with a white glass cooktop, when it is hot. This is temporary and will disal)l)e`ar
as the` glass cools.
Plastic melted to Hot cooktop came into • Se`e`the` Glass surface potential for permanent damage
the surface contact with plastic placed se`ctiou in the` Cleaning the glass cooktop section.
on the hot cooktop.
Pitting (or indentation) Hot sugar mixture spilled • (;:ill a qualified technician for replacement.
of the cooktop on the cooktop.
Frequent cycling hnproper cookware • Use` only flat cookware to minimize cvclin,
off and on of being used.
surface units
Controlsignals a#er You forgot to enter a • Press the BAKEpad mad desired te`mpe`ratm'e` or
entering cooking time bake temperature or the` SELF CLEAN LO/STD pad and desired cle`:m time`.
or delay start clemfing time.
Food does notbake Oven controls improperly set. • See the Using the oven se`ctiou.
or roast properly Rack position is incorrect • See the Using the oven section.
or the rack is not level.
Incorrect cookware or • See the Using the oven section.
cookware of improper
size being used.
Oven thermostat needs • See the Adjust the oven thermostat--Do it yourself[
adjustment, se`('tiou. 2 7
Page 28

Beforeyoucall forservice...
Troubleshooting -tips
Possible Causes What To Do
Clockandtimerdo
notwork
Ovenlight does Light bulb is loose or defective. * Tighten or replace the bull9.
not work
Food does not Oven controls improperly set. * Make sure you press the BROIL HI/LOpad.
broil properly
Plug on raaage is not completely * Make sure electrical phtg is plugged into a live, properly
inserted ha the electrical outlet, grounded outlet.
A fuse ha your home may * Replace the fllse or reset the circuit breaker:
be blown or the circuit
breaker tripped.
Oven controls improperly set. * See the Using the clock and timer section.
Switch operating light * Call for service.
is broken.
Improper rack position * See the Broiling Guide.
being used.
Cookware not suited * Llse the broiling, l_an and ,grid that came with your range.
for broiling.
Ahtmhaum foil used on the * See the Using the oven section.
the broiling pan mad grid has
not been fitted properly mad
slit as recommended.
ha some areas the power * Preheat the broil element for 10 minutes.
(voltage) may be low.
• Broil for the lon,,est_, period of time recommended in
the Broiling Guide.
Oven temperature too Oven thermostat • See the Adjust the oven thermostat--Do it yourself[
hot or too cold needs adjustment, se (-tic)n.
Oven will not work A fuse ha your home may be • I_el)lace the fl/se or reset the circtfit breaker:
Storage drawer Rear drawer support is • Reposition the drawe_: See the Storage Drawer
is crooked on top of the guide rail. RemovalinstHlctions in the Care and cleaning of
Storage drawer Power cord may be • Reposifion the drawer and power cord. See the
won't close obstructing drawer Storage Drawer Removal instructi_)ns in the Care and
blown or the circuit
breaker tripped.
Oven controls improperly set. • See the Llsing the oven section.
your range section.
in the lower back cleaning of your range section.
of the range.
Rear drawer support is
on top of the guide rail.
• Reposition the drawe_: See the Storage Drawer
Removalinstructions in the Care and cleaning of
your range section.
28
Page 29

www.GEAppliances.com
: Possible Causes What ToDo
Oven will not seff-clean The oven telnperature is * _AOI()w the oven 1o cool ;ind l'eset tile' ('ontl'ols.
too high to set a self-cleml
operation.
Oven controls improperly set. * See tile Using the self-cleaning oven section,
"Crackling" or This is the sound of the * This is normal.
"popping" sound metal heating and cooling
during both the cooking and
cleaning functions.
Excessivesmoking Excessive soil. * Press tile CLEAR/OFFpad.Open tile windows to
during a clean cycle rid tile rl)mn of smoke. X_ait until tile LOCKEDlight
goes off. _]pe up tile excess soil and reset tile
clean cycle.
Oven door will not Oven too hot. * Allow tile oven to cool below locking temperature.
open after a
clean cycle
Oven not clean after Oven controls not properly set. * See tile Using the self-cleaning oven section.
a clean cycle
"LOCKED"flashes The self-clema cycle has been * (]lose the oven door.
Oven was heavily soiled. * (3ean up heavy spillovers 1)etore starting tile clean
cycle. Heavily soiled ovens may need to sell:clean
again or for a longer period of time.
in the display selected but the door is not
closed.
"LOCKED'light is on The oven door is locked * Press tile CLEAR/OFFpad. _Mh>w tile oven to cool.
when yon want to cook because the temperature
"F--and a number You have a function * Press the CLEAR/OFFpad. Put the oven back into
orletter"flash error code. operation.
in the display If the fmaction code repeats. * Disconnect :ill power to tile range for at least
inside the oven has not
dropped below the
locking temperature.
30 seconds and then reconnect power. If the
flmction error code repeats, call for service.
29
Page 30

Beforeyoucall forservice...
Troubleshooting -tips
Possible Causes
Displaygoesblank A fuse h_ your home may be
blowta or the circttit
breaker tripped.
The clock is in the • See the Specialfeatures of your oven controlsection.
black-out mode.
Oisplayflashes Power failure. • Reset the dock.
Unableto getthe Oven control pads were • The BAKEand BROIL HI/LO pads must be pressed
displayto show "SF! not pressed properly, at the same time and held tot 3 seconds.
Power outage, Power outage or surge. • Reset the clock. If the oven was in use Vou must reset
What ToDo
• Replace the tuse or reset the circuit breaker:
it by, I)ressing, the CLEAR/OFFpad, setting" the clock
and resetting any cooking flmction.
"Burning. or"oily, This is normal in a new • To speed the process, set a sell=clean c_cle for a
odor emitting from oven and will disappear minimum of 3 hours. See the Using the self-cleaning
the vent in time. oven section.
Strong odor An odor from the insulation • This is temporary.
Fannoise
around the inside of the
oven is normal for the first
few times the oven is used.
A cooling fan may
automatically turn
on m_d off.
• This is normal. The cooling tim will turn off and
on to cool internal parts. It may rtm alier the oxen
is tin'ned OFF.
30
Page 31

Notes.
_t
_L
m.
w
w
m
31
Page 32

Accessories.
Looking For Something More ?You can find these accessories and many more at www.GEAppfiances.com, or
call 800.626.2002 (during normal business hours). Have your model number ready.
i___;_ii__i!_ii_i_i!_ii_i_iI_I_IIIII(_I_)_I_)_I_)_I_)_I_)_I/_II
Surface Elements & Drip Pans
Oven Elements
Cleaner Cleaning Pads Scraper
OvenRacks BreHerPan
¸ i!
Light Bulbs Knobs
32
Tired of discolored racks? Wishing you had exu'a-hea_T-duty oven x_mks?
NOWA VAILABLEfor your range:
(;E's innovative, self-cleanable porcelain-coated oven racks!
• Heax T Duty
• Durable
• Able m be cleaned in a self-cleaning oven
Visit www.GfAppliances.com for more information.
Page 33

GE Service Protection Plus 'M
GE, a name recognized worldwide %r quality and dependability, oflers y'ou
Service Protection Plus'_'--comprehensive protection on all y'our appliances--
No Matter What Brand!
Benefits Include:
• Backed by GE
• All brmads covered
• Unlimited service calls
• All parts mad labor costs included
• No out-of-pocket expenses
• No hidden deductibles
• One 800 number to call
You will be completely satisfied with our service protection or you ma} request your inone} back
on the remaining value of 3our contract. No questions asked. It's that simple.
Protect yore" refrigerat(m dishwasher; washer and dryer; range, TV, VCR and much more--rely brand!
Plus there's no extra charge tot einergency ser;'ice and low inonthly financing is available. Even icelnaker
coverage and t()od spoilage protection is ottered. You can rest eas> knowing that all y(mr valuable
household products are protected against expensive repairs.
Place your confidence in (;E and (all us in the IU.S. toll-free at _tllt,_Z_,ZZZ_
foY UlOI'e inloi'u/ation.
"*Allbrands coxered, up to 2(} years old. in the contin< nlal I_.S.
We71CoverAnyAppliance.
Anywhere. Anytime.*
_.. (.:_."._22.............
Please place in envelope and mail to:
General Electric Company
Warranty Registration Department
EO. Box 32150
Louisville, KY 40232-2150
,3,3
Page 34

Consumer Product Ownership Registration
Dear Customer:
Thank you for purchasing our product and thank you for placing your confidence in us.
_A/eare proud to ha_e you as a customer!
Follow these three steps to protect your new appliance investment:
Important: If you did not get a registration card with your
................................................................................................... _,,._ (M111{1-(
Consumer Product Ownership Registration
Complete and mail
your Consumer
Product Ownership
Registration today.
ttaw' the peace ot
mind of knowing wc
C_lll COlltact VOI/ ill
the tmlikely ev{nt of a
satbly modificalion.
Aiter mailing the
registration below,
store this docmnent
ill a sati' place. It
contains inlonnation
you will need should
you require service.
Our selwice number is
800.GE.CARES
(8t)0.432.2737).
Model Number Serial Number
, , , , , I I , , , , , , , I
product, detach and return the form below to
ensure that your product is registered, or register
online at www.GEAppliances.com.
Read your Owner's
Malmal careihllv.
It will help you
operat( your lle'*_
appliance properly.
Model Number Serial Number
Ms. M*>,. Mix_,
Fir'q ] I L_sl]
Name I I I I I I I I I Nain(! I I I I I I I I I I I I
Addr{ ss I I I I I I I I I I I I I I I I I I I I I I I I
Apt. # I i i
(;i,vI I I
l )ale Placed
hi Use III
Monlh
0
BE Consumer & hldustrial
Louisville, Kentucky
www, GEApplianees,eom
34
I I I I I I EqnailAddress*
I I I I
D_,yl , I
GEAppliances
I I I I I I I I s_l<,I
Y:!ar I I I Phon(
* Please pr(wi(le your e-mail ad(Ircss to rcceive, via e-mail, discounts, special oflbr', and other impoltant
commmficafions from (;E Appliances ((;15\).
[ Check herc if you do not want to receixe COlmmmications fl-om G1LVs carcfillly select{d paltner_,.
FAIIJ£RE T() COMPLETE AND RETURN TIIIS CAR1) DOES NOT DIMINISII _,3)1 R
BT\I_L\N'IY RI(;IfFS.
For morc intormation about G1LVsprixacy an(1 dala usage policg go to _x_w.(;EAppliances.com and
click on "Prixa_y Policy" or call 8{}',}.626.2224.
Nunll)(!r I , I
I ] Code I I I I
Zip I
I-I,, I-I , , ,
I
I
I
Page 35

GEElectricRange Warranty.
Aft warranty service provided by our Factory Service
Centers, or an authorized Customer Care®technician.
Toschedule service, on-line, 24 hours a day, vis# us at
www. GEAppliances.com, or call 800.GE.CARES (800.432.2737).
GEWill Provide:
Anypatt of the range which fifils due to a defect in materials or workmanship. During this
Fromthedateof the
originalpurchase
origina!purchase
Service trips to your home to teach you how to use
the product.
hnproper h_staJlation, delivery or maintenance.
FaJltme of the product if it is abused, misused,
or used for other thma the intended purpose or
used commerciaJly.
Dmnage to the glass cooktop caused by use of clemmrs
other than the recommended clemlhlg cretans mid
pads.
full one-year warranty, GE will also pro_kle, free of charge, all labor and in-home service to
replace the deiecti_e part,
A replacement glass cooktop if it should crock due to themml shock, discolor or if the
pattern wea_ oft_
A replacement radiant surface uuitif it should burn out.
During this lim#ed additional four-year warranty, you will be responsible tor any labor or
in-home service.
Staple your receipt here.
Proof of the original purchase
date is needed to obtain service
under the warranty.
Replacement of house fuses or resetting of circuit
breakers.
Damage to the product caused by accident, fire, floods
or acts of God.
hlcidenta] or consequential damage caused by possible
defects with this appliance.
Damage caused after delivery.
Dmnage to the glass cooktop caused by hardened
spills of sugaxy materials or melted plastic that
axe not clemmd according to the directions in
the Owner's MmmaJ.
This warranty is extended to the original purchaser and any succeeding owner for products purchased for
home use within the USA. In Alaska, the warranty excludes the cost of shipping or service calls to your home.
Some states do not allow the exclusion or limitation of incidental or consequential damages. This warranty
gives you specific legal rights, and you may also have other rights which vary from state to state. Toknow
what your legal rights are, consult your local or state consumer affairs office or your state's Attorney General
Warrantor: General Electric Company.Louisville,KY 40225
35
Page 36

ConsumerSupport.
gEAppliancesWebsite www.GEAppliances.com
Have a question or need assistance with your appliance? Try the GE Appliances _,Vebsite 24 hom_ a (la};
any day of the year! For greater convenience and faster selMce, you can now download Owner's Manuals,
order parts, cat;flogs, or even schedule service on-line. You can also "_sk Ore" Team of EN)erts .....
yOtlI" (ltlestions_ _lll(1 so IIltlch iiloi'e...
ScheduleService
Expert (;E repair setMce is onlx one step awa) from your (loot; Get on-line and schedule your service at
veto" comenience 24 hom_ am dm of the _ear! Or call 800.GE.(:ARES (800.432.2737) dtwing nomml
business hom_.
www.GEAppliances.com
RealLifeDesignStudio www.GEAppliances.com
GE supports the Uni\'e_al Design concept--l)roducts, services and environments that can be used by
people of all ages, sizes and capabilities. We recognize the need to design fin" a wide range of physical and
mental abilities and impaim/ents. For details of GE's Universal Design api)lications, including kitchen
design ideas fin" people with disabilities, check out Oily _.Vebsite today. For the hearing impaired, please call
800.TDD.GEAC (800.833.4322).
ExtendedWarranties www.GEAppliances.com
Pro'chase a (;E extended _arrant_ and learn about special discounts that are a_ailable _hile _our _arrant_
is still in effect. You can i)m'chase it on-line an) time, or call 800.626.2224 dm_ing nomml business hom_.
GE Consumer Home Set\ices will still be there after your warrant} expires.
PartsandAccessories www.GEAppliances.com
Individuals qualified to se_Mce their own appliances can have parts or accessories sent directly to their
homes (V]SA, MasterCard and Discover cards are accepted). Order on-line today, 24 hom_ eve_' day or
by phone at 800.626.2002 dining nomml business hom_.
Instructions contained in this manual cover proceduresto be performedbyany user. Other servicing generally
should be referred to qualified service personnel. Caution must be exercised, since improper servicing may cause
unsafe operation.
ContactUs www.GEAppliances.com
If you are not satisfied with the service you receive from GE, contact us on our _.Vebsite with all the details
including yore" phone ntlIllbeI; oI" write to: General Manage_; Customer Relations
GE Appliances, Appliance Park
I,ouisville, KY 40225
RegisterYourAppliance www.GEAppliances.com
Register your new applimlce on-line---at yollr €onYenience[ Tilnel} i)roduct registration will allow for
enhanced commtmication and prompt service trader the terms of)ore" warranty shotfld the need arise.
You may also mail in the preprinted registration card included in the I)ackin°_ material.
Printed in flTeUnited States
 Loading...