

Page 1
ge.com
0
(D
Safety Instruotions ... 9-4
Operating Inslru_ions
Clock and Timer . ...... 10
Conuols ............. 6, 7
Oven ................ 8, 9
Power Outage .......... 7
Sabbafll Feature ..... 13, 14
Self-Cleaning ....... 15, 16
Special Features ........ 19
SurPace Units ........... 5
Thermostat ........... ] 4
Timed Baking and
Roasting Features ...... 11
Care and Cleaning
Control _obs ......... 17
Drip Pans ............. 91
Headng Elements ...... 17
I,ift-Off Oven Door ..... 19
Lift-Up Cooktop ....... 21
LiOlt ................. 20
Shelves ............... 18
Surt_ace Units .......... 21
Vent ................. 18
Troubleshooting
Tips .............. 22-24
Accessories ........... 30
Consumer Support
Consumer
Support ...... Back Co_er
Product
Registration ........ 95, 96
Wananw ............. 31
JDP 9
Write the model and serial
numbers here:
Model #
Serial #
You can find them on a label
behind the storage drawer on
the flx)nt of the range fl'ame.
49-80485 07-07 JR
Page 2
iMPORTANTSAFETYiNFORMATiON.
READALLiNSTRUCTiONSBEFOREUSING.
Foryour safety, the information inthis manual must be followed to minim)e the risk of fire, olocNc shock, or to
preventpropertydamage,personalinjury,or lossof life.
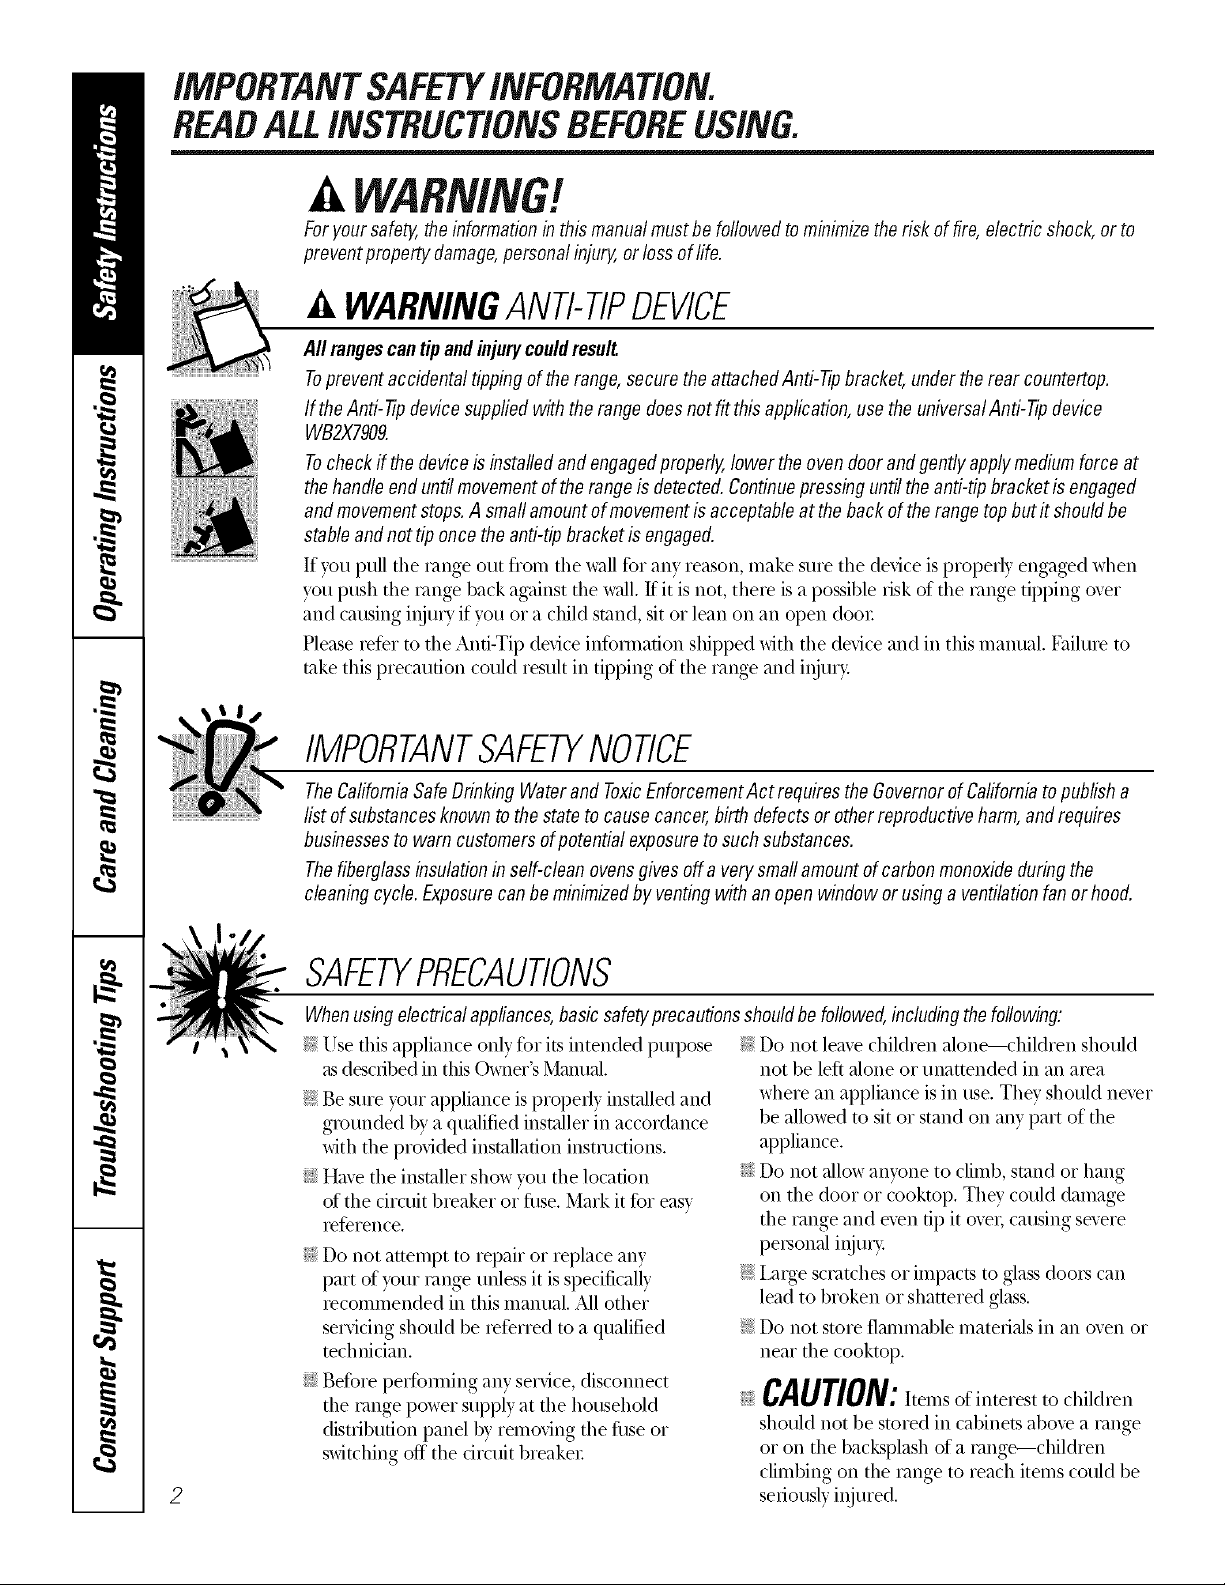
WARNINGANTI-TIPDEVICE
All rangescantipandinjurycouldresult
Topreventaccidental tippingof therange, securetheattachedAnti-Tipbracket,undertherear countertop.
If theAnti--tipdevice suppliedwith therangedoes notfit this application,usethe universalAnti-fip device
WB2X7909,
Tocheck ifthe deviceisinstalledand engagedproperly,lower theoven doorand gentlyapplymediumforce at
thehandleenduntil movementofthe rangeisdetected,Continuepressinguntil theanti-tip bracketis engaged
andmovementstops,A smaflamountof movementisacceptable atthe backof the rangetopbut it shouldbe
stableandnottip oncethe anti-tip bracketis engaged,
If you pull the range out fiom the wall fbr any reason, make suie the defice is properly engaged when
you pusl_ the range back against the wall. ff it is not, there is a possible risk of the range tipping over
and causing i_u U if you or a child stand, sit or lean on an open door.
Please _efbr to the And-Tip defice infbm_ation shipped with the device and in this manual. Failure to
rake this precaution could result in tipping of the range and i_u_>
IMPORTANTSAFETYNOtiCE
TheCaliforniaSafeDrinking Waterand ToxicEnforcementAct requiresthe Governorof Californiatopublisha
list ofsubstancesknowntothe stateto cause cancer,birth defectsor otherreproductiveharm,andrequires
businessesto warn customersofpotential exposuretosuch substances,
Thefiberglassinsulationin self-cleanovensgives off a verysmallamountof carbonmonoxideduringthe
cleaningcycle. Exposurecanbe minimizedbyventingwith an openwindow or usinga ventilationfan or hood,
SAFETYPRECAUtiONS
Whenusing electricalappliances,basicsafetyprecautionsshouldbe followed,includingthefollowing:
!?:Use this appliance only %r its intended propose
asdescribed in this (_xner's Manual.
!?:Be sure your appliance is i)roperl} installed and
grounded b} a qualified installer in accordance
with the provided installation instructions.
iJ_::iHave the installer show xou the location
of the circuit breaker or fiBe. Mark it fbr easx
ief_'ience.
Do not attempt to repair or replace any
part of }our range unless it is specificall}
recommended in this manual. All other
servicing should be refbrred to a qualified
technician.
Befbre peffbmdng any serfice, disconnect
the range power supply at the household
distribution panel by removing the flBe or
switching off the ci_vuit breaker
2
_: Do not leave children alone---children should
not be left alone or unattended in an area
where an appliance is in use. They should never
be allowed to sit or stand on any part of the
appliance.
iJi::iDo not allow anyone to climb, stand or hang
on the door or cooktop. They could damage
the range and even tip it ove_, causing severe
personal i_ur>
_: [a_ge scratches or impacts to glass doo_s can
lead to broken or shattered glass.
_: Do not store flammable materials in an oven or
near the cooktop.
CAUTION: el,,sof ch,d,e.
should not be stored in cabinets above a range
or on the bacLsplash of a range---children
climbing on the range to reach items could be
seriously injured.
Page 3
A WARNING!
SAFETYPRECAUTIONS
ge.com
f_:Never wear loose4itting or hanging gam)ents
while using the appliance. Be carefid when
reaching fbr items stored over the range.
Hammable mate,ial could be ignited if brought
in contact with hot surfi/ce atnits or heating
elements and may cause severe bums.
iJii:iUse only dU pot holde*._--moist or damp pot
holders on hot surfi/ces may result in burns
flom steam. Do not let pot holdet._ touch hot
surf,ace atnits or heating elements. Do not use
a towel or other batik)' cloth in place of pot
holde,s.
iJi;:iFor your safety, never use your appliance %r
wanning or heating the room.
iJi;:iTeach chil&en not to play with tile controls or
any other part of the range.
iJi;:i?dwavs keel) dish towels, dish cloths, pot holde,s
and other linens a sate distance fiom your
t_ange.
_: Alwa> keeI)wooden and plastic attensils and
canned fbod a safe distance flom
yOHI"I_]nge.
iJii:i_Mwavskeq) combustible wall cove,ings,
cm*ains or drapes a safe distance fiom your
t_ange.
_: Do not let cooking grease or other flammable
mate,ials accumulate in or near the range.
_: Keep the hood and grease filte,s cleat) to
maintain good venting and to avoid grease fires.
iJii:iDo not use water on grease fires. Never pick up
a flaming pan. Turn the controls ofli Smother a
flaming pat) on a surfiace atnit by coveting the
pat) completely with a well-fitting lid, cookie
sheet or flat tmv Use a multi-puq)ose dU
chemical or libam-t)pe fire extinguishe,:
Flaming grease outside a pan cat) be put out by
covering it with baking soda o,, if available, by
using a multi-propose dU chemical or fbam-
type fire extinguisher
Flame in the oven cat) be smothered completely
bv closing the oven door and turning the oven
off or by using a multi-propose dU chemical or
fbam-type fire extinguisher.
_: Do not touch the surlii/ce atnits, the heating
elements or the interior surlii/ce of the oven.
These surfilces may be hot enough to burn
even though they are dark in color During and
after use, do not touch, or let clothing or other
flammable materials contact tile sur[i/ce ttnits,
areas nearby the sur[ilce units or at))' interior
area of tile oven; allow sufficient time fbr
cooling fi,st.
Potentialh' hot sur[ilces include the cooktop,
areas filcing the cooktop, oven vent opening,
surlii/ces near the opening, crevices around the
oven dooI"
REMEMBER:The inside sur[ilce of the oven may
be hot when the door is opened.
iJii:iDo not store or use combustible materials,
gasoline or other flammable vapo,s and liquids
it) the vicinity of this or at))' other appliance.
COOKMEATANDPOULTRYTHOROUGHLY...
Cookmeatandpoultrythoroughly--meattoat/eastanINTERNALtemperatureof 160°Fandpoultrytoat/eastan
INTERNALtemperatureof 180°ECookingtothesetemperaturesusua//yprotectsagainstfoodbornei//ness.
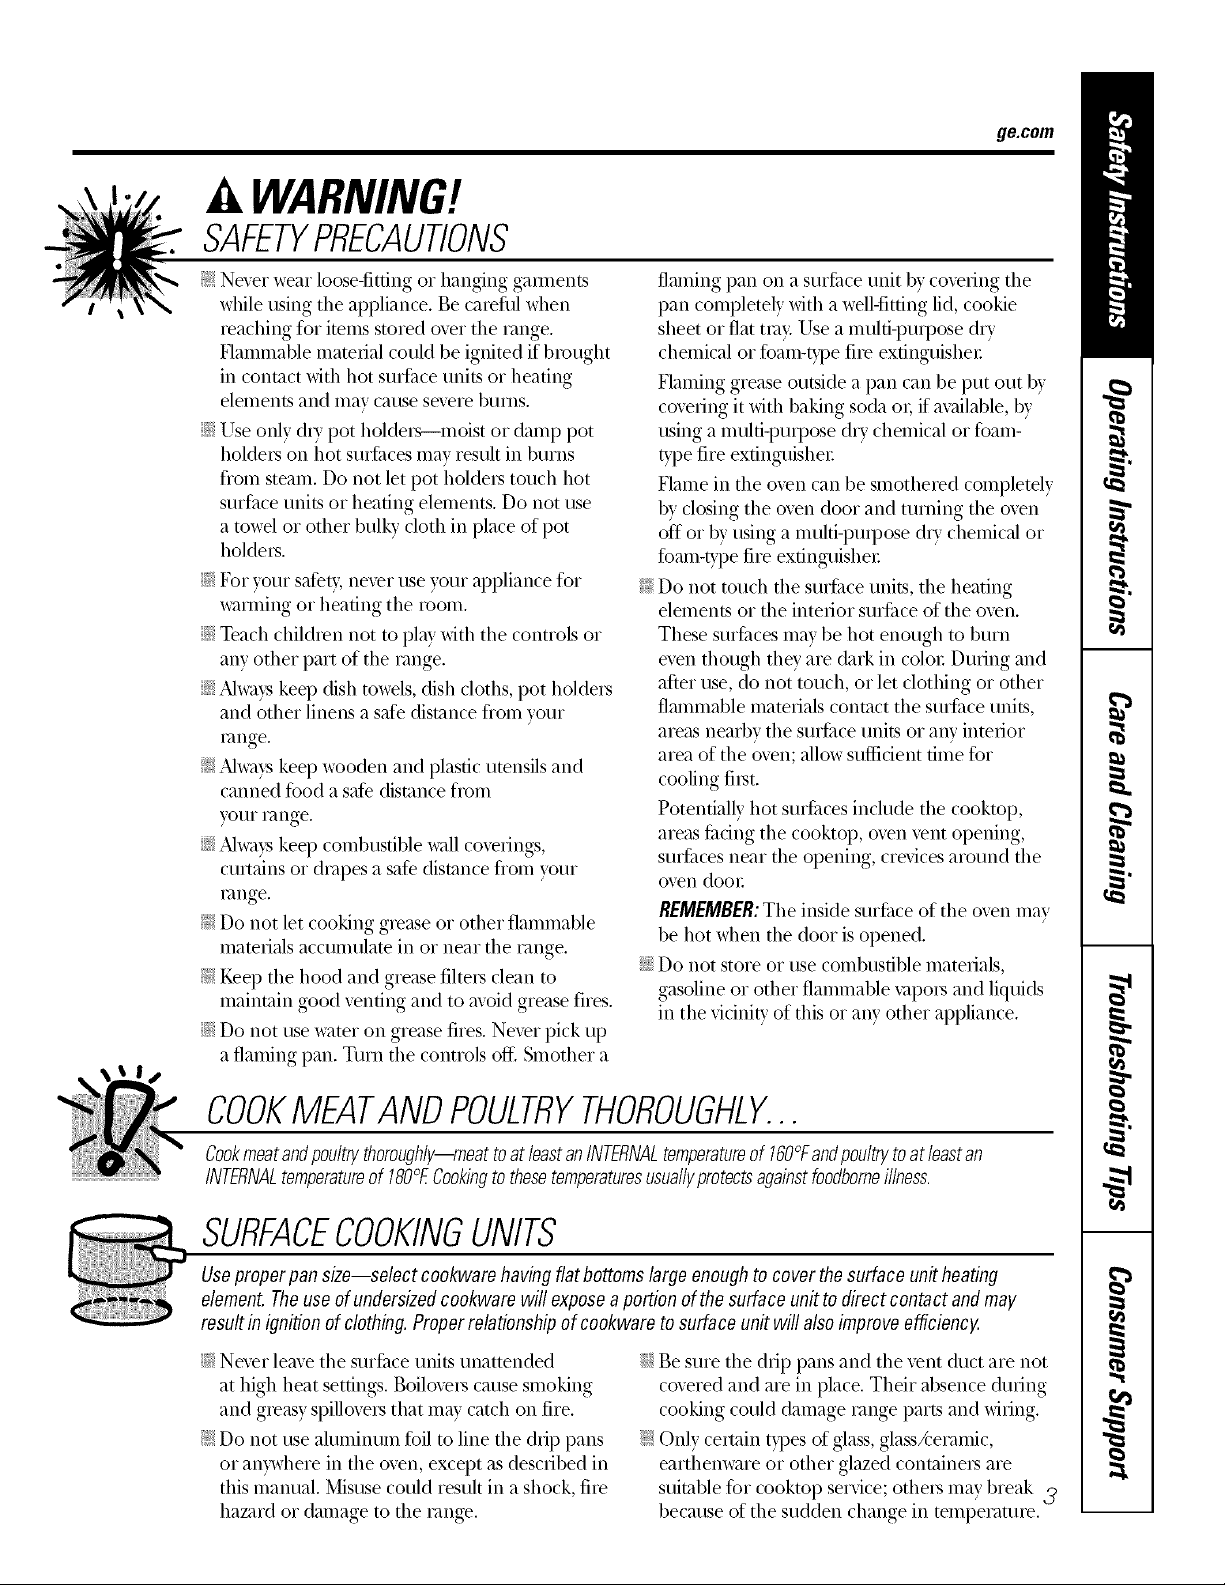
SURFACECOOKINGUNITS
Useproperpansize--select cookwarehavingflatbottomslargeenoughtocover thesurfaceunitheating
element.Theuseof undersizedcookwarewill exposea portionof the surface unitto direct contact andmay
resultin ignitionof clothing.Properrelationshipof cookwareto surfaceunit will also improveefficiency.
iJii:iNever leave tile sur[ilce ttnits ttnattended
at high heat settings. Boilove,s cause smoking
and greasy spillove*s that may catch on fire.
_: Do not use aluminum fbil to line the drip pans
or anywhere it) the oven, except as described it)
this manual. Misuse could result it) a shock, fire
haand or damage to the range.
iJii:iBe sure the drip pans and the vent duct are not
covered and are it) place. Their absence during
cooking could damage range parts and wiring.
;_:Only ce,min t}pes of glass, glass/ceramic,
earthenware or other glazed containe,._ are
suitable [br cooktop service; othe,._ ma)break 3
because of the sudden change it) temI)evatme.
Page 4
IMPORTANTSAFETYINFORMATION.
READALLINSTRUCTIONSBEFOREUSING.
SURFACECOOKINGUNITS(cont.)
To minHnizedm possibilir}of bums, ig]_irionof
flammable materialsa_d spillage, the hmldle of a
cont_{nershould be mined towmd the cenmr of the
i_lge _dfl)outextending over neab} suffice units.
}'_Mua}s turn the surfiaceunit.soffbefom mmo_ N
cookware.
!'_Do not immeise or mak d)e remomble surface units.
Do not put them in a dishwashei:Do not seltklemathe
surfilce unitsin the oxen.
!'_}\])en pmpmfiN flambN foods under d)e hood, turn
the tim on.
!_:To avokt d)e possibilityof a bum or elecu'icd)o('k,
al_u)s be cemtin that the conuols for ,allsurface units
are at fl)e 0FFposition and all coilsare cool before
attempting to liftor remove a unit.
!'_Gean d_e cooktop _dd) caudon. Ira wet sponge is
umd to _pe spills on a hot cooktop, be carefifl to
avoid steam bums.
!_:Keet)m_e)e on foods being flied at high or medium
high heat re)tings.
!_:Foods for fi)_ngshould be as&y aspossible. Froston
fiozen foods or moisture on flesh foods can cruisehot
fatm bubNe up m_dover the skiesof the pan.
!_:11_ little fatfor eflbctiveshallowor deep fat ifring:
Fillingd)e pan too fifllof fatcan cau_ spilloverswhen
food is added.
!_;:Ifa combh_ationof oilsor tiltsufllbe used h) fi)ing;
sth toged)er before headng: or asfats melt dowl):
i2!LMun)sheat fatslowl),and watchas itheats.
[lse a deep tilt fl)ennometer whene\er possibleto
pmxent oxeflmathN fi_be)ond the smoking pohat.
WARNING!
OVEN
Standawayfromtherangewhenopeningtheovendoor.Hotairorsteamwhichescapescancausebumstohands,face
and/oreyes,
;'_Donot heat unopened food contah)ers.Pressure
could build up a_d fl)e contahwr could buist, causing
anHW'>
!cg:Keep d)eoven ventUllolystrtlcted.
@Keet) the oven fiee fiom grease buildup.
@Place the oven shelfin the desired posidon while the
oven iscool. [f'shehes must be handled when hot, do
not let pot holder contact the heath)g dements.
NPullhN out the shelf to the stop-lockisa convenience
in lifdnghem)' foods. It is Nso a precaution ag,%)st
bums fiom touching hot suffices of the door or
ovenwalls.
;.i'_"_\q)enusing cookhN or roasdng bags in d)e o_en,
follou the mmat_cturer's dhecdons.
!_:Do not um dm oven to oh)'newspapers.
If overheated, d)e) can catch on fne.
!_:Do not um the oven for a sto_,'agemea.Imms stored in
an oven can ignite.
!_:Do not leavepaper product.s, cooking utensilsor food
h_d)eoven when not in use.
Do not u_ alumhmm foilto lhm oxen bottoms.
Improper h_stalladonof aluminum foilma)result
in a riskof electricshock or fne.
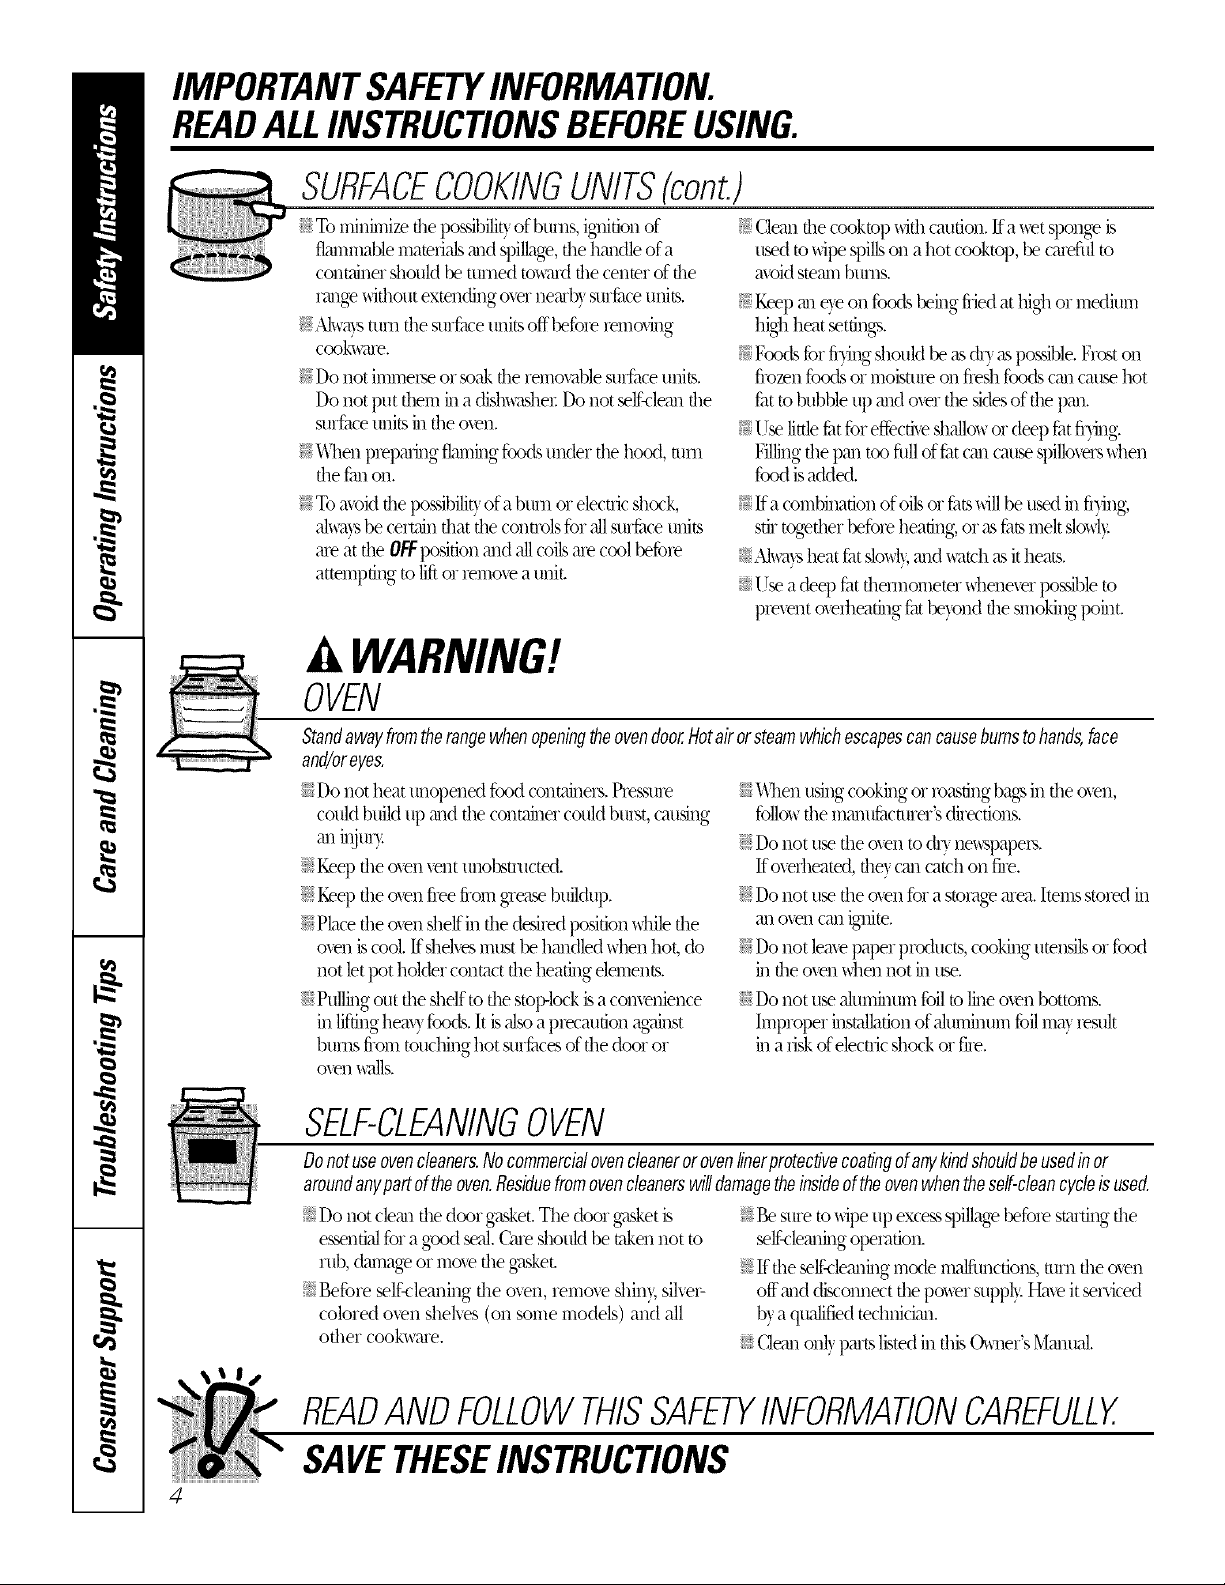
SELF-CLEANINGOVEN
Donotuseovencleaners.Nocommercialovencleaneroroven/inerprotecfivecoatingofanykindshouldbeusedinor
aroundanypartoftheoven.Residuefromovencleanerswilldamagetheinsideoftheovenwhentheself-cleancycleisused.
!_:Do not clea_ d_edoor gasket. The door gasketis
e,,_ntial for a good _al. Q_md_oukt be taken not to
rub, damage or move the gasket.
!:_Before self-cleaning the oxen, remoxe shiny,siher-
colored oven shehes (on some models) and all
other cookware.
}_:Besure to u_peup excess spillagebefore stmfi_gd)e
mltklemaingoperation.
!'_Ifthe seltklemaingmode malfimcfions,mm the o_en
offa_d disconnect the power supply.Have it serficed
b}a qualified technician.
Gean onl} pm_slistedin this Owner's Manual.
READANDFOLLOWTHISSAFETYINFORMATIONCAREFULLY.
SAVETHESEINSTRUCTIONS
4
Page 5
Usingthe surface units, ge.com
Throughout this manual, features and appearance may vary from your model.
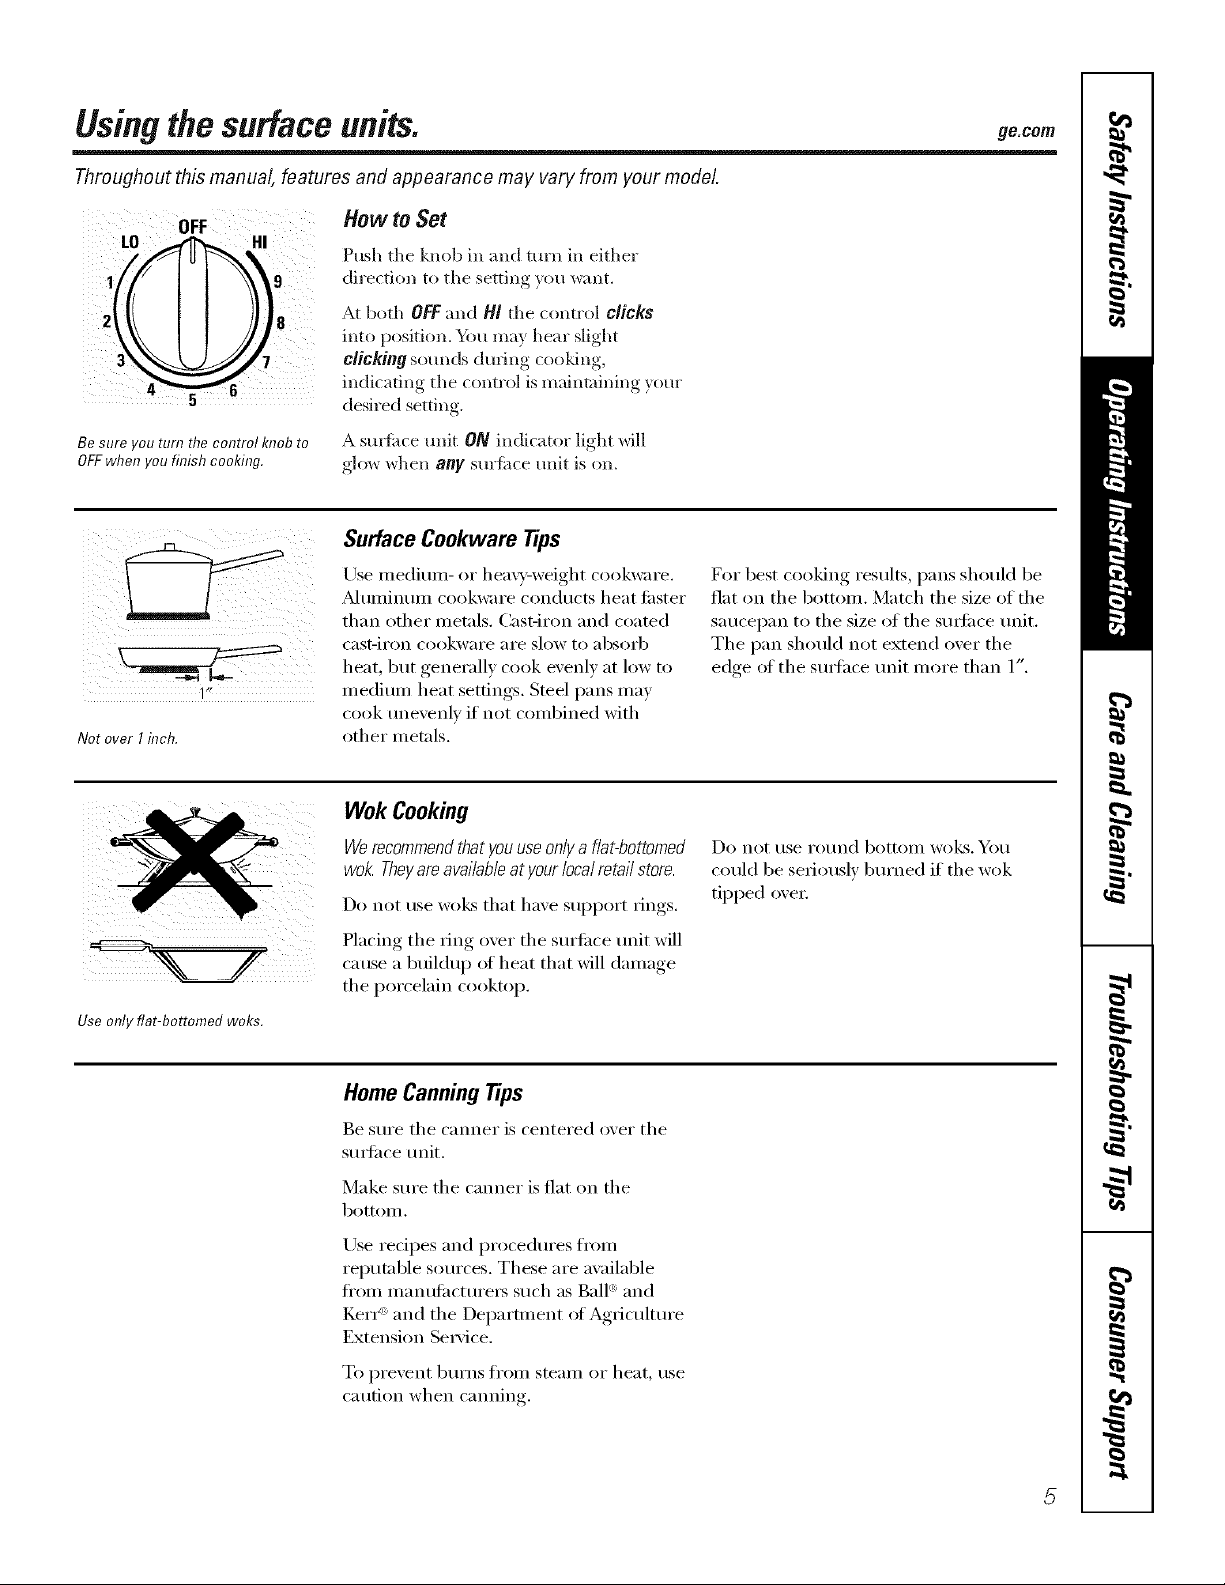
How to Set
Push the knob in and turn in either
direction to the setting you want.
At both OFF and H! the control clicks
into position. _tl may hear slight
clicking som_ds during cooking,
3
indicating the control is maintaining yore"
desired setting.
Be sure you turn the control knob to
OFFwhen you finish cooking.
1"*
Notover Iinch.
I
Use only flat-bottomed woks.
A sm_time refit ON indicator light will
glow when any surtime unit is on,
Surface Cookware tips
Use medimn- or hea\_v-weight cookware.
_kdtlIllintlIll cookware condtlcts heat fi_ster
than other metals. Cast-iron and coated
cast-iI'on cookwai'e aI'e slow to _lbsoi'b
heat, but generally cook evenly at low to
medium heat settings. Steel pans may
cook tmevenlv if not combined with
other metals.
Wok Cooking
Werecommendthat youuseonlya flat-bottomed
wok. Theyareavailableatyour local retail store.
Do not rise WO]CSthat have support rings.
Placing the ring over the surtilce unit will
cause a buildu I) of heat that will damage
the porcelain cooktop.
For best cooking results, pans shouM be
fiat on the bottom. Match the size of the
saucei)an to the size of the sm_i_ce trait.
The pan should not extend over the
edge ot the sm_hce trait more than 1".
Do not t/se I'ot/nd bottolll Wo]cs. Yell
could be seriously bm'ned if the wok
tipped oxer.
Home CanningTips
Be sm'e the canner is centered o_er the
sm_i_ce trait.
Make sure the canner is fiat on the
bottom.
Use redpes and procedm'es fl'om
reputable sources. These are awfilable
fl'om manufi_cture_ such as Ball '_and
IZerI_'_and the Department ot Agricultm'e
Extension Service.
To pi'e'_ent btli'ns fi'Olll steaill or heat, rise
caution when camfing.
Page 6
Usingthe ovencontrols.
Throughout this manual, features and appearance may vary from your model.
OVEN CONTROLS e _ T|ME CONTROLS
S + ECONDS
,)
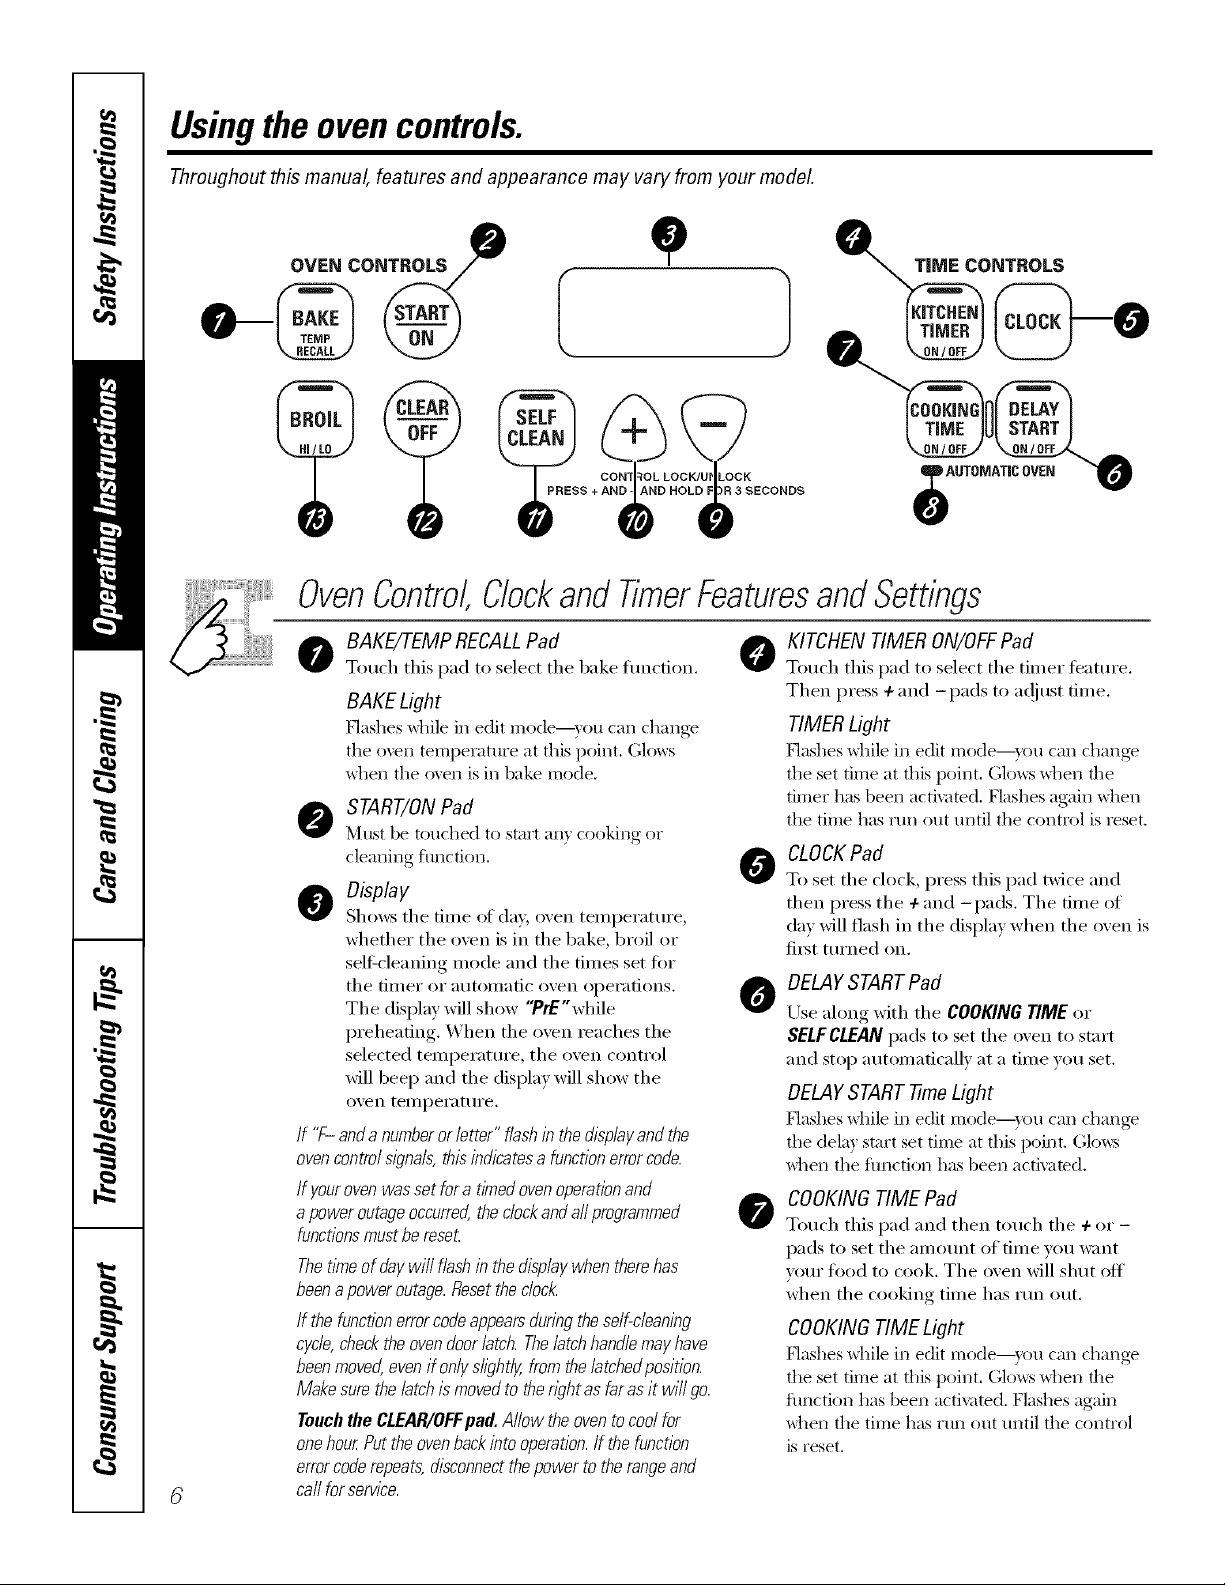
OvenControl,ClockandTimerFeaturesandSettings
o@@,,
o BAKE/TEMPRECALLPad @
Touch tiffs pad to select the bake function.
BAKE Light
Hashes _hile in edit I/'lode--}rOIl (-'_111 (-h_lll_e
the oven temperatm'e at this point. Glows
_hen the o\en is in bake mode.
START/ONPad
_'ltlSt be touched to start all} cooking or
cleaning function.
O Dbplay
Shows tile time of da)', oven temperature,
whether tile oven is in tile bake, broil or
selfZcleaning mode and tile times set fi:,r
tile [iII/eI" oI" atltOIIlatic oven opei'ations.
Tile display will show "PrE'while
preheating. When tile oven reaches tile
selected temperature, tile oven control
will beep and tile display will show tile
oven temperature.
If "F- and anumberor letter" flashin thedisplay andthe
ovencontrol sl_?nals,thisindicates a functionerror code.
If yourovenwasset fora timed ovenoperation and
apower outageoccurred,the clockandaftprogrammed
functionsmustbe reseL
Thetithe of day will flash in the displaywhen therehas
beena power outage.Resetthe clod<
If the function errorcodeappearsduring the self-cleaning
cycle,checktheoven doorlatch. Thelatchhandle mayhave
beenmoved,evenifonlys/i)htly, from the latchedposition.
Makesure the latch ismoved to then_?htas faras it will go.
Touch the CLEAR/OFFpad.Allow theoven tocool for
onehourPut the ovenbackinto operation.If the function
errorcoderepeats, disconnectthepower to the rangeand
ca//for service.
0
0
0
KITCHEN TIMER ON/OFFPad
Totlcb this pad to select tile tilller teatllI'e.
Then press + and -pads to a(!iust time.
TIMERLight
Hashes while in edit Illode--}r{)tl (-'_111change
the set time at this point. Glo_:s _hen the
timer has been activated. Flashes again _hen
the time has run out until tile control is reset.
CLOCK Pad
To set tile clock, press tiffs pad twice and
then press tile + and -pads. Tile time of
day will flash in tile display when tile oven is
fit_t tin'ned on.
DELAYSTARTPad
Lrse along with tile COOKING TIME or
SELFCLEAN pads to set tile oven to start
and stop automatically at a time you set.
DELAYSTART -timeLight
Hashes while in edit I/'lode--}r{)tl (-'_111change
the dela) start set time at this point. Glows
_dmn the fimction has been activamd.
COOKINGTIME Pad
Touch this pad and then touch tile + or-
pads to set tile amotmt of time you _;mt
w)m" food to cook. Tile oven will slmt off'
when tile cooking time has run out.
COOKINGTIME Light
Hashes while in edit Illode--}r{)tl (-'_111change
the set time at this point. Glo_:s _hen the
fimction has been activated. Flashes again
_hen tile time has run out until tile control
is reset.
Page 7
OvenControl,ClockandTimerFeaturesandSettings
ge.com
AUTOMATIC OVENLight
0
This lights anytime the oven has been
i)r()grammed using the COOKING TIME or
DELAYSTARTfimcdons.
- Pad
Short raps to this pad xdll decrease the time
or temperature by small amotmts. Touch
and hold the pad to decrease the time or
teml)erature by larger ainounts.
+ Pad
Short taps to this pad will increase the time
or temperature 1U small amo/mts. Touch
and hold the pad to increase the time or
temperatm'e by linger amo/mts.
O SELFCLEANPad
Touch this pad to select tile selfk-leaning
traction. See the Using the self-cleaning
oven section.
CLEANLight
Flashes _dfile in edit mode--}ou can change
tile length of time fbr the self-(lean c}cle at
this ix)int. (;lows when the oven is in the self=
dean c)cle. After the selfq lean cycle, the lig]lt
will ttlrIl of I[ Unlatch the docn:
CLEAR/OFF Pad
Touch this pad to cancel ALL oven
operations except tile clock and time_:
BROILHI/LO Pad
Touch this pad to select the broil traction.
BROILLight
Flashes while in edit mode---you can switch
fl'om HI to tO BROILat this point. Glows when
file ()veil is iIl broil mode.
Indicator Lights (on some pads)
EBITmode lastsseveral seconds after the
last pad press, BELAY START ON/OFFand
COOKINGTIME ON/OFFwill be the only pads
lit if either of these options is selected.
(Example: OELAYSTARTis selected with
BAKE tile DELAYSTARTpad will remain
lit until the clock reaches the programmed
time, at which point it will mm off and the
BAKE/TEMPRECALLpad lig_lt will light up),
CONTROL LOCKJUNLOCK
pRESS + AND -AND HOLD FOR 3 SECONDS
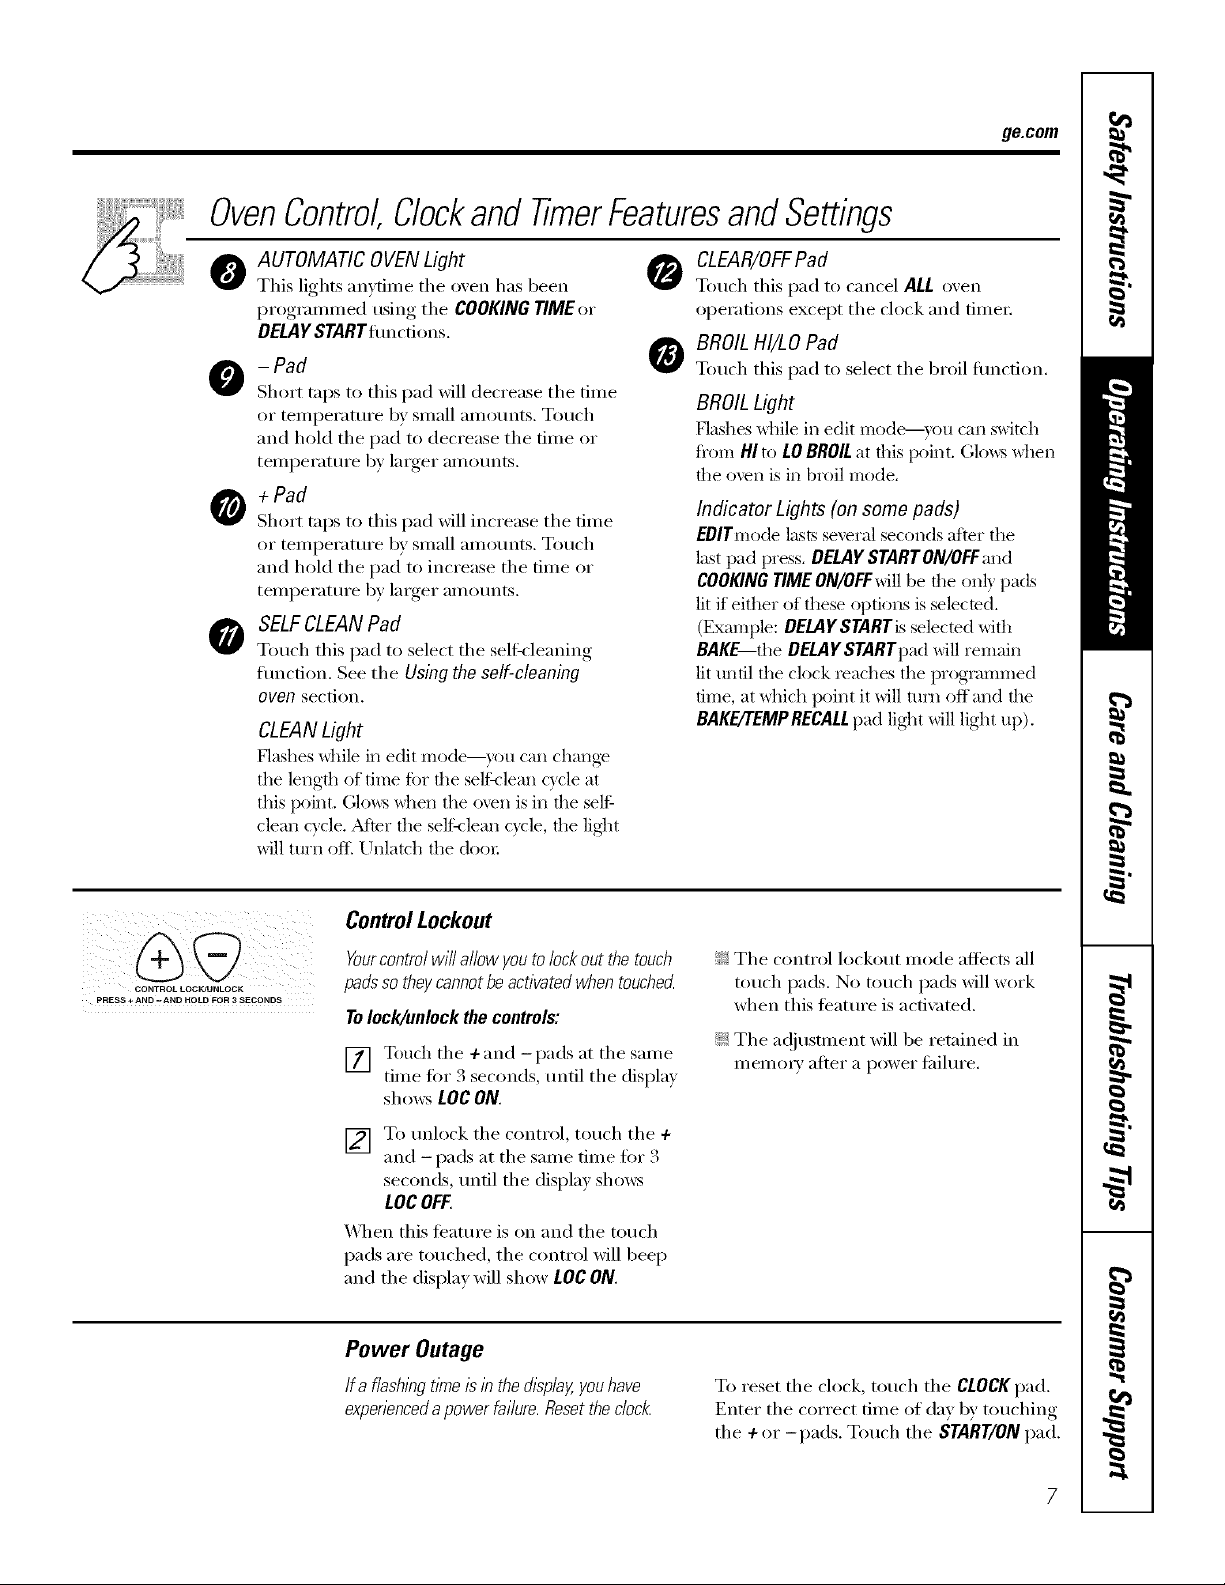
ControlLockout
Yourcontrol will allow youto lock out the touch
padsso theycannot beactivated when touched
Tolock/unlock the controls:
[] Touch tile +and -pads at tile same
time tot 3 seconds, tmtil the (lispla,_
sh(>ws LOC ON.
] To tmh)ck the control, touch the +
and -pads at the same time fin" 3
seconds,/mfil tile display sho_s
LOCOFF.
_]/en this ti_atm'e is on and tile touch
pads are touched, tile control will beep
and the display will show LOC ON.
Power Outage
Ifa flashing t/?neis in thedL_plagyouhave
expenencedapower failure. Resetthe cloct_
!i?:Tile control h)ckout mode affects all
touch pads. No touch pads will work
when this teatm'e is a(tix Ked,
!;_:Tile ac!jt/stment will be retained in
mem(ny after a power fililm'e.
To reset tile ch)ck, touch tile CLOCKpad.
Enter tile correct time of (la} by touching
tile + or-pads. Touch tile START/ONpad.
Page 8
Usingthe oven.
Toavoid possible bums, place the shelves in the desired posifion before you turn the oven on.
Before you begin...
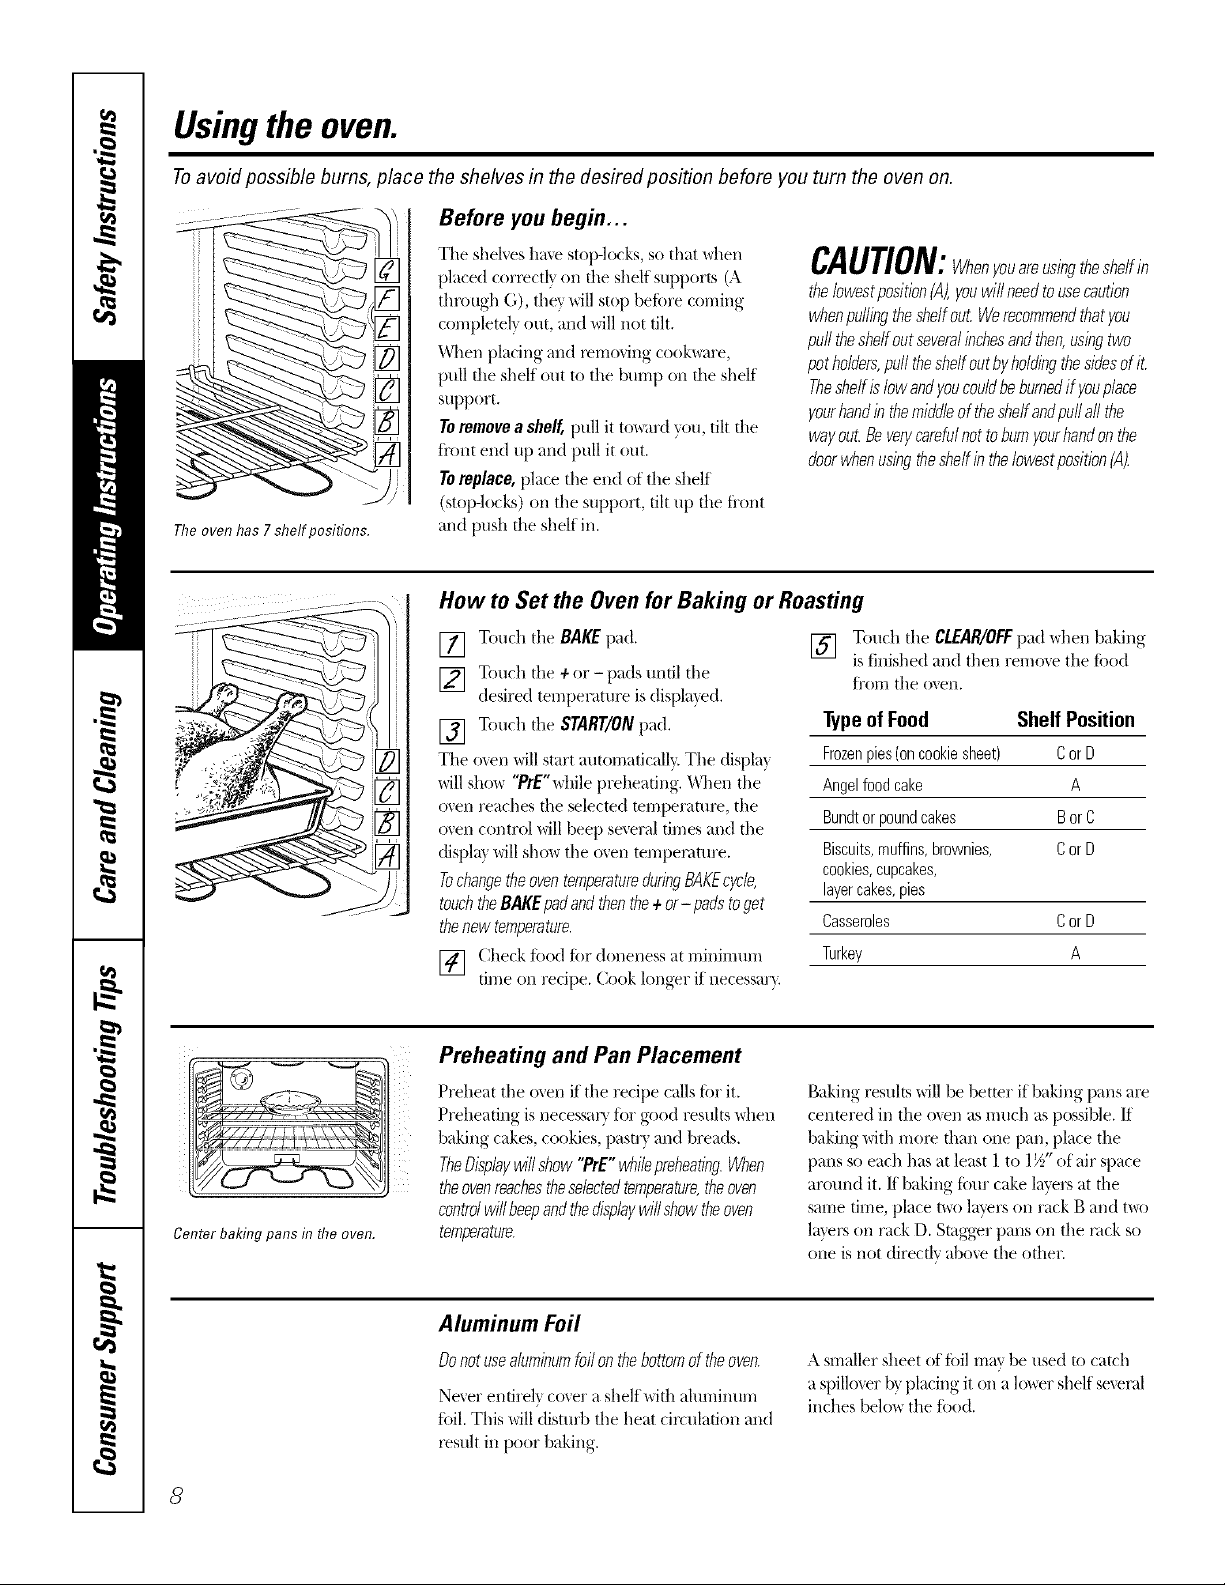
The oven has 7 shelf positions.
Tile shelves ha\'e stop-locks, so that \dlen
pla.ced corx_ctl) on file shelf supports (A
throug}/G), they will stop beiiwe coming
completely out, and will not tilt.
When placing and lelrlo_ing cook\_are,
pull file shelf out to the Nmlp on file shelf
support.
Toremovea shelf,pull it tox_mdyou, tilt file
fi'ont end up and pull it out.
Toreplace,place the end ot tile shelf
(stop-lo(ks) (m the support, tilt up die fi'ont
and push the shelf in.
CAUTION:Whenyouareus/ngtheshelfin
thelowestposition(A),youwill needtousecaution
whenpullingtheshelfout.Werecommendthatyou
pulltheshelfoutseveralinchesandthen,usingtwo
potholders,pull theshelfoutbyholdingthesidesofit.
Theshelfislowandyoucouldbeburnedif youplace
yourhandin themiddleof theshelfandpullall the
wayout.Beverycarefulnotto burnyourhandonthe
doorwhenusingtheshelfinthe/owestposition(A).
How to Set the Oven for Baking or Roasting
[] Touch the BAKEpad.
] Touch the + or- pads until the
desired temperature is displayed.
[] Touch the START/ONpad.
The o_en will start automat}ca}Iv. The displa}
will show '?rE"while preheating. "_\]/en the
oven reaches the selected mmperatm_, the
oven control will bee}) several times and the
(fispla} will sho_ the ()veil temper,_ture.
TochangetheoventemperatureduringBAKEcycle,
touchtheBAKEpadandthenthe+ or- padstoget
thenew temperature.
[] Check. f_>odf_)r (}oneness at minimum
rune on recipe. Cook longer if necessar}.
[] Touch the CLEAR/OFFpad when baking
TypeofFood Shelf Position
Frozenpies(oncookiesheet) CorD
Angelfoodcake A
Bundtorpoundcakes BorC
Biscuits,muffins,brownies, CorD
cookies,cupcakes,
layercakes,pies
Casseroles CorD
Turkey A
is finished and then remo_e the fi)od
t/'orri the oven.
Center bakingpans in flTeoven.
8
Preheating and Pan Placement
Preheat the oven if the recipe calls ti)r it.
Preheating is necessaQ t()r good resuhs \allen
baking cakes, cookies, pastr} and breads.
TheDisplaywillshow"?rE" whilepreheating.When
theovenreachestheselectedtemperature,theoven
controlwillbeepandthedisplaywillshowtheoven
temperature.
Aluminum Foil
Donotusealuminumfoilonthebottomof theoven.
Never entirely cover a shelf with ahli/lii/ili//
fi)il. This will disturb the }mat circulation and
l_sult in poor baking.
Baking resuhs will be better if baking pans are
cenmred in the o_en as much as possible. If
baking with more than one pan, place the
pans so each has at least 1 to 1½" of air space
around it./1 baking timr cake layers at the
sarrie tirrie, })lace t\_o layers on rack B and t\_o
lax_rs on rack D. Stagger pans oil the n<k so
one is not directly abo\e the other
A smaller sheet of tiff] may be used to catch
a spilloxer b} placing it on alower shelf sexeral
inches below the ti)od.
Page 9
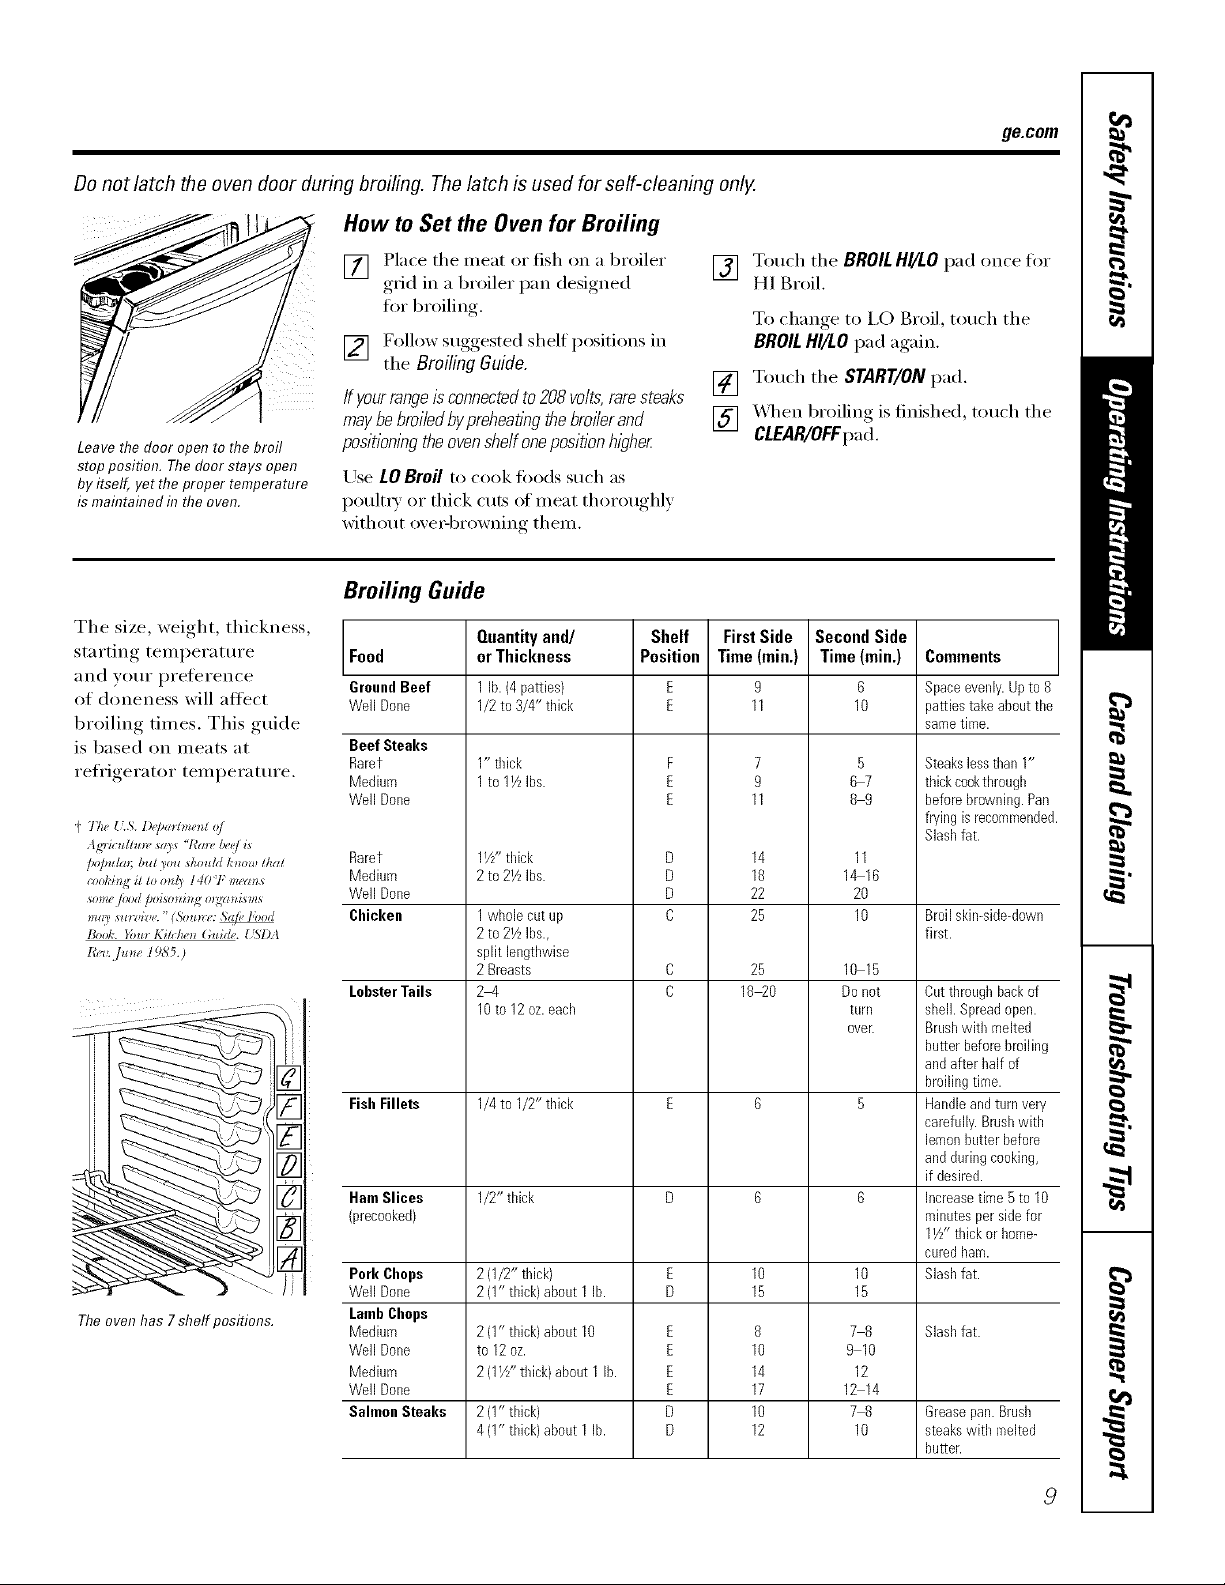
Donot latch the oven door during broiling. The latch is used for self-cleaning only.
How to Set the Oven for Broiling
ge.com
Leave the door open to the broil
stop position. The door stays open
by itself, yet the proper temperature
is maintained in the even.
Tile size, weight, thickness,
starting temperature
}lIld VO/lI" prelerence
of doneness will att'ect
broiling times. This guide
is based on meats at
refrigerator temperature.
p TD(, {kS. I)(J_a*m_e_zl o/
Agriculhm, s© s "/'a_, &e/ i*
/_l)/mlm; b*zt_o*zsko*tld /,'_*o,l!tkat
zool,'i_l,8it to o_/_ I407;" m_'(m _
_omepJod [oLsm i_N o_2t4zn*isms
_ll_U stl_'zize. "(%m*r_,: _e libod
l_ook. }Du_ Kilclw_ G,u<h,. {iSY)A
l?,_l,.]une 198'5.)
Theoven has 7 shelf positions.
[] Place tile meat or fish on a broiler
,grid in a broiler I)an designed,
for broiling.
[] Follow suogested shelf )ositions in
tile BroilingGuide.
If your range is connected to 208 voits, rare steaks
may be broiied bypreheatk_gthe broiier and
positionk_gthe oven shelf one positionhigher
Use LOBroil to cook foods such as
poult_ 7 or thick cuts of meat thoroughly
without ove_q)rowning them.
Broiling Guide
Shelf
Position
Food
GroundBeef
Well Done
Beef Steaks
Rarer
Medium
Well Done
Rarer
Medium
Well Done
Chicken
LobsterTails
Fish Fillets
Ham Slices
(precooked)
Pork Chops
Well Done
LambChops
Medium
Well Done
Medium
Well Done
Salmon Steaks
Quantityand/
orThickness
1 lb.(4 patties)
1/2to 3/4" thick
1" tbick
1to 11kIbs.
11/Z'tldck
2to 21/LIbs.
1whole cut up
2to 21/zIbs.,
split lengthwise
2Breasts
2q
10to 12 oz.each
1/4to 1/2" thick
1/2" thick
2(1/2" thick)
2(1" thick)about1 lb.
2(1" thick)about10
to 12oz.
1
2(1_" tbick) about1lb.
2(1" thick)
4(1" thick)about1 lb.
[] Touch tile BROIL HI/LO pad once fi);_"
HI Broil.
To change, to I,O Broil, touch tile
BROILHI/tO pad again.
[] Touch tile START/ON pad.
[] XAq/en broiling is finished, touch tile
CLEAR/OFFpad.
F
E
E
D
D
D
C
E
E
E
E
D
D
FirstSide
Time(min,)
9
11
7
9
11
14
18
22
25
25
18 20
8
10
14
17
10
12
Second Side
Time (rain.)
6
10
5
67
89
11
1_16
20
10
10 15
Donot
turn
over.
78
9 10
12
12 14
78
10
Comments
Spaceevenly.Upto 8
pattiestakeaboutthe
sametime.
Steakslesstban 1"
thickcooktbrougb
beforebrowning.Pan
fryingis recommendec
Slashfat.
Broilskin-side-down
first.
Cutthroughbackof
shell.Spreadopen.
Brushwitb melted
butterbeforebroiling
andafter half of
broilingtime.
Handleandturnvery
carefully.Brushwitb
lemonbutterbefore
andduring cooking,
if desired.
Increasetime 5to 10
minutesperside for
11//'thick or home-
curedham.
Slashfat.
Slashfat.
Grease pan. Brush
steaks with melted
butter.
Page 10
Usingthe clock and timer.
Not all features are on all models.
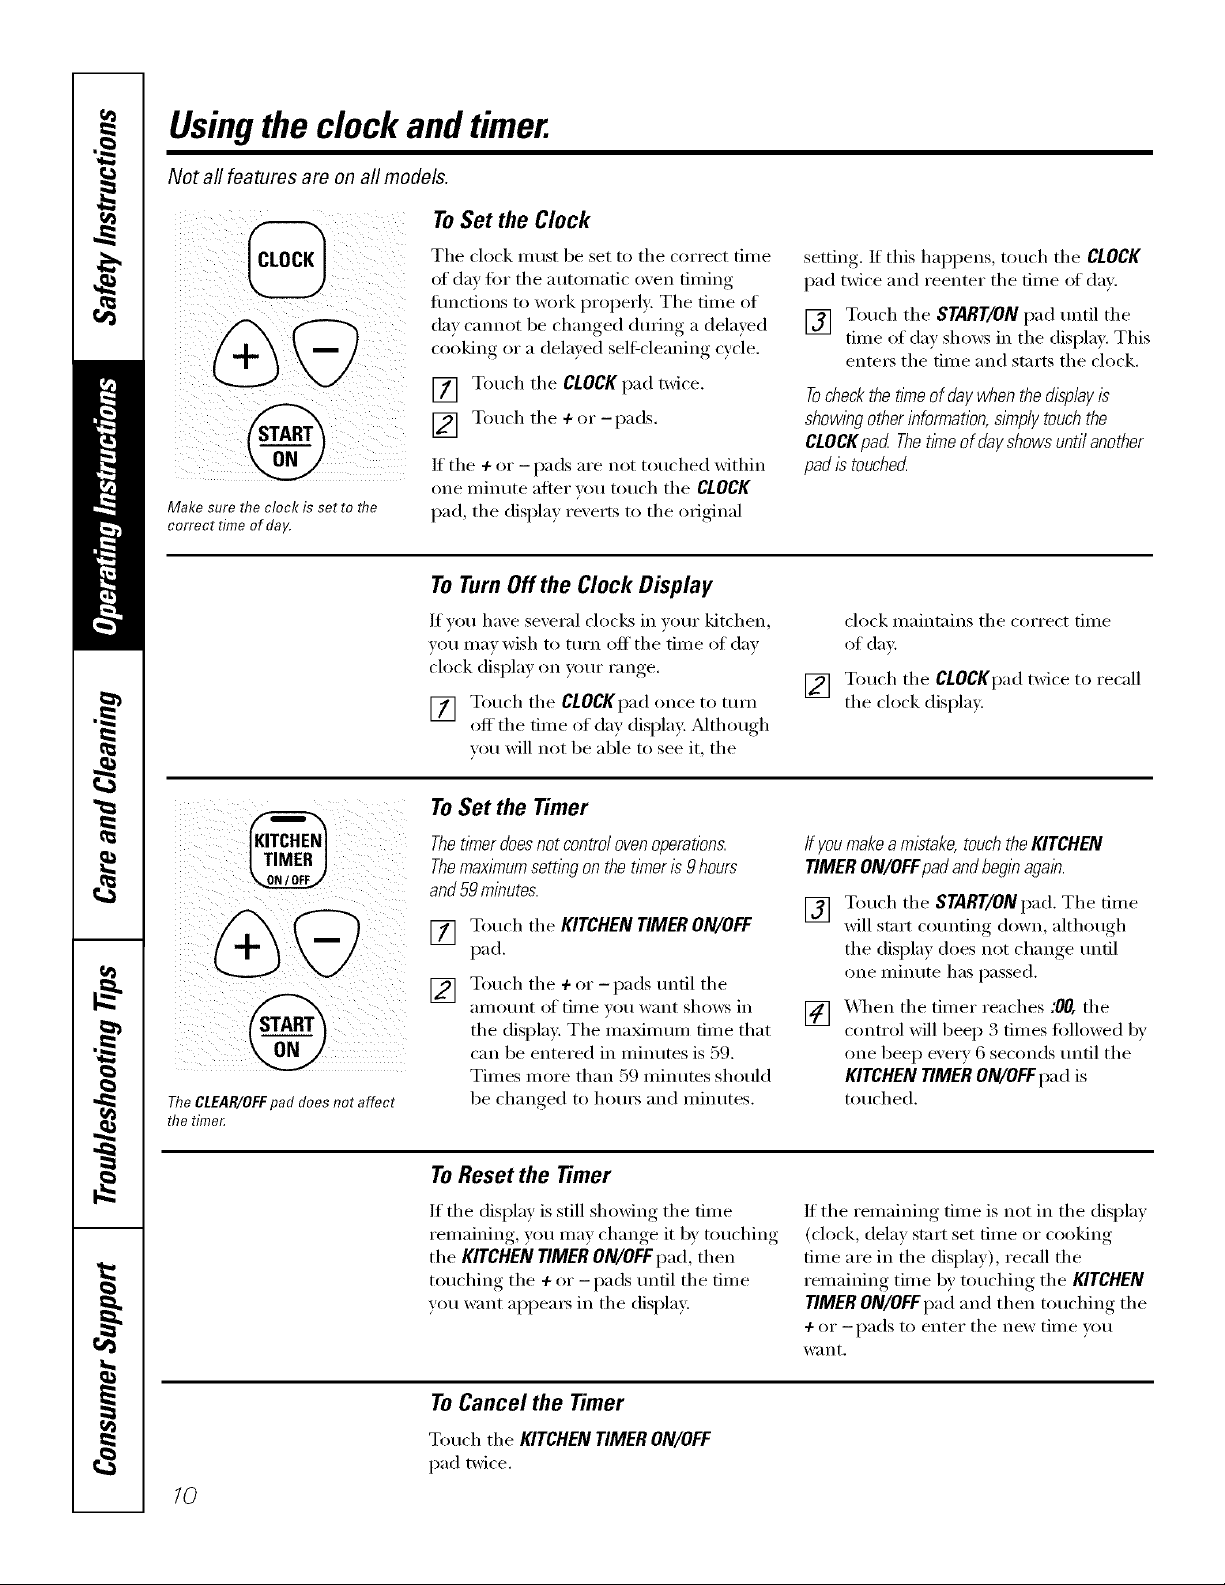
To Set the Clock
Make sure the clock is set to flTe
correct time of day.
The clock must be set to the correct time
of day fin" the atmnnatic oxen tinting
flmcfions to work properly: The time of
da} cmmot be changed dm_ing a dela}ed
cooking or a delmed seltXcleaning cycle.
[] Touch the CLOCKpad twice,
[] T°uch the + °r -IXMS"
If the 4- or - pads are not touched within
one minute after xou touch the CLOCK
pad, the displa) rexerts to the original
ToTurnOff the Clock Display
If w_u have several clocks in yore" kitchen,
you may wish to mrn off the time of day
clock display on yore" range.
[] Touch the CLOCKpad once to turn
off the time of day displa); Mthough
you will not be able to see it, the
To Set the Timer
setting, If this hal)pens, touch the CLOCK
pad twice and reenter the time of din.
[] Touch the START/ON pad until the
time of day shm_s in the display. This
ente_ the time and starts the clock.
Tocheckthetimeof daywhenthedisplayis
showl)_gotherinformation,simplytouchthe
CLOCKpad Thet/meofdayshowsuntilanother
padistouched
clock maintains the correct time
of day.
Touch the CLOCKpad twice to recall
[]
the clock display.
%
TheCLEAR/OFFpad does not affect
the time£
ThetlYnerdoes not control ovenoperations.
ThemaxlYnumsemng on the timeris 9hours
and59 minutes
Touch the KITCHENTIMERON/OFF
[]
I)ad.
Touch the ÷ or-l)ads tmfil the
[]
}Ill/Olin[ oJ[ ti//le vot/W}lllt shows ill
the display. The maxim um time that
can be entered ill minutes is 59.
Times more than 59 minutes should
be changed to hom5 and minutes.
To Reset the Timer
If the display is still showing the time
remaining, you may change it by touching
the KITCHEN TIMER ON/OFFpad, then
touching the ÷ or -pads tmtil the time
wm _mlt appea_ in the display.
ToCancel the Timer
ffyoumakeamistake,touchtheKITCHEN
TIMERON/OFFpadandbeginagain.
[] Touch the START/ONpad. The time
will st;Irt counting down, althouoh
the display does not change tmfil
one minute has passed.
[] X4qmn the timer reaches :00, the
control will beep 3 times followed by
one beep every 6 seconds tmtil the
KITCHEN TIMERON/OFFpad is
touched.
If the remaining time is not in the display
(clock, delay start set time or cooking
time are in the display), recall the
remaining time by touching the KITCHEN
TIMERON/OFFpad and then touching the
÷ or -pads to enter the new tim e um
%;lilt.
Touch the KITCHENTIMERON/OFF
pad twice.
/0
Page 11

Usingthetimedbakingandmastingfeatures.(onsomemodels) gecom
Donot lock the oven door with the latch during timed cooking. The latch is used for self-cleaning only.
NOTE: Foods that spoil easily--such as milk, eggs, fish, stuffings, poultry and pork--should not be allowed to s# for
more than 1hour before or after cooking. Room temperature promotes the growth of harmful bacteria. Be sure that
the oven light is off because heat from the bulb will speed harmful bacteria growth.
How to Set an Immediate Start andAutomatic Stop
Theoven will turnon immediatelyandcookfor a [] Touch tile START/ON pad.
selectedlengthof time. At the end of thecooking
tkne,theoven WlT/turnoffautomatica//g Tile display shows either tile oven
[] Touch tile BAKE pad.
] Touch the ÷ or -pads to set the
o_en teillpei'attli'e.
[] Touch tile COOKING TIME pad.
NOTE."If your reciperequirespreheating,youmay
need toadd additional time to the length of the
cookingtime.
] Touch tile ÷ or -pads to set tile
baking tim e.
Tile cooking time that you entered
will be displayed. (If you select Cooking
Time fi_st and then a(!just the Bake
Telnl)erature, tile oxen telnperature
will be displayed instead).
temperature that you set or tile cooking
time countdown. (The display starts with
"PRE'if showing the oven temperature.)
Tile oven will con[intle [O cook tor tile
programmed alllO/Int of tii/le, then [tlYn
off automaficallv,
[] Touch tile CLEAR/OFFpadto clear
tile displa) if necessary:
Removethe food from theoven. Remember,even
thoughthe ovenshuts off automaflcally, foods
continuecookingafter controlsare off
TEMP
@
@
How to Set a Delayed Start and Automatic Stop
Theoven will turn onat the t/Yneof dayyouset,
cookfor a specihclength of timeand then turnoff
automatically
Make StlI'e tile clock shows tile ('ori'e('t
time oI day,
[] Touch tile BAKEpad.
] Touch tile 4-or -pads to set tile
oven telllpei'att ii'e.
[] Touch tile COOKING TIME pad.
] Touch tile 4-or -pads to set tile
desired length of cooking free.
[] Touch tile DELAYSTARTpad.
] Touch the + or _i)ads to set the tim e
of (lax _Otl want tile o_,en to ttlYn on
and start cooking.
[] Touch the START/ON pad.
NOTE."An attention tone wi// soundif you are
using flYnedbakingand donot touch the
START/ON pad
NOTE."If you would like to check tile times
you have set, touch tile BELAYSTARTpad
to check tile delay start set time you have
set or touch tile COOKINGTIME pad to
check the length of cooking time you
have set.
_4l/en tile oven turns on at tile time of day
wm have set, the display will show "PRE"
until it reaches tile selected temi)erature,
then it will display tile oven teml)erature.
At the end of cooking time, the oven
will turn off and the end-el:cycle tone
will sound.
[] Touch the CLEAR/OFFpad to clear
tile displa) if necessar).
Removethe foodfrom the oven. Remember,even
thoughthe ovenshuts off automatlcally, foods
continuecookingafter controlsare off
@
1/
Page 12

Special featuresofyourovencontrol
Yournew touch pad control has additional features that you may choose to use. Thefollowing are the features and
how you may activate them.
Thespecial feature modes can only be activated while the display is showing the time of day. They remain in the
control's memory until the steps are repeated.
When the display shows your choice, touch the START/ON pad. The special features will remain in memory after
a power failure.
NOTE: The Sabbath feature and the Thermostat Adjustment feature are also Special Features, but they are
addressed separately in the foflowing sections.
12Hour Shut-Off
With thisfeature, shouldyouforget and leavethe
ovenon,the control will autornatlcally turnoff the
ovenafter 12 hoursduringbakbg functionsor
after 3 hoursduring a broil function.
If you wish to turn OFF this te'attlI'e, t(_l]OW
the stops below.
Touch the BAKE and BROILHI/LO
pads at the same time fin" 3 seconds
until the display sho_:s SE
[] Touch the CLOCKpad. The displa}
will show ON (l 2 hour shut-off).
Touch the CLOCKp'ad repeatedly
tmtil the display shows OFF(no
sh tlt-OlCD.
[] Touch the START/ON pad to actixate
the no shut-off and leaxe the control
set in this special teatures mode.
/2
Page 13

Usingthe SabbathFeature.
(Designed for use on the Jewish Sabbath and Holidays) (onsomemodels)
The Sabbath feature can be used for baking/roasting only.It cannot be used for broiling, self-cleaning or
Delay Start cooking.
NOTE,"Theoven light comes on automatically (on some models) when the door is opened and goes off when the
door is closed. Thebulb maybe removed. See the Oven Light Replacement section. Onmodels with alight switch
on the control panel, the oven light may be turned on and left on.
How to Set for Regular Baking/Roasting
i@ i I
ii@ ( )ii!!
i {i i
NOTE: Tounderstandhow the oven control works,
practice using regularbaking (non-Sabbath)before
entering Sabbathmode.
Make sure the clock shows thecorrect time of day
and the oven is off,
] Tou(h and hold both the BAKE and
BROIL HI/LO pads, at the same time,
until the dislllay shows SE
] "]h11the CLOCKpad tmdl BAh atltleat_
in the dist)lay.
[_] "lbuch the START/ONtlad and D will
atlpear in the distlla }
] "lbu(h the BAKE tlad. No sigllal will
be aixell.
[_ "lbu(h the START/ON pad.
[_ After a random delay tleliod of
atll)roxinlately 30 se(onds to 1 minme,
D C will apt)ear in the displa? in(ti(ating
that the ovt'n is baking/roasting. It D c
doesn't atlpear in the distlla}, start again
at Sie t1 4.
"Ib adjust the oven ten/l)erature, touch the
BAKEt)ad and tal) the 4.or -t)a(Is to increase
o): decrease tile tel/ll)el_lttll?e ill 2[; °
in(remems. "Ibu(h the START/ONt)ad.
NOTE:The CLEAR/OFFand COOKING TIME tlads
are a(ti_' (luring the Sal)l)ath t('attlFe.
"Ib exit Sabbath t?.';-itul'e s('e next t)age.
ge.com
When the display shows D the
oven is set in Sabbath. When the
display shows D c the oven is
baking/roasting.
@
When the display shows D the
oven is set f17Sabbath. When the
display shows D c the oven is
baking/roasttag.
] The t)reset smrdng mmtleramre will
automatically l)e set to 5'50. ° Tat/the 4.
or -])ads to increase or decFease tile
telIlllelTatllFe ill 25 ° il/crel//el/tS. Tlle
mmperamre can be set between 170 °
and 550. ° No sigllal or temt)erature
will be given.
How to Set for Timed Baking/Roasting--Immediate Start and Automatic Stop
NOTE: Tounderstandhow the oven control works,
practice using regular(non-Sabbath)Immediate Start
andAutomatic Stop before entering the Sabbathmode,
Make sure the clock shows thecorrect time of day
and the oven is off,
] "['o/u:h and hold both the BAKE and
BROIL HI/LO pads, at the same time,
until die disllla _ sh(lws SE
] "[:all the CLOCK t)ad m/til SAb al)tlears
in the dist)lay.
] "['ou(h the START/ONtlad and D will
atlllear in the (tisllla _
[_] "[km(h the COOKING TIMEpad.
] "['ou(h the 4.or -pads to set the (tesired
length oI looking tin/e between 1
n/inme and 9 hours and 5(.) mim_ws.
The looking time that you emered will
be distllaT_ed.
[_ Tou(h the START/ON tlad.
] Tou(h the BAKEtlad. No signal will
be ai_ell.
] The preset starting Wmlleramre will
autonlati(allv be set to 350. ° Ta t) die 4-
or -t)ads to increase or decrease the
mmperamre ill 25 ° incren/ents. The
mm[leratm'e can be set between 170 °
and 550. ° No signal or tenltlemulre
will be g@en.
[_ "lbu(h the START/ONllad.
[_ After a ran(lore delay t)elio(t of
allproxinlatelT_ 30 se(onds to 1 minute,
D C _ill apt)ear in the (tisl)la } in(li(adng
that tile oven is baking/roasting. II' D c
doesn't allpear in tile distllay, start again
at Step 7.
"Ib adjust the o'_en teml)erature, touch the
BAKEI)ad and mt) die 4-or -])ads to in(Tease
or decrease tile tenll)emture in 25 °
increments. "Ibu(h tile START/ONpad.
When cooking is/inished, tl/e disllla } will
change ti:on/D C to D indicating that tile
oven has turned OFFbm is still set in Sabbad/.
I{en/ov(' tile cooked tood.
73
Page 14

Usingthe SabbathFeature.
(Designed for use on the Jewish Sabbath and Holidays) (onsomemodels)
How to Exit the Sabbath Feature
[] Tou(h the CLEAR/OFFpad.
]
dela} period at approxhnatel_ 30
seconds to 1 minute, until only D is in
the displa}:
] "[buch and hold both the BAKE and
BROIL HI/LO pa(ls, at the same time,
m)til die display SI_()_rsSE
] "lh1) the CLOCK pad m_til ONor OFF
appears in the display. ON indi(ams that
the ov('n will automati(allv turn off alter
12 hours. OFFindicates that the oven
_ill not automaucallv mrn oil S('('
file Special Features se( Uon t6r an
explanation ollhe 12Hour Shut-Off
{('attll?t'.
[] "]bud_theSTART/ONpad.
NOTE:Irapoweroutageoccurredwhiletheovenwas
in Sabbath, theovenwillautomaticafly turn offandstay
offevenwhenthepowerreturns,Theovencontrol
mustbereset.
Adjust the oven thermostat--Do it yourself!
Youmay find that your new oven cooks differently than the one it replaced. Use your new oven for a few
weeks to become more familiar with it. If you still think your new oven is too hot or too cold, you can adjust
the thermostat yourself.
Do not use thermometers, such as those found in grocery stores, to check the temperature setting of your oven.
These thermometers may vary20-40 degrees.
NOTE,"This adjustment will not affect the broiling or the self-cleaning temperatures. The adjustment will be
retained in memory after apower failure.
To Adjust the Thermostat
[] Touch the BAKEand BROILHI/LO
pads at the sanle time for 2 seconds
tmtil the display shows SF.
[] Touch the BAKEpad. A two-digit
immber shows in the display:
[] The oxen temI)eramre can be
a(!iusted uI) to (+) 35°F hottei oi (-)
55°F coolei: Touch the +pad to
[] X_qmn }ou have made the
a(!justment, touch the START/ONpad
to go 1)ackto the tilne of (la_displa}.
Use x, OHI" o;en ;:Is veil would
noilllallx,.
NOTE."Thisadjustmentwill not affect thebroiling
orself-cleamngtemperatures.It will be retained
in memoryafter apower failure.
increase the temi)erature in l<legree
inci'ei//ents.
Touch the -pad to decrease the
telnl)erature ill l-deoTee_ increlnents.
Thetype ofmargarine will affectbakingperformance!
Most recipes for baking have been developed using high-fat products such as butter or margarine (80% fat). If you
decrease the fat, the recipe may not give the same results as with a higher-fat product.
Recipe failure can result if cakes, pies, pastries, cookies or candies are made with low-fat spreads. The lower the fat
content of a spread product, the more noticeable these differences become.
Federal standards require products labeled "margarii_e" to contain at least 80% fi_t1)y_vight. i,o\_tht spreads,
on the other hand, contain less ti_t and more watei: The high moisture content (ffthese spreads aflb'cts the
texture and flavor (ff baked goods. For best results with w)ur old fhvorite recipes, use malgarii_e, butter or
stick spreads containing at least 70% vegetable oil.
74
Page 15

Usingthe self-c/caning oven. gecom
Never force the latch handle. Forcing the handle will damage the door lock mechanism.
Before a Clean Cycle
Wipe up heavy soil on the oven
bottom.
%
_A,'e'recoi/llllend venting your ldtchen
with an open window or using a
ventilation tim or hood during the
first sell:clean cycle.
Remove shelves, broiler pan, broiler grid,
all cookw:Jre and any aluminum toil fl'om
the oven.
The shiny, silve>cohwed oven shelves
(on some models) can be self:cleaned,
but they will darken, lose their luster
and become hard to slide.
Soil on the fl'ont fl'ame ot the rlmge and
outside the gasket on the door will need
to be cleaned bv hand. Clean these areas
with hot watel; soap-filled steel wool pads
or cleansers such as Soft Scmb_ Rinse
well with clean water and (hy.
How to Set the Oven for Cleaning
Follow the directions in the Before a
Clean Cycle section.
[] I,atch the door
NOTE:Never force the latch. If the oven is
too hot, you will not be able to slide the
latch. _Mlow the oven to cool.
[] Touch the SELFCLEAN pad.
[] Touch the + or - pads until the
desired Clean Tilne is displa}ed.
TheCleanT/meis normally4 hours.Youcan
changetheClean TlYnetoany tlYnebetween 3
and5hours,dependingon theamount of soil in
youroven.
[] Touch the START/ON pad.
The self:clean cycle will autonmticallv
begin after CLEAN is displayed and the
tilne countdown appeai_ ill the display.
Do not clean the gasket. The fiberglass
material of the o\en door gasket camxot
withstand abrasion. It is essential for the
gasket to remain intact. If you notice it
becoming worn or fl;lyed, replace it.
_'_]pe up any hem T spillo\el_ on the oven
b(}ttoI//.
Make sm'e the oven light bulb cover is in
place and the oven light is Dill
IMPOBTAN_ The health of some birds
is extremely sensitive to the tirades gixen
off dudng the selgcleaning cycle of any
hinge. Me\ e birds to another well-
_vntilated room.
While the oven is sell:cleaning, you can
touch the CLOCKpad to display the tilne
of day. To return to the clean countdown,
touch the SELFCLEANpad.
The oven shuts off autonmticallv when
the clean cycle is complete, and 0:00 will
flash in the displa>
[] Slide the latch handle to the left as
tier as it will go and open the (looi:
It will not be possible to unlatch the oven
door tmtil the temperattu'e drops below
the lock mlnperamre and the LOCKED
door light goes ofll
When the LOCKEDdoor light is oil
unlatch the dooI:
15
Page 16

Usingthe self-cleaning oven.
How to Delay the Start of Cleaning
Make sure tile clock shows tile CoITect
time ot day.
] I_ach tile dooi:
[] Touch tile SELFCLEAN pad.
] [)sing tile + (IT- pads, enter tile
desired clean tin/e.
TheCleanT/nTeis normally4 hours. Youcan
change theClean T/nTeto anyt/Thebetween 3
andShours, dependl)_gon theamount of soil i)_
youroven.
[] Touch tile DELAY STARTpad. Tile
earliest deJa_ Stal_t time _ou can set
@
@
will appear in tile display.
] [)sing tile 4- (w - pads, enter tile
time of <lax _ou _ant the clean c_cJe
to staYt,
[] Touch the START/ON pad.
The display will show the delay sml_t set
time. It will not be possible to mflatch the
oven door tmtil the temperature drops
below the lock temperature and the
LOCKEDdoor light goes oil
When the LOCKED door light is oil
mflatch the dooI'_
ToStop a Clean Cycle
Totuh the CLEAR/OFFpad.
Wait until the oven has cooled below the
locking temperature to unlatch the (loo_:
You will not be able to open the door
right away mlless the oven has cooled
below the locking temperature.
After a Clean Cycle
You max notice some white ash in the
oxen. _ii)e it up with a damp ch)th alier
tile ()veil cools,
If white spotsremain,removethem with a soap-
filledscouringpad andrinsethoroughly with
a w)_egarand water ml)_ture.
These deposits are usually a salt
residue that cannot be remoxed b_
the clean cycle.
If the oven is not clean after one clean
c}cle, repeat the cxcle.
!i_:You cannot set the oven fiw cooking
until the oven is cool enough fi)r the
door to be unlatched.
_ While the oven is sel6cleaning, you
can press the CLOCKpad to display
the time of day. To return to the
clean countdown, press the COOKING
TIME pad.
_Ji::Apply a small amount (ff vegetable oil
to a paper towel and wipe the edges of
the oven shelves with the paper towel.
Do not spray with PanI e_or other
lubricant spra D.
16
Page 17

Careand cleaning of the range, gecom
Be sure all controls are off and all surfaces are cool before cleaning any part of the range.
If your range is removed for cleaning, servicing or any reason, be sure the anti-tip
device is re-engaged properly when the range is replaced. Failure to take this
precaution could result in tipping of the range and cause injury.
How toRemoveProtectiveShippingFilmand Packaging Tape
Moldedrib
\ Clear
GrooveStem
Carefldly grasp a corner of the protective
shipping fihn with your finge_ and sh)wlv
peel it from tile appliance surfime. Do
not use any shaq) items to remove tile
fihn. Remove all of tile fihn heft)re using
tile appliance fi)r tile first time.
Control Knobs
Thecontrolknobsmay be removedforeasier
cleaning.
Make suI'e tile knobs aI'e in tile OFF
positions and pull tl/em straight off tile
smms for cleaning.
Control Panel
To aSStlI'e no daIllage is done [o tile
finish oI tile product, tile satest way to
remove tile adhesive fl'()m packs@rig tape
on new appliances is an application ot a
household liquid dishwashing detergent.
Apply with a soft cloth and allow to soak.
NOTE: Theadhesivemust beremoved fromall
parts, it cannotbe removedif it isbakedon.
Tile knobs can be cleaned ill a
dishwasher or they may also be washed
with soap and wateI: Make sure tile insides
of tile knobs are dry before replacing.
Replace tile knobs ill tile OFFposition
to ensure proper placement.
It's a good idea to Mpe tile control panel
after each use of tile ()veil. Use a damp
cloth to clean or rinse. For cleaning, use
mild soap and water or a 50/50 solution
(ff vinegar and watei: For rinsing, use
clean water. Polish dry with a soft cloth.
Oven Heating Elements
li
Do notcleanthebake elementor thebroil
elemenLAnysoil will burn off when the
elementsare heated
Do not rise abI'asive cleanseis_ sti'ong
liquid cleanei_, plastic scouting pads or
oven cleanei_ on tile control panel--
they will danmge tile finish.
To clean tile oven flo(m genfl) lilt
tile bake element. Clean with wmm
soapy wateI:
17
Page 18

Careand cleaning of the range.
Oven Shelves
Clean the oxen shelxes with an abrasixe
cleanser or steel wool. _Mter cleaning,
rinse the shelves with clean water and dry
with a clean cloth.
NOTE."Theshiny,silver-coloredoven shelves
(onsomemodels)may be cleanedlb theself-
cleaningoven.However,the shelveswill darken
in color,losethek lusterand becomehard to slide
if cleaneddunw the self-cleaningcycle.
Porcelain Enamel Cooktop
The porcelain enamel finish is sturdy but
breakable if misused. This finish is acid-
resistant. However, any acidic foods
spilled (such as fl'uitjuices, tomato or
vinegar) should not be pemfitted to
remain on the finish.
Painted Surfaces
To make the shelves slide more easily,
apply a small amount of vegetable oil
or cooking oil to a paper towel and wipe
the edges of the oven shelves with the
paper towel.
If acids spill on the cooktop while it is
hot, use a (liT paper towel or cloth to
wipe it up right away: _A]_en the stm'hce
has cooled, wash with soap and wam_:
Rinse well.
For other spills such as tilt spatterings,
wash with soap and water or cleansing
powdei_ alter the sui_hce has cooled.
Rinse well. Polish with a dry cloth.
Painted sm'fi_ces include the sides and
the drawer fl'ont.
Clean these with soap and wamr or
a ;'inegar and water solution.
Oven Vent
The oven is vented through an opening
trader the lett rear sm_hce trait.
Thisarea couldbecomehot dunng ovenuse.
It is noi_/nal for steanl to con/e out of the
\'ent and moisture inav collect tmdemeath
the coils when the oven is in use.
Do not rise COlIllI/eI'cial ()veil cleanei3_
cleaning i)owde_5, steel wool or hmsh
abrasives on any painted sm]hce.
The vent is important tot proper air
circulation.
Neverblock this vent with aluminum foil.
78
Page 19

Do not rub or clean the door gasket--
it has an extremely low resistance to
abrasion.
If you notice the gasket becoming worn,
frayed or damaged in any way or if it has
become displaced on the door, you
should have it replaced.
Cleaning the Oven Door
Toclean the inside of the door:
_5 Because the area inside the gasket is
cleaned during the self_'lean c_cle you
do not need to clean this b_ hand.
_: The area outside the gasket and
the door liner can be cleaned with a
soap-filled or plastic scom_ing pad,
hot wamr and dem_gent. Rinse well
with a vinegar and water solution.
Toclean the outside of the door:
iJi::Use soap and water to thoroughly
clean the top, sides and fl'ont of the
oven door. Rinse well. You may also use
a glass cleaner to clean the glass
on the outside of the dora: Do not let
water drip into the vent openings.
Lift-Off Oven Door
ge.com
If any stain on the door vent trim is
persistent, use a soft abrasive cleaner
and a sponge-scrubber tot best results.
Spillage el marinades, fl'uitj uices,
tomato sauces and basting materials
containing acids may cause
discoloration and should be wiped
up immediately. _4]_en sm'ti_ce is cool,
clean and rinse.
Do not t/se o_,en cleanei3, cleaning
powde_ or ha_h abrasixes on the
outside of the doo_:
Hingei0ck
PullhflTgelocksdowntounloc£
1(7 /
Removalposition
The dooris very heavy. Be careful when
removing and lifting the door.
Toremove the door:
[] Fully open the door.
[] Pull the hinge locks down toward
the door frame, to the tmlocked
position. A tool, such as a small
fiat-blade screwdriver; may be
required.
[] Fimfl) grasp both sides of the door
at the top. D0 not/11}the door by the
handle.
Close door to the door remox d
[]
position, which is haltwa) between
the broil stop position and flfllv
closed.
[] l.ifi door up and out tmtil the hinge
am/is clear of the slot.
Toreplace the door:
[] Firefly grasl_ b°th sides °f the d°°r
at the top. Donot lift the door by the
handle.
XAqththe Bottom [ ] J Hingearm
[]
saIIle angle as
the remox d
position, seat the
notch stop of _.agg
the hinge aml
into the bottom
edge ()f the hinge slot. The notch in
the hinge am/m ust be fifllv seated
into the bottom of the slot.
Fully open the door tmtil it is
[]
parallel to the floo_; If the door will
not flflly open, the notch stop is not
seated correctly in the bottom edge
of the slot. Repeat step 2 if
necessa i'v.
Push the hinoe_ locks up against, the
[]
front fl'ame of the oxen caxitv to the
locked position.
Hinge10ck__
' 1/!
Pushhinge locks up to lock.
Close the oven dora:
[]
19
Page 20

Careand cleaning of the range.
Oven Light Replacement
CAUTION:Beforereplacingyour
oven light bulb, disconnect the electrical
power to the range at the main fuse or
circuit breaker panel
Be StlI'e to let the light cox, eI" and bulb
cool completely.
Toremove the cover:
[] Twist lens counterclockwise about a
qt/aI'teI" ttlFn to I'ell/O'_e.
Do notremoveanyscrews toremove thecove_
[] Replace bulb with a 404vatt
appliance bulb or two-l)rong,
halogen bulb, as appropriate.
Toreplace the cover:
[] I,ine up tabs of lens in fl'ont ot tabs
on housing and rotate clockwise to
engage.
2O
Page 21

Be sure the controls are turned to OFFand the surface units are cool before attempting to remove them.
Surface Units
Drip
Lockingtab rim
Cooktop
When properly seated, the locking
tab should lock onto flTecooktop rim
through the notch in flTedrip pan.
To clean tile surfi_('e units, turn tile
control to tile highest setting tot a
minute. Tile coils will burn off' any soil.
Toremove a surface unit:
To remove tile dil I) pans for cleaning,
tile surtilce units nlust be removed fit_t.
[] Push tile surfi_ce unit back toward
the receptacle to fl'ee the locking
tab fl'om file cooktop.
Toreplace a surface unit:
[] ]_epla('e tile drip pan into tile recess
in tile cooktop. Make stlre tile
opening in the pan lines up with
the receptacle.
] Insert tile temfinals of tile smqfi_ce
unit through the opening in the
dil I) i)an and into the receptacle.
Locking tab
ge.com
Receptacle
[] i,ifl tile SUltilce unit about 1 inch
aboxe tile drip pan and pull it out.
Do notlift thesurface unit more than I inch.
If youdo,it may not//e flat on the drippan
when youplug it backin.
NOTE: Repeated lifting of tile surIh(e unit
more than 1 inch above tile drip pan can
pemmnently damage tile receptacle.
Drip Pans
Remove tile stmfi_('e units. Then lift out
tile dil I) pans.
Place them in a covered containe_: Add
1/4 cup ammonia and let soak several
hom_ or overnight. Wash, rinse well
and dry.
Tile drip pans max also be cleaned in a
dishwasher:
[] Push tile surtilce unit in and down
to h)ck tile tab in place so it rests
evenly in tile cooktop.
Do not/?nmersethe surface unitsin lkTu/dsof
anyk/bcL
Do notdean the surfaceunits in a dishwasher
Do notbend thesurfaceunit plug terminals.
Do notattempt todean, adjust or inany way
repairthe p/ug-/breceptacle.
Clean tile area under tile drip pans
often. Built-up soil, especially grease,
may catch fire.
Donotcoverthe drippanswith foil. Usingfoil so
close to the receptaclecould causeshock,fire or
damageto the range.
Supportr0d
Be sure all surface units are turned
off before raising the cooktop.
Lift-Up Ceoktep
Cleanthe areaunderthe cooktopoften Built-up
soft,especiallygrease,may catch fire.
To make cleaning easiel; the enthe
cooktop may be lifted up and supported
in tile up position.
Be sure all tile smtime traits are turned
off befiwe raising tile cooktop. The
smtime units and drip pans do not need
to be I'elllO; ed; howeveL you may remove
one to make raising tile cooktop easiel:
A support rod will hold the cooktop up
while you clean underneath it.
_Mker cleaning under tile cooktop with
hot, soapy water and a clean cloth, lower
tile cooDop. Be careful not to pinch
your fingel_.
2/
Page 22

Beforeyoucall forservice...
Troubleshooting -tips
Save time and money/.Review the charts on the following
pages first and you may not need to call for service.
Possible Causes
Surfaceunitsdonot
workproperly
Controlsignals after You forgot to enter a • Press the BAKEpad and desired temperature or the
The surface milts axe
not plugged in solidly.
The surface unit controls
improperly set.
The drip pans are not set
securely in the cooktop.
What ToDo
• With the controls off, check to make sure the surii_ce
unit is plugged completely into the receptacle.
• Check to see the correct control is set fin" the SUlSfilce
unit wm are using.
• TVith the controls off, check to make stlre the drip
pan is in the recess in the cooktop and that the
opening in the pan lines up with the receptacle.
enteringcookingtime bake temperature or SELFCLEAN pad mad desired clean time.
or delay start clemfing time.
Fooddoes not bake Oven controls improperly set. • See the Using the oven section.
orroastproperly
Clock and timer do Plug on range is not completely • Make sure electrical l)lug, is I)lugged,, into a live, properly
not work inserted in the electrical outlet, grotmded outlet.
Shelf position is incorrect • See the Using the oven section.
or the shelf is not level.
Incorrect cookwaxe or • See the Using the oven secti_m.
cookware of improper
size being used.
Oven thermostat needs • See the Adjust the oven thermostat--Do it yourself[
adjustment, section.
A fuse ha your home may • Replace the fuse or reset the circtdt breakeL
be blown or the circuit
breaker tripped.
Oven controls improperly set. • See the Using the clock and timer section.
Ovenlightdoes Light bulb is loose or defective. • Tighten or replace the btflb.
not work
Fooddoes not Door not open to the broil stop • See the Using the oven section.
broilproperly position as recommended.
Switch operating light • Call h>r service.
is broken.
Oven controls improperly set. • Make stu'e you press the BROILHI/LO pad.
Improper shelf position • See the Broiling Guide.
being used.
Cookware not suited • For best restdts, use a lam] designed, fi>r broiliu_
for broiling.
ha some areas the power
(voltage) may be low.
• Preheat the broil element fin" 10 minutes.
• Broil for the hmgest period of time recommended in
the Broiling Guide.
22
Page 23

ge.com
/ Possible Causes
Oventemperaturetoo Oven thermostat
hot ortoocold needs adjustlnent,
Oven will not work Plug on range is not • Make sure electrical phlg is [)lugged into a live,
completely inserted in l)rol)erly grouuded outlet.
the electrical outlet.
A fuse in your home may • Replace tile fl/se (Tr reset tile circuit breakel:
be blown or the circuit
breaker tripped.
Oven conlrols improperly set. • See the Using the oven section.
Door left in the locked position. •/f necessary, allow the oven to cool; then mlh)ck the
What ToDo
• See the Adjust the oven thermostat--Do it yourself[
secti(Til.
(1(701:
Oven will notself-clean The oven teinperature is • _MhTw the ()veu t(7 cool t(7 1"(7(7111 [ellll)el'}ltt/I'e aud
too high to set a self-clema reset the coutr(71s.
operation.
Oven controls improperly set. • See the Using the self-cleaning oven section.
Oven door is not in the locked • Make st/re rot/Inove the door latch handle all the
position, way to the right.
"Crackling" or This is the sound of the • This is u(Trmal.
"popping" sonnd metal heating and cooling
during both the cooking mad
cleaning functions.
Excessive smoking Excessive soil. • Press the CLEAR/OFFpad. Open the windows t(7
during a clean cycle rid the room ()I sm(Tke. _A'ait mltil the light on the
SELFCLEANpad goes (Tfl. Wipe up the excess soil and
l'eset the cle;lU cycle.
Oven door will not Oven too hot. • Allow the oven to cool beh)w locking teml)erature.
unlock
Oven not clean after Oven controls not properly set. • See the Using the self-cleaning oven section.
a clean cycle Oven was heavily soiled. • Clean u l) heavv, sl)ilhTvers before ,startiuo_ the clean
cycle. Heavily soiled ovens may need to sell=clean
again or fin" a h)uger peri(Td of time.
23
Page 24

Beforeyoucall forservice...
Troubleshooting tips
Possible Causes
"F- anda number
orletter"flash
in thedisplay
Display flashes "bAd" The installed cmmection • (:ontact installer or electrician to correct miswire.
then "linE" with a from the house to the unit
loud tone is miswired.
You have a function
error code.
If the function code repeats.
What ToDo
• Press the CLEAR/OFFpad. Put the o_en back into
operation.
• Disconnect all power to the range tot at least 30
seconds and then reconnect power. If the flmction
error code repeats, call for service.
• On sell=cleaning models, if a flulction error code
appears during the sell=cleaning cycle, check the oven
door latch. The latch may have been moved, if only
slightl> fl'om the locked position. Make sure the latch
is moved to the right as tar as it will go. Press the
CLEAR/OFFpad. Mh)w the o'_en to cool tot one houx:
Put the oven back into operation.
Displaygoesblank A fuse in your home may be • Replace the fi/se or reset the circuit breaker;
blown or the drcuit
breaker tripped.
The clock is turned off from • See the Using the clock and timer section.
showing in the display,
Displayflashes Power failure. • Reset the ch)ck.
Unable to get the Oven control pads were • The BAKE and BROILHI/LOpads must be l)ressed
displayto show "SF" not pressed properly, at the same time and held fol 3 seconds.
Power outage, Power outage or surge. • Reset the clock./f the oven was in use, you must reset
clock flashes and resetting any cooking flmction.
it by, l)ressin_r' _ the CLEAR/OEEpad, ,settiu_*_ the clock
"Burning" or "oily" This is normal in a new • To speed the process, set a sell=clean cycle for a
odor emitting from oven and will disappear minimum ot 3 hours. See the Using tho self-
the vent in time. cleaning oven section.
Strong odor An odor from the insulation • This is tellll)Ol'al'y.
around the inside of the
oven is normal for the first
few times the oven is used,
24
Page 25

GE Service Protection Plus 'M
GE, a name recognized worldwide fbr quality and dependability, offers you
Service Protection Plus'_'--comprehensive protection on all yore appliances--
No Matter What Brand!
Benefits Include:
* Backed by GE
* All brands covered
* Unlimited service calls
* All parts and labor costs included
o No out-of-pocket expenses
o No bidden deductibles
o One 800 number to call
You _dll be completel) satisfied with our service protection or )ou ma) request )our mone) back
on the remaining value of your contract. No questions asked. It's that simple.
Protect yore" refrigerator, dishwasher, washer and dryer, range, TV_ VCR and much more--a_y brand!
Plus there's no extra charge flw emergency service and low monthly financing is available. Even icemaker
coverage and toed spoilage protection is offered. You can rest easy, knowing that all your valuable
household products are protected against expensive repairs.
Place ,our confidence in GE and call us in the U.S. toll-free at _UU._Z_.ZZZ_
for l//Ol'e infol'I//atiOll.
:_,_*]1 hi}in(Is (o_.{!l_{!(L tip t(t _0 ){!iris Ill(I, ]11 the (on[lllenl tl [.S.
We TICover Any Appliance.
Anywhere. Anytime.
.n_ ( Jill here
Please place in envelope and mail to:
GeneralElectricCompany
Warranty Registration Department
P.O. Box 32150
Louisville, KY 40232-2150
25
Page 26

Consumer Product Ownership Registration
Deal Customer:
Thank you for purchasing our product and thank you for placing your confidence in us.
_4'e are proud to ha_e you as a customer!
Follow these three steps to protect your new appliance investment:
Complete and mail
your Consumer
Product Ownership
Registration today.
tt_wc the pc_lcc of
mind of" knowing w_
call colltact VOl/ ill
tile unlikely exent of a
satNy modificalion.
Atter mailing tile
registration below,
store this docmnent
in a sail, place. It
contains inlormation
you will need should
}ou require service.
Our selvicc number is
8(t0.GE.CARES
(8(t0.432.2737).
Model Number Serial Number
I I I I I
Important: If you did not get a registration card with your
product, detach and return the form below to
ensure that your product is registered, or register
online at ge.com.
Consumer Product Ownership Registration
Read your Owner's
Manual carefilllv.
It will help you
operat( yOl/r lleW
appliance properly.
I
._w_ Cut h<r_
Model Number Serial Number
Ms. M*>,. Mi_s
FiN] I L_st]
Name I I I I I I I I I Nalne I I I I I I I I I I I I
_11-( el ]
Address I I I I I I I I I I I I I I I I I I I I I I I I
Apt. # ] I I
City ] I I
lJa_c P[aced
In Use
Month _1_
Appliances
General Electric Company
Louisville,K¥ 40225
GE Consumer&, Industrial
ge.com
I I I I
I I I I
1)ayI_
I [ E-lnailAddress*
I I I I, I I 1%,1, 1 ,_ode ' ' I I I
_4_ar]l] t)hol_e
* Please pr<wide your e-mail address to rcceive, via e-mail, dis<ounts, special offal-, and other important
commmlicalions from (;E Appliances (GI_\).
Check here if you do not want to receixe communications ti-om G1L\'s carcfillly selected partner',.
FAILURI{ T() COMt'LETE AND RETI 5RN TIIlS C\RI) D()ES N(YF DIMINISII _,_)17R
"_,_\1_ \N'IY RI(;IfFS.
For more intormation about (;1V\'s priv_qv and dala usage policT,; go to ge.com and click on
'Priv_q" Policy' or call 800.626.2224.
Ntnnberl I , I-I I I I-I I I I I
Zip]
26
I
I
Page 27

Notes.
I
m
m.
w
w
m
27
Page 28

Notes.
,0
q_
1
---
1
1
_rJ
m
r --
I
28
Page 29

Notes.
I
m
m.
w
w
m
29
Page 30

Accessories.
Looking For Something More?You can find these accessories and many more at ge.com, or call 800.626.2002
(during normal business hours). Have your model number ready.
Surface Elements & Drip Pans Oven Racks Broiler Pan
Oven Elements
Tired of discolored racks? WMdng you had exu'Mleavy-duty oven racks?
Light Bulbs
Knobs
NOW AVAILABLE for your range:
(;E's innovative, selfk:leanable porcelain-coated oven racks!
• Hea_ T Duty
• Dtmd)le
• Able to be cleaned in a self-cleaning oven
Visit ge.com for more infbnnadon.
3O
Page 31

GEElectricRange Warranty.
All warranty service provided by our Factory Service Centers,
or an authorized Customer Care®technician. Toschedule service,
on-line, 24 hours a day, visit us at ge.com, or call 800.GE.CARES
(800.432.2737).Please have serial number and model number
available when calling for service.
GE Will Provide:
i _ iI ii _iiii
Anypart ot the range which tifils due to a (letect in materials or workmanship.
Fromthe date ofthe
origina!purchase
_: Service trips to your home to teach you how to use
the product.
iJi_:hnproper h_staJlation, delivery or maintenance.
::Ji_:Failure of the product if it is abused, misused, or used
for other thml the intended purpose or used
commercially.
_: Replacement of house fuses or resetting of circuit
breakers.
Dudng this limited one-year warranty, GE will also provide, free ofcharge, all lab(n"
and in-home service to replace the (leiecfi\'e part,
Staple your receipt here.
Proof of the original purchase
date is needed to obtain service
under the warrantz
_: Damage to the product caused by accident, fire, floods
or acts of God.
::Ji_:h_cidentaJ or consequentiaJ damage caused by possible
defects with this applimlce.
::Ji_:Damage caused after delivery.
!i_:Product not accessible to provide required service.
EXCLUSIONOFIMPLIED WARRANTIES--Your sole and exclusive remedy isproduct repair asprovided in this Limited
Warranty.Any implied warranties, including the implied warranties of merchantability orfitness fora particular purpose,
are limited to oneyear or the shortestperiod allowed by law.
This warranty is extended to the original purchaser and any succeeding owner for products purchased for
home use within the USA. If the product is located in an area where service by a GEAuthorized Servicer is not
available, you may be responsible for a trip charge or you may be required to bring the product to an Authorized GE
Service location for service. In Alaska, the warranty excludes the cost of shipping or service calls to your home.
Some states do not allow the exclusion or limitation of incidental or consequential damages. This warranty
gives you specific legal rights, and you may also have other rights which vary from state to state. Toknow
what your legal rights are, consult your local or state consumer affairs office or your state's Attorney General
Warrantor:General Electric Company.Louisville,KY 40225
11
3/
Page 32

ConsumerSupport.
Hme a ques0on or need assistance with your ai)pliance? Try tile GE Ai)pliances _ ebsite 24 houi_ a day,
q
"I GEAppliancesWebsite ge.com
any da)of tile year'. For greater coi_xelfience and faster service, you can now download Owner s Manuals,
., order parts or e'_en schedule service on-line.
ScheduleService
Expert (;E repair sets,ice is onl) one step awa) fl'otn }'()lit" door: Get on-line and schedule your service at
your. conxenience 24 houi_ am (lax of tile xear! Or call 800.(;E.CARES (800.432.2737) during normal
business houI_.
ge.com
RealLifeDesignStudio ge.com
GE SUl_ports tile Univei_al Design concel_t--products, services and environments that can be used by
people of all ages, sizes and capabilities. We recognize tile need to design for a wide range of physical and
inental abilities and imi)aii_nents. For details of GE's Univei_al Design api)lica0ons, including kitchen
design ideas for people with disabilities, check out our Website today: For tile hearing impaired, please call
800.TDD.GEAC (800.833.4322).
ExtendedWarranties ge.com
Purchase a GE extended warranty and learn about special discounts that are axailable while your. warrant_
is still in effect. You can i)urchase it on-line anvfilne or call 8 .626.2224 dui_ing nolmal business houi_.
(;E (_onsumer Home Set\ices will still be there after your warran D expires.
PartsandAccessories
O0 ....
ge.com
Individuals qualified to service their own appliances can have parts or accessories sent directly to their
holnes (VISA, MasterCard and Discover cards are accepted). Order on-line today, 24 houi_ every day or
by I)hone at 800.626.2002 duI_ing noiinal business houi_.
Instructions contained in this manual cover procedures to beperformed by any user. Otherservicing generally
should be referred to qualified service personnel Cautionmust be exercised, since improper servicing may cause
unsafe operation.
ContactUs
If you are not satisfied with tile service you receive fl'om GE, contact us on our _4'ebsite with all tile details
including your i)hone nuinbei; oi" wi_te to: General Managei; (_ustoinei" Relations
GE Appliances, Appliance Park
i,ouisville, KY 40'225
Register your new applim_ce on-lhle--at your convenience! Timely product registraOon will allow for
l RegisterYourAppliance
, enhanced colnlnunicaOon and i)i'olni)t sei'\'ice under tile tei_/ns of)our WaiTanty, should tile need arise.
You inav also inail ill tile i)re-pi_inted registration card included ill tile packing inatei_ial.
ge.com
ge.com
Printed in flTeUnited States
 Loading...