

Page 1
www.GEAppliances.com
L.)
e,,,,,,l
Safety Instrue_tions ... 9-4
Operating Inslru_lions
Clock and Timer ....... ] 0
Controls ............. 6, 7
Oven ................ 8, 9
Power Outage .......... 7
Sabbafll Feature ..... ] 3, ] 4
Self-Cleaning ....... ] 5, ] 6
Special Features ........ ] 2
Surt:ace Units ........... 5
Thermostat ........... ] 4
Timed Baking and
Roasting Features ...... ] ]
Care and Cleaning
Broiler Pan and Grid ... 90
Control l,h_obs ......... ] 7
Drip Pans ............. 91
Heating Elements ...... ] 7
I_ift-Off Oven Door . .... ] 9
Lift4Jp Cooktop ....... 91
Light ................. 90
Sheh'es ............... ] 8
Surface Units .......... 91
Vent ................. 18
Troubleshooting
Tips .............. 99-94
Accessories ........... 30
Consumer Support
Consumer
Support ...... Back Co_er
Product
Registration ........ 25, 26
_4'anantv ............. 31
JDR 9
Write the model and serial
numbers here:
Model #
Serial #
You can find them on a label
behind the storage drawer on
the fl'ont of the range fl'ame.
164D4290P406 49-80255 07-04 JR
Page 2
IMPORTANTSAFETYINFORMATION.
READALLINSTRUCTIONSBEFOREUSING.
WARNING!
Foryour safe_ the informationinthismanualmustbe followed tominimizetheriskof fire,electricshock,or to
preventpropertydamage,personalinjury,orlossoflife.
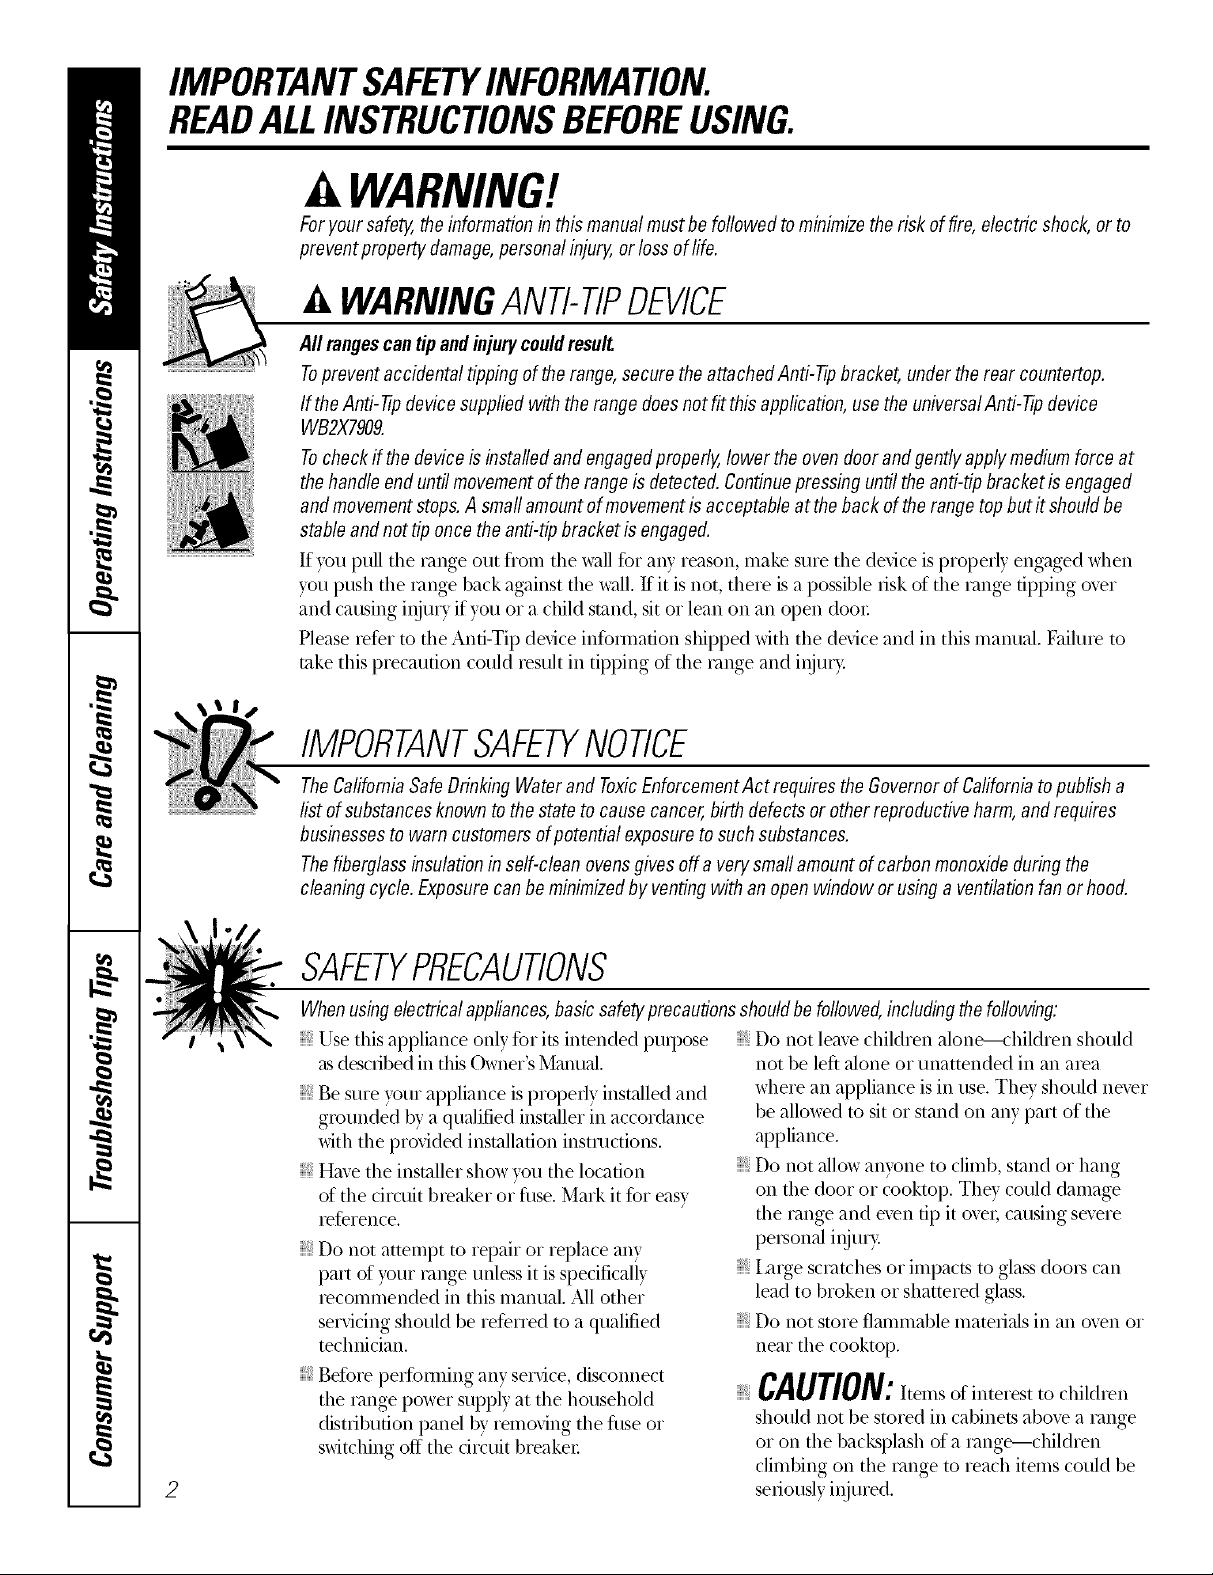
WARNINGANTI-TIPDEVICE
Aftrangescantip andinjurycouldresult
Topreventaccidental tippingoftherange,securetheattachedAnti-Tipbracket,underthe rear countertop.
If theAnti--tipdevicesuppliedwith therangedoesnotfitthisapplication,usethe universalAnti-fip device
WB2X7909.
Tocheck ifthe deviceisinstalledand engagedproperly,lower theovendoorand gentlyapplymediumforce at
thehandleenduntilmovementofthe rangeis detected,Continuepressinguntiltheanti-tipbracketis engaged
andmovementstops,A stoat amountofmovementisacceptableattheback of the rangetop butit shouldbe
stableandnot tip once theanti-tipbracket is engaged.
If you pull the _'ange out flom the wall fbr any reason, make StlIe the dedce is properly engaged when
you pusl_ the nange back against the wall. If it is not, there is a possible risk of the range tipping over
and causing i_ju U if you or a child stand, sit or lean on an open door.
Please _efbr to the Anti-Tip dedce infbmmtion shipped with the device and in this manual. Failme to
take this precaution could _esuh in tipping of tim range and i_jm>
IMPORTANTSAFETYNOtiCE
TheCaliforniaSafeDrinking Waterand ToxicEnforcementAct requiresthe GovernorofCaliforniatopublisha
list ofsubstancesknowntothe statetocause cancer,birthdefectsor otherreproductiveharm,andrequires
businessesto warn customersofpotential exposuretosuchsubstances.
Thefiberglassinsulationin self-cleanovensgivesoffaverysmallamountofcarbonmonoxideduringthe
cleaningcycle. Exposurecanbe minimizedbyventingwithanopenwindow or using a ventilationfan or hood.
SAFETYPRECAUtiONS
Whenusingelectricalappliances,basicsafe_/precautionsshouldbe followed,includingthefollowing:
} Use tiffs appliance only %r its intended propose
asdescribed in this (-_a'ner's Manual.
} Be sure your appliance is proped} installed and
grounded b} a qualified installer in accordance
with the provided installation instructions.
} Hm,e the installer show xou the location
of the circuit breaker or fuse. Mark it fbr easx
ief_Tence.
Do not attempt to repair or replace any
part of }our range unless it is specificall}
recommended in this manual. All other
servicing should be referred to a qualified
technician.
gefbre per[hinting any serdce, disconnect
the range power supply at the household
distribution panel by removing the filse or
switching off the ci_vuit breaker
2
Do not leave children alone---children should
not be left alone or unattended in an area
where an appliance is in use. They should never
be allowed to sit or stand on any part of the
appliance.
Do not allow anyone to climb, stand or hang
on the door or cooktop. They could damage
the range and even tip it ove_; causing severe
personal i_jur>
Imge scratches or impacts to glass doo_s can
lead to broken or shattered glass.
Do not store flammable materials in an oven or
near the cooktop.
CAUTION: of ch,d,e.
should not be stored in cabinets above a range
or on the backsplash of a range---children
climbing on the range to reach items could be
seriously injured.
Page 3
WARNING!
SAFETYPRECAUTIONS
vvww.GEAppliances.com
Never weal loose-fitting or hanging garments
while using tile appliance. Be carefld when
reaching fbr items stored over tile range.
Hammable mateiial could be ignited if brought
ill contact with hot surfi/ce units or heating
dements and may cause severe bums.
Use only dU pot holdei.s--moist or damp pot
holdeIs on hot surfi/ces may result ill burns
flom steam. Do not let pot holdei._ touch hot
surface units or heating elements. Do not use
a towel or other bulky cloth ill place of pot
holdeIs.
For your safety, never use your appliance %r
wamling or heating the room.
Teach chil&en not to play with tile controls or
ally other part of the range.
Always keel) dish towels, dish cloths, pot holdeis
and other linens a safe distance flom your
I_lnge.
Alwa> kee I)wooden and plastic utensils and
canned fbod a safe distance flom
VO/lI" I)1Ilge.
Always keq) combustible wall coxefings,
cm*ains or drapes a safe distance fiom your
I_lnge.
Do not let cooking grease or other flammable
materials accumulate ill or near the range.
KeeI)the hood and grease filteis clean to
maintain good venting and to avoid grease fires.
Do not use water on grease fires. Never pick up
a flaming pan. Turn the controls off_Smother a
flaming pan on a surfi/ce unit by coveting tile
pan completely with awell-fitting lid, cookie
sheet or flat tia}: Use a muld-puq)ose dU
chendcal or foam-t}pe file extinguisher.
Flaming grease outside a pan call be put out by
coveting it with baking soda oI, if available, by
using a muhi-l)Uq)ose dU cllemical or fbam-
Cpe fire extinguishei:
Flame ill tile oven call be smothered completely
by closing the oven door and turning the oven
of{or by using a multi-propose d U chelnical or
fbamWpe fire extinguisher.
Do not touch tile surfi/ce units, tile heating
dements or tile interior surfi/ce of tile oven.
These surfilces may be hot enough m burn
even though they are dark ill color Dining and
after use, do not touch, or let clothing or other
flammable materials contact tile surfi/ce units,
areas nearby tile surfilce units or aW inteiior
area of tile oven; allow sufficient time for
cooling fiist.
Potentially hot surfilces include the cooktop,
areas fi/cing the cooktop, oven vent opening,
surfi/ces near the opening, crevices around the
oven door
REMEMBER:Tile inside surfilce of tile oven may
be hot when the door is opened.
Do not store or use combustible materials,
gasoline or other flammable vapois and liquids
ill tile vicinity of this or any other appliance.
COOKMEATANDPOULTRYTHOROUGHLY...
Cookmeatandpoultrythoroughly--meattoat/eastanINTERNALtemperatureof 160°Fandpoultrytoat/eastan
INTERNALtemperatureof 180°ECookingto thesetemperaturesusua//yprotectsagainstfoodbomei//ness.
SURFACECOOKINGUNITS
Useproperpansize--select co&ware havingflat bottomslargeenoughtocover thesurfaceunit heating
element.Theuseofundersizedcookware will exposea portion ofthe surfaceunitto direct contact andmay
resultin ignitionof clothing.Properrelationshipof cookwareto surfaceunitwill alsoimproveefficiency.
Never leave tile surfilce units unattended
at high heat settings. Boiloveis cause smoking
and greasy spilloveIs that may catch on fire.
Do not use almninum fbil to lille the dilI)pans
or am:where ill tile oven except as described ill
this manual. Misuse could result ill a shock, file
hazard or damage to the range.
Be sure tile dilI) pans and tile vent duct are not
covered and are ill place. Their absence during
cooking could damage range parts and wiring.
Only certain t}pes of glass, glass/ceramic,
earthenware or other glazed containeis are
suitable fbr cooktop service; othei.s ma} break 3
because of the sudden change ill tempevamie.
Page 4
IMPORTANTSAFETYINFORMATION.
READALLINSTRUCTIONSBEFOREUSING.
SURFACECOOKINGUNITS(cont.)
To minhnize dm possibilir}of bums, ig_irionof
flammable mateiials a_d spillage, thehmldle of a
container should be mined towmd the cenmr of the
i_lge _dfl)outexren(fing over neab} surface units.
{{_'_\a)s turn the surface unit.soff before mmo\_)g
cookware.
Do not immeise or mak d)e remomble surface units.
Do not put them in a dishw,_shei:Do not selJklemathe
suri_aceunitsin the oxen.
}\])en pmpmfiN flambN foods under d)e hood, turn
the tim on.
To avokt d)e possibilityof a bum or elecu'ic d)cK'k,
al_u)s be cemtin that the conuols for ,allsurf,_e units
are at fl)e 0FFposition and all coilsare cool before
attempting to liftor remove a unit.
Gean d_e cooktop _dd) caudon. If a wet sponge is
umd to _pe spills on a hot cooktop, be carefifl to
avoid steam bums.
Keet)a_ e)e oi) foods being flied at high oi medium
high heat re)tings.
Foods for fi)ing should be aschyas possible.Frost on
fiozen foods or moisture on flesh focKtscan caum hot
fiatto bubNe up m_dover the skiesof the pan.
11_ little fatforeflbctiveshallowor deep fat fl)ing:
Fillingd)e pan too fifllof fatcan cau_ spilloverswhen
food isadded.
Ifa combhlation of oilsor tiltsufll be used in ftring;
sth toged)er before headng: or ,asfats melt dowl):
_Mua)s heat tiltslowl),and watch as itheats.
[lse a deq) fat thennonmter whenever possible to
pmxent oxeflmathN tiltbe)ond the smoking pohat.
WARNING'!
OVEN
Standawayfromtherangewhenopeningtheovendoor.Hotairorsteamwhichescapescancausebumstohands,face
and/oreyes,
Do not heat unopened food contah)ers. Pressure
could build up a_d fl)e contahler could buist, causing
an h_juI>
Keep d)e oven ventUllolystrtlcted.
Keet)the oven fiee fiom grease buildup.
Placethe oven shelfin the desired posidon while the
oven iscool. Ifshehes must be handled when hot, do
not let pot holder contact the heating dements.
{{Pullingout the shelf to the stop-lockisa comenience
in lifdnghem) foods.It is,alsoa precaution ag,qinst
bums fiom touching hot surfaces of the door or
ovenwalls.
"_\q)enusing cookhN oi roasdng bagsh) d)e o_en,
follou the mmat_lcturer's directions.
Do not um dm oven to N)' newspapeis.
If overheated, d)e) can catch on fne.
Do not um d)e oven fora stoi,'agearea. Items stored in
an oven can ignite.
Do not leavepaper product.s, cooking utensilsor food
in d)eoven when not in use.
Do not u_ alumhmm foil to Ibmoxen bottoms,
except as suggested in this mama[ Improper
hastalladonof alumhmm foilma)result h_a risk
of ekxuic shock or fue.
SELF-CLEANINGOVEN
Donotuseovencleaners.Nocommercialovencleanerorovenlinerprotectivecoatingofanykindshouldbeusedinor
aroundanypartoftheoven.Residuefromovencleanerswilldamagetheinsideoftheovenwhentheself-cleancycleisused.
Do not clea_ d)e door gg,sket.The (too1g?,sketis
essentialfor a good seal.(;are shoukt be taken not to
rub, damage oi movefl)egasket.
Before selkleafing the oven, remove the broiler pan,
g_ktand odler cookware.
Be sure to u_peup excessspillagebefore st_fing file
seltkleanJng operation.
Ifd)e mlfkleaning mode malfunctions, aim d_eoven
offald (fisconnect die power suppl): Have it secficed
b}a qualified technician.
Gean on]) pm_slisted in this Owner's Manual.
READANDFOLLOWTHISSAFETYINFORMATIONCAREFULLY.
SAVETHESEINSTRUCTIONS
4
Page 5
Usingthe surface units, www.GEAppliances.com
Throughout this manual, features and appearance may vary from your model.
LO HI
Be sure you turn the control knob to
OFFwhen yozlfinish cooking.
Not over I inch.
OFF
9
1I,
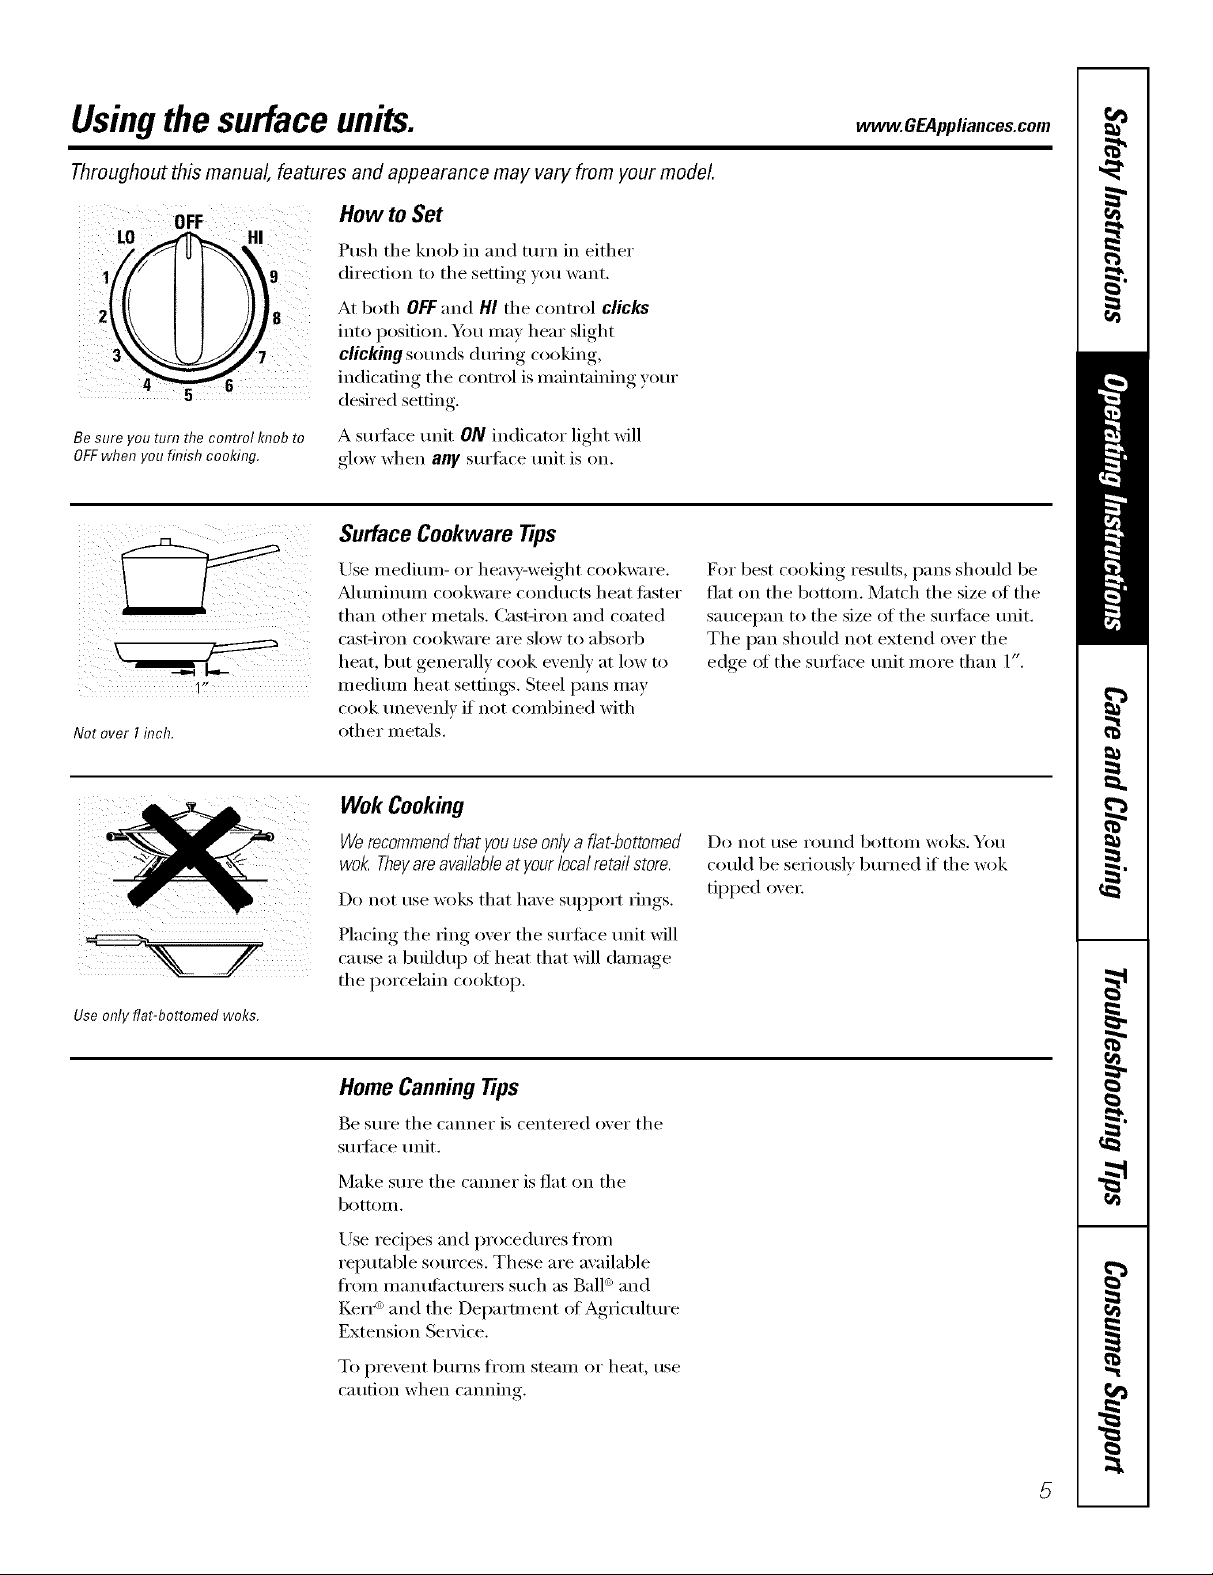
How to Set
Push the knob in and mrn in either
dfi'ection to the setting you want.
At both OFFand HI the control clicks
into position. Ym may hear slight
clickingso/Inds (hltJng cooking,
indicating the control is maintaining your
desired setting.
A suxl'ilce unit ON indicator light will
glow when any surti_ce trait is on.
Surface Cookware Tips
Use medium- or hea\y-weight cookware.
_kdtllllilltllll cookware conducts heat tipster
than other metals. Cast-iron and coamd
cast-iron cookware are slow to _lbsorb
heat but generall_ cook exenl_ at low to
medium heat settings. Steel pans may
cook unevenly if not combined with
other metals.
For best cooking results, pans should be
fiat on the bottom. Match the size of the
saucei)an to the size of the stu]i_ce unit.
The pan should not extend over the
edge ot the stu_hce unit more than 1".
Use only flat-bottomed woks.
Wok Cooking
Werecommendthat youuseonlya flat-bottomed
wok. Theyareavailableatyour localretail store.
Do not use wo!<_that have support rings.
Placing the ring o'_er the surli_ce unit will
cause a buildu I) of heat that will damage
the porcelain cooktop.
Home CanningTips
Be sure the canner is centered o_er the
sm_i_ce refit.
Make sure the canner is fiat on the
bottom.
Use redpes and procedures fl'om
reputable sources. These are available
fl'Olll Illallt/filcttlI'eI3 s/Ich as Bald and
KerI _')and the Department of Agriculture
Extension Se_'ice.
To l)i'e_,ellt b/Irns frolll stealll or heat, rise
caution when canning.
Do not t/se ro//nd bottoIll Wo]cs. _/()/l
could be seriously burned if the wok
tipped oxen:
5
Page 6
Usingtheovencontrols.
Throughout this manual, features and appearance may vary from your model.
.%
OVEN CONTROLS
S + EC S
TIME CONTROLS
OvenControl,ClockandTimerFeaturesandSettings
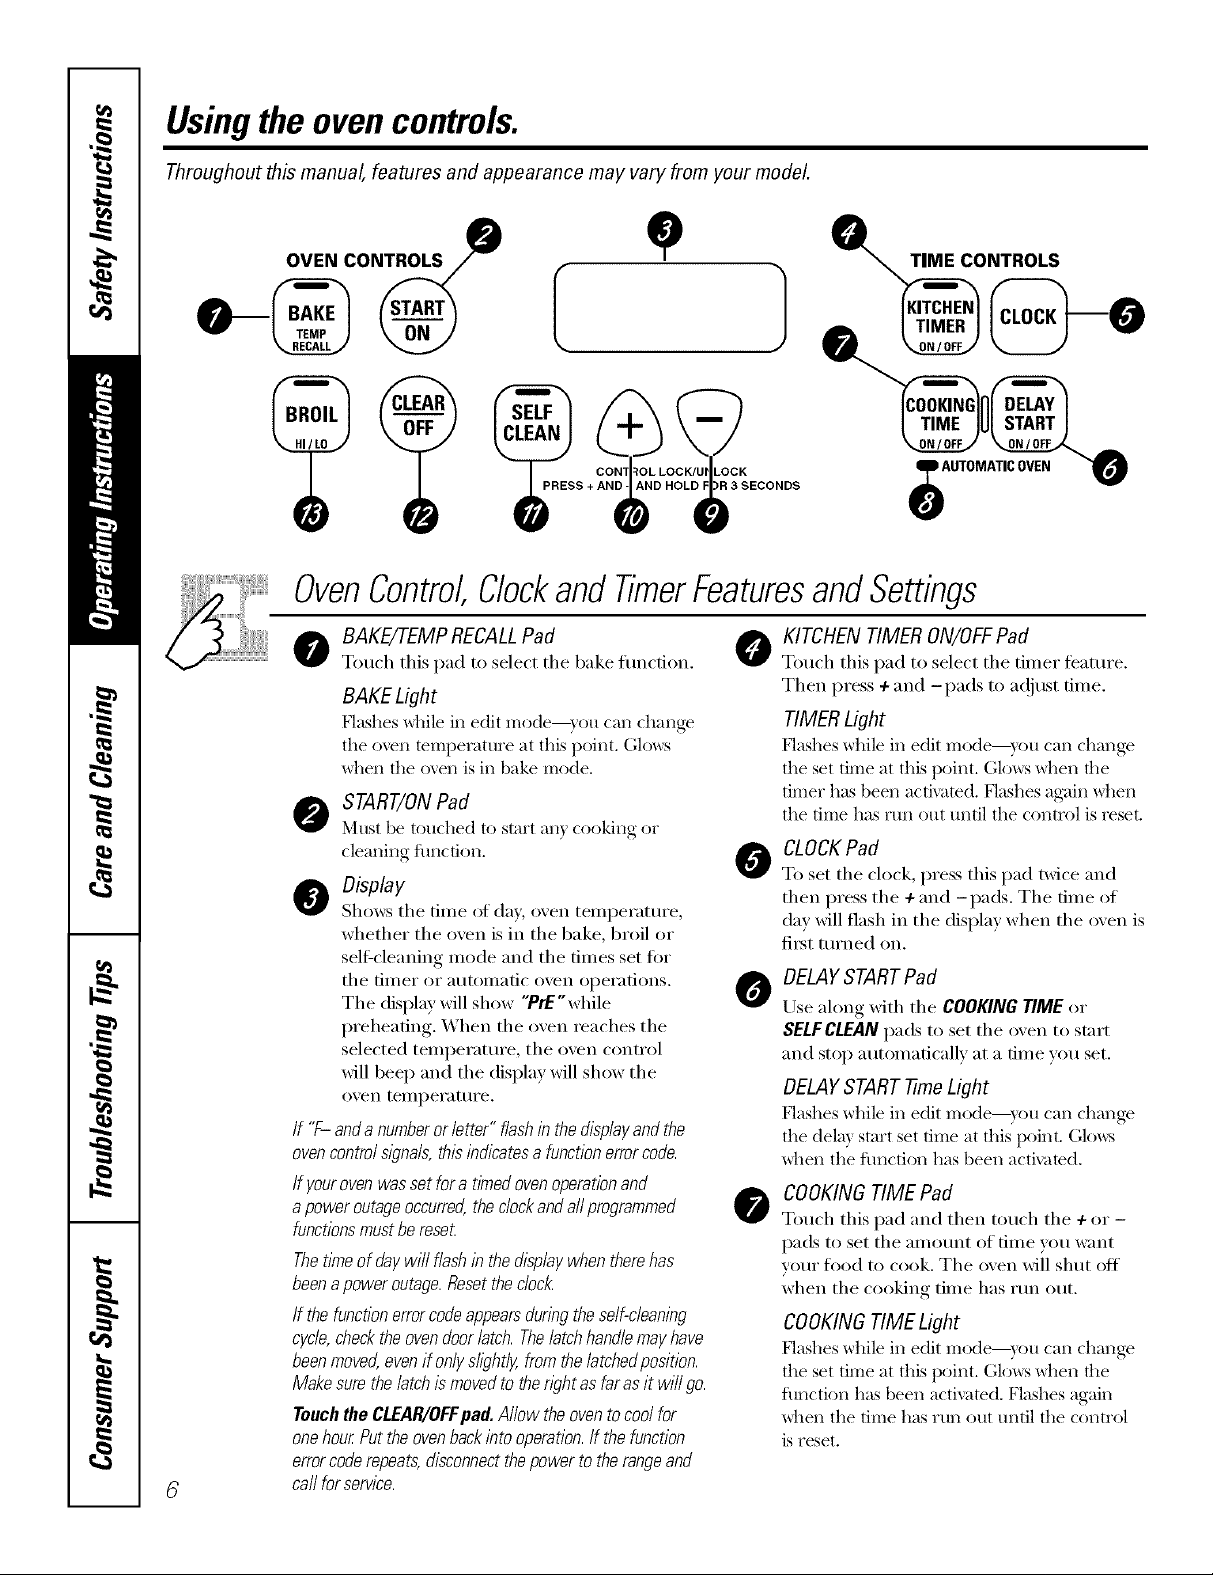
o BAKE/7-EMPRECALLPad @
Touch tiffs pad to select tile bake function.
BAKE Light
Hashes _hile in edit I/'lode--}rO[l {-'_111 (-h_lll_e
the oven temperature at this point. Glows
_hen the o\en is in bake mode.
START/ONPad
]_'ltlSt be touched to start all} cooking or
cleaning function.
O Display
Shows tile tiIlle of da,v, oven teillperattlre,
whether tile oven is in tile bake, broil or
self=cleaning mode and tile times set fi)r
tile [iII/er or atltOIIlatic oven operations.
Tile display will show "PrE'while
preheating. When tile oven reaches tile
selected temperature, tile oven control
will beep and tile display will show tile
()veil telllperattlre.
If "F- and anumberor letter" flashin the displayand the
ovencontrol s/)_na/s,thisindicatesa functionerrorcode.
If youroven was set fora timed ovenoperation and
apower outageoccurred,the dock and aftprogrammed
functionsmust be reseL
Thetime of day wi// flash in the displaywhenthere has
beena power outage.Resetthe c/oc/_
If the function errorcodeappearsduring the self-cleaning
cycle,checktheovendoorlatch. Thelatch handlemayhave
beenmoved,even if onlys//)ht/y, from the/atchedposition.
Makesure the latch ismoved to thewht as far asit wi// go.
Touchthe CLEAR/OFFpad. Allow theovento cool for
onehour Put the ovenbackinto operation./f the function
errorcoderepeats, disconnectthepower to the rangeand
ca//for service.
KITCHEN TIMER ON/OFFPad
Totlcb this pad to select tile tiIller t_'atllI'e.
Then press + and -pads to a(!iust time.
TIMERLight
Hashes while in edit Illode--}r()tl ('aI1 change
the set time at this point. Glo_:s _hen the
timer has been activated. Flashes again _hen
the time has run out until the control is reset.
CLOCK Pad
0
To set tile clock, press this pad twice and
then press tile 4-and -pads. Tile time of
day will flash in tile display when tile oven is
fit_t turned on.
DELAYSTARTPad
0
Use along with tile COOKING TIME or
SELFCLEAN pads to set tile oven to start
and stop automatically at a time you set.
DELAYSTART -timeLight
Hashes while in edit I/'lode--}r()tl ('aIl change
the dela) start set time at this point. Glows
_hen the flmction has been activamd.
COOKINGTIME Pad
0
Touch this pad and then touch tile + or-
pads to set tile all/Otlnt of time you want
your food to cook. Tile oven will shut off
when tile cooking time has run out.
COOKINGTIME Light
Hashes while in edit Illode--}r()tl {-'_111change
the set time at this point. Glo_:s _hen the
fimction has been activated. Flashes again
_hen the time has run out until the control
is reset.
Page 7
www.GEAppliances.com
OvenControl,ClockandTimerFeaturesandSettings
AUTOMATIC OVENLight
O
This lights anytime the oven has been
programn_ed using the COOKING TIME or
DELAYSTARTFImcdons.
- Pad
Short trips to this pad xdll decrease the time
or temperatm'e 1U small amotmts. Touch
and hold the pad to decrease the time or
temperature by larger amounts,
+Pad
Short trips to this pad will increase the time
or temperature by small amotmts. Touch
and hold the pad to increase the time or
temperature by larger amounts,
O SELF CLEANPad
Touch this pad to select the selfkleaning
traction. See the Using the self-cleaning
oven section,
CLEANLight
[:lashes _hile in edit mode--)ou can change
the lengfl_ of time fi)r fl_e self,lean c)cle at
this point. (;lo_:s _hen file oven is in file self:
clean c)cle..Mter the selfklean cycle, fl_e ligJ_t
will ttlri1 ofi'[ Unlatch the dooi:
CLEAR/OFFPad
Touch this pad to cancel ALL oven
operations except the clock and time_;
BROILHI/LO Pad
Touch this pad to select the broil traction.
BROILLight
[qashes while in edit mode---you can switch
from HI to tO BROIL at dfis point. Glows wt_en
fl_e oven is in broil mode.
Indicator Lights (on some pads)
EDITmode lasts several seconds after tile
last pad press, DELAYSTARTON/OFFand
COOKINGTIMEON/OFFwill be the only pads
lit if either of these ol/tions is selected,
(Example: OELAYSTARTis selected with
BAKE the DELAYSTARTpadwill remain
lit until the clock reaches the programmed
time, at which point it will ttu'n off and the
BAKE/TEMPRECALLpad lig_t will light up),
PRESS + AND -AND HOLD FOR 3 SECONDS
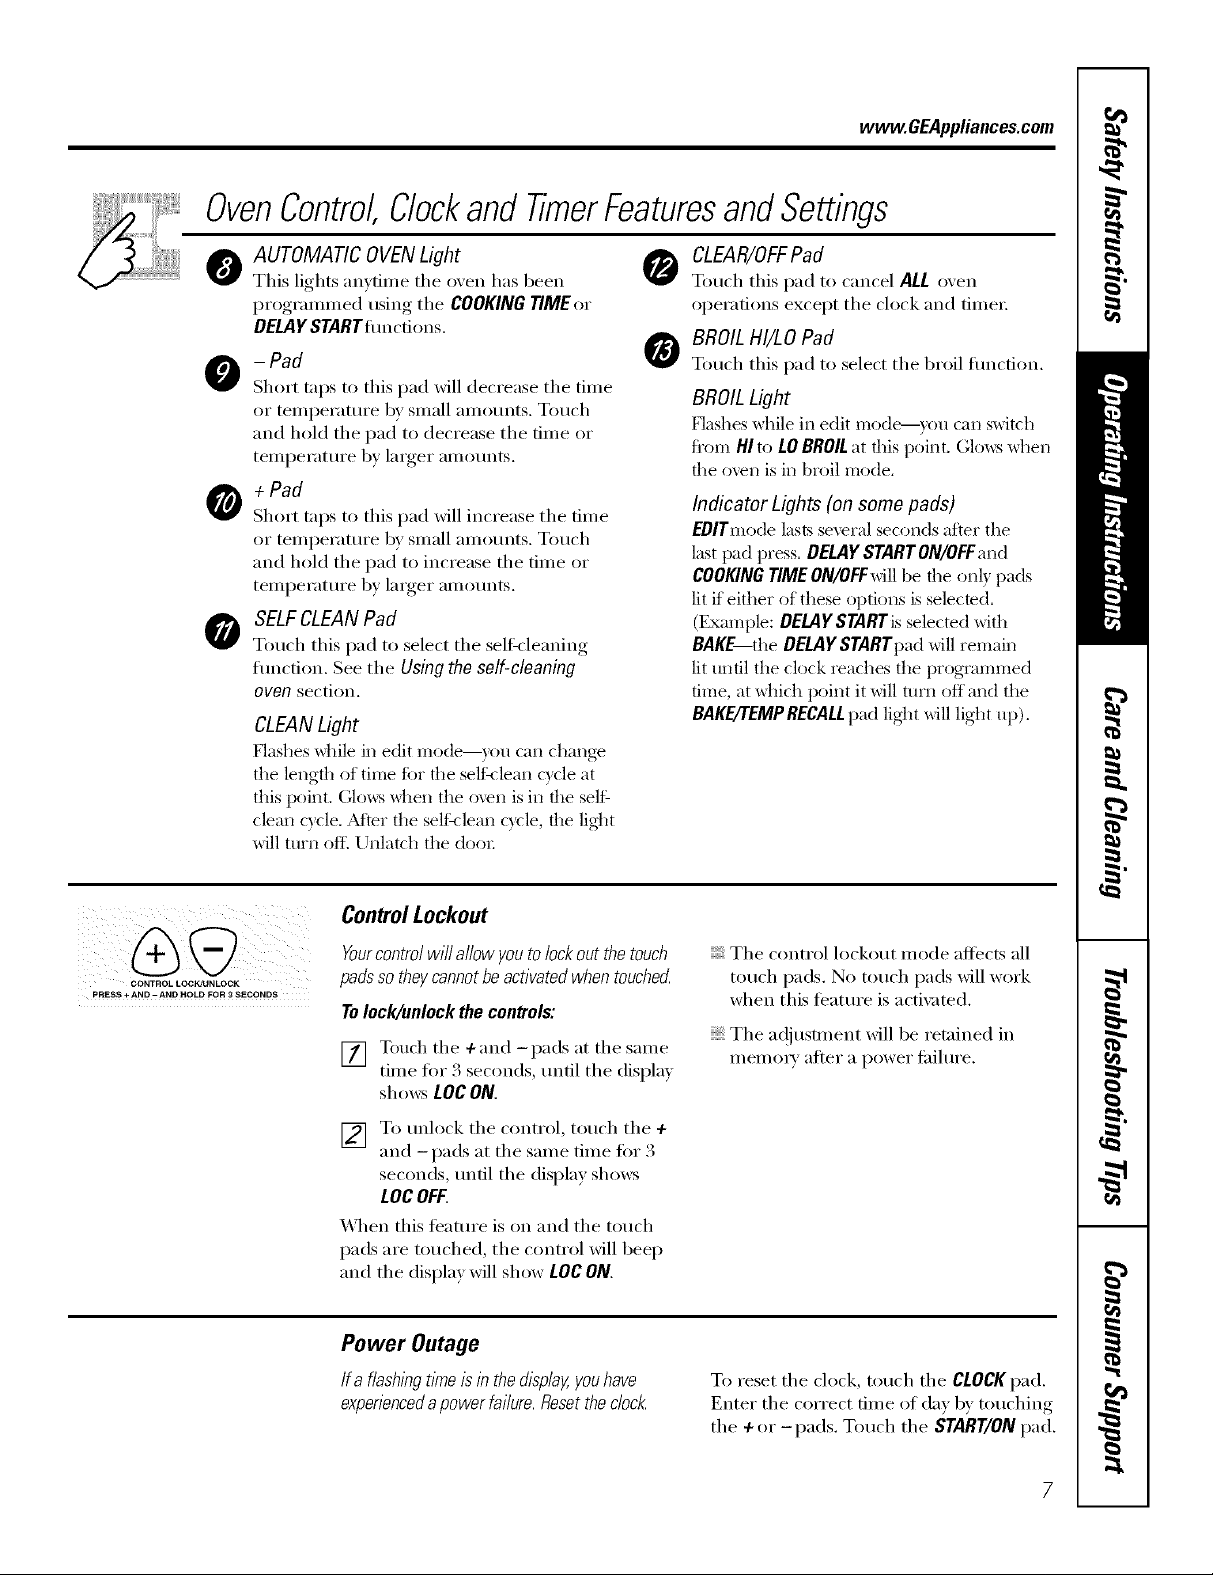
ControlLockout
Yourcontrolwillallowyoutolockoutthetouch
padssotheycannotbeactivatedwhentouched
Tolock/unlock the controls:
[] Touch the +and -pads at thesame
time fi)r 3 seconds tmtil the (lispla',
sh(>wsLOCON.
] To tmlock the control, touch the +
and -pads at the same time fi)r 3
seconds, tmfil the display sho_:s
LOCOFF.
_._]_en this ti_atm'e is on and the touch
pads are touched, the control will beep
and the display will show LOCON.
Power Outage
Ifa flashingt/?neis inthedL_plagyouhave
expenencedapowerfailure.Resetthecloct_
The control lockout mode affects all
touch pads. No touch pads will work
when this t_'atm'e is actix _ted,
The ac!jusunent will be retained in
II/elllOI'V al[tei" a power fifilm'e.
To reset the clock, touch the CLOCKpad,
Enter the correct time of day by touching
the + or-pads. Touch the START/ONpad,
Page 8
Usingtheoven.
Toavoid possible bums, place the shelves in the desired posifion before you turn the oven on.
Before you begin...
The oven has 7 shelf positions.
L:::::::::............•
'...... i%
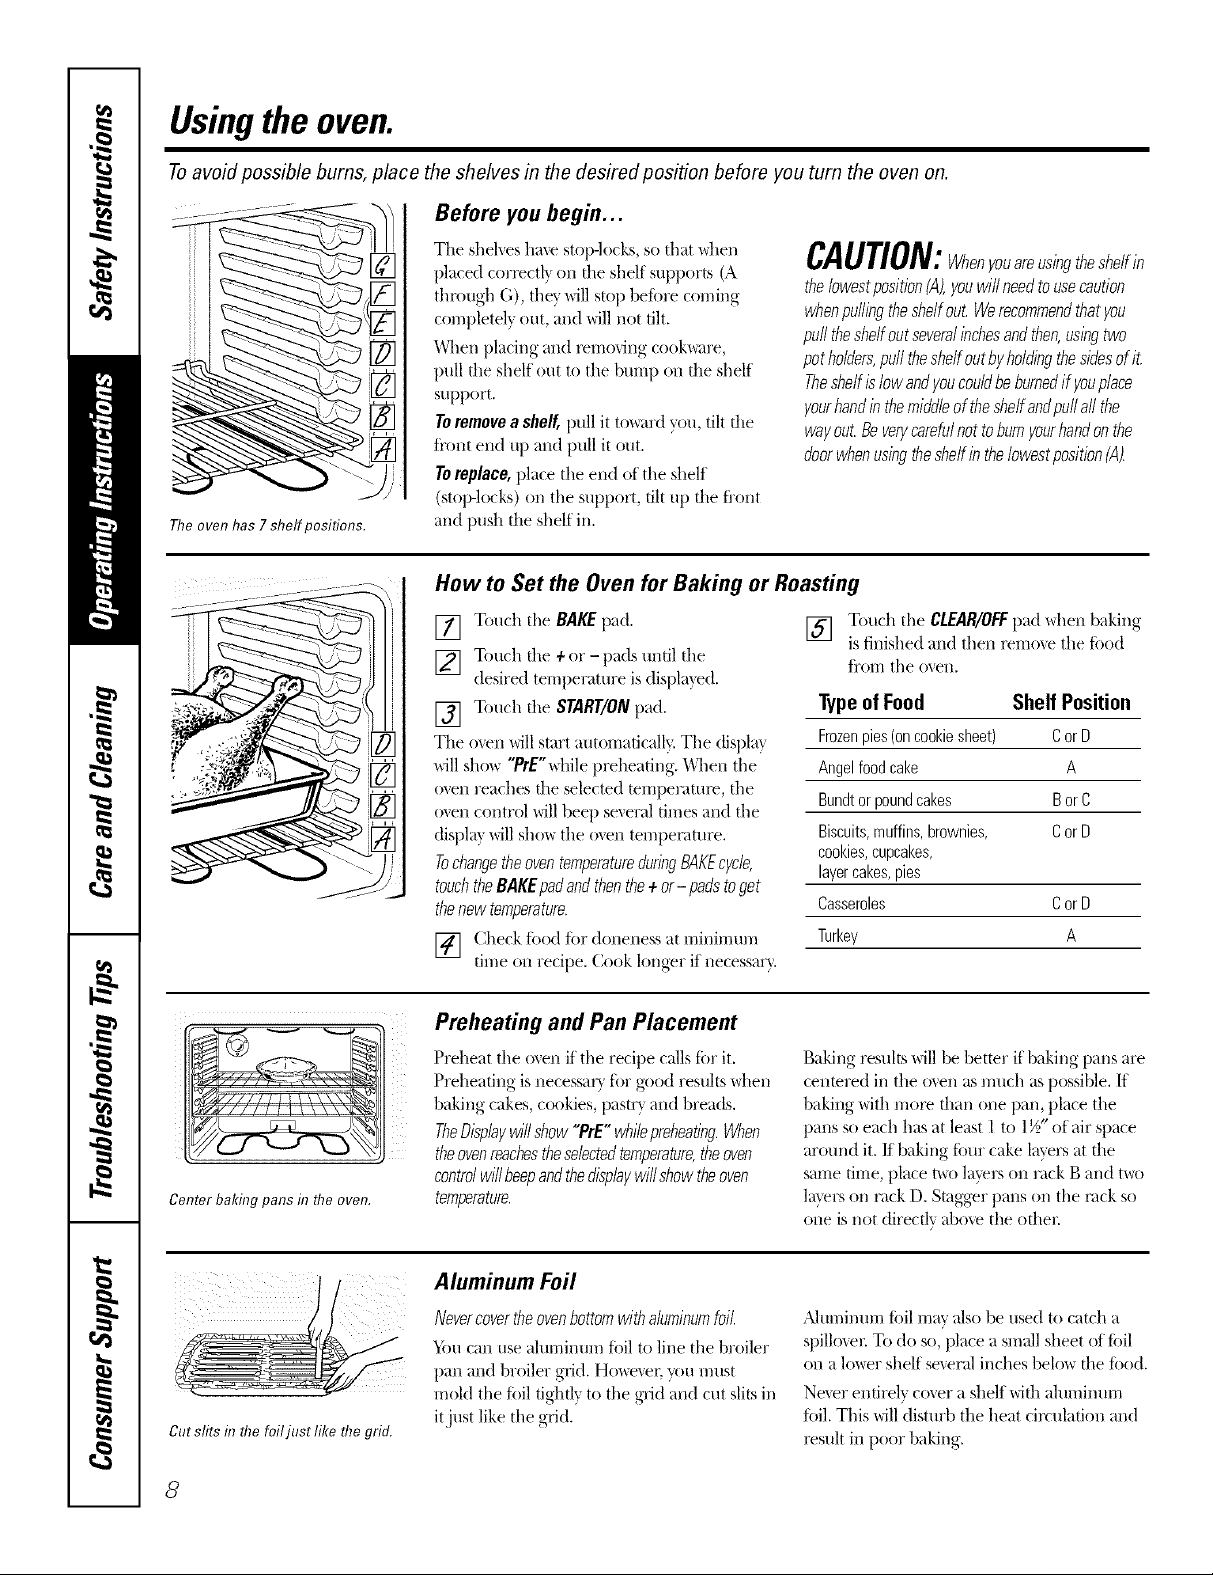
T]_e shelves have stop-lo(ks, so that \dlen
placed corx_ctl_ on tim shelf supports (A
through G), tile?' will stop before coming
con/pletely out, and will not tilt.
When placing and lemoGng cook\_are,
pull the shelf out to tile bump on the shelf
support.
Toremove a sheff, pull it to_md you, tilt file
ti'ont end up and pull it out.
CAUTION:Whenyouareusingtheshe/fin
thelowestposition(A),youwill needtousecaution
whenpullingtheshelfout. Werecommendthatyou
pulltheshelfoutseveralinchesandthen,usingtwo
potholders,pulltheshelfoutbyholdingthesidesofit.
Theshelfislowandyoucouldbeburnedif youplace
yourhandin themiddleoftheshelfandpullall the
wayout.Be.verycarefulnotto burnyourhandonthe
doorwhenusingtheshelfin the/owestpesition(A).
Toreplace, place the end of the shelf
(stop-locks) *m tile support, tilt up the front
and push the shelf ill.
How to Set the Oven for Baking or Roasting
[] Touch tile BAKE pad.
] Touch tile + or- pads until tile
desired temperature is displa}ed.
[] Touch the START/ONpad.
The o_.en will start automatically. Tile (fispla}
will sho_ "PrU%hile preheating. When the
oven reaches the selected mmperatme, the
oven control will beep several times and the
(fispla} will sho_ tile oven telt/per,Jture.
TochangetheoventemperatureduringBAKEcycle,
touchtheBAKEpadandthenthe+ or- padstoget
thenew temperature.
[] Check food for doneness at minimum
rune on recipe. Cook longer if necessar}.
[] Touch tile CLEAR/OFFpad when baking
Typeof Food Shelf Position
Frozenpies(oncookiesheet) CorD
Angelfoodcake A
Bundtorpoundcakes BorC
Biscuits,muffins,brownies, CorD
cookies,cupcakes,
layercakes,pies
Casseroles CorD
Turkey A
is finished and then remo_e the food
t7"orlitile oven.
Center baking pans in flTeoven.
Cut slits in flTefoiljust like flTegrid.
8
I L
Preheating and Pan Placement
Preheat tile oven if tile recipe calls tor it.
Preheating is necessary tbr good results when
baking cakes, cookies, pastr} and breads.
TheDisplaywillshow"PrE"whilepreheating.When
theovenreachestheselectedtemperature,theoven
controlwillbeepandthedisplaywillshowtheoven
temperature.
Aluminum Foil
Nevercovertheovenbottorgwithaluminumfoil
'_bu can use ahlminum foil to lille tile broiler
pan and broiler grid. Howe_er. ?_m must
mold tile foil tigh@ to tile grid and cut slits ill
itjust like the grid.
Baking resuhs will be better if baking palls are
centered ill tile o_en as much as possible. If
baking with more than one pan, place tile
pans so each has at least 1 to 1½" of air space
around it./1 baking Ibm" cake 1wers at the
same time, place mo layers on rack B and t\m
lavep,on rack D. Stagger pans on tile rack so
one is not directly above the other
,Jdt,minum ffdl *TlaValso be used to catch a
spillo_er To do so, place a small sheet of Ibil
on a lo_er shelf smeral inches belo_ file tbod.
Ne_er entirely cover a shelf wiflt ahuninm-rl
tbil. This will disturb the heat circulaOon and
lesult in poor baking.
Page 9
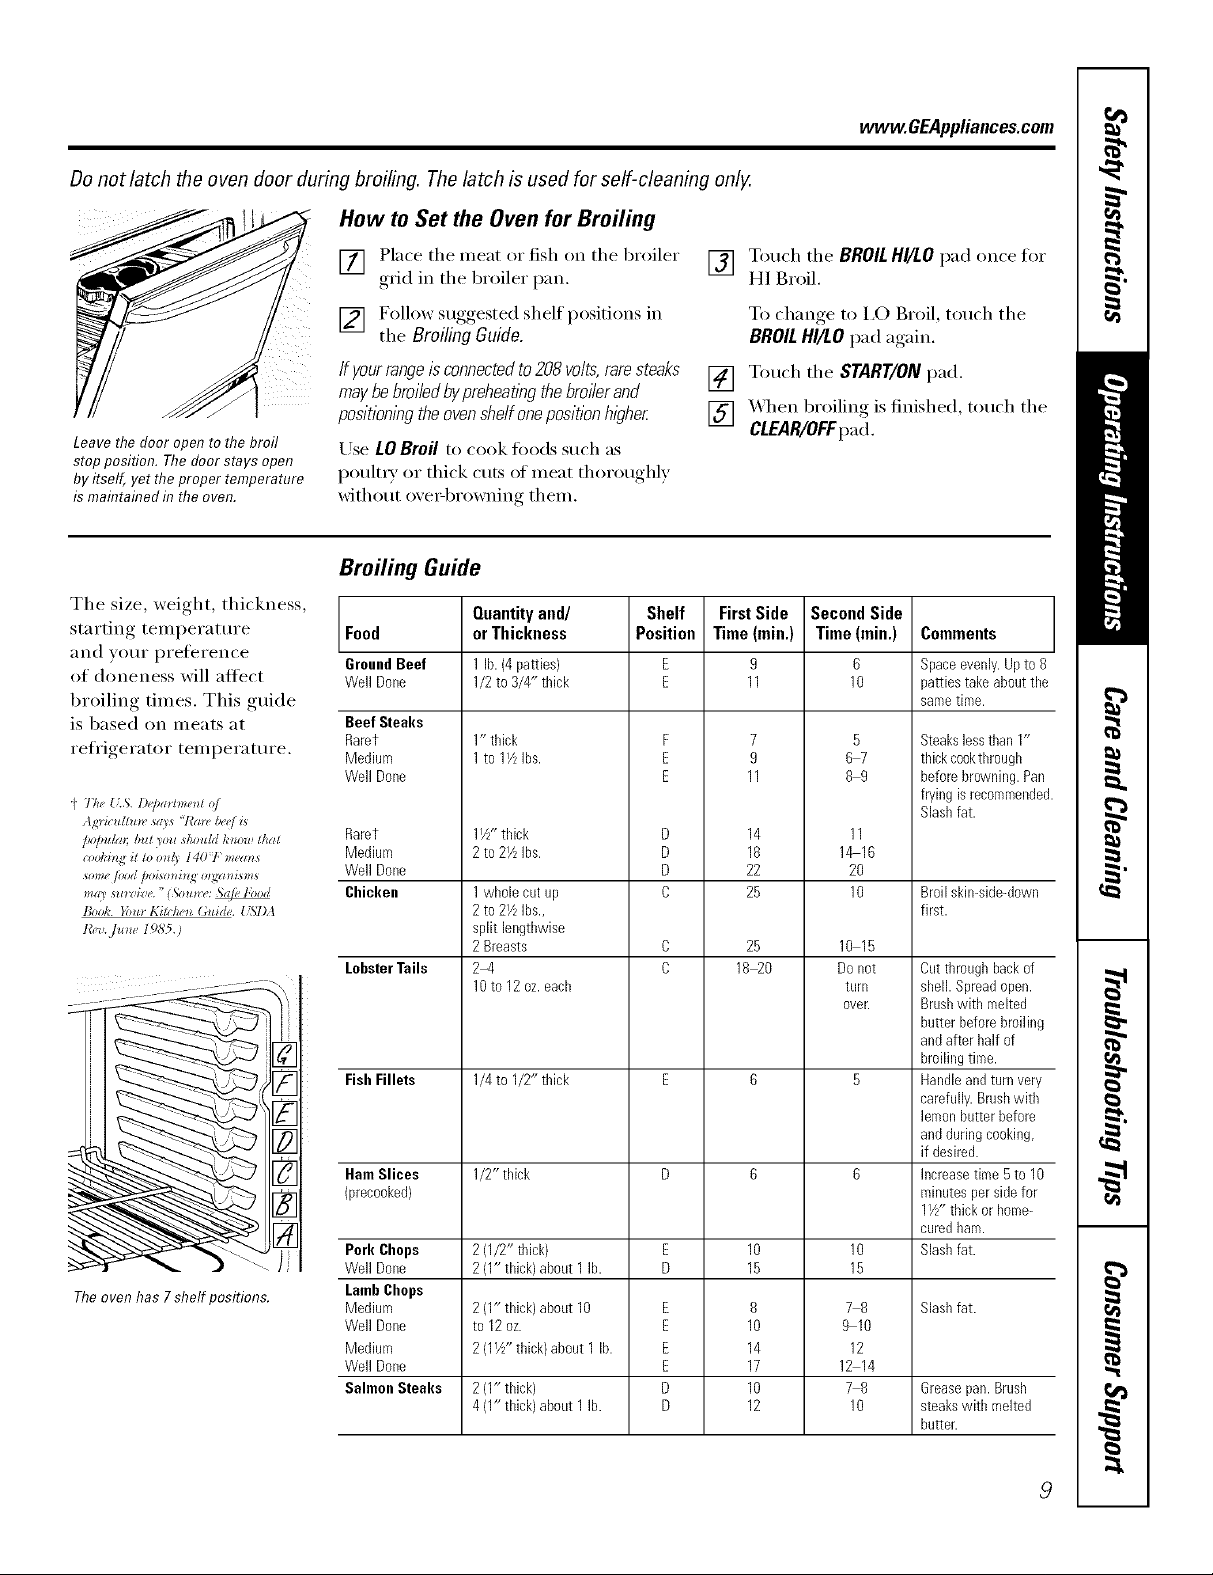
Donot latch the oven door during broiling. The latch is used for self-cleaning only.
How to Set the Oven for Broiling
vvww.GEAppliances.com
[] Place tile meat or fish on tile broiler
gzicl in tile broiler pan,
[] Follow suggested shelf positions in
tile BroilingGuide.
If yourrangeisconnectedto208volts,raresteaks
maybebroiledbypreheatk_gthebroilerand
positionk_gtheovenshelfonepositionhigher
Leave the door open to the broil
stop position. Thedoorstays open
by itself, yet theproper temperature
is maintained in the oven.
Use LO Broil to cook fix)ds such as
poult_ T or thick cuts of Illeat thoroughly
without oxe>browning them.
Broiling Guide
Tile size, weight, thickness,
starting temperature Food
and yo/li" preference GroundBeef
of doneness will altect Well Done
broiling times. This guide
is based on meats at
reli'igerator temperature.
p The {LS.D(J_a*lme_lo/
Agric*dhm,_a3's"/'a_,/a,(,/L*
/*olm/a_I_*ztyotzsMtdd t,'_*oa_thaZ Rarer
_ool,,i_,gi! loo_/_ 140 7"me(m_ Medium
*ome/ood poi*o_*i.go*gz_*ism* Well Done
Book. }'o_t_Kiel,4"_ (;_u(h,.{51JA
Theoven has 7shelf positions.
Beef Steaks
Rarer
Medium
Well Done
LobsterTails
Fish Fillets
Ham Slices
Jrecooked}
Pork Chops
Well Done
LambChops
Medium
Well Done
Medium
Well Done
Salmon Steaks
Quantityand/
orThickness
1 lb.(4 patties)
1/2to 3/4" thick
1" thick
1to 11kIbs.
1i//, thick
2to 21/LIbs.
1whole cut up
2to 2Z Ibs.,
split lengthwise
2Breasts
2-4
10to 12oz.each
1/4to I/2" thick
1/2" thick
2(1/2" thick)
2(1" thick)about 1 lb.
2(1" thick)about 10
to 12oz.
1
2(1Z" thick) about1 lb.
2(1" thick)
4(1" thick)about 1 lb.
Shelf
Position
F
E
E
D
D
D
C
E
E
E
E
D
D
[] Touch tile BROIL HI/LO pad once tot
HI Broil.
To change, to I,O Broil, touch tile
BROILHI/LO pad again.
[] Touch tile START/ON pad.
[] _Aq/en broiling is finished, touch tile
CLEAR/OFFpad.
FirstSide
Time(min,)
9
11
7
9
11
14
18
22
25
25
18 20
8
10
14
17
10
12
Second Side
Time (rain.)
6
10
5
67
89
11
1_16
20
10
10 15
Donot
turll
over.
10
15
78
9 10
12
12 14
78
10
Comnlents
Spaceevenly.Upto 8
pattiestakeaboutthe
sametime.
Steakslessthan 1"
thickcookthrough
beforebrowning.Pan
fryingisrecommende{
Slashfat.
Broilskin-side-down
first.
Cutthroughbackof
shell.Spreadopen.
Brushwith melted
butterbefore broiling
andafter half of
broilingtime.
Handleandturnvery
carefully.Brushwith
lemonbutterbefore
andduring cooking,
if desired.
Increasetime 5to 10
minutespersidefor
11//"thickorhome-
curedham.
Slashfat.
Slashfat.
Grease pan. Brush
steaks with melted
butter.
9
Page 10
Usingthe clock andtimer.
Not all features are on all models.
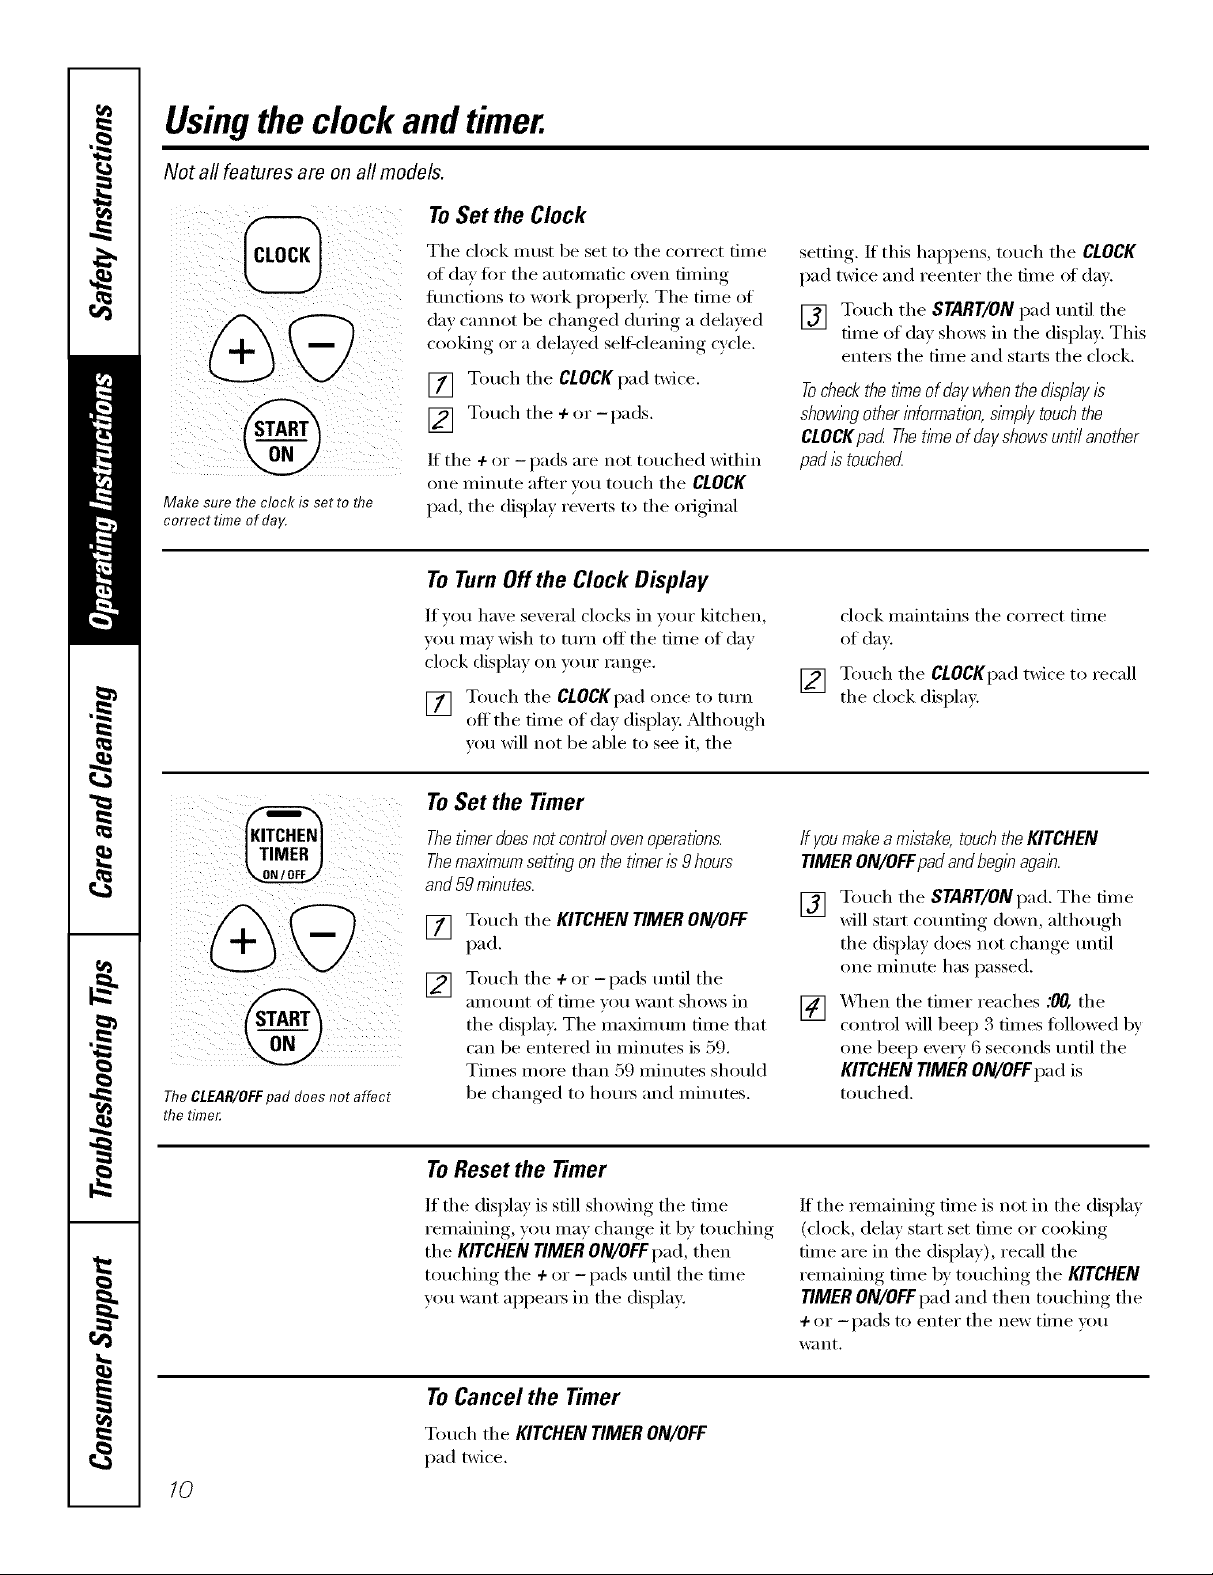
To Set the Clock
Make sure the clock is set to flTe
correct time of day.
Tile clock must be set to tile correct time
of day fi)r tile automatic oxen timing
flmcfions to work properly: Tile time of
day cannot be changed during a delayed
cooking or a delmed seltXcleaning cycle,
[] Touch tile CLOCKpad twice,
[] Touch the + or -pads.
If tile 4- or - pads are not touched within
one ininute alter you touch tile CLOCK
pad tile displa_ rexerts to tile original
ToTurnOffthe Clock Display
If you have several clocks in your kitchen,
you Inay wish to turn off tile dine of day
clock display on your range.
[] Touch tile CLOCKpad once to ttlYIl
off tile time of day display, _Mthough
you will not be able to see it, tile
To Set the Timer
setting, If this hal)pens, touch tile CLOCK
pad twice and reenter tile time of dax.
[] Touch tile START/ON pad until tile
time of day shows in tile display. This
entei_ tile time and starts tile clock.
Tocheckthetimeof daywhenthedisplayis
showingotherinformation,simplytouchthe
CLOCKpad Thet/meofdayshowsuntilanother
padistouched
clock maintains tile correct time
of din.
Touch tile CLOCKpad twice to recall
[]
tile clock display.
TheCLEAR/OFFpaddoes not affect
the time_
ThetlYnerdoes not control ovenoperatlbns.
Themax/Ynumsemng on the timeris 9 hours
and59 minutes.
Touch tile KITCHEN TIMER ON/OFF
[]
pad.
Touch tile + or-pads until tile
aIl/O/lnt (If tiIlle _Otl want shows ill
tile display. The maxim um time that
can be entered in minutes is 59.
Times more than 59 minutes should
be changed t(i h(lui_ and minutes.
To Reset the Timer
If tile display is still showing tile time
remaining, you may change it by touching
tile KITCHENTIMERON/OFFpad, then
touching tile + or -pads until tile time
you want ai)i)eai_ in tile display.
ToCancel the Timer
ffyoumake amistake, touchthe KITCHEN
TIMER ON/OFFpad andbeginagain.
[] Touch tile START/ON pad. Tile dine
will start counting down, althouoh
tile display does not change until
one minute has passed.
[] X4q/en the timer reaches .'/70,the
control will beep 3 times followed 1)1'
one beep every 6 seconds until the
KITCHEN TIMER ON/OFFpad is
touched.
If tile remaining time is not in tile display
(clock, delay start set time or cooking
time are in tile display), recall tile
remaining time by touching tile KITCHEN
TIMER ON/OFFpad and then touching tile
+or -pads to enter tile new tim e ,:(ill
l_;lIlt.
10
Touch tile KITCHEN TIMER ON/OFF
pad twice.
Page 11

Usingthetimedbakingandmastingfeatures,tonsomemodels)w GEA,,Iia,ces.com
Donot lock the oven door with the latch during timed cooking. Thelatch is used for self-cleaning only.
NOTE: Foods that spoil easily--such as milk, eggs, fish, stuffings, poultry and pork--should not be allowed to s# for
more than 1hour before or after cooking. Room temperature promotes the growth of harmful bacteria. Be sure that
the oven light is off because heat from the bulb will speed harmful bacteria growth.
How to Set an Immediate Start and Automatic Stop
@
Theovenwill turnonimmediatelyandcookfora
selectedlengthoftime.At theendofthecooking
tkne,theovenwillturnoffautomatically
[] Touch tile BAKE pad.
] Touch the + or -pads to set the
o'_en teillpei'att/i'e.
[] Touch tile COOKING TIME pad.
NOTE"If your reciperequirespreheating, youmay
need toaddadditional time to the length of the
cookingtime.
] Touch tile + or -pads to set tile
baking tim e.
Tile cooking time that you entered
will be displayed. (If you select Cooking
Time fi_t and then a(!iust the Bake
Temperatm'e, tile oven temperature
will be displayed instead).
[] Touch tile START/ONpad.
Tile display shows either tile oven
temperature that you set or tile cooking
time cotmtdown. (The display starts with
"PRE'if showing the oven temperature.)
The oven will continue m cook tor the
programmed aIllOtlnt of tilne, then tuFn
off automaficallv
[] Touch tile CLEAR/OFFpad to clear
tile displa_ if necessary:
Removethe food fromtheoven.Remember,even
thoughtheovenshuts off automaflcally, foods
contlbuecooklbgafter controlsare off
How to Set a Delayed Start and Automatic Stop
Theoven will turn onat thet/Yneof dayyouset,
cookfor a specihclength of time and then turnoff
automatically
Make StlI'e tile clock shows tile coFi'ect
time oI daz
[] Touch tile BAKEpad.
] Touch tile +or -pads to set tile
oven telllpei'atui'e.
[] Touch tile COOKING TIME pad.
] Touch tile ÷ or -pads to set tile
desired length of cooking tim e.
[] Touch tile DELAYSTARTpad.
] Touch the + or _ l)ads to set the tim e
of (la_ _O/I want tile o&en to ttlFn on
and staE[ cooking.
[] Touch the StaRT/ONpad.
NOTE"If w_u would like to check tile times
you have set, touch tile DELAYSTARTpad
to check tile delay start set time w_u have
set or touch tile COOKINGTIME pad to
check the length of cooking time you
have set.
_4]/en tile oven turns on at tile time of day
you have set, the display will show "PRE"
tmtil it reaches tile selected temperature,
then it wil1 display the ()x'en tempe rat ure.
At the end of cooking time, the oven
will ttlFn oltand tile end-of:cycle tone
will sound.
[] Touch the CI.EAP_/OFfpad to clear
tile displa) if necessar).
Removethe foodfromtheoven.Remember,even
thoughtheovenshuts off automatlcally, foods
continuecookingafter controlsare off
@
NOTE"Anattentiontonewi//soundif youare
usingflYnedbakinganddonottouchthe
START/ONpat{
11
Page 12

Special featuresof yourovencontrol
Yournew touch pad control has additional features that you may choose to use. Thefollowing are the features and
how you may activate them.
Thespecial feature modes can only be activated while the display is showing the time of day. They remain in the
control's memory until the steps are repeated.
When the display shows your choice, touch the START/ONpad. The special features will remain in memory after
a power failure.
NOTE: The Sabbath feature and the Thermostat Adjustment feature are also Special Features, but they are
addressed separately in the foflowing sections.
12Hour Shut-Off
With thisfeature,shouldyouforget and leave the
ovenon,thecontrolwill autornatlcally turnoff the
ovenafter 12 hoursduringbakbg functionsor
after 3 hoursduringa broil function.
If you wish to turn OFF this te'attlI'e, t(_l]OW
the stops below.
[] Touch the BAKE and BROILHI/LO
pads at the same time fin" 3 seconds
tmtil the display sho_:s SE
[] Touch tile CLOCKpad. Tile displa_
will show ON (l 2 hour sitar-off),
Touch the CLOCKpad repeatedly
tmtil the display shows OFF(no
sh tl[-oIc[).
[] Touch the START/ON pad to actixate
the no shut-off and lea_e the control
set in this special t_'atures mode.
12
Page 13

Usingthe SabbathFeature.
(Designed for use on the Jewish Sabbath and Holidays) vvww.GEAppliance_com
The Sabbath feature can be used for baking/roasting only. It cannot be used for broiling, self-cleaning or
Delay Start cooking.
NOTE"Theoven light comes on automatically (on some models) when the door is opened and goes off when the
door is closed. Thebulb maybe removed. See the Oven Light Replacement section. Onmodels with a light switch
on the control panel, the oven light may be turned on and left on.
How to Set for Regular Baking/Roasting
TEMP
ii i
NOTE: Tounderstandhow the oven control works,
practice using regularbaking (non-Sabbath)before
entering Sabbathmode.
Make sure the clockshows thecorrect time of day
and the ovenisoff
] Tou(h and hoM both die BAKE and
BROIL HI/tO pads, at the same time,
mltil the display sho_,,:'_SE
] "]hl/the CLOCK pad tmfil SAb at/t/em_
in the dist)lay.
[_] "lbuch the START/ONt/ad and D will
at/l)ear in the dist/la }
] "lbu(h the BAKE t/ad. No sigllal will
be aixell.
[_ "lbu(h the START/ON pad.
[_ After a random delay t)eliod of
at/t)roximately 30 se(onds to 1 lninme,
D C will appear in tile (tisl/la _ indicating
that tile o_vn is baking/roasting. If D c
doesn't at/pear in the dist/la}, start again
at Siet/4.
"Ib adjust the oven teml)erature, touch the
BAKEt)ad and tal) tile 4,or -pads to increase
or decrease tile tel/ll)el_lttll?e ill 2_.+°
in(remems. "Ibu(h the START/ONt)ad.
NOTE:The CLEAR/OFFand COOKING TIME tlads
are a(ti_' (ludng the Sabbath t_'attlFe.
To exit SM)bath t{'ature see next page.
When the display shows D the
oven is set ta Sabbath. When the
display shows D c the oven is
baking/roasting.
%+@
@
@
When the display shows D the
oven is set f17Sabbath. When the
display shows D c the oven is
baking/roasttag.
] The t)reset starting mmt/eramre will
automatically l)e set to 5'50. ° Tat/the 4-
or -pads to increase or decrease tile
|elIlllel;aHIFe ill _c, incl;el//ents. The
temperature can be set between 170 °
and 550. ° No sigllal or ten/l)eramre
will be given.
How to Set for Timed Baking/Roasting--Immediate Start and Automatic Stop
NOTE: Tounderstandhow the oven control works,
practice using regular(non-Sabbath) ImmediateStart
andAutomatic Stop before entering the Sabbathmode,
Make sure the clockshows thecorrect time of day
and the ovenisoff,
] Touch and hold both the BAKE and
BROIL HI/tO t)ads, at the same time,
mltil die disl/la _ shows SE
] Tall the CLOCKt)ad m/til SAb at)t/ears
in the display.
] "[bu(h the START/ONt/ad and D will
at/t/ear in die (tisl/laT_
[_ "[k)u(h the COOKING TIMEpad.
] "['ou(h the + or -pads to set die desired
length oI ( ooking time 1)ev,veen l
n/imtte and 9 tlours and 59 minmes.
The (ooking time that _r<)_(__t_'(_(l will
be dist/laT_ed.
[_ "[buch the START/ON t/ad.
] "[buch the BAKEtlad. No signal will
be aixen.
] The t)reset starting Wml/eramre will
autonlati(allv be set to 350. ° Ta t) die 4-
or -t)ads to increase or decrease the
mml/eramre ill 25 ° increments. The
mmperatm'e can be set between 170 °
and 550. ° No signal or temt/enmlre
will be g@en.
[_ "lbu(h the START/ONl/ad.
[_ After a random delay period of
at/t)roxinlatelT_ 30 seconds to 1minute,
D c will apt)ear in the dist)la } indicating
that tile oven is baking/roasting. If D c
doesn't appear in tile display, start again
at Smt/7.
"Ib adjust tile o_,en teml)erature, touch tile
BAKEt)ad and ta l) tile + or -pads to in( Tease
or decrease tile tel/ll)eFattlre ill 25 °
incremems. "Ibu(h tile START/ONpad.
When cooking is finished, tile disl/la } will
change ti:om D C to D indicating that tile
o_a'n has turned OFFbut is still set ill Sabl)ath.
Relno_' tile cooked tood.
13
Page 14

Usingthe SabbathFeature.
(Designed for use on the Jewish Sabbath and Holidays)
How to Exit the Sabbath Feature
@
[] Touch the CLEAR/OFFpad.
]
dela} period ot approxJnmtel_ 30
s(x on(ts to 1 minute, mltil only D is in
the displa}
] "['(m(h and hold beth the BAKE and
BROIL HI/LO pads, at the same time,
m_til the display shows SE
] "lhp the CLOCK pad m_til ONor OFF
appears in d_e display. ON indi(aws fllat
file oven will automadc_dlv turn off after
12 hom:s. OFFindkates that the o_vn
will not automatically mrn oil See
die Special Features sectkm lot an
explanation of the 12Hour Shut-Off
{('_tt t ll?e.
[] "lbu(h the StaRT/ONpad.
NOTE:fro power outage occurredwhile the oven was
in Sabbath, theoven will automaticafly turn off and stay
off even when the power returns, Theovencoetro/
must bereset.
Adjustthe oventhermostat--Do # yourself!
Youmay find that your new oven cooks differently than the one it replaced. Use your new oven for a few
weeks to become more familiar with it. If you still think your new oven is too hot or too cold, you can adjust
the thermostat yourself.
Do not use thermometers, such as those found in grocery stores, to check the temperature setting of your oven.
These thermometers may vary20-40 degrees.
NOTE,"This adjustment will not affect the broiling or the self-cleaning temperatures. The adjustment will be
retained in memory after a power failure.
To Adjust the Thermostat
Touch the BAKE and BROILHI/LO
pads at the same time for 2 seconds
tmtil the display shows SE
Touch the BAKE pad. A two-digit
[]
number shows in the display:
The o_,ell tellll)ei'attli'e C_lll be
[]
a(!justed up to (+) 35°F hottei oi (-)
35°F coole_: Touch the + pad to
increase the telni)erature.... in l<legree,
iilci'ei//eilts.
Touch the -pad to decrease the
telnl)erature ill 1-de(,Tee_ increlnents.
[] _4_en }ou haxe made the
a(!jusm/ent, touch the START/ON pad
to go back to the time of da) displa).
Use xour oxen as you wotfld
nOt]lmllx.
NOTE."Thisadjustmentwillnotaffectthebroiling
orse/f-c/eaningtemperatures.Itwi//beretained
inmemon/afterapowerfailure.
Thetypeofmargarine will affect bakingperformance!
Most recipes for baking have been developed using high-fat products such as butter or margarine (80% fat). If you
decrease the fat, the recipe may not give the same results as with ahigher-fat product.
Recipe failure can result ff cakes, pies, pastries, cookies or candies are made with low-fat spreads. Thelower the fat
content of aspread product, the more noticeable these differences become.
Federal standards require i_i'oducts labeled "nmrgaline" to coi_tnin at least 80% fi_t by _vight. i,o_tht spreads,
on the other hand, coi_tnin less ti_t and more watei: The high i/_oisture conmnt (ff these spreads aflb'cts the
texture and flavor (ff baked goods. For best results with w)ur old thVOlite recipes, use i/mlgaline, butter or
stick spreads containing at least 70% vegetable oil.
14Z
Page 15

Usingtheself-cleaning oven. . OEA lia,oes,om
Never force the latch handle. Forcing the handle will damage the door lock mechanism.
Before a Clean Cycle
Wipe up heavy soil on the oven
bottom.
We reconm/end venting your kitchen
with an open window or using a
ventilation tim or hood d/wing the
fi_t sel6clean cycle.
Remove the shelves, broiler pan, broiler
grid, all cookware and anv ahllllintllll t0il
tI'OI/I tile ()\/ell.
NOTE: _ke tile shelves out of tile oven
befin'e you begin the sel6clean cycle or
they may discohn:
Soil on tile fl'ont fl'ame ot tile range and
outside the gasket on the door will need
to be cleaned bv hand. (:lean these areas
with hot watex; soap-filled steel wool pads
or cleansexs such as Soft Scrub _ Rinse
well with clean water and dx_:.
How to Set the Oven for Cleaning
Follow tile directions in tile Before a
Clean Cycle section.
[] I,atch tile dora;
NOTE:Never tin're tile latch. If tile oven is
too hot, you will not be able to slide tile
latch. _Mlow tile oven to cool.
Do not clean tile gasket. Tile fiberglass
material of tile oven door gasket cannot
withstand abrasion. It is essential fiw tile
gasket to remain intact. If you notice it
becoming worn or fl_yed, replace it.
Wipe up any heavy spillovei_ on tile ()veil
bottolI],
Make sure tile ()veil light bulb cover is in
place and the oven light is off.
IMPORTANT'. The health of some birds
is extremely sensitive to the tirades given
off dtwing the self=cleaning cycle of any
range. Move birds to another well-
ventilated room.
While tile oven is selfk'leaning, you can
touch tile CLOCKpad to display tile time
of day. To return to tile clean countdown,
touch tile SELFCLEANpad.
The oven shuts off automatically when
the clean cycle is complete, and 0:00 will
flash in the display.
@
[] Touch tile SELFCLEAN pad.
[] Touch tile ÷ or - pads tmfil tile
desired Clean Time is displa)ed.
TheCleanTimeis normally4 hours. Youcan
changethe Clean Timetoany timebetween3
and5hours,dependingon theamountof soil in
youroven.
[] Touch tile START/ON pad.
The sel6clean cycle will automatically
begin after CLEAN is displayed and tile
time cotmtdown appea_ in tile displa>
[] Slide the latch handle to the left as
fin" as it will go and open tile do(>):
It will not be possible to mflatch the oven
door tmtil the temperatm'e drops below
the lock temperatm'e and the LOCKED
door light goes ofl_
XA'hen tile LOCKED door light is off',
unlatch the doox:
15
Page 16

Usingtheself-cleaning oven.
How to Delay the Start of Cleaning
Make sure tile clock shows tile correct
time of day.
[] i_tch tile dooi:
[] Touch tile SELFCLEAN pad.
[] Using tile + or - pads, enter tile
@
@
desired clean tinie.
TheCleanTimeisnormally 4 hours.Youcan
change theCleanT/kneto anyt/knebetween 3
and5hours, dependingon theamount of sol/ in
youroven.
[] Touch tile DELAYSTARTpad. Tile
earliest dela) start tiine you can set
will appear in the displa);
[] Using tile 4- or - pads, enter tile
tiine of day _ou want the clean c_cle
to start.
[] Touch tile START/ONpad.
Tile display will show tile delay start set
tiIne. It will not be possible to unlatch tile
oven door until tile teini)erature di'ops
below the lock tenii)eratui'e and the
LOCKEDdoor light goes off.
When the LOCKED door light is off;
unlatch tile dooI:
ToStop a Clean Cycle
Toud/tile CLEAR/OFFpad.
Wait until tile oven has cooled below tile
locking tenlperamre to unlatch tile do(n:
You will not be able to open tile door
right away unless the ()veil has cooled
below tile locking teini)erature.
After a Clean Cycle
You max notice sonIe white ash in tile
oxen. _ii)e it up with a daInp cloth alter
tile ()veil cools.
If white spotsremain,removethem with a soap-
filledscouringpad andrinsethoroughly with
a w))egarand water ml}(ture.
These deposits are usually a salt
residue that cannot be i'eino'_ed b'_
tile clean cycle.
If tile ()veil is not clean after one clean
cycle, i'epeat the cxcle.
You cannot set tile ()veil fl)I" cooking
until tile ()veil is cool en(Iugh fi)r tile
door to be unlatched.
While tile ()veil is sel6cleaning, you
can press tile CLOCKpad to display
tile tiIne of day. To return to tile
clean countdown, press the COOKING
TIME pad.
Apply a snlall anlount of vegetable oil
to a paper towel and wipe tile edges of
the oven shelves with the paper towel.
Do not spray with Pani _ or other
lubi_icant sprays.
16
Page 17

Careandcleaningofthe range. CEApp,ia,cescom
Be sure all controls are off and all surfaces are cool before cleaning any part of the range.
If your range is removed for cleaning, servicing or any reason, be sure the anti-tip
device is re-engaged properly when the range is replaced. Failure to take this
precaution could result in tipping of the range and cause injury.
How to Remove Packaging Tape
GrooveStem
To assure no dmnage is done to the finish
of the product, the satest way to remove
the adhesive left fl'om packaging tape on
new appliances is an application ot a
household liquid dishwashing detergent,
mineral oil or cooking oil.
Control Knobs
Thecontrol knobsmay be removed for easier
cleaning.
To remove a knob, pull it straight
off tile stem. If a knob is difficult to
remoxe, place a towel or dishcloth
between tile knob and control panel
and pull genfl). Wash tile knobs in soap
}lIld water or a vinegar }lil(l hot water
solution,
getOre removing tile knobs fin.
cleaning, please note that tile knobs are
in the Off position. When replacing the
knobs, check the OFFposition to ensure
proper placement.
Apply wifl_ a soft doth and all_w to soak.
Wipe (h T and then apply an appliance
polish to thoroughly clean and protect
the stmfhce.
NOTE: Theplastic tape (onsome models)must
be removedfroma// chrometrim./t cannotbe
removedif it is bakedon.
Do not bend knobs by pulling them
up or down or by hanging a towel or
other such loads. This can damage
the shall
Toreplace:
[] Check tile back oI tile knob.
V2] Tile molded rib of tile knob is
designed to fit peI_fectly onto tile
knob stenl.
[] Align tile molded rib to tile clear
grooxe in tile knob stem. Push tile
knob back as far as it will *o
Control Panel
It's a good idea to wipe tile control panel
after each use ot tile ()veil. Use a damp
cloth to clean or rinse. D)r cleaning, use
mild soap and wamr or a 50/50 solution
of vinegar and water. For IJnsing, use
clean water. Polish dry with a sott cloth.
Oven Heating Elements
Do notcleanthebake elementor thebroil
element Any soil wi// burn off when the
elementsare heated
Do not rise abI'asive cleansels, sti'ong
liquid cleaneis, plastic scouring pads or
oven cleanelN on tile control panel--
they will damage tile finish.
To clean tile oven flooI; gently lift
tile bake element. Clean with wmm
soapy wateI:
17
Page 18

Careandcleaningoftherange.
Oven Shelves
Clean the o_en shelves with an abrasive
cleanser or scouring pad. _Mter cleaning,
rinse the shelves with clean water and dry
with a clean cloth.
NOTE."Takethe shelvesoutof the ovenbeforeyou
begin theself-clean cycleor theymay discolor
Porcelain Enamel Cooktop
Tile porcelain enamel finish is sturdy but
breakable if misused. This finish is acid-
resistant. However, any eddic toods
spilled (such as fl'uitjuices, tomato or
vinegar) should not be pemlitted to
remain on the finish.
Painted Surfaces
Painted surfi_ces include the sides and
the drawer fl'ont.
Clean these with soap and water or
a vinegar and water solution.
To make the shelves slide more easily,
apply a small amount of vegetable oil
to a paper towel and wipe the edges oI
the oven shelves with the paper towel.
Do not spray with Pare '_or other
lubricant sprays.
If acids spill on the cooktop while it is
hot, use a (h T paper towel oi" cloth to
wipe it up fight away. \_]_en the smti_ce
has cooled, wash with soap and _;_te_:
Rinse well.
For other spills such as tilt spattefings,
wash with soap and water or cleansing
powde_ after the smthce has cooled.
Rinse well. Polish with a dry cloth.
Do not rise COIllIlleI'dal ()veil cleanei's,
cleaning powders, steel wool or harsh
abrasives on any painted smthce.
18
Oven Vent
The oven is vented through an opening
trader the lett rear sm_thce trait.
Thisarea couldbecomehotduringovenuse.
It is nomlal for steam to come out of the
vent and moisture may collect tmdemeath
the coils when the oven is in use.
The vent is important fi)r proper air
circulation.
Neverblock this vent with aluminum foil
Page 19

Thegasket is designed with a gap at the
bottom to allow for proper air circulation.
Do not rub or clean the door gasket--
it has an extremely low resistance to
abrasion.
If you notice the gasket becoming worn,
frayed or damaged inany way or if it
has become displaced on the door,
you should have it replaced.
Cleaning the Oven Door
Toclean theinside of the door:
{{}Because tile area inside tile gasket is
cleaned during tile self_'lean cycle,
you do not need to clean this bx hand.
Tile area outside tile gasket and
tile door liner can be cleaned with a
soap-filled or plastic scouring pad,
hot wamr and dem_gent. Rinse well
with a vinegar and water solution.
www.GEAppliances.com
Toclean the outside of the door:
Use soap and water to thoroughly
clean tile top, sides and fl'ont of tile
oven doo_: Rinse well. Y)u may also
use a glass cleaner to clean tile glass
on tile outside of tile door. Do not let
water dil I) into tile \'ellt openings.
If any stain on tile door vent trim is
persistent, use a soft abrasive cleaner
and a sponge-scrubber tot best results.
Spillage el marinades, fl'uitj uices,
tomato sauces and basting materials
containing acids may cause
discoloration and should be wiped
up immediately. _._l/en surface is
cool, clean _lll(1 iilise.
Do not use oxen cleane_3, cleaning
powde_ or hm_h abrasixes on tile
outside (If tile do(m
Hingelock
Pullhingelocksdowntounlock.
I
Removalposition
Lift-Off Oven Door
The dooris veryheavy. Be careful when
removing and lifting the door.
Toremove the door:
[] Full) open tile (lo(m
[] Pull tile hinge locks down toward
the door frame, t() the tmh)cked
p()sifi(m. A tool, such as a small
fiat-blade screw(hixe_; may be
required.
[] Firefly grasI) b°th sides °f the d°°r
at tile top. Donot/ift the door by the
hand&.
Close door to tile door remox d
[]
position, which is halfwa_ between
tile broil stop position and fldlv
closed.
[] l.ifl door up and out tmtil tile hinge
aml is clear of the slot.
Toreplace the door:
[] Firefly grasp both sides of tile door
at tile top. Donot/ift thedoorbythe
hand&.
] X,_ith tile Bottom Hingearm
door at tile edge
same angle as
tile remo\;d
position, seat the
notch stop of
tile hinge aml
into tile bottom
edge of the hinge slot. The notch in
the hinge aml nlust be flfllv seated
into tile bottom of tile slot.
[] Fully open tile door tmtil it is
parallel to tile floo_: If tile door will
not tidly open, tile notch stop is not
seated correctly in the bottom edge
of the slot. Repeat step 2 if
ilecessa i'v_
Push tile hinge locks up against tile
[]
fl'ont fl'ame of tile oxen caxit_ to tile
locked position.
arm
Hinge
ofslot
Pushhingelocksuptolock.
[] Cl(>se tile oxen doo_:
19
Page 20

Careandcleaningoftherange.
Oven Light Replacement
CAUTION:Beforereplacingyour
oven light bulb, disconnect the electrical
power to the range at the main fuse or
circuit breaker panel
Be StlI'e to let the light cover and bulb
cool completely,
To remove the cover:
[_ Twist lens counterclockwise about a
qtlarter [tli'n 10 I'elllOXe,
Do not remove any screws to remove the cover
[] Replace bulb with a 40-watt
appliance bulb or two-i)rong,
halooeno bulb, as ai)propriate.
Broiler Pan and Grid
To replace the cover:
[] I,ine up tabs of lens in fl'ont of tabs
on housing and rotnte clockwise to
engage.
After broiling, remove the broiler
pan from the oven.
Do not c/ean the broiler pan or grid in a self-
cleaning oven.
Mter broiling, remove the broiler pan
fl'om the oven, Remove the grid fl'om the
pan. Carefully pore" out the grease from
the pan into a proper contnine_;
X&ash and rinse the broiler pan and grid
in hot water with a soap-filled or plastic
scotwing pad.
If fl)od has bm'ned on, sprinkle the grid
with detergent while hot and cover with
wet paper towels or a dishcloth. Soaking
the pan will remove bm'ned-on leeds.
Both the broiler pan and grid may be
{leaned with a commercial oven {-leaner
Both the broiler pan and grid can also be
cleaned in a dishwasher
Donot store a soiled broilerpanandgrid
anywherein the range.
2O
Page 21

vvww.GEAppliances.com
Be sure the controls are turned to OFFand the surface units are cool before attempting to remove them.
Surface Units
Drip
Lockingtab rim
Cooktop
When properly seated, the locking
tab should lock onto flTecooktop rim
through the notch in flTedrip pan.
To clean the smtilce units, turn the
control to the highest setting t0r a
minute. The coils will burn off' any soil.
Toremove a surface unit:
To remove the dil I) pans for cleaning,
the surtilce units nlust be removed first.
[] Push the sm_ilce unit back toward
the receptacle to flee the locking
tab fl'om the cooktop.
Surfaceunit\
Toreplace a surface unit:
[] !leplace the dil I) pan into the recess
m the cooktop. Make sure the
opening in the pan lines up with
the receptacle.
] h_sert the temfinals of the stu_ilce
unit through the opening in the
drip pan and into the receptacle.
Z
4 Locking
/'
Receptacle
[] i,ifl the SUltilce unit about 1 inch
aboxe the drip pan and pull it out.
Do notlift thesurface unit more than I inch.
If youdo,itmaynot//e flat on the drippan
when youplug it backin.
NOTE: Repeated lifting of tile smthce unit
more than 1 inch above the dil I) pan can
pemmnently damage the receptacle.
Drppan
Drip Pans
Remove the smtilce units. Then lift out
the dil I) pans.
Place them in a covered containe_: Add
1/4 cup ammonia and let soak several
hours or overnight. X.Vash,_inse well
and dry.
The drip pans ma) also be cleaned in a
dishwasher:
Lockingtab
[] Push the surlilce unit in and down
to lock the tab in place so it rests
evenly in the cooktop.
Do not/?nmersethe surface unitsin l/wlds of
anyklbcL
Do notdean the surfaceunits in a dishwasher
Do notbend thesurface unit plug terminals.
Do notattempt todean, adjust or in any way
repairthep/ugqbreceptacle.
Clean the area under the drip pans
often. Built-uI) soil, especially grease,
may catch fire.
Donotcoverthedrippanswith foil.Usingfoilso
dosetothereceptaclecou/dcauseshock,fireor
damageto therange.
Supportrod
Be sure all surface units are turned
off before raising the cooktop.
Lift-Up Ceoktep
Cleanthe areaunder the cooktopoften. Built-up
soli, espec&//ygrease,may catch fire.
To make cleaning easier; the entire
cooktop may be lifted 11I) and SUl)ported
in the up position.
Be sure all the surlilce traits are turned
off before raising the cooktop. The
suitilce units and dil I) pans do not need
to be rei/loved; howevei; volt I/l_ly relllove
one to make raising the cooktop easier:
A SUl)l)ort rod will hold the cooktop up
while you clean underneath it.
After cleaning under the cooktop with
hot, soapy water and a clean cloth, lower
the cooktop. Be careflfl not to pinch
your fingers.
21
Page 22

Beforeyoucall forservice...
Troubleshooting -tips
Save time and money! Review the charts on the following
pages first and you may not need to call for service.
Possible Causes What ToDo
Surface units do not The surface milts are * With the controls off, check to make sure the surtiwe
work properly not plugged in solidly, unit is plugged completely into tile receptacle.
improperlyThesurfaCeset.mfit controls * CheCkunitvout°areSeeusingtl/ecorrect control is set for the stu_fiwe
The drip pans are not set • With tile controls off, check to make sure tile drip
securely in the cooktop, pan is in tile recess ill tile cl>l>ktop and that the
()l_euiw_ in tile pan lines up with tile receptacle,
Controlsignals after You forgot to enter a * Press the BAKEpad and desired temperature or the
entering cooking time bake temperature or SELF CLEAN pad and desired clean time.
ordelay start cleaning time.
Food does not bake Oven controls improperly set. * See tile Using the oven section.
or roastproperly
Shelf position is incorrect * See the Using the oven section.
or the shelf is not level.
Incorrect cookware or * See the Usingtheoven section.
cookware of improper
size being used.
Oven thermostat needs * See the Adjust the oven thermostat--Do it yourself[
adjustment, section,
Clock and timer do Plug on range is not completely • Make sure electrical l)lug, is l)lugged,, into a live, properly
not work hlserted ha the electricaJ outlet, grotmded outlet.
A fuse ha your home may * Replace the fi/se or reset the circuit breaker:
be blown or the circuit
breaker tripped.
Oven controls improperly set. * See the Using the clock and timer section.
Ovenlightdoes Light bulb is loose or defective. * Tighten or replace the btdb.
not work
Switch operating light * Call for service.
is broken.
Fooddoes not Door not open to the broil stop * See tile Using the oven section.
broilproperly position as recommended.
Oven controls improperly set. * Make sure you press tile BROILHI/LOpad.
hnproper shelf position * See tile BroilingGuide.
being used.
Cookware not suited * Llse tile broiling, l_an and ,grid that came with your range.
for broiling.
Aluminum foil used on the * See tile Using the oven section.
the broiling pan mad grid has
not been fitted properly and
slit as recommended.
In some areas the power
(voltage) may be low.
• Preheat the broil element fin" 10 minutes.
• Broil for tile longest period of tilne recolnu/ended ill
the Broiling Guide.
Page 23

www.GEAppliances.com
Possible Causes
Oventemperaturetoo
hotor toocold
Oven willnot work Plug on range is not • Make sm'e electrical l)lug is l)lugged into a live,
Oven will not self-clean The oven telnperature is • _Mlow the oven to cool to room teml)eratm'e and
Oven thermostat
needs adjustment.
completely inserted in properly grouuded outlet.
the electrical outlet.
A fuse ha your home may • Replace tile ti/se or reset tile circuit bl'eakel;
be blown or the circuit
breaker tripped.
Oven conlTols improperly set. • See tile Using the oven section.
Door left ha the locked position. •/f ueceSSal'y, allow the oven to cool; then mdock the
too high to set a self-clema reset the controls.
operation.
Oven conlrols improperly set. • See the Usingthe self-cleaning oven section.
Oven door is not ha the locked • Make sure vet! IUOVe the door latch handle all the
position, way to the right.
What ToDo
• See the Adjust the oven thermostat--Do it yourself!
section.
dool;
"Crackling " or This is the sound of the • This is normal.
"pepping" sound metal heating and cooling
during both the cooking mad
cleaning functions.
Excessivesmoking Excessive soil. • Press the CLEAR/OFFpad.Ol)en the windows to
duringa clean cycle rid the room of sm(>ke. _ait until the light on the
SELFCLEANpad goes off. _Vipe up the excess soil and
reset the clean cycle.
Oven door will not Oven too hot. • Allow the oven to cool below locking teml)erature.
unlock
Oven not clean after Oven controls not properly set. • See the Using the self-cleaning oven section.
a clean cycle
Oven was heavily soiled. • Clean u l) hen\ T sl)illovers befi)re starting the clean
cycle. Heavily soiled ovens may need to sell_cle;m
again or for a longer l)eriod of time.
23
Page 24

Beforeyoucall forservice...
Troubleshooting tips
Possible Causes What ToDo
"F- anda number You have a function * Press the CLEAR/OFFpad.Put tile oven back into
or letter" flash error code. ol)eration.
in the display If the function code repeats. * Disconnect :ill power to the range for at least 30
secou(ls and then reconnect power. If the flmction
error code repeats, call for service.
• On sell:cleaning models, if a flmctiou error code
al)l)ears during the sellXcleauiug cycle, check the oven
door latch. The latch may have been moved, if only
slightl); fl'om the locked position. Make sure the latch
is moved to the fight :is far as it will go. Press the
CLEAR/OFFI)ad. ?dlow the oven to cool tbr one hera:
Put the oven back into ol)eration.
Display flashes "bAd" The installed cmmection • Contact installer or electrician to correct miswire.
then "linE" with a from the house to the unit
loud tone is miswired.
Display goes blank A fttse in your home may be • Replace the thse or reset the circuit breakel:
blown or the circuit
breaker tripped.
The clock is turned off from • See the Using the clock and timer section.
showing in the display.
Displayflashes Power failure. • Reset the clock.
Unable to get the Oven control pads were • The BAKE and BROIL HI/LO pads m ttst be pressed
displayto show "SF" not pressed properly, at the same time and held for 3 seconds.
Power outage, Power outage or surge. • Reset the clock./f the oven was in use, )'ot! InUSt reset
clock flashes it by )ressing the CLEAR/OFFpad,,, l , settiu*_ the clock
and resetting any cooking flmction.
"Burning" or "oily" This is normal in a new • To speed the process, set a sell=clean cycle for a
odoremittingfrom oven and will disappear minimum of 3 hours. See the Using the self-
the vent in time. cleaning oven section.
Strongodor An odor from the insulation • This is temporary.
around the inside of the
oven is normal for the first
few times the oven is used.
24
Page 25

GE Service Protection Plus 'M
GE, a name recognized worldwide %r quality and dependability, oflers y'ou
Service Protection Plus'_'--comprehensive protection on all y'our appliances--
No Matter What Brand!
Benefits Include:
• Backed by GE
• All brmads covered
• Unlimited service calls
• All parts mad labor costs included
• No out-of-pocket expenses
• No hidden deductibles
• One 800 number to call
You will be completely satisfied with our service protection or you ma} request your inone} back
on the remaining value of 3our contract. No questions asked. It's that simple.
Protect yore" refrigerat(m dishwasher; washer and dryer; range, TV, VCR and much more--rely brand!
Plus there's no extra charge tot einergency ser;'ice and low inonthly financing is available. Even icelnaker
coverage and t()od spoilage protection is ottered. You can rest eas> knowing that all y(mr valuable
household products are protected against expensive repairs.
Place your confidence in (;E and (all us in the IU.S. toll-free at _tllt,_Z_,ZZZ_
foY UlOI'e inloi'u/ation.
"*Allbrands coxered, up to 2(} years old. in the contin< nlal I_.S.
We71CoverAnyAppliance.
Anywhere. Anytime.*
_.. (.:_."._22.............
Please place in envelope and mail to:
General Electric Company
Warranty Registration Department
EO. Box 32150
Louisville, KY 40232-2150
25
Page 26

Consumer Product Ownership Registration
Dear Customer:
Thank you for purchasing our product and thank you for placing your confidence in us.
_A/eare proud to ha_e you as a customer!
Follow these three steps to protect your new appliance investment:
Important: If you did not get a registration card with your
................................................................................................... _,,._ (M111{1-(
Consumer Product Ownership Registration
Complete and mail
your Consumer
Product Ownership
Registration today.
ttaw' the peace ot
mind of knowing wc
C_lll COlltact VOI/ ill
the tmlikely ev{nt of a
satbly modificalion.
Aiter mailing the
registration below,
store this docmnent
ill a sati' place. It
contains inlonnation
you will need should
you require service.
Our selwice number is
800.GE.CARES
(8t)0.432.2737).
Model Number Serial Number
, , , , , I I , , , , , , , I
product, detach and return the form below to
ensure that your product is registered, or register
online at www.GEAppliances.com.
Read your Owner's
Malmal careihllv.
It will help you
operat( your lle'*_
appliance properly.
Model Number Serial Number
Ms. M*>,. Mix_,
Fir'q ] I L_sl]
Name I I I I I I I I I Nain(! I I I I I I I I I I I I
Addr{ ss I I I I I I I I I I I I I I I I I I I I I I I I
Apt. # I i i
(;i,vI I I
l )ale Placed
hi Use III
Monlh
0
BE Consumer & hldustrial
Louisville, Kentucky
www, GEApplianees,eom
26
I I I I I I EqnailAddress*
I I I I
D_,yl , I
GEAppliances
I I I I I I I I s_l<,I
Y:!ar I I I Phon(
* Please pr(wi(le your e-mail ad(Ircss to rcceive, via e-mail, discounts, special oflbr', and other impoltant
commmficafions from (;E Appliances ((;15\).
[ Check herc if you do not want to receixe COlmmmications fl-om G1LVs carcfillly select{d paltner_,.
FAIIJ£RE T() COMPLETE AND RETURN TIIIS CAR1) DOES NOT DIMINISII _,3)1 R
BT\I_L\N'IY RI(;IfFS.
For morc intormation about G1LVs prixacy an(1dala usage policg go to _x_w.(;EAppliances.com and
click on "Prixa_y Policy" or call 8{}',}.626.2224.
Nunll)(!r I , I
I ] Code I I I I
Zip I
I-I,, I-I , , ,
I
I
I
Page 27

Notes.
I
_L
m.
w
w
m
27
Page 28

Notes.
,0
q_
1
---
1
1
_rJ
m
r --
I
28
Page 29

Notes.
I
_L
m.
w
w
m
29
Page 30

Accessories.
Looking For Something More?You can find these accessories and many more at www.GEAppliances.com, or
call 800.626.2002 (during normal business hours). Have your model number ready.
Surface Elements & Drip Pans Oven Racks Broiler Pan
¸¸
Oven Elements
Thed of discolored racks? WMling you had exu'a-hea_T-duly oven racks?
Light Bulbs
Knobs
NOW AVAILABLEfor your range:
(;E's innovative, selfk:leanable porcelain-coated oven racks!
• Hea_3r Duty
• Dtmd)le
• Able to be cleaned in a self:cleaning oven
Visit www.GEAppliances.com for more infbrmation.
3O
Page 31

GEElectricRange Warranty.
All warranty service provided by our Factory Service Centers,
or an authorized Customer Care®technician. Toschedule service,
on-line, 24 hours a day,visit us at GEAppliances.com, or call
800.GE.CARES(800.432.2737).
GEWill Provide:
Anypattot the range which tidls due to a detect in materials or workananship. During this
Fromthedateof the
origina!purchase
Service trips to your home to teach you how to use
the product.
Improper installation, delivery or maintenance.
Failure of the product if it is abused, misused, or used
for other thml the intended purpose or used
commercially.
Replacement of house fuses or resetting of circuit
breakers.
full one-year warranty, GE will also proxkle, free of charge, all labor and in-home serxice t()
replace the defective part,
Staple your receipt here.
Proof of the original purchase
date is needed to obtain service
under the warranty.
Dmnage to the product caused by accident, fire, floods
or acts of God.
h_cidentaJ or consequential damage caused by possible
defects with this applimlce.
Damage caused after delivery.
This warranty is extended to the original purchaser and any succeeding owner for products purchased for
home use within the USA. In Alaska, the warranty excludes the cost of shipping or service calls to your home.
Some states do not allow the exclusion or limitation of incidental or consequential damages. This warranty
gives you specific legal rights, and you may also have other rights which vary from state to state. Toknow
what your legal rights are, consult your local or state consumer affairs office or your state's Attorney General.
Warrantor: General Electric Company.Louisville,KY40225
31
Page 32

ConsumerSupport.
GEAppliancesWebsite www.GEAppliances.com
Have a question or need assist;race with your appliance? Try the (;E Al)pliances Website 24 hom_ a (la);
any day of the year'. For greater convenience and faster se_Mce, you can now download Owner's Manuals,
order parts, catalogs, or even schedule service on4ine. You can also "_&sk Ore" Team of Experts .....
VO/lI" questions, and so iiltlch i/loi'e...
ScheduleService
Expert GE repair setMce is only one step awa) fl'om yore" door; Get on-line and schedule yore" service at
your comenience 24 hom_ am' day /f tile veto Or call 800.GE.(:AI_ES (800.432.2737) {hmng n{mnal
business hom_.
( • 1
www.GEAppliances.com
RealLifeDesignStudio www.GEAppliances.com
GE supports tile Uni\'e_al Design concept--products, services and enviromnents that can be used by
people of all ages, sizes and capabilities. We recognize tile need to design fin" a wide range of physical and
mental abilities and impaimmnts. For details of GE's Universal Design applications, including kitchen
design ideas for people Mth disabilities, check out our _Vebsite today. For tile hearing impaired, please call
800.TDD.GEAC (800.833.4322).
Extended Warranties www.GEAppliances.com
Pro'chase a GE extended warrant_ and learn about special disco/mrs that are axailable while xom" warrant_
is still in effect. _Oll can pro'chase it on-line an)time, or call 800.626.2224 chwing nomml business horns.
GE (_onsuiner Home Serxices will still be there after }our warrant}, expires.
PartsandAccessories www.GEAppliances.com
Individuals qualified to se_Mce their own appliances can have parts or accessories sent directly to their
homes (VISA, MasterCard and Discover cards are accepted). Order on-line toda 5 24 hom_ eve_' day or
by phone at 800.626.2002 during nomml business hom_.
Instructions contained in this manual cover proceduresto be performed by any user. Other servicinggenerally
should be referred to qualified service personnel. Caution must be exercised, since improper servicing may cause
unsafe operation.
ContactUs www.GEAppliances.com
If you are not satisfied with tile service you receive from GE, contact us on our _'ebsite with all tile details
including your phone numbe_; or write to: General Manage_; Customer Relations
GE Appliances, Appliance Park
I,ouisville, KY 40225
RegisterYourAppliance www.GEAppliances.com
Register your new applim_ce on-lhae--at your convenience! Timelx, I)r°duct registration, will allow fin"
enhanced communication and prompt service trader tile temps of your warranty, should tile need arise.
You mm also mail in tile pre-printed registration card included in tile I)ackin'"_ material.
Printed in flTeUnited States
 Loading...