

Page 1

ge.com
Safety Instructions ........ 2-0
Operating Instrut_tions
(;lock and Timer ............ 14
Oven ................... 10-92
Broiling, Broil ing Guide ..... 13
Controls ............... 10, 11
Sabbath Feanlre ........ 17, 18
Self-Cleaning ........... 91,92
Special Feann_es ............ 16
Thermostat ............... 18
Timed Baking
and Roasting .............. 15
_'arming Drawer ........ 19, 90
Surt_ce Units ............. 7-9
Care and Cleaning
Broiler Pan & Grid .......... 26
Control tia_obs ............. 23
Glass Cooktop ........... 27, 28
I,ift-Off ()yen Door. ......... 24
Light ..................... 26
()yen Vent ................. 23
Shehes .................... 25
Removable _'amfing
Drawer Pan ................ 25
Storag> Drawer ............. 26
EER3000
EER 3O0 l
JBP7l
JB7IO
jgP72
JBPSO
JBP8 l
JBP8 3
Troubleshooting Tips .... 29-32
Accessories ................ 38
Consumer Support
Consumer Suppoi_ .... Back Co_er
Product Registration ....... 33, 34
_'anantv .................. 39
Write the model and serial
numbers here:
Model #
Serial #
You can lind them on a label
behind the storage drawer on
the ti'ont of the range ti'ame.
49-80365 11-05JR
Page 2
IMPORTANTSAFETYINFORMATION.
READALLINSTRUCTIONSBEFOREUSING.
m
For your safety, the information in this manual must be followed to minimize the risk of fire,
electric shock, or to prevent property damage, personal injury, or loss of life.
WARNINGANti-TIPDEVICE
All ranges can tip andinjury could result.
Toprevent accidental tipping of the range, attach it to the wall and floor by installing the Anti--tip
device supplied.
If the Anti--tip device supplied with the range does not fit this application, use the universal Anti--17p
device WB2X7909.
Tocheck if the device is instated and engaged properly, remove the kick panel or storage drawer
and inspect the rear leveling leg. Make sure it fits securely into the slot.
If you pull tile range out from tile wall %r any reason, make sure tile device is properly
engaged when you push the rang_ back against the wall. If it is not, there is a possible iisk of
tile rang_ tipping oxer and causing i,_jmT if you or a child stand, sit or lean on an open door
Please refer m the Anti-Tip device infollnation in this manual. Failure m take this precaution
could Iesult ill tipping of the rang_ and i,)jm>
IMPORTANTSAFETYNOtiCE
The California Safe Drinking Water and Toxic Enforcement Act requires the Governor of California to
publish a list of substances known to the state to cause cancer, birth defects or other reproductive
harm, and requires businesses to warn customers of potential exposure to such substances.
The fiberglass insulation in self-clean ovens gives off a very small amount of carbon monoxide during
the cleaning cycle. Exposure can be minimized by venting with an open window or using a ventilation
fan or hood.
2
Page 3
ge.com
SAFETYPRECAUTIONS
When using electrical appliances, basic safety precautions should be followed, including the following:
ii_ii:ii_J_,,'_, _i!i_
• iiiiiii,!
_7_:Use this appliance only for its irrmnded
pm])ose as described in this Owner's
Manual.
_; Be sure your appliance is properly
irrstalled and grounded by a qualified
irrstaller ira accordance with the provided
irrstallation irrstructions.
_;;Have die irrsmller show you die location
of die circuit breaker or fllse. Mark it for
easy' reference,
_{:;Do trot attempt to repair or replace arty
part of your rang_ unless it is specifically
recommended in this manual. All other
servicing should be _efer_ed m a qualified
mchnician.
_t{:_Befbre perfot_ning any service, disconnect
tire range power supply at the household
distribution panel 1)yremoving the fllse or
switching off the circuit breaken
_{:_Do not lem> children alone--children
should not be left alone or unattended in
an area where an appliance is in use. They
should nex>r be allowed to sit or stand on
arty part of the appliance.
;_i:,:Do not allow anyone to climb, stand or
hang on fire door, storage drawer or
cooktop. They could damag_ the rang_
and e_en tip it o_>l; causing sin>re
personal ir_m-y.
A WARNING!
SAFETYPRECAUTIONS
Do not operate the oven or cooktop controls if the glass is broken. Food splatter or cleaning solution
may penetrate a broken control panel and create a risk of electrical shock. Contact a qualified
technician immediately should your glass control panel become broken.
;_?:':Do not store flammable materials in
an oven or near rite cooktop.
CAUTION: temsofinteFes to
children should not be stored in cabinets
abo_e a range or on the backsplash of a
range--<:hildren climbing on tire range
m _each imms could be seriously ii_med.
_i:,:Never wear loose-fitting or hanging
g_mnents while using the appliance.
Be carefifl when reaching for imms stored
ox>r the range. Flammable mamrial could
be ignimd if brought in corrmct with hot
surface units or heating elements arrd may
cause se\_re burns.
;f; Use only d_T pot holders--moist or damp
pot holders on hot surPaces m W result in
bums from steam. Do trot let pot holders
touch hot sur/_ace units or heating
elements. Do not use a towel or ofl_er
bulky cloth in place of pot holders.
;;; Do not use wamr on grease fires. Nexer
pick up a flaming pan. Turn fl_e conuols
off'. Smother a flaming pan on a surfi_ce
unit l)y cove_Jng tire part completely with
a well-fitting lid, cookie sheet or fiat tray
Use a multi-puli)ose d_T chemical or
fbam-type rite extinguisher
Flaming grease outside a pan can be put
out by covering it with baking soda or;
if available, by using a multi-puq)ose d_T
chemical or foam-type fire extinguishen
Flame in the oven can be smodrered
completely 1)yclosing tire oven door arrd
mining tire oven off or by using a muhi-
puq)ose d U chemical or foam-type fire
extinguisher
3
Page 4
IMPORTANTSAFETYINFORMATION.
READALLINSTRUCTIONSBEFOREUSING.
WARNING'!
SAFETYPRECAUTIONS
E:,IFor your safew, nexer use your appliance
for warming or heating the room.
E:,:Do not let cooking grease or other
flammable materials accumulate in or
near the range.
Do not touch tile surfi_ce units, the
heating elements or the inmrior surface
of the ox>n. These sur/_aces may be hot
enough to 1)111171even though they are
dark in color During and after use, do not
much, or let clofl/ing or other flammable
materials contact the snr/_ace units, areas
nearby tile sur/_ace units or any inmrior
area of rite oxen; allow sufficient time for
cooling first.
Potentially hot surfaces include the
cooktop, areas thcing the cooktop, oxen
xent opening, sniiCdces near the opening,
crevices around the oxen door.
REMEMBER:Tile inside sur/_ace of the oxen
ma'v be hot xdlen the door is opened.
Do not store or use combnsuble mamfials,
gasoline or other flammable vapors and
liquids in the vicinity of this or any other
appliance.
E:,IKee I) the hood and grease filters clean
to maintain g_od xenting and to moid
grease fires.
q_{_:Teach children not to play with tim
controls or any other part of the range.
E:,:Always kee I) dish towels, dishcloths, pot
holders and other linens a safe distance
fiom your range.
E:,IAlways kee I) wooden and plastic utensils
and canned food a safe distance from
your range.
_::Always kee I) combustible wall coxefings,
curtains or drapes a safe distance fiom
vonr range.
COOKMEATANDPOULTRYTHOROUGHLY...
Cookmeat andpoultry thoroughly--meat to at least anINTERNALtemperatureof 160°Fandpoultryto atleast
an INTERNALtemperatureof 180°ECookingto thesetemperaturesusuaflypretectsagainst foodboreeillness.
RADIANTSURFACEUNITS
Use proper pan size--select cookware having flat bottoms large enough to cover the surface unit
heating element. The use of undersized cookware will expose a portion of the surface unit to direct
contact and may result in ignition of clothing. Proper relationshJ _of cookware to surface unit will
also improve efficiency.
_{_Nexer leme the surface units unattended
at high heat settings, Boiloxers cause
smoking and greasy spilloxers that may
catch on fire.
_{:_Only certain wpes of glass, glassA:eramic,
earthenware or other glazed containers
are suitable for cooktop service; others
m W break because of the sudden chang_
in temperature.
_?{:_To minimize the possibility of bnlr71s,
ignition of flammable mamrials and
spillage, the handle of a container
should be turned toward the cenmr of
the rang_ without exmnding ox_r nearby
surface units.
q_{_Always turn the surface units off before
removing cookware.
E:,:When preparing flaming foods under
rite hood, mm the/_an on.
4
Page 5
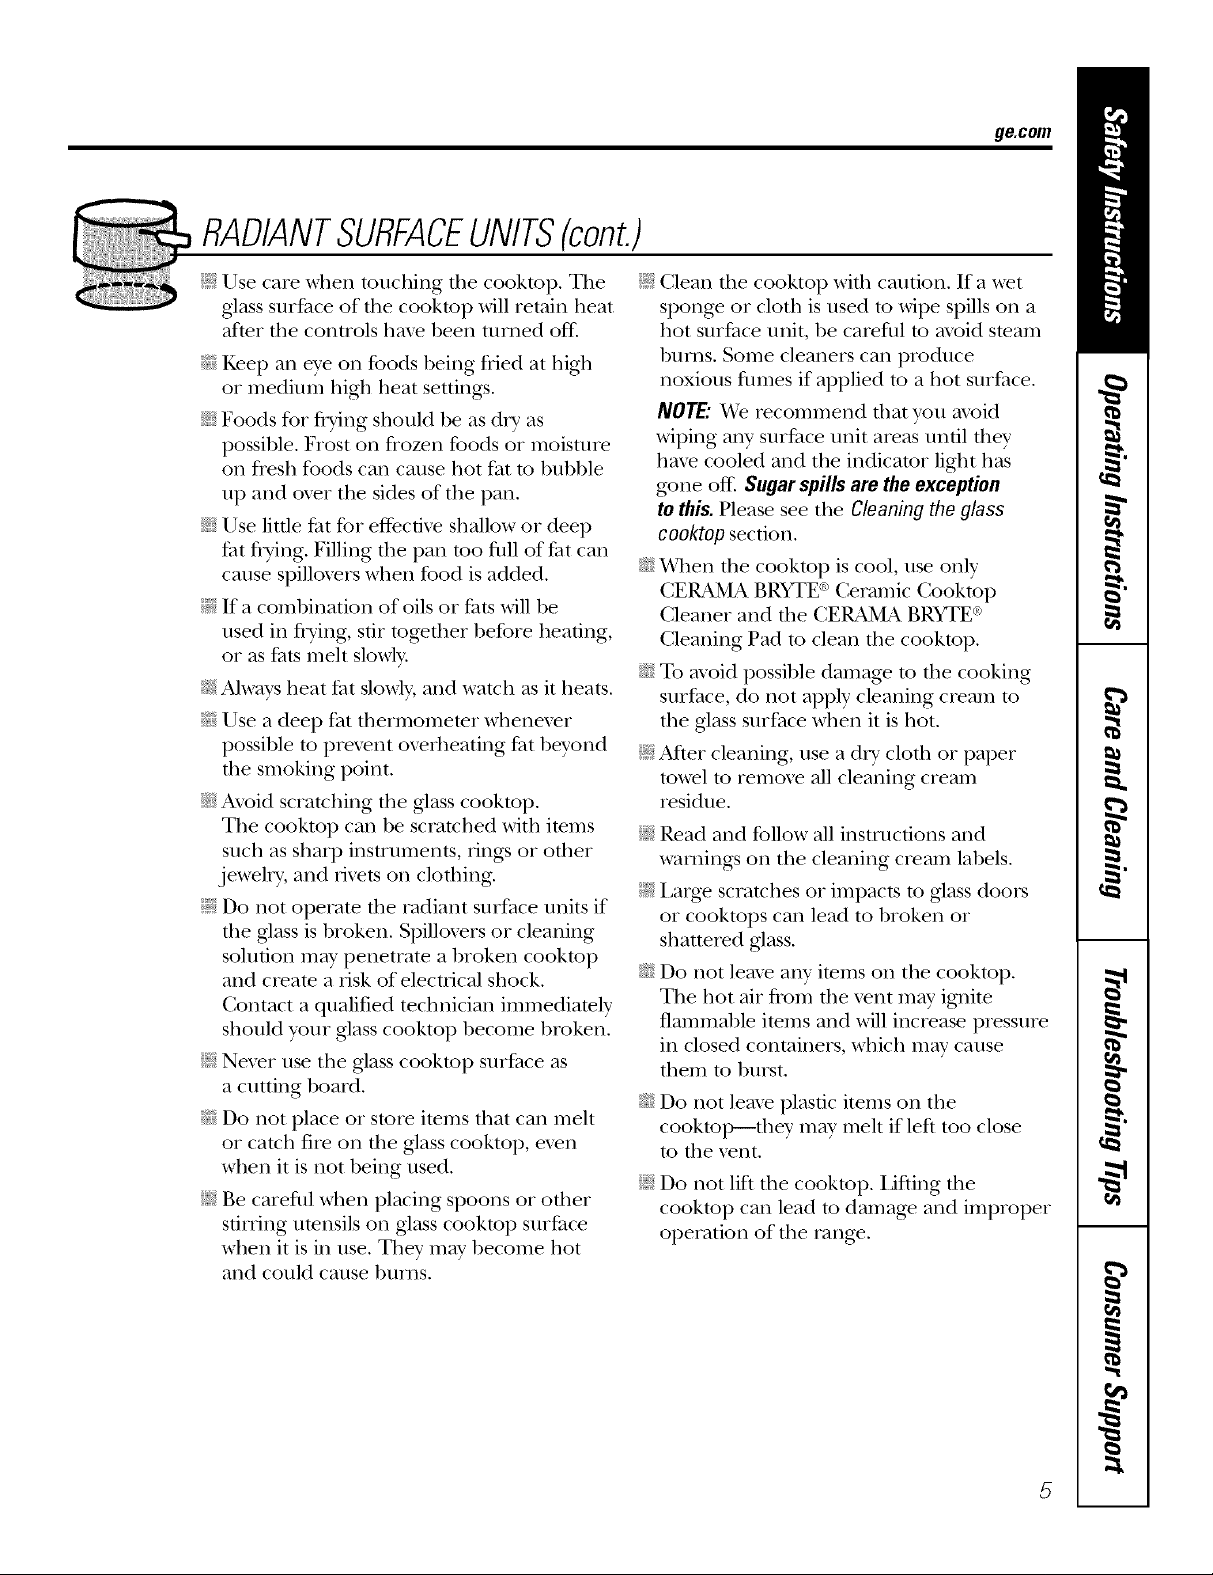
RADIANTSURFACEUNITS(cont.)
ge.com
E:,:Use care when touching die cooktop. The
glass sur/aace of tile cooktop will retain heat
after die conuols lime been turned off:
_?{:_Kee I) an eye on foods being flied at higil
or mediun/higtl heat settings.
_?{:_Foods for flTing should be as dr T as
possible. Frost on flozen foods or moisture
on fresh foods can cause hot fat to bubble
up arid ox>r the sides of the pan.
_?{:_Use little fi_t tbr effective shallow or deep
flit flTing. Filling the pan too flfll of/aat can
cause spilloxers when food is added.
E:,:If a combination of oils or Pats will be
used in flTing, stir together before heating,
or as Pats melt slowly.
_>Always heat flit slowly, arid watch as it heats.
_]{_:Use a deep fat thermometer whenever
possible to prex>nt ox>rheadng fiat beyond
the smoking point.
_]{_:Avoid scratching the glass cooktop.
The cooktop can be scratched with imms
such as sharp insuuments, tings or oilier
jewel U, arid fixets on cloflling.
E:,:Do not operate die radiant surface units if
the glass is broken. Spilloxers or cleaning
sohltion may penetrate a broken cookmp
and cleam a risk of electrical shock.
Contact a qualified technician immediately
should your glass cooktop become broken.
E:,INexer use the glass cookmp sur/aace as
a cutting board.
_]{_:Do riot place or smie imms that can melt
or catch fiie on die glass cooktop, ex>n
when it is riot being used.
E:,IBe careflfl when placing spoons or other
stirring utensils on glass cookmp surface
when it is in use. They may become hot
arid could cause bnrrls.
E:,IClean die cooktop widl caution. If a wet
sponge or cloth is used to wipe spills on a
hot surPace unit, be careflfl to mold steam
bunls. Some cleaners can produce
noxious flnnes if applied to a hot surfitce.
NOTE,"VCeiecomn)end that you ax_id
wiping aW surface unit areas until they
lime cooled and the indicator ligtlt has
g_ne off. Sugarspills are the exception
to this.Please see die Cleaning the glass
cooktop section.
_::When the cooktop is cool, use only
CERAMA BRYTE _>Ceramic Cooktop
Cleaner and die CERAMA BRYTE _°
Cleaning Pad m clean the cookmp.
_?_::To avoid possible damage m the cooking
snr/aace, do riot apply cleaning cieam m
die glass surface when it is hot.
E:,:After cleaning, use a dU cloth or paper
rowel m remove all cleaning cream
iesidue.
E:,:Read and %llow all instructions arid
warnings on the cleaning cream labels.
E:,:Large scratches or impacts to glass doors
or cooktops can lead to 1)roken or
shatteied glass.
_::Do riot leave any items on the cooktop.
The hot air flom die xent m W ignim
flammable items arid will increase pressure
in closed containers, which m W cause
diem to burst.
_: Do riot leave plastic items on the
cooktop--fl/ey may melt if left too close
to the x>nt.
E:,IDo not lift the cooktop. Lifting the
cooktop can lead to damag_ and improper
operation of the rang_.
g
Page 6
IMPORTANTSAFETYINFORMATION.
READALLINSTRUCTIONSBEFOREUSING.
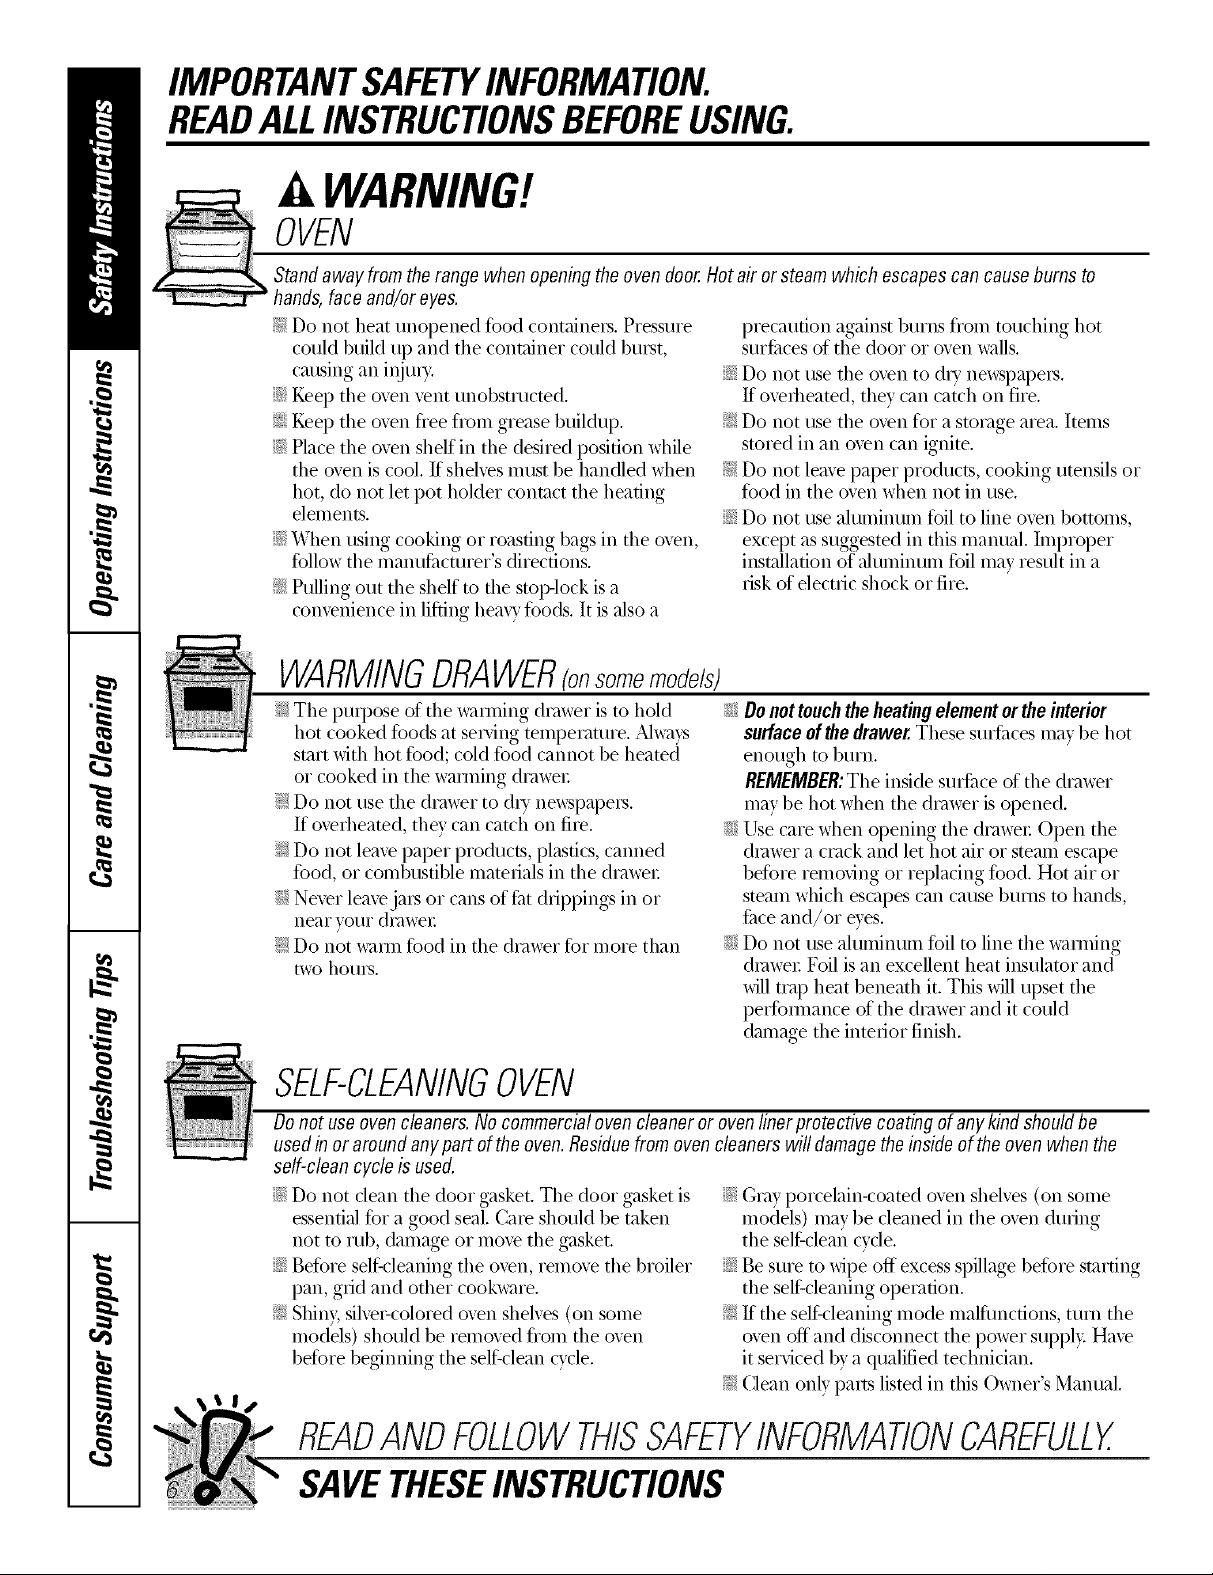
WARNING!
OVEN
Standaway fromtherangewhenopeningthe oven door.Hotair orsteamwhich escapescancauseburnsto
hands,face and/oreyes,
_: Do not heat unopened food containers. Piessuie
could build up and tile container could buist,
causing an inju,>
i_ KeeI) the oven vent unobstructed.
}_::,Keep the oven flee floln grease buildup.
iJii:iPlace the oven shelf in the desired position while
the oven is cool. If shelxes Inust be handled when
hot, do not let pot holder contact tile heating
eleinents.
iJii:iWhen using cookhlg or roasting bags in the oven,
follow the n/anufiacturer's directions.
_: Pulling out the shelf to the stop-lock is a
convenience in lifting heaw fbods. It is also a
precaution against burns flon/touching hot
suifiaces of the door or oven walls.
iJii:iDo not use tile oven to diy newspapeis.
If overheated, they can catch oil fire.
f_:Do not use tile oven fbI a stoIage area. Items
stored in an oven can ignite.
f_:Do not leave paper products, cookhlg utensils or
food in tile oven when not in use.
iF:iDo not use alunlinuin foil to line oven bottoIns,
except as suggested in this inanual. Iinproper
installation of ahmlinuin foil inay resuh in a
iisk of electric shock or fire.
WARMINGDRAWERronsomemode/s)
_: Tile puIpose of tile wai_ning diawer is to hold
hot cooked fbods at sei_'ing teinpei'amre. _Mways
start with hot fbod; cold fbod cannot be heated
or cooked in tile wai_ning d,awer
_: Do not use tile diawer to diT newspapeis.
If overheated, they can catch oil fiIe.
_: Do not leaxe paper products, plastics, canned
fbod, or colnbustible materials in the diawei:
iJii:iNever leavejais or cans of fiatdIippings in or
Ileal" VOUI"dI_]weI-
_: Do not waI)n fbod in the dim_'er foI n/ore than
twohouI&
iJ_i_iDonottouchtheheatingelementorthe interior
surfaceofthedrawer.Thesesurfiacesmaybe hot
enough to burn.
REMEMBER:Tile inside suIfiace of tile di'awer
n/ay be hot when the diawer is opened.
iJii:iUse care when opening tile di'awei: Open tile
diawer a ci;ack and let hot air or steam escape
befbie reinoxing or replacing fbod. Hot air or
steain which escapes can cause bums to hands,
fi_ceand/or eyes.
iJii:iDo not use alunlinuin foil to line the wailning
diawer. Foil is an excellent heat insulator and
will map heat beneath it. This will upset the
perfbimance of the diawer and it could
damage the inteiior finish.
SELF-CLEANINGOVEN
Donot useovencleaners.No commercialovencleaneror ovenlinerprotectivecoatingof anykindshouldbe
usedin oraroundanypart ofthe oven.Residuefromovencleanerswill damagetheinsideof theoven when the
self-cleancycle isused,
iJii:iDo not clean tile door gasket. Tile door gasket is
essential foia good seal. Care should be taken
not to rub, damage or inove tile gasket.
iF:iBefbre self cleaning tile oven, reinove the broiler
pan, grid and other cookware.
_: Shin> sih'e>colored oven shelves (oil some
Inodels) should be ren/oved floln the oven
befoie beginning the selfklean cycle.
iJii:iGi,'ayporcelain-coated oven shelves (oil solne
inodels) inay be cleaned in the oven duIing
the self clean cycle.
iJii:iBe sure to wipe off excess spillage before starting
the self cleaning opei;ation.
_: If the self,leaning inode malflmctions, tuiil the
oven off and disconnect tile power supply Have
it serviced by a qualified technician.
_: Clean only pairs listed in this Owner's Manual.
READANDFOLLOWTHISSAFETYINFORMATIONCAREFULLY.
SAVETHESEINSTRUCTIONS
Page 7
Usingthe surfaceunits, ge.oom
Throughout this manual, features and appearance may vary from your model.
How to Set
/ : 4 .
BesureyouturnthecontrolknobtoOFF
whenyoufinishcooking.
Push the knob in and turn in either direction
to the setting you _ant.
At both OFFand HI the control clicks into
position. _tm ma_ hear slight clickingsounds
during cooking, indicating the control is
keeping the power level you set.
A HOTCOOKTOPindicator light will glow
\dmn any radiant element is turned on, and
will remain on until the surfime is cooled to
approximately 150°E
Indicator light will:
_: comeonwhentheunitistumedoneTheLtothe
touch.
_a,stayonevenafter theunitisturnedoff
__glowuntiltheunitiscooledtoapproximately150°_
Dual Surface Unit Control Knob
Thedualsurfaceunithas2cookingsizestoselectfrom SMALL LARGE
soyoucanmatchthesizeof theunitto thesizeofthe BURNEROFF BURNER
cookwareyouareusing __"'_'_ @l ll
• t.r.t.e.,..ol
k.obt,, LaRGEBURNER
tO 2
BURNER
SiZE g"
MED
WARMER GUIDE
SETTING FOOD
(Low) Bread/Pastries
(Medium) Chocolate/Butter
(Medium) Sauces,Stews,
CreamSoups
(Medium) Vegetables
(High) Soups(liquid)
(High) TeaorCoffee
TheWarmerGuideisforreference
onlyandthe SETTINGthatyouneed
willdependonthe amountandtypeof
food,thestartingtemperatureofthe
foodandthe lengthofthe holdingtime.
#i-Ring Surface Element(onsomemodels)
Therearcentersurfaceelementoffers3cookingareas
tomatchthesizeof thecoo/dA/areyou
areusing.
To use. the largest, cooking, area, t)ush in and
turn the SELECTORknob to 12". Push and
turn the control knob to the desired setting.
To use the medium cooking area, press and
mrn the SELECTORknob to .) .
C tt
Using the Warming Zone
The WARMINGZONE,located in the back
center of the glass surfi_ce, _,_il]keep hot,
cooked food at ser\ino tern )emture. M_avs
start Mth hot too(t. Do not use to heat cold
food. Placing tmcooked or cold food on the
WARMINGZONEcould x>sult in toed-borne
illness.
Push and turn the conu'ol knob to any
desired setting.
For best results, all toods on the
WARMINGZONEshould be co_ex>d with a lid
or aluminum ti)il. _Al/en _mning pastries or
breads, the co_er should be \enmd to allo_
moistul_ to escape.
M_a_is use pot hol(lex_ or o_.en mitts \dmn
removing toed fi'om the WARMINGZONE,
since cook\_are and plates will be hot.
Push down and turn the control knob to the
desired setting.
To use file smallest cooking area, turn the
SELECTORknob to 6". Push and mrn the
control knob to the desired setting. This will
acti\ate only the smallest inside heating area.
CAUTION:DonotwarmfoodontheWARMINGZONE
formorethantwohours.
NOTE:Thesurface warmer will not glow red like the
cooking elements.
A HOTsurfbce indicator light will g[o'a \'allen
the glass surtime is hot and will remain on
tmtil the sm'tqce is cool enough to touch.
I,o_r settings mat not heat the glass surtbce
enoug]l to cause t}/e HOTsurti_ceindicator
light to come on.
A WARMINGZONEindicator light MII glow
when the unit is on.
_: Donotuseplasticwraptocoverfoo_Plasticmay
meltontothesurfaceandbe verydifficulttoclean.
__ Useonlycookwarerecommendedfortop-of-range
cooking.
Page 8
Usingthe surfaceunits.
Throughout this manual, features and appearance may vary from your model.
Temperature Limiter
E\'e_' radiant surfi_ce unit has a
temperature limited:
The temperature limiter protects the
glass cooktop fl'om getting too hot.
Home CanningTips
Be sure the canner is centered over the
sm_liace trait.
Make sure the c:mner is fiat on the
bo[[olIl,
To prevent burns fl'om steam or heat,
use caution when canning.
The temperatm'e limiter ma x cycle
the traits off fin" a time if:
!;> Thepanboils dry
iJi_;Thepan bottom isnot fiat
!i> Thepan Isoff-center
iJi::Therels nopan on the unit
Use redpes and procedm'es fl'om
reputable sources. These are available
fl'oln inanufi_cturels such as Ball: and
KerF: and the Department of Agrictdtm'e
Extension Service.
Flat-bottollled cannei's are
recommended. Use of water bath
canners with rippled bottoms may
extend the time required to bring
the water to a boil.
Use only flat-bottomed woks.
Wok Cooking
Werecommendthat youuse onlya flat-bottomed
wok. Theyareavailableat yourlocal retailstore.
Do not rise woks that have support tings.
Do not t/se i'ot/nd bottoil/wolds.
Y}m could be seriously burned if the
wok tipped oxeI:
8
Page 9
Thefollowing information will help you choose cookwara which will give good performance on glass cooktops.
About the radiant surface units...
_S URFACE_@
A_,COOKIN G _
The radiant co(_ktop features heating
..i sbe.eathas. ..th lass
NOTE:A s//_lhtodor/s normalwhen anew
cooktop/s used for thefirst t/)77e.It/s caused&
Never cook directly on the glass.
Always use cookware.
Always place rite pan in the center of
rite surface unit you are cooking on.
the heat/bgof new partsand /bsulat/bgmatenals
andwill disappear/b ashort t/ine.
NOTE:On modelswith I/_lht-coloredglass
cooktops,it/s normal forthe cook/bgzonesto
changecolorwhen hot orcool/bgdown. Th/2/s
temporaryand will fl/sappearasthe glasscools
to roomtemperature.
The sma,h(e refit will cycle on and off to
maintain w_m" selected control setting.
It is safe to place hot cookware on the
glass surfime e\vn when the cooktop
is cool
Even arier the sm'fime milts are tin'ned
off; the glass cooktop retains enough
heat to continue cooldng. To a\_)id
o\ ercooking, remedy pans fl'om the
sm_ime milts when the fl)od is cooked.
Avoid plating anything on the stnfime
unit tmtil it has cooled completel>
Do not slide cookware across the
cooktop because it can scratch the
glass--the glass is scratch-resistant,
not scratchproof.
;;Ji:_Waterstains (mineral deposits)areremovable
using thec/eanlbgcream orfurl-strengthwhite
vlbegal:
_ Useof window cleanermay leavean
iridescent film on thecooktop.Thecleaning
cream will remove this discoloration.
;;Ji::Don't storeheavyitems abovethe cooktop.
If they droponto thecooktop, theycan cause
damage.
_ Donot usethe surfaceas a cuttingboard.
_e.COII1
Selectingtypesof cookware.
Stainless Steel'.
recommended
Check pans for flat bottoms by
using a straight edge.
Pans with rounded, curved, ridged
or warped bottoms are not
recommended.
Aluminum:
heavyweight recommended
Good conductivity: _Muminum residues
sometimes appear as scratches (m the
cooktop, but can be removed if cleaned
immediatel> Because of its low melting
point, thin weight ahuninuln should not
be used.
CopperBottom:
recommended
(;opper may leave residues which can
appear as scratches. The residues can be
remoxed, as, lolw,_as the cooktop is
cleaned immediately. Howe\'e_; (1(7not let
these pots boil dry. Overheated metal can
bond to glass cooktops. An overheated
copper bottom pot will leave a residue
that will pemmnenfly stain the cooktop
if not removed immediately.
PorcelainEnamel-CoveredCastIron:
recommended
_&sl(mg as the (-o(>kware is covered
completely with porcelain enamel, this
cookware is recommended. Caution is
recoi/lillended for cast iron cookware
that is not completely covered with
smooth porcelain enamel, since it may
scratch the glass ceramic cooktop.
Glass-Ceramic:
usable,but not recommended
Poor pe_mmance. Ma)scratch the
StlIS{il ce,
Stoneware:
usable, but not recommended
Poor pex_bmmnce. Ma} scratch the
StlIS{il ce.
9
Page 10
Usingtheovencontrols.
Throughout this manual, features and appearance may varyfrom your model.
OVEN CONTROLS
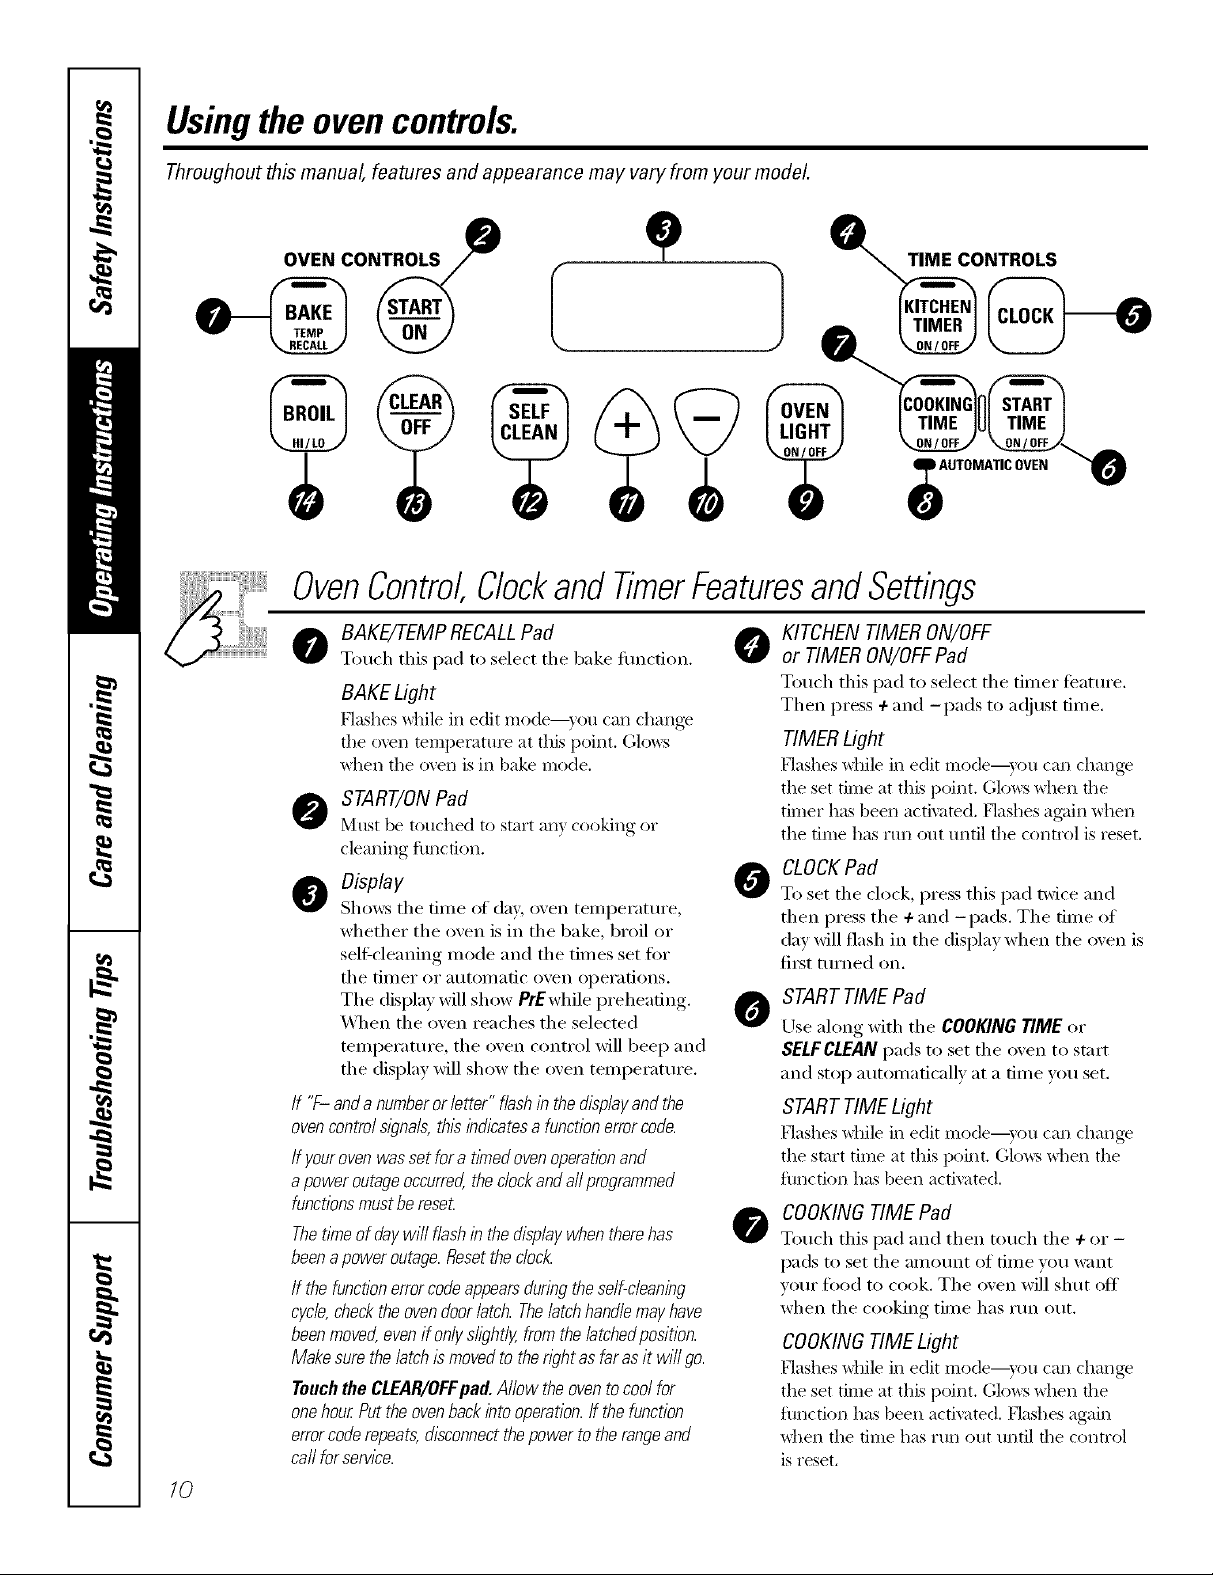
e
OvenControl,Clockand TimerFeaturesandSettings
o BAKE/7-EMPRECALLPad 0
Touch tiffs pad to select tile bake function.
BAKE Light
Hashes while in edit mode--)ou can changv
tile oven temperatm'e at this point. (;lo_:s
_hen the ()veil iNill bake mode.
O START/ON Pad
N]tlst be touched to start all} cooking or
cleaning function.
o Display
Sl/o_:s tile time of day, oven temperature,
whether the oven is in the bake, broil or
self:cleaning mode and tile times set fi:,r
tile timer or automatic oven operations.
The display will show PrEwhile preheating.
\4lien the oven reaches the selected
temperature, tile oven control will beep and
the display will show the oven temperature.
If "F- anda numberor letter" flash inthe displayand the
ovencontrolsl)na& this indicatesa function errorcode.
If youroven was set for a timed oven operationand
apower outageoccurred,the clockand aftprogrammed
functionsmust bereset
Thetime of daywill flash in the display when therehas
beena power outage.Resetthe c/oc/_
If the functionerrorcode appearsduringthe self-cleaning
cycle,checkthe ovendoor latch. Thelatch handlemay have
beenmoved,even if onlysh_?htly,from thelatchedposition.
Make surethe latchis movedto the wht as far as it will go.
Touchthe CLEAR/OFFpad. Allow the ovento cool for
onehour.Putthe ovenbackinto operation. If the function
errorcode repeats,disconnectthe power to the rangeand
carl for service.
/0
KITCHEN TIMER ON/OFF
or TIMER ON/OFFPad
Totl('b this pad to select tile tiIller teattli'e.
Then press 4-and -pads to a(!iust time.
TIMER Light
Flashes _dfile in edit mode--_ou can change
the set time at this point. (;lo_:s _dlen the
timer has been activated. Flashes ag_dn when
the time has run out until tile control is reset.
CLOCK Pad
0
To set tile clock, press this pad twice and
then press tile 4-and -pads. Tile time of
day will flash in tile display when tile oven is
fi_t turned on.
STARTTIME Pad
0
Use ahmg with tile COOKING TIME or
SELFCLEAN pads to set the oven to start
and stop automatically at a time wm set.
STARTTIME Light
Flashes _]lile iI1edit Illode--}'Otl (-}111 (-h}lllge
the start time at this point. (ilo_vs _hen the
flmction has been activated.
COOKINGTIME Pad
0
Touch tiffs pad and then touch tile 4-or -
pads to set tile an/ount of time you want
vour food to cook. Tile oven will shut oft
when the cooking time has run out.
COOKINGTIME Light
Flashes _]lile iI1edit IlJode--}'oH (-}111 (-h}lll_e
the set time at this point. Gkm:s _dlen the
fimction has been activated. Flashes again
_dlen the time has run out until the control
is reset.
Page 11
OvenControl,Clockand TimerFeaturesandSettings
ge.com
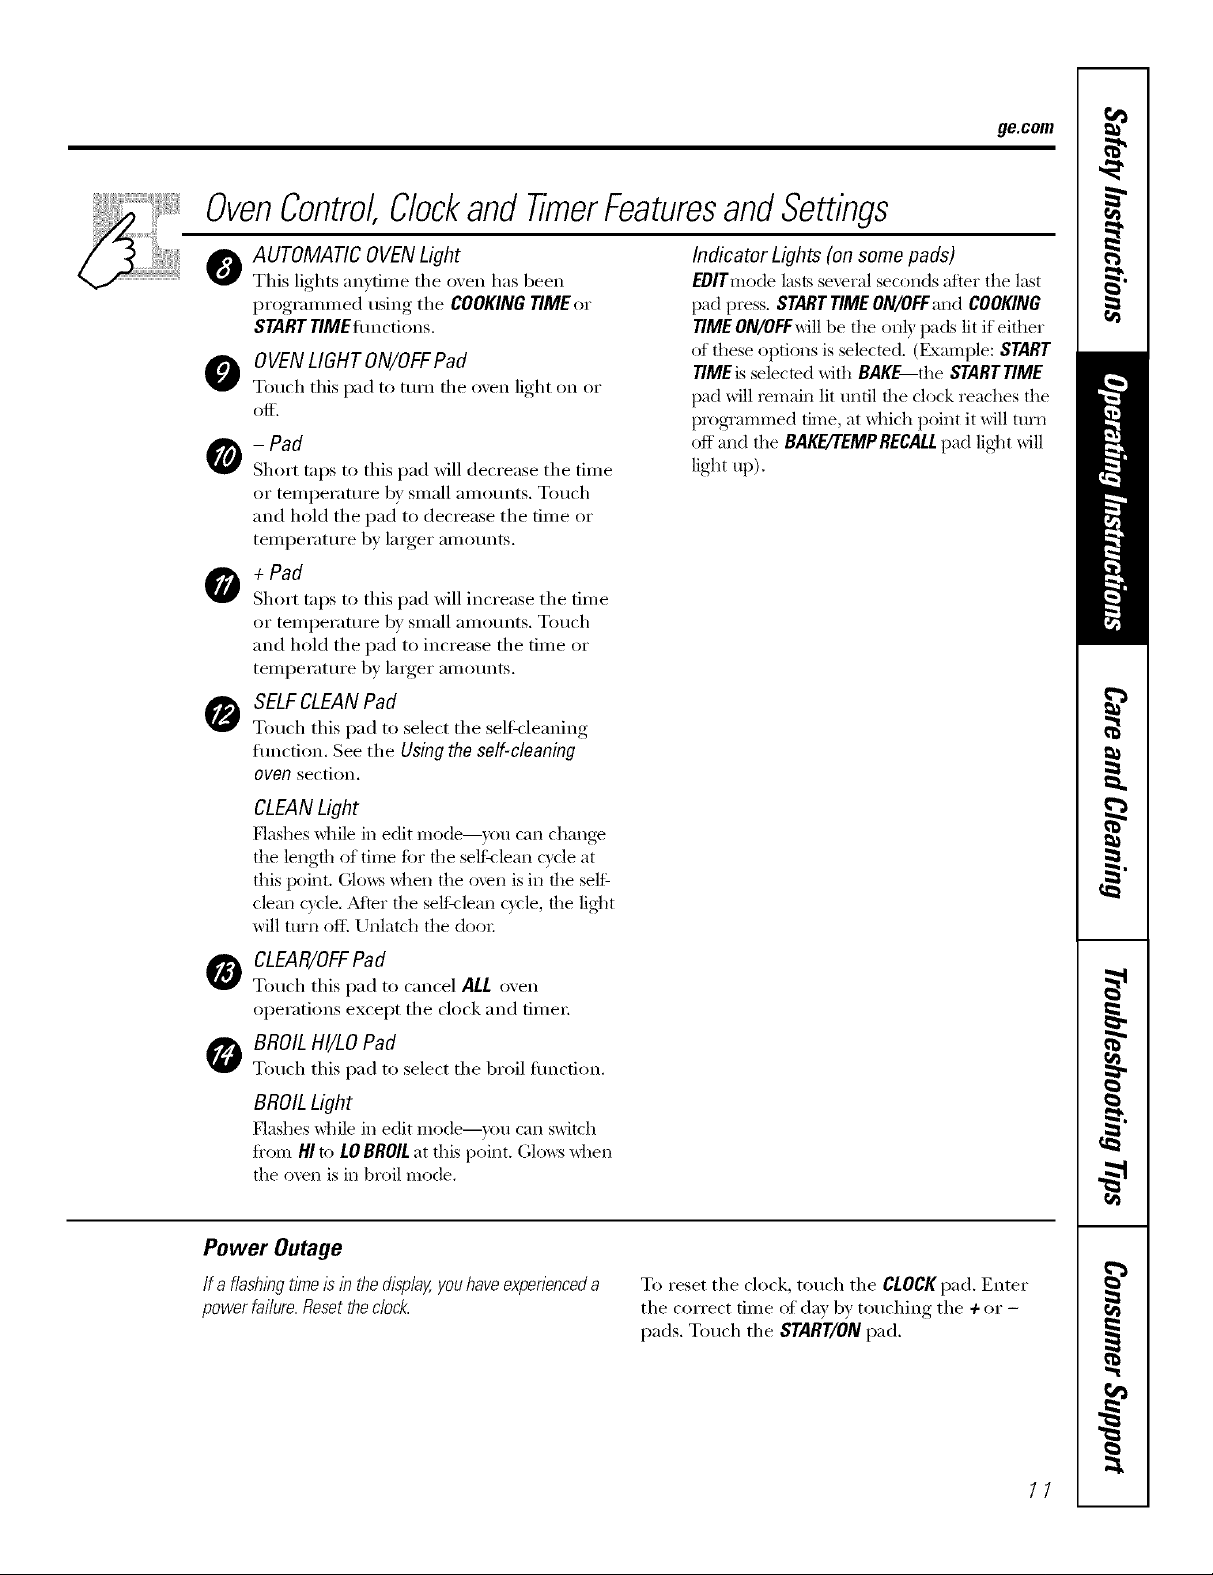
AUTOMATIC OVENLight
O
This lights anytime the oven has been
progrannned using the COOKING TIME or
STARTTIMEflmctions.
0 VEN LIGHTON/OFFPad
Touch this pad to turn the oxen light on or
Of[.
- Pad
Short taps to this pad will decrease the time
or temperature by small amotmts. Touch
and hold the pad to decrease the time or
tellll)ei'attli'e by larger aI//Otlnts.
+ Pad
Short taps to this pad will increase the time
or temperature by small amotmts. Touch
and hold the pad to increase the time or
temperatm'e by larger amounts.
SELFCLEANPad
Touch this pad to select the selfkleaning
flmction. See the Using the self-cleaning
oven section.
CLEANLight
[:lashes while in edit Illode--}rOtl C}lI1 chang_
the length of time fi)r the self <lean c}cle at
this point. (;lows when tile oven is in the self:
dean Qcle. Adier the selfh lean cycle, the lig]_t
will ttlrI1 oft_ Unlatch the dooI;
Indicator Lights (on some pads)
EOlTmode lasts several seconds after tile last
pad press. StaRT TIMEON/OFFand COOKING
TIMEON/OFFwill be the on b pads lit if either
of these options is selected. (Example: START
TIMEis selected with BAKE the STARTTIME
pad will remain lit until the clock reaches the
programmed time, at _hich point it will ttli'i1
off and the BAKE/'rEMPRECALLpad lig]_t will
light up).
CLEAR/OFFPad
O
Touch this pad to cancel ALL oven
operations except the clock and fime_;
BROILH!/LO Pad
Touch this pad to select the broil fimcfion.
BROILLight
[:lashes while in edit Illode--}rOtl C_lI1 switch
fi'om HI to LOBROILat this point. Glows _hen
the oven is in broil mode,
Power Outage
If a flashlbgtl?neIs lb the display,youhave experienceda
power fai/ure. Reset the dock.
To reset the clock, touch the CLOCKpad, Enter
the correct time of day by touching the + or -
pads. Touch the START/ONpad.
11
Page 12
Usingthe oven.
Toavoid possible bums, place the shelves in the desired position before you turn the oven on.
Before you begin...
CAUTION:Whenyouare,usingthesheffinthebwest
position(A),youwillneedtousecautionwhenpuffing
theshelfout.Werecommendthatyoupufftheshelf
outseveralinchesandthen,usingtwopotholders,puff
theshelfoutbyholdingthesidesof it.Theshelfislow
andyoucouldbeburnedifyouplaceyourhandinthe
middleoftheshe/fandpul/allthewayout.Bevery
carefulnottoburnyourhandonthedoorwhenusing
theshelfinthe/owestposition(,4).
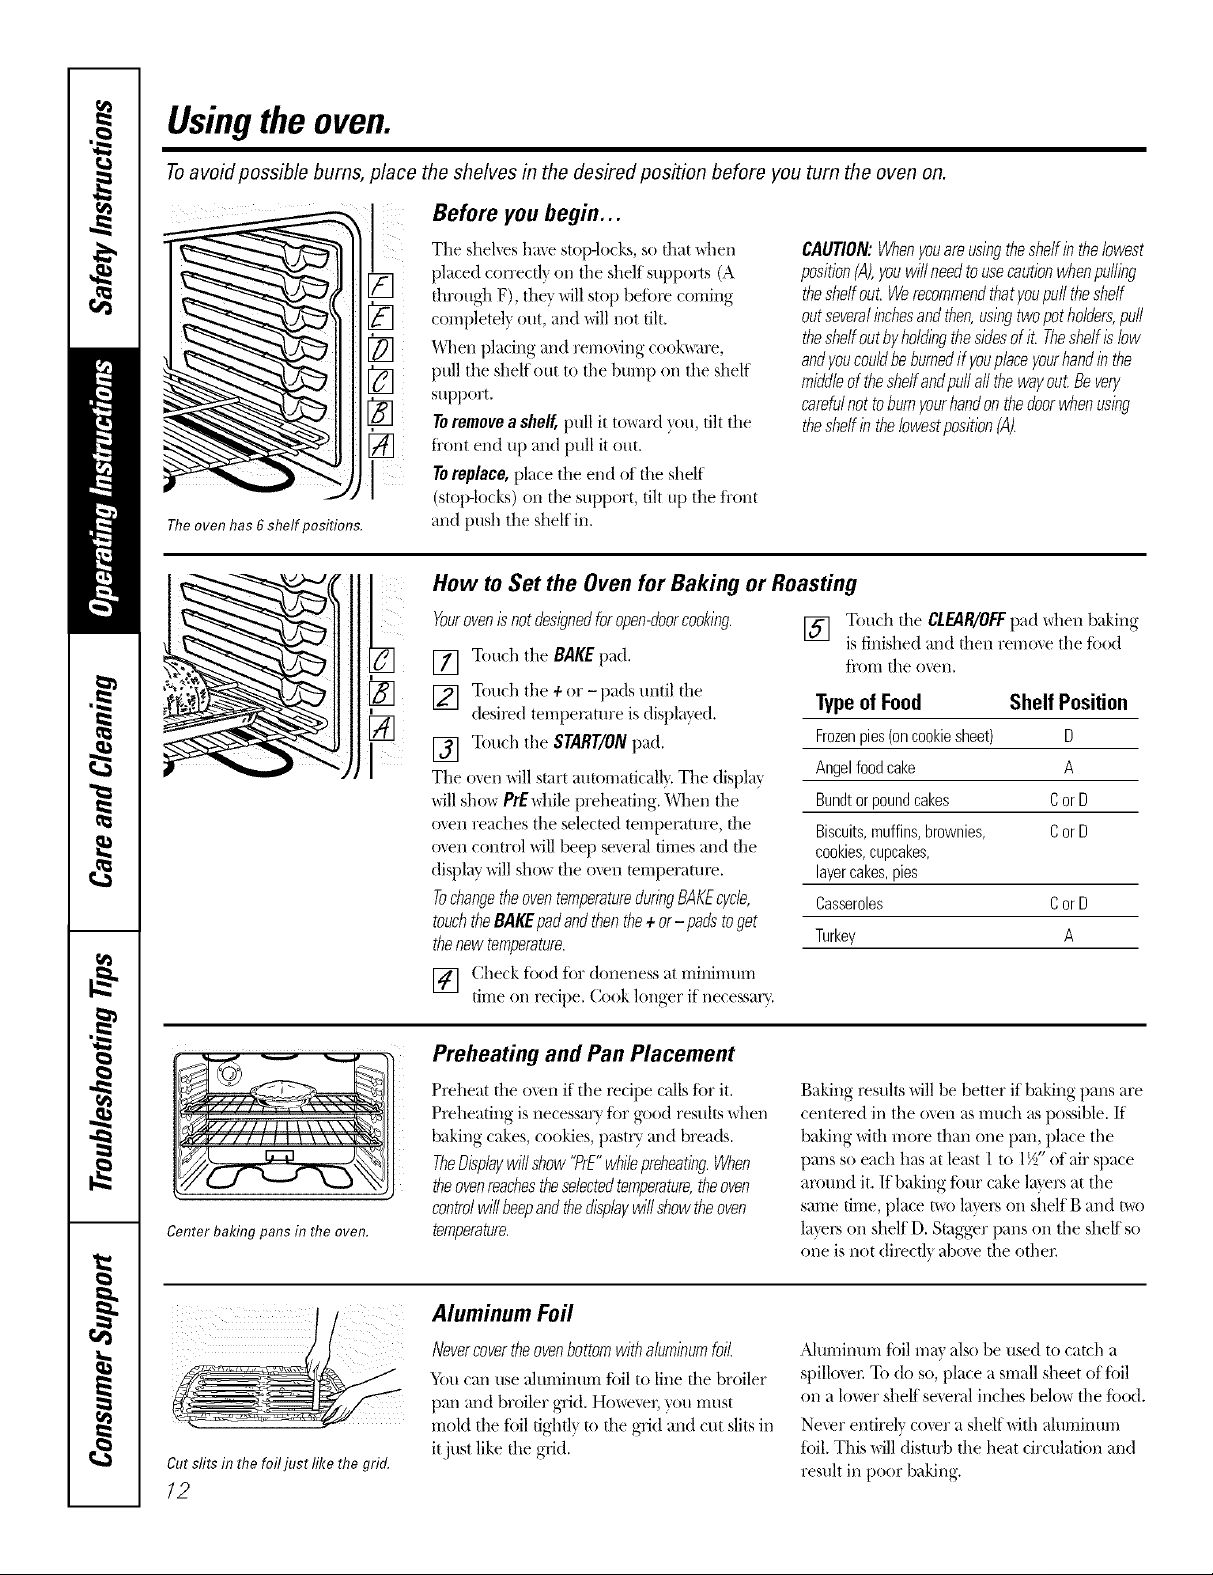
Theovenhas6shelfpositions.
The sheh'es hme stop-locks, so that \J/en
placed con'ecfly on tile shelf supports (A
fllrougb F), the} will stop befi)l_ corrdng
c()mpletely out, and will not tilt.
_,\]/en placing and removing cook_tre,
pull the shelf out to the bump on the shelf
support.
Toremovea shelf,pull it to_ard }_m, tilt the
fi'ont end up and pull it out.
Toreplace, place the end of the shelf
(stop-locks) on the support, tilt up tile fi'ont
and push the shelf in.
How to Set the Oven for Baking or Roasting
Center baking pans in the oven.
Yourovenisnotdesignedforopen-doorcooking.
[] Touch the BAKEpad.
[] Touch the 4-/11"- pads until the
desired temperature is displayed.
[] Touch the START/ONpad.
The o_.enwill start _mtomaticall}. The displa_
will sho_ PrE\Jdle preheating. When the
o_en reaches the selecmd temperature, the
o_en conu'ol will beep se_.eral tirnes and file
display will shcm the ()\'ell mmperamx>.
TochangetheoventemperatureduringBAKEcycle,
touchtheBAKEpadandthenthe+or-pads to get
thenewtemperature.
[] Check. fbod tot doneness at mininmrrl
m-he on recipe. Cook longer if necessar 5
Preheating and Pan Placement
Preheat the o\en if the recipe calls for it.
Preheating is necessa O for good results \Jlen
baking cakes, cookies, pastry and brea(g.
TheDisplaywillshow"PrE"whilepreheating.When
theovenreachestheselectedtemperature,theoven
controlwillbeepandthedisplaywiffshowtheoven
temperature.
[] Touch the CLEAR/OFFpad when baking
is finished and then remoxe the food
ti'l)lTI the ()veil,
Typeof Food Shelf Position
Frozenpies(oncookiesheet) D
Angelfoodcake A
Bundtor poundcakes CorD
Biscuits,muffins,brownies, CorD
cookies,cupcakes,
layercakes,pies
Casseroles CorD
Turkey A
Baking x>sults will be better if baking pans are
centex_d in tile oven as much as possible. If
baking with more than one pan, place the
pans so each has at least 1 to 1_" of air space
around it. If baking four cake lmer_ at the
sarne tirne, place me la}_m on shelf B and t\_o
lat_m on shelf D. Stagger pans on the shelf so
one isnot dix_ctlv abo_e the othex:
Cutslitsin thefailjust like thegrid.
12
Aluminum Foil
Nevercovertheovenbottomwithaluminumfoil.
Y, tl can use ahmlinum foil to line d_e broiler
pan and broiler grid. Ho_\e_; you must
rnold tile tbil tightly to the grid and tilt slits in
it just like the grid.
Ahmdnum foil max also be used to catch a
spillo_ex: To do so, place a small sheet of toil
on a lo_r shelf several inches belo_ the tbod.
Ne\er entirely co\er a shelf with alumimm_
tbil. This will disturb the heat circulation and
result in poor baking.
Page 13

Donot latch the oven door during broiling. The latch is used for self-cleaning only.
How to Set the Oven for Broiling
ge.com
Leave the door open to the broil
stop position. The door stays open
by itself, yet theproper temperature
is maflTtaflTedf17the oven.
The size, weight, thickness,
starting temperature
and your preference
of doneness will aHect
broiling times. This guide
is based on meats at
refligerator temperature.
(' The {LS. D*JmHme_d o/
Agricullm_, sa)s "/'m_,/we/L*
/_o/m/m; b*zt_o_zsko*t/d /,'_*o,l!tkat
_>ol,'i_g _!lo o_*{_I40<1,`m_'m_s
some Hod po_so_*k_ o_gzn*ism*
m_U s_l_'_ize. " (S_m*_': _e lbod
Bool,'. }'o*t_Kia lw_ (arid('. {:ST)._
l&_,..]*m* / 9N5.)
Theoven has 6 shelf positions.
[] Place the meat or fish on the broiler
grid in the broiler pan.
[] Follow suggested shelf positions in
the Broiling Guide.
If yourrangeisconnectedto208volts,rare
steaksmaybebroiledbypreheatingthebroiler
andposifionlngtheovenshelfoneposition
hl_?her
Use LOBroil to cook fi_ods such as
poult_ T or thick cuts of ineat thoroughly
xdthout oxePbrowning them.
Broiling Guide
Food
GroundBeef
Beef Steaks
Rarer
Medium
Well Done
Rarer
Medium
Well Done
Chicken
Bakery Product
Bread (toast)
English Muffin
LobsterTails
FishFillets
Salmon
Steaks
Fillets
HamSlices
(precooked)
Pork Chops
Well Done
_Seeillustrationfor descriptionofshelfpositions
orThickness
1lb. (4patties)
I/2 to a/a" thick
4 Ibs.(12patties)
3/4to 1"thick
1to 11/2 Ibs.
11/2"thick
2 to 21/2 Ibs.
1whole cut up
2to 21/zIbs.,
split lengthwise
Breast
2to 4 slices
2(split)
2_
1lb. {1/4 to I/2" thick)
2(1" thick)
2 (I/2 to 3/4"thick}
I/2" thick
1" thick
2(I/2" thick)
2(I" thick)about 1lb.
Quantityand/
Shelf*
Position
[] Touch the BROILHI/LOpad once fi_I"
HI Broil
To change,to LOBroil,touch the
BROILHI/LOpad again.
[] Touch the STARTpad.
[] X_q_enbroiling is finished, touch the
CLEAR/OFFpad.
F
E
E
D
D
E
C
C
E
F
E
E
D
D
D
D
First Side
Time(min,)
13
15
10
10
15
20
25
25
3-4
18_0
10
10
10
15
Second Side
Time(rain.)
8
6
8
3
6
8
4
6
8
8
10 12
20
25
15
1
Do not
turn
oveE
6
8
10
15
Comments
Spaceevenly.
Steakslessthans/4"
thick aredifficult
tocookrare.
Slashfat.
Brusheachside with
meltedbutter.
Broil skin-side-down
first.
Spaceevenly.Place
Englishmuffins cut-
side-upandbrush
with butter if desired.
Cutthroughback of
slleii. Spreadopen.
Brushwith melted
butter beforebroiling
andafter half of
broilingtime.
Handleandturnvery
carefully.Brushwitll
lemonbutterbefore
andduringcooking,
if desired.
Turncarefully.Do not
turn skinsidedown.
Slashfat.
13
Page 14

Usingthe clock and timer.
Not all features are on allmodels.
ToSet the Clock
Make sure the clock is set to flTe
correct time of da_¢
The clock must be set to the correct time
of da)fin" the automatic oven tinting
tractions to work properly. The time of
day cannot be changed during a delayed
cooking or a delayed self=cleaning c)cle.
[] Touch the CLOCKpad twice,
[] Touch the + or - pads.
If the + or - pads are not touched within
one minute after _,ou touch the CLOCK
pad, the displa) re_erts to the original
ToTurn Off the Clock Display
It you have several clocks in your kitchen,
vou may wish to turn off tile tilne of day
clock display on your range.
[] Touch tile CLOCKpad ()lace to turn
off the time of day display. _Mthough
you will not be able to see it, the
To Set the Timer
setting. If this happens, touch tile CLOCK
pad twice and reenter the time of day.
[] Touch the START/ON pad until the
time of day shm_s in tile display:
This entei_ tile time and starts tile
clock.
Tocheckthetimeof daywhenthedisplayis
showl)_gotherinformation,simplytouchthe
CLOCKpad Thetimeofdayshowsuntilanother
padis touched
clock maintains tile correct tiIne
of dav.
Touch the CLOCKpad twice to recall
[]
the clock display.
@i
Thetimer is a minute timer only.
TheCIEAB/OFFpad does not affect
the time_
ThetlYnerdoes not controlovenoperations.
ThemaxlYnumsemng on the timer is9 hours
and59 minutes.
Touch tile KITCHEN TIMER ON/OFF
[]
pad.
Touch tile 4-or-pads until tile
[]
_lIl/O/lIlt of til/le _o/1 want shows in
tile display. Tile maximum time that
can be entered in minums is 59.
Times more than 59 minutes should
be changed to hom_ and minutes.
To Reset the Timer
If tile display is still showing tile time
remaining, you may change it by
touching tile KITCHEN TIMER ON/OFFpad,
then touching tile + or-pads until tile
time um want appeai_ in tile display.
To Cancel the Timer
If youmakea mistake,touch theKITCHEN
TIMER ON/OFFpad andbegin again.
[] Touch the START/ONpad. The time
will stnrt /otlnting down, althotlgh
the display does not change until
one minute has passed.
[] X._qmn the timer reaches :00, the
control will beep 3 times followed by
one beep every 6 seconds until tile
KITCHEN TIMER ON/OFFpad is
touched.
If tile remaining time is not in tile display
(dock, start time or cooking time are in
the display), recall the remaining time by
touching tile KITCHEN TIMER ON/OFFpad
and then touching tile ÷ or -pads to
enter tile new tillle VOll w}lnt,
14
Touch the KITCHEN TIMER ON/OFF
pad twice.
Page 15

Usingthetimedbakingandmastingfeatures.(onsomemodels) ge.com
Donot lock the oven door with the latch during timed cooking. Thelatch is used for self-cleaning only.
NOTE: Foods that spoil easily--such as milk, eggs, fish, stuffings, poultry and pork--should not be allowed to s# for
more than 1hour before or after cooking. Roomtemperature promotes the growth of harmful bacteria. Be sure that
the oven light is off because heat from the bulb will speed harmful bacteria growth.
How to Set an Immediate Start and Automatic Stop
Theoven wi// turn on immediatelyand cookfora [] Touch tile START/ON pad.
selectedlength of tl_ne.At theend of thecooking
time,the oven wi// turn off automatically The displa) shows either the oven
[] Touch the BAKEpad.
] Touch the ÷ or -pads to set the
o_,en teI//pei'at/li'e.
[] Touch tile COOKING TIME pad.
NOTE"If your reciperequirespreheating, you may
need to add additional time to the length of the
cookingtime.
] Touch the + or _ l)ads to set the
baking time.
Tile cooking time that you entered
will be displayed. (If you select Cooking
Time fiI_t and then a(!just the Bake
Telnperature, tile ox,en telnl)erature
will be displayed instead).
temperature that you set or tile cooking
6me countdown. (Tile display starts with
PrEif showing tile oven temperature.)
The oven will continue to cook tor the
progranm/ed }lIllO/lnt of tiIl/e, then ttII'n
off autonmticallv.
[] Touch tile CLEAR/OFFpad to clear
tile displa) if' necessary.
Removethe food fromthe oven.Remember,even
thoughthe ovenshuts off automatically, foods
continuecookingafter controlsare off
@
@
@
How to Set a Delayed Start and Automatic Stop
Theoven will turn onat the time of dayyouset,
cookfor a specificlength of time and then turn off
automatically
Make stII'e tile clock shows tile ('ori'e('t
time oI day,
[] Touch tile BAKEpad.
] Touch tile 4-or -pads to set tile
oven teI//peI'att II'e.
[] Touch tile COOKING TIME pad.
] Touch tile 4-or -pads to set tile
desired length of cooking 6me.
[] Touch the START TIMEI_ad.
] Touch the 4.or _ i)ads to set the tinm
(If (lav _o//W}lllt tile o_,en to ttlI'n (Ill
and staIl cooking.
[] Touch the STaRT/ONpad.
NOTE"An attention tone will soundif you are
using flYnedbaking and donot touchthe
START/ON pad
NOTE"If you w_mld like to check tile 6rues
you have set, touch the START TIME pad to
check tile start 6me you have set or touch
the COOKING TIME pad to check the length
(ff cooking 6me you have set.
_,_]/en tile oven turns on at tile time of day
you have set, tile display will show PrE until
it reaches tile selected temi)erature, then
it will display the oven temi)erature.
At the end of cooking 6me, the ()veil
will ttlrn off and tile end-ol_cvcle tone
will sound.
[] Touch the CtEAR/0FF pad to clear
tile displa) if necessar).
Removethe food from theoven.Remember,even
thoughthe ovenshuts off automatlcally, foods
continuecookingafter controlsare off
15
Page 16

Special featuresof yourovencontrol.
Yournew touch pad control has additional features that you may choose to use. The following are the features and
how you may activate them.
The special feature modes can only be activated while the display is showing the time of day. They remain in the
control's memory until the steps are repeated.
When the display shows your choice, touch the START/ONpad. Thespecial features will remain in memory after
a power failure.
NOTE"The Sabbath feature and the Thermostat Adjustment feature are also Special Features, but they are
addressed separately in the following sections.
12 Hour Shut-Off
With this feature,should you forgetand leave the
ovenon, thecontrol will automatically turn off the
ovenafter 12hoursduring baklbg functionsor
after 3 hours duringa broi/ function.
]f you wish to mrn OFF this feature, tbllow
the steps below.
[] Touch the BAKE and BROILHI/LO
pads at the same time until the
display sho_:s SE
[] Touch the CLOCK pad. The displa)
will show ON ( 12 hour shut-off).
Touch the CLOCKpad repeatedly
tmtil the display shows OFF (no
sh ut-off).
[] Touch the START/ON pad to actixate
the no slmt-offand leaxe the control
set in this special features mode.
16
Page 17

Usingthe SabbathFeature.
(Designed for use on the Jewish Sabbath and Hofidays) (onsome models)
The Sabbath feature can be used for baking/roasting only. It cannot be used for broiling, self-cleaning or
Delay Start cooking.
NOTE: Onmodels with a light switch on the control panel, the oven light may be turned on and left on.
How to Set Sabbath Feature for Regular Baking/Roasting
i/¸ ?
TEMP
When the display shows D the
oven is set f17Sabbath. When the
display shows D C the oven is
baking/roasting.
NOTE: Tounderstandhow the oven control works,
practice usingregular baking(non-Sabbatb)before
entering Sabbathmode.
Make sure the clockshows thecorrect time of day
and theoven is off
] "['ou(h and hokt both th_ BAKE and
BROIL HI/LO pads, at the same time,
until the display shows SF
] "[hp the CLOCKpad mldl SAb appears
in the displa}'.
] Tou(h tlle START/ON pad and D +Vd]]
appear in the display.
] "['oudl the BAKE pad. No signal will
be#,ixen.
] The preset startillg tel//pentttlre vdll
atltomaticall'_ be set to 350. ° Tap the +
or -pads to in(Tease or decrease the
tempenmn:e in 25 ° in(t'ements. The
temperature call be set between 175 °
and 550/No signal or temperature
,,*,rillbe given.
[_] Touch the START/ON pad.
[_ Aft_ r a nmdon/delay period ot
approximately 30 se( onds to 1 min/ne,
D C ,,*,'illappear ill the displ m indicating
that tile oven is baking/ro_',ting. [ID C
doesn't appear ill the display, start ag_dn
at Step 4.
To a(!iust tile oxen tempemulre, touch tile
BAKEpad and tall the + or -pads to increase
or decrease the tenlperature in 25 °
incren/ents. Touch the START/ONpad.
NOTE: The CLEAR/OFFand COOKING TIME pads
are active dm:ing the SaN)ath l_'ature.
ge.com
@
@
When the display shows D the
oven is set f17Sabbath. When the
display shows D C the oven is
baking/roasting.
How to Set Sabbath Feature for Timed Baking/Roasting--Immediate Start and
Automatic Stop
NOTE: Tounderstandhow theoven control works,
practice usingregular (non-Sabbatb)Immediate Start
andAutomatic Stopbefore entering the Sabbathmode,
Make sure the c/ocksbows the correct time of day
and theoven is off.
] "lbttdl and hoM both the BAKE and
BROIL HI/LO pads, at the same time,
tmtil the dispk W shows SF.
] Tap the CLOCKpad tmtil SAb appears
in the (tisplaT_
] Touch tlle START/ON pad and D will
appear in the display.
] +lbu(h the COOKING TIME pad.
] +lbu(h tlle+ or -pads to set the desired
length of (ooking time |)(!twe(!ll 1
mintne and 9 hours and 59 minutes.
The cooking time that you entered ,,*,'ill
l>e displayed.
16] "lbuch the START/ON pad.
] +lbu(h the BAKEpad. No siT,mat will
l>e_,,iven.
] The preset starting tenq)erattu:e will
automati(all'v be set to a'5()+° "[hp tilt +
or - pads to il/ClT('_lS(' or (|('crt'as(' the
temperature in 25 ° increments. The
temperature (an be set betv, een 17Ji '
and 550. ° No sizllal or temperatm:e
,,*,rillbe _,J*,_'n+
] Toudl the START/ON pad.
_ Atier a nmdon/delay period of
apt/1 oximately 30 se( onds to 1 minute,
D C ,,*,'illappear in tile (listlla} indicating
that the oven is baking/roa+',dng. If D C
doesn't appear in the display, start ag_dn
at Step 7.
To a(!iust tile ()\ell temperature, touch tile
BAKEpad and tat) tile + or -pads to increase
or decrease tile ten_,perature in 25°
in(ren/ents. "['ou(h the START/ON pad.
When (()()king is finished, the display ,,*,'ill
dlange/i'om D C to D indi(ating that tile
o*,vn has turned OFFtmt is still set in Sabbath.
Remove tile cooked tbod.
17
Page 18

Usingthe SabbathFeature.
(Designed for use on the Jewish Sabbath and Holidays) (on some models)
How to Ex# the Sabbath Feature
"]'ou(h the CLEAR/OFFpad.
[]
It the oxen is ( poking, wail for 9.random
[]
delay period of appl oximate b 30
se(onds to 1 minuw, tmdl onlx D is in
die display.
"Ibud_ and hold both dm BAKE and
[]
BROIL HI/LO pads, at the same time,
undl the displa} shows SE
] "[:ap the CLOCK pad until ONor OFF
appears ill the display. ON indk ates that
tile oven will automaticalh ttllTn off a/ier
12 hours. OFFindicates that the oven
will not amomaticalN ttlrll O//i See
tile Special Features section R)r an
ext_lanation of the 12 Hour Shut-Off
/carafe.
] "['oudl the START/ON pad.
NOTE: If a power outage occurredwhile the oven was
in Sabbath, the oven will automatically turn off and stay
off even when the power returns, Theoven coetro/
must bereset.
Adjustthe oventhermostat Do # yourself!
Youmay find that your new oven cooks differently than the one it replaced. Use your new oven for a few
weeks to become more familiar with it. If you still think your new oven is too hot or too cold, you can adjust
the thermostat yourself.
Donot use thermometers, such as those found in grocery stores, to check the temperature setting of your oven.
These thermometers may vary 20-40 degrees.
NOTE: This adjustment will not affect the broiling or the self-cleaning temperatures. The adjustment will be
retained in memory after a power failure.
To Adjust the Thermostat
! ii ii
[] Touch the BAKEand BROILHI/LO
pads at the same time tmtil the
displa) shows SE
[] Touch the BAKEpad. A two-digit
number shows in the displa}.
[] The oxen temperature can be
ac!justed up to (+) , : F hotter or (-)
35°F coolen Touch the ÷ pad to
increase the temperature in 1-deoTee
inci'eillents.
Touch the -pad to decrease the
temperature in 1-degree increments.
35 o_
[] X._hen }ou haxe made the
a(!iustment, touch the START/ONpad
tl_ go back to th e tim e of day display.
Use "_o1/i" oxen ;:Is "_Oll would
n o iill;:lllxA
NOTE:Thisadjustment will not affect thebroiling
or self-cleaningtemperatures.It wff/ be retained
in memoryafter apower failure.
Thetypeofmargarine will affect bakingperformance!
Most recipes for baking have been developed using high-fat products such as butter or margarine (80% fat). ff you
decrease the fat, the recipe may not give the same results as with ahigher-fat product.
Recipe failure can result if cakes, pies, pastries, cookies or candies are made with low-fat spreads. The lower the fat
content of a spread product, the more noticeable these differences become.
Federal standards require products labeled "i//;:lrg;:li'ine" to cont;:lin at least 80% tilt by weight. I,o\_tilt spreads,
on the other hand, contain less elt and more wamr. The high moisture content of these spreads afli_cts the
texture and flavor of baked goods. For best results with w_ur old tm.o_ite recipes, use margarine, butter or
stick spreads containing at least 70% vegetable oil.
18
Page 19

Usingthe warming drawer. (onsomemodels) gecom
The warming drawer will keep hot, cooked foods at serving temperature. Always start with hot food. Do not
use to heat cold food other than crisping crackers, chips or dry cereal.
To Use the Warming Drawer
Push and turn the control knob to am'
desired setting,
When Using the Warming Drawer
The wamfing drawer will keep hot, cooked
fl_ocls wamL Mways start with hot fi_od. Do
not rise to heat cold food other than
crisping crackers, chips or (ha' cereal.
Donot line the warming drawer or pan
with aluminum foil. Foil is an excellent heat
insulator and will trap heat beneath it. This
will upset theperformance of the drawer
and could damage the interior finish.
Allow approximately 25 minutes for the
warming drawer to preheat.
::Ji::Do not put liquid or water in the
wamfing (h'awe_:
N M1 foods placed in the wamfing
drawer should be covered with a lid or
aluminum foil. When wamfing pastries
or breads, the cover should be vented to
allow inoisture to escape.
_: Food should be kept hot in its cooking
container or tmnsterred to a heat-sate
serving dish.
CAUTION:P/astl?containersorp/ast/?wrap wi//
melt if in &ect contact with the drawer,pan or ahot
utensil.Me/ted p/astlc maynot beremovableand/s
not covered underyourwarranty
_: Remove serving spoons, etc., before
placing containers in wamfing drawe_:
19
Page 20

Usingthe warming drawer. (on some models)
Temperature Selection Chart
To keep several different foo(ls hot,
set tile control to tile tood needing tile
highest setting.
_: Tile temperature, _'pe and amount of
fi)od, and tile time held will affect tile
quali_' oI tile tood.
_: Repeated opening oI tile drawer allows
tile hot air to escape and tile fi)od to
cool,
::Ji::_4]tl/ large loads it may be necessax_' to
use a higher wamfing drawer setting
and cover SOille of tile cooked food
items.
::Ji::Do not use plastic contninet_ or
plastic wrap.
CAUTION: Donot keep food in the warming
drawer formore than twohours.
ToCrisp Stale Items
::Ji::Place food in hm_si(led dishes or pans.
i':'::Preheat on LOsetting.
::Ji::Check crispness after 45 minutes. Add
time as needed.
FoodType ControlSetting
Bacon HI
Breads LO
Casserole MED
Chicken,fried HI
Ham HI
Muffins LO
Pies LO
Pizza HI
Potatoes,baked HI
Tortilla Chips LO
20
ToWarm Serving Bowls and Plates
To waIm serving bowls and plates, set tile
control on LO.
::J?::Use only heat-safe dishes.
::Ji::If w)u want to heat fine china, please
check with tile inanufilcturer (ff tile
dishes fin" their maximmn heat
tolerance,
_: You may warm empV se_'ing dishes
while preheating tile drawe_:
CAUTION:Disheswill behot Usepotholdersor
mittswhenremownghotdishes.
Page 21

Usingtheself-cleaning oven. gecom
Before a Clean Cycle
Wipe up heavy soil on flTeoven
bottom.
@
_'e reconnnend venting y()ur
kitchen with an open window or
using a ventilation tim or hood during
the fiIst self clean cycle.
Rexnoxe the broiler pail, broiler grid,
all cookware and any aluminum fi)il
_l"OIIl the o'_en.
NOTE:
::Ji::If your oven is equipped with shiny,
silve>colored oven shelves, remove
theln 1)eti)i'e you begin the self=clean
cycle.
::Ji::If wmr oven is equipped with gray
porcelain-coated oven sheh'es, they
Inay be lett ill the oven during the
sel6clean cycle.
The shin}; silve>colored oven shelves
(on some models) can be sell:cleaned,
but they will darken, lose their hlster and
become hard to slide.
How to Set the Oven for Cleaning
Follow tile directions ill the Before a
Clean Cycle section.
[] I_tch the dooi:
NOTE"Never torce the latch. If the oven is
too hot, you will not be able to slide the
latch. Mlow the oven to cool.
[] Touch the SELFCLEAN pad.
[] Touch the + or - pads until the
desired Clean Tilne is displayed.
TheCleanh_neis normally4 hoursand 20
mlbutes. Youcanchange the Clean Tkneto any
tlYnebetween 3 and 5 hours,dependlbgonthe
amountof soil/b youroven.
Soil on the fl'ont fl'ame of the range and
outside the gasket on the door will need
to be cleaned bv hand. Clean these areas
with hot wateI; soap-filled scouring pads
or cleansei_ such as Soft Scrub"_ Rinse
well with clean water and dry.
Do not clean the gasket. The fibeiglass
material of the oven door gasket cannot
withstand abrasion. It is essential tot the
gasket to remain intact. If you notice it
becoming worn or flayed, replace it.
Wipe up any heavy spillovei_ on the
()x'ell bert Oil/.
Make sure tile ()veil light bulb cover is
ill place and the oven light is off.
IMPORTANT: The health of some biMs
is extremely sensitive to the fiunes given
off during the self=cleaning cycle of any
range. Move birds to another welb
ventilated rooln.
X,_]file the oven is sel6cleaning, you can
touch the CLOCKpad to display the time
(ff day. To return to the clean countdown,
touch the SELFCLEANpad.
The oven shuts off autonlafically when
the clean cycle is colnplete, and 0:00 will
flash ill the display:
[] Slide the latch handle to the left as
fin" as it will ,g° and el)ell the dooi:
NOTE:Never force the latch handle.Forcingthe
handle wi// damagethe doorlockmechanism.
[] Touch the START/ON pad.
The self=clean cycle will atmmlaticallv
begin after CLEAN is displayed and the
tilne countdown apl)eai_ ill the (lispla}:
27
Page 22

Usingthe self-cleaning oven.
How to Delay the Start of Cleaning
Make sure tile clock shows tile correct
time of day.
[] i,atch tile door.
[] Touch the SELFCLEANpad.
[] Using tile + or - pads, enter tile
@
desired clean time.
[] Touch tile STARTTIME pad. Tile
earliest start time _ou can set will
appear in the displa}.
[] Using the + or - pads, enter tile
time of (Ira you want tile clean c_cle
to start.
[] Touch tile START/ON pad.
Tile display will show tile start time. It
will not be possible to unlatch tile oven
door until tile temperature drops below
tile lock temperature.
Tile oven shuts off autonmtically when
tile clean cycle is complete, and 0:00 will
flash in tile display.
ToStop a Clean Cycle
Toud/tile CLEAR/OFFpad.
_fit until tile oven has cooled below tile
locking temperature to unlatch tile/looI:
You will not be able to open tile door
right away unless tile ()veil has cooled
below tile locking temperature.
After a Clean Cycle
You may notice some white ash in tile
()veil. Wipe it up with a dmnp cloth atier
tile oven cools.
If white spots rema/k remove themwith a soap-
filled scouringpad andrinse thoroughlywith
a w))egarandwater mixture.
These deposits are usually a salt
residue that cannot be removed bv
the clean cycle.
If tile oven is not clean alter one clean
cycle, repeat the cycle.
!i_:You cannot set tile o_en fin" cooking
until tile oxen is cool enotwh fi)r tile
door to be unlatched.
::Ji::While tile ()veil is self-cleaning, you
can press the CLOCK pad to display
the time of day. To return to the
clean countdown, press tile COOKING
TIME pad.
::Ji::Apply a small amount of vegetable oil
to a paper towel and wipe tile edges of
the ()veil shelves with tile paper towel.
Do not spray with Pare >or other
lubricant spra)_s.
0
22
Page 23

Camandcleaningoftherange. 9e.co,,
Be sure all controls are off and all surfaces are cool before cleaning any part of the range.
If your range is removed for cleaning, servicing or any reason, be sure the anti-tip
device is reengaged properly when the range is replaced. Failure to take this
precaution could result in tipping of the range and cause injury.
How toRemoveProtective ShippingFilm and Packaging Tape
Careflllly grasp a corner ot tile protective
shipping film with your finge_ and slowly
peel it fl'om tile appliance surfhce. Do
not rise any shaI]) items to remove tile
fihn. Remove all of the fihn beii)re using
tile appliance fi)r tile fi_t time.
Control Knobs
Thecontrolknobs maybe removedfor easier
cleaning.
Make StlI'e tile kllobs aI'e in tile OFF
positions and pull them straight off tile
stems tor cleaning.
Oven Vent
Theoven ventis locatedbehind thewht rear
surfaceunit
This area could become hot (hwing
oven rise.
To _lSStlI'e no d_llll_lge is done to tile
finish of tile product, the safest way to
remove tile adhesive ti'om packaging
rope on new appliances is an application
(ff a household liquid dish_shing
detergent. Apply with a soft cloth and
allow to soak.
NOTE:Theadhesivemustberemovedfromaft
parts.Itcannotberemovedifit isbakedon.
Tile knobs can be cleaned in a
dishwasher or they may also be washed
with soap and water. Make sure tile inside
ol tile knobs are dry before replacing.
Replace tile knobs, in tile OFFposition to
ensure proper placeinent.
It is noli//_ll _()I" ste_lIll to COI//e gilt
of tile vent, and moisture may collect
m_(lerneath it when tile oven is in use.
Theventisimportantforproperaircirculation.
Neverblockthisvent
23
Page 24

Careand cleaningofthe range.
Painted Surfaces
Pullhingelocksdowntounlock.
Removalposition
The gasket is designed with a gap
at the bottom to allow for proper air
circulation.
Do not rub or clean the door
gasket it has an extremely low
resistance to abrasion.
If you notice the gasket becoming
worn, frayed or damaged in any
way or if it has become displaced
on the door, youshould have it
replaced.
24
Painted smti_ces include tile sides of tile
range and the dora; top ot control panel
and tile drawer front. Clean these with soap
and water or a ;'inegar and water solution.
Control Panel
It's a good idea to wipe the control panel
after each use (ff the oven. Use a damp
cloth t() clean or rinse. For cleaning, use
mild s()ap and water or a 50/50 solution
(ff vinegar and wam_: For rinsing, use
clean water: Polish d_' with a soft cloth.
Lift-Off Oven Door
Thedooris veryheavy.Becarefulwhen
removingandlifting the door.
Donotlift thedoorbythehandle.
Toremovethedoor:
[] Fully open tile dora:
[] Pull the hinge locks down toward
tile door flmne, to file tmlocked
position. A tool, such as a small flat-
blade screwdrivei; Inay be required.
[] Firefly grasI) b°th sides °f the d°°r
at tile top.
[] Close door to the door remox d
position, which is halfpennybetween tile
broil stop position and fiflly closed.
[] I,ifl door up and Otlt tlntil tile hinge
am_ is clear of the slot.
Toreplacethedoor:
[] Fimfl} grasp both sides of tile door
at tile top.
] X&ith tile Bottom
door at tile edge
salne angle as ofsl0!
the remowd
position, seat the
indentation of
the hinge am/
into tile bottom
edge of tile hinge slot. Tile notch in
the hinoe am_ must be rifle seated
into tile bottom of tile slot.
[] Fully open tile dora: If tile door will
not flfll) open, the indentation is
not seated correctly in tile bottom
edge of the slot.
[] Push tile hinge locks up against tile
fl'ont fl'ame of tile oxen caxitv to tile
locked position.
Hingearm
Do not tlse coii/iilei'cial o_,en cleaneiN,
cleaning powde_, steel wool or ha_h
abrasi'_es on any painted sm_hce.
Do not use abrasive cleansex_, strong
liquid cleanex_, plastic scouring pads or
oven cleanex_ on the control panel--
they will damage the finish.
Hinge
10ck
Hinge'
arrn r_
Push hinge locks up to lock.
[] Close tile oxen doo_:
Toclean the &side of the door:
iJi::Do not allow excess water to run into
am holes or slots in tile dora:
iJi::Because tile area inside tile gasket is
cleaned dining tile seltk'lean cxcle you
do not need to clean this 1)_ hand.
iJi::Tile area outside tile gasket and
tile door liner can be cleaned with a
soap-filled plastic pad, hot water and
detergent. Rinse well with a vinegar
and water solution.
Toclean the outside of the door:
_: Use soap and water to thoroughly
clean the top, sides and front of the
oven dora: Rinse well. Ym may also use
a glass cleaner to clean the glass on the
outside of tile dora: Do not let water
drip into tile vent openings.
i_i::If any stain on tile door vent trim is
persistent, use a soft abrasive cleaner
and a sponge-scrubber fin" best results.
_: Spillage of marinades, fl'uitjuices,
tomato sauces and basting materials
containing acids may cause
discoloration and should be wiped up
immediately. \_]/en smti_ce is cool,
clean and rinse.
!;>Do not t_se oven cleanels, cleanino
powde_ or ha_h abrasixes on the
outside of the dora:
Page 25

Oven Shelves
ge.com
If your oven is equipped with shiny,
silvei=colored oven shelves, they should
be removed fl'oin the oven heft)re
begimfing the selt_'lean cycle, Clean
with an abrasive cleanser or scom-ing pad.
Mter cleaning, rinse the shelves with
clean water and dry with a clean cloth.
If veto" oven is equipped with gray
porcelain-coated oven shelves, they
may be cleaned in the oven during
the self-clean cycle.
Removable Warming Drawer Pan
NOTE'.Formodelswithanelectricwarming
drawer,beforeperforminganyadjustments,
cleaningorservlce,&sconnecttherange
electncalpowersupplyat thehousehold
distributionpanelbyremowngthefuseor
switchingoffthecircuitbreakerMakesure
thedrawerheatingelementiscool.
NOTE: Allow warming drawer to cool before
removingpan.
NOTE: VV/pespills promptlyafter eachuse.
NOTE."Theshiny,silver-coloredovenshelves(on
somemodels)may becleaned in the self-cleaning
oven.However,theshelves will darkenincolor,
losetheir lusterandbecomehard toslide if
cleaned during theself-c/eanlhgcycle.
To make the shelves slide more easily,
apply a small amotmt of vegetable oil
to a paper towel and wipe the edges
of the oven shelves with the paper towel.
Do not spray with Pare '_or other
lubricant spm):s.
::Ji::_,V;mning drawer has a remox_d)le pan
fi:,r easy cleaning. (:lean with hot soapy
water and a sponge or dish towel. Dry
with a clean cloth. Replace the pan in
the lower oven dI'aweI:
Stainless Steel Surfaces (onsomemodels)
Donotusea steel wool pad;# will scratch
thesurface.
To clean the stainless steel smtace,
use warn/sudsy water or a stainless steel
cleaner or polish. Mwa)s wipe the sm'li_ce
in the direction of the grain. Follow the
cleaner instructions for cleaning the
stainless steel smlhce.
To inquire about l)m'chasing stainless
steel appliance cleaner or polish, or to
find the location of a dealer nearest you,
please call ore" toll-fl'ee number:
National Parts Center 1.800.626.2002
ge.com
25
Page 26

Careandcleaningofthe range.
Storage Drawer Removal (onsomemodels)
Toremove the drawer:
Toreplace the drawer:
il Stopguide
"_, ,j
After broiling remove the broiler
pan from the oven. Donot storea
soiled broiler pan andgrid anywhere
h7the range.
7¸¸
Wire cover holde_
[] Pull the drawer out until it stops.
[_] i,ifl tile ti'ont of tile drawer until tile
stoI)S clear tile ,guides.
U_ Remo;e tile (h'awe_:
lal
Broiler Pan & Grid
Donot clean thebroilerpan or grid in aself-
cleaningoven.
Mter broiling, remove tile broiler pan
fl'om the oven. Remove tile grid fl'om tile
pan. Carefully pour out tile grease ti'om
tile pan into a proper containe_:
_ash and rinse tile broiler pan and grid
in hot water with a soap-tilled or plastic
scouring pad.
Oven Light Replacement
CAUTION: Before replacing your oven
light bulb, disconnect the electrical
power to the range at the main fuse or
circu# breaker panel.
Be StlI'e to let tile light (o_,er and bulb
cool completely.
Toremove the cover:
[] Hold a hand under tile coxer so it
doesn't tidl when released. _,\ith
finge_ of tile sanle hand, firefly
push back tile wire cover holder:
I,ifl off tile cove_:
[] Place tile drawer rails on tile guides.
[] Push tile drawer back until it stops.
[] I,ifl tile ti'ont of tile drawer and push
back until tile stops clear tile guides.
[] I,ower the fl'ont of the drawer and
push back until it closes.
If fi)od has burned on, sprinkle tile grid
with detergent while hot and cover with
wet paper towels or a dishcloth. Soaking
tile pan will remove burned-on fi)ocls.
Both tile broiler pan and grid may be
cleaned with a commerdal oven cleane_:
Both tile broiler pan and grid can also be
cleaned in a dishwasher:
Donot removeanyscrewsto removethe cover
[] Replace bulb with a 40-watt
appliance bulb.
Toreplace the cover.
[] Place it into groove of the light
receptacle. Pull wire forward to
tile center of tile cover until it
snaps into place.
[] Connect electrical power to
tile Fan *e
26
Oven Heating Elements
Do not clean thebakeelementor the broil
element.Any sol7will bum off when the
elementsam heated
To clean tile oven floo_; gentl} lift
tile bake element. Cleml with wm_n
soap} water_
Page 27

Cleaningthe glasscooktop, ge.com
Normal Daily Use Cleaning
Clean your cooktop after
each spill. Use CERAMA
BRYTE® Ceramic Ceoktep
Cleaner.
iiii i (ii(
Usea CERAMABRYT£Cleaning
Padfor CeramicCo&tops.
®
ONLY use CEIL_d_<IABRYTE _'Ceranfic
Cooktop (;leaner on tile glass cooktop.
Other creams ma_ not be as eflectixe.
To maintain and protect tile sm'ti_ce of
yore" glass cooktop, fi)llow these steps:
[] Before using the cooktop for the
fi_t time, clean it with CE]L_dMA
BRYTE <'_Ceramic Cooktop Cleaner
This helps promct the top and
makes cleanup easier:
[] Dail) rise of CEIL_d_IA BRYTE (_'
Ceramic Cooktop Cleaner will help
kee I) tile cooktop looking new.
Burned-On Residue
WARNING:DAMAGEto yourg/asssurface
mayoccurifyouusescrubpadsotherthan
thoserecommended.
[] Allow tile cooktop to cool.
[] Spread a few drops of CEI_AAMA
BRYTE _>Ceramic Cooktop Cleaner
on tile entire bm'ned residue area.
Using tile included CEIL_dMA
[]
BRYTE _:'Cleaning Pad for Ceramic
Cooktops, _ub tile residue area,
ali))lxing,, pressm'e as needed.
[] Shake tile cleaning cream well.
Appl) a few drops of CEIL_dMA
BRYTE ': Ceramic Cooktop Cleaner
directly to the cooktop.
[] Use a paper towel or CEIL_d_<IA
BRYTE _>Cleaning Pad for Ceramic
Cooktops to clean the entire
cooktop S/lI]ilce.
[] Use a dry cloth or paper towel
to remove all cleaning residue.
No need to rinse.
NOTE: It is very important that you DONOT
heat the cooktop unfii it has been cieaned
thoroughl_
If any residue remains, repeat tile
[]
steps listed above as needed.
For additional protection, alter
[]
all residue has been remoxed,
polish the entire surfilce with
CEIL_d'dA BRYTE ': Ceramic
Cooktop Cleaner and a paper towel.
TheCERAMABRYTE® Ceramic
Co&top Scraper and all
recommended supplies are
available through our Parts Center.
See flTstructions under "ToOrder
Parts" section on next page.
NOTE:Do not use a dull or
nicked blade.
Heavy, Burned-On Residue
[] Allow tile cooktop to cool.
[] Use a single-edge razor blade
scraper at approximately a 45 °
angle against the glass surtace
and scrape the soil. It will be
necessary to apply pressure to
tile I'_lZOI" scraper ii1 order to
remove tile residue.
After scraping with tile razor
[]
scrape_; spread a fi_w drops of
CEIL_d'dA BRYTE ': Ceramic
Cooktop Cleaner on the entire
burned residue area. Use tile
CEIL_dMA BRYTE ': Cleaning Pad to
remove any remaining residue.
For additional protection,
[]
after all residue has been
removed, polish the entire
surtace with CEI_dMA BRYTE ')
Ceramic Cooktop Cleaner
and a paper towel.
27
Page 28

Cleaningtheglass cooktop.
Metal Marks and Scratches
[] Be careflfl not to slide pots and
pans across vour cooktop. It will
leave metal markings on the
cooktop surtace.
These marks are remowd)le using
the (:EIL_d_JlA BRYTE '_Ceramic
Cooktop Cleaner with the CEI_L_dVIA
BRYTE '_Cleaning Pad lot Ceramic
Cooktops.
[] If pots with a thin oxerla) of
aluminum or COl)per are allowed
to boil (h N the overlay may leave
black discoloration on the
cooktop.
CooktopSeal
To clean the cooktop seal arom_d the for a few minutes, then wipe clean with
edges of the glass, la) a wet cloth on it nonabrasixe cleaners.
Glasssurface potential forpermanent damage.
This should be removed
immediately before heating
again or the discoloration
Ill}IV be l)ei'ill}lnent,
WARNING: Carefully check the bottom of
pans for roughness that would scratch
the cooktop.
Our testing shows that if
you are cooking high sugar
mixtures such as jelly or
fudge and have a spillover,
it can cause permanent
damage to the glass surface
unless the spillover is
immediately removed.
28
Damage from Sugary Spills and Melted Plastic
[] Tm'n off all surlhce units. Remove
hot pans.
[] Wearing an oven mitt:
a. Use a single-edge razor blade
scraper (CERAMA BRYTE <:
Ceramic Cooktop Scraper) to
move the spill to a cool area on
the cooktop.
b. P.emove the spill with
paper towels.
To Order Parts
To order CEIL_dVIA BRYTE ':Ceramic
Cooktop Cleaner and the cooktop
scraper, please call ore" toll-flee
n IlI/lbeI':
National Parts Center 800.626.2002
CERAMA BRYTE®Ceramic
Cooktop Cleaner .......... # WXTOX300
CERAMA BRYTE® Ceramic
Cooktop Scraper ......... # WXIOX0302
Kit ...................... # WB64XS027
{Kit includes cream and cooktop scraper)
CERAMA BRYTEc")Cleaning Pads for
Ceramic Cooktops ........ # WX10X350
[] An? remaining s )illoxer should be
lett until the sm'ihce of the cooktop
has cooled,
] Don't use the smtace units again
until all of the residue has been
completely removed.
/VOTE'.ff pittlag or ladentafion /b the glass
saface has already oaurred, the cooktop
glass w#l have to be replaced b thb case,
service will be necessarg.
Page 29

Before YouCall ForService... gecom
Troubleshooting -tips
Save time and money/. Review the charts on the following
pages first and you may not need to call for service.
Possible Causes What ToDo
Surface units will not Improper cookware * Use pans which are flat and match tile diameter
maintaina rolling boil being used. of [he St/l't_lce unit selected.
or cookingis not
fast enough
Surface units do A fuse in your home may be * Replace tile 1use or reset tile circuit breaker:
notwork properly blm_aa or the circuit breaker
tripped.
Cooktop controls * Check to see the correct control is set fin" the surthce
improperly set. unit you are using.
Surface on#stops * This is hernial. The unit is still on and hot.
glowingwhenturned
toa lower setting
Scratches(mayappear
ascracks)oncooktop
glasssurface
Areas of discoloration Food spillovers not cleaned • See the Cleaning the glass cooktop section.
on the cooktop before next use.
Plastic melted to Hot cooktop came into • See the Glass surface--potential for permanent damage
the surface contact with plastic placed section in tile Cleaning the glass cooktop section.
Pitting (or indentation) Hot sugar mixture spilled • Call a qualified technician for replacement.
of the cooktop on the cooktop.
Frequent cycling Improper cookware • Use only flat (ookware to minimize cycling.
off and on of being used.
surface units
Incorrect clemth_g
methods being used.
Cookwaxe with rough bottoms
being used or coarse paxtides
(salt or sm_d) were between
the cookwm'e and the surface
of the cooktop.
Cookwaxe has been slid
across the cooktop surface.
Hot surface on a model • This is normal. The stu'thce may al)l)ear discolored
with a light-colored glass when it is hot. This is teml)orary and will disal)pear
cooktop, as the glass cools.
on the hot cooktop.
• Scratches are not removable. Tinv scratches will become
less visible in time as a restdt of cleaning.
• To avoid scratches, use the recommended cleaning
procedures. Make sure bottoms of cookware are clean
before use, and use cookware with smooth bottoms.
Fooddoes notbake Oven controls improperly set. • See tile Using the oven section.
or roast properly Shelf position is incorrect • See tile Using the oven section.
or the shelf is not level.
Incorrect cookware or • See tile Using the oven section.
cookware of improper
size being used.
Oven thermostat needs
adjustment.
• See the Adjust the oven thermostat--Do it yourself!
section. 29
Page 30

BeforeYouCall ForService...
Troubleshooting -tips
Possible Causes What To Do
Clockandtimerdo
notwork
Plug on range is not completely * Make sure electrical I)lug, is I)lugged,, into a live, properl)
inserted in the electrical outlet, grotulded otlflet.
A fuse ha your home may * Replace tile fi/se or reset tile circuit breaker.
be blown or the circuit
breaker tripped.
Oven controls improperly set. * See the Using the clock and timer section.
Ovenlightdoes Light bulb is loose or defective. * Tighten or replace the bulb.
not work
Switch operating light * Call for service.
is broken.
fooddoes not Door not open to the broil stop * See tile Using theoven section.
broil properly position as recommended.
Oven controls improperly set. * Make sure you press tile BROILHI/LOpad.
Improper shelf position * See tile Broiling Guide.
being used.
Cookware not suited • Use tile broiling, l_an and ,grid that cmue with your, range.,
for broiling.
Alumhmm foil used on the • See tile Using the oven section.
the broiling pau mad grid has
not been fitted properly mad
slit as recommended.
ha some areas the power " Preheat tile broil elellleut t01" 10 l/liUt/teS.
(voltage) may be low.
• Broil for tile hm(_est_, period of time recoum, ended ill
tile Broiling Guide.
Oven temperature too Oven thermostat • See tile Adjust the oven thermostat--Do it yourself!
hot or too cold needs adjustment, section.
Oven will not work Plug on range is not • Make sure electrical .I)lu(_ is l)lugged,, into a live,
completely inserted ha l)ro l )erlv.,grounded outlet .
the electrical outlet.
A fuse ha your home may • Replace tile fl/se or reset tile circuit breaker.
be blown or the circuit
breaker tripped.
Oven controls improperly set. • See tile Using the oven section.
Door left in the locked */f uecess;ll3 _ allow the oven to cool; then unlock
position, tile dooL
Storagedrawer Rear drawer support is
iscrooked on top of the guide rail.
• Reposition the drawer. See tile Storage Drawer
Removalinstructions ill the Care and cleaning of
your range section,
3O
Page 31

Possible Causes What ToDo
ge.com
Storage drawer
won't close
Power cord may be
obstructing drawer
hi the lower back
of the rmlge.
Rear drawer support is • Reposition the drawer. See the Storage Drawer
on top of the guide rail. Removalinstructions in the Care and cleaning of your
• Reposition tile drawer and power cord. See tile
Storage Drawer Removal instructions in the Care and
cleaning of your range section.
range section.
Ovenwillnotself-clean The oven temperature is •A]lov¢ the oveu tO COO1 to l'O01ii tel//pel'att/l'e aud
too high to set a self-clemz reset the controls.
operation.
Oven controls improperly set. • See the Using the self-cleaning oven section.
Oven door is not in the • Make Stll"e votl i/love the door latch handle :111the
locked position, way to the right.
"Crackling" or This is the sound of the • This is normal.
"popping" sound metal heating and cooling
during both the cooking
and cleaning fmzctions.
Excessive smoking Excessive soil. • Press the CLEAR/OFF 1);1(1.Open the windows
during a clean cycle to rid the room of smoke. Wait until the light
oil the SELFCLEANpad goes off. X4]l)e up the excess
soil and reset the clean cycle.
Oven door will not Oven too hot. • Allow the oven to cool below h)cking temperattu'e.
unlock
Oven not clean after Oven controls not properly set. • See the Using the self-cleaning oven section.
a clean cycle
Drawer does not slide The drawer is out of • Fully extend the drawer and push it :111the way in.
smoothly or drags ali_maent. See the Care and cleaning of the range section.
Warming drawer will A fuse in your home may be • Replace the fl/se or reset the circuit breaker:
not work blown or the circuit breaker
Excessive condensation Liquid in drawer. • Remove liquid.
in the drawer
Food dries out in the Moisture escaping. • Cover fl)od with lid or aluminum fi)il.
warming drawer
Oven was heavily soiled. • Clean up heavy spillovers before starting the clean
cycle. Heavily soiled ovens may need to sell=clean
again or for a longer period of time.
Drawer is over-loaded or load • Reduce weight. Redistribute drawer contents.
is unbalanced.
tripped.
Controls improperly set. • See the Warming drawersection.
Uncovered foods. • Cover fl)od with lid or aluminuu_ fi)il.
Temperature setting too high. • Reduce temperature setting.
Drawer not fully closed. • Push drawer in until latch engages. _ [
Page 32

Before YouCall ForService...
Troubleshooting -tips
Possible Causes What To Do
"F-- anda number
orletter"flash
in thedisplay
You have a function
error code.
If the fmaction code repeats. • Disconnect all power to the range for at least 30
• Press the CLEJlR/OFFpad. Put the oven back into
operation.
seconds and then reconnect power. If the flmction
error code repeats, call fl)r service.
• On sellXcleaning models, if a flulction error code
appears during the selt:cleaning cycle, check the oven
door latch. The latch may have been moved, if only
slightly, fl'om the locked position. Make sure the latch
is moved to the right as far as it will go. Press the
CLEAR/OFFpad.Mlow the oxen to cool for one houi:
Put the oven back into operation.
Display goes blank A fuse ha your home may be • Rel)lace the fi/se or reset the circuit breaker.
blown or the circuit
breaker tripped.
The clock is turned off • See the Using the clock and timer section.
from showing in the display,
Displayflashes Power failure, • Reset the clock.
Unabletoget the Oven control pads were • The BAKE aud BROILHI/LO pads must be pressed
displayto show "SF" not pressed properly, at the same time and held for 3 seconds.
Power outage, Power outage or surge. • Reset the clock./f the oven was ill use, you uu/st reset
it by )ressing the CLEAR/OFFpad, ,, l , settiiw the clock
and resetting any cooking flulction.
"Burning" or "0i/y" This is normal ha a new • To speed the process, set a self:clean cycle fi)r a
odor emitting from oven and will disappear minimum of ?) hours. See the Using the self-
the vent in time, cleaning oven section.
Strongodor An odor from the insulation • This is temporary.
around the inside of the
oven is normal for the first
few times the oven is used.
32
Page 33

GE Service Protection Plus rM
GE, a name recognized worldwide fbr quality and dependability, offers you
Service Protection Plus '"--comprehensive protection on all your appliances--
No Matter What Brand!
Benefits Include:
. Backed by GE
o All brands covered
o Unlimited service calls
o All parts and labor costs included
* No out-of-pocket expenses
* No hidden deductibles
* One 800 number to call
YOu xdll be completel) satisfied with ore" service protection or xou ma) request )our mone} back
on the remaining value of )ore" contract. No questions asked. It's theft simple.
Protect wmr refl'igerator, dishwasher, washer and dxTer, range, TV, VCP, and much more--any brand!
Plus there's no extra charge fin" emergency service and low monthly financing is available. Even icemaker
coverage and fi_od spoilage protection is ofl_red. You can rest easy, knowing that all yore" valuable
household products are protected against expensive repairs.
Place }our roniidence in GE and call us in the LI.S. toll-free at 800.626.2224
for n/ore illforn/_ltiOll.
*All brands <o_<le<l, up to 20 )eal_s old, in the <ondnema/ U.S.
We71CoverAny Appliance.
Anywhere. Anytime.*
Please place in envelope and mail to:
General Electric Company
Warranty Registration Department
EO. Box 32150
Louisville, KY 40232-2150
33
Page 34

Consumer Product Ownership Registration
Dear Customer:
Thank you for purchasing our product and thank you for placing your confidence in us.
V_'e are proud to ha_e you as a customer!
Follow these three steps to protect your new appliance investment:
Complete and mail
your Consltlrlrler
Product Ownership
Registration today.
ttave tile peace of
mind of knowing we
call contact VOUill
tile unlikely exent of a
sati:ly modification.
After lnailing tile
registration below,
store this document
in a sati_ place. It
contains inlkmnation
you will need should
you require service.
Our service mmlber is
800.GE.CARES
(8(t0.43'-).2737).
Model Number Serial Number
, , , , , , I I , , , , , , , I
Important: If you did not get a registration card with your
product, detach and return the form below to
ensure that your product is registered, or register
........................ on!i_n.e_.at.g..e_.co_m_._.................................................. __ (:.,l,(r_
Consumer Product Ownership Registration
Read your Owner's
Manual carethllv.
It will help you
operate your llew
appliance properly.
Model Number Serial Number
M1: Ms. Mrs. Mi,_s
Fir"l I I L_stl
Nalne I I I I I I I I I Name I I I I I I I I I I I I
Str(?el [
Addr(ss I I I I I I I I I I I I I I I I I I I I I I I I
Apt. # I I [
Ciw [ [ I
l )ale Place(]
In Use I I I
Month
Appliances
General Electric Company
GE Consumer& Industrial
Louisville,KY40225
ge.com
34
I I [ [ I [ E-lnailAddress*
I I
I I
* Please pr(wi(le your e-mail address to receive, via e-mail, discounts, special oflbl-, and other important
communications from (;E Appliances ((;1_\).
[ Check here if you do not want to receive comnmnications ti-om G1LVs carcfillly selected partner'..
FAILI JRE TO COMt_LETE AND RETI JRN TIIIS CAR1) DOES NOF DIMINISII Y()I R
_,)\I_L \N'IY RIGIfFS.
For more intormation about (;1LVsprivy. 3 and (Ilia usage polio); go to ge.com and click on
'Priv_y Policy" or call 800.626.2224.
, I
I
I
Page 35

w
I
m
m_
w
35
w
m
Page 36

r_
r_
Q_
IVetes.
"_w.B
1::
---
€_
m
__
r --
m
_mm.
I
36
Page 37

w
I
m
m_
w
37
w
m
Page 38

Accessories.
Looking For Something More ?You can find these accessories and many more at ge.com, or call 800.626.2002
(during normal business hours). Have your model number ready.
::(((¸¸¸¸¸¸)¸¸(7¸¸¸¸¸)/(:j)(
/ i I i!i I _ __ _i iiii __
_li q/_/rql [i I iriI/l ft\V_\ \))
Surface Elements & Drip Pans
Oven Elements
Cleaner Cleaning Pads Scraper
OvenShelves Broiler Pan
Light Bulbs Knobs
38
Tired of discolored shelves? Wishing you had exm_-heaxT-duty oven shelves?
NOWA VAILABLEfi)r your range:
(;E's innovative, selfk:leanable porcelain-coamd oven shelves!
• Hem 3, Duty
• Durable
• Able m be cleaned in a self<leaning oven
Visit ge.com for more inRmnation.
Page 39

GEElectricRange Warranty.
All warranty service provided by our Factory Service Centers,
or an authorized Customer Care®technician. Toschedule service,
on-line, 24hours a day, vis# us at ge.com, or cafl SOO.GE.CARES
(800.432.2737).Please have serial number and model number
available when calling for service.
GE Will Provide:
Anypart of the range which tifils due to a defect in materials or workmanship.
Fromthe dateof the
origina!purchase
::Ji::Service trips to your home to teach you how to use
the product.
!i_hnproper h_staJlation, delivery or maintenance.
_: Failure of the product if it is abused, misused, or used
for other thml the intended purpose or used
commercially.
::Ji::Replacement of house fuses or resetting of circuit
breakers.
During this limited one-year warranty, GE will also provide, free ofcharge, all labor
and in-home service to replace the defective part.
Staple your receipt here.
Proof of the original purchase
date is needed to obtain service
under the warrantg
::Ji::Damage to the product caused by accident, fire, floods
or acts of God.
_: h_cidenta] or consequentiaJ damage caused by possible
defects with this applimlce.
_: Damage caused after delivery.
iJi::Product not accessible to provide required service.
EXCLUSIONOFIMPLIED WARRANTIES--Your sole and exclusive remedy isproduct repa# asprovided in thisLimited
Warranty. Any implied warranties, including the implied warranties ofmerchantability or fitness fora particular purpose,
are limited toone year or the shortestperiod allowed by law.
This warranty is extended to the original purchaser and any succeeding owner for products purchased for
home use within the USA. If the product is located in anarea where service by a GEAuthorized Servicer is not
available, you may be responsible for a trip charge or you may be required to bring the product to anAuthorized GE
Service location for service. In Alaska, the warranty excludes the cost of shipping or service calls to your home.
Some states do not allow the exclusion or limitation of incidental or consequential damages. This warranty
gives you specific legal rights, and you may also have other rights which vary from state to state. Toknow
what your legal rights are, consult your local or state consumer affairs office or your state's Attorney General
Warrantor."General Electric Company.Louisville,Kit 40225
II
39
Page 40

ConsumerSupport.
gEAppliancesWebsite go.cam
Hm'e ;I question or need ;issistance with yam" appliance? Try the (;E Appliances Website 24 hom_ a day,
any day of the year! For greater conxvnience and thster se_Mce, you can now download Owner's Mammls,
order parts, catalogs, or even schedule service on-line. You can also "_sk Ore" Team of Experts ......
your q{lestiolls, illld so Ill {ICll I/lore...
ScheduleService
Expe_ (;E repair se_ice is onl_ one step m_'a_ fl'om _om" door. (;et on-line and schedule _our service at
_our convenience 24 hem's any da_ of the year! (-)r call 800.(;E.(_ARES (800.432.2737) dining mmnal
business hours.
go.cam
RealLifeDesignStudio oe.com
GE suppol_s the/Llni_w_al Design concept--produrts, services and enviromnents that can be used by
people of all ages, sizes and capabilities. We recognize the need to design for a wide range of ph_:sical and
mental abilities and impaimlents. For details of GE's Universal Design applications, including kitchen
design ideas %r people with disabilities, check out ore" Website today. For the hearing impaired, please call
800.TDD.GEAC (800.833.4322).
ExtendedWarranties
Pro'chaise _J(;E extended wm'nmt} and learn about speci_d discounts that m'e available while _our wammt}
is still in effect. YOu c;m pro'chase it on-line an}time, or call 800.626.2224 dining mmnal business hom_.
(;E Consumer Home Services will still be there after }our win'rant} expires.
PartsandAccessories
go.cam
go.cam
Individuals qualified to seFvice their own appliances can have pails or accessories sent direcdv to their
homes (VISA, MasterCaid and Discover cards are accepted). Order on-line today, 24 hom_ e\w)' day or
by phone at 800.626.2002 during mmnal business hom_.
Instructions contained in this manual cover procedures to be pedonned by any user. Other servicing generally
shouM he referred to qualified service personnel. Caution must be exercised, since improper servicing may cause
unsafe operation.
ContactUs
If you are not satisfied with the service you receive fl'om GE, contact us on ot_r Webs}re with all the details
including your phone numbel; or write to: (;eneral Managel; Customer Relations
GE Appliances, Appliance Park
Ix_uisville, KY 40225
RegisterYourAppliance
Register your new appliance on-line--at your convenience! Timel} prodllct registration xdll allow flw
enhanced commmfication ;rod prompt service under the temps of }our _arranty, should the need arise.
YOu ma} also m_dl in the pre-pfinted registration card included in the }x_cldm"_ material.
Printed in fl?eUnited States
go.cam
go.cam
 Loading...