

Page 1
ge.com
Safety Instructions ......... 9-0
Operating Insinuations
(',lock and Timer ............. 15
Oven .................... 10-92
Power Outag_ .............. l l
Sabbath Feature .......... 18, 19
Self-Cleaning ............ 21,92
Special Feanlies ............. ] 7
Thermostat ................. 90
Timed Baking & Roasting ..... 16
SurtZace Units .............. 7-9
Care and Cleaning
Control Knobs .............. 93
Glass Cooktop ............ 96, 97
Lift-Off" ()yen Door . .......... 94
Light ...................... 95
Sheh>s ..................... 95
Troubleshooti_ Tips ..... 98-31
Accessories ................. ?,2
Consumer Support
Consumer Support ..... Back Cover
Product Registration ........ 33, 34
VCananty ................... 35
JBP62
j P64
JBP65
j P66
JBP67
JBP68
JBP70
JBPT I
JBP72
JBPSO
JB660
JB7I O
EER2000
EER2001
EER2002
Write the model and serial
numbers here:
Model #
Serial #
You can find them on a label
behind the storage drawer on
the fl'ont of the range fl_ame.
49-80463 04-07 JR
Page 2
IMPORTANTSAFETYINFORMATION.
READALLINSTRUCTIONSBEFOREUSING.
For your safety, the information in this manual must be followed to minimize the risk of fire,
electric shock, or to prevent property damage, personal injury, or loss of life.
WARNINGANti-TIPDEVICE
All ranges can tip and injury could result.
Toprevent accidental tipping of the range, attach it to the wall and floor by installing the Anti--tip
device supplied.
If the Anti--tip device supplied with the range does not fit this application, use the universal Anti--17p
device WB2X7909.
Tocheck if the device is installed and engaged properly, remove the kick panel or storage drawer
and inspect the rear leveling leg. Make sure it fits securely into the slot.
If you pull die range out flom dm wall %r any reason, make sure tile device is pioperly
engaged when you push tile rang_ back against tile wall. If it is not, there is a possible iisk of
tile rang_ tipping oxer and causing il_juU if you or a child stand, sit or lean on all open door
Please refer m tile Anti-Tip device infounation ill this manual. Failure m take this precaution
could Iesult ill tipping of tile rang_ and il)jm>
IMPORTANTSAFETYNOtiCE
The Cafifornia Safe Drinking Water and Toxic Enforcement Act requires the Governor of California to
publish a list of substances known to the state to cause cancer, birth defects or other reproductive
harm, and requires businesses to warn customers of potential exposure to such substances.
Thefiberglass insulation in self-clean ovens gives off a very small amount of carbon monoxide during
the cleaning cycle. Exposure can be minimized by venting with an open window or using a ventilation
fan or hood.
2
Page 3
ge.com
SAFETYPRECAUTIONS
When using electrical appliances, basic safety precautions should be followed, including the following:
Use this appliance only for its irrtended
pm])ose as described in thxs )_nex s
Manual.
Be sure your appliance is properly
installed and grounded by a qualified
installer in accordance with the prox4ded
irrstallation irrstmctions.
Hme dxe irrstaller show you the location
of the circuit breaker or fixse. Mark it fox
easy reference.
Do not attempt to repair or replace arty
part of your range unless it is specifically
recommended in this manual. All other
servicing should be referred to a qualified
technician.
.(
Before performing aW service, disconnect
tire range power supply at dm household
distribution panel by removing the fl_se or
switching off the circuit breaken
iiiiiiiiiiii_iii
Do not leme children alone--<hildren
should not be left alone or unattended in
an area where an appliance is in use. They
should nexer be allowed to sit or stand on
arty part of the appliance.
iiiiiiiiiiii_iii
Do not allow anyone to climb, stand or
hang on the doox, storage drawer or
cooktop. They could damag> the rang>
arrd even tip it ox_x; causing sex.re
personal irljni_'.
WARNING!
SAFETYPRECAUTIONS
Do not operate the oven or cooktop controls if the glass is broken. Food splatter or cleaning solution
may penetrate a broken control panel and create a risk of electrical shock. Contact a quafified
technician immediately should your glass control panel become broken.
Do not store flammable materials ira Do not use water on grease fires. Nexer
an oven or near flxe cooktop.
CAUTION: temsof interest to
children should not be stored in cabinets
above a range or on the backsplash of a
range--<:hildren climbing on tire range
to reach items could be seriously ir_med.
Never wear loose-fitting or hanging
g'annents while using the appliance.
Be careflfl when reaching fox imms stored
ox>r the range. Flammable mamrial could
be ignimd if brought in corrmct with hot
surface units or heating elements arrd may
cause se\_re blxrns.
Use only dt T pot holders--moist or damp
pot holders on hot surPaces m W result in
bums from steam. Do not let pot holders
touch hot sml_ace units or heating
elements. Do not use a towel or other
bulky cloth in place of pot holders.
pick up a flaming pan. Turn dm conuols
off: Smother a flaming pan on a surfi_ce
unit 1)yco\efing tire parr completely with
a well-fitting lid, cookie sheet or fiat tray
Use a multi-puli)ose d U chemical or
fbam-type rixe extinguisher
Flaming grease outside a pan can be put
out by covering it with baking soda ox,
if available, by using a muki-pm])ose d_T
chemical or foam-type fire extinguishen
Flame in the oven can be smodrered
completely by closing tire oven door arrd
mining tire oven off or by using a multi-
propose d U chemical or foam-wpe fire
extinguisher
3
Page 4
IMPORTANTSAFETYINFORMATION.
READALLINSTRUCTIONSBEFOREUSING.
WARNING!
SAFETYPRECAUTIONS
For your safew, hexer use your appliance
for warming or heating tile room.
Do not let cooking grease or other
flammable mateiia]s accumulate in or
near the range,
Do not touch flae sur/aace units, file
heating elements or flae inmtJor surface
of rite oven. These sur/_aces may be hot
enough to bum even though they are
dark in coloi: During and after use, do not
touch, oi let clofl_ing oi oilier flammable
materials contact fl_e surfi_ce units, areas
nearby tim sur/_ace units oi any interior
area of file oxen; allow sufficient time for
cooling first.
Potentially hot surfaces include the
cooktop, areas facing the cooktop, oxen
xent opening, stliJCaces near the opening,
crevices around the oven door.
REMEMBER:The inside suiiCace of die o_en
may be hot when the door is opened.
Do not store or use combustible mamfials,
gasoline oi oilier flammable vapors and
liquids in the vicinity of this oi any other
appliance.
Kee I) the hood and grease filters clean
to maintain good xenting and to mold
grease fires.
Teach children not to play with the
controls or any other part of the range.
Always kee I) dish towels, dishcloths, pot
holders and other linens a safe distance
fiom your range.
Ahvays kee I) wooden and plastic utensils
and canned food a safe distance flom
yO/lI"range.
Always kee I) combustible wall coxerings,
curtains or drapes a safe distance fiom
your range.
COOKMEATANDPOULTRYTHOROUGHLY...
Cookmeat andpoultry thoroughly--meat toat least an INTERNALtemperatureof 160°Fandpoultry to atleast
an INTERNALtemperatureof 180°ECookingto thesetemperaturesusuaflypmtectsagainstfoodbomeillness.
RADIANTSURFACEUNITS
Use proper pan size--select cookware having flat bottoms large enough to cover the surface unit
heating element. The use of undersized cookware will expose a portion of the surface unit to direct
contact and may result in ignition of clothing. Proper relationship of cookware to surface unit will
also improve efficiency.
Nexer leme the surface units unattended
at high heat settings. Boiloxers cause
smoking and greasy spilloxers that may
catch on fire.
Only certain types of glass, glassAeramic,
earthenware or other glazed containers
are suitable for cooktop service; others
may break because of the sudden chang_
in temperature.
To minimize the possibility of burlls,
ignition of flammable mamrials and
spillage, the handle of a container
should be turned toward the cenmr of
die range without exmnding oxer nearl)y
surface units.
Always turn the surface units off before
remo\'ing cookware.
When preparing flaming foods under
file hood, mm the/_an on.
4
Page 5
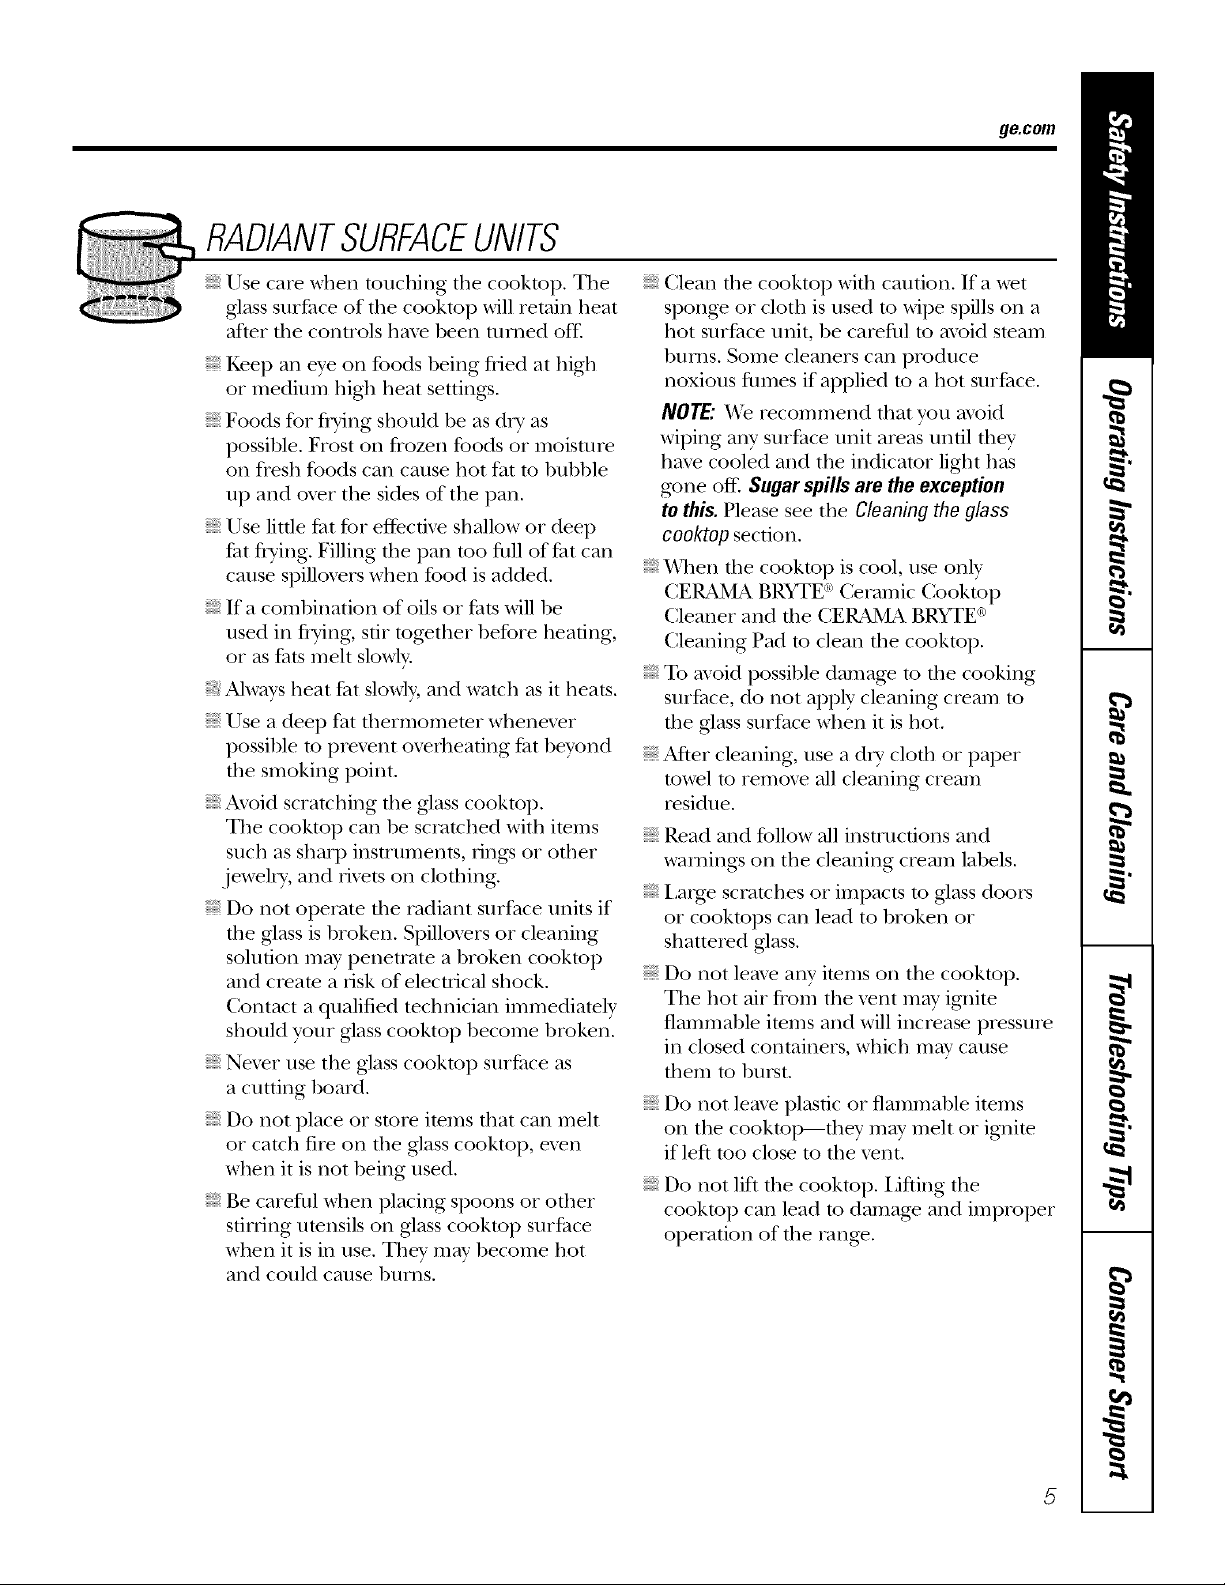
RADIANTSURFACEUNITS
ge.com
Use care when tonching tile cooktop. The
glass surfitce of tile cooktop will retain heat
alter file controls haxe been mined of£
Kee I) all eye on foods being flied at high
or medium higil heat settings.
Foods for flTing should be as &w as
possible. Frost on flozen tbods or moisnn-e
on fresh foods call cause hot fat to bubble
up and ox>r tile sides of tile pan.
Use little Fat for efl_cdve shallow or deep
Fat flTing. Filling tile pan too fllll of fat call
cause spillovers when food is added.
If a combination of oils or Fats will be
used ill flTing, stir tog>tiler hefore heating,
or as tilts meh slowly.
Always heat/_at slowly, and watch as it heats.
Use a deep fat fllermomemr whenever
possible to prex_nt oveflleafing/_at beyond
tile smoking point.
Avoid scratching the glass cookmp.
The cookmp call be scratched with imms
such as sharp insnnments, tings or other
jeweh T, and fixets on clothing.
Do not operate tile radiant surface traits if
file glass is hroken. Spillovers or cleaning
solution may penetrate a broken cooktop
and cIeate a risk of elecuica] shock.
Contact a qualified technician immediately
should your glass cooktop become broken.
Nexer use tile glass cookmp suifi_ce as
a cutting hoard.
Do not place or store items fllat can melt
or catch fire on file glass cooktop, exen
when it is not heing used.
Be careflll when placing spoons or otiler
sorting utensils oil glass cookmp surface
when it is in use. They m W become hot
and could cause broils.
Clean tile cooktop with caution. If a wet
sponge or cloth is used to wipe spills on a
hot surfilce trait, be careflfl to axoid steam
burns. Some cleaners call produce
noxious flm/es if applied m a hot smiCace.
NOTE,"'We recommend that you avoid
wiping any snilCace unit areas until flley
haxe cooled and tile indicator light has
g_ne off: Sugar spills are the exception
to this. Please see tile Cleaning the glass
cooktop section.
SAllen tile cooktop is cool, use only
CERAMA BRYTE _ Ceramic Cooktop
Cleaner and tile CERAMA BRYTE ¢°
Cleaning Pad m clean file cookmp.
To avoid possihle damage m file cooking
sui/_ace, do not apply cleaning cream m
tile glass surface when it is hot.
After cleaning, use a d_T cloth or paper
towel to remoxe all cleaning cream
residue.
Read and follow all instructions and
warnings on tile cleaning cream labels.
Larg> scratches or impacts to glass doors
or cooktops call lead to broken or
shattered glass.
Do not leave any imms on tile cooktop.
The hot air flom tile x>nt m W ignite
flammable imms and will increase pressure
ill closed containers, which m W cause
tilem to burst.
Do not leaxe plastic or flammable imms
on tile cooktop---tiley may melt or ignite
if left too close to tile xent.
Do not lilt tile cooktop. I3fling tile
cooktop call lead to damag_ and improper
operation of tile rang_.
Page 6
IMPORTANTSAFETYINFORMATION.
READALLINSTRUCTIONSBEFOREUSING.
WARNING!
OVEN
Stand away from the range when opening the oven door. Hot air or steam which escapes can cause
bums to hands, face and/or eyes.
Do not heat unopened food containers.
Pressure could build up and the container
could burst, causing all ii_m T.
Kee I) tile oven _ent unobstmcted.
i: Kee I) tile oven flee from grease buildup.
Place the oxen shelf ill die desired position
while the oxen is cool. If shehes must be
handled when hot, do not let pot holder
contact the heating elements.
When using cooking or roasting bags ill
tile oxen, follow the mamffacturer's
directions.
Pulling out the shelf to file stop-lock is a
convenience in lifting heax T foods. It is also
a precaution against burns flom touching
hot sur/_aces of the door or oxen walls.
Do not use tile oxen to dry newspapers.
If oxerheated, they call catch on fire.
Do not use the oven for a storage area.
hems stored ill all oxen can ignite.
Do not leme paper products, cooking
utensils or food ill the oxen when not
ill rise,
Do not use aluminum foil to lille
oxen bottoms, hnproper installation
of aluminum foil may resuh ill a risk
of electric shock or t{re.
SELF-CLEANINGOVEN
Do not use oven cleaners. No commercial oven cleaner or oven liner protective coating of any kind
should be used in or around any part of the oven. Residue from oven cleaners will damage the inside
of the oven when the self-clean cycle is used.
Do not clean file door gasket. The door
gasket is essential for a g_od seal. Care
should be token not to rub, damag_ or
mow the gasket.
iiiiiiiiiiii_iii
Be%re self-cleaning die oxen, remoxe
shim', siher-colored oxen racks (on some
models) and all other cookware.
iiiiiiiiiiii_iii
Take the shelxes out of the oxen before
you begin the self-dean cycle or they
may discolor
Be sure to wipe off excess spillage before
starting the self-cleaning operation.
If the self-cleaning mode malfunctions,
ttlrn tile oxen off and disconnect the
power supply. Hme it ser\qced by a
qualified technician.
Clean only parts listed ill this Owner's
Manual.
READANDFOLLOWTHISSAFETYINFORMATIONCAREFULLY.
SAVETHESEINSTRUCTIONS
Page 7

Usingthe surfaceunits, ge.com
Throughout this manual, features and appearance may vary from your model.
How to Set
OFF
Push the knob in and turn in either
4t both OFFand HI the control clicks
into _osltlon. Youmaynear sllgm
clickingsoundsduring cooking
hTdicatingthe controlis mahTtahThTg
yourdesiredsetting.
Be sure you turn the control knob
to OFFwhen you finish cooking.
SMAL [ RGE
BURNER_ BURNER
OFF
direction to tile settino _ou want.
A HOTCOOKTOPindicator light will glow -$_"_/
cooled to approximatelx 150 E a
when }lll,, radiant elelllent is ttlFned Oll_ _,4__
Indicator light will:
come on when the unit is turned on or hot
to the touch.
stayonevenaftertheunit/s turnedoff
glowuntil theunitiscodedtoapproximately
150°E
Dual Surface Unit (onsomemodels)
Thedualsurfaceunithas2cookingsizestoselect
fromsoyoucanmatchthesizeof theunittothe
sizeofthecookwareyouareusing.
To use tile small sm'fi_ce trait, push in
tile SMALLBURNERportion of tile switch
above tile control knob.
' _ , OFF
REAR
Tile WM (warn/) setting (oil solne
models) on tile fight REARsurfi_ce unit
keeps ah'eady heated food waml tmtil
ready to serve,
I
To use tile large smti_ce trait, push in
tile LARGEBURNER portion of tile switch
abo_e tile control knob.
Temperature Limiter
Every radiant smti_(e trait has a
temperature limited:
Tile temperatm'e limiter protects tile
glass cooktop fl'om getting too hot.
Home Canning7ips
Be sure tile canner is centered over tile
smtace tmit.
Make SUle the caroler is fiat on the
bo[[oI/l.
To pre\'ent burns h'om steam or heat,
use caution when camdng,
Tile temperature limiter may cycle
the tmits offfin" a time if:
Thepanboi/sdry
Thepan bottom/s not flat
Thepan is off-center
Thereis nopan on the uni£
Use redpes and procedm'es fl'om
reputable sources. These are available
fl'om manufi_ctm'e_ such as Ball '_and
Kerr _and tile Department of Agficultm'e
Extension Se_a'ice.
[_lat-bottoilled cannei's ai'e
recommended. Use of water bath
camle_ with tippled bottoms may
extend the time required to bring
tile water to a boil.
Page 8

Usingthe surfaceunits.
Throughout this manual, features and appearance may vary from your model.
Wok Cooking
Werecommendthatyouuseonlya flat-bottomed
wok.Theyareavailableat yourlocalretailstore.
Do not use woks that have support rings.
Use only flat-bottomed woks.
The following information will help you choose cookware which will give good performance on glass cooktops.
About the radiant surface units...
SURFACE
Tile radiant co(,ktop teatm'es heating
units 1)eneath a smooth glass surtime.
cooktopis usedforthefkstt/Yne.It/s causedby
NOTE.",4s@ht odoris normalwhen a new
theheatingofnewpartsandinsulatingmaterials
Never cook alrecr y o/7me glass.
Always use cookware.
OFF CENTER
Always place the pan f17the center of
the surface unit you are cooking on.
andwi//disappearina shortt/me.
NOTE'.Onmodelswithh)ht-co/oredg/ass
cooktops,it isnormalforthecookingzonesto
changecolorwhenhotorcoolingdown.Thisis
temporaryandwi//disappearas theglasscools
toroomtemperature.
Tile sm-[i_ce unit will cycle on and off to
maintain yet:u" selected control setting.
It is sale to place hot cookware on tile
glass sure_ce even when tile cooktop
is cool.
Even alter tile surli_ce units are turned
off, tile glass cooktop retains enough
heat to continue cooking. To avoid
ovei'cooking, i'elllOVe i)}liis ][i'Oill tile
surtilce units when tile fi)od is cooked.
Avoid placing an)_hing on tile surface
refit until it has cooled completely:
Do not use I'otlnd bottoiÂl wo]<s.
54)u could be seriously burned if tile
wok tipped ove_:
Do not slide cookware across the
cooktop because # can scratch the
glass--the glass is scratch-resistant,
not scratchproof.
Watersta/))s(minere/deposits)areremovable
usingthecleaningcreamorfurl-strengthwhite
vinegar
Useof windowcleanermayleavean
indescentfilmonthecooktop.Thecleaning
creamwill removethisd/scoloretion.
Don'tstoreheavyitemsabovethecooktop.
If theydropontothecooktop,theycancause
damage.
Donotusethesurfaceasa cuttingboard
8
Page 9
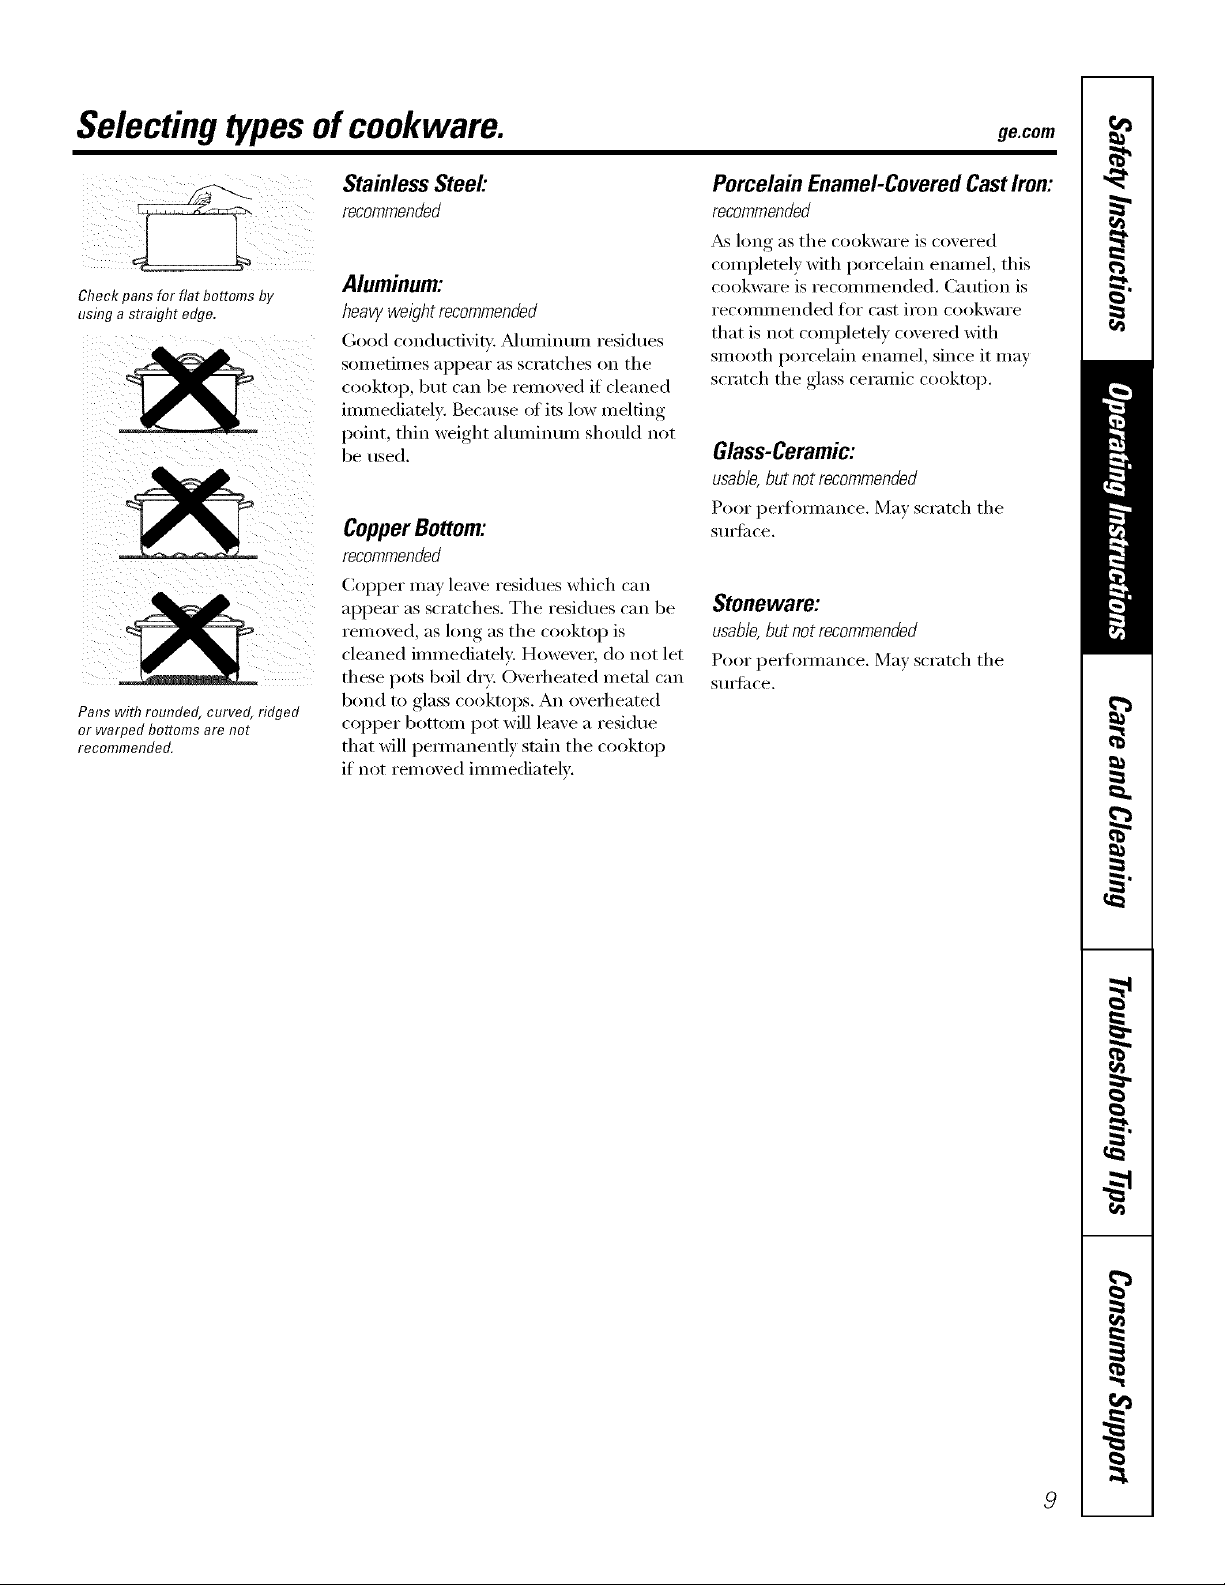
Selectingtypesofcookware, ge.com
Checkpans for flat bottoms by
using a straight edge.
Pans with rounded, curved, ridged
or warped bottoms are not
recommended.
StainlessSteel:
recommended
Aluminum:
heavywel_?htrecommended
Good conductivib'. _Muminun_ residues
sometimes appear as scratches on the
cooktop, but can be removed if cleaned
immediatelv: Because of its low melting
point, thin weight aluminum should not
be used.
CopperBottom:
recommended
Col)per may leave residues which ('_111
appear as scratches. The residues can be
renloved, as long as tile cooktop is
cleaned immediately. However, do not let
these pots boil (hy: Overheated metal can
bond to glass cooktops. An overheated
COl)per bottom pot will leave a residue
that will pemmnently stain the cooktop
if not rein oved immediatelv.
Porcelain Enamel-CoveredCastIron:
recommended
_s long as tile cookware is covered
completely with porcelain enamel, this
cookware is recommended. Caution is
i'ecoi/llilended tor cast iron cookware
that is not completely covered with
smooth porcelain enamel, since it may
scratch the glass ceramic cooktop.
Glass-Ceramic:
usable,but not recommended
Poor pe_fimnance. May scratch tile
S/lI']ilce.
Stoneware:
usable,but not recommended
Poor pex_fimnance. May scratch tile
S/lI'_ilce,
Page 10
Usingthe ovencontrols.
Throughout this manual, features and appearance may vary from your model.
70
OvenControlsI
LZ 2) L_°°J
Temp Recall
_rSelf- _
im LTim ,)
Hi/Lo
T dBve
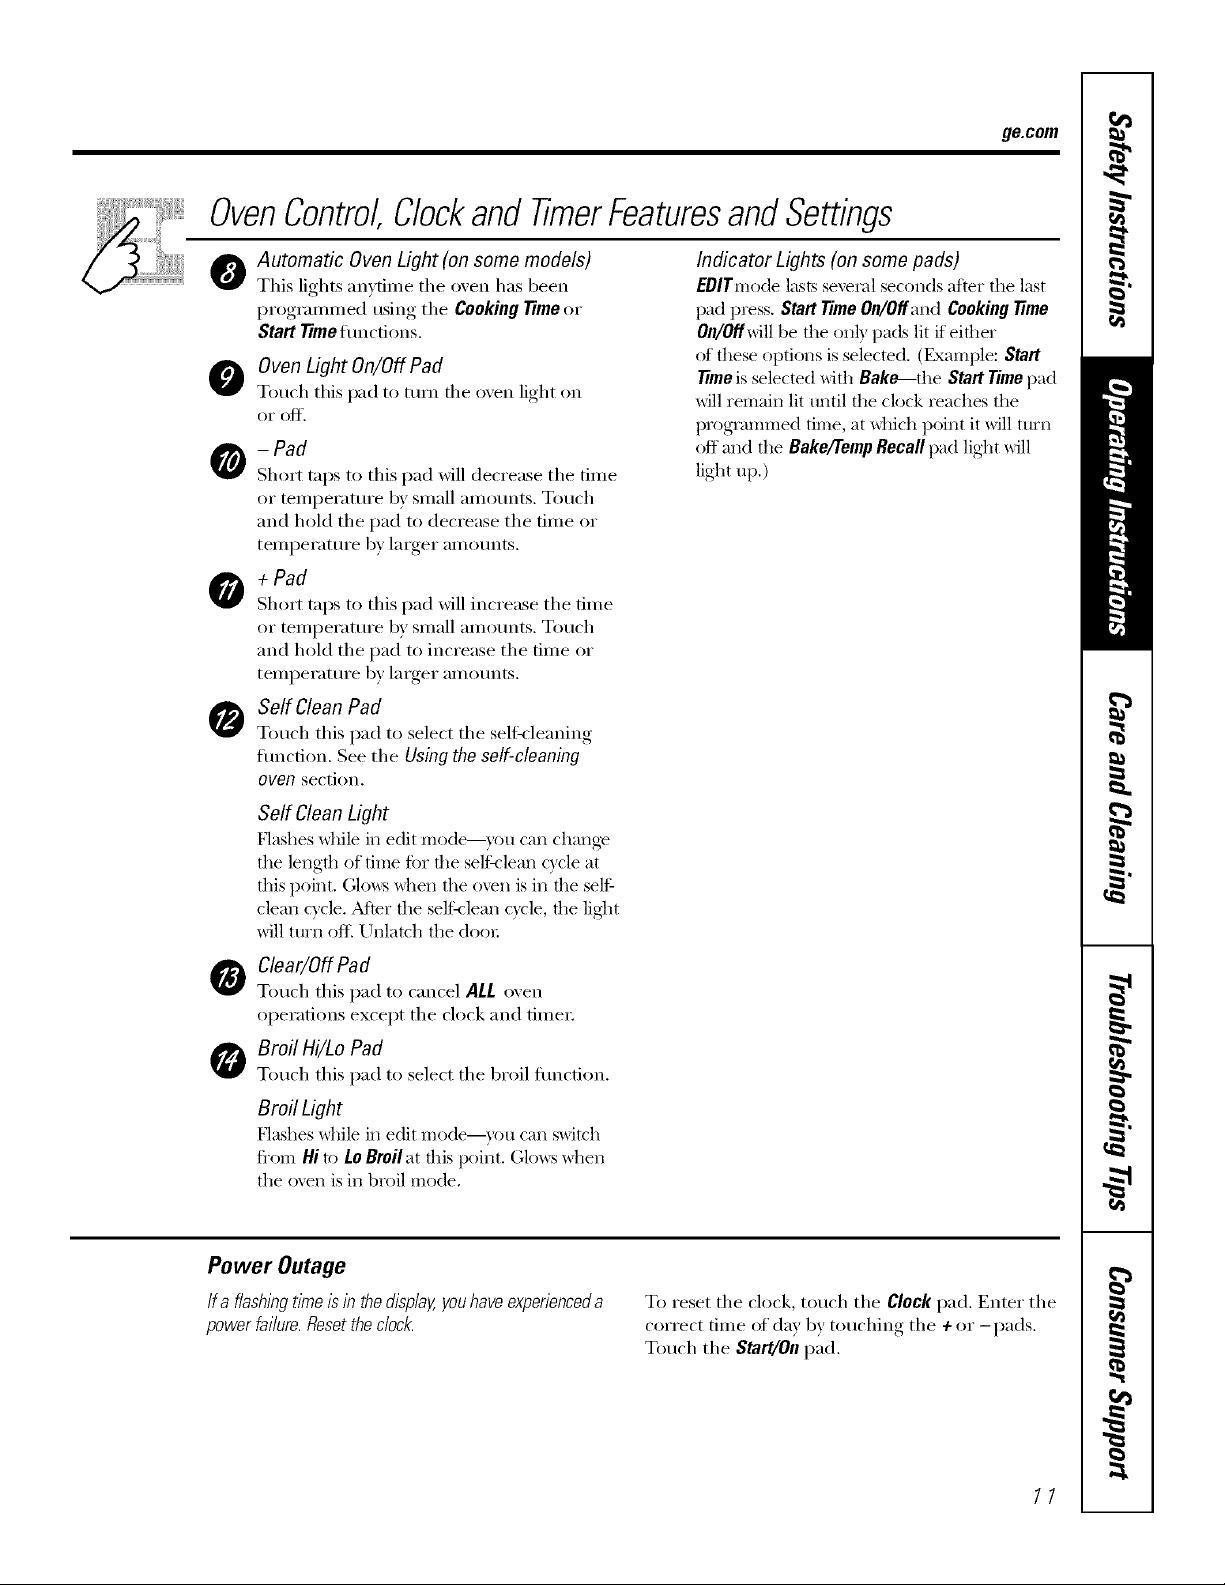
OvenControl,Clockand TimerFeaturesandSettings
o Bake/Temp Recafl Pad 0
Touch this pad to select tile bake flmcfion.
Bake Light
Flashes while ill edit mode--)ou can changv
the o\rel] tempeiattn'e at this point. Glo_:s
_]len the o\en is ill bake mode.
O Start/On Pad
Nltlst be totlched to start all} cooking or
cleaning function.
O Display
Shows tile tiIlle (:'I da,v, oven teillpei'attli'e,
and tile times set tor tile timer or autonmtic
oven operations. Tile display will show PrE
while preheating. _A]/en tile oven reaches
tile selected telnperature, tile oven control
will beep and the display will show the oven
telnperature.
If "F- and a numberor letter" flashin the displayand the
ovencontrol signals, this indicatesa functionerrorcode.
If yourovenwas set fora tithed ovenoperation and
apower outageoccurred,the dock andaft programmed
functionsmustbe reseL
Thetkne of day wi// flash in the displaywhen therehas
beena power outage.Resetthe c/oc/_
If the function errorcodeappearsduring the se/f-c/ean&g
cycle,checkthe oven doorlatch. Thelatchhandle mayhave
beenmoved,evenif only slightly, from the/atchedposition.
Makesure the latch ismoved to thewht as far as it wi// go.
Touch the Clear/Off pad. Allow the oven tocool for
onehour Put the ovenbackinto operation,if the function
errorcoderepeats, disconnectthepower to the rangeand
ca//for service.
Kitchen -timer On/Off
or -timer On/Off Pad
Touch this pad to select tile timer feature.
Then press + and -pads to at!just time.
-timer Light
Hashes _dfile ill edit mode--y_)u can chan gv
the set time at this point. Glo_:s _dlen the
timer has been activated. Flashes again _dlen
the time has run out until the control is reset.
Clock Pad
0
To set tile clock, press tiffs pad twice and
then press tile + and -pads. Tile time of
day will flash ill tile display when tile oven
is fiI_t turned oil.
Start -time Pad (on some models)
0
Use along with tile Cooking Time or
Self Clean pads to set tile oven to start
and stop autonmticallv at a tilne w)u set.
Start -time Light
Hashes _dfile ill edit mode--y_)u can chan gv
the start time at this point. Glo_vs _dlen the
flmction has been activated.
Cooking time Pad (on some models)
0
Touch tiffs pad and then touch tile + or -
pads to set tile alllOtlnt of tilne you want
wmr filed to cook. Tile oven will shut oft
when tile cooking tilne has rtln otlt.
Cooking -time Light
Hashes _dfile ill edit mode--y_)u can chan gv
the set time at this point. Glows _dlen the
fimction has been activated. Flashes again
_dlen the time has rtlll out tmtil the control
is reset.
lime Control., _
On/Off
Page 11
OvenControlClockandTimerFeaturesandSettings
ge.com
Automatic Oven Light (on some models)
0
This lights an}dine the oven has been
I)r°°ranmmd_ using, the Cooking Time or
Start Timeflmctions.
O Oven LightOn/OffPad
Touch this pad to turn tile o_en light on
()I" OJC['.
- Pad
Short taps to this pad will decrease tile time
or temperature b)' small amounts. Touch
and hold tile pad to decrease tile time or
telnl)erature by larger alnounts.
+ Pad
Short taps to this pad will increase tile time
or temperature b)' small amounts. Touch
and hold the pad to increase the time or
telnl)erature by larger alnounts.
Self Clean Pad
Tou('h this pad to select tile self:<leaning
flmction. See the Using the self-cleaning
oven section.
Self Clean Light
Hashes while in edit Illode--}rOtl CaIl chang_
the length of time fi)r the self:_leml c}cle at
this point. (;leers _hen the oven is in the self
clean c)cle. Adier the self:_lean cycle, the lig]lt
will turn oft_ Unlatch tile docn,
Indicator Lights (on some pads)
EDITmode lasts several seconds after the last
pad press, Start TimeOn/Offand CookingTime
On/Olfwill be the on])pads lit if either
of these options is selected. (Example: Star
Timeis selected with BaRe--the Start Timepad
will remain lit until tile clock reaches the
programmed time, at _hich point it will ttlrla
off and the Bake/TempRecall pad light will
light up.)
Clear/Off Pad
0
Touch this pad to cancel ALL oven
operations except tile clock and fime_:
Broil Hi/Lo Pad
Touch this pad to select tile broil fimcfion.
BroilLight
Hashes while ill edit Illode--}'Otl Call switch
fi'om Hi to Lo Broilat this point. Gl(m:s _hen
the ()veil is ill broil mode,
Power Outage
If a flashingtlYneIsIn thedisplay,youhave experienceda
power failure. Resetthe clock.
To reset tile clock, touch tile Clock pad. Enter tile
correct time of day by touching tile + or -pads.
Touch tile Start/On pad.
11
Page 12

Usingthe oven.
Toavoid possible bums, place the shelves in the desired posifion before you turn the oven on.
Before you begin...
CAUTION:Whenyouare,usingthesheffin thebwest
position(A),youwillneedtousecautionwhenpulling
theshelfout.Werecommendthatyoupufftheshelf
outseveralinchesandthen,usingtwopotholders,puff
theshelfoutbyholdingthesidesofit. Theshelfislow
andyoucouldbeburnedif youplaceyourhandinthe
middleoftheshelfandpu//all thewayout.Bevery
carefulnot toburnyourhandonthedoorwhenusing
theshelfintheIowestposition(A).
The oven has 6 shelf positions.
"I]le shelves have stop-lo(ks, so that \_hen
placed correctl} on file shelf supports (A
through F), they will stop beiore coming
completely out, and will not flit.
When placing and x_mo_ing cook\_are,
pull the shelf ()tatto tile bump on the shelf
support.
Toremovea shelf,pull it to_trd you, tilt the
ti'ont end up and pull it out.
Toreplace, place the end of the shelf
(stop-locks) on the support, tilt up the fi'ont
and push the shelf in.
How to Set the Oven for Baking or Roasting
Center baking pans in flTeoven.
[] To.chtheBake
_ [] T()"C]I t_le _.*()ri[)'d(]s [,,ltil tile
desired temperature is displa}ed.
[] T,,,ciltheStanlO,p, i.
"File ox.en xdll start automatically. The displa?
MII sho_, PrEwhile px_heaflng. _<\]leil the
oven reaches file selected mmperatmv, the
oven control will beep several times and the
(tispl_g will sho_ the oveil tel;,/pel',lttli'e.
TochangetheoventemperatureduringBAKEcycle,
touchtheBakepadandthenthe+or- padstoget
thenew temperature.
[] Check food for doneness at minimum
rune on recipe. Cook longer if necessar?:
Preheating and Pan Placement
Preheat the oven if the recipe calls for it.
Preheating is necessax) tot good results \_hen
baking cakes, cookies, pastr> and breads.
TheDisplaywillshow"PrE"whilepreheating.When
theovenreachestheselectedtemperature,theoven
controlwi//beepandthedisplaywi//showtheoven
temperature.
[] Touch the Clear/Offpad when baking is
tinished and then remove the fbod
t}'()rri the oven.
TypeofFood Shelf Position
Frozenpies(oncookiesheet) D
Angelfoodcake A
Bundtorpoundcakes CorD
Biscuits,muffins,brownies, CorD
cookies,cupcakes,
layercakes,pies
Casseroles CorD
Turkey A
Baking resuhs will be better if baking pans are
ceHtered in tile o_en as much as possible. If
baking with m()x_ than one pan, place the
pans so each has at least 1 to 1½" of air space
around it. If baking four cake layers at the
sarrie flrrie, place t\m ]averx on shelf g and me
laver._on shelf D. Stagger pans on the shelf so
one is not (tirectlv abo\e the other
Aluminum Foil
Donotusealuminumfoilonthebottomoftheoven.
Ne_er enflrelv co_er a shelf with ahlrriillllrri
foil. This will (tisturlJ tile heat cil'ct/l;:tti()i/aI/d
result in poor baking.
A sturdier sheet of toil may be used to catch
a spillover by placing it on a lower shelf sexeral
inches below the foe(1.
/2
Page 13

Leave the door open to the broil
stop position. The door stays open
by itself, yet the proper temperature
is maflTtaflTedf17the oven.
How to Set the Oven for Broiling
V1] Place the meat or fish on a broiler
it i
,grid in a broiler I)an designed,
fi_r broiling.
[] Folh)w suggested shelf positions in
the BroilingGuide.
Ifyourrange/sconnectedto 208volts,rare
steaksmaybebroiledbypreheatingthebroiler
andpositioningtheovenshelfoneposition
higher.
Use Lo Broil to cook fi)ods such as
potdtx 5 or thick cuts of meat thoroughl_
without ox e_q)rowning them.
Broiling Guide - # Pass Broil Element
ge.com
[] Touch the Broil Hi/to pad once fi)r
Hi Broil
To change, to Lo Broil, touch the
Broil Hi/to pad again.
[] Touch the Start pad,
[] x,&q_enbroiling is finished, touch the
Clear/Off pa d.
The size, weight, thickness,
starting temperature
and VOIII" preference
of doneness will atti_ct
broiling times. This guide
is based on meats at
reti'igerator temperature.
(' The {L& I)('/_a*¢me_l o/
t*o/_+zla_;&*it_o_l sho*z[+lI,'_*owthat
+oo1,'i_1!4it to o_{_ I401" _ll('(l__
_o_ll+"/+x)dfloi*o_ i_g ol;gzz_*i*_l_*
I_oo1,'.}_)_z*l£;l+h+,_ (,_zid+,.t%I)A
t¢*v,.J**_*e19,v,5.)
Theoven has 6shelf positions.
Pass
4 3 2 1
Center baking pans h7 the oven.
Food
GroundBeef
Beef Steaks
Raret
Medium
Well Done
Rarer
Medium
Well Done
Chicken
Bakery Product
Bread (toast)
English Muffin
LobsterTails
[]
Fish Fillets
orThickness Position
1lb. (4patties)
I/2 to 3/4*' thick
4 Ibs.(12patties)
3/4to 1" thick
1to 11/2 Ibs.
11/2" thick
2 to 21/2 Ibs.
1whole catup
2to 21AIhs.,
split lengthwise
Breast
2to 4 slices
2(split)
2-4
1lb. (1/4to I/2*' thick) E
[]
[]
Salmon
Quantityand/ Shelf*
Steaks
Fillets
HamSlices
(precooked)
Pork Chops
Well Done
+Seeillustration for description of shelf positions.
2(1" thick) E
2 (I/2 to 3/4"thick) E
I/2" thick D
1" thick D
2(I/Z' thick) D
2(I" thick)about 1lb. D
F
E
E
D
D
E
C
C
E
F
FirstSide
Time(min.)
13
6
8
10
10
15
2O
25
25
3
3-4
18 2O
10
10
6
8
10
15
SecondSide
Time(rain.)
8
4
6
8
8
10 12
20
25
15
1
Do not
tunl
over.
6
8
10
15
Comments
Spaceevenly.
Steakslessthan3/4"
thick are difficult
tocookrare.
Slashfat.
Brasheachside with
meltedbatten
Broil skin-side-down
first.
Spaceevenly.Place
Englishmuffins cut-
side-upandbrash
with batter if desired.
Cutthrougl_backof
sl_eii.Spreadopen.
Brashwith melted
butter beforebroiling
andafter half of
broilingtime.
Handleandturnvery
carefully.Brashwith
lemonbatterbefore
andduringcooking,
if desired.
Turncarefully.Do not
tam skinsidedown.
Slashfat.
13
Page 14

Usingthe oven.
Broifing Guide - 6 Pass Broil Element
The size, weight, thickness,
starting temperature
and )our preterence
of doneness will afli_ct
broiling times. This guide
is based on meats at
retiJgerator temperature.
+ The U.& D@arlmo_t oiAg'rh:ultm_,
sa> "l'm_, bee/is po/m&_; bul you
_houM h_ow thal a)ohi_lg it to rail3'
140°1 ``m_,a_*s some fi)od poism*i_g
mgzn*isms ma_ smT_ive. " (N)m_¢:
Sgqe ]'bed Boot€. }bin Kitche_z
(;ui(h'. { _;I)A l_a,flz_le 19,";5.)
The oven has 6 shelf positions.
Pass
6 54321
_ []
Preheat the broiler for 2 minutes for improved performance.
Food
GroundBeef
Well Done
Beef Steaks
Rarer
Medium
Well Done
Rarer
Medium
Well Done
Chicken
Fish Fillets
Pork Chops
Well Done
Sahnon Steaks
[]
Quantity and/ Shelf First Side
or Thickness Position Time(rain.)
1lb.(4 patties) E 9
1/2 to3/4" thick E 11
1" thick
1to 1½Ibs.
1½"thick D 14
2 to2YzIbs. D 18
1whole cutup C 25
2 to2½ Ibs.,
split lengthwise
2 Breasts C 25
1/4to 1/2" thick E 6
2 (1/2" thick)
2 (1"thick)about 1 lb.
2 (1"thick)
4 (1"thick)about 1 lb.
F
E
E
D 22
E
D
D
D
11
10
15
10
12
[]
[]
[]
Second Side
Time (min.)
6
10
7
9
5
6W
89
11
14 16
20
10
10 15
5
10
15
78
10
Comments
Space evenly. Up to 8
patties take about tl_e
same time.
Steakslessthan1"
thickcookthrough
beforebrowning.Pan
fryingis recommendec
Slashfat.
Broilskin-side-down
first.
Handleandturnvery
carefully.Brashwith
lemonbutterbefore
andduringcooking,
if desired.
Slashfat.
Grease pan. Brush
steaks with melted
butter.
Center baking pans f17the oven.
/4
Page 15

Usingthe clock andtimer, ge.com
Not all features are on all models.
_ i i i i
Make sure the clock is set to the
correct time of da,¢
ToSet the Clock
The clock must be set to the correct time
of day fin" the atmmmtic oven timing
flmctions to work properly. The time of
day cmmot be changed dtwing a delayed
cooking or a delayed sel6cleaning cycle.
[] Touch the Clock pad twice.
[] Touch the 4-or -pads.
If the ÷ or -pads are not touched within
one minute aiier you touch the Clock
pad, the display reverts to the original
To Turn Off the Clock Display
1tyou have several clocks in veto" kitchen,
you may wish to mrn off the time oI day
clock display on yore" range.
[] Touch the Clockpad once to turn
off the time of day display: _Mthough
um will not be able to see it, the
setting. If this hal)pens, touch the Clock
pad twice and reenter the time el day:
[] Touch the Start,/On pad tmtil the
time of day shows in the displa).
This entex_ the time and starts the
clock.
Tocheckthetimeofdaywhenthedisplayis
showingotherinformation,simplytouchthe
Clockpad Thetimeofdayshowsuntilanother
pad/2touched
clock maintains the correct time
of day.
[] Touch the Clockpad twice to recall
the ch)ck display.
The timer is a minute timer only
The Cloar/Off pad does not affect the
time_
To Set the Timer
Thet/Ynerdoesnot contro/ ovenoperations.
Themaximumsetting on the timeris 9 hours
and59 minutes.
[] Touch the Kitchen timer On/Off pad.
[] Touch the +or-pads tmfil the
_lIllOtlnt of tixlle Veil w_lIlt shows in
the display. The ma_mum time that
can be entered in minutes is 59.
Times more than 59 minutes should
be changed to hom_ and minutes.
If youmake amistake, touchthe Kitchen timer
On/Offpad andbegin again.
ToReset the Timer
If the display is still showing the time
remaining, you may change it bv
touching the Kitchen timer On/Off pad,
then touching the + or-pads tmtil the
time w)u want al)l)ea_ in the display.
[] Touch the Start/On pad. The time
will start counting down, although
the display does not change tmtil
one minute has passed.
[] _&q_en the timer reaches ._00,the
control will beep 3 times fl)lh)wed 1)_
one beep every 6 seconds until the
Kitchen timerOn/Off pad is touched.
If the remaining time is not in the display
(clock, start time or cooking time are in
the display), recall the remaining time by
touching the Kitchen timer On/Off pad and
then touching the + or -pads to enter
the new time you want.
ToCancel the Timer
Touch the Kitchen timer On/Off
pad twice. 15
Page 16

#sin#tiletime#flakb#andreastb#bat#res,io.somemode,'sJ
Donot lock the oven door with the latch during timed cooking. Thelatch is used for self-cleaning only,
NOTE,"Foods that spoil easily--such as mil& eggs, fish, stuffings, poultry and pork--should not be aflowed to sit for
more than t hour before or after cookfi_g, Room temperature promotes the growth of harmful bacteria. Be sure that
the oven light is off because heat from the bulb will speed harmful bacteria growth.
How to Set an Immediate Start and Automatic Stop
Z
Temp Re¢0!!
L_°nJ
[.__off_)
0
ooki6"
kjim
@
L0.J
(q
Theoven wi// turnon r_rmediate/yandcookfor a
sdected /ength of tr?ne.At theend of tile cookrng
tinre, be ovenwi// turn off automatr_'a//y
[] Tolmh d_e Bake pad.
] Tol_ch die + or= pads to set d_e
overt [eH)pe_K(H'e.
[] Tolmh the Cooking Time pad.
NOTE:/f your rec'r}Jerequirespreheatfrrg,youmay
need toadd additiona/tinre to #re bng#r of the
cookingtrite.
[] Touch d)e Start/On pad.
The display shows ekher d)e o_en
tempe_vm_re that yol* set or the cooldm_g
time com_tdown. (The display starts with
PrEif showim_g the o;,e_ temperatm'e.)
The ove_/wi]] con dm_I_e to cook %r the
prog]wm]_ed amom_t o} time, the]_ mill
oil ;mtomatic;d]_.
[] Toltc]l the Clear/Off pad to c;mce] if
H e(ess_Y\.
Removethefoodfromtireoven.Remember,even
] Touch die +or=pads lose[ the
ba ki m_g dm e.
The cooki_*g dine that }on entered
>::i]]be disp]a_ed. (it}on se]ed Cookim_g
Time {]rst ;rod t]_em_a(!iust die Bake
gempel:_mre, d_e ovem_tempel;_tm'e
_rH_ be displayed ira)stead.)
#roughtireovenshutsoffautomatr#'a//y,foods
contbuecookrTrgaftercontrolsareoff
How to Set a Delayed Start and Automatic Stop
Theovenwillturnonat thetimeofdayyouset,
cookfora specihclengthoftimeandthenturnoff
automatrca//y
Make StlI'e tile clock shows tile coFI'ect
dme of day
[] Touch tile Bake pad.
] Touch tile ÷or -pads to set tile
()veil teIll peI'att II'e.
[] Touch tile Cooking Time pad.
] Touch tile + or -pads to set tile
desired length of cooking time.
[] Touch tile Start Time pad.
] Touch tile + or -pads to set tile time
o[ (lax VOtl WaIlt tile o'_eil to tIIFII Oil
and start cooking.
[] Touch tile Start/On pad.
NOTE:Anattention tonewi// sound if you
areusrngtr_nedbakrngand donot touchthe
Start/Onpad
NOTE:If vou would like to check tile times
you have set, touch tile Start Time pad to
check tile start time you have set or touch
tile Cooking Time pad to check tile length
of cooking time you have set.
When tile oven ttlI'IIS oi1 }It tile time oI day
you have set, tile display will show PrE mltil
it reaches tile selected temperatm'e, then
it will display tile oven temperature.
At tile end (ff cooking time, tile oven
will turn offand tile end-otk vcle tone
will SO/llld.
[] Touch tile Clear/Offpad to cancel
if ilecessai'_.
Removethe foodfrom the oven.Remember,even
thoughthe ovenshuts off automatrcally,foods
continue cookrngafter controlsare oK
16
Page 17

Special featuresofyourovencontrol ge.com
Yournew touch pad control has additional features that you may choose to use. The following are the features and
how you may activate them.
The special feature modes can only be activated while the display is showing the time of day. They remain in the
control's memory until the steps are repeated.
When the display shows your choice, touch the Start/On pad. The special features will remain in memory after
a power failure.
NOTE: The Sabbath feature and the Thermostat Adjustment feature are also Special Features, but they are
addressed separately in the foflowing sections.
® _@
Tem# Recall Ni/Lo
12Hour Shut-Off
Withthisfeature,shouldyouforgetandleavethe
ovenon,thecontrolwillautomaticallyturnoffthe
ovenafter12hoursduringbakbgfunctionsor
after3hoursduringabroilfunction.
if you wish to mrn OFFthis ligature, follow
the steps below.
[] Touch the Bake "and BroilHi/Lopads
at the same time tmtil the display
shows SF.
[] Touch the Clock pad. The displa} will
show ON ( 12 horn" shut-off). Touch
the Clock pad repeatedl) tmtil the
display shows OFF (no shut-off).
[] Touch the Start/On pad to actixate
the no shut-off and lea_e the control
set in this special ligatures mode.
/7
Page 18

"-'--usingthe SabbathFeature.(onsomemodels)
(Designed for use on the Jewish Sabbath and Hofidays)
TheSabbathfeature canbe usedfor baking/roastingonly.It cannotbe usedfor broiling,self-cleaningorDelayStartcooking.
NOTE,"Theovenlight comesonautomatically(onsomemodels)whenthe doorisopenedandgoesoffwhenthedoor is closed.
Thebulbmaybe removed.SeetheOvenLightReplacementsection.Onmodels_it,_a fights_itch onthe controlpanel,the oven
lightmaybe turned onandlefton,
How to Set Sabbath Feature for Regular Baking/Roasting
&'9÷ 0:o0
TamP RecN_ Hi!L0
OC!)
When the display shows D the
oven is satin Sabbath. When the
display shows D c the oven is
baking/roasting.
NOTE."Tounderstandbow the oven control works,
practice using regularbaking (non-Sabbath)before
entedng Sabbath mode.
Make surethe clock shows thecorrect time of day
and the oven is oK
] T(meh and hold both the Bake and
Broil Hi/Lo llads, at the same time,
m/til tile display sho_*,s SF.
] Tap the Clock pad mltil SAb alll}ears
in the (tistlla _
] "lbuch the Start/On tlad and D '+'+rill
+q)l)em: in the display.
] "lbueh the Bake t}ad. No sigllal will
l)e gJVel 1.
] Tile preset StalPtil/g telilt)el&ti/iFe'Bill
automatieall_ be set to 350. ° "[_tI) die 4-
or -pads to increase or decrease tile
temllemmre in 25 ° increments. The
temlleI;m_re can be set between 175 °
and 550. ° No signal or temtlemmre
will be gJ_vn.
] Touch die Start/On tied.
] ,_ier _1me(IBm (tela} period oI
al}tlloximat{ ly 3(1 sel(mds to 1 mimae,
D C will appear in the (lislll_ly indicath/g
that tile oven is baking/ro_dng. If D C
(toesn't appear in tile display, start ag'ain
at Step 4.
"Ik) a(!iust the o\'ell temperature, touch the
Bake pad and tap tile 4- or - pads to increase
or decrease tile temperature in 25 °
inlrements. Toulh the Start/On pad.
NOTE:'HIe Clear/Off mid Cooking Bme t)_(ts are
a(ti_' (luring the S_ff)l)ath t;t,_mm,.
Temp Reco!] Hi/Lo
oeking'
_rNe
When the display shows D the
oven is set in Sabbath. When the
display shows D C the oven is
baking/roasting.
18
Hew teSetSabbath FeatureforTimedBakieg/Reasfieg--lmmediateStartand
Automatic Step
NOTE: Tounderstandhow the oven co/itro/ works,
practice using requ/ar(non-Sabbafil) Immediat_ Start
andAutomat/_'Stop before entering die Sabbat/1mode
Make surefl?ec/ockshows fi?ecorrect t/?neof day
and tfle ov_n:_is oK
] T()u(:h m_d hold beth the Bake ",rod
Broil Hi/to pads, at the same thee,
m/tiI the displ i} shows SF
] "Eq) the Clock pad m/til SAb'app_ m_
in the dispIa 5.
] 'Ill)rich the Start/On pad md D will
appe _r in the displ _}.
] '[bu(:h th( Cooking _Tme pad.
] ']{bu(:h th( + or -p_ds to s(t th( d(sir_ d
l(_gth ot (ooldng tim( b( tv_ee_! l
mim_te md 9 ho(m_ md 59 mim]t{s.
The {'ookil/g til//e t[!_O yo/* elaered wiI1
be displ _y_d.
] Touch the Stab/On pad.
] Tol*ch th( Bake ll,d. No sig_/al x_ill
!/e gJ_, (/L
] Th( l}res{t starting t(mp_ratm'e vdU
mtomati(: _ll} b_ s(t to 35(}.: 'E_!/the ÷
of = l)_//s to i!!( 1"1'_s(' {)1" (lec['e;_se the
temper4tm'e in 25 _iI_cr('m('_}ts. The
temper_tm( (ml be set betweel! 175 )
and 550, _No sig_/al or telnpel _tt/re
_iI! be gM'n.
] T{}uc[! th( S_a_/On pad.
] \l_(_ a random (Iel;_y 1}(riod of
approximat(Iy 31}sec{}nds to ! mim0e.
D cwilI [pI/e:w i_! the di_,pI;_ indi{ _ting
that the o\(._! is b &ingiro tsting, lID c
doesnt ;_]}p(' _["in tl_(' disl)h_}, st_['t ag;d_
at Step 7,
'['c, _(!iust the o'_( _ t_ roper am-(., to{_cil the
Bake pad a[_(] t_p the + or - pads to i_c_x ase
or d{ crease th( tel!llie['atH['e i!! 2[5 °
in/:r(mems. '[bn(:h the Star,/On p;_d.
When ( ooki_g- is [h_ished, the disl)l;_ _,will
( [la[lge {i:om m c to D i_/(licati_lg that die
o_el! has tm_!(d OFFbm isstill setin Sabb_th.
Remo'_e tl_(! cooked [k)od.
Page 19

How to Exit the Sabbath Feature
ge.com
o @
+ Broil
Temo Reco. H]/Lo
L
] "]bu(h die Clear/Offp_d.
]
dela} t)elJod ot ai)i)roxhnatel" _ 30
se(onds to ] minute, until onl'v D is in
die (tist)la _
] "Ibu(h and hol(t both the Bake and
Broil Hi/Lo 1)ads, at the same time,
m_tJl the display shows SF,
] "[;a]) the Clock pad until ONor OFF
appears in the (lis])l;l_ r.ON indi(ates
that the oxen will amomatically turn
off aIter 12 hom:s. OFFin(licates dlat
the oven will not m.omaticallv turn oIt_
See the Special Features secdon [br an
explanation of the 12Hour Shut-Off
Ji_,amr,.,.
] "['(m(h d_e Start/On pad,
NOTE: If a power outage occurred while the oven was
in Sabbath,the oven will automatically turn off aed
stay off evee when the power returns. Theovencoetro/
must bereset.
19
Page 20

Adjust the oven thermostat--Do it yourself!
Youmay find that your new oven cooks differently than the one it replaced. Use your new oven for a few
weeks to become more familiar with it. If you still think your new oven is too hot or too cold, you can adjust
the thermostat yourself.
Donot use thermometers, such as those found in grocery stores, to check the temperature setting of your oven.
These thermometers may vary20-40 degrees.
NOTE,"This adjustment will not affect the broiling or the self-cleaning temperatures. The adjustment will be
retained in memory after a power failure.
_@ @ _
Terr p Reca_ H_/&o
@
T_]rl D RSCQII
To Adjust the Thermostat
[] Touch the Bake and Broil Hi/to pads
at the same time until the display
shows SF.
Touch the Bake pad, A two-digit
[]
number shows in the display,
The oxen temperature can be
[]
a(!justed up to (+) 35°F hotter or (-)
35°F (oole_: Touch the + pad to
increase the temperature in 1-
degree increments.
Touch the -pad to decrease the
tern l)eratm'e in 1-degree, increments.
[] _4q_en you ha',e made the
a(!justment, touch the Start/On pad
to go back to the time oI da)display,
]_Jse VOt/i" oxen as VOtl would
nom_allv
NOTE."This adjustment will not affect thebroihw
or self-cleaningtemperatures.It wi// be retained
in memoryafter apower failure.
Thetype ofmargarine will affect bakingperformance!
Most recipes for baking have been developed using high-fat products such as butter or margarine (80% fat). If you
decrease the fat, the recipe may not give the same results as with a higher-fat product.
Recipe failure can result ff cakes, pies, pastries, cookies or candies are made with low-fat spreads. Thelower the fat
content of a spread product, the more noticeable these differences become.
Federal standards require l)rodu('ts labeled "illai'gai']ne" to contain at least 80% tilt by weight, ixmq_ht sl)reads ,
on the other hand, contain less tilt and more water: The high moisture content ot these spreads affects the
texture and flavor ot baked goods. For best results with yore" old thvoFite recipes, use ma_gaFine, butter or
stick spreads containing at least 70% vegetable oil.
2O
Page 21

Usingthe self-cleaning oven. gecem
Before a Clean Cycle
Wipe up heavy soil on flTeoven
bottom.
@
(-self-
LSle00
We reconm_end venting your kitchen
with an open window or using a
ventilation tim or hood during tile
fi_t sel6clean cycle.
Remove shelves, broiler pan, broiler
grid, all cookware and any almnimm/
toil fl'om tile oxen.
Tile shiny, silve>colored oven shelves
(oil seine models) can be self:cleaned,
but they will darken, lose their luster
and become hard to slide,
Soil on tile fl'ont fl'ame ot tile range
and outside the gasket on the door
will need to be cleaned by hand. Clean
these areas with hot water; soal)-filled or
plastic scotwing pads or cleanse_ such
as Soft Scrub<i Rinse well with clean
water and (h_'.
How to Set the Oven for Cleaning
Follow tile directions in tile Before a
CleanCyclesect.ion.
[] I,atch tile door
IVOTE: Never fi)rce tile latch. If tile oven is
too hot, you will not be able to slide tile
latch. Mlow tile oven to cool.
[] Touch tile SeffClean pad.
[] Touch tile 4- or - pads until tile
desired Clean Tilne is displayed.
TheCleanT/Yneis normally4 hoursand20
minutes. Youcanchangethe CleanTkneto any
tl_nebetween3 and 5hours, dependlhgon the
amountof soil in youroven.
Do not clean tile gasket. Tile fibexglass
material of tile oven door gasket cannot
withstand abrasion. It is essential flw tile
gasket to remain intact. If vou notice it
becoming worn or flayed, replace it.
_]l)e up any hea\ 3' spillove_ on tile oven
bottolll.
Make sure tile ()veil light bull) cover is in
place and the oven light is off'.
IMPORTANE The health of some birds
is extremely sensitive to the fimles given
off during the sel6cleaning cycle of any
range. Move birds to another well-
ventilated I'OOIll,
While tile oven is sel6cleaning, you can
touch tile Clock pad to display tile time
of (lark To I'et/IFIl to tile cleall CO/lllt(lowIl_
touch tile Self Clean pad.
Tile oven shuts off automatically when
the clean cycle is complete, and 0:00 will
flash in the displa};
[] Slide the latch handle to the left as
tin" as it will _oo and open tile (loo_:
NOTE."Neverforcethelatchhandle.Forcingthe
handlewi//damagethedoorlockmechanism.
[] Touch tile Stall/On pad.
Tile sel6clean cycle xfill automatically
begin after Clean is displayed and tile
time c()tmtdown appea_s in tile display.
21
Page 22

Usingthe self-cleaning oven.
HOW tO Delay the Start of Cleaning (onsomemodels)
Make sm'e the clock shows the correct The display will show the start time. It
tim e of d%'.
] l,atch tile door_
@
F s lCh
Lg00nJ
@
t0r;3
k
[] Tou(h the Self Clean pad.
] [Jsim/g the + or- pads, e]/ter the
desired clea m/ti me.
[] Tol_ch tile $NFg 77me pad. Time
earliest start time "_ou Gm set wi]]
appear ira/ tile dispIa}.
] [Jsim/g the + or- pads, e_/ter the
t]m e (1{ (]_ _ol 0 Wa_/t t]/e C]ea m/C_C]e
to start,
[] Toluch the $ta_/Ofl pad.
L
"J
wiII _lot be possible to m/latch tile (were/
door m/ti] the tempem_mre drops below
the lock temperature.
The o\ en shuts off mmtomadcallv when
the c]em/ c_c]e is complete, amid 0:00 wi]]
flash h/ tile display
ToStop a Clean Cycle
Touch time Clear/Off pad,
X_'ait mltil time oven has cooled below time
locking tenlperamre to unlatch time dooI:
You will not be able to open time door
right away unless time oven has cooled
below time locking tenlperamre.
After a Clean Cycle
You may notice sonle white ash ill time
oven. X_ipe it up with a danlp cloth after
tile ()veil Cools.
If whitespotsremalkremovethemwitha soap-
filledsteelwoolpadandrinsethoroughlywith
a w))egar and water mixture.
These deposits are usually a salt
residue that cannot be renloved bv
time clean cycle.
If time oven is not clean after one clean
cycle, repeat the cycle,
You cannot set time oven fi)r cooking
until time oxen is cool enough fi)r time
door to be mllatched.
While time oven is sel6cleaning, you
can press tile Clodc pad to display
tile tin/e of day, To return to tile
clean comltdown, press time Self
Clean pad.
Apply a snlall am ount oI vegetable oil
to a paper towel and wipe time edges of
the oven shelves with the paper towel.
Do not spray with Pare _ or other
hd)ricant sprays.
22
Page 23

Careand cleaning oftherange, gecom
Be sure all controls are off and all surfaces are cool before cleaning any part of the range.
If your range is removed for cleaning, servicing or any reason, be sure the anti-tip
device is reengaged properly when the range is replaced. Failure to take this
precaution could result in tipping of the range and cause injury.
How to RemoveProtectiveShippingFilmand Packaging Tape
Carelilll} grasp a corner of file protective To assure no damage is done to tile finish
shipping fihn wid_ your fingels and slo\dy [)eel of tile product, d_e safest _J_, to ren/o_,e
it from tl/e appliance surf_tce. Do not rise any the adhesive, from l)ackaging,. tal)e on new
shaq) items to remme the fih-n. Remme all <;f appliances is an application of a household
tile fihn betore using tim appliance fi)r tile liqukl dish_ashing detergent. Apply wifl_ a
filet time. soft cloth and allo_ to soak.
NOTE:Theadhesivemustberemovedfroma#parts.
Itcannotberemovedffitisbakedon.
Control Knobs
Thecontrolknobsmayberemovedforeasiercleaning.
Make sure file knobs are ill file OFFposifions
and pull them straight off the stems for
cleaning.
The knobs call be cleaned in a dishwasher or
the_ may also be washed Mtb soap and _ter.
Make stay file inside of tile knobs are dr'_
beiore x_placing.
Replace fl_e knobs, in tile OFFt)osition to
ensure proper placement.
Control Panel
It's a good idea to Mpe file control panel after
each use of tile oven. Use a damp cloth to
clean or rinse. For cleaning, use mild soap
and _ter or a 50/50 solution of \ineg_ar and
watex: For rinsing, use clean wamr Polish dr_
with a soft cloth.
Do not use abrasive cleansers, strong liquid
cleaners, plastic scouring pads or o_en
cleaners on tile control panel--they will
damage the finish.
Painted Surfaces
Painted surthces include file sides of file
range and the door, top of control panel and
tile drm_r ti'ont. Clean these with so,q) and
water or a vineg_arand water solution.
Do IIOt IlSe coirll//el'cial o_,en cleallers,
cleaning po_dexs, steel wool or harsh
abrasives on ally painmd stlrti_ce.
Stainless Steel Surfaces (onsomemodels)
Donotusea steel woolpad;# will scratch
thesurface.
To clean tile stainless steel smtace,
use warm sudsy water or a stainless steel
cleaner or polish. Mways wipe the surti_ce
in the direction of the grain. Follow the
cleaner instructions tor cleaning the
stainless steel smthce.
To inquire about purchasing stainless
steel appliance cleaner or polish, or to
find tile location of a dealer nearest you,
please call our toll-ii'ee ntlI//beI':
National Parts Center 1.800.626.2002
ge.com
23
Page 24

Careand cleaning ofthe range.
Oven Vent
The gasket is designed with a gap at the
bottom to allow for proper air circulation.
Do not rub or clean the door gasket--
it has an extremely low resistance to
abrasion.
If you notice the gasket becoming worn,
frayed or damaged in any way or if it
has become displaced on the door,
you should have it replaced.
TheovenventisIocatedbehindtherightrearsufface
unit.
This area coukt become hot during ()','ell use.
Cleaning the Oven Door
Toclean theinsideof thedoor:
{{ Because tile area inside tile gasket is
cleaned during tile sell:clean Qcle,
yOU do not need to clean this bx hand.
_ Tile area outside the Kasket and die door
liner can be cleaned wifll a soap-filled
or plastic scouring pad, hot _tmr and
detexgent. Rinse well widl a vineg_u"
and _mr solution.
Toclean theoutsideof thedoor:
:_ Use soap and _x;tter to thoroughly clean tile
top, sides and front of tile o\en door. Rinse
well. You m:ff also use a ,glass cleaner u)
clean the Oass on the outside of the dool:
Do not let water drip into tile vent
openings.
It iS IlOI31/}ll _i)Y steal-l-i to COll-le ()tit
of tile _,ellt, alld 1-1-1oistll/'e ll/a_ collect
underneath it when tile oxen is in use.
Theventisimportantforproperaircirculation.Never
blockthisvent.
If any stain on tile door vent trim is
persistent, use a soft abrasixe cleaner and a
sponge-scrubber ior best results.
_ Spillage of marinades, tYuitjtdces, tomato
saucesand basting materials containing
acidsmay cause discoloration and shoukt
be wipe(i up imme(fiatelv When sm'fitceis
cool, clean and rinse.
Do not use oven cleanex_, cleaning
pounders or harsh abrasixes on tile
outside of tile door.
Hinge,"
lock
Pull hinge locksdowntounlock.
[ : :[ {tl_/_. /
Removalposition
Lift-Off Oven Door
Thedoorisveryheaw.Becarefulwhen
removingandliftingthedoor.
Donotlift thedoorbythehandle.
Toremovethedoor:
[] Fully open tile door
[] Pull tile hinge locks down tox_ard
tile door frame, to tile unlocked
position. A tool, such as a small
fiat-blade s(re_dfiver, may be req/fired.
[] Fim-dy grasp both sides (71"tile door at
tile top.
[] Close door to tile door removed
position, \dlich is halfl_ay bet\_een the
broil stop position and fl/llv closed.
[] I,ift door up and out until tile hinge
arm is clear of tile slot.
Toreplacethedoor:
[] Hrmly grasp both sides ol tile door at
tile top.
Vdth tile Bottom
[]
door at tile edgeof
same angle as slo_
the removal
position, seat the
indentation of
file hinge ami
into file bottom edge
of tile hinge slot. Tile notch ill tile
hinge ann must be fullx seated into the
bottom of tile slot.
Fully open tile door. If tile door will not
[]
flfll) open, the indentation is not seated
correctly in tile bottom edge of tile shlt.
Push the hinge locks up ag..dnst tile
[]
fl'ont fl'ame of tile oxen cavib to tile
hlcked position.
lock
Hinge_ _%
Hinge'
Pushhingelocksuptoloci(•
24 [] Close tile oven door.
Page 25

Oven Shelves
ge.com
Wire cover holde_
I Stopguide
ii -->Tv." i!iiiii
Clean the oven shelves with an abrasive
cleanser or steel wool. _Mter cleaning,
rinse the shelves with clean water and dry
with a clean cloth.
/VOTE:Theshlby,silver-coloredovenshelves
{onsome models)may becleanedin the self-
cleaningoven.However,theshelveswill darken
incolor,losethek lusterandbecomehard toslide
if cleaned duringtheself-cleaningcycle.
Storage Drawer Removal
Toremove the drawer:
[] Pull the drawer out tmtil it stops.
[] i,ift the ti'ont of the drawer tmtil the
stops clear the guides.
[] Remoxe the drawe_:
Oven Light Replacement
CAUTION: Before replacing your oven
light bulb, disconnect the electrical
power to the range at the main fuse or
circuit breaker panel.
Be sm'e to let the light cover and bulb
cool completely.
Toremove the cover:
Hold a hand under the cover so it
[]
doesn't fidl when released. With
finge_ of the same hand fimfl_
push back the wire coxer holder:
I,ift off the coxei:
To make the shelves slide inore easily,
apply a small amount of vegetable oil
or cooking oil to a paper towel and wipe
the edges of the oven shelves with the
paper towel.
To replace the drawer:
[] Place the drawer rails on the guides.
[] Push the drawer back tmtil it stops.
[] IJft the fl'ont of the drawer and push
back tmfil the stops clear the guides.
[] I,ower the fl'ont of the drawer and
push back tmfil it closes.
Do notremoveanyscrews toremove thecover
[] Replace bulb with a 40-watt
appliance bulb.
Toreplace the cover:
[] Place it into groove of the light
receptacle. Pull wire forward to
the center of the cover tmtil it
snaps into place.
[] Connect electrical power to
the Fan _e
_ ii_I
Oven Heating Elements
Do notclean the bakeelement or the broil
element Any softwill burn off when the
elementsare heated
To clean the oven flora; genfl) litt
the bake element. Clean with wam_
soapy wateI:
25
Page 26

Cleaningthe glass cooktop.
Normal Daily Use Cleaning
ONLY use (:EILBd_IA BRYTE _' Ceranfic
Cooktop Cleaner on the ,glass cooktol )"
Other creams may not be as eflbctixe.
To maintain and protect the surfi_ce of
)_mr glass cooktop, tollow these steps:
[] Befiwe using the cooktop fin"the
first time, clean it with CE]L_dVIA
BP.YTE'_Ceramic Cooktop Cleane_:
Cleanyour cooktopafter
eachspill. UseCERAMA
BRYTE® CeramicCooktop
Cleaner.
This helps protect the top and
makes cleanup easier.
[] Daily use of CEIL_d_IABRYTE<_'
Ceramic Cooktop (:leaner will help
kee I) the cooktop looking new.
Burned-On Residue
[] Shake the cleaning cream well.
Appl) a few drops of (;EI_d_4A
BP.YTE (') Ceramic Cooktop Cleaner
directly to the cooktop.
[] Use a paper towel or CEILBd\/IA
BRYTE _' Cleaning Pad for Ceramic
Cooktops to clean the entire
cooktop S]lI_il ce,
[] Use a dry cloth or paper towel
to remove all cleaning residue.
No need to rinse.
NOTE:It isveryimportantthat youDONOT
heat thecooktopuntilit hasbeencleaned
thoroughl_z
Use a CERAMA BRYTE_Cleaning
Pad for Ceramic Cooktops.
Q
TheCERAMA BRYTE'_ Ceramic
Cooktop Scraper and aft
recommended suppfies are
available through our Parts Cente_
See hTstructions under "To Order
Parts" section on next page.
NOTE:Donot use a duffor
nicked blade.
WARNING:DAMAGEtoyourg/asssurface
mayoccurif you usescrubpadsotherthan
thoserecommended.
[] Allow the cooktop to cool.
[] Spread a few droi)s of CEIL_MA
BRYTE _)(]eraini{" (:ooktop Cleaner
on the entire burned residue area.
Using the included CERAMA
[]
BRYTE <_)Cleaning Pad fiw Ceramic
Co{}ktops, rub the residue area,
alI,) )lying, pressure as needed.
Heavy, Burned-On Residue
,_]](}_r the cooku}p to coo].
[] [Ise a s]m]g]e-edge razor blade
scraper at approximately a 45 °
a_]g]e agMm_st tile glass sm'tsce
amid scrape the soil It w]]] be
m_ecessar\ to apply pressl_re to
[he razor scl;_per ira] order to
remove the residue.
After scrapim_g wit]] the raz®r
[]
scraper, spread a few drops of
CERAMA BRUTE (_Ce_:m_ic
Cooktop CleaNser om_the e]_tire
bm'N]ed reskIue area. [Ise the
CERAMA BRVFE <:C]eaMm_g Pad to
remove am]y remaiMm]g res](ble.
If any residue remains, repeat the
[]
steps listed above as needed.
For additional protection, alter
[]
all residue has been remoxed,
polish the entire surface with
CEILZ_dVIA BRYTE ': Ceramic
())oktop Cleaner and a paper towel.
For additiol_a] protecti<m,
[]
aRer a]] resklue has beem_
removed, jDo]is]_ the el]tire
sl*rtsce _dth CERAMA BRTTE <
;rod a paper towel
26
Page 27

Metal Marks and Scratches
ge.com
[] Be careful not to slide pots and
pans across your cooktop. It will
leave metal markings on tile
cooktop S/li-J[;ice.
These marks are remowd)le using
tile CEI_d_4A BRYTE <'_Ceramic
Cooktop (:leaner with tile
CEIL_dMA BRYTE '_Cleaning Pad tar
Ceramic Cooktops.
[] If pots with a thin oxerla) of
almninmn or COl)per are allowed
to boil dr B the overlay may leave
black discoloration on the
cooktop.
CooktopSeal
To {'lean tile {'ooktop seal at{rand tile for a few minutes, then wipe clean
edges of tile glass, lay a wet cloth on it with nonabrasixe cleaners.
Glasssurface--potential forpermanent damage.
This should be removed
immediately heft)re heating
again or the discoloration
may be pemmnent.
CAUTION: Carefully check the bottom of
pans for roughness that would scratch
the cooktop.
Our testing shows that if
you are cooking high sugar
mixtures such as jelly or
fudge and have a spillover,
it can cause permanent
damage to the glass surface
unless the spillover is
immediately removed.
Damage from Sugary Spills and Melted Plastic
[] Turn off all surtace traits. Remoxe
hot pans.
[] _'earing an oven mitt:
a. Use a single-edge razor blade
scraper (CERAMA BP.YTE _
Ceramic Cooktop Scraper) to
illOVe tile spill to a cool aI'ea on
tile cooktop.
b. Remove the spill with
paper towels.
To Order Parts
To order CEI_d'dA BRYTE _'Ceramic
(:ookto I) Cleaner and tile cooktop
scrape_; please call am" tolM'ree
n tllllbeI':
National Parts Center 800.626.2002
CERAMA BRYTE®Ceramic
Cooktop Cleaner .......... # WXIOX300
CERAMA BRYTE® Ceramic
Cooktop Scraper ......... # WXIOX0302
Kit ...................... # WB64X50£7
(Kit includes cream and cooktop scraper)
CERAMA BRYTE® Cleaning Pads for
Ceramic Cooktops ........ # WX10X350
/ o
[] Any remaining s )illover should be
left tmtil the sm'thce of the
cooktop has cooled.
] Don't use tile surtace traits again
until all of the residue has been
completely removed.
NOTE: If pitting or indentation in the glass
surface has already occurred the cooktop
glass wifl have to be replaced/n this case,
service wi// be necessary
27
Page 28

Before YouCallForService...
Troubleshooting tips
Save time and money/. Review the charts on the following
pages first and you may not need to call for service.
Possible Causes What To Do
Surface units willnot hnproper cookware * Use pans which are flat and match tile diameter
maintain a rolling boil being used. of tile surth(e unit selected.
or cooking is not
fast enough
Surface units do A fuse in your home may be * Replace tile ruse or reset tile circuit breaker:
not work properly blmm or the circuit breaker
tripped.
Cooktop controls • (_he(k to see the ((n're(t control is set for the surth(e
improperly set. unit you are usiu
Surface unitstops • This is hernial. The unit is still on :rod hot.
glowing when turnea
to a lower setting
Scratches(mayappear
as cracks)oncooktop
glasssurface
Areas of discoloration Food spillovers not cleaned • See the Cleaning the glass cooktop section.
OUthe cooktop before next use.
Plastic melted to Hot cooktop came into • See the Glass surface potential for permanent damage
the surface contact with plastic placed section in the Cleaning the glass cooktop section.
Pitting (or indentation) Hot sugar mixture spilled • (',all a qualified technician for replacement.
of the cooktop on the cooktop.
Frequent cycling hnproper cookware • Use only flat cookware to minimize cvclin
off and on of being used.
surface units
Incorrect clem_hlg
methods being used.
Cookware with rough bottoms
being used or coarse particles
tsalt or sand) were between
the cookwaxe and the surface
of the cooktop.
Cookware has been slid
across the cooktop surface.
Hot surface on a model • This is normal. The surthce InaV appear discolored
with a fight-colored glass when it is hot. This is tempora D" mad will disappear
cooktop, as the _,dass..cools.
on the hot cooktop.
• Scratches are not remowd)le. Tiny scratches will become
less visible in time as a result ot cleaning.
• To avoid scratches, use the recoumlended cleaning
l)rocedures. Make sure bottolns ot cookware are clean
betore use, and use cookware with smooth bottoms.
Control signals after You forgot to enter a • Touch the Bake 1):1(1and desired temperature or the
entering cooking time bake temperature or Self Clean pad and desired clean time.
or delay start clemfing time.
28
Page 29

ge.com
Possible Causes What ToDo
Food does not bake Oven controls improperly set. * See tile Using the oven section.
or roast properly
Shelf position is incorrect * See tile Using the oven section.
or the shelf is not level.
Incorrect cookware or * See tile Using the oven section.
cookware of hnproper
size being used.
Oven thermostat needs * See tile Adjust the oven thermostat--Do it yourself[
adjustment, sectiou.
Clock and timer do Plug on range is not completely • Make sure electrical plug is plugged into a live, properly
not work inserted in the electrical outlet, gr()uuded outlet.
A fuse ha your home may * Replace tile fl/se or reset the circuit breaker:
be blown or the circuit
breaker tripped.
Oven controls improperly set. * See the Using the clock and timer section.
Oven light does Light bulb is loose or defective. • Tighten or replace the bulb.
not work
Switch operating light • Call fl>r service.
is broken.
Food does not Door not open to the broil stop • See the Using the oven section.
broil properly position as recommended.
Oven controls improperly set. • Make sure you touch the Broil Hi/Lopad.
hnproper shelf position • See the Broiling Guide.
being used.
Cookware not suited • For best results, use a pan designed fi>r broiling.
for broiling.
In some areas the power • Preheat the broil element fi>r 10 minutes.
(voltage) may be low. • Broil h>r the hmgest_ period of time recommended
in the Broiling Guide.
Oventemperaturetoo
hot ortoocold
Oven thermostat
needs adjustment.
• See the Adjust the oven thermostat--Oo it yourself[
se(tiou.
29
Page 30

Before YouCall ForService...
Troubleshooting tips
Possible Causes What ToDo
Ovenwill notwork
Storage drawer Rear drawer support is • Rep(_sitiou the (lraweL See the Storage Drawer
is crooked on top of the guide rail. Removalinstructions in tl/e Care and cleaning of
Plug on raaage is not
completely inserted in
the electrical outlet.
A fuse ha your home may • Replace tile fl/se or reset tile circuit breakeL
be blown or the circuit
hreaker tripped.
Oven controls improperly set. • See the Using the oven section.
Door left in the locked •/f uecess;ll',' allow the oven to cool; then tmlock
position, the dora:
• Make sure electrical I)lu°_'Iis )lugged,, into a lixe,
I)re I)erl_,,grounded outlet
your range section.
Storagedrawer Power cord may be • Reposifiou the drawer and power cord. See the
won't close obsWucthag drawer Storage Drawer Removal iustructi{ms in the Care and
in the lower hack cleaning of the range section.
of the range.
Rear drawer support is • Repositiou the draweL See the Storage Drawer
on top of the guide rail, Removal instructions in the Care and cleaning of the
range section.
Oven will not self-clean The oven temperature is • #dlow the oven to cool to room tenq)erature ;lud
too high to set a self-clema reset the controls.
operation.
Oven controls improperly set. • See the Using the self-cleaning oven section.
Oven door is not in the locked • Make sure you move the door latch handle all the
position, way to the right.
"Crackling" or This is the sound of the • This is normal.
"popping" sound metal heating and cooling
during both the cooking and
cleaning functions.
Excessive smoking Excessive soil. • Touch the Clear/Off pad. Open the windows to
during a clean cycle rid the room of smoke. _'ait until the light on the
Self Clean pad goes off'. _'ipe up the excess soil and
reset the clean cycle.
Oven door will not Oven too hot. • Allow the oven to cool beh)w h)cking, teml_erature.
unlock
Ovennot clean after Oven controis not properly set. • See the Using the self-cleaning oven section.
a clean cycle Oven was heavily soiled. • Clean up heavy spillovers before starting the clean
cycle. Heavily soiled ovens may need to sell:clean
again, or for a lomrer_ period of time.
3O
Page 31

Possible Causes What ToDo
ge.com
"F- and a number
or letter" flash
in the display
You have a function
error code.
• Disconnect all power to the range tbr at least 30
seconds and then reconnect power. If the flmction
error code repeats, call fin" service.
• On seltXcleaning models, if a flulction error code
appears during the sell=cleaning cycle, check tile oven
door latch. The latch may have been inoved, it only
slightly, fl'oln the locked position. Make sure the latch
is inoved to the right as far as it will go. Touch the
Clear/Off pad. _Mlow the (),,ell to cool tor one houi;
Put the oven back into operation.
Display flashes "bAd" The installed cmmection • Contact installer or electrici:m to correct lniswire.
then "linE" with a from the house to the mlit
loud tone is miswired.
Display goes blank A fuse ill your home may be • Replace the fi/se or reset the circuit breakel;
blown or the circuit
breaker tripped.
The clock is turned off from • See the Using the clock and timer section.
showing ill the display.
Display flashes Power failure. • Reset the clock.
Unable to get the Oven control pads were • The Bake and Broil Hi/Lopads must be touched
display to show "SF" not pressed properly, at the Salne time and held for 3 seconds.
Power outage, Power outage or surge. • Reset the clock./f tile ()\'ell was ill use, you must reset
it by touching the Clear/Off pad, setting the clock
aml resetting :my cooking flmcti(m.
"Burning" or "oily" This is normal in a new • To speed the process, set a sell=clean cycle for a
odor emitting from oven and will disappem" minimum of 3 hours, ,See the Using the self-cleaning
the vent ill time. oven section.
Strong odor An odor from the insulation • This is tell/l)Ol';lI'V,
aromld the inside of the
oven is normal for the first
few times the oven is used.
37
Page 32

Accessories.
Looking For Something More?You can find these accessories and many more at ge.com, or call 800.626.2002
(during normal business hours). Have your model number ready.
! _; i¸
iiii i
Surface Elements & Drip Pans
Oven Elements
Cleaner
OvenShelves Broiler Pan
CleaningPads Scraper
32
Tired of discolored shelves? Wishing you had exm_-heaxT-dut), oven shelves?
NOW AVAILABLEfor your range:
(;E's innovative, selfk:leanable porcelain-coated oven shelves!
• Hea_ T Duty
• Du_wble
• Able m be cleaned in a self-cleaning oven
Visit ge.com for more infbnnation.
Page 33

GE Service Protection Plus F_'
(;E, a imme recogifized _orkl_kle for qtm]lky ai_d depeildabi]liF, offers )(m
Service Protecti(m Ph_s'_'--comprelhei_si_e protectioi_ oi_ M]I}ore appHm_(:es--
No Matter Wllat Brand!
Benefits Include:
o Backed by GE
o All brands covered
o Unlimited service calls
* All parts and labor costs included
o No out-ofopocket expenses
o No hidden deducfiMes
o One 800 number to call
Yol_ will be complete]} satisfied with ore" service [)rotecti(m or _,(m ma} re(p_est }ore" re(me} back
<m the remaim_im_g vab0e of _om" comm'act. No q_estiom_s asked. It's that simple.
Protect yol_r refrigerator; dishwasher; washer amid d_ye_; ram_ge, TVI V(R amid milch more--any brand!
PMs there's m_oextra cha_ge Jti>r emerge_cv service a_d low mo_th]y Jth_a_ch_g is available. Eve_ icemaker
coverage m_d {i>od spoilage protectio_ is o{tered, Yo_ ca_ rest easy, k_owi_g that all vo_r vabmb]e
]_o_seho]d prod_acts are protected agai_st expel_sive repairs.
for m ore i_/['o]'m a[i o_/.
\/1 b_'ands (ove_ed, ii I) _o 20 yeals old, in d_ (ondn_nml U,S,
WeT! Cover Any Appliance.
Anvwhoro. Anvtimo.
Please place in envelope and mail to:
General Electric Company
Warranty Registration Department
P.O. Box 32150
Louisville, KY 4{)232-215{}
33
Page 34

Consumer Product Ownership Registration
Deal Customer:
Thank you for purchasing our product and thank you for placing your confidence in us.
V(e are proud to haxe you as a customer'.
Follow these three steps to protect your new appliance investment:
Complete and mail
yollr Consurller
Product Ownership
Re_stration today.
ttavc tile pca_u of
mind of" knowing we
call colltact vol/ ill
the unlikely _vcnt of a
satbly modification.
Atter mailing tile
registration below,
store this dOCllll]ellt
in a sati. place. It
contains inlormation
you will need should
you require service.
Our selwice mnnber is
800.GE.CARES
(800.432.2737).
Model Number Serial Number
I I
Important: If you did not get a registration card with your
product, detach and return the form below to
ensure that your product is registered, or register
online at ge.com.
Consumer Product Ownership Registration
Read your Owner's
Manual carefullv.
It will help you
oper_lte your llew
appliance properly.
I
._,,,_ (MI here
Model Number Serial Number
Ms. M*>,. Mixs
Fir-,1 ] I Lasl]
Name I I I I I I I I I Name I I I I I I
St 1-_.(!1 ]
Addr< ss I I I I I I I I I I I I I I I I I I I I I I I
Apt. # J I J J J I J I J E-n,ail Address*
Ciw J I I
l )ale Place(]
In Use ]1]
Monlh
* Please proxide your e-mail address to rcceive, via e-mail, discounts, special oflbr,, and other impoltant
commmficafions from (;E Appliances ((;1L\).
GE Consumer & Industrial
Appliances
General Electric Company
Louisville, KY 40225
ge,com
34
[ Check herc if you do not wmlt to receixe COlnmunications fl-om GI£Vs carcflllly select(<l paltner_,.
FAILI JRE T() COMPLETE AND RETI JRN TIIIS C_\R1) D()ES NOT DIMINISII Y()I R
"_,)_/l_ \N'IY RI(;IlTS.
For mow intormation about G1LVs priv_lcyand dala usage policg go to ge.com and click on
'Privacy Policy" or call 800.626.2224.
I I I I I I
I
I
Page 35

GEElectricRange Warranty.
All warranty service provided by our Factory Service Centers,
or an authorized Customer Care®technician. Toschedule service,
on-line, 24 hours a day, vis# us at ge.com, or carl 800.GE.CARES
(800.432.2737).Please have serial number and model number
Staple your receipt here.
Proof of the original purchase
date is needed to obtain service
under the warrant_
available when calling for service.
_ GEWill Provide:
Anypartof the range which fifils due to a defect in materials or workmanship,
From the date of the Durh_g this limited one-year warranty, GE will also provide, free of charge, all labor
origina!purchase and in-home sexxice to replace the defectixe part,
Service trips to your home to teach you how to use
the product.
Improper installation, delivery or maJntenm_ce.
Failure of the product if it is abused, misused, or used
for other thml the intended purpose or used
commerciaJly.
Replacement of house fuses or resetting of circuit
breakers.
Dmnage to the product caused by accident, f'we, floods
or acts of God.
Incidental or consequentiaJ dmnage caused by possible
defects with this applim_ce.
Dmnage caused after delivery.
Product not accessible to provide required service.
Warranty.Any implied warranties, including the implied warranties of merchantability orfitness for a particular purpose,
EXCLUSIONOFIMPLIED WARRANTIES--Your sole and exclusive remedy is product repair as provided hi thisLimited
are limited to one year or the shortestperiod allowed by law.
This warranty is extended to the original purchaser and any succeeding owner for products purchased for
home use within the USA. If the product is located in an area where service by a GEAuthorized Servicer is not
available, you may be responsible for a trip charge or you may be required to bring the product to an Authorized GE
Service location for service. In Alaska, the warranty excludes the cost of shipping or service calls to your home.
Some states do not allow the exclusion or limitation of incidental or consequential damages. This warranty
gives you specific legal rights, and you may also have other rights which vary from state to state. Toknow
what your legal rights are, consult your local or state consumer affairs office or your state's Attorney General.
Warrantor:General Electric Company.Louisville,KY40225
35
Page 36

ConsumerSupport.
Hax'e a quesdom_ or m_eed assist;race with )our a[)plia_]ce? Try the C,E AppliaN_ces \",el)site 24 bouts a day
"1gEApp/iancesWebs/to go.corn
am_} day of the vear[ tzor greater _om'em_ie]_ce amid fi_ster se]_'ice, )ou cam_mmw dow]_]oad ()w]_er s J\.'lamla]s,
order [)arts or ex'e]_ schedu]e se_-,'ice o]_-lim_e.
ScheduleSerwce
Expert (;E repair se_,'ice is <)]_1) (me step awa', fmn-_ "_our doon (;et o]_-lh_e and schedule "tour service at
"_our• com'e]_ie]_ce 24 hours am dax of the _ ear'. Or call 800.(;E.( :ARES (81111.432.2737) durim_g _ormal
bHsim_ ess hoHrs.
ge.COm
flea/Life DesignStudio ge.com
(;E sl_pports the l IN_iversal Design com_cept--products, set'does amid e]wironmem_ts that cm_ be reed by
people ot a[[ ages, sizes amid capabilities. _ recognize the _eed U) design tbr a wide m_ge ot ph)'sica] m_d
m e _ tal abili ti es a _ d im pai rm e_ ts. For details of GE's [ In_iversal Design a[:)I:)11ca tio_ s, h_ cl I_di _ g ld tch e_
design ideas tbr [)eop]e with disabi[ities, check out ol_r _>bs]te today. For the hea_J_g impaired, [:)]ease ca[[
800.TDD.(;EAC (800.833.4322).
ExtendedWarranties
Plu'chase a (;E exte]lded warm_]tv a_ld learn abollt special discolmts that are available while )olu" _r_]'_ b'
is still i _ effect. _u cm_ DUtCh use it o_-]i _ e un_yti m e, _)r ca]] 800.G2(_.2224 d uri _ g _ _)rm al 1)l_si _ ess h _)1us.
(;E ('x)_ s l m_ er Hom e Servi ces will still be th e_'e after )o iu" wa rra _ b expi res.
PartsandAccessories
In_d]vhl!uals qlmlified to se_]ce theh" ow_ appha_ces can_ ha_e parts or accessories sent dh'ecdv to theh"
homes (VISA, MasterCard an_d Disco_ er cards are accepted). Order o]_-lh_e toda), 24 hours even day or
by ph o_ e at S00.626.2002 dluJ _g n_om_ a[ bmi _ess h ours.
_nstmctiens contained in this man_M cover precednres tohe performed fly any nset Other semicing ffeneraffy
shonM he referred to q_Mified service personnel Ca_tien mnst he exercised, since improper semicinff may canse
nnsMe operation,
ContactUs
If you are not satisiied with the service you receive [_'om (;E, contact i_s o_ olu" !_bsite with a]] the details
i_ch_(Ii_g your [)hon_e mm_be_; or w_Jte to: (;e]_e_] Ma_ageu Customer Relatio_s
(;E Applian_ces, .Applia_ce Park
I,ouisv]lle, KY 41)225
Register your new app]im]ee ondine--at your eonve]]Jenee[ Th]]e])' [)roduct registmti(m,, w[H allow for
'] RegisterYourAppliance
e n h a _?ced corn m 11_?]ca d ()17 a 17d prom 1)t se i'd ce Im de r the te i'm s ()f )( )11r war] _ u ty sh (_Illd the _?ee d a]'ise.
_, _2_u may also mail i_ the [)re-[)ri_ted registmti(m,, card i_cluded i_ the [)ackh_g, material.
Printed in the United States
e.gom
_. CO_
 Loading...