

Page 1
wvvw.GEAppliances.com
Safetylnstruc_ions ......... 2_
Operating Instructions
Clock and Timer ............. 14
Oven .................... 10-20
Power Outage .............. 11
Dabbath Feature .......... 17, 18
Sell'Cleaning ............ 19, 20
Special Features ............. 16
Thermostat ................. 18
Timed Baking & Roasting ..... 15
Surl:ace Units .............. 7-9
Care and Cleaning
Broiler Pan & Grid ........... 23
Control Knobs .............. 21
Glass C_ktop ............ 24, 25
Lift-Off _en Door ........... 22
Light ...................... 23
Shelves ..................... 23
Troubleshooting Tips ..... 26-29
Accessories ................. 30
EER3000
EER3001
6oo
71o
JBP64
JBP66
JBP67
JBP68
JBP69
JBP71
JBP78
Consumer Support
C_msumer Support ..... Back Cover
Warranty ................... 31
Write the model and serial
numbers here:
Model #
Serial #
You can find them on a label
behind the storage drawer on
the front of the range frame.
164D4290P334 49-80178 03-03JR
Page 2
IMPORTANTSAFETYINFORMATION.
READALLINSTRUCTIONSBEFOREUSING.
WARNING!
For your safe_ the information in this manual must be followed to minimize the risk of fire,
electric shock, or to prevent property damage, personal injury, or loss of life.
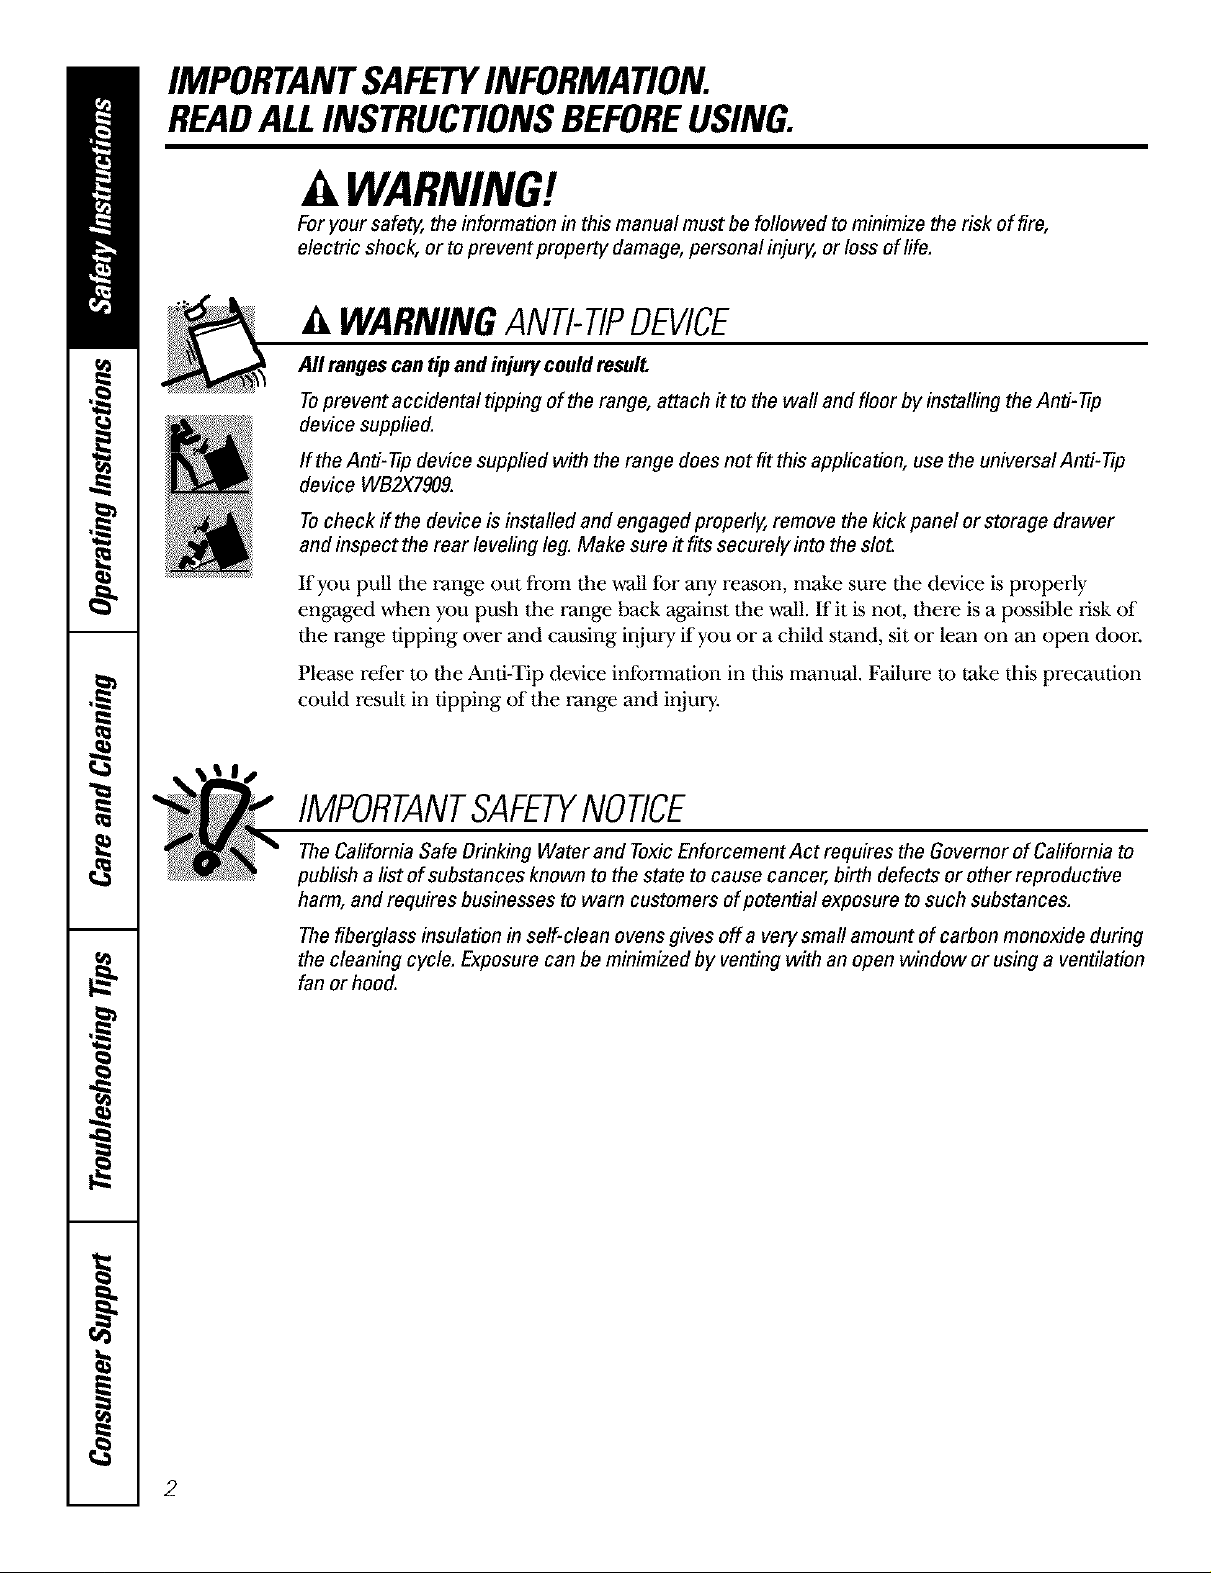
WARNINGANTI-TIPDEVICE
All ranges can tipand injurycould result.
Toprevent accidental tipping of the range, attach it to the wall and floor by installing the Anti- tip
device supplied.
If the Anti- tip device supplied with the range does not fit this application, use the universal Anti- 77p
device WB2X7909.
Tocheck if the device is installed and engaged properly, remove the kick panel or storage drawer
and inspect the rear leveling leg. Make sure it fits securely into the slot.
If you pull the range out from the wall lbr any reason, make sure tile device is properly
engaged when you push the range back against the wall. If it is not, there is a possible risk of
tile range tipping over and causing injury if you or a child stand, sit or lean on an open d_r.
Please refer m the Anti-Tip device information in this manual. Failure m take this precaution
could result in tipping of the range and injury.
IMPORTANTSAFETYNOTICE
The Califomia Safe Drinking Water and ToxicEnforcement Act requires the Govemor of Califomia to
publish a list of substances known to the state to cause cancer, birth defects or other reproductive
harm, and requires businesses to warn customers of potential exposure to such substances.
The fiberglass insulation in self-clean ovens gives off a very small amount of carbon monoxide during
the cleaning cycle. Exposure can be minimized by venting with an open window or using a ventilation
fan or hood.
2
Page 3
wwvc.GEAppliances.com
SAFETYPRECAUTIONS
When using electrical appliances, basic safety precautions should be followed, including the following:
N Use this appliance only lbr its intended
pui_se _s described in this Owner's
Manual.
@ Be sure your appliance is properly
installed and grounded by a qualified
installer in accordance with the provided
installation instructions.
N Have tile installer show you tile location
of tile circuit breaker or fuse. Mark it Ibr
e_y reference.
N Do not attempt to repair or replace any
part of your range unless it is specifically
recommended in this manual. All other
servicing should be refelTed m a qualified
technician.
@ Belore perlbrming any se_Mce, disconnect
tile range power supply at tile household
distribution panel by removing tile fuse or
switching off tile circuit breaker.
N Do not leave children alone--children
should not be left alone or unattended in
an area where an appliance is in use. They
should never be allowed m sit or stand on
any part of tile appliance.
@ Do not allow anyone m climb, stand or
hang on tile door; storage drawer or
cooktop. They could damage the range
and even tip it over, causing severe
personal injmy.
WARNING!
SAFETYPRECAUTIONS
Do not operate the oven or cooktop controls if the glass is broken. Food splatter or cleaning solution
may penetrate a broken control panel and create a risk of electrical shock. Contact a qualified
technician immediately should your glass control panel become broken.
N Do not store flammable materials in
an oven or near tile c_ktop.
CAUtiON:Items of interest to
children should not be stored in cabinets
above a range or on tile backsplash of a
range--children climbing on tile range
m reach items could be seriously irgured.
N Never wear loose41tting or hanging
garments while using the appliance.
Be careful when reaching Ior items stored
over tile range. Flammable material could
be ignited if brought in contact with hot
surface units or heating elements and may
cause severe bums.
N Use only di T lx_t holders-moist or damp
pot holders on hot surfaces may result in
burns ['rom steam. Do not let pot holders
Much hot surface units or heating
elements. Do not use a towel or other
bulky cloth in place of pot holders.
Do not use water on grease fires. Never
pick up a flaming pan. Turn the controls
off. Smother a flaming pan on a surface
unit by covering tile van completely with
a well41tting lid, cookie sheet or flat tray.
Use a multi-pu_se dry chemical or
Ibam-type fire extinguisher
Flaming grease outside a pan can be put
out by covering it with baking soda or;
if a_lable, by using a multi-purpose dry
chemical or [ham-type fire extinguisher
Flame in tile oven can be smothered
completely by closing tile oven d_r and
mining tile oven offor by using a multi-
purpose dry chemical or Ibam-type fire
extinguisher
3
Page 4
IMPORTANTSAFETYINFORMATION.
READALLINSTRUCTIONSBEFOREUSING.
WARNING!
SAFETYPRECAUTIONS
i_ _,,,_
_ For your s_ety, never use your appliance
for wa*aqfing or heating the room.
N Do not let cooking grease or other
flammable materials accumulate in or
near the range.
N Do not touch tile surface units, the
heating elements or the interior surface
of the oven. These surfaces may be hot
enough to burn even tilough tiley are
dark in color" During and Mter use, do not
touch, or let clothing or other flammable
materials contact tile surface units, areas
nearby tile surface units or any interior
area of tile oven; allow st_mient time for
cooling first.
Potentially hot surfaces include the
cooktop, areas facing the cooktop, oven
vent opening, surfaces near the opening,
crevices around tile oven door;
REMEMBER: The inside surface of the oven
may be hot when tile door is opened.
@ Do not store or use combustible materials,
gasoline or other flammaMe vapors and
liquids in the vicinity of this or any other
appliance.
N Keep the hood and grease filte*:s clean
to maintain good venting and to avoid
gwease fires.
N Teach children not to play with tile
controls or any other part of the range.
N Mways keep dish towels, dishcloths, pot
holde*:s and other linens a s_e distance
from your range.
N Mways keep wooden and plastic utensils
and canned f_d a s_e distance from
your range.
N Always keep combustible wall covering,
curtains or drapes a s_e distance from
your range.
COOKMEATANDPOULTRYTHOROUGHLY...
Cookmeatandpoultry thoroughly_me@ to at leastan INTERNALtemperatureof 160°Fandpoultry to at least
an INTERNALtemperatureof 180% Cookingtothese temperaturesusuallyprotectsagainstfoodborneillness.
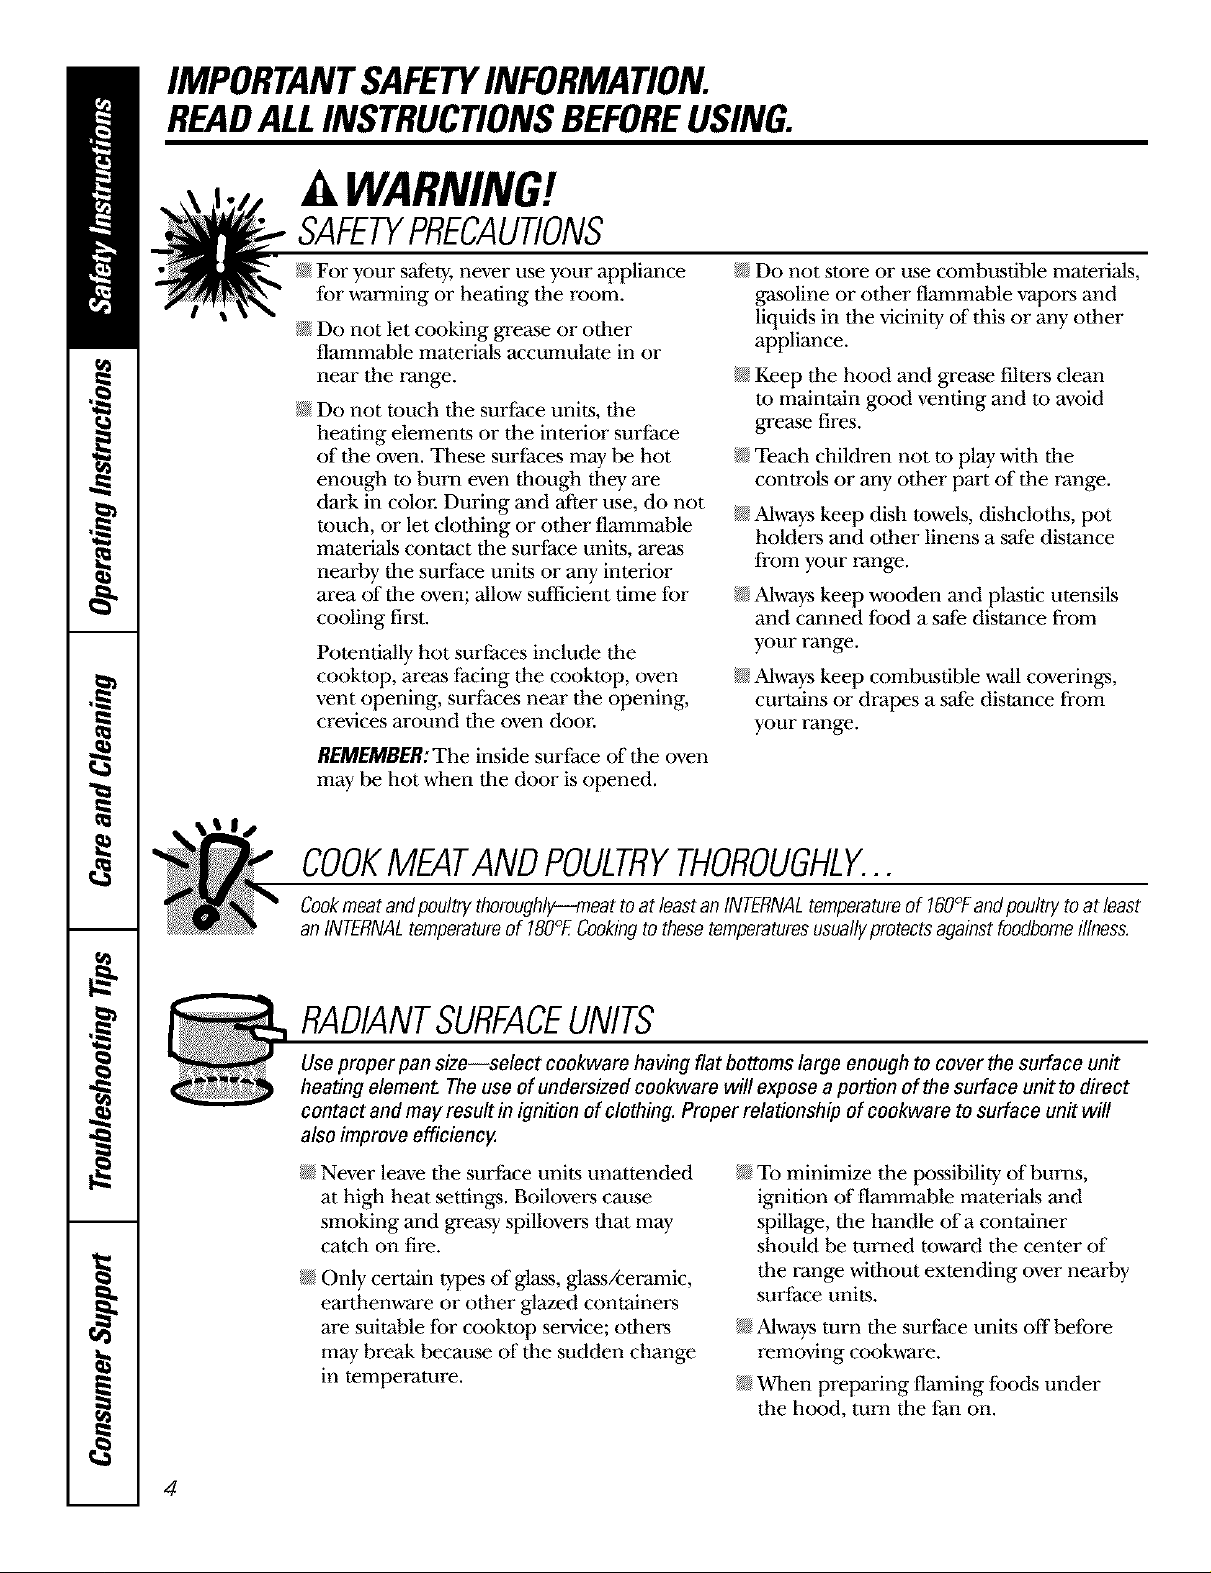
RADIANTSURFACEUNITS
Use proper pan size--select cookware having flat bottoms large enough to cover the surface unit
heating element The use of undersized cookware will expose a portion of the surface unit to direct
contact and may result in ignition of clothing. Proper relationship of cookware to surface unit will
also improve efficiency.
@ Never leave tile surface units unattended
at high heat setting. Boilovers cause
smoking and greas T spillove_s that may
catch on fire.
N Only certain types of glass, glass/ceramic,
earthenware or other glazed containe*:s
are suitable lbr cooktop service; others
may break because of tile sudden change
in temperature.
N To minimize the possibility of burns,
ignition of flammable materials and
spillage, tile handle of a container
should be turned toward tile center of
the range witilout extending over nearby
surface units.
@ Always turn tile surlSce units off belbre
removing cookware.
@ When preparing flaming tbods under
the hood, turn tile fan on.
4
Page 5
RADIANTSURFACEUNITS
ww_. GEAppliances.com
N Use care when touching tile c_ktop. The
glass surface of the cookmp will retain heat
_ter the controls have been turned oII:
N Keep an eye on foods being flied at high
or medium high heat setting.
N Foods for hTing should be as dry as
possible. Frost on frozen foods or moisture
on fresh foods can cause hot fat m bubble
up and over tile sides of the pan.
@ Use little fat for effective shallow or deep
fat [i_ing. Filling the pan mo full of fat carl
cause spillovers when lbod is added.
N If a combination of oils or lats will be
used in [i_ing, stir together beibre heating,
or as lats melt slowly.
{{{{1iAlways heat lat slowly, and watch as it heats.
@ Use a deep fat thermometer whenever
possible m prevent overheating lat beyond
tile smoking point.
N Avoid scratching the glass cookmp.
Tile c_ktop can be scratched with items
such as sharp instruments, rin_ or other
jewelry, and rivets on clothing.
@ Do not operate tile radiant surface units if
tile glass is broken. Spillovers or cleaning
solution may penetrate a broken cooktop
and create a risk of electrical shock.
Contact a qualified technician immediately
should your glass c_ktop become broken.
N Never use the glass cooktop surface as
a cutting board.
_;_Do not place or store items that can melt
or catch fire on the glass cookmp, even
when it is not being used.
N Be careful when placing spoons or other
stirring utensils on glass cookmp surt:ace
when it is in use. They may become hot
and could cause burns.
@ (;lean the cookmp with caution. Ifa wet
sponge or cloth is used m wipe spills on a
hot surl:ace unit, be careful to avoid steam
burns. Some cleaners can produce
noxious fumes if applied m a hot surface.
NOTE: We recommend that you avoid
wiping any surface unit areas until they
have c_led and the indicator light has
gone off. Sugarspills are the exception
tothis.Please see the Cleaning the glass
cooktop section.
N When the cooktop is cool, use only
CERAMA BRYI'E ® Ceramic Cookmp
Cleaner and the CERAMA BRYTE ®
Cleaning Pad m clean the cookmp.
N To avoid possible damage m the cooking
surt:ace, do not apply cleaning cream m
the glass surt:ace when it is hot.
N After cleaning, use a dr 7 cloth or paper
towel m remove all cleaning cream
residue.
N Read and lbllow all instructions and
warnings on the cleaning cream labels.
N Large scratches or impacts m glass doors
or cookmps can lead m broken or
shattered glass.
N Do not leave any items on the c_ktop.
Tim hot air from the vent may ignite
flammable items and will increase pressure
in closed containe*:s, which may cause
them to bur:st.
N Do not leave plastic or flammable items
on the cookmp--they may melt or ignite
if left too close to the vent.
N Do not lift the c_ktop. Lifting the
cookmp can lead m damage and improper
operation of the range.
5
Page 6
IMPORTANTSAFETYINFORMATION.
READALLINSTRUCTIONSBEFOREUSING.
WARNING!
OVEN
Stand away from the range when opening the oven door. Hot air or steam which escapes can cause
bums to hands, face and/or eyes.
@ Do not heat unopened food containers.
Pressure could build up and tile container
could burst, causing an irgu*y.
N Keep the oven vent unobstructed.
N Keep the oven free from grease buildup.
N Place the oven shelf in tile desired position
while the oven is cool. If shelves must be
handled when hot, do not let pot holder
contact the heating elements.
N When using cooking or roasting ba_ in
tile oven, fbllow the mantffacturer's
directions.
N Pulling out tile shelf m tile stop-lock is a
convenience in lifting heavy fbods. It is also
a precaution against burns from touching
hot surfaces of the door or oven walls.
N Do not use tile oven to dry newspapers.
If overheated, they can catch on fire.
Do not use tile oven for a storage area.
Items stored in an oven can ignite.
N Do not leave paper products, cooking
utensils or food in the oven when not
in use.
N Do not use aluminum foil m line oven
bottoms, except as suggested in this
manual. Improper installation of
aluminum foil may result in a risk of
electric shock or fire.
SELF-CLEANINGOVEN
Do not use oven cleaners. No commercial oven cleaner or oven liner protective coating of any kind
should be used in or around any part of the oven. Residue from oven cleaners will damage the inside
of the oven when the self-clean cycle is used.
@ Do not clean the door gasket. The door
gasket is essential fbr a good seal. Care
should be taken not m rub, damage or
move tile gasket.
N Before sell'cleaning the oven, remove tile
broiler pan, grid and other cookware.
@ Take tile shelves out of tile oven before
you begin the self:dean cycle or they
may discolor.
N Be sure to wipe off excess spillage belbre
starting the seltq:leaning operation.
N If tile self:cleaning mode mallhnctions,
turn the oven off and disconnect the
power supply. Have it se*viced by a
qualified technician.
N Clean only parts listed in this Owner's
Manual.
READANDFOLLOWTHISSAFETYINFORMATIONCAREFULLY.
SAVETHESEINSTRUCTIONS
6
Page 7
Usingthesurfaceunits. .. GEA ,lianco,com
Throughout this manual, features and appearance may vary from your model.
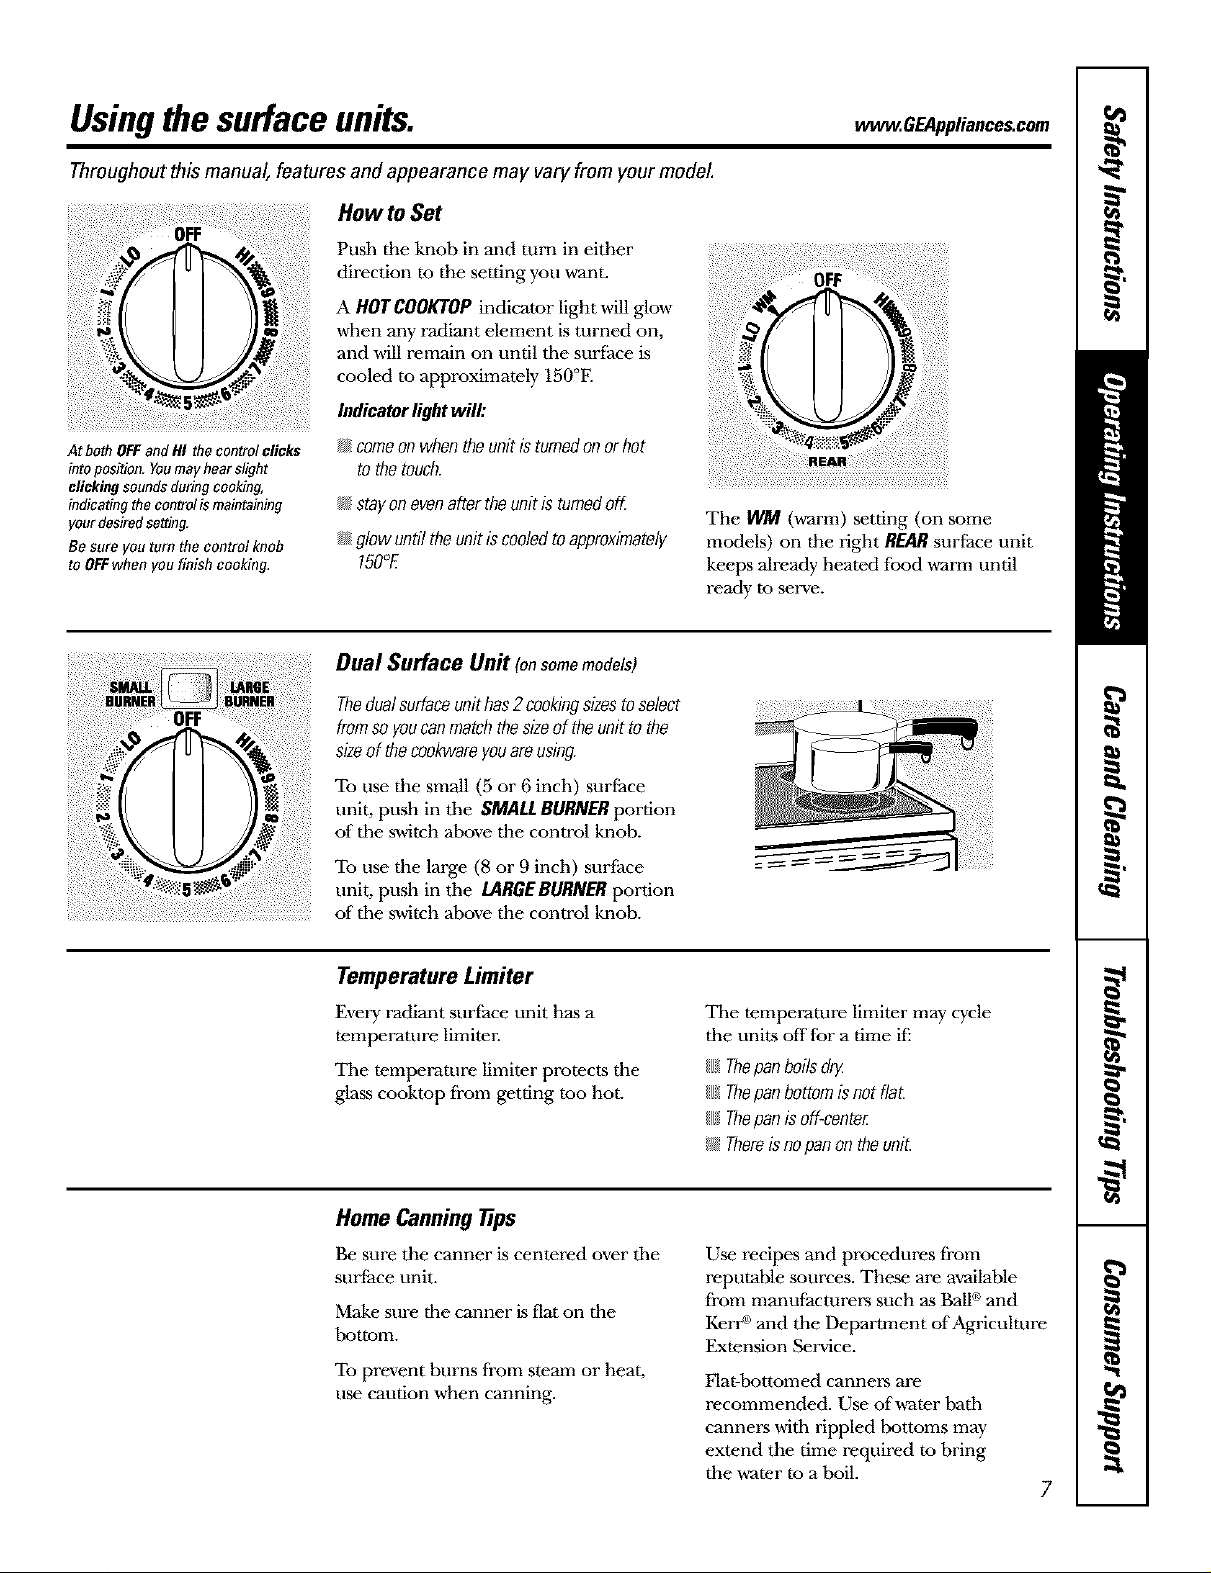
How to Set
Push the knob in and turn in either
direction tu the setting you want.
A HOTCOOKTOP indicator light Mll glow
when any radiant element is turned on,
and will remain on until tile suri;ace is
cooled to approximately 150°F.
Indicatorlightwill:
At both OFFand HI the control clicks
intoposition. Youmayhear slight
clicking sounds during cooking,
indicatingthe controlis maintaining
yourdesiredsetting.
Besure you turn the control knob
to #FFwhen you finish cooking,
_ comeonwhentheunitisturnedonorhot
tothetouch.
_ stay on evenafter the unit is turnedoff.
_ glow untiltheunitiscooledtoapproximately
150°E
Dual Surface Unit (onsomemodels)
Thedualsurfaceunithas2cookingsizestoselect
fromsoyoucanmatchthesizeoftheunittothe
sizeof thecookwareyouareusing.
The WM (warm) setting (on some
models) on the fight REARsurface unit
keeps already heated food warm until
ready to serve.
To use the small (5 or 6 inch) surface
unit, push in tile SMALl. BURNER portion
of tile switch above the control knob.
To use the large (8 or 9 inch) surface
unit, push in the LARGEBURNER portion
of the switch above the control knob.
Temperature Limiter
Every radiant suri;ace unit has a
temperature limiter.
The temperature limiter protects the
glass cooktop from getting too hot.
Home Canning tips
Be sure the canner is centered over the
surface unit.
Make sure the canner is flat on the
bottom.
To prevent burns from steam or heat,
use caution when canning.
The temperature limiter may cycle
the units offfor a time ifi
{{1_Thepan boils dr_
{{1_Thepan bottom is notflaL
{{{I;Thepan isoff-center
I;_ Thereisnopan on the unit.
Use recipes and procedures from
repu 'table sources. These are a'cailable
from manufacturers such as Ball®and
Ken a and the Department of Agriculture
Extension Service.
Flat-bottumed canners are
recommended. Use of water bath
canners with rippled bottoms may
extend the time required to bring
the water to a boil.
7
Page 8
Usingthesurface units.
Throughout this manual, features and appearance may vary from your model
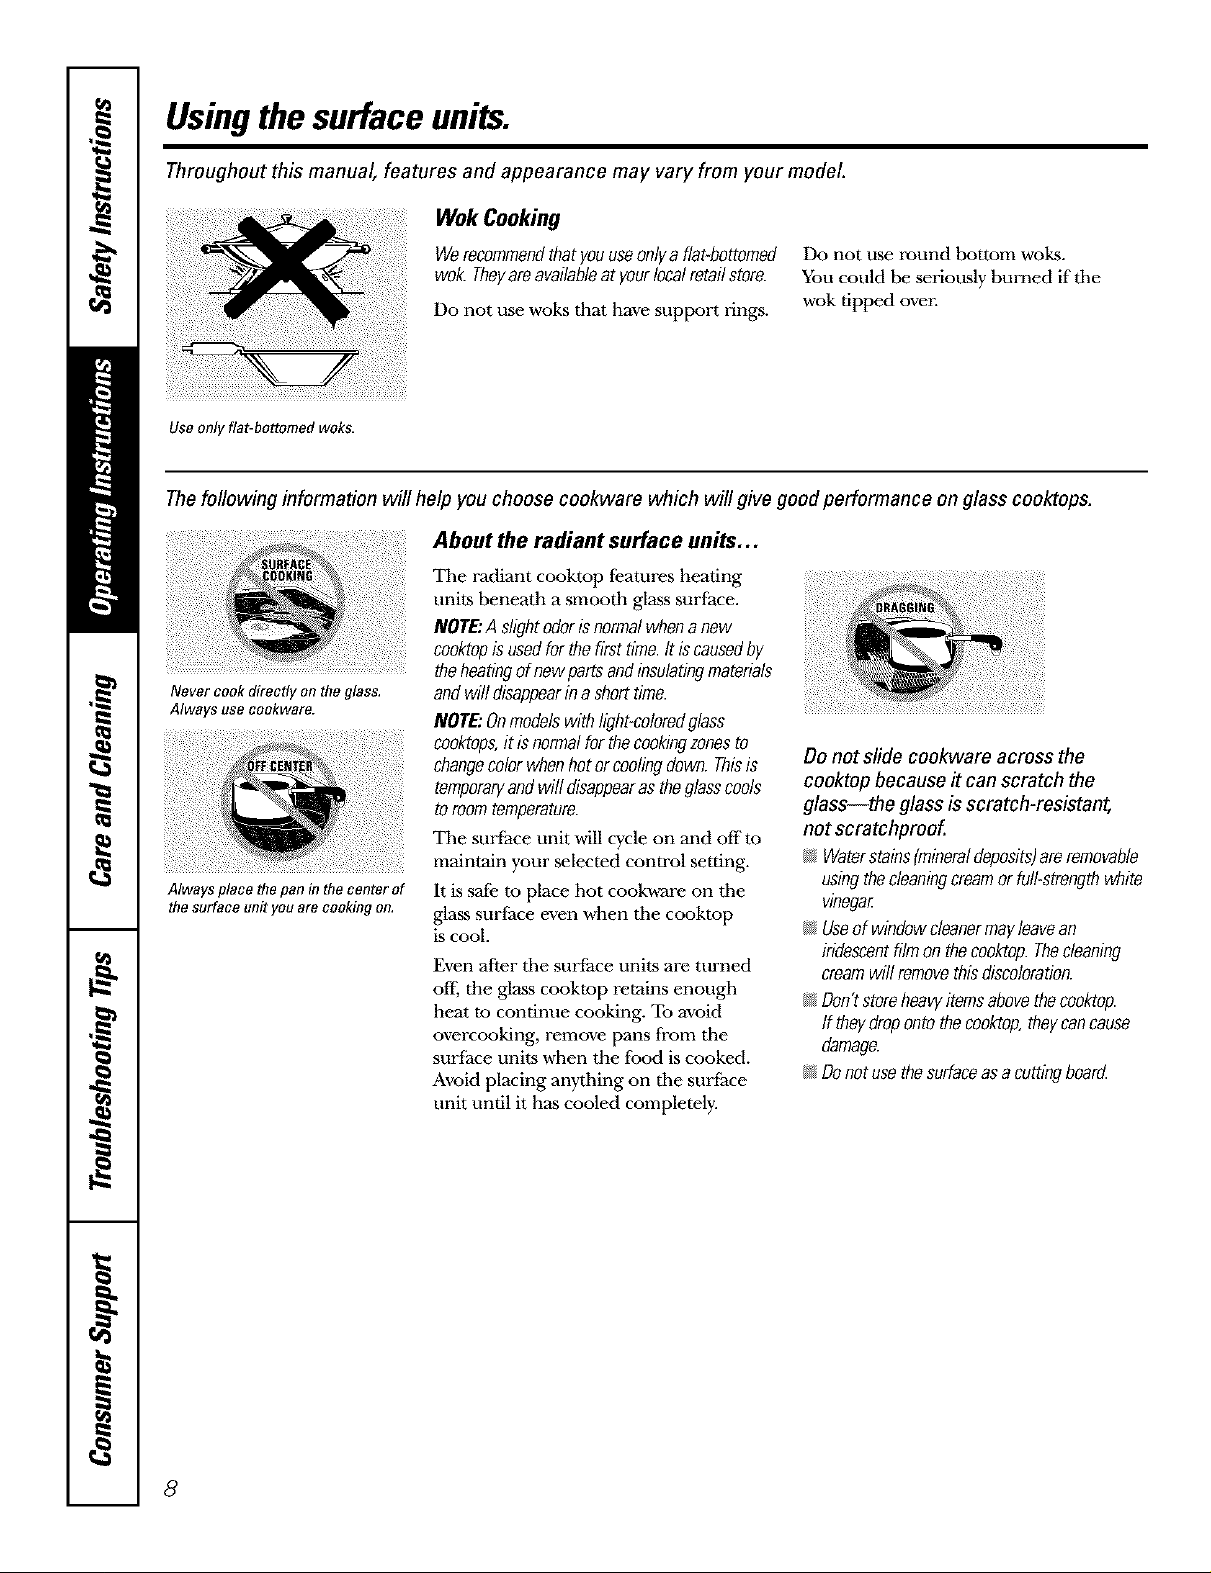
WokCooking
Werecommendthatyouuseonlyaflabbottomed
wok.Theyareavailableatyourlocalretailstore.
Do not use woks that have support rings.
Use only flat-bottomed wok&
Thefollowing information will help you choose cookware which will give good performance on glass cooktops.
About the radiant surface units...
Tile radiant cooktop features heating
units beneath a smooth glass surface.
NOTE:A slightodorisnormalwhena new
cooktopis usedforthefirsttime.It iscausedby
theheatingofnewpartsandinsulatingmaterials
Never cook directly on the glass,
Always use coekware.
andwilldisappearina shorttime.
NOTE:OnmodelswithIighbcoloredglass
cooktops,it isnormalforthecookingzonesto
changecolorwhenhotorcoolingdown.Thisis
temporaryandwill disappearastheglasscools
toroomtemperature.
Tile surface unit will cycle on and offm
maintain your selected control setting.
Always place the pan inthe center of
thesurface unityou are cooking on,
It is safe tu place hot cooky€are on the
glass surt:ace even when the cooktop
is cool.
Even after the surface units are turned
off, the glass cookmp retains enough
heat to continue cooking. To avoid
overcooking, remove pans from the
suriZaceunits when the food is cooked.
Avoid placing anything on the surface
unit until it has cooled completely.
Do not use round bottom woks.
You could be seriously burned if tile
wok tipped ove_:
Do not slide cookware across the
cooktop because it can scratch the
glass--the glass is scratch-resistant,
not scratchproof.
_ Waterstains(mineraldeposits)areremovable
usingthecleaningcreamorfull-strengthwhite
vinegar
_ Useof windowcleanermayleavean
iridescentfilmonthecooktop.Thecleaning
creamwillremovethisdiscoloration.
_ Don'tstoreheawitemsabovethecooktop.
ff theydropontothecooktop,theycancause
damage.
_ Donotusethesurfaceasacuttingboard.
8
Page 9
Selectingtypesof cookware.
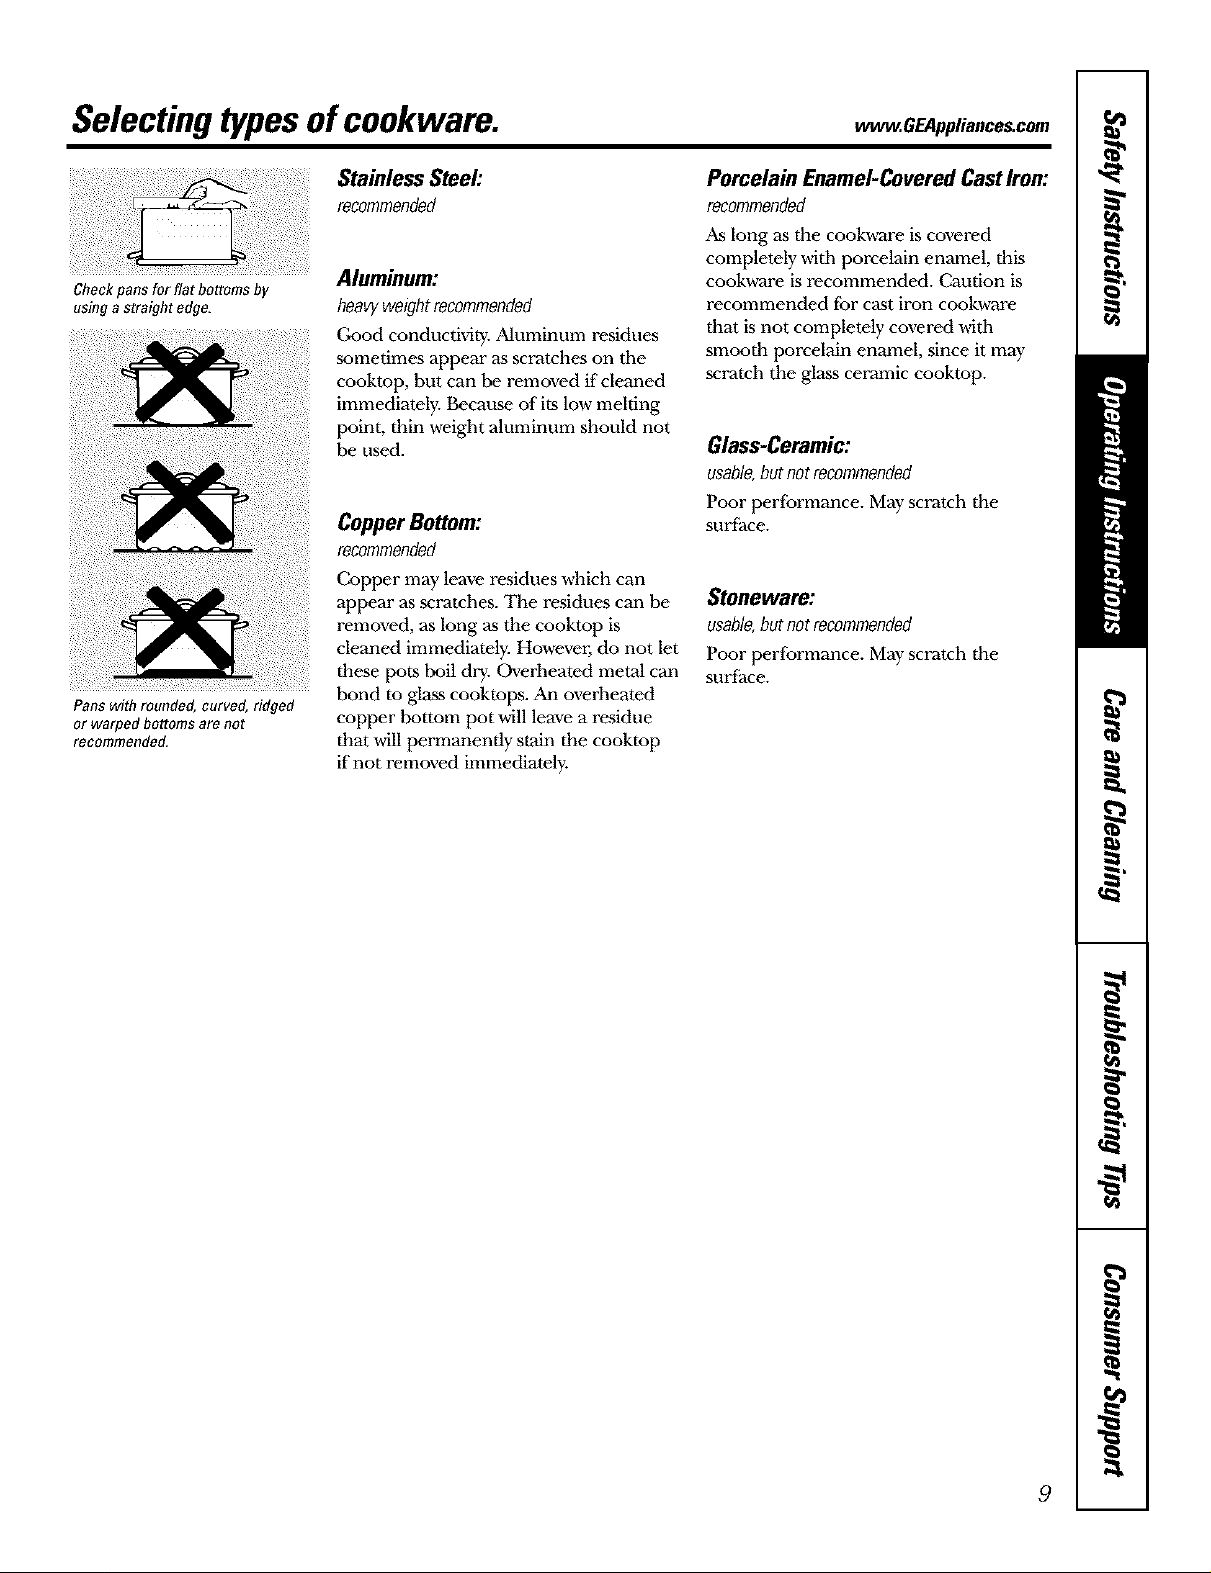
Check pansfor flat bottoms by
using a straight edge.
Pans with rounded, curved, ridged
or warped bottoms are not
recommended,
Stainless Steel:
recommended
Aluminum:
heavyweightrecommended
Good conductMry. _Muminum residues
sometimes appear as scratches on tile
cookmp, but can be removed if cleaned
immediately. Because of its low melting
point, thin weight aluminum should not
be used.
Copper Bottom:
recommended
Copper may leave residues which can
appear as .scratches. The residues can be
removed, as long as the cooktop is
cleaned immediately. Howevm; do not let
these pots boil dry. Overheated metal can
bond to glass cooktops. An overheated
copper tx_ttom pot will leave a residue
that will permanently stain the cooktop
if not removed immediately.
Porcelain Enamel-CoveredCastIron:
recommended
As long as the cookw_re is covered
completely with porcelain enamel, this
cookware is recommended. Caution is
recommended fbr cast iron cookware
that is not completely covered with
smooth porcelain enamel, since it may
scratch the glass ceramic cooktop.
Glass-Ceramic:
usable,butnotrecommended
Poor performance. May scratch the
surtZace.
Stoneware:
usable,butnotrecommended
Poor performance. May scratch the
surtZace.
9
Page 10
Usingtheovencontrols.
Throughout this manual, features and appearance may vary from your model
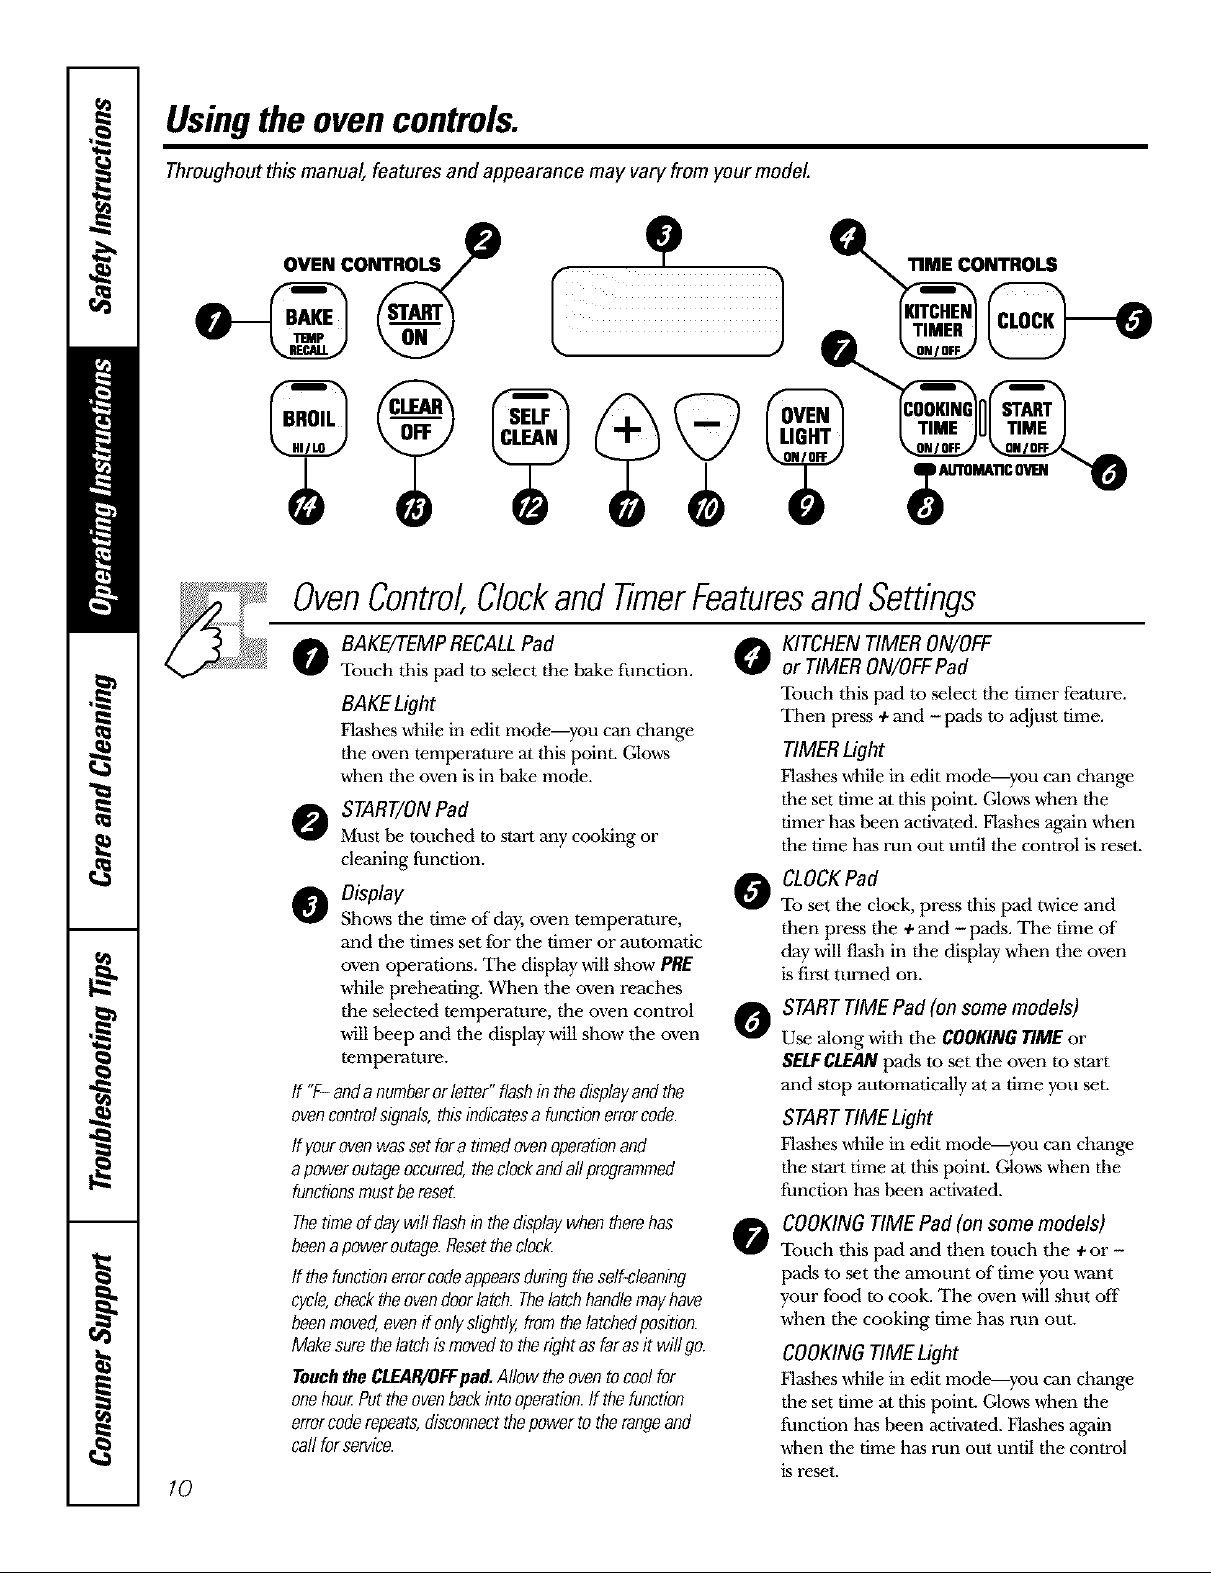
OvenControl,ClockandTimerFeaturesandSettings
10
o BAKE/TEMP RECALLPad 0
Touch this pad to select the bake ftinction.
BAgE Light
Flashes while in edit mode--you can change
the oven temperature at this point. Glows
when the oven is in bake mode.
START/ONPad
Must be touched to stml any cooking or
cleaning function.
O Oisplay
Shows the time of"day, oven temperature,
and the times set for the timer or autumatic
oven operations. Tile display will show PRE
while preheating. When the oven reaches
the selected temperature, the oven control
will beep and the display will show the oven
temperature.
If "F-andanumberorletter"flashinthedisplayandthe
ovencontrolsignals,thisindicatesafunctionerrorcode.
If yourovenwassetfora timedovenoperationand
apoweroutageoccurred,theclockandallprogrammed
functionsmustbereseL
Thetimeof daywill flashinthedisplaywhentherehas
beenapoweroutage.Resettheclock.
ff thefunctionerrorcodeappearsduringtheself-cleaning
cycle,checktheovendoorlatch.Thelatchhandlemayhave
beenmoved,evenif onlyslightly,fromthelatchedposition.
Makesurethelatchismovedtotherightasfarasit willgo.
TouchtheCLEAR/OFFpad.Allowtheoventocoolfor
onehourPuttheovenbackintooperation,ff thefunction
errorcoderepeats,disconnectthepowertotherangeand
callforservice.
KITCHEN TIMERON/OFF
or TIMER ON/OFFPad
Touch this pad to select the timer feature.
Titan press +and -pads to adjust time.
TIMER Light
Flashes while in edit mode-you can change
the set time at this point. Glows when the
timer has been activated. Flashes again when
the time has run out until the control is reset.
_O_d
0
To set the clock, press this pad mice and
then press the + and - pads. Tiae time of
day will flash in the display when the oven
is first turned on.
STARTTIME Pad (on some models)
0
Use along widl the COOKINGTIMEor
SELFCLEANpads to set the oven to start
and stop automatically at a time you set.
STARTTIME Light
Flashes while in edit mode---you can change
the star1 time at this point. Glows when the
function has been activated.
COOKINGTIME Pad (on some models)
0
Touch this pad and then touch the + or -
pa&s to set the amount of time you ,a-ant
your food to cook. The oven will shut off
when the cooking time has run out.
COOKING TIME Light
Flashes while in edit mode-you can change
the set time at this point. Glows when the
function has been activated. Flashes again
when the time has run out until the control
is reset.
Page 11

ww_.GEAppliances.com
OvenControl,ClockandTimerFeaturesandSettings
o AUTOMATIC OVEN Light (on some models) Indicator Lights (on some pads)
This lights anytime tile oven has been ED/Tmode lasts several seconds after the last
programmed using the COOKING TIME or pad press. STARTTIME ON/OFFand COOKING
STARTTIME functions. TIME ON/OFFwill be the only pads lit if either
of these options is selected. (Example: START
o OVENLIGHTON/OFFPad
Touch this pad to turn the oven light on
or o]_.
- Pad
Short taps to this pad will decrease the time
or temperature hy small amounts. Touch
and hold the pad to decrease the time or
temperature by larger amounts.
+ Pad
Short taps to this pad will increase the time
or temperature hy small amounts. Touch
and hold the pad to increase the time or
temperature by larger amounts.
TIMEis selected with BAKE the STARTTIME
pad will remain lit until the clock reaches the
programmed time, a* which point it will turn
off and the BAK_q'EMP RECALLpad light will
light up).
_ SELFCLEAN Pad
Touch this pad to select the selJ[Xcleaning
function. See the Usingtheself-cleaning
oven section.
SELFCLEAN Light
Flashes while in edit mode--you can change
dm length of time for the self-dean cycle at
dlis point. Glows when the oven is in the self-
clean cycle. After the self-clean cycle, dm light
will turn off. Unlatch the door:
G CLEAR/OFFPad
Touch this pad to cancel ALL oven
operations except the clock and timer.
o BROIL HI/LO Pad
Touch this pad to select the broil function.
BROILLight
Flashes while in edit mode--you can switch
from RI to tO BROIL a_ this point. Glows when
dm oven is in broil mode.
Power Outage
Ifa flashingtimeis in thedisplay,youhaveexperienceda
powerfailure.Resettheclock.
To reset the clock, touch the CLOCKpad. Enter
the correct time of day by touching the +or -
pads. Touch the START/ON pad.
11
Page 12

Usingtheoven.
Toavoid possible burns, place the shelves in the desired position before you turn the oven on.
Before you begin...
The oven has6 sheff positions.
The shelves have stop-locks,so that when
placed correctly ell file shelf supports (A
through F), theywillstop before coming
completely out, and willnot flit.
When placing and removing cookware,
pull the shelf out to the bump on the shelf
support.
TOremovea shelf, pull it toward you, tilt tile
CAUTION:Whenyouareusingtheshelfinthelowest
position(,4),youwillneedtousecautionwhenpulling
theshelfoe_Werecommendthatyoupulltheshelf
outseveralinchesandthen,usingtwopotholders,pull
theshelfoutbyholdingthesidesofit.Theshelfislow
andyoucouldbeburnedifyouplaceyourhandinthe
middleoftheshelfandpullallthewayou_Bevery
carefulnottoburnyourhandonthedoorwhenusing
theshelfinthelowestposition(A).
front end up and pull it out.
Foroplaco,place tile end of the shelf
(stop-locks) on the support, tilt up tile front
and pttsh tile shelf in.
How to Set the Oven for Baking or Roasting
Yourovenisnotdesignedforopen-doorcooking.
[] Touch the BAKEpad.
[] Touch the +or - pads until tile
desired temperature isdisplayed.
[] Touch the START/ONpad.
The oven willstart automatically.The display
willshow PREwhilepreheating. When the
oven roaches file selected temperature, file
oven control willbeep several times and file
displaywillshow tile oven temperature.
TochangetheoventemperatureduringBAKEcycle,
touchtheBAKEpadandthenthe+ or-pedstoget
thenewtemperature.
[] Touch the CLEAR/OFFpad when baking
Typeof Food Shelf Position
Frozenpies(oncookiesheet) D
Angelfoodcake A
8undtorpoundcakes Cor D
8iscuits,muffins,brownies, Cor D
cookies,cupcakes,
layercakes,pies
Casseroles Cor D
Turkey A
is finished and then remove the food
from the oven.
_.a-.-///,11_ \ \\\q_._
Center bakin9 pans in the even.
Cutslits in the for just like the grid.
12
[] Check food for doneness at minimum
Umeon recipe. Cook longer if necessar}:
Preheating and Pan Placement
Preheat the oven ifthe recipe callsfor it.
Pmheaflng is necessary for good results when
baking cakes, cookies, pastry and breads.
TheDisplaywillshow"PRE"whilepreheating.When
theovenreachestheselectedtemperature,theoven
controlwillbeepandthedisplaywillshowtheoven
temperature.
Aluminum Foil
Nevercovertheovenbottomwithaluminumfoil.
You can ttse aluminum foil to line tile broiler
pan and broiler grid. However; you mttst
mold the foil tightly to the grid and cut slits in
it just like the grid.
Baking results Mll be better if baking pans are
centered in the oven as much aspossible. If
baking with more than one pan, place the
pans s_ each has at least 1m 1½"of air space
around it. If baking four cake layet_at the
same time, place twolayet_on rack B and two
layer_on rack D. Stagger pans on the rack so
one is not directly above tile othen
Aluminum foil may also be used to catch a
spillovenTo do so, place a small sheet of foil
on a lower shelf several inches below tile food.
Never endrely cover a shelf with aluminum
foil. This will disturb the heat circulation and
result in poor baking.
Page 13

How to Set the Oven for Broiling
ww_. GEAppliances.com
Leave the door open tothe broil
stop position. The door stays open
by itself, yet the proper temperature
is maintained in the oven,
The size, weight, thickness,
starting temperature
and your prefbrence
of doneness will affect
broiling times. This guide
is based on meats at
refrigerator temperature.
Thg {£X i)q)ai_mgnt of
Ag'&vltun, _a)s "Rale beq" i_
p_ula_ but you shoukl know that
L_&ing it to _ly 140_F r_o_am
Book. _m ¸Kikl_e_ Gu#le. US1)A
IO_,. Ju_ 1985.)
i i!iiiii)i:i i!!!i iiii
The oven has 6sheff positions.
[] Place the meat or fish on the broiler
grid in the broiler pan.
[] Follow suggested shelf positions in
the Broilin9 Guide.
If yourrangeisconnectedto208volts,raresteaks
maybebroiledbypreheatingthebroilerand
positioningtheovensheffonepositionhigher
Use LO Broil to cook foods such as
poult_ 7 or thick cuts of meat thoroughly
without over-browning them.
Broiling Guide
Food
GroundBeef
Beef Steaks
Beret
Medium
Well Done
Raret
Medium
Well Done
Chicken
Bakery Product
Bread (toast)
English Muffin
LobsterTails
FishFillets
Salmon
Steaks
Fillets
HamSlices
srecooked}
Pork Chops
Well Done
LambChops
Medium
Well Done
Medium
Well Done
*Seeillustration fordescriptionof shelfpositions
orThickness
1Ib (4patties)
_/_to3/4"thick
4Ibs (12patties}
3/4to1" thick
1to 1/_ Ibs
17J thick
2tO2/_ Ibs
1whole cut up
2to 27zIbs,
split lengthwise
Breast
2to 4slices
2{split}
2-4
11b {74t0 7g'thick}
2(1" thick}
2(Tz" tO3/4"thick}
7_" thick
1" thick
2{7/'thick)
2(1" thick}about 1lb.
2{1" thick}about 10
to12 oz
2(17Z' thick)about 1Ib
Quantityand/
Shelf
Position*
P
E
E
B
B
E
C
C
E
P
E
E
B
B
B
B
E
E
E
E
[] Touch the BROILHI/LOpad once for
HI Broil.
To change to LO Broil, touch the
BROILNI,q.O pad again.
[] Touch tile START/0N pad.
[] When broiling is finished, touch the
gila R/0_" pad.
First Side
Time (min.)
13
15
6
8
10
10
15
20
25
25
3
3-4
18-20
10
10
6
8
10
15
7
10
9
14
SecondSide
Time (min.)
8
11
4
6
8
8
10-12
20
25
15
1
Do not
turn
ovec
6
8
10
15
4
9
6
10
Comments
Spaceevenly
Steakslessthana/a"
thick aredifficult
to cookrare
Slashfat.
Brusheachsidewith
melted butteE
Broilskin-side-down
first.
Spaceevenly Place
Englishmuffins cut-
side-upandbrush
with butterif desired
Cutthroughback of
shell.Spreadopen.
Brushwith melted
butterbeforebroiling
andafter half of
broilingtime
Handleandturn very
carefully Brushwith
lemonbutterbefore
andduringcooking,
if desired
Turncarefully Donot
turn skin sidedown.
Slash fat.
Slash fat.
13
Page 14

Usingtheclock and timer.
Not all features are on all models.
To Set the Clock
The clock must be set to the correct time
of day fbr the automatic oven timing
tractions to work properly. The time of
day cannot be changed during a delayed
cooking or a delayed self-cleaning cycle.
[] Touch tile CLOCK pad twice.
[] Touch tile + or - pads.
If tile + or - pads are not touched within
Make sore the clock is set to the
correct time of dag
one minute after you touch the CLOCK
pad, the display reverts to the original
ToTurn Off the Clock Display
If you have several clocks in your kitchen,
you may wish to turn off the time of day
clock display on your range.
[] Touch the CLOCKpad once to turn
off the time of day display. Although
you will not be able to see it, the
setting. If this happens, touch tile CLOCK
pad twice and reenter the time of day.
[] Touch the START/ON pad until the
time of day shows in the display. This
enters the time and starts the clock.
Tocheckthetimeof daywhenthedisplayis
showingotherinformation,simplytouchthe
CLOCKpad.Thetimeofdayshowsuntilanother
padistouched.
clock maintains the correct time
of day.
[] Touch the CLOCKpad twice to recall
the clock display.
Thetimer doesnot controlovenoperations.
To Set the Timer
Themaximumsetting onthe timer is9 hours
[] Touch the KITCHEN TIMER 0N/0FF
pad.
amount of time you want shows in
the display. The maximum time that
[] Touch the + or - pads until the
can be entered in minutes is 59.
Times more than 59 lninutes should
The timer is a minute timeronlg he changed to houL-s and minutes.
TheCLEAR/OFFpaddoesnot affect
thetimer tfyou makea mistake,touchthe KITCHEN
TIMER ON/OFFpad andbegin again.
To Reset the Timer
K the display is still showing the time
remaining, you may change it by touching
the KITCHEN TIMER ON/OFF pad, then
touching the + or - pacts until the time
you want appears in the display.
To Cancel the timer
Touch the START/ON pad. The time
[]
will start counting down, although
the display does not change until
one minute has passed.
When the timer reaches :00, the
[]
control will beep 3 times J[bllowed by
one heep evm y 6 seconds until the
KITCHEN TIMER ON/OFFpad is
touched.
tithe remaining time is not in the display
(clock, start time or cooking time are in
the display), recall the remaining time by
touching the KITCHEN TIMER ON/OFF pad
and then touching the + or - pads to
enter the new time you want.
14
Touch the KITCHENTIMERON/OFF
pad twice.
Page 15

Usingthetimedbakingandmastingfeatures.(onsomemodels) ww .GEAppliances.com
Do not lock the oven door with the latch during timed cooking. Thelatch is used for self-cleaning only.
NOTE: Foods that spoil easily--such as milk, eggs, fish, stuffings, poultry and pork--should not be allowed to sit for
more than I hour before or after cooking. Room temperature promotes the growth of harmful bacteria. Be sure that
the oven light is off because heat from the bulb will speed harmful bacteria growth.
How to Set an Immediate Start and Automatic Stop
Theovenwillturnonimmediatelyandcookfora
selectedlengthof time.At theendof thecooking
time,theovenwill turnoff automaticallg
[] Touch the BAKEpad.
[] Touch the +or - pads to set the
oven temperature.
[] Touch the COOKINGTIMEpad.
NOTE:If yourreciperequirespreheatingyoumay
needtoaddadditionaltimeto the lengthofthe
cookingtime.
] Touch the +or - pads to set the
baking time.
The cooking time that you entered
will be displayed. (lfyou select Cooking
Time first and then adjust the Bake
Temperature, the oven temperature
will be displayed instead).
[] Touch tile START/ONpad.
The display shows either the oven
temperature that you set or tile cooking
time countdown. (The display starts with
PREif showdng the oven temperature.)
The oven will continue to cook for tile
programmed amount of time, then turn
off automatically.
[] Touch the CLEAR/0FFpad to cancel
if necessary.
Removethe foodfromtheoven.Remember,even
thoughtheovenshutsoff automatically,foods
continuecookingaftercontrolsareoff.
How to Set a Delayed Start and Automatic Stop
Theovenwill tumonatthetimeofdayyouset,
cookforaspecificlengthof timeandthenturnoff
automaticallg
Make sure the clock shows the correct
time of day.
[] Touch the BAKEpad.
[] Touch the + or - pads to set the
oven temperature.
[] Touch the COOKING TIME pad.
[] Touch the + or - pads to set the
desired length of cooking time.
[] Touch the START TIME pad.
[] Touch the + or - pads to set the time
of day you want the oven to turn on
and start cooking.
[] Touch the START/ON pad.
NOTE.'Ifyou would like to check the times
you have set, touch the STARTTIMEpad to
check the start time you have set or touch
the COOKINGTIMEpad to check the length
of cooking time you have set.
When the oven turns on at the time of day
you have set, the display will show PRE
until it reaches the selected temperature,
then it will display the oven temperature.
At the end of cooking time, the oven
will turn off and the end-of_'ycle tone
will sound.
[] Touch the CLEAR!OFFpadto cancel
if necessary.
Removethe food fromthe oven.Remember,even
thoughtheovenshutsoffautomatically,foods
continuecookingaftercontrolsareoff.
NOTE:Anattentiontonewillsoundif youare
usingtimedbakinganddonottouchthe
START/ONpad.
15
Page 16

Specialfeaturesofyourovencontrol
Yournew touch pad controlhas additional features that you may choose to use. Thefollowing are the features and
how you may activate them.
Thespecial feature modes can only be activated while the display is showing the time of day. They remain in the
control's memory until the steps are repeated.
When the display shows your choice, touch the START/ONpad. Thespecial features will remain in memory after
a power failure.
NOTE: The Sabbath feature and the Thermostat Adjustment feature are also Special Features, but they are
addressed separately in the following sections.
12Hour Shut-Off
Withthisfeature,shouldyouforgetandleavethe
ovenon,thecontrolwillautomaticallytumoff the
ovenafter 12hoursduringbakingfunctionsor
after3 hoursduringa broilfunction.
lfyou wish to turn OFF this feature, fbllow
the steps below.
[] Touch the BAKE and BROILHI/LO
pads at the same time for 3 seconds
until the display shows SF.
[] Touch the CLOCKpad. The display
will show ON (12 hour shut-oil).
Touch the CLOCKpad repeatedly
until tile display shows OFF(no
shut-off).
[] Touch the START/ON pad to activate
tile no shut-off and leave tile control
set in this special features mode.
/6
Page 17

UsingtheSabbathFeature.(onsome models)
(Designed for use on the Jewish Sabbath and Hofidays)
TheSabbath feature can be used for baking/roasting only. It cannot be used for broiling, self-cleaning or
Delay Start cooking.
NOTE: The oven light comes on automatically (on some models) when the door is opened and goes off when the
door is closed. The bulb maybe removed. See the Oven Light Replacement section. On models with a light switch
on the control panel, the oven light may be tumed on and left on.
How to Set for Regular Baking/Roasting
When the disptayshows _ the
even is set in Sabbath. When the
display shews _ c the even is
baking/roasting,
NOTE:Tounderstandhowtheovencontrolworks,
practiceusklgregularbaking(non-Sabbath)before
enteringSabbathmode.
Makesuretheclockshowsthecorrecttimeofday
andtheovenisoff.
[] 'lbuch and hold boththe BAKEand
BROILHI/tO pads, at thesametime,
until the display show SE
[] 'l_p the CLOCK pad until SAbappears
in the display.
[] 'lbuch the START/ON pad and D will
aplx,ar in the display.
[] 'lbuch the BAKEpad. No signalwill
be given.
The preset stall.ing temperature will
[]
atm)matically be s_,t to 350. ° 'l_p the +
or - pads to increase or decrease the
temperature in 25 ° increments. The
temperature can be set between 170 °
and 550. ° No signal or temlx, rature
will be given.
[] 'Ibuch the START/ONpad.
] After a random delay period of
approximately 30 seconds to 1 minute,
c will appear in the display indicating
that lhe oven is baking/roasting. IfD c
doesn't appear in the display, start again
at Step 4.
'Ib adjust the oven temperature, touch the
BAKEpadand tap the + or - pads m increase
or decrease the mmperature in 25°
increments. Touch the START/ONpad.
NOTE:The CLE4R/OlaTandCOOKINGTIMEpacts
are active during the Sabbath tbature.
www.GEAppliances.com
When the disptayshows D the
even is set in Sabbath. When the
display shews _ c the even is
baking/roasting.
How to Set for Timed Baking/Roasting--lmmediate Start and Automatio Stop
NOTE:Tounderstandhowtheovencontrolworks,
practiceusklgregular(non-Sabbath)ImmediateStart
andAutomaticStopbeforeenteringtheSabbathmode.
Makesuretheclockshowsthecorrecttimeofday
andtheovenisoff.
[] 'lbuch and hold boththe BAKEand
BROILHI/tO pacts, at thesametime,
until the display shows SE
[] 'l_p the CLOCK pad until SAbappears
in the display.
[] 'lbuch the START/0N pad and D will
appear in the display.
[] 'lbuch the COOKING TIME pad.
] 'lbuch the +or -pacts reset the desired
length of cooking time between 1
minule and 9 hours and 59 minums.
The cooking time that you entered will
be displayed.
'lbuch the START/ONpad.
[]
'lbuch the BAKEpad. No signal win
[]
be given.
The preset starting temtx, rature will
[]
automatically be set to 350. ° 'lhp the +
or - pacts to increase or decrease the
temperature in 25 ° increments. The
temperature can Ix' set between 170 °
and 5NI. ° No signal or temperature
will be given.
'Ibuch the START/ONpad.
[]
After a random delay period of
[]
approximately 30 seconds to 1 minute,
c will appear in the display indicating
that file oven is baking/roasting. IfD c
doesn't appear in the display, start again
at Step 7.
'Ib adjust the oven temperature, touch the
BAKEpad and tap the + or - pads m increase
or decrease the mmperature in 25°
increments. 'Ibuch the START/0N pad.
When cooking is finished, the display will
change from D c m D indicating dmt the
oven has turned 0EFbut is still set in Sabbath.
Remove the cooked filed.
17
Page 18

Usingthe SabbathFeature.(onsome models)
(Designed for use on the Jewish Sabbath and Hofidays)
How to Exit the Sabbath Feature
[] 'Ibuch the CLEAR/OFFpad.
] If the oven is cooking, wait i_)r a random
delay Ix.Hod of approximately 30
secon&s to 1 minute, until only D is in
the display.
] 'Ibuch and hold boththe BAKEand
BROILH!/LOpads, atthesametime,
until the display sho_ SE
'Iitp the CLOCKpad until ONor OFF
[]
appeals in the display. 0Nindicates
that the oven will automatically turn
ott atier 12 hours. 0FFindicates that
the oven will not automatically turn ott:
See the SpeciaIFeatures section fbr an
explanation of the 12Hour ShubOff
f;t.ature.
[] 'Ibuch the START/ONpad.
NOTE:If apoweroutageoccurredwhiletheovenwas
in Sabbath,theovenwill automaticallyturnoffandstay
off evenwhenthepowerreturn&Theovencontrol
mustbereset.
Adjust the oventhennostatmDo # yourself!
Youmay find that your new oven cooks differently than the one it replaced. Use your new oven for a few
weeks to become more familiar with it. If you still think your new oven is too hot or too cold, you can adjust
the thermostat yourself.
Do not use thermometers, such as those found in grocery stores, to check the temperature setting of your oven.
These thermometers may vary 20-40 degrees.
NOTE: Thisadjustment will not affect the broiling or the self-cleaning temperatures. The adjustment will be
retained in memory after a power failure.
To Adjust the Thermostat
Touch the BAKEand BROILHI/LO
[]
pads at the same time for 3 seconds
until the display shows SF.
Touch the BAKEpad. A twomligit
[]
number shows in the display.
The oven temperature can be
[]
adjusted up m (+) BS°F hotter or (-)
BS°Fcooler. Touch the + pad to
increase the temperature in l<tegree
increments.
Touch the - pad to decrease the
temperature in l_egree increments.
[] When you have made the
adjustment, much the START/ONpad
to go back m the time of day display.
Use your oven as you would
normally.
NOTE:Thisadjustmentwill notaffectthebroiling
orself-cleaningtemperatures.Itwill beretained
inmemoryafterapowerfailure.
Thetypeofmargarine will affect bakingperformance!
Most recipes for baking have been developed using high-fat products such as butter or margarine (80%fat). If you
decrease the fat, the recipe may not give the same results as with a higher-fat product.
Recipe failure can result if cakes, pies, pastries, cookies or candies are made with low-fat spreads. Thelower the fat
content of a spread product, the more noticeable these differences become.
Federal standards require products labeled "margarine" m contain at least 80% fht by weight. Low-Pat spreads,
on the other hand, contain less fat and more water: The high moisture content of these spreads affects the
texture and flavor of baked goods. For hest results with your old favorite recipes, use margarine, butter or
stick spreads containing at least 70% vegetable oil.
18
Q
Page 19

Usingtheself-cleaning oven. com
Never force the latch handle. Forcing the handle will damage the door lock mechanism.
Before a Clean Cycle
Wipe up heavy soil on the oven
bottom,
We recommend venting your kitchen
with an open window or using a
ventilation fan or hood during the
first self-clean cycle.
Remove the shelves, broiler pan, broiler
grid, all cookware and any aluminum foil
from the oven.
NOTE:Take the shelves out of the oven
before you begin the selfMean cycle or
they may discolor.
Soil on the front frame of the range
and outside tile gasket on the door
will need m be cleaned by hand. Clean
these areas with hot water, soap-filled or
plastic scouring pads or cleansers such
as Soft Scrub_ Rinse well with clean
water and di T.
How to Set the Oven for Cleaning
Follow the directions in the Beforea
CleanCyclesection.
[] Latch the door.
NOTE:Never force the latch. If the oven is
too hot, you will not be able to slide the
latch. Allow the oven to cool.
Do not clean the gasket. The fibe@ass
material of the oven door gasket cannot
withstand abrasion. It is essential for the
gasket to remain intact. If you notice it
becoming worn or frayed, replace it.
Wipe up any heavy spillovers on tlle oven
bottom.
Make sure the oven light bulb cover is in
place and the oven light is offl
IMPORTANT: The health of rome birds
is extremely sensitive to the fumes given
off during the self-cleaning cycle of any
range. Move birds to another well-
ventilated room.
While the oven is self-cleaning, you can
touch the CLOCKpad to display the time
of day. To return to the clean countdown,
touch the SELFClEANpad.
The oven shuts off automatically when
the clean cycle is complete, and 0:00 will
flash in the display.
[] Touch the SELFCLEANpad.
[] Touch the + or - pads until the
desired Clean Time is displayed.
TheCleontimeisnormally4hoursand20
minutes.YoucanchangetheCleantimetoany
timebetween3and5 hours,dependingonthe
amountofsoilinyouroven.
[] Touch tlle START/ONpad.
The selfMean cycle will automatically
begin after CLEANis displayed and the
time countdown appears in tlle display.
[] Slide the latch handle to the left as
far as it will go and open tlle door.
19
Page 20

Usingtheself-cleaning oven.
How to Delay the Start of Cleaning
Make sure the clock sbows the correct
time of day.
[] Latch the door.
[] Touch tim SELFCLEANpad.
[] Using tile ÷ or - pads, enter the
desired clean time.
Touch the STARTTIMEpad. The
[]
earliest start time you can set will
appear in tile display.
Using tile + or - pads, enter the
[]
time of day you ,a-ant the clean cycle
to starL
[] Touch the START/ONpad.
The display will show tile start time. It
will not be possible to unlatch tile oven
door until tile temperature drops below
the lock temperature.
ToStop a Clean Cycle
Touch tile CLEAR/OFFpad.
Wait until the oven has cooled below tile
locking temperature to unlatch tim door.
You will not be able to open the door
right away unless the oven has cooled
below the locking temperature.
After a Clean Cycle
You may notice some white ash in the
oven. Wipe it up witb a damp cloth after
tim oven cools.
If whitespotsremain,removethemwithasoap-
filledsteelwoolpadandrinsethoroughlywith
a vinegarandwatermixture.
These deposits are usually a salt
residue that cannot be removed by
the clean cycle.
If the oven is not clean after one clean
cycle, repeat the cycle.
/;55You cannot set tim oven J[brcooking
until the oven is cool enough fbr the
door to be unlatched.
/})5While the oven is self-cleaning, you
can press tbe CLOCKpad to display
the time of day. To remm to tim
clean countdown, press the SELF
CLEANpad.
N Apply a small amount of vegetable oil
to a paper towel and wipe the edges of
the oven shelves with the paper towel.
Do not spray with Pam ®or other
lubricant sprays.
2O
Page 21

Careand cleaning of therange. .. GEA,,,i..oo.com
Be sure all controls are off and all surfaces are cool before cleaning any part of the range.
ff your range is removed for cleaning, servicing or any reason, be sure the anti-tip
device is reengaged properly when the range is replaced. Failure to take this
precaution could result in tipping of the range and cause inju_
Howto RemovePackaging Tape
GrooveStem
To assure no damage is done to tile finish
of the product, the safest way to remove
the adhesive left from packaging tape on
new appliances is an application of"a
household liquid dishwashing detergent,
mineral oil or cooking oil.
Control Knobs
Thecontrolknobsmayberemovedforeasier
cleaning
To remove a knob, pull it straight
off tile stem. If a knob is difficult to
remove, place a towel or dishcloth
between tile knob and control panel
and pull gently. Wash the knobs in soap
and water or a vinegar and hot water
solution.
Before removing tile knobs for
cleaning, please note that tile knobs are
in the 0FFposirion. When replacing tile
knobs, check the OFFposition to ensure
proper placement.
Painted Surfaces
Painted surfaces include the sides of the
range and the door, top of control panel
and the drawer front. Clean these with
soap and water or a xdneg-arand w_ater
solution.
Apply with a soft doth and Nlow to .soak.
Wipe dlT and then apply an appliance
polish to thoroughly clean and protect
tile suri;ace.
NOTE:Theplastictapemustberemovedfromall
chrometrim.It cannotberemovedif it isbakedon.
Do not bend knobs by pulling them
up or down or by hanging a towel or
other such loads. This can damage
the shaJ[L
Torep,ace:
[] Check the back of the knob.
[_ The molded rib of the knob is
designed to fit perfectly onto the
knob stem.
[] Align tile molded rib to tile clear
groove in the knob stem. Push tile
knob back as far as it will go.
Do not use commercial oven cleane_.'s,
cleaning powders, steel wool or harsh
abrasives on any painted surface.
Control Panel
It's a good idea to wipe tile control panel
after each use of the oven. Use a damp
cloth to clean or rinse. For cleaning, use
mild soap and vcater or a 50/50 solution
of vinegar and v_-atenFor rinsing, use
clean water. Polish dry with a soft cloth.
Oven Vent
Theovenventislocatedbehindtherightrear
surfaceunit.
This area could become hot during
oven use.
Do not use abrasive cleansers, strong
liquid cleaners, plastic scouring pads or
oven cleane_.-son the control panel_
they will damage tile finish.
It is normal for steam to come out
of the vent, and moisture may collect
underneath it when the oven is in use.
Theventis importantforproperaircirculation.
Neverblockthisvent. 2 l
Page 22

Careandcleaning ofthe range.
Cleaning the Oven Door
Tocleantheinsideofthedoor:
_NBecause tile area inside the gasket is
cleaned during the self:clean cycle,
you do not need to clean tbis by hand.
Thegasketis designedwith agap at the
bottomto allowfor properair circulation.
Oonotrub or cleanthedoorgasket--
it hasanextremelylow resistanceto
abrasion.
ff younotice thegasketbecomingworn,
frayedordamagedinanyway or ifit
hasbecomedisplacedonthe door,
youshouldhaveit replaced.
_NThe area outside the gasket and
tile door liner can be cleaned witb a
soap-filled or plastic scouring pad, hot
water and detergent. Rinse well with a
vinegar and water solution.
Tocleantheoutsideofthe door:
/}S_Use soap and w-ater m tboroughly
clean tile top, sides and front oftbe
oven door. Rinse well. You may also
use a glass cleaner to clean the glass
on tile outside oftbe door. Do not let
water drip into tile vent openings.
/;;_If any stain on the door vent trim is
persistent, use a soft abrasive cleaner
and a sponge-scrubber fbr best results.
/;_Spillage of marinades, fruit juices,
tomato sauces and basting materials
containing acids may cause
discoloration and should be wiped
tip immediately. When surface is
cool, clean and rinse.
/;;_Do not use oven cleaners, cleaning
powders or harsh abrasives on tile
outside of tile door.
Hingelock
Pull hingelocks down to unlock.
Removalposition
Lift-Off Oven Door
Thedoorisveryheavy.Be carefulwhen
removingandliftingthedoor.
Donotlift thedoorbythehandle.
Toremovethedoor:.
Fully open tile door.
[]
Pull tbe hinge locks down toward
[]
tbe door frame, to tile unlocked
position. A tool, such as a small
flat-blade screwdrivm; may be
required.
Firmly grasp both sides of tbe door
[]
at tile top.
Close door to tile door removal
[]
position, which is halfway hetween
tile broil stop position and fitlly
closed.
[] Lift door tip and out until tile hinge
arm is clear of tile slot.
Toreplace the door:
Witb the Bottom Hingearm
[]
door at the edgeof
same angle slo]
as tbe
removal position,
seat tbe
indentation of
the hinge arm
into tbe bottom edge of the hinge
slot. Tile notch in tbe hinge arm
must be fully seated into tile bottom
of tile slot.
Fully open tile door. Iftbe door will
[]
not fi.tllyopen, tile indentation is
not seated correctly in tile bottom
edge of tile slot.
Push tile hinge locks tip agmnst tile
[]
front frame of the oven cavity to tile
locked position.
Hinge
arm
22
[] Firmly grasp both sides oftbe door
at tbe top.
Push hinge locks up to lock.
[] Close tile oven door.
Page 23

Oven Shelves
Clean the oven shelves with an abrasive
cleanser or scouring pad. After cleaning,
rinse tile shelves with clean water and dry
with a clean cloth.
NOTE:Taketheshelvesoutoftheovenbeforeyou
begintheself-cleancycleortheymaydiscolor
Storage Drawer Removal
Toremovethedrawer.
ww_. GEAppliances.com
To make tile shelves slide more easily,
apply a small amount of vegetable oil
to a paper towel and wipe tile edges of
tile oven shelves with tile paper towel.
Do not spray with Pam ®or other
lubricant sprays.
Toreplacethedrawer:
After broilingremove the broiler
pan from the oven, Do not store a
soiled broiler pan andgrid anywhere
in therange.
Wire cover holdoK
[] Pull the drawer out until it stops.
[] Lift the front of the drawer until the
stops clear tile guides.
] Remove the drawer.
Broiler Pan & Grid
Donotcleanthebroilerpanorgridinaself-
cleaningoven.
After broiling, remove the broiler pan
from the oven. Remove the grid from the
pan. Carefully pour out the grease from
the pan into a proper container.
Wash and rinse the broiler pan and grid
in hot water with a soap-filled or plastic
scouring pad.
Oven Light Replacement
CAUTION:Before replacing your oven
light bulb, disconnect the electrical
power to the range at the main fuse or
circuit breaker panel
Be sure to let the light cover and bulb
cool completely.
To remove the cover.
[_] Hold a hand tinder the cover so it
doesn't fall when released. With
tingm.'sof the same hand, firmly
push back the wire cover holder.
Lift off the cover.
[] Place tile drawer rails on tile guides.
[] Push the drawer back until it stops.
[] Lif_ the front of the drawer and push
back until the stops clear the guides.
[] Lower the front of the drawer and
push back until it closes.
If fbod has burned on, sprinkle the grid
with detergent while hot and cover with
wet paper towels or a dishcloth. Soaking
the pan will remove burned-on foods.
Both the broiler pan and grid may be
cleaned with a commercial oven cleaner.
Both the broiler pan and grid can also be
cleaned in a dishwasher.
Donotremoveanyscrewstoremovethecover
[] Replace bulb Mth a 40-watt
appliance bulb.
Toreplacethecover.
[] Place it into groove of the light
receptacle. Pull wire fbrward to
the center of the cover until it
snaps into place.
[] Connect electrical power to
the range.
Oven Heating Elements
Donotcleanthebakeelementorthebroil
elemenLAnysoilwillburnoff whenthe
elementsareheated.
To clean the oven floor, gently lift
the bake element. Clean with w-arm
soapy water.
23
Page 24

Cleaningtheglasscooktop.
Normal Daily Use Cleaning
ONLY use CERAMA BRYrE ® Ceramic
Cooktop Cleaner on tile glass cooktop.
Otber creams may not be as effective.
To maintain and protect the surface of
your glass cooktop, follow these steps:
Before using tile cooktop fbr tile
[]
first time, clean it with CERAivD\
BRYI'E®Ceramic Cooktop Cleaner.
Cleanyourcooktopafter
eachspill. UseCERAMA
BRYTE_ CeramicCooktop
Cleaner.
This helps protect tile top and
makes cleanup easier.
[] Daily use of CER_MMABRYTE®
Ceramic Cooktop Cleaner will help
keep tile cooktop looking new.
Burned-On Residue
Shake the cleaning cream well.
[]
Apply a few drops of CERAMA
BRYTE®Ceramic Cooktop Cleaner
directly to the cooktop.
Use a paper towel or C£R_MMA
[]
BRYrE ®Cleaning Pad for Ceramic
Cooktops to clean tile entire
cooktop surface.
Use a dry cloth or paper towel
[]
to remove all cleaning residue.
No need to rinse.
NOTE:It is veryimportantthatyouDONOT
heatthecooktopuntilit hasbeencleaned
thoroughl_
Use a CERAMABRYTE® Cleaning
Pad for Ceramic Cooktop®
TheCERAMABRYTE_ Ceramic
Cooktop Scraper and aft
recommended supplies are
available through our Parts Cente_
See instructions under "To Order
Parts" section on nextpage,
NOTE:Do not use adull or
nicked blade,
WARNING:DAMAGEtoyourglasssurface
mayoccurif youusescrubpadsotherthan
thoserecommended.
[] Allow the cooktop to cool.
[] Spread a few drops of CERAMA
BRYTE®Ceramic Cooktop Cleaner
on tile entire burned residue area.
[] Using the included CERAMA
BRYTE®Cleaning Pad fbr Ceramic
Cooktops, rub the residue area,
applying pressure as needed.
Heavy, Burned-On Residue
[] Allow the cooktop to cool.
[] Use a single-edge razor blade
scraper at approximately a 45 °
angle against the glass surface
and scrape tile soil. It will be
necessary to apply pressure to
the razor scraper in order to
remove the residue.
After scraping with the razor
[]
scrapeu spread a few drops of
CERAMA BRYTE ® Ceramic
Cooktop Cleaner on the entire
burned residue area. Use the
CERAMA BRYTE ® Cleaning Pad to
remove any remaining residue.
[] lfany residue remains, repeat the
steps listed above as needed.
[] For additional protection, aJ[}er
all residue has been removed,
polish the entire surface with
CERAMA BRYTE®Ceramic
Cooktop Cleaner and a paper towel.
For additional protection,
[]
after all residue has been
removed, polish the entire
surface with CERAMA BRYTE®
Ceramic Cooktop Cleaner
and a paper towel.
24
Page 25

GEAppliances.com
Metal Marks and Scratches
[] Be careflll not to slide pots and
pans across your cooktop. It will
leave metal markings on the
cooktop surfhce.
These marks are removable using
the CERAMA BRYTE®Ceramic
Cookmp Cleaner with the
CER_MMABRYTE®Cleaning Pad for
Ceramic Cooktops.
[] If pots with a thin overlay of
aluminum or copper are allowed
to boil dry, the overlay may leave
black discoloration on the
cooktop.
This should be removed
immediately before heating
again or the discoloration
may be permanent.
WARNING:Carefullychockthebottom of
pansforroughnessthat wouldscratch
thecooktop.
Cooktop Seal
To clean tile cooktop seal around the for a few minutes, then wipe clean
edges of the glass, lay a wet cloth on it with nonabrasive cleaners.
Glasssurface--potential forpermanent damage.
Ourtestingshows thatif
youare cookinghighsugar
mixturessuchasjelly or
fudgeand havea spillover,
it cancause permanent
damagetotheglasssurface
unlessthe spilloveris
immediatelyremoved.
Damage from Sugary Spills and Melted Plastic
[] Turn offall surface units. Remove
hot pans.
[] Wearing an oven mitt:
a. Use a single-edge razor blade
scraper (CERAMA BRYTE _
Ceramic Cooktop Scraper) m
move the spill to a cool area on
the cooktop.
b. Remove the spill with
paper towels.
ToOrder Parts
To order CER_MMABRYTE®Ceramic
Cooktop Cleaner and the cooktop
scrapm; please call our toll-free
number:
National PartsCenter 800.626.2002
CERAMABRYTE®Ceramic
CooktopCleaner .......... # WX10X300
CERAMABRYTE_ Ceramic
CooktopScraper ......... # WX10XO302
Kit ...................... # WB64X5027
(Kitincludescreamandcooktopscraper)
CERAMABRYTE®CleaningPadsfor
CeramicCooktops ........ # WX10X350
[] Any remaining spillover should be
left until the surface of the
cooktop has cooled.
[] Don't use the surfhce units again
until all of the residue has been
completely removed.
NOTE:ff pitting orindentationin theglass
surfacehasalreadyoccurred,thecooktop
glasswill haveto bereplaced.Inthis case,
servicewill benecessary.
25
Page 26

Before YouCall ForService...
Troubleshooting tips
Save time and money! Review the charts on the following
pages first and you may not need to call for sen/ice.
_:_ Possible Causes What To Do
Improper cookware • Use pans which are flat and match the diameter
being used. of the surface unit selected.
A fuse in your home may be • Replace tile fuse or reset the circuit breaken
blown or the circuit breaker
tripped.
Cooktop controls • Check to see the correct control is set for the surfhce
improperly set. unit you are using.
Sc tches(ma app ar
_rfa_
Incorrect cleaning
methods being used.
Cookware with rough bottoms
being used or coarse particles
(salt or sand) were between
the cookware and the surface
of the cooktop.
Cookware has been slid
across the eooktop surface.
Food spillovers not deaned • See the Cleaning the glass cooktop section.
before next use.
Hot surface on a model • This is normal. The surface may appear discolored
with a fight-colored glass when it is hot. This is temporary and will disappear
cooktop, as the glass cools.
Hot cooktop came into • See the Glass surface--potential for permanent damage
contact with plastic placed section in the Cleaning the glass cooktop section.
on the hot cooktop.
Hot sugar mixture spilled • Call a qualified technician for replacement.
on the cooktop.
Improper cookware • Use only flat cookware to minimize cycling.
being used.
• Scratches are not removable. Tiny scratches will become
less xdsible in time as a result of cleaning.
• To avoid scratches, use the recommended cleaning
procedures. Make sure bottoms of"cookware are clean
before use, and use cookware with smooth bottoms.
You forgot to enter a • Press the BAKE pad and desired temperature or the
bake temperature or SED:CLEANpadanddesiredcleantime.
cleaning time.
Oven controls improperly set. • See the Using the oven section.
Shelf position is incorrect • See the Using the oven section.
or the shelf is not level.
Incorrect cookware or
cookware of improper
size being used.
Oven thermostat needs
adjustment.
• See the Using the oven section.
• See the Adjustthe oven thermostat--Oo ityourself!
section.
Page 27

ww_.GEAppliances.com
Possible Causes What ToDo
Plug on range is not completely * Make sure electrical plug is plugged into a live, properly
inserted in the electrical outlet, grounded outlet.
A fuse in your home may • Replace the fuse or reset the circuit breaken
be blown or the circuit
breaker tripped.
Oven controls improperly set. • See the Using the clock and timer section.
Light bulb is loose or defective. • Tighten or replace the bulb.
Switch operating light • Call for service.
is broken.
Door not open to the broil stop • See the Using the oven section.
position as recommended.
Oven controls improperly set. • Make sure you press the BROIL HI/LO pad.
Improper shelf position • See the Broiling Guide.
being used.
Cookware not suited • Use the broiling pan and grid that came with your range.
for broiling.
Aluminum foil used on the • See the Using the oven section.
the broiling pan and grid has
not been fitted properly and
slit as recommended.
In some areas the power • Preheat the broil element for 10 minutes.
(voltage) may he low.
• Broil for the longest period of time recommended in
the Broiling Guide.
Oven thermostat • See the Adjust the oven thermostat--Do it yourself!
needs adjustment, section.
Plug on range is not • Make sure electrical plug is plugged into a live,
completely inserted in properly grounded oudet.
the electrical outlet.
A fuse in your home may • Replace the fuse or reset the circuit breaken
be blown or the circuit
breaker tripped.
Oven controls improperly set. • See the Using the oven section.
Door left in the locked position. • If necessalT, allow the oven to cool; then unlock the
Rear drawer support is
on top of the guide rail.
dool:
• Reposition the drawen See the Storage Drawer
Removalinstructions in the Care and cleaning of your
range section.
27
Page 28

Before YouCall ForService...
Troubleshooting tips
Possible Causes What To Do
Power cord maybe • Reposition the drawer and power cord. See the
obstructing drawer Storage Drawer Removal instructions in the Care and
in the lower back cleaning of your range secdon.
of the range.
Rear drawer support is • Reposition the drawel_ See the Storage Drawer
on top of the guide rail. Removal instructions in tile Care and cleaning of your
The oven temperature is • _-Mlowthe oven to cool to room temperature and
too high to set a serf-dean reset tile controls.
operation.
Oven controls improperly set. • See the Using the self-cleaning even section.
Oven door is not in the locked • Make sure you move the door larch handle all the
position. _-ay to the right.
This is the sound of the • This is normal.
metal heating and cooling
during both the cooking and
cleaning functions.
range section.
Excessive soil. • Press the CLEAR/OIl=pad. Open the windo_ to
rid the room of smoke. Wait until the light on the
SELI=¢LEANpad goes off. Wipe up the excess soil and
reset the clean cycle.
Oven too hot. • Allow the oven re cool below locking temperature.
Oven controls not properly set. • See the Using the self-cleaning oven section.
Oven was heavily soiled. • Clean up heavy spillovers before starting the clean
cycle. Hea_;dy soiled ovens may need re self:clean
again or for a longer period of time.
28
Page 29

ww_.GEAppliances.com
Possible Causes What To Do
You have a function • Press tile CLEA_OFFpad. Put tile oven back into
error code. operation.
If the function code repeats. • Disconnect all power to tile range for at least 30
seconds and then reconnect power. If the function
error code repeats, call for service.
• On self_cleaning models, if a ffmcdon error code
appears during tile self_cleaning cycle, check the oven
door larch. The latch may have been moved, if only
slightly, from the locked position. Make sure the larch
is moved to the right as far as it will go. Press the
CLEAR/OFFpad. Mlow the oven to cool for one hour.
Put the oven back into operation.
A fuse in your home may be • Replace the fuse or reset the circuit breaken
blown or the circuit
breaker tripped.
The dock is turned off from • See the Using tho clock and timor section.
showing in the display.
Power failure. • Reset the clock.
Oven control pads were • The BAKE and BROIL HIiLO pads must be
ii i
Strong,dot An odor from the insulation • This is tempora W.
not pressed properly, at the same time and held for 3 seconds.
Power outage or surge. • Reset the clock. If the oven was in use, you must reset
it by pressing the CLEAR/OFFpad, setting the clock
and resetting any cooking ihnction.
This is normal in a new • To speed dm process, set a self-clean cycle for a
oven and will disappear minimum of 3 hours. See the Using the self-
in time. cleaning oven section.
around the inside of the
oven is normal for the first
few times the oven is used.
pressed
29
Page 30

Accessories.
Looking For Something More?
Youcan find these accessories and many more at www.GEAppliances.com, or
call 800.626.2002 (during normal business hours). Have your model number ready.
Surface Elements& Drip Pans
I
OvenElements LightBulbs Knobs
Cleaner Cleaning Pads Scraper
OvenRacks Broiler Pan
3O
Tired of discolored racks? Wishing you had extra-heavy-duty oven racks?
NOWAVAILABLEfor your range:
GE's innovative, self-cleanable porcelain-coated oven racks!
• Heavy Duty
• Durable
• Able to be cleaned in a self-cleaning oven
Visit w_,6EAppliances.com for more information.
Page 31

GEElectricRange Warranty.
All warranty service provided by our Factory Service
Centers, or an authorized Customer Care®technician.
Toschedule service, on-line, 24 hours a day, visit us at
GEAppliances.com, or call 800.GE.CARES (800.432.2737).
GE Will Provide:
Any part of the range which Pails due m a defect in materials or workmanship. During this
fullone-yearwarranty, GE will also proxdde, free of charge, all labor and in-home service to
replace tile defective part.
A replacement glass cooktop if it should crack due to thermal shock, discoloL crack at tile
rubber seal between the glass cooktop and tile porcelain edge, or if the pattern wears off.
A replacement radiant surface unit if it should burn out.
During this limited additional four-year warranty,, you will be responsible for any labor or
in-home service.
_ Service trips to your home to teach you howto use
the product.
N Improper iustalladon, delivery or maintenance.
_ Failure of the product if it is abused, misused,
or used for other than the intended purpose or
used commercially.
_ Damage to the glass cooktop caused byuse of cleaners
other than the recommended cleaning creams and
pads.
_ Damage to the glass cooktop caused by hardened
spills of sugary materials or melted plastic that
are not cleaned according to the directions in
the Owner's Manual.
Staple your receipt here.
Proof of the original purchase
date is needed to obtain service
under the warranty.
N Replacement of house fuses or resetting of circuit
breakers.
N Dmnag_ to the product caused by accident, In'e, floods
or acts of God.
N Incidental or consequential damage caused by possible
defects with this appliance.
N Damage caused after delivery.
This warranty is extended to the original purchaser and any succeeding owner for products purchased for
home use within the USA. In Alaska, the warranty excludes the cost of shipping or service calls to your home.
Some states do not allow the exclusion or fimitation of incidental or consequential damages. This warranty
gives you specific legal rights, and you may also have other rights which vary from state to state. To know
what your legal rights are, consult your local or state consumer affairs office or your state's Attorney General
Warrantor: General Electric Company.Louisville,KY40225
31
Page 32

ConsumerSupport.
GEAppliancesWebsite
Have a question or need assistance with your appliance? Try the GE Appliances Website 24 hom.-sa day,
any day of the year! For greater convenience and faster service, you can now download Owner's Manuals,
order parts, catalogs, or even schedule service on-line. You can also "Ask Our Team of Experts''"
your questions, and so much more...
ScheduleService
Expert GE repair service is only one step away fi'om your door. Get on-line and schedule your service at
your convenience 24 hours any day of the year! Or call 800.GE.C_M/ES (800.432.2737) during normal
business hours.
www.GEAppliances.com
www.GEAppliances.com
RealLifeDesignStudio www.GEAppliances.com
GE supports the Universal Design concept--products, services and environments that can be used by
people of all ages, sizes and capabilities. We recognize the need m design for a wide range of physical and
mental abilities and impairments. For details of GE's Universal Design applications, including kitchen
design ideas for people with disabilities, check out our Website today. For the hearing impaired, please call
800.TDD.GEAC (800.833.4322).
ExtendedWarranties
www.GEAppliances.com
k____.._,
v______
Purchase a GE extended warranty and learn about special discounts that are a'_ailable while your warranty
is still in effect. You can purchase it on-line anytime, or call 800.626.2224 during normal business hours.
GE Consumer Home Selwices will still be there alter your vcarranvy expires.
PartsandAccessories
Individuals qualified to serxdce their own appliances can have parts or accessories sent directly to their
homes (VISA, MasterCard and Discover cards are accepted). Order on-line today, 24 hours every day or
by phone at 800.626.2002 during normal business hours.
Instructionscontainedinthismanualcoverprocedurestobeperformedbyanyuser.Otherservicinggenerally
shouldbe referredtoqualifiedservice personnelCautionmustbeexercised,sinceimproperservicing maycause
unsafeoperation.
ContactUs
If you are not satisfied with the smwice you receive from GE, contact us on our Website Mth all the details
including your phone number, or write to: General Managm; Customer Relations
GE Appliances, Appliance Park
Louisxdlle, KY40225
RegisterYourAppliance
www.GEAppliances.com
www.GEAppliances.com
www.GEAppliances.com
v,_____.._
Register your new appliance on-line---at your convenience! Timely product registration will allow tor
enhanced communication and prompt serxdce under the terms of your warranty, should the need arise.
You may also mail in the pre-printed registration card included in the packing material.
Printed in the United States
 Loading...