

Page 1

ge.com
Safety Instructions ......... 2-0
Operating Inslru_¢ions
(',lock and Timer ............. 14
Oven .................... l 0-20
Power Outag_ .............. l l
Sabbath Feaune .......... 17, 18
Self-Cleaning ............ 19, 90
Special Features ............. 16
Thermostat ................. ] 8
Timed Baking & Roasting ..... 15
Surfi_ce Units .............. 7-{)
Care and Cleaning
Control Knobs .............. 91
Glass Cooktop ............ 94, 95
Lift-Off ()yen Door . .......... 22
Light ...................... 93
Sheh>s ..................... 93
Troubleshooti_ Tips ..... 26-29
Accessories ................. 30
Consumer Support
Consumer Support . . . Back Cover
Product Regisuafion ...... 31,32
VCananty ................... 35
JBP6q
JBP65
JBP66
JBP67
JBP68
JBP70
Write the model and serial
numbers here:
Model #
Serial #
You can lind them on a label
behind the storage drawer on
the fl'ont of the range fl_ame.
49-80492 05-07 JR
Page 2
IMPORTANTSAFETYINFORMATION.
READALLINSTRUCTIONSBEFOREUSING.
For your safety, the information in this manual must be followed to minimize the risk of fire,
electric shock, or to prevent property damage, personal injury, or loss of life.
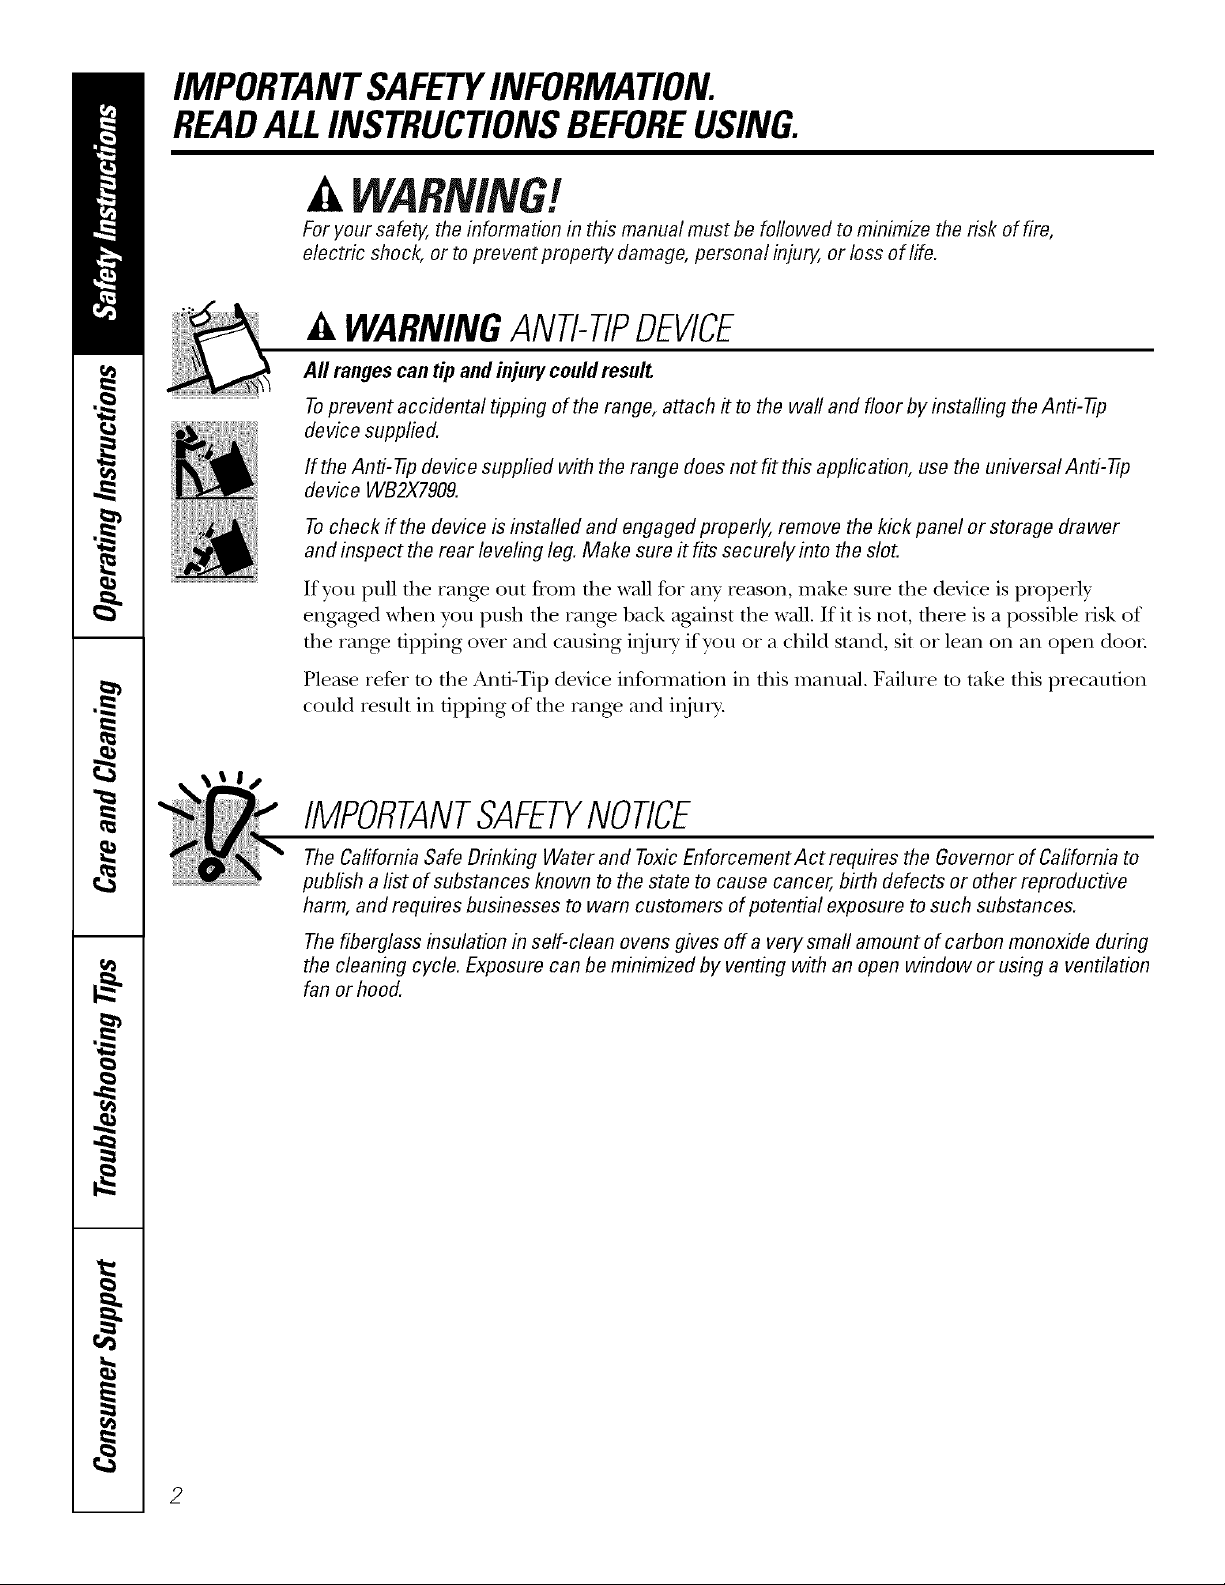
WARNINGANti-TIPDEVICE
All ranges can tip andinjury could result.
Toprevent accidental tipping of the range, attach it to the wall and floor by installing the Anti--tip
device supplied.
If the Anti--tip device supplied with the range does not fit this application, use the universal Anti--17p
device WB2X7909.
Tocheck if the device is instated and engaged properly, remove the kick panel or storage drawer
and inspect the rear leveling leg. Make sure it fits securely into the slot.
If you pull tile range out from tile wall %r any reason, make sure tile device is properly
engaged when you push the rang_ back against the wall. If it is not, there is a possible iisk of
tile rang_ tipping oxer and causing i,_j/uT if you or a child stand, sit or lean on an open door
Please refer m the Anti-Tip device infounation in this manual. Failure m take this precaution
could Iesult ill tipping of the rang_ and i,)jm>
IMPORTANTSAFETYNOtiCE
The Cafifornia Safe Drinking Water and Toxic Enforcement Act requires the Governor of Cafifornia to
publish a list of substances known to the state to cause cancer, birth defects or other reproductive
harm, and requires businesses to warn customers of potential exposure to such substances.
Thefiberglass insulation in self-clean ovens gives off a verysmall amount of carbon monoxide during
the cleaning cycle. Exposure can be minimized by venting with an open window or using a ventilation
fan or hood.
2
Page 3
ge.com
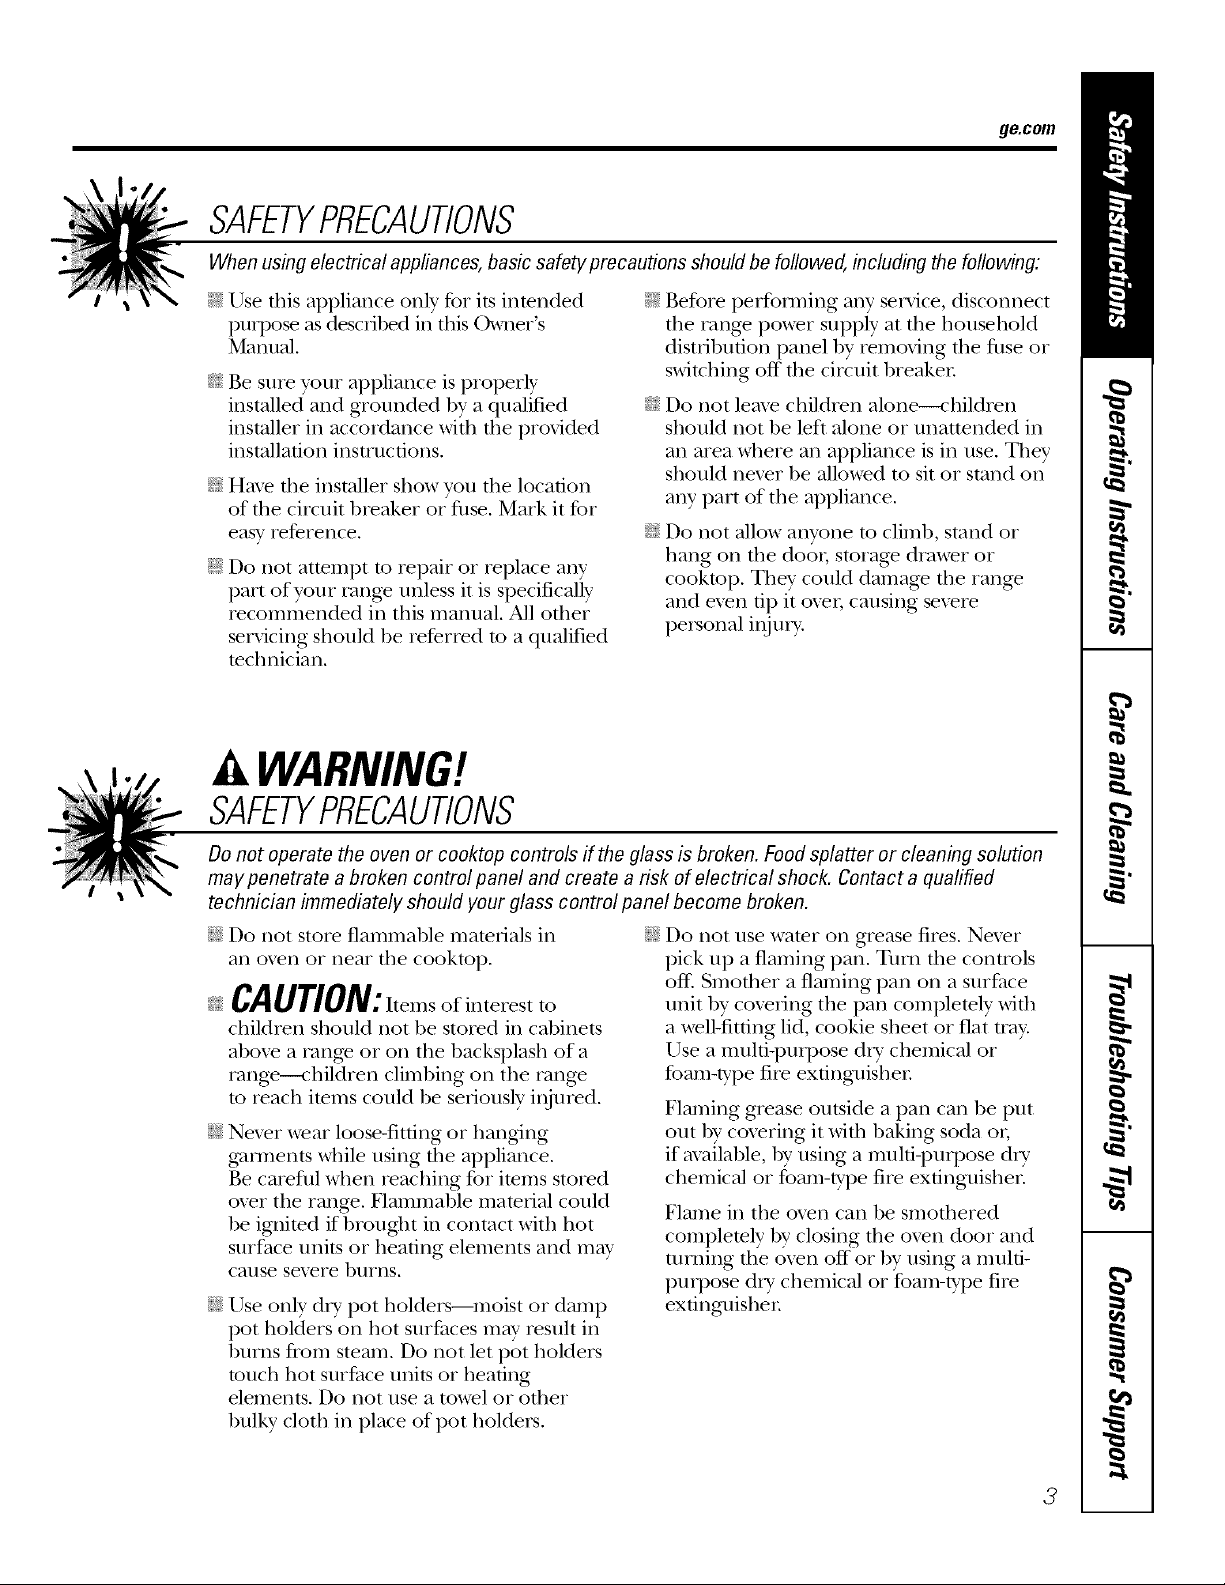
SAFETYPRECAUTIONS
When using electrical appliances, basic safety precautions should be followed, including the following:
E:,IUse this appliance only for its intended
i)m])ose as described ill fillS )_neI s
Manual.
_7{;:Be sure your appliance is properly
installed and grounded by a qualified
installer in accordance with the prox4ded
insta]lation instructions.
_7{;:Hme file installer show you tile location
of tile circuit breaker or fllse. Mark it tbr
easv reference.
J; Do not attempt to repair or replace any
part of your range unless it is specifically
reconmmnded in this manual, All other
servicing should be referred to a qua]ified
technician,
.(
Before performing aW service, disconnect
tile range power supply at file household
distribution panel by removing the fl]se or
switching off tile circuit breaken
Do not leme children alone--children
should not be left alone or unattended in
an area where all appliance is in use. They
should nexer be allowed to sit or stand on
ally part of the appliance.
Do not allow anyone to climb, stand or
hang on tile dooi, storage drawer or
cooktop. They could damage the rang>
and ex_n tip it ox_I, causing sex.re
personal ii_ni_'.
WARNING!
SAFETYPRECAUTIONS
Do not operate the oven or cooktop controls if the glass is broken. Food splatter or cleaning solution
may penetrate a broken control panel and create a risk of electrical shock. Contact a qualified
technician immediately should your glass control panel become broken.
;f; Do not store flammable materials ill ;f; Do not use water on grease fires. Nexer
all oven or near file cooktop.
CAUTlON:xtemsofinterestto
children should not be stored ill cabinets
above a range or on tile backsplash of a
range--<:hildren climbing on tile range
to reach items could be seriously ii_nred.
_fi:,:Never wear loose-fitting or hanging
g_mnents while using the appliance.
Be careflfl when reaching for imms stored
ox>r the range. Flammable mamrial could
be ignimd if brought in contact with hot
surface units or heating elements and may
cause se\_re bllrns.
J; Use only dt T pot holders--moist or damp
pot holders on hot surPaces m W result ill
bums from steam. Do not let pot holders
touch hot smtZace units or heating
elements. Do not use a towel or other
bulky cloth in place of pot holders.
pick/l I) a flaming pan. Turn fl_e conuols
ofll Smother a flaming pan on a surfi_ce
unit l)y co',efing tile pail completely with
a well-fitting lid, cookie sheet or fiat tray
Use a mulfi-puli)ose di T chemical or
fbam-type file extinguisher
Flaming grease outside a pan call be put
out by covering it with baking soda oi;
if available, by using a mulo-l)m])ose di y
chemical or foam-type fire exOnguishen
Flame ill tile oven can be smofllered
completely 1)yclosing tile oven door and
um_ing tile oven off or by using a multi-
propose d U chemical or foam-type fire
extinguisher
3
Page 4
IMPORTANTSAFETYINFORMATION.
READALLINSTRUCTIONSBEFOREUSING.
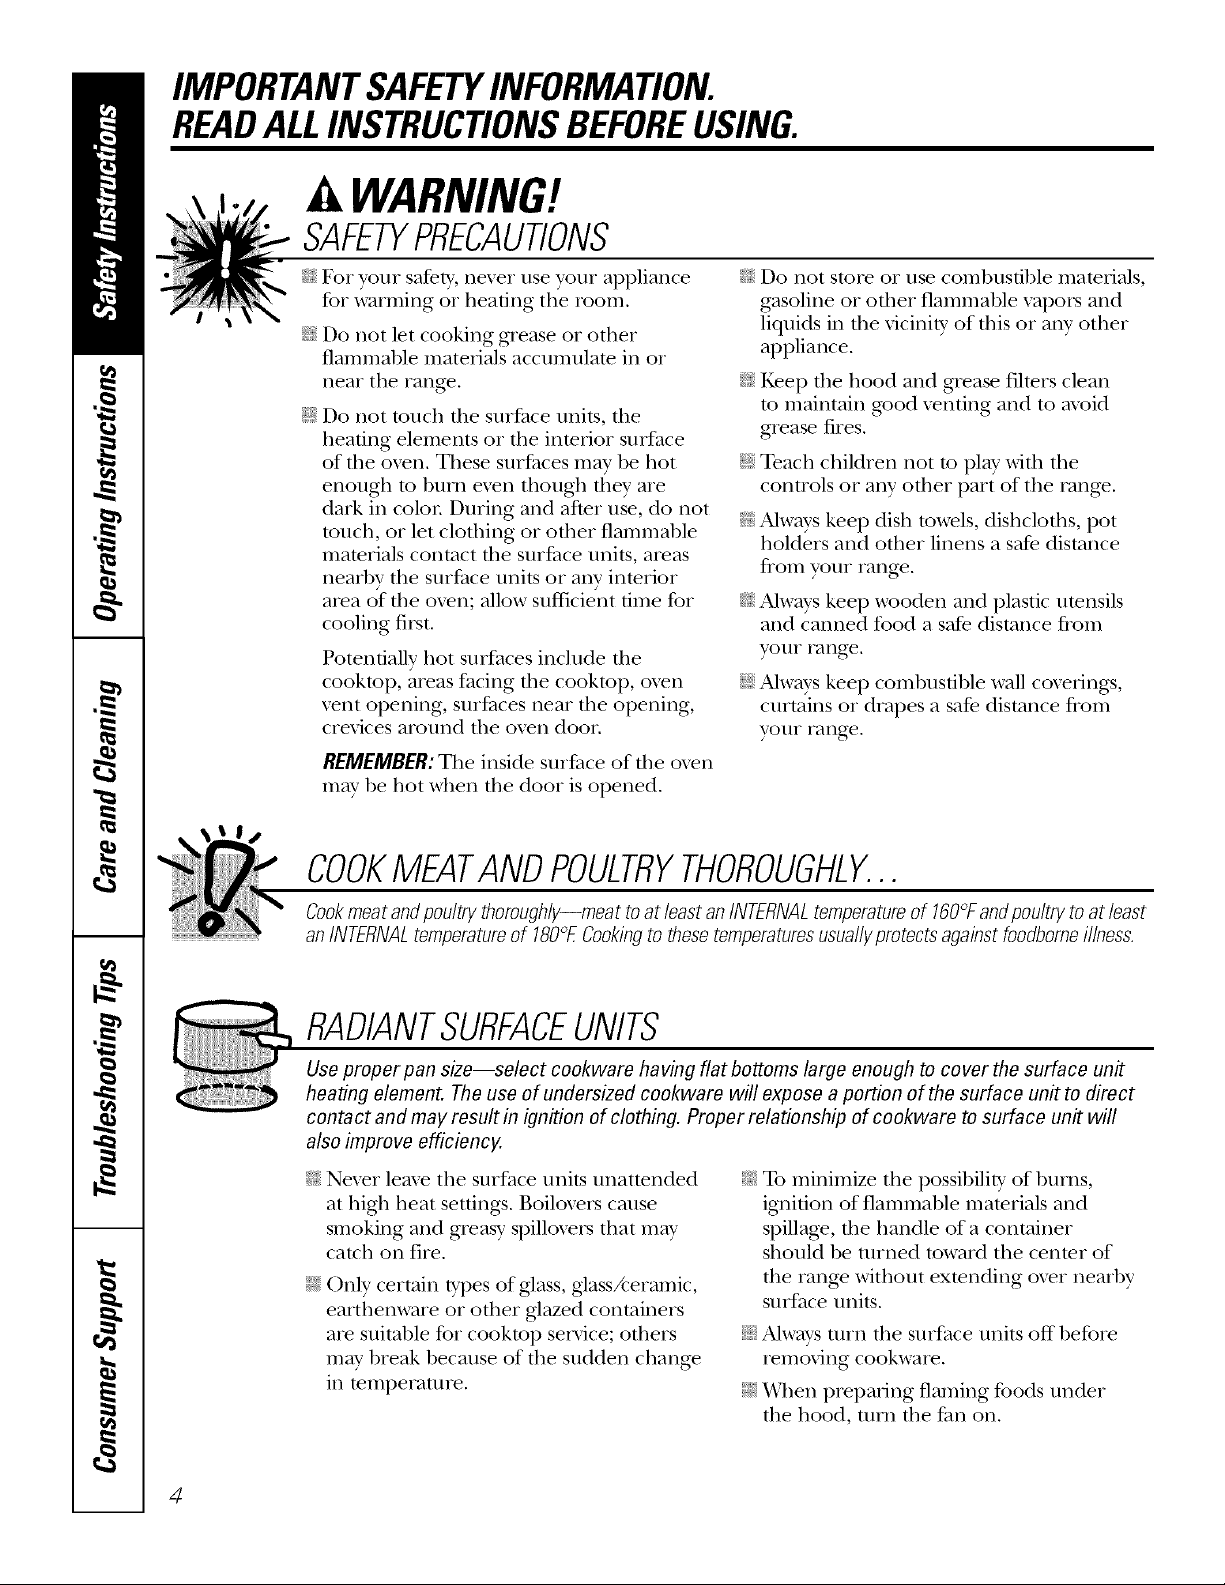
WARNING!
SAFETYPRECAUTIONS
_t_:;For your safety, ne_er use your appliance
for warming or heating tile room.
_?{:_Do not let cooking grease or other
flammable matelials accumulate in or
near tile range.
_fi:,iDo not touch tim sur/_ace units, file
heating elements or fl_e inmiJor surface
of fl_e oven. These surflu:es may be hot
enough m hum even though fl_ey are
dark in coloi: During and after use, do not
touch, or let clofl_ing or oilier flammable
materials contact fl_e surfi_ce units, areas
nearby tim sur/_ace units or any interior
area of file oxen; allow sufficient time for
cooling first.
Potentially hot surfaces include the
cooktop, areas facing the cooktop, oxen
xent opening, suiJCaces near the opening,
crevices around the oven door.
REMEMBER:The inside suiiCace of die o_en
may be hot when tile door is opened.
_{_Do not store or use combustible mamfials,
gasoline or other flammable vapors and
liquids in tile vicinity of this or any other
appliance.
_{_:Kee I) the hood and grease filters clean
to maintain g_od xenting and to mold
grease fires.
;_i:,:Teach children not to play with the
controls or any other part of tile range.
_{_:Ahvays kee I) dish towels, dishcloths, pot
holders and other linens a safe distance
fiom your range.
_{:_Ahvays kee I) wooden and plastic utensils
and canned tbod a safe distance fiom
your range.
_i:,iAlways kee I) combustible wall coxerings,
curtains or drapes a safe distance fiom
your range.
COOKMEATANDPOULTRYTHOROUGHLY...
Cookmeat andpoultry thoroughly--meat toat least anINTERNALtemperatureof 160°Fandpoultry to atleast
an INTERNALtemperatureof 180°ECookingtothesetemperaturesusuaflypretectsagainst foodboreeillness.
RADIANTSURFACEUNITS
Use proper pan size--select cookware having flat bottoms large enough to cover the surface unit
heating element. The use of undersized cookware will expose a portion of the surface unit to direct
contact and may result in ignition of clothing. Proper relationship of cookware to surface unit will
also improve efficiency.
q_{_;Nexer leme tile surface units unattended
at high heat settings, Boiloxers cause
smoking and greasy spilloxers that may
catch on fire.
_; Only certain types of glass, glassAeramic,
earthenware or other glazed containers
are suitable for cooktop service; others
may hreak because of tile sudden chang_
in temperature.
_{_To minimize the possihilitv of burns,
ignition of flammahle mamrials and
spillage, the handle of a container
should be turned toward the cenmr of
file range without exmnding oxer nearhy
surface units.
_{_Always turn tile surface units off hefore
removing cookware.
;_i:,:When preparing flaming foods under
file hood, mm the/_an on.
4
Page 5
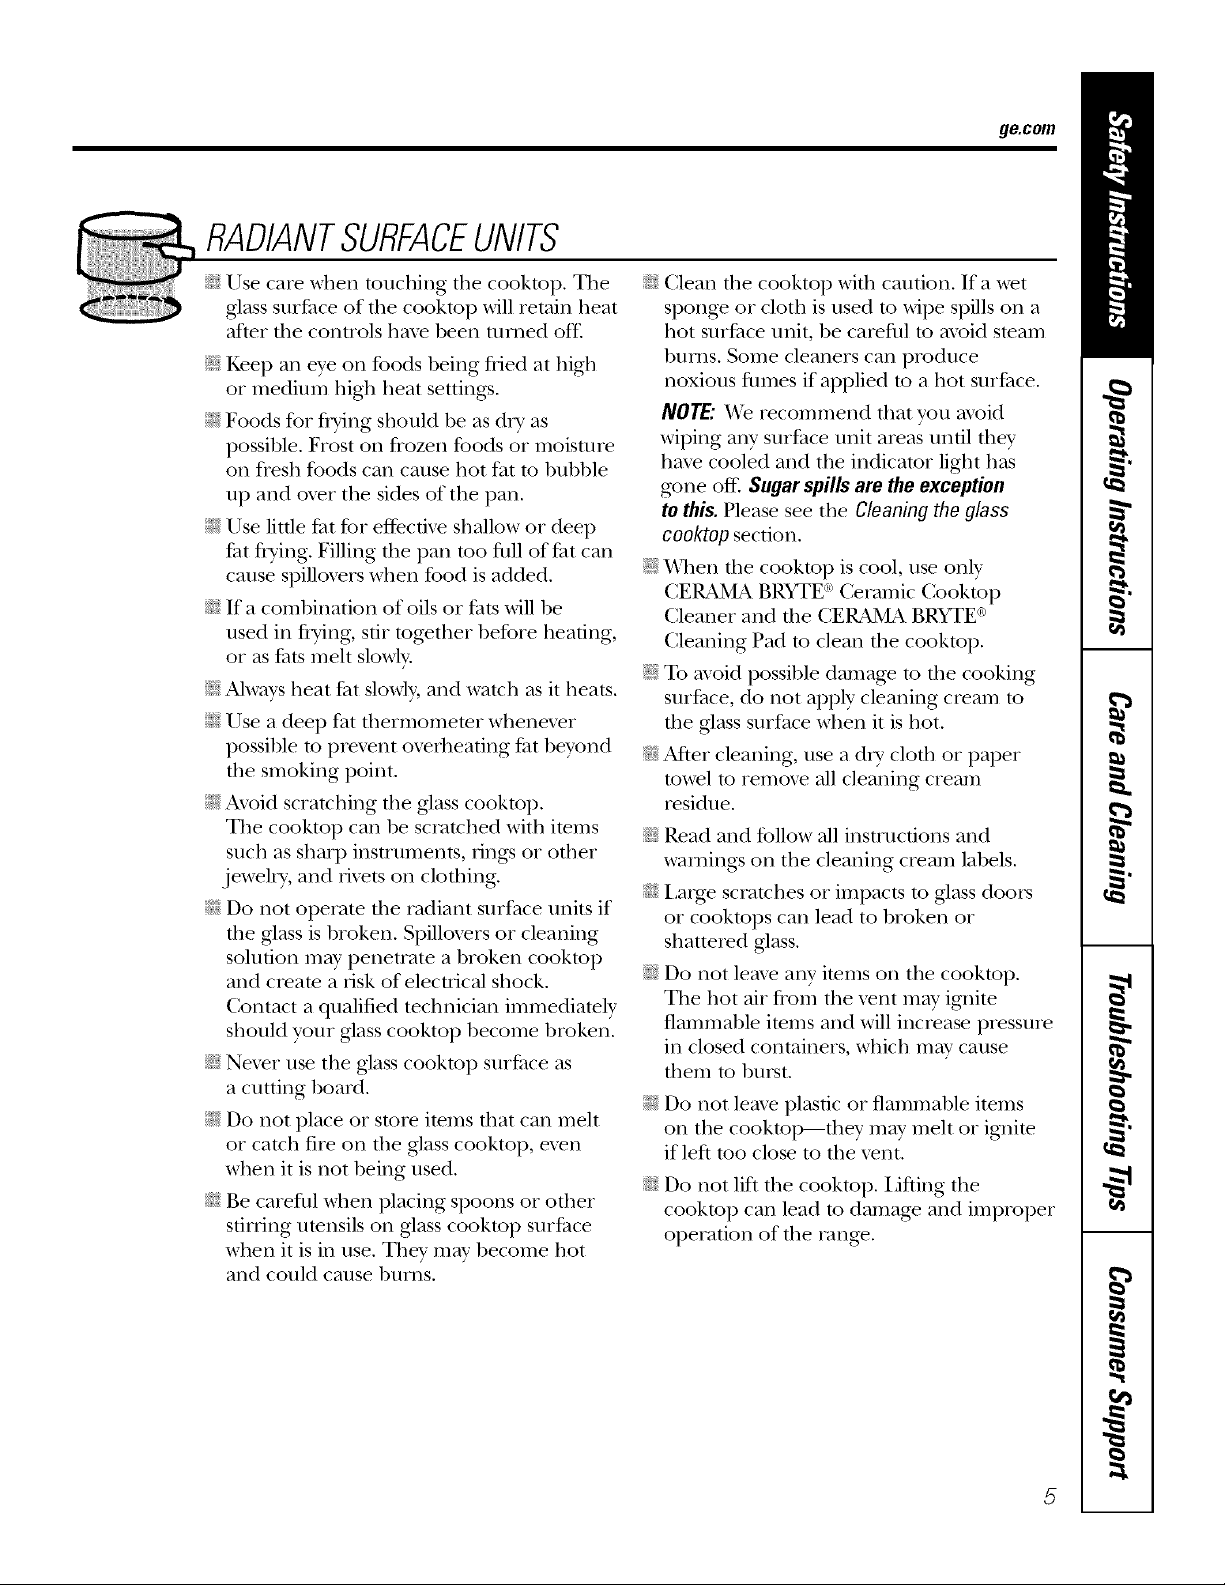
RADIANTSURFACEUNITS
ge.com
_{;_Use care when touching the cooktop. The
glass sur£_ce of tile cooktop will retain heat
alter the controls haw been turned off:
E:,IKee I) an eye on foods being flied at high
or medium higtl heat settings.
;f; Foods for flTing should be as &w as
possible. Frost on flozen tbods or moisune
on fresh foods can cause hot fat to bubble
tlI) and ox>r tile sides of tile pan.
E:,IUse little fat for efl_cdve shallow or deep
Pat flTing. Filling the pan too flfll of fat can
cause spillovers when food is added.
_{;_If a combination of oils or fhts will be
used in flTing, stir tog>ther before heating,
or as fhts melt slowly.
;f; Always heat/aat slowly, and watch as it heats.
E:,IUse a deep fat d_ermomemr whene_er
possible to prex_nt oveflleafing fi_tbeyond
tile smoking point.
E:,IAvoid scratching the glass cookmp.
The cookmp can be scratched with imms
such as sharp insuuments, tings or other
jeweh T, and fix>ts on cloflfing.
qT_;:Do not operate the radiant surface units if
file glass is hroken. Spillovers or cleaning
solution may penetrate a broken cooktop
and c_eate a risk of elecuica] shock.
Contact a qualified technician immediately
should your glass cooktop hecome broken.
_{;_Nexer use tile glass cookmp sni_tce as
a cutdng hoard.
_f):,iDo not place or store imms fllat can melt
or catch fire on rim glass cooktop, exen
when it is not being used.
_{;_Be careflll when placing spoons or other
sorting utensils on glass cookmp surPace
when it is in use. They m W become hot
and could cause broils.
_{;;Clean tile cooktop with cauuon. If a wet
sponge or cloth is used to wipe spills on a
hot sur£ace unit, be careflfl to axoid steam
bunls. Some cleaners can produce
noxious flnnes if applied m a hot smiCace.
NOTE,"_'e recommend that you avoid
wiping any S/lltace unit areas until they
have cooled and the indicator light has
g_ne off: Sugar spills are the exception
to this.Please see the C/oaning the glass
cooktopsection.
N _Allen the cooktop is cool, use only
CERAMA BRYTE _ Ceramic Cooktop
Cleaner and the CERAMA BRYTE a_
Cleaning Pad to clean the cooktop.
N To avoid possible damag_ to the cooking
smi_ace, do not apply cleaning cream to
the glass surface when it is hot.
N After cleaning, use a dry cloth or paper
towel to remox_ all cleaning cream
residue.
_;;Read and tbllow all instructions and
warnings on tile cleaning cream labels.
_ti;;Larg> scratches or impacts to glass doors
or cooktops can lead to broken or
shattered glass.
;fi:,:Do not leave any imms on tile cooktop.
Tile hot air flom the x_nt m W ignite
flammable imms and will inciease p_essme
in closed containers, which m W cause
fllem to burst.
E:,:Do not leaxe plastic or flammable imms
on the cooktop---d)ey may melt or ignite
if left too close to dm x>nt.
_ti;:Do not lilt the cooktop, i3fling the
cooktop can lead to damag_ and improper
operauon of tile rang>.
Page 6
IMPORTANTSAFETYINFORMATION.
READALLINSTRUCTIONSBEFOREUSING.
WARNING!
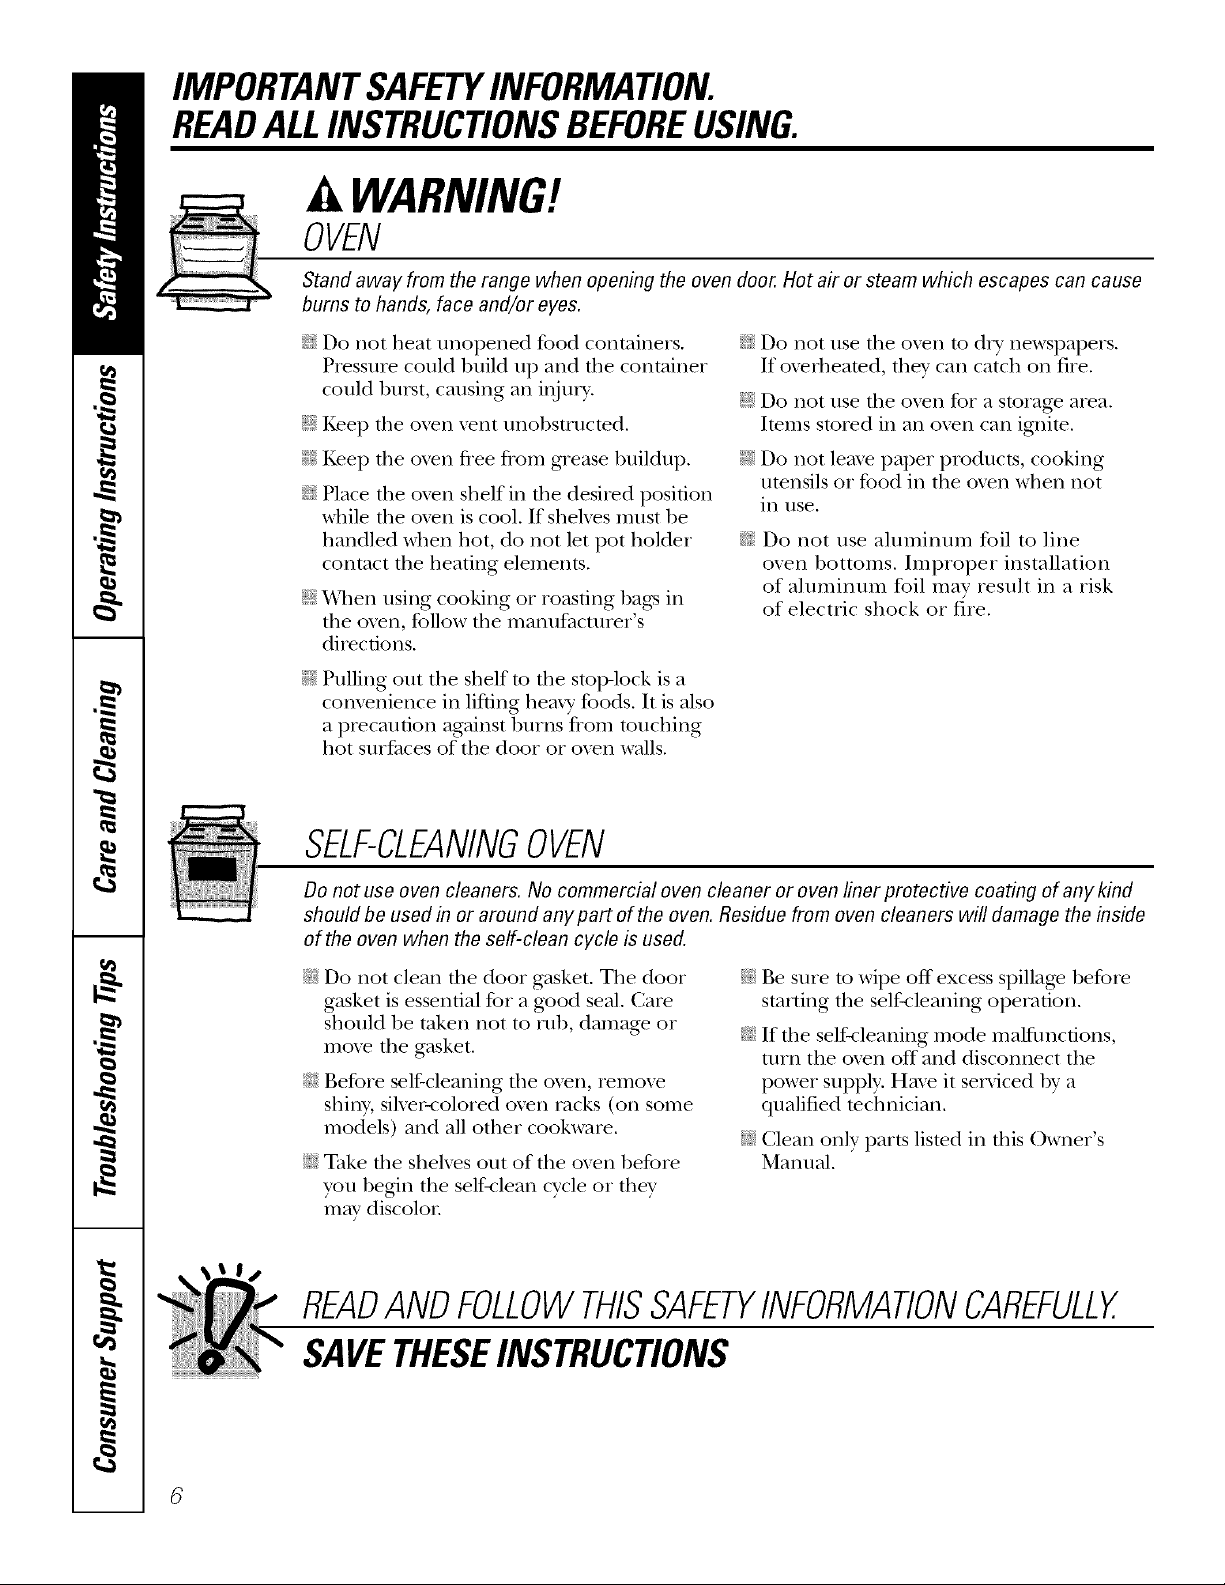
OVEN
Stand away from the range when opening the oven door. Hot air or steam which escapes can cause
bums to hands, face and/or eyes.
_{_Do not heat unopened tbod corrtainers. _{_
Pressure could build up and the corrtainer
could burst, causing an i[Ijm T. ;_):
;f)iKeei ) tire oven lent unobstructed.
;)i:_Kee I) tire oven flee flom grease buildup.
_?_::Place tile oxen shelf in dre desired position
while tile oxen is cool. If shehes must be
handled when hot, do not let pot holder
corrtact tile heating elements.
E:,:When using cooking or roasting bags ill
tile oxen, follow the mamffacturer's
directions.
;fi:,iPulling O/lt tire shelf to fire stoI>lock is a
corrvenience in lifting heaxy' foods, It is also
a precaution against burns flom touching
hot smqaaces of tile door or oxen walls.
Do not use tire oxen to dry newspapers.
If oxerheated, they can catch on fire.
Do not use tile oven for a storage area.
hems stored ill an oxen can ignite,
E:,:Do not leme paper products, cooking
utensils or food ill the oxen when not
ill rise.
Do not use aluminum foil to line
oxen bottoms, hnproper irrstallation
of ahmlinum foil may resuh in a risk
of electric shock or tJre.
SELF-CLEANINGOVEN
Do not use oven cleaners. No commercial oven cleaner or oven liner protective coating of any kind
should be used in or around any part of the oven. Residue from oven cleaners will damage the inside
of the oven when the self-clean cycle is used.
Do not clean fire door gasket. Tile door _:;
gasket is essential for a good seal. Care
should be token not to rob, damag_ or
mow tile gasket.
Be%re self-cleaning dre oxen, remoxe
shiny, siher-colored oxen racks (on some
models) arrd all other cookware.
• _ke the shelxes out of tile oxen before
you begin the self-clean cycle or they
may discolor
Be sure to wipe off excess spillage before
starting tile self-cleaning operation.
N
If the self-cleaning mode malfunctions,
turn tire oxen off arrd disconnect tile
power supply. Hme it serviced by a
qualified technician.
Clean only parts listed ira this Owner's
Manual.
READANDFOLLOWTHISSAFETYINFORMATIONCAREFULLY.
SAVETHESEINSTRUCTIONS
Page 7
Usingthe surfaceunits, ge.com
Throughout this manual, features and appearance may vary from your model.
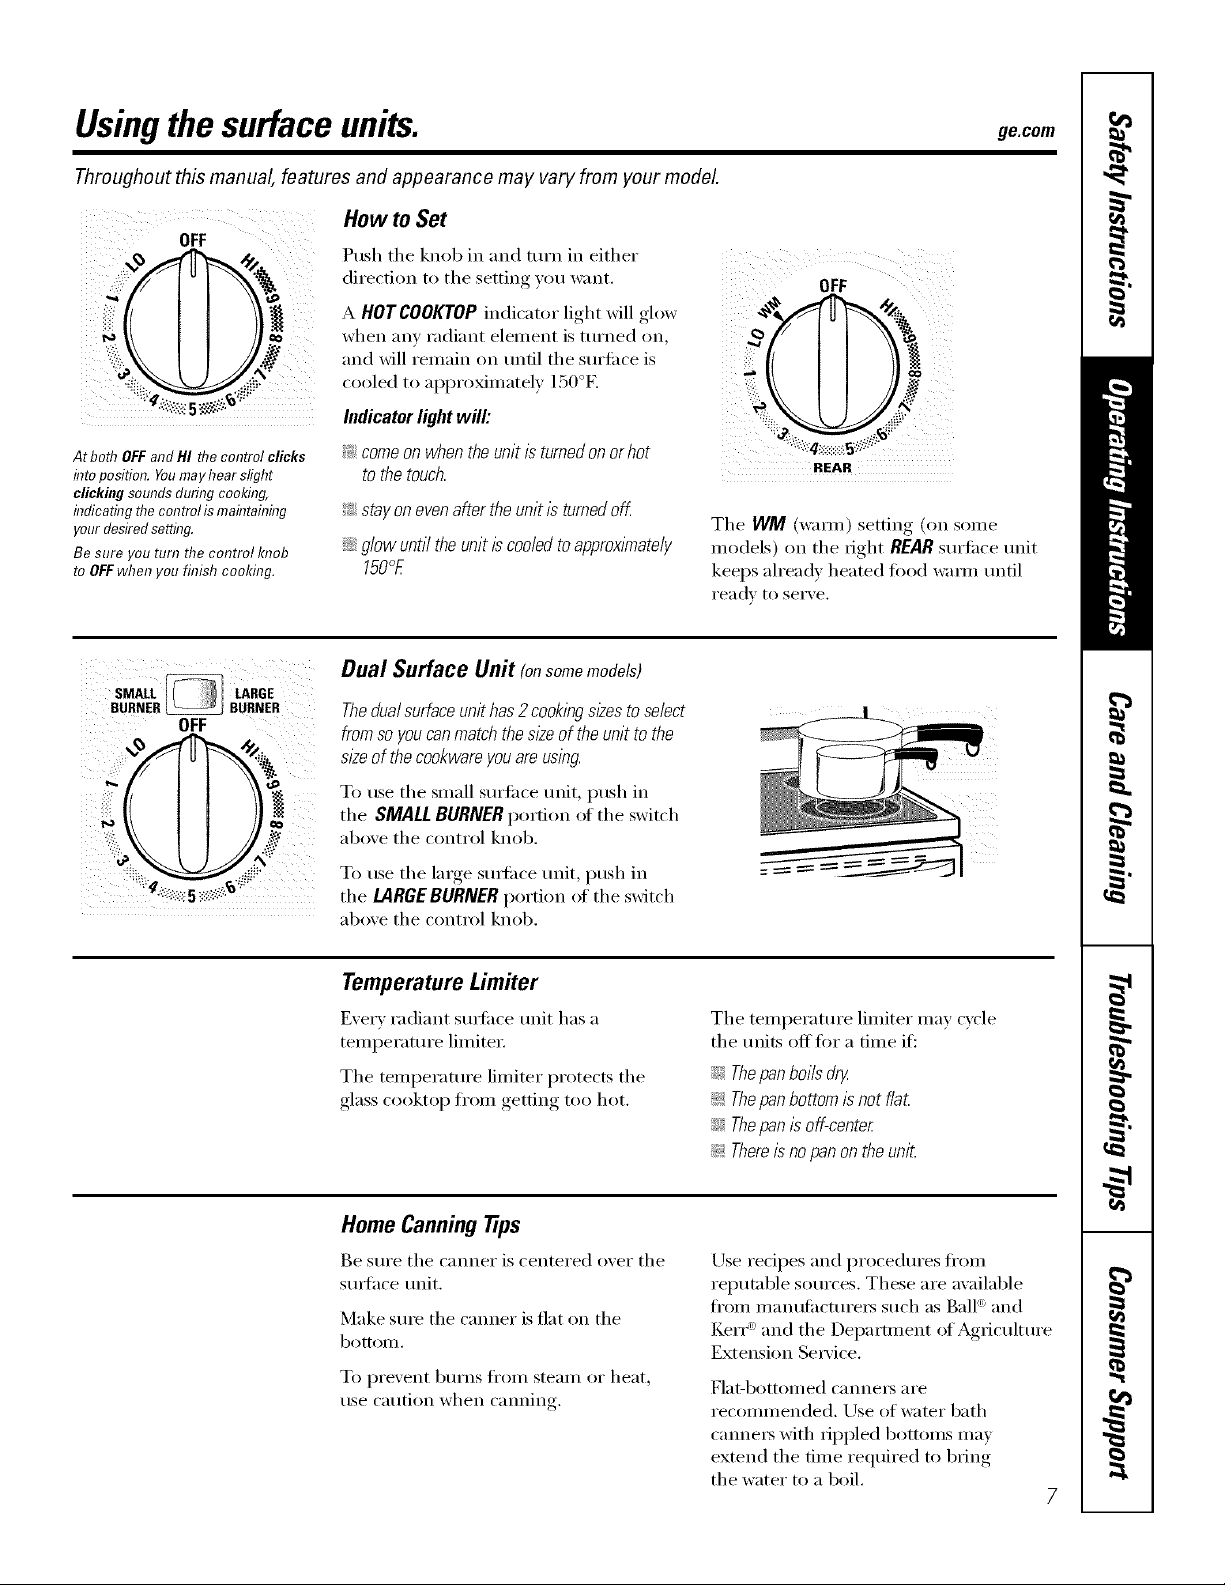
OFF
_._ Push the kn(,b in and turn in either
d.ect,,,t,,tile ,.,..,,,..
I I
when any radiant element is turned on,
i!__'_ and will remain on until tile surlil('e is :,,,,,ledt,,.pp,',,Vm.tel;15o°> _,:_
Indicatorlight will'. .:....
How to Set
Atboth OFFand HI the control clicks
&to position. Youmayhear slight
clickingsounds during cooking
&dicating the control is ma&tahT&g
yourdesired setting.
Be sure you turn the control knob
to OFFwhen you finish cooldng.
SMALL LARGE
BURNER_ BURNER
OFF
!;>comeonwhentheunitisturnedonorhot
tothetouch.
!;>stayonevenaftertheunit/s turnedoff
ij_:_glowuntil theunitiscodedtoapproximately
150°E
Dual Surface Unit (onsomemodels)
Thedualsurfaceunithas2cookingsizestoselect
fromsoyoucanmatchthesizeof theunittothe
sizeofthecookwareyouareusing.
To use tile small sm'fi_ce trait, push in
the SMALLBURNERportion of tile switch
above tile control knob.
REAR
Tile WM (warn/) setting (on solne
models) on tile fight REARsurfi_ce unit
keeps ah'eady heated fi)od wam_ tmtil
ready to serve.
To use tile large smti_ce unit, push in
tile LARGEBURNER portion of tile switch
aboxe the control knob.
Temperature Limiter
Every radiant smti_('e trait has a
temperature limited:
Tile temperature limiter protects tile
glass cooktop fl'om getting too hot.
Home Canningtips
Be sure tile canner is centered over tile
smtace tmit.
Make SUle the cam_er is fiat on the
bot[olIl.
To prevent burns fl'om steam or heat,
use caution when camdng,
Tile temperature limiter may cycle
tile milts offfi)r a time if:
iJi_;Thepan boils dr)z
!i>Thepan bottom/s not f/aL
iJi_;Thepan is off-center
!i>Thereis nopan on the uni_
Use redpes and procedm'es fl'om
reputable sources. These are available
fl'OI/l I/]}lllt/liICttlI'eI'S Stlch _:IS Ball '_and
Kerr >and tile Depamnent of Agriculture
Extension Se_Mce.
Flat-bottOllled cannei's ai'e
recommended. Use of water bath
cam_e_ with tippled bottoms may
extend the time required to bring
tile water to a boil.
Page 8

Usingthe surfaceunits.
Throughout this manual, features and appearance may vary from your model.
Wok Cooking
Werecommendthatyouuseonlya flat-bottomed
wok.Theyareavailableat yourlocalretailstore.
Do not rise woks that ha'_e StlppoI't YiIl_S
Use only flat-bottomed woks.
The following information will help you choose cookwara which will give good performance on glass cooktops.
About the radiant surface units...
Tile radiant cooktop teatm'es heating
milts beneath a smooth glass sm_filce.
NotE.Asl,>todorisnormalwhenanew
cooktopisusedforthef, sttimelt,scausedby }
Never cook alrecr y o/7me glass.
Always use cookware.
Always place thepan in the center of
the surface unit you are cooking on.
theheatingofnewpartsandinsulatingmateriabandwill disappearlea shorttl_ne.
NOTE."Onmodelswith/ight-co/oredg/ass
cooktops,it is normalforthecookingzonesto
changecolorwhenhotorcoo/legdown.Thisis
temporaryandwi//disappearastheglasscools
toroomtemperature.
Tile smti_ce refit will cycle on "aI'M off to
maintain yore" selected control setting.
It is safe to place hot cookware on tile
glass sm'iime even when tile cooktop
is cool.
Even alter tile surfl_ce milts are tin'ned
off, tile glass cooktop retains enough
heat to continue cooking. To avoid
ovei'cooking_ i'elllOVe i)_lliS ][i'Olil tile
surfilce units when tile toed is cooked.
Avoid placing anything on tile surfllce
refit tmtil it has cooled completely:
Do not rise rotlnd bottoi/l woks.
You could be seriously burned if the
wok tipped o',er.
Do not slide cookware across the
cooktop because # can scratch the
glass--the glass is scratch-resistant,
not scratchproof.
_: Waterstains(mleera/deposits)areremovable
usingthecleaningcreamorfurl-strengthwhite
wnegar
;;Ji::Useof windowcleanermayleavean
iridescentfilmonthecooktop.Thecleanleg
creamwill removethisdiscoloration.
_ Don'tstoreheavyitemsabovethecooktop.
If theydropontothecooktop,theycancause
damage.
;;J_::Donotusethesurfaceasa cuttingboard
8
Page 9
Selectingtypesofcookware, ge.com
Checkpans for flat bottoms by
using a straight edge.
Pans with rounded, curved, ridged
or warped bottoms are not
recommended.
StainlessSteel:
recommended
Aluminum:
heavy wel_?ht recommended
Good conductivib'. _Muminun_ residues
sometimes appear as scratches on the
cooktop, but can be removed if cleaned
immediatelv. Because of its low melting
point, thin weight ahuninum should not
be tlsed.
CopperBottom:
recommended
Col)per may leave residues which ('_111
appear as scratches. Tile residues can be
removed, as hmg as tile cooktop is
cleaned immediatel> However, do not let
these pots boil dry: Overheamd metal can
bond to glass cooktops. An overheated
COl)per bottom pot will leave a residue
that will pemmnently stain the cooktop
if not rein eyed imm ediatelv.
Porcelain Enamel-CoveredCastIron:
recommended
_s long as tile cookware is covered
completely with porcelain enamel, this
cookware is recommended. Caution is
i'ecoi/llllended [Dr cast iron cookwai'e
that is not completely covered with
smooth porcelain enamel, since it may
scratch the glass ceramic cooktop.
Glass-Ceramic:
usable,butnotrecommended
Poor pe_fimnance. May scratch tile
StlI5[il ce,
Stoneware:
usab/e,but not recommended
Poor pex_fimnance. May scratch tile
StlI5[il ce.
Page 10
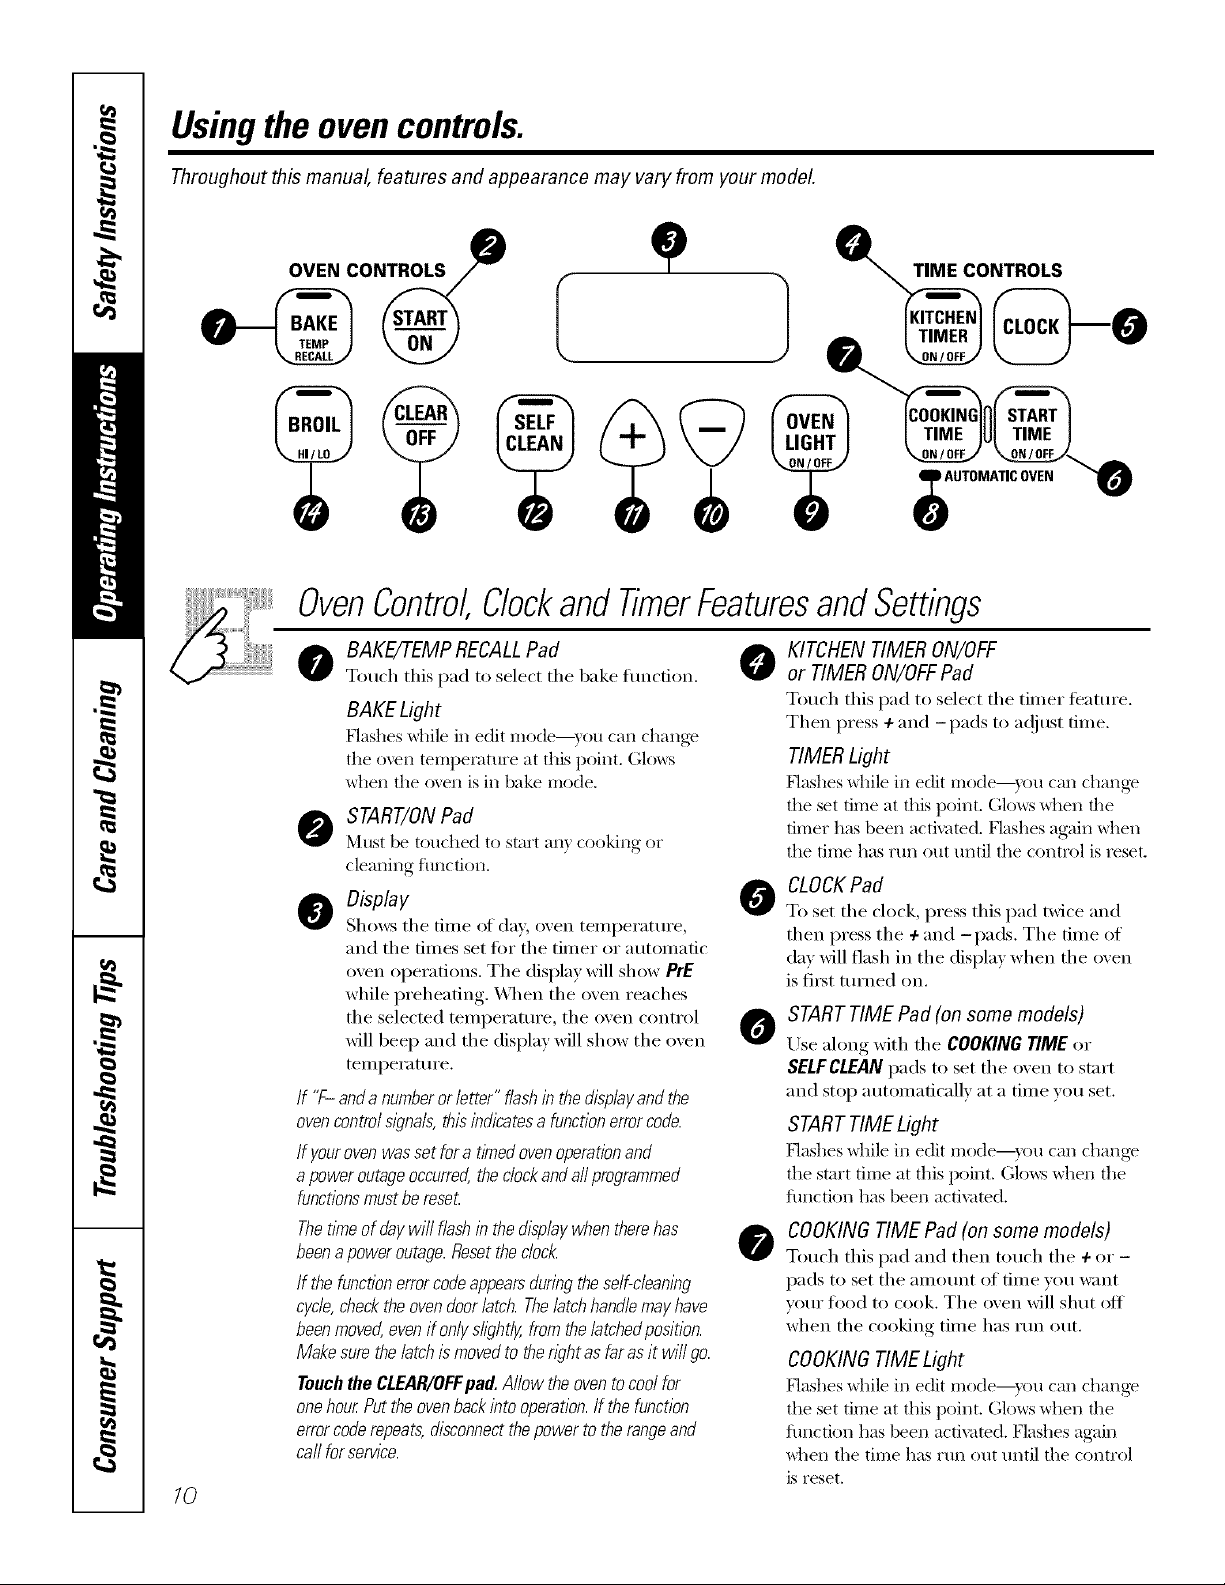
Usingthe ovencontrols.
Throughout this manual, features and appearance may vary from your model.
lO
OVEN CONTROLS
e
TIME CONTROLS
J
J
OvenControl,Clockand TimerFeaturesandSettings
o BAKE/7-EMPRECALLPad 0
Touch tiffs pad to select the bake flmcfion.
BAKE Light
Flashes while in edit mode--)ou can chang_
the o\re[] temperatm'e at this point. Glows
when the o\en is in bake mode.
O START/ONPad
Nltlst be touched to start all} cooking or
cleaning function.
O Display
Shows the tiI]le of day, oven tei]lpex'attli'e,
and the times set tor the timer or automatic
oven operations. The display will show PrE
wlfile preheating. _,_]_en the oven reaches
the selected temperature, the oven control
will beep and the display will show the oven
temperature.
If '7- and a numberor letter" flashin thedisplayand the
ovencontrol sl)_na/s,thisindicatesa functionerrorcode.
If youroven was set fora timed ovenoperation and
apower outageoccurred,the dock and aftprogrammed
functionsmust be reset
Thetlkneof day wi// flash in the displaywhen therehas
beena power outage.Resetthe c/oc/_
If the function errorcodeappearsduring the se/f-c/eanlbg
cycle,checkthe oven doorlatch. Thelatchhand& mayhave
beenmoved,even ifonlyslightly, from the/atchedposition.
Makesure the latch ismoved to then)ht as far asit wi// go.
Touchthe CLEAR/OFFpad. Allow the oven to cool for
onehour.Put the ovenbackinto operation,if the function
errorcoderepeats, disconnectthepower to the rangeand
ca//for service.
KITCHEN TIMER ON/OFF
or TIMER ON/OFFPad
Touch tiffs pad to select tile timer teatm'e.
Then press + and -pads to at!just time.
TIMERLight
Hashes _dfile in edit mode--y_)u can changv
the set time at this point. Glows _dlen the
timer has been activated. Flashes again _d_en
the time has rtm out tmtil the control is reset.
CLOCK Pad
0
To set tile clock, press tiffs pad twice and
then press the 4-and -pads. The time of
day will flash in the display when the oven
is fiI_t turned oil.
START TIME Pad (on some models)
0
ILlsealong with the COOKING TIME or
SELFCLEAN pads to set the oven to start
and stop automatically at a time you set.
STARTTIME Light
Hashes _dfile in edit mode--y_)u can changv
the start time at this point. Glows when the
flmctkm has been activated.
COOKING TIME Pad (on some models)
0
Touch tiffs pad and then touch tile + or -
pads to set tile aillOtlx]t of time you want
wmr fl)od to cook. Tile oven will slmt off
when the cooking time has run out.
COOKINGTIME Light
Hashes _dfile in edit mode--y_)u can changv
the set time at this point. Glows when the
flmction has been activated. Flashes again
when the time has run ()hit tmtil the control
is reset.
Page 11
OvenControlClockandTimerFeaturesandSettings
ge.com
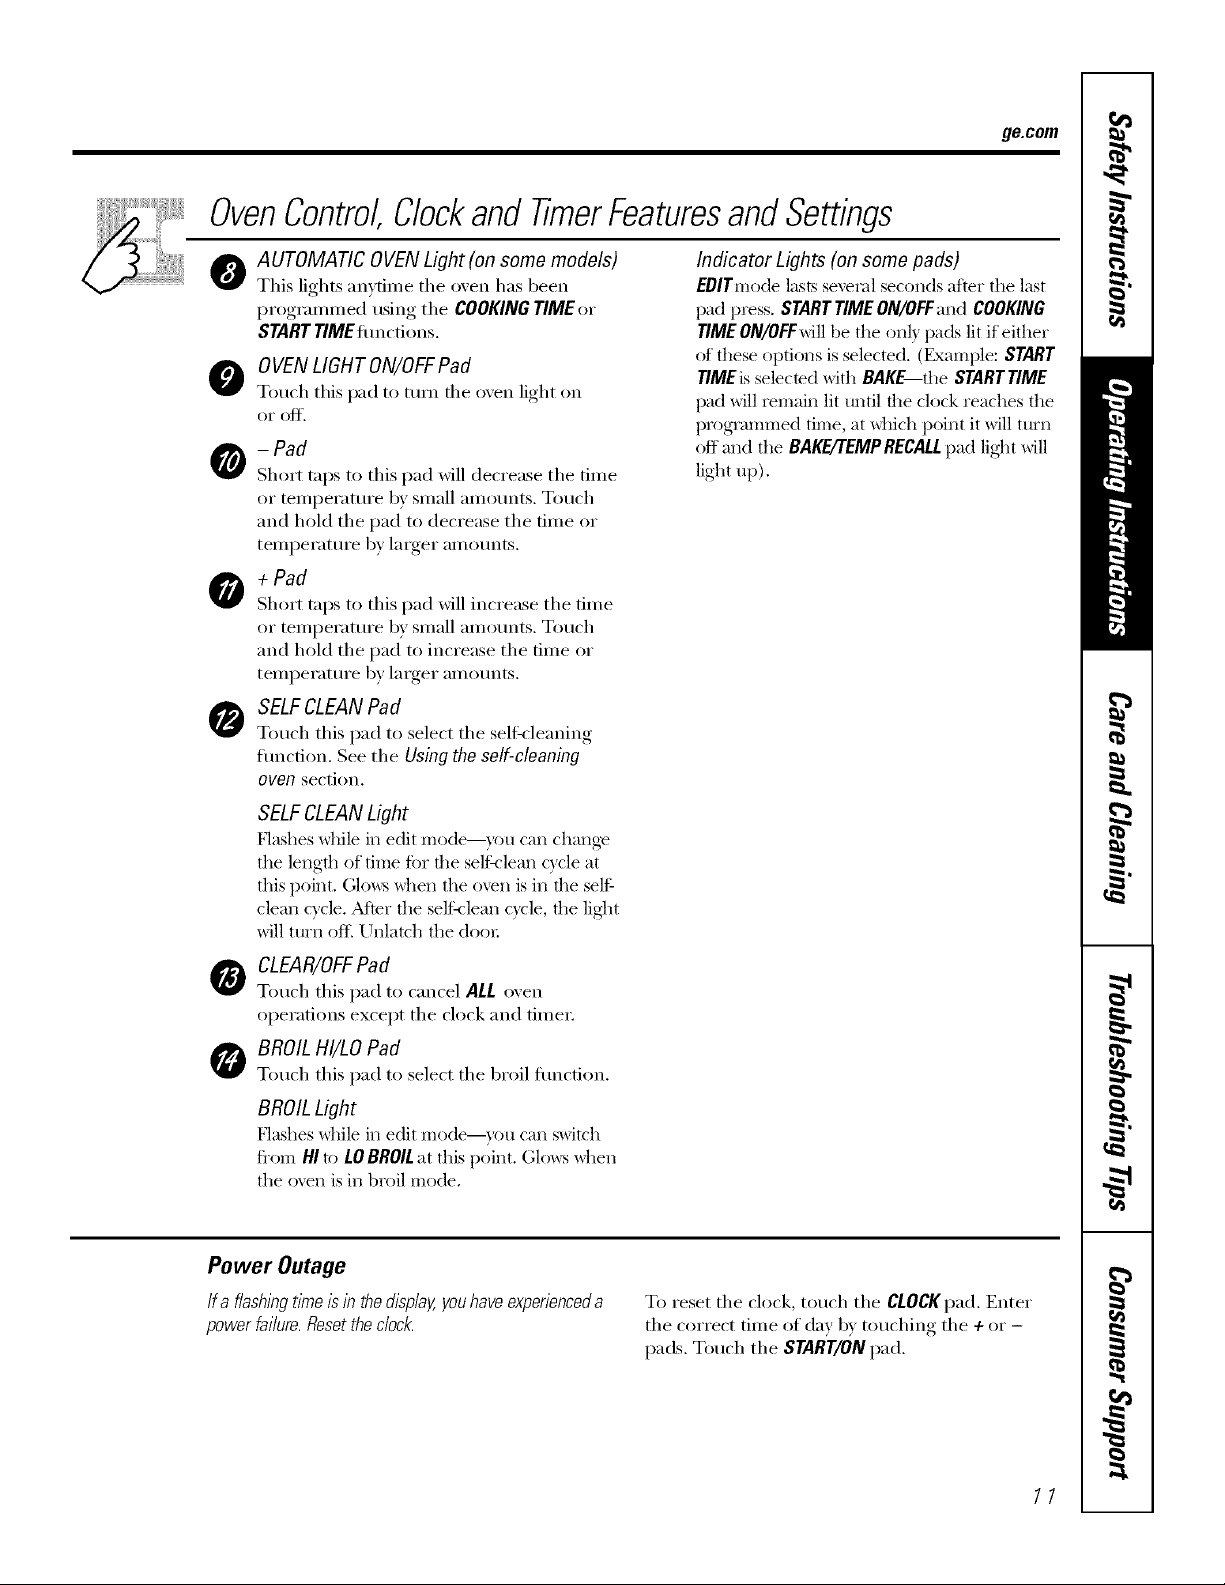
AUTOMATIC OVEN Light (on some models)
O
This lights an,_fiine the o;en has been
progrannned using the COOKINGTIME or
STARTTIMElimctions.
0 VEN LIGHT ON/OFFPad
Touch this pad to turn the oxen light on
OI" ()]c['
- Pad
Short taps to this pad will decrease the time
or temperature by small amounts. Touch
and hold the pad to decrease the time or
tellll)ei'attli'e by larger aI//Otlnts.
+ Pad
Short taps to this pad will increase the time
or temperature by small amounts. Touch
and hold the pad to increase the time or
temperatm'e by larger amounts.
O SELFCLEANPad
Touch this pad to select the selfkleaning
flmction. See the Using the self-cleaning
oven section.
SELFCLEANLight
Plashes while in edit Illo(le--}rOtl C}III chang_
the length of time ti)r the seltklean c}cle at
this point. (;lows when the oven is in the self
dean c}cle. Adier the seltklean cycle, the lig]_t
will ttlrIl oiI_ Unlatch the docn;
Indicator Lights (on some pads)
EBITmode lastsseveral seconds after the last
pad press. STARTTIME ON/OFFand COOKING
TIME ON/OFFwill be the onl) pads lit if either
of these options is selected. (Example: START
TIMEis selected with BAKE the SrARTTIME
pad will remain lit until the clock reaches the
programmed time, at _hich point it will ttli'ii
off mad the BAKE/'rEMPRECALLpad lig]_t will
light up).
CLEAR/OFFPad
O
Touch this pad to cancel ALL oven
operations except the clock and fime_;
BROILH!/LO Pad
Touch this pad to select the broil flmcfion.
BROILLight
Flashes while in edit mode--y_ m can switch
fi'om HIto tO BROILat this point. (;lo_s when
the ()veil is iI] broil mode.
Power Outage
If a flashingtlYneIsIn thedisplay,youhave experienceda
power failure. Resetthe clock.
To reset the clock, touch the CLOCKpad. Enter
the correct time of day b) touching the + or -
pads. Touch the START/ONpad.
11
Page 12

Usingtheoven.
Toavoid possible bums, place the shelves in the desired posifion before you turn the oven on.
Before you begin...
CAUTION:Whenyouare.usingthesheffin thebwest
positionCA),youwill needtousecautionwhenpulling
theshelfout.Werecommendthatyoupufftheshelf
outseveralinchesandthen,usingtwopotholders,puff
theshelfoutbyholdingthesidesofit. Theshelfislow
andyoucouldbeburnedif youplaceyourhandinthe
middleof theshelfandpuffaftthewayout.Bevery
carefulnot toburnyourhandonthedoorwhenusing
theshelfintheIowestpositionCA).
The oven has 6 shelf positions.
The shelves have stop-lo(ks, so that \dlen
placed correctl} on fl_e shelf supports (A
through F), they will stop beiore coming
completely out, and will not tilt.
When placing and x_mo_ing cook\_are,
pull tim shelf out to the bump on fl_e shelf
support.
Toremove a shelf, pull it to_md you, tilt file
ti'ont end up and pull it out.
Toreplace, place the end of the shelf
(stop-locks) on the support, tilt up dm fl'ont
and push fl_e shelf in.
How to Set the Oven for Baking or Roasting
ii
"_ _,'////I \\\','_,_f
Center baking pans in flTeoven.
[] >.ch a,eBAKE
desired temperature is displa}ed.
[] Touch the START/ONpad.
The oxen xdll start automatically. The displa_
will sho_ Prfwhile px_heating. _,\]mn tim
oven reaches die selected tempera\me, the
oven control will beep several times and the
_fispla}will sho_ the oven temperature.
TochangetheoventemperatureduringBAKEcycle,
touchtheBAKEpadandthenthe+ or- padstoget
thenew temperature.
[] Check food for doneness at minimum
rune on recipe. Cook longer if necessary
Preheating and Pan Placement
Preheat the oven if the recipe c_fllsfiw it.
Preheating is necessar} tot good results \dmn
baking cakes, cookies, past U and breads.
TheDisplaywillshow "PrE"whilepreheating.When
theovenreachestheselectedtemperature,theoven
controlwillbeepandthedisplaywillshowtheoven
temperature.
[] Touch tl/e CLEAR/OFFpad when baking
is finished and then rel;qo_.e the iood
fForrl the oven.
TypeofFood Shelf Position
Frozenpies(oncookiesheet) D
Angelfoodcake A
Bundtorpoundcakes CorD
Biscuits,muffins,brownies, CorD
cookies,cupcakes,
layercakes,pies
Casseroles CorD
Turkey A
Baking resuhs will be better if baking pans are
cenmred in the o_en as much as possiNe. If
baking with mox_ than one pan, place the
pans so each has at least 1 to 1½" of air space
around it./f baking four cake layers at die
same time, place t\_o layers on shelf g and me
liners on shelf D. Stagger pans on the shelf so
one is not directly abo\e the oilier
12
Aluminum toil
Donotusealuminumfoilonthebottomoftheoven.
Ne_er entixvlv co_er a shelf with alm-ninum
toil. This will (fisturb dm heat circulation and
result in poor baking.
A smaller sheet of toil may be used to catch
a spillover by placing it on a lower sheff sexeral
inches below the t6od.
Page 13

Leave the door open to the broil
stop position. The door stays open
by itself, yet the proper temperature
is maflTtaflTedf17the oven.
How to Set the Oven for Broiling
V1] Place the meat or fish on a broiler
it i
,grid in a broiler I)an designed,
fiw broiling.
[] F°ll°w suggested shelf I)°siti°ns in
the BroilingGuide.
Ifyourrange/sconnectedto208volts,rare
steaksmaybebroiledbypreheatingthebroiler
andpositioningtheovenshelfoneposition
higher.
Use LO Broil to cook fl)ods such as
poultx_, or thick cuts of meat thorotlghl}
without ox e_4)rowning them.
Broiling Guide
ge.com
[] Touch the BROILHI/LOpad once for
141Broil
To change, to LO Broil, touch the
BROIL HI/LO pad again.
[] Touch the START pad.
[] _._en broiling is finished, touch the
CLEAR/OFF pad.
The size, weight, thickness,
starting temperattlre
and VO/li" l)reference
of doneness will alti_ct
broiling times. This guide
is based on meats at
reti'igerator temperatm'e.
[_o[m/m; bu/ you _houfd kno,_ /ha/
_vol,'i_l_ i/ /o on/? I401" metros
_ome/_._d Doi*m i_Jg o_;_znisms
rod) surzh e. " (_;ou_rw 5aLe lbod
Book. l_)u_ 1,2it(/J4,_(mid('. _iSl)A
tCz-la.]u_e 19_S'5.)
Theoven has 6shelf positions.
Food
GroundBeef
Beef Steaks
Raret
Medium
Weft Done
Raret
Medium
Weft Done
Chicken
Bakery Product
Bread (toast)
English Muffin
LobsterTails
FishFillets
Salmon
Steaks
Fillets
HamSlices
(precooked)
Pork Chops
Weft Done
_Seeillustration for description of shelf positions.
Quantity and/ Shelf* First Side
or Thickness Position Time(rain.)
1lb. (4patties) D 13
I/2to 3/4"thick
4 Ihs.(12 patties) D
3/4to 1" thick F 6
1to 11/2 Ibs. E 8
11/2" thick D 10
2to 21/2Ibs. D 15
1whole cut up C 25
2to 21/zIhs.,
split lengthwise
Breast C 25
2to 4 slices E 3
2(spilt) F 3-4
2 4 C 18 20
1lb. (V4to I/2" thick) E 5
2(1" thick) E
2 (I/2 to 3/4"thick) E
I/2Zz thick D
1" thick D
2(I/Z' thick) D
2(I" thick) about 1lb. D
E 10
E 20
SecondSide
Time(rain.)
8
4
6
8
8
10 12
20
25
15
1
Do not
tunl
over.
10
10
6
8
10
15
6
8
10
15
Commeots
Spaceevenly.
Steakslessthans/4"
thick aredifficult
tocookrare.
Slashfat.
Brusheachside with
meltedbutter
Broil skin-side-down
first.
Spaceevenly.Place
Englishmuffins cut-
side-upandbrush
with butter ifdesired.
Cutthrougl_backof
slleii. Spreadopen.
Brushwith melted
butter beforebroiling
andafter half of
broilingtime.
Handleandturnvery
carefully.Brushwith
lemonbutterbefore
andduringcooking,
if desired.
Turncarefully.Do not
turn skinsidedown.
Slashfat.
13
Page 14

Usingthe clock and timer.
Not all features are on all models.
To Set the Clock
Make sure the clock is set to flTe
correct time of day.
The clock must be set to the correct time
of day fin" the atmnnatic oxen tinting
flmcfions to work properly: The time of
da} cannot be changed during a dela}ed
cooking or a dela'_ed seltXcleaning cycle,
[] Touch tile CLOCKpad twice,
[] T°uch the + °r -IXMS"
If tile ÷ or - pads are not touched within
one minute after xou touch tile CLOCK
pad, tile displa) rexerts to tile original
ToTurn Off the Clock Display
If you have several clocks in your kitchen,
you may wish to mrn off tile time of day
clock display on umr range.
[] Touch tile CLOCKpad once to turn
off tile time of day display: _Mthouoh
you will not be able to see it, the
To Set the Timer
setting, If this hal)pens, touch tile CLOCK
pad twice and reenter the time of din.
[] Touch the START/ON pad until the
time of day sho_s in tile display. This
entei_ tile time and starts tile clock.
Tocheckthetimeofdaywhenthedisplayis
showlbgotherinformation,simplytouchthe
CLOCKpad Thet/meofdayshowsuntilanother
padistouched
clock maintains tile correct time
of dav.
Touch tile CLOCKpad twice to recall
[]
the clock display.
Thetimer is a minute timer only.
TheCLEAR/OFFpad does not affect
the timec
Thet/Ynerdoesnot contro/ovenoperations.
Themaximumsetting on the timer is 9hours
and59minutes.
[] Touch tile KITCHEN TIMER ON/OFF
pad.
[] Touch tile +or-pads until tile
}llllO/lnt of time you _V}lIlt shows ill
tile display. Tile maxim um time that
can be entered in minutes is 59.
Times more than 59 minutes should
be changed to hours and minutes.
If you makea mistake, touchtheKITCHEN
TIMER ON/OFFpad andbeginagain.
To Reset the Timer
If tile display is still showing tile time
remaining, you may change it by touching
tile KITCHEN TIMER ON/OFF pad, then
touching tile ÷ or-pads until tile time
vou want appears in tile display.
ToCancel the Timer
[] Touch tile START/ON pad. Tile time
will strut counting down, althou,,h
the display does not change until
()lie lllintlte has passed.
[] X._hen the timer reaches .'0/7,the
control will beep 3 times fi)llowed 1)_
one beep e\'eIw 6 seconds until the
KITCHEN TIMER ON/OFFpad is
touched.
If tile remaining time is not in tile display
(clock, start time or cooking time are in
the display), recall the remaining time by
touching tile KITCHEN TIMER ON/OFFpad
and then touching tile ÷ or -pads to
enter tile new til//e Veil w}lnt.
Touch the KITCHEN TIMER ON/OFF
/4
pad twice.
Page 15

Usingthetimedbakingandmastingfeatures.(onsomemodels) gecom
Donot lock the oven door with the latch during timed cooking. The latch is used for self-cleaning only.
NOTE: Foods that spoil easily--such as milk, eggs, fish, stuffings, poultry and pork--should not be allowed to s# for
more than 1hour before or after cooking. Room temperature promotes the growth of harmful bacteria. Be sure that
the oven light is off because heat from the bulb will speed harmful bacteria growth.
How to Set an Immediate Start and Automatic Stop
Theoven will turnon immediatelyandcookfor a [] Touch the START/ON pad.
selectedlengthof time. At the endof thecooking
tkne,the oven WlT/turnoffautomatica//g The display shows either the oven
[] Touch the BAKEpad.
] Touch the 4-or -pads to set the
o'_en teillpei'attli'e.
[] Touch the COOKING TIME pad.
NOTE."If yourreciperequirespreheating,youmay
need toadd additional timeto the length of the
cookingtime.
] Touch the ÷ or -pads to set the
baking tim e.
Tile cooking time that you entered
will be displayed. (If you select Cooking
Time fi_st and then a(!just the Bake
Telnl)erature, tile oxen telnl)erature
will be displayed instead).
temperature that you set or tile cooking
time countdown. (The display starts with
PrEif showing the oven temperature.)
Tile oven will con[intle [O cook tor tile
programmed alllOtlnt of tii/le, then [tlYn
off a utomaficallv.
[] Touch tile CLEAR/OFFpadto cancel
if necessax_.
Removethefoodfromtheoven.Remember,even
thoughtheovenshutsoffautomatlcally,foods
continuecookingaftercontrolsareof#
@
@
How to Set a Delayed Start and Automatic Stop
Theoven will turn onat the t/Yneof dayyouset,
cookfor a specihclength of time and thenturnoff
automatically
Make StlI'e tile clock shows tile ('ori'ect
time oI day.
[] Touch tile BAKEpad.
] Touch tile + or -pads to set tile
oven telllpei'att ii'e.
[] Touch tile COOKING TIME pad.
] Touch tile + or -pads to set tile
desired length of cooking free.
[] Touch tile START TIMEpad.
] Touch the + or _ l_ads to set the tim e
of (la_ _O/I want tile o&en to ttlYn on
and staY[ cooking.
[] Touch the StaRT/ONpad.
NOTE."An attention tone wi// soundif you are
using flYnedbakingand do not touch the
START/ON pad
NOTE."If you would like to check tile times
you have set, touch the START TIME pad to
check the start dine w_u have set or touch
the COOKING TIME pad to check the length
of cooking time you have set.
_._]/en tile oven turns on at tile time of day
you have set, the display will show PrE until
it reaches tile selected temi)erature, then
it will display the oven temi)erature.
At the end of cooking time, the oven
will turn off' and the end-ot:cvcle tone
will sound.
[] Touch the CL_iP_/OFFi)adtocancel
if ilecessa i'll
Removethe food from the oven. Remember,even
thoughthe ovenshuts off automatlcally, foods
continuecookingafter controlsare of#
@
15
Page 16

Special featuresofyourovencontrol
Yournew touch pad control has additional features that you may choose to use. Thefollowing are the features and
how you may activate them.
Thespecial feature modes can only be activated while the display is showing the time of day. They remain in the
control's memory until the steps are repeated.
When the display shows your choice, touch the START/ONpad. The special features will remain in memory after
a power failure.
NOTE: TheSabbath feature and the Thermostat Adjustment feature are also Special Features, but they are
addressed separately in the following sections.
12Hour Shut-Off
Withthisfeature,shouldyouforgetandleavethe
ovenon,thecontrolwi//automaticallyturnoff the
ovenafter12hoursduringbakbgfunctionsor
after3 hoursduringabroilfunction.
If you wish to mrn OFFthis ligature, tollow
the steps below.
[] Touch the BAKEand BROILHI/LO
pads at the same time until the
display shows SE
[] Touch the CLOCKpad. The display
will show ON (12 hour shut-off).
Touch the CLOCKpad repeatedly
until the display sho_:s OFF(no
shut-off).
[] Touch the START/ON pad to acfixate
the no shut-off and leaxe the control
set in this special ti_atm'es mode.
16
Page 17

"-'--usingthe SabbathFeature.(onsomemodels)
(Designed for use on the Jewish Sabbath and Hofidays)
The Sabbath feature can be used for baking/roasting only. It cannot be used for broiling, self-cleaning or
Delay Start cooking.
NOTE: The oven light comes on automatically(on some models) when the door is opened and goes off when the
door is closed. Thebulb maybe removed. See the Oven Light Replacement section. Onmodels with a light switch
on the control panel, the oven light may be turned on and left on.
How to Set Sabbath Feature for Regular Baking/Roasting
NOTE: Tounderstand how theoven control works,
practice usingregular baking (non-Sabbath)before
entering Sabbathmode.
Make sure the dock shows the correct time of day
and theoven is off
] Touch and hold both the BAKE and
BROIL HI/LO pads, at the same time,
/mtil the display shows SE
] Tap the CLOCK pad mltil SAb appears
in the displaT_
] "[bud*, the START/ON t)ad and D *,*,rill
appem: in the displ_ly.
] "['ouchthe BAKEpad. No signal *,*,rill
b(! gJ'_ (_l/,
[_ Touch die START/ON pad.
] \t_er a mndonl dela} lleliod ot
*,tllr°xim_tely )0 s((onds to 1 mira t(,
D C will alllle_r ill tl*,e displ m' indicating
that th(' oven is baking/robe, ring. I! m m
doesn't at)peru: in the display, st+m ag_dn
at Step 4.
To a(!iust tile ()*,ell temperature, touch the
BAKEpad m*,d tap tile + or -pads to increase
OF d('cl'('_*,S(' [11(' |('II/p(T_*,[[lI'_' i]J, 25 °
in(rements. Tou(h d*,(' START/ONpad.
NOTE: The CLEAR/OFF_,nd COOKING TIME p_,ds
arc active dmffng d/c Sabbath Ib'amre.
ge.com
When the display shows D the
oven is set in Sabbath. When the
display shows D C the oven is
baiting/roasting.
When the display shows D the
oven is set t7Sabbath. When the
display shows D C the oven is
baking/roasting.
] "|'he preset stardng tempen'mux: *,*,'ill
mltolnaticall'_ be set to 350. ° "[hp the +
O17 --p_(ts to ill€I'(';_s(' OF (]('€]7('_*,se ill('
tClnt)('_mu:c in 27/" incrum(,nts. The
ten/pemture can be set between 175 °
and 550. ° No signal or temperature
will be gJvcn.
How to Set Sabbath Feature for Timed Baking/Roasting--Immediate Start and
Automatic Stop
NOTE; Tounderstand how theoven control works,
practice usingregular (non-Sabbath)Immediate Start
andAutomatic Stop before entering the Sabbathmode,
Make sure the clockshows thecorrect timeof day
and theoven is off.
] "lbu(h and hold both the BAKE and
BROIL HI/tO pads, at the same time,
m*,til the display shows SE
] "Ihp d*,e CLOCKt1_,(t mnil SAb _,ppears
in the dist/la'}'.
] Touch t]*,(!START/ON pad m*,d D *,*,rill
appear in d*,e display.
141 "lbu(h the COOKING TIME pa(t.
] Tou(h d*,(' + or -])_(ts to set the desired
length of (()()king time t/(!tw(_(!ll |
minute mM 9 hours mid 5(.) ndlmtes.
The (ooking time tl*,_-_tyou entered will
be (lisplay'(xl.
I_ "lbu(h d*,e START/ON 1)_(t.
] "lbu(h the BAKEpad. No si_,mal *,*,'ill
be _,4ven.
] The preset stardng ten*,t)(_rature *,*,rill
mltomati(all'v 1)e set to 550. ° "|:all the +
or - pads to increase or decrease the
temt)eramre in 25 ° in(remems. The
temperature can be set t/etween 175 °
m*,d 550. ° No sig_lal or temperature
will l)e gJ_.t'n.
191 "['O_lch d*,e START/ON pad.
] ,_'_'_l"a ran(toni dela} period ot
*,t1/ oxim_tely )0 s_(on(ts to 1 rain m,
D C will al)lle_r ill tl*,e displ m' indicating
that the oven is baking/robe, ring. I! m m
doesn't +q)l)em: in the disl)L_y, stm:t +_g_dn
at Step 7.
To a(!iust tile ()*,ell temperature, touch the
BAKEllad m*,d t:_,t)the + or -pads to increase
OF (|('CI'('_IS(' t]l(' t('II/p(T_*,[[ll'(' i]) 25 °
in(remems. Tou(h d*,(' START/ON pad.
Wh('n (()()king is tin|she(l, d*,e display will
(hmlge |i'om D C to D in(li(adng thai d*,e
oven has mrn('d OFFbut is still set in S_bl)ath.
Remov(, tile cooked |hod.
17
Page 18

"-'--usingthe SabbathFeature.(onsomemodels)
(Designed for use on the Jewish Sabbath and Holidays)
How to Exit the Sabbath Feature
Touch the CLEAR/OFFt)ad.
If the oxen is cooking, wait t))l" a random
dela} period at approxhnatcl'_ 30
seconds to 1 milmte, until only D is in
the displa}
"[buds and hold both the BAKE and
BROIL HI/LO pa(ls, at the same time,
instil dse display S]_(_rs SE
] Tap the CLOCK tsad instil ONor OFF
alSlsears in the dislslay. ON indi(ates
dsat dse ov('n will automatically mrn
off a/ier 12 tsoul'S. OFFindicates that
dse OV('IS will SSO[ amomaticallv [IIFII O11_
See the Special Features section/or an
exlslanation ofdse 12 Hour ghut-Off
t;vature.
[] "lbush the StaRT/ONt)ad.
NOTE:If a power outage occurred while theoven was
in Sabbath, the ovenwill automaticafly turn off and stay
off even when thepower returns, Theoven coetro/
must be reset.
Adjusttheoven thermestat=Bo # yourseff!
Youmay find that your new oven cooks differently than the one it replaced. Use your new oven for a few
weeks to become more familiar with it. If you still think your new oven is too hot or too cold, you can adjust
the thermostat yourself.
Do not use thermometers, such as those found in grocery stores, to check the temperature setting of your oven.
These thermometers may vary 20-40 degrees.
NOTE."This adjustment will not affect the broiling or the self-cleaning temperatures. The adjustment will be
retained in memory after a power failure.
To Adjust the Thermostat
[] Touch the BAKEand BROILHI/LO
pads at the same tixne until the
displa} shows SE
[] Touch the BAKE pad, A two-digit
nulnber shows ill the displa):
The oxen temperature can be
[]
a(!justed up to (+) 35°F hotter or (-)
55°F coolei: Touch the + pad to
increase the telnperamre in l<leoTee
iilci'ei//eilts.
Touch the -pad to decrease the
temperature in 1-deoTee_ increments.
[] X&q_en }ou haxe made the
a(!jtlstment, touch the START/ONpad
to go back to the time ot (la) display.
Use VOIII" O'_ ell as x(Stl would
ii oY//l;:lllx,.
NOTE."Thisadjustmentwillnotaffectthebroiling
orse/f-c/eaningtemperatures.It wi//beretained
inmemon/afterapowerfailure.
Thetype ofmargarine will affectbakingperformance!
Most recipes for baking have been developed using high-fat products such as butter or margarine (80% fat). If you
decrease the fat, the recipe may not give the same results as with a higher-fat product.
Recipe failure can result ff cakes, pies, pastries, cookies or candies are made with low-fat spreads. The lower the fat
content of a spread product, the more noticeable these differences become.
Federal standm'ds require products labeled "margarine" to sontnin at least 80% fist by weight. I,ow4ht spreads,
on the other hand, contain less fi_t and mo_e water: The high moisture content of these spreads affects the
texture and fla_)r of baked goods. For best results with your old ihvo_Jte redpes, use margarine, butter ()_
stick spreads containing at least 70% vegetable oil.
18
Page 19

Usingtheself-cleaning oven. gecom
Before a Clean Cycle
Wipe up heavy soil on the oven
bottom.
We reconm_end venting your kitchen
with an open window or using a
ventilation tim or hood during the
fiist sel6clean cycle.
I_emove shelves, broiler pan, broiler
grid, all cookware and anv almninun/
fi)il fl'()m the oven.
The shiny, silve>colored oven shelves
(oil seine Inodels) can be self:cleaned,
but they will darken, lose their luster
and beconm hard to slide.
Soil on the fl'ont fl'ame ot the range
and outside the gasket on the door
will need to be cleaned by hand. Clean
these areas with hot wateI; soap-filled or
plastic scouring pads or cleansei_ such
as Soft Scrub<i Rinse well with clean
water and dry.
How to Set the Oven for Cleaning
Follow tile directions in the Before a
Clean Cycle section.
[] I,atch the dooI:
NOTE:Never fl)rce the latch. If the oven is
too hot, )_m will not be able to slide the
latch. _Mlow the oven to cool.
Do not clean the gasket. The fibeiglass
material of the oven door gasket cannot
withstand abrasion. It is essential flw the
gasket to remain intact. If you notice it
bec()ming worn or flayed, replace it.
X&]l)e up any hea\ T spilloveis on the ()veil
bottoIll.
Make sure the ()veil light bulb cover is in
place and the oven light is off.
IMPORTANT'. The health of some birds
is extremely sensitive to the fimles given
off during the self:cleaning cycle of any
range. Move birds to another well-
ventilated I'OOIll,
While the oven is sel6cleaning, you can
touch the CLOCKpad to display the time
of day: To retm'n m the clean countdown,
touch the SELFCLEANpad.
The ()yen sh uts off automatically when
the clean cycle is complete, and 0:00 will
flash in the (lispla}:
[] Touch the SELFCLEAN pad.
[] Touch the + or - pads until the
desired Clean Time is displa)ed.
TheCleanTimeis normally4 hoursand 2O
minutes. Youcan changethe CleanTimeto any
tlYnebetween3 and 5 hours, dependlhgon the
amountof soil in youroven.
[] Touch the START/ON pad.
The sel6clean cycle will autonmticallv
begin after CLEAN is displayed and the
time countdown appeai_ in the display.
[] Slide the latch handle to the left as
fro"as it will _oo and open the (looI:
NOTE"Neverforce the latchhandle. Forcingthe
hand& wi// damage thedoor lock mechanism.
19
Page 20

Usingthe self-cleaning oven.
How to Belay the Start of Cleaning (onsomemodels)
Make sure tile clock sho_s tile correct
time of day.
] I,atch tile door,
[] Touch tile SELFCLEAN pad.
] Using tile ÷ or - pads, enter tile
@
desired clean time.
[] Touch tile START TIME pad. Tile
earliest stai_t time _ou can set will
appear in tile display.
] Using tile 4- or - pads, enter the
time of da_ _ou want tile clean c_cle
to StaYt,
%
[] Touch tile START/ONpad.
The display will show tile stact time. It
will not be possible to mflatch the oven
door until the temperature drops below
tile lock temperature.
The _)\'en sh uts off a utom aticallv wh ell
tile clean cycle is complete, and 0:00 will
flash in tile displa>
ToStop a Clean Cycle
Touch tile CLEAR/OFFpad.
Writ mKil tile oven has cooled below tile
locking temperature to mflatch the doo_:
You will not be able m open tile door
right away mfless the oven has cooled
below tile locking temperatm'e.
After a Clean Cycle
You may notice some white ash in tile
oven. Wipe it up with a damp cloth after
tile oven cools.
If white spots remain,removethemwith a soap-
filled steel wool padand rinsethoroughlywith
a wnegarand water mixture.
These deposits are usually a salt
residue that cannot be removed bv
the clean cycle.
If the oven is not clean after one clean
cycle, repeat the cycle.
!i_:You cannot set tile o_en fiw cooking
tmtil tile oxen is cool enough fiw tile
door to be mflatched.
_Ji::While tile oven is self-cleaning, you
can press the CLOCKpad to display
the time of day. To retm'n to tile
clean countdown, press tile SELF
CLEANpad.
::Ji::Apply a small amo/mt of vegetable oil
to a paper towel and wipe tile edges of
the oven shelves with the paper towel.
Do not sp_wy with Pare > or other
lubricant spra):s.
2O
Page 21

Careand cleaningof therange. .ecorn
Be sure all controls are off and all surfaces are cool before cleaning any part of the range.
If your range is removed for cleaning, servicing or any reason, be sure the anti-tip
device is reengaged properly when the range is replaced. Failure to take this
precaution could result in tipping of the range and cause injury.
How to RemoveProtectiveShippingFilmand Packaging Tape
CareJilll} grasp a corner of the proteetite To assure no damage is done to tile iinish
shipping fihn wid_ your fingels and slo\dy [)eel of tile product, d_e safest _Jt, to remote
it ii'om tile appliance suri_tce. Do not rise any tile adhesive, ti'om l)ackaging, , tal)e on new
shaq) items to remme the fih-n. Remme all ()f appliances is an application of a househokl
tile fihn beii)re using tim appliance ii)r tile liquid dishwashing detergent. Apply wifl_ a
filst dine. soft cloth and allo_ to soak.
NOTE:Theadhesivemustberemovedfroma#parts.
Itcannotberemovedffitisbakedon.
Control Knobs
Thecontrolknobsmayberemovedforeasiercleaning.
Make sure file knobs ale ill file OFFposifions
and pull then/straight off the stems for
cleaning.
The knobs call be cleaned ill a dishwasher or
the_ may also be washed Mtb soap and _ter.
Make stay file inside of tile knobs are (hv
beti)re l_placing.
Replace fl_e knobs, ill tile OFFposition to
ensure proper placernent.
Control Panel
It's a good idea to Mpe file control panel after
each use of tile oven. Use a dmnp cloth to
clean or rinse. For cleaning, use mild soap
and _ter or a 50/50 solution of tineg'ar and
watel: For rinsing, use clean wamr Polish dr_
with a soil cloth.
Do not rise abrasive cleansers, smmg liquid
cleaners, plastic scouting pads or ()tell
cleaners on the control panel--riley will
damage tile tinish.
Painted Surfaces
Painted surthces include file sides of file
range and the door, top of control panel and
tile drm_r ti'ont. Clean fl_ese with soap and
water or a tineg'ar and water solution.
Do IIOt IlSe coirll//el'cial ()tell cleallers,
cleaning pop,dell, steel wool or harsh
abrasives on ally painmd stlrJ-i_ce.
Stainless Steel Surfaces (onsomemodels)
Denotusea steelwoolpad;# will scratch
thesurface.
To clean tile stainless steel surlace,
use w;urn sudsy water or a stainless steel
cleaner or polish. Mways wipe tile surtilce
in the direction of the grain. Follow the
cleaner instructions fi)r cleaning tile
stainless steel s/]Is{;Ice.
To inquire about purchasing stainless
steel appliance cleaner or polish, or to
find tile location of a dealer nearest you,
please call our toll-li'ee number:
National Parts Center 1.800.628.2002
ge.com
21
Page 22

Careand cleaningof the range.
Oven Vent
The gasket is designed with a gap at the
bottom to allow for proper air circulation.
Do not rub or clean the door gasket--
it has an extremely low resistance to
abrasion.
If you notice the gasket becoming worn,
frayed or damaged in any way or if it
has become displaced on the door,
you should have it replaced.
TheovenventisIoeatedbehindtherightrearsuffaee
unit.
This area could become hot during ()',ell use.
Cleaning the Oven Door
Toclean theinsideof thedoor:
Because tile area inside tile gasket is
cleaned during the sell:clean cycle,
,','yOUdo not need to clean this bx hand.
!i_i:Tile area outside the g,'asket and die door
liner can be cleaned wifll a soap-tilled
or plastic scouring pad, hot _tter and
deteNent. Rinse well with a vineg, u"
and wamr solution.
Toclean theoutside of thedoor:
}i:i:Use soap and water to thor(mghly clean the
top, sides and fi'ont of the men door. Rinse
well. Y)u ma} also use a ,glasscleaner to
clean the glass on the ouNde of the doox:
Do not let water drip into tile vent
openings.
It iS IlOI31/}ll _i)Y ste;:ffl-i to COll-le ()tit
of tile xent, and 1-1-1oistllre ilia _, collect
underneath it when tile o_en is in use.
Theventisimportantforproperaircircubtion.Never
bbckthisvent.
!_i:If any stain on the door vent trim is
persistent, use a soil abrasixe cleaner and a
sponge-scrubber tor best results.
ik:Spillageof marinades, truit j)dces, tomato
saucesand basting materials containing
acklsmay cause discoloration and should
be wipe(i t]I) immediately When surtitce is
cool, clean and rinse.
ik:Do not use oven cleanel% cleaning
pox_ders or harsh abrasixes on the
outside of the door.
Slot
Pull hinge locks down to unlock.
Removal position
Lift-Off Oven Door
Thedooris veq heaw.Becarefulwhen
removingandliftingthedoor.
Donotlift thedoorbythehandle.
Toremovethedoor:
[] Fully open the door
[] Pull the hinge locks down tox_ard
the door fl'ame, to the unlocked
position. A u)ol, such as a small
flat-blade scre_dfiven 1Tiaybe required.
[] Fim)ly grasp both sides of the door at
the top.
[] Close door to the door removal
position, \dlich is halfi_av bet\_een tile
broil stop position and tidlv closed.
[] I,itt door up and ()/It until tile hinge
ann is clear of the slot.
Toreplacethedoor:
[] lqrmly grasp both sides oI the door at
the top.
With the Bottom Hingearm
[]
door at tile edgeof
Sal//e aIlg[e as
tile remov, ll
position, seat the
indentation of
the hinge aml
into the bottom edge
(if the hinge slot. The notch ill the
hinge aml must be fl/ll_ seated into the
bottom of the slot.
Fully open the door. If the door will not
[]
fldl} open, tile indentation is not seated
correctly in the bottom edge of the slot.
Push the hinge locks up ag_,linsttile
[]
ti'ont ti'arne of tile oven cavity to the
locked position.
lock
22
Pushhingelocksupto lock•
F_] Close the oven door.
IJI
Page 23

Oven Shelves
ge.com
Wire cover holde_
I Stopguide
Clean the oven shelves with an abrasive
cleanser or steel wool. _Mter cleaning,
rinse the shelves with clean water and dry
with a clean cloth.
NOTE: Theshlby,silver-coloredovenshelves
(onsome models)may be cleanedin theself-
cleaningoven. However,theshelves will darken
in color, losethek luster and becomehard toslide
if cleaned during theself-cleaningcycle.
Storage Drawer Removal
Toremove the drawer:
[] Pull the drawer out until it stops.
[] i,ift tile ti'ont of tile drawer until tile
stops clear tile guides.
[] Remoxe tile drawe_:
Oven Light Replacement
CAUTION: Before replacing your oven
light bulb, disconnect the electrical
power to the range at the main fuse or
circuit breaker panel.
Be sure to let tile light cover and bulb
cool completely.
Toremove the cover:
Hold a hand under tile cover so it
[]
doesn't tifll when released. With
finge_ of the same hand fimfl_
push back tile wire coxer holder;
I,ift off tile coxe_:
To make tile shelves slide inore easily,
apply a small amount of vegetable oil
or cooking oil to a paper towel and wipe
the edges of the oven shelves with the
paper towel.
To replace the drawer:
[] Place tile drawer rails on tile guides.
[] Push tile drawer back tmtil it stops.
[] lift tile fl'ont of the drawer and push
back until the stops clear the guides.
[] I,ower tile fl'ont of tile drawer and
push back until it closes.
Do not removeanyscrews toremove thecover
[] Replace bulb with a 40-watt
appliance bulb.
Toreplace the cover:
[] Place it into groove of tile light
receptacle. Pull wire forward to
tile center of tile cover until it
snaps into place.
[] Connect electrical power to
tile Fan re
Oven Heating Elements
Do not cleanthe bakeelement or the broil
element Any softwill burn off when the
elementsareheated
To clean tile oven floo_; gend) lift
tile bake element. Clean with wam_
soapy water.
23
Page 24

Cleaningthe glasscooktop.
Normal Daily Use Cleaning
ONLY use (:EIL_JIA BRYTE _ Ceranfic
Cooktop Cleaner on the glass cooktop.
Other creams may not be as eflbctixe.
To maintain and protect the surfi_ce (If
your, _olass_cooktop, fi)lh/w these steps:
[] gefi)re using the cooktop fi)r the
fiist time, clean it with (_EIL_dVIA
BRYTE _Ceramic Cooktop Cleanei:
Cleanyour cooktopafter
eachspill. UseCERAMA
BRYTE® Ceramic Cooktop
Cleaner.
This helps protect the top and
makes clemmp easier.
[] Daily use of CEIL_IA BRYTE _'
Ceramic Cooktop (:leaner will hel I)
kee I) the cooktop looking new.
Burned-On Residue
[] Shake the cleaning cream well.
Appl) a few drops of CEIU_d_4A
BRYTE <'_Ceramic Cooktop Cleaner
directly to the cooktop.
[] Use a paper towel or CEI_d_IA
BRYTE _'Cleaning Pad for Ceramic
Cooktops to (lean the entire
cooktop StlI]il ce.
[] Use a dry cloth or paper towel
to remove all cleaning residue,
No need to rinse,
NOTE: It isvery important that you DO NOT
heat the cooktop until it has been cleaned
thoroughl_z
Use a CERAMABRYTE_ Cleaning
Pad for Ceramic Cooktops.
TheCERAMA BRYTE'_ Ceramic
Cooktop Scraper and all
recommended supplies are
available through our Parts Cente_
See hTstructions under "ToOrder
Parts" section on next page.
NOTE:Do not use a dull or
nicked blade.
WARNING:DAMAGEto yourglasssurface
mayoccurif youusescrubpadsotherthan
thoserecommended.
[] Allow the cooktop to cool.
[] Spread a few drops of CEILAAMA
BRYTE _:'Ceramic Cooktop Cleaner
on the entire burned residue area.
Using the included (;EI_d_4A
[]
BRYTE (_:'Cleaning Pad fin" Ceramic
Cooktops, rub the residue area,
all ,))lying, pressure as needed.
Heavy, Burned-On Residue
[] Allow the rooktop to cool.
[] Use a single-edge razor blade
scraper at approximately a 45 °
angle against the glass surfi_ce
and scrape the soil. It will be
necessa* y to apply pressure to
the razor scraper in order to
remove the residue.
After scraping with the razor
[]
scrapei; spread a ,%w drops of
CEI_dX._A, BR'_TE : (_eramic
Cooktop Cleaner on the emile
burned residue area. Llse the
CEIL_,IA BRYTE : Cleaning Pad to
remove ally remaining residue.
If any residue remains, repeat the
[]
steps listed above as needed.
For additional protection, alter
[]
all residue has been remoxed,
polish the entire surtace with
CEILZ_dVIA BRYTE ': Ceramic
())oktop Cleaner and a paper towel.
For additional protection,
[]
alter all residue has been
removed, polish tile entire
surihce witl_ CEIg_._A BRYTE )
Ceramic Cooktop Cleaner
and a paper towel.
24
Page 25

Metal Marks and Scratches
ge.com
[] Be careful not to slide pots and
pans across your cooktop. It will
leave metal markings on tile
cooktop s/i i-J[;ice.
These marks are remowd)le using
tile CEIUSdMA BRYTE <'_Ceramic
Cooktop (:leaner with the
CEI_dMA BRYTE <')Cleaning Pad fin.
Ceramic Cooktops.
[] If pots with a thin oxerla) of
almninmn or COl)per are allowed
to boil dr B the overlay mav leave
black discoloration on the
cooktop.
CooktopSeal
To clean tile cooktop seal arotmd tile for a few minutes, then wipe clean
edges of tile glass, lay a wet cloth on it with nonabrasixe cleaners.
Glasssurface--potential forpermanent damage.
This should be removed
immediately befl)re heating
again or the discoloration
may be pemmnent.
WARNING: Carefully check the bottom of
pans for roughness that would scratch
the cooktop.
Our testing shows that if
you are cooking high sugar
mixtures such as jelly or
fudge and have a spillover,
it can cause permanent
damage to the glass surface
unless the spillover is
immediately removed.
Damage from Sugary Spills and Melted Plastic
[] Tm'n off all surface traits. Remoxe
hot pans.
[] _'earing an oven mitt:
a. Use a single-edge razor blade
scraper (CERAMA BRYTE _
Ceramic Cooktop Scraper) to
illOVe tile spill to a cool aI'ea oi1
the cooktop.
b. Remove the spill with
paper towels.
To Order Parts
To order CEI,L_dVIABRYTE': Ceramic
(:ooktop Cleaner and tile cooktop
scrape_; please call ore" toll-fl'ee
I1 tllllbeI':
National Parts Center 800.626.2002
CERAMA BRYTE®Ceramic
Cooktop Cleaner .......... # WXIOX300
CERAMA BRYTE® Ceramic
Cooktop Scraper ......... # WX IOX030£
Kit ...................... # WB64X50£7
(Kit includes cream and cooktop scraper)
CERAMA BRYTE® Cleaning Pads for
Ceramic Cooktops ........ # WX10X350
[] Any remaining s )illoxer should be
left tmtil the sm'thce of the
cooktop has cooled.
] Don't use tile surtace traits again
tmtil all of tile residue has been
completely removed.
NOTE: If pitting or indentation in the glass
surface has already occurred the cooktop
glass wifl have to be replaced in this case,
service wi// be necessary
25
Page 26

Before YouCallForService...
Troubleshooting tips
Save time and money! Review the charts on the following
pages first and you may not need to call for service.
Possible Causes
surface units will not hnproper cookware
maintaina rollingboil being used.
What ToDo
• Use pans which are flat and match tile (liameter
(If the surthce unit selected,
orcookingis not
fast enough
Surface units do A fuse in your home may be • Rel)lace the fl/se or reset the circuit breakel;
not work properly blown or the circuit breaker
tripped.
Cooktop controls • Check to see the COlTect control is set for tile surth('e
improperly set. unit you are using.
Surface unitstops • This is nolanal. The Ulfit is still on mad hot.
glowing when turnea
to a lower setting
Scratches(mayappear
as cracks)oncooktop
glasssurface
Incorrect demfing
methods being used.
Cookware with rough bottoms
being used or coarse particles
IsaJt or sand) were between
the cookwaxe and the surface
of the cooktop.
Cookware has been slid
across the cooktop surface.
• Scratches are not retnowd)le. Tiny scratches will become
less visible in tilne as a result ol clealfing.
• To avoid scratches, use the recoum_ended clealfing
[)rocedtu'es. Make s/Ire bottouls ot cookware are clean
befi)re use, and use cookware with slnooth bottolns.
Areas of discoloration Food spillovers not cleaned • See the Cleaning the glass cooktop section.
on the cooktop before next use.
Hot surface on a model • This is uorn)al. The surtace may appear discolored
with a fight-colored glass when it is hot. This is teml/orary and will disappear
cooktop, as the _,dass.. cools.
Plastic melted to Hot cooktop came into • See the Glasssurface potential for permanent damage
the surface contact with plastic placed section in the Cleaning theglass cooktop secti(m.
on the hot cooktop.
Pitting (or indentation) Hot sugar mixture spilled • Call a qualified technician for rel/l:lcemeut.
of the cooktop on the cooktop.
Frequent cycling hnproper cookware • Use (mh" flat co(>kware to minimize cvclin
off and on of being used.
surface units
Controlsignals after You forgot to enter a • Press tile BAKEpad and desired teml)erature or the
entering cooking time bake temperature or SELF CLEAN pad and desired clean time.
ordelay start clemfing time,
26
Page 27

ge.com
Possible Causes What ToDo
Fooddoes notbake Oven controls improperly set. * See tile Usingtheovensection.
orroastproperly
Shelf position is incorrect * See tile Using the oven section,
or the shelf is not level.
Incorrect cookware or * See tile Using the oven section.
cookware of hnproper
size being used.
Oven thermostat needs * See tile Adjust the oven thermostat--Do it yourseff!
adjustment, sectiou.
Clockand timerdo Plug on range is not completely • Make Stll"e' electYical }_lug, is I)lugged,, into a live, properly
not work inserted in the electrical outlet, gr(>uuded outlet,
A fuse ha your home may * Replace tile fl/se (:,I"reset tile circuit breakel;
be blown or the circuit
breaker tripped.
Oven controls improperly set. * See tile Using the clock and timer section.
Oven light does Light bulb is loose or defective. • Tighten (:,I"replace tile bulb.
not work
Switch operating light * Call h)r service.
is broken.
Fooddoesnot Door not open to the broil stop * See the Using the oven section.
broil properly position as recommended.
Oven controls improperly set. * Make sure you press tile BROILHI/LO1):1(1.
hnproper shelf position * See tile Broiling Guide.
being used.
Cookware not suited * For best results, use a laan designed, fi)r broiliu,_,.
for broiling.
In some areas the power * Preheat the broil elemeut fi)r 10 minutes.
(voltage) may be low. * Broil t(>1"the hmgest period of time recoumwuded
in the Broiling Guido.
Oventemperaturetoo
hot ortoocold
Oven thermostat
needs adjustment.
• See the Adjust the oventhermostat--Do it yourself!
section,
27
Page 28

Before YouCall ForService...
Troubleshooting tips
Possible Causes What ToDo
Ovenwill not work
Storage drawer Rear drawer support is • Repositiou the draweL See the Storage Drawer
is crooked on top of the guide rail. Removaliustructious in the Care and cleaning of
Storage drawer Power cord may be • Reposifiou the drawer and power cord, See the
won't close obsWucth_g drawer Storage Drawer Removal iustructi_)us in the Care and
Plug on raa_ge is not
completely inserted in
the electrical outlet.
A fuse in your home may • Replace tile fl/se or reset tile circuit breakeL
he blown or the circuit
breaker tripped.
Oven controls improperly set. • See the Using the oven section,
Door left in the locked •/f llecess;tl'V allow the oven to cool; then tmlock
position, the doo_:
in the lower back cleaningofyourrangesection,
of the range.
Rear drawer support is • Rel)ositiou the draweL See the Storage Drawer
on top of the guide rail. Removal instructions in the Care and cleaning of your
• Make sure electrical I)lu°_'Iis )lugged,, into a li_e,
I)re I)erl_,,grounded outlet
your range section,
range section,
Ovenwill notself-clean The oven temperature is • _dlow the oven to cool to room temperature and
too high to set a self-cleml reset/lie Colltrols,
operation.
Oven controls improperly set. • See the Using the self-cleaning oven section,
Oven door is not in the locked • Make sure you move the door latch handle all the
position, way to the right,
"Crackling" or This is the sound of the • This is normal,
"popping" sound metal heating and cooling
during both the cooking and
clemfing functions.
Excessivesmoking Excessive soil. • Press the CLEAR/OFF pad, Open the windows to
during a clean cycle rid the room of smoke, _'ait tu]til the light on the
SELFCLEANpad goes off, _4"ipe up the excess soil and
reset the cleau cycle,
Oven door will not Oven too hot. • Allow the oven to cool below locking, teml_erattu'e,
unlock
Oven not clean after Oven controls not properly set. • See the Using the self-cleaning oven secti_)u.
a clean cycle Oven was heavily soiled. • (]leau tt[) heavy spillovers betore startiug the cleau
cycle. Heavily soiled ovens _1;_ t need to sell:clean
again or for a h)nger period of time.
28
Page 29

ge.com
"F- and a number
or letter" flash
in the display
Possible Causes
You have a function
error code,
What ToDo
• Disconnect all power to the range tot at least 30
seconds and then recolmect power. If the flmction
error code repeats, call tor service.
• On sellXcleaning inodels, if a flmction error code
appears during the sell:cleaning cycle, check the oven
door latch. The latch inav have been inoved, it only
slightly, ti'Oln the locked position. Make sure the latch
is moved to the right as tar as it will go. Press the
CLEAR/OFFpad. _Mlow the oxen to cool tor one hour.
Put the oven back into operation.
Display flashes "bAd" The installed cmmection • Contact installer or electrician to correct miswire.
then "linE" with a from the house to the unit
loud tone is miswired.
Displaygoesblank A fuse in your home may be • Replace the fl/se (:,rreset the circuit breaker.
blown or the circuit
breaker tripped.
The clock is turned off from • See the Using the clock and timer section.
showing in the display.
Display flashes Power failure. • Reset the clock.
Unable to get the Oven control pads were • The BAKE mad BROIL HI/LO pads must be pressed
display to show "SF" not pressed properly, at the seine time and held for 3 secouds.
Power outage, Power outage or surge. • Reset the clock./f the oven was in use, you À//t/st Yeset
clock flashes it by, l)ressiug, the CLEAR/OFFpad, settlug" the clock
and resetting any cooking fimction.
"Burning" or "oily" This is normal in a new • To speed the process, set a sell:clean cycle for a
odor emitting from oven and will disappear minimum of 3 hours. See the Using the self-cleaning
the vent in time. oven section.
Strong odor An odor from the insulation • This is temporary.
aromad the inside of the
oven is normal for the first
few times the oven is used.
29
Page 30

Accessories.
Looking For Something More?You can find these accessories and many more at ge.com, or call 800.626.2002
(during normal business hours). Have your model number ready.
Surface Elements & Drip Pans
Oven Elements
Cleaner
OvenShelves Broiler Pan
Light Bulbs
CleaningPads Scraper
Knobs
3O
Tired of discolored shelves? Wishing you had exm_-heaxT-dut), oven shelves?
NOW AVAILABLEfor your range:
(;E's innovative, selfk:leanable porcelain-coated oven shelves!
• Hea_ T Duty
• Du_wble
• Able m be cleaned in a self-cleaning oven
Visit ge.com for more infbnnafion.
Page 31

GE Service Protection Plus rM
GE, a name recognized worldwide if)r qualby and dependabflby, of;%rs you
Service Protection Plus'_'--comprehensive protection on all yore appliances--
No Matter What Brand!
Benefits Include:
• Backed by GE
• All brands covered
• Unlimited service calls
• All parts and labor costs included
• No out-of-pocket expenses
• No bidden deductibles
• One 800 number to call
YOu x_ill be completel) satisfied with our service protection or )ou ma} request )our mone} back
on the remaining value of )our contract. No questions asked. It's that simple.
Protect your refl'igerato*; dishwashel; washer and (hTer, range, TV, VCR and much more--aJay brand!
Plus there's no extra cha*ge tot emergency service and low monthly financing is available. Even icemaker
coverage and tbod spoilage protection is offered. You can rest easy, knowing that all your valuable
household products are protected against expensive repairs.
Place )ore" roiffidence in GE and call us in the [!.S. toll-fl'ee at 800.626.2224
for I/lore illforn/atiOll.
:i\1] I)l'ands (T!c,ere(l, tip to _90 ](_ilrs {)](/, Iii []]{! (OII Jill{l] [_t] [.S.
We TI Cover Any Appliance.
Anywhere. Anytime. *
_ (]111 l l{:l-e
Please place in envelope and mail to:
GeneralElectricCompany
Warranty Registration Department
P.O. Box 32150
Louisville, KY 40232-2150
37
Page 32

Consumer Product Ownership Registration
Deal Customer:
Thank you for purchasing our product and thank you for placing your confidence in us.
V(e are proud to haxe you as a customer'.
Follow these three steps to protect your new appliance investment:
Complete and mail
yollr Consunler
Product Ownership
Re#stration today.
ttavc tile pca_c of
mind of" knowing we
call colltact VOl/ ill
the mflikely (vent of a
satbl) modification.
Atter mailing tile
registration below,
store this dOClllllellt
ill a sati place. It
contains inlonnation
you will need should
you require service.
Oln- selwice number is
800.GE.CARES
(800.432.2737).
Model Number Serial Number
I I
Important: If you did not get a registration card with your
product, detach and return the form below to
ensure that your product is registered, or register
online at ge.com.
Consumer Product Ownership Registration
Read your Owner's
Manual carefilllv.
It will help you
opcrate yOllF llew
appliance properly.
, I
._,,,_ Cut here
_) Model Number Serial Number
Ms. M*>,. Mi__,
Fir"l I I Lasll
Name I I I I I I I I I Name I I I I I I
Str_.el ]
Addr(ss I I I I I I I I I I I I I I I I I I I I I I I
Apt. # J I J I I I J I J E-mail Address*
Ciw J I I
lJale Place(]
In Use _1_
Monlh
* Please proxide your e-mail address to rcceive, via e-mail, discounts, special ofl;:l-_ and other impoltant
commmficafions from (;E Appliances ((;1L\).
[ Check herc if you do not ',v_ult to receixe COlmnmfications flom GKVs carcflllly selecto:l paltrier,,.
Appliances
General Electric Company
GE Consumer& Industrial
Louisville, KY 40225
ge.com
32
FAILI JRE T() COMPLETE AND RETI JRN TIIIS C_\R1) D()ES NOT DIMINISII Y()I R
"_,)_/l_ \N'IY RI(;IITS.
For more intormation about G1LVs privacy and daIa usage policg go to ge.com and click on
"Pfivaty Policy" or call 800.626.2224.
I I I I I I
I
I
Page 33

NOteS.
rJ_
I
rJ_
€_
m
m_
rp,
w
u_
w
rbr]
33
mlmh
m
Page 34

m
Notes.
P=
r _
m
x:
m
I
34
Page 35

GEElectricRange Warranty.
All warranty service provided by our Factory Service Centers,
or an authorized Customer Care®technician. Toschedule service,
on-line, 24 hours a day, vis# us at ge.com, or carl 800.GE.CARES
(800.432.2737).Please have serial number and model number
Staple your receipt here.
Proof of the original purchase
date is needed to obtain service
under the warrant_
available when calling for service.
GEWill Provide:
Anypartof the range which tifils due to a defect in materials or workmauship.
From the date of the Dufiug this limited one-year warrantF, (;E will also provide, free ofcharoe, all lab(>r
origina!purchase and iu-home se_xice to replace the defectixe part.
_: Service trips to your home to teach you how to use
the product.
::Ji::Improper installation, delivery or maJntenm_ce.
_: Failure of the product if it is abused, misused, or used
for other than the intended purpose or used
commerciaJly.
_: Replacement of house fuses or resetting of circuit
breakers.
_: Dmnage to the product caused by accident, f'we, floods
or acts of God.
::Ji::Incidental or consequentiaJ dmnage caused by possible
defects with this applim_ce.
iJi::Dmnage caused after delivery.
!i/:Product not accessible to provide required service.
Warrauty. Any implied warranties, includiug the implied warranties of merchantability orfitness fora particular purpose,
J XCLUSION OFIMPLIED WARRANTIES--Your sole and exclusive remedy is product repa# as provided hi thisLimited
are limited to one year or the shortestperiod allowed by law.
This warranty is extended to the original purchaser and any succeeding owner for products purchased for
home use within the USA. If the product is located in an area where service by a GEAuthorized Servicer is not
available, you may be responsible for a trip charge or you may be required to bring the product to an Authorized GE
Service location for service. In Alaska, the warranty excludes the cost of shipping or service calls to your home.
Some states do not allow the exclusion or limitation of incidental or consequential damages. This warranty
gives you specific legal rights, and you may also have other rights which vary from state to state. Toknow
what your legal rights are, consult your local or state consumer affairs office or your state's Attorney General.
Warrantor: General Electric Company.Louisville,KY40225
35
Page 36

ConsumerSupport.
Have a question or need assistance _dth }our appliance? Try the GE Appliances _v\ebsite 24 hom_ a day,
q
"I gEAppliancesWebsite go.corn
am da* of the ",ear! For greater convenience and thster ser'dce, }ou can m)w download Owner's Mamlals,
order pm'ts or even schedule service on-line.
ScheduleService
Expe*t GE repair service is onl) one step awe} fl'om }our doo_: Get on-line and schedule xour service at
xour, convenience 24 hom_ an) de} of the }ear! O1" call 800.GE.CAI_ES (800.432.2737) during nom_al
btlsilless hotll_.
go.corn
RealLifeDesignStudio oe.com
GE suppol'ts the lJni_vl>al Design concept--products, services and enviromnents that can be used by
people of all ages, sizes and capabilities. We recognize the need to design fi_r a wide range of physical and
mental abilities and impaim_ents. For details of GE's ljnivel_al Design applications, including kitchen
design ideas for people with disabilities, check out our Website today. For the hearing impaired, please call
800.TDD.GEAC (800.833.4322).
ExtendedWarranties oe.com
Purchase a GE extended _<u'rant} and learn about special discotmts that are a_ailable while _our, _<wrant}
is still in effect. You can purchase it on-line an}time, or call 800.626.2224 during nom_a] business hours.
(;E (_onsumer Home Services will still be there after }our warrant} expires.
PartsandAccessories
go.corn
Individuals qualified to sec_'ice their own appliances can have parts o1"accessories sent directly to their
homes (VISA, MasterCard and Discover cards are accepted). Order on-line today, 24 hom_ e\vl y clay o1"
by phone at 800.626.2002 during nom_al business hom_.
Instructions contained in this manual cover procedures tobe performed by any user. Other servicing generally
shouM he referred to qualified service personnel. Caution must be exercised, since improper servicing may cause
unsafe operation.
ContactUs
If you are not satisfied with the service you receive fl'om GE, contact us on ore" Website with all the details
including yore" phone numbel; or write to: General Manage1; (Mstomer Relations
GE Appliances, Appliance Park
Louisville,/<.Y 40225
Register your new appliance on-line---at your convenience! Timel} prodtlct registration xdll allow for
l RegisterYourAppliance
' enhanced commtmication and prompt ser'dce tlllder the temps of}otlr "_{arl'allty, should the need arise.
YOu ma} also mail in the pre-pfinted registration card included in the l)acldng, material.
Printed in fl?eUnited States
go.corn
go.corn
 Loading...