

Page 1
v
Contents
Aluminum _bil 4, 18 Vent Duct 22
Anti-Tip Bracket 3, 5 Problem Solver 26
Appliance Registration 2 Repair Service 27
Canning Tips 9 Safety Instructions 3, 4
Care and Cleaning 22-25 Surface Cooking 8
Clock/Timer 12 Control Settings 8
Energy-Saving Tips 5 Cookware Tips 10, 11
Features 6, 7 Warranty Back Cover
Installation Instructions 5
Leveling 5
Model and Serial Numbers 2
Oven 13
Baking, Baking Guide 14, 15
Broiling, Broiling Guide 18, 19
Control Settings 13
Door Removal 22
Light; Bulb Replacement 13, 22
Roasting, Roasting Guide 16, 17
Self-Cleaning Instructions 20, 21 GEAI_wor Cente#
Thermostat Adjustment 23 000.026.20fl6
Models JBP22K
JBP22GK
JBP23K
$[]!_ !1_¢11A _t'_ 1[2*
JBP26K
JBP26GK
GEApp# cos
Page 2
"lg'g_ll .... L...,,I ......
n_lp _ uvlp yuu...
Before using your range,
read this book carefully.
Keep it handy for answers to your
questions.
If you don't understand something
or need more help, write (include
your phone number):
Consumer Affairs
GE Appliances
Appliance Park
Louisville, KY 40225
If you received
a damaged range...
hnild_r'_ that gold you the range
Save time and money.
Before vou teariest
...... _d v'31
t
service...
Check the Problem Solver on
page 26. It lists causes of minor
operating problems that you can
correct yourself.
Write down the model
_nd _arinl mirnharg_
You'll fred them on a label on
tll_ I/UIIt UI tIl_ 1 glltl_g_ rJ_IIJLIIU UI_
oven door.
These numbers are also on the
(_nncHrt_a*r ProPHet f)x_n_rchin
Registration Card that came with
your range. Before sending in this
card, please write these numbers
here:
Model Number
Serial Number
[ Ire. the, ge nurnhexg in any
......................... d
correspondence or service calls
concerning your range.
Page 3
Read aRinstructions befbre using this appliance.
When using electrical appliances,
basic safbty precautions should
be fol!owed, including the
following:
Use this appliance only for its
intended use as described in this
manual.
properly instMled and grounded
by a qualified technician in
accordance with the provided
installation instructions.
* Dofft attempt to repair
or replace anv_ _-nartof your
range unless it is specifically
recommended in this book. All
other servicing should be referred
to a qualified technician.
* Before perforrr_g any
service, D_CONNECT
RANGE POWER SL_PLY
AT THE HOUSEHOLD
DL_J'NIB U'I]ON FANEL
BY REMOV_G THE FUSE
k_l_ O_a/llLrlll_k.l IJl_lP lrll_
CIRCUIT BREAKER.
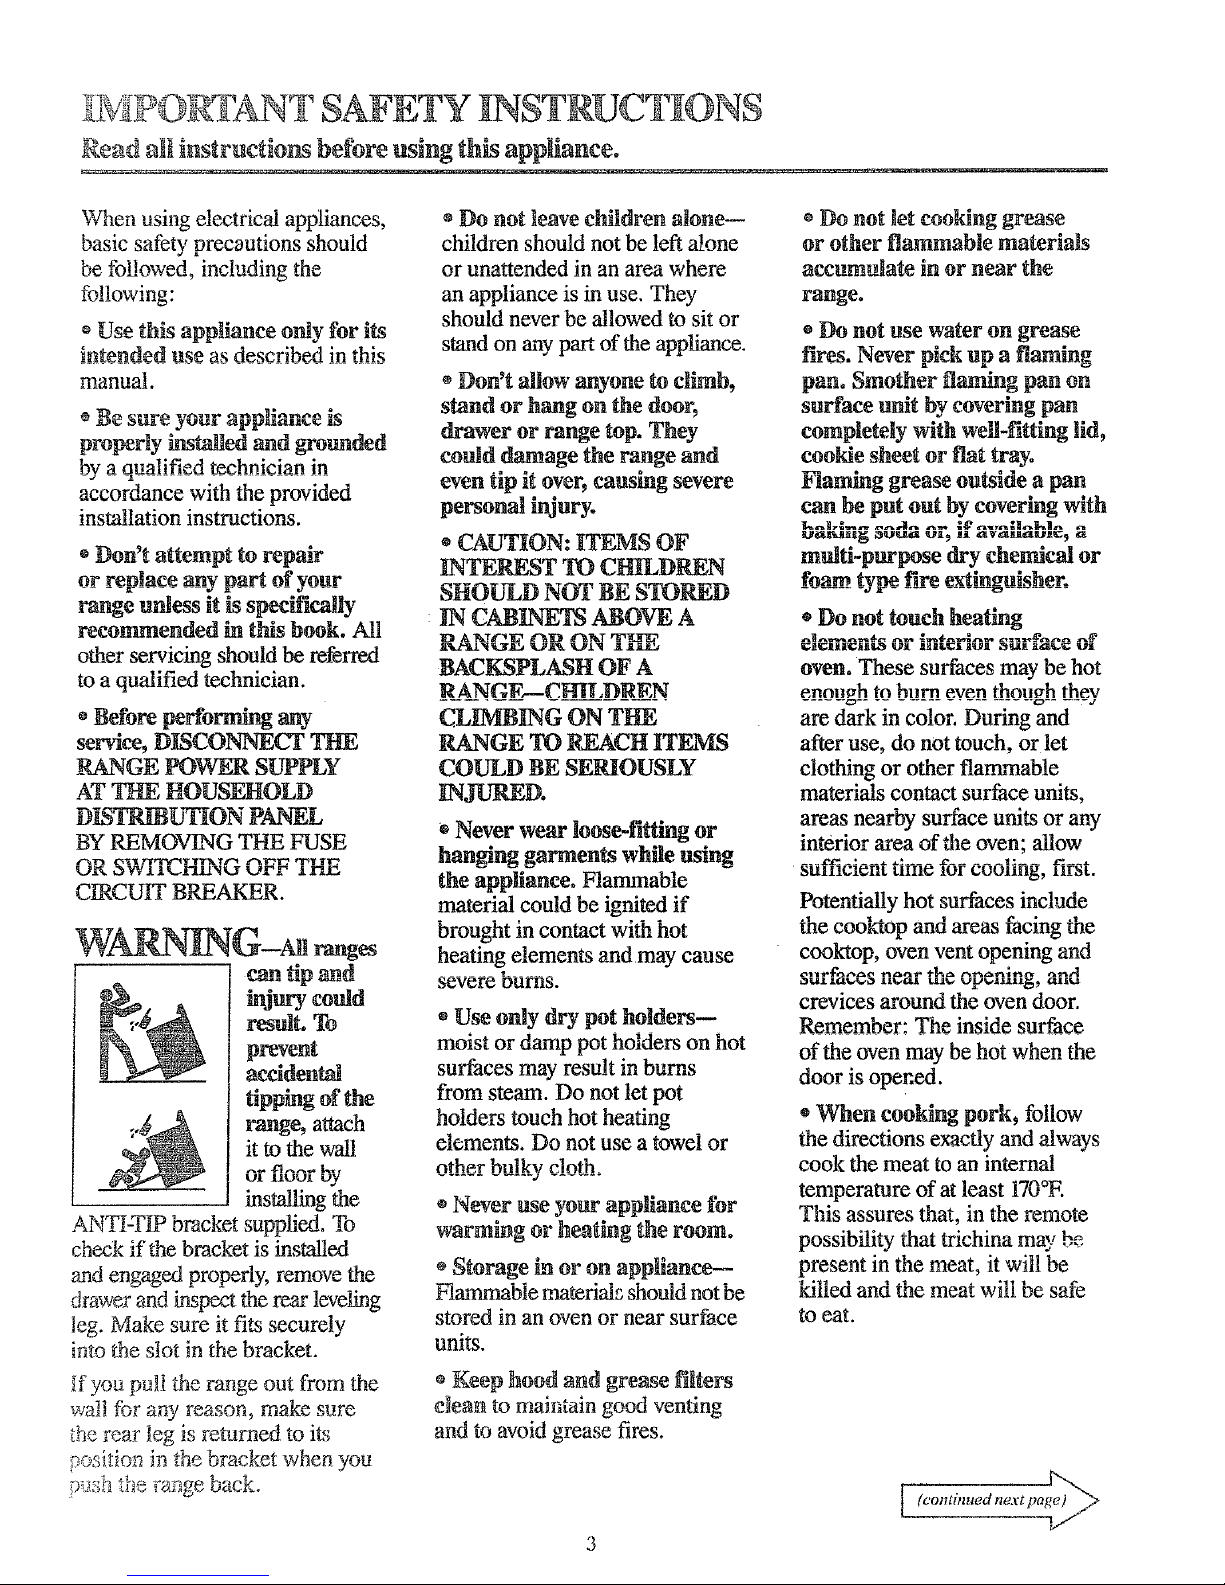
WARNING-n
remit. To
prevent
accidental
tipping of the
range, attach
it to the wall
v_ nuw uy
installing the
ANTI-T_P bracket supplied. To
check if the bracket is installed
and engaged properly, remove the
drawer and inspec_ the rear leveling
leg. Make sure it fits securely
into the slot in the bracket.
if you pult the range out from the
walt for any reason, make sure
the rear leg is returned to its
positio_ in the bracket when you
p_:sh th_ rar_ge back.
®Do not leave children alone--
children should not be left alone
or unattended in an area where
an appliance is in use. They
should never be allowed to sit or
stand on any part of the appliance.
Don't allow anyone to club,
stand or hang on the door,
drawer or range top. They
could damage the range and
even up !_ over, causing severe
personal injury.
* CAUTION: ITEMS OF
_ST TO CHILDREN
_t'iUULD NUI _ _'I_NVSIO
IN CABINETS ABOVE A
BACKSPLASH OF A
R_&NGE_--CNILDR EN
CLIMBING ON THE
RANGE TO REACH ITEMS
COULD BE SERIOUSLY
INJUm_D.
* Never wear loose-fitting or
hanMng garments while using
the appliance. Flammable
material could be ignited if
brought in contact with hot
heating elements and may cause
....... L ......
sever_ ollrlls.
* Use only dry pot holders--
moist or damp pot holders on hot
surfaces may result in bums
from steam. Do not let pot
holders touch hot heating
elements. Do not use a towel or
other hn|kv cloth.
........... J .......
®Never use your appliance tbr
warming or heating the room.
* Storage in or on appRance--
Fiam_bie materials should not be
stored in an oven or near surface
units.
Keep hood and grease filters
c_ean to maintain good venting
and to avoid grease fires.
* Do not let cooking grease
or other flammable materials
accumuhte in or near the
range.
o Do not use water on grease
fires. Never pick up a flaming
pan. Smother flaming pan on
snrface unit by covering pan
completely with wel!-fitting lid,
cookie sheet or fiat tray.
Fiami_g grease outside a pan
can be put out by covering Mth
multi-purpose dry chemical or
foa__ type fire extin_sher.
* Do not touch heating
oven. These surfaces may be hot
enongh to bllrn even though thev
are dark in color. During and
after use, do not touch, or let
clothing or other flammable
materials contact surface units,
areas nearby surface units or any
interior area of the oven; allow
_UlIIGI_IIt Lllllt_ Iur GUUIIIIg_ IUNL.
Potentially hot surfaces include
the cook-top and areas facing the
cooktop, oven vent opening and
crevices around the oven door.
Remember: The inside surface
of the oven may be hot when the
door is opened.
®When cooNng pork, follow
the directions exactly and always
cook the meat to an internal
temperature of at least 170°F.
This assures that, in the remote
possibility that trichina may
present in the meat, it will be
killed and the meat wiii be safe
to eat.
(combmedn,:xtpage)_!
Page 4
xMP©RTANT SAFETY INSTRUCTgONS (continued)
Oven
Stand away from range when
opening oven doon Hot air or
steam which escapes can cause
burns to hands, face and/or
eyes.
* Don't heat unopened food
containers in the oven. Pressure
could buiM up and the container
could burst, causing an injury.
* Keep oven vent duct
unobstructed.
* Keep oven free from grease
buildup.
* Place oven shelf in desired
position while oven is cool. If
shelves must be handled when
hot, do not let pot holder contact
heating units in the oven.
* Pulling out shelf to the
shelf stop is a convenience in
lifting heavy foods. It is also a
precaution against burns from
touching hot surfaces of the
door or oven walls.
When using cooking or
roasting bags in oven, follow
the manufacturer's directions.
o Do not use your oven to dry
newspapers. If overheated, they
can catch fire.
Se_f-Cileaning Oven
* Do not clean door gasket.
The door gasket is essential for a
good seat. Care should be taken
not to rub, damage or move the
gasket.
* Do not use oven cleaners. No
commercial oven cleaner or oven
liner protective coating of any
kind should be used in or around
any part of the oven.
_,Ctean only parts listed in this
Use a_d Care Book.
o _ore selfocieaning t_m oven,
rer_ove br_i_er pan and other
Surface Cooking UniN
Use proper pan size--This
appliance is equipped with one
or more surface units of different
size. Select cookware having flat
_Ilt) ugll
oouoms mrge to cvwt
the surface unit heating element.
Thg* n¢_ nfllnrt_,r¢iT_cl ennkwara
will expose a portion of the
heating element to direct contact
and may result in ignition of
clothing. Proper relationship of
cookware to burner will also
improve efficiency.
* Never leave surface units
unattended at Ngh heat sett_s.
Boiiover causes smoking and
greasy spillovers that may catch
UII lUg.
Be sure drip pans and vent
in place. Their absence during
r,.,_rdrlncr c,n_ld clnrn_c_o r_noe
parts and wiring.
llne drip pans or anywhere in
the oven except as described in
this book. Misuse could result in
a shock, fire hazard or damage
to the range.
* On!y certain types of glass,
glass/ceramic, earthenware or
other glazed containers are
suitable for range-top service;
others may break because Ofthe
sudden change in temperature.
(See section on "Surface
Cooking" for suggestions.)
To m_nimi_e the possibility of
burns, ignition of flammable
materials, and spillage, the
handle of a container should be
turned toward the center of tke
range without extending over
nearby surface units.
o Always turn surface unit to
_ hw_rw rwm_vh_
cookware.
* Keep an eye on foods being
HIGH heats.
* TOavoid the possibility
of a burn or electric shock,
controls for all surface units
_r_ _* _ no,_tlon a_d all
......... Jr- .................
coils are cool before attempting
to remove the unit.
Don't hnmerse or soak
rem_vahle snrfaee unRs. Don't
put them in a dishwasher. Do
not self-dean the surface units
in the oven.
* When flaming foods curler
the hood, turn the fan off. The
fan, if operating, may spread
the flame.
* Fonds for frvim, should be as
dry as possible. Frost on frozen
foods or moisture on fresh foods
can cause hot fat to bubble up
and over sides of pan.
* Use IRfle fat for effective
shallow or deep-fat frying.
Filling the pan too full of fat can
cause spillovers when food is
added.
* If a combination of oils or
fats will be used in frying, stir
together before heating, or as fats
melt slowly.
®Always heat fat slowly, and
watch as it heats.
* Use deep fat thermometer
whenever pos_ble to prevent
overheating fiatbeyond the
smoking point.
AXTII_ r___ _
NSTRUCTIONS
Page 5
_(bur range, like many other
household items, is heavy and
such as cushionedvinylor
carpeting. When moving the range
on this type of flooring, use care,
and it is recommended that these
be followed.
Th_ ,,-_no,,_ ch_uld h_ _nct_lIorl _n
a sheet of plywood (or similar
material) as follows: When the
floor covering ends at the front of
the range, the area that the range
plywood to the same level or higher
than the floor covering. This will
allow the range to be moved for
cleaning or servicing.
Leve ng the
Leveling screws are located on
each comer of the base of the
range. Remove the bottom drawer
an uneven floor with the use of
a nutdriver.
To remove drawer, pull drawer
out all the we% tilt up the front
and take it ont. To replace
drawer, insert glides at back of
drawer beyond stop on range glides.
Lift drawer if necessary to insert
easily. Let front of drawer down,
then push in to close.
One of the rear leveling screws
will engage the ANTI-TIP bracket
(allow for some side to side
a_ustment). Allow a minimum
clearance of 1/8" between the range
mad the leveling screw that is to be
installed into the ANTI-TIP bracket.
i_tllrll_ll2_ %00Nlng
Use cookware of medium weight
aluminum, with tight-fitting covers,
and flat bottoms which completely
surface unit.
-- _ 1 _ _1 ........ , _'I.I ........ _,| ....
o LOOK iresn vege[aoies with a
minimum amount of water in a
covered pan.
Watch foods when bringing them
¢_ir.ldxr t_ o,-wdrln_r t_rnn_r_t_r_ _t
high heal When food reaches
cooking temperature, reduce heat
immediately to lowest setting that
will keep it cooking.
* Use residual heat with surface
cooking whenever possible, For
example, when cooking eggs in the
shel!, bring water and egg s to boil,
then turn to OFF nosition and cover
...... r ........ _ lr - ....
with lid to complete the cooking.
HIGH--to start cooking (if tim e
nllr_w_ do nnt n_e I-TTC_T-The_t to
start).
MEDIUM H! quick brow_nj_ngo
MEDIUM--slow frying.
quantities, simmer--double boiler
heat, finish cooking, and special
for small quantities.
WARM--to maintain serving
temperature of most foods.
* When boiling water for tea or
coffee, heat only amount needed.
It is not economical to boil a
container full of water for one
or two cups.
* Preheat oven only when
necessary. Most foods will cook
satisfactorily without preheating.
Tf.zr_, gnA nrt_ha_oflnr_ ic noooec_r;t
watch the indicator light, and put
food in oven promptly after the
light goes out.
* Always turn oven OFF before
removing food.
Fh_rincr hnkinct nvnid fr_ou_nt
door openings. Keep door open as
short a time as possible if it is
opened.
®Be sure to wipe up excess
spillage before starting the self-
cleaning operation.
* Cook complete oven meals
instead of just one food item.
Potatoes, Other vegetables, and
some desserts will cook together
loaf, chicken or roast. Choose
foods that cook at the same
temperature and in approximately
the same time.
®Use residual heat in the oven
whenever possible to finish
cooking casseroles, oven meals,
etc. Also add rolls or precooked
de_rert_ tn warm oven_ nrin_
residual heat to warm them.
Page 6
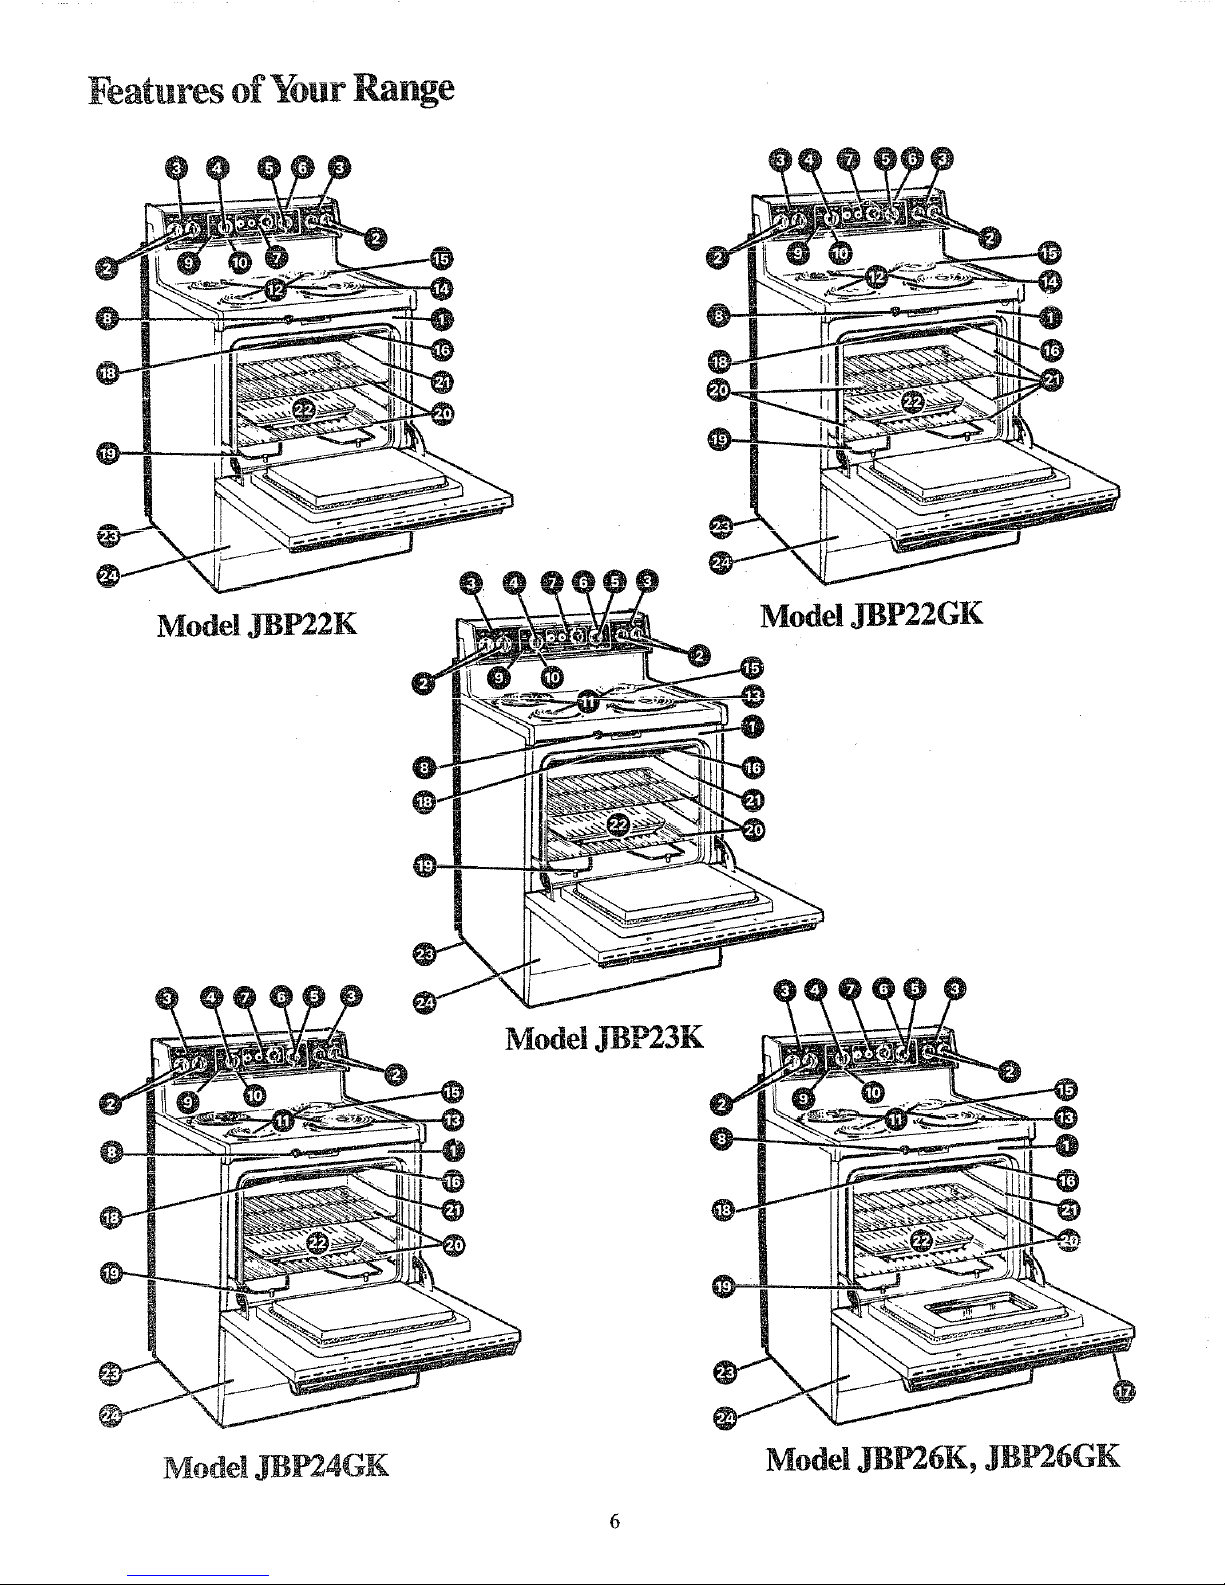
_atures o[ _our KaHge
Model JBP22K
Mode! .H_P24GK
Mode! JBP26K, _P26GK
Page 7
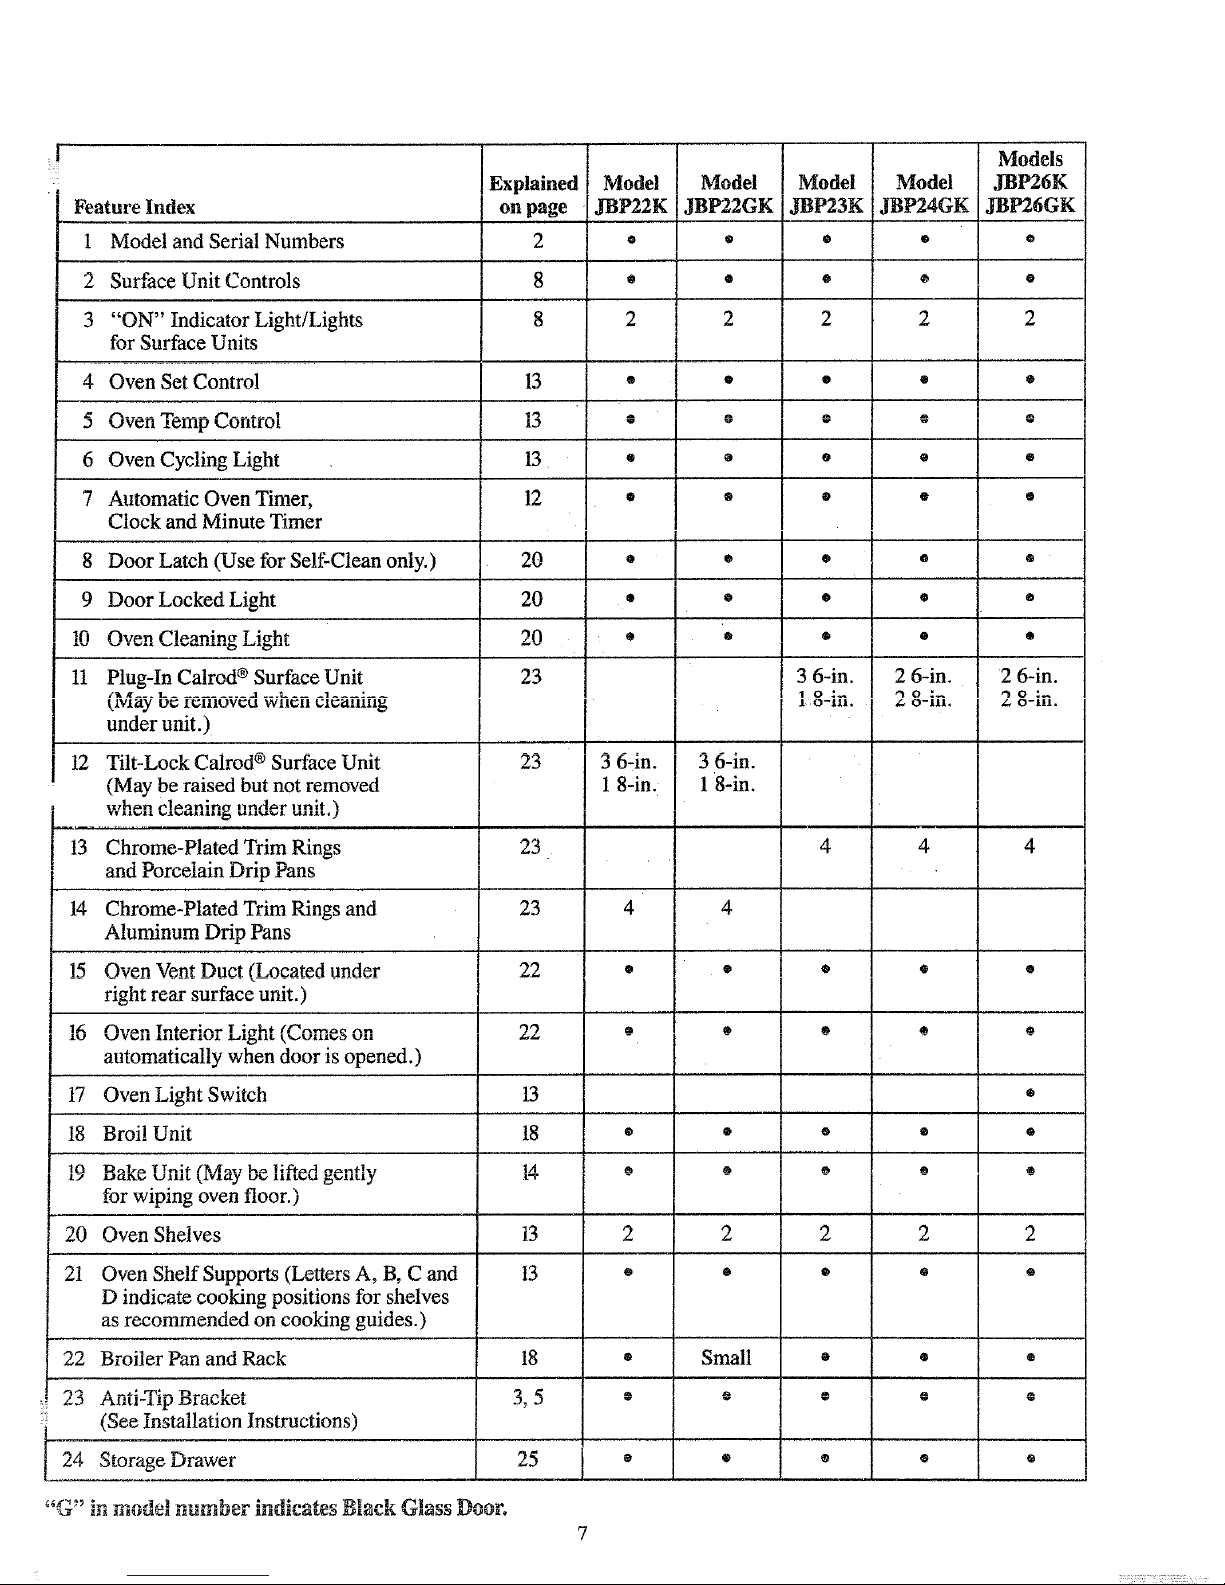
Feature Index
1 Model and Serial Numbers
2 Surface Unit Controls
3 "ON" Indicator Light/Lights
for Surface Units
4 Oven Set Contro!
Explained
L)V_II l_lllp LOllt[_dA
6 Oven Cycling Light
7 Automatic Oven Timer,
Clock and Minute Timer
8 Door Latch (Use for Self-Clean only.)
9 Door Locked Light
11"1 C'lv@n ('_lonnincr I i_ht
11 Plug-In Calrod ® Surface Unit
under unit.)
12
t3
14
Tilt-Lock Calrod ® Surface Unit
(May be raised but not removed
Chrome-Plated Trim Rings
and Porcelain Drip Pans
Chrome-Plated Trim Rings and
Aluminum Drip Pans
!5 Oven Vent Duct (Located under
right rear surface unit.)
£u %J vt.,_ll £1tlt_,._£1tv,t .I-t£_llL _,_.vt£Lt_ t.tll
automatically when door is opened.)
17
18
1171
20
21
22
"30
Z;D
Oven Light Switch
Broi! Unit
for wiping oven floor.)
Oven Shelves
Oven Shelf Supports (Letters A, B, C and
D indicate cooNng positions for shelves
as recommended on cooking guides.)
Broiler Pan and Pack
/_lltl-I I_/ Dlttt_Ik_L
(See Installation Instructions)
I on page
2
!3
LD
13
12
20
20
20
23
23
23
23
22
13
18
1A
.L'_
13
13
18
o_ ,3
Model
JBP22K
®
2
®
Q
®
O
®
3 6-in.
1 8-in.
L
4
®
2
@
O
w
Model
JBP22GK
o
2
o
®
o
o
o
O
2
o
Small
Model
_P23K
@
2
o
0
@
@
@
3 6-in.
I O-111,
@
@
2
o
Q
m
Model
JBP24GK
@
@
2
@
@
®
o
o
o
2 6-in.
/_ O-111.
O
2
@
O
w
Models
JBP26K
,_P26GK
@
@
@
@
®
@
@
@
2 6-in.
•_ O-Ill •
@
@
@
2
@
@
24 Storage Drawer 125 [ * ® ® @ @
Page 8
Surface Cooking
See Surface Cooking Guide on pages 10 and 11.
Surface Cooking with
Infinite Heat Controls
Your surface units and comro!s
are designed to give you an infinite
choice of heat settings for surface
unit cooking.
At both OFF and HI positions,
there is a slight niche so control
"clicks" at those positions; "click"
lowest setting is between the words
WM and OFF. In a quiet kitchen
you may hear slight "clicking"
sounds during cooking, indicating
heat ........ '.... _ °-- '--: -
settings selccteu me uc_ng
maintained.
always shows a quicker change than
switching to lower settings.
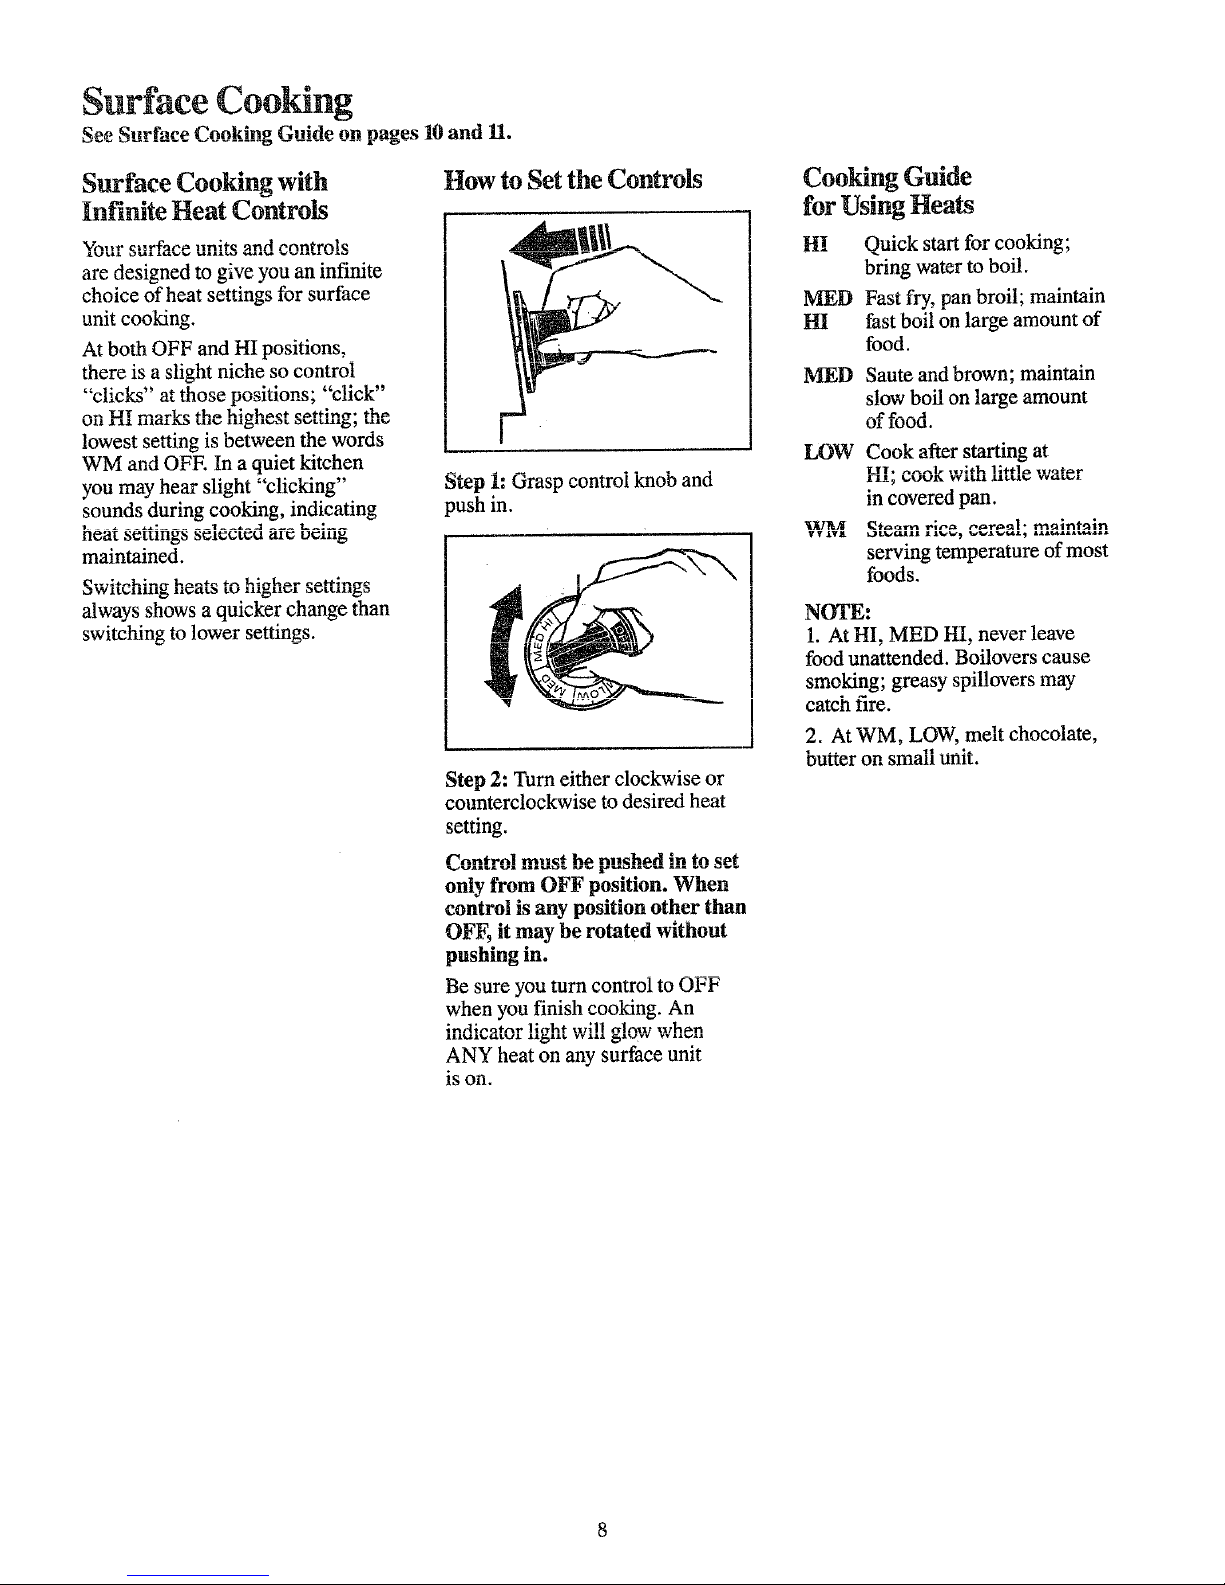
How to Set the Controls
Step i: Grasp control knob and
push in.
Step 2: Turn either clockwise or
counterclockwise to desired heat
setting.
Control must be pushed in to set
only from OFF position. When
control is any position other than
OFF_ it may be rotated without
pushing in.
Be sure you turn control to OFF
when you finish cooking. An
i,_Aio_t,-,v llrrht _t_ll crlnut x_1h,_rl
ANY heat on any surface unit
is on.
Cooking Guide
for Using Heats
HI
IVIED
HI
MED
LOW
v¥£v_
Quick start for cooking;
bring water to boil.
Fast fry., pan broil; maintain
Ihst boil on large amount of
food.
Saute and brown; maintain
slow boil on large amount
oI mOO.
Cook after starting at
]tl&_ q_L/_l_ VVILII Jt_Ll_t_,_ VV._L_L
in covered pan.
serving temperature of most
foods.
NOTE:
1. At HI, MED HI, never leave
food unattended. Boilovers cause
smoking; greasy spillovers may
catch fire.
2. At WM, LOW, melt chocolate,
butter on small unit.
Page 9
Questions & Answers
iQ. May I can foods and preserves
_ mw _ilw, fo.-_ Hrdf9
A. Yes, but only use cookware
de_ivnecl fnr cRnnin_ nurnoge_
Check the manufacturer's
instructions and recipes for
preserving foods. Be sure canner
is flat-bottomed and fits over the
canning generates large amounts of
steam, be careful to avoid burns
from steam or heat. Canning should
only be done on surface units.
Q. Can I cover my drip pans with
foil?
A. No. Clean as recommended in
Cleaning Guide.
Q. Can I use special cooking
on any surface units?
A_ Cookware without flat surfaces
is not recommended. The life of
your surface unit can be shortened
and the range top can be damaged
from the high heat needed for this
Q. Why am I not getth_g the heat
fleeQ Iroln my um_s even mougn
I have the knobs on the right
setting?
A. After turning surface unit off
and making sure it is cool, check to
make sure that your plug-in units
are securely fastened into the
surtace connecuon.
Q. Why does my cookware tilt
A. Because the surface unit is not
fl,_. Make sure that the "feet" on
your Calrod ®units are sitting
tightly in the range top indentation
and the reflector ring is flat on the
range surface.
Q. Why is the porcelain finish on
my cookware coming off?.
A. If you set your Calrod ® unit
higher than required for the
the finish may smoke, crack, pop,
or burn depending on the pot or
pan. Also, a too high heat for long
periods, and small amounts of dry
food, may dan_age the finish.
@
Canning should be done on
surface units only.
In surface cooking, the use of pots
extending more than 1-inch beyond
edge of surface unit's trim ring is
not recommended. However, when
canner, larger-diameter pots may
be used. This is because boiling
water temperatures (even under
pressure) are not harmful to
cooktop surfaces surrounding the
surface unit.
HOWEVER, DO NOT USE
T AT_tt_]_ T'_TAM_T'_'D (_ANTNTT_Dq
OR OTHER LARGE DIAMETER
POTS FOR FRYING OR BOILING
FOODS OTHER THAN WATER.
Most syrup or sauce mixtures--
m_u a_ typ_ ui _uym_;-- _uur. ,at
temperatures much higher than
boiling water. Such temperatures
could eventually harm cooktop
surfaces surrounding surface units.
Observe Following Points
in Canning
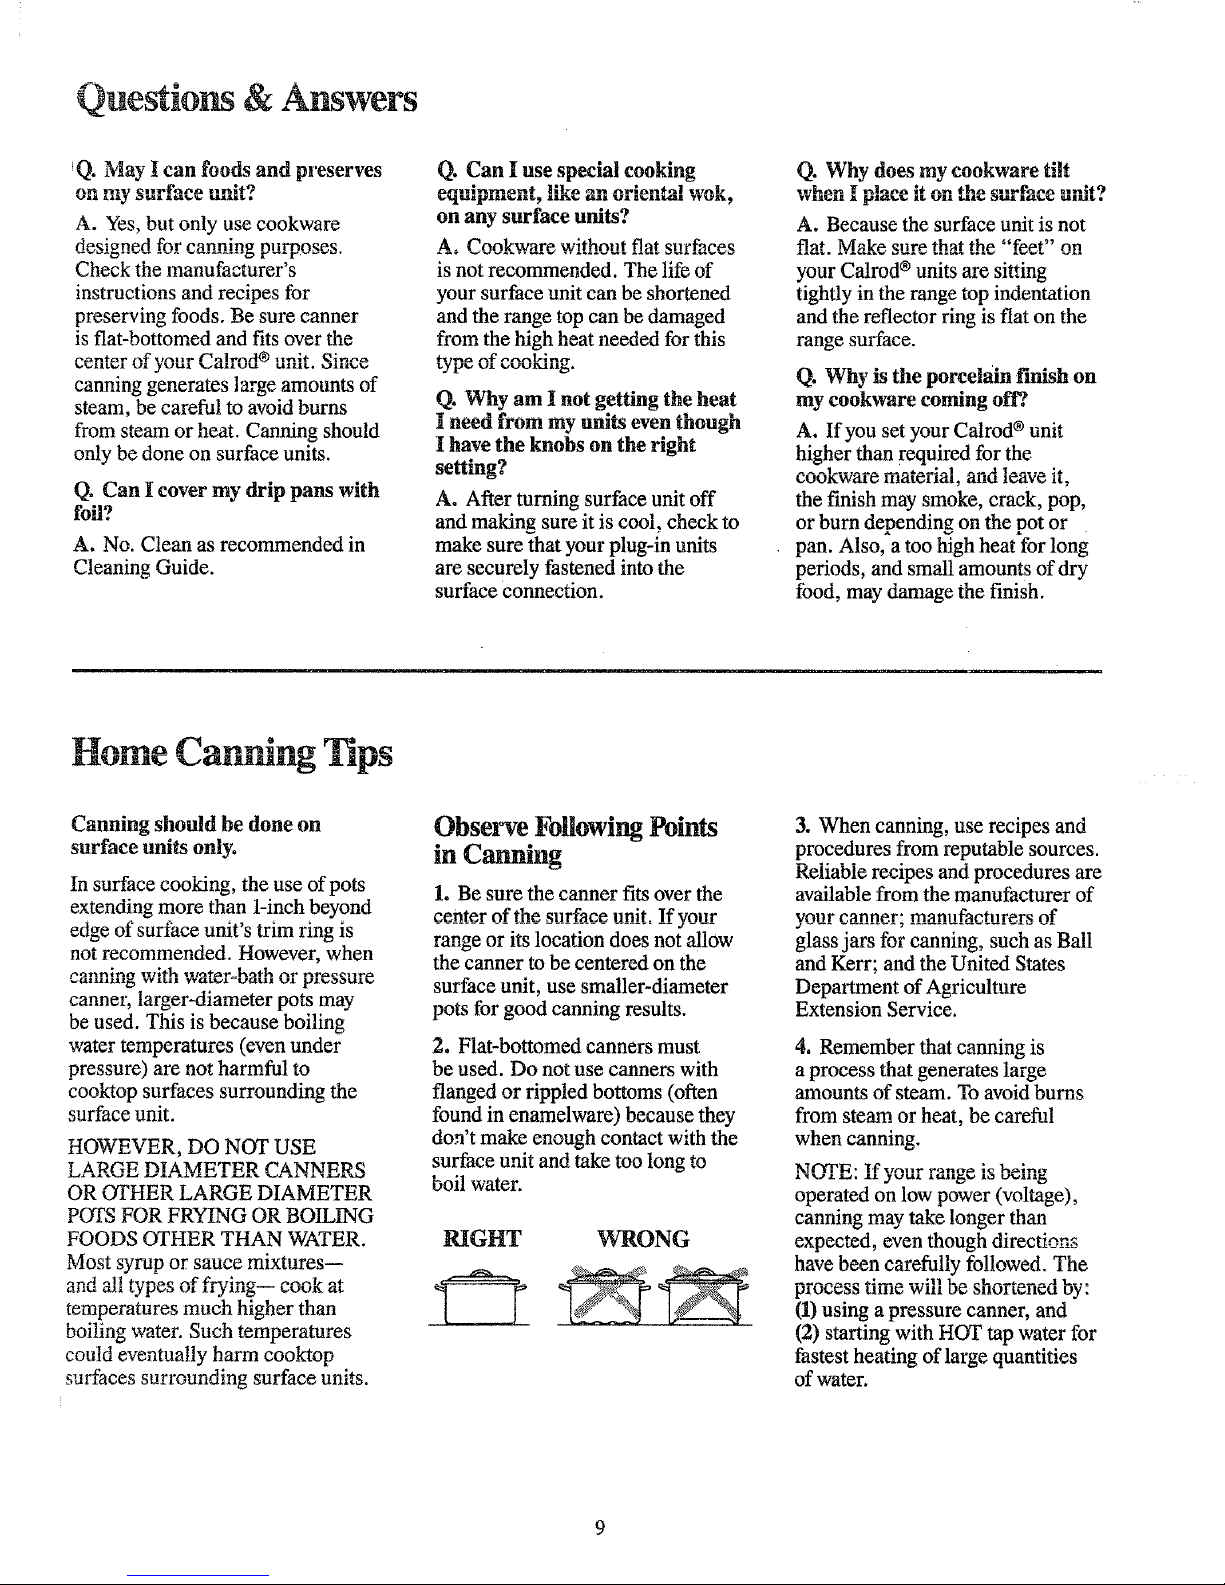
1. Be sure the canner fits over the
center of the surface unit If vonr
range or its location does not allow
the canner to be centered on the
surface unit, use smaller-diameter
pots for good canning results.
2. Flat-bottomed canners must
be used. Do not use canners with
flanged or rippled bottoms (often
found in enamelware) because they
don't make enough contact with the
surface unit and take too long to
boil water.
NIGHT
2___2
V_flONG
3. When canning, use recipes and
procedures from reputable sources.
Reliable recipes and procedures are
available from the manufacturer of
vn))r eannor" manufaetnrer_ of
j .......... _ .................
glass jars for canning, such as Ball
and Kerr; and the United States
Department of Agriculture
Extension Service.
4. Remember that canning is
a process that generates large
amounts of steam. To avoid burns
from steam or heat, be careful
when canning.
operated on low power (voltage),
canning may take longer than
expected, even though directions
have been carefully followed. The
plU(d_bb tllll_ Will LI_ _l!Ol't_lI_(l oy ;
(1) using a pressure canner, and
(2) starting with HOT tap water for
fastest heating of large quantities
of water.
Page 10

_UI'E_ _UUKaI_ _JUIU_
Cookware Tips
cookware. Aluminum cookware
conducts heat thster than other
metals. Cast iron and coated cast
iron cookware is slow to absorb
heat, but generally cooks evenly at
LOW or MED settings. Steel pans
may cook unevenly if not combined
with other metals.
energy, pans should be fiat on the
bottom, have straight sides and tight
fitting lids. Match the size of the
saucepan to the size of the surface
unit. A pan that extends more than
an inch beyond the edge of the trim
ring traps heat which causes
",_ra_rlna '_ [_na hoirlln_ r,r_t-_€_ _n
porcelain, and discoloration
ranging from blue to dark gray on
chrome trim rings.
Directions and Setting Setting to Complete
Food Cookware ,,. to,Start Conking Cookin g ......... Comments .................
Cereal
Cornmeal, grits, Covered HI. In covered pan bring LOW or WM, then add cereal. Cereals bubble and expand as
cereal, to package directions, saucepan to prevent boilover.
Cocoa Uncovered HL Stir together water or MED, to cook I or 2 minutes Mi kboils over rapidly, Watch as
Saucepan milk, cocoa ingredients, to completely blend ingredients, boiling point approaches.
ii _ _'*_"_"_'iii_ii"ll" Y.... i ...........
Pe_o!ator H!. At f!_t perk, switch LOW to maintain gentle bat Percolate Sto tOmlnute_ for
heat to LOW. steady perk. 8cups, less for fewer cups.
Coff_
Eggs
Cooked in shell
Fried sunny-side-up
Fried over easy
Poached
Scrambled or omelets
_¥ui_s
Meats, Poultry
Braised: Pot roasts of
beef_ lamb or veal;
pork steaks and
chops
Pan-fried: Tender
chops; thin steaks up
to 3!4-inch; minute
franks and sausage;
thin fish fillets
Covered
Saucepan
Covered
Skillet
Hi. Cover eggs with cool
water. Cover pan, cook
until steaming.
MED HI. Melt butter, add
eggs and cover skillet,
I ow. tsoo_ only 3 to 4
minutes for soft cooked;
15 minutes for hard cooked.
Continue cooking at MED HI
until whites are just set, about
3 to 5 more minutes.
LOW, then add eggs. When
carefully turn over to cook
other side.
LOW. Carefully add eggs.
Cook uncovered about 5
minutes at MED HI.
MED. Add egg mixture.
t_nok. _tlrrin_ todesired
..... • ........ o .........
doneness,
LUW. _t_r occasionally and
check for sticking.
HI. Melt butter.
LOW. Simmer until fork
Uncovered
O_lllet
Covered
Skillet
Uncovered
SkSl!et
Covered
Saucepan
Covered
Skillet
Uncovered
Skillet
HI. In covered pan bring
water to a boil.
HI. Heat butter until light
oold_.n in e(_Inr
Hi, in covered pan bring
fruit and water to boil.
HI. Melt fat then add meat.
Switch to MED HI to
brown meat. Add water or
other liqukt.
HI. Preheat skillet, then
grease lightly.
tender.
MED HI or MED. Brown and
cook to desired doneness,
turning over as needed.
If you do not cover skillet, baste
eggs with fat to cook tops evenly.
Remove cooked eggs with slotted
spoon or pancake turner,
Eggs continue to set slightly after
conking. For omelet do not stir
last few minutes. When set, fold
in half.
Fresn rrum use 1_€to ltz cup
water per pound of fruit.
Dried fruit: Use water as package
directs. Time depends on whether
fruit has been presoaked, if not,
allow more cooking time.
Meat can be seasoned and floured
before it is browned, if desired.
Liquid variations for flavor could
be wine, fruit or tomato juice or
meat broth.
Timinrp Rtaak_ 1 to 9.i_,h_" ! to
2 hours, Beef Stew: 2 to 3 hours.
I
Pot Roast: 2/2 to 4 hours.
Pan frying is best for thin steaks
and chops, If rare is desired, pre-
heat skillet before adding meat.
10
Page 11

. Deep Fat Frying. Do not overfill
ettle with fat that may spill over
wl!_ll _LIUIIIg IUUU, _lO_ty IOOUi:i
bubble vigorously. Watch foods
frying at HIGH temperatures and
keep range and hood clean from
accumulated grease.
RIGHT
M
I
UV t" I't I'" II
Food
Fried Chicken
Pan fried bacon
Sauteed: Less tender
thin steaks (chuck,
round, etc.); liver;
thick or whole fish
Simmered or stewed
meat; chicken; corned
beef; smoked pork;
stewing beef; tongue;
etc.
Melting chocolate,
butter, marshmallows
l_llcak_ or
French toast
Pasta
Noodles or spaghetti
Cookware
Covered
O_,ll I_ t,
Uncovered
Skillet
Covered
Skillet
Covered
Dutch Oven,
Kettle or
Large
Saucepan
Small
Uncovered
oaucepan.
Use small
surface unit
Skillet or
Griddle
Covered
Large Kettle
or Pot
Directions and Setting
to Start Cooking
HI. Melt fat. Switch to MED
Ill tU t;tUWli _dtl_t_lt,
IlL In COIU sKnlet, arrange
bacon slices. Cook just
until starting to sizzle.
HI. Melt fat. Switch to MED
to brown slowly.
HI. Cover meat with water
and cover pan or kettle.
Cook until steaming.
W/vLAllow 10to15minutesto
melt through. Stir tosmooth.
MED HI. Heat skillet 8 to
10 minutes. Grease lightly.
Pressore
Cooker or
Canner
Uncovered
Saucepan
Covered
Saucepan
HI. Incovered kettle, bring
sal_ _ater to a boil, uncuve_
and add pasta slowly so
boiling does not stop.
Setting to Complete
Cooking
LOW. Cover skillet and
Uncover last E_wminutes.
I'VL._L I Ill, LOOK, [Urlllng
over as needed.
LOW. Cover and cook
until tender.
LOW. Cook until fork
tender. (Water should
slowly boil). For very large
loads, medium heat may
be needed.
Cook 2 _o3 minutes per side.
MED HI. Cook uncovered
amounts, HI may be
needed to Keep water at
roln[lg DOll KfirougnOLU.
entire cooking time.
Comments
For crisp dry chicken, cover only
_Gt_v _x_it_h_n_r tn I telW fnr lfl
minutes. Uncover and cook, turning
occasionally 10 to 20 minutes.
is to start and cook at MED.
Meat may be breaded or
marinated in sauce before frying.
Add salt or other seasoning
before cookingif meat has not
been smoked or otherwise
cured.
When melting marshmallows, add
milk or water.
Sauteed: Onions;
green peppers;
mushrooms; celery; etc.
_i_'e _nd Grits
r
Frozen
Vegetables
Fresh
Covered
Saucepan
MED. Cook I pound 10
to 30 or more minutes,
depending on tenderness
of vegetable.
LOW.Cook according to
time onpackage.
MED. Add vegetable.
Cook until desired
tenderness is reached.
WM. Cover and cook
according to time.
Uncovered
Skillet
HI. Bring saltedwater toa
boil.
HI. Measure 1/2 to I inch
water in saucepan. Add
salt and prepared vegetable.
In covered saucepan bring
to boil.
HI. Measure water and salt
as above. Add frozen block
of vegetable. In covered
saucepan bring to boil.
HI. In skillet melt fat.
Covered
Saucepan
Pressure Cooking HI. Heat until first jiggle is MED HI for foods cooking Cooker should jiggle 2 to 3 times
heard. 10 minutes or less. MED for per minute.
foods over 10 minutes.
Puddings, Sauces, HI. Bring just to boil. LOW. To finish cooking. Stir frequently to prevent
Candies, Frostings sticking.
Use large enough kettle to
in size when cooked.
Uncovered pan requires more
i water and time.
longer
Breakupor stiras needed while
cooking.
Turn over or stir vegetable as
necessary for even browning.
Triple in volume after cooking.
Time at WM. Rice: i cup rice and
2 cups water--25 minutes. Grits:
I cup grits and 4 cups watct_
40 minutes.
Thick batter takes slightly longer
time. Turn over pancakes when
bubbles rise to surface.
Page 12

Automatic Timer and Clock
The Automatic Timer and Clock on
your range are n_lplUl u_vl_:_b mat
serve several purposes.
To Set Clock
q( SET THE CLOCK, push the
center knob in and turn the clock
hands to the correct time. (The
Minute Timer pointer will move
pointer to OFE)
To Set Minute Timer
The Minute Timer has been
combined with the Range Clock.
Use it to time a!! your precise
cooking operations. You'll
recognize the Minute Timer as the
pointer which is different in color
and shape than the Clock hands.
TO SET THE MINUTE TIMER,
turn the center knob, without
number ofminutesyouwishtotime.
(Minutesaremarked, up to60,in
the center ring on theClock.) At the
end of the set time, a buzzer sounds
to tell you time is up. Turn ........
KnOO_
without pushing in, until pointer
reaches OFF and buzzer stops.
fme Bake Uses
L-IJkULUI!_ lffl::U+l_ 111111lllt1_1
Usin_g Aut_omaticTimer, you can
TIME BAKE wltla the oven starting
immediately and turning off at the Stop
START (some models say S_RT)
and STOP dials to automatically start
and stop oven at a later time of day.
It takes the worry out of not being
Setting the dials for TIME BAKE
_l___'l_n Ilco_
Automatic Timer
The self-cleaning function on your
range uses the Automatic Timer to
€_t th_ lon_th nf time needed to
clean whether you wish to clean
immediately or delay the cleaning
until low energy times such as
during the night. See page 20.
Questions and Answers
Q. How can I use my Minute
Timer to make my surface
A. Your Minute Timer will help
tlrn_ tntnl r.nolrlno which includes
time to boil food and change
temperatures. Do not judge cooing
time by visible steam only. 14oo6
wilt cook in covered containers
_V_II LIIUU_II y'Ju r_g_,ll I. o'*'_' u_a]
steam.
correct time of day when I w_sh
to use the Automatic Timer for
baking?
A, Yes, if you wish to set the
DELAY START or STOP dials to
turn on and off at set times during
timed functions.
Q. Can I use the Minute Timer
during oven cooking?
A. The Minute Timer can be used
during any cooking function. The
Automatic Timers (DELAY STAR_I
*rid R'lY_p dinl_'_ are n_ed with
TIME BAKE function only.
I'm Time Cooking in the oven?
A kT_ 'rho g'_ln,-I_ o_nnnt _ ehnncrod
during any program that uses the
oven timer. You must either stop
those programs or wait until they
are finished before changing time.
!2
Page 13

Using Your Oven
Before Using YourOven
!. Look at the controls. Be sure
you understand how to set them
_I'J[./_,IJ.cY. 1%%,0A.,_ %'v*..,l _,1x%, _tll_._*..,_,l*Jxlo
for the Automatic Oven Timer so
you understand its use with the
controls.
2. Check oven interior° Look at
the shelves. Take a practice run at
removing and replacing them
properly, to give sure, sturdy
support.
3. Read over information and tips
that follow.
4. Keep this book handy so you can
refer to it, especially during the
with your range.
Oven Controls
m_llmlll ilm_llll
The controls for the oven are
marked OVEN SET and OVEN
TEMR The OVEN SET control has
BROIL, CLEAN and OFE When
you turn the knob to the desired
setting, the proper heating units are
then activated for that operation.
The OVEN TEMP control maintains
the temperature you set, from
WARM (150°F.) to BROIL (550°F.)
_nrt M_n _t ('I _ANI (RRl'!°17 "l
Oven Cycling Light
The Oven Cycling Light glows
temperature, then goes off and on
with the oven unit(s) during cooking.
PREHEATING the oven, even to
h;ah t_,mnarntnro _ttincr¢ ;c cno_dxt
--rarely more than about 10 minutes.
Preheat the oven only when
necessary. Most foods will cook
satisfactorily without preheating.
keep an eye on the indicator light
and put food in the oven promptly
after the light goes out.
Oven Interior Shelves
The shelves are designed with stop-
locks so that when placed correctly
on the shelf supports, they (a) will
stop before Coining completely
from the oven, and (b) will not tilt
ixzhon romn_,llno" fnnc'l frc_m or
placingfoodon them,
To remove shelffrom t..h_own, !Lft
up rear of shelf, pull forward with
stop-locks (curved extension under
shelf) along top of shelf supports.
Be certain that shelf is cool before
Toreplace shelf in oven,insert
shelf with gtcm-lcmk_ r_gt_n_r on
............... 11_ ............. ID _u
shelf supports. Push shelf toward
rear of oven; it wil! fall into place.
When shelf is in proper position,
stop-locks on shelf will run under
olaal4 r o,_nr.,.t" ts_han ohal¢ io n.llaA
forward.
Shelf Positions
The oven has four shelf supports--
A (bottom), B, C and D (top).
Shelf positions for cooking food
are suggested on Baking, Roasting
and Broiling pages.
Oven Light
The light comes on automatically
when the door is opened. (On
models with oven window, use
switch to turn light on and off
when door is closed.)
Switch is located on front of door.
13
Page 14

Bakinz
!6' II_II UUOKIII_ _1 IUUU lt,_l HIG lll_,t
given on recipes as a guide. Oven
thermostats, over a period of years,
may "drift" from the factory setting
and differences in timing between
rill UIU dll£1 _ IIGW UV_II UI .9 IU IV
may be inclined to think that the new
oven is not performing correctly.
However, your new oven has been
set correctly at the factory and is
more apt to be accurate than the
oven it replaced.
1_€_ ta _l_t Vanr R_no_
Step 1: Place food in oven, being
certain to ...........
_eave annul i mcn of
oven for good circulation of heat.
Close oven door. During baking,
avoid frequent door openings to
prevent undesirable results.
KIIUU LUIH]['II UV 12,1N _E_ l
_[ep
BAKE and OVEN TEMP knob to
temperature on recipe or in Baking
Guide.
Step 3: Check food for doneness
at minimum time on recipe. Cook
longer if necessary. Switch off heat
and remove foods.
How to Time Bake
The automatic oven timer controls
are designed to turn the oven on or
off automatically at specific times
1.11_11. yUU bl_t. l_htllll])l_b 131 lll,lllll,AllOD._
Rtart (nvon tnrn_ nn now _nd VI311
set it to turn off automatically) or
Delay Start and Stop (setting the
oven to turn on automatically at a
later time and turn off at a preset
How to Set Immediate
NOTE: Before beginning, make
sure the hands of the range clock
show the correct time of day.
Immediate Start is simply setting
off at a latar tima a.tnmztleMlv.
Remember, foods continue cooking
after controls are off.
Step 1: To set Stop Time, push in
lrnnh nn qTCIP dim and tnrn nnlntar
to time you want oven to turn off;
for example 6:00. The DELAY
START dial should be at the same
position as the time of day on dock.
Step 2: Turn OVEN SET knob to
TIME BAKE. Turn OVEN TEMP
knob to oven temperature, for
example 250°F. The oven will start
immediately and will stop at the
time you have set.
How to Set Delay Start
and Stop
Delay Start and Stop is setting the
oven timer to turn the oven on and
off automatically at a later time
than the present time of day.
Step i: To set start time, push in knob
on DELAY START dia! (some models
may _nv RTART'I and tnrn n_inter
to time you want oven to turn on,
for example 3:30.
knob on STOP dial and turn pointer
to time you want oven to turn off,
for example 6:00. This means your
recipe called for two and one-half
hours of baking time.
NOI'E: Time on S'IOP dial must
be later than time shown on range
UIU_IIU ,I.,_'.t2_l.w/_kJL 01,f'KJL%.& _1(_1,
TIME BAKE. Turn OVEN TEMP
knob to 250°E or recommended
temperature.
Place food in oven, close the door
and automatically the oven will be
turned on and off at the times you
have set. When cooking is
onmnl_t_rl h,rn (-TV_ q_C_ _0
OFF and remove food from oven.
OVEN INDICATOR LIGHT(s) at
TIME BAKE setting may work
differently than they do at BAKE
setting. Carefully recheck the steps
given above. If all operations are
done as explained, oven will
operate as it should.
14
Page 15

1. Aluminum pans conduct heat
quickly. For most conventional
results because they help prevent
overbrowning. For best browning
results, we recommend dull bottom
surfaces for cake pans and pie plates.
2. Dark or non-shiny finishes and
glass cookware generally absorb
l.,_oe ,_,hl,-.h r,ooxz r,_,m,H" ";taArw or;_
crusts. Reduce oven heat 25°F. if
lighter crusts are desired. Rapid
browning of some foods can he
achieved by preheating cast iron
3. Preheating the oven is not always
necessary, especially for foods
_xzhir'h ondk Innoor than "41"1'to ._0
minutes. For food with short
cooking times, preheating gives
best appearance and crispness.
4. Open the oven door to check
food as little as possible to prevent
uneven heating and to save energy.
Food
Bread
Biscuits Qh-in. thick)
Coffee cake
Corn bread ormuffins
Gingerbread
Muffins
Popovers
Quick loaf bread
Yeast bread (2 loaves)
Plain rolls
Cakes
(without shortening)
Angel tooa
Jelly roll
Sponge
Cakes
Bundt cakes
Cupcakes
Fruit cakes
Layer, chocolate
Loaf
Cookies
Brownies
Drop
Refrigerator
Rolled or sliced
Fruits,
Other Desserts
Baked apples
Custard
Puddings, Rice
and Custard
Pies
Frozen
Meringue
Sheff
Container Position
Shiny Cookie Sheet
Shiny Metal Pan with
satin-finish bottom
Cast Iron or Glass
Shiny Metal Pan with
satin-finish bottom
Shiny Metal Muffin Pans
Deep Glass or Cast Iron Cups
Metal or Glass Loaf Pans
Metal or Glass Loaf Pans
Shiny Oblong or Muffin Pans
Alummnm iuoe tan
Metal Jelly Roll Pan
Metal or Ceramic Pan
Metal or Ceramic Pan
Shiny Metal Muffin Pans
Metal or Glass Loaf or
Tube Pan
_hin_ M_tM P_n with
..... .j ..............
satin+finish bottom
Shiny Metal Pan with
satin-finish bottom
Metal or Glass Loaf Pans
Mdml orGlagg Pang
Cookie Sheet
Cookie Sheet
Cookie Sheet
Glass or Metal Pan
Glass Custard Cups or Casserole
(set in pan of hot water)
Glass Custard Cups or
Casserole
Foil Pan on Cookie Sheet
B, €
B,A
B
B
A,B
B
B ¸
A;B
A,B
B,A
A
B
A
A,B
B
A,B
B
B,C
_,c
B, C
B,C
I A,B,C
B
B
A
r_ h
I
Oven
Temperature
4000-475 °
350o-4000
400%450 °
350 °
4000.425 °
375°
350°-375 °
_ID --tTd.D-
375°-425 °
350°-_5 °
375°-400 °
3250-350 °
325o-350°
350°-375°
275o.300 °
350°-375 °
350°-375 °
350 °
3250-350 °
350o-400 °
400o425 °
375%400 °
350°-400 °
3000-350 °
325 °
400°-425 °
T_me_
Minutes
15-20
20-30
2040
45-55
20-30
45-60
45-60
10-25
20-30
10-15
45-60
45-65
20-25
2-4 hrs.
20-35
25-30
40-60
25-35
_0
6-2
30-60
30-60
50-90
45-70
Comments
Canned, refrigerated biscuits take
2 to 4 minutes less time.
Preheat cast iron pan for crisp crust.
Decrease about 5 minutes for muffin
mix, or bake at 450°E for 25 minutes,
then at 350+E for 10to 15 minutes.
browning.
For thin rolls; Shelf B may be used.
I_nr thin rnll_ _h_lf R may h_.Ilged.
Line pan with waxed paper.
Paper liners produce more moist
Use 300°E and Shelf B for small or
individual cakes.
Bar cookies from mix use same time.
Use Shelf C and increase temp.
25°E to 50°E for more browning.
Reduce temp, to 300°E for large
with custard base 80 to 90 minutes.
I_ qq
Large pies use 400_F. and increase
time.
400°E for 8 to 10 minutes.
Custard fillings require lower
temperature, longer time.
One crust Glass or Satin-finish Metal A, B 4000-425 ° 40-60
Two crust Glass or Satin-finish Metal B 400°-425 ° 40-60
Pa.stry shell Glass or Satin-finish Metal B 450 ° 12-15
Misce!laneous I ]
Baked potatoes oct o, B, C --,,,,,
Scal!oped dishes Glass or Metal Pan A, B, C 325%375 ° 30-60 or size.
Souffles Glass B 300°-350 _ 30-75
!5
Page 16

Roastingiscookingbydryheat.
Tendermeatorpoultrycanbe
Roastingtemperatures,which
shouldbelowandsteady,keep
spatteringtoaminimum.When
roasting,it isnotnecessaryto
sear,oaste,coverorauuwater
toyourmeat.
procedureusedformeats.Therefore,
ovencontrolsaresettoBAKEor
TIMEBAKE.(Youmayheara
slightclickingsound,indicating
.t • 1 • ........
me oven as working property.)
Roasting is easy;just follow
these ster)s:
r-"
Step 1: Check weight of meat, and
IJIO_A,.-_, la, L _*IU_., LIIJ , Llll JL_IhCl_._LIIII _ ll_[_,,,.k%.
in a shallow pan. (Broiler pan with
rack is a good pan for this.) Line
broiler pan with aluminum foil when
using pan for marinating, cooking
Wlldl IrUltS_ COOKIIIg IleaVlly culeu
meats, or for basting food during
cooking. Avoid spilling these
materials on oven liner or door.
A or B position. No preheating is
necessary.
I
I
r
_tep ¢4:MOSt meats connnue to
cook slightly while standing, after
he;no removed from the oven
Standing time recommended for
roasts is 10 to 20 minutes to allow
roast to firm up and make it easier
to carve. Internal temperature will
for temperature rise, if desired,
remove roast from oven at 5° to 10LF.
less than temperature on guide.
NOTE: You may wish to use TIME
BAKE, as described on page 14, to
turn oven on and off automatically.
Remember that t0od will continue
to cook in the hot oven and therefore
_hnnlA h_ r,_'mnxz,_rl ,txzh,_n th_ rloe;r_.rt
internal temperature has been
reached.
For Frozen Roasts
Frozen roasts of beef, pork,
lamb, etc., can be started without
thawing, but allow 10 to 25 minutes
per pound additional time (10
minutes per pound for roasts under
5 pounds, more time for larger
roasts).
®Thaw most frozen poultry before
roasting to ensure even doneness.
Some commercial frozen poultry
can be cooked successfully without
thawing. Follow directions given
on packer's label.
Questions and Answers
Qo_s it necessary to check for
doneness with a meat thermometer?
A. Checking the finished internal
temperature at the completion of
cooking time is recommended.
Temperatures are shown in Roasting
Guide on opposite page. For roasts
over 8 pounds, cooked at 300°E
with reduced time, check with
thermometer at half-hour intervals
after half the time has passed.
Qo Why is my roast crumbling
when I try to carve it?
A. Roasts are easier to slice if
allowed to cool 10 to 20 minutes
after removing from oven. Be sure
Q. Do I need to preheat my
OYell euI211 Llll[le 1 gOOl_ _11rO_ll_,
or poultry?
your oven, only for very small
roasts, which cook a short length
of time.
Q. When buying a roast, are
there any special tips that would
help me cook it more evenly?
A. Yes. Buy a roast as even in
thickness as possible, or buy rolled
roasts.
Q. Can I seal the sides of my foil
"tent" when roasting a turkey?
A. Sealing the foil will steam the
meat. Leaving it unsealed allows the
air to circulate and brown the meat.
Step 3: Turn OVEN SET to BAKE
and OVEN TEMP to 325°F. Small
poultry may be cooked at 375°F.
F_r hPCt hr_x;n_n_
JO
Page 17

Koasung ulae
Roasting
i"USIUOII OV_I1 S[I_II lit B Lot
small-size roasts (3 to 7 lbs.) and
at A for larger roasts.
2. Place meat fat-side up, or poultry
hron_t_elclo nr_ _n hmilor nnn rw
other shallow pan with trivet. Do
not cover. Do not stuffpoultry until
just before roasting. Use meat
thermometer for more accurate
thermometer in stuffing.)
a. t_emove mt anu unppmgs as
necessary. Baste as desired.
4. Standing time recommended for
roasts is 10to 20 minutes to allow roast
t_ Grrn nn _nd rn_k-_ it o_ci_r t,a
carve. Internal temperature will rise
about 5° to 10°E; to compensate for
temperature rise, if desired, remove
roast from oven at 5° to 10°F. less
5. Frozen roasts can be
conventionally roasted by adding
10 to 25 minutes per pound more
time than given in guide for
refrigerated masts. (10 minutes
per pound for roasts under 5 pounds.)
Defrost poultry before roasting.
Type
lvlea[
Tender cuts; rib, high quality sirloin tip,
rump or top round*
Lamb leg or bone-in shoulder*
Veal shoulder, leg or loin*
Pork loin, rib or shoulder*
Ham, precooked
Ham, raw
*For boneless rolled roasts over 6-inches thick
Poultry
Chicken or Duck
Chicken pieces
Turkey
I
Oven
Temperature
325 °
325 °
325 °
325 °
325 °
325 °
Internal
Doneness Temperature °F
i Approximate Roasting Time,
in Minutes per Pound
0 m a-ins.
_ ZO _-IO$.
Rare: 24-30 18-22
Medium: 30-35 22-25
WellDone: ] 35-45 28-33
Rare: I 21-25 20-23
Medium: 25-30 24-28
Well Done: I 30-35 28-33
Well Done: I 35-45 30-40
Well Done: 35-45 30-40
To Warm:
10minutes per pound (any weight)Under 10-1bs. 10 to 15-1bs.
Well Done: [ 20-30 17-20
add 5 to 10minutes per pound to times given above.
] 3 to 5-1bs.
325 ° Well Done: 35-40
3750 [ Well Done: [ 3540
10 to 15-1bs.
325 ° Well Done: 20-25
t 1 I
130°.140 °
150°-160 °
i70°-i85 °
130°-140 °
150°-160 °
170°-185 °
170°-180 °
!70°-!80 °
125°-130 °
170 °
Over5-1bs.
30-35 185°-190 °
185°-190 °
Overlg-lbs. In thigh:
15-20 185°-190 °
I
I
[
I
[
I
)
(
I
I
17
Page 18

Broiling
Broiling is cooking lbod by intense
radiant heat from the upper unit in
the oven. Most fish and tender cuts
of meat can be broiled. Follow
these steps to keep spattering and
smoking to a minimum.
Step 1: If meat has fat or gristle near
edge, cut vertical slashes through
UUrull _IUUUL X._ _.[J¢ll L. 11 ut_l_k,u_ L(-_
may be trimmed, leaving layer
about 1/8" thick.
Step 2: Place meat on broiler rack
in broiler r)an which comes with
......... 17 .......
range. Always use rack so fat drips
into broiler pan; otherwise juices
may become hot enough to catch fire.
Step 3: Position shelf on recommended
shelf position as suggested in Broiling
Guide on opposite page. Most
OIUIUlIg 1_ UUII_ Oil % pU_IUUII_ OUt
if your range is connected to 208
volts, you may wish to use higher
position.
!
i
i
I
I
Step 4: Leave door ajar a few inches
(except when broiling chicken).
yetIne ooor stays open oy
the proper temperature is maintained
in the oven.
Step 5: Turn both OVEN SET and
OVEN TEMP knobs to BROIL.
Preheating units is not necessary.
I I
I //(1111
k3lL_ D rdl; IUIIt IOOU Ullly Ulll,_ UUlIII_
cooking. Time foods for first side
per Broiling Guide.
Turn food, then use times given for
second side as a guide to preferred
doneness. (Where two thicknesses
and times are given together, use
ilrs[ times given ior mmnest louta.)
Step 7: Turn OVEN SET knob
to OFE Serve food immediately,
and leave pan outside oven to cool
Use of Aluminum Foi!
/ ,V---q
1. If desired, broiler pan may be
lined with foil and broiler rack may
be covered with foil tbr broiling.
FOIL THOROUGHLY TO
BROILER RACK, AND SLIT
FOIL TO CONFORM WITH
SLITS IN RACK. Broiler rack is
designed to minimize smoking and
_n_ri-,_rinr_ anrl t_ Ir_t_rs rlr;nnlncr¢
cool during broiling. Stopping fat
and meat juices from draining to
the broiler pan prevents rack from
serving its purpose, and juices may
2. DO NOT place a sheet of
aluminum foil on shelf. To do so
may result in improperly cooked
_hnd_ dnrnnc_tonven f'inigh and
increase in heat on outside surfaces
of"the oven.
Questions & Answers
Q. Why should I leave the door
closed when broiling chicken?
A. Chicken is the only food
recommended for closed-door
hrnilln_r Thig i_ he,_m_e chicken ig
relatively thicker than other foods
you broil. Closing the door holds
more heat in the oven which allows
chicken to cook evenly throughout.
Q. When broiling, is it necessary
to always use a rack in the pan?
A. Yes. Using the rack suspends
the meat over the pan. As the meat
_OOKS, tll_jul'sc:s laiJ XIILU ill(5 l)illl_
thus keeping meat drier. Juices
are protected by the rack and stay
cooler, thus preventing excessive
Spatter and smoking.
Q. Should I salt the meat before
broiling?
A, No. Salt draws out the juices
and allows them to evaporate.
Always salt after cooking. Turn
meat with tongs; piercing meat
u_ith _ fnrk nl_n _lln_y_ i_i_ tn
escape. Whenbroilingpoultry
or fish, brush each side often
with butter.
Q. Why are my meats not turning
out as brown as they should?
A. In some areas, the power
(voltage) to the range may be low.
In these cases, preheat the broil
HDI[ Jor 113 IIllllilt_S I)_lOl_ pli:lGlll_
broiler pan with food in oven.
Check to see if you are using the
recommended shelf position. Broil
for longest period of time indicated
in the Broiling Guide. Turn food
OHly Oll_ UUllII_ UIUilIII_.
Q. Do I need to grease my broiler
rack to prevent meat from sticldng?
A. No. The broiler rack is designed
to reflect broiler heat, thus keeping
the surface cool enough to prevent
meat sticking tothe surface. However,
spraying the broiler rack lightly with
a vegetable cooking spray before
cooking will make cleanup easier.
18
Page 19

Broiling Guide
Broiling
1. Always use broiler pan and rack
that comes with your oven. It is
designed to minimize smoking and
spattering by trapping juices in the
2. Oven door should be ajar for all
special position on door which
holds door open correctly.
3. For steaks and chops, slash fat
evenly around outside edges of meat.
To slash, cut crosswise through
outer fat surface just to the edge of
the meat. Use tongs to turn meat
_.r to nr_v_.nt ni_rt_in_m_t _nd
losing juices.
4. If desired_ marinate meat_ or
chicken before broiling. Or brush
with barbecue sauce last 5 to 10
minutes only.
5. When arranging food on pan,
do not let fatty edges hang over
sides, which could soil oven with
fat drinninp
...... 17 It" -'-I_"
6. Broiler does not need to be
preheated. However, for very thin
foods, or to increase browning,
t_rph_t ifAP¢(rPA
7. Frozen Steaks can be
eanvantianM|v broiled hv
................ d ........ d
positioning the oven shelf at next
lowest shelf position and increasing
cooking time given in this guide
ltA times per side.
8. if your oven is connected to
208 volts, rare steaks may be broiled
hv nrahaatino hrnll hantar and
positioning the oven shelf one
position higher.
Food
Bacon
Quantity and/or
Thickness
V2-1b.(about 8
Shelf
Position
First Side
_me, Minutes
3½
Second Side
Time, Minutes Comments
Arrange in single layer.
C 3½
Ground Beef Mb. (4 patties) Space evenly.
Well Done tAto ¾-in, thick C 7 4-5 Up to 8 patties take about same time.
C
C
C
C
C
C
l-inch thick
(i to iV2-ibs.)
7
9
t3
10
15
25
1½-in. thick
(2 to 2½-tbs.)
7
9
13
7-8
14-!6
20-25
IO'13
Beef Steaks
Rare
Medium
WelI Done
Rare
Medium
Well Done
!
n",L*'--I.---- I ._.L _t_ I
_mcac. t wuo_e A 35
(2 to 2Vz-lbs.),
split lengthwise
Bakery Products
Bread (Toast) or 2 to 4 slices C l IA-2 I/j ,qnne__vanlv Place F.no!i_h ranffln_
........ r ......... .' ......... 1_...............
Toaster Pastries 1 pkg. (2) cut-side-up and brush with butter, if
English Muffins 2 (split) C 3-4 desired.
Ix_bster Tails 2-4 B 13-16 Do not Cat through back of shell. Spread
(6 to 8-oz. each) turn over. open. Brush with melted butter
before and after half time.
Fish l-lb. fillets ;Ato C 5 5 Handle and turn very carefully.
½-in. thick Brush with lemon butter before and
daring cooking if desired. Preheat
hrnilar t_ incre_ hn_vnlncr
i .......................... to.
Ham Slices 1-in. thick B 8 8 Increase times 5 to 10 minutes per side
I
(precooked) for 1½-inch thick or home cured.
Pork Chops 2 (½ inch) C 10 10 Slash fat.
Well Done 2 (l-in. thick) B 13 13
aOOLn i IO.
Slash fat.
Lamb Chops
Medium
Wet! Done
Medium
Wei!Done
8
10
10
17
Wieners and similar
precooked sausages,
bratwurst
c
c
c
B
4-7
10
4-6
12-14
2 (1 inch)
about 10 to 12 oz.
2 (tlA inch)
o!_,tt I Ib
Steaks less than 1 inch cook through
before browning. Pan frying is
recommended.
Slash fat.
xeauce ames anout _ to lOrmnutes per
side for cut-up chicken, Brush each side
with melted butter. Broil with skin
UOWll lll_t 1_11_ OlOll WILII UOO[ t;IU_it_LI.
l-lb. pkg. (10) 1-2
If desired, split sausages in half
lengthwise; cut into 5 to 6-inch pieces.
19
Page 20

Operating the Self-Cleaning Oven
Before Setting Oven
Comrois, Check These
Things:
Step 1:
Remove broiler pan, broiler rack
and other cookware from the oven.
(Oven shelves may be left in oven.
Note: Shelves w!!! disco!or a_er
the self-clean cycle.)
Wipe up heavy soil on oven bottom.
If you use soap, rinse thoroughly
before self-cleaning to prevent
staining.
..... ,
©
A° Oven Front Frame
B Nw_n l'_aar C_lkot
C. Openings in Door
D. Oven Light
Step 3:
• Clean spatters or spills on oven
front frame (A) and oven door
outside gasket (B) with a dampened
cloth. Polish with a dry cloth. Do
not clean gasket 03). Do not allow
water to run down through openings
in top of door (C). Never use a
commercial oven cleaner in or
around self-cleaning oven.
• Clean top, sides and outside front
_,)10V_tl UUUI Wltll ;_t,)a_ _IIU wat_l.
Do not use abrasives or oven
cleaners.
Step 4:
Close oven door and make sure
oven light (D) is off.
Step 5:
111_ _IUlIIIIIUlII Ol [.)01 _igllll-
enameled drip pans that came
with your range can be cleaned
automatically in the self-cleaning
oven, but the aluminum pans may
eventually change color. Wipe off
boilovers that are not stuck on
before placing two pans, uoside
down, on each oven shelf.
I_al_l-|an* I'_hrnmo trim r_t_oc
_.s_l,a_lso _,._l_x_x_ _x_xzx xxxx_o
around the surface units should
never be cleaned in the self-
cleaning oven. Neither should
reflector pans of foil or shiny
gill Olll_.
for Cleaning
Step 1:
Turn OVEN SET and OVEN
will snap into final position when
the CLEAN location is reached.
Step 2:
right as far as it will go.
Step 3:
Set the automatic oven timer:
Make Sure both the: range clock
andthe DELAY START dia! show
me correct ume or uay. wnen me
DELAY START knob is pushed in
and turned_ it will "pop" into place
when the time shown on the range
clock is reached.
Decide on cleaning hours
necessary.
Recommended Cleaning Time:
Moderate Soil--2 hours
(thin spills and light spatter)
Heavy Soil--3 hours
(heavy, greasy spills and spatter)
®Add these hours to present time
of day, then push in and turn STOP
dial clockwise to this desired stop
time. CLEANING light glows,
showing cleaning is starting.
The LOCKED light will glow,
indicating oven is hot and door
cannot be opened. Oven door a_d
window get hot during self-cleaning.
DU INUI IUUkSH.
2O
Page 21

Follow These Steps after
Self-Cleaning
After cleaning is complete, the
door will stay Iocked until the oven
cools and the LOCKED light goes
off. This takes about 30 minutes.
r ............." a
[
Step 1:
When LOCKED light is off, slide
the LATCH HANDLE to the left as
far as it will go and open the door.
Step 2:
Turn OVEN SET knob to OFE
Step 3:
Tnrn NVitTN TITMP Irncsh t_ WADJkAr
NOTE: If you wish to start and
_LU_ uIUalllll_ at a ldtUl LlltlU 1.11dll
shown on clock, push in and turn
DELAY START dial to time you
wish to start. Add the hours needed
for cleaning to this "start" time,
then push in and turn STOP dial to
LIII_ _..t_.,*_llt.,k.t _*LU].3 Lllll_, L,-_Y_._II Will
automatically turn on and off at
the set times.
Questions and Answers
Q. Why won't my oven clean
immediately even though I set
all the time and clean knobs
correctly?
A. Check to be sure your DELAY
START dial is set to the same time
be sure LATCH HANDLE is
moved to the r_ht.
Q. If my oven clock is not working,
cnn I _tili _l|'._|e_n my avon9
A. No. Your Automatic Oven
Timer uses the range clock to help
start and stop your self-cleaning
cycle.
Q. Can I use commercial oven
cleaners on any part of my
self-cleaning oven?
A. No cleaners or Coatings should
be used around any part of this
oven. If you do use them and do not
residue can scar the oven surface
and damage metal parts the next
time the oven is automatically
cleaned.
Q. Can I clean the Woven Gasket
around the oven door?
A, No, this gasket is essential for
a good Oven seal, and care must be
taken not to rub, damage or move
this gasket.
Q. Alter having just used the
oven, the LOCKED light came
on and I could not move the
LATCH HANDLE. Why?
A. After several continuous high-
temperature bakings or broilings,
the LOCKED light may come on.
The oven door can't he latched for
self-cleaning while the LOCKED
light is on. If this happens, let the
oven cool nntil the I.OCKF.13 li_rht
goes off. Then the oven door can
be latched for self-cleaning.
Q. What should I do if excessive
smoking occurs during cleaning?
A. This is caused by excessive soil,
and you should switch the OVEN
SET knob to OFF. Open windows
to rid room of smoke. Allow the
oven to cool for at least one hour
before opening the door. Wipe up
the excess soil and reset the clean
Q. Is the "crackling" sound I
hear during cleaning normal?
A. Yes. This is the metal heating
aria cooling uurlng Dom me
cooking and cleaning functions.
Q. Should there be any odor
during the cleaning?
A. Yes, there may be a slight odor
during the first few cleanings.
FMlnra t_ wine nnt a_i_a _nil
might also cause an odor when
cleaning.
Q. What causes the hair-like
lines on the enameled surface
of my oven?
A. This is a normal condition
resulting from heating and cooling
during cleaning. They do not affect
IIUW yULll UY_II _IIUIIII_,
Q. Why do I have ash left in my
oven aider cleaning:
A. Some types of soil will leave a
is ash. _t can
uepos_t wmcn oe
removed with a damp sponge or
cloth.
Q. My oven shelves do not slide
**_l_ Wh_t i_ fho rn_t_*_av9
A. Aftermany cleaniugs, oven
shelves may become _n _lenn they
............ .j ................... j
do not slide easily. If you wish
shelves to slide more easily,
dampen fingers with a small
amount of cooking oil and rub
lightly over sides of shelf where
they contact shelf supports.
Q. My oven shelves have become
gray after the self-clean cycle. Is
this normal?
A. Yag After the gatf-el_an c,_ol_
the shelves may lose some luster
and discolor to a deep gray color.
Q. Can I cook food on the cooktop
while the oven is self-cleaning?
A. Yes. While the oven is self-
cleaning, you can use the cooktop
just as you normally do.
2!
Page 22

C re and Cl nln
(See Cleaning Guide, pages 24 and 25)
_v_* _ _14_ _la_as b _
important so your range will give
you efficient and satisfactory
service. Follow these directions
carefully in caring for your range to
Cooktop
The porcelain enamel cooktop is
sturdy but breakable if misused.
This finish is acid-resistant.
However, any acid foods spilled
(such as fruit juices, tomato or
vinegar) should not be permitted
to remain on the finish.
Cleaning Under the Range
The area nncler the range of models
equipped with a bottom drawer can
be reached easily for cleaning by
removing the bottom drawer. To
remove, pull drawer out all the way,
U.IL 1_1_ t/l_ J..tulll. _llK.It JL_,,a.,_llV_.JY_*,*' Jt_. l't,J
renl:ae.e in_ext ¢,lides at back of
drawer beyond stop on range glides.
Lift drawer if necessary to insert
easily. Let front of drawer down,
then push in to close.
Removable Oven Door
1\\ _\ -._l
.to KV_,JVILJV12,(1oo/'_ opeI1 to DK_._JL,
position, or where you feel hinge
catch slightly. Grasp door at sides;
lift door up and away from hinges.
To REPLACE_ grasp door at sides.
Line up door with hinges and push
door firmly into place.
Your range is vented through a duct
located under the right rear surface
unit. Clean the duct often.
_n Ie_,ii.I¢.i/_¢t/_ •
,, Make sure unit is cool.
L,1It up rlgn[ rear suriace unit,
Remove trim ring and drip pan.
Lift out oven vent duct.
To replace:
• Dlnt,_ th_ hart ov_r the oven vent
located below the cooktop with
opening of the duct under the round
opening inth e drippan: I! is
important tnat me auct _s m me
correct position so moisture and
van_r_ from the r'_ver|¢_an be
released during oven use. NOTE:
Never cover the hole in the oven
vent duct with aluminum foil or
any other material. This prevents
I.llli_ ¢JV_71I VgTllt IIUIII _¢UiI_llI_
properly during any cooking cycle.
Lamp Replacement
CAUTION: Before replacing
youroven_ampbulb, disconnect
the electricpowerforyourrange
at the main fuse or circuit
breakerpanel. Be sureto let the
lamp cover and bulb cool
completely beforeremovingor
1 I_[J li;[l._ll I_ tIl¢[ll.
'T'h_ r_zr, n larnn fh]dh'_ i_ _nvered
with a glass removable cover which
is held in place with a bail-shaped
wire. Remove oven door, if desired,
to reach cover easily.
To remove:
t l.h_lA hand .rider r,_w_r _n it
doesn't fall when released. With
fingersOf same hand, firmly push
back wire bail until it clears cover.
Lift off cover. DO NOT REMOVE
ANY SCREWS.
Replace bulb with 40-watt home
appliance bulb.
To replace cover:
• Place it into groove of lamp
receptacle_ Pull wire bail forward
to center of cover unti! it snaps into
place. When in place, wire holds
cover firmly. Be certain wire bali is
in depression in center of cover.
Connect electric power to range.
Surface Units
Cl_:an the :area nnder the drio hans
often. Built-up soil, especially
grease, may catch fire. To make
cleaning easier, tilt-lock units lift
up and lock in the up position, and
plug-in units are removable.
Caution: Be sure all controis are
turned to t_ 1_anu surlace um
are cool before attempting _.ohft
or remove them.
After lifting the tilt-lock units or
removin¢ nhm-in units, remove the
trim rings and drip pans under the
units and clean them according to
directions in the Cleaning Guide o.
pages 24 and ............
z3. w_pe arounu the
Clean the area below the units.
Rinse all washed areas with a damp
cloth or sponge.
A,g,,
Page 23

Tilt-Lock (stand-up) Units
TUt-Lock units cannot be removed.
You can lift a tilt-lock unit upward
_lJOil[ U llll_l 3It W_l IU_Ik Ill [ll_ U_
position.
To reposition the tiit-iock unit:
• Replace the drip pan and trim
ring into the recess in the cooktop.
* Put the trim ring in place over the
drip pan. The drip pan must be
under the trim ring.
• Guide the surface unit into place
so it fits evenly into the trim ring.
Hug-In Units
(On models so equipped)
f_
Plug-in units can be removed.
Repeated lifting of the p|ug-in
e._ARAAL AgltT_FS !._ L_V[Aal I _AIA.F_.FYQ_ _Al_k_ _, l,lSA
ring can permanently damage
the receptacle,
! / I
I \._x-5/K._J%_ ¢ "---_1
To replace a plug-in unit:
trim ring into the surface unit cavity
found on top of the cooktop so the
unit receptacle can be seen through
the opening in the pan.
• Insert the terminals of the plug-in
unit through the opening in the drip
pan and into the receptacle.
* Guide the surface unit into place
so it fits evenly into the trim ring.
Note: The drip pan must be under
the trim ring.
CAUTION
* Do not attempt to clean plug-in
surface units in an automatic
dishwasher.
• Do not immerse plug-in surface
units in liquids of any kind.
1_o not he,nd the nh]_-in .rurfaee
unit plug terminals.
®Do not attempt to clean, adjust or
in any way repair the plug-in
receptacle.
I
I
I
Adjusthag Oven Thermostat
Use time given on recipe when
cooking first time. Oven thermostats,
111 LIIII_) llli_[ff UIIIt tlUIII tllU
factory setting and differences in
timing between an old and a new
oven of 5 to 10 minutes are not
unusual. If you find that your foods
consistently brown too little or too
much, you may make a simple
adln_trnant in the. thexmo,_tat
(Oven Temp) knob.
Pull knob off of shaft, look at back
of knob and note current setting
before making any adjustment.
To increase temperature, turn toward
HI or RAISE; to decrease turn
toward LO or LOWER. Each notch
changes temperature 10 degrees.
!
I
J
L Pull off knob. Loosen both screws
on back of knob. 2. Move pointer one
screws. 3. Return knob to range,
matching fiat area of knob to shaft.
Recheck oven performance before
making an additional adjustment.
Lift a plug-in unit about 1" above
the trim ring--just enough to grasp
Do not lift a plug-ln unit more
than 1:' If you do, it may not lie
flat on the trlm rlng when you
ph_g it back in.
23
Page 24

Cleaning Guide
NOTE: Let range/oven parts cool before touching or handling.
Z,_AIA
Bake Unit and
Broil Unit
Broi!er Pan and Rack
Contro! Knobs:
Range Top and Oven
Outside Glass Finish
Metal, including
Chrome Side Trims
Porcelain Enamel
and Painted Surfaces*
Oven Door*
Oven Gasket*
Oven Liner
Oven VentDuct
Shelv_
(See Self-Cleaning
Oven Directions)
M,A_EPJA!_ _ USE
e Soap and Water
o Soap-Fined Scouring Pad
• Plastic Scouring _d
• Dishwasher
_,Mild Soap and Water
. Soap and Water
o Soap andWater
l e Paper Towel
• Dry Cloth
e Soap and Water
• Soap and Water
Soap and Water
'_Soap and Water
8 Soap and Water
GENE__ALDLR.ECT!ONS
Do not clean the bake unit or broil unit. Any soil will burn off when the unit is heated.
Nc,JI'I_: liae I_al_eunit is nmgeo ano can De llt'Ie0 gently to clean me oven Iloor. J.1spmovcr,
residue, or ash accumulates around the bake unit, gently wipe around the unit with warm water.
Drain fat, cool pan and rack slightly. (Do not let soiled pan and rack stand in oven to cool.)
Sprinkle on detergent. Fill the pan with warm water and spread cloth or paper towel over the
rack, Let pan ............................ _....... '_'-'" ........ :_......... ": ..... "_"_-*
OFHON: The broiler pan and rack may also be cleaned in a dishwasher.
Pull off knobs. Wash gently but do not soak. Dry and return controls to range, making sure to
match flat area on the knob and shaft.
Wash all glass with cloth dampened in soapy water. Rinse and polish with a dry cloth. If
of glass while cleaning.
[
! O NO'r USE st_l wool,
abrasives, ammonia, acids or
com_merc!_ oven c!eane_o
DO NOT USE oven cleaners,
cleansing powders or harsh
abrasives. These might
scratch the surface.
DO NOT USE oven cleaners,
cleansing powders or harsh
Wash, rinse, and than polish with a dry cloth.
If acids should spill on the range while it is hot, use adD'
paper towel or cloth to wipe up right away. When the
surface has cooled, wash and rinse.
and water when cooled and then rinse. Polish with a dry cloth.
INSIDE OF DOOR: Clean ONLY the door liner outside the
gasket. The door is automatically cleaned if the oven is in
Avoid getting soap and water on the gasket or in the
openings on the door. Rinse well. NOTE: Soap left on liner
OUTSIDE OF DOOR: Use soap and water to thoroughly
clean the top, sides and front of the oven door.
Avoid getting ANY cleaning materials on the gasket.
Cool before cleaning. Frequent wiping with mild soap and water will prolong the time
between major cleanings, lie sure to rinse thoroughly to avoid additional staining. For
heavy soiling, use your self-cleaning cycle often.
Remove the Oven Vent Duct found under the right rear surface unit. Wash in hot, soapy water
and dry and replace. (Opening should match opening in drip pan.)
Your shelves can be cleaned with the self-cleaning function in the oven. For heavy soil, clean
by hand and rinse thoroughly.
*Spillage of marinades, frnit juices, tomato sauces and basting materials containing acids maycause discoloration. Spillovers should be wiped up
immediately, with care being taken to not touch any hot portion ofthe oven. When the surfaceis cool, clean and rinse.
24
Page 25

PART MATERIALS TO USE GE_RAL DIRECTIONS
[
CBIrnd® _nri'ac_ DO NOT USE a dishwasher I
Unit Coils to clean the surface unit [
I
coils.
Storage Drawer
Chrome-Plated
Porcelain Enamel or
Aluminum Drip Pans
SoapandWater
o Soap and Water
-"Stiff-Bristled Brash
• Soap-Filled Scouring Pad
(Non-Metallic)
1
i o Soap and Water
• Soap-Filled Scouring Pad
o Plastic Scouring Pad
l e Dishwasher
Spatters and spills burn away when the coils are heated. At
the end of a meal, remove all utensils from the Calrod ®unit
and heat the soiled units at HI. Let the soil burn offabout a
minute and _witeh the unit_ to (-)FE Avoid _etfinu cleanin_
materials on the coils, Wipe off any cleaning materials with
a damp paper towel before heating the Calrod ®unit.
I !du Nut llanale toe umt Delore comptetely cornea.
DO NOT attempt to clean plug-in units in the self-cleaning
oven.
I Do NOT immerse plug-in units in kind of liquid.
any
For cleaning, remove drawer by pulling it a!l the way open, tilt up the front and lift out. Wipe
with damp cloth or sponge and replace. Never use harsh abrasives or scouring pads.
Clean as described below or in the dishwasher. DO NOT CLEAN ON THE SELF-
_l 17ANITNa '_. _I TNTt'_PTC'_NI l_n_r¢ _lJHI _'l_lar
Wipe all rings after each cooking so unnoticed spatter will not "'burn on" next time you cook.
To remove "burned-off' spatters use any Orall cleaning materials mentioned. Rub lightly with
scouring pad to prevent scratching of the surface.
Cool pans sllgnuy, sprmKle on detergent and wash or scour pans with warm water.
Rinse and dry. In addition, pans may also be cleaned in the dishwasher or cleaned in the
self-cleaning oven.
25
Page 26

.-:-,+_a+_ ++--+
Questions?
PROBLEM
OVEN WILL NOT WORK
POSSIBLE CAUSE AND REMEDY
Plug on range is not completely inse_ed in the electrical outlet.
1 The circuit breaker .......................
in your house has been tnppea, or a luse nas teen mown.
t Oven controls not properly set.Door left in locked position after cleaning.
IoVE_I_T 1 Light bulb is loose.
' 1)OE-S NOlZ_VORK Bulb is defective. Replace.
Switch operating oven light is broken. Call for service.
FOOD DOES NOT OVEN SET knob not set at BROIL.
bKUIL _'KOt'eKC?_ OVEN TEMP knob not set at BROIL.
Door not left ajar as recommended.
Improper shelf position being used. Check BrOiling Guide.
Necessary preheating was not done°
Food is being cooked0n hot pan.
Utensils are not suited for broiling.
Aluminum foil used on the broil pan rack has not been fitted properly and slit
as recommended.
OR BAKE PROPERLY OVEN TEMP knob not set correctly.
1_ IntelleCt .
3nelI pOSltlt!ii
Oven shelf is not level.
IncorreCt cookware or cookware of impr0per:size is being Used.
A foil tent was not used when needed to slow down browning during roasting.
CALROD ® SURFACE UNITS SurNce units are not plu_ed in solidly.
NOT FUNCI'IONING Trim rings and drip pans are not set securely in the range top.
PROPERLY SurNce unit controls are not properly set:
OVEN WILL NOT Automatic timer dins not set or not set properly. Clock must be set to time of day
SELF-CLEAN and the KIDP dial must be set and advanced beyond the time noted on oven clock.
TheSTOP dial was not advanced for long enough.
Both OVEN SET and OVEN TEMP knobs must be set at CLEAN setting.
A tldck pile of spillover when cleaned leaves a heavy layer of ash in spots
whmh could have insulated the area from further heat.
Latch not moved to the right.
OVEN DOOR Turn OVEN SET knob to CLEAN. Glowing Locked Light after knob is turned
WON'T LATCH indicates oven is too hot from previous use and door won't latch. To cool oven,
open door wide, then Latch can be moved.
OVEN SET knob must be at CLEAN or OFF before Latch Can be moved.
t_ yo_ need more hdp...eaR, to_ free:
3_o525+2999
26
Page 27

o
To obtain service, see your warranty
on the back page of this book.
We're proud of our service and
want you to be pleased. If for some
reason you are not happy wi_h the
service you receive, here are three
steps to follow for further help.
FIRST, contact the people who
serviced your appliance. Explain
why you are not pleased. In most
cases, this will solve the problem.
NEXT, if you are still not pleased,
write all the details--including
.yuUl l_llvlie Jztaiiio_,,L--tv.
Manager, Consumer Relations
G_ A _l_no_€
Appliance Park
Louisville, Kentucky 40225
FINALLY, if your problem is still
not resolved, write:
Major Appliance
Consumer Action Panel
20 North Whcker Drive
Chicago, Illinois 60606
27
Page 28

YOUR GENERAL ELECTRIC RANGE ]J
A ANTV ]
W UA='-'_I mJ B,W-_= !1 nl I m
l
......... , , ,, __ _J=_ _-L--=l ..... *--L=_--L ........ * ..... :=--_
_ave prooTOToriginalpurcnaseoa[eSUChas yoursalesslipor oancelleaCheCK_oes[au,sn w_rra,Wpu.r_uu.
FULL ONE-YEAR WARRANTY
Forone year from date of original
i! purchase, we wiii provide, free of II
in your home to repair or replace
any part of the range that fails
_1 because of a manutacturing detect. Ii
WHAT iS COVERED
!l II
il Ii
i!
I
J
!
L
!
I
I
It
RI
This warranty is extended to
the original purchaser and any
€:1_P._t'linn nwn_r fnr nrnrh iP.t_
purchased for ordinary home use
inthe 48 mainland states, Hawaii
and Washington, D.C. In Alaska the
_At_rr_nh/i_ tit= _mo _Y¢,_r'tt th=t it i_
LIMITED because you must payto
ship the product to theservice shop
or for the service technician's travel
coststo your home.
All warranty service will be provided
byour Factory Service Centers or
by our authorized Customer Care®
servicers during normal working
hours.
_f v_l Ir tRl__nhnn_ dir_.ntnrv fnr
GENERAL ELECTRIC COMPANY,
GENERAL ELECTRIC FACTORY
SERVICE, GENERAL ELECTRIC-
HOTPOINT FACTORY SERVICE or
GENERAL ELECTRIC CUSTOMER
CARE® SERVICE.
• Service trips to yourhome to
teach you how touse the product.
Read your Use and Care material.
ifyou then have any questions
about operating the product,
please contact your dealer orour
Consumer Affairs office at the
address below, or call, toil free:
GE Answer Center ®
800.626,2000
consumer information service
= Improper installation.
If you have an installation problem,
contact your dealer or installer.
You are responsible for providing
adequate electrical, gas, exhausting
and other connecting facilities.
Replacement of house fuses or
resetting of circuit breakers.
Failure of the product ifit is used
for other than itsintended purpose
or used commercially.
Damage to product caused
by accident, fire, floods or acts
of God.
WARRANTOR IS NOTRESPONSIBLE
FOR CONSEQUENTIAL DAMAGES.
Some states do not allow the exclusion or limitation of incidental orconsequential damages, so the above limitation or exclusion
may not apply to you. This warranty gives you specific legal rights, and you may also have other rights which vary from state to state.
To know what your legal rights are in your state, consult your local or state consumer affairs office or your state's Attorney General,
Warrantor: General Electric Company
if further help is needed concerning this warranty, write:
li
I
i. l-'_r[ I_O, IOGU,-_U_,'t"U,3_. , ! .jLJ= _.,.(.,u,,.
I Pub. hto.49-8034 , JBP22GK JBP26K
_ JBP23K JBP2_GK
 Loading...