

Page 1
_&com
o_
cl3
Safety Instructions ............. 2-5
Operating Instrug_ions
Clock, Timer and
Control l[_ockout .............. 18, 19
Com_cfion ()_>n ............. 21-25
Roasting Guide ................ 25
Timed Features ............. 23, 24
Cookware ....................... 7
Lower Oven Drawer. ............. 20
Oven ....................... 14, 15
Broiling Guide ................. 15
Oven Controls ............... 12, 13
Probe .......................... 17
Proofing Feature ................ 26
Sabbath Feature ................. 32
SelfXCleaning ................. 27, 28
Special Features .............. 29-31
Surfi_ce Units ................. 6-11
]{a_ob-Controlled Models ..... l 0, l l
Touch Pa&Controlled Models ...8, 9
Thermostat Adjustment--
Do It Yourself ................... 19
Timed Baking and
Roasting Features ................ 16
*M_rming Feature ................ 26
i! ii !!
j 96s
jggss
Care and Cleani_ .......... 33=39
Troubleshooting Tips ........ 40-44
Accessories .................... 50
Consumer Support
Consumer Support ...... Back Cover
Product Registration .......... 45, 46
_\_rranty ...................... 51
Write the model and serial
numbers here:
Model #
Serial #
You can lind them on a label
behind the storage drawer
on the range frame.
49-80M7 05-07 dR
Page 2
iMPORTANTSAFETYiNFORMATiON.
READALLiNSTRUCTIONSBEFOREUSING.
A !
For your safety, the information in this manual must be followed to minimize the risk of fire, electric
shock, or to prevent property damage, personal injury, or loss of fife.
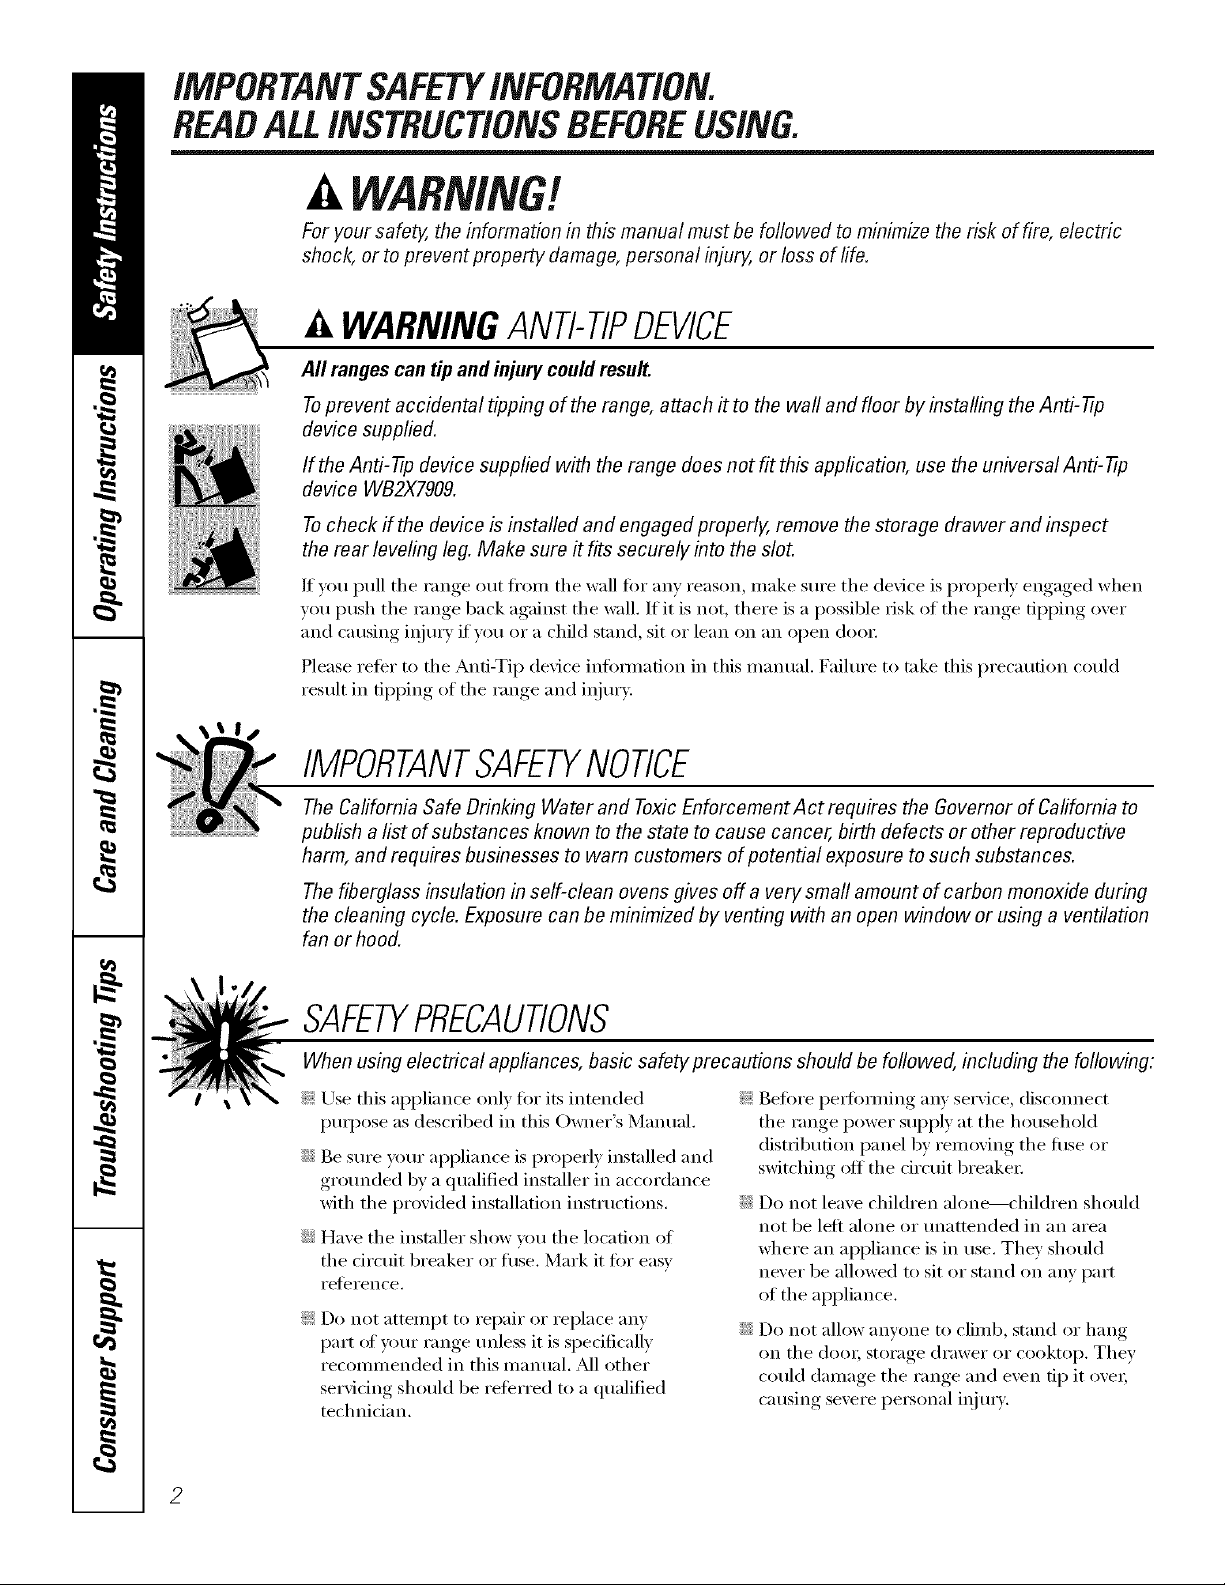
A WARNINGANti-TIPDEVICE
All rangescan tipand injury could result.
Toprevent accidental tipping of the range, attach it to the wall and floor by installing the Anti--tip
device supplied.
If the Anti--tip device supplied with the range does notf#this application, use the universal Anti--17p
device WB2X7909.
Tocheck if the device is installed and engaged properly, remove the storage drawer and inspect
the rear leveling leg. Make sure #fits securaly into the slot.
If you pull the range out fl'om the wall fin" any reason, make sure the device is properly engaged when
you push the range back against the wall. If it is not, there is a possible dsk of the range tipping over
and causing iqiurv if you or a child stand, sit or lean on an open dam:
Please relier to the Anti-Tip device infimnation in this manual. Failm'e to take this precaution could
result in tipping of the range and iqiury.
IMPORTANTSAFETYNOtiCE
The California Safe Drinking Water and ToxicEnforcement Act requires the Governor of California to
publish alist of substances known to the state to cause cancer, birth defects or other reproductive
harm, and requires businesses to warn customers of potential exposure to such substances.
The fiberglass insulation in self-clean ovens gives off a very small amount of carbon monoxide during
the cleaning cycle. Exposure can be minimized by venting with anopen window or using a ventilation
fan or hood.
SAFETYPRECAUtiONS
When using electrical appliances, basic safety precautions should be followed, including the following:
_: Use this appliance only fin" its intended
pull)ose as described in this Owner's Manual.
::Ji::Be sm'e w>m" appliance is properly installed and
grotmded by a qualified installer in accordance
with the provided installati(m instructions.
::Ji::Have the installer show u)u the location of
the drcuit breaker or fllse. Mark it fin" easy
reference.
_: Do not attempt to repair or replace any
part (}f"your range unless it is spedfically
recommended in this manual. _M1other
servicing should be referred to a qualified
technician.
_: Deft)re ped0mfing aW service, discom_ect
the range power supply at the household
distribution panel by removing the Rise or
switching off the circuit breakei:
::Ji::Do not leave children alone--children should
not be left alone or unattended ill an area
where an appliance is ill use. They shoukl
ne','er be allowed to sit or stand on any part
of the appliance.
::Ji::Do not allow anyone to climb, stand or hang
on the dooi; storage drawer or cooktop. They
could damage the range and even tip it ovel;
ca using severe pei_onal iI]juI7.
2
Page 3
_e.com
WARNING'!
SAFETYPRECAUTIONS
Donot operate the oven or cooktop controls ffthe glass is broken. Food splatter or cleaning solution
may penetrate a broken control panel or cooktop and create a risk of electrical shock. Contact a
qualified technician immediately should your glass control panel or cooktop become broken.
_: Do IIOt stoI'e flalllI/lable IllatelJals iI1 _lIl ()veil
OF IleaI" tile cooktop.
CAUTION:]teIllSofinteresttochildren
should not be stored in cabinets above a range
or on tile back of a rang_hikh'en cliinbing
on tile range to reach iten/s could be seriously
ii_jui'ed.
_: Never wear loose-fitting or hanging gamlents
while using the appliance. Be carefli1 when
reaching for iteins stored over the range.
Flanlnlable inatefial couM be ignited if
brought in contact with hot suibfhce units or
heating eleinents and nlav cause severe burns.
::J?::Use only dry pot holdei_--nloist or dan/p
pot holdeIs Oil hot SUll'ilces nlav result in
burns ti'oin steanl. Do not let pot holdeis
touch hot sui_i_ce units or heating elenlents.
Do not use a towel or other bulky cloth in
place of pot holdei_.
_: Do IIOt rise water Oil grease fires. Never pick
up a flanling pan. Turn tile controls off.
Sinother a flanling pan on a suF[ilce unit
by covering tile pan coinpletely with
a well-fitting lid, cookie sheet or fiat tray:
Use a inulti-puil)ose dry chenlical or
fi)an/-t,ipe fire exfinguishei:
Flan/ing grease outside a pan can be put
out by covering it with baking soda oi; if
a*:filable, by using a n/ulti-puil)ose dry
chen/ical or ti)ain-type fire extinguishei:
Name in the oven can be sn/othered
con/plemly by closing tile oven door and
turning tile oven off or by using a inulti-
puq)ose (liT chen/ical or fi)an/-type fire
extinguishei:
N For your s'alb'Q:,never use your appliance
for wam/ing or heating tile roonl.
_: Do not let cooking grease or other flanmlable
inaterials accunlulate in or near the range.
::Ji::Do not touch tile sui_i_ce units, tile heating
elen/ents or tile interior suiqfi_ce of tile oven.
These surli_ces nlav be hot enough to burn
even though tile*' are dark in coloi: During and
atter use, do not touch, or let clothing or other
flanmlable inaterials contact tile suil'_lce units,
areas nearby tile surfi_ce units or anv interior
area of tile ()veil; allow sufficient dine for
cooling fii_t.
Potentially hot sudhces inchide the cooktop,
areas thcing tile cooktop, oven vent opening,
sui_i_ces near the opening, crevices around the
ovell door.
REMEMBER:Tile inside suI{hce (ff tile oven
n/av be hot when tile door is opened.
::Ji::Do not store or use conlbustible nlaterials,
gasoline or other flanlnlable vapoi_ and liquids
in tile vicinity of this or any other appliance.
_: Keep tile hood and grease filtei_ clean
to nlaint;fin good venting and to avoid
grease fires.
::Ji::Teach children not to play with tile controls
or any other part of tile range.
::Ji::Mways kee I) dish towels, dish cloths, pot
holdeI_ and other linens a safi _distance
fi'oIll your range.
_: Mwa D kee I) wooden and plastic utensils and
canned food a sale distance fl'onl p)ur range.
::Ji::Mways kee I) con/bustible wall coverings,
curtains or drapes a safe distance fl'onl
VO/lI" KIIlge.
COOKMEATANDPOULTRYTHOROUGHLY...
Cookmeat and poultry thoroughly--meat to at least an INTERNAL temperature of 160°Fand poultry to at least
an iNTERNAL temperature of 180°E Cooking to these temperatures usually protects against foodbome illness.
3
Page 4
iMPORTANTSAFETYiNFORMATiON.
READALLiNSTRUCTiONSBEFOREUSING.
RADIANTSURFACEUNITS
Useproper pan size--select cookware having flat bottoms largo enough tocover the surface unit heating
element.Theuse ofundersized cookware will exposea portion ofthe surface unit todirect contact andmav
result in ignition of clothing. Proper relafionship of cookware tosurface unit will also improve efficiencv.
_: Never leave the surfl_ce units unattended at
high heat settings. Boilove_ cause smoking
and greasy spillove_ that may catch on fire.
_: Only certain b'pes of glass, glassXeramic,
earthenware or other glazed containe_ are
suitable for cooktop service; othe_ may break
because of the sudden change in temperatm'e.
_: To minin/ize the possibiliQ' of burns, ignition
of flammable materials and spillage, the handle
of a container should be turned toward the
center of the range without extending over
nearby SUll'ilce units.
_: Mwavs turn the sm_ilce units off before
i'ei/loving cookware.
::Ji::X4]_en preparing flaming foods under the
hood, turn the tim oil.
::Ji::Use care when touching the cooktop.
The glass sui_ilce of the cooktop will retain
heat after the controls have been turned ofl_
_: Kee I) an eve on foods being fl_ied at high or
mediunl high heat settings.
_: Foods for fiTing should be as dry as possible.
Frost on [i'ozen [0o(ls or IllOiStuI'e on ti'esh
foods can cause hot lilt to bubble up and
over the sides ot the pan.
::Ji::Use little tilt for effective shallow or deep
lilt fl'ying. Filling the pan too flfll of lilt can
cause sI)illoveI_ when food is added.
::Ji::If a combination of oils or lilts will be used
in flying, stir together before heating, or
as lilts melt slowly
::Ji::Alwm:s heat lilt slowly, and watch as it heats.
::J?::Use a deep tilt tl_emlometer whenever
possible to prevent oveit_eating elt beyond
the smoking point.
_: Avoid scratching the glass cooktop. The
cooktop can be scratched with imms such
as shaq) instrmnents, rings or otherjeweh T,
and rivets on clothing.
_: I_lIge scratches or impacts to glass dooI_ or
cooktops can lead to broken or shattered glass.
_: Do not operate tile radiant surlilce units if the
glass is broken. Spillovei_ or cleaning solution
may penetrate a broken cooktop and create a
risk of electrical shock, Contact a qualified
technician immediately should vour glass
cooktop 1)ec()me broken.
_: Never use tile glass cooktop SUll'ilce as a
cutting board.
::Ji::Do not place or store items that can melt or
catch fire on the glass c()()ktop, even when it
is not being used.
N Be careful when placing spoons or other stin_ing
utensils oil glass cooktop sudilce when it is in ttse.
They may become hot and could cause bums.
::Ji::Clean the cooktop with caution. If a wet
sponge or cloth is used to wipe spills on a hot
surfilce unit, be carefifl to a\_fid steam burns.
Soi/le cleanei_ can produce noXiO/IS lililleS i[
applied to a hot surface.
NOTE'. We reconmlend that vou avoid wilting
any surfilce unit areas until they have cooled
and the indicator light has gone off. Sugar
spills are the exception to this. Please see the
Cleaning the glass cooktop section.
_: _,_l_en the cooktop is cool, use only the
CEIL_dMA BRYTE ':Ceramic Cooktop Cleaner
and the CEIL_4A BRYTE Ceramic Cooktop
Cleaning Pad to clean the cooktop.
_: To avoid possible (lamage to the cooking
stlrfilce, do not apply cleaning creanl to
the glass surlhce when it is hot.
_: _M)er cleaning, use a (h'v cloth or paper towel
to remove all cleaning cream residue.
::_i::Read and follow all instructions and warnings
oil the cleaning cream labels.
::_i::Do not use plastic wrap to cover fi)od. Plastic
may melt onto the sm_hce and be very difficult
to i'eillove.
4
Page 5
ge.com
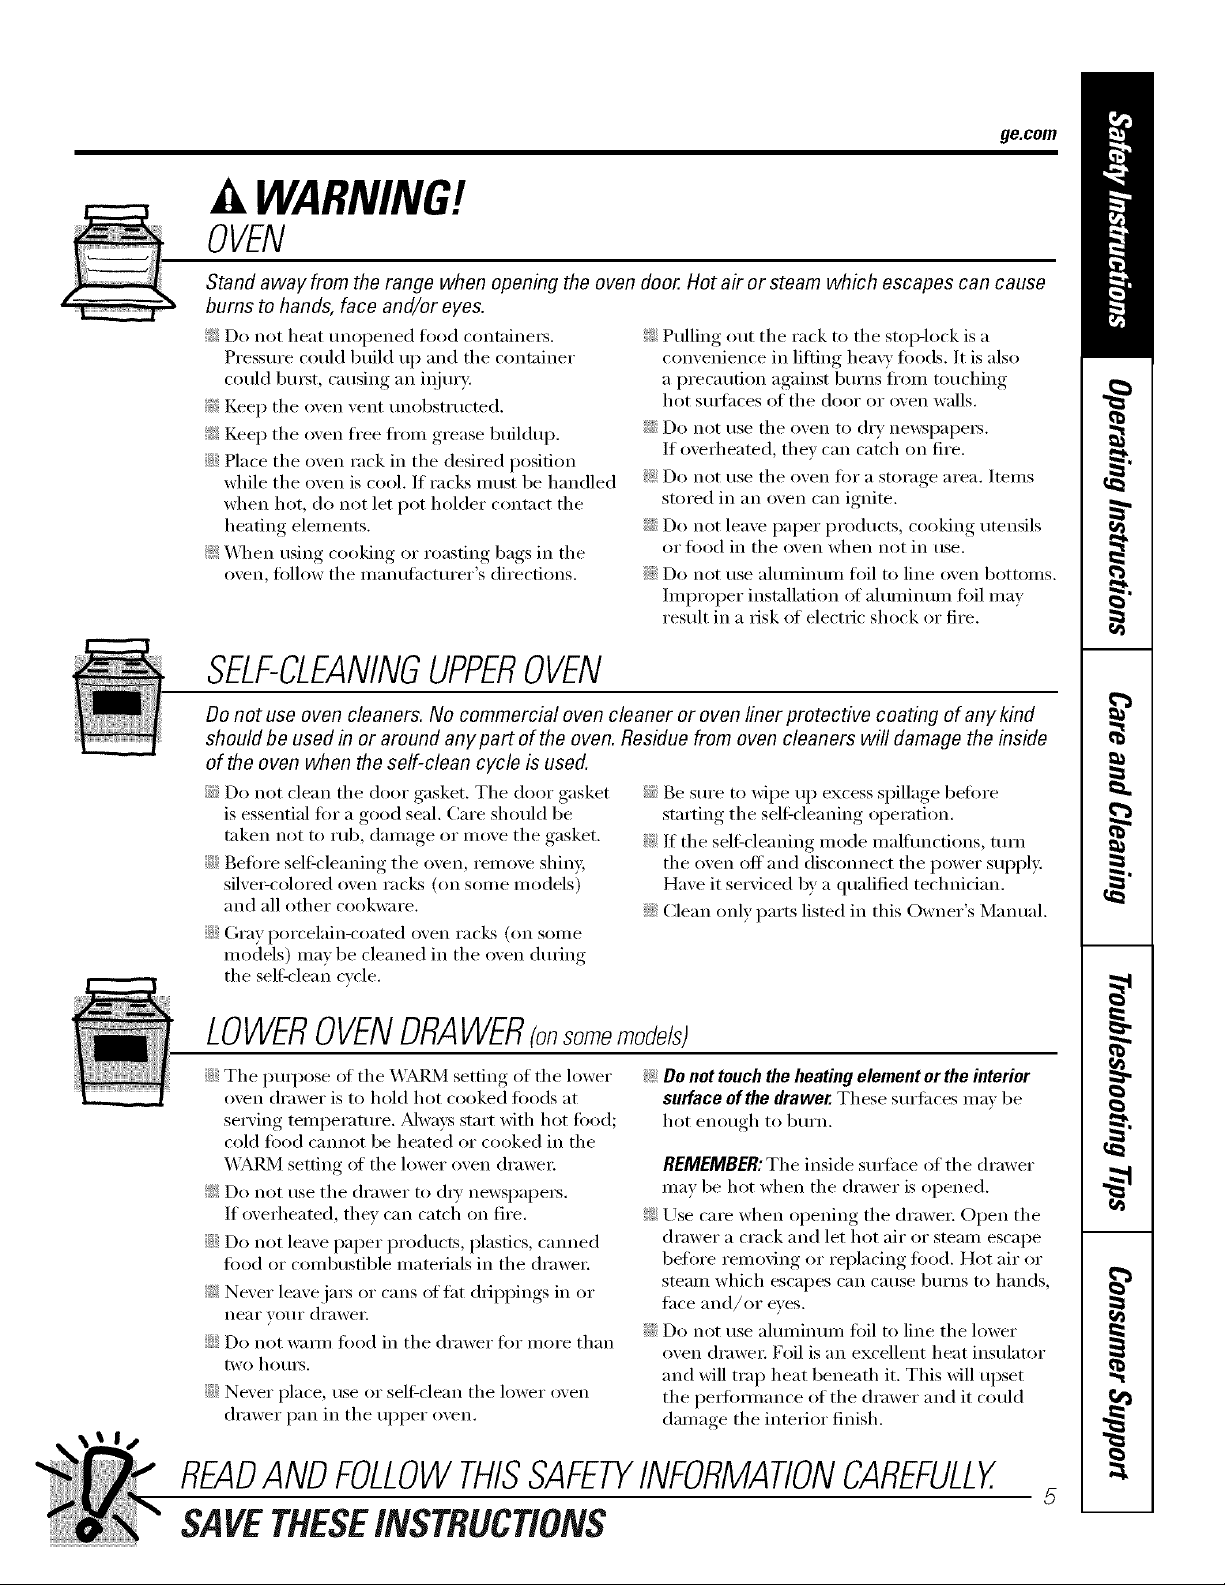
WARNING!
OVEN
Stand away from the range when opening the oven door. Hot air or steam which escapes can cause
bums to hands, face and/or eyes.
_: Do not heat unopened food ('ontaine_.
Pressure could build up and the container
could bmst, causing an iqjmy:
!_:iKeep the oven vent imobstructed.
_: Keep the oven fl'ee fl'om grease buildup.
::Ji::Place the oven rack in the desired position
while the oven is cool. If racks IlltIst be handled
when hot, (lit not let pot holder contact the
heating elements.
_: When using cooking or roasting bags in the
oven, tollow the tnanufilctttrer's directions.
SELF-CLEANINGUPPEROVEN
_: Pulling (rot the rack to the stop-lock is a
convenience in lifting heavy t0ods. It is also
a precaution against burns fl'om touching
hot sm'_hces of the door or oven walls.
::Ji::Do not use the oven tit (h T ne_vspapets.
If overheated, they can catch on fire.
_: Do not use the oven fi)r a storage area. Items
stored in an oven can ignite.
::Ji::Do not leave paper products, cooking utensils
or food in the oven when not in use.
::Ji::Do not use ahmfinum fltil to line oven bottoms.
Improper installation of ahmfinum f0il may
result in a risk ot electric shock or fire.
Donot use oven cleaners. No commercial oven cleaner or oven liner protective coating of any kind
should be used in or around any part of the oven. Residue from oven cleaners will damage the inside
of the oven when the self-clean cycle is used.
_-::Do not clean the (loot" gasket. The door gasket
is essential fin"a good seal. Care should be
taken not to rub, damage or move the gasket.
::Ji::Bed)re selfk'leaning the oven, remove shin B
silve>colored oven racks (on some models)
and all other cookware.
::Ji::Gray porcelain-coated oven racks (on some
models) may be cleaned in the oven during
the sel6clean cycle.
_:: Be sure to wipe up excess spillage bet0re
starting the sel6cleaning operation.
_: If the self_cleaning mode malflmcfions, turn
the oven off and disconnect the power supply.
Have it serviced by a qualified technician.
::Ji::Clean only parts listed in this Owner's Manual.
LOWEROVENDRAWERronsomemodels)
::Ji::The l)Uq)ose of the _._%1_] setting of the lower
oven drawer is to hold hot cooked toods at
serving temperature. Mways start with hot fi)od;
cold food cannot be heated or cooked in the
_A;%RM setting of the lower oven drawer:
_: Do not use the drawer to (h 7 newspapet_.
If overheated, they can catch on fire.
::Ji::Do not leave paper products, plastics, cmmed
fitod or combustible materials in the drawer:
_: Never leave ires or cans ol tat drippings in or
near your drawer:
::Ji::Do not wamt fi)od in the drawer fin" inore than
tWO h Otll'S.
::Ji::Never place, use or sell:clean the lower oven
drawer pan in the upper oven.
__:Do not touch the heating element or the interior
surface of the drawer. These surlilces may be
hot enough to burn.
REMEMBER: The inside sm_hce of the drawer
may be hot when the drawer is opened,
_: Use care when opening the drawer: Open the
drawer a crack and let hot air or smam escape
befl)re removing or replacing fi)od. Hot air or
steanl which escapes can Catlse btlYns to hands,
filce and/or eyes.
::J)::Do not use ahuninutn toil tit line the lower
oven drawer: Foil is an excellent heat insulator
and will trap heat beneath it. This will upset
the perl0mmnce of the drawer and it could
damage the inmdor finish.
READANDFOLLOWTHISSAFETYINFORMATIONCAREFULLY.
SAVETHESEiNSTRUCTiONS
Page 6
Abouttheradiant surfaceunits.
NOTE:Throughoutthismanual,featuresand appearancemay varyfromyourmodel
About the radiant surface units
;OOKIN6 _
Never cook directly on the glass.
Always use co&ware.
Always place thepan in the center of
the surface unit you are cooking on.
Z
Z
Do not sfidecookware across the
control or cooktop surface because it
can scratch the glass. Theglass is
scratch-resistant, not scratchprooL
The radiant cooktop features heating
units beneath a smooth glass stmti_ce.
Cooktop temperatures increase with
the number of suHi_ce units that are
on. With 3 or 4 units turned on, surti_ce
temperatures are high. _wavs use
caution when touching the cooktop.
An indicator light will come on when the
surti_ce trait is turned on.
The appropriate HOTSURFACEindicator
light will glow when its corresponding
radiant element is turned on and will
remain on until the surti_ce has cooled
below 150°E
NOTE."
Hot surti_ce indicator light xdll:
_/_Comeonwhenthesurfaceunitis
turnedon.
ij_::Stayonevenaftertheunitis turnedoff
!;>Glowbrightlyuntiltheunithascooled
below150°£
NOTE:Ashghtodorisnormalwhenanew
cooktopis usedforthefirsttime.It iscausedby
theheatlbgof newpartsandinsu/atlbgmatena/s
andwi//disappearinashorttime.
NOTE:& modelswith/ight-co/oredg/ass
cooktops,it isnormalforthecooklbgzonesto
changecolorwhenhotorcodingdown.Thisis
temporaryandwi//disappearastheglasscools
toroomtemperature.
It is sale to place hot cookware ti'om the
oven or suHace on the glass cooktop
when the stmthce is cool.
Even after the suHi_ce units are turned
off, the glass cooktop retains enough
heat to continue cooking. To avoid
overcooking, remove pans fl'om the
suHi_ce traits when the t0od is cooked.
Avoid placing anything on the stmtace
unit until it has cooled completel>
::Ji::Waterstains (mineraldeposits)areremovable
us/bgthecleaning cream or fu// strength white
vinegar
_: Useof wlbdow cleanermay leavean iridescent
film on the cooktop. Thecleaningcreamwill
removethis discoloration.
_; Don'tstoreheavyitemsabovethecooktop.
If theydropontothecooktop,theycancause
damage.
_ Donotusethesurfaceasa cuttingboard
Temperature Limiter
Every radi:mr suHhce unit has a
temperature limited:
The temperature limiter protects the
glass cooktop fi'om getting too hot.
The temperature limiter may cycle the
units off flw a tim e ifi
::Ji::Thepanboils dry.
_ Thepanbottom is not f/a_
;;Ji::Thepan is off center
_ Thereisno panon the unit.
Page 7
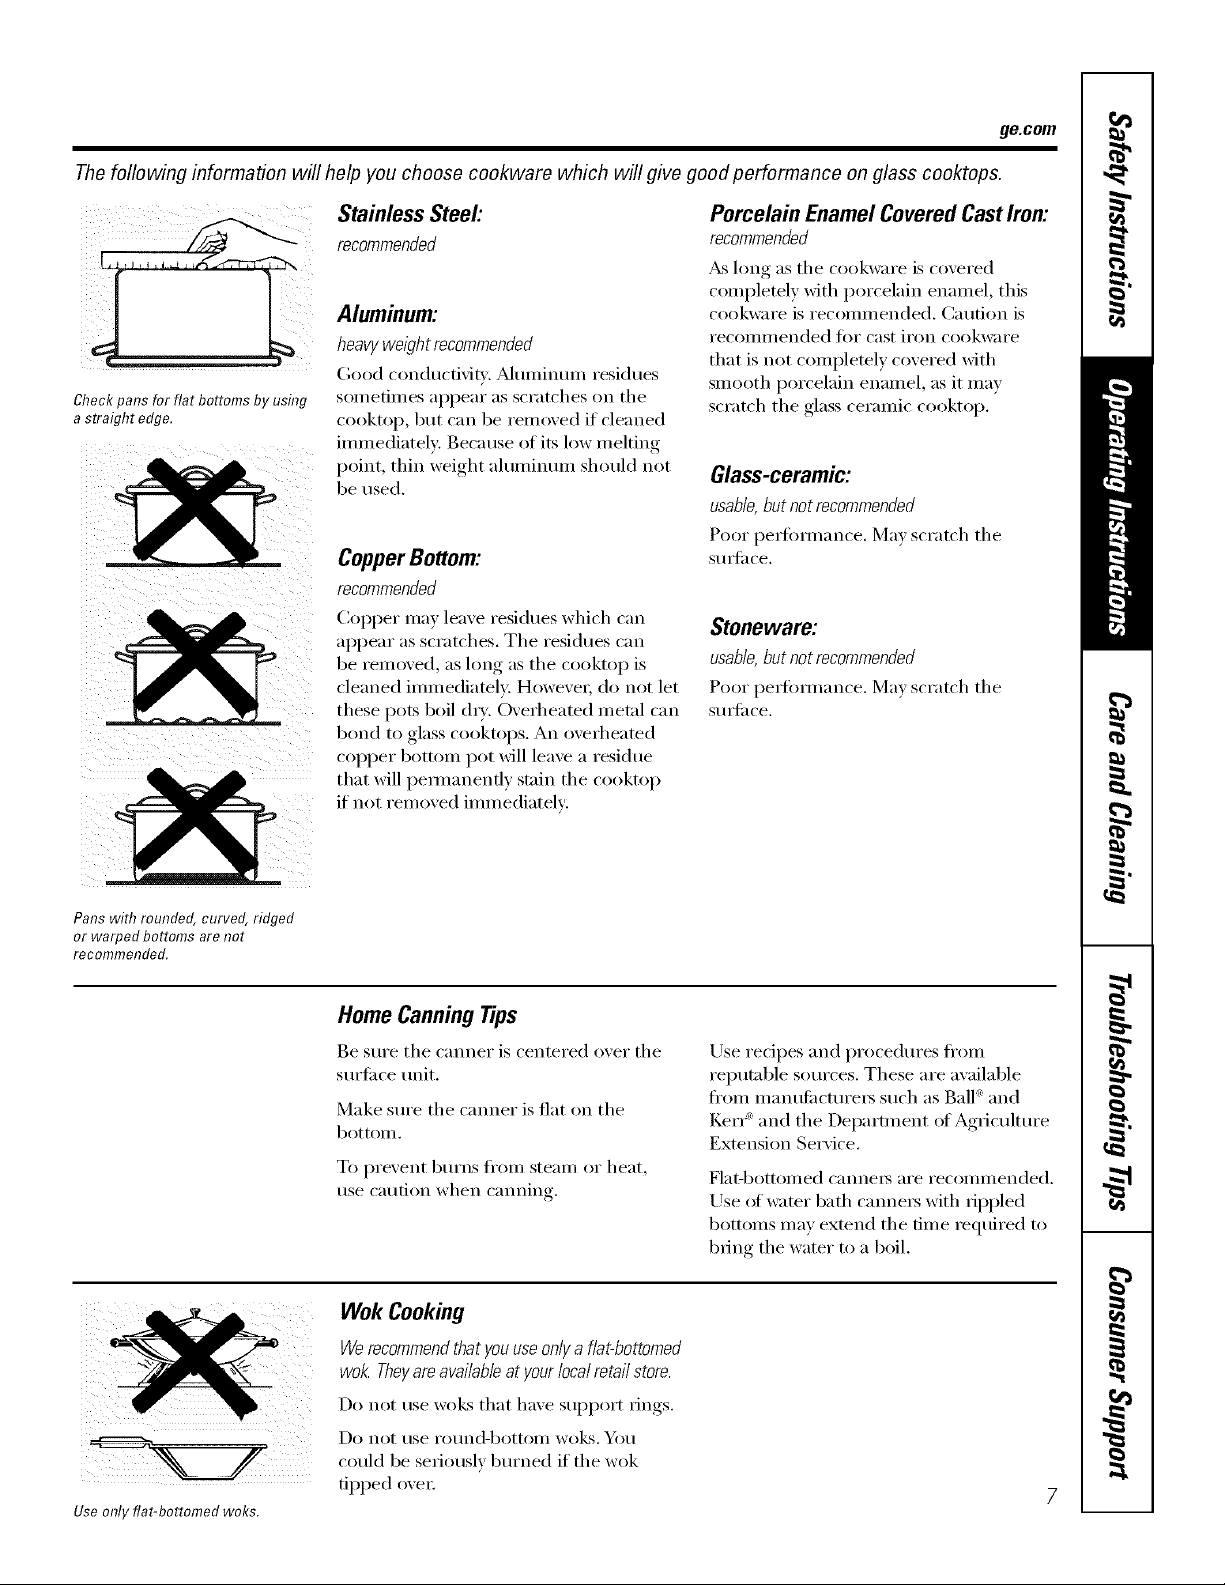
Thefoflowing information will help you choose cookware which will give good performance on glass cooktops.
ge.com
Check pans for flat bottoms by using
a straight edge.
Stainless Steel:
Aluminum:
heavy weight recommended
Good conducfidb'. ,Mmninun/residues
st)metin_es appear as scratches on the
cooktop, but can be removed if cleaned
immediately: Because of its low melting
point, thin weight aluminum should not
be used.
CopperBottom:
recommended
Copper ma) leaxe residues which ('_111
appear as scratches. The residues can
be remoxed, as hmg as the cooktop is
cleaned immediately: However, do not let
these pots boil (h). O\ erheated metal can
bond to glass cooktops. An oxerheated
copper bottom pot will leaxe a residue
that will pemmnenfl) stain the cooktop
if not remoxed immediately:
Porcelain EnamelCoveredCastIron:
recommended
_ hmg as the cookware is covered
completely with porcelain enamel, this
cookware is recommended. Caution is
reCOllli/lended t0r cast ii'on cookware
that is not completely covered with
smooth porcelain enamel, as it may
scratch the glass ceramic cooktop.
Glass-ceramic:
usable,butnotrecommended
Poor perlbmmnce. Ma_ scratch the
StlI5{il ce,
Stoneware:
usable, but not recommended
Poor pex_fimnance. Mm scratch the
StlI5{il ce.
Pans with rounded, curved, ridged
or warped bottoms are not
recommended.
Use only flat-bottomed woks.
Home Canning Tips
Be sure the canner is centered o_er the
surtilce unit.
Make sure the canner is fiat on the
bottOlll.
To prexent buries fl'Oln steam or heat,
use caution when canning.
Wok Cooking
Werecommendthatyouuseonlya flat-bottomed
wok.Theyareavailableat yourlocalretailstore.
Do not rise wo]<s that have support rings.
Do not rise i'otlnd-bottolll wo_s. _J_()l.l
could be seriously burned if the wok
tipped ovei;
Use redpes and procedures fl'om
reputable sources. These are a\_filable
fl'Olll II/allttlilcttlI'eI's such as Ball ®and
Ken _ and the Deparm_ent ot Agriculture
Extension Service.
Flat-bottoi/led cannels ai'e recollllllended.
Use of wamr bath canne_ with rippled
bottoms may extend the time required to
bring the water to a boil.
Page 8

Usingthe surfaceunits--Touch pad-controlledmodels.
Surface Unit Cook Settings
The controls for the radiant surface
units allow fi)r l 0 different heat settings:
I,O, 2-9 and HI. The heating element
may not visibly glow at low heat settings.
NOTE: Whenchangingfroma high heat setflbgto
a lowerheat settlbg, thesurfaceunit maystop
g/owlbg. Thisisnormal Theunit is stiff onandhot
NOTE: Thiscooktop hasarepid heat-up feature.
If the cooktopis cool when turnedon, it will g/ow
red forashort period of time until the desired
power setting is reached
ii ¸
Single Surface Unit--Cook Settings
To turn on a single surfi_ce unit:
[] Touch the ON/OFF pad, then touch
the (4-)/(-} pad.
[] Use the (+)/(-)i;ad to choose the
desired I)()wet setting,.
To turn off a single surIhce unit, touch
the ON/OFF I)ad again.
Tri-Ring Burner
To use the multi-size burner:
[] Touch the ON/OFF pad fi)r the front
fight surii_ce refit.
[] Use the (+)/(-)pad to set the desired
I)°wer setting,.
needed to select the desired burner
size. _,_hen fit_t selected, the 19" size
[] T(,uch the BURNER SIZEpad as IFL____
is on. Touch again for the .) and
• . . (,,
again fi)r the 6".
The light next to the BURNER SIZEpad
indicates which size surli_ce unit is on.
To turn the surtace unit off, touch the
ON/OFF pad.
J
Using Heat Settings
}i_:At high or medium-high ,settinosb,,never
lea',e food unattended. Boilo',e_ cause
,smokin _,",greas_, sl)illox e_ ram, catch
on fire.
::Ji::It is sate to place hot cookware
fl'om the oven or surti_ce units on the
glass-ceramic surti_ce when it is cool.
NOTE: Cooktoptemperaturesincrease with the
number ofsurfaceunits that are on. With 3 or
more units turnedon, surfacetemperaturesare
high,sobe careful when touching thecooktop.
Thehot surface indicator hght(s)will remainfit
after the surfaceunit is off until the surfacehas
cooledbelow 150°E
8
Page 9
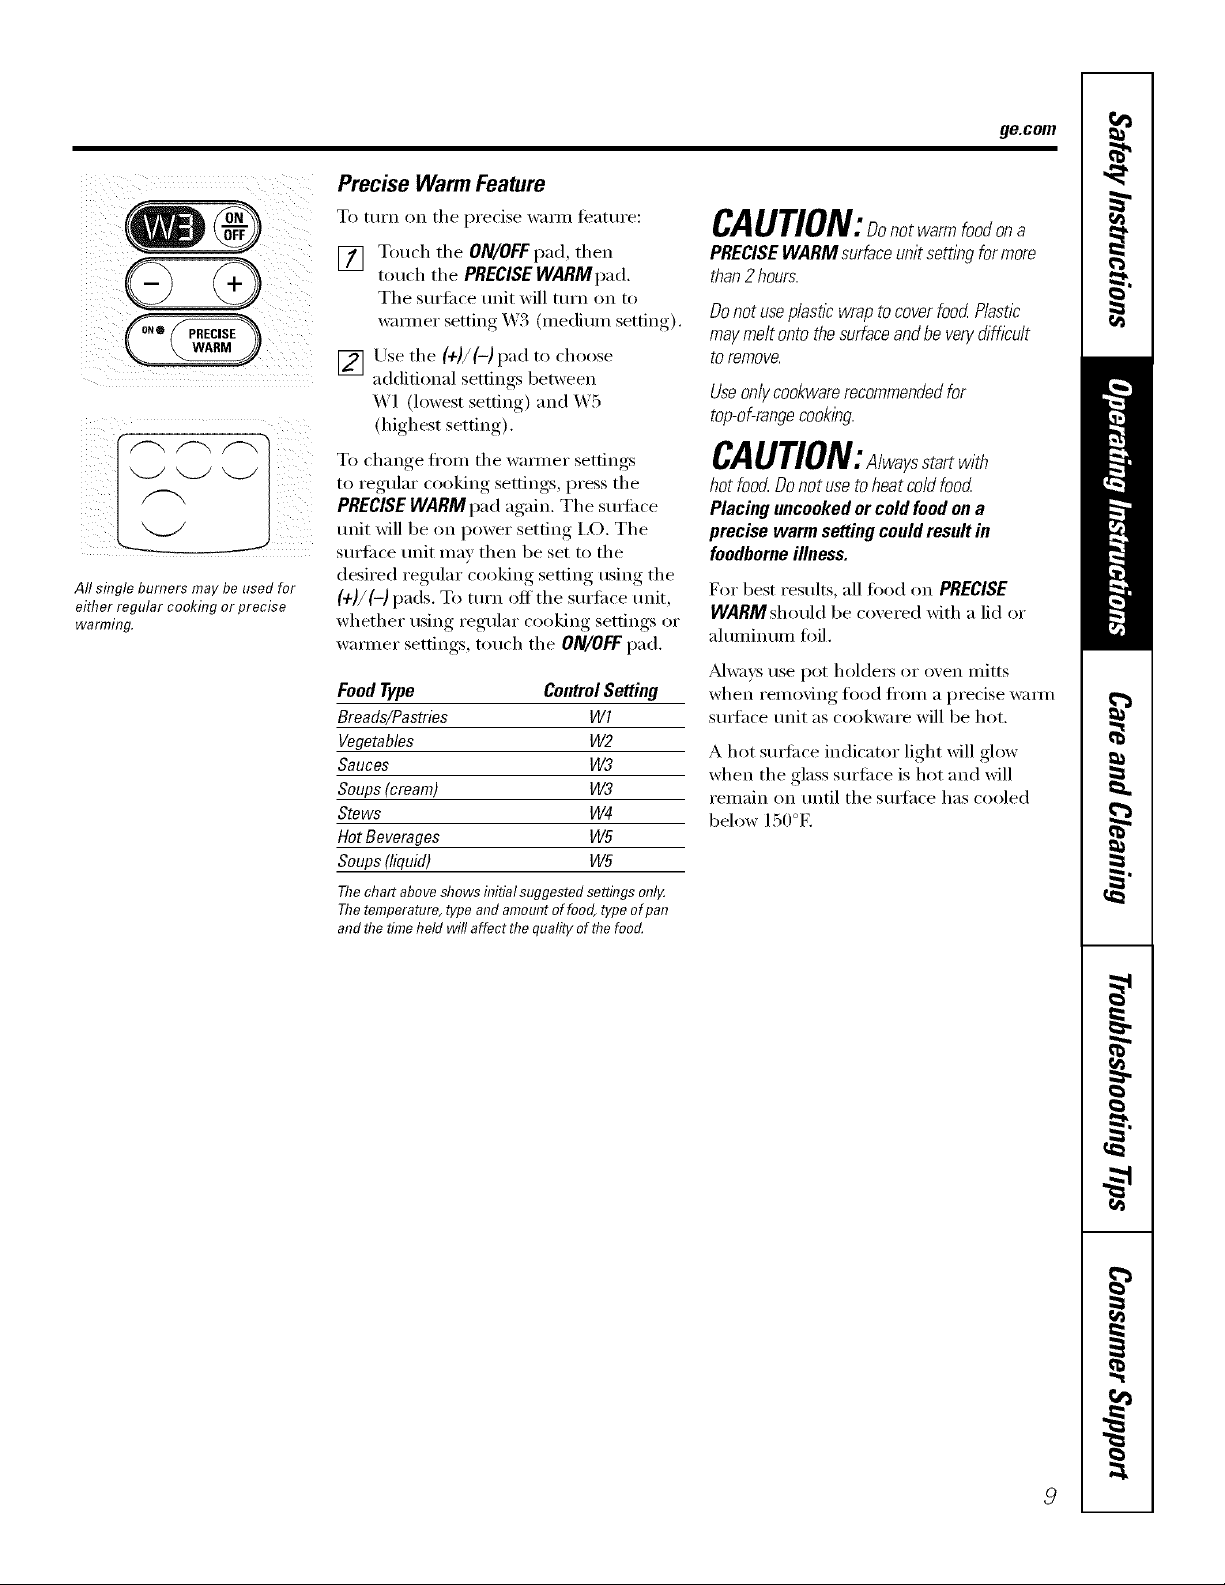
Precise Warm Feature
ge.com
iiiii
:
) _A()
AftsflTgleburners may be used for
either regular cookflTgor precise
warming.
To turn on tile precise wam_ feature:
[] Touch the ON/OFF pad, then
touch tile PRECISE WARMpad.
Tile surfi_ce unit will turn on to
wam_er setting X._3 (medium setting).
[] Use tile (-/-)/(--)pad to choose
additional settings between
W1 (lowest setting) and W5
(highest setting).
To change fl'om tile waimer settings
to regular cooking settings, press tile
PRECISE WARM pad again. Tile stm'ilce
unit will be on power setting I,O. Tile
surli_ce unit may then be set to tile
desired regular cooking setting using the
(4)/(-) pads. To ttlrn Off the surtilce tlnit,
whether using regular cooking settings or
warmer settings, touch tile ON/OFFpad.
Food Type Control Setting
Breads/Pastries Wl
Vegetables W2
Sauces W3
Soups (cream) W3
Stews W4
Hot Beverages W5
Soups (liquid) W5
Thechart above showsflfitial suggested settings onl_
Thetemperature,type and amountof food, type ofpan
and the timeheld will affect the quality ofthe food.
CAUTION:Donotwarmfoodona
PRECISE WARM surfaceunit sett/))g formore
than2hours.
DonotuseplasticwraptocoverfoodPlastic
maymeltontothesurfaceandbeven/difficult
toremove.
Useonlycookwarerecommendedfor
top-of-rangecooklhg.
CAUTION:Alwayssta with
hot food Donot use toheat cold food
Placing uncooked or coldfood on a
precise warm setting could result in
foodborne illness.
For best results, all toed on PRECISE
WARMshould be covered with a lid or
ahuninunl foil.
Mways use pot holders or oven mitts
when removing fl)od from a precise wmm
s/mfhce unit as cookware will be hot.
A hot suHi_ce indicator light will glow
when tile glass surfi_ce is hot and will
remain on until the stmfhce has cooled
below 150°E
Page 10
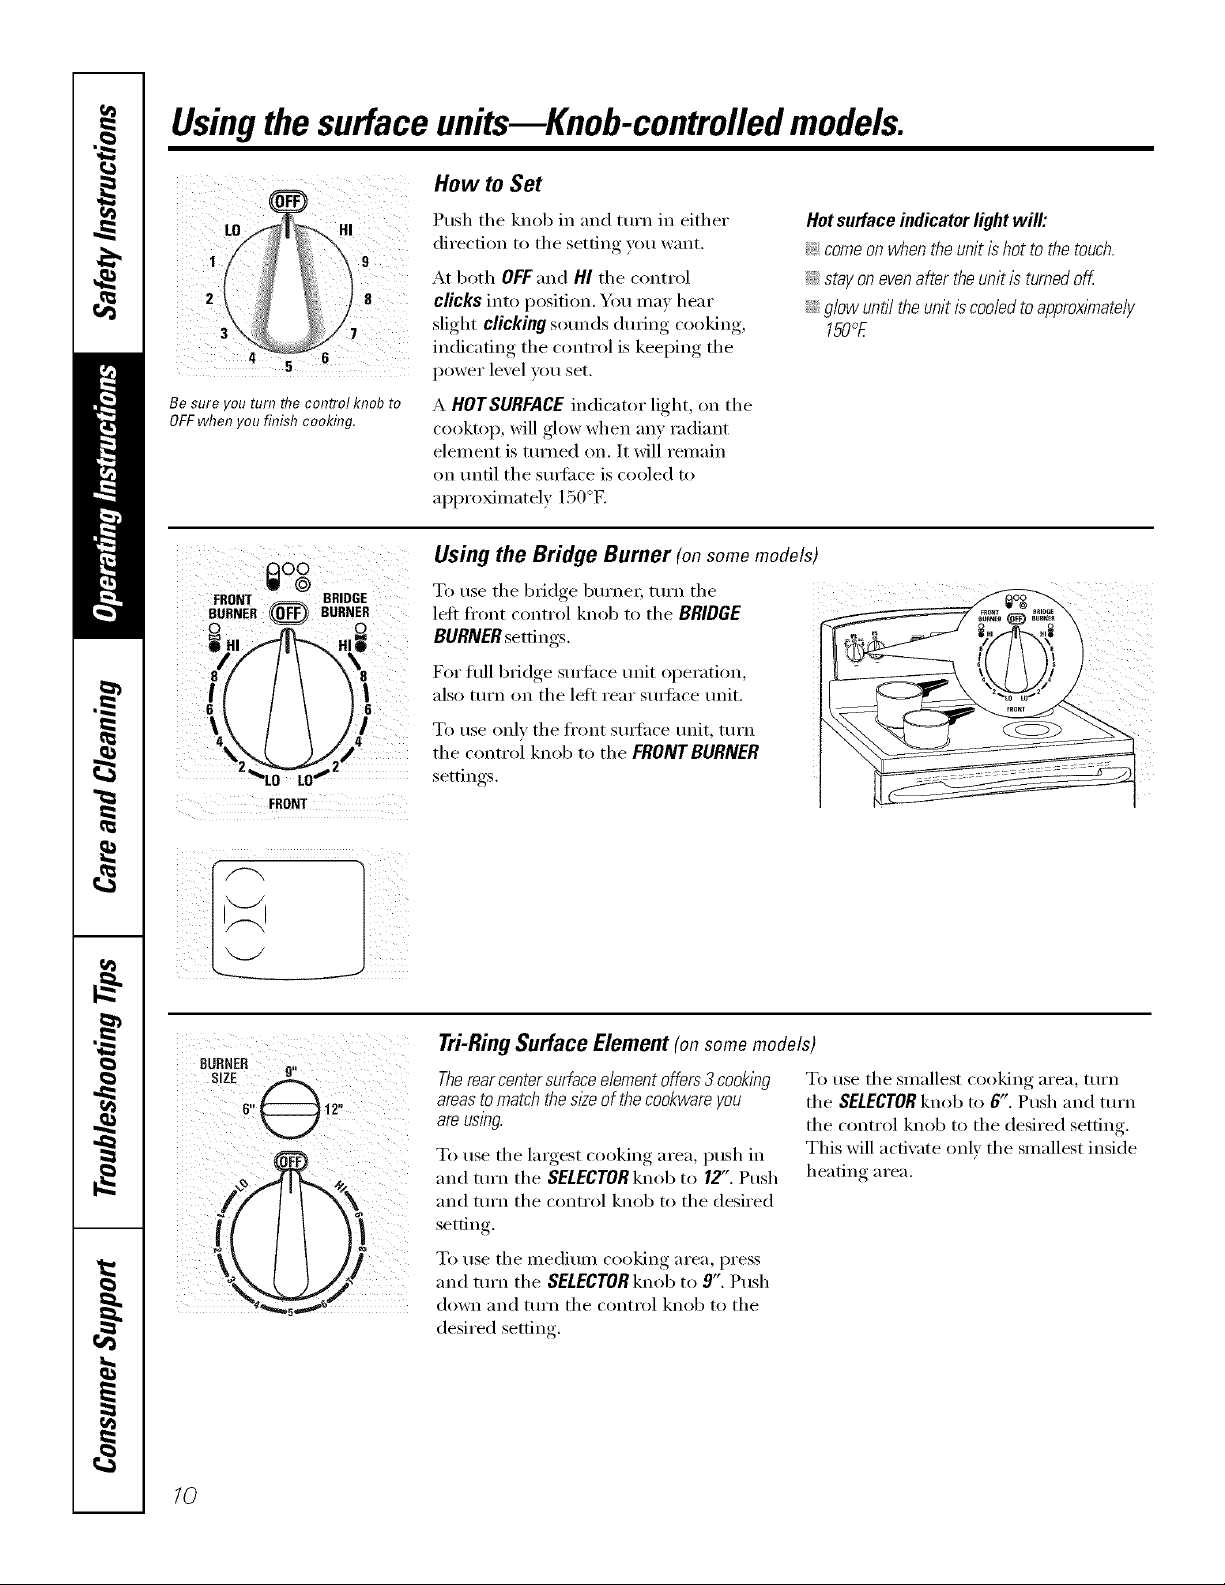
Usingthe surfaceunits--Knob-controlled models.
How to Set
LO HI
i 9
8
3
Be sure you turn flTecontrol knob to
OFF when you finish cooking.
I_lO0
W @
FRONT _ BRIDGE
BURNER (0_,_ BURNER
I
FRONT
Push the knob in and turn in either
direction to the setting you want.
At both OFF and HI the control
clicks into position. You may hear
slight clicking sounds during cooking,
indicating the control is keeping the
power level you set.
A HOTSURFACEindicator light, on tile
cooktop, will glow when any radiant
element is turned on. It will remain
on tmfil tile sm_i_ce is cooled to
approximately 150°E
Using the Bridge Burner (on some models)
To use tile bridge burnex; turn tile
leti fl'ont control knob to the BRIDGE
BURNER settings.
For flfll bridge surtilce unit operation,
also turn on tile left rear SUltilce unit.
To use only tile fl'ont SUltace unit, turI_
the control knob to the FRONT BURNER
settin *s
Hot surface indicator light will:
_ comeon when the unit ishot to the touch.
_Ji::stay on evenafter the unit is turnedoff
::Ji::glow until the unit is cooled to approximately
150°E
lO
Tri-Ring Surface Element (on some models)
Therearcenter surface element offers3 cooking
areasto match thesl2eof the cookwareyou
areusing.
To use tile largest cooking area, push in
and turn tile SELECTOR knob to 12". Push
and tt/rn tile control knob to tile desired
setfin ,
To use tile medium cooking area, press
and turn the SELECTOR knob to 9". Push
down and tt/rn tile control knob to tile
desired setting.
To use tile smallest cooking area, turn
tile SELECTORknob to 6". Push and turn
the control knob to the desired setting.
This will actiw_te only the smallest inside
heating area.
Page 11
iiiiiii i i !iiiI i!
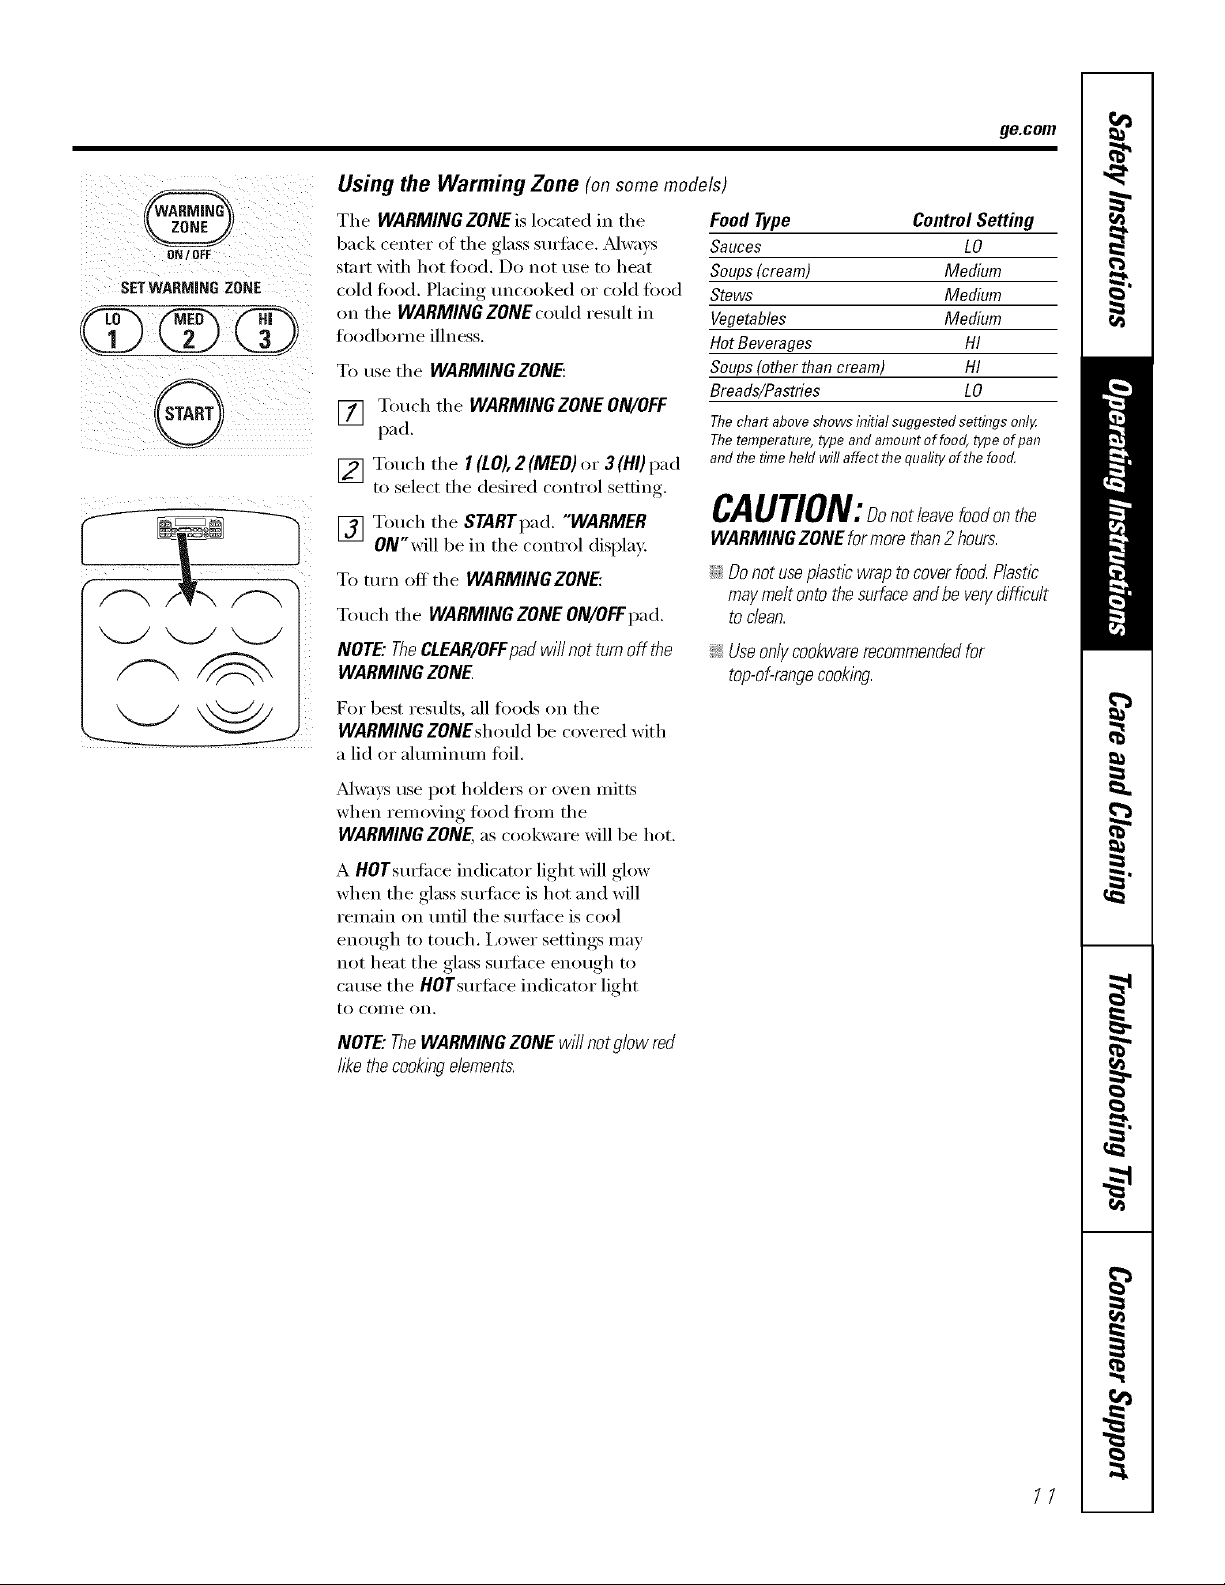
SETWARMINGZONE
@
\-__M __J \J
J
Using the Warming Zone (onsomemodels)
The WARMING ZONE is located in the Food Type
back center o_'the glass surii_ce. _Mwa_s Sauces
start with hot food. Do not use to heat Soups(cream)
cold fi_od. Placing uncooked or cold fi_od
on the WARMING ZONE could result in
fl_odborne illness.
To use the WARMING ZONE:
1_7 Touch the WARMING ZONE ON/OFF
Itl
l)[I (l,
[] Touch the I (tO), 2 (MEO) or 3(HI)i_i,d
to select the desired control setting.
Stews
Vegetables
Hot Beverages
Soups (other than cream)
Breads/Pastries
The chart above shows initial suggested settings only.
The temperature, type and amount of food, type of pan
and the time held will affect the quality of the food.
Control Setting
LO
Medium
Medium
Medium
HI
HI
LO
CAUTION:Donotleavefoodonthe
[] Touch the STARTpad. "WARMER
ON"will be in the control display.
To mrn off the WARMING ZONE:
Touch tile WARMING ZONE ON/OFFpad.
NOTE"TheCLEAR/OFFpadwi//nottumoff the !;_:Useonlycookwarerecommendedfor
WARMINGZONE top-of-rangecooking.
For best results, all fi)ods on tile
WARMING ZONEshould be co'_ered with
a lid or ahmfinmn foil.
WARMING ZONE formore than2 hours.
iJi::Donot useplastic wrapto cover food Plastic
may melt onto the surfaceand be ven/difficult
todean.
ge.com
_Mwa) s use pot holdet_ or o_en mitts
when removing fi)od fl'om the
WARMINGZONE,as cookware will be hot.
A HOTsurti_ce indicator light will glow
when the glass surfime is hot and will
remain on until the stli'filce is cool
enough to touch. I,ower settings may
not heat the glass stlYfilce enough to
cause the HOTsm'ii_ce indicator light
[o COii/e Oil.
NOTE"TheWARMINGZONEwillnotglowred
likethecookIwelements.
11
Page 12

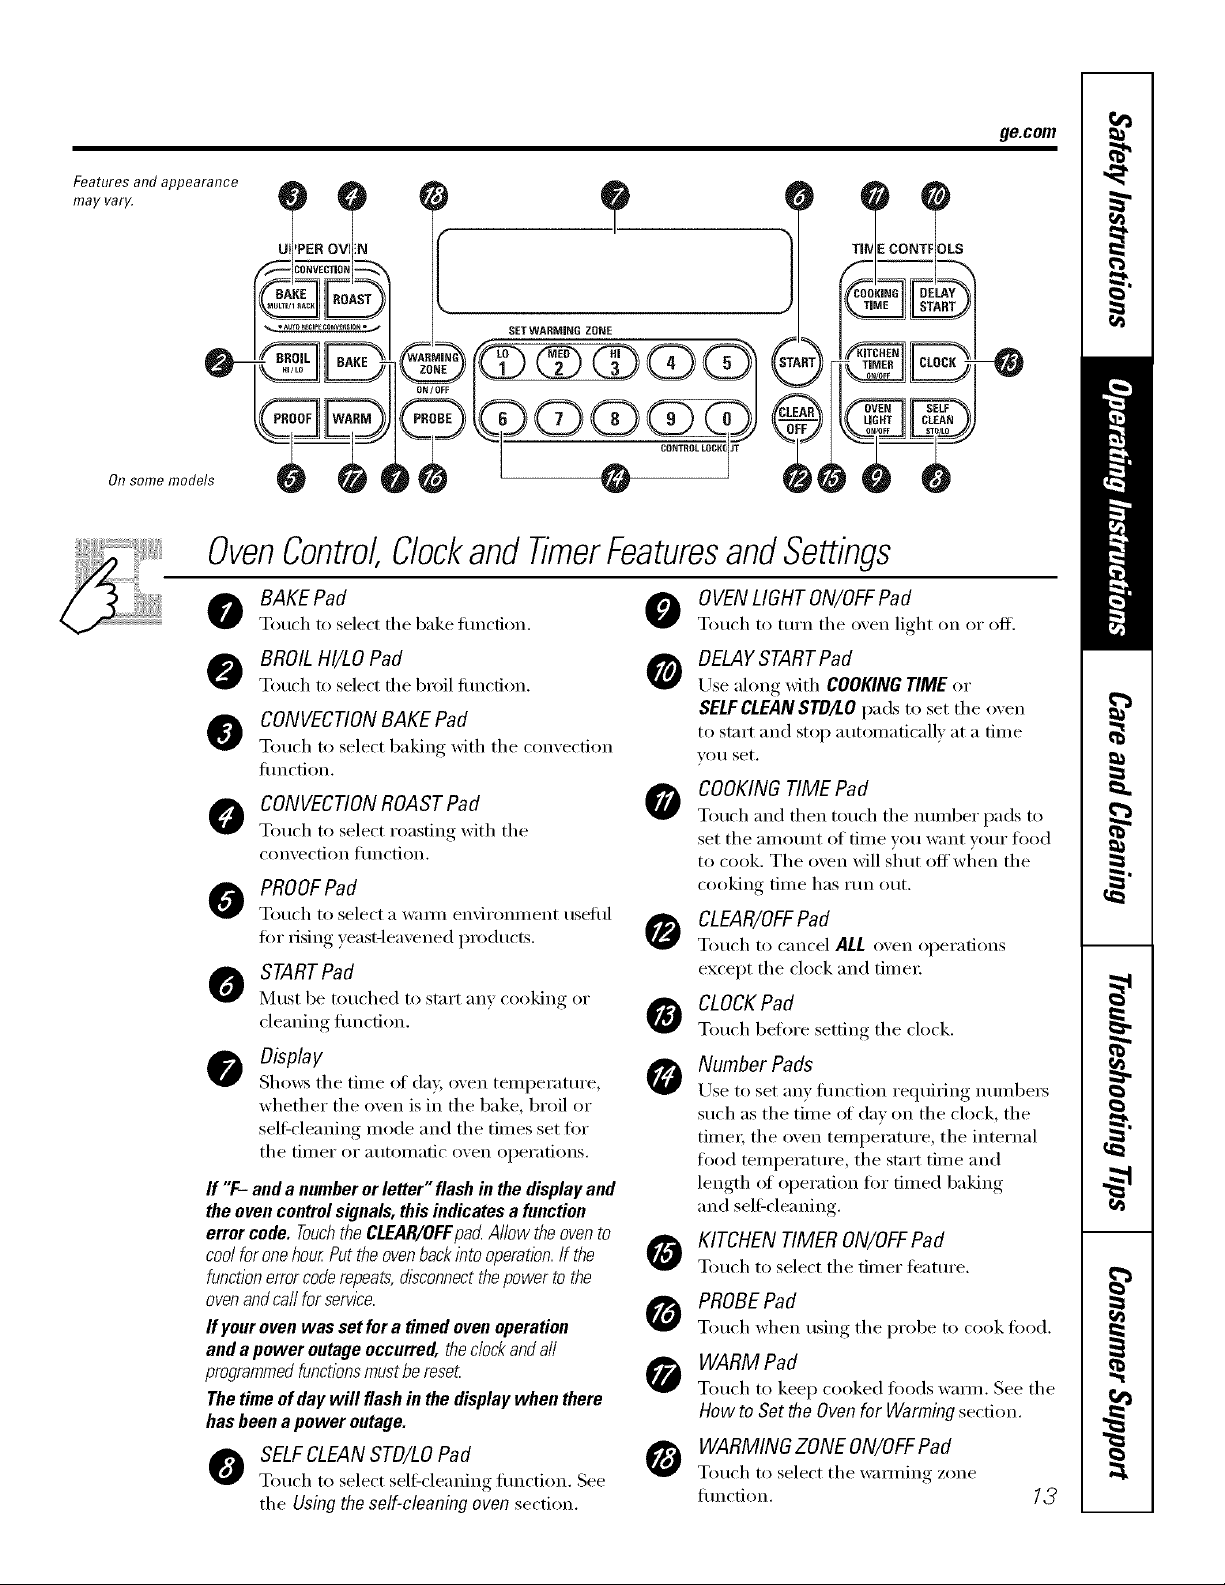
Usingthe ovencontrols.
NOTE:Throughoutthismanual,featuresandappearancemayvaryfromyour model
Feateres and appearance
may var_¢
Onsome models
/2
0-
OvenControl,ClockandTimerFeaturesandSettings
BAKE Pad
Touch to select tile bake flulcfion.
BROIL HI/LOPad
Touch to select tile 1)roll flulcfion.
CONVECTIONBAKE Pad
Touch to select baking with tile con_e('fion
flulction.
O CONVECTIONROAST Pad
Touch to select roasting with tile
con_, eolian ttlnction.
PROOFPad
Totl(h to select a waml environillent tIseftIl
for rising )east-leaxened products.
STARTPad
Must be touched to stair _lIl} cooking (/r
cleaning fiulction.
Display
Shows tile tiIlle of day, oven teillpei'attli'e,
whether tile oven is in tile bake, broil or
selfXcleaning nlode and tile tiines set fi)r
tile [iil/er or }ltl[Oill}l[ic ()veil opei'il[ions,
If "F- anda numberor letter"flashin thedisplayand
theovencontrolsignals, thisindicatesafunction
errorcode.7-ouchtheCLEAR/OFFpadAllow theovento
coolforonehourPuttheovenbackintooperation.If the
functionerrorcoderepeats,disconnectthepowertothe
ovenandca//forservice.
Ifyourovenwas set foratimedovenoperation
anda poweroutageoccurred,thedockanda//
programmedfunctionsmustbereset
Thetimeof daywill flashin thedisplaywhen there
hasbeenapoweroutage.
SELFCLEANSTD/LOPad
Touch tt/select sell:cleaning tiulction. See
tile Using the self-cleaning oven section.
OVENLIGHT ON/OFFPad
Touch to turn tile o',en light on or off.
DELAYSTARTPad
Use ahmg with COOKING TIME or
SELFCLEANSTD/LO pads to set tile o;en
to start and stop autoinaficalh at a tiine
&Oil set.
COOKINGTIME Pad
O
Totlch this pad and then tOtlch tile ntln/ber
pads to set tile aillOtlnt of tiIne you want
your food to cook. Tile oven will shut off
when tile cooking tiIne has run ()/It.
CLEAR/OFFPad
Touch to cancel ALL oven operations
except tile clock and tiIneI:
CLOCKPad
@
Touch before setting tile chick.
Number Pads
Use to set anv filn(fion requiiJng ntlll/bei's
such as tile tiIne (ff day oil tile clock, tile
tiIneI; tile oven tenlperature, tile internal
food tenlperature, tile start tiIne and
length (ff operation for dined baking
and selfZcleaning.
KITCHEN TIMER ON/OFFPad
Touch to select tile diner teatuI'e.
PROBEPad
Touch when using tile prol)e to cook food.
WARM Pad
Touch to kee I) cooked foods warn/. See tile
How to Set the Oven for Warming section.
RANGE LOCKOUTPad
Touch this pad, then touch STARTto
lock/unlock the range touch pad controls.
@
CLEAN
Page 13
Features and appearance
may vary.
0-
On some models
OvenControl,ClockandTimerFeaturesandSettings
ge.com
RO
__ SETWARMING ZONE
BAKEPad
Touch to select tile bake flnlcfi(m.
BROILHI/LO Pad
Touch to select die broil funcdon.
CONVECTIONBAKE Pad
Touch to select baking with tile con;ecfion
flulcfion.
CONVECTIONROAST Pad
Touch to select roasting with tile
convection ftlncti(/n.
PROOFPad
Touch to select a wann envii'onillent useflIl
fi)r rising yeast-leaxened products.
STARTPad
Must be touched to stnrt }lIl} cooking oi"
cleaning flulcfi(m.
Display
Shows tile tillle of day, oven teillpei'attli'e,
whether tile ()veil is in tile bake, broil or
self:cleaning nlode and tile tiines set fi)r
tile tiiller or atltOillatic ()veil opei'ations.
ff "F- anda numberorletter"flashinthedisplayand
theovencontrolsignals, thisindicatesafunction
error code.TouchtheCLEAR/OFFpad Allowtheovento
coolforonehourPuttheovenbackintooperation.If the
functionerrorcoderepeats,disconnectthepowertothe
ovenandca//forservice.
Ifyourovenwas setfora timedovenoperation
anda power outageoccurred,thedockanda//
programmedfunctionsmustbereset
Thetimeof daywill flashinthedisplaywhenthere
hasbeenapoweroutage.
SELFCLEANSTD/LOPad
Touch tII select self=cleaning flInction. See
tile Using the self-cleaning oven section.
OVENLIGHT ON/OFFPad
Touch to turn tileoxen lighton or off.
DELAYSTARTPad
Use ahmg with COOKING TIME or
SELF CLEAN STD/LOpads to set tile o_,en
to start and stop autoinaticallx at a tiIne
&Oil set.
COOKINGTIME Pad
0
Totl('h and then totl('h tile ntlillber pads to
set tile aniount of tiine you want your flied
to cook. Tile oven will s'hut offwflen tile
cooking tillle has I'[In o/it.
CLEAR/OFFPad
Touch to cancel ALL oven operations
except the clock and tiinei;
CLOCKPad
@
Touch heft)re setting tile chick.
Number Pads
ILrse to set any flulcfion requiring nuni1)ei5
such as tile tinIe of day oil tile clock, tile
tiIneI; tile (wen tenlperature, tile internal
tO()d tenlperature, tile start tiIne and
length of operation fi)r dined 1)aking
and sel6cleaning.
KITCHEN TIMER ON/OFFPad
Touch to select tile diner featuI'e.
PROBEPad
Touch when using tile probe to cook flied.
WARM Pad
Touch t(I kee I) cooked iliads wamI. See tile
How toSetthe Ovenfor Warmingsection.
WARMING ZONE ON/OFFPad
Touch to select tile wai_ning zone
flInction. 1_
Page 14
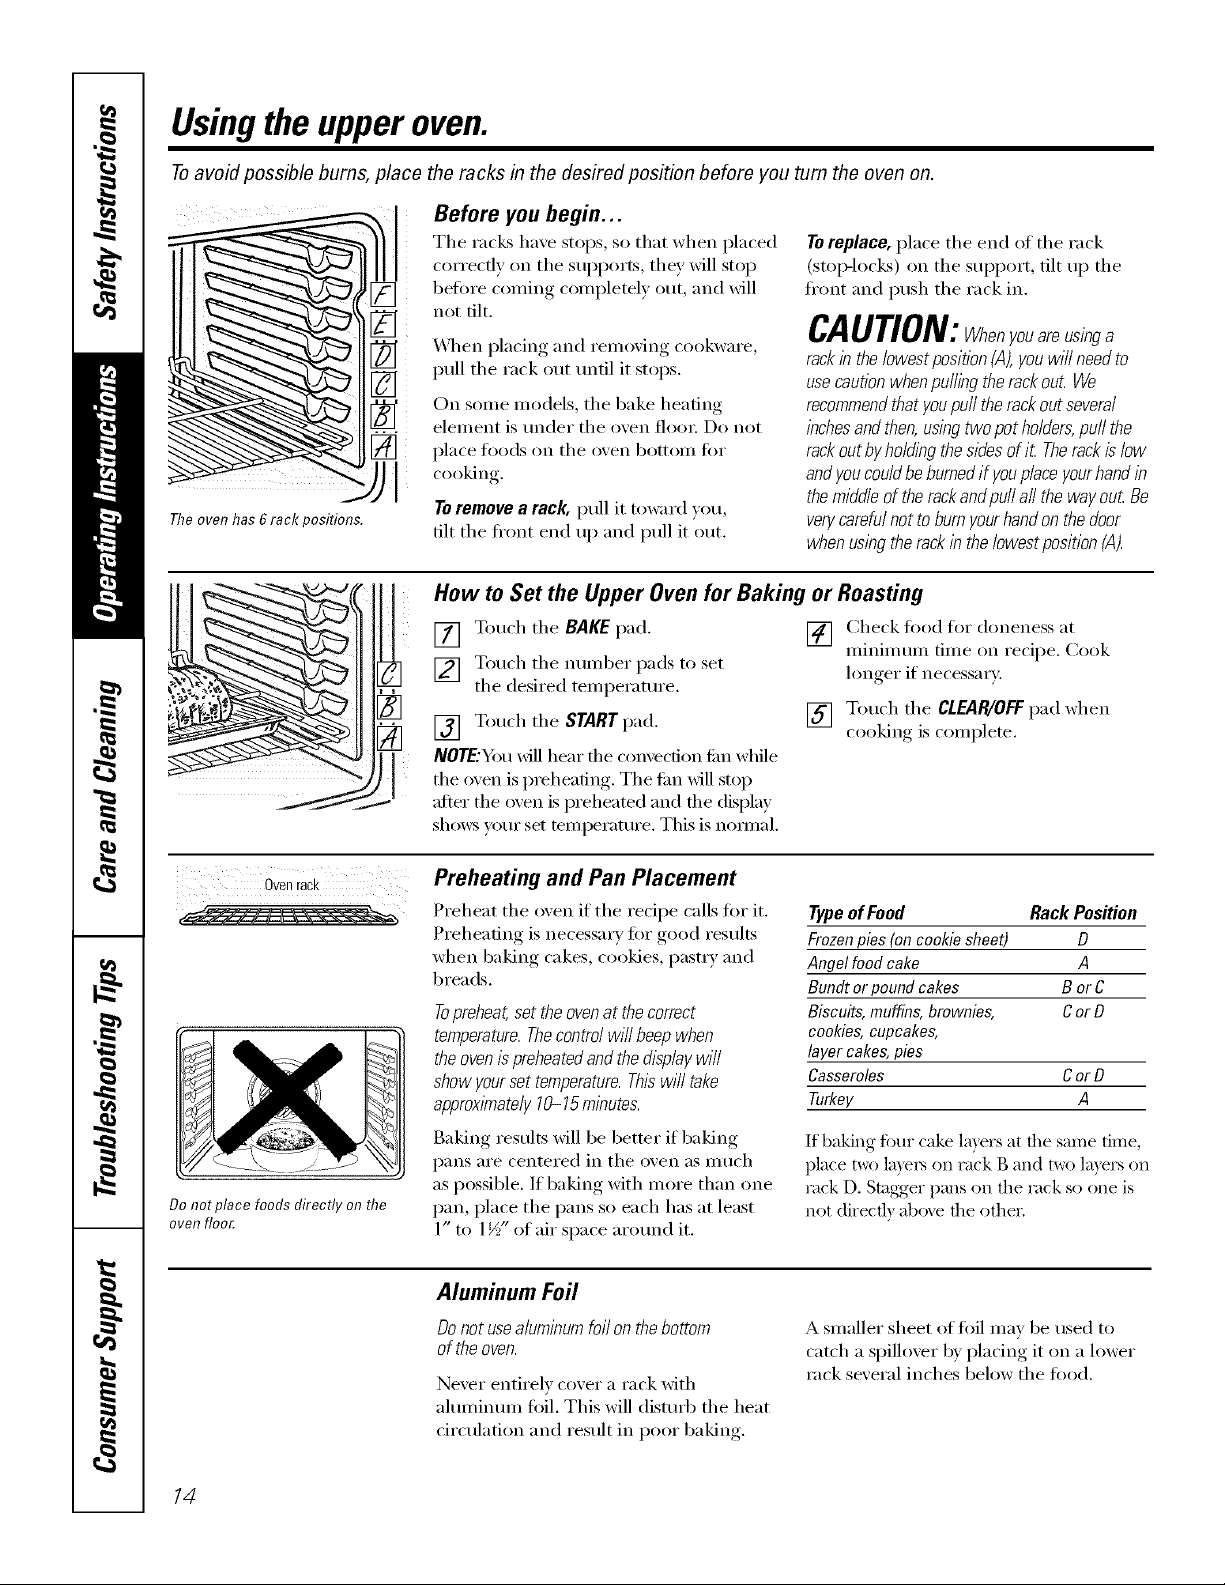
Usingthe upperoven.
Toavoid possible bums, place the racks in the desired position before you turn the oven on.
Before youbegin...
Theovenhas6 rackpositions.
The racks have stops, so that when placed
correctly on the supports, they will stop
befin'e coming completely ()tit, alld will
not tilt.
\A]]en placing and removing cookware,
pull the rack out tmtil it stops.
On some models, the bake heating
element is trader the oven flora: Do not
place toads on the oven bottoii/ fi)i"
cooking.
Toremove a rack, pull it toward you,
tilt the ti'ont end up and pull it out.
Toreplace, place the end of the rack
(stop-loci<s) on the support, tilt up the
fi'ont and push the rack in.
CAUTlON:whenyouarausinga
rack in the lowest position (,4),you will need to
use cautionwhenpuffing therack out We
recommendthat youpuff therackout several
inchesand then,using twopot holders,puff the
rack outby ho/ding thesides of it Therack islow
andyoucould beburned if youplaceyourhand in
themiddle of the rackand pu// a// the way out Be
verycarafu/not to burn your handon the door
when usingthe rack in the/owestposition (A).
Ovonrack
Do not place foods directly on the
oven floo£
How to Set the Upper Oven for Baking
[] Touch the BAKE pad.
[] Touch the number pads to set
the desired temperature,
[] Touch the START pad.
NOTE:You _ill hear the {x)nvecfion_m while
the oven is preheating. The em will stop
after the oven is preheated and the display
sh(m:s p)ur set mmperatm'e. This is hernial.
Preheating and Pan Placement
Preheat the oven if the recipe calls fi)r it.
Preheating is necessm y fin" good results
when baking cakes, cookies, past_ T and
breads.
Topreheat,set the ovenat the correct
temperature.Thecontrol will beep when
the ovenis preheatedandthe&splay will
show your set temperature. Thiswill take
approximately 10-15 minutes.
Baking results will be better if baking
pans are centered in the oven as much
as possible. If baking with more than one
pan, place the pans so each has at least
1" to 1½" ofair space arotmd it.
or Roasting
[] Check toed tar doneness at
minimum time on recipe. Cook
longer if necessary.
[] Touch the CLEAR/OFFpad when
cookingis complete.
Type of Food Rack Position
Frozen pies (on cookie sheet) D
Angel food cake A
Bundt or pound cakes B or C
Biscuits, muffins, brownies, Cor D
cookies, cupcakes,
layer cakes, pies
Casseroles Cor D
Turkey A
If baking fi)ur cake layers at file same time,
[)lace t_) la)'e_ on rack g and two layers on
rack D. Stagg'er pans on file rack so one is
not direcfl} abo_e file oflle_;
14
Aluminum Foil
Do not usealuminum foil on the bottom
of the oven.
Never entirely cover a rack with
almninmn fi)il. This will disturb the heat
circulation and result in poor baking.
A smaller sheet offifil may be used to
catch a spilloxer by placing it on a lower
rack sexeral inches below the food.
Page 15
Hew to Set the Upper Oven for Broiling
Leavethedooropentothebroilstopposition
Thedoorstaysopenbyitself,yettheproper
temperature/2mabtabedb theoven.
ge.com
Use tO Broi[ to cook ioods such as
poultx y or thick cuts of meat thoroughly
without oveN_rowning them.
[] Pl_ce the meat or fish on a broiler
,gild in a bi oiler Ixm designed,
fiw broiling.
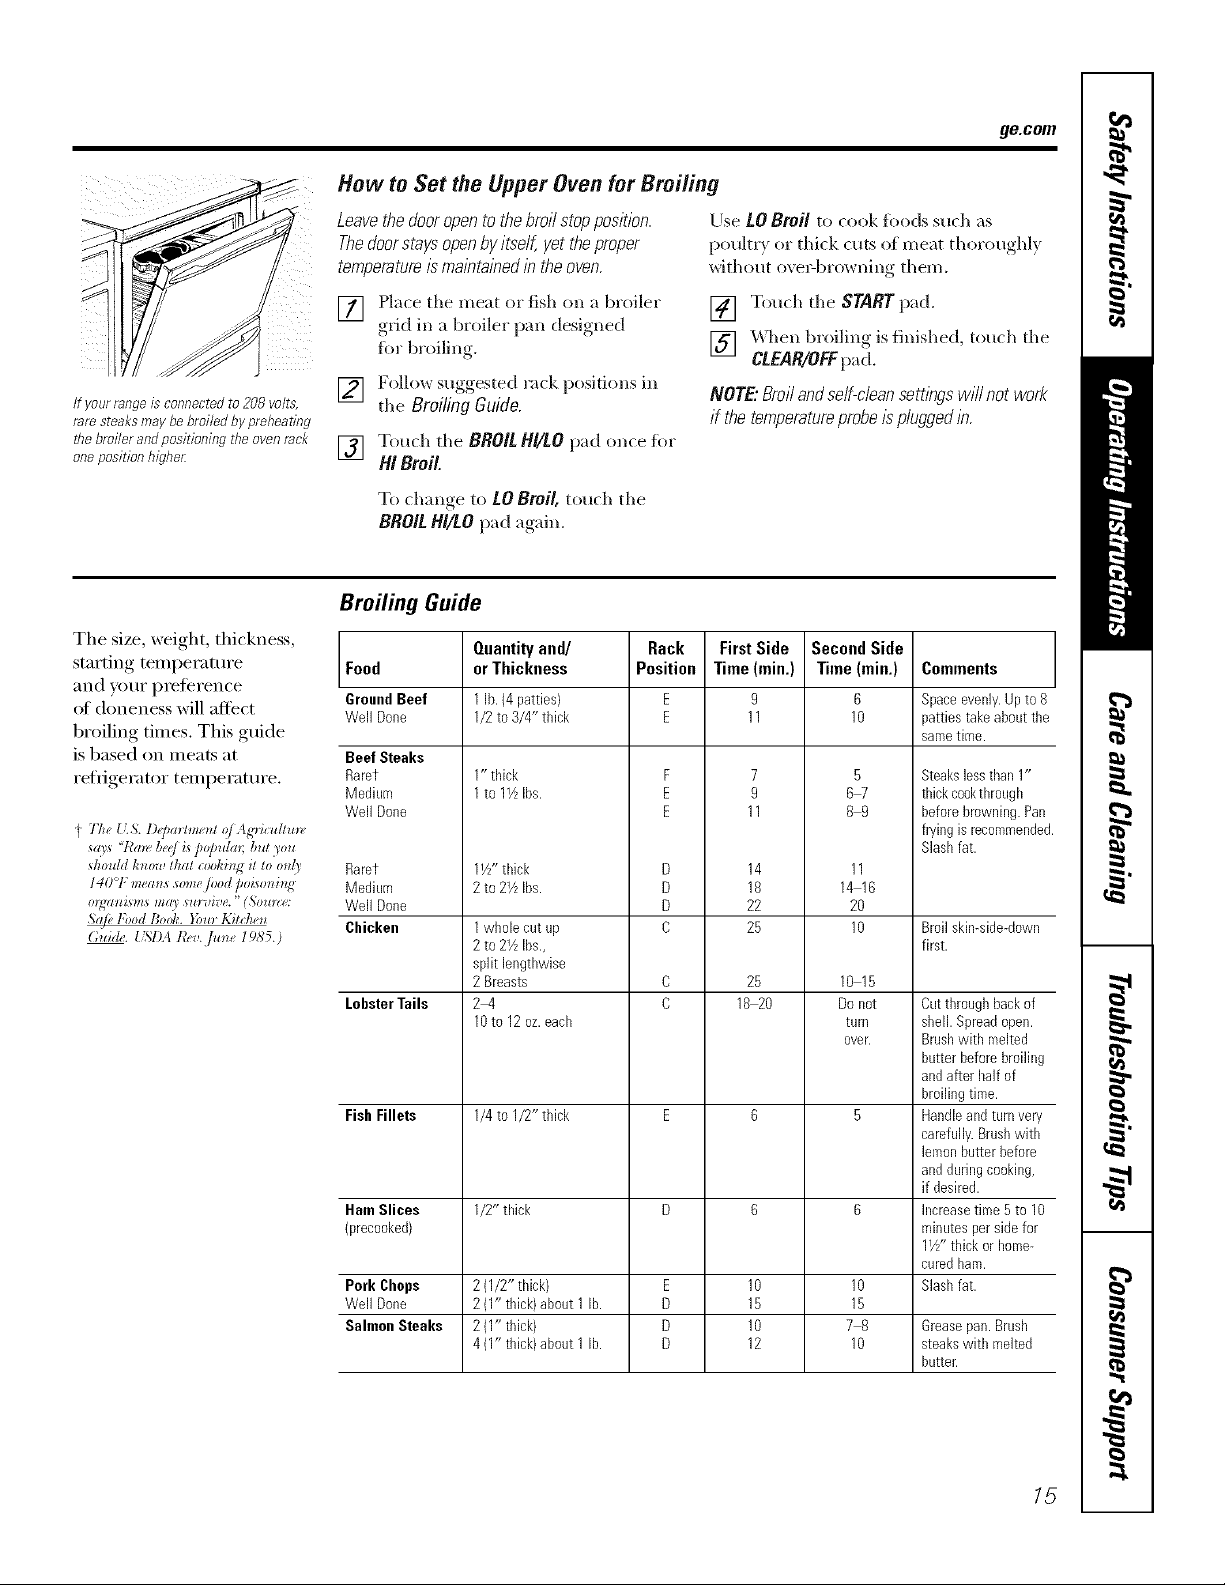
If yoorrangeis connectedto208volts,
rare steaksmaybe broiledbypreheating
thebroiler andpositioning theovenrack
oneposition higheL
[] Follo_ suggested rack positions in
tile Broiling Guide.
[] To.ch tile BROIL HI/£O pad once for
/4/Broil
To ch'm,,e to tO Broil, touch tile
BRO/Ll/l/tO I_ad"__,"_in
Broiling Guide
The size, weight, thickness,
starting temperatm'e Food
}lIld VO/II" preference GroundBeef
of doneness will affect Well Done
broiling times. This guide
is based on meats at
refrigerator temperatm'e.
I 77,, {t& l)_j)arhnunt o/Ag'Hcuflu_v
_ays '7_'m_ MJ is pu/mla_; but you
_houht know thai cookhl_ it lo on/_ Rarer
140°l: means _o_ne /_od poison{,g Medium
m_t_lisms ma_' _m_oMe." (,%)tree: Well Done
Safe, ],}_od Book. }_)m Kitchen
(;tddu. USI)A I&v. ]um, I')A'5.)
Beef Steaks
Rarer
Medium
Well Done
Chicken
LobsterTails
Fish Fillets
Ham Slices
(precooked)
Pork Chops
Well Done
Salmon Steaks
Quantityand/
or Thickness
1lb.(4 patties)
1/2to 3/4" thick
1" thick
1to 1_ Ibs.
11//'thick
2to 2YLIbs.
1whole cut up
2to 2YzIbs.,
split lengthwise
2 Breasts
2-4
lOto 12oz.each
1/4to 1/2" thick
1/2" thick
2(1/U thick)
2(1" thick)about 1 lb.
2(1" thick)
4(1" thick)about 1 lb.
Rack
Position
F
E
E
D
D
D
O
E
D
D
D
[] Touch tile START }x_d.
[] \'_qlen broiling is finished, touch tile
CLEAR/OFFp',_d.
NOTE"Broilandself-cleansettlbgswill notwork
if thetemperatureprobe/spluggedb.
FirstSide
Time(rain.)
11
11
14
18
22
25
25
18 20
10
15
10
12
SecondSide
Time(rain.)
9
6
10
7
9
B
67
89
11
14 16
20
10
10 15
Donot
turn
OVer.
10
15
78
10
Comments
Spaceevenly.Upto 8
pattiestakeabout the
same tilee.
Steakslessthan1"
thickcookthrough
beforebrowning.Pan
fryingis recommende(
Slashfat.
Broilskimsidedown
first.
Cutthroughbackof
shell. Spreadopen.
Brushwith melted
butter beforebroiling
andafter Mf of
broilingtime.
Handleandturnvery
carefully.Brushwith
lemonbuiter before
andduringcooking,
if desired.
Increasetime 5 to 10
minutespersidefor
1Y/'thick orhome-
curedham.
Slashfat.
Grease pan. Brush
steaks with melted
butter.
15
Page 16
Usingthe timed bakingand masting features.(o,somemodels)
NOTE" Foods that spoil easily--such as milk, eggs, fish, stuffings, poultry and pork--should not be allowed to sit for
more than 1hour before or after cooking. Room temperature promotes the growth of harmful bacteria. Be sure that
the oven light is off because heat from the bulb will speed harmful bacteria growth.
How to Set an Immediate Start and Automatic Stop
Theoven will turn on lYnmediatelyandcookfor
aselected lengthof time.At the end of the
cookIw time the oven will turn off automatically
[] Touch the BAKE pad.
[] Touch the nmnber pads to set the
desired o_en temperature.
[] Touch the COOKING TIME pad.
NOTE: If yourreciperequirespreheating,you may
need to addadditional t/meto the length of the
cookingtime.
[] Touch the number pads to set the
desired length of cooking time. The
minimum cooking time you can set
is 1 minute.
Tile oven temperatm'e that you set
and tile cooking time that you
entered will be in the display.
[] Touch tile STARTpad.
Tile oven Mll turn ON, and tile display _dll
show file cooking time co/mtdown and tile
changing temperature strafing at 100°F.
(Tile temperature display Mll start to
change once file (Well tellll)eKKtlI'e reaches
100°E) XA]/en the oven reaches the
mmperature you set, 3 beeps will sotmd.
The oven will continue to cook fin.
the set amount of time, then turn off
autolnafically, unless tile _A_&II[X/Ifeature
was set. See the How to Sot the Oven for
Warmingsection.
[] Touch tile CLEAR/OFF pad to clear
tile display if necessary: Remove tile
fl)od from tile oven. Remembei;
even though tile oven turns off
automaficall); food left in tile oven
will continue cooking al]er tile oven
ttlI'ns ()fl_
NOTE."Anattentiontonewi//soundif youareuslW
flmedbakingand@nottouchtheSTARTpad
How to Set a Delayed Start and Automatic Stop
iQQQQQ
@@@@@
16
Theoven wi// turnon at the t/kneof day youset,
cook for a speci@ length of time and thenturn off
automatically
Make st/re tile clock shows tile correct
tim e of day.
[] Touch tile BAKEpad.
[] Touch tile number pads to set tile
desired oxen temperature.
[] Touch tile COOKING TIME pad.
NOTE: If yourreciperequirespreheating,you may
need to addadditional time to the length of the
cook/w t/me.
[] Touch tile number pads to set tile
desired length of cooking time. The
minimum cooking time you can set
is 1 minute.
Tile oven temperatm'e that you set
and tile cooking time that you
entered will be in the displa),
[] Touch tile DELAYSTART pad.
[] Touch tile number pads to set tile
time of day you want tile oxen to
ttlI'n (Ill and st;lI't cooking.
[] Touch tile STARTpad.
NOTE."Anattentbntonewillsoundif youareusIw
flmedbakbgand@nottouchtheSTARTpad
NOTE:If youwouldliketo checkthetimes
youhaveset,touchtheDELAYSTARTpadto
checkthestarttimeyouhavesetortouchthe
COOKINGTIMEpadto checkthelength
ofcookingtimeyouhaveseL
XAqlen tile oven turns ONat tile dine
of day you set, tile display will show tile
cooking time countdown and tile
changing temperature stinting at 100°E
(Tile mmperature display will start to
change once tile oven temperatm'e
reaches 100°E) XAl/en the oven reaches
the temi)eratme you set, beeps will so/md.
The oven will continue to cook t0r
tile set anlount of filne, then turn off
automaticall> unless tile XA'ARMfeature
was set. See tile How to Set the Ovenfor
Warmingsection.
[] Touch tile CLEAR/OFFpad to clear
tile display if necessm T. Remove tile
food fl'om tile oven. Remembei;
even though tile oven turns off
automatically, t0od left in the oven
will continue cooking after the oven
ttlFnS ()J_
Page 17

Usingthe probe.(o,some odels) ge.com
Formany foods, especially roasts andpoultry, internal food temperature is the best test for aloneness. The
temperature probe takes the guesswork out of roasting by cooking foods to the exact aloneness you want.
Use of probes other than the one
proxided with this product Iuay result in
(laluage to the probe or oxen conti'ol,
Thetemperature probe has a
skewer-like probe at one end and
a plug at the otter end flTatgoes
into the outlet in the oven.
Use the handles of the probe and plug
_d_en inselting and removii_g theln fl'oln
the fi)od and outlet.
_::_Toavoiddamagingyourprobe, donot use
tongsto puff on the cable when removingit
_'; Toavoidbreakingtheprobe,makesure food
is completelydefrosted before insertlbg.
_MteI"preparh_g the iueat and placing it
(m a trivet or a broiler pan grid designed
fllr broiling, fi/llow these directions fl)r
proper probe placelnelm
Insert the probe completely illto the
meat. It should not touch bone, fat
or gristle.
NOTE."Failure to fully insert theprobe into the
meat mayresult in poor cookingperformance
becausethe probe wi// sense the ovenair vs.
the foodtemperature.
Plu _-___ _ReadandrernevelabelCable
_ Never leaveyour probeinside the ovenduring
aself-cleaning orbroil cycle.
_ Do not store theprobein the oven.
CAUTION:ropreventpossiblebums,
do not unplug theprobe from the ovenoutlet until
the ovenhascooled
For roasts with no bone, insert the probe
into the ineatiest part of the roast. D/r
bone-in haln or lalnb, insert the probe
into the center of the h)west large in uscle.
Insert the probe into the center at dishes
such as lneat loat or casseroles.
Insert the probe into the meatiest part of
the ilmer thigh from below and parallel
to the leg of a whole turkey.
NOTE."Self-dean and Broilsettings w/7/not work
if the temperatureprobe is pluggedlb.
How to Set the Upper Oven For Baking/Roasting When Using the Probe
(on some models)
Insert the probe hilly into the fi)od.
[]
Plug the probe into the outlet ill the
[]
oxen. Make sure it's pushed all the
way in. Close the oven deal: Make
sure the probe cable is not touching
the broil elelnent.
Touch the PROBEpad.
[]
Touch the Iluluber pads to set the
[]
desired internal toad or lneat
teluperature. The nm_nmln
internal telnperature tor the toad
that w)u can set is 200°E
[] Touch the BAKEpad.
[] Touch the imlnber pads to set the
desired oven tenlperature.
[] Touch the STARTpad.
Thedisplay wi// flash if theprobe is/bserted
lbto theoutletand youhavenot set aprobe
temperatureand touchedthe STARTpad
_dtei" the interlml telnperature of the
toad reaches 100°K the chai_ging internal
telnperature will be shown in the displa):
[] X._qmn the internal telnperature of
the toad reaches the imlnber xou
have set, the probe and the oven
turn off and the oven calm-el signals.
To stop the signal, touch the
CLEAR/OFfpad. Use hot pads to
relnove the probe ti'om the load.
Do not use tongs to pull on it--they
might damage it.
iJi::If theprobeis removedfrom the oven while
probecooklbg,the oven wi// not automatically
turnoff
To change the oven temperature during
the Bake/Roast cycle, touch the BAKE
pad and then the nunlber pads to set the
new telilpei'attli'e.
_: Youcan usetheKitchen Timereventhough
youcannotuse timedovenoperations l 7
while using theprobe.
Page 18

Usingthe clock, kitchen timerand controllockout.
ToSet the Clock
Make sure the clock is set to flTe
correct time of da,A
TheKitchen 77meris a mflnltetinier onlg
The Kitchen Timer does not control
over operations. Themaximum
setting on the Kitchen Timeris 9hours
and 59 minutes.
The clock must be set to the correct time
of day fin" tile aut(mmtic oven tinting
fimctions to work properly. Tile time ot
day cmmot be changed (hwh_g a timed
baking or self-cleaning cycle.
To Set the Kitchen Timer
[] Touch tile KITCHEN TIMER
ON/OFF pa d.
[] Touch tile mmfl)er pads/mtil tile
alilO/lnt of time VO/X W;lllt sl/o_N
in tile display. For example, to set
2 hom_ and 45 minums, touch Z 4[
and 5 in that ordex: If you make a
mistake touch the KITCHENTIMER
ON/OFF pad and begin again.
[] Touch tile STARTpad.
After touchingthe STARTpad, SETdisappears,
thistells youthe time iscounting down, although
ToReset the Kitchen Timer
[] Touch tile CLOCKpad.
[] Touch tile number pads.
[] Touch tile STARTpad.
the displaydoesnot change until oneminute has
passed Secondswill not beshown in the display
until the lastminute is counting down.
[] _._q/en tile t_dtchen Timer reaches :00,
tile control will beep 3 times fi)llowed
by one beep eve_T 6 seconds tmtil
tile KITCHENTIMERON/OFFpad
is touched,
The&secondtonecanbecance/edbyfollowing
thestepsin theSpecialfeaturesofyouroven
controlsectionunderTonesat theEndof a
TimedCycle.
i ji@ ; iiillfll
iiiiii
If tile display is still showing tile time
remaining, you may change it by
touching tile KITCHEN TIMER ON/OFFpad,
then touch tile number pads tmtil tile
time you want appea_ in tile display.
ToCancel the Kitchen Timer
Touch tile KITCHEN TIMER ON/OFF
pad twice.
Range Lockout (on some models)
Yourcontrol will allow you to lockout thetouch
padssotheycannotbe activated whenpressed
To hwk/tmhxk tile touch pad controls:
[] Touch tile RANGELOCKOUTpad,
then t(>uch tile STARTpad.
The smti_ce unit displays (on models
so equil)ped ) will show LC and the
oven display will show Loc Onfor
several seconds, then they will go
blank until a cooking pad is touched.
If tile remaining time is not in tile display
(dock, delay start or cooking time are in
the display), recall the remaining time by
touching tile KITCHENTIMERON/OFFpad
and then touching tile number pads to
enter tile new tilne VOII want,
If the range control is locked and a
cooking pad is touched, tile aI)propfiate
SUltilce display (on models so equipped)
or the oven display will show that the
control is locked.
iJi::TheRANGELOCKOUTmodeaffectsaii
touchpads.Notouchpadswiiiworkwhen
thisfeatureisactivated
18
[] To mflock the control, touch the
RANGE LOCKOUTpad, then touch
tile STARTpad.
Page 19

ge.com
i _ ii i _ i i _ _ iii
i i
CONTROLLOCKOUT
Control Lockout (onsome models)
Yourcontrol wi// allow you to lockout the touch
padssotheycannot beactivated whenpressec_
To lock/unlock the touch pad controls:
If tile ran,*e control is locked and a
cooking pad is touched, tile oxen display
will show that tile control is locked.
!;>Onmodelswith CONTROLLOCKOUTon/y,
[] Touch and hold the 9and 0 pads
at the same time until the control
beeps.
The oven display will show Loc On
tot several seconds, then it will go
blank until a cookhlg pad is touched.
[] To tmlo(k tile control, touch and
hold tile 9 and 0 pads at tile salne
time tmtil tile control beeps.
theovenwHIbelockedout Theknob-controlled
surfaceunitswi// stillbeactive.
Adjust the upper oven thermostat--Do # yourself!
Youmay find that your new oven cooks differently than the one it replaced. Useyour new oven for afew weeks to
become more familiar with it. If you still think your new oven is too hot or too cold, you can adjust the thermostat
yourself.
Do not use thermometers, such as those found ingrocery stores, to check the temperature setting of your oven.
These thermometers may vary20_40degrees.
NOTE."Thisadjustment will only affect baking and roasting temperatures; # will not affect broiling, convection or
self-cleaning temperatures. The adjustment will be retained in memory after a power failure.
ToAdjust the Thermostat
÷+÷
[] Touch tile BROIL HI/LO and BAKE
pads at tile same time until tile
display shrews SE
(Z)(2)(2)(D(D
(D (D(Z)(D
[] Touch tile BAKE pad. A two digit
number shows in tile display.
Touch BAKE again to alternate
between increasing and decreasing
tile oven temperature.
Thetypeofmargarine will affect bakingperformanc!!
Most recipes for baking have been developed using high fat products such asbutter or margarine (80% fat). If you
decrease the fat, the recipe may not give the same results as with a higherfat product.
Recipe failure can result if cakes, pies, pastries, cookies or candies are made with low fat spreads. The lower the
fat content of a spread product, the more noticeable these differences become.
[] Tile oxen temperature can be
ac!justed up to (+) 35°F hotter or (-)
35°F coole_: Touch tile number pads
tile saI/le WaV VO/I read theill, goF
example, to change tile oven
temperature 15°K touch I and 5.
[] "X._q/en}ou haxe made tile
a(!iustment, touch tile START pad to
go back to tile time oI day display.
[Jse VO/lI" oven as VO/I Wo/lld nOlillallv;
Federal standards reqtfire products labeled "margarine" to contain at least 80% tilt by weight. I.ow tilt spreads, on tile
other hand, contain less tilt and more water: Tile high moisture content of these spreads afli_cts tile mxture and flavor
at baked goods. For best results with your old tavorite recipes, use mmgmine, butter or stick spreads containing at least
70% vegetable oil. 19
Page 20

Usingthe lower ovendrawer.(onsome models)
Thelower oven drawer may be used to bake foods using the same times and temperatures as a standard oven. Foods
ideal for baking in the lower oven drawer include pizza,frozen foods, casseroles, biscuits, rolls and many desserts.
LOWER
o_N
300 . 350 * 400
4EATING
o
Push in and turn the lower oven
drawer knob to any desired setting.
To Use the Lower Oven Drawer
[] Push in and turn the lower oxen NOTES:
(lmwer knob to an) desired setting.
] _dlow the h)wer o_en (lI'_l_veI" to
preheat,
i:}:The ON signal light is located above the
knob and glo_:s when the knob is in the
ON position. It remains ON until the
knob is moved to the OFF position.
The "Heating" signal light is located iJi::
below the knob and glows when the
heating elements are active, Preheat is
c()ml)lete after the "Heating" signal has
turned off fi)r tile fii_t time after tile ::Ji::
knob is turned oil.
iJi::Always usethe includeddrawer rackwhen
us/bgthelowerovendrawer
ii_ Thelower ovendrawer cannot be usedduring
aself-cleancycleof the upperoven.
ii_Donotput food,foilorcookwarediracflyon
thebottomofthelowerovendrawerAlways
usetheincludeddrawerrack.
If foods requkeacover, useonly foil or lids
able to withstand baking temperatures.Do not
useplastic.
Maxl_numhel_?htof foodsthatcanbebaked
lb thelowerovendrawer/s3_".
ii!:
Donotputliquidorwaterin theloweroven
drawer
iii_::
Neverplace plastics,paper,canned foodsor
combustiblematenal ib thelower ovendrawer
The lower oven drawer uses less energ9' than the upper ()veil.
_Mlow tile fi)lh)wing al)pro_mate times fi)r preheating:
Desired Lower Preheat
Oven Temperature Time
WARM 10m/hutes
350°1: 15mbutes
425°1: 25 minutes
20
When Using the Lower Oven Drawer Warm Setting
TheWARM SETTINGof the lower ovendrawer [] Push in and turn tile control knob
canbe usedtokeephot cookedfoodsatservlbg to the waml setfin ,
temperatures.Always start with hot food Donot
use the WARMSETTINGtoheat cold food other
thancrisplbgcrackers,chipsor drycereal.
NOTE: Thebeginnlbg temperatureof the
food,the amount of food, the type of food,the
containerand theamount of flYnethe foodis in
the drawerwill affect the quafity and ending
temperatureof thefood
Page 21

Usingthe convectionoven.(onsome models) ge.com
Convection Fan Operation
In a convectionoven,a fan c/Tculateshot air over,
underandaroundthe food
Thiscirculatinghot air is evenl}/distributed
throughoutthe ovencavity.As aresult, foodsare
even/}/cookedandbrowned--often in less time
with convectionheat
Introduction
NOTE:To ina_nfize cooking evenness,
tile tim is designed to rotate in both
directions, with a pause in between.
This is nomml.
Tile convection tim shuts offwhen tile
oven door is opened. DO NOTleave tile
door open fiw long periods of time while
using convection cooking or you may
shorten the lite ot the convection heating
element.
Multi-rack position.
Tile convection oven coi//es with two
convection baking modes started by
touching tile CONVECTION BAKE MULTI/
I RACKpad once ortwice, depending
on VOILE cooking need:
MULTI--for convection cooking on more
than one rack. Touch the CONVECTION
Multi-Rack Convection Baking
Because heated air is circuklted e_ enl}
throughout tile oven, foods can be
baked xdth excellent results using
multiple racks.
Multi-rack baldng ma) increase cook
times slighfl) for some fi)ods but tile
overall result is time saved. Cooldes,
muffins, biscuits and ()tiler quickbreads
give ve U good results with m ulti-mck
baldng.
1-Rack Convection Baking
Whenconvectionbaklbg with on/}/I rack,use
CONVECTIONBAKE IRA CKand follow the
rackpositions recommendedin theUslhgthe
ovensection.
BAKEMULTI/1RACKpad once.See tile
Multi-RackConvectionBakingsecdon belo_:
I RACK--for convection cooking on one
rack only. Touch tile CONVECTIONBAKE
MULTI/1 RACKpad twice. See tile 1-Rack
Convection Baking section bel(m'.
To cook ik)od on I/lore thall one rack ill
comvction bake, use CONVECTIONBAKE
MULTI.
When baldng on 3 racks, place one
rack in tile second (B) position, one rack
ill tile fi_urth (D) position and one rock
in tile sixth (F) position.
For two-rock baking, place one rock
in tile second (B) rock position. Nace
tile other rack in tile fbm_h (D) rack
position.
;;Ji::ldealforbakedfoodscookedonlrack.
Adapting Recipes...
You can use veto" fi_\'orite recipes in tile
convection oven.
}\qlen convection baking, file Auto
Recipe _'_Conversion feature automatically
reduces the set reglflar baking temperature
by tile recommended 25°E See Auto
Recipe _'*Conversion in the Special
Features section.
_ Usepan sl2erecommendecL
_Ji::Somepackage ibstructionsforfrozen
casserolesormalb disheshavebeen
developeduslbgcommercialconvection ovens.
Forbest results in this oven,preheat the oven
andusethe temperatureon thepackage.
21
Page 22

Usingthe convectionoven.(o,some models)
Convection Roast
CONVECTION
Q(3>
(i)(D(Z)(Z)(D
@"
_: Good for large tender cuts of meat, uncovered
The convection tim circulates the heated
air evenly over and around the fi)od.
Meat and poult_ T are browned on all
sides as if they were cooked on a
rotisserie. The heated air seals in juices
quickly fin" a moist and tender product
wlfile, at the same time, creating a rich
golden brown exterioi:
X4]_en you are convection roasting, it is
import'ant that you use a broiler pan and
grid designed fin" broiling fin" best
convection roasting results. The pan is
used to catch grease spills and the grid
is used to prevent grease spatters.
How to Set the Upper Oven for Convection Baking or Roasting
[] Touch the CONVECTIONBAKEMULTI/
I RACKpad once fin" multi-rack
convection baking. Tlfis mode is used
fi)r cooking food items on more titan
one rack (i.e., 9, 3 or more rocks) at
tile same time in convection bake.
See tile Multi-Rack Convection Baking
se_on _)I" II/oIP iilfOiillation.
Touch the CONVECTIONBAKEMULTI/
I RACKpad mke fin"one vack
convection baking. This mode is used
fi)r cooking fi)od items on only one
Iack in coIlvecfion bake.
Touch the CONVECTIONROASTpad
fin" convection roasting.
[] Touch the number pads to set the
oven [eilll)ei'attii'e.
[] Touch the STARTpad.
NOTE'.If the Auto Recipe_ ConversionFeature
is on, it will automatically reducethe setregular
bakingtemperatureby 25°F to theappropnate
convection temperaturein convectionbakemode.
SeeAutoRecipe_ ConversionlbtheSpecial
Featuressection.
To change tile _wen temperature, touch
the CONVECTIONBAKE MULTI/1 RACKer
CONVECTIONROAST pad and then the
number pads to set the new teml)eramre.
_]/en the oven starts to beat, the
changing temperature, starting at 100°K
will be displayed. _]/en oven reaches the
temperature you set, 3 beeps will sound.
[] Touch CLEAR/OFFpad when finished.
::J_::Youwill heara fan while cooklbg with
convection.Thefan will stop when the door
isopened,but theheat will not turn off.
_: Youmayhear the ovenclicklbg during
baking. Thisis normal
_: Inconvectionbake modes,for maxl_numcooking
evenness,thefanis designed torotate in
both directions,with apausein between.
Thisis normal
When bakflTgcooldes, you will get
the best results if you use a flat
coolde sheet hTsteadof a pan with
low sides.
22
Cookware for Convection Cooking
gefin'e using your convection oven, check
to see if },o/ii" cookwai'e leaves i'OOill [()i"air
circulation in tile oven. If you are baking
with several pans, leave space between
them. Mso, be sure tile pans do not touch
each other or tile walls of tile oven.
Paper and Plastic
Heat-resistant paper and plastic
containei_ that are recommended for
use in regular 1)aking can also be used
for convection baking, 1)ut should not
be used at temperatures lfigber than
tile temperaUu'e recommended by tile
cookware manufi_cturen Plastic cookware
that is heat-resistant to temperatures of
400°F can also be used.
Metal and Glass
Any Dl)e of cookware Mll work in your
con;'ection ()veil. Howevei; illetal l)ans
heat tile fi_stest and are recommended
fin" convection 1)aking.
::Ji::Darkenedor matte-finlshedpans will bake
faster thanshlbypans.
::Ji::Glassor ceramicpans cookmoreslowly
For recipes like ovenq)aked clficken,
rise a l)an with low sides. Hot air
cmmot drculate well around food
in a pan with lfigh sides.
Page 23

Usingthe timedfeaturesforconvectioncooking, gecom
Youwill hear afan while cooking with these features. Thefan will stop when the door is opened, but the heat
will not turn off.
NOTE"Foods that spoil easily--such as milk, eggs, fish, stuffings, poultry and pork--should not be allowed to s#
for more than 1hour before or after cooking. Room temperature promotes the growth of harmful bacteria. Be sure
that the oven light is off because heat from the bulb will speed harmful bacteria growth.
How to Set an Immediate Start and Automatic Stop
(D(DG)Q(D
G)G)(D(D(D
(D(D(D@(D
'@
Theupperovenwi// turnon immediate/yandcook
forase/ected/engthof time.At the endof the
cookingtime,theovenwill turnoffautomatica//y
Make sure die clock sho_:_ the correct
time of da).
[] Tou(.h the CONVECTION BAKE
MUtT/If RACK pad once for m uld-
rack comw tion baldng. This mode
is used for cooking food items on
more than one rack (i.e., 2 3 or
mo_e facies) at the same time in
convection bake. See Multi-Rack
Baking section fb* more infommdon.
Touch the CONVECTIONBAKE MUTT//
I RACK pad t_ice for oJte rack
convection baking. This mode is used
for cooking food items on only one
rack in COIl\rectio11bake.
Tou(.h [1)e CONVECTIONROAST pad
f()l" (OllVe(ti()n l'O'tStill r
] Touch the number pads to set the
oven ten/perattlre.
[] Touch the COOKING TIME pad.
] Touch the number })ads to set the
desired length of cooking time. The
minimum cooking time you ca1 set
is 1 minute. The o_en temperature
that you set and the cooking dine that
)ou entered will be in the displa).
[] Touch the STARTpad.
The o_en will mrn ON, and the displa? will
show the cooking time (.ountdo_l and the
(.hanging mmperature starting at 100°E
(The temperature displ W will start to
change once the o\en temprature reaches
100°E) When the oven *eaches the
temperature }ou set, 3 beeps will sound.
NOTE"If the Auto Recl>e" ConversionFeature
/_on, it will automat/ba//yreducethe set regular
bak/bgtemperatureby 25°F to the appropnate
convectiontemperature in convectionbakemode.
SeeAuto Rec/pd_Conversion/b the Spec/a/
Featuressection.
The o_en will condnue to cook %r die set
amotmt of time, then mrn off automati(.al]},
unless the \_;_RJ\.I tbature _:ls set. See the
How to Setthe Ovenfor Warmingsection.
NOTE:tf yourreciperequirespreheating,youmay
needto addadditiona/timeto thebngth ofthe
cookingtime.
_Mter the oven tm'ns ott; the end-ot_-ycle
tone will sound.
[] Touch the CLEAR/0_q:pad to clear
the displa} if necessa* 3 Remove
the food fi'om the o\en. Remembei;
e_en thoug]l the oxen tm'ns off
automati(.all}, food left in the oven
will (.ontJntle cooking after the oven
23
Page 24

Usingthe timed featuresforconvectioncooking.
CONVECTION
QQOOQ
QQQQQ
00QQ@
QQQQO
@@@@@
@@@@@
@
How to Set a Delayed Start and Automatic Stop
Theupperovenwill turnonat thetimeof flayyou
set,cookfora speci@/engthof timeand thenturn
off automatically
Make sure tile clock shows tile correct
time of day.
[] Touch tile CONVECTION BAKE
MULTI/1 BACK pad once tbr n/ulti-
rack convecti(m baking. This mode
is used for cooking food itetns oil
more than one rack (i.e., 2, 3 or
more racl<s) at tile same tin/e in
convection bake, See Multi-Rack
Baking section fi:,r n/ore infimnafion.
Touch the CONVECTIONBAKEMULTI/
I RACKpad twice fi)r one rack
coIl\recdon baking. This mode is used
fi)r cooking fi)od items on ()Ill)' oIle
iack ii1 ¢OIl\rectioI1 bake.
Touch tile CONVECTIONROAST pad
J()I" (-on'_ection i'(tastin r
[] Tou(h tile nunlber [)ads to set tile
oven tenll)eratili'e,
[] Touch tile COOKINGTIMEpad.
NOTE:Ifyourreciperequirespreheating,youmay
needto addadditionaltimeto thelengthof the
cookingtime.
[] TotwB tile ntlnlbe/" pads to set tile
desired length of cooking time, Tile
mininmm cooking dine )'ou can set
is 1 minum.
Tile oven temperatm'e that }ou set
and the cooking time that )ou entered
will be in the displa):
[] Touch tile DELAYSTARTpad.
[] Touch tile number pads to set the
time of da)}ou want tile oxen to turn
on and start cooking,
[] Touch tile STARTpad,
NOTE:Anattention tonewill soundif youare
usingtimedbakingorroastingand@ not touch
theSTARTpad
NOTE:if youwouldlike tocheckthe timesyouhave
set, touchtheDELAYSTARTpad tocheckthestart
timeyouhaveset,or touchthe COOKINGTIME
padtocheckthelengthofcookingtime youhavese_
_\llen the oxen turns ONat the tinle of da}
you set, tile displa) will show the cooking
time countdown and tile changing
tenapeIature starting at 100°E (Tile
temI)eIature displa) will start to change
once the oven temperature reaches 100°El
_\_]len the oxen reaches the mmperature
you set, 3 beeps will sound.
NOTE:If theAuto Recipe" ConversionFeature
/s on, it wi//automaticallyreduce the set regular
bakingtemperatureby 25°F to theapproprbte
convection temperaturein convectbn bakemode.
SeeAuto Recipe_ Conversionin the Special
Featuressection.
Tile oxen will continue to cook fi)r tile
prog_'ammed amount of time, then shut
off automaticall}, unless tile _\ARM feature
was set. See tile HOw to Set the Oven for
Warmingsection.
Atter the oven ttlrns Ofl_ tile end-ofq'ycle
tone will sound.
[] Touch tile CLEAR/OFFpad to clear
tile displa) if necessai3'. Remote
the tbod fl'on-:_tile oxen. Remembei;
exen thoug]l the ()veil shuts off
automaficall), food left in tile oven
will continue cooking alter the oxen
turns oftl
24
Page 25

Usingthe convectionoven. gocorn
For best results when roasting large
turkeys and roasts, we recommend
usflTgtheprobe included f17the
col?vectiol? oveR,
CONVECTION
O}(D@(D(D
Tochange the oven temperature
during the Convection Roast cycle,
touch the CONVECTIONROASTpad
and then touch the numberpads to
set the new desired temperature.
How to Set the Upper Oven for Convection
Place tile oven rack in the position
[]
that centel_ the food beP,_een the
top and bottom of the o_en. Insert
the probe into the meat. Make sure
it is pushed all the _a} in.
] _q_en the internal temperatm'e of
] Plug the probe into the outlet in the
o_en. Make sure it is pushed all the
wa} in. Close the oven doo*_
[] Touch the PROBE pad.
] Touch the number pads to set the
desired internal meat temperature.
NOTE" The ma_murn internal tempemtm'e
for the ibod that xou can set is 200°E
] Touch the number pads to set the
desired oxen temperature.
NOTE" If the probe/sremoved from the
oven while probecook/bg,the oven will not
automaticallyturn off.
CAUTION:ropreventposs, leburns,
do not unp/ug the probe from the oven out/et unti/
the oven has cooled[] Touch the CONVECTIONROASTpad.
NOTE"
iJi::Youwill heara fan whiiecookingwith this
The display will flash PROBE and the oven
conttol will signal if the probe is inserted
into the outlet, and you ha\v not set a probe
tempemtm'e and pressed the SYARYpad.
[] Touch the START pad.
_hen the oxen starts to heat, the word
LO will be in the display.
_Mter the internal tempemtm'e of the m eat
reaches 100°E the changing internal
tempenmn'e will be shown in the displa>
_: Youcan usethe Kitchen Timereventhoughyou
iJi::Never ieaveyour probe /bsidethe ovenduring
_: Donot store theprobe in theoven.
iJi::Probenot for usein BroilorSelf-Cleanfunctions.
Convection Roasting Guide
Roasting when Using the Probe
the meat reaches the number }ou
have set, the probe and the oven
turn off and the o\ en control signals.
To stop the signal, touch the
CLEAR/OEEpad. Use hot pads to
remove the probe Kom the ibod.
Do not rise tongs to pull on it--
they might damage it.
feature. Thefan will stop when the dooris
opened,but theheat will not turn off.
cannotuse timed ovenoperations.
aserf-cleaningcycie.
Meats Minutes/Lb. Oven Temp. Internal Temp.
Beef Rib,BonelessRib, Rare 20 24 325°F 140°Ft
Pork Bone-in,Boneless(3to 5 ibs./ 23 27 325°F 170°F
Ham Canned,Butt, Shank(3to 5Ibs.fully cooked) 14 18 325°F 140°F
Lamb Bone@,Boneless(3to 5Ibs./ Medium 17 20 325°F 160°F
Seafood Fish,Whole (3to 5 Ibs.) 30_40total 4O0°F
Poultry Whole Chicken(2½to 31/zIbs.) 24 26 350°F 180° 185°F
"!'St*(//('d bi_z{*gr_ *_all3 _z'qui*z"3045 mi_ ue* additio)_al _*,asti_*gtime. ShDM I<gsa_ d b*l,ast with/oil to D*z,ze)_f
t 77'#U'_.Det'a'¢m,"_to/A,Wic*'fl_m'sa)s "7_an'b*'_'jisD@ukn; b*zt)ouslmuldknowthatc_Md,*giZtoo_{t 1401mem_* 25
>m_"flx_d poi>_i_ g o_g*nzism*may surH'lw." (%o*mw S@, l"(x)d Bo&. _3_t*Ki>,5*n Guide. t N/)A t¢,,v,tithe 19S5.)
TopSirloin Medium 24 28 325°F 160'_F
(3to 5 ibs./ Weii 28 32 325°F 17ff_F
BeefTenderloin Rare 10 14 325°F 140'_Ft
Medium 14 18 325°F 160'+
Chops(1/2 to 1" tNck/ 2chops 30_5 total 325°F 17ff'F
4chops 35_40total 325°F 170"F
6chops 40_45total 325°F 170'_F
Well 20 24 325°F 170°F
LobsterTails(6to 8 oz.each) 20_5 total 350°F
CornishHens,Unstuffed(I to 1½ Ibs.) 50%5 total 350°F 180° 185°F
Stuffed(1to 1½ Ibs.) 55_80total 350°F 180° 185°F
Duckling(4 to 5Ibs.) 24 26 325°F 180° 185°F
Turkey,Whole*
Unstuffed(10to 16 Ibs.) 8 11 325°F 180° 185°F
Unstuffed(18to 24 Ibs.) 7 10 325°F 180° 185°F
TurkeyBreast(4to 6 Ibs.) 16 19 325°F 170°F
Page 26

Usingtheproofingand warming features.
Theproofing feature maintains a warm environment useful for rising yeast-leavened products.
How to Set the Upper Oven For Proofing (on some models)
[] Place the co;ered dough in a dish in [] _Ahen proofing is finished, touch
the oxen on shelf g or C. the CLEAR/OFFpad.
0
NOTE:Forbestresults,coverthedoughwitha
clothor withgreasedplastlcwrap(theplastic
mayneedto beanchoredunderneaththe
containersotheovenfanwillnotblow itoff}
[] Touch the PROOF pad and then the
STARTpa d.
The display will read PrF (proof).
The oven interior light turns on and
remains on during proofing.
The proofing feature automatically
provides the optimum temperature fin.
the proofing process, and therefin'e does
not have a temperature a(!iusnnent.
[] Set the KITCHEN TIMER ON/OFF fi,r
the minim um proof time.
_: Toavoidloweringtheoventemperatureand
fengtheningproofingtithe,donotopenthe
ovendoorunnecessarily
::Ji::Checkbreadproductsearlytoavoid
over-proofbg.
NOTE:
_: Donotusetheproofingmodeforwarming
foodorkeepingfoodhot Theproofingoven
temperatureisnothotenoughtoholdfoods
atsafetemperatures.UsetheWARMfeature
tokeepfoodwarm.
::Ji::Proofingwill notoperatewhenovenis above
125°E"HOT"willshowinthedisplay
26
How to Set the Upper Oven For Warming (onsome models)
The WARMteature keeps cooked
fi)ods hot.
This feature is not designed to reheat
cold food.
To use the WARMfeature, touch the
WARMpad and then the STARTpad.
To use the WARMleature after Timed
Baking or Roasting, tollow these steps:
[] Touch the mode of cooking that
VOtl want to use (BAKE,CONVECTION
BAKEMULTI,CONVECTIONBAKE
I RACKor CONVECTIONROAS13.
_);:::I,eaxe them tmcoxered.
!;?:Check crispness after 20-30 minutes.
Add time as needed.
IMPORTANTNOTES:
::Ji::Foodshouldbekepthotin itscookingcontainer
ortransferredtoaheat-safeservingdish.
_: Formoistfoods,coverthemwithanoven-safe
lidoraluminumfoiL
_: Friedorcrispfoodsdonotneedto becovered,
butcanbecometoodryif warmedfortoolong.
::Ji::Repeatedopeningofthedoorallowsthehot
aft toescapeandthefoodtocool
[] Touch the number pads to set the
oven [eIllpeKIttlI'e,
_:AllowextratlYneforthe temperatureinsidethe
oventostabih2eafteraddingitems.
[] Touch the COOKINGTIMEpad.
::Ji::Withlargeloadsit maybenecessarytocover
[] Touch the number pads to set the
desired length of cooking time.
[] Touch the WARMpad.
[] Touch the STARTpad.
To Crisp Stale Items
::Ji::Place food in lol/_sided dishes or pans.
_: For best results, place the food items in
a single layer: Do not stack.
someof thecookedfooditems.
iJi::Removeservingspoons,etc., beforeplacing
containersin theoven.
_: Donotuseplasticcontainers,lidsor
plasticwrap.
CAUTION: lasticcontainers,lidsor
plasticwrapwillmeltif placedin theoven.
Meltedplasticmaynotberemovabfeandisnot
coveredunderyourwarranty
Page 27

Usingthe self-cleaning upperoven. gecom
Before a Clean Cycle
WipeupheavysoilonflTeoven
bottom.
_\'e reconnnend venting your kitchen
with an open window or using a
ventilation tim or hood during the
fii_t sel6clean cycle.
Reinox e broiler pan, broiler grid, probe,
all cookware and any ahuninuni fifil
fI'OIlI tile o%eil,
NOTE"
::Ji::If your oven is equipped with shiny,
silvei=colored oven i'ack% reniove theni
betoi'e you begin the sel6clean cycle.
::Ji::If your oven is equipped with gray
porcelain-coated oven i'ac!<s, they
nlav be lett in tile oven during tile
sel6clean cycle.
Tile shiny, silvei:coloi'ed oven i'acl<s
(Oil soine Inodels) can be self=cleaned,
but they Mll darken, lose their hister and
becoine hard m slide.
Soil on tile fl'ont fl'anle (ff tile range and
outside the gasket Oil the door will need
to be cleaned by hand. Clean these areas
with hot watei; soap-filled steel-wool pads
or cleansei_ such as Soft Scrub _Rinse
well with clean water and di'_:
Do not clean tile gasket. Tile fibeiglass
nlaterial ot tile oven door gasket cannot
withstand abrasion. It is essential fi)r tile
gasket to renlain intact. If vou notice it
beconiing worn or ti'ayed, replace it.
Wipe up any hea\?' spillovei_ on tile
()veil bottolil.
Make sure tile oven light bulb cover is
in place and the oven light is ott
IMPORTANT'. The health of sonle biMs
is extrenielv sensitive to the dunes given
off during the sell=cleaning cycle ot any
range. Move birds to another well-
ventilated i'ooin.
@@(3)(3)@
(3)@@@@
@
How to Set the Upper Oven for Cleaning
The oven door must be closed and all controls
set correctly for the cycle to work propefl)z
[] Touch tile SELFCLEANsro/tO pad
Ollce tk)r _1 4-hour (Ieall tilne or
twice fi)r a 3-hem" clean time.
A 3-hem" selgclean time is
recoilllllellded ik)i" use when
cleaning small, contained spills.
A self=clean time ot 4 houl_ or
longer is recommended fin.
a diKier oven.
V2] Ifa time other than 4 houlS or
3 hom_ is needed, use tile ram/bet
pads and enter tile desired
de;Ill tinle.
You can change tile clean dine to an}
tiIne bet_een 2½ hotu's and 5 houI_,
del)elldlll_, n bevy dll't% hotly ()veil is.
[] Touch tile STARTpad.
• (y () *
Tile door locks autoinaticallv. Tile display
will show tile clean tiine remaining. It will
not be possible to open tile o\en door
until tile tempelatuie drops below tile
lock temperature and tile LOCKEDlight
goes olE
When tile LOCKEDlight goes ofl_ you will
be able to open tile do(n=
_: Tile word LOCKEDwill flash and tile
woM deorwill display if you set tile
clean cycle and t0iget to close tile
()veil dooi:
::Ji::To stop a clean cycle, touch tile
CLEAR/OFFpad. _'_]/eI1 tile LOCKEDlight
goes off indicating tile ()veil has cooled
below tile locking teinperamre, you
will be able to open tile dooI:
27
Page 28

Usingthe self-cleaning upperoven.
Theoven door must be closed and all controls set correctly for the cycle to work properly.
How to Delay the Start of Cleaning
@@@@@
@@@@@
@@@@@
@@@@@
@
[] Touch tile SELFCLEANSTD/LOpad
once tor a 4-hour clean tiine or
twice toi a 3-houi clean tinie.
A 3-hour selt:clean dine is
reconnnended tbr use when
cleaning snlall, contained spills.
A sel6clean dine of 4 houi_ or
longer is reconnnended tor
a dirtier oven.
[] If a tiine other than 4 houis or
3 houI_ is needed, use tile nuinber
pads and enter tile desired
clean dine.
Y)m can change tile clean tiine to am
dine between _2½ houls and 5 houi_,
dei)ending, on how dirt_, your oxen is.
After a Clean Cycle
Y_tI Ina_ notice some white ash in tile
o_en. _ii)e it up with a danlp cloth after
tile o_en COOLS.
If white @orsremain,removethem with a soap-
filledsteel wool pad and rinse thoroughlywith
a wnegarand water mlkture.
These deposits are usually a salt residue
that cannot be reinoved by tile clean
cycle.
If tile oven is not clean atter one clean
c)cle, repeat the cxcle,
[] Touch tile DELAYSTARTpad.
[] Using tile nuinber pads, enter tile
tiine of (la_ _ou want tile clean cycle
to stnrt.
[] Touch tile START pad.
Tile door locks autoinadcally, Tile display
will show tile start tinIe. It will not be
possible to open tile oven door until
the tenlperature drops below the lock
teniperamre and tile LOCKEDlight
goes off.
'_l/eIl tile LOCKEDlight goes off, 7m
will be able to open tile dooi:
_: _l_)tl c}lnnot set tile ()veil tor cooking or
another selfXclean cycle until tile oven
is cool enough fl_I" tile door to unlock.
_: \4]/ile the oven is seltkleaning, you can
touch tile CLOCKpadto display tile
tinIe of din: To return to tile clean
countdown, touch tile SELFCLEAN
STD/LOpad.
_: If tile racks becoine hard to slide, apply
a Slllall _lll/O/in[ of cooking oil to a
paper towel and wipe tile edges of tile
oven racks with tile paper towel.
28
Page 29

Special featuresof yourovencontrol ge.com
Yournew touch pad control has additional features that you may choose to use. The following are the features
and how you may activate them.
Thespecial feature modes can only be activated while the display is showing the time of day. They remain
in the control's memory until the steps are repeated.
When the display shows your choice, touch the $TARTpad. Thespecial features will remain in memory after
a power failure, exceptfor the Sabbath feature, which will have to be reset.
f2-Hour Shutdown
With this feature,should youforget and leave the
ovenon, thecontrol wi//automatically turn off the
ovenafter 12hours dunbgbak/bg functionsor
after 3 hoursdunbg a broil function.
]f_ou wish to mrn OFFthis feature, fidlo_
the steps belo,,_.
[] Touch the BROILHI/LOandBAKE
pads at the same time m_tfl the
displa_ shows SE
[] Touch the BELAYSTART pad tmfi}
no shdn (no shut-off) appem_ in the
disp}a).
[] Touch the STARTpad to _ctiv:_te the
no shut-off and lea_e the control
set in this speci:d ieamres mode.
Fahrenhe# or Celsius Temperature Selection
Yourovencontro/ is set to usetheFahrenheit
temperatureselections,but you maychange this
touse the Ce/siusselections.
[] Touch the BROILHI/LOand BAKE
pads at the same time tmtil the
display shows BE
[] Touch the COOKING TIMEand BROIL
HI/LOpads at the same time. The
(lisp}a} will show F (Fahrenheit).
[] Touch the COOKING TIMEand BROIL
HI/LO pads again at the sanle tiine.
The display will show C (Celsius).
[] Touch the STARTpad.
Tonesat the End of a Timed Cycle
At the end ofa flYnedcycle, 3 short beepswill
soundfollowed byone beepevery6 seconds
/i)iii i!(iii);)i!!ii
until the CLEAB/OFFpadis touche_ This
continual 6-secondbeepmaybecanceled
To cancel the 6-second beep:
[] Touch the BROILHI/LO and BAKE
pads at the same time tmtil the
display shows SE
[] Touch the KITCHENTIMER ON/OFF
pad. The display shows CONBEEP
(contimu,us beep). Touch the
KITCHEN TIMER ON/OFFpad a#fin.
The display sho_:s BEER (This cmce}s
the one beep e\'e_' 6 seconds.)
[] Touch the STARTpad.
29
Page 30

Special featuresof yourovencontrol.
Tone Volume
ii
(i iiill
i_i___i!i_I!i@ii_ i_i__i
0
Thisfeatureaflows you toadjust the tone volumes
toa moreacceptable volume. Thereare three
possiblevolumelevels.
[] Touch the BROIL HI/tO and BAKE
pads at the same dine until the
display sho_vs SF.
[] Touch the OVEN LIGHTON/OFFpad.
The display will show 2 BEEP. This is
the nfiddle w)hune level.
Touch the OVENLIGHTON/OFFpad
again. The displa_ will show 3 BEEP.
This is the loudest xolume lexel.
12-Hour, 24-Hour or Clock Blackout
Yourcontrol isset to usea 12-hourclock.
If you would prefer to have a 24-hour
military time clock or black out the clock
display, follow the steps below.
[] Touch the BROIL HI/tO and BAKE
pads at the same time tmtil the
display sho_vs SE
[] Touch the CLOCKpad once. The
displa} will show 12hr. If this is
the choice you want, touch the
START pad.
Touch the OVEN LIGHT ON/OFFpad
again. The display will show I BEEP.
This is the quietest volume level.
For each dine the level is changed,
a tone will sound to provide an
indication of the volume level.
]_] Choose the desired sound level
( 1BEER 2 BEER3 BEEP).
[] Touch the START pad to actixate
the lexel shown.
Touch the CLOCKpad again to change
to the 24 hour milita U time clock. The
display will show 24hr. If this is the choice
you want, touch the START pad.
Touch the CLOCKpad again to black out
the clock display. The display will show
OFF.If this is the choice you want, touch
the START pad.
NOTE:If theclockisintheblack-outmodeyou
willnotbeableto usetheDelayStartfunction.
3O
Page 31

CONVECTION
• AUTO RECIP£CONVERSION•
START
Auto Recipe TM Conversion
Whenus/bgconvectionbake,theAuto flec/peT_
Conversionfeaturewill automat/ca//yconvert
enteredregularbaklbg temperaturesto
convectionbaklbgtemperatures.
Thisfeature12activatedso that the displaywill
show the actua/converted(reduced)temperature.
Forexample,if youenter aregular recipe
temperatureof 350°Fand press the STARTpad,
the &splay will show CON and the converted
temperatureof 325°£
.qe.com
Todeactivate the feature:
[] Press tile BAKEand BROIL HI/tO pads
at tile same time until tile displa}
shox_s SF.
Press the CONVECTION RAKE
[]
MULTI/1 RACKpad. Tile displa} _ill
show CON ON. Press tile
CONVECTION BAKEMULTI/I RACK
pad again. Tile display will show
CON OFF.
[] Press tile STARTpad.
To reactivate tile tbatm'e, repeat steps
1-3 aboxe but press tile STARTpad _,_hen
CON ON is in tile displa}.
31
Page 32

Usingthe Sabbathfeature.
(Designed for use on theJewish Sabbath and Holidays) (on some models)
TheSabbathfeature can be usedfor baking/roastingonly.It cannotbe usedfor convection,broiling,self-cleaning or
DelayStart cooking.
riOT["Theovenlightcomesonautomatically(onsomemodels)whenthedooris openedandgoesoffwhenthedoorisclosed.Thebulbmaybe
removed.SeetheOvenLightReplacementsection.Onmodelswithalightswitchonthecontrolpanel,theovenlightmaybeturnedonandlefton.
How to Set for Regular Baking/Roasting
Using the munber pads, emer th(
desired t(tmperalure be[we(ll 17(1'1_"mid
55() 'E No sigl/_/I or tel/lp(l';ttlllTe will be
gJ'Vel/.
Tou(h die START pad.
[]
After a l_tlldOill d(l m period of
[]
tpl mxim _I(1?. )0 s/ on(Is to ] lninule,
D c will _q)ilear ill the displ_ly
indicating that tile oven is baking!
roasting. IfD c doesn't apilear in tile
displ m, start ag_fin at Step 4.
To a(!just tile o_en temperature, timch tile
BAKEpad, enter tile new temperature using
th( mlmb(r ilads and touch tile STARTpad.
NOTE: The CLEAR/OFFand COOKING TIME pads
are acti_( dining tile Sal)bath Ibamre.
When the display shows D the
oven is set h7Sabbath. When the
display shows D C the oven is
baking/roasting.
Make sure the clock shows the correct time of day and 14q
fl_eoven is off
rT] Touch and hold both Ill(! BROIL HI/LOand
I,'1
BAKE pads, at the same time, mnil the
displ m shows SE
NOTE: II l/_d_.eor broil _lpp('_o'sin the
displ m, tile BROIL HI/LOand BAKEllads
were llOt toHch(d at th( sa_/le time.
"li)uch tile CLEAR/OFFpad and begin
ag:dn.
[_] Tap die DELAY START ilad until SAb bAtH
appears i / l/( (isp =}
] Touch ill(, START pad and D _sill appear
in die (isp t}
] "[buch file BAKE pad. No signal will
be },_,rivel/.
When the display shows D the
oven is set f17Sabbath. When the
display shows D C the oven is
baiting/roasting.
ii !iiiiii!i I ii
32
How to Set for Timed Baking/Roasting--Immediate Start and Automatic Stop
Make sure the clock shows the correct time of day and
theoven is oK
I_ Touch an(t hol(t both the BROIL HI/tO and
I,'1
BAKE pads, atthe same time, until die
display sh/)_ SE
NOTE: ff bake or broil appears ill tile
display, tile BROIL HI/tOand BAKEpads
_r_'t_'_()t touched _lt the stone time.
Touch tile CLEAR/OFFpad and begin
ag_dn.
12] "[_t])the DELAYSTART pad mliil SAb bAtH
i,r.- i
al)pem:s ill the displa}.
] "['ou(h the START pad and D will appem:
ill the displa}
F_] Touch the COOKING TIME pad.
I'TI
"['(mch the nmntler pads to set the
[]
desired length of looking time l)et_reel/
1 minute and 9 horn's and 99 minutes.
Tlle looking time that ym entered will
be displ_ued.
] "lbu(h the START pad.
] "lbu(h the BAKEpad. Nil si_,mal will be
Using the numl)er pads, enter the
] desired temperature. Nil sig_ml ill"
tellll)eT'_lHllFe will be g,dxen.
] "lbuch the START pad.
After a random (tela)peliod oI
[]
approxhnately 30 seconds t() 1 minme,
D C will appear ill die display indi(adng
d/at tile oven is baking/roasting. If D C
doesn't _llt)ear ill tile displa}, start _g_dn
at Step 7.
"Ib a(ljust the oven temperature, touch tile
BAKEpad, emer tile new temperaum' using
tile nmnt)er pads and touch tile STARTpad.
When cooking is finished, tile displa} will
challge ti'ol// D C tO D alld O:OOwillappear,
indicating that the o\en has mrne(I OFFbut is
still set ill Sabbath. Remo_' tile cooked tood.
How to Exit the Sabbath Feature
I_ "lbu(h the CLEAR/OFFp_Id.
I., I
] lI the oxen is cooking, w_tit for a randon/
dela} period of approximatel 7 30
se(ol/dS to ] ll/illllie, /llltil ()l/]V D
is ill the display.
r_] "lbu(h and hol(1 both the BROILHI/tO
i,Ji
and BAKE p;_ds, at the same time, m/til
the display sllows SE
] Tap die DELAYSTART pad undl 12shdn
ill" no shdn al)tle_u:s ill the (tispla}
] Choose 12shdn, indicating that the oven
will amomatliall mrn off _dter 12 hours
or no shdn, in(li( _dng that the oxell will
I/()i a/llilm_'di(;411v ttllTI/ ()_]:_t[tel: ] _ ]lo/lrs.
Press START_dlenthe optiinl that vim
[] wamisin dledisplay (12shdnornoshdn).
NOTE: If a power outage occun:ed while
tile oven was ill Sabbath, tile o\en will
alltOlllaticallv tIIYI/ Off all(I sta_ Off ('Veil
wile// the poweF l'etllrllS. Tile ovel/
COllI1;ol l///lSt be reset
Page 33

Careand cleaningof therange, gecom
Be sure all controls are off and all surfaces are cool before cleaning any part of the range.
If your range is removed for cleaning, servicing or any reason, be sure the anti-tip
device is re-engaged properly when the range is replaced. Failure to take this
precaution could result in tipping of the range and cause injury.
How toRemoveProtective ShippingFilmandPackaging Tape
Cai'etully grasp a corner ot tile protective
shipping fihn with your fingei_ and slowly
peel it fl'oin tile appliance sui_i_ce. Do not
use any shaq) iteins to renlove tile fihn.
Renlove all of tile fihn befi)re using tile
appliance fi)r tile fiI_t fin/e.
Control Knobs
The control knobs may be removed foreasier
c/eambg
Make sure tile knobs are in tile OFF
positions and pull theIn smfight off tile
steins for cleaning.
To aSStlI'e no daIllage is done to tile
finish of tile product, tile safest way to
renlove tile adhesive ti'on/packaging tape
on new appliances is an application (ffa
household liquid dishwashing demIgent.
Apply with a sott cloth and allow to soak.
NOTE."Theadhesivemustberemovedfromall
paris.Itcannotberemovedif it isbakedon.
Tile knobs can be cleaned in a
dishwasher or they nlav also be washed
with soap and wateI: Make sure the inside
of tile knobs are di T befi)i'e replacing.
Replace tile knobs in tile OFf position to
ensure proper placen/ent.
Oven Vent
Theovenventislocatedabovethen)htrear
surfaceuni_
This area could becon/e hot during
()veil rise.
Control Panel
If desked, the touchpads may be deactivated
beforecleaning.
See tile Range Lockout or Control Lockout
infoimati(>n in tile Using the clock, timer
and controllockout section in this nlanual.
Clean up splattei_ with a dan/p cloth.
It is nor/llal Jbi" Ste}lI/l to COIl/e ()tit of
tile vent.
TheventIslYnportantforproperaircirculation.
Neverblockthisvent.
_Otl Illag also tlse a glass cleanei i
Renlove heavier soil with waim soapy
wateI: Do not use abrasives of any kind.
Reactivatethetouchpadsaftercleaning.
33
Page 34

Careand cleaningof therange.
Cleaning the Oven Door
To clean the inside of the door:
Toclean the outsideof the door:
Thegasketis designedwitha gapat the
bottomto allow forproperair circulation.
Donot rubor cleanthe doorgasket--
it hasan extremelylowresistanceto
abrasion.
If younotice thegasketbecomingworn,
frayedor damagedin anywayor if it
hasbecomedisplacedon thedoor,
youshouldhaveit replaced.
Slot_
Hinge-,
10ck
Pull hinge locks down to unlock.
}t:ilBecause the area inside the gasket is
cleaned during the selfk'lean c_cle
you do not need to clean this b_ hand.
_: The area outside the gasket and
the door liner can be cleaned with
a soap-filled steel wool or plastic pad,
hot water and detergent. Rinse well
with a vinegar and water solution.
Lift-Off Oven Door
Thedoorisveryheavy.Becarefulwhen
removingandlifting thedoor.
Donotlift thedoorbythehandie.
Toremovethedoor:
[] Fully open the door.
[] Pull the hinge locks down toward
the door fl'ame, to the tmlocked
position. A tool, such as a small
fiat-blade screwdriver; may be
required.
[] Fimflx,_,,ras,),_ both sides of the door
at the top.
[] Close door to the door remoxal
position, which is halBvav between
the broil stop position and fiflly
closed.
iJi::Use soap and water to thoroughly
clean the top, sides and ti'ont of the
oveil dooi: Riiise well. YOl.l IIl_lV _llso
use a glass cleaner to clean the glass
on the outside of the dora: Do not let
wamr drip into the vent openings.
iJi::If any stain on the door vent trim is
persistent, use a soft abrasive cleaner
and a sponge-scrubber tot best results.
_: Spillage ot marinades, fl'uitjuices,
tomato sauces and basting materials
cont;fining acids may cause
discoloration and should be wiped
up immediately: _4]_en sm_i_ce is
coo L €lead add Yiiise.
!;>Do not use oxen cleanei_, cleaning
powde_ or hm_h abrasixes on the
outside of the door.
X&qththe Bottorn Hingearm
[]
door at the edge
same angle as X
the removal
position, seat the
indentation of
the hinge am_
into the bottom
edge of the hinge slot. The notch in
the hinge am/m ust be fifllv seated
into the bottom of the slot.
Fully open the door. If the door will
[]
not fiflly open, the indentation is not
seated correctly in the bottom edge
of the slot.
Push the hinge locks up against the
[]
flxmt fl'ame of the oxen caxi_' to the
locked position.
ofslot
Removalposition
34
[] I,ifl door up and out tmfil the hinge
am/is clear of the slot.
To replace the door:
[] Fimfl_,_,,ras,),_ both sides ot the door
at the top.
Hing
lock
Hinge:
arrn
Push hinge locks up to lock.
[] Close the oxen (h:,c_r
Page 35

Removable Lower Oven Drawer Pan
NOTE:Formodelswithanelectncwarming
drawerorlowerovendrawer,beforeperformleg
anyadjustments,cleaningorservice,disconnect
therangeelectricalpowersupplyat the
householddistributionpanelbyremovingthe
fuseorswitchingoffthecircuitbreakerMake
surethedrawerheatingelementiscool.
NOTE"Allowlowerovendrawertocoolbefore
removingpan.
NOTE Wipespillspromptlyaftereachuse.
::Ji::Never place, use or self'clean the lower
oven drawer pan in the upper oven.
::J_::i,ower (wen (h'awer has a i'eill(wable
pan ff)r easy cleaning. Clean with hot
soaI_)'water and a sponge or dish towel.
D_' with a clean cloth. Replace the pan
ill the lower oven drawer
35
Page 36

Careand cleaning oftherange.
Oven Light Replacement
CAUTION: Beforereplacingyouroven fight bulb,
disconnect thee/ectrica/power to the rangeat the
main fuseor circuit breakerpane/.
Be stlI'e to let the light cover and bulb
cool completely.
Toremove the cover:
Wire cover holde_
Q, i' to utd'e
Hold a hand under the co',er so it
[]
doesn't tidl when released. _,_ith
finge_ of the same hand fimfl_
push back the wire coxer holden
I,ift off the coxen
Do not remove any screws to remove
the cover
Storage Drawer Removal (on some models)
Toremove the drawer:
[] Pull the drawer out until it stops.
[] I,ift the fl'ont of the drawer until the
stops clear the guides.
[] Remoxe the drawen
[] Replace bulb with a 40-watt
appliance bulb,
Toreplace thecover."
[] Place it into groove ot the light
receptacle. Pull wire torward to the
center of the cover tmfil it snaps
into place.
[] Connect electrical power to the
range.
Toreplace thedrawer:
[] Place the drawer rails on the guides.
[] Push the drawer back until it stops.
[] I,ifl the thmt of the drawer and push
back until the stops clear the guides.
[] l,ower the ti'ont of the drawer and
push back until it closes.
Wipeupheavysoilontheoven
bottom.
36
Oven Heating Elements
Do not clean the broil element. Am soil
will btlrn off'when the element is heated.
Clean the oxen floor with warm, soapy
water.
Onsomemodels, the bakeelement/s not
exposedand is under the ovenfloor If spillovers,
residueor ash accumulateon theoven floor,
wl}geup beforeself-c/eanlbg.
Page 37

Ovenrank Oven Racks
ge.com
M1 oven racks may be cleaned bv hand
with an abrasive cleaner or steel wool.
After cleaning, rinse the racks with clean
water and dry with a clean cloth. Gray
l)orcelain-coated oven i'ilC]_; Ill,IV i'eil/ain
in the oven during the sel6cleaning
cycle without being (lanmged. The shin 5
silver<'olored oven racks may remain in
the oven during the seltLcleaning cycle,
but thev will h)se their hlster and becolne
hard to slide,
Stainless Steel Surfaces (onsome models)
Donotusea steel wool pad;# will scratch
thesurface.
To clean the stainless steel surfhce,
use warn/sudsy water or a stainless steel
cleaner or polish. Alwa)s wipe the surti_ce
in the direction of the grain. Follow the
cleaner instructions for cleaning the
stainless steel stmface.
It Mll be necessai T to grease all oven
rack side edges with a light coating ot
vegetable oil alter cleaning then/by hand
or in the oven. This will hel I) maintain
the ease of sliding the racks in and out
of the oven.
To inquire about purchasing stainless
steel appliance cleaner or l)olish, or to
find the location ()t a dealer nearest you,
please call our toll-ti'ee nmnber:
National Parts Center 1.800.626.2002
ge.com
Painted Surfaces
Painted sm'fimes include the dool.
top (ff the control panel and tile drawer
fl'ont. Clean these with soap and water
or a vinegar and water solution,
Do not rise coI//l//erclal ()veil cleanei_,
cleaning powdel_, steel wool or hmM_
abrasives on any painted sm'_ime,
37
Page 38

Cleaningthe glasscooktop.
Normal Daily Use Cleaning
ONLY use CEIL&MA_ BRYTE" Cermnic
Other creams may not be as eflocfive.
To maintain m_d protect the surlilce of
your glass cooktop, fi)llow these steps:
(2)okto I) Cleanel" on tile glass cooktol}.
[] Before using the cooktop lot the
fiist time, clean it with CEIL_2dA
BRYTE <':Ceramic Cooktop Cleane_:
Cleanyourcooktopafter
each spill. UseCERAMA
BRYTE® CeramicCooktop
Cleaner.
This helps protect the top and
makes cleanup easier:
Dail) use of (;EIL_dVIA BRYTE <_'
[]
Ceramic Cooktop Cleaner will help
kee I) tile cooktop looking new.
Burned-On Residue
[] Shake tile cleaning cream well.
Apply a few drops of CEILz_dMA
BRYTE ':Ceramic Cooktop Cleaner
directly to the cooktop.
[] Use a paper towel or CEIL_dMA
BP.YTE <_>Cleaning Pad fin" Ceramic
Cooktops to clean the entire
cooktop S/lI]il ce.
[] Use a (h)' cloth or paper towel
to relnove all cleaning residue,
No need to rinse,
NO_: ItisveryimportantthatyouDONOTheat
thecooktopuntilithasbeencleanedthoroughly
Use a CERAMA BRYTE'_ Cleaning
Pad for Ceramic Cooktops.
The CERAMABRYTE'*_Ceramic
Cooktop Scraper and all
recommended supplies are
available through our Parts Cente_
See instructions under "To Order
Parts" section on next page.
NOTE:Do not use a dull or nicked
blade.
WARNING:DAMAGEto yourglasssurfacemay
occurif youusescrubpadsotherthanthose
recommendecL
] Pdlow tile cooktop to cool.
[] Spread a tew drops ol CEIL_dVIA
BRYTE _>Ceramic Cooktop Cleaner
on tile entire bm'ned residue area.
Using tile included CERAMA
[]
BRYTE <_:'Cleaning Pad for Ceramic
Cooktops, rub tile residue area,
ali,) )lying, pressm'e as needed.
Heavy, Burned-On Residue
[] _Mlow tile cooktop to cool.
[] Use a single-edge razor blade scraper
at approximately a 45° angle against
the glass stwlhce and scrape the soil.
It will be necessary to apply pressm'e
to tile razor scraper in order to
remove the residue.
_Mter scrai)ing, with tile razor scrape_;
[]
spread a few drops of CEIL&MA
BRYTE <':Ceramic Cooktop Cleaner
on tile entire bm'ned residue area.
Use the CEIL_dVIA BRYTE ': Cleaning
Pad to remove any remaining
residue.
[] If any residue remains, repeat the
steps listed above as needed.
[] For additional protection, alter all
residue has been remoxed, polish
the entire stwfi_ce with CEI_U_dVIA
BRYTE ':Ceramic Cooktop Cleaner
and a paper towel.
For additional protection, after all
[]
residue has been remoxed, polish
the entire stwfi_ce with CEIL_dMA
BRYTE _>Ceramic Cooktop Cleaner
and a paper towel.
38
Page 39

Metal Marks and Scratches
Be careflll not to slide pots and pans
[]
across your cooktop. It will lea_e
metal markings, on tile cooktoI _
StlIS[ilce.
These marl_s are remox:d)le using
tile CEI_d_JlA BRYTE <':Ceramic
Cooktop (:leaner with the CER_d_qA
BRYTE <')(:leaning Pad tot Ceramic
Cooktops.
Rubber-like Seal
To clean tile rubbe>like seal at tile outer
edge of the glass, wipe it with cooktop
crealn when needed.
ge.com
[] If pots xfitl/ a thin oxerla) of
ahmfinum or copper are allowed
to boil dry, the overlay may leave
black discoloration on the cooktop.
This should be relnoved
immediately betore heating again
or tile discoloration may be
peli//allellt.
WARNING:Care ullycheckthe
bottom ofpans for roughnessthat would scratch
thecooktop.
Glasssurface potential forpermanent damage.
Sugary spillovers (such as
jellies, fudge, candy,syrups)
or melted plastics can cause
pitting of the surface of your
cooktop (not covered by the
warranty) unless the spill is
removed while still hot.
Special care should be taken
when removing hot
substances.
Be sure to use a new, sharp
razor scraper.
Do not use a dull or nicked
blade.
Damage from Sugary Spills and Melted Plastic
[] Turn off all surthce units. Remove
hot pans.
[] _.Veming an oven mitt:
a. Use a single-edge razor blade
scraper (CE]_d_4A BRYTE <:
Ceramic Cooktop Scraper) to
move the spill to a cool area on
tile cooktop.
b. Remove tile spill with paper
towels.
To Order Parts
To order CE/_d'dA BRYTE _ Ceramic
Cooktop Cleaner and tile cooktop
scrape_; please call our toll-fl'ee IltllllbeF:
National Parts Center 800.826.2002
ge.com
CERAMA BRYTE®Ceramic
CooktopCleaner ........... # WX?OX300
CERAMA BRYTE®Ceramic
CooktopScraper ........... # WXTOX0302
Kit ........................ # WB64XS027
(Kit includescreamand cooktopscraper)
[] Any remaining spillover should be
left until the stmfiace of the cooktop
has cooled.
] Don't use tile surfhce units again
until all of the residue has been
completely removed.
NOTE" If pittliTgor indentation in the glass
surfacehas alreadyoccurred,the cooktopglass
will have tobe replaced Inthiscase, semce will
be necessary
CERAMABRYTE_CleaningPadsfor
CeramicCooktops ......... # WXIOX350
39
Page 40

Beforeyoucall forservice...
Troubleshooting -tips
Save time and money/. Review the charts on the following
pages first and you may not need to call for service.
Possible Causes What To Do
Surface units will not hnproper cookwaJce • Use pans which are flat and match the diameter of
maintain a rolling boil being used. the surthce unit selected.
or cooking is not
fast enough In some areas, the power * Coxer pan with a lid until desired heat is obtained.
Surfaceunitsdo A fuse ha your home may be * ]_el)lace the filse or reset the circuit breaker.
not work properly blown or the circuit breaker
Surface unit stops This is normal. The refit
glowing when turned is still on and hot.
to a lower setting
(voltage) may be low.
tripped.
Cooktop controls * Check to see the correct control is set for the surtace
improperly set. unit "_ou are t,sin ,
Scratches(mayappear
as cracks)oncooktop
glasssurface
i i ii i
i ii i ii ii ii ii ii ii ii ii ii iii
Areas of discoloration Food spillovers not cleaned • See the Cleaning the glass cooktop section.
on the cooktop before next use.
Plastic melted to Hot cooktop came into • See the Glass surface--potential for permanent damage
the surface contact with plastic placed section in the Cleaning the glass cooktop section.
Pitting (or indentation) Hot sugar mixture spilled • Call a qualified technician for replacement.
of the cooktop on the cooktop.
Frequent cycling hnproper cookwaxe • Use only fiat cookware to minimize c)cling.
Off and on of being used.
surface units
Incorrect deaalhlg
methods being used.
Cookware with rough bottoms
being used or com'se partides
(salt or sand) were between
the cookware and the surface
of the cooktop.
Cookware has been slid
across the cooktop surface.
Hot surface on a model • This is normal. The sm'face may appear discolored
with a light-colored cooktop, when it is hot. This is temporary and will disappear
on the hot cooktop.
• Scratches are not remoxzd)le. Tinv scratches will become
less visible in time as a result of cleaning.
• To avoid scratches, use the recommended cleaning
procedures. Make sure bottoms of cookware are clean
bet0i'e rise, and rise cookware with SUlooth bottou/s.
as the glass cools.
Oven light does Light bulb is loose. • Tighten or replace the 1)ulb.
not work
Oven will not work Plug on range is not completely • Make sm'e electrical l)lu°_ is l)lugged,, into a lixe, properly
h_serted in the electrical outlet, grotmded outlet.
A fuse in your home may be • Replace the filse or reset the circuit breaker.
blown or the circuit
b Xer pped.
Oven controls improperly set. • See the Using the oven section.
40 Oven too hot. • Allow the oven to cool to below locking tern )erattu'e
, I
Page 41

Possible Causes What ToDo
Fooddoesnotbake Oven controls improperly set. * See tile Usingtheoven section.
orroastproperly
Rack position is incorrect * See tile Usingthe oven section.
or the rack is not level.
Incorrect cookware or * See tile Usingthe oven section.
cookware of improper
size being used.
Oven thermostat needs * See tile Adjust the oven thermostat--Do it yourself[
adjustment, se(-ti()u.
Fooddoes not Oven controls hnproperly set. * Make sure you touch the BROILHI/tOpad,
broilproperly
hnproper rack position * See tile Broiling Guide.
being used.
Cookware not suited * For best results, use a pan designed for broiling.
for broiling.
The probe is plugged into the * Unplug and relnove tile probe fl'om tile oven,
outlet ha the oven.
(on some models)
In some areas the power • Preheat tile broil element for 10 minutes.
(voltage) may be low. • Broil for tile lon,_est_, period of time recommended ill
tile Broiling Guide.
ge.com
Oven temperature Oven thermostat • See tile Adjust the oven thermostat--Do it yourself[
too hot or too cold needs adjustment, sectiou.
Storagedrawer Rear drawer support is • Repositiou the drawer, See the Storage Drawer
is crooked on top of the guide rail. Removaliustructious in the Care and cleaning of your
range section.
• Check to make sure drawer is properly seated
if removed.
Storagedrawer
won'tclose
Power cord may be
obstructing drawer
in the lower back
of the rmage.
Rear drawer support is
on top of the guide rail.
• Reposifion the drawer and power cord. See tile
Storage Drawer Removal instructions ill the Care and
cleaning of your range section.
• Reposition the drawer, See tile Storage Drawer
Removalinstmctions in the Care and cleaning of your
range section.
41
Page 42

Beforeyoucall forservice...
Troubleshooting -tips
Possible Causes What To Do
Clock and timer do Plug on range is not completely * Make sure electrical [)lu,_ is l)lugged,, into a live, properly
not work inserted ha the electrical outlet, gr_)uuded outlet.
A fuse ha your home * Replace tile ti/se or reset tile circuit breaker.
may be blown or the
circuit breaker tripped.
Oven controls improperly set. * See the Using the clock and timer section.
Oven will notseff-clean The oven temperature is * _Mlow the range to cool and reset the controls.
too high to set a self-cleaJa
operation.
Oven controls improperly set. * See the Using the self-cleaning oven section.
The probe is plugged into * Remove the probe from the oven.
the outlet in the oven.
(on some models)
"Crackling" or This is the sound of the * This is normal.
"popping" sound metal heating and cooling
during both the cooking and
clemfing functions.
Excessive smoking Excessive soil. * Touch the CLEAR/OFFpad. Open the windows to
during a clean cycle rid the room of smoke. Wait until the LOCKEDlight
goes off. _'ipe up the excess soil and reset the clean
cvcle.
Oven door will not Oven too hot. * Allow the oveu to cool below hwkiug temperature.
open after a clean cycle
Oven not clean after a Oven controls not properly set. * See the Using the self-cleaning oven section.
clean cycle Oven was heavily soiled. * Clean up heavy spillovers before starting the clean
cycle. Heavily soiled ovens may need to sell_cleau
again or for a h)uger period of time.
"LOCKED"flashes The self-clema cycle has been * Close the oven door.
in the display selected but the door is not
closed.
"LOCKED"light is The oven door is locked * Touch the CLEAR/OFFpad. Allow the oven to cool.
on when you want because the temperature
to cook inside the oven has not
dropped below the
locking temperature.
"F--anda number You have a function error code. • Disconnect all power to the range for at least 30
orletter, flash seconds and then reconnect power. If the flu]ction
in the display error code repeats, call for service.
42
Page 43

ge.com
LocOnappearsin the
ovendisplayorLC
Possible Causes
The controls have
been locked.
What ToDo
• See the Range lockout or Control Iockout section
to unlock,
in the surfacedisplay
Control signals after You forgot to enter a • Touch tile BAKE pad and desired temperature or
entering cooking time bake temperature or tile SELF CLEAN STD/LO pad and desired clean time.
or start time cleaning time.
Display goes blank A fuse in your home may be • Replace tire fi/se or reset tire circuit breaker:
Display flashes Power failure. • Reset tire clock.
Unable to get the Oven control pads were • The BROIL HI/LO and BAKE pads must be touched at
display to show "SF" not touched properly, tire same time and held for3 seconds.
"Probe" appears in This is relninding you to • Enter a probe telnper;iture.
the display enter a probe temperature
(on some models) after plugging in the probe.
Power outage. Power outage or surge. • Reset tire clock./f the oven was in use, you must reset
clock flashes it by tourhing the CLEAR/OFFpad, ,settiw_,.the clock
blown or the circuit
breaker tripped.
The clock is in the • See the Special features of your oven control section.
black-out mode.
and resetting any cooking flmction.
Steam from the vent When using the convection • This is normal.
feature, it is normal to see
steam coming out of the oven
vent. As the number of racks
or mnomlt of food being
cooked increases, the amount
of visible steam will increase.
"Burning" or "oily" This is normal in a new oven • To speed the process, set a self-clean cycle for a
odor emitting from and will disappear in time. minimum of 3 hera's. See the Using the self-cleaning
the vent oven section.
Strong odor An odor from the insulation • This is tempor:uy.
around the inside of the oven
is normal for the first few times
the oven is used.
Fan noise A convection fan may • This is normal. TI) maximize col)king evenness,
automatically turn on tire t_m is designed to operate in both directions,
and off. with a pause in between.
• The convection thn will operate dtu_ing preheat
of the bake cxcle. The thn will turn oft after the oxen
is heated to the set temperature. This is normal.
43
Page 44

Beforeyou callforservice...
Troubleshooting -tips
Possible Causes
Ovenracks are
difficult toslide
Drawerdees not slide The drawer is out • Ftdlv extend the (lr;iwer mad push it all the way in.
smoothly or drags of aligmnent. See the Care and cleaning of the range section.
Lower oven drawer or A fuse in your home may be • Replace the fuse or reset the circuit breaker.
The shiny, silver-colored
racks were clemled in a
self-clean cycle.
Drawer is over-loaded or • Reduce weight. Iledistribute drawer contents.
load is unbalanced.
What To Do
• Apply a small amount of vegetable oil to a paper
towel and wipe the edges of the oven racks with
the paper towel. Do not spray with Pare '_or other
lubricant sprays.
warmingdrawer will blown or the circuit breaker
not work tripped.
Controls improperly set. • See the Electric warming drawer or Lower oven
Excessive condensation Liquid in drawer, • Remove liqtdd.
in the drawer
Food dries out in the Moisture escaping. • Cover fi)od with lid or aluminum foil.
lower oven drawer or
warming drawer
Uncovered foods. • Cover food with lid or aluminum foil.
Temperature setting too high. • Reduce temper;iture setting.
Drawer not fully closed. • Push drawer in until latch eugnges.
drawer section.
44
Page 45

GE Service Protection Plus 'M
GE, a name recognized worldwide fbr quality and dependability, offers you
Service Protection Plus'_'--comprehensive protection on all yore appliances--
No Matter What Brand!
Benefits Include:
* Backed by GE
* All brands covered
* Unlimited service calls
* All parts and labor costs included
o No out-of-pocket expenses
o No bidden deductibles
o One 800 number to call
You _dll be completel) satisfied with our service protection or )ou ma) request )our mone) back
on the remaining value of your contract. No questions asked. It's that simple.
Protect yore" refrigerator, dishwasher, washer and dryer, range, TV_ VCR and much more--a_y brand!
Plus there's no extra charge flw emergency service and low monthly financing is available. Even icemaker
coverage and toed spoilage protection is offered. You can rest easy, knowing that all your valuable
household products are protected against expensive repairs.
Place ,our confidence in GE and call us in the U.S. toll-free at _UU._Z_.ZZZ_
for l//Ol'e infol'I//atiOll.
:_,_*]1 hi}in(Is (o_.{!l_{!(L tip t(t _0 ){!iris Ill(I, ]11 the (on[lllenl tl [.S.
We TICover Any Appliance.
Anywhere. Anytime.
.n_ ( Jill here
Please place in envelope and mail to:
GeneralElectricCompany
Warranty Registration Department
P.O. Box 32150
Louisville, KY 40232-2150
45
Page 46

Consumer Product Ownership Registration
Deal Customer:
Thank you for purchasing our product and thank you for placing your confidence in us.
Vi/e are proud to haxe you as a customer'.
Follow these three steps to protect your new appliance investment:
Complete and mail
your Consunler
Product Ownership
Registration today.
ttavc tim pca(u of
mind of knowing w_
Call (olltact VOll ill
the unlikely (vcnt of a
satbl 7, modificalion.
Alter mailing tile
registration below,
store this dOClltllellt
in a safe place. It
contains inlormation
you will need should
you require service.
Our selwice mnnber is
800.GE.CARES
(800.432.2737).
Model Number Serial Number
I I I I I I
Important: If you did not get a registration card with your
product, detach and return the form below to
ensure that your product is registered, or register
online at ge.com.
Consumer Product Ownership Registration
Read your Owner's
Manual carefully.
It will help you
operate yollr llew
appliance properly.
, I
._1_ (MI ll(lx
Model Number Serial Number
Ms. M*>,. Mi_s
Fir"l I I L_slI
Name I I I I I I I I I Nain(! I I I I I I I I I I I I
_11-( (!1 I
Addr(ss I I I I I I I I I I I I I I I I I I I I I I I I
Ap_.#I, , , , , , , I E-lllail,\ddress*
Zip
1ill(, Pla_ed
.,,o,,l_ II II i I
* Please pro',ide your e-lnail address to r,:ceive, via eqnail, discounts, special otlbr_ and other impoltant
commmficafions from GE Appliances ((;1_\).
[ Check herc if you do not want to recei',e COlnlmmications fl-om G1LVs carcfillly selecto:l paltner_,.
Appliances
General Electric Company
Louisville, KY 40225
GE Consumer& Industrial
ge.com
FAILI JRE TO COMPLETE AND REFI JRN TIIIS (_\Pd) DOES NOT DIMINISII Y()I R
_,)\1_ \N'IY RI(;IfFS.
For mort* intormation about G1LVs privacy and daIa usage polic), go to ge.com and click on
'Privacy Policy" or call 800.626.2224.
Nulnl)(!r I I I I I I I
I
I
46
Page 47

NOteS.
rJ_
I
rJ_
€_
m
m_
rp,
w
u_
w
rbr]
47
mlmh
m
Page 48

r_
€_
r_
NOteS.
--°
€_
€_
m
_°
r i
m
I
48
Page 49

NOteS.
rJ_
I
rJ_
€_
m
m_
rp,
w
u_
w
rbr]
49
mlmh
m
Page 50

Accessories.
Looking For Something More?Youcan find these accessories and many more at ge.com, or call 800.626.2002
(during normal business hours). Have your model number ready.
i¸¸)!
Surface Elements & Drip Pans
Oven Elements
_ ! ;j))i ¸
Cleaner Cleaning Pads Scraper
OvenRacks Broiler Pan
¸ ! i
Light Bulbs Knobs
5O
Tired of discolored racks? Wishing you had exm_-hemo_-duty oven rocks?
NOWA VAILABLEfor your range:
(;V's innovative, self-cleanable porcelain-coated oven racks!
• Hem), Duty
• Durable
• Able m be cleaned in a self-cleaning oven
Visit go.corn for more information.
Page 51

GEElectricRange Warranty.
All warranty service provided by our Factory Service Centers,
or an authorized Customer Care®technician. Toschedule
service, on-line, 24 hours a day, vis# us at ge.com, or call
800.GE.CARES (800.432.2737).Please have serial number and
model number available when calling for service.
GE Will Provide:
Anypattof the range which tifils due to a defect in materials or workananship, During this
Fromthedateofthe
origina!purchase
Fromthe dateof the
originalpurchase
_: Service trips to your home to teach you how to use
the product.
iJi::Improper installation, delivery or maintenance.
i_ Failure of the product if it is abused, misused,
or used for other than the intended purpose or
used commerciaJly.
::Ji::Dmnage to the glass cooktop caused hy use of deaJmrs
other than the recommended clem_hig cretans mid
pads.
limited one-year warranty, GE will also proxide, free of charge, all labor and in-home service
to replace the defectixe part,
A replacement glass cooktop if it should crack due to thermal shock, (liscolo_, crack at the
rubber seal between the glass cooktop and the porcelain edge, or if the pattern wea_ off..
A replacement radiant surface unit if it should burn ()tit.
During this limited additional four-year warranty, you will be responsible for any labor or
in-home se_'ice.
Staple your receipt here.
Proof of the original purchase
date is needed to obtain service
under the warranty.
!i_:Replacement of house fuses or resetting of circuit
breakers.
iJi::Damage to the product caused by accident, fire, floods
or acts of God.
::Ji::htcidentaJ or consequential damage caused by possible
defects with this applimlce.
::Ji::Damage caused after delivery.
_: Product not accessible to provide required service.
_: Dmnage to the glass cooktop caused by hardened
spills of sugaacy materials or melted plastic that
are not clemmd according to the directions hi
the Owner's MmmaJ.
Warranty.Any implied warranties, including the implied warranties of merchantability or fitnessfor a particular purpose,
EXCLUSIONOFIMPLIED WARRANTIES--Your sole and exclusive remedy isproduct repair asprovided in thisLimited
are limited to one year or the shortestperiod allowed by law.
This warranty is extended to the original purchaser and any succeeding owner for products purchased for
home use within the USA. If the product is Iocated in an area where service by a GEAuthorized Servicer is not
available, you may be responsible for a trip charge or you may be required to bring the product to an Authorized GE
Service location for service. In Alaska, the warranty excludes the cost of shipping or service calls to your home.
Some states do not allow the exclusion or limitation of incidental or consequential damages. This warranty
gives you specific legal rights, and you may also have other rights which vary from state to state. Toknow
what your legal rights are, consult your local or state consumer affairs office or your state's Attorney General
Warrantor: General Electric Company.Louisville,KY40225
51
Page 52

ConsumerSupport
Haxe a question or need assistance with your appliance? Try tile (;E Appliances _.Vebsite 24 hours a day
gEAppliancesWebsite ge.com
' any day of tile }ear'. For greater convenience and taster service, you can now download Owner's Manuals,
order parts or exert schedule serxice on-line.
ScheduleService
Expert (;E repair setsice is onl} one step away fl'om xour door Get on-line and schedule your set\ice at
xour. conxenience 24 hours any (lax of tile year! Or call 800.GE.CARES (800.432.2737) dining n{mnal
business hours.
ge.com
RealLifeDesignStudio ge.com
GE supports tile Universal Design concept--products, services and environments that can be used by
people _ff all ages, sizes and capabilities. _A'erecognize tile need to design for a wide range _ffphysical and
mental abilities and impaim_ents. For details of GE's Universal Design applications, including kitchen
design ideas t0r people with disabilities, check out our Websim today. For tile headng impaired, please call
800.TDD.GEAC (800.833.4322).
ExtendedWarranties ge.com
Purchase a GE extended warrant_ and learn about special discounts that are a_ailable while _our. warrant_
is still in effect. You can purchase it on-line anytime, or call 8 .626.2224 duling nomml business hours.
(;E Consumer Home Serxices will still be there alter }our warrant) expires.
PartsandAccessories
ge.com
Individuals qualified to se_a'ice their own appliances can have parts or accessories sent direct.Iv to their
homes (VISA, MasterCard and Discover cards are accepted). Order on-line today, 24 hours eve_' day or
by phone at 800.626.2002 dining nomml business hours.
Instructions contained in this manual cover procedures tobeperformed by any user. Other servicing generally
should be referred to qualified service personnel. Cautionmust be exercised, since improper servicing may cause
unsafe operation.
ContactUs
If you are not satisfied with tile service you receive fl'om (;E, contact us (m our _.Vebsite with all tile details
including your phone ntlI/lbeI'_ oi" write to: General Manager; Customer ]),elations
GE Appliances, Appliance Park
I,ouisville, KY 40225
Register your new applimlce on-line---at your convenience! Timely product registration will allow for
RegisterYourApplbnce
' enhanced COlllll/tlnication and pi'Oll/pt ser','ice tinder tile telills ot }OILY WalTantv, shot/ld tile need alJse.
You may also mail in tile prep_inted registration card included in tile I)ackin°_ material.
ge.com
ge.com
Printed in flTeUnited States
 Loading...