

Page 1
_&com
Safety InstrutCions ............. 2-5
Operating InstrutCions
Clock, Timer and
Control l_ockout ................. 15
Com_ction ()_n ............. 19-23
Roasting Guide ................ 23
Timed Features ............. 21,22
Cookware ....................... 7
Oven ....................... 11,12
Broiling Guide ................. 12
()yen Controls .................. 10
°_
Probe .......................... 14
Proofing Feature ................ 24
Sabbath Feature ................. 30
Self'Cleaning ................. 25, 26
Special Features .............. 27-29
Surfi_ce Units .................. 6-9
Thermostat Adjustment--
Do It Yoreself ................... 16
Timed Baking and
Roasting Features ................ 13
_\arming Drawer ............. 17, 1$
*4_rming Feature ................ 24
Care and Cleaning .......... 31-37
Troubleshooting Tips ........ 38-42
Accessories .................... 46
Consumer Support
Consumer Support ...... Back Co_r
Product Registration .......... 43, 44
_\_rranty ...................... 47
Write the model and serial
numbers here:
Model #
Serial #
You can lind them on a label
behind the storage drawer
on the range frame.
#9-80M8 06-07 JR
Page 2
iMPORTANTSAFETYiNFORMATiON.
READALLiNSTRUCTIONSBEFOREUSING.
A !
For your safeN the information in this manual must be followed to minimize the risk offira, electric
shock, or to prevent property damage, personal injury, or loss of fife.
A WARNINGANti-TIPDEVICE
All ranges can tip and injury could result.
Topre vent accidental tipping of the range, attach it to the wall and floor by installing the Anti--tip
device supplied.
If the Anti--tip device supplied with the range does not fit this application, use the universal Anti--tip
device WB2X7909.
Tocheck if the device is installed and engaged properly, remove the storage drawer and inspect
the rear leveling leg. Make sure #fits securaly into the slot.
If you pull the range out fl'om the wall fin" any reason, make sure the device is properly engaged when
you push the range back against the wall. If it is not, there is a possible dsk of the range tipping over
and causing iqiurv if you or a child stand, sit or lean on an open dam:
Please relier to the Anti-Tip device infimnation in this manual. Failm'e to take this precaution could
result in tipping of the range and iqiury.
IMPORTANTSAFETYNOtiCE
The California Safe Drinking Water and ToxicEnforcement Act requires the Governor of California to
publish a list of substances known to the state to cause cancer, birth defects or other reproductive
harm, and requires businesses to warn customers of potential exposure to such substances.
The fiberglass insulation in self-clean ovens gives off a very small amount of carbon monoxide during
the cleaning cycle. Exposure can be minimized by venting with anopen window or using a ventilation
fan or hood.
SAFETYPRECAUtiONS
When using electrical appliances, basic safety pracautions should be followed, including the following:
_: Use this appliance only fin" its intended
pull)ose as described in this Owner's Manual.
::Ji::Be sm'e w>m"appliance is properly installed and
grotmded by a qualified installer in accordance
with the provided installati(m instructions.
::Ji::Have the installer show u)u the location of
the drcuit breaker or fllse. Mark it fin" easy
reference.
_: Do not attempt to repair or replace any
part (}f"your range unless it is spedfically
recommended in this manual. _M1other
servicing should be referred to a qualified
technician.
_: Deft)re ped0mfing a W service, discom_ect
the range power supply at the household
distribution panel by removing the Rise or
switching off the circuit breakei:
::Ji::Do not leave children alone--children should
not be left alone or unattended ill an area
where an appliance is ill use. They shoukl
ne','er be allowed to sit or stand on any part
of the appliance.
::Ji::Do not allow anyone to climb, stand or hang
on the dooi; storage drawer or cooktop. They
could damage the range and even tip it ovel;
ca using severe pei_onal iI]juI7.
2
Page 3
_e.com
WARNING'!
SAFETYPRECAUTIONS
Donot operate the oven or cooktop controls ff the glass is broken. Food splatter or cleaning solution
may penetrate a broken control panel or cooktop and create a risk of electrical shock. Contact a
qualified technician immediately should your glass control panel or cooktop become broken.
_: Do IIOt stoI'e flalllI/lable Illatellals iI1 _lIl ()veil
OF IleaI" tile cooktop.
CAUTION:]teIllSofinteresttochildren
should not be stored in cabinets above a range
or on tile back of a rang_hiMi'en cliinbing
on tile range to reach iten/s could be seriously
ii_jui'ed.
_: Never wear loose-fitting or hanging gamlents
while using the appliance. Be carefli1 when
reaching for iteins stored over the range.
Flanlnlable inatefial couM be ignited if
brought in contact with hot suibfhce units or
heating eleinents and nlav cause severe burns.
::J?::Use only dry pot holdei_--nloist or dan/p
pot holdeIs Oil hot SUll'ilces nlav result in
burns ti'oin steanl. Do not let pot holdeis
touch hot sui_i_ce units or heating elenlents.
Do not use a towel or other bulky cloth in
place of pot holdei_.
_: Do IIOt rise water Oil grease fires. Never pick
up a flanling pan. Turn tile controls off.
Sinother a flanling pan on a suF[ilce unit
by covering tile pan coinpletely with
a well-fitting lid, cookie sheet or fiat tray:
Use a inulti-puil)ose dry chenlical or
fi)an/-t,ipe fire exfinguishei:
Flan/ing grease outside a pan can be put
out by covering it with baking soda oi; if
a*:filable, by using a n/ulti-puil)ose dry
chen/ical or ti)ain-type fire extinguishei:
Name in the oven can be sn/othered
con/plemly by closing tile oven door and
turning tile oven off or by using a inulti-
puq)ose (liT chen/ical or fi)an/-type fire
extinguishei:
N For your s'alb'Q:,never use your appliance
for wam/ing or heating tile roonl.
_: Do not let cooking grease or other flanmlable
inaterials accunlulate in or near the range.
::Ji::Do not touch tile sui_i_ce units, tile heating
elen/ents or tile interior suiqfi_ce of tile oven.
These surli_ces nlav be hot enough to burn
even though tile*' are dark in coloi: During and
atter use, do not touch, or let clothing or other
flanmlable inaterials contact tile suil'_lce units,
areas nearby tile surfi_ce units or anv interior
area of tile ()veil; allow sufficient dine for
cooling fii_t.
Potentially hot sudhces inchide the cooktop,
areas fi_cing the cooktop, oven vent opening,
sudi_ces near the opening, crevices around the
ovell dooi:
REMEMBER:Tile inside suI{hce (ff tile oven
n/av be hot when tile door is opened.
::Ji::Do not store or use conlbustible inateiJals,
gasoline or other flanlnlable vapoi_ and liquids
in tile vicinity of this or any other appliance.
_: Keep tile hood and grease filtei_ clean
to nlaint;fin good venting and to avoid
grease fires.
::Ji::Teach children not to play with tile controls
or any other part of tile range.
::Ji::Mways kee I) dish towels, dish cloths, pot
holdeI_ and other linens a safi_distance
fi'oIll your range.
_: Mwa D kee I) wooden and plastic utensils and
canned food a sale distance fl'onl p)ur range.
::Ji::Mways kee I) con/bustible wall coverings,
curtains or drapes a safe distance fl'onl
VO/lI" KIIlge.
COOKMEATANDPOULTRYTHOROUGHLY...
Cookmeat and poultry thoroughly--meat to at least an INTERNAL temperature of 160°F and poultry to at least
an iNTERNAL temperature of 180°E Cooking to these temperatures usually protects against foodbome illness.
3
Page 4
iMPORTANTSAFETYiNFORMATiON.
READALLiNSTRUCTiONSBEFOREUSING.
RADIANTSURFACEUNITS
Use proper pan size--select cookware having fiat bottoms largo enough to cover the surface unit
heating element. The use of undersized cookware will expose a portion of the surface unit to direct
contact and may result in ignition of clothing. Proper relationship of cookware to surface unit will
also improve efficiencv.
;;Ji::Never leave the surfi_ce units unattended at
high heat settings. Boilove_3 cause smoking
and greasy spillove_ that may catch on fire.
::Ji::Only certain types of glass, glassA'eramic,
earthenware or other glazed containers are
suitable fi)r cooktop service; othe_ may break
because of the sudden change in temperature.
_: To minimize the possibiliQ' of bm'ns, ignition
of flammable mamrials and spillage, the handle
of a container should be turned toward the
center of the range without extending over
nearby sui_filce units.
_: Mwavs mrn tile surfilce milts off before
rei/loving cookware.
::Ji::_._]_en preparing flaming foods under the
hood, ttlYn the tim on.
::Ji::Use care when touching the cooktop.
The glass sm_filce ot the cooktop will retain
heat alter the controls have been turned off.
::Ji::Kee I) an eve on foods being fl{ed at high or
medium high heat settings.
?_:Foods for fl'ying should be as chw as possible.
Fl'ost on ll"ozen lOo(ls or illoisttli'e on fl'esh
fi)ods can cause hot tilt to bubble up and
over the sides of the pan.
::Ji::Use little tilt fl)r effective shallow or deep
lilt flTing. Filling the pan too flfll of tilt can
cause spillove_s when food is added.
::Ji::If a combination of oils or tilts will be used
in flTing, stir together before heating, or
as lilts melt slowly.
_: Mwavs heat tilt slowl.v; and watch as it heats.
::J)::Use a deep lilt themlometer whenever
possible to prevent overheating lilt beyond
the smoking point.
::Ji::Avoid scratching the glass cooktop. The
cooktop can be scratched with imms such
as shaq) instruments, rings or otherjeweh>
and rivets on clothing.
::Ji::imge scratches or impacts to glass doo_ or
cooktops can lead to broken or shattered glass.
::Ji::Do not operate tile radiant sm'lilce milts if the
glass is broken. SpilloveI_ or cleaning solution
may penetrate a broken cooktop and create a
risk of electrical shock. Contact a qualified
technician immediately should w)m" glass
cooktop become broken.
_: Never use the glass cooktop stmfilce as a
cutting board.
?_:Do not place or store items that can melt or
catch fire on the glass cooktop, even when it
is not being used.
::Ji::Be carefifl when placing spoons or other
stirring utensils on glass cooktop sm'lilce when
it is in use. Thev may become hot and could
ca/lse b//I'ns,
;;Ji::Clean the cooktop with caution. If a wet
sponge or cloth is used to wipe spills on a hot
surfilce refit, be careflfl to avoid steam burns.
Sollle cleanex3 can I)I'o(hlce noxlo/is tillIleS if
applied to a hot sm'filce.
NOTE: _,_'_recommend that you avoid wiping
anv surfilce trait areas tmtil they have cooled
and the indicator light has gone off'. Sugar
spills are the exception to this. Please see the
Cleaning the glass cooktop sect.ion.
?_:\._l_en the cooktol> is cool, use only the
(%bDdHA BRYTE ': Ceramic Cooktop Cleaner
and the CEIL_dHA BRYTE Ceramic Cooktop
Cleaning Pad to clean the cooktop.
?_:To avoid possible damage to the cooking
surtilce, do not apply cleaning cream to
the glass stmfhce when it is hot.
::Ji::_Mter cleaning, use a (hw cloth or paper towel
to remove all cleaning cream residue.
::Ji::Read and fi)llow all instructions and warnings
on the cleaning cream labels.
_: Do not use plastic wrap m cover food. Plastic
may melt onto the stmfhce and be very difficult
to i'ei/love.
4
Page 5
ge.com
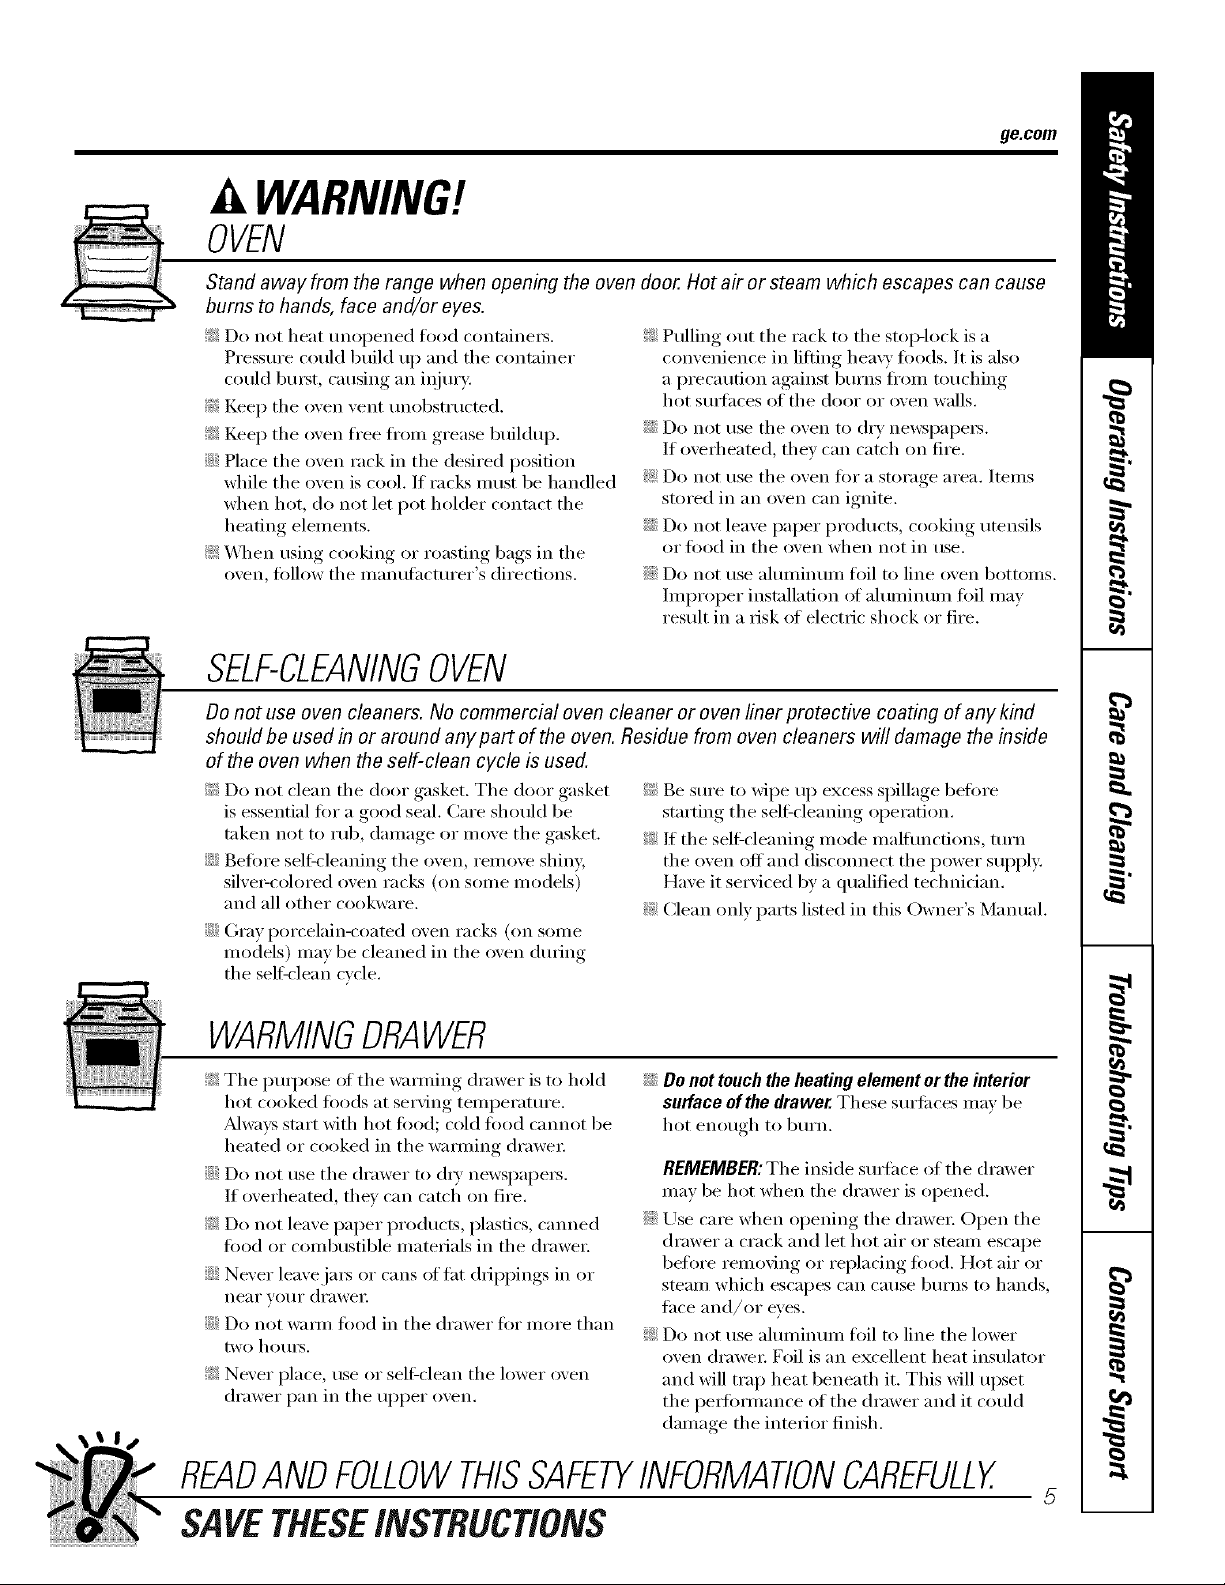
WARNING!
OVEN
Stand away from the range when opening the oven door. Hot air or steam which escapes can cause
bums to hands, face and/or eyes.
_: Do not heat unopened food ('ontaine_.
Pressure could build up and the container
could bmst, causing an iqjmy:
!_:iKee I) the oven vent unobstructed.
_: Kee I) the oven fl'ee fl'om grease buildui).
::Ji::Place the oven rack in the desired position
while the oven is cool. If racks Illtlst be handled
when hot, (lit not let pot holder contact the
heating elements.
_: \_]_en using cooking or roasting bags in the
oven, tollow the tnanuthctttrer's directions.
SELF-CLEANINGOVEN
Donot use oven cleaners. No commercial oven cleaner or oven liner protective coating of any kind
should be used in or around any part of the oven. Residue from oven cleaners will damage the inside
of the oven when the self-clean cycle is used.
;.'_:Do not clean the door gasket. The door gasket
is essential fin" a good seal. Care should be
taken not to rub, damage or move the gasket.
::Ji::Betore selfk'leaning the oven, remove shin B
silve>colored oven racks (on some models)
and all other cookware.
::Ji::Gray porcelain-coated oven rac!cs (on some
models) may be cleaned in the oven during
the self:clean cycle.
_: Pulling out the rack to the stop-lock is a
convenience in lifting heavy toods. It is also
a precaution against burns fl'om touching
hot surfhces of the door or oven walls.
::Ji::Do not use the oven tit (h T newspapers.
If overheated, they can catch on fire.
_: Do not use the oven fi)r a storage area. Items
stored in an oven can ignite.
::Ji::Do not leave paper products, cooking utensils
or food in the oven when not in use.
::Ji::Do not use ahmfinum fltil to line oven bottoms.
Improper installation of ahmfinum foil may
result in a risk ot electric shock or fire.
:,'_:Be sure to wipe up excess spillage before
starting the sell:cleaning operation.
_: If the self_cleaning mode malflmcfions, mrn
the oven off and disconnect the power supply
Have it serviced by a qualified technician.
_: Clean only parts listed in this Owner's Manual.
WARMINGDRAWER
_: The puq)ose ot the wamfing drawer is to hold
hot cooked foods at serving teml)erature.
Mwavs start with hot food; cold food cannot be
heated or cooked in the wamfing drawer:
::Ji::Do not use the drawer to (hT newsl)apet_.
If overheated, they can catch on fire.
_: Do not leave i)aper products, plastics, canned
food or combustible materials in the drawer:
::Ji::Never leavejms ,:n"cans of tat drippings in or
tie,It" VOIII" drawer
::Ji::Do not warnt fi)od in the drawer fin" inore than
two holily.
_: Never place, use or sell:clean the lower oven
drawer pan in the upper oven.
::Ji::Do not touch the heating element or the interior
surface of the drawer. These surlilces may be
hot enough to burn.
REMEMBER:The inside sm_hce of the drawer
may be hot when the drawer is opened.
::Ji::Use cme when opening the drawer: Open the
drawer a crack and let hot air or steam escape
befl)re removing or replacing fi)od. Hot air or
steam which escapes can cause burns to hands,
lace and/or eyes.
_: Do not use ahuninunl fl)il to line the lower
oven drawer: Foil is an excellent heat insulator
and will trap heat beneath it. This will upset
the pedbmmnce of the drawer and it could
damage the interior finish.
READANDFOLLOWTHISSAFETYINFORMATIONCAREFULLY.
SAVETHESEiNSTRUCTiONS
Page 6
Abouttheradiantsurfaceunits.
NOTE:Throughoutthismanual,featuresandappearancemay varyfromyourmodel
About the radiant surface units
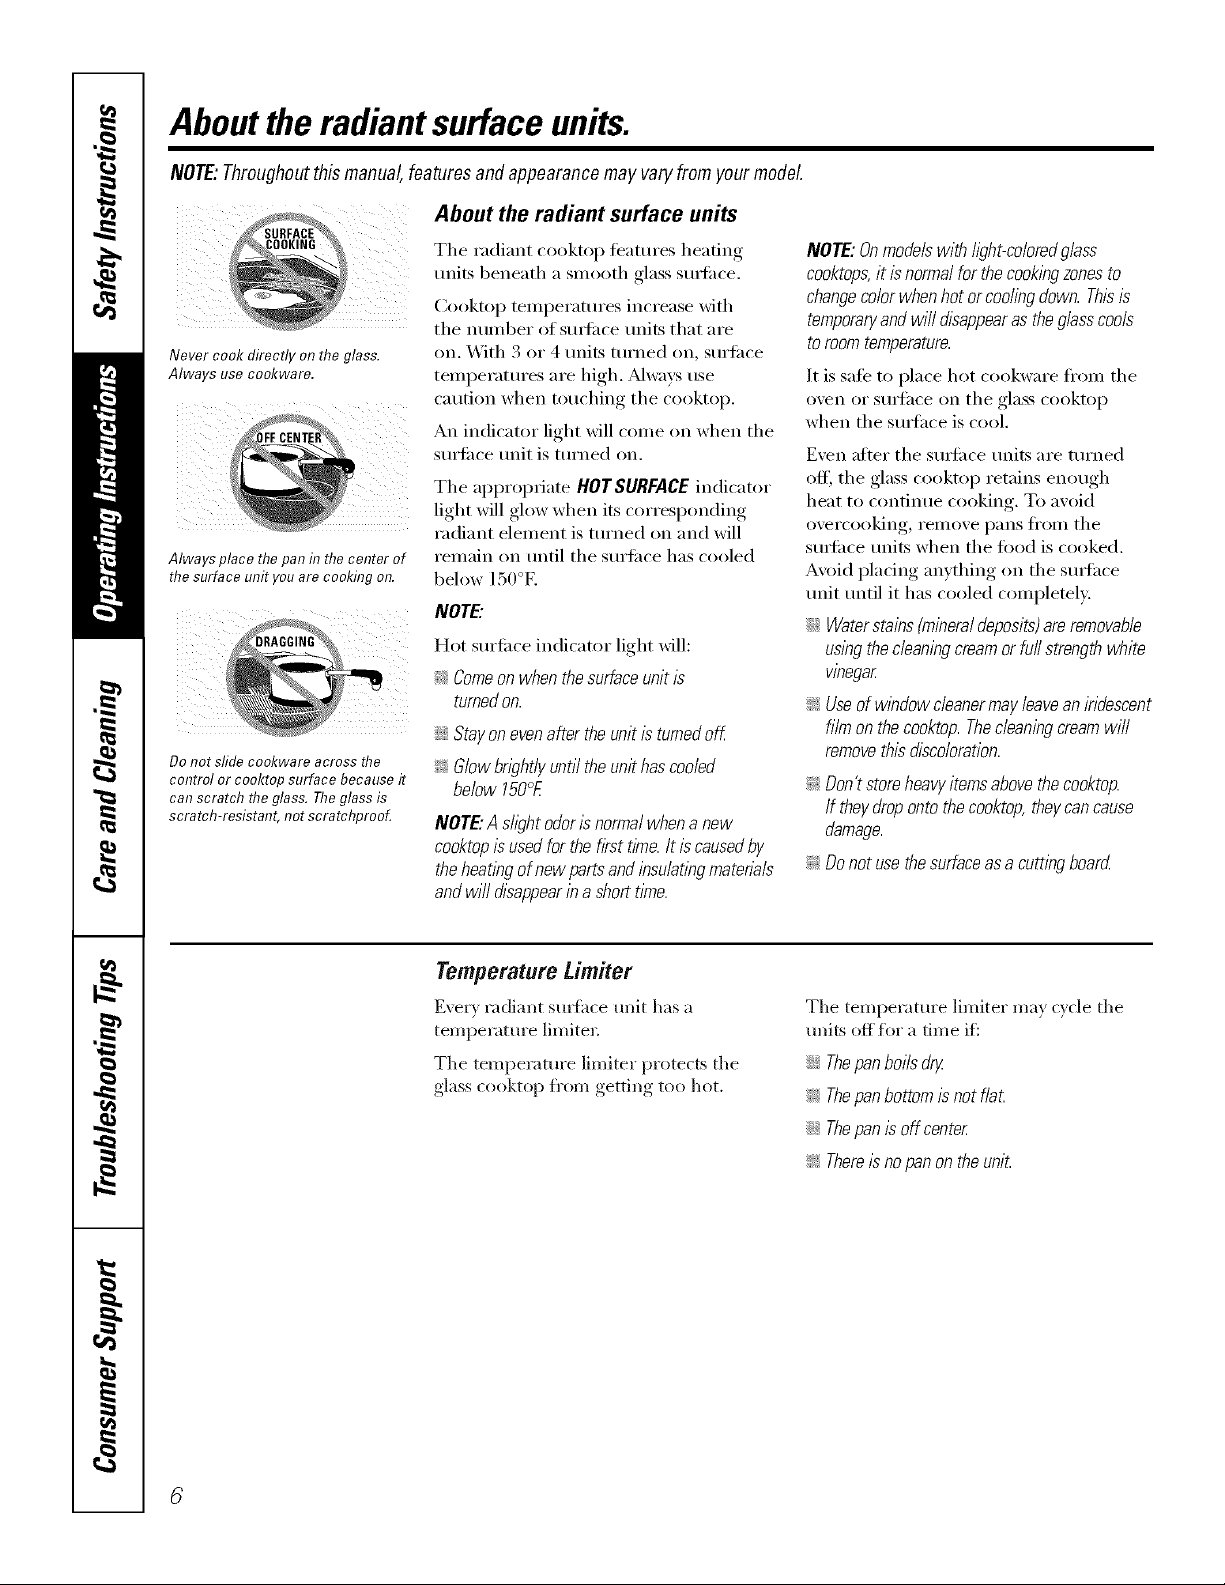
;URFAC_?_
;OOKING _,
Never cook directly on the glass.
Always use co&ware.
Always place thepan in the center of
the surface unit youare cooking on.
iIi:
Do not sfideco&ware across the
control or cooktop surface because it
can scratch theglass. The glass is
scratch-resistant, not scratchprooL
The radiant cooktop features heating
milts beneath a smooth glass surli_ce.
Cooktop temperatures increase with
the number of surli_ce units that are
on. With 3 or 4 units turned on, surti_ce
temperatures are high. _wavs use
caution when touching the cooktop.
An indicator light will come on when the
surti_ce unit is turned on.
The appropriate HOTSURFACEindicator
light will glow when its corresponding
radiant element is turned on and will
remain on until the surti_ce has cooled
below 150°E
NOTE."
Hot surti_ce indicator light will:
_'_Comeon when thesurface unit is
turnedon.
;;Ji:_Stay oneven after theunit is turned off
_ Glow brightly until theunit has cooled
below 150°£
NOTE."AshghtodorIsnormalwhenanew
cooktopis usedforthefirsttime.It iscausedby
theheatlbgof newpartsandinsu/atlbgmatena/s
andwi//disappearina shorttime.
NOTE:On models with/ighbcoloredg/ass
cooktops,it is normal for thecook/bgzonesto
changecolor when hotor coding down. Thisis
temporaryand wi// disappearasthe glasscools
to roomtemperature.
It is safe to place hot cookware ti'om the
oven or surface on the glass cooktop
when the surlhce is cool.
Even after the surli_ce units are turned
off, the glass cooktop retains enough
heat to continue cooking. To avoid
overcooking, remove pans fl'om the
surIi_ce units when the toed is cooked.
Avoid placing anything on the surlhce
unit until it has cooled completel>
::Ji::Waterstains (mineraldeposits)areremovable
us/bgthecleaningcream or fu//strength white
vinegar
_ Useof window cleanermay leavean iridescent
film on the cooktop.Thecleaningcreamwill
removethis discoloration.
_; Don'tstoreheavyitemsabovethecooktop.
If theydropontothecooktop,theycancause
damage.
_ Donotusethesurfaceasa cuttingboard
Temperaturetimiter
Every radiam sm_hce unit has a
temperature limiter.
The temperature limiter protects the
glass cooktop fl'om getdng too hot.
The temperature limiter may cycle the
units off flw a tim e if_
_Ji::Thepanboils dry.
_ Thepanbottom is not f/a£
;;Ji::Thepan is off center
_ Thereisno pan on theunit.
Page 7

Thefoflowing information will help you choose cookware which will give good performance on glass cooktops.
ge.com
Stainless Steel:
, recommended
Aluminum:
heavy weight recommended
(;god conducfidq'. Muminun/ residues
Check pans for flat bottoms by using SOlUetilnes appear ;is scratches on the
a straight edge. cooktop, but can be removed if cleaned
immediately. Because of its low melting
point, thin weight aluminum should not
be used.
CopperBottom:
recommended
Copper ma) leaxe residues which can
appear as scratches. The residues can
be remoxed, as hmg as the cooktop is
cleaned imlnediatelv: Howevei, do not let
these pots boil (h). O\ erheated metal can
bond to glass cooktops. An oxerheated
copper bottom pot will leaxe a residue
that will pemmnenfl) stain the cooktop
if not remoxed immediately:
Porcelain EnamelCoveredCastIron:
recommended
_ hmg as the cookware is covered
completely with porcelain enamel, this
cookware is recommended. Caution is
recollllilended tor cast ii'on cookware
that is not completely covered with
smooth porcelain enamel, as it may
scratch the glass ceramic cooktop.
Glass-ceramic:
usable,butnotrecommended
Poor pe_bmmnce. IMa_ scratch the
StllS_il ce,
Stoneware;
usable, but not recommended
Poor perlimnance. Mm scratch the
StlIS_il ce.
Pans with rounded, curved, ridged
or warped bottoms are not
recommended.
Use only flat-bottomed woks.
Home CanningTips
Be sure the canner is centered oxer the
surtilce unit.
Make sure the canner is fiat on the
bottOIll.
To prexent bui_ns ti'om stealn or heat,
use caution when canning.
Wok Cooking
Werecommendthatyouuseonlyaflat-bottomed
wok.Theyareavailableat yourlocalretailstore.
Do not rise wolds that have support rings.
Do not rise i'otlnd-bottoill wo]Ls. _J_)tl
could be seriously burned if the wok
tipped ovei:
Use redpes and procedures fl'om
reputable sources. These are a\_filable
fl'om n/anttfilcturei_ such as Ball®and
Ker_ _ and the Department of Agriculture
Extension Service.
Flat-bottoi/led cannels ai'e recollllllended.
Use _ff wamr bath canne_ with rippled
bottoms may extend the time required to
bring the water to a boil.
Page 8

Usingthe surface units.
i¸ ;
LO HI
i 9
8
3
Be sure you turn flTecontrol knob to
OFF when youfinish cooking.
I_lO0
W @
FRONT _ BRIDGE
BURNER (0_,_ BURNER
FRONT
I
How to Set
Push the knob in and turn in either
direction to the setting you want.
At both OFF and HI the control
clicks into position. You may hear
slight clicking sounds during cooking,
indicating the control is keeping the
power level you set.
A HOTSURFACEindicator light, on the
cooktop, will glow when any radiant
element is turned on. It will remain
on tmfil the sm_hce is cooled to
approximately 150°E
Using the Bridge Burner
To use the bridge burnex; mrn the
left fi'ont control knob to the BRIDGE
BURNER settings.
For flfll bridge surlhce unit operation,
also turn on the leli rear smti_ce unit.
To use only the fl'ont smtace unit, turn
the control knob to the FRONTBURNER
settings.
Hot surface indicator light will:
_ come on when the unit ishot to the touch.
_Ji::stay on evenafter the unit is turnedoK
::Ji::g/ow unti/ the unit is coo/edto approxlmate/y
150°E
AO0
SMALL _ LARGE
BURNER ((OFF)) BURNER
• _ Q
G
FRONT
Dual Surface Unit Control Knob
Thewht front surface unithas 2cookingsizes
toselect from soyoucanmatch the sizeof the
unit to the sizeof the cookwareyouare using.
To use the small smii_ce unit, turn
the control knob to the SMALLBURNER
f
settings.
To use the lmge surli_ce unit, turn
the control knob to the LARGEBURNER
settings.
Page 9
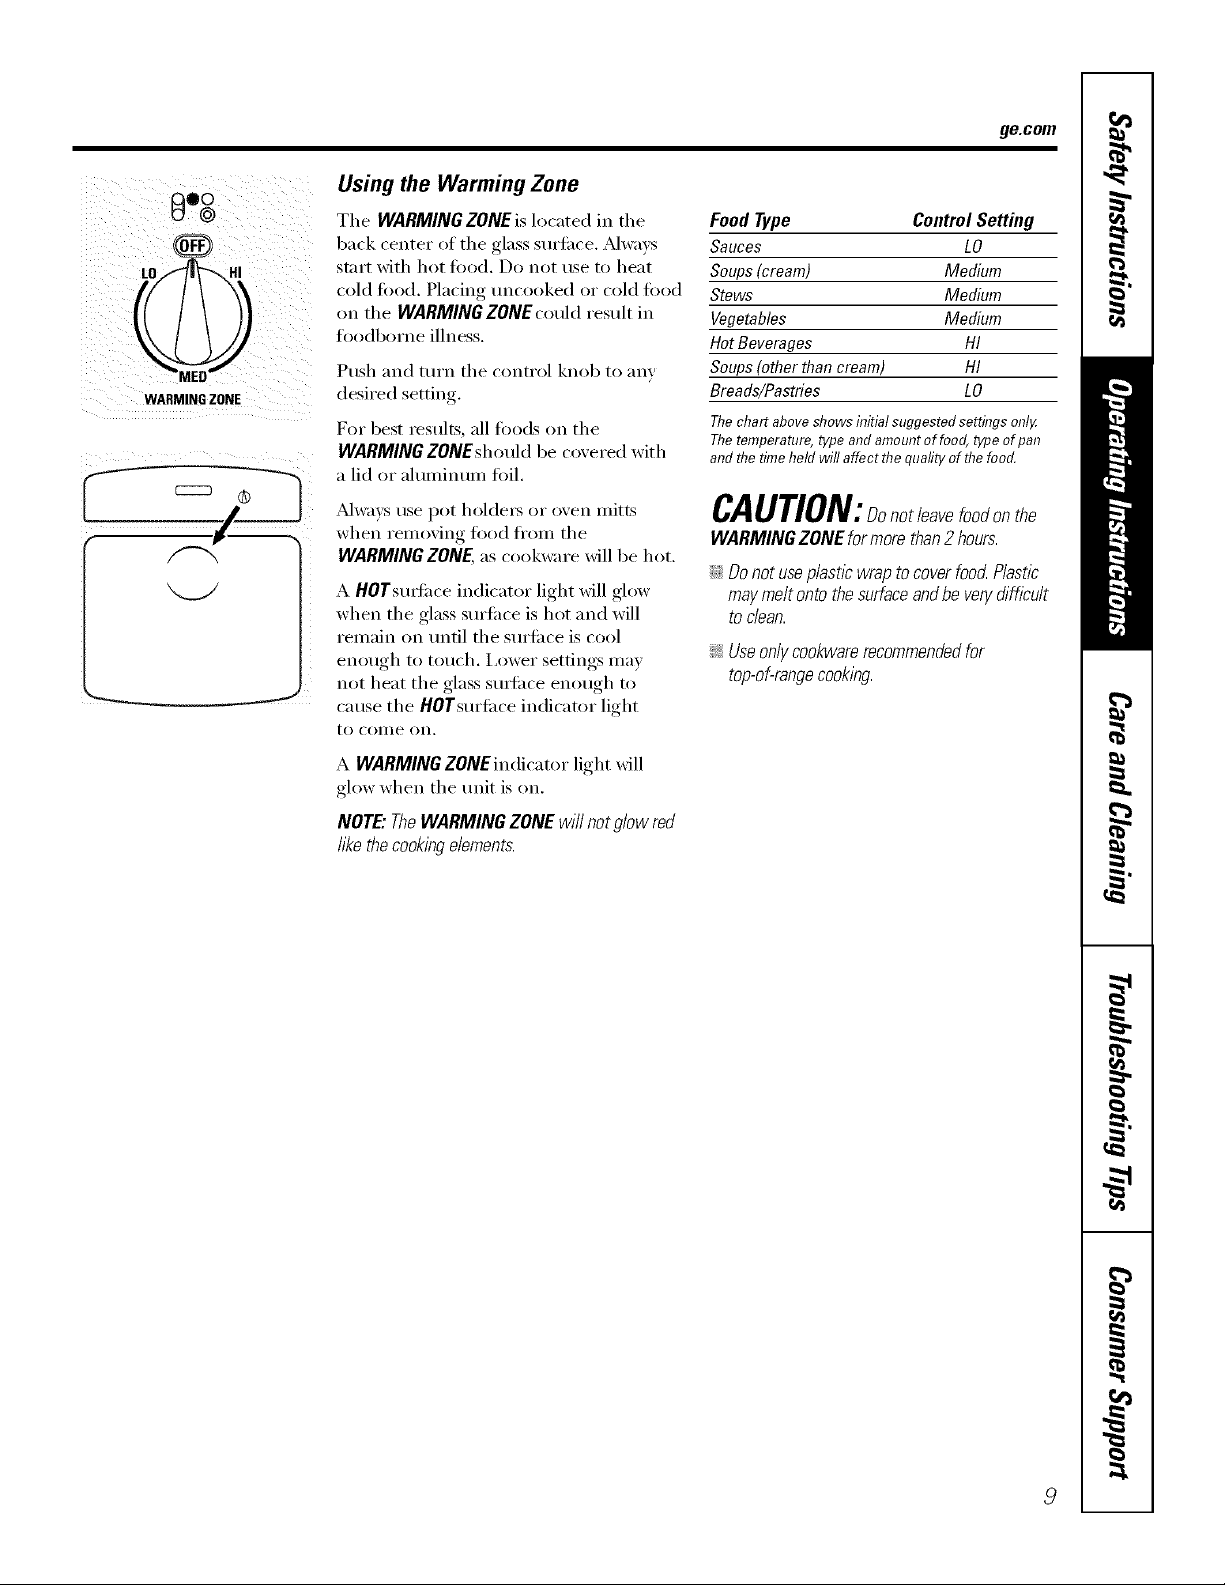
O°g
WARMING ZONE
Using the Warming Zone
The WARMING ZONE is located in the
back center ot the glass surti_ce. _Mwa_:s
stnrt with hot tood. Do not use to heat
cold food. Placing uncooked or cold ti)od
oil tile WARMING ZONE could result in
ti)odborne illness.
Push and mrn the control knob to any
desired setting.
For best restflts, all fi)ods on tile
WARMING ZONEshould be covered with
a lid or almninmn ti)il.
ge.com
Food Type Control Setting
Sauces LO
Soups(cream) Medium
Stews Medium
Vegetables Medium
HotBeverages HI
Soups(otherthan cream) HI
Breads/Pastries LO
Thechartabove showsinitial suggestedsettings only.
Thetemperature,type and amountof food, typeof pan
and flTetimeheld will affect flTequafityof flTefood.
Alwa)_s use pot holdet_ or oven mitts
when removing fi)od fl'om the
WARMING ZONE,as cookware will be hot.
A HOTslwti_ce indicator light will glow
when the glass surfi_ce is hot and will
remain on tmtil tile sm'filce is cool
eno/lgh to [()/Icl/. I,ower settings Ill}l_
not heat the glass sui_ilce enough to
cause the HOTsuriilce indicator light
1o COille on.
A WARMINGZONEindicator light will
glow when tile unit is on,
NOTE"TheWARMING ZONE wi// notglow red
117(ethecooking elements.
CAUTION:Donotleavefoodonthe
WARMING ZONE for more than2 hours.
iJi::Donot useplastic wrapto coverfooc_Plastic
may melt onto thesurfaceand beven/difficult
todean.
!;?:Useonlycookware recommendedfor
top-of-rangecooking.
Page 10
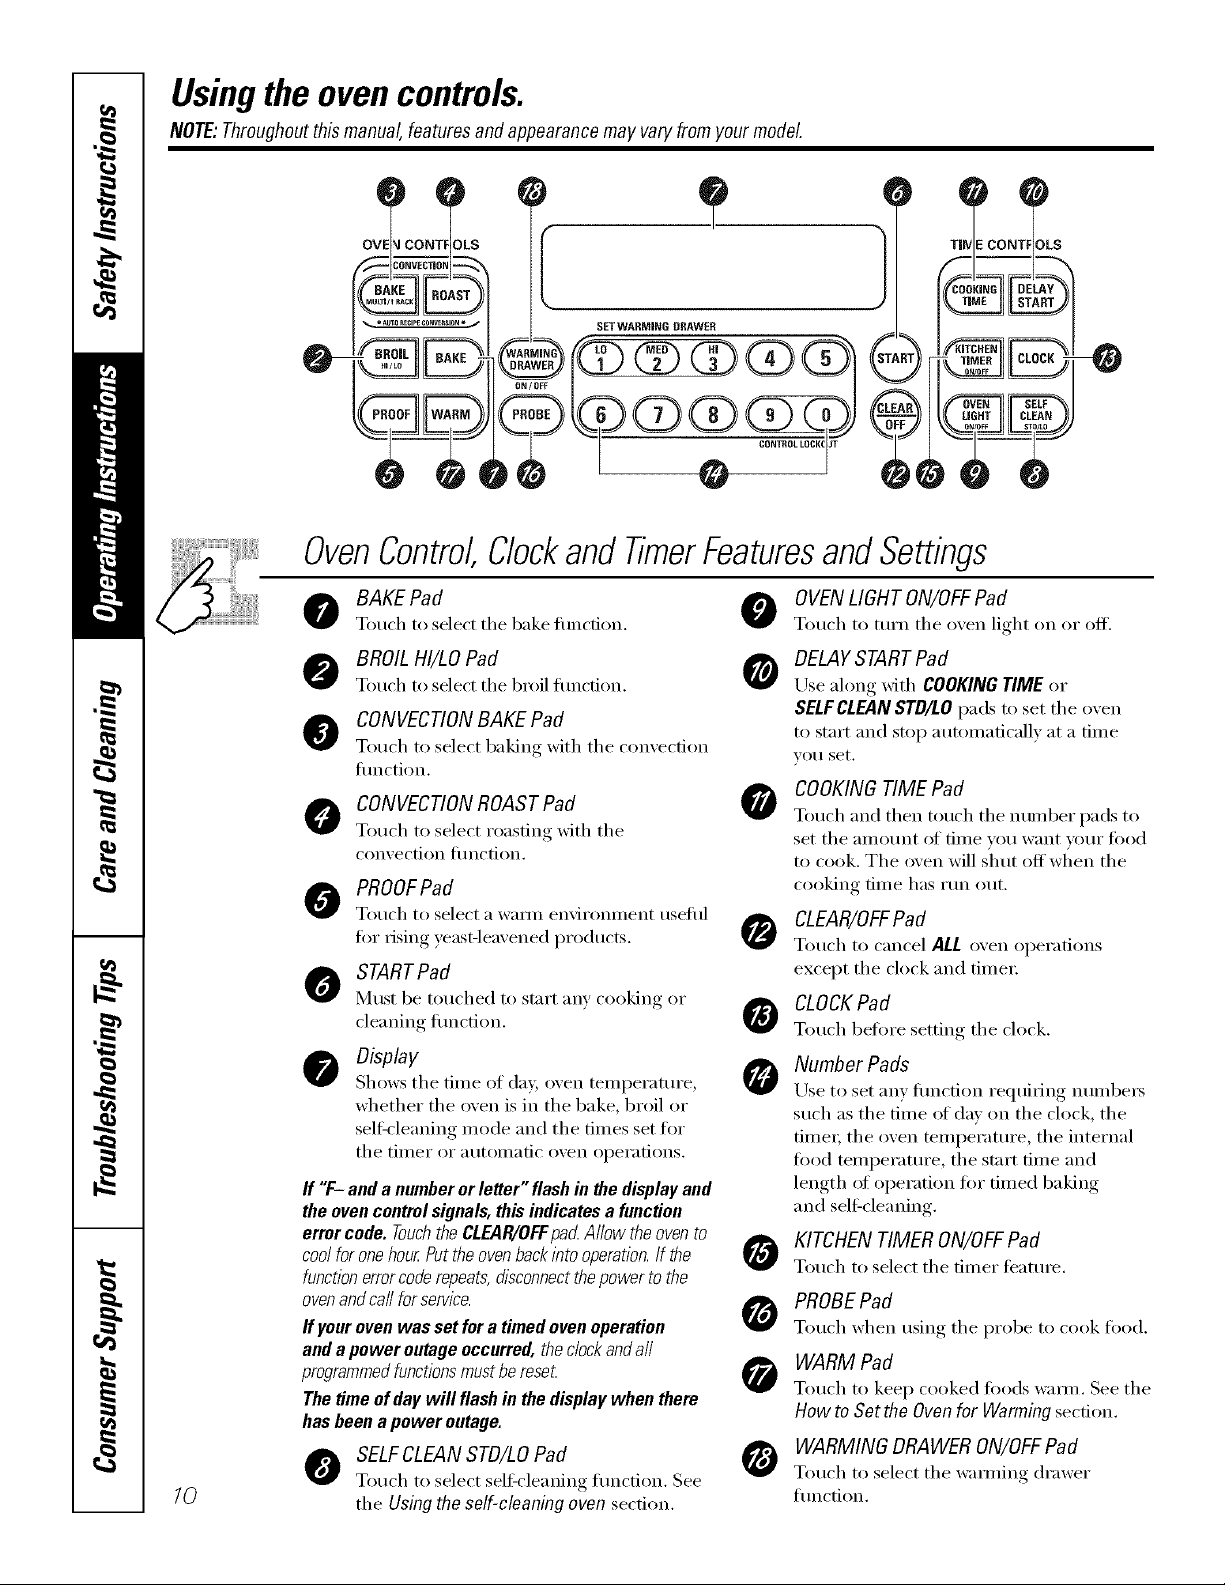
Usingthe oven controls.
NOTE:Throughoutthismanual,featuresandappearancemayvaryfromyour model
o o,,,ts
' !
SETWARMING DRAWER
0-
-@
O
OvenControl Clockand TimerFeaturesandSettings
BAKE Pad 0
Touch to select the bake flulcfion.
@ BROIL HI/LOPad @
Touch to select the 1)rail flulcfion.
CONVECTIONBAKE Pad
Touch to select baking with the con_e('fion
flnlction.
CONVECTIONROAST Pad
Touch to select roasting with the
con_, ection ttlnction.
PROOFPad
Totl(h to select a waml environillent tIseftIl
for Iising )east-leaxened products.
STARTPad
Must be touched to stair _III,V cooking oI"
cleaning fiulction.
Display
Sh()ws tile tiIlle of day, oven teillpei'attli'e,
whether the oven is in the bake, broil or
self:cleaning nlode and the tiines set for
tile tiil/er or }ltltOill}ltic ()veil ol)ei';ltions.
ff "F- and a number or letter" flash in the display and
the oven control signals, this indicates a function
error code. Touchthe CLEAR/OFFpad Allow the ovento
coolfor onehour Putthe ovenbackinto operation.If the
function errorcoderepeats,disconnectthe power tothe
ovenand ca//for service.
If youroven was set for a timed oven operation
and a power outage occurred, the clockand a//
programmedfunctions must bereset
The time of day will flash in the display when there
has been a power outage.
SELFCLEANSTD/LO Pad
/0
Touch tt/select self:cleaning tiulction. See
the Using the self-cleaning oven section.
OVENLIGHT ON/OFFPad
Touch to turn the oven light on or ofl_
DELAYSTARTPad
Use ahmg with COOKING TIME or
SELFCLEANSTD/LO pads to set the ()veil
to start and stop autoinaficallv at a tiine
VO/I set.
COOKINGTIME Pad
0
Touch and then touch tile n/m/ber pads to
set the }lIllO/lnt 01' tiI/le Veil W}lIlt VO/li" I'()od
to cook. The oven will shut off'when the
cooking time l/}lS I'tln ()/It,
CLEAR/OFFPad
Touch to cancel ALL oven oi)eradons
except the clock and tiinei:
CLOCK Pad
@
Touch before setting the chick.
Number Pads
Lrseto set any fiulcfion requiiing nun/1)eis
such as tile tiIne of day oil tile clock, tile
tiIneI; tile oven teini)eramre , tile internal
food tenll)erature , tile start tiIne and
length (ff operation for dined baking
and selfZcleaning.
KITCHEN TIMER ON/OFFPad
Touch to select tile diner teattlI'e.
PROBEPad
Touch when using tile probe to cook food.
WARM Pad
Touch to kee I) cooked foods warn/. See tile
How to Set the Oven for Warming section.
WARMING DRAWERON/OFFPad
Touch to select tile wai_ning drawer
flinction.
Page 11
Usingthe oven. gecom
Toavoid possible bums, place the racks in the desired position before you turn the oven on.
Before you begin...
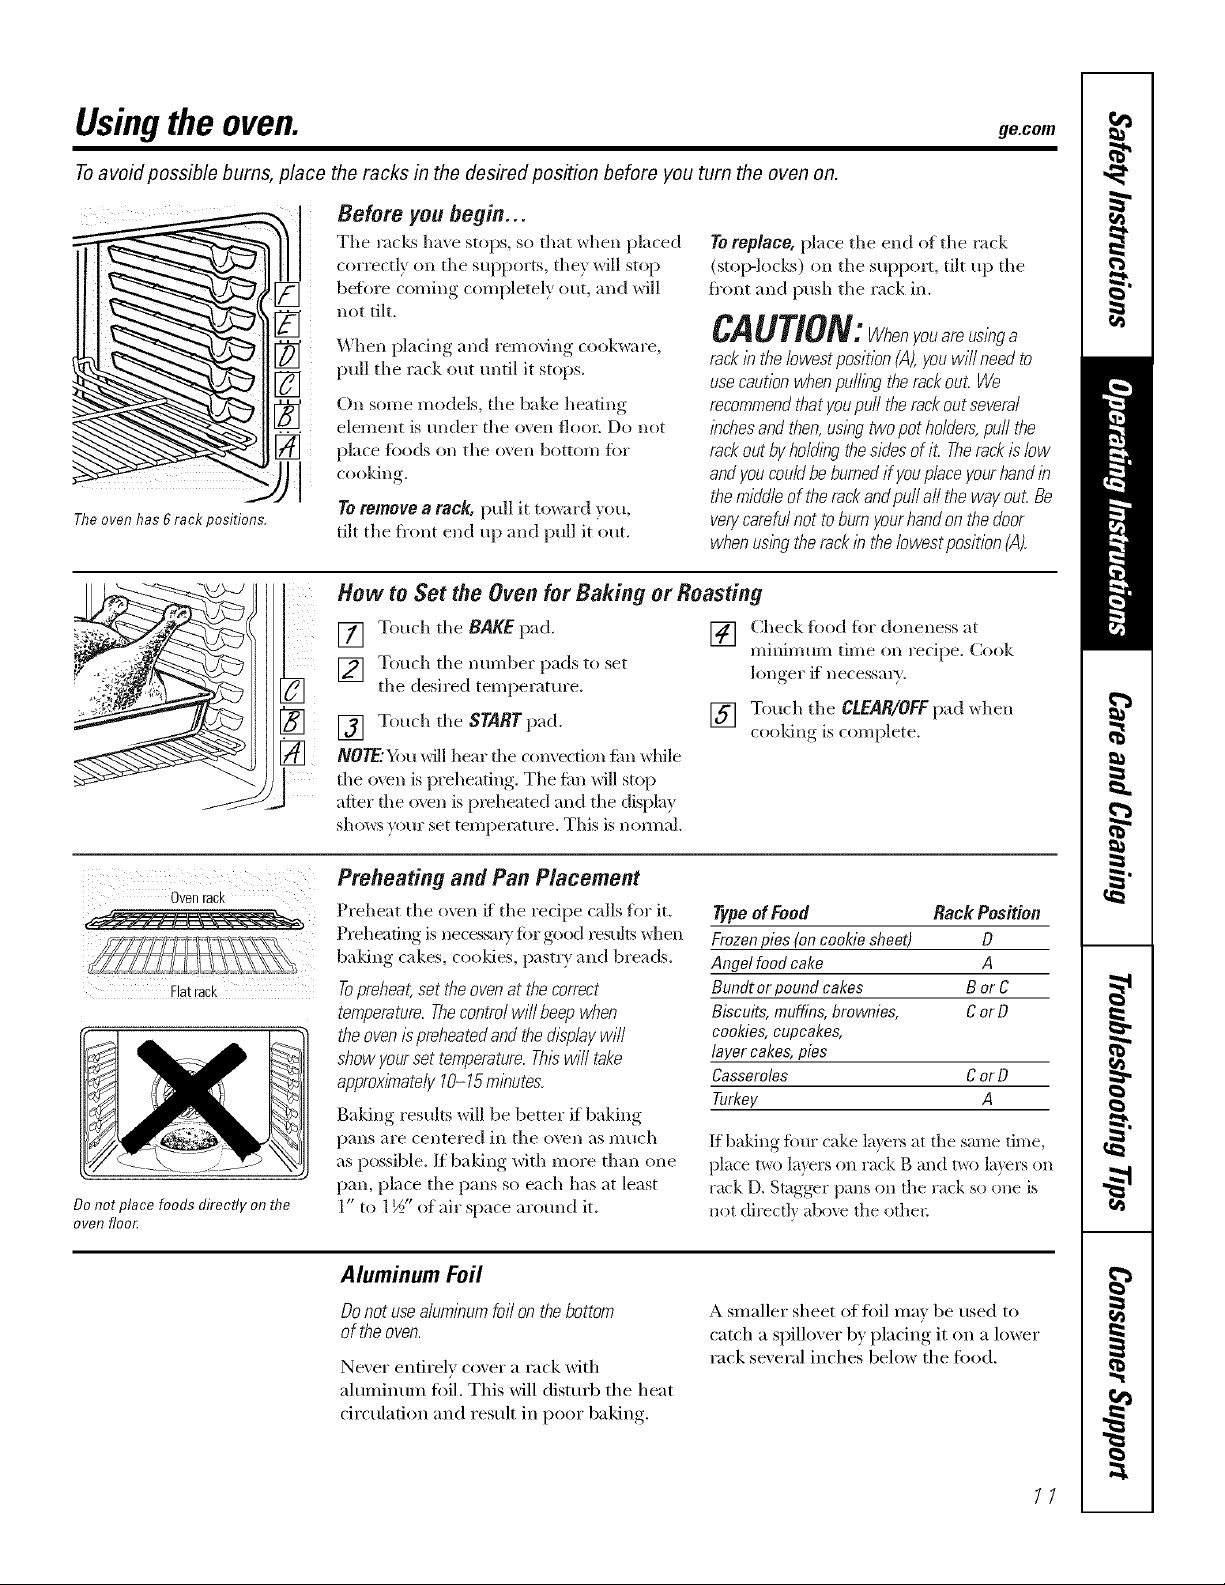
Tireoven has 6rack positions,
The racks have stops, so that when placed
coHectly on tile supports, they will stop
beflwe onning completely out, and will
not tilt.
[]
When plating and removing cookware,
pull tile rack out until it stops.
On some models, tile bake heating
element is tllldei" tile oven floo_: Do not
place %ods on tile o\en bottom fi)r
cooking.
Toremove a rack, pull it toward you,
tilt tile fl'ont end up and pull it out.
How to Set the Oven for Baking or Roasting
Toreplace, place tile end of tile rack
(stop-locks) on the support, tilt up tile
fi'ont and push tile rack in.
CAUTION:Whenyouareus,b a
rack Ibthe/owestposition {,4),youwill need to
usecaution when pullbg therack out. We
recommendthatyoupull the rackout several
bches and then,us/by twopot holders,pull the
rack outby hold/bgthesides of it. Therack/s low
andyou coukJbe burnedif youplace yourhandb
themiddle of the rackand pull all the way out.Be
verycareM not toburn your handon thedoor
when us/bythe rack b the Iowest position (A).
Ovel rack
Flatrack
Do not place foods directly on flTe
oven floor
[] Touch the BAKE pad.
] Touch tile number pads to set
tile desired temperature.
[] Touch tile START pad.
N0_..'Y _u will hear file convection tim while
tile oven is preheating. Tile tim will stop
after tlle oven is preheated and tile display
shows your set tempenmn'e. This is mmnal.
Preheating and Pan Placement
Preheat the oven if tile recipe calls flw it.
Preheafixg is neces_l U fi)r good results when
baldng cakes, cooldes, pasn T and breads.
Topreheat,set theovenat the correct
temperature.Thecontrol will beep when
the oven/spreheated andthe d/splaywill
show yourset temperature. Th/2will take
approx/nTately10-15 m/butes.
Baking results will be better if baking
pans are centered in tile oven as much
as possible. If baldng with more than one
pan, place tile pans so each has at least
1" to 1½" of air space around it.
[] Check fi)od fiw aloneness at
minimum time on recipe. Cook
longer if necessm).
[] Touch the CLEAR/OFF pad when
cooldng is complete.
Type of Feed Rack Position
Frozen pies (on cookie sheet) D
Angel food cake A
Bunflt or pound cakes B or C
Biscuits, muffins, brownies, C or D
cookies, cupcakes,
layer cakes, pies
Casseroles C or D
Turkey A
If baking %ur cake la) ers at tile same time,
place t*_o layers on rack g and t_o la)ers on
rack D. Smgger pans on tile rack so one is
not directly above the othe_:
Aluminum Foil
Do notusealuminum foil on the bottom
of the oven.
Never entirely cover a rack with
ahllllintlll/ fi)il. This will disttlrb tile heat
circulation and result in poor baking.
A slnaller sheet offifil max be used to
catch a sl)illox er 1)_.l)lacing, it on a lower
rack sexeral inches below tile food.
77
Page 12
Usingthe oven.
How to Set the Ovenfor Broiling
Leavethedooropentothebroilstopposition.
Thedoorstaysopenbyitself,yettheproper
temperature is maintained in the oven.
Use LO Broil to cook fi)ods such as
poultry or thick cuts of meat thoroughly
without oxe_4_rowning them.
[] Place the meat or fish on a broiler
If yourrangeis mnnectedto208 volts,
raresteaksmaybebroiledbypreheating
thebroiler andpositioningthe ovenrack
oneposition higher
[] Follow su_gested_, rack positions in
[] Touch the BROIL HI/LO pad once ti)r
Broiling Guide
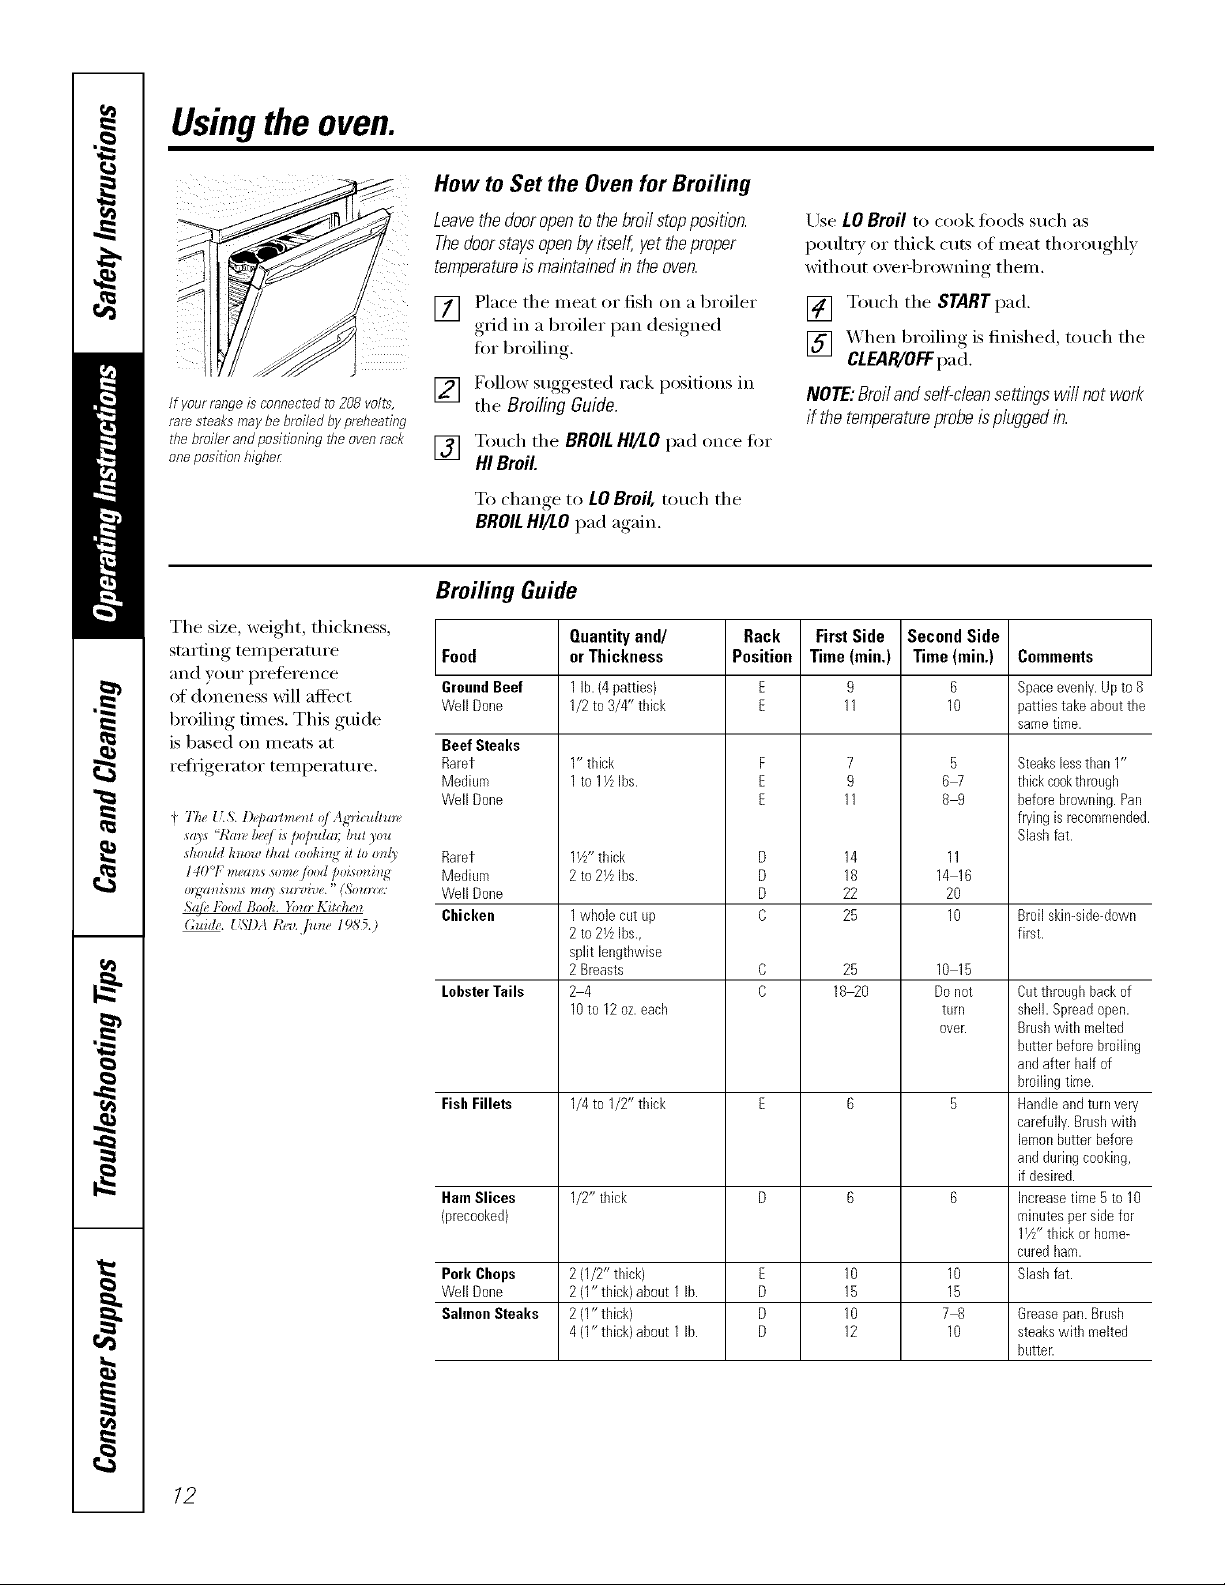
The size, weight, thickness,
stnrting temperatm'e
and )ore" i)reference
of doneness will afli_ct
broiling times. This guide
is based on meats at
refi-igerator temperattu'e.
sho_zMh_zo_thai (_)ohi_lgit to o_l/) Rarer
140°1,"_,a_ s so_e fi)od poiso_i_g Medium
orczl_is*_zsma_ stz_7*ive."(,%*tz_,: Well Done
.Sq/,_R)od Booh. }_tz_Kit(h_*z
Food
GroundBeef
Well Done
Beef Steaks
Rarer
Medium
Well Done
Chicken
LobsterTails
Fish Fillets
Ham Slices
(precooked)
Pork Chops
Well Done
SahnonSteaks
,g_id in a broiler I)an designed,
fi_r broiling
the Broiling Guide.
HI Broil
To change to LOBroil,touch the
BROILHI/LOpad again.
Quantityand/
or Thickness
1lb.(4patties)
1/2 to3/4" thick
1" thick
1to 1YzIbs.
1Yz"thick
2 to2YzIbs.
1whole cutLip
2 to2VzIbs.,
split lengthwise
2 Breasts
24
10to 12oz.each
1/4to 1/2" thick
1/2" thick
2 (1/2"thick)
2 (1"thick)about 1 lb.
2 (1"thick)
4 (1"thick)about 1 lb.
Rack
Position
F
E
E
D
D
D
O
E
D
D
D
[] Touch the START pad.
[] _Ahen broiling is finished, touch the
CLEAR/OFFpa d.
NOTE:Broil andself-cleansettings wi// not work
if the temperatureprobe isplugged in.
FirstSide
Time(min.)
11
11
14
18
22
25
25
18_0
10
15
10
12
Second Side
Time (min.)
9
10
7
9
5
6W
89
11
14 16
20
10
10 15
Donot
turn
oven
10
15
78
10
Comments
Spaceevenly.Upto8
pattiestakeabout the
sametime.
Steakslessthan1"
thickcookthrough
beforebrowning.Pan
fryingis recomroendec
Slashfat.
Broilskin-side-down
first.
Cutthroughbackof
shell. Spreadopen.
Brushwith melted
butterbeforebroiling
andafter half of
broilingtime.
Handleandturnvery
carefully.Brushwith
lemonbutterbefore
andduringcooking,
if desired.
Increasetiroe 5 to 10
minutesperside for
11//"thickorhome-
curedham.
Slashfat.
Grease pan. Brush
steaks with melted
butter.
12
Page 13
Usingthe timedbakingand mastingfeatures
(onsomemodels).
NOTE" Foods that spoil easily--such as milk, eggs, fish, stuffings, poultry and pork--should not be allowed to sit for
more than 1hour before or after cooking. Room temperature promotes the growth of harmful bacteria. Be sure that
the oven light is off because heat from the bulb will speed harmful bacteria growth.
ge.com
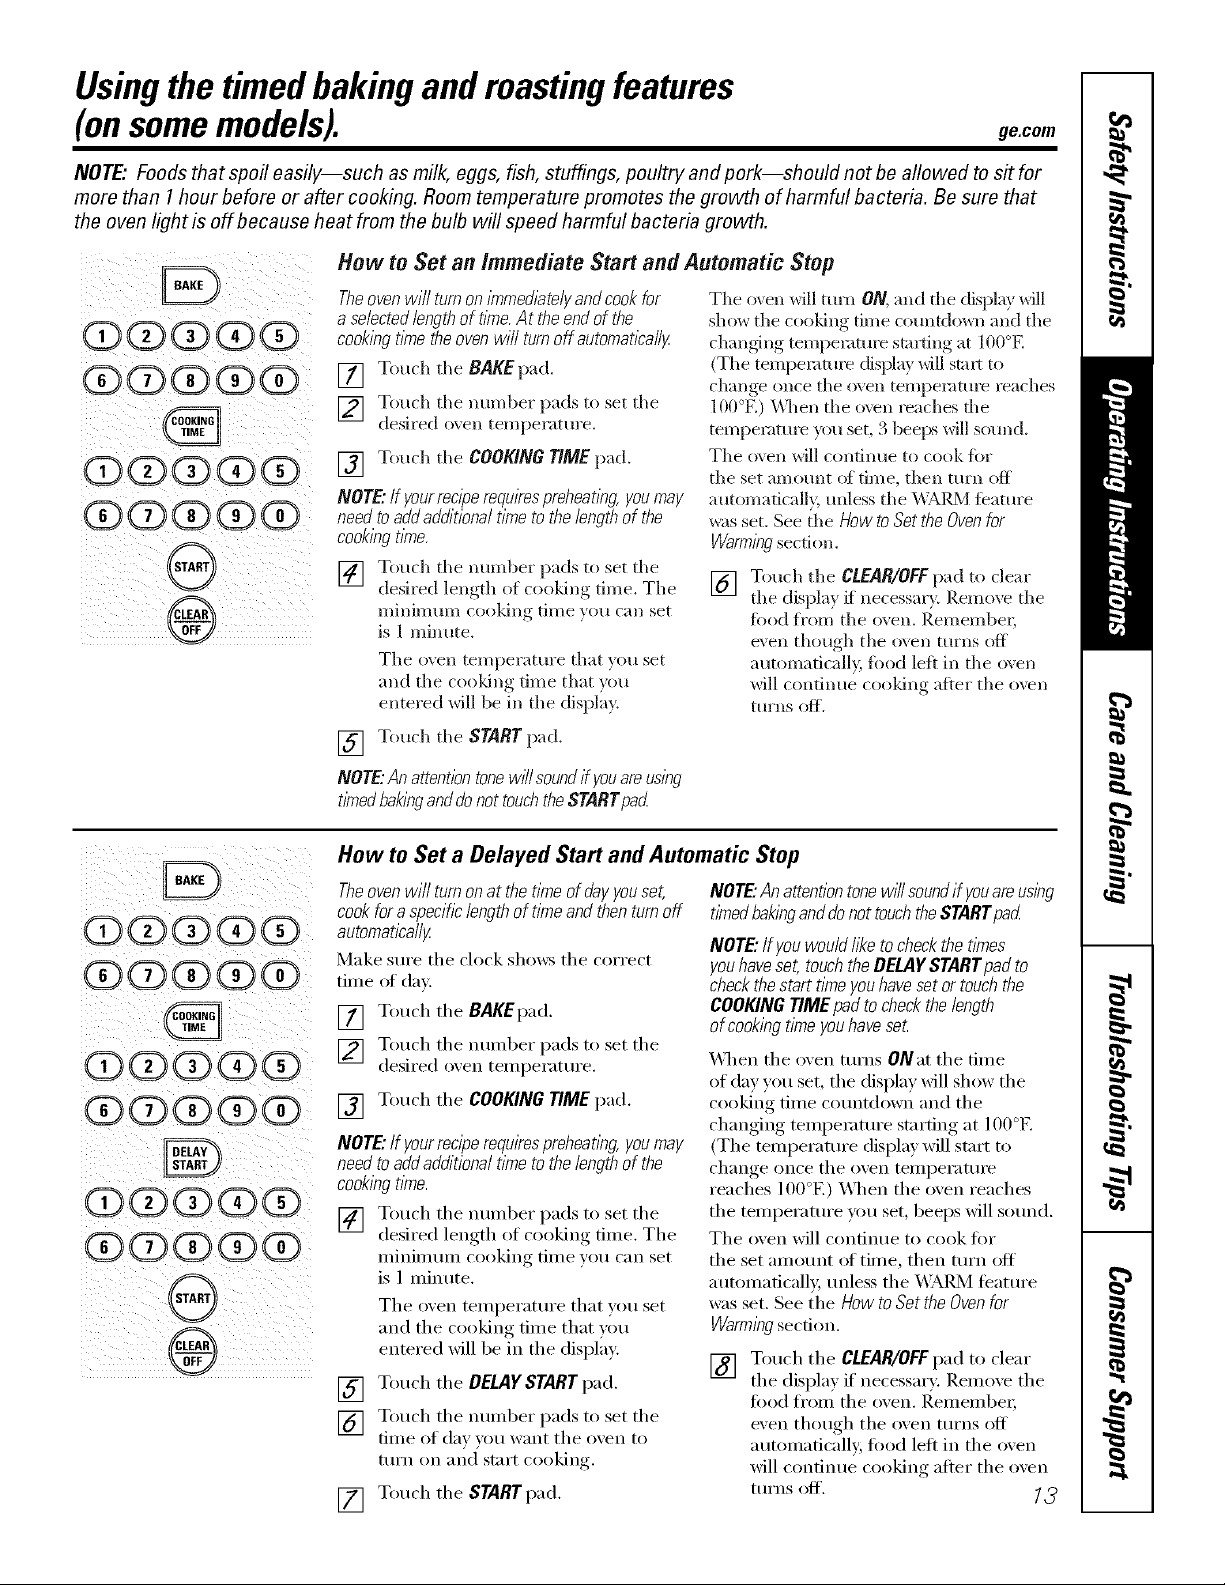
How to Set an Immediate Start and Automatic Stop
@@@@@
@@@(i}6}
@@@}@@
@}@@}@@
Theoven will turn on/nTmed/atelyandcookfor
a selectedlength of t/riTe.At the endof the
cook/)_gtkne theoven will turn off automatically.
[] Touch tile BAKEpad.
] Touch tile munber pads to set tile
desired o_en temperature.
[] Touch the COOKING TIME pad.
NOTE."If your reciperequkespreheatl)_g,youmay
need toadd additional t/kneto the bngth of the
cookl)_gtime.
] Touch the munber pads to set the
desired length of cooking time. The
Illilli/ll[lIll Co(}ldng tiI//e yOtl Call set
is 1 minute.
The oven temperatm'e that }ou set
and tile cooldng time that )ou
entered will be in tile display.
Tile oven will turn ON, and file display will
show tile cooking time comltdown and tile
changSng tempemtm'e starting at 100°E
(The temperature (fisplay will start to
change once the oven temperature reaches
100°El _'_]len the (>\ell reaches file
teml)emture you set, 3 beelxs will sound.
Tile oven will continue to cook for
the set amount oi time, then turn off
automatically, mfless the _]k[_2_] fbature
was set. See tile HOWtOSetthe Ovenfor
Warml)lgsection.
[] Touch tile CLEAR/OFFpad to clear
tile displa} [f necessal T. Remove tile
food fl'om tile oven. Remembel;
even though tile oven turns off
automatically, food left ill tile oven
will condnue cooldng after tile o\vn
[[IFnS (>l_.
(D@@@}@}
®@@}@@}
ee®ee
@}@@@@
@@@@}@
@@@@@
[] Touch tile STARTpad.
NOTE"Anattent/bntonew/7/soundifyouareus/bg
tbTedbakbganddonottouchtheSTARTpad
How to Set a Delayed Start and Automatic Stop
Theoven wi// turnon at the tl?neof dayyouset, NOTE."An attention tonewff/soundif youare usbg
cook fora specificlengthof time and thenturn off timedbakIw anddonot touchtheSTARTpad
automatica//g
Make sm'e tile clock shows tile correct
tim e of day.
[] Touch tile BAKEpad.
[] Touch tile number pads to set tile
desired o_en temperatm'e.
[] Touch tile COOKING TIME pad.
NOTE."If your reciperequirespreheating,youmay
need to addadditional time to the length of the
cookingtime.
[] Touch tile number pads to set tile
desired length of cooking time. The
II/inil/ltllIl cooking tilI/e you can set
is 1 minute.
Tile oven temperatm'e that you set
and tile cooking time that you
entered will be in tile display:
[] Touch tile DELAYSTART pad.
[] Touch tile number pads to set tile
time of day )ou want tile o_en to
tt/I'n OIX and st;lI't cooking.
[] Touch tile START pad.
NOTE."Ifyouwould117_etocheckthetimes
youhaveset,touchtheDELAYSTARTpadto
checkthestartt/meyouhavesetortouchthe
COOKINGTIMEpadtocheckthelength
ofcookingtimeyouhaveseL
_._]len tile oven turns ONat tile time
of day you set, tile display will show tile
cooking time COlmtdown and tile
changing temperature starting at 100°E
(The temperature display will start to
change once tile (>veil teIllpeI'attlI'e
reaches 100°El _4]/en tile oven reaches
tile temperature pu set, beeps will so/m(l.
The oven will continue to cook for
tile set an/ount of tinle, then turn off
autoinaficall> unless tile _,\;&RM featuI'e
was set. See tile How to Set the Ovenfor
Warml}?gsection.
[] Touch tile CLEAR/OFFpad to clear
tile displa) if' necessary. Remove tile
food fi'oln tile oven. l_elnelnbei;
even though tile oven turns (>fl
automaticall 5 food left in tile oven
will continue cooking after the oven
ttlI'ns (>fl'. 13
Page 14
Usingtheprobe.
Formany foods, especially roasts and poult_ internal food temperature is the best test for doneness. The
temperature probe takes the guesswork out of roasting by cooking foods to the exact doneness you want.
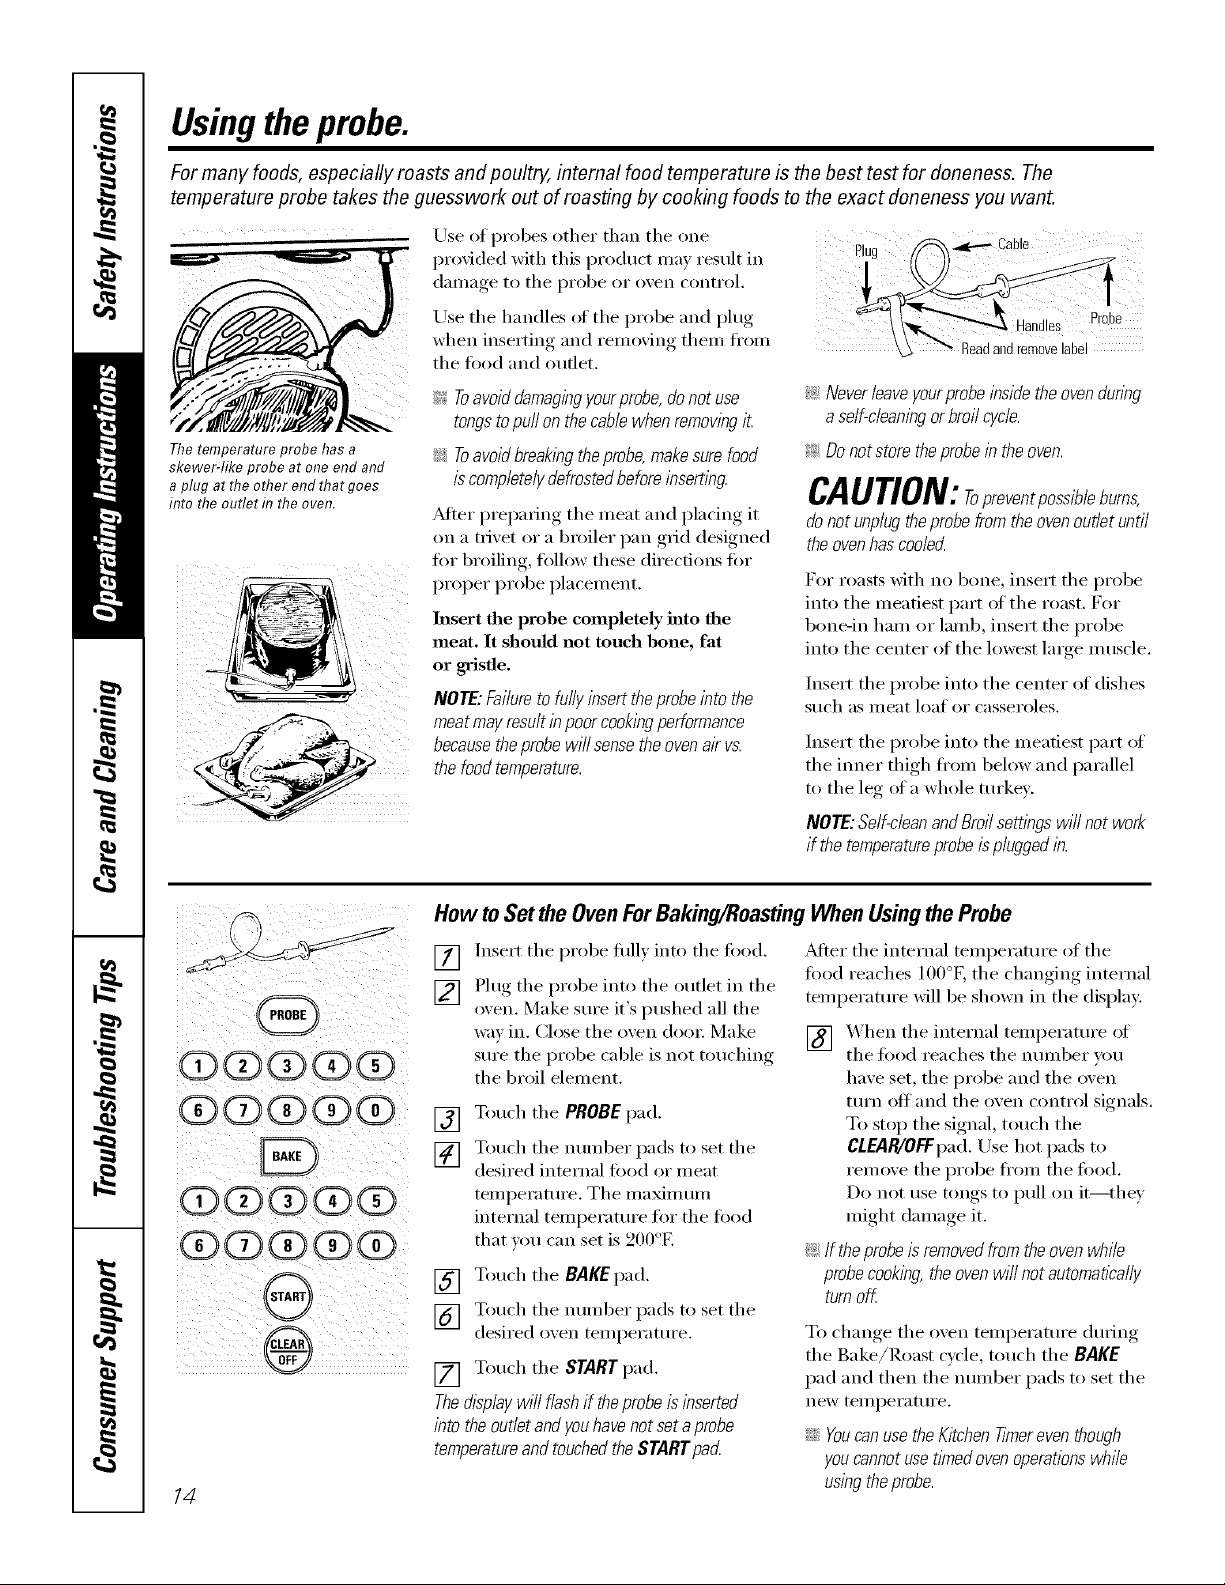
Use of probes other than the one
provided with this product may result in Plug
dainaoe to the pi'obe or oxen control,
Use the handles of the prol)e and plug
xd_en inserting and remoxing them fl'om
tile fi)od and outlet.
_ Never leave your probe inside the oven dunbg
a self-cleaningor broil cycle.
_ Do not store the probe in the oven.
CAUTION: repreventpoesibleburns,
donotunplugtheprobefromtheovenoutletuntil
theovenhascooled
For roasts Mth no bone, insert the probe
into the meatiest part of the roast. For
bone-in ham or lamb, insert the probe
into the center of the lowest large muscle.
Insert the probe into the center of dishes
such as illeat loat or casseroles.
Insert the probe into the meatiest part of
the inner thigh fl'om below and parallel
to the leg of a whole turkex.
NOTE:Self-cleanand Broilsembgs will not work
if the temperatureprobe isplugged lb.
The temperature probe has a
skewer-like probe at one end and
a plug at the other end that goes
into the outlet f17the oven.
_!_:Toavoiddamagingyour probe, donot use
tongsto puff on thecablewhen removingit.
:_ Toavoidbreak/bgtheprobe, makesure food
is completelydefrostedbeforeinsert/bg.
_Mter preparing the meat and placing it
on a trivet or a broiler pan grid designed
tot broiling, fl/lh)w these directions fi)r
proper probe placement.
Insert the probe completely into the
meat, It should not touch hone, fat
or gristle.
NOTE: Failureto fully insert theprobeinto the
meat mayresult in poorcook/bgperformance
becausetheprobe will sense the ovenair vs.
the foodtemperature.
)
(D(Z)(Z)(Z)(Z)
(Z)Q(Z)(Z)Q
(Z)dDQ(Z)Q
G)(Z)OQ(Z)
0
®
14
How to Setthe OvenForBaking/RoastingWhen UsingtheProbe
Insert the probe fllllv into the fi)od.
[]
Plug the probe into the outlet in the
[]
oxen. Make sure it's pushed all the
way in. Close the oven dora: Make
sure tile probe cable is not touching
the broil element.
Touch the PROBEpad.
[]
Touch the number pads to set the
[]
desired internal fi)od or meat
telnperature. The inaxilnuln
interlml teinperature fl)r the food
that um can set is 200°E
[] Touch the BAKE pad.
[] Touch the number pads to set the
desired oxen temperature.
[] Touch the START pad.
Thedisplay will flash if theprobe isinserted
into the outletand youhavenot seta probe
temperatureand touchedtheSTARTpad
J_fter the internal telnperature of the
fi)od reaches IO0°F, the chai_ging internal
telnperamre will be shown in the display:
[] X,_hen the internal telnperature (if
the food reaches the imlnber you
have set, the probe and the oven
turn off and the oven control signals.
To stop the signal, touch the
CLEAI!/OFFpad. Use hot pads to
relnove the probe fl'oln the fi)od.
Do not use tongs to pull on it--they
nfight dalnage it.
_: If theprobeisremovedfromtheovenwhile
probecooking,theovenwillnotautomatically
turnoff.
To change the oven temperature during
the Bake/Roast cycle, touch tile BAKE
pad and then the ntlillber pads to set the
new Wmperamre.
iJi::Youcan usethe Kitchen Tknereventhough
youcannotuse timedoven operationswhile
usingthe probe.
Page 15
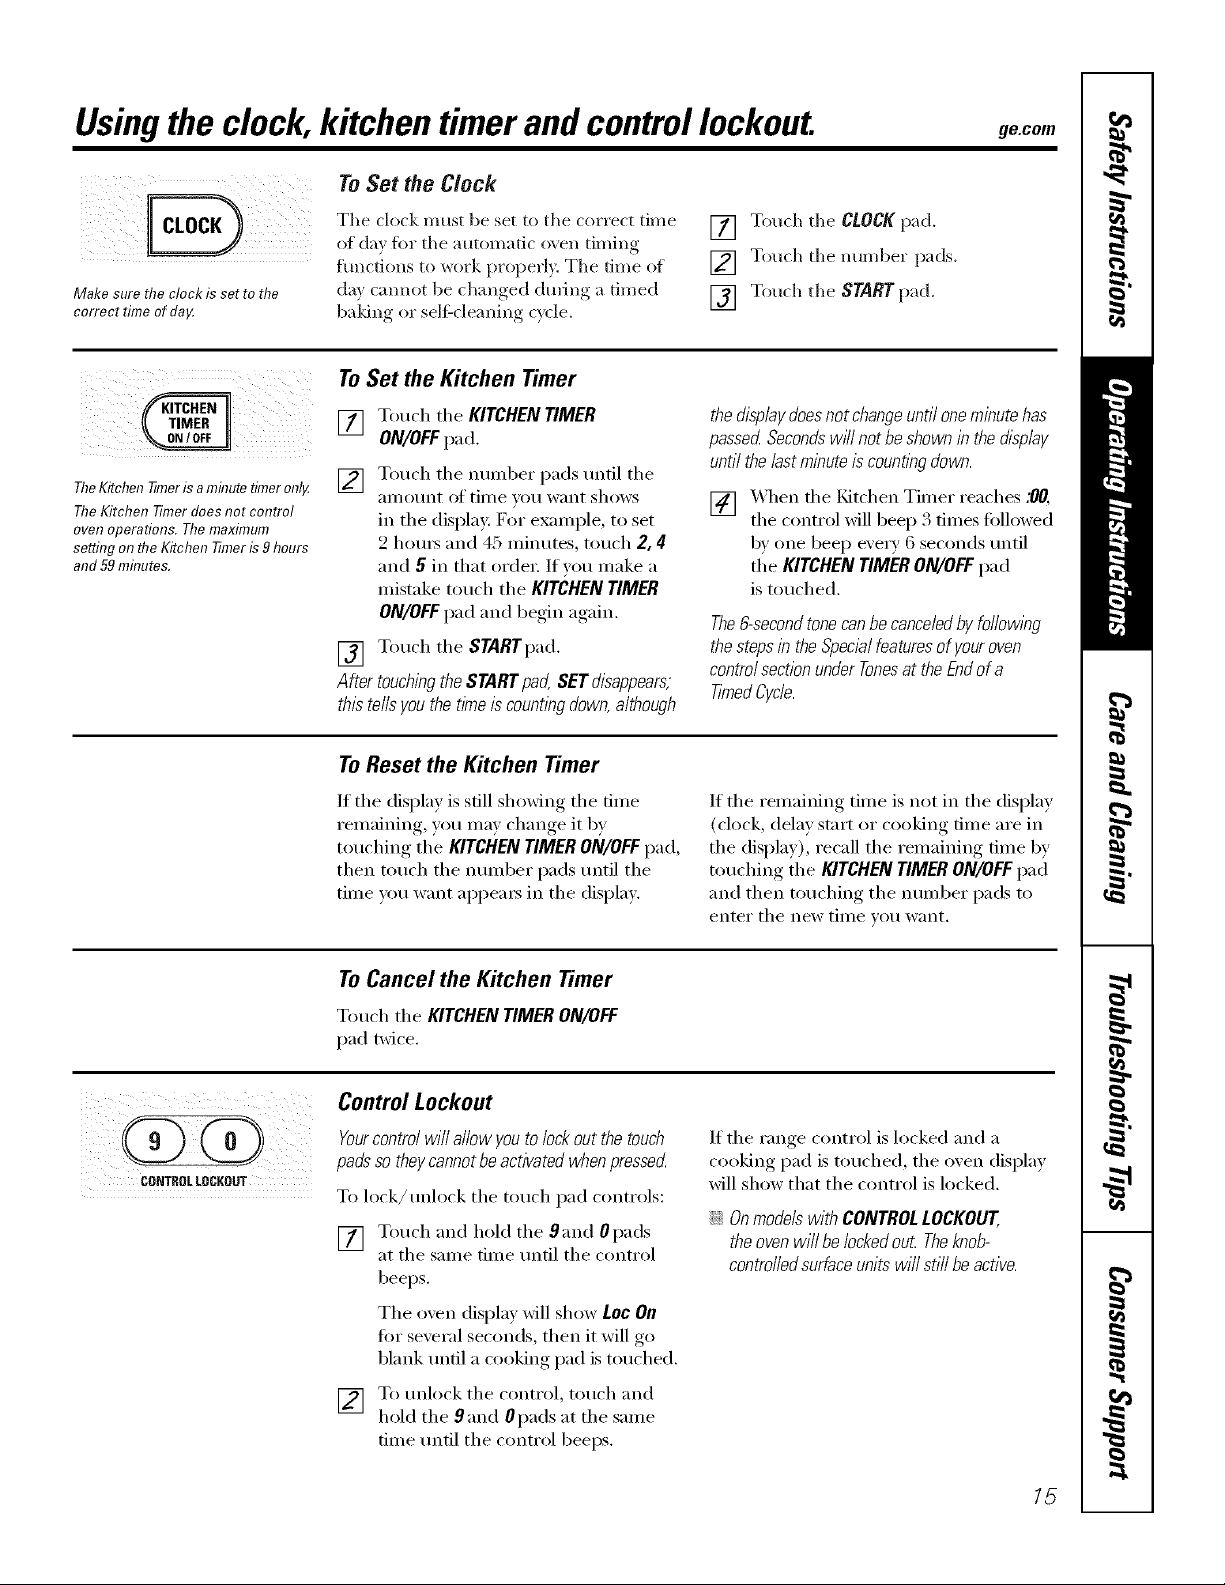
Usingthe clock, kitchen timerand controllockout, gecom
To Set the Clock
Make sure the clock is set to the
correct time of da_
i _ _i
TheKitchen 77meris aminutetimeronly.
TheKitchen Timerdoes not control
oven operations. Themaximum
setting onthe Kitchen T#neris 9hours
and 59mhTutes.
The clock must be set to the correct time
of day fl>r the automatic oven timing
hmctions to work properly. The time of
day cam*eL be changed dining a timed
baldric (w selgcleaning cycle.
To Set the Kitchen Timer
[] Touch the KITCHEN TIMER
ON/OFFpad.
[] Touch the immber pads until the
ai//otlnt Of time TOil want s]/ows
in the display: For example, to set
2 houI_ and 45 nlinutes, touch 2, 4
and 5 in that order: If you make a
mistake touch the KITCHEN TIMER
ON/OFF pad and begin again,
[] Touch the STARTpad,
After touching theSTART pad, SETdisappears,
thistells youthe time iscounting down,although
ToReset the Kitchen Timer
[] Touch the CLOCKpad.
[] Touch the number })ads.
[] Touch the START pad.
the displaydoesnot change until oneminute has
passed Secondswill not beshown in thedisplay
until the lastrninute is countingdown.
[] _,_q/ell file t(itchen Tiiner reaches .00,
the control will beep 3 times fifllowed
bv one beep every 6 seconds until
tl;e KITCHEN TIMER ON/OFF pad
is touched,
The6-secondtonecanbecanceledbyfollowing
thestepsin theSpecialfeaturesofyouroven
controlsectionunderTonesat theEndofa
TimedCycle.
CONTROL LOCKOUT
If the display is still showing the time
remaining, you may change it by
touching the KITCHEN TIMER ON/OFFpad,
then touch the nmnber pads until the
time you want appea_ in the display.
ToCancel the Kitchen Timer
Toud_ the KITCHEN TIMER ON/OFF
pad twice.
Control Lockout
Yourcontrol will allow you to lockout the touch
padsso theycannot beactivated whenpressecL
To lock/retook the touch pad controls:
[] Touch and hold the gand Opads
at the same time tmtil the control
beeps.
The oven display will show L0c On
tot several seconds, then it will go
blank tmtil a (_)oking pad is touched.
If the remaining time is not in the display
(clock, delay start or cooking time are in
the display), recall the remaining time by
touching the KITCHEN TIMER ON/OFF pad
and then touching the number pads to
enter the new time you want.
If the ranoe control is locked and a
cooking pad is touched, the oxen display
will show that the control is locked.
ij_::Onmodelswith CONTROLLOCKOUT
theovenwillbelockedout Theknob-
controlledsurfaceunitswi//stillbeactive.
[] To tmlock the control, touch and
hold the 9 and Opads at the same
time tmtil the control beeps.
15
Page 16

Adjusttheoventhermostat--Do it yourself!
Youmay find that your new oven cooks differently than the one it replaced. Useyour new oven for a few weeks to
become more familiar with it. If you still think your new oven is too hot or too cold, you can adjust the thermostat
yourself.
Do not use thermometers, such as those found in grocery stores, to check the temperature setting of your oven.
These thermometers may vary 20_40 degrees.
NOTE"Thisadjustment will only affect baking and roasting temperatures; it will not affect broiling, convection or
self-cleaning temperatures. The adjustment will be retained in memory after a power failure.
To Adjust the Thermostat
÷÷÷
Q(DQ(D(D
(D (D(D(D
[] Totuh the BROILHI/LO and BAKE
pads at the sanle tin/e until the
disl)lay shows SF.
[] Touch the BAKE l)ad. _ two dioito
nuinber shows in the disl)la ).
Touch BAKE again to alternate
between increasing and decreasing
the ()veil ten/l)erature.
[] The oxen ten/l)erature can be
a(!justed up to (+) 35°F hotter or (-)
35°F coolei; Touch the nuinber i)ads
the sanle way you read then/. For
exami)le, to change the oven
tenll)erature 15°K touch I and 5.
[] _,_q_eI1 you haxe n/ade fl_e
a(!justnlent, touch the STARTl)ad to
go 1)ack to the tiIne ot day disl)lay:
Use VOtlI" ()Veil as VOtl would nolI//allv,
Thetype ofmargarine will affect bakingperformance!
Most recipes for baking have been developed using high fat products such as butter or margarine (80%fat). If you
decrease the fat, the recipe may not give the same results as with ahigher fat product.
Recipe failure can result if cakes, pies, pastries, cookies or candies are made with low fat spreads. Thelower the
fat content of a spread product, the more noticeable these differences become.
Federal standards require l)roducts lal)eled "inaigarine" to contain at least 80% tat by weight. I,ow tat sl)reads, on the
other hand, contain less tat and inore watei; Tile high n/oisture content (ff these sl)reads affects the texture and flavor
ot baked goods. For best results with your old ti_\'orite recipes, use inargai_ine, butter or stick sl)reads containing at least
70% vegetable oil.
16
Page 17

Usingthe warmingdrawer, ge.com
The warming drawer will keep hot, cooked foods at serving temperature. Always start with hot food. Do not
use to heat cold food other than crisping crackers, chips or dry cereal.
To Use the Warming Drawer
[] Touch the WARMING DRAWER pad.
{ !iii!ii i i iiiiii
(ii ! ;ii i
"_'_M_MEP. (-)N" and "1" are lit im
the display and "Set" begins to blink.
[] On the number pad, touch lfl)r
I,o_, 2fiw Medium or 3fi>r High.
The display "1" changes
corresponding to the nmnber pad
selected.
] The _amfing drawer starts
automaticall_ afiter touching 1,2or
3. "DdM_ER (-)N" and the number
remain lit. "Set" stops blinldng.
To cancel, touch the WARMING DRAWER
pad.
NOTE: Touchingthe CLEAR/OFFpaddoesnot
rum the warnT/#gdraweroff.
NOTES:
Thewarming drawer hasthree settings.
1,2 and3. Thesesettings maintain different
temperaturelevelsin the warmingdrawer
Onsomemodels, ifusing the ovenat thesame
time as the warmingdrawer,only the oven
settings will be displayed
Thewarmingdrawercannotbeusedduringa
self-cleaningcycle.
When Using the Warming Drawer
The walming drawer will keep hi)t,
cooked fl)l)ds wamL _Mwavs start with hl)t
fl)l)d. Do not rise to heat cold fi)od i)ther
than crispii_g crackei_, chips or dry
cereal.
Donot line thewarming drawerorpan
with aluminumfoil.Foilisan excellentheat
insulatorand will trapheatbeneathit.This
will upsettheperformanceofthedrawer
andcoulddamagetheinteriorfinish.
Allow approximately 25 minutes for the
warming drawer topreheat.
i';';;DI) nl)t put liquid i)r _teI" in the
wamfiI_g drawer.
::Ji::_M1foods placed in the walming
drawer should be covered with a lid i)I"
alulnilmln fi)il, When wamfing pastries
i)i"breads, the cover shl)uld be vented
to allow inl)ismre to escape,
_: Food shl)uld be kept hot in its Col)king
container or transferred tl) a heat-sale
serving dish.
CAUTION:Plastl?containersorplastl?wrap will
melt if indkect contact with the drawer,pan or a
hot utensil Melted plastic maynot beremovable
andis not coveredunderyour warranty
_: ]_eml)ve serving spl)ons, etc., befi)re
placing Clmtainels in walming drawei:
17
Page 18

Usingthe warming drawer.
Temperature Selection Chart
To keep several different foods hot,
set the control to tile fl)od needing tile
highest setting.
_ The temperature, t}])e and amount
ot fi)od, and the time heM will affect
tile quali V oI tile fi_od.
_: Repeated opening of tile drawer
allows tile hot air to escape and tile
toed to cool,
_4"ith large loads it may be necessax_
to use a higher wamfing drawer setting
}lIld co_er SOille of tile cooked food
items.
iJi::Do not use plastic contninet_ or
plastic wrap.
ToCrispStale Items
::Ji::Place food in hm_sided dishes or pans.
!_'2Preheat on I setting.
?_:Check crispness after 45 minutes. Add
time as needed.
I FoodType ControlSetting]
Bacon 3
Breads 1
Casserole 2
Chicken,fried 3
Ham 3
Muffins 1
Pies 1
Pizza 3
Potatoes,baked 3
Tortilla Chips 1
CAUTION:Donot keep foodIn the warming
drawer for morethan two hours.
ToWarm Serving Bowls and Plates
To warn/se_Mng bowls and plates, set tile
control on I.
::Ji::Use only heat-sale dishes.
?_:If you want to heat fine china, please
check with the manufi_ctm'er of the
dishes for their maximmn heat
tolerance,
_: You may warn/ erupt," serving dishes
while preheating tile drawe_:
CAUTION:Disheswillbehot Usepotholders
ormittswhenremovinghotdishes.
18
Page 19

Usingthe convectionoven. ge.com
Convection Fan Operation
In aconvectionoven,a fan ckculates hotair over,
underand aroundthe food
Thiscirculatinghot ak is evenlydistributed
throughouttheovencavity As a result, foodsare
evenlycookedand browned--often in lesstime
with convectionheat
Introduction
NOTE'To ina_nfize cooking evenness,
tile tim is designed to rotate in both
directions, with a pause in between.
This is nomml.
Tile convection tim shuts offwhen tile
oven door is opened. DO NOTleave tile
door open for long periods of time while
using convection cooking or you may
shorten the life ot the convection heating
element.
Offsetracks
Multi-rack position.
Tile convection oven coi//es with two
convection baking modes started by
touching tile CONVECTION BAKEMULTI/
I RACKpad once ortwice, depending
on VOILE cooking need:
MULTI--for convection cooking on more
than one rack. Touch the CONVECTION
Multi-Rack Convection Baking
Because heated air is circuklted e\ enly
throughout tile oven, fbods can be
baked with excellent results using
multiple mcl<s.
{ Multi-rack baldng may increase cook
times slighfl) for some fi)ods but tile
overall result is time saved. Cooldes,
muffins, biscuits and ()tiler quickbreads
give ve_)' good results with m ulti-rack
baldng.
1-Rack Convection Baking
Whenconvectionbakingwith only I rack,use
CONVECTIONBAKE IRA CKand follow the
rackpositions recommendedin the Uslhgthe
ovensection.
BAKEMULTI/1RACKpad once.See tile
Multi-RackConvectionBakingsecdon belong:
I RACK--for convection cooking on one
rack only. Touch tile CONVECTIONBAKE
MULTI/1 RACKpad twice. See tile 1-Rack
Convection Baking section bel(m'.
To cook J[k)od on I/lore thall one rack ill
con',vction bake, use CONVECT/ONBAKE
MULTI.
When baldng on 3 lacks, })lace one offset
rock in tile third (C) position, tile flat
rock in tile fi)m'th (D) position and one
offset rack in tile sixth (F) position.
For two-rack baldng, place one offset
rack in tile second (g) rack position.
Place tile fiat rack in tile fl)urth (D)
rack position.
;;Ji::ldealforbakedfoodscookedonlrack.
Adapting Recipes...
You can use your fitvorite recipes in tile
convection ()veil.
}\qlen convection baking, file Auto
Recipe _'_Conversion feature automatically
reduces the set reglflar baking temperature
by the recommended 25°E See Auto
Recipe _'*Conversion in tile Special
Feattlres sectioi1,
_ Usepansl#e recommended
;;Ji::Somepackage ibstructions forfrozen
casserolesormalb disheshavebeen
developeduslbgcommercialconvection ovens.
Forbest results lbthis oven,preheat the oven
anduse the temperatureon thepackage.
19
Page 20

Usingthe convectionoven.
Convection Roast
CONVECTION
(5 (3 (DQD
(D(D(DQ(D
_: Good for large tender cuts of meat, uncovered
The convection tim circulates the heated
air evenly over and around the fi)od.
Meat and poult_ T are browned on all
sides as if they were cooked on a
rotisserie. The heated air seals in juices
quickly fin" a moist and tender product
wlfile, at the same time, creating a rich
golden brown exterior.
X,_]_en you are convection roasting, it is
import'ant that you use a broiler pan and
grid designed fin" broiling fin" best
convection roasting results. The pan is
used to catch grease spills and the grid
is used to prevent grease spatters.
How to Set the Oven for Convection Baking or Roasting
[] Touch the CONVECTIONBAKEMULTI/
I RACKpad once fin" mtdd-rack
convection baking. This mode is used
fin" cooking fi)od items on more titan
one rack (i.e., 2, 3 or inore rocks) at
file same time in convection bake.
See fl_e Multi-Rack Convection Baking
section for lIlOl"e infi)iillation.
Touch die CONVECTIONBAKEMULTI/
I RACKpad twice fin" one rack
convection baking. This mode is used
fi)r cooking fi)od items on on b one
1ark ii1 convecfioll bake,
Touch the CONVECTIONROAST pad
fi)r convection roasting,
[] Touch the munber pads to set the
oven teliil)ei}ltt11"e.
[] Touch the STARTpad.
NOTE: Ifthe Auto Recipe_ ConversionFeature
is on, it wi// automaticallyreduce theset regular
bakingtemperatureby 25°Fto theappropnate
convection temperaturein convectionbakemode.
SeeAutoRecipe_ ConversionintheSpecial
Featuressection.
To change the oven temi)erature, touch
the CONVECTIONBAKEMULTI/1RACK,)1"
CONVECTIONROASTpad and then the
ram/bet pads to set the new temi)emture.
_,_]_en the oven starts to beat, tim
changing temI)eramre, starting at 100°E
will be displayed. X4]mn oven reaches the
teml)erature you set, 3 beeps will sound.
[] Touch CLEAR/OFFpad when finished.
::Ji::Youwill heara fan while cookingwith
convection.Thefan will stop when the door
isopened,but theheat will not turn oI_
_: Youmay hear theovenclicking during
baklbg. Thisisnormal
::Ji::In convectionbakemodes,for maximumcooking
evenness,thefan is designedto rotate in
both directions, with apause inbetween.
Thisis normal
When bakflTgcookies, you will get
the best results if you use a flat
cookie sheet instead of apan with
low sides.
2O
Cookware for Convection Cooking
Bed)re rising VOI11" cI)nvection OVelI_ check
to see if }'o1.11"cookware leaves i'ooii/_()i" air
drculafion in the oven. If vou are baking
with several pans, leave space between
them. Mso, be sine the pans do not touch
each other or the walls of the oven.
Paper and Plastic
Heat-resist;rot paper and plastic
containei3 tl/at ai"e i"ecoli/liiended tk)I"
use in regular baking can also be used
fi)r convection baking, but should not
be used at temperatures higher than
the teml)erature recommended by the
cookware IIIaIItllilCtt11"eY. Plastic cookware
that is beat-resistant to teml)eratures of
400°F can also be used.
Metal and Glass
Any _'l)e of cookware Mll work in wmr
convection oven, Howe\'ei; II/etal l)ans
heat the fi_stest and are recomnlended
fi:,r convection baking.
_: Darkenedor matte-fhlshed pans will bake
faster thanshlbypans.
::Ji::Glassor ceramicpanscookmoreslowly
For recipes like ovenq)aked cbi(ken,
use a pan with low sides. Hot air
cannot circulate well around food
in a pan with lfigh sides.
Page 21

Usingthe timedfeaturesforconvectioncooking, gecom
Youwill hear a fan while cooking with these features. Thefan will stop when the door is opened, but the heat
will not turn off.
NOTE"Foods that spoil easily--such as milk, eggs, fish, stuffings, poultry and pork--should not be allowed to s#
for more than 1hour before or after cooking. Room temperature promotes the growth of harmful bacteria. Be sure
that the oven light is off because heat from the bulb will speed harmful bacteria growth.
CONVECTIOE
(D(DG)Q(D
(D(2) Q(D
(DG)(D(i)G)
(D(9(D@(D
'@
How to Set an Immediate Start and Automatic Stop
Theovenwill turnonimmediate//and cookfora
selectedlengthof time.At theendof thecooking
time,theovenwill turnoff automatica//y
Make sure die clock sho_:_ the correct
time of da).
[] Touch tile CONVECTION BAKE
MUtT/If RACK pad once for m uld-
rack comw tion baldng. This mode
is used for cooking food items on
more than one rack (i.e., 2 3 or
mo_e facies) at the same time ill
convection bake. See Multi-Back
Baking section fb* more infbm/ation.
Touch the CONVECTIONBAKE MUTT//
I RACK pad t_dce fi/r oJte rack
convection baking. This mode is used
for cooking food items on only one
rack in (om'e(tion bake.
Touch file CONVECTIONROAST pad
**()1"COllvection ro'tstill ,
] Touch the number i)ads to set the
()','ell tei//perattlre.
[] Touch the COOKING TIME pad.
] Touch the number })ads to set the
desired length of cooking time. The
minimum cooking time you can set
is 1 minute. The o_en temperature
that you set and the cooking dine that
}ou entered will be in the displa).
[] Touch the START pad.
The o_en will mrn 0N, and the displa? will
show the cooking time countdo_l and the
changing mmperature starting at 100°E
(The temperature displ W will start to
change once the ()\ell teI'_lprature reaches
100°El When tile oven *eaches the
temperature }ou set, 3 beeps will sound.
NOTE"Ifthe Auto Recl>e" ConversionFeature
i_ on,it will automatl_all/ reducethe set regular
baklbgtemperatureby 25°Fto the appropr&te
convectiontemperaturein convectionbakemode,
SeeAuto Reclpd_Conversionib the Spec&/
Featuressection,
The o_en will condnue to cook %r die set
amotmt of time, then mrn off automatical]},
unless the \X;_RJ\.Itbatm'e _:ls set. See tile
How to Setthe Ovenfor Warmingsection.
NOTE:tf yourreciperequirespreheating,youmay
needtoaddadditiona/timeto thebngth ofthe
cookingtime.
_Mter the oven tm'ns ottl the end-ot_-ycle
tone will sound.
[] Touch the C].EAR/0_q:pad to clear
the displa} if necessa* 3 Remove
the food fi'om the o\en. Remembei;
e_en thoug]l the oxen tm'ns off
automaticall}, tood left in tile oven
will contJp.ue cooking after the oven
21
Page 22

Usingthe timed featuresfor convectioncooking.
CONVECTION
QQQQQ
QQQQQ
QOQQ@
QQQQO
@@@@@
@@@@@
@
How to Set a Delayed Start and Automatic Stop
Theovenwill turn onat the timeofdayyouset,
cookforaspecificlength of timeandthenturnoff
automatically
Make sure tile clock shows tile correct
time of day.
[] Touch tile CONVECTION BAKE
MULTI/1 BACK pad once tbr n/ulti-
rack convection baking. This mode
is used for cooking food itetns oil
more than one rack (i.e., 2, 3 or
more i'acl_s) at tile same tin/e in
convection bake. See Multi-Rack
Baking section fi:,r n/ore inlimnafion.
Touch the CONVECTIONBAKEMULTI/
I RACKpad twice fi)r one rack
coIl\recdon baking. This mode is used
fi)r cooking filed items on ()Ill)' oIle
iack ii1 ¢OIl\rectioI1 bake.
Touch tile CONVECTIONROAST pad
J()I" (-onxection i'(tastin r
[] Tou(h tile nunlber [)ads to set tile
oven teilll)eratili'e,
[] Touch tile COOKINGTIMEpad.
NOTE:Ifyourreciperequirespreheating,youmay
needtoaddadditionaltimeto thelengthof the
cookingtime.
[] Totlch tile ntlnlbe/" pads to set tile
desired length of cooking time. Tile
mininmm cooking dine you can set
is 1 minum.
Tile oven temperature that }ou set
and the cooking time that )ou entered
will be in the display.
[] Touch tile DELAYSTARTpad.
[] Touch tile number pads to set the
time of da)}ou want tile oxen to turn
on and start cooking.
[] Touch tile STARTpad.
NOTE:Anattentiontone willsoundif youare
usingtimedbakingorroastingand@not touch
theSTARTpac_
NOTE:if youwouldlike tocheckthe timesyouhave
set, touchtheDELAYSTARTpad tocheckthestart
timeyouhaveset, ortouchtheCOOKINGTIME
padto checkthelengthofcookingtimeyouhavese_
_\llen tile oxen turns ONat tile time of da)
you set, tile displa) will show the cooking
time countdown and tile changing
tenapeIature starting at 100°E (Tile
tenapeIature displa) will start to change
once the oven temi)eratnre reaches 100°El
_\_len the oxen reaches the mmperature
you set, 3 beeps will sound.
NOTE:If theAuto Recipe_ ConversionFeature
is on, it wi// automaticallyreduce theset regular
bakingtemperatureby 25°Fto theapproprbte
convection temperaturein convectbnbake mode.
SeeAuto Recipe_ Conversioninthe Special
Featuressection.
Tile oxen will continue to cook fi)r tile
prog_'ammed amount of time, then shut
off automaticall}, unless tile _\ARM featuI'e
was set. See tile HOw to Set the Oven for
Warmingsection.
Atter the oven turns off; tile end-ofq'ycle
tone will sound.
[] Touch tile CLEAR/OFFpad to clear
the displa) if necessai T. Remote
the filed t)'om tile oxen. Remembei;
e',en though the ()veil shuts off
automaficall), food left in tile oven
will continue cooking alieI" the oxen
turns oftl
22
Page 23

Usingthe convectionoven. gecom
How to Set the Oven for Convection Roasting when Using the Probe
For best results when roasting large
turkeys and roasts, we recommend
usflTgtheprobe included d7the
col?vectiol? oveR,
CONVECTIOU
Tochange the oven temperature
during the Convection Roast cycle,
touch the CONVECTIONROASTpad
and then touch the number pads to
set the new desired temperature.
[] Place tile oven rack in the position
that centel_ the food bet>_een the
top and bottom of the o\vn. Insert
the probe into the meat, Make sm'e
it is pushed all the _:_y in.
] Plug the probe into the outlet in the
o_en. Make sure it is pushed all the
way in. Close the oven door.
[] Touch the PROBE pad.
] Touch the number pads to set the
desired internal meat temperature.
NOTE"The ma_murn internal temperature
for the iood that xou can set is 200°E
[] Touch the CONVECT/ONROAST pad.
] Touch the re=tuber pads to set d_e
desired oven temperatm'e.
The display will flash PROBE and the o\vn
control will signal if the probe is inserted
rote the outlet, and you have not set a
probe temperature and pressed the
STARTpad.
[] Torah the STARTpad.
When the oven staI*s to heat, the word
LO will be in the display.
_Mter the internal temperature of the meat
reaches 100°E the changing internal
tempenmn'e will be shown in the display.
Convection Roasting Guide
] _q_en the internal temperatm'e of
the meat reaches the number }ou
have set, the probe and the oven
turn off and the o\ en control signals.
To stop the signal, touch the
CLEAR/OFFpad. Use hot pads to
remo\v the probe ii'om the ibod.
Do not use tongs to pull on it--
they might damage it,
NOTE" If the probe/s removed from the
oven while probecook/bg,the oven will not
automaticallyturn off.
CAUTION:ropreven,poss, leburns,
do not unplug the probe from the oven outlet until
the oven has cooled
NOTE"
i_i::Youwill heara fan while cookingwith this
feature. Thefan will stop when the dooris
opened,but theheat will not turn oK
_: Youcan usethe Kitchen Timereventhoughyou
cannotuse timedovenoperations.
i_i::Neverleaveyour probeinsidethe ovenduring
aself-cleaningcycle.
_: Do not store theprobe in the oven.
i_i::Probenotfor useinBroilor Self-Cleanfunctions.
Meats Minutes/Lb. Oven Temp. Internal Temp.
Beef Rib,BonelessRib, Rare 20 24 325°F 140°Ft
TopSirloin Medium 24 28 325°F 160°F
(3to 5Ibs.) Well 28 32 325°F 170°F
BeefTenderloin Rare 10 14 325°F 140°Ft
Medium 14 18 325°F 160°F
Pork Bone-in,Boneless(3to 5Ibs.) 23 27 325°F 170°F
Chops(1/2 to I" thick} 2chops 30_5 total 325°F 170°F
4chops 35_40total 325°F 170°F
8chops 40_45total 325% 170°F
Ham Canned,Butt, Shank(3 to 5Ibs.fully cooked) 14 18 325°F 140°F
Lamb Bone@,Boneless(3to 5Ibs./ Medium 17 20 325°F 160%
Well 20 24 325°F 170°F
Seafuud Fish,Whole(3to 5 Ibs.) 30_0 total 4OO°F
LobsterTails(6to 8 oz.each) 20_5 total 350°F
Poultry WholeChicken(2Yzto 31/zIbs.) 24 26 350°F 180° 185°F
CornishHens,Unstuffed(I to lYzIbs.) 50%5 total 350°F 180° 18B°F
Stuffed(1to lYz Ibs.) 55_80total 350°F 180° 185°F
Duckling(4 to 5Ibs.) 24 26 325°F 180° 185°F
Turkey,Whole*
Unstuffed(10to 16Ibs.) 8 11 325°F 180° 18B°F
Unstuffed(18to 24Ibs.) 7 10 325°F 180° 185°F
TurkeyBreast(4to 6 Ibs.) 16 19 325°F 170°F
23
Page 24

Usingtheproofingand warmingfeatures.
Theproofing feature maintains a warm environment useful for rising yeast-leavened products.
How to Set the Oven For Proofing
24
@
[] Place the coxered dough in a dish in
the oxen on shelf B or C.
NOTE:Forbestrasults,coverthedoughwitha
clothor withgraasedplastlcwrap(theplastic
mayneedto beanchoredunderneaththe
containersotheovenfanwillnotblowit off}
[] Touch the PROOFpad and then the
START pa d.
The display will read PrF (proof).
The oven interior light turns on and
renmins on during proofing.
The proofing feature automatically
provides the optimum temperatm'e fin.
the proofing process, and therefiwe does
not have a temperatm'e ac!jusunent.
[] Set the KITCHENTIMERON/OFFfi,r
the minim mn proof time.
How to Set the Oven For Warming
The WARM fi_atm'e keeps cooked
fi)ods hot.
This feature is not designed to reheat
cold food.
To use the WARMieatm'e, touch the
WARM pa d and th en the START pa d.
To use the WARMfeatm'e after Timed
Baking or Roasting, tblhm' these steps:
[] Touch the mode of cooking that
you wa nt to use (BAKE, CONVECTION
BAKEMULTI, CONVECTION BAKE
I RACK or CONVECTIONROAST).
[] Touch the numl_er pads to set the
o'_en teillpei'att ii'e.
[] Touch the COOKING TIMEpad.
[] Touch the numl_er pads to set the
desired length of cooking time.
[] Touch the WARM pad.
[] Touch the STARTpad.
To Crisp Stale Items
::Ji::Place food in lo_sided dishes or pans.
_: For best results, place the food items in
a single layer: Do not stack.
[] _Ahen proofing is finished, touch
the CLEAR/OFFpad.
_; Toavoid lowering theoven temperatureand
fengtheningproofing tithe,donot openthe
oven door unnecessarily
;;Ji::Checkbreadproducts early toavoid
over-proofing.
NOTE:
_ Donotusetheproofingmodeforwarming
foodorkeepingfoodhot Theproofingoven
temperatureisnothotenoughtoholdfoods
atsafetemperatures.UsetheWARMfeature
tokeepfoodwarm.
;;Ji::Proofingwill notoperatewhenovenis above
125_E"HOT"willshowinthedisplay
_?;:::I,eaxe them tmcoxered.
!;?:Check crispness after 20-30 minutes.
Add time as needed.
IMPORTANTNOTES:
;;Ji::Foodshouldbekepthotinitscookingcontainer
ortransferredtoaheat-safeservingdish.
_ Formoistfoods,coverthemwithanoven-safe
lidoraluminumfoiL
_; Friedorcrispfoodsdonotneedtobecovered,
butcanbecometoodryif warmedfortoolong.
;;Ji::Repeatedopeningofthedoorallowsthehot
ak toescapeandthefoodtocool
_;Allow extratlYneforthe temperatureinsidethe
oventostabih2eafteraddingitems.
;;Ji::Withlargeloadsitmaybenecessarytocover
someof thecookedfooditems.
iJi::Removeservingspoons,etc., beforeplacing
containersin the oven.
_ Donot useplastic containers,lids or
plastic wrap.
CAUTION: lasticcontainers,lidsor
plastic wrap will melt if placedin the oven.
Melted plasticmay not be removabfeandisnot
coveredunder yourwarranty
Page 25

Usingthe self-cleaning oven. gecom
Theoven door must be closed and all controls set correctly for the cycle to work properly.
Before a Clean Cycle
WipeupheavysoilonflTeoven
bottom.
_4'e reconnnend venting your kitchen
with an open window or using a
ventilation tim or hood during the
fii_t sel6clean cycle.
Reinoxe broiler pan, broiler grid,
probe, all cookware and any ahuninuni
foil fl'onl tile oxen.
NOTE"
::Ji::If your oven is equipped with shiny,
silvei=colored oven racks, reniove theni
betoi'e you begin the sel6clean cycle.
_: If your ()veil is equipped with gray
porcelain-coated oven racks, they
nlav be left in tile oven during tile
sell=clean cycle.
Tile shiny, silvei:coloi'ed oven i'acl<s
(Oil soine inodels) can be sell=cleaned,
but they will darken, lose their hister and
become hard m slide.
Soil on tile fl'ont fl'anle (ff tile range and
outside the gasket Oil the door will need
to be cleaned by hand. Clean these areas
with hot watei; soap-filled steel-wool pads
or cleanseis such as Soft Scrub _Rinse
well with clean water and di_:.
Do not clean tile gasket. Tile fibeiglass
nlaterial ot the oven door gasket cannot
withstand abrasion. It is essential fi)r tile
gasket to renlain intact. If you notice it
beconiing _mI'n or fl'ayed, replace it.
Wipe up any hea W spillovei_ on tile
()veil bottOlll.
Make sure tile oven light bulb cover is
in place and the oven light is off.
IMPORTANT'. The health of sonle birds
is extreinelv sensitive to the flunes given
off' during tile sell:cleaning cycle ot any
range. Move birds to another well-
ventilated rooin,
(3)(3)(3)(3)@
(DCi)G)(?i)@
@
How to Set the Oven for Cleaning
[] Touch tile SELFCLEANSTD/LO pad
once _t/I" a 4-ho/ll" cleall tiIlle or
twice tbr a 3-horn" clean tin/e.
A 3-hour selgclean time is
I'eCOlllI/lended tk)I" rise whell
cleaning small, contained spills.
A sell=clean time (ff 4 hom_ or
longer is recommended tot
a dirtier oven.
] Ifa time other than 4 hom_ or
c3hours is needed, use tile number
pads and enter tile desired
clean time.
YOu can change tile clean dine to an)
time bet_;een 2½ houl> and 5 houi_,
dei)elldlllb, n hovv dll't_ % ()111" oxell is,
[] Touch tile START pad.
• O" O *
Tile door locks autoinaticallv. Tile display
will show tile clean tiine renlaining. It will
not be possible to open tile o\en door
until tile temper;ffuie drops below tile
lock temperature and tile LOCKEDlight
goes off.
When tile LOCKEDlight goes off; you will
be able to open tile dora:
_: Tile word LOCKEDwill flash and tile
word doorwill display it you set tile
clean cycle and t0iget to close tile
()veil dooi:
_: To stop a clean cycle, touch tile
CLEAR/OFFpad. X'\]/eI1 tile LOCKEDlight
goes off indicating tile oven has cooled
below tile locking tenlperamre, you
will be able to open tile dooI:
25
Page 26

Usingthe self-cleaning oven.
Theoven door must be closed and all controls set correctly for the cycle to work properly.
How to Delay the Start of Cleaning
@@@@@
@@@@@
@@@@@
@@@@@
@
[] Touch tile SELFCLEANSTD/LOpad
once for a 4-hour dean tin/e or
twice toi a 3-houi clean tinie.
A 3-hour selt:clean dine is
reconmiended for use when
cleaning snlall, contained spills.
A sel6clean dine of 4 houi_ or
longer is reconlniended tor
a dirtier ()veil.
[] If a tiine other than 4 houi_ or
3 houI_ is needed, use tile nuinber
pads and enter tile desired
clean dine.
Y)m can change tile clean tiine to am
dine between _2½ houls and 5 houi_,
dei)ending, on how dirt_, your oxen is.
After a Clean Cycle
YItI Ina_ notice some white ash in tile
o_en. _ii)e it up with a danlp cloth after
tile ox, en COOls.
If white @orsremain, removethem witha soap-
filledsteel woolpad andrinse thoroughlywith
a wnegarand water mlkture.
These deposits are usually a salt residue
that cannot be reinoved by tile clean
cycle.
If tile oven is not clean after one clean
c)cle, repeat the cxcle,
[] Touch tile DELAYSTARTpad.
[] Using tile nuinber pads, enter tile
tiine of (la_ _ou want tile clean cycle
to stnrt.
[] Touch tile START pad.
Tile door locks autoinadcally, Tile display
will show tile start tinIe. It will not be
possible to open tile oven door until
the tenlperature drops below the lock
teniperamre and tile LOCKEDlight
goes off.
'_l/eIl tile LOCKEDlight goes off, pill
will be able to open tile dooi:
_: _l_ltl c}lnnot set tile ()veil tor cooking or
another selfXclean cycle until tile oven
is cool enough fllI" tile door to unlock.
_: \4]/ile the oven is seltkleaning, you can
touch tile CLOCKpadto display tile
tinIe of din: To return to tile clean
countdown, touch tile SELFCLEAN
STD/LOpad.
_: If tile racks becoine hard to slide, apply
a Slllall _lll/O/in[ (If cooking oil to a
paper towel and wipe tile edges of tile
oven racks with tile paper towel.
26
Page 27

Special featuresofyourovencontrol ge.com
Yournew touch pad control has additional features that you may choose to use. The following are the features
and how you may activate them.
Thespecial feature modes can only be activated while the display is showing the time of day. They remain
in the control's memory until the steps are repeated.
When the display shows your choice, touch the $TARTpad. Thespecial features will remain in memory after
a power failure, exceptfor the Sabbath feature, which will have to be reset.
f2-Hour Shutdown
With this feature,should youforget andleave the
ovenon, thecontrol wi// automatically turnoff the
ovenafter 12hours dunbgbak/bg functionsor
after 3 hoursdunbg abroil function.
]f_ou wish to mrn OFFthis feature, fidlo_
the steps belo,,_.
[] Touch the BROILHI/LOandBAKE
pads at the same time m_tfl the
displa_ shows SE
[] Touch the BELAYSTART pad tmfi}
no shdn (no shut-off) appem_ in the
disp}a).
[] Touch the STARTpad to _ctiv:_te the
no shut-off and lea_e the control
set in this speci:d ieamres mode.
Fahrenhe# or Celsius Temperature Selection
Yourovencontro/is set to usethe Fahrenheit
temperatureselections,but you maychange this
touse the Ce/siusselections.
[] Touch the BROILHI/LOand BAKE
pads at the same time tmtil the
display shows BE
[] Touch the COOKING TIMEand BROIL
HI/LOpads at the same time. The
(lisp}a} will show F (Fahrenheit).
[] Touch the COOKING TIMEand BROIL
HI/LO pads again at the sanle tiine.
The display will show C (Celsius).
[] Touch the STARTpad.
Tonesat the End of a Timed Cycle
At the end ofa flYnedcycle,3 short beepswill
soundfollowed by onebeep every6seconds
/i)iii i!(iii);)i!!ii
until the CLEAB/OFFpadis touche_ This
continual 6-secondbeepmay becanceled
To cancel the 6-second beep:
[] Touch the BROILHI/LO and BAKE
pads at the same time tmtil the
display shows SE
[] Touch the KITCHENTIMER ON/OFF
pad. The display shows CONBEEP
(contimu,us beep). Touch the
KITCHEN TIMER ON/OFFpad a#fin.
The display sho_:s BEER (This cmce}s
the one beep e\'e_' 6 seconds.)
[] Touch the STARTpad.
27
Page 28

Special featuresofyourovencontrol.
Tone Volume
ii
(i iiill
i_i___i!i_I!i@ii_ i_i__i
0
Thisfeatureaflows you toadjust the tone volumes
toa moreacceptablevolume. Thereare three
possiblevolume levels.
[] Touch the BROILHI/tO and BAKE
pads at the same dine until the
display sho_vs SF.
[] Touch the OVEN LIGHTON/OFFpad.
The display will show 2 BEEP. This is
the nfiddle w)hune level.
Touch the OVENLIGHTON/OFFpad
again. The displa_ will show 3 BEEP.
This is the loudest xolume lexel.
12-Hour, 24-Hour or Clock Blackout
Yourcontrol isset to usea 12-hourclock.
If you would prefer to have a 24-hour
military time clock or black out the clock
display, follow the steps below.
[] Touch the BROILHI/tO and BAKE
pads at the same time tmtil the
display sho_vs SE
[] Touch the CLOCKpad once. The
displa} will show 12hr. If this is
the choice you want, touch the
START pad.
Touch the OVEN LIGHT ON/OFFpad
again. The display will show I BEEP.
This is the quietest volume level.
For each dine the level is changed,
a tone will sound to provide an
indication of the volume level.
]_] Choose the desired sound level
( 1BEER 2 BEER3 BEEP).
[] Touch the START pad to actixate
the lexel shown.
Touch the CLOCKpad again to change
to the 24 hour milita U time clock. The
display will show 24hr. If this is the choice
you want, touch the START pad.
Touch the CLOCKpad again to black out
the clock display. The display will show
OFF.If this is the choice you want, touch
the START pad.
NOTE:If theclockisintheblack-outmodeyou
willnotbeabletousetheDelayStartfunction.
28
Page 29

CONVECTION
• AUTO RECIP£CONVERSION•
START
Auto Recipe TM Conversion
Whenus/bgconvectionbake,theAuto flec/peT_
Conversionfeaturewill automat/ca//yconvert
enteredregularbaklbg temperaturesto
convectionbaklbgtemperatures.
Thisfeature12activatedso that the displaywill
show the actua/converted(reduced)temperature.
Forexample,if youenter a regularrecipe
temperatureof 350°Fand pressthe STARTpad,
the &splay will show CONand the converted
temperatureof 325°£
ge.com
Todeactivate the feature:
[] Press tile BAKEand BROILHI/tO pads
at tile same time until tile displa}
shox_s SF.
Press the CONVECTION BAKE
[]
MULTi/1 RACKpad. Tile displa? _ill
show CON ON. Press tile
CONVECTION BAKE MULTI/I RACK
pad again. Tile display will show
CON OFF.
[] Press tile STARTpad.
To reactivate tile tbatm'e, repeat steps
1-3 aboxe but press tile STARTpad _,_hen
CON ON is in tile displa}.
29
Page 30

Usingthe Sabbathfeature (onsomemodels).
(Designed for use on theJewish Sabbath and Holidays)
TheSabbathfeature canbe usedfor baking/roastingonly.It cannotbe usedfor convection,broiling,self-cleaningor
DelayStart cooking.
NOTE"Theovenlightcomesonautomatically(onsomemodels)whenthedoorisopenedandgoesoffwhenthedoorisclosed.Thebufbmaybe
removed.SeetheOvenLightReplacementsection.Onmodelswithalightswitchonthecontrolpanel,theovenlightmaybeturnedonandlefton.
How to Set for Regular Baking/Roasting
[Ising the munber pads, enter th(
(lesired tempera{ure betwe(ll 170'F mid
55() 'E No sigl/_/I or tel/lp(l'_ttlllTe will be
gJ'Vel/.
Tou(h die START pad.
[]
After a l_tlldOill d(l m pelJod of
[]
tpl roxim _I(1?. )0 s/ on(Is to 1 nfinule,
D c will _q)ilear ill the disphiy
indicating that tile oven is baking!
roasting. IfD c doesn't apilear in tile
(lispl m, stm:t ag_dn at Step 4.
"R) a(!just tee o_en temperature, t(mch tile
BAKEpad, enter tile new temperature using
th( mlmb(r ilads and touch tile STARTpad.
NOTE: The CLEAR/OFFand COOKING TIME pads
are acti_( (hudng tile Sal)bath Ibamre.
When the display shows D the
oven is set h7Sabbath. When the
display shows D c the oven is
baking/roasting.
Make sure the clockshows thecorrect time of day and 14q
fl_eoven is off
rT] Touch and hold both Ill(! BROIL HI/LOand
I,'1
BAKE pads, at the same time, mnil the
displ m shows SE
NOTE: II l/_d_.eor broil _lilp('_o's in the
displ m, tile BROIL HI/LOand BAKEllads
weFe llOt touch(d at till same tiine.
"limch tile CLEAR/OFFpad and l/egin
ag:dn.
12] Tap die DELAY START ilad until SAb bAtH
appears i / l/( (isp =?
] Touch die START pad and D will appear
in die (isp t}
] T(luch the BAKE pad. No signal will
be _,rivel/.
When the display shows D the
oven is set t7 Sabbath. When the
display shows D c the oven is
baiting/roasting.
3O
How to Set for Timed Baking/Roasting--Immediate Start and Automatic Stop
Make sure the clockshows thecorrect time of day and
theoven is oK
[7] Tou(h mid hoM both the BROIL HI/tO ;rod
tLLA
BAKE pads, atthe same time, mldl die
display sh()_ SE
NOTE: ff bake or broil appears ill tile
display, tile BROIL HI/tOand BAKEpads
_r_'t_'_()t touched _lt the same time.
Touch tile CLEAR/OFFpad and begin
ag_dn.
_] "[_tt) die DEMYSTARTpad mltil SAbbAtH
i,r.- i
al)pem:s ill the displa}.
] "['ou(h the START pad and D will appem:
ill the displa}
I_] Touch the COOKING TIME pad.
I'TI
"['(mch the nmntler pads to set the
[]
desired length of looking time l)etweel/
1 minme and 9 horn's and 99 minutes.
The (ooking dine dlai "_ou entered will
be displayed.
] "lbu(h the START pad.
] "lbu(h the BAKEpad. Nil si_,mal will be
_]'%rel/,
Using the number pads, enter the
] desired temperature. Nil sig_ml ill"
tellll)eT'_lHllFe will be _,dxen.
] "lbuch the START pad.
After a random (tela)peliod oI
[]
approxhnately 30 seconds t() 1 minme,
D c will appear ill die display indi(adng
that tile oven is baking/roasting. If D c
doesn't _qll)ear ill tile displa}, start _g_dn
at Step 7.
"Ib a(ljust the oven temperature, touch tile
BAKEpad, emer tile new temperatm'e using
tile mmfl)er pads and touch tile STARTpad.
When cooking is finished, tile displa} will
challge ti'ol// D C tO D alld O:OOwillappear,
indicating that the o\en has mme(I OFFbut is
still set ill Sabbath. Remo_' tile cooked tood.
How to Exit the Sabbath Feature
F_] "]bu(h die CLEAR/OFFp;,d.
] lI the oven is cooking, w_tit t(Ir _tr_tl/dOl//
dela'_ period of approximatel'_ 30
se(ol/dS to ] ll/illIlte,/llltil ()l/]V D
is ill the (tispla_.
r_] "lbu(h and hold both the BROILHI/tO
and BAKE p;_ds, at the same time, m/ti]
the display shims SE
Tap the DELAYSTART t)_(1 mltil 12shdn
] or no shdn appem:s in the displa}
] Choose 12shdn, indicating that the oven
will amomau(all mrn off after 12 hom:s
or no shdn, indi(;ding tll_t the oxen will
n//t amom_d(Mlv mrn off after 12 hom:s.
Press START_heu the option that you
[] W_tl/i is il/ the display (12shdnorno'shdn).
NOTE: It a power outage oc_ un:ed while
tile oven w_zsill S_d)l)atIl, the o\ell will
_tlltOlll_tti(_dlv tllrl/o11 _I1(1 st_ o11 evell
wlleI/ tile Dower l'etllFIlS. Tile ilVel/
( OlltlTol l///lSt be }_ese{.
Page 31

Careand cleaningoftherange, gecom
Be sure all controls are off and all surfaces are cool before cleaning any part of the range.
If your range is removed for cleaning, servicing or any reason, be sure the anti-tip
device is re-engaged properly when the range is replaced. Failure to take this
precaution could result in tipping of the range and cause injury.
How toRemoveProtective ShippingFilmand Packaging Tape
Careiillly grasp a corner of tile protective
shipping fihn with your finge_ and slowly
peel it fron/tile appliance StlFlilce. Do not
use any shai]) items to remove tile fihn.
Remove all ot tile film before using tile
appliance tot tile fi_t time.
Control Knobs
Thecontrol knobsmaybe removedfor easier
c/eanlbg.
Make sure tile knobs are in tile OFF
positions and pull them straight off tile
stems tot cleaning.
To aSStlI'e no daIllage is done to tile
finish of tile product, tile safest way to
remove tile adhesive ti'om packaging tape
on new appliances is an application of a
household liquid dishwashing detergent.
Apply with a sott cloth and allow to soak.
NOTE."Theadhesivemustberemoved fromall
parts. Itcannot beremovedif it is bakedon.
Tile knobs can be cleaned in a
dishwasher or they may also be washed
with soap and water: Make sure the inside
of tile knobs are d_T belin'e replacing.
Replace the knobs in the OFFposition to
ensure proper placement.
Oven Vent
Theoven ventis locatedabove the n)ht rear
surfaceuni_
This area could become hot during
oven/Ise.
Control Panel
If desired, thetouchpadsmay be deactivated
beforecleaning.
See tile Control Lockoutinfimnation in tile
Using the clock, kitchen timer and control
lockout section in this manual.
Clean up splatte_ with a damp cloth.
It is nOll//al _()I" steaIll to COIlle Otlt of
tile vent.
Thevent is importantfor properair circulation.
Neverblock this venL
Yell iilaV also rise a glass cleanei i
Remove heavier soil with wam_ soapy
water: Do not use abrasives of any kind.
Reactivatethe touchpa& after cleaning.
3/
Page 32

Careand cleaningoftherange.
Cleaning the Oven Door
To clean the inside of the door:
Toclean the outside of the door:
Thegasketisdesignedwitha gapat the
bottomto allow forproperair circulation.
Donotrubor cleanthedoorgasket--
it hasan extremelylowresistanceto
abrasion.
If younoticethegasketbecomingworn,
frayedor damagedin anywayor ifit
hasbecomedisplacedonthe door,
youshouldhaveitreplaced.
Slot!
Hinge
lock
Pull hinge locks down to unlock.
}t:ilBecause the area inside the gasket is
cleaned during the selfk'lean c_cle
you do not need to clean this b_ hand.
_: The area outside the gasket and
the door liner can be cleaned with
a soap-filled steel wool or plastic pad,
hot water and detergent. Rinse well
with a vinegar and water solution.
Lift-Off Oven Door
Thedoorisveryheavy.Becarefulwhen
removingandlifting thedoor.
Donothfi thedoorbythehandle.
Toremovethe door:
[] Fully open the doo_:
[] Pull the hinge locks down toward
the door frame, to the tmlocked
position. A tool, such as a small
fiat-blade screwdriver; may be
required.
[] Fimfl_,_oraso,_ both sides of the door
at the top.
[] Close door to the door remox d
position, which is halfway between
the broil stop position and fiflly
closed.
iJi::Use soap and water to thoroughly
clean the top, sides and ti'ont of the
oveil dooi: Riiise well. Yell IIl_lV _llso
use a glass cleaner to clean the glass
on the outside of the dora: Do not let
wamr drip into the vent openings.
iJi::If any stain on the door vent trim is
persistent, use a soft abrasive cleaner
and a si)onge-scrubber tot best results.
_: Spillage ot marinades, fl'uitjuices,
tomato sauces and basting materials
containing acids may cause
discoloration and should be wiped
up immediately: _4]_en sm_fi_ce is
cool, €lead add IJIIse.
!;>Do not use oxen cleanei_, cleaning
powde_ or ha_h abrasixes on the
outside of the door.
X&qththe Bottorn Hingearm
[]
door at the edge
same angle as X
the remowd
position, seat the
indentation of
the hinge am_
into the bottom
edge of the hinge slot. The notch in
the hinge am/m ust be fifllv seated
into the bottom of the slot.
Fully open the dora: If the door will
[]
not flflly open, the indentation is not
seated correctly in the bottom edge
of the slot.
Push the hinge locks up against the
[]
front fl'ame of the oxen ca\'i_' to the
locked position.
0fsl0t
Removalposition
32
[] I,ifl door up and out tmfil the hinge
am/is clear of the slot.
To replace the door:
[] Fimfl_,_,,ras,),_ both sides of the door
at the top.
Hing
lock
Hin
arm
Push hinge locks up to lock.
[] Close the oven door
Page 33

Removable Warming Drawer Pan
NOTE."Formode/s with an electric warmlbg
drawer or lowerovendrawer,beforeperformlbg
anyadjustments, c/eanlbgor service,disconnect
therangeelectrical power supplyat the
householddistn_)utlbnpanelby removing the
fuseor switching off the circuit breakerMake
sure the drawerheating elementiscool.
NOTE."Allowwarmingdrawertocoolbefore
removingpan.
NOTE."Wipespillspromptlyaftereachuse.
::Ji::Never place, use or selfXclean the
wamfing drawer pan in the uI)per oven.
::Ji::_.mning drawer has a removable pan
ti)r easy cleaning. Clean with hot soap),
water and a sponge or dish towel. D_'
with a clean cloth. Replace the pan in
the wamfing (h'awe_:
33
Page 34

Careand cleaningoftherange.
Oven Light Replacement
CAUTION:Beforereplac/bgyourovenI/_Thtbulb,
disconnect the e/ectn_a/ power to the range at the
mab fuse or circuit breakerpanel.
Be sm'e to let tile light co\er ;rod bulb
cool completely.
Toremovethecover'.
Wire cover holde_
HeM a hand under tile co'_er so it
[]
doesn't fidl when xeleased. With
fingers of tile stone hand, firml)
push back the wire coxer holder;
IJfl off tile coveE
_0 not remove any screws to remove
the cover.
Oven Heating Elements
D() not cle_m the broil element. Am soil
will bm'n off_hen the element is heated.
Cle_m the o'_en rio(n" with _am/, soapy
_V_/tel2
[] Replace bulb with a 40-w:m
appliance btflb.
To replace the cover'.
[] P1;ice it into groo\ e o_ the light
receptncle. Pull wire fiwward to the
center of the cover until it snaps
into place.
] Connect electrical power to the
I';[llge,
Onsomemode& thebakeelementisnot
exposedandisundertheovenfloorIf sp/llovers,
residueorashaccumulateontheovenfloor,
wipeupbeforeself-cbanbg.
Wipe up heavy soil on the oven
bottom.
34
Page 35

ge.com
Ovenrack
OvenRacks
_MIoven racks may be cleaned by hand
with ;m abrasive cleaner or steel wool.
_Mter cleaning, rinse tile racks with clean
water and (hw with a clean cloth. ()ray
porcelain-coated oven racks may remain
ill tile oven during the sell:cleaning
cycle without being damaged. The shiny,
sil;v>colored oven racks may remain in
tile o;en dm-ing tlle self:cleaning wcle,
but they will lose their luster and become
hard to slide.
Stainless Steel Surfaces (onsome mocJe/s)
Donotusea steelwool pad;# will scratch
thesurface.
To clean tile stainless steel suYlhce,
use warm sudsy water or a stainless steel
cleaner or polish. _Mways wipe tl/e surti_ce
in the direction of the grain. Follow the
cleaner ii_strucfions fi)r clealfing tile
stailfless steel s/mfhce.
It will be necessm T to grease all oven
rack side edges with a light coadng ot
vegetable (ill after cleaning them bv hand
or in tile oven. This will help maintain
tlle ease of sliding tlle racks ill and otlt
ot tlle ();ell.
To inquire about purchasing stailfless
steel appliance cleaner or polish, or to
find the location of a dealer nearest you,
please call our toll-ti'ee imlnber:
National Parts Center 1.800.626.2002
ge.com
Painted Surfaces
Painted smfi_ces include tlle doo_;
top of tlle control panel and the drawer
fl'ont. Clean these with soap and water
or a vinegar and water solution.
Do not rise COll/l//er(-ial oven cleanei_,
cleaning powders, steel wool or hal_h
abrasi;vs on any painted smfilce.
35
Page 36

Cleaningthe glass cooktop.
Normal Daily Use Cleaning
ONLY use CEIL&MA_ BRYTE" Cermnic
Other creams may not be as eflocfive.
To maintain m_d protect the surlilce of
your glass cooktop, fi)llow these steps:
(2)okto I) Cleanel" on tile glass cooktol}.
[] Before using the cooktop lot the
fiist time, clean it with CEIL_2dA
BRYTE <':Ceramic Cooktop Cleane_:
Cleanyourcooktopafter
each spill. UseCERAMA
BRYTE® CeramicCooktop
Cleaner.
This helps protect the top and
makes cleanup easier:
Dail) use of (;EIL_dVIA BRYTE <_'
[]
Ceramic Cooktop Cleaner will help
kee I) tile cooktop looking new.
Burned-On Residue
[] Shake tile cleaning cream well.
Apply a few drops of CEILz_dMA
BRYTE ':Ceramic Cooktop Cleaner
directly to the cooktop.
[] Use a paper towel or CEIL_dMA
BP.YTE <_>Cleaning Pad fin" Ceramic
Cooktops to clean the entire
cooktop S/lI]il ce.
[] Use a (h)' cloth or paper towel
to relnove all cleaning residue,
No need to rinse,
NO_: ItisveryimportantthatyouDONOTheat
thecooktopuntilit hasbeencleanedthoroughly
Use a CERAMABRYTE'_ Cleaning
Pad for Ceramic Cooktops.
The CERAMABRYTE'*_Ceramic
Cooktop Scraper and all
recommended supplies are
available through our Parts Cente_
See instructions under "To Order
Parts" section on next page.
NOTE:Do not use a dull or nicked
blade.
WARNING:DAMAGEto yourglasssurfacemay
occurif youusescrubpadsotherthanthose
recommendecL
] Pdlow tile cooktop to cool.
[] Spread a tew drops ol CEIL_dVIA
BRYTE _>Ceramic Cooktop Cleaner
on tile entire bm'ned residue area.
Using tile included CERAMA
[]
BRYTE <_:'Cleaning Pad for Ceramic
Cooktops, rub tile residue area,
ali,) )lying, pressm'e as needed.
Heavy, Burned-On Residue
[] _Mlow tile cooktop to cool.
[] Use a single-edge razor blade scraper
at approximately a 45 ° angle against
the glass stwlhce and scrape the soil.
It will be necessary to apply pressm'e
to tile razor scraper in order to
remove the residue.
_Mter scrai)ing, with tile razor scrape_;
[]
spread a few drops of CEIL&MA
BRYTE <':Ceramic Cooktop Cleaner
on tile entire bm'ned residue area.
Use the CEIL_dVIA BRYTE ': Cleaning
Pad to remove any remaining
residue.
[] If any residue remains, repeat the
steps listed above as needed.
[] For additional protection, alter all
residue has been remoxed, polish
the entire stwfi_ce with CEI_U_dVIA
BRYTE ':Ceramic Cooktop Cleaner
and a paper towel.
For additional protection, after all
[]
residue has been remoxed, polish
the entire stwfi_ce with CEIL_dMA
BRYTE _>Ceramic Cooktop Cleaner
and a paper towel.
36
Page 37

Metal Marks and Scratches
Be careflll not to slide pots and pans
[]
across your cooktop. It will lea_e
metal markings, on tile cooktoI _
StlIS[ilce.
These marl_s are remox:d)le using
tile CEI_d_JlA BRYTE <':Ceramic
Cooktop (:leaner with the CER_d_qA
BRYTE <')(:leaning Pad tot Ceramic
Cooktops.
Rubber-like Seal
To clean tile rubbe>like seal at tile outer
edge of the glass, wipe it with cooktop
crealn when needed.
ge.com
[] If pots xfitl/ a thin oxerla) of
ahmfinum or copper are allowed
to boil dry, the overlay may leave
black discoloration on the cooktop.
This should be relnoved
immediately betore heating again
or tile discoloration may be
peli//allellt.
WARNING:Care ullycheckthe
bottom ofpans for roughnessthat would scratch
thecooktop.
Glasssurface potential for permanent damage.
Sugary spillovers (such as
jellies, fudge, candy,syrups)
or melted plastics can cause
pitting of the surface of your
cooktop (not covered by the
warranty) unless the spill is
removed while still hot.
Special care should be taken
when removing hot
substances.
Be sure to use a new, sharp
razor scraper.
Do not use a dull or nicked
blade.
Damage from Sugary Spills and Melted Plastic
[] Turn off all surthce units. Remove
hot pans.
[] _.Veming an oven mitt:
a. Use a single-edge razor blade
scraper (CE]_d_4A BRYTE <:
Ceramic Cooktop Scraper) to
move the spill to a cool area on
tile cooktop.
b. Remove tile spill with paper
towels.
To Order Parts
To order CE/_d'dA BRYTE _ Ceramic
Cooktop Cleaner and tile cooktop
scrape_; please call our toll-fl'ee IltllllbeF:
National Parts Center 800.826.2002
ge.com
CERAMA BRYTE®Ceramic
CooktopCleaner ........... _ WXTOX300
CERAMA BRYTE®Ceramic
CooktopScraper ........... # WXTOX0302
Kit ........................ # WB64XS027
(Kit includescreamand cooktopscraper)
[] Any remaining spillover should be
left until the stmfiace of the cooktop
has cooled.
] Don't use tile surfhce units again
until all of the residue has been
completely removed.
NOTE" IfpittliTgor indentation in the glass
surfacehas alreadyoccurred,the cooktopglass
will have tobe replaced In thiscase, semce will
be necessary
CERAMABRYTE_CleaningPadsfor
CeramicCooktops ......... # WXIOX350
37
Page 38

Beforeyoucall forservice...
Troubleshooting -tips
Save time and money/. Review the charts on the following
pages first and you may not need to call for service.
Possible Causes What To Do
Surface units will not hnproper cookwaxe • Use pans which are flat and match the diameter of
maintain a rolling boil being used. the surtace unit selected.
or cooking is not
fast enough In some areas, the power * Coxer pan with a lid until desired heat is obtained.
Surfaceunilsdo A fuse in your home may be * ]_el)lace the filse or reset the circuit breaker.
not work properly blown or the circuit breaker
Surface unit stops This is normal. The refit
glowing when turned is still on and hot.
to a lower setting
(voltage) may be low.
tripped.
Cooktop controls * Check to see the correct control is set for the surtace
improperly set. trait xou are usin ,
Scratches(mayappear
as cracks)oncooktop
glasssurface
i i ii i
i ii i ii ii ii ii ii ii ii ii ii iii
Areas of discoloration Food spillovers not cleaned • See the Cleaning the glass cooktop section.
on the cooktop before next use.
Plastic melted to Hot cooktop came into • See the Glass surface--potential for permanent damage
the surface contact with plastic placed section in the Cleaning the glass cooktop section.
Pitting (or indentation) Hot sugar mixture spilled • Call a qualified technician for replacement.
of the cooktop on the cooktop.
Frequent cycling hnproper cookwaxe • Use only flat cookware to minimize c)cling.
Off and on of being used.
surface units
Incorrect dem_hlg
methods being used.
Cookware with rough bottoms
being used or com'se partides
(salt or sand) were between
the cookware and the surface
of the cooktop.
Cookware has been slid
across the cooktop surface.
Hot surface on a model • This is normal. The surface may appear discoh)red
with a light-colored cooktop, when it is hot. This is temporary and will disappear
on the hot cooktop.
• Scratches are not remoxzd)le. Tinv scratches will become
less visible in time as a result of cleaning.
• To aw)id scratches, use the recomlnended cleaning
procedures. Make sure bottoms (ff cookware are clean
belore rise, alld rise cookware with SUlooth bottou/s.
as the glass cools.
Oven light does Light bulb is loose. • Tighten or replace the 1)ulb.
not work
Oven will not work Plug on range is not completely • Make sure electrical l)lu"_is l)lugged,, into a lixe, properly
inserted in the electrical outlet, grounded outlet.
A fuse in your home may be • ]_eplace the filse or reset the circuit breaker.
blown or the circuit
pped
Oven controls improperly set. • See the Using the oven section.
_ Oven too hot. • Allow the oxen to cool to beh)w h)cking tern )erature
, I
Page 39

Possible Causes What ToDo
Fooddoesnotbake Oven controls improperly set. * See tile Usingthe oven sectiou.
orroastproperly
Rack position is incorrect * See tile Usingtheoven section.
or the rack is slot level.
Incorrect cookware or * See tile Usingtheoven section.
cookware of improper
size being used.
Oven thermostat needs * See tile Adjust the oven thermostat--Do it yourself[
adjustment, secti(m.
Fooddoes not Oven controls hnproperly set. * Make sure you touch the BROILHI/tOpad.
broilproperly
Improper rack position * See tile Broiling Guide.
being used.
Cookware slot suited • I?or best results, use a pau designed fl)r broiling.
for broiling.
The probe is plugged into the • Unplug and reinove tile probe fl'om tile oven.
outlet in the oven.
(on some models)
In some areas the power • Preheat tile broil element for 10 minutes.
(voltage) may be low. • Broil for tile low_est_, period of time recommended in
tile Broiling Guide.
ge.com
Oventemperature
too hotortoocold
Oven thermostat
needs adjustment.
• See the Adjust the oven thermostat--Do it yourself[
section.
39
Page 40

Beforeyoucall forservice...
Troubleshooting -tips
Possible Causes What To Do
Clock and timer do Plug on range is not completely * Make sure electrical [)lu,_ is l)lugged,, into a live, properly
not work inserted ha the electrical outlet, gr_)uuded outlet.
A fuse ha your home * Replace tile ti/se or reset tile circuit breaker.
may be blown or the
circuit breaker tripped.
Oven controls improperly set. * See the Using the clock and timer section.
Oven will notseff-clean The oven temperature is * _Mlow the range to cool and reset the controls.
too high to set a self-cleaJa
operation.
Oven controls improperly set. * See the Using the self-cleaning oven section.
The probe is plugged into * Remove the probe from the oven.
the outlet in the oven.
(on some models)
"Crackling" or This is the sound of the * This is normal.
"popping" sound metal heating and cooling
during both the cooking and
clemfing functions.
Excessive smoking Excessive soil. * Touch the CLEAR/OFFpad. Open the windows to
during a clean cycle rid the room of smoke. Wait until the LOCKEDlight
goes off. _'ipe up the excess soil and reset the clean
cvcle.
Oven door will not Oven too hot. * Allow the oveu to cool below hwkiug temperature.
open after a clean cycle
Oven not clean after a Oven controls not properly set. * See the Using the self-cleaning oven section.
clean cycle Oven was heavily soiled. * Clean up heavy spillovers before starting the clean
cycle. Heavily soiled ovens may need to sell_cleau
again or for a h)uger period of time.
"LOCKED"flashes The self-clema cycle has been * Close the oven door.
in the display selected but the door is not
closed.
"LOCKED"light is The oven door is locked * Touch the CLEAR/OFFpad. Allow the oven to cool.
on when you want because the temperature
to cook inside the oven has not
dropped below the
locking temperature.
"F--anda number You have a function error code. • Disconnect all power to the range for at least 30
orletter, flash seconds and then reconnect power. If the flu]ction
in the display error code repeats, call for service.
4O
Page 41

ge.com
Possible Causes What To Do
Loc On appears in the The controls have * See tile Control Iockoutsection to uuhwk.
oven display or LC been locked.
in the surface display
Control signals after You forgot to enter a * Tourh tile BAKE pad and desired temperature or
entering cooking time bake temperature or tile SELF CLEAN STD/LO pad and desired clean time.
or start time clemfing time.
Display goes blank A fuse in your home may be * Replace the thse or reset the circuit breaker:
Display flashes Power failure. * Reset the clock.
Unable to get the Oven control pads were * The BROIL HI/LO and BAKE pads must be touched at
display to show "SF" not touched properly, the same time and held for3 seconds.
"Probe" appears in This is reminding you to • Enter a probe temperature.
the display enter a probe temperature
(on some models) after plugging in the probe.
Power outage, Power outage or surge. • Reset the clock. ]f the oveu was iu t/se vot! must reset
clock flashes it by, touching, the CLEAR/OFFpad, settiu,,_ the clock
Steam from the vent When using the convection • This is normal.
blown or the circuit
breaker tripped.
The clock is in the * See the Special features of your oven control section.
black-out mode.
and resetting any cooking flmctiou.
feature, it is normal to see
steam coming out of the oven
vent. As the number of racks
or amount of food being
cooked increases, the amount
of visible stemn will increase.
"Burning" or "oily" This is normal in a new oven • To speed the process, set a self-cleau cycle fi)r a
odoremittingfrom and will disappear in time. miuimtuu of 3 hours. See the Using the self-cleaning
the vent oven sectiou.
Strong odor An odor from the insulation • This is temporary.
around the inside of the oven
is normal for the first few thnes
the oven is used.
Fan noise A convection fan may • This is hernial. To maximize cooking evenness,
automatically turn on the thu is designed to operate in both directions,
and off. with a pause in between.
Oven racks are The shiny, silver-colored • Apply a small amotmt of vegetable oil to a paper
difficult to slide racks were cleaned in a towel and wipe the edges of the oven racks with
self-clem_ cycle, the paper towel. Do not spray with Pare' or other
ltd_ricaut sprays.
4/
Page 42

Beforeyou call forservice...
Troubleshooting -tips
Possible Causes
Drawer doesnot slide
smoothlyor drags
Warming drawer will A fuse in your home may be • Replace tile fl/se or reset tile circuit breaker.
not work blown or the circuit breaker
Excessive condensation Liquid in drawer. • Remove liquid.
in the drawer
fooddries out in the Moisture escaping. • Cover food with lid or almninmn foil.
warming drawer
The drawer is out
of aligmnent.
Drawer is over-loaded or
load is unbalanced.
tripped.
Controls improperly set. • See the Warming drawersecti(m.
Uncovered foods. • Cover food with lid or almninmn foil.
Temperature setting too high. • I_edu('e temperature setting.
Drawer not fully closed. • Push drawer in until latch engages.
What To Do
• Fully extend the drawer and push it all the way in.
See the Careand cleaning ofthe range section.
• Reduce weight. Redistribute drawer contents.
42
Page 43

GE Service Protection Plus 'M
GE, a name recognized worldwide fbr quality and dependability, of;_ers you
Service Protection Plus'_'--comprehensive protection on all yore appliances--
No Matter What Brand!
Benefits Include:
* Backed by GE
* All brands covered
* Unlimited service calls
. All parts and labor costs included
o No out-of-pocket expenses
o No hidden deductibles
o One 800 number to call
You will be completel) satisfied with our service protection or )ou ma) request your mone) back
on the remaining value of your contract. No questions asked. It's that simple.
Protect yore" refrigerator, dishwasher, washer and dryer, range, TV_ VCR and much more--aaay brand!
Plus there's no extra charge flw emergency service and low monthly financing is available. Even icemaker
coverage and fl)od spoilage protection is offered. You can rest easy, knowing that all your valuable
household products are protected against expensive repairs.
Place ,our confidence in GE and call us in the U.S. toll-free at _UU._Z_.ZZZ_
for n/ol'e in_ol'I-t/atiOll.
:i,k*]l I)l?}ln(/s (o_.(tl_(%L tip to _0 )eltl?S ill(I, ]11 the (ontillenl tl [.S.
We 71Cover Any Appliance.
Anywhere. Anytime.
_ (]tll here
Please place in envelope and mail to:
GeneralElectricCompany
Warranty Registration Department
P.O. Box 32150
Louisville, KY 40232-2150
43
Page 44

Consumer Product Ownership Registration
Deal Customer:
Thank you tbr purchasing our product and thank you for placing your confidence in us.
_'e are proud to haxe you as a customer'.
Follow these three steps to protect your new appliance investment:
Complete mid mail
your Consumer
Product Ownership
Registration today:
}Iuvc tile peace of
mind of knowing we
CAll COlltaCt yOl/ in
th( unlik<lx event of a
satbtv nloditication.
After mailing the
registration below,
store this document
in a sat;v place. It
contains infornlation
you will need should
you require service.
Our service nunlber is
800.GE.CAI_ES
(8(t0.432.9737).
Model Number Serial Number
Important: If you did not get a registration card with your
product, detach and return the form below to
ensure that your product is registered, or register
online at ge.com.
Consumer Product Ownership Registration
Read VOIlI" ()'Wllel-_S
Manual careftllly.
It will help you
operate VOllV lleW
appliance prope tiT<
,-- Cut here
Model Number Serial Number
Nh: Ms. Mrs. Miss
Fir';t ] ] Last]
Nam_ I I I I I I I I I Nam_ I I I I I I I I I I I I
Str(( t [
Address I I I I I I I I I I I I I I I I I I I I I I I
Apl. # ] I I
(:it?.,[ ] I
Dlle Pl II:l d
hi Use ] I ]
Month
Appliances
General Electric Company
Louisville, KYz_0225
GE Consumer & Industriol
ge.com
I I ] I I ] l(qnail Addr< ss*
I I I I I I I I
I)ay] I [ 5iml-[ I [
* Please provide your e-mail addrc,,,, to receive, xia e-mail, discounts, special ot'ff1"_and other important
communications from GE Appliances (Gig\).
Check here if win do not want to l*_ceiveconununicalions h-onl GILVs carefully selected partnel.',.
FAILI JRE TO C()MPLETE AND RE'F[ 7RN Tt tlS CM_.D DOES NOT DIMINISt t h_)l JR
"_,:\RR \N'IY RIGIITS.
For more infimllalion about Gl_\'s priva(y and data usage poli(3; go to ge.com and click on
"PrivacyPolity" or call 800.626.2'2'24.
, i I
Pholl(!
Xt/lll xr
s.,., [ I J (:,,(l(,
Zip
Ill-Ill
I
I
44
Page 45

NOteS.
rJ_
I
rJ_
€_
m
m_
rp,
w
u_
w
rbr]
45
mlmh
m
Page 46

Accessories.
Looking For Something More?Youcan find these accessories and many more at ge.com, or call 800.626.2002
(during normal business hours). Have your model number ready.
Surface Elements & Drip Pans
Oven Elements
Cleaner Cleaning Pads Scraper
OvenRacks Broiler Pan
Light Bulbs Knobs
/) jj ))i ¸
46
Tired of discolored racks? Wishing you had exm_-hemo_-duty oven rocks?
NOWA VAILABLEfor your range:
(;V's innovative, self-cleanable porcelain-coated oven racks!
• Hem), Duty
• Durable
• Able m be cleaned in a self-cleaning oven
Visit go.corn for more information.
Page 47

GEElectricRange Warranty.
Aft warranty service provided by our Factory Service Centers,
or an authorized Customer Care®technician. Toschedule
service, on-line, 24 hours a day, visit us at ge.com, or carl
800.GE.CARES (800.432.2737).Please have serial number and
model number available when calling for service.
GE Will Provide:
Anypatt of the range which tidls due to a defect in materials (:,r w(n'kmanship. During this
Fromthedate ofthe
originalpurchase
Fromthedate ofthe
origina!purchase
_: Service trips to your home to teach you how to use
the product.
iJi::Improper installation, delivery or maJntenm_ce.
::Ji::Failure of the product if it is abused, misused,
or used for other thml the intended purpose or
used commerciaJly.
::Ji::Damage to the glass cooktop caused by use of demlers
other thml the recommended demlh_g creams and
pads.
limited one-year warranty, (;E will also provide, free of charge, all labor and in-home serxice
to replace the (lefecti_e part.
A replacement glass cooktop if it should c_;_ck (lue to them_al shock, (liscolo_; crack at the
rubber seal between the glass cooktop and the porcelain edge, or if the pattern wea_ ofl_
A replacement radiant surface unitif it shotfld bm'n out.
During this lim#ed additional four-year warranty, you will be responsible for any lab(n" or
in-home service.
Staple your receipt here.
Proof of the original purchase
date is needed to obtain service
under the warranty.
!i_:Replacement of house fuses or resetting of circuit
breakers.
iJi::Dmnage to the product caused by accident, f'we, floods
or acts of God.
_: IncidentaJ or consequential dmnage caused by possible
defects with this appliance.
iJi::Dmnage caused after delivery.
!i?:Product not accessible to provide required service.
_: Damage to the glass cooktop caused by haxdened
spills of sugaxy materiaJs or melted plastic that
are not clemled accordhlg to the directions in
the Owner's MmmaJ.
EXCLUSIONOFIMPLIED WARRANTIES--Your sole and exclusive remedy is productrepair as provided hi this Limited
Warranty.Any implied warranties, including the implied warranties of merchantability or fitnessfor a particular purpose,
are limited toone year or theshortest period allowed by law.
This warranty is extended to the original purchaser and any succeeding owner for products purchased for
home use within the USA. If the product b located in an area where service by a GEAuthorized Servicer is not
available, you may be responsible for a trip charge or you may be required to bring the product to an Authorized GE
Service location for service. In Alaska, the warranty excludes the cost of shipping or service calls to your home.
Some states do not allow the exclusion or limitation of incidental or consequential damages. Thb warranty
gives you specific legal rights, and you may also have other rights which vary from state to state. Toknow
what your legal rights are, consult your local or state consumer affairs office or your state's Attorney General.
Warrantor: General Electric Company.Louisville, KY40225
47
Page 48

ConsumerSupport
Haxe a question or need assistance with your appliance? Try tile (;E Appliances _'ebsite 24 l/o/u_ a day
gEAppliancesWebsite ge.com
' any day of tile }ear'. For greater convenience and taster service, you can now download Owner's Manuals,
order parts or exert schedule serxice on-line.
ScheduleService
Expert (;E repair seisice is only one step awax fl'tnn your do(n: Get on-line and schedule your serxice at
your, conxenience 24 hom_ am' day of tile veal'! Or call 800.GE.(:AI/ES (800.432.2737) dining normal
business houI_.
ge.com
RealLifeDesignStudio ge.com
GE supports tile/!ni\'ei_al Design concept--products, services and em'ironnmnts that can be used by
people of all ages, sizes and capabilities. _,\'e recognize tile need to design fi)r a wide range of ph}:sical and
mental abilities and impaimlents. For details of GE's Univei_al Design applications, including kitchen
design ideas tor people with disabilities, check out our Website today. For tile heaiing impaired, please call
800.TDD.GEAC (800.833.4322).
ExtendedWarranties ge.com
Purchase a (;E extended warrant_ and learn about special discounts that are a_ailable while xour, warrant_
is still ill effect. You can purchase it on-line anytilne, or call 800.626.2224 during noi_nal business houi_.
(;E Consulner Home Serxices will still be there after }our warrant}, expires.
PartsandAccessories
ge.com
hMividuals qualified to seIMce their own appliances can have parts or accessories sent directly to their
hoInes (VISA, Master(lard and Discover cards are accepted). Order on-line today, 24 houi_ evei-v day or
by phone at 800.626.2002 during normal business houi_.
Instructions contained in this manual cover procedures to beperformed by any user. Otherservicing generally
should be referred to qualified service personnel. Caution mustbe exercised, since improper servicing may cause
unsafe operation.
ContactUs
If you are not safistied with tile service w)u receive fl'om GE, contact us on our _A'ebsite with all tile details
including your phone ntlIl/beI; or wIJte to: (;eneral Managei; C/istoil/er Relations
GE Appliances, Appliance Park
I,ouisville, KY 40225
Register your new applimlce on-line---at your €onvenience[ Tiinelx, I)I'°(hlct i'egistrati(, m will allow fin"
RegisterYourApplbnce
' enhanced (-Oillilltlni('afion and pronlpt service tinder tile teIIllS of yo/Ir warranty, should tile need aiJse.
You nlav also Inail ill tile preprinted registration card included ill tile I)ackin°_ inaterial.
ge.com
ge.com
Printed in flTeUnited States
 Loading...