

Page 1
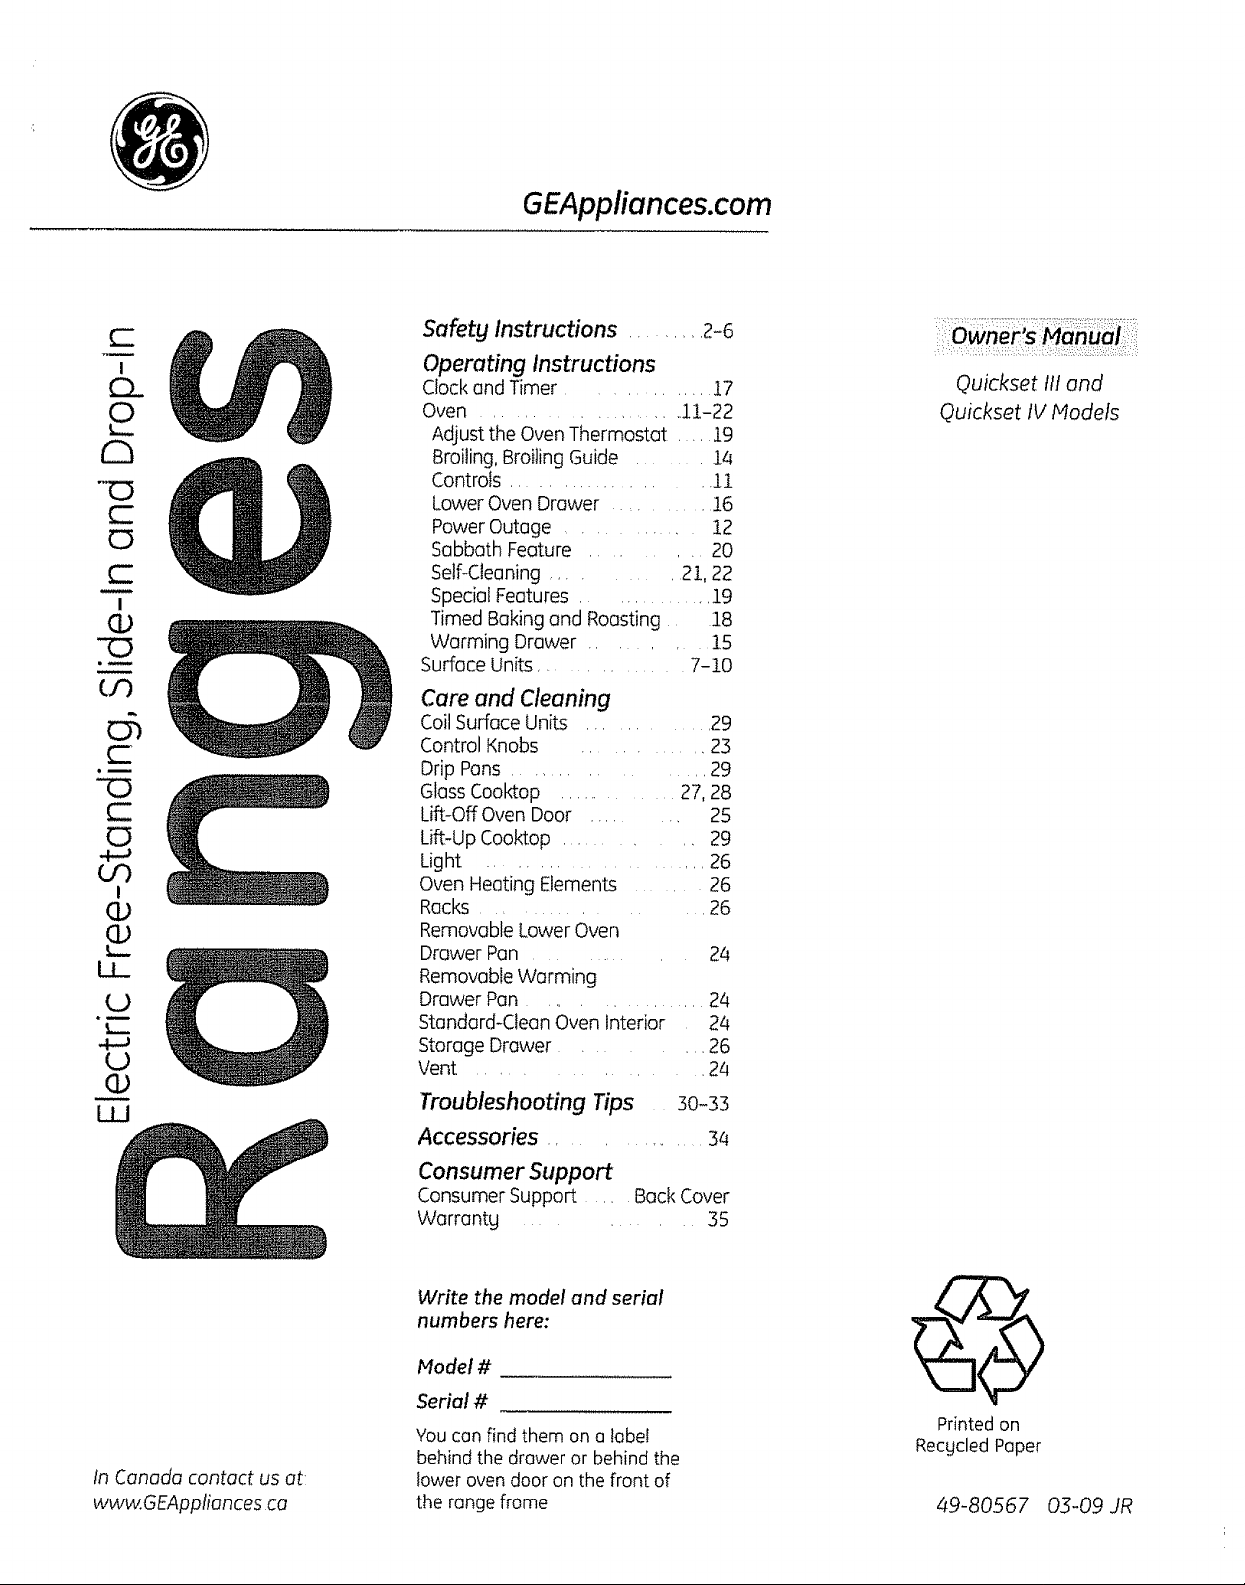
GEAppliances.com
Safety instructions ........ 2-6
-0
C5
C
0
"0
U3
C
C
C_
4-a
Or)
0
(1)
LL.
I
I
Operating Instructions
Clock end Timer ............. 17
Oven ...................... 1!-22
Adjust the Oven Thermostat .... 19
Broiling, Broiling Guide ....... 14
Controls ................... 1i
Lower Oven Drawer ........... 16
Power Outage ......... 12
Sabbath Feature ......... 20
Self-Cleaning .......... 21, 22
Special Features .............. 19
Timed Baking and Roasting 18
Warming Drawer ...... 15
Surface Units .............. 7-10
Quickset tli and
Quickset IV Models
Care and Cleaning
CoilSurface Units ............ 29
Control Knobs ............ 23
Drip Pans ............. 29
Gloss Cooktop ............. 27, 28
Lift-Off Oven Door ...... 25
Lift-Up Cooktop ........... 29
Light ...................... 26
I
Oven Heating Elements ...... 26
Racks ............ 26
Removable Lower Oven
Drawer Pan ......... 24
Removable Warming
Drawer Pan ................. 24
Standard-Clean Oven Interior 2/4
Storage Drawer ..... 26
Vent ....... 2/4
In Canada contact us at:
www.GEAppfiances ca
Troubleshooting Tips 30-33
Accessories .............. 34
Consumer Support
Consumer Support ,, BackCover
Warrantg ....... 35
Write the model and serial
numbers here:
Model #
Seria! #
You can find them on a label
behind the drawer or behind the
lower oven door on the front of
the rangeframe
Printed on
Recgcled Paper
49-80567 03-09 JR
Page 2

IMPORTANT SAFETYINFORMATION.
READ ALL INSTRUCTIONS BEFOREUSING.
WARNING I
Readaft safety instructions before using the product, Failure to follow these instructions mag result in fire,electric
shock, serious injury or death
ANTI-TIP DEVICE
Toreduce the nsk of tipping the range, the range must
be secured bg apropertg installed anti-tip bracket See
installation instructions shipped with the bracket for complete
details before attempting to install
For Freestanding Ranges:
Tocheck if the bracket is installed and engaged properly,
remove the storage drawer or kick panel and took underneath
the range to see that the leveling leg isengaged in the
bracket, On models without a storage drawer or kickpanel,
carefully tip the range forward Thebracket should stop the
range within 4 inches, tf it does not, the bracket must be
reinstalled If the range is pulled from the watt for"ang reason,
atwags repeat this procedure to verifg the range is properf#
secured bg the anti-tip bracket
Never completely remove the leveling legs or the range wilt
not be secured to the antFtip device propertg
For Slide-In Ranges:
To check if the bracket is installed and engaged properlg,
remove the storage drawer or kick panel and look
underneath the range to seethat the leveling leg is engaged
in the bracket
0
•All ranges can tip.
•BURNS or other SERIOUS
INJURIES can result,
• INSTALL and CHECK the
ANTI-TI P bracket following
the instructions supplied
with the bracket.
For Drop-ln Ranges:
Tocheck if the bracket is installed and engaged propertg,
lower the oven door and gentlg applg medium force at
the handle end until movement of the range is detected
Continue pressing until the anti-tip bracket is engaged
and movement stops,,A small amount of movement is
acceptable at the back of the range top, but it should be
stable and not tip once the anti-tip bracket is engaged,
if it does not, the bracket must be reinstalled
If gou did not receive an anti-tip bracket with gout purchase,
coil 1800 626877/4 to receive one at no cost {in Canada, call
1..800,5613344) For installation instructions of the bracket,
visit GEAppliances,,com (inCanada, GEAppliances,ca),
WARNING I IMPORTANTSAFETYNOTICE
TheCafifomJaSafe Drinking Water and ToxicEnforcement Act requires the Governor of Cafifomia to publish a list
of substances known to the state to cause cancer; birth defects or other reproductive harm, and requires
businesses to warn customers of potentiaf exposure to such substances
Thefiberglass insulation in self-dean ovens gives off a verg smafl amount of carbon monoxide during the cleaning
cgde Exposure can be minimized by venting with an open window or using a ventilation fan or hood
Page 3
ltt, WARNING IGENERALSAFETYINSTRUCTIONS
GEAppliancesocom
Use this appliance for its intended purpose as
described in this Owner's l'4anua[
Be sure gour appliance isproperlg installed and
grounded bg a qualified installer in accordance with
the provided installation instructions
Do not attempt to repair or replace ang part of gour
range unless it is speciflcallg recommended inthis
manual All other servicing should be transferred to
a qualified technician
Before performing ang service, unplug the range
or disconnect the power supplg at the household
distribution panel bg removing the fuse or switching
off the circuit breaker
: Do not leave children alone-children should not
be left alone or unattended inan area where an
appliance isin use Theg should never be allowed
to climb, sit or stand on ang part of the appliance
:::::::CAUTION :Do notstoreitemsofinterestto
children above a range or on the backguard of a
range-children climbing on the range to reach
items could be seriouslg injured
: Use onfg drg pot holders-moist or damp pot
holders on hot surfaces mag result in burns from
steam. Do not let pot holders touch hot surface
units or heating elements Do not use a towel or
other bulkg cloth in place of pot holders
,: Never use gour appliance for warming or heating
the roam
:i: Do not touch the surface units, the heating
elements or the interior surface of the oven
These surfaces mag be hot enough to burn even
though theg are dark in color_During and after use,
do not touch, or let clothing or other flammable
materials contact the surface units, areas nearbg
the surface units or ang interior area of the oven;
allow sufficient time for cooling first, Other surfaces
of the appliance may become hot enough to cause
burns Potentiallg hot,surfaces include the cooktop,
areas facing the cooktop, oven vent opening,
surfaces near the opening and crevices around the
oven door.
Do not heat unopened food containers Pressure
could build up and the container could burst,
causing an injury
Do not use aluminum foil to line the drip pans or
anywhere in the oven, except as described inthis
manual Hisuse could result in damage to the range
and shock or fire hazard
:' Avoid scratching or impacting glass doors, coot<
tops or control panels Doing so mag lead to glass
breakage. Do not cook on a product with broken
glass Shock,fire or cuts mag occur.
:::Cook meat and poultrg thoroughlg-meat to at
least an internal temperature of 160°F and poultrg
to at least an internal temperature of 180°F.Cooking
to these temperatures usuallg protects against
foodborne illness
WARNING I KEEPFLAMMABLE MATERIALSAWAY FROM
THERANGE.
Do not store or use flammable materials in on oven
or near the cooktop, including paper, plastic, pot
holders, linens, wall coverings, curtains, drapes and
gasoline or other flammable vapors and liquids
Never wear toose4itting or hanging garments while
using the appliance These garments mag ignite if
theg contact hot surfaces causing severe burns
:::::Do not let cooking grease or other flammable
materials accumulate inor near the range Grease
in the oven or on the coot,top mag ignite,
Clean ventilating hoods frequently Grease should
not be allowed to accumufate on the hood or filter,
Page 4
IMPORTANT SAFETYINFORMATION.
READ ALL INSTRUCTIONS BEFOREUSING.
i_, WARNING !IN THE EVENTOFA FIRE,TAKETHE FOLLOWING
STEPSTOPREVENTTHEFIREFROMSPREADING:
Do not use water on grease fires Never pick up
a flaming pan, Turn the controls off Smother a
flaming pan on a surface unit bg covering the
pan completelg with a weIFfitting lid, cookie sheet
or fiat t_ag Use a multi-purpose drg chemical or
foam-tgpe fire extinguisher
iz::If there is a fire in the oven during baking, smother
the fire bg closing the oven door and turning the
oven off or by using a multi-purpose drg chemical
or foam-type fire extinguisher
L: If there isa fire in the oven during selFclean,
turn the oven off and wait for the fire to go out
Do not force the door op_B Introduction of fresh
air at self-clean temperatures may lead to a burst
of flame from the oven Failure to follow this
instruction mag result in severe burns
l_i,WARNING JCOOKTOP,SAFETYINSTRUCTIONS
Never leave the surface units unattended at
medium or high heat settings Boilovers cause
smoking and greasy spillovers that mag catch
on fire
Never leave oil unattended while frying If allowed
to heat begond its smoking point, oil mag ignite
resulting in fire that may spread to surrounding
cabinets Use a deep fat thermometer whenever
possible to monitor oil temperature
if!::
To avoid oil spitlover and fire, use o minimum
amount of oil when shallow pan-frying and avoid
cooking frozen foods with excessive amounts of ice
i;::Onlg certain types of glass, glass/ceramic,
earthenware or other glazed containers are suitable
for cooktop service; others mag break because of
the sudden change in temperature,
To minimize the possibility of burns, ignition of
flammable materials and spillage, the handle of a
container should be turned toward the center of the
range without extending over nearby surface units,
: When preparing flaming foods under a hood, turn
the fan on
Use proper pan size-select cookware having flat
bottoms large enough to cover the surface heating
element, The use of undersized cookware will
expose a portion of the surface unit to direct
contact and mag result in ignition of clothing.
Proper relationship of cookware to surface unit
will also improve efficiency
4
Page 5
GEAppliances.com
[AkWARNHNG ] RADIANTCOOKTOPSAFETYINSTRUCTIONS
(Somemodels)
Use care when touching the cooktop The glass
surface of the cook*topwill retain heat after the
controls have been turned off,
Do not cook on a broken cooktop If glass cooktop
should break, cleaning solutions and spi!lovers mag
penetrate the broken cooktop and create a risk of
electric shock Contact a qualified technician
immediatelg
Avoid scratching the glass cooktop The cooktop
can be scratched with items such as knives, sharp
instruments, rings or otherjewelrg, and rivets on
clothing
::: Do not place or store items that can melt or catch
fire on the glass cooktop, even when it isnot being
used, If the cooktop is inadvertentlg turned on, theg
mag ignite. Heat from the cooktop or oven vent
after it is turned off mag cause them to ignite also
Use CERAMABRYTE®ceramic Cooktop Cleaner and
CERAMABRYTE®Cleaning Pad to clean the cooktop
Wait until the cooktop cools and the indicator light
goes out before cleaning A wet sponge or cloth
on a hot surface can cause steam burns Some
cleaners can produce noxious fumes if applied to
o hot surface, Note: Sugar spills ore on exception
Theg should be scraped off while still hot using an
oven mitt and a scraper. Seethe Cleaning the glass
coaktop section for detailed instructions,
Readand follow all instructions and warnings on
the cleaning cream label
WARNnNG1COIL COOKTOPSAFETYINSTRUCTIONS
(Some models;
Do not immerse or soak the removable surface
units Do not put them in a dishwasher Do not self-
clean the surface units in an oven, Doing so mag
cause them to fail presenting a burn or fire hazard
:::::Toavoid the possibilitg of a burn or electric shack,
atwags be certain that the controls for atl surface
units are at the OFFposition and a!l coils are coo!
before attempting to lift or remove a coil surface unit
L Besure the drip pans are not covered and are in
place. Their absence during cooking could damage
range parts and wiring
l,& WARNHNG I OVENSAFETYINSTRUCTIONS
Stand owag from the range when opening the oven
door, Hot air or steam which escapes can cause
burns to hands, face and/or ages
( Keep the oven vent unobstructed
::: Keep the oven free from grease buildup Grease
in the oven mag ignite
::: Place oven racks in desired location while oven
iscool. If rack must be moved while oven is hot,
do not let pot holder contact hot heating element
in oven.
When using cooking or roasting bags in the oven,
follow the manufacturer s directions
Pullthe oven rack to the stopqock position when
loading and unloading food from the oven. This
helps prevent burns from touching hot surfaces
of the door and oven walls
Do not leave items such as paper, cooking utensils
or food in the oven when not in use Items stored in
an oven can ignite
Do not use aluminum foil to line the oven bottom
Foilmag trap or reflect heat leading to a shock or
fire hazard.
5
Page 6
IMPORTANT SAFETYINFORMATION.
READALL INSTRUCTIONS BEFOREUSING.
....................................................................... ,,,,,,,,,,,,,,,,,,,,, ,
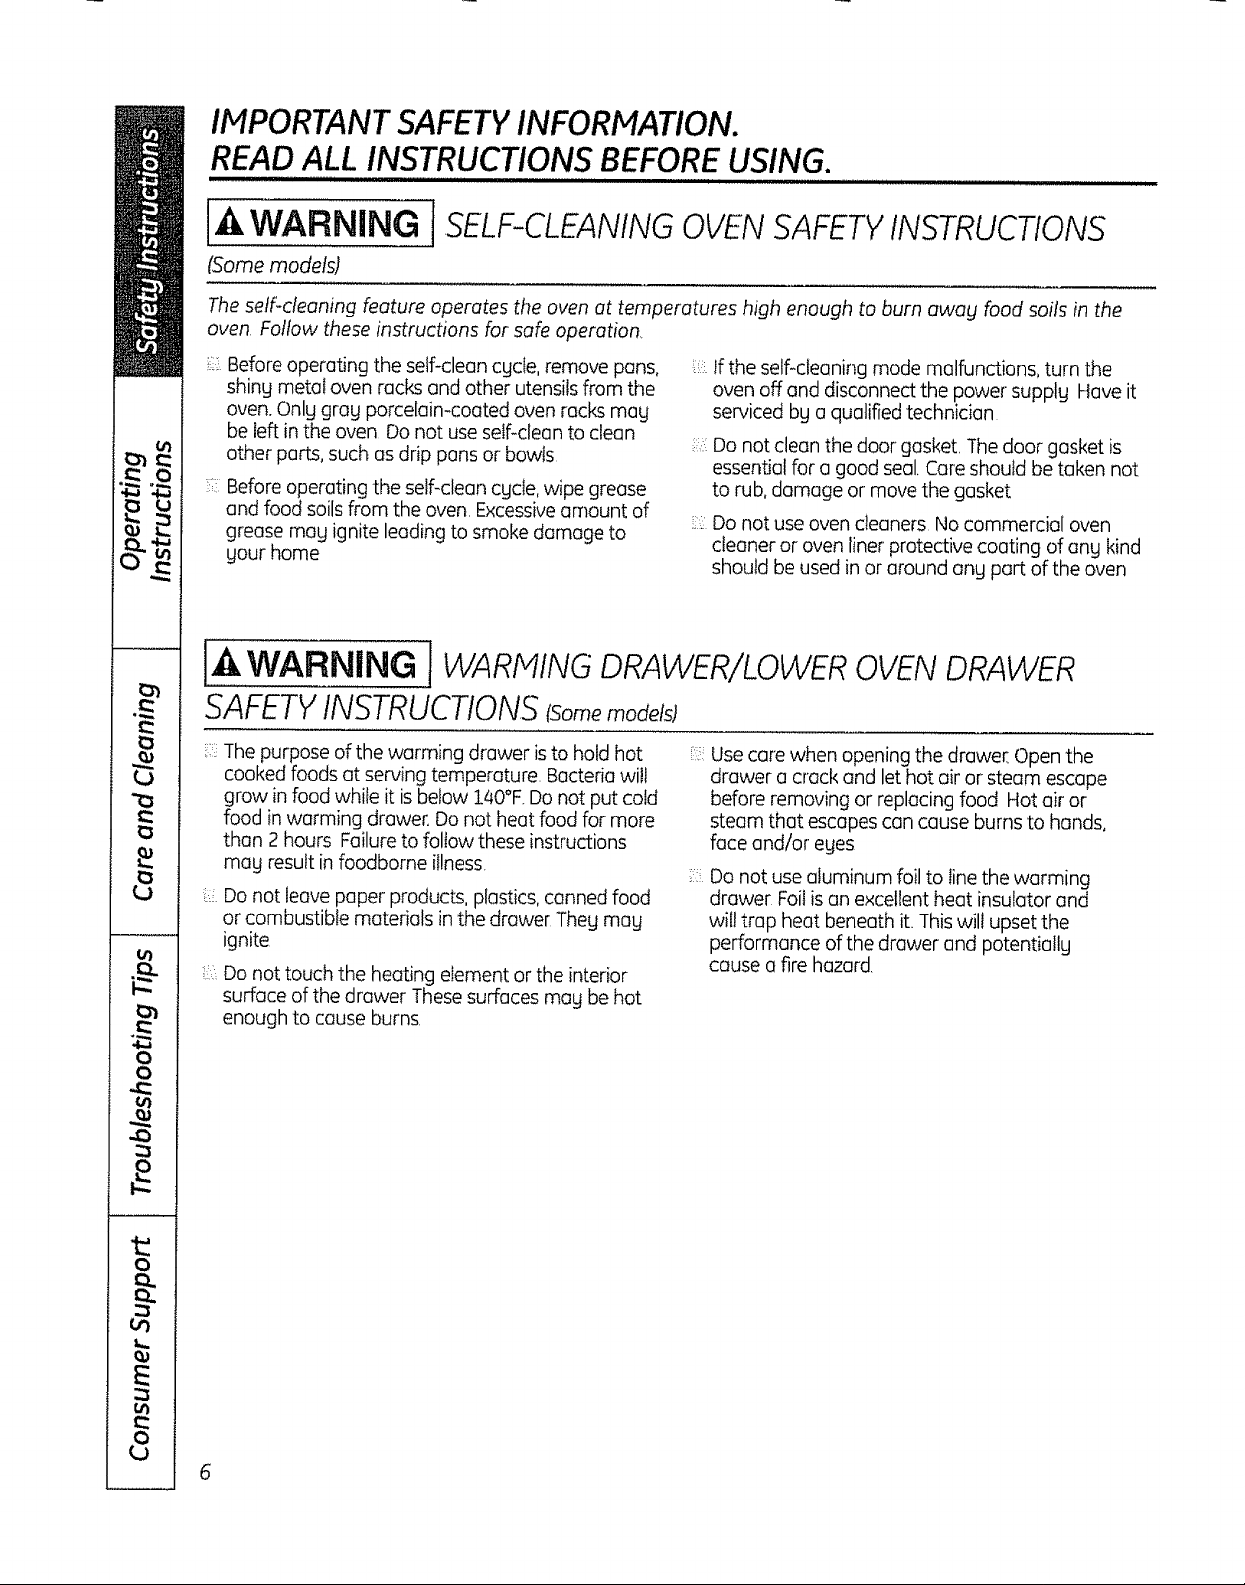
I_ WARNING SELF-CLEANINGOVENSAFETYINSTRUCTIONS
{Some models)
The seff-cleaning feature operates the oven at temperatures high enough to burn awag food soils in the
oven Follow these instructions for safe operation.
Before operating the self-clean cgcte, remove pans,
shing metal oven racks and other utensils from the
oven. Onlg grag porcelaimcoated oven racks mag
be left in the oven Do not use self-clean to clean
other parts, such as drip pans or bowls
Before operating the self-clean cgcle, wipe grease
and food soils from the oven. Excessiveamount of
grease mog ignite leading to smoke damage to
gour home
If the selFcleoning mode malfunctions, turn the
oven off and disconnect the power supplg Have it
serviced bg a qualified technician
Do not clean the door gasket. The door gasket is
essential for o good seal. Care should be taken not
to rub, damage or move the gasket
!i:!:.
Do not use oven cleaners No commercial oven
cleaner or oven liner'protective coating of ang kind
should be used in or around ang part of the oven
!-&WARNING t WARMING DRAWER/LOWEROVEN DRAWER
SAFETYINSTRUCTIONSCsomemodefsJ
i!i!i!
The purpose of the warming drawer isto hold hot
cooked foods at serving temperature. Bacteria will
grow in food while it isbelow ].40°F Do not put cold
food in warming drawer. Do not heat food for more
than 2 hours Failure to follow these instructions
mag result in foodborne iIIness.
Do not leave paper products, plastics, conned food
or combustible materials in the drawer Theg mag
ignite
Do not touch the heating element or the interior
surface of the drawer These surfaces mag be hot
enough to cause burns,
L Use core when opening the drawer, Open the
drawer o crack and let hot air or steam escape
before removing or replacing food Hot air or
steam that escapes can cause burns to hands,
face and/or eges
Do not use aluminum foil to line the warming
drawer Foil isan excellent heat insulator and
wilt trap heat beneath it. This will upset the
performance of the drawer and potentia!lg
cause o fire hazard,
Page 7
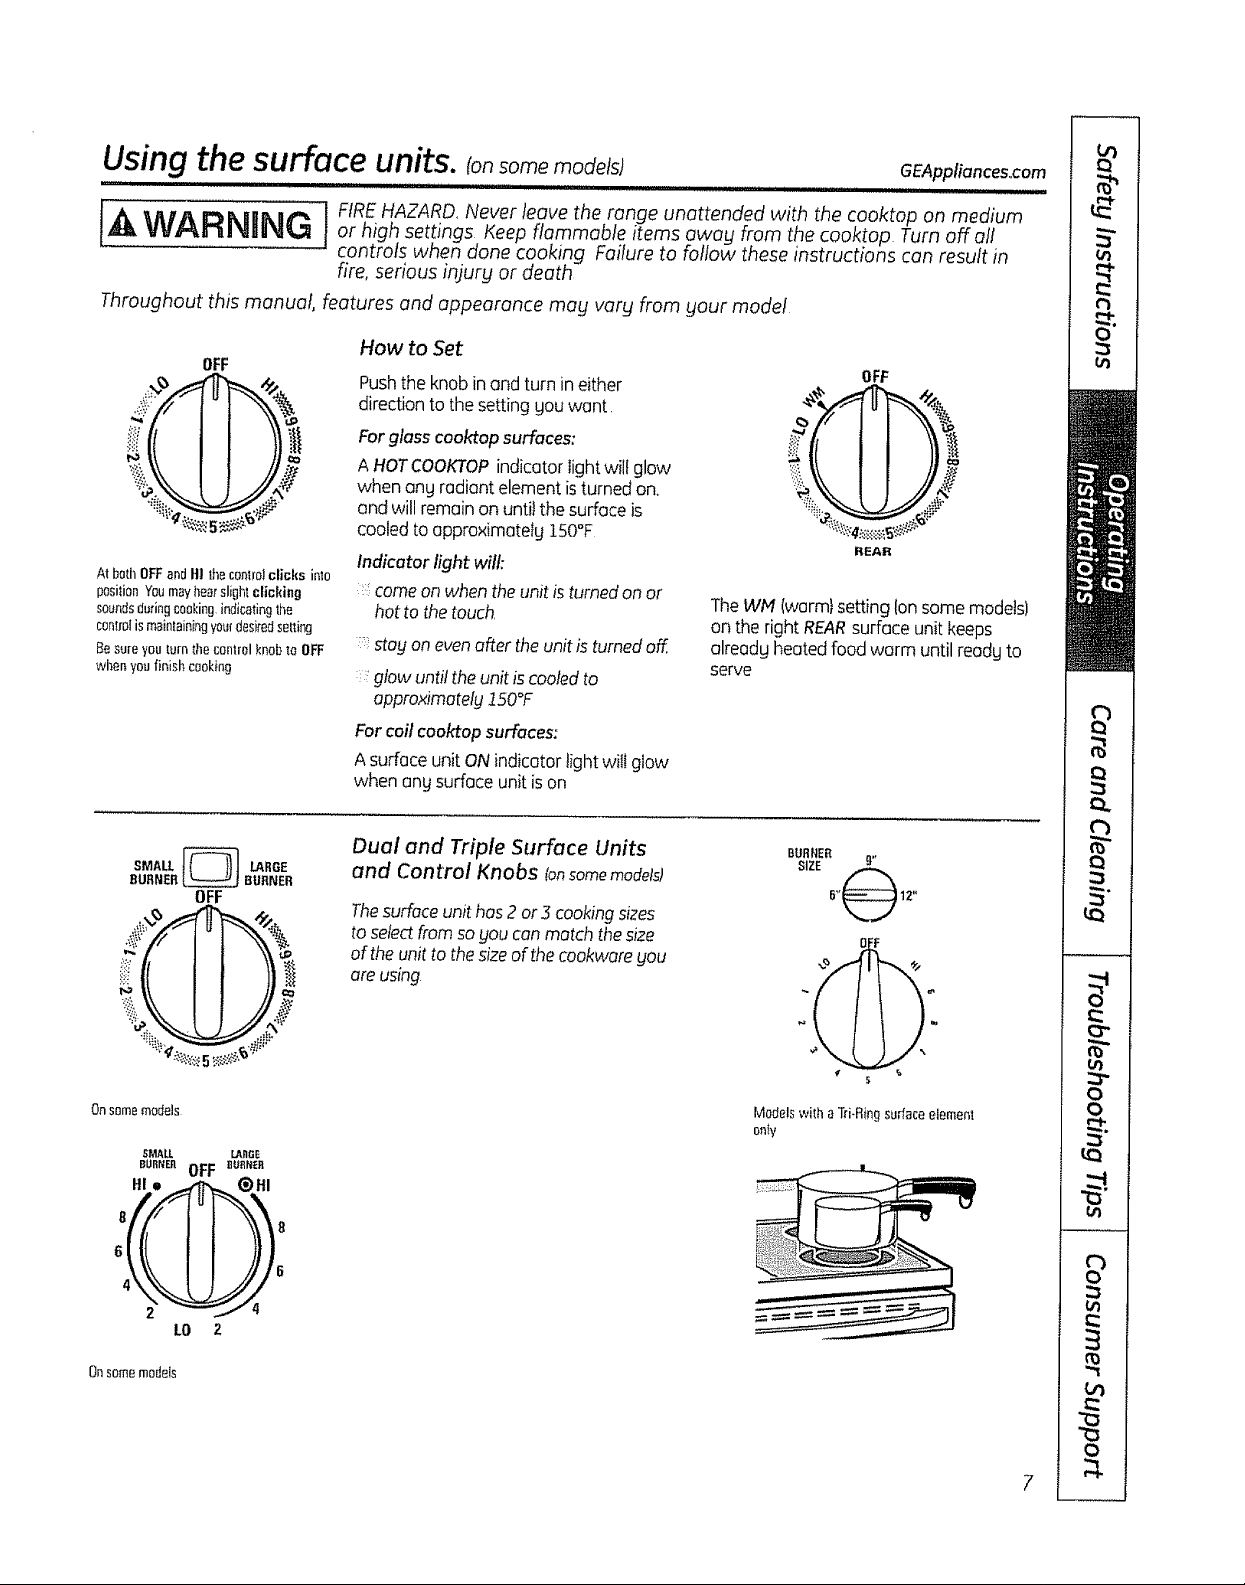
Using the surface units, tonsomemode )
,,i,,u,ml,i ,,,,,,,,,,,, ii ilu i,im ii, ullll i
GEAppliances,,com
WARNI or high settings Keep flammable items owag from the cooktop Turn off all
NG_ FIREHAZARD, Never leave the range unattended with the cooktop on medium
...... controls when done cooking Failure to follow these instructions con result in
fire, serious injurg or death
Throughout this manual, features and appearance mug vary from your model
How to Set
OFF
Pushthe knob inand turn ineither
OFF
directionto thesetting gouwant.
Forglass cooktop surfaces:
A HOTCOOKTOPindicator lightwillglow
when ong radiant element isturned on.
_.\* I I //,,_
I I /l
and will remain on untilthe surfaceis
AtbotllOFFandItl thecontrolclicks inlo
positio_¥_Jm_¥l_ sii_h_cli_ki_g
soundsduringcookingindicatingthe
controtis maintainingyo_rdeskodstating
Besureyou _.urnthecontrolknobto OFF
whenyoufinishcooking
cooled toappro×imatetg150°F
Indicator light will:
:_.comeonwhentheunit isturnedon or
hotto thetouch,
::;stagonevenafter the unit is turnedoff,
::'glow until the unit is cooledto
TheWM (warmtsettingIon some models)
ontheright REARsurfaceunit keeps
olreodgheatedfoodworm until reodgto
serve
RI_AR
approximately!150°F
For coil cooktop surfaces:
A surface unit ONindicator light wilt glow
when ong surface unit is on
SMALL _ LARGE
BURNER_ 8UF_NEFI
OFF
On some models
_MAtL LMiGE
BOn.EnOFF_n_e.
6
LO Z
Onsome models
Dual and Triple Surface Units
and Control Knobs tonsomemodels)
BURNER
SIZE 9"
Thesuffoce unit has 2 or 5 cooking sizes
to select from so _loucan motd_ tt]esize
0
of the unit to the size of the cookwore gou
ore using
Modelswilha Td.Rfngsurfaceelement
ontV
B
Page 8
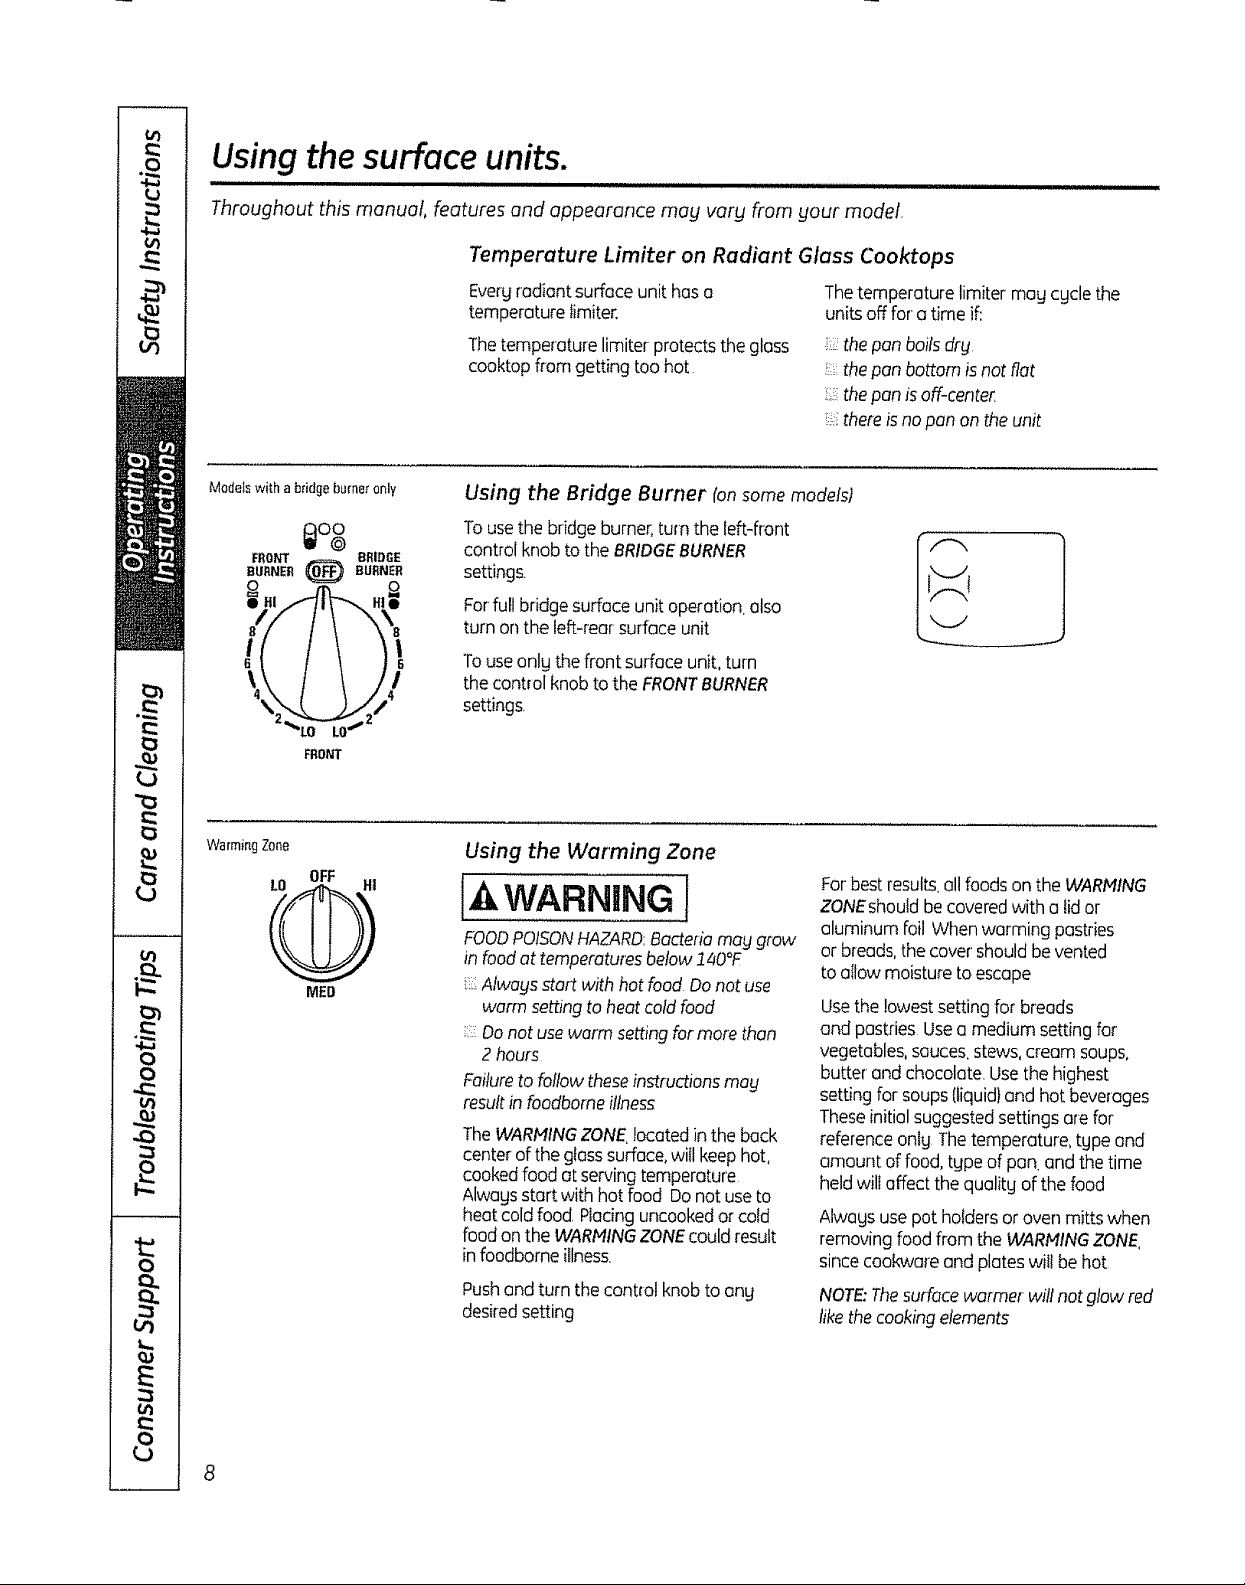
Usingthe surface units.
Throughout this manual, features and appearance may vary from your model,
Temperature Limiter on Radiant Glass Cooktops
Evergradiant surface unit has a
temperaturetimiter.
Thetemperature lirniter protects thegloss
coaktopfrom getting toohot
Thetemperature limiter mag cgclethe
unitsoff for atime if,'
::_.thepan bails drg
• thepan bottom Jsnotfiat
,::thepan is off-center
:::thereis no pan onthe unit
Modelswith a bridgebume_"only
I%
FnONT BRIDGE
BURNER _ BURNER
F'-."k"
\t,l !)i
FRONT
WarmingZone
MED
Using the Bridge Burner (onsome models)
Tousethe bridge burner,turn the left-front
controlknob tothe BRIDGEBURNER
settings
Forfull bridge surfaceunit operation,also
turn on the left-rear surfaceunit
Touse onlg the front surface unit, turn
the control knob to the FRONT BURNER
settings.
Using the Warming Zone
For best results, all foods on the WARNING
WARNaNGI
FOODPOISONHAZARD:Bacteriamay grow
in foodat temperaturesbelow140°F
Alwagsstart with hot food.Donot use
warm setting to heat cold food
Donot usewarm settingfor more than
2 hours
Failureto follow theseinstructionsmag
resultin foodbomeillness
TheWARNINGZONElocatedin the back
centerof theglasssurface,willkeephot,
cookedfood at servingtemperature
Alwagsstart with hot food Donot useto
heatcoldfood. Placinguncookedor cold
foodon the WARNINGZONEcouldresult
in foodbomeillness.
Pushandturn thecontrol knob to ong
desiredsetting
ZONEshould be covered with a lid or
aluminum foil When warming pastries
or breeds, the cover' should be vented
to oIIow moisture to escape
Use the lowest setting for breads
and pastries Use a medium setting for
vegetables, sauces, stews, cream soups,
butter and chocolate. Use the highest
setting for soups {liquid} and hot beverages
These initial suggested settings are for
reference onlg The temperature, tgpe and
amount of food, tgpe of pan. and the time
held will affect the qualitg of the food
Alwagsusepot holdersor oven mitts when
removing food from the WARNINGZONE
sincecookwareand plateswil!be hot
NOTE:Thesurfacewarmer willnotglow red
likethecookingelements
Page 9
GEAppliances.com
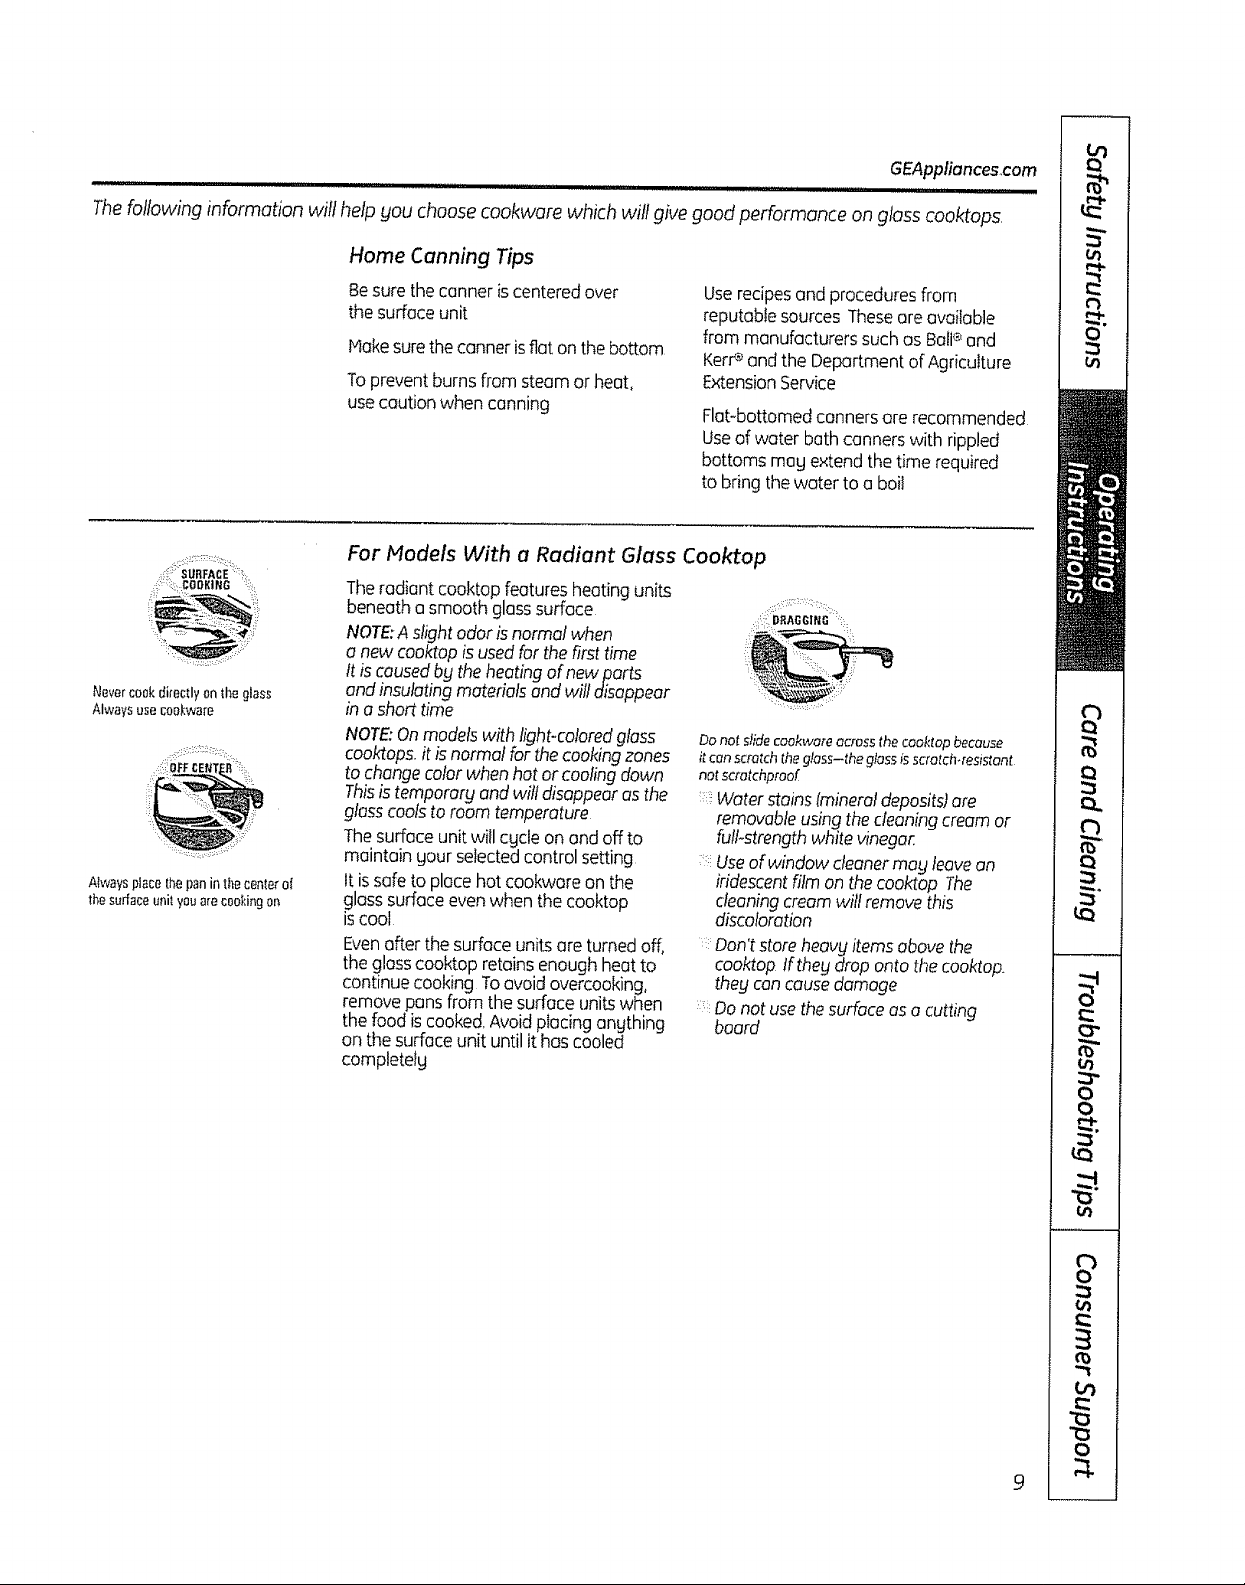
Thefollowing information wifl help gou choose cookware which wit! give good performance on glass cooktops,
Home Canning Tips
Besurethecanneriscenteredover
the surfaceunit
Makesurethecannerisfiat onthe bottom
Topreventburns from steam or heat,
usecautionwhen canning
Userecipesand proceduresfrom
reputablesources Theseareavailable
from manufacturers suchas Bali®and
Kerr¢ and the Department of Agriculture
ExtensionService
Flat-bottomedcannersare recommended
Useof water bath cannerswith rippled
bottoms mag extendthe time required
to bring the water to a boil
============================
::i;:_SURFACE :
i:::_,:, COOK NG
Nevercookdirectly{_ntheglass
Alwaysusecookware
Ak,_aysplacethepaninthecenterof
thesurfaceunityouarecookingon
For Models With a Radiant Glass Coo_op
Theradiantcooktopfeatures heating units
beneatha smooth glasssurface
NOTE:A slightodorisnormal when
a new cooktop is usedforthefirst time
tt is causedb9 theheatingof newports
and insulatingmaterialsand will disappear
in a shorttime
NOTE:Onmodelswith light-coloredglass
cooktops,it isnormal forthecookingzones
to changecolorwhen hot or coolingdown
Thisistemperer9 and will disappearusthe
glasscoolstoroom temperature
Thesurfaceunit will cgcle on and off to
maintain gour seiectedcontrolsetting
issafe to
It surfaplacecehot cookwareon the
glass evenwhen the cooktop
iscool
Evenafterthe surfaceunitsare turned off,
theglasscooktopretainsenough heatto
continue cooking Toavoidovercooking,
removepansfrom the surfaceunitswhen
thefood iscooked,Avoidplacing anything
DO not slide caakware across the cooktop because
itcan scratch the glass-the glass isscratch.resistant
not scratchprao[
Waterstainslmineral deposits) are
removable using the cleaning cream or
fulFstrength white vinegar
:::!Useof windowcleanermagleavean
iridescentfilm on the cooktop The
cleaningcreamwillremovethis
discoloration
: Don't storeheavyitemsabovethe
cool<toplf thegdrop onto thecool<top.
they cancausedamage
Do not use the surface as a cutting
board
on the surface unit until it has cooled
completelg
::::::::::: :i: :::: : :
D_AO6IIIO
Page 10
Selecting types of cookware for radiant glass cooktop models.
The following information willhelp you choose cookware which wilt give good performance on g/ass cooktops,
Stainless Steel:
recommended
Porcelain Enamel on Cast Iron:
recommended if bottom of pan is coated
ChBckpansfor flatbottomsbyusing
as{raightedge
Panswith roundedcurvedridgedor
warpedbottomsarenot recommended
Aluminum:
heavgweight recommended
Goodconductivitg Aluminum residues
sometimesappear as scratcheson the
coaktop but canbe removedif cleaned
immediatelg Becauseof its low melting
point,thin weight aluminum should not
be used
Copper Bottom:
recommended
Coppermag leave residueswhich can
appear as scratches The residuescan
be removed,as long as the cooktop is
cleanedimmediatetg However,do not let
these pots baildrg,Overheatedmetal carl
bond to gloss cooktops. Anoverheated
copper bottom pot willleave o residue
that wil!permanentlg stain the cooktop
ifnot removed immediatelg
Porcelain Enamel on Steel:
not recommended
Heating emptg pans can cause permanent
damage to cooktop gloss The enamel can
mett and bond to the ceramic cook-top
Glass-ceramic:
not recommended
Poor performance Willscratch the surface
Stoneware:
not recommended
Poor performance lag scratch the
surface
Cast Iron:
not recommended-unless designed
specificallyfor glass cooktops
Poor conductivitg and slow to absorb heat
Willscratch the cooktop surface
Donetplacewet pans
onthe g_asscooktop
Donat usewakswith support
ringsonthe g_assceoktep
Useflat4}ottemedwoks
]. 0 on the gtasscooktop
NOTE:Follow al!cookware manufacturer's recommendations when using ang &Ipeof
cookware on the ceramiccooktop
For Best Results
Place onlg drg pans on the surface
elements Do not place lids on the
surface elements, particularlg wet lids
Do not usewoks that have support
rings Thistgpe of wok will not heat
on gloss surface elements
We recommend that gou use onlg a
fiat-bottomed wok Theg are available
at gour local retail store The bottonq
of the wok should have the same
diameter as the surface element
to ensure proper contact
Some special cooking procedures
require specific cookware such as
pressurecookers or deep-fat frgers
All cookwore must have flat bottoms
and be the correct size
Page 11
Using the oven controls.
Throughout this manual features and appearance may vary from your model
Quickset IV shown here
_%ven Controls_ ) t_ _r)Time Controls_
CBake_'l F start'l ,Ki' =n,! _ , ,/1-Kitchene--" "- -!..
T_'mp R_'il _' _ On/Off
GEAppliences.com
o
f"--Self-_
tcieanJ
LOive
@D
On/Off
0 .0,
¢ okin ¢-S art--'l
r-Czim JL-rime)
Oven Control, Clock and Timer Features and Settings
BakeiTemp RecallPad
0
Touchthispad to selectthe bakefunction
Bake Light
Flasheswhile inedit mode-gou canchange
theoventemperatureatthispoint Glowswhen
theovenisin bakemode
Start/On Pad
Hust betouchedtostart angcookingor
cleaningfunction
Dispbg
Showsthe time of dag,oventemperature
and the times setfor thetimer or automatic
ovenoperations,Thedisplagwiil show PrE
while preheatingWhenthe ovenreachesthe
selectedtemperature,theoven control wilI
beepand the displagwillshow theoven
temperature
If F-" anda numberor letter flashin the display and
theovencontrolsignals,thisindicatesa function
errorcode
lfgour oven wasset for a timedovenoperationand
apower outageoccurred,theclockandaft
programmed functions must be reset
Thetime of dug wiflflush in the displag when there
hasbeenapower outage Resettheclock
If the function errorcodeappearsduring the self-
cleaningcgcle,checkthe ovendoorlatch Thelatch
handlemaghavebeenmoved,evenif onlgslightlg.
from the latchedposition Nake surethelatch is
moved to the right as far us it will go
Touch the Cleur/Off pad.Allow the oven to cool for
one hour.Puttheovenbackintooperation Ifthe
function errorcode repeats, disconnect the power to
therangeand call for service
Kitchen Timer On/Off
or Timer On/Off Pad
Touch this pad to select the timer feature,
Then press + and - pads to adjust time
Timer Light
Flasheswhile inedit mode-gou canchange
thesettime at thispoint Glowswhenthe timer
has beenactivated Flashesagainwhen the
time hasrun outuntilthecontrolisreset
Cbck Pad
Toset the clock, press this pad twice and then
press the + and - pads The time of dog will
flash inthe displag when the oven
is first turned on
Start Time Pad (onsome models)
Usealong with the Cooking Time or
SelfCleanpadsto set the oven to start
and stop automaticallg at a time gou set.
Start TimeLight
Flasheswhile inedit mode-gou canchange
thestarttimeatthis point Glowswhenthe
functionhasbeenactivated
Cooking Time Pad fansome models)
0
Touchthis padand then touch the + or -
padsto set the amount of time gou want
gout foodto cook Theovenwill shutoffwhen
the cookingtime hasrun out
Cooking Time Light
Flasheswhile inedit mode-gou can change
thesettimeatthis point Glowswhenthe
functionhasbeenactivated Flashesagain
whenthe time hasrunout untilthe control
isreset
tt
Page 12

Using the ovencontrols.
Oven Control, Clock and Timer Features and Settings
Automatic Oven Light (on some models)
0
Thislightsangtime the ovenhas been
programmed using the CookingTimeor
Star Timefunctions
Oven Light On/Off Pad
0
Touchthis padto turnthe ovenlightonor off,
- Pad
Shorttaps to this pad will decreasethe time
or temperature bg smallamounts,Touch
and hold the pad to decreasethe time or
temperature by largeramounts
+ Pad
0
Shorttapsto this padwill increasethe time
or temperature by smallamounts.Touch
and hold the pad to increasethe time or
temperatureby larger-amounts
Self Clean Pad
Touchthis padto selectthe self-cleaning
function Seethe Usingthe self-cleaningoven
section
Self CJeanLight
Flasheswhile in editrnode-gou can change
the lengthof time forthe self-cleancgdeat this
point Glowswhentheovenisin theself-clean
cgde Afterthe self-deancgde.the light will
turn off Unlatchthedoor,
Clear/Off Pad
Touchthis padto cance!ALLovenoperations
exceptthe clockand timer.
Broil Hi/Lo Pad
Touchthis padto selectthe broil function
Broil Light
Flashes while in edit mode-gou can switch
from Hi to Lo Broil at this point Glows when
the oven isin broil mode
Indicator Lights (on some padsl
EDITmode lastsseveralsecondsafterthe last
pad pressStart TimeOn/Offand Cooking
TimeOn/Offwill betheonb padslit if either
oftheseoptionsisselected,[Example:Start
Timeisselectedwith Bake-the Start Timepod
willremainlituntiltheclockreachesthe
programmedtime,at which pointit wiltturn
off andtheBake/TampRecallpadlightwill
lightup}
Power Outage
ff a flashingtime isin thed_splag,gou have
experiencedapower failure Resettheclock
Using the oven.
Toavoid possible bums, place
N_rnber of rack positions vary by model
12
Toresetthe clock,touch the Clock pad Enterthe
correcttime of dug by touching the + or- pads
Touchthe Start/On pad
,,,,,,,,,,,,,,,,,,,,, ,, ,,, ,
the racks in the desiredposition before you turn the oven on.
Before gou begin°.,
Therackshavestop-locks,sothatwhenplaced
correctigontheracksupports,thegwillstop
be[orecomingcompletelgoutandwillnottilt
Whenplacingandremovingcookware,pull
therackoutto thebumpontheracksupport
Toremovearack, pullit towardgou.tiltthe
frontendupandpullitout
Toreplace,placetheendof therack(stop-
locks}onthesupport,tiltupthefrontandpush
therackin
CAUTION I
Whengouareusingtherackinthelowest
positiontA),gouwillneedtousecautionwhen
pullingtherackout Werecommendthatyou
pulltherackoutseveralinchesendthen.using
twopotholders,pulltherackoutbLjholdingthe
sidesofit Therackislowand_loucouldbe
burnedifyouplace_!ourhandinthemiddleof
therackandpullallthewagout Beverycareful
nottobum_Iourhandonthedoorwhenusing
therackinthelowestposition(AJ
Page 13

Using the oven.
GEAppliances,com
Toavoid possible burns, place
Donotplacefoodsdffectlyontl_eoven
floor
I wiIIshowPrEwhilepreheatingWhentheoven
the racks in the desiredposition before you turn the oven on
Preheating and Pan Placement
Preheatthe oven if the recipeca!lsfor it
Preheatingisnecessargfor good resultswhen
bakingcokes,cookies,pastries and breads
Thedisplaywillshow "PrE"while preheating
When the oven reaches the seleded temperature.
the ovencontrol willbeep and the display will
show the oven temperature
Ifbakingfourcakelagersatthe
sometime,placetwolayerson
rackCandtwolayersonrackE
Staggerpansontheracksoone
isnotdirectlyabovetheother,
How to Set the Oven for Baking or Roasting
[]
TouchtheBake
[_ Touchthe+ or- padsuntilthedesired
temperatureisdisplayed
I_] TouchtheStart/Onpad
TheovenwillstartautomaticallgThedisplag
reachestheselectedtemperature,theoven
controlwiltbeepseveraltimesandthedisplay
willshowtheoventemperature
Tochangetheoventemperaturedu#ngBAKE
cgde,touchtheBakepadandthenthe+or-
padstogetthenewtemperature
pad
Bakingresultswillbebetterif thefoodis
centeredintheovenasmuchaspossible
AngelFoodcakeistheexceptionandshould
beplacedonthebottomovenrackfposi%nAt
Followpackagedirectiononprepackagedand
frozenfoodsforpanplacement.Pansshould
nottoucheachotherorthewallsoftheovenIf
youneedto usetwo rocks,staggerthepansso
oneisnotdirectlyabovetheother,Leave
approximatelylYi' betweenpansandfrom
thefront,backandsidesofovenwail
[_ Checkfoodfordonenessat minimumtime
onrecipeCooklongerif necessary
I_ TouchtheClear/Offpadwhenbakingis
finishedandthenremovethefoodfrom
theoven
Aluminum Foil
Donotusealuminumfailanthebottomoftheoven,
Neverentirelycoverarackwithaluminumfoil
Thiswilldisturbtheheatcirculationandresultin
poorbaking
Asmallersheetoffoifmaybeusedto catch
aspi!!overbyplacingitonolowerrackseveral
inchesbelowthefood
The type of margarine will affect baking performance!
Most recipes for baking have been developed using high-fat products such as butter or margarine [80%fadIfyou decrease
the fat. the recipe mug not give the same results as with a higher-fat product
Recipefailurecan resultifcakes,pies,pastries,cookiesor candiesaremade withlow-fatspreads Thelower the fat contentof
a spreadproduct, themore noticeablethesedifferencesbecome
Federalstandardsrequireproductslabeledmargarine"to containatleast80%fat by,weightLow-fatspreads,on the otherhand.
containlessfat andmorewater Thehighmoisturecontentof thesespreadsaffectsthetextureand flavorof bakedgoods For
bestresultswithyouroldfavoriterecipes,usemargarine,butteror stickspreadscontainingat least70%vegetableoil !3
Page 14

Usingtheoven.
Door Positioning During Broiling:
Formodels JSS28 and JDS28:
Foral_othermodels:
Leave the door opento the broil stop
position Tile door stays open by itself,
yet the propertemperature is maintained
in tile oven
How to Set the Oven for Broiling
UseLoBroil to cookfoods such as poultrg
or thick cuts of meet thoroughly without
overbrowning them
[Z] Placethe food on a broilergrid in o
broilerpan designedfor broiling,
[_ Followsuggested rock positionsinthe
BroilingGuide
[] Touchthe Broil Hi/Lo podoncefor
HiBroil.
Tochangeto LoBroil, touch the Broil
Hi/Lo pad again
Touchthe Start pad
Whenbroiling isfinished,touchthe
@
Clear/Off pod
Thesize weight, thickness.
starting temperature
and your preference
of doneness will affect
broiling times This guide is
based on meats at
refrigerator temperature
t The U S Department of
Agriculture says "Rare beer is
papuiatt but you should know
that cooking it to only ]40°F
means same food poisoning
organisms meg survive" lSource
Safe Food Beak Your Kitchen
Guide, USDA Ray,June 1985j
Broiling Guide
Preheatthe broiler for 2minutes to improveperformance
Food
Beet
Cldcken
Donelless
Rarefl40"F)
Medium (160°F)
WellDone(I70°F)
Type or
Thickness
Steaks
1" thick
Steaks-
3/4,"to1" thick
.......................... meat slashfatat 1"
Steaks-
3/4" to1" thick
orGroundBeefPatties
8roast.boneless
Breast bone-in
Back Position*
'EorF(foodshouldbe1"
to3" frombroilelemenl)
E(foodshoutdbe3"
to4" frombroilelement)
OorE(foodshouldbe3" intervals
to5" frombroilelement)
C(foodshouldbe8" Broilskin-side,down
to 9" from_roilelement} first
C(foodshouldbe7'
to8" frombroiIelement)
Comments ]
Steakslessthant" thic
aredifficult to cook
rare Theycookthrough
beforebrowning
Topreventcurlingo_
FishFi,ots .................. VZ"toi"thiik 'O0iE(foodsho.ldbe3" Han,_ea"dt.rove_
to6" frombroilelement) carefully
Pork Chops Well Done(170°F) "3/4"ihick........... g (foodshoutdbe6" : Topro'ventcurlingof.........
*Userack positionA for the smaIier2-rock positionoven
ff _lourrangeisconnectedto 208 volts,ratesteaksmay be broiledb_lpreheatingthebroiler
andpositioningthe ovenrack oneposition higher
to7" frombroi!element) meat slashfatat f"
intervals.
t4
Page 15

Using the warming drawer. [onsome models)
IA WARNING ] FooE,POISON,AZAR Bo teriomaygrowinfoodottemp roturesbelow
lu, J
The worming drawer will keep hot, cooked foods at serving temperature Alwogs start with hot food
Do not use to heat cold food other than crisping crackers, chips or drg cereal.
o Alwogs start with hot food Do not use worm settings to heat cold food
° Do not worm food for more then 2 hours
Failure to follow these instructions mag result in foodborne illness
GEAppliancesocom
ii ....................
WARMINGDRAWER
M[O
When Using the Warming Drawer
Pushand turn the control knob to ong i:::Allfoodsplacedinthe warmingdrawer
desiredsetting shouldbecoveredwitho lidor aluminum
Thewa[mingdrawerwillkeephot.cooked foil.Whenwormingpastriesorbreads,the
foodswarm covershouldbeventedto allow moisture
Donot linethewarming drawer or pan with toescape
aluminumfoil. Foilisanexcellentheat ::::Foodshouldbekepthotin itscooking
insulator and will trap heat beneath it,. This
will upset the performance of the drawer
and could damage the interior finish
Allow approximately 25 minutes for the
warming drawer to preheat,
: Do not put liquid or water in the warming
drawer.
containerortransferredto a heat-safe
servingdish
NOTE:Plasticcontainersorplasticwrapwill
meltifindirectcontactwith thedrawer,pan
ora hotutensil,t4eltedplasticmognatbe
removableandisnatcoveredundergour
warrantg
:; Removeservingspoons,etc, before
placingcontainersinwarmingdrawer.
Temperature Selection Chart
Tokeepseveraldifferentfoodshot,setthe
controltothefoodneedingthehighestsetting
: Thetemperature,tgpeandamountoffood,
andthetimeheldwi!taffectthequalitgof
thefood
: Repeatedopeningofthe drawerallows
the hotairto escapeandthefoodtocool
With largeloadsitmagbenecessargto
useahigherwarmingdrawersettingand
coversomeofthecookedfooditems
Donot useplastic containersor plasticwrap
FoodType ControlSetting
Casserole MED
Chili HI
Pizza MED
Potatoes,baked HI
TortillaChips LO
Waffles LO
To Crisp Stale items
....:::Hocefoodinlow-sideddishesorpans
Preheaton LOsetting
To Warm Serving Bowls and Plates
tO,CAUTiONj
Disheswill behot Usepot holdersor miffs
when removing hot dishes
Towarm servingbowlsandplates, set the
controlonLO
::',Checkcrispnessoffer t45minutesAddtime
asneeded
Useonlgheat-safedishes
tf gouwontto heatfinechino,pleasecheck
with the manufacturerofthedishesfor
theirmaximumheattolerance
Youmagwarm emptgservingdishes
whilepreheatingthedrawer.
I5
Page 16

Using the lower oven drawer, consomemodetsJ
iii, iiiiiiiiiiiuiiiii i '"'"'"'"'"'"' ...................................... iiiiiiiiiiiii LII
The lower oven drawer may be used to bake foods using the same times and temperatures as a standard oven
Foods ideal for baking in the lower oven drawer indude pizza, frozen foods, casseroles, biscuits, rolls and mang
desserts
_.OWEff
OVEN
o
3_1 . 350 . 4_
Pushinandturnthelowerovendrawer
knobtoanydesiredsetting
To Use the Lower Oven Drawer
[Z] Pushinand turn the lower oven
drawerknobto angdesiredsetting
[] Allowthe lowerovendrawerto
preheat
:: TheONsignallightislocatedabovethe
knoband glowswhen theknob is in the
ONposition It remainsONuntiltheknob
ismovedto theOFFposition
The"Heating_signallightislocatedbelow
theknoband glowswhen the heating
elementsareactive Preheatiscomplete
afterthe "Heating"signalhas turned off
for the firsttime after the knob is turned
on
NOTES:
Always use the included drawer rock
when using the lower oven drawer
i:i Thelowerovendrawer cannotbe used
during o self-dean cgcte of the upper
oven
(::::::Donot put food foilor cookwore directly
on the bottom of the lower oven drawer.
Always use the included drawer reck
!5::
tf foods require o cover, use only foil or
lidsable to withstand baking
temperatures Donot use plastic
Maximumheightoffoodsthat cartbe
bakedin thelowerovendrawer is 3¥z"
Do not put liquid or water in the lower
oven drawer
':,::::Neverpbce pbstics, paper:canned foods
orcombustiblematerial intheloweroven
drawer
Thelower oven drawer useslessenerggthan the upper oven
Allowthe followingappro×imatetimes for'preheating:
Desired Lower Preheat
Oven Temperature Time
WARM 10 minutes
350°F 15 minutes
425°F 25 minutes
!6
When Using the Lower Oven Drawer Warm Setting
The WARN SETTINGof the lower oven
drawer can be used to keep hot cooked
foods at serving temperatures Alwags start
with hot food Do not use the WARM
SETTINGto heat cold food other than
crisping crackers, chips or dry cereal
Pushin and turn the control knobto
theworm setting,
NOTE:The beginning temperature of the
food the amount of food, the type of food,
the container end the amount oftime the
food is in the drawer willaffect the quatit!j
end ending temperature ofthe food
Page 17

Using the clock and timer.
Not all features are on all models
To SettheClock
GEAppliancesocom
clo
Makesure1h8clockisso[to the_otrect
timeofday
Theclockmust beset to the correcttime
of day for theautomatic oven timing
functions to work properly Thetime of day
cannot bechangedduring a delayed
cooking or o delayed self-cleaningcgcle
[Z] Touchthe Clockpad twice
[_ Touchthe + or- pads
Ifthe + or - pods are nottouched within
one minute after you touch the Clockpad,
the displayrevertsto theoriginal setting If
To Turn Off the Clock Displag
If gou hoveseveralclocksin gour kitchen.
goumay wishto turnoff thetime of day
clockdisplayon your range
TouchtheClockpad once to turn
Ffl
off the time of dog display Although
youwill notbe able to seeiL the clock
maintainsthe correcttime of day
To Set the Timer
this happens,touch the Clock pad twice
and reenter the time of day
[_ Touchthe Start/On pad until the time
of day showsin the display This
entersthe time andstarts the clock
Tocheckthetime ofdog when thedisplay
isshowingotherinformation,simplytouch
theClockpod Thetimeof dayshows until
anotherpad istouched
[] Touchthe Clockpod twice to reca!l
theclockdisplag
r tchJ '
t.2imer__)
OnlOff
The timer is a minule timer only
]he Clear/Ol! pad does not affect the
timer
Thetimerdoesnot controloven operations
Themaximumsettingon the timer is
9 hours and59 minutes
[Z] Touchthe Kitchen Timer On/Off pod
[_ Touchthe + or - padsuntil the
amount of time you wont shows in
thedisplay The maximum time that
con beenteredin minutes is 59
Timesmore then 59 minutesshould
be changed to hours end minutes
lf gau makea mistake,touch the Kitchen
Timer On/Off pad and beginagain
To Reset the Timer
If the displayisstillshowingthe time
remaining,gou megchange itbg touching
the Kitchen TimerOn/Offpod, then
touching the + or - pads until the time you
wont appears inthe display
TouchtheStart/On pod Thetime will
[]
startcounting down, although the
displaydoesnot changeuntilone
minute has passed
Whenthe timer reaches:00, the
[]
controlwill beep2;timesfollowed by
one beepeverg6 secondsuntilthe
Kitchen TimerOnlOffpad istouched
ifthe remainingtime is not in the displag
(clock,start time or cookingtime arein the
displag),recallthe remainingtime by
touching the Kitchen Timer On/Off pad
and then touching the+ or - pads to enter
the newtime gouwant
To Cancel the Timer
Touchthe Kitchen Timer On/Off
padtwice 17
Page 18

using the timed baking and roasting features,consomemodefst
Do not lock the oven door with the latch during timed cooking The latch is used for self-cleaning onfg
NOTE: Foods that spoil easilg-such as milk, eggs, fish, stuffings, poultrg and pork-should not be allowed to sit
for more than 2 hour before or after cooking. Room temperature promotes the growth of harmful bacteria Be sure
that the oven/ight is off because heat from the bulb wilt speed harmful bacteria growth
How to Set an Immediate Start and Automatic Stop
,,,,,,,,,,,,,,,,,,,,,,,,,,,,,,,,,,,,,,, ,,, ...............
Tamp Recall
ime_)
0_
[.__Time_../
r2 j
%J
Theovenwilt turn onimmediatelyand cook
fora selectedlengthof time At theend of
thecookingtime,the ovenwill turn off
automaticallg
[Z] TouchtheBakepad
[] Touchthe+ or- padsto setthe
oventemperature
[_] Touchthe Cooking Time pad
NOTE:If your reciperequirespreheating,
you may needto add additionaltime to the
lengthofthecooking time
[_ Touchthe+ or - padsto set the
bakingtime
Thecookingtime that gou enteredwill be
dispJoged(Ifgou selectCookingTimefirst
and then adjustthe BakeTemperature,the
oventemperaturewill be displayed
instead)
How to Set a Delaged Start and Automatic Stop
Theoven willturn on at the time of day gou
set. cook for a specific length of time and
then turn off automotico!fg
Hake sure the clock showsthe correct
time of dag
[Z] TouchtheBake pad
[_ Touch the + or - pads to set the
oven temperature
[_ Touchthe Cooking Time pad
[_ Touchthe + or - padsto set the
desiredlength of cookingtime
_-] Touchthe Start Time pad
[_ Touchthe + or - padsto setthe time of
day you want the oven to turn on and
start cooking.
[Z] Touchthe Start/On pod
NOTE:An attentiontone will soundif gou
are usingtimed bakingand do nottouch the
Start/On pad
1_ TouchtheStart/On pad
Thedisplagshows either the oven
temperature that gou set or the cooking
time countdown (Thedisplaystartswith
PrEifshowing the oventemperature}
Theovenwilt continue to cookfor the
programmed amount of time.then turn
off automatically
I-_ Touchthe ClearlOff pod to cancelif
necessary
Removethefood from theoven Remember.
eventhough the ovenshutsoff
automoticallg,foodscontinuecookingafter
controlsoreoff
NOTE:If youwould liketocheck the times
gouhaveset,touch the Start Time padto
checkthe start time gou have setor touch
the CookingTime padto checkthe length
of cookingtime gouhaveset
Whenthe oventurns on at the time of day
gou have seL the displagwill show PrEuntil
it reachesthe selectedtemperature thenit
willdisplay the oven temperature
Atthe endof cooking time, the oven
willturn off and theend-of-cycle tone
willsound
[_ Touchthe Clear/Off pad to cancel
if necessarg
Removethe food from theoven Remember
eventhough the oven shutsoff
automatically,foodscontinuecookingafter
controlsare off
18
Page 19

Special features of your oven control.
Yournew touch pad control has additiona! features that you mag choose to use The following are the features
and how you may activate them
The special feature modes can only be activated while the display is showing the time of day They remain in the
control's memory until the steps are repeated,
When the display shows your choice, touch the Start/On pad The special features will remain in memory after
a power failure
NOTE: The Sabbath feature and the Thermostat Adjustment feature are also Special Features, but theg are
addressed separately in the following sections
22 Hour Shutoff
GEAppliancesocom
With this feature, should you forget and
leave the oven on,the control will
automatically turn offthe oven after
12 hours during baking functions or after
3 hours during a broilfunction
If gou wishto turn OFFthis feature,follow
the stepsbelow
[] Touchthe Bake and Broil Hi/Lo pads
at thesame time until thedisplag
showsSF,
[_] Touchthe Clock pad The displatjwill
show ON 112hourshutoff) Touchthe
Clockpad repeatedly until the displag
showsOFF(noshutoffi,
[_ Touch the Star_JOn pad to activate the
no shut-off and leave the control set in
this special features mode
Adjust the oven thermostat--Do it yourself!
You may find that your new oven cooks differently than the one it repbced Use your new oven for a few
weeks to become more familiar with it If you still think your new oven is too hot or too cotd_you can adjust
the thermostat yourself
Do not use thermometers, such as those found in grocerg stores, to check the temperature setting of your oven,
These thermometers may varg 20-40 degrees,
NOTE: This adJustment will not affect the broiling or the self-cleaning temperatures The adjustment will be
retained in memory after a power failure
To Adjust the Thermostat
(_ e_Bake +(_Br%ilil--_
Temp Recoil Ht/Lo
®
&9
Ternp RecotI
Touchthe Bakeand Broi! Hi/to pods
at the sametime untilthe displag
showsSE
TouchtheBake pad A two-digit
numbershowsin the displag
Theoven temperature can be
adjustedup to (+)35°Fhotter or
F)35°Fcooler.Touchthe + pad to
increasethe temperaturein l-degree
increments
Touch the - pad to decrease the
temperature in 1-degree increments
[_ When gou have made the
adjustment, touch the Start/On pad
to go back to the time of dog displag
Usegout ovenas gou would normaIlg
NOTE:ThisadJustmentwill notaffect the
broifingor self-cleaningtemperaturesIt will
be retained in memorg after a power failure
t9
Page 20

":-usingthe Sabbath Feature. (onsomemodels)
(Designedfor use on the Jewish Sabbath and Holidays]
TheSabbathfeaturecanbeusedforbaking/roastingonly tt cannotbeusedforbroiling,self<leaningorDelayStartcooking
NOTE:The oven lightcomesan automatically {on some models) when the door isopenedandgoesoffwhen thedoorisclosedThe
bulb may beremoved Seethe Oven LightReplacement section Onmodels with a light switch on the control panel, the oven light
may be turned on and left on
0
Temp £e_eff H_/L8
e
Tamp Recall
xc?
C@
When the display shows 13 the oven is
set in Sabbath When the display shews
Z.-)C the oven is baking/roasting
How to Set Sabbath Feature far Regular Baking/Roasting
NOTE:Tounderstandhowtheovencontrolworks
practiceusingregularbaking(non-SabbathJbefore
enteringSabbathmode
t,,/akesuretheclackshowsthecorrecttimeofclawand
theovenisoff
[Z] Touchandholdbath the Bakeand BroilHi/Lo
pads,at thesame time untilthe displaysho,_ SF..
[_ Tapthe clock pad until SAbappears
in the display
[_ ]'ouch the Start/On pad and Dwill
appear inthe display
TouchtheBake pad No signalwill
begiven
[_-] The presetstarting temperature will
automatically be set to 350 °Top the + or -
pads to increase or decrease the temperature
in 25° increments The temperature can be set
between 175:and 550_'No signal or
temperature will be given
................................. iiiiiiiiiiiiiiiiiiiiiiii I I I L II L
_] TouchtheStart/Onpad
[Z] Afterorandomdelayperiodofapproximately
30secondsto i minute,D C willappear'
inthedisplayindicatingthat theovenis
baking!roastingIfD C doesn'tappear
inthedispIaystartagainat Stepa
Toadjusttheoventemperaturetouchthe
Bakepadandtapthe+ or- padsto increase
ordecreasethetemperaturein25°increments
TouchtheStart/Onpad
NOTE:TheClear/OffendCookingTimepadsare
activeduringtheSabbathfeature
Tamp B eel:Ill Hi/Le
f--?to_-"" I
L--o- j
o
okiql
|.._TimeJ
Whenthedisplayshows11)theovenis
setinSabbathWhenthedisplayshows
11)C theovenisbakinrjiroasting
f-cleaTh
( j
Temp I_o_II H_Lo
20
How to Set ,Sabbath Feature for Timed Baking/Roasting-Immediate Start
and Automatic Stop
NOTE:Tounderstandhowtheovencontrolworks.
practkeusingregular(non-Sabbath]ImmediateStart
andAutomaticStopbeforeenteringtheSabbathmode
Makesuretheclockshowsthecorrectt_meofdayand
theovenisoff
[_[] TouchandholdboththeBakeandBroilH_/Lo
pads,at thesametime.unti!thedispOLJshowsSF
['_ TaptheClockpaduntilSAbappears
inthedisplay
r-J1 TouchtheStart/OnpodendD will
appearinthedisplay
[_ TouchtheCookingTimepad
[_ Touchthe+or- padstosetthedesiredlength
ofcookingtimebetweenI minuteand9hours
and59 minutesThecookingtimethatyou
enteredwillbedisplayed
_ TouchtheStart/On pad
Z] TouchtheBakepadNosignalwillbegiven,
Thepresetstartingtemperaturewill
automaticallybesetto350°Topthe+
or - padsto increaseor decreasethe
temperaturein25_incrementsTi_e
temperaturecanbesetbetween175°and
550°Nosignalor_.emperaturewillbegiven.
TouchtheStart/Onpad
After a random delay period of approximately
30 seconds to 1 minute, D C willappear
in thedisplay indicating that the oven is
baking!roosting lid C doesn't appear
in thedisplay start again at Step 7
Toadjust theoven temperature, touch the
Bakepod and tap the + or- pads to increase
or decrease the temperature in 25° increments
Touch the Start/On pad
When cookingis finished,thedisplay willchange from
D C toD indicatingthat the ovenhas turned OFFbut
isstill set in Sabbath Removethe cookedfood
How to Exit the Sabbath Feature
[Z] TouchtheClear/Offpad
Iftheoveniscooking,waitforarandomdelay
periodofapproximately30secondsto i minute
untilonlyDisinthedisplay
TouchandholdboththeBakeandBroilHi/to
pads,at thesametime.untilthedisplayshowsSF
[]Top theClockpaduntilONorOFFappearsinthe
display,ONindicatesthattheovenwillautomatically
turnoffafter12hours.OFFindicatesthattheovenwilt
notautamatkaIIgturnoffSeetheSperJalFeatures
see'donforanexplanationof the12-HourShutoff
f_ture
_ Touchthe Start!On pad
NOTE,.IfopoweroutageocoJffedwh#etheovenwasin
Sobba_ theovenwitlautomaticatigturnoffandstagoff
_,enwhen thepowerretums.Theovencontrdmustbereset
Page 21

Usingtheself-cleaning oven.Ionsomemo efsj GEAppliances.com
r WARNING l IRE,AZAR :Wipe reoseandheavy soilfromoven before self-cfeaning
e nJ
Wipeupheavysoilontimovenbottom
I Failure to do so may result in an oven fire
If your range has this control pad, it has a self-cleaning oven.
Follow these instructions.
If not,refertothePorcelainOvenCleaningsectionbr ovencleaninginstrudions
Before a Clean Cycle
Werecommendventing your kitchen with
an openwindow or usinga ventilationfan
or hoodduring the first self-cleancycle
Removebroilerpan. broilergrid,all
cookwareand any aluminum foi! from
theoven
NOTE:
'_::If your oven is equippedwith shiny,
silver-coloredovenracks,we
recommendto removethem before
you beginthe self-cleancycle They
may remain in theovenduring the self-
cleancycle,but they will darken,lose
theirlusterand becomehard to slide
If gout ovenis equippedwith gray
porcelain-coatedoven racks,they
may beleft in theovenduring the
self-cleancycle
Soilon the front frame of the range and
outsidethe gasket on the door will need
to be cleaned bg hand Clean these areas
with hot water, soap-filled or plastic
scouring pads or cleansers such as
Soft Scrub'_ Rinsewell with clean water
and drg
Donot cleanthegasket Thefiberglass
material of the oven door gasketcannot
withstand abrasion ttisessentialfor the
gasketto remainintact If you notice it
becomingworn or flayed replaceit
Hakesurethe ovenlightbulb cover isin
placeand theovenlight isoff
IMPORTANT:The health of somebirds
isextremely sensitiveto the fumes given
off duringthe self<leaning cgde of any
range Movebirdsto another well-
ventilatedroom
o
L.€leanJ
How to Set the Oven for Cleaning
Followthedirectionsinthe BeforeaClean
Cyclesection
Latchthe doo[
NOTE:Neverforce thelatch If the oven is
too hot, gouwill not beable to slidethe
latch Allow the oven to cool
[_ TouchtheSelfClean pad
[_ Touchthe + or - padsuntilthe
desiredCleanTimeisdisplayed.
TheCleonT_meisnormally 4 hours end
20 minutes Youconchange the Clean
Timetoany time between3 and 5 hours,
dependingon the amount ofsoil in your
oven
[_ Touchthe Start/On pad
Theself-cleancgclewill automaticallg
beginafter Clean isdisplagedandthe
time countdown appears inthe displag
while theovenisself-cleaning gou can
touch the Clockpad to displag the time
ofdag.Toreturnto the clean countdown.
touch the Self Clean pad
The oven shuts off automaticallg when the
clean cgcle is complete, end 0:00 will flash
in the displag
[_ Slidethelatch handleto theleft asfar
as itwill go and open the door.
NOTE:Never force the latch handle Forcing
the handle wit! damage the door lock
mechanism
2!
Page 22

Using the self-cleaning oven. Ior,somemo eIsj
II II iiiiiiiiiiiiiiiiiiiiiiiiiiii IIIIIIIIII IIIIIIIII IIII IIIIIIILI II IIII II LI I II IIII I I I I IL I I
f self "/
LCeeo
f sto t]
L_Tim
How to Detag the Start of Cleaning
Hakesurethe clockshowsthe correcttime
ofday
l_ Latch the door:
[] Touchthe Self Clean pad,
l_ Usingthe+ or - pads,enter the
desiredclean time
Touchthe ,StartTime pad The
[]
earlieststart time you can setwill
appear in thedisplay
[] Usingthe + or- pads,enter thetime
ofday you want theclean cycleto
start
[] Touchthe Start/On pod
_'onsomemodels)
Thedisplay will show the start time It
wil! not be possibleto unlatchthe oven
door until the temperature drops below the
locktemperature
Theovenshutsoff automatically when the
clean cycle iscomplete, and0:00will flash
in the display
To ,Stop a Clean Cycle
Touchthe Clear/Off pad
Wait until the ovenhas cooled below the
lockingtemperature to unlatch thedoor:
Youwill notbe ableto openthe doorright
away unlessthe ovenhas cooled below
the lockingtemperature
After a Clean Cycle
Youmay notice some white ash inthe
oven Wipe it up with a damp cloth after
the oven cools
Ifwhite spots remain, remove them with
a soap-filled steel wool pad and _inse
thoroughly with a vinegar and water
mixture
Thesedepositsare usuallya salt residue
that cannot be removedby theclean
cycle.
Ifthe ovenisnot cleanafter one clean
cycle repeatthecycle
Youcannot set the oven for cooking until
the oven is cool enough for the doo_ to
be unlatched
Whilethe oven isself-cleaning you
can pressthe Clockpad to displaythe
time ofday Toreturn tothe clean
countdown, pressthe SelfCleanpad
:,:,Applya small amount ofvegetableoil
toa paper towel andwipe the edgesof
theovenrackswith the paper towel,Do
not spraywith Pameorotherlubricant
sprays
22
Page 23

Care and cleaning of the range. GEAppliances.com
............................. ,lln,, ,,, ,ul, ,ll in
Be sure all controls are off and all surfaces are cool before cleaning ang part of the range
j jlfgourrangeisremovedforcteaningservicingor
,&WARNING anyreason,Oesuretheanti-tipdevic isre ngo ed
properly when therange isreplaced Fa&Jreto take thisprecaution could result in
tipping of the range and cause injurg
How to Remove Protective Shipping
Carefulb graspocornerofthe protective
shippingfilmwithyourfingersandslowlypeel
itfromtheappliancesurfaceDonotuseong
sharpitemstoremovethefilm Removeallof
thefilmbeforeusingtheapplianceforthefirst
time
Control Knobs
Thecontrolknobsmagberemovedforeasier
cleaning
HakesuretheknobsareintheOFFpositions
andpullthemstraightoffthestemsfor
cleaning
Control Panel
It'sagoodideatowipethecontrolpaneloffer
eachuseoftheovenUseadampclothto
cleanorrinseForcleaning,usemildsoapand
waterora 50/50sobtionofvinegarandwater,
Forrinsing,usecleanwater,Polishdr_jwitho
softcloth
Painted Surfaces
Paintedsurfacesincludethesidesoftherange
andthedoor,topofcontrolpanelandthe
drawerfront Cleanthesewithsoapandwater
ora vinegarandwatersolution
Film and Packaging Tape
Toensurenodamageisdanetothefinishof
theproduct,thesafestwagto removethe
adhesivefrompackagingtapeonnew
appliancesisonapplicationofa household
liquiddishwashingdetergentApptgwitha soft
clothandallowtosoak
NOTE:Theadhesivemustberemovedfromo//
parts Itcannotbe removedifitisbakedon
Theknobscanbecleanedinadishwasheror
thegmagalsobewashedwithsoapandwater,
Hakesuretheinsideoftheknobsaredrg
beforereplacing
Replacetheknobs,intheOFFpositionto
ensureproperplacement
Do not use abrasive cleansers,strong liquid
cleaners,plasticscouring padsor ovencleaners
on the control panel-theg will damage the
finish
Donotusecommercialovencleaners,cleaning
powders,steelwoolorharshabrasivesonang
pointedsurface
Stainless Steel Surfaces (on some models)
Donat usea steel woo! pad; it will
scratch the surface,
Tocleanthe stainlessstee{surface,use
warm,sudsgwater oro stainlesssteel
cleaneror polish Alwagswipe the surface
in the directionofthe grain Followthe
cleanerinstructionsfor cleaning the
stainlesssteelsurface
Porcelain Enamel Cooktop tonsome models)
Theporcelainenamel finish issturdg but
breakableif misused Thisfinishisacid-
resistant.However,angacidic foodsspilled
(suchas fruitjuices,tomato or vinegar}
shouldnot be permitted to remain onthe
finish
Ifacidsspillon thecooktop while it is hot,
usea drg papertowel or cloth to wipe it up
Toinquire about purchasing stainless steel
appliance cleaner or polish, or to find the
location of a dealer nearest gou. please colt
our toll-free number:
National Parts Center ,L800o6262002
GEAppliances, com
rightawag When the surface has cooled,
washwith soapand water.Rinsewell
Forother spillssuch asfat spatterings.
washwith soapand water or cleansing
powdersafter the surfacehascooled
Rinsewell Polishwith a drLJcloth
25
Page 24

Care and cleaning of the range.
Porcelain Oven Interior (on standard-dean models)
with propercare,the porcelainenamel
finishon the insideof theoven-top,
bottom, sides,back and insideof the door-
will stag new-lookingfor gears.
Lettheovencool beforecleaning We
recommendthat gouwear rubbergloves
when cleaningthe oven
Soapand waterwill normaIIgdothejob
Heavespatteringor spilloversmag require
cleaningwith a mildabrasivecleaner.Soap-
filledscouringpads may also be used
Do not allow food spillswith a high sugar or
add content (such as tomatoes, sauerkraut,
fruitjuices orpie filling)to remain on the
surface Theymag causeo dull spoteven
after cleaning
Householdammoniamag makethe
deaningjob easier.Place1/2cup ina
shallowgtassor pattergcontainerin acold
ovenovernight TheammoniafumeswiEl
helploosenthe burned-ongreaseandfood
If necessarg,gou mag usean ovencleaner
Followthe packagedirections,
Do not spray oven cleaner on the
electncat controls and switches because it
could cause o short circuit and result in
sparking or fire
Do not allow a film from the deoner to
build up on the temperature sensor-it
could cause the oven to heat improperlg
ffbe sensor is located at the top of the
oven) Carefullg wipe the sensor clean
after each oven cleaning, being careful
not to move the sensor as a change in its
position could affect how the oven bakes
Do not spray any oven cleaner on the
oven door, handles or any exterior
surface of the oven, cabinets orpainted
surfaces The cleaner can damage these
surfaces
Radiantglassmodels:
Coilcooktopmodels:
Removable Warming/Lower Oven Drawer Pan Ion some models)
NOTE:For models with an electric
warming drawer or lower oven drawer,
before performing ang adjustments,
cleaning or service, disconnect the
range electrical power supply at the
household distribution panel bg
removing the fuse or switching off the
circuit breaker, Make sure the drawer
heating element is coot
Thedrawer hasa removable panfor
ease cleaning Cleanwith hot. soapg
water and a spongeor dishtowel Drg
with a clean cloth Replacethe panin
the lowerovendrawer
Neverplace,useor self-clean the lower
oven drawer pan inthe upper oven(on
some models}
NOTE:Allow drawer to cool before
removtngpan
NOTE:Wipespillsprampttg after eachuse
Oven Vent on Radiant Glass or Coil Cooktops
Onglasscooktopmodels,theoven ventis
locatedbehindtheright-rearsurface unit
Oncoilcooktopmodelstheovenisvented
throughanopeningundertheright-rearsurface
unit
Itisnormal for steamb come out of the vent,
andmoisture mag collectunderneath it when
the oven is in use
Theventisimportantforproperaircirculation
Neverblockti]isvent
Thisareacouldbecomehotduringovenuse
24
Page 25

Thegasketis designedwith a gapat the
bottom 1oal]o,,vlo_propera}rdrculalien
Do not rubo_cleanthe door gasket--it has
an extremelyIow resistancetoabrasion
If you not;_etim gaske!bocomFngworn.
flayed #rdamagedin coy way or if il has
becomedisplacedon thedoe; youshould
havei_replaced
GEAppliances,com
Cleaning the Oven Door
Tocleantheinsideof thedoor: Toclean the outside of the door:
Onself-deanmodels:
Becausethe area insidethe gasket is
cleanedduring the self-cleoncycle.
you do not needto cleanthisbg hand,
"[heareaoutsidethegasketandthedoor
linercanbecleanedwithasoap-filled
orplasticscouringpad hotwaterand
detergentRinsewellwithavinegar
andwatersolution
Onstandard-cleanmodels:
: SoapandwaterwillnormallyworkHeavy
spatteringorspil!oversmayrequirecleaning
witho mildabrasivecleaner.Soap-filled
scouringpodsmayalsobeused
SeealsoPorcelainOvenInteriorsection
?:Usesoapandwaterto thoroughlycleonthe
top,sidesandfrontoftheovendoor,Rinse
wellYoumayalsouseaglosscleanerto
cleantheglossontheoutsideof thedoor,Do
notletwaterdripintotheventopenings
Ifanystainonthedoorventtrimis
persistent,useasoftabrasivecleanerand
o sponge-scrubberforbestresults
Spillageofmarinades,fruitjuices,tomato
saucesandbastingmaterialscontaining
acidsmaycausediscolorationandshould
bewipedupimmediatelyWhensurfaceis
coot,cleanandrinse
::/Do not use ovencleaners,cleaningpowders
or harshabrasiveson the outside of the door.
Lift-Off Oven Door
Io_k
PuI _ngelocksdowntounlock
Remove| goeitiaf_
Thedoor is verg heavg. Becareful when
removing and lifting the door.
Do not lift the door bgthe handle
Toremove the door:
[71 Fullyopenthedoo_
Pu_lthehingelocksdowntowardthedoor
frame,to the unlockedpositionAtool,
suchasosmaIlflat-bladescrewdriver,
mayberequired
[_] Firmlygraspbothsidesofthedooratthe
top
[_ Closedoorto thedoorremovalposition,
whichishalfwaybetweenthebroiJstop
positionandfu!lgclosed
[_ Liftdoorupandoutunti!thehingearmis
clearoftheslot
Toreplacethedoor:
[Z] Firmkjgraspbothsidesofthedoorat
thetop
Withthe Bolmm Hingearm
someangleas slot [
theremoval
position,seatthe
indentationofthe
hingearmintothe
bottomedgeof the
hingeslatThenotchinthehingearm
mustbefullyseatedintothebottomof
theslot
Fullyopen the door,If the doorwill not
%
fully open. theindentation is not seated
correctly inthe bottom edgeof the slot
[_ Pushthe hinge locks upagainst thefront
frame of the ovencavity to the locked
position
lock
Hinge
arm
Poshhingelacksupm lo_:k
Closetheovendoor.
_L_
25
Page 26

Care andcleaning of the range.
Oven Racks
Aflovenracksmag be cleanedbg hand
with an abrasivecleaneror steelwool
After cleaning,rinsethe rackswith clean
water and drg with a cleancloth Grog
porcelain-coatedoven racks mag remain
inthe ovenduring the selficleaning cgcle
without beingdamaged.Theshing,sider-
coloredovenracksmag remaininthe oven
during the self-cleaningcgde, but theg will
losetheir-Iusterand becomehard to slide
,Storage Drawer Removal
Toremove the drawer:
[Z] Pullthedrawer outuntilit stops,
[] Liftthe front of thedrawer untilthe
stopsclearthe guides
r3] Removethe drawer.
Oven Light Replacement
wAR. .G1
It will be necessargto greaseall oven rack
sideedgeswith alight coating ofvegetable
oilafter cleaningthem bg hand or inthe
oven Thiswill helpmaintain theease of
slidingthe racksin andout of the oven
Toreplace the drawer:
[Z] Placethe drawer rails on the guides,
[_ Pushthedrawer backuntil it stops
E_ Liftthe front ofthe drawerand push
backuntilthe stopsclearthe guides
[] Lower-thefront ofthe drawer and
pushback until it closes
Donot removean_lscrewstoremovethe
COVer,
Wire cover holder
.SHOCKOR BURNHAZARD:Before
repteong oven light bulb, unplug the
range or disconnect the electrical power
to the range at the main fuse or circuit
breaker panel Failure to do so mag
resultin electricshockor bum,
Besureto letthe lightcover and bulb cool
completelg
To remove the cover:
[Z] Holda hand underthe coverso it
doesn'tfail when releasedWith
fingersofthe samehand.firmly push
back the wire cover holder.Liftoffthe
COVer.
Oven Heating Elements
Donot cleanthe bake elementor thebroil
element Ang soilwill burnoff when the
elementsoreheated
Replace bulb with a 40-watt
appliance bulb
Toreplace the coven
Placeit into groove of the light
[]
receptacle Pullwire forward to the
centerof the coveruntil itsnaps into
place
[_ Connectelectricalpower to the range.
Tocleanthe oven floor,gentlg lift the bake
element lif element isaboveoven floorl
Cleanw th warm soapg water,
26
Page 27

Cleaning the glass cooktop, tonsomemfde s)
iH/_l i.u , ,,n, i n
Normal Dailg Use Cleaning
ONLVuse CERAHA BRYTE®Ceramic
Cooktop Cleaner on the glasscooktop
Other creams may not be as effective
Tomaintain and protect thesurface of
your glasscooktop,follow thesesteps:
Before using the cooktop for the
%
first time, clean it with CERAMA
BRYTE®Ceramic Cooktop Cleaner.
Clean your cool(top after
each spill° Use CERAMA
BRYTE_ Ceramic Cooktop
Cleaner_
This helps protect the top and makes
cleanup easier
[] Daily use ofCERAHA BRYTE®Ceramic
Cooktop Cleaner will help keep the
cooktop looking new
Burned-On Residue
in,.i ,,,,u,i, i , i,i i
Shake the cleaning cream welt Apply
@
o few drops of CERAMABR'FTE_
Ceramic Cooktop Cleaner directly to
the cooktop,
Usea papertowel or CERAMA
[]
GEAppliancesocom
BRYTE'_CleaningPadfor Ceramic
Cooktopstocleanthe entire cooktop
surface
[] Usea dry cloth or paper towel
to remove all cleaning residue No
need to rinse
NOTE: It is very important that you DO
NOT heat the cooktop until it has been
cleaned thoroughlg
Usea CERAMABRYT_:_ CleaningPadfor
CeramicCooktops
]he CEBAMABBYTE'_'CezamicCeektop
Scraperandall [ecommendedsupplies
a_eavailabteth[oughourParisCenter
Seeinstructionsunder"ToOrderPans
sectionon nextpage
NOTE:Donot usea duIIor
nickedblade
NOTE:DAMAGEto your glass surface
may occur if you usescrub pads other
than those recommended
[Z] Allow the cooktop to cool
[_ Spread a few drops of CERAHA
BRYTE®Ceramic Cooktop Cleaner on
the entire burned residue area
Using the included CERAtfABRYTE®
CleaningPadfor CeramicCool<tops,
rub the residue area,applying
pressure as needed
Heavg, Burned-On Residue
Allow the cooktop to cool
Use a single-edge razor blade
scraper at approximatel_j a 45°
angle against the glass surface and
scrape the soil It will be necessary
to apply pressure to the razor
scraper in order to remove the
residue
After scraping with the razor
scraper,spread a few drops of
CEPAHABRYTE®CeramicCooktap
Cleaneron theentireburned residue
area,Usethe CERAHABRYTE®
CleaningPadto remove ang
remaining residue
ifany residue remains,repeat the
steps listed above as needed
For additional protection, after al!
@
residue has been removed polish
the entire surface with CERAHA
BRYTE®CeramicCooktopCleaner
end a paper towel
For additional protection, after all
residue has been removed, polish
the entire surface with CERAHA
BRYTE®Ceramic Cooktop Cleaner
and a paper towel
27
Page 28

Metal Marks and Scratches
[Z] Be careful not to slide pots and
pans across gour cooktop, It will
leave metal markings on the
cooktop surface
These marks a_'e removable using
the CERAHA BRYTE® Ceramic
Cooktop Cleaner with the CERAIA
BRVTE®Cleaning Pad for Ceramic
Cooktops,
[_ If pots with a thin overlog of
aluminum or copper are allowed to
bail drg the overlag mag leave
black discoloration on the cooktop
NOTE: Carefuflg check the bottorn of
pans for roughness that would scratch
the cooktop
Cooktop Seal
To clean the cooktop seal around the
edges of the glass lag a wet cloth on it
for o few minutes, then wipe clean with
nonabrasive cleaners
Glasssurface-potential for permanent damage.
This should be removed
immediatelg before heating
again or the discoloration
mag be permanent
Our testing shows that if
gou are cooking high
sugar mixtures such as
jelly or fudge and have a
spillover; it can cause
permanent damage to the
glass surface unless the
spillover is immediately
removed_
Damage from Sugary Spills and Melted Plastic
Turn off all surface units Remove
[]
hot pans
Wearing an oven mitt:
[]
a_ Usea single-edge razor blade
scraper (CERAIVlABRYTE®
Ceramic Cooktop Scraper}to
move the spill to a cool area on
the cooktop
b. Remove the spill with
paper towels,
Ang remaining spiltover should be
left until the surface of the cooktop
hascooled
[_] Don't use the surface units again
until all of the residue has been
completelg removed
NOTE:Ifpitting or indentation in the
glass surface has alreadg occurred, the
cooktop glass wil! have to be replaced
In this case. service wilt be necessarg
To Order Parts
To order CERAHABRYTE®Ceramic
Cooktop Cleaner and the cooktop
scraper, please call our toll-free number:
National Parts Center
800.6262002
CERAMA BRVTE®Ceramic
Cooktop Cleaner #WX! OX300
CERAMA BRVTEe Ceramic
Coaktop Scraper #WXIOXO]02
Kit ..... #WB64XS027
(t<itincludes cream and cooktop scraper)
CERAMABRVTE®Cleaning Pads for"
Ceramic Cooktops #WX! 0X350
28
Page 29

Careand cleaning of the coil cooktop. Ionsom modeI J GEAppliancescom
nlnllnl,,i,l,i ii ....................... ii I' II ,,i ,i, i1,11,,,i ......
Be sure the controls are turned to OFF and the surface units are coot before attempting to remove them
Surface Units
Drip
Locking tab rim
Cooktop
Whenproperlyseated,thelockingtab
sl'_ouldlockontothe cooktoprimthrough
thehotel1inthe drip pan
TocleanthesurfaceuniLs,turn thecontrolto
thehighestsettingforaminuteThecoilswill
burnoffanysoil
Toremove o surface unit:
Toremovethedrippansforcleaning,tile
surfaceunitsmustberemovedfirst
[Z] Pushthesurfaceunitbacktowardthe
receptacletofreethelockingtabfromthe
cooktop
Surfaceunit\
Toreplace a surface uniL
[Z] Replacethe drip pan into the recessin the
cooktop Hakesure the openingin the
panlinesup with the receptacle
[] inserttheterminalsof thesurfaceunit
throughthe openinginthedrippanand
intothereceptacle
Lockingtab
lab
Locking
Receptacle
Drip
[_ Liftthesurfaceunitabout1inchabove
thedrippanandpullitout
Donatliftthesurfaceunitmarethani inch
ffyaudo,it maynotfieflatonthedrippan
whenyouplugit backin,
NOTE:Repeatedliftingofthesurfaceunit
morethani inchabovethedrippancan
permanentlydamagethereceptacle
Drip Pans
RemovethesurfaceunitsThenliftoutthedrip
pans
Forbestresults,cleanthedrippansbghand
Placetheminacoveredcontainer(ora plastic
bag}withV_cupammoniato loosenthesoi!
Rinsewithcleanwaterandpolishwithaclean
softcloth
Thedrippansmayalsobecleanedina
dishwasher`
Cleantheareaunderthedrippansoften Built-
upsoil.especiallygrease,maycatchfire
DonatcoverthedrippanswithfoilUsingfoilso
closetothereceptaclecouldcauseshock,fireor
damageto therange
[_ Pushthesurfaceunitinanddownto lock
thetab inplacesoitrestsevenlyin the
cooktop
Donotimmersethesurfaceunitsinliquidsof
anykind
Donotcleanthesurfaceunitsinadishwasher.
Donotbendthesurfaceunitplugtetminals
Donatattempttocleon,adjustorinanywa_l
repairtheplug-inreceptacle
NOTEIfyourcoaktopisequippedwithshiny
silver-coloreddrippans.donotcleantheminthe
self-cleaningoven Permanentdamageto the
finishcanoccur.
IfgoutcooktopisequippedwJtt_blackorgray
porcelain-coateddrippans.theycanbecleaned
in theovenduringtheself-cleaningcycleBefore
you begina self-cleaningcycle,removeany
heavysoilfromthedrippansandplacethemon
theporcelain-coatedovenracksDonotplace
thedrippansdirectlyontheovenbottom,After
theself-cleaningcycleiscompletedand the drip
pans are cool,w_pethemwitha damp clothto
removeany remainingash orresidue
Besureall surfaceunitsareturnedoff
beforeraisingthecooktop
Lift-Up Cooktop
Theentirecooktopmayberiftedupand
supportedin theuppositionforeasiercleaning
Thesurfaceunitsdanotneedtoberemoved;
however,youmayremoveonetomakeraising
thecooktopeasier.Therearetwosidesupports
thatlockintopositionwhenthecooktopis
liftedup
After cleaning under the cooktopwith hot, mild
soapywater and a cleancloth, lower the
cooktop Becareful notto pinchgout fingers
Tolowerthecooktoppushtherodsbackand
gentlylowerthecooktopuntilitrestsinplace
29
Page 30

Before You Call For Service...
Troubleshooting Tips
Savetime and money! Review the charts on the following
pages first and you mag not need to call for service
Possible Causes What To Do
Surface units will not Improper' caakware • Usepans which are flat and match the diameter
maintain a rolling boil being used_ of the surface unit selected
or cooking is not
fast enough
Radiant surfaceunits A fuse in gour home mag be • Replacethefuseor resetthe circuitbreaker_
do not work properly blown or the circuit breaker
tripped,
Cooktop controls ° Check to see the correct control is set for the surface
improperlg set. unit you are using
Surfaceunit stops . Thisis normal.Theunit isstillon andhot
glowing when turned
to a lower setting
Scratches (magappear Incorrect cleaning • Scratchesare not removable Ting scratcheswill become
as cracks) on radiant methods being used, lessvisiblein timeaso resultofcleaning
cooktop glass surface Cookwarewith rough bottoms • To avoid scratches,use the recommendedcleaning
being used or coarse particles procedures Hake surebottoms of cookwore are clean
(salt or'sand)were between before use and usecookwarewith smooth bottoms
the cookware and the surface
of the cooktop,
Cookware has been slid
across the cooktop surface,
GEAppliances,com
Areas of discoloration Food spillovers not cleaned . See the Cleaning the glass cooktop section
on the radiant glass before next use,
cooktop Hot surface on a model * This is normal The surface mag appear discolored
with a light-colored glass when it is hot This is [emporargand wilI disappear
cooktopo astheglasscools
Plastic melted to Hot cooktop came into • Seethe Glasssurface-potential for permanent damage
the radiant surface contact with plastic placed section in the Cleaning the glass cooktop section
on the hot cooktop,
Pitting (or indentation) Hot sugar mixture spilled • Colta qualified technician for replacement
of the radiant glass on the cooktoF
cooktop
Frequent cgcling off Improper cookware ° Use ontg flat cookware to minimize cgcling
and on of radiant being used°
surface units
Contro! signals after Youforgot to enter a ° Touch the Bake pod and desired temperature or the
entering cooking time bake temperature or Self Clean pad and desired cleon time
or delag start cleaning time,
Coilsurface units do Thesurface units are • Withthe controlsoff.checkto makesure the surface
not work properlg not plugged in solidlg, unit is plugged completelgintothe receptacle
Thesurface unitcontrols • Checkto seethe correctcontrolisset for the surface
improperly set. unityou are using.
The drip pans are not set • With the controls off, checkto make sure the drip
30 opening in the pan tines up with the receptacle
securelg in the cooktop, pan isin the recessin the cooktop and that the
Page 31

GEAppliances,cam
Probiem' _::::_i::/i:i:i::::::::::_:_::Possible Causes What To Do
Food does not bake Oven controls improperlg set., o See the Using the oven section
or roast properlg Rock position is incorrect, ° See the Using the oven section
or the rack is not leveE,.
Incorrect cookware or cookware ° See the Using the oven section
of improper size being used.
Oven thermostat needs ° See the Adjust the oven thermostat-Do it yourself!
adjustmenL section
Clock and timer do Plug on range is not completelg o Hake sure electricel plug is plugged into a live. properlg
not work inserted in the electrical outlet, grounded outlet
A fuse in gour home mag • Replace the fuse. or reset the circuit breaker
be blown or the circuit
breaker tripped.
Oven controls impropedg set. ° See the Using the clock and timer section
Oven light does Light bulb is loose or defective, o Tighten or replace the bulb
not work
Switch operating Bight ° Colt for service
is broken,,
Food does not Door not open to the broil stop o See the Using the oven section
broil properlg position as recommended.
Oven controls improperlg set, , Hake sure you touch the Broil Hi/Lo pad.
Improper rack position ° See the Broiling Guide
being used,
Cookware not suited ° For best results, use a pon designed for broiling
for broiling.
In some areas the power , Preheat the broil element for 10 minutes
(voltage) meg be low.
Oven temperature too Oven thermostat • See the Adjust the oven thermostat-Do it gourselFt
hot or too cold needs adjustment, section
Oven wil! not work Plug on range is not • Hake sure electrical plug is plugged into a live.
completelg inserted in properly grounded outlet
the electrical outlet.
A fuse in gour home mag • Replace the fuse or reset the circuit breaker,
be blown, or the circuit
breaker tripped.
Oven controls impropertg set, ° Seethe Using the oven section
Door left in the locked
position,
° Broil for the longest period of time recommended
in the Broiling Guide
° If necessarg, allow the oven to cool; then unlock
the door.
3!
Page 32

Before VouCall For Service...
Troubleshooting Tips
Possible Causes What To Do
Storage drawer Rear'drawer support is • Repositionthe drawer:,Seethe Storage Drawer
is crooked on top of the guide rail. Removalinstructions inthe Careand cleaning of
pour range section
Storagedrawer Powercordmeg be • Repositionthe drawer andpower cord Seethe
won't close obstructing drawer StorageDrawerRemovalinstructionsin the (.-areand
in the lower back cleaningof therange section
of the range,,
Rear-drawer support is • Repositionthe drawer Seethe Storage Drawer
on top of the guide raft Removalinstructions in the Careand cleaning of the
range section
Ovenwil! not self-dean Theoven temperature is • Allowtheoven to coolto roomtemperature and
too high to seta self-clean resetthe controls
operation,
Oven controls improperig set° • Seethe Using the self-cleaning ovensection
Oven door is not in the locked • Hake sure gou move the door batchhandle all the
position, wag to the right
"Crackling" or This is the sound of the • This is normal,
"popping" sound metal heating and cooling
during both the cooking and
cleaning functions.
Excessivesmoking Excessivesoil. • Touch the Clear/Offpad Open the windows to
during a clean cycle rid the room of smoke, Wait until the light on the
SelfClean pad goes off Wipe up the excess soil and
reset the cleoncgcle
Oven door will not Oven too hot. •Aitow the oven to cool below locking temperature,
unlock
Ovennot cleanafter Oven controlsnot properlg set. ° Seethe Usingtheself-cleaningovensection
a clean cgcle
"F-" and a number Youhave a function • Disconnect all power to the range for at least
or letter flash error code, 30 seconds end then reconnect power If the function
in the display error code repeats, call far service
Oven was heavilg soiled. •Clean up heavgspitlovers before starting the clean
cgcle Heavilg soiled ovens may need to self-clean
again or for a longer'period of time
- On self-cleaning models, if a function error code
appears during the self-cleaning cycle, check the oven
door latch The latch mug hove been moved, if onlg
slightlg, flom the locked position, Hake sure the batch
is moved to the right as far as it will go Touch the
Clear/Offpad Allow the ovento coolforone hour,
Putthe ovenback into operation,
32
Page 33

GEAppliances.com
:::Probiem ; Possible Causes What To Do
Display flashes "bAd" The installed connection o Contact installer or electrician to correct miswire
then "linE" with a from the house to the unit
loud tone is miswired.
Displag goes blank A fuse in gour home meg be ° Replace the fuse or reset the circuit breaker,
blown, or the circuit breaker
tripped.
The clock is turned off from o See the Using the clock and timer section
showing in the displag.
Displag flashes Power failure. • Reset the clock
Unable to get the Oven control pads were ° The Bake and Broil Hi/Lo pads must be touched
displag to show "SF" not pressed properlg, at the some time end held for 3 seconds
Power outage, Power outage or surge° ° Reset the clock. If the oven was in use, gou must reset
clock flashes it bg touching the C'lear/Offpad, setting the clock
and resetting ong cooking function,
"Burning" or "oilg" This is normal in a new oven ° To speed the process, set o self-cleon cgcle for o
odor emitting from and will disappear in time. minimum of 3 hours See the Using the self-cleaning
the vent oven section
Strong odor An odor from the insulation ° This is temporary
.... oven is normal for the first
Drawer does not slide The drawer is out of ° Fullg extend the drawer end push it olt the way in
smoothly or drags alignment. See the Care and cleaning of the range section
Warming/lower oven A fuse in gour home mag be ° RepIace the fuse or reset the circuit breoke_
drawer will not work blown, or the circuit breaker
Excessive condensation Liquid in drawer. • Remove liquid
in the drawer
Food dries out in the Noisture escaping,, • Cover food with iid or aluminum foil,
warming!tower oven
drawer Drawer not fullg closed,, • Push drawer in until latch engages
around the inside of the
few times the oven is used,,
Drawer is overloaded or load • Reduce weight Redistribute drawer contents
is unbalanced.
tripped.
Controls improperlg set. ° See the Worming drawer section
Uncovered foods,, • Cover food with lid or aluminum foil
Temperature setting too high. ° Reduce temperature setting
53
Page 34

Accessories.
LooMng For Something More?
Youcan find these accessories and many more at GEAppliancesocom(U.S,) or
www.GEAppliances.ca (Canada), or call 800.626.2002(U,S.)or 800,661.1616(Canada)
(during normal business hours). Have your model number ready.
Grates
SurfaceBurnerHeadsand Caps
OvenRacks OvenElements Light Bulbs
SurfaceElementsendDrip Pans
Experiencetheseothergreatproductsto keep yourkitchen lookinggreat!
CleaningKit. CleaningWipes Appliance Polish
Includes cleaner, Wipes
scraper and pad
WXtOXl 17GCS WXt0)(305 WXlOXtO001
Get the most out of your Broiler Pant. (Not for use with Broiler Drawer models.)
Use your pan and grid cover to broil hma_btugers, seafood, steaks, vegetables,
bacon, chops and so much more! The pan below catches !he excess t_ts and oils
= Genuine GE Pmt
• Ea_syTo Clean
• One_ear Warianty
Limited time Offe!! Free Shipping!
When you order your broiler pan within 30 days of purchasing your GE cooking product:
Smafl
USaPart # WB48XtO055
Canada Part # 22202097GO0t
Dimensions 8-3/4"Wx l- t/4" Hx I3-1/2"D
Price US$10.50t
t Plusapplicablestate salestax (PST/HSTandGST)
* Thelarge(standard)broilpen doesnot fit in 20/24"ranges.
** TheXLpan doesnot fit in 24"wal!ovens,27"drop-insor2072#"ranges
Toplace ),ourorder,call800.6262002(USJ,800.661.I616{Canada)ormai!_hisform to'
in theUS= GEParts,ROBox221027,Memphis`TN38122-1027InCanada;GEParts,I FactoryLane,Moncton,NB EIC 9M3
12-3/4"Wx t-l/4"Hx t8- t/2_D
Large*
WB48XtO056
222D2097GO02
t7" Wx I-1/4"Hx t9-t/4"D
USS14.50'
Knobs
Stainless Steel
Appliance
Cleaner
PM tOX3! t
WB48X10057
N/A
U$$16,75'
$4
Broiler Pan Order Form
Quantity PartNumber
Model Number Serial Number. Brand
Rrst Name Last Name
Address
City State
Phone E-Mail
Credit Card Check _ Money Order__
Visa __ MasterCard Discover AmEx _ Credit Card#
Exp,. Date: Month Year Signature,:
DateofPurchase
Zipcode
Page 35

GE Electric Range Warranty. GEAppliancescam
iiiii ...................
All warranty service provided by our Factory Service Centers,
or an authorized Customer Care®technician Toschedule
service, on-line, visit us at GEApptiancescam, or call
800GE CARES(800432.2737) Please have serial number
and model number available when calling for service
oEW,lprovide:
OneYear
Fromthedateof the
originalpurchase
:_:Servicetrips to your home to teach you how to use
the product.,
Improper installation, delivery or maintenance,
:::Failureof the product if it isabused,misused,or used
for other than the intended purposeor used
commerciallg,
::Replacement of house fusesorresettingof circuit
breakers.
Any part of the rangewhich failsdueto a defectin materialsor workmanship
Duringthis limited one-year warranty, GEwill alsoprovide,free of charge, alIlabor
and in-home serviceto replacethe defectivepart
Staple your receipt here 1
Proof of the original purchase j
date is needed to obtain service l
under the warranty I
i:: Damage to the product caused bg accident, fire, floods
or acts of God.
Incidental or consequential damage causedbg possible
defects with this appliance.
::!Damagecaused after delivery.
Product not accessibleto provide required service.
hi, ii , ............
Warranty. Any implied warranties, including the implied warranties of merchantability or fitness for aparticular
' EXCLUSIONOFIMPLIEDWARRANTIES--Yoursoleand exclusiveremedyisproduct repair asprovided in this Limited
purpose,are limited to one gearor the shortestperiod allowed bg law.
This warranty is extended to the original purchaser and any succeeding owner for products purchased for
home use within the USA Ifthe product is located in an area where service by a GE Authorized Servicer is not
available, you may be responsible for a trip charge or you may be required to bring the product to an Authorized
GE Service location for service InAlaska, the warranty excludes the cost of shipping or service calls to your home
Some states do not allow the exclusion or limitation of incidental or consequential damages This warranty
gives you specific legal rights, and you may also have other rights which vary from state to state To know
what your legal rights are, consult your local or state consumer affairs office or your state's Attorney
General
Warranton General Electric Company. Louisvifle, KY 40225
,JJillllL
35
Page 36

,consumersupport.
GEAppliances Website
Havea questionor needassistancewith gour appliance?TrgtheGEAppliancesWebsite24hoursa day
ang dag ofthe gear!Forgreaterconvenienceand fasterservice,gou can now download Owner's Manuals,
order parts or even scheduleservice on-line
GEAppliances.com
.ScheduleService GEAppliances°com
ExpertGErepairserviceisonly one stepaway from your door Geton-line and scheduleyour serviceat
gour convenienceang dog of the gear!Orcall800GECARES(8004322737) duringnormal businesshours
RealLife Design Studio
GEsupports the Universal Design concept-products, services and environments that con be used bg
people of all ages, sizes end capabilities We recognize the need to design fat a wide range of phgsica! and
mental abilities and impairments For details of GE'sUniversal Design applications, including kitchen design ideas
for people with disabilities, check out our Website todag. For the hearing impaired, please call 800,TDD GEAC
(800 833 4322}
Extended Warranties
Purchasea GEextendedwarrantg and learnabout specialdiscountsthat are availablewhile gout warrantg
isstillin effect Youcan purchaseitonqine angtime, or call800626 2224 during normal businesshours
GEConsumerHomeSen,iceswillstill bethereafter gourwarranty expires
GEAppliances.corn
GEAppliances.com
Parts and Accessories
Individualsqualifiedto servicetheir own appliancescan haveparts or accessoriessentdirectlg to their homes
(VISAHasterCardand Discovercards are accepted} Orderon-linetodag, 24 hoursevergdag or
bg phoneat 800626 2002 during normal businesshours
Instructions contained in this manual cover procedures to be performed by any user: Other" servicing
generatlg should be referred to qualified service personnel° Caution must be exercised, since improper
servicing mag cause unsafe operation,
Contact Us
1
If gou are not satisfiedwith the servicegou receivefrom GE.contact uson our Websitewith all the details
includinggour phone number;or write to: GeneralManager:Customer Relations
GEAppliances.Appliance Park
Louisville,KY40225
GEAppliances.cam
GEAppliances.com
Y°u---ZAppliance GEAppli._anc_es.com
I _ J Registergour new appliance onqine--at gour convenience! Timelgproduct registrationwillallow for
j _ j enhancedcommunication and prompt serviceunder theterms of gour warrantg should the need arise
k,................................,) Youmag alsomail in the pre-printed registration card includedin the packingmaterial,or detach and usethe
form in the Owner'sManual
Printed in the United States
 Loading...