

GE J2B912WEK1WW, J2B912SEK1SS, J2B912CEK1CC Owner’s Manual
ge.com
©
°_
oq
Sa_bty lndruc_ions ...... 2-7
Q_erating Indructions
Abm_hmm Foil ............ ]3
Clock am_d T]m e_............ ] 7
OveN_ ................. ] ]-28
Bakh_g a*_d Roasdm_g . . .]3, ]4
Bro]]im_g, Broi]im_g GIdde . . .15
()ve]_ C.ontro] ............ ] ]
Po_er Omage ............ ] 2
Preb ea t]m_g .............. ] 3
Sabbath Featm'e ....... 22, 23
SeIt:C]eaN_im_g ......... 27, 28
Shelves ................. 13
Special Featm'es ....... ]i9-21
Thermostat A(!il_stmel_t .... 24
Timed Bakim_g
amid Roastim_g ............ ] S
Smffime Cookim_g ......... 8-10
Griddle ................. l 0
Warmim_g Drawer . ...... 25, 26
Care and Cleaning
Broiler IPam_amid ()rid ....... 33
Bm'm_er Assembly ........ 29, 30
Burner (;rates ............. 3l
Co_tro] Pam_e] a_(] K_obs .... 32
Cooktop Sm'ti_ce .......... 31
Door ]_em oval ............ 3_'{
Drawer . ................. _'_5
Griddle .................. 29
()veN_ Bottom ............. 33
()vel_ Light RepIaceme_t .... 34
Ove]] Ve]_ ts ............... 32
Se]t:CJ ea _1_g .......... 27, 28
Shelves .................. 34
Stai_]ess Steel Sm'_;_ces ...... 31
Ins¢allation
Instrucdons .......... 36-47
Air A <]j_stm e_ t ............ 41
A_ti-Tip Device ......... 39, 47
Assemble Sm'tbce Bm'_ers . . .44
Cbecki_g Bm'_ er
lgniti(m .................. 45
Col_ect]_g the Rmge
to Gas ................ 40-42
Dime]_s]o]_s ;rod Clear;races . .38
Electrical (]o_]ecti(ms . . .43, 44
I,eve]i_g the Ravage ........ 46
I ,P ...................... 47
Troubleshooting
Accessories .............. _,2
Consumer Support
Co_sm_er S_q_port . .Bad< Cover
Prod_ct Registratio_ ..... 53, 54
'Warra _tv fl)r (]_lstom ers
i_ Ca_ada ................ 59
Warra _ ty fl)r Custom ers
i_: the [I.S.A .............. 58
In Canada contact us at:
www. GEAppliances. ca
Write the model and serial
numbers here:
Model #
Serial #
You can find them on a label
on the front of the range behind
the warming drawer.
18305580P171 49-85085 O&05JR
IMPORTANTSAFETYINFORMATION.
7
iiiiiiiiii!!Jil¸!i!i!i
m
READALLINSTRUCTIONSBEFOREUSING.
WARNING!
For your safe_ the information in this manual must be followed to minimize the risk of fire or explosion,
electric shock, orto prevent property damage, personal injury, or loss of life.
WARNING:If the information
in this manual is not followed exactly,
a fire or explosion may result causing
property damage, personal injury
or death.
-- Do not store or use gasoline or other
flammable vapors and liquids in the
vicinity of this or any other appliance.
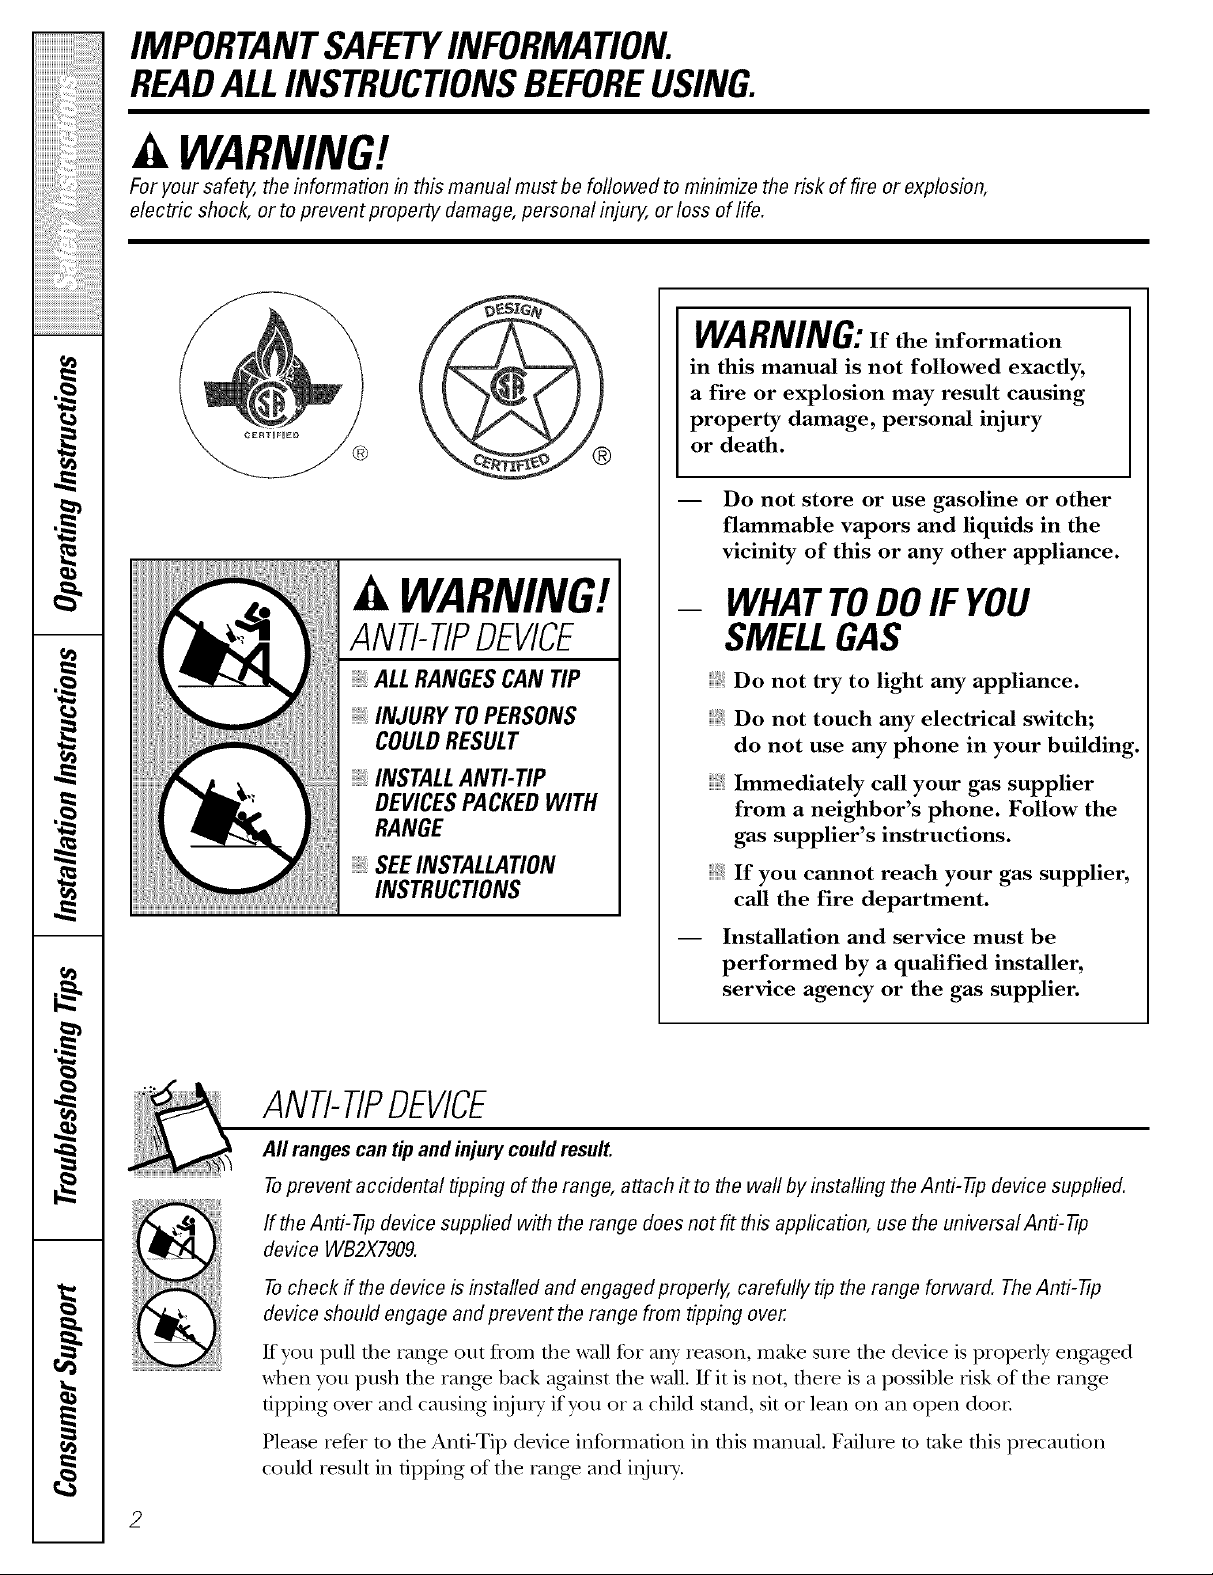
WARNING!
ANTI-TIPDEVICE
- WHATTODOIF YOU
SMELLGAS
o_
q
#.
, ALL RANGES CAN TIP
INJURY TOPERSONS
COULD RESULT
INSTALL AN_ TIP
DEVICES PACKED WITH
RANGE
SEE INSTALLAtiON
INSTRUCtiONS
Do not try to light any appliance.
Do not touch any electrical switch;
do not use any phone in your building.
Immediately call your gas supplier
from a neighbor's phone. Follow the
gas supplier's instructions.
If you cannot reach your gas supplier,
call the fire department.
-- Installation and service must be
performed by a qualified installer,
service agency or the gas supplier.
ANTI-TIPDEVICE
All rangescan tip and injury could result.
Toprevent accidental tipping of the range, attach # to the waft by installing theAnti-tip device supplied.
If the Anti-tip device supplied with the range does not fit this application, use the universal Anti-tip
device WB2X7909.
Tocheck if the device is installed and engaged properly, carefully tip the range forward. TheAnti-tip
device should engage and prevent the range from tipping over.
Kyou pull die rang_ out from die wall %r ally' reason, make snie tile device is properly engag>d
when you push the range back against tile wall. If it is not, there is a possible risk of the rang>
tipping ox_r and causing ii_juU if you oi a child stand, sit oi lean on all open door
Please Iefer m file Anti-Tip device information ill fl_is mannal. Failure m take fl_is plecaufion
could iesult ill tipping of the rang> and ii_ju U.
ge.com
WARNING!
IMPORTANTSAFETYNOtiCE
The California Safe Drinking Water and Toxic Enforcement Act requires the Governor of California to
publish a list of substances known to the state to cause birth defects or other reproductive harm, and
requires businesses to warn customers of potential exposure to such substances.
Gas appliances can cause minor exposure to four of these substances, namely benzene, carbon
monoxide, formaldehyde and soot, caused primarily by the incomplete combustion of natural gas or
LP fuels. Properly adjusted burners, indicated by a bluish rather than a yellow flame, will minimize
incomplete combustion. Exposure to these substances can be minimized by venting with an open
window or using a ventilation fan or hood.
SAFETYPRECAUtiONS
Have the installer show you the location of the range gas shut-off valve and how to shut it off if necessary.
Have yotli range installed and propeity Plug your range into a 120-voh grounded
grounded by a qualified installel, in
accordance with fl_e Installation Instructions.
Any adjusunent and service should be
performed only by qualified gas rang>
installers or service mchnicians.
Do not attempt to repair or replace any
part of your range unless it is specifically
recommended in this manual. All other
ser\dce should be referred to a qualified
technician.
outlet only. Do not remove file round
grounding prong from the plug. If in doubt
about file grounding of file home electrical
system, it is your personal responsibili w and
obligation to hax> an ungrounded outlet
replaced with a properly grounded,
three-prong outlet in accordance with
the National Electrical Code. Do not use
an extension cord with this appliance.
3
IMPORTANTSAFETYINFORMATION.
7
iiiiiiiiiiiiil;_i!i!!';i_:_i'iiiililililililililiiii_;_!_
m
,0
,0
,0
q
m
READALLINSTRUCTIONSBEFOREUSING.
aa
4
SAFETYPRECAUTIONS
Locate tile range out of kitchen traffic path
and out of drafw locations to prexent poor
air circulation.
Be sure all packaging mamrials are
removed from die rang_ before operating it
to prevent fire or smoke damag> should the
packaging material ignite.
iiiiiiiiiiii_iii
Be sure your range is correctly adjusted by
a qualified service teclmician or installer for
the type of gas (natural or LP) that is to be
used. Your range can be converted for use
with either wpe of gas. See the Installation of
the range sect.ion.
WARNING: adjnstments mnst
be made by a qualified service technician
in accordance with the nmnut_acturer's
instructions and all codes and requirements
of the authority having jurisdiction! Failure
m follow these insuucfions could iesnlt in
serious ir_juU or property damage. The
qualified ag>n W perforating this work
assumes _esponsibility for the conversion.
After prolong>d use of a range, high floor
mmperamres m W result and many floor
co_>ring_ will not withstand this kind of use.
Ne_>r install the rang> over vinyl tile or
linoleum that cannot withstand such type
of use. Nexer install it directly ox>r interior
kitchen carpeting.
Do not leme children alone or unattended
where a range is hot or ira operation.
They could be seriously burned.
Do not allow anyone to climb, stand or
hang on the o\_n doo_, wanning drawer
or cooktop. They could damage the rang_
and ex_n tip it oxen; causing sex,re personal
i@n-y.
CAUTION:Items of interest to
iiiiiiiiiiii_iii
children should not be stored ira cabinets
aboxe a range or on the backsplash of a
range---dfildren climbing on the range to
reach items could be seriously ir_nied.
WARNING:NEVERusethis
appliance as a space heater to heat or
warm the room. Doing so may resuh
iracarbon monoxide poisoning and
oxerheating of the oven.
Nexer wear loose fitting or hanging gamaents
while using the appliance. Be carefld when
reaching for imms stored ira cabinets oxer the
range. Flammable material could be ignimd
if l)ronght iracontact with flame or hot oxen
snr_tces and m W cause sex>re l)nr_as.
iiiiiiiiiiii_iii
Do not store flammable materials ira an
oxen, a range drawer or near a cooktop.
iiiiiiiiiiii_iii
Do not store or use combustil)le materials,
gasoline or other flammable vapors and
liquids in the vicinity of this or any other
appliance.
iiiiiiiiiiii_iii
Do not let cooking gTease or other flammable
materials accumulate iraor near the range.
iiiiiiiiiiii_iii
Do not use wamr on grease fires. Nex>r pick
up a flaming pan. Turn the controls off:
Smother a flaming pan on a surfime burner
by cox_ring the pan complemly with
a well-fitting lid, cookie sheet or fiat tray.
Use a multi-purI)ose dU chemical or
foam-type fire extinguisher:
Flaming grease outside a pan can be put
out by co_>ring it with baking soda o_,
if available, by using a multi-purpose dr T
chemical or foam-type fire exdnguishen
Flame ira the o_>n or wanning drawer can
be smothered completely by closing the o_>n
door or drawer and turning the control to
off orby using a multi-purpose dry chemical
or foam-type rite extinguishen
iiiiiiiiiiii_iii
Let the 1)ni_ller grates and other surt_aces
cool before touching them or leaving them
where children can reach them.
iiiiiiiiiiii_iii
Never block the vents (air openings) of the
rang>. They provide tim air inlet and outlet
that are necessa U for the range to operate
properly with conect combustion. Air
openings are locamd at flae rear of the
cooktop, at the top and bottom of the oven
door; and at the bottom of the rang> under
the wanning drawer
iiiiiiiiiiii_iii
Large scratches or impacts to glass doors
can lead to broken or shattered glass.
ge.com
WARNING!
SURFACEBURNERS
Use proper pan size--avoid pans that are unstable or easily tipped. Select cookware having flat bottoms
large enough to cover bumer grates. Toavoid spiflovers, make sure cookware is large enough to contain
the food properly. This will both save cleaning time and prevent hazardous accumulations of food, since
heavy spattering orspillovers left on range can ignite. Use pans with handles that can be easily grasped
and remain cooL
Always use tile LITE position when ignidng
the top burners arrd make sure tile burners
haw ignited.
Never leaxe tile surfirce bm_rers unattended
at hiOr flame setting:s. Boilox>rs cause smoMng
arrd greasy spillox>rs that m W catch on fire.
Adjust fire mp burner flame size so it
does not exmnd beyond tire edge of tire
cool<ware. Excessixe flame is hazardous.
Use only d U pot holders-- moist or damp
pot holders on hot surtaces may result in
1)urlrs flom steam. Do not let pot holders
come near open flames when lifting
cool<ware. Do not use a towel or oilier bu]kv
clofll in place of a pot holder
When using glass cool<ware, make sure it
is designed for mI>-of-rang> cooking.
To minimize tile possibility of bums, ignition
of flammable materials arrd spillage, turn
cookware handles toward tire side or back
of fire range wifl/out extending over
adjacent burnel_.
Caiefldly wamh foods being fcied at a high
flame setting.
Alwws heat fat slowl> arrd wamh as it heats.
Do not leave any items on fire cookmp. Tile
hot air flom the lent m W ignim flammable
imms and will irrcrease pressure iraclosed
corrtainers, which m W cause fllem m b/list.
If a combination of oils or fats will be used
in flying, stir mg>ther before heating or
as fats melt slowly.
Use a deep fat thei_nometer whenexer
possil)le to prexent oveflleafing fat beyond
tile smoMng point.
Use fire least possible amount of fat for
effecfixe shallow or deeI>lzat ruing. Filling
tire pan mo fill of fiat can cause spilloxers
when food is added.
When flaming foods are under dre hood,
turn tire fan off'. Tile tzan, if operating, m W
spread the flames.
Do not use a wok on flae cooMng surlZace
if tire wok has a round metal ring that is
placed ox>r fire burner gxam m support tire
wok. Tiffs ring acts as a heat trap, which m W
damag_ the burner gram and burner head.
Also, it m W cause tile burner m work
improperly. Tills may cause a carbon
monoxide level abo_> fllat allowed by
cu_Tent standards, resu]fing in a healfll
hazard.
Foods for flTing should be as d_T as possible.
Frost on Dozen foods or moisulre on fresh
tbods can cause hot rift to bubble up and
ox>r tire sides of tile pan.
Nexer taT to mole a pan of hot tZat,especially
a deep fat flTer _'ait until tile fat is cool.
Do not leaxe plastic items on tile cookmp--
filey m W melt if left too close to file x>nt.
Kee I) all plastics aw W from tile smlZace
billTreFs.
To ax_id tire possibility of a bum, always be
certain that tile controls for all bui_]ers are
at the OFFposition arrd all grams are cool
before atmmpting to remox_ flrem.
If rang_ is locamd near a windo_, do not
hang long curtains flint could blow oxer file
surfi_ce burners arrd cream a fire hazard.
If you smell gas, troll off tile gas to the rang_
arrd call a qualified service technician. Ne_>r
use an open flame to locate a leak.
Always ulm fire surfl_ce burner controls off
before removing cool<ware.
Do not lift the cooktop. I,ifting tire cooktop
can lead to damag> arrd improper operauon
of the rang_.

IMPORTANTSAFE INFORMATION.
7
iiiiiiiiiiiiiii_i!i!!'_i_i'iiiililililililililiiii_i_!_
m
,0
,0
READALLINSTRUCTIONSBEFOREUSING.
ELECTRICWARMINGDRAWER
Tile puq)ose of die wanning drawer
is to hold hot cooked foods at serving
temperature. Always start with hot food;
cold food cannot be heated or cooked ill
tile warming &awen
Do not use the drawer to &T newspapers.
lt'overheamd, they carl catch on fire.
Do not leax> paper products, plastics,
canned food, or combustible mamlials ill
tile drawer
Never lemejars or calls of fi_t dIippings ill
or near your drawer.
Do not waInl food ill file drawer for mole
than two ho/lrs.
Do not touch theheating element or the
interior surface of the drawer. Tilese
surfaces may be hot enough to bum.
REMEMBER:Tile inside surt_ace of tile
drawer may be hot when tile drawer
is opened.
Use care when opening tile drawer Open
tile drawer a crack and let hot air or steam
escape befoie removing or replacing food.
Hot air or smam which escapes carl cause
bums m hands, Pace and/or eyes.
Do not use aluminun_ foil to lille tile
drawer Foil is all excellent heat insulator
and will trap heat beneath it. Tills will upset
file perfoi_nance of tile drawer and it could
damag_ tile interior finish.
,0
q
#_.
COOKMEATANDPOULTRYTHOROUGHLY...
Cook meat and poultry thoroughly--meat to at least an INTERNAL temperature of 16001:and poultry to
at least an INTERNAL temperature of 180°F.Cooking to these temperatures usually protects against
foodborne illness.
SELF-CLEANINGTHEOVEN
Be sure to wipe off excess spillag> be%re
self-cleaning operation.
Before self-cleaning tile oven, remove tile
broiler pan, broiler glid, all cookw;ue and
any almninum foil.
iiiiiiiiiiii_iii
Oxen shelves should be remoxed from tile
oxen before beginning tile self-clean cycle.
iiiiiiiiiiii_iii
Clean only parts listed ill this Owner's
Manual.
iiiiiiiiiiii_iii
Do not clean the door gasket. Tile door
gasket is essential for a g_od seal. Care
should be token not to rub, damag> or
move tile gasket.
If die self-cleaning mode malfunctions,
turn tile oxen off" and disconnect tile power
supply. Ha_e it serviced by a qualified
technician.
Do not use oxen cleaners. No commercial
oxen cleaner or oxen liner of any kind
should be used ill or around ally part of
the oxen. Residue flom oxen cleaners will
damage tile inside of the oxen when tile
self-clean cycle is used.
m
rd_
a__,
6
ge.com
OVEN
Stand away from the range when opening the door of a hot oven. The hot air and steam that escape can
cause bums to hands, face and eyes.
Do ,lot use the oven for a storage area.
Imms stored in the o\>n can ig_lite.
Kee I) tile oxen flee flom grease bnildup.
Place tile oven shelx_s in the desired
position while tile oven is cool.
Pulling out tile shelf m tile stop-lock is a
convenience in lifting heaxy tbods. It is also
a precaution against burns flom ranching
hot surfaces of tile door or o_en walls. The
lowest position is ,lot designed m slide.
Do ,lot heat unopened food containers.
Pressure could build up and tile container
could burst, causing an inju U.
it WARNING:NEVERcoverany
slots, holes or passages in the oven bottom
or co_er an enfi_e rack with mamlials such
as aluminum fbil. Doing so blocks air flow
through the oven and m W cause carl)on
monoxide poisoning. Alunfinum foil lining:s
m W also trap heat, causing a fire hazard.
Do ,lot use aluminum %il anywhere in the
oxen except as described in dais manual.
Misuse could result in a fire hazard or
damage to ti_e range.
When using cooking or roasting bag:s in tiae
oven, follow the manu_acturer's directions.
Do ,lot use your oven to dU newspapers.
If ox>_tleated, tiler can catch rite.
Use only glass cool<ware that is
recommended for use in gas oxens.
Alwws _emove the broiler pan flom range as
soon as you finish broiling. Grease left in the
pan can catch fire if oxen is used witilont
removing tile g_ease flom tile broiler pan.
When broiling, if meat is mo close m tile
flame, tile fat m W ignite. Trim excess l_atto
prevent excessive time-ups.
Make sine the broiler pan is in place
correctly m reduce tile possibility of
g_ease rites.
If you should haw a grease fire in the broiler
pan, much the CLEAR/OFFpad,and kee I)
tile oxen door closed m contain rite until
it l)n,_ls ont.
For safety and proper cooking performance,
always bake and broil with the oven door
closed.
Tile unit should *lot be operamd in any
mode witi1 tile bake element temox>d.
READANDFOLLOWTHISSAFETYINFORMATIONCAREFULLY.
SAVETHESEINSTRUCTIONS
,O
Usingthegas surfaceburners.
Throughout this manual, features and appearance may vary from your model
Before Lighting a Gas Burner
Make sure all burne_ are in place.
Make sure all grates on the range are
properly placed before using any bm'ner
iiiiiiiiiiiii'?i_5:i:i:i:i:i:i:i:i:ilili_ii_!!i_!!
iiiiiiiiiiii_ii!ii!ii_ii;;i_iiil;_ii;_!)i'_%iiii_i!)!i{i
iiiiiiiiiiiiiiiiiii iiiiiiiiiiiiiiii iiiiililililililililiiiiiiii i!ill
.O
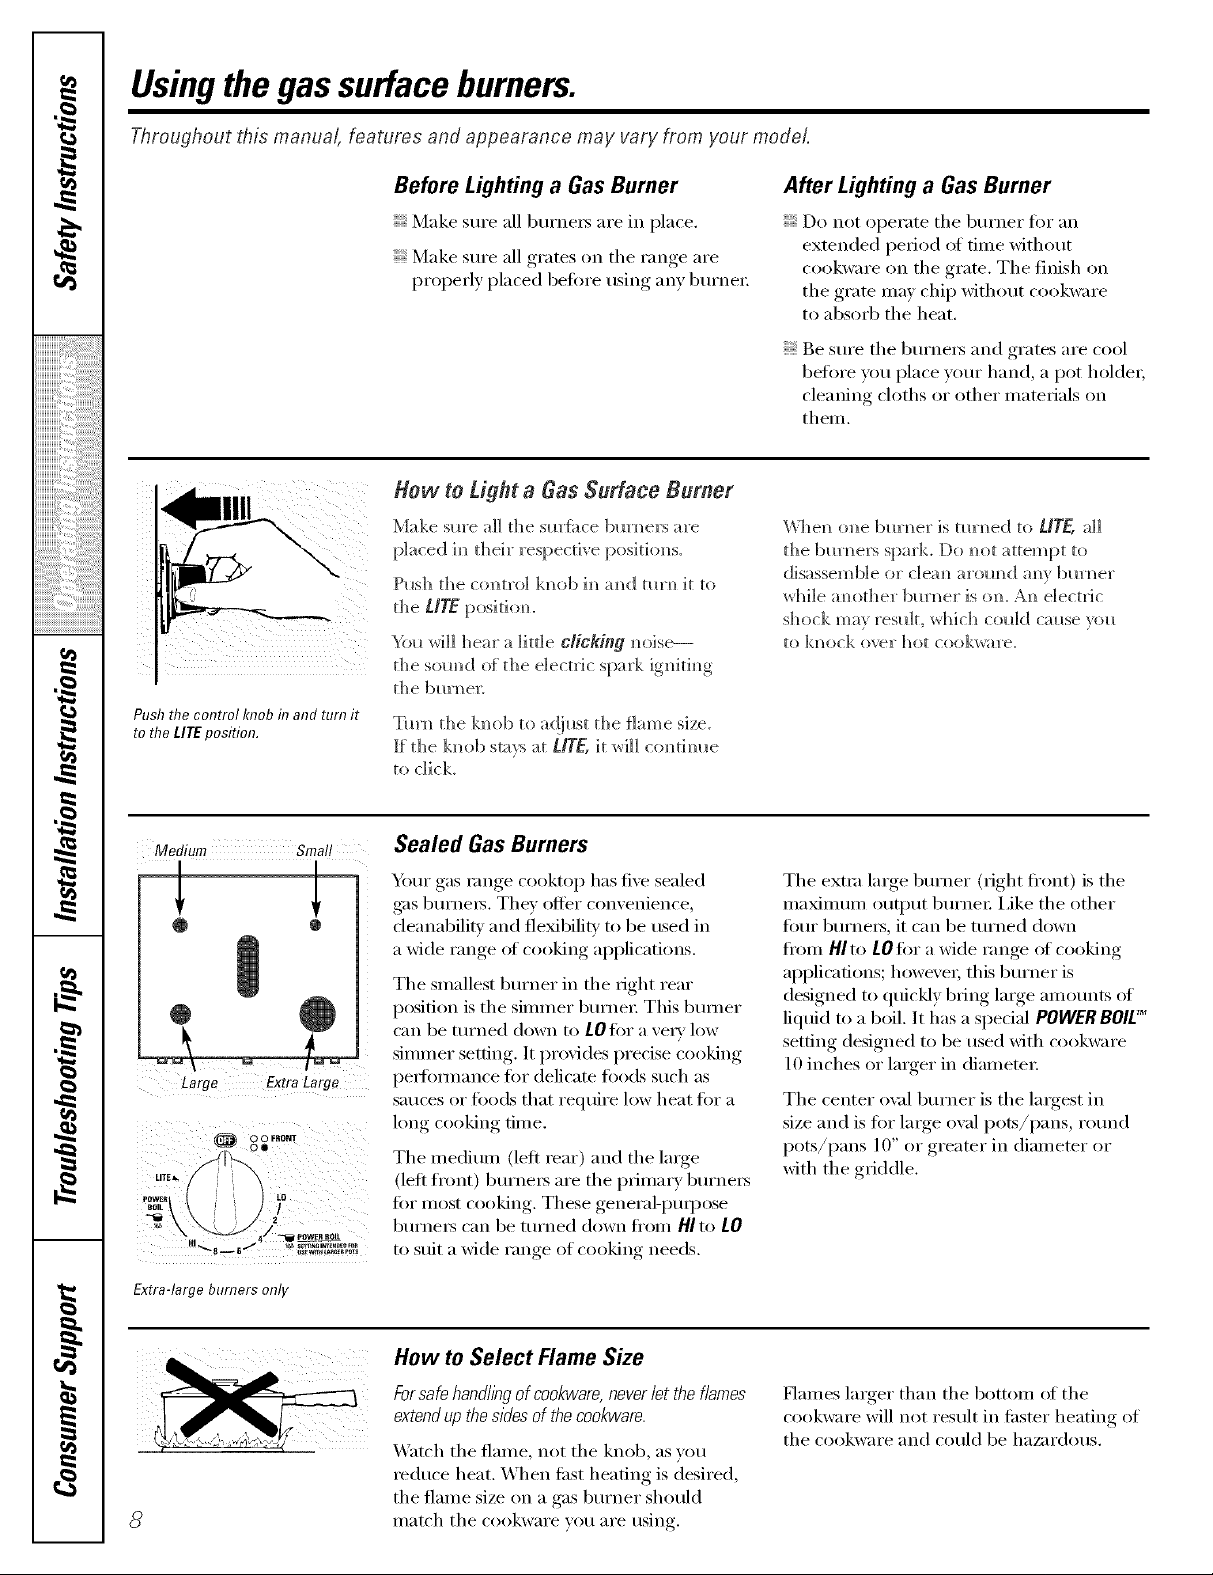
Push the control knob in and turn it
to the LITEposition.
How to Light a Gas Surface Burner
Make sm'e a]] d_e sm'fi_ce bm'm_ers are
placed h_ their respective position,s.
Push the ctmtro] kmtb im_amid mrm_ it to
the UTE posid om
S(}_ _rH]] ]lear a little CYiCking m_oise---
the somld of the electric spark ignkim_g
t]_e bm'n_ e_:
Tm'n_ the kmlb to ad}ust the flame size.
ff the kllob sta):s at/lYE, it _i]] co_tim_e
to dick
After Lighting a Gas Burner
Do not operate tile burner tot an
extended period of time without
cookware on the grate. The finish on
tile grate may chip without cookware
to absm4) the heat.
Be sm'e tile bm'ne_s and grates are cool
before you place yore" hand, a pot holder,
cleaning cloths or other materials on
them.
_l_el_ o_ie bm'n_er is mrn_ed to U]r_, all
the bm'n_ers spark, Do _ot attempt to
disassemble or c]ea_ arom_d m_v bm'n_er
_d_i]e :mother ]l)m'i_er is o1_. A]_ electric
shock ma} result, _hich co_dd cause _o_
tO kl/ock ovel" I/or cook_are.
,0
#_.
m
e,
Medium Small
l L
Large Extra Large
Extra-large burners only
Sealed Gas Burners
Yore" gas range cooktop has five sealed
g_s burners. Tile)' offer convenience,
deanabilitv and fleMbilitv to be used in
a wide range of cooking applications.
The smallest bm'ner in the right rear
position is the simmer bm'ne_: This btm_er
can be turned down to LO for a vet_' low
simmer setting. It provides precise cooking
pe_tommnce fi:,r delicate foods such as
SatlCeS or [i)ods that require low heat for a
long cooking time.
The medium (left rear) and the large
(left fi'ont) burners are tile primary burners
fi)r most cooking. These general-puq)ose
burners can be turned down fl'om /41to tO
to suit a wide range of cooking needs,
How to Select Flame Size
Forsafehandlingofcookware,neverlettheflames
extendupthesidesof thecookware.
Watch tile flame, not tile knob, as you
_educe heat. When ti_st heating is desired,
the flame size on a gas burner should
II/at('h tile cookware VO/l ai'e tlsing.
Tile extra lmge bm'ner (right fl'ont) is tile
nlaxinluln output burnei; i,ike the other
Ibm" burne_, it can be turned down
fl'om/41to LOfor a wide range of cooking
apl)lications; however; this bm'ner is
designed to quickly bring large amotmts of
liquid to a boil. It has a spedal POWERBOlE_
setting designed to be used with (-ookware
10 inches or larger in diameter:
Tile center ox_fl bm'ner is tile largest in
size and is fin" large owd pots/pans, rotmd
pots/pans l 0" or greater in diameter or
with the griddle.
Haines larger than tile bottom of tile
cookware will not result in filster heating of
tile cookware and could be hazardous.
Top-of-Range Cookware
ge.com
Aluminum: Medium-weight cookware is
recommended because it heats qtfickly
and e',enl_. Most foods brown e',enlv in an
aluminum skillet. Use saucepans with 6ght-
fitting lids when cooking with minimum
aXllO/xxlts of watei:
Cast-Iron: If heated slowly, most skillets will
give satisthctorv results.
Enamelware:Under some conditions,
tile enai/lel of soille cookwaFe ill,iv i/xelt.
Follow cookwax'e iilan/iJ[ilctui'ei"s
recommendations fin" cooking methods.
Stove TopGrills
Do not ....use stove toI _ ,grills on _om', sealed
gas burnexs. If you use the stoxe top grill
on tile sealed gas bm'ner, it will cause
incomplete combustion and can result
in exposul'e to Cal'bon illonoxide lexels
aboxe allowable cmTent standards.
Glass: There are two t,ipes ot glass
cookwax'e--those tot ovexl txse oxllv and
those for u>p-of-range cooking (saucepans,
coffee and teapots). Glass conducts heat
very slowly.
Heatproef Glass Ceramic: Can be used tot
either sm_i_ce or oven cooking. It conducts
heat vex?' slowly and cools very slowly: Check
cookware I/l_lnH[ilCttlI'eI"S directions to be
sure it can be used on gas ranges.
Stainless Steel'. This metal alone has poor
heating properties and is usually combined
with coppex; aluminum or other metals for
improved heat distribution. Combination
metal skillets usually work satisfi_ctorik if
they are used with medium heat as the
IIl_l n/l[il Cttli'ei" i'ecoxi/iilends.
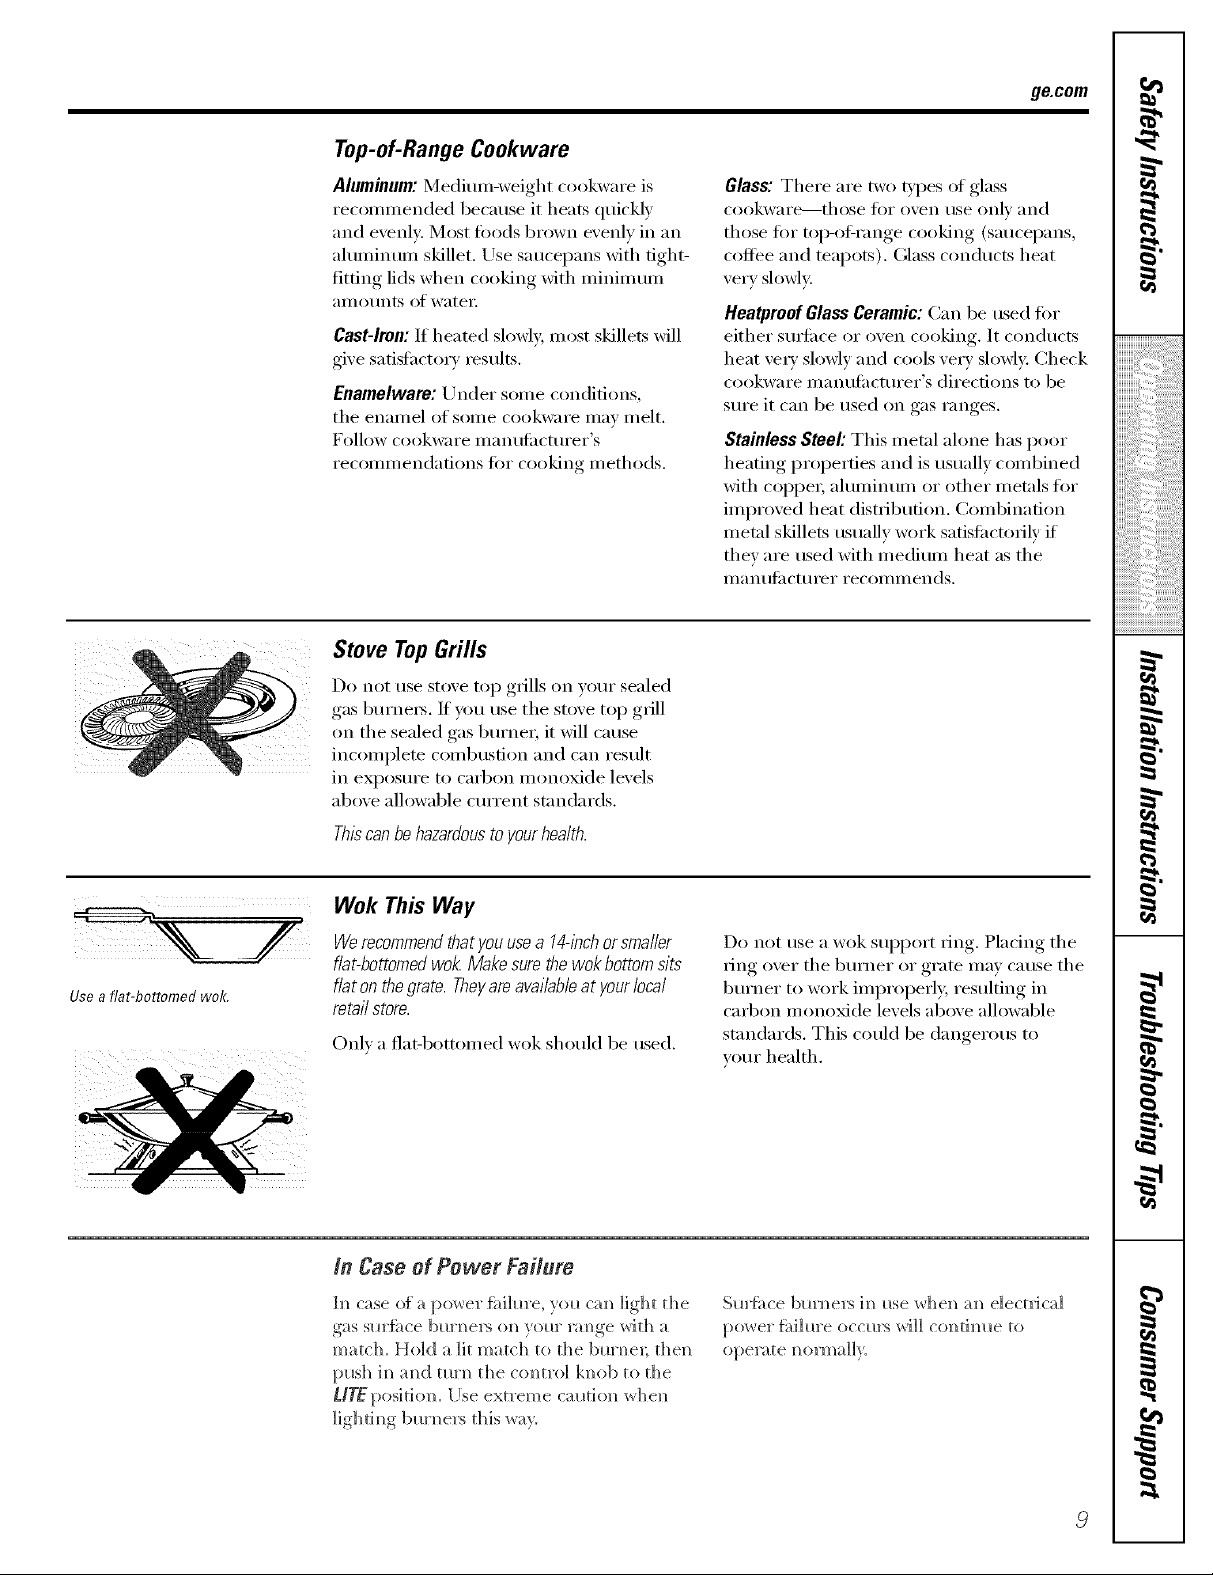
Use a fiat-bottomed wok.
Thiscanbehazardoustoyourhealth.
Wok This Way
Werecommendthatyou usea 14@chor smaller
fiat-bottomed wok Make sure thewok bottomsits
fiat onthe grate. Theyare available at yourlocal
re,taftstore.
Onl) a fiat-bottomed wok should be used.
In Case of Power Fai&re
h_ case of a po_er fi_ih*re, yol* cam_ light the
gas sHrfi_ce blll'm?elN on Vollr l_mge with a
match. Hold a ]it match to the bm'm_e_; the]_
push ]m_amid tm'm_ the com_tro] k]_ob to the
L/gfpos]do]_. Else extreme cal_d(m whe]_
lighdm_gbm'm_ers this wa):
Do not use a wok support ring. Placing tile
ring over tile bm'ner or grate may cause tile
burner to work improperl> resulting in
cad)on monoMde levels above allowable
standards. This could be dangerous to
veto" health.
Sm'fi_ce bm'mlers h_ 10sewhe]_ am_electrical
power fhi]m'e oco_rs wi]] co]_tim_e to
,0
Usingthegriddle.
_A_ur non-stick coated griddle provides
an extra-large cooking sur_i_ce for ineats,
pancakes, or other tood usually prepared
in a fl'ving pan or skillet.
How to Insert the Griddle
11111111113"¸ ........
A CAUTION:Placeandremovethe
griddle only when all grates and griddle are cool
and all surface units are turned OFF.
The griddle can only be used with the
center bm'ne_; To insert the griddle,
remove the center grate and replace with
the griddle,
iiiiiiiiiiiiiiiiiii iiiiiiiiiiiiiii ii, iiiiililililililililiiiiii ii i!il
Using the Griddle
,0
,0
q
Most gddd]ed {bods x'eqlfi_'e coo]d_g
o_ a p_'eheated sm'fi_ce. P_'eheat g_'idd]e
accox'di_g to the gtdde below, the_ S*,VitCh
to the de@'ed cook setti_g.
TypeofFood
Preheat
Conditions
Warming
Tortillas
Pancakes
Hamburgers
FriedEggs
Bacon
Breakfast
SausageLinks
HotSandwiches
(suchas
GrilledCheese)
none
5(MED-HI)
3min.
7(MED-HI)
5min.
HI
5min.
none
HI
5min.
HI
4min.
Cook
Setting
3(MED-LOW)
4(MED)
7(MED-HI)
4(MED)
5(MED)
5(MED)
HI
NOTE"Yourgriddlewill discolorovertimeasit
becomesseasonedwithuse.
IMPORTANTNOTES:
Avoidcookingextremelygreasyfoodsandbe
carefulofgreasespill-overwhilecooking.
Donotuseoffonthegriddleforextendedlengths
oftime.Permanentstainingand/orcrazefineson
thesurfacecouldresu£
Neverplace orstore any itemson thegriddle,
evenwhen it isnot inuse. Thegriddle can
becomeheated when usingthesurrounding
burners.
Do not overheat thegriddle. Leavingthe
griddle burneron at HIfor an extendedamount
of t/?newithout foodcan damagethenon-stick
coa tlbg.
Avoid usingmetal utensilswith sharppoints pr
roughsharpedgeswhichm/ght damagethe
griddle surface.
Donot cut foodson thegriddle.
NOTE: Griddle settings may need to be adjusted
if the griddle is used for an extended time.
m
10
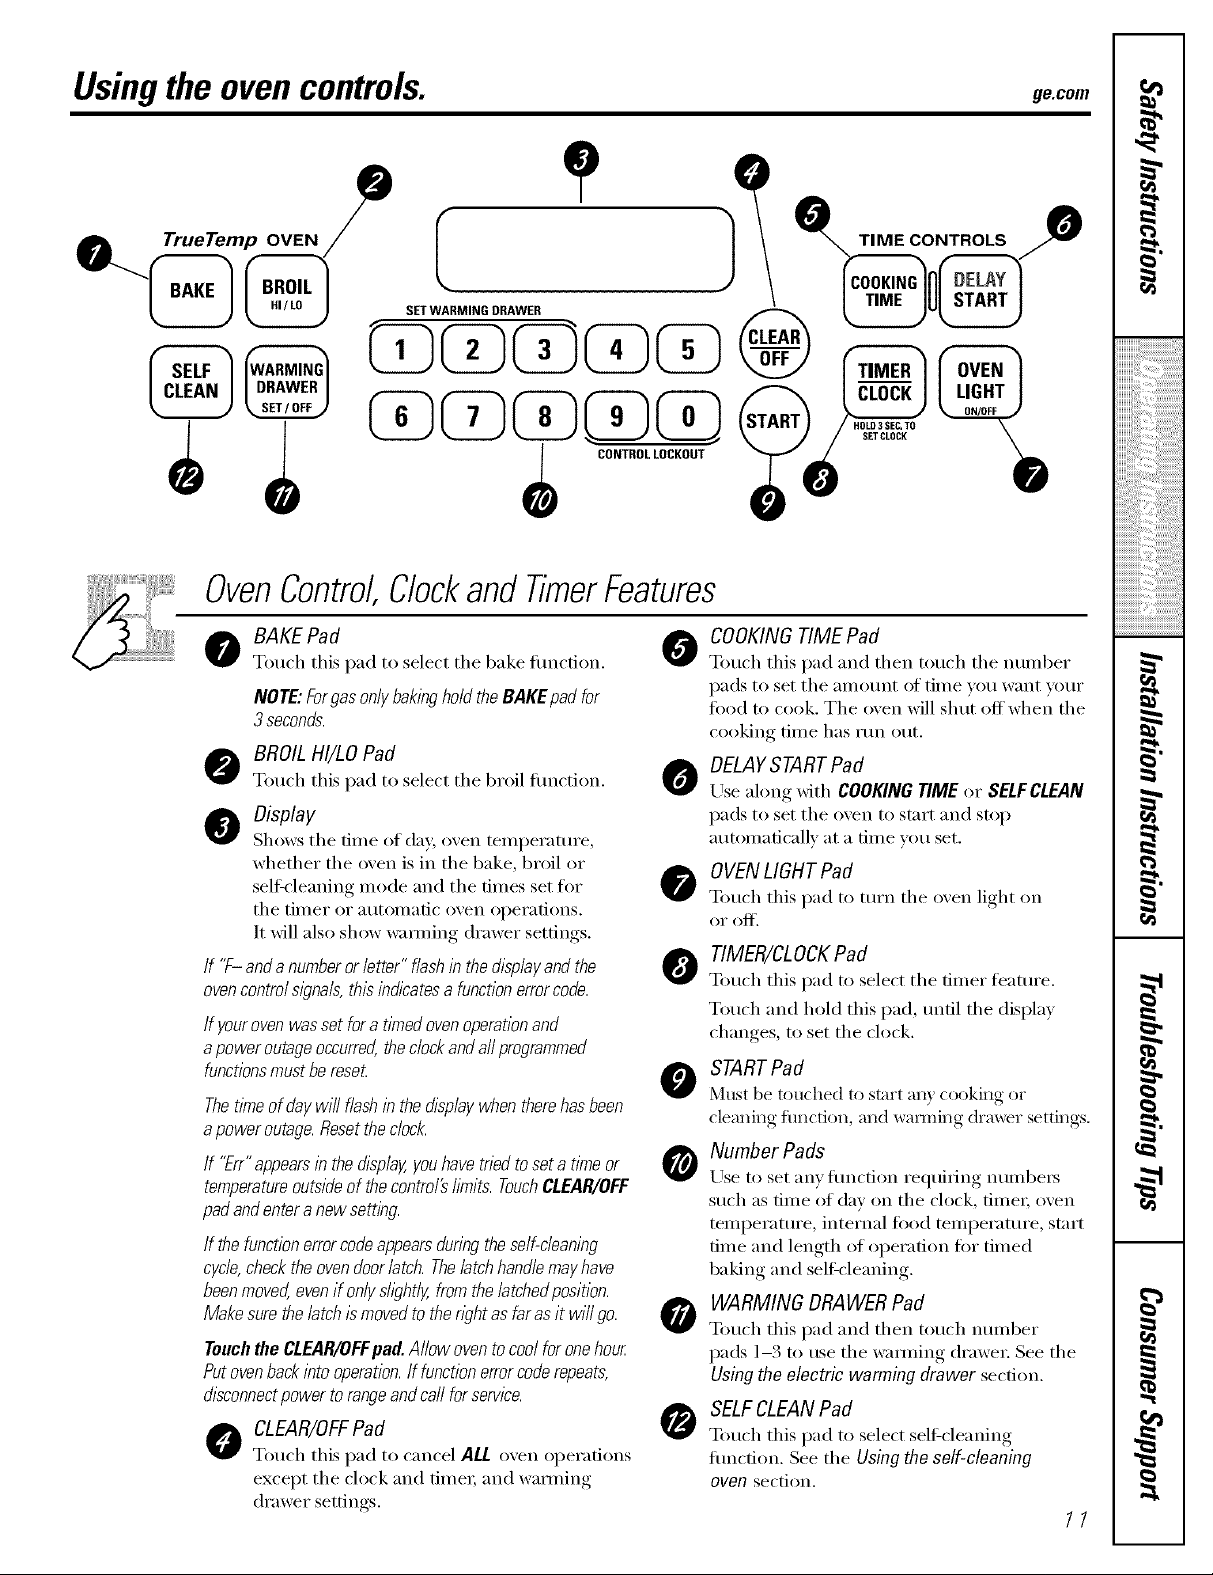
Usingthe ovencontrols, gecom
mp OVEN
CONTROLLOCKOUT
OvenControl,ClockandTimerFeatures
BAKE Pad
0
Touch this pad to select tile bake fiulction.
NOTE:ForgesonlybakingholdtheBAKEpadfor
3 seconds.
BROILHI/LO Pad
Touch this pad to select tile broil fiulction.
O Display
Shows tile dine of da)', oven teini)erature ,
whether the oven is in the bake, broil or
self:_'leaning inode and tile dines set for
tile timer or autonlatic ()veil ol)erations.
It will also show wamiing drawer settings.
If "f- anda numberorletter"flashinthedisplayandthe
ovencontrolslgna& thisindicatesa functionerrorcode.
If yourovenwassetfora timedovenoperationand
apoweroutageoccurred,thedockandaftprogrammed
functionsmustbereset
Thetimeofdaywill flashinthedisplaywhentherehasbeen
apoweroutage.Resettheclock.
If "Err"appearsinthedisplay,youhavetriedtoseta timeor
temperatureoutsideofthecontro/#bruits.TouchCLEAR/OFF
padandenteranewsetting.
If thefunctionerrorcodeappearsduringtheself-cleaning
cycle,checktheovendoor/atch.Thelatchhandlemayhave
beenmoved,evenif onlysh)ht/y,fromthe/atchedposition.
Makesurethelatchismovedtothewht asfarasit wi//go.
TeuehtheCLEAR/OFFflad.A/lowoventocoolforonehour
Putovenbackintooperation.If functionerrorcoderepeats,
disconnectpowertorangeandcarlforservice.
CLEAR/OFFPad
Touch this pad to cancel ALLoxen oi)ei'afions
except the clock and fiinei; and wamiing
drawer settings.
O COOKINGTIMEPad
Touch this pad and then totl('h tile ntllllbeI"
pads to set tile ainount of tinie you want your
tood to cook. The oven will shut offwhen the
cooking tiine has run out.
O DELAYSTARTPad
Use along _dth COOKINGTIMEor SELFCLEAN
pads to set tile oven to start and stop
atltOlllaticallv at a [lille vo/i set.
OVENLIGHT Pad
Touch this pad to turn tile oxen light on
(II" (111}'.
TIMER/CLOCKPad
To/l(-h this pad to select tile tiiller leattli'e.
Touch and hold this pad, until the display
changes, to set the clock.
STARTPad
Must be totlched to start any cooking or
cleaning flmction, and wai_ning di'm_r settings.
Number Pads
Use to set }lily tilnction reqtlilJng ntllllbei3
such as tiIne of day on the clock, tiIneI; oven
teini)erature, internal food teInI)erature, start
dine and length of operation for tiined
baking and self:cleaning.
WARMING ORAWERPad
0
To/lch this pad and then to/l(h ntllllber
pads 1-3 to tlse tile waiming di'awei: See tile
Using the electric warming drawer section.
SELFCLEANPad
Touch this pad to select self:cleaning
flulction. See tile Usingthe self-cleaning
ovensection.
11
Usingthe oven.
,0
Toavoid possible bums, place the shelves in the desired position before you turn the oven on.
Before you begin...
iiiiiiiiiiiii'i_'i_5:i:i:i:i:i:i:i:i:i;i;i_ii_!!i_!!
,0
,0
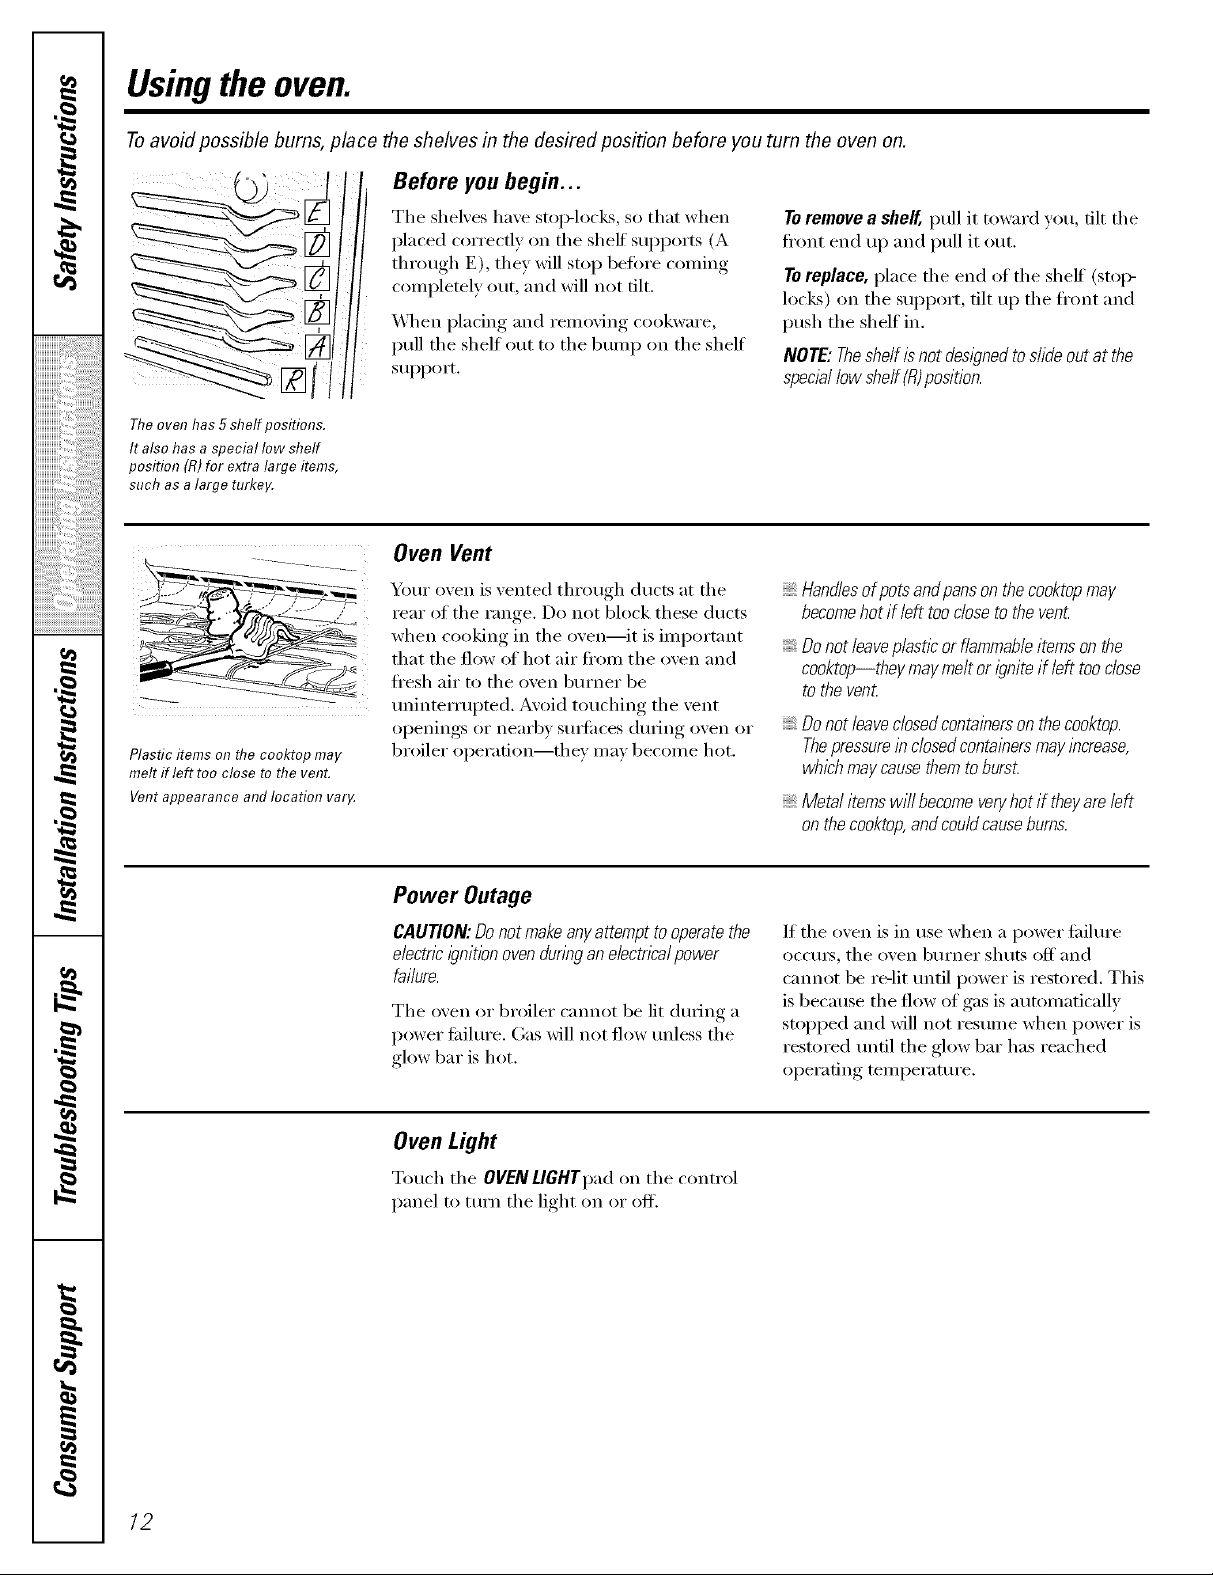
Theoven has 5 shelf positions.
It also hasa special low shelf
position (R)for extra large items,
such as a large turkey.
iiiI
i_ i i i
Plastic items on flTecooktop may
melt if left too close to the vent.
Vent appearance and location varg
_Z.. ¸
The shelves have stop-locks, so that when
placed correctly on the shelf supports (A
through E), they will stop before coming
completely out, and will not tilt.
When placing and removing cookware,
pull the shelf out to the bumI_ on the shelf
support.
Oven Vent
Your oven is vented through ducts at the
rear of the range. Do not block these ducts
when cooking in the oven--it is important
that the flow of hot air fl'om the oven and
ti'esh air to the oven burner be
mfinterrupted. Avoid touching the vent
openings or nearby smti_ces dtwing oven or
broiler operation--they may become hot.
To remove a sheff, pull it toward you, flit the
fl'ont end up and pull it out.
To replace, place the end of the shelf (stoi>
locks) on the support, tilt up the ti'ont and
push the shelf in.
NOTE'.Theshelf is not desl)ned toshde out at the
speciallow sheff (fl)position.
Handlesofpotsandpansonthecooktopmay
becomehotif lefttoocloseto thevent
Do not leaveplastic or flammableitems onthe
cooktop--they may melt or igniteif left too close
to thevenL
Do not ieavedosed containerson thecooktop.
Thepressurein dosedcontalbersmay lbcrease,
whichmay causethem toburst.
Metai items wiii becomeveryhot if theyare/eft
on the cooktop,and couldcausebums.
Power Outage
CAUTION:Donotmakeanyattempttooperatethe
e/ectncignitionovendunngane/ectncaipower
failure.
The oven or broiler cmmot be lit dining a
q
power fifilm'e. Gas will not flow tmless the
glow bar is hot.
If the oven is in use when a power fifilm'e
occm_, the oven bm'ner shuts off and
cannot be re-lit until power is restored. This
is because the flow of gas is automatically
stopped and will not resunle when power is
restored tmfil the glow bar has reached
operating temperature.
Oven Light
Touch the OVEN LIGHTpad on the control
panel to mrn the light on or off.
m
12
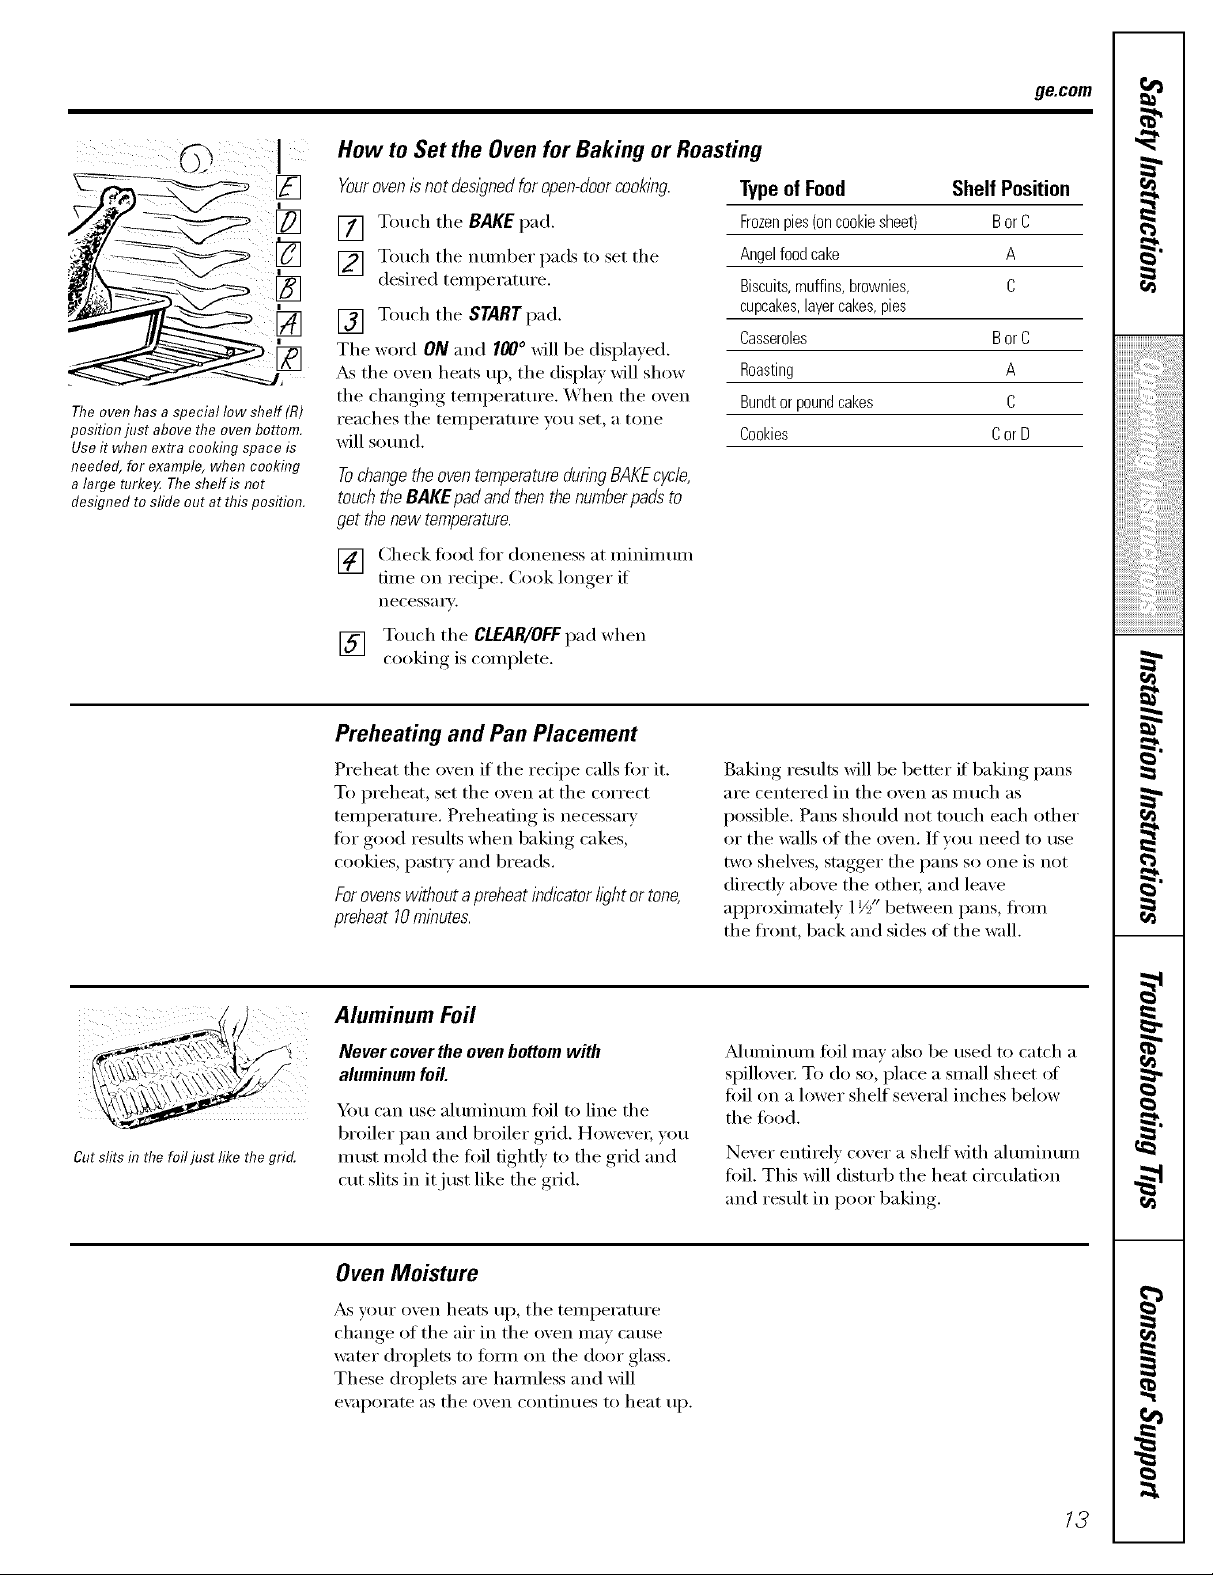
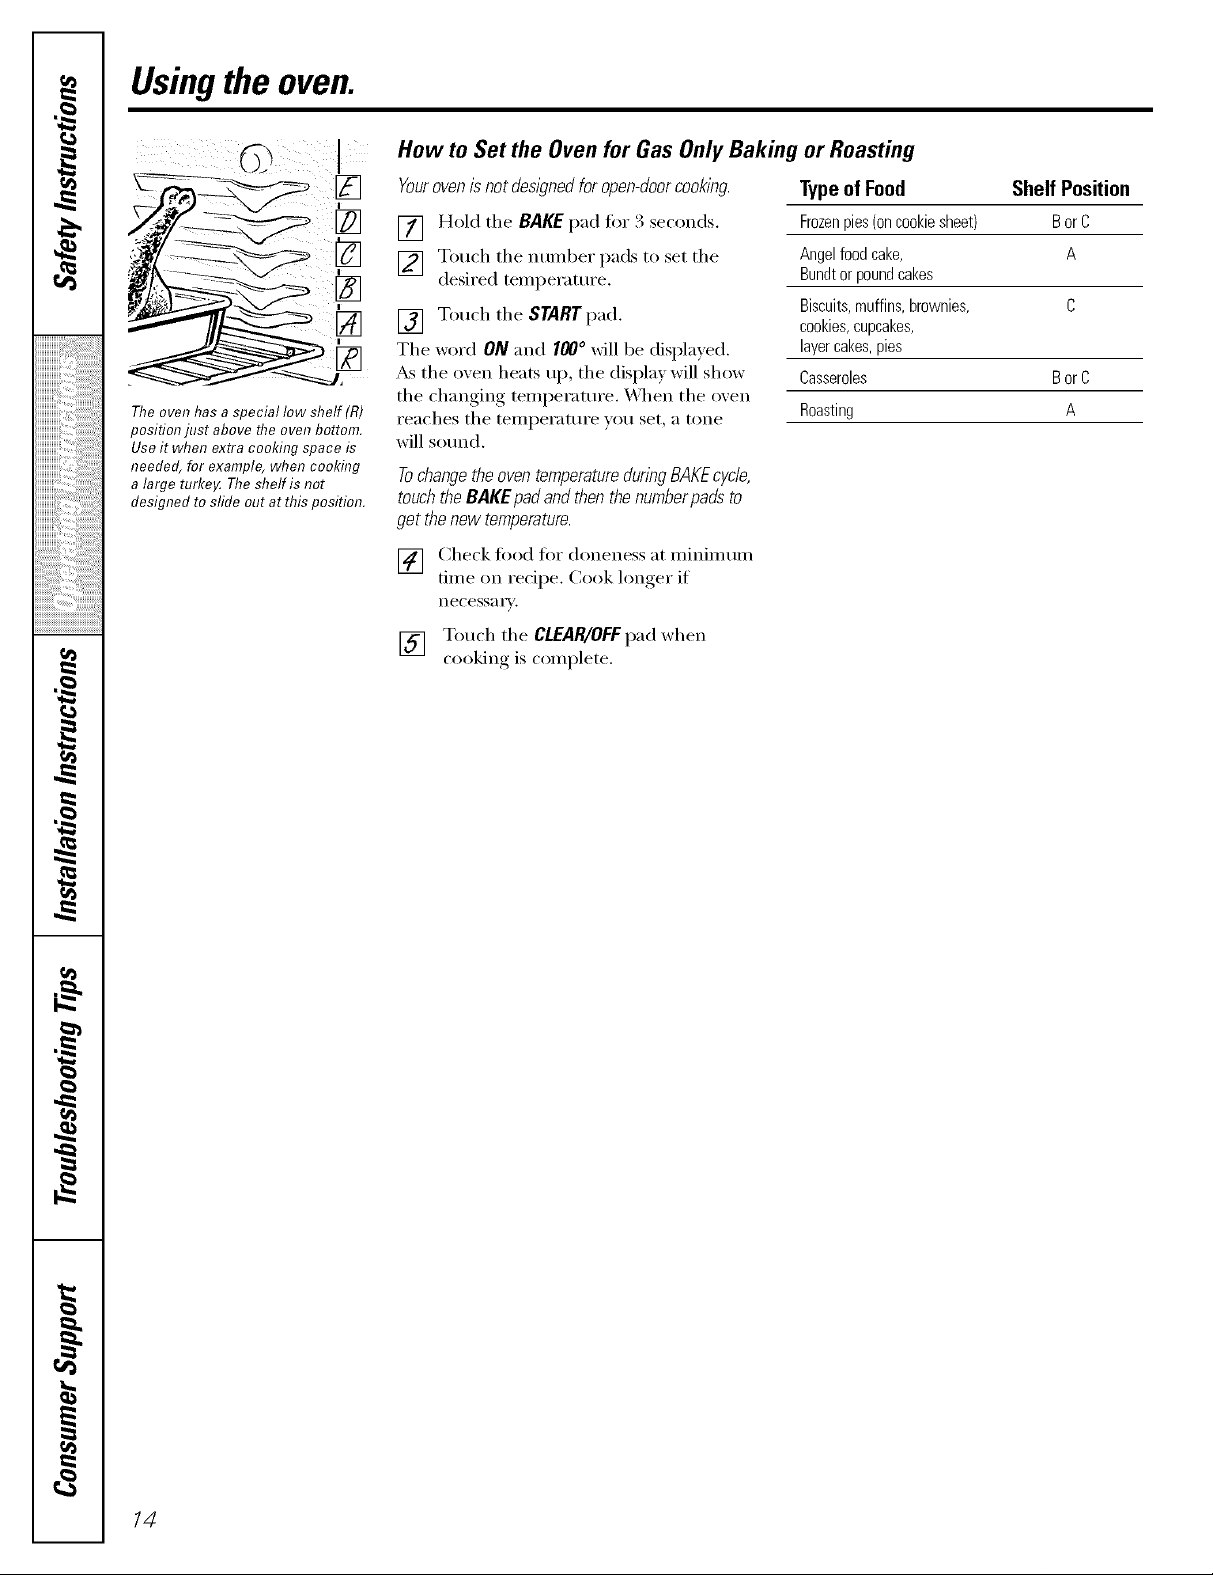
How to Set the Oven for Baking or Roasting
ge.com
Theoven has a special low shelf (R)
position just above the oven bottom.
Useit when extra cooking space is
needed, for example, when cookhTg
a large turke_ The shelf is not
designed tosfide out at this position.
Yourovenis notdesigned foropen-doorcooking.
[] Touch the RAKE pad.
[] Touch tile ntII/lbeI" pads to set tile
desired tenlperature.
[] Touch tile START pad.
Tile word ON and 100 ° will be displayed.
_&stile ()veil heats up, tile display will show
tile changing tenlperamre. When tile oven
reaches tile tenlperature you set, a tone
will sound.
TochangetheoventemperaturedunbgBAKEcycle,
touchtheRAKEpadandthenthenumberpadsto
getthenewtemperature.
[] (_heck fi)od fl)r aloneness at nlinini uni
dine on recipe. Cook longer if
necessa i'v.
[] Touch tile CLEAR/OFFpad when
cooking is coniplete.
Preheating and Pan Placement
Typeof Food Shelf Position
Frozenpies(oncookiesheet) BorC
Angelfoodcake A
Biscuits,muffins,brownies, C
cupcakes,layercakes,pies
Casseroles BorC
Roasting A
Bundtor poundcakes C
Cookies Cor D
Cut slits in the foiljust like the grid.
Preheat tile oven if' tile recipe calls fi)r it.
To preheat, set tile oven at tile correct
tenlperature. Preheating is necessary
fi)r good results when baking cakes,
cookies, pastry and breads.
Forovenswithout apreheat indicator l/#htor tone,
preheat 10minutes.
Aluminum Foil
Never cover the ovenbottom with
aluminum foil.
Y))/I can use ahuninunl foil to line tile
broiler pan and broiler grid. HoweveI; you
Inust inold the fi)il tightly to the gild and
cut slits in it just like the gild.
Oven Moisture
_S VOtlI" ()\/ell heats tip, tile tei/lpei';ittli'e
change of tile air in tile oven nlay cause
wamr droplets to form oil tile door glass.
These droplets are haimless and will
e\;ipoi'ate as tile ()veil contintles to heat tip.
Baking results will be better if baking pans
aI'e centei'ed in tile ()veil as illtlch }is
possible. Pans should not much each other
or the wails of the oven. If you need to use
two shelves, stagger the pans so one is not
directly above the othei; and leave
approMnlately 1½" between pans, fl'oIn
the fl'ont, back and sides ot the wall.
Munfinunl toil nlav also be used to catch a
spillovei: To do so, place a snlall sheet ot
fi)il on a lower shelf several inches below
tile fi)od.
Never entirely cover a shelf with ahuninunl
fi)il. This will disturb the heat circulation
and result in poor baking.
13
Usingthe oven.
,0
How to Set the Oven for Gas Only Baking or Roasting
Yourovenis notdesigned foropen-doorcooking.
[] Hold the RAKE pad fi_ 3 seconds.
[] Touch the nt/i/lber pads to set the
!
!
desired temi,_eratm'e.
[] Touch the STARTpad.
The word ON and 100° will be displayed.
_s the oven heats up, the display will show
iiiiiiiiiiiii_.....i_,i_iii_:i:i:i:i:i:i:i:i:ilili_ii_!!i_!!
The oven has a special low shelf (R)
position just above the oven bottom.
Use it when extra cooking space is
needed, for example, when cooking
a large turke,AThe shelf is not
designed tosfide out at this position.
the changing temperature. _\]aen the oven
reaches the temperature you set, a tone
will sotmd.
Tochangethe oventemperaturedunng BAKEcycle,
touchtheBAKEpadand thenthe numberpads to
get thenew temperature.
[] Check fi_od fl_r doneness at minim mn
time on recipe. Cook longer if
necessa i'v.
iiiiiiiiiiiiiiiiiii iiiiiiiiiiiiiii ii, iiiiililililililililiiiiii ii i!il
[] Touch the CLEAR/OFFpad when
cooking is colnplete.
,0
Typeof Food Shelf Position
Frozenpies (oncookie sheet) Bor C
Angelfood cake, A
Bundtor poundcakes
Biscuits,muffins, brownies, C
cookies,cupcakes,
layer cakes,pies
Casseroles Bor C
Roasting A
,0
q
m
14
How toSet the Ovenfor Broiling
ge.com
[] Place the meat or fish on the broiler
grid in the broiler pan.
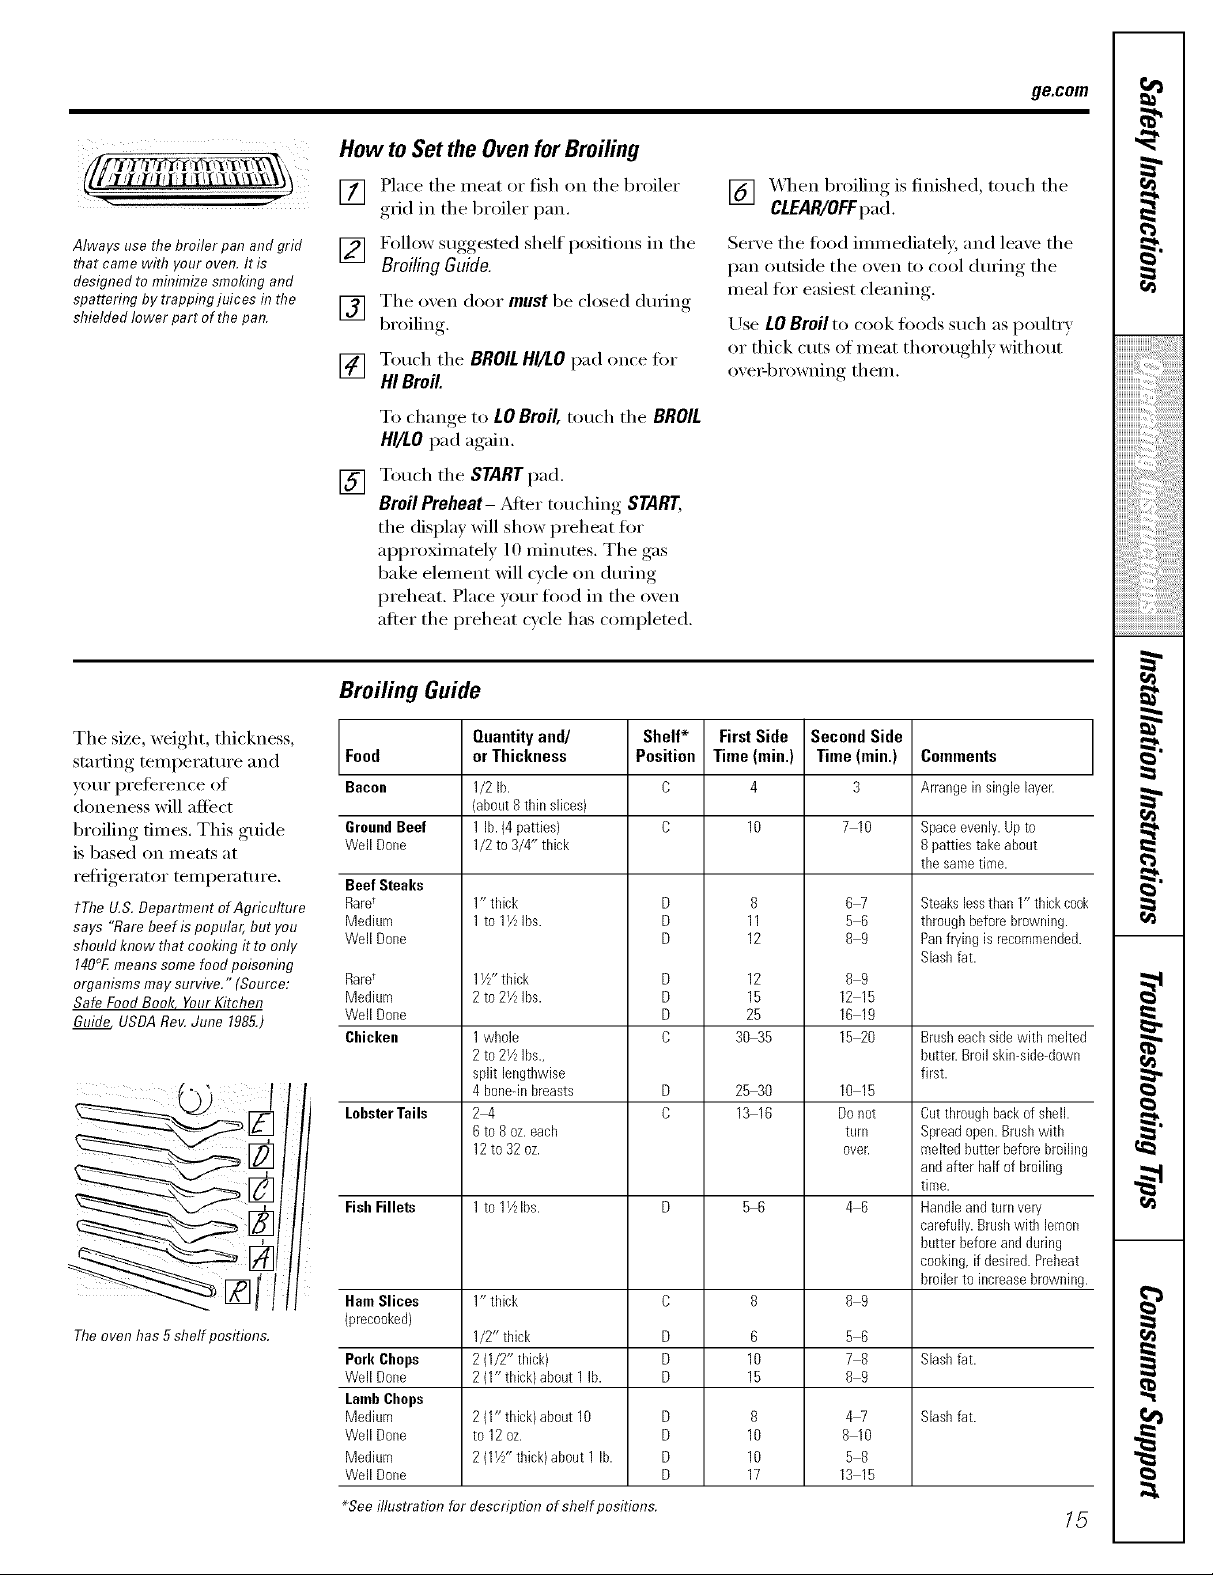
Always use the broiler pan and grid
that came with your oven. It is
designed to minimize smoking and
spattering by trapping juices #7the
shielded lower part of the pan.
[] Follow suggested shelf positions in the
Broiling Guide.
[] The oven door must be closed dining
broiling
[] Touch the BROILHI/LO pad once ti)r
HI Broil.
To change to LO Broil, touch the BROIL
HI/LO pad again,
[] Touch the STARTpad.
Broil Preheat- Adter touching START,
the display will show preheat for
approximately 10 minutes. The gas
bake element will cycle on during
preheat. Place your fl)od in the oven
after the preheat cycle has completed.
Bruiting Guide
The size, weight, thickness,
,stnrtino_ temperature and Food
vottr preference ol Bacon
aloneness will afli_ct
broiling times. This gtfide GroundBeef
is based on meats at
refiJgerator teml)erattu'e, Beef Steaks
tThe U.S. Department ofAgriculture Rare_
says "Rare beef is popular,but you Medium
should know that cooking it to only Well Done
140°Emeans some food poisonflTg
organisms may survive." (Source: Rare_
Safe Food Book YourKitchen Medium
Guide USDARev.June 1985.) Well Done
Theoven has 5 shelf positions.
Well Done
Chicken
LobsterTails
Fish Fillets
Ham Slices
")recoeked)
Pork Chops
Well Done
LambChops
Medium
Weii Done
Medium
Well Done
Quantityand/
orThickness
1/2 lb.
(about8 thinslices)
1 lb.(4 patties)
1/2to 3/4" thick
1" thick
1to 1½Ibs.
1½" thick
2to 2YzIbs.
1whole
2to 2½Ibs.,
split lengthwise
4 bone-inbreasts
24
6to 8 oz.each
12to 32oz.
1to 1½Ibs.
1" thick
1/2" thick
2(1/2" thick)
2(1" thick)about 1 lb.
2(1" thick)about 10
to 12oz.
2(1½" thick)about 1lb.
Shelf*
Position
D
D
D
D
D
D
C
D
D
D
D
D
D
D
[] _,_q_en broiling is finished, touch the
CLEAR/OFFpad.
Serve the food immediately, and leave the
pan outside the oven to cool dtu_ing the
meal for easiest cleaning.
Use LOBroil to cook toods such as poultry
or thick CtltS of nleat thorotlghly without
ove_q)rowning them.
First Side
Time (rain.)
4
11
12
12
15
25
30_5
2530
1316
56
10
15
10
10
17
Second Side
Time (rain.)
3
7 10
8
6
8
67
56
89
89
1215
1619
15_0
10 15
Donot
turn
oveE
46
89
56
78
89
4W
8 10
58
13 15
Comments
Arrangein single layer.
Space evenly. Up to
8 patties take about
the same time.
Steakslessthan 1" thickcook
throughbeforebrowning.
Panfryingis recommended.
Slashfat.
Brusheachside with melted
butter.Broil skin-side-down
first.
Cutthroughbackof shell.
Spreadopen.Brushwith
meltedbutterbefore broiling
andafter halfof broiling
time.
Handleandturnvery
carefully.Brushwith lemon
butterbefore andduring
cooking,if desired.Preheat
broilerto increasebrowning.
Slashfat.
Slashfat.
_See illustration for description ofshelf positions. _5
,0
Usingthe clock andtimer.
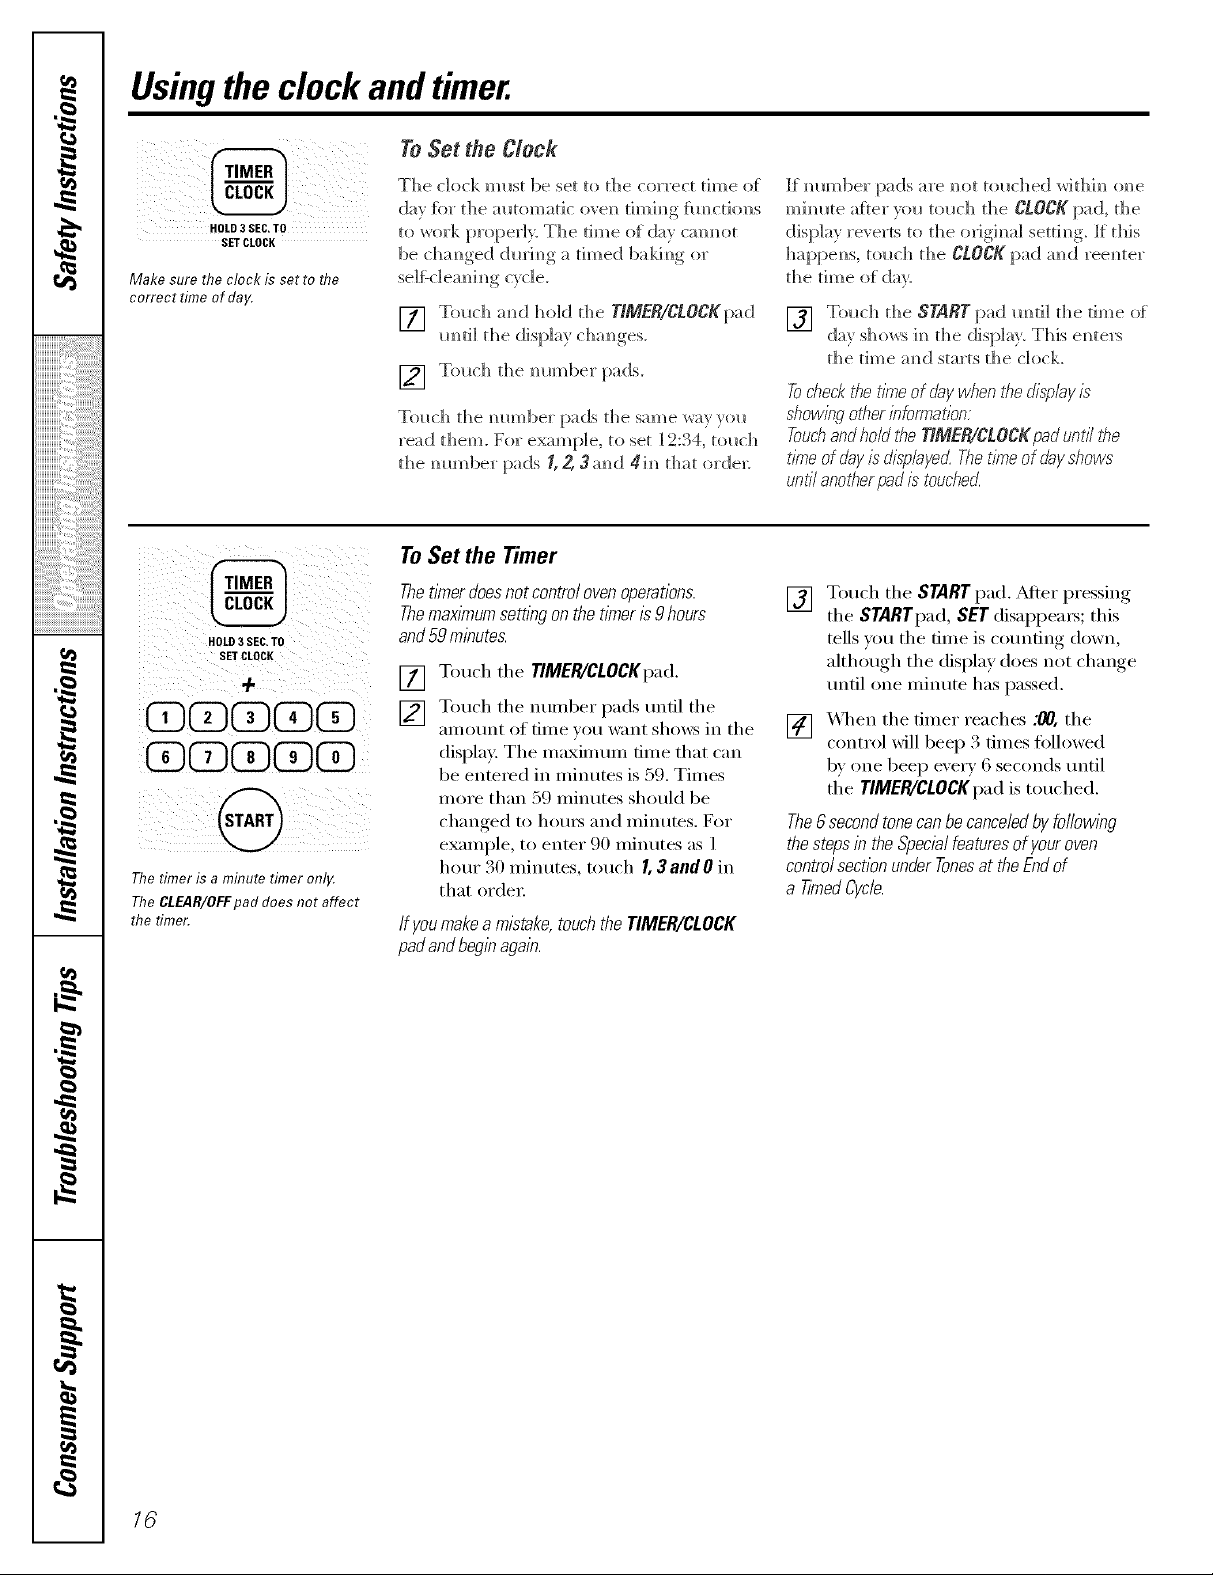
To Set the Clock
The clock m I_st be set to the correct tim))e of
day {k)r the iu_tomat]c ove]_ timh_g flmct]o]_s
to work properl> The time of day c:mm_ot
be chm_ged dmim_g a timed bakim_g or
Make sure the clock is set to the
correct time of day.
[] To_ch m_d hold the T/MER/CLOCKpad
mHil the display cha_ges.
[] Touch the mm_ber [)ads.
iiiiiiiiiiiii_%i3;i:i:i:i:i:i:ilili_ii_!!i_!!
T_ch th e _ _m_bet pa(Is the sam e way yo_
read them. For example, to set _=:34. umch
the mm_ber pads _, 2, 3mK] 4i_ that orde]_
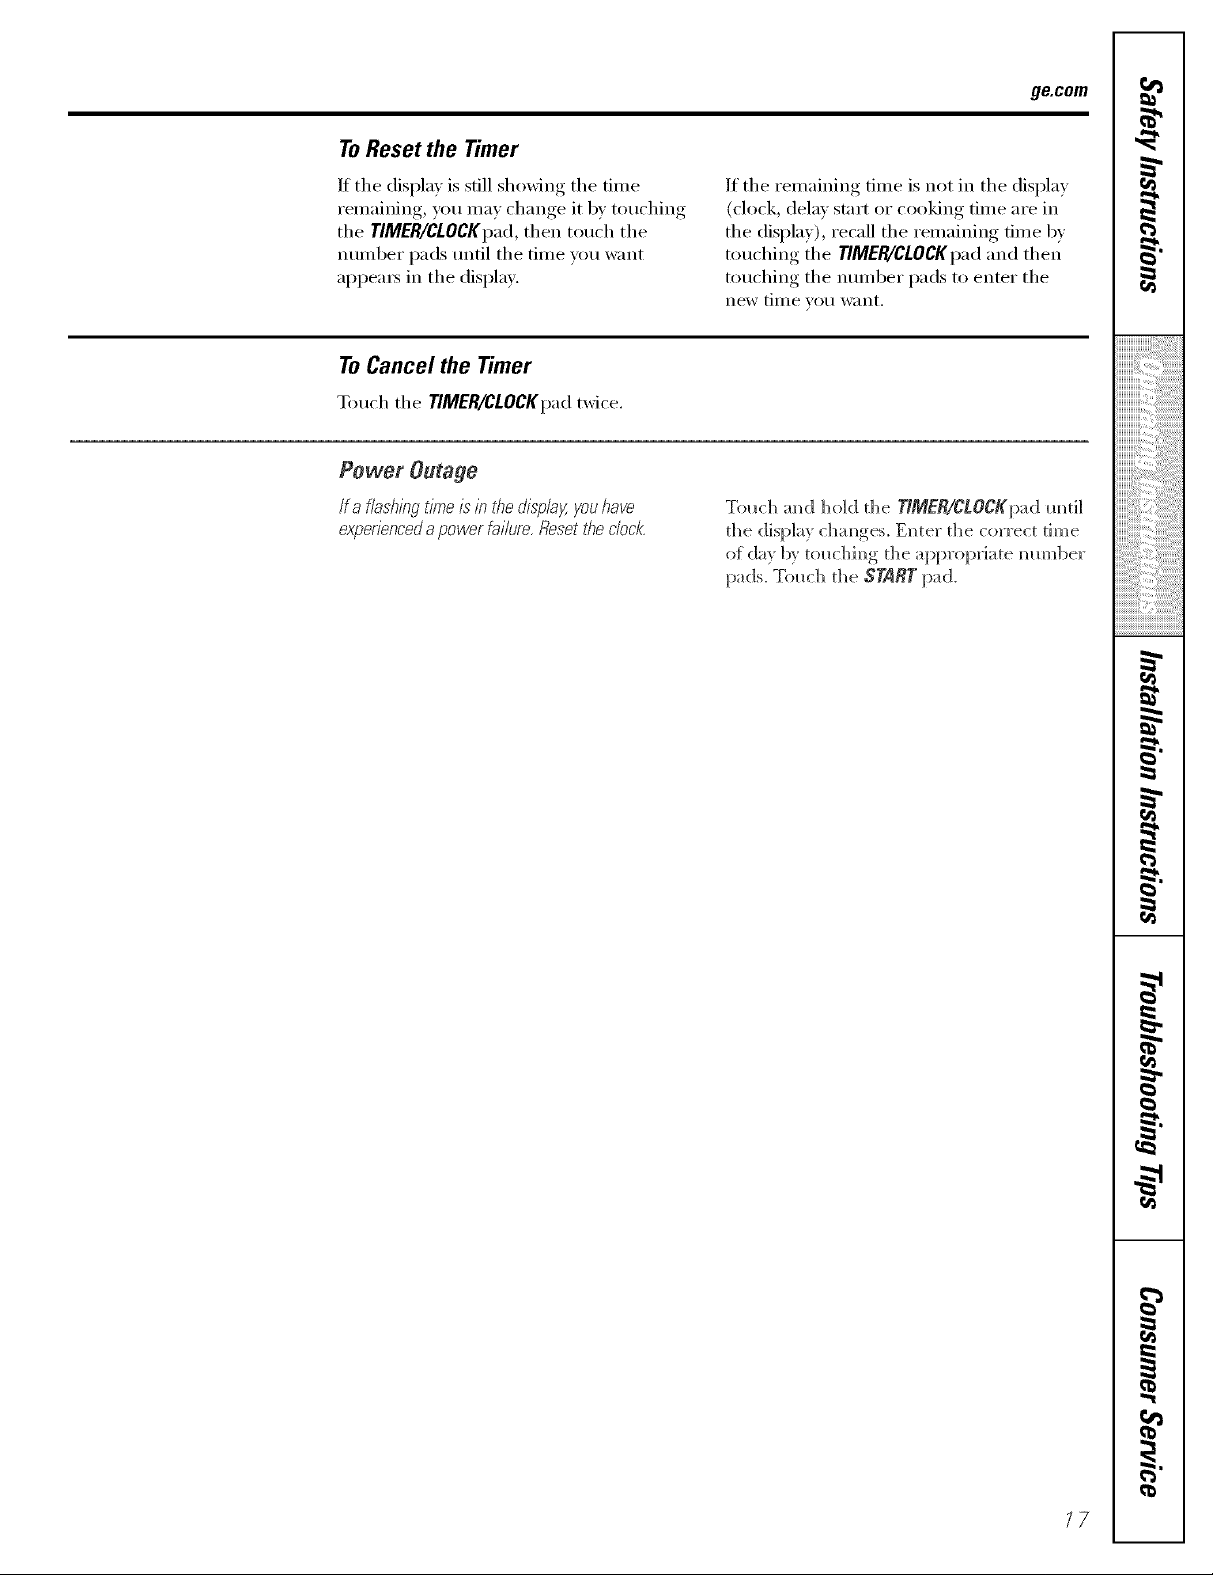
To Set the Timer
iiiiiiiiiiiiiiiiiii6iiiiiiiililililililililiiiiiiiii!il
,0
@D@XD@D@
,0
The timer is a minute timer onl_¢
rtie CLEAR/OFFpad does not affect
the timer.
HOLD3 SE& TO
SET CLDCII
+
@
@
Thet/Ynerdoesnot controloven operations.
Themax/_numsetting on the timer/s 9 hours
and59minutes.
Touch the TIMER/CLOCKpad.
[]
Touch the numl)er pads m]til the
[]
_lII]Otln[ of tiIlle _()tl want shows in the
display. The maxim mn time that can
be entered in minums is 59. Times
more than 59 minutes should be
changed to hom_ and minums. For
example, to enter 90 minutes as 1
h()tlr 30 n]inutes, touch I, 3andO ix]
that orcle_:
If youmakeamistake,touchtheTIMER/CLOCK
padandbeginagain.
c) , ,
If _ m_ bet pa (Is are _ ot t(>_ch ed w] th h_ (me
mim_te a{ter _x_ t(>_ch the CLOCK pad, the
display reverts to the o_Jgimd setth_g, if this
happe_s, to_ch the CLOCK pad a_K] ree_Her
the time of day.
[] Touch the STARTpad m_dl the time of
(1_' S]](}_rs d_ the disp]a}. This e_Hers
the time ;_:mdstarts the clock.
Tocheck the t/_e of daywhen t¢}edisplayis
showingotf}erbformation:
Touchandhold tile T/MER/CLOCK pad untf the
time of day is"dis;olaye_ Thetime of dayshows
until anotherpad is touched.
Touch the START pad. _ter pressing
[]
the STARTpad, SET disappeax_; this
tells _ou the time is com]ting down,
although the display does not change
m]til one minute has passed,
_,_q]en the timer reaches :00, the
[]
control xdll beep 3 times followed
b} one beep exer) 6 seconds m]til
the TIMER/CLOCKpad is touched.
The6secondtonecanbecanceledby following
thestepsin theSpecialfeaturesof youroven
controlsectionunderTonesat theEndof
a TimedCycle.
q
m
r_
16
ToReset the Timer
g_com
If the display is still showing the time
remaining, you may change it by touching
the TIMER/CLOCKpad,then touch the
ntunber pads until the time wm want
appea_ in the display.
ToCancel the Timer
Touch the TIMER/CLOCKpad twice.
Power Outage
lf a flashing tl?neis in t¢_edisp/a_,:youhave
exper/encedapower failura Resetbe dock.
If the remaining time is not in the display
(clock, delay start or cooking time are in
the display), recall the remaining time bv
touching the TIMER/CLOCKpad and then
touching the number pads to enter the
new tillle you W;lllt,
Tol*ch aN_(1hold the TIMER/CLOCKpad Imti]
fl_e display cham_ges. Enter fl_e correct time
ot da_ by tol_chim_gthe al:>prop_iate m_m_ber
pads. Tol_ch d_e START pad.
/7
Usingthe timedbakingand masting features.
,0
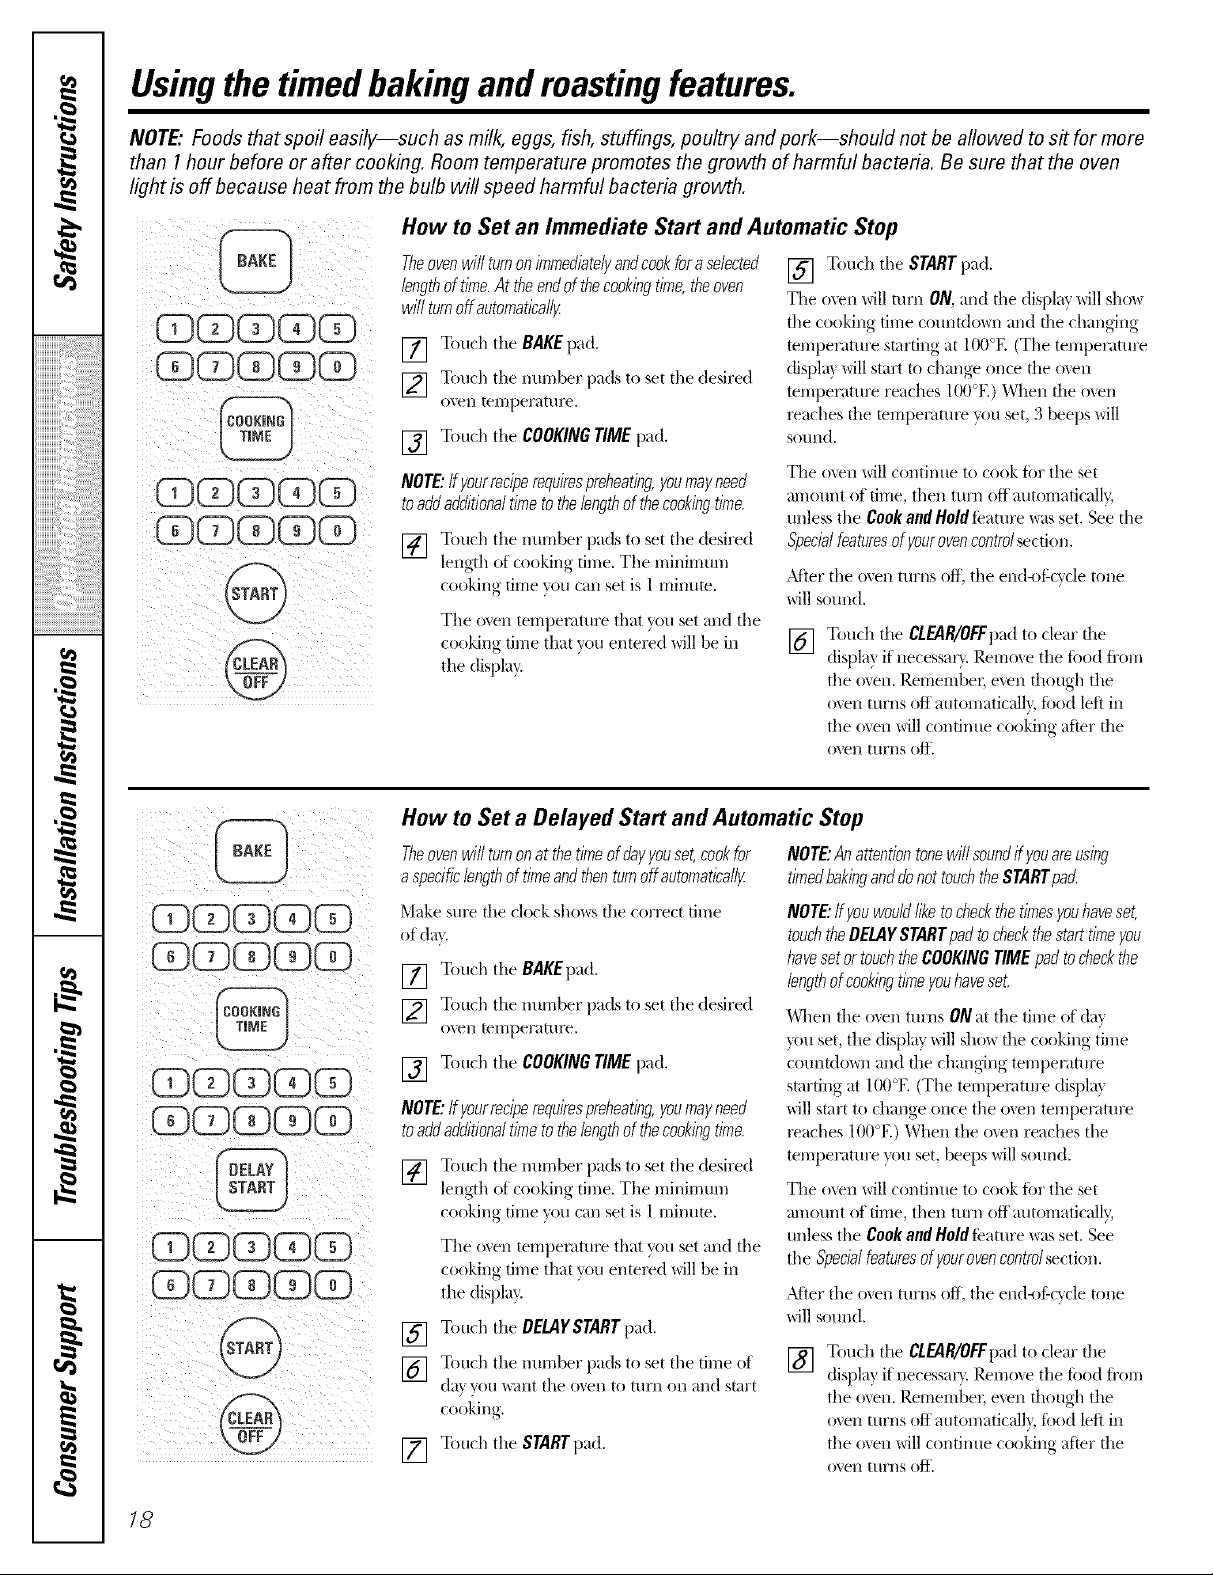
NOTE."Foods that spoil easily--such as milk, eggs, fish, stuffings, poultry and pork--should not be allowed to s# for more
than 1hour before or after cooking. Room temperature promotes the growth of harmful bacteria. Be sure that the oven
light is off because heat from the bulb will speed harmful bacteria growth.
How to Set an Immediate Start and Automatic Stop
Theovenwillturnonimmedbtelyandcookforaselected
lengthoftime.Attheendofthecookingtime,theoven
willturnoffautomaticallF
[] Touch the BAKE pad.
[] Touch the inm-lber pads to set tile desired
iiiiiiiiiiiii_":,'i_'i_5:i:i:i:i:i:i:i:i:ilili_ii_!!i_!!
IIIIIIIIIIIL''__,=_%_:
iiiiiiiiiiiiiiiiiii iiiiiiiiiiiiiii ii, iiiiililililililililiiiiii ii i!ill
i
.0
oven [ell]perattlre.
[] Touch the COOKINGTIMEpad.
NOTE:Ifyourreciperequiresprehearing,youmayneed
toaddadditionaltimetothelengthofthecookingtime.
[] Touch the nm-nber pads to set the desired
length of cooking time. The minimum
cooking time you can set is 1 mim_te.
The oven temperature that you set and the
cooking time that w)u entered will be in
the dispk 0.
[] Touch the STARTpad.
Tile oven will mm ON, and d_e display will sho_
the cooking time cotmtdo_m and fl_e changing
temperatm'e starting at 100°E (The temperatm'e
(fispla_ will start to change once file o_,en
temperatm'e reaches 100°E) When fl_eo_en
_aches fl_e temperam_ you set, 3 beeps will
SOtlnd,
The o\en will contintle to cook for tile set
an/aunt of time, then turn off automaficall 3
unless the Cook and Hold feature was set. See the
Specialfeaturesof yourovencontrolsection.
After the oven turns Off, the end<_f:cycle tone
will sound.
[] Touch the CLEAR/OFFpadto clear the
displa} if necessar} Remme the food fl'om
the oxen. Remember; even though the
o_en turns off automatic_fll}, tbod left in
the o',en will continue cooking after the
oven films off,
,0
ii @ ii iiiiiii
i i
m
How to Set a Delayed Start and Automatic Stop
Theovenwill turnonat the timeofdayyouset,cookfor NOTE:Anattentiontonewill soundif youareusing
aspecificlengthof timeandthenturnoff automatleallF timedbakinganddonottouchtheSTARTpad.
Make sure the clock shows the correct time
of dat,
[] Touch the _AKEpad.
[] Touch the nmnber pads to set the desired
0"_ ell temperature,
[] Touch the COOKINGTIMEpad.
NOTE:Ifyourreciperequiresprehearing,youmayneed
toaddadditionaltimetothelengthofthecookingtime.
[] Touch the number pads to set the desired
length of cooking time. The minimum
cooking time you can set is 1 minum.
The oven temperature that you set and the
cooking time that you entered will be in
the display.
[] Touch the OEUIg SrART pad.
] Touch the number pads to set the time of
da} you _ant the men to turn on and start
cooking
[] Touch the STARTpad.
NOTE:ff youwouldliketocheckthetimesyouhaveset,
touchtheDELAYSTARTpadtocheckthestarttimeyou
havesetortouchtheCOOKINGTIME padto checkthe
lengthofcookingtimeyouhaveset.
When the o_en tm'ns ONat the time of day
}x)u set, the dispk_y will sho_ the cooking time
coulltdov4/and the chang4ng temperature
starting at 100°E (The tempemtm'e displa}
will start to change once the oven temperature
_aches 100°E) When the o_en reaches the
temperatm'e }x)uset, beeps will sotmd.
The oven will continue to cook fbr tile set
an/aunt of time, then turn off automatically;
unless the Cook and Hold teature was set. See
the Specialfeaturesof yourovencontrolsection.
_Miel"tile oven turns off, tile end<#:cycle tone
will sound.
[] Touch the CLEAR/OFFpadto clear the
displa? if necessar}. Remoxe the toed ti'om
the oven. Remember, even though the
oxen turns off automaticall}, food left in
the oven will continue cooking after the
o'_ell [uyI/S Off,
18
 Loading...