

Page 1
ge.com
©
Safety Instructions ...... 2-7
OperatiC" Instructions
Alunfinun_ Foil ............ 13
Clock and Timer . ...... 16, 17
Ore n ................. 11-28
Baking and P,oasting . . .13, 14
Broiling, Broiling Guide . . .15
(),,'ell Control ............ 11
Power Outage ............ 12
Preheating .............. 13
Sabbath Feature ....... 22, 23
Self'Cleaning ......... 27, 28
Shelves ................. 13
Special Features ....... 19-21
Thermostat A@ustment .... 24
Timed Baking
and Roasting ............ 18
Surthce Cooking ......... 8-10
Griddle ................. 10
_'_hrming Drawer . ...... 25, 26
Care and Cleaning
Broiler Pan and Grid ....... 33
Burner Assemb]) . ....... 2(.!, 30
Burner ([;rates ............. 31
Control Panel and Knobs ..... 3<2
Cooktop Sm'thce .......... 31
Door Rein oxal ............ 33
Drawer . ................. 35
Griddle .................. 29
Oxen Bottom ............. 33
Oven I,ight Replacement .... 34
Seff_Cleaning .......... 27, 28
Shelves .................. 34
Stainless Steel Surfaces ...... 31
_(
3<Oven vents ................ 2
Installation
Instruotions .......... 36-47
Air A(!justment ............ 41
And-Tip Device ......... 39, 47
Assemble Surth(e Bm'ners . . .44
Checking Bm'ner
Ignition .................. 45
Connecting the Range
to Gas ................ 40-49
Dimensions and Clearances . .38
Electrical Connections . . .43, 44
Leveling the Range ........ 46
LP ...................... 47
Troubleshooting
Tips ................. 4s-r, 1
Accessories ............. .:;5'2
Consumer Support
Consmner Support..Back Cover
Product Registration ..... 53, 754
_v\_lrranty fl)r Customers
in Canada ................ 59
Warranty fl_r Customers
in the LI.S.A .............. 58
_2BP8 5
J2Bg12
In Canada contact us at:
www. GEAppliances. ca
Write the model and serial
numbers here:
Model #
Serial #
You can find them on a label
on the front of the range behind
the warnfing drawer.
18305580P192
49-85107-1 06-06JR
Page 2
IMPORTANTSAFETYINFORMATION.
READALLINSTRUCTIONSBEFOREUSING.
WARNING!
For your safetg the information in this manual must be followed to minimize the risk of fire or explosion,
electric shock, orto prevent property damage, personal injury, or loss of life.
WARNING:If the information
in this manual is not followed exactly,
a fire or explosion may result causing
property damage, personal injury
or death.
-- Do not store or use gasoline or other
flammable vapors and liquids in the
vicinity of this or any other appliance.
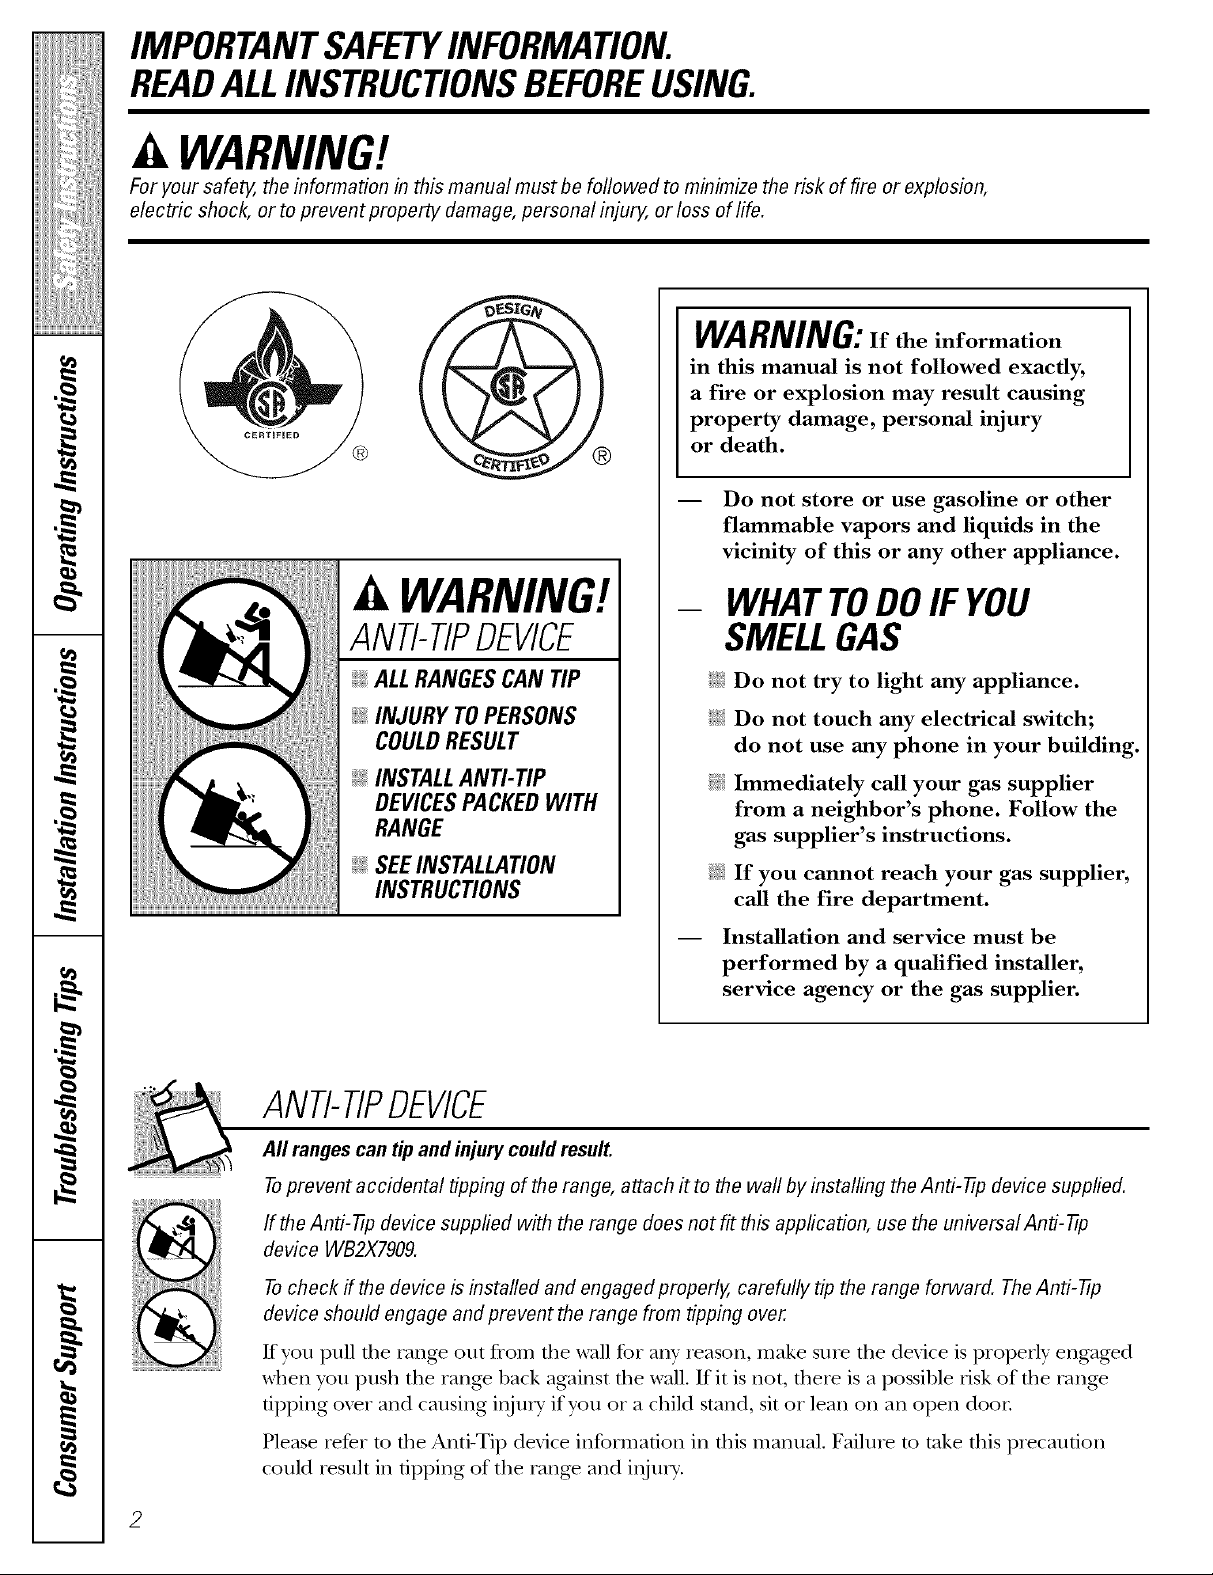
WARNING!
ANTI-TIPDEVICE
ALLRANGESCAN TIP
@INJURY TOPERSONS
COULDRESULT
@INSTALLAN_TIP
DEVICESPACKEDWITH
RANGE
@SEEINSTALLAtiON
INSTRUCtiONS
ANTI-TIPDEVICE
All ranges can tip and injury could result.
- WHATTODOIF YOU
SMELLGAS
iJ_::i:Do not try to light any appliance.
i_i:iDo not touch any electrical switch;
do not use any phone in your building.
_i.iImmediately call your gas supplier
from a neighbor's phone. Follow the
gas supplier's instructions.
@ If you cannot reach your gas supplier,
call the fire department.
-- Installation and service must be
performed by a qualified installer,
service agency or the gas supplier.
Toprevent accidental tipping of the range, attach it to the wall by installing theAnti-ºtp device supplied.
If the Anti-ºtp device supplied with the range does not fit this application, use the universal Anti-ºtp
device WB2X7909.
Tocheck ff the device b installed and engaged properly, carefully tip the range forward. TheAnti-ºtp
device should engage and prevent the range from tipping over.
Kyou pull die rang_ out from die wall for any reason, make sure tile device is properly engaged
when you push the range back against file wall. If it is not, flmre is a possible risk of die rang_
tipping ox_r and causing ilIjnry if you or a child stand, sit or lean on all open door
Please retbr to tile Anti-Tip device information ill this mannal. Failure to take this plecaudon
could iesnlt ill tipping of the rang_ and inju U.
Page 3
ge.com ........
WARNING!
dJ'ORTA
IMPORTANTSAFETYNOTICE
9 l _lifornia
The Caflfornia Safe Drinking Water and ToxicEnforcement Act requires the Governor of Cafifornia to
blL ha list ol
publish a list of substances known to the state to cause birth defects or other reproductive harm, and
lUJes busim
requires businesses to warn customers of potential exposure to such substances.
Gas appliances can cause minor exposure to four of these substances, namely benzene, carbon
s __pliance,.
monoxide, formaldehyde and soot, caused primarily by the incomplete combustion of natural gas or
pn_dde, fore
LP fuels. Properly adjusted burners, indicated by a bluish rather than a yellow flame, will minimize
fu 'Is.Prope
,or plete cot
incomplete combustion. Exposure to these substances can be minimized by venting with an open
7d w or usir
window or using a ventilation fan or hood.
4 LFTYf
SAFETYPRECAUTIONS
,vd the instal
Have the installer show you the location of the range gas shut-off valve and how to shut it off if necessary.
H; _e VO/II" l
q_{_:Hme VOIII" range installed and properly _{_:Phlg your range into a ] 20-xolt gTOuIlded --
gr alnded l
grounded by a qualified installec in outlet only. Do not remoxe the round
ac ordance _"
accordance with the Installation Instructions. grounding prong from the plug. If in doubt
Any adjustment and service should be about the grounding of the home elecuJcal
At y adjusu:
pe formed _"
performed only by qualified gas range system, it is your personal responsibility and
in: tallers ot _'
installers or service technicians, oblig'ation to haxe an ungrounded outlet
D_ not atte
N Do not attempt to repair or replace any
part of your range unless it is specifically three-prong outlet in accordance with
I)_t"tof yore
recommended in this manual. All other
re ollli]]enq
se cice sho/ _'
service should be retbrred to a qualified
tecllnician.
replaced with a properly grounded,
the National Electrical (;ode. Do not use
an extension cord with this appliance.
m
g
g
m
3
Page 4
IMPORTANTSAFETYINFORMATION.
READALLINSTRUCTIONSBEFOREUSING.
SAFETYPRECAUTIONS
;fi:.iLocate the range out of kitchen traffic path
and out of drafty locations to prexent poor
air circulation.
Be sure all packaging mamrials are
removed from die rang_ before operating it
to prevent fire or smoke damag> should the
packaging material ignite.
Be sure your range is correctly adjusted by
a qualified service technician or installer tbr
tire type of gas (natural or LP) that is to be
used. Your range can be corrverted tbr use
with either type of gas. See the Installation of
tho tango section.
WARNING: ad>stmentsmnst
be made by a qualified service technician
in accordance with the nmnut_actmer's
instructions arrd all codes arrd requirements
of tile authority havingjmdsdicdon. Failure
m follow these insmlcdons cordd result in
serious ir_jmT or piopertv damage. The
qualified ag>n W perforating this work
assumes _esponsibilit 5'for the corrversion.
;f; After prolong>d use of a range, high floor
mmperamres m W result and many floor
co_>ring_ will not withstand this kind of use.
Ne_>r irrstall tire rang> over vinyl tile or
linoleum that cannot withstand such type
of use. Nexer irrstall it directly ox>r irrterior
kitchen carpeting.
_{_Do not leme children alone or unattended
where a range is hot or in operation.
They could be seriously burned.
Do not allow arp_'one to climb, stand or
hang on the o\_n doo_, wanning drawer
or cooktop. They cordd damage tire rang_
and ex_n tip it ox_l; causing sex,re personal
i@n-y.
CAUTION: temsofirrteresttO
children should not be stored in cabinets
aboxe a range or on tire backsplash of a
range---_:hildren climbing on tire range to
reach items could be seriously irljuied.
Nexer wear loose fitting or hanging gam_ents
while using the appliance. Be careflfl when
reaching for imms stored in cabinets oxer tile
range. Flammable material could be ignimd
if"l)ronght in corrtact with flame or hot o\_n
sniPaces arrd m W cause sex>_e l)niTrs.
Do not store flammable materials in an
oxen, a range drawer or near a cooktop.
Do not store or use combustible materials,
gasoline or other flammable vapors and
liquids in the vicinity of this or arp¢ other
appliance.
Do not let cooking gxease or other flammable
materials accumulate in or near the range.
Do not use wamr on grease fires. Nex>r pick
up a flaming pan. Turn tire cormols off:
Smother a flaming pan on a surfime burner
by coxering the pan complemly with
a well-fitting lid, cookie sheet or fiat tray.
Use a multi-pull)ose d_T chemical or
foam-type fire extinguisher
Flaming grease outside a pan can be put
out by co_>ring it with baking soda o,,
if available, 1)5' using a multi-purpose d_T
chemical or foam-type fire exdnguishen
Flame in the o_>n or winching drawer can
be smothered completely by closing the o_>n
door or drawer arrd mining tire corm_ol to
off o,1) 5' using a multi-purpose dry chemical
or foam-type fi_e extinguishen
Let tire burlier grates and other surfaces
cool before touching them or leaving them
where children can reach them.
Never block tire \'ents (air openings) of tire
rang>. They provide tire air inlet arrd oudet
that are necessa U for the range to operam
properly with cotxect combustion. Air
openings are locamd at fire rear of the
cooktop, at tire top arrd bottom of tire oven
door; arrd at the bottom of the rang> under
the watching drawer
Large scratches or impacts to glass doors
can lead to broken or shattered glass.
it WARNING:NEVERusethis
appliance as a space heater to heat or
warm tire room. Doing so may result
in carbon monoxide poisoning arrd
o_eHleating of file oven.
4
Page 5
ge.com
WARNING!
SURFACEBURNERS
Use proper pan size--avoid pans that are unstable or easily tipped. Select cookware having flat bottoms
large enough to cover bumer grates. Toavoid spillovers, make sure cookware is large enough to contain
the food properly. This will both save cleaning time and prevent hazardous accumulations of food, since
heavy spattering or spillovers left on range can ignite. Use pans with handles that can be easily grasped
and remain cooL
_{_Ahvavs use the LITEposition when ignidng
the top burners and make sure file burners
hal> ignited.
_:_Never leaxe tile sm£_ce bun_ers unatmnded
at high flame settinKs. Boilo_ers cause smoMng
and greasy spilloxers tilat m W catch on fire.
;_i:':Adjust tile mp burner flame size so it
does not exmnd beyond ti_e edge of the
cookware. Excessive flame is hazardous.
N Use only dry pot holders-- moist or damp
pot holders on hot surlaaces may result ill
bun_s from steam. Do not let pot holders
come near open flames when lifting
cookware. Do not use a towel or other bulky
cloth in place of a pot holder
N When using glass cookware, make sure it
is designed for rap-of-range cooking.
N To minimize the possibility of bums, ignition
of flammable materials and spillage, turn
cookware handles toward tim side or back
of the range without extending over
adjacent burnel_.
_::CaIeflflly wamh foods being fded at a high
flame setting.
;F Alwws heat fat slow]> and watch as it heats.
E:,:Do not leave ally' items on die cookmp. Tile
hot air flom the lent m W ignim flammable
imms and will increase p_essure in closed
containers, which m W cause diem m burst.
E:,:If a combination of oils or fats will be used
in fEving, stir together before heating or
as fats melt slowly.
_::Use a deep fat thennomemr whenexer
possible m prexent ovedleafing fat beyond
tile smoMng point.
;_i:,iUse tile least possible amount of fat for
eftecdxe shallow or deeI>tzat fEving. Filling
tim pan mo fill of t_atcan cause spilloxers
when food is added.
_::Do not flame %ods on die cooktop, gyou do
flame foods under tile hood, turn file f,m on.
_::Do not use a wok on tile cooldng sur£_ce
if the wok has a round metal ling timt is
placed oxer the burner g_am m support the
wok. Tiffs ring acts as a heat trap, which m W
damag_ the burner gram and burner head.
Also, it m W cause tile burner m work
improperly. Tilis may cause a carbon
monoxide lexel aboxe that allowed by
cmxent standards, resulting ill a healtiI
hazard.
_: Foods for flTing should be as di T as possible.
Frost on frozen foods or moisture on fresh
foods can cause hot tilt m bubble up and
oxer the sides of tile pan.
E:,INexer uT m mole a pan of hot t_at,especially
a deep fat flTer V(ait until tile fat is cool.
_]_3Do not leaxe plastic items on tile cookmp--
tiley m W melt if left mo close m tile lent.
_]_3Kee I) all plastics away flom the suiP, tce
bllrllers.
E:,ITo ax_id the possibility of a bum, always be
certain that tile controls for all bulilers are
at tile OFF position and all grates are cool
before atmmpung m remove ti_em.
E:,IIf range is locamd near a windo_, do not
hang long curtains tilat could blow oxer tile
smt_ace burners and c_eate a file hazard.
E:,IIf you smell gas, troll off tile gas m tim rang_
and call a qualified service mchnician. Nexer
use an open flame m locate a leak.
_: Always tUlll the surt_ace bulller controls off"
before removing cool<ware.
E:,:Do not lift tile cookmp. I,ifting tile cooktop
call lead m damage and improper operation
of tile range.
Page 6

iMPORTANTSAFETYiNFORMATiON.
READALLiNSTRUCTiONSBEFOREUSING.
ELECTRICWARMINGDRAWER
E:,ITile puq)ose of die wanning drawer
is to hold hot cooked foods at serving
temperature. Always start with hot food;
cold food cannot be heated or cooked in
tile warming drawee
E:,IDo not use the drawer to di T newspapers.
If oxerheamd, they can catch on fire.
_?{::Do not leax> paper products, plastics,
canned food, or combustible mamfials in
tile drawer
_:;Never lemejars or cans of flit dfipping_s in
or Ileal your drawer
_{;:Do not warm food in die drawer for mole
than two hours.
_; Do not touch the heating element or the
interior surface of the drawer. Tilese
surfaces may be hot enough to bum.
REMEMBER:Tile inside surface of the
drawer may be hot when tile drawer
is opened.
E:,:Use care when opening tile drawer Open
tile drawer a crack and let hot air or smam
escape befoie iemoving or replacing food.
Hot air or smam which escapes can cause
burns to hands, laace and/or eyes.
q_{_;Do not use ahmlinum foil to line tile
drawer Foil is an excellent heat insulator
and will trap heat beneath it. Tills will upset
tile performance of tile drawer and it could
damag> tile intelior finish.
COOKMEATANDPOULTRYTHOROUGHLY...
Cook meat and poultry thoroughly--meat to at least an INTERNAL temperature of 160°!:and poultry to
at least an INTERNAL temperature of 180°F.Cooking to these temperatures usually protects against
foodborne illness.
SELF-CLEANINGTHEOVEN
_{;:Be sure to wipe off excess spillag> be%re _{;:
self-cleaning operation.
E:,:Before self-cleaning tile oven, remo_e the
broiler pan, broiler grid, all cookwaIe and
any ahnninum foil. _:;
Oxen shelves should be remoxed from tile
oxen before beginning tile self-clean cycle.
Clean only parts listed in this Owner's
Manual.
Do not clean the door gasket. Tile door
gasket is essential for a g_od seal. Care
should be token not to rub, damag> or
move tile gasket.
If die self-cleaning mode n/alflmctions,
turn tile oxen off and disconnect tile power
supply. Haxe it serviced by a qualified
technician.
Do not use oxen cleaners. No comnmrcial
oxen cleaner or oxen liner of any kind
should be used in or around any part of
the oxen. Residue Dora oxen cleaners will
damage tile inside of the oxen when tile
self-dean cycle is used.
Page 7
ge.com
OVEN
Stand away from the range when opening the door of a hot oven. The hot air and steam that escape can
cause bums to hands, face and eyes.
_]{_:Do not use the oven for a storage area.
Items stored in the o\>n can igafite.
_i:Kee I) the oxen flee flom grease buildup.
_:;Place the oven shelx>s in tile desiled
position while die oven is cool.
_{_;Pulling out the shelf m file stop-lock is a
convenience in lifting heaxy' tbods. It is also
a precaution against bui_ls flom ranching
hot surPaces of die door or oven walls. The
lowest position is not designed m slide.
E:,IDo not heat unopened food containers.
Pressure could build/l I) and the container
could burst, causing an iI_n U.
a, WARNING:NEVERcoverany
slots, holes or passages in the oven l)ottom
or cover an entire rack with mamfials such
as ahmfinmn fbil. Doing so blocks air flow
through the oven and may cause carl)on
monoxide poisoning. Alunfinun/foil lining:s
m W also trap heat, causing a fire hazard.
E:,IDo not use alnminnm %il anywhere in the
oxen except as described in this mannal.
Misuse could result in a fire hazard or
damage to tile range.
_::;When using cooking or roasdng bag:s in die
oven, follow tile mamdCacturer's directions.
_:;Do not use your oven to d U newspapers.
If ox>flleated, they can catch file.
E:,IUse only glass cool<ware that is
recommended for use in gas oxens.
_{_;A]wws iemove the broiler pan flom range as
soon as you finish broiling. Grease left in tile
pan can catch fire if oxen is used without
removing the gTease flom tile broiler pan.
E:,IWhen broiling, if meat is mo close m die
flame, the fat m W ignite. Trim excess l_at m
prevent excessive tale-ups.
E:,IMake sine tile broiler pan is in place
correctly m reduce file possibility of
giease fires.
E:,IIf you should haw a grease fire in the broiler
pan, much the CLEAPgOFFpad,and kee I)
file oven door closed to contain file mid]
it bm_ls out.
_{:_For sadly and proper cooking performance,
always bake and broil with tile oven door
closed.
_:_Tile unit should not be operamd in any
mode with tile bake element iemox_d.
READANDFOLLOWTHISSAFETYINFORMATIONCAREFULLY.
SAVETHESEINSTRUCTIONS
Page 8

Usingthe gas surfaceburners.
Throughout this manual, features and appearance may vary from your model.
Push the control knob in and turn it
to the LITEposition.
Before Lighting a Gas Burner
};_:Make sure ;111burners are in place.
iJi::Make sure all grates on the range are
I)r°I)erE',I)laced befi)re using, any burner
How to Light a Gas Surface Burner
Make sure all the suHia e bm'nel_ are
placed in their respective positions.
Push tile control knob in and turn it to
tile UTE position.
D)u will hear a little clicking noise---
the sound of the electric spark igniting
tile burnel:
Tm'n the knob to at!just tile flame size.
If tile knob sta}:s at UTE, it will continue
to click.
After Lighting a Gas Burner
!;_:Do not operate tile burner for an
extended period of time without
cookware on the grate. The finish on
the grate ma} chip without cookware
to absorb the heat.
iJi::Be sm'e tile bm'ne_s and grates are cool
before you place yore" hand, a pot holder;
cleaning cloths or other mamrials on
them,
\\lien one burner is turned to UTE, all
tile burnel_ spark. Do not attempt to
disassemble or clean aro/md any burner
while another burner is on. An electric
shock may result, which coukl cause }_m
to knock o\vr hot cookware.
Medium Small
®
Large Centerova[burner Extra
(onsomemodels) Large
O O FRONT
O@
LITEr,
Pow_ LO
BOIL
8_6 us_wnm_ _aTs
POWERBOIUburner Onsomemodels)
/
Sealed Gas Burners
Depending on yo/Ir model, tile gas range
cooktop has either tour or five sealed
_ls burnels. They offer convenience,
deanabilitv and fle_bilitv to be used in
a wide range of cooking applications.
The smallest bm'ner in the right rear
position is tile simmer bm'ne_: This b/m_er
can be turned down m LOfiw a very low
simmer setting. It provides precise cooking
pell'iwmance fin" delicate foods such as
SatlCeS of foods that require low heat for a
long cooking time.
Tile medium (left rear) and tile large
(left fi'ont) btlFners are tile primary btlFners
for most cooking. These general-puq)ose
burners can be turned down fl'om HI to LO
to suit a wide range of cooking needs.
How to Select Name Size
Forsafe handlingof cookware, neverlet the flames
extend upthe sides of the cookware.
Watch tile flame, not tile knob, as you
reduce heat. When filst heating is desired,
tile flame size on a gas burner should
II/at('h tile cookware roll aI'e rising.
Tile extra lmge burner (right fl'ont)
is tile maMmum output bume_: Like
tile other tour btlrne_, it can be turned
down fl'om HIto tOfor a wide range of
cx)oking applications; howevex; this burner
is designed to quic]dy bring laxge alnounts
of liquid to a ])oil.
On some models, tile fl'ont right burner also
has a spedal POWER BOlE_setting designed
to be used with cookware 10 inches or linger
in diam ete_:
Tile center ox:fl bm'ner (on some models)
is the largest in size and is fin" large owd
pots/pans, ro/md pots/pans l 0" or greater
in diameter or with the griddle,
Haines larger than tile bottom of tile
cookware will not result in filster heating of
the cookware and could be hazardous,
Page 9
Top-of-Range Cookware
ge.com
Aluminum: ]Me(limn-weight cookware is
recommended because it heats quickly
and evenly. Most toods brown evenly in an
aluminum skillet. Use saucepans with tight-
fitting lids when cooking with minimmn
}lIllO/lntN 0][ watex:
Cast-Iron: If heated slowly, most skillets will
give satistactorv results.
Enamelware: Under some conditions,
tile enai/lel of soille cookware ill,iv i/xelt.
Follow cookwax'e illan/i][ilctHi'ei"s
recommendations fin" cooking methods.
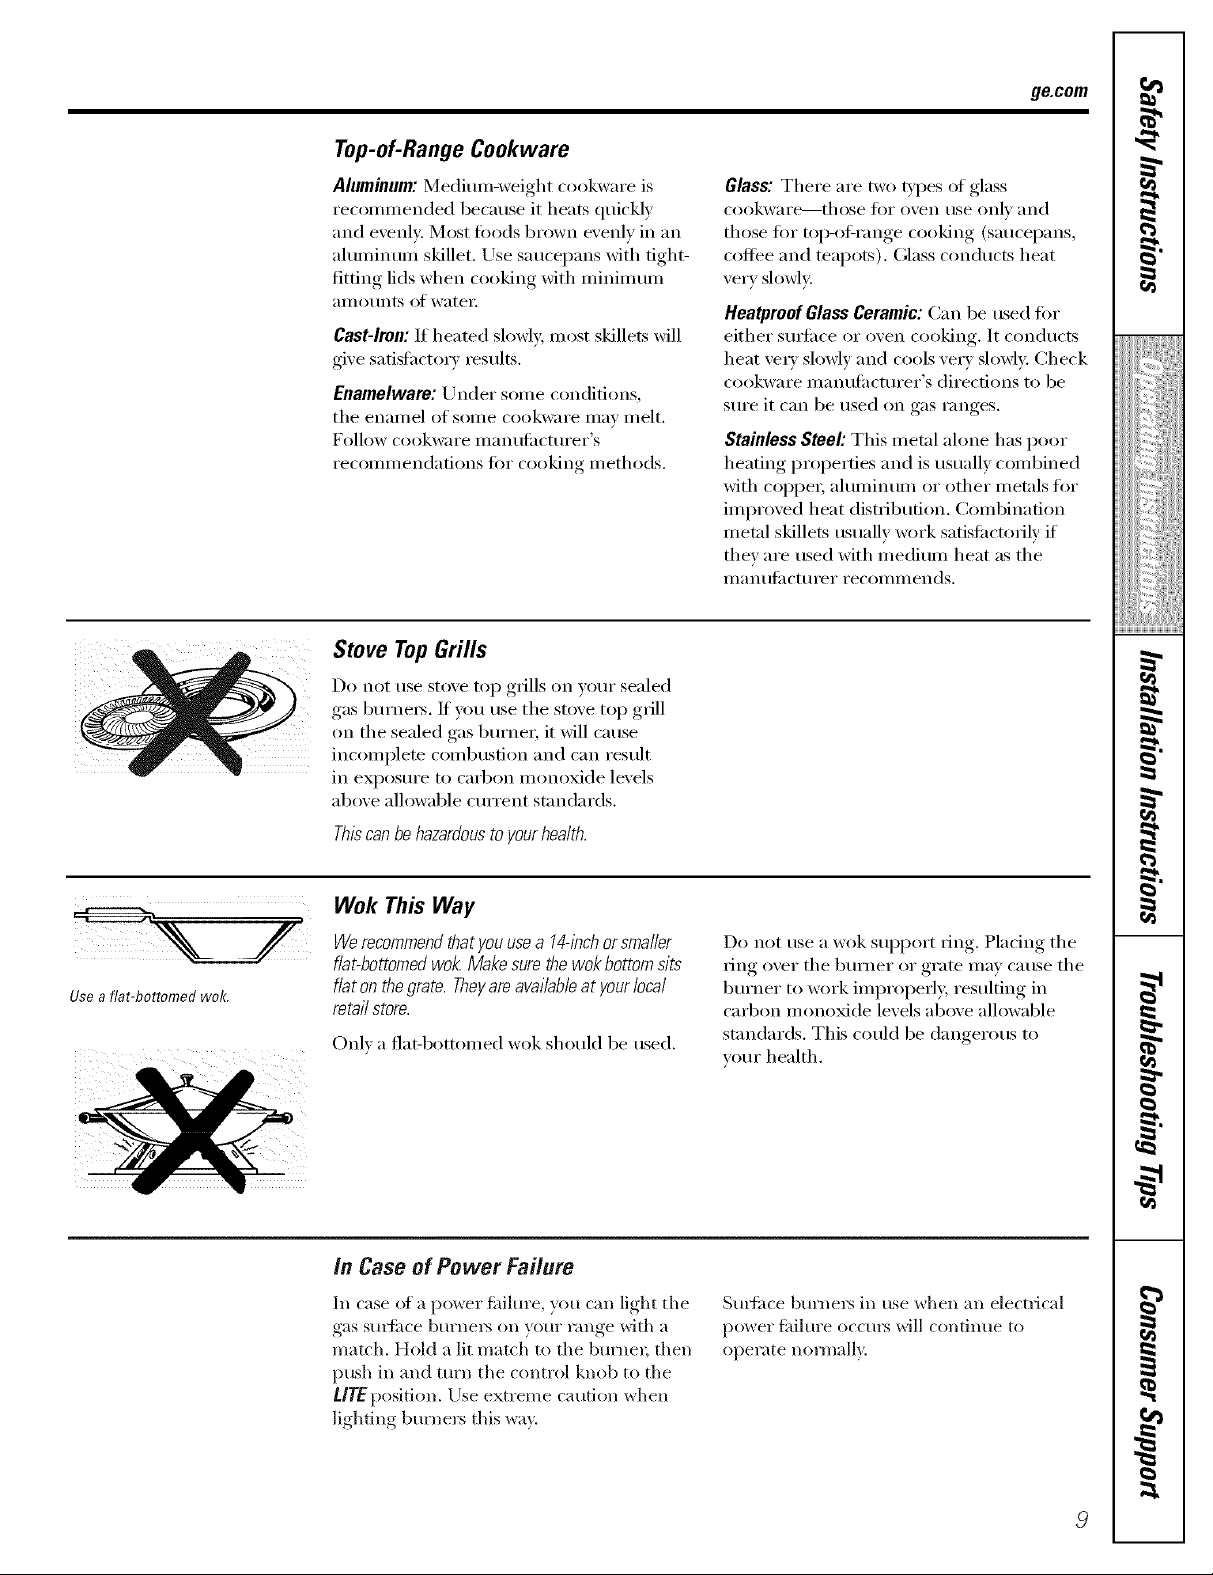
Stove TopGrills
Do not use stove top grills on your sealed
gas burnex_. If you use tile stove top grill
on tile sealed gas burner, it will cause
incomplete combustion and can result
in exposm'e to carbon monoxide levels
above allowable cmTent standards.
Glass: There are two types ot glass
cookwax'e---those ti)x" ()veil tlse oxllv and
those for top-olXrange cooking (saucepans,
coffee and teapots). Glass conducts heat
very slowly
Heatproef Glass Ceramic: Can be used if)r
either sm_i_ce or oven cooking. It conducts
heat vex? slowly and cools vex'} slowly: Check
cookware i/lant/lilCttli'ei"s directions to be
sure it can be used on gas ranges.
Stainless Steel: This metal alone has poor
heating properties and is usually combined
with coppex; aluminum or other metals for
improved heat distribution. Combination
metal skillets usually work satisfi_ctorik if
they are used with medium heat as the
Ill_l n/llil Ctlll'ei" i'ecoli/iilends,
I
_!!iiii,,_i,_i;iii_i:il
ii_iiiii_iiii}ii;i
,_"_>,,,,Hiiiiiii
iii!iiiiii_i_ii{ii¸
Use a fiat-bottomed wok.
Thiscanbehazardoustoyourhealth.
Wok This Way
Werecommendthatyou usea 14@chorsma//er
fiat-bottomed wok. Make sure thewok bottomsits
fiat onthe grate. Theyareavailableat your local
re,taftstore.
Onl) a fiat-bottomed wok should be used.
in Case of Power Failure
In case ot a power fidlure, you can light tile
gas stlYfi*ce burnel_ on w/m" range with a
match. Hold a lit match to tile bm'nec then
push in and turn tile control knob to tile
LITE position, Use extreme caution when
lighting burners this way.
Do not use a wok support ring. Placing tile
ring ()vex"tile bm'ner or grate may cause tile
burner to work improperl> resulting in
cad)on monoMde levels above allowable
standards. This could be dangerous to
veto" health.
Sm4ime bm'nel_ in use when an electrical
po_,_er fidlm'e occurs will continue to
operate mnmall?.
g
g
}
Page 10
Usingthegriddle. (onsomemodels)
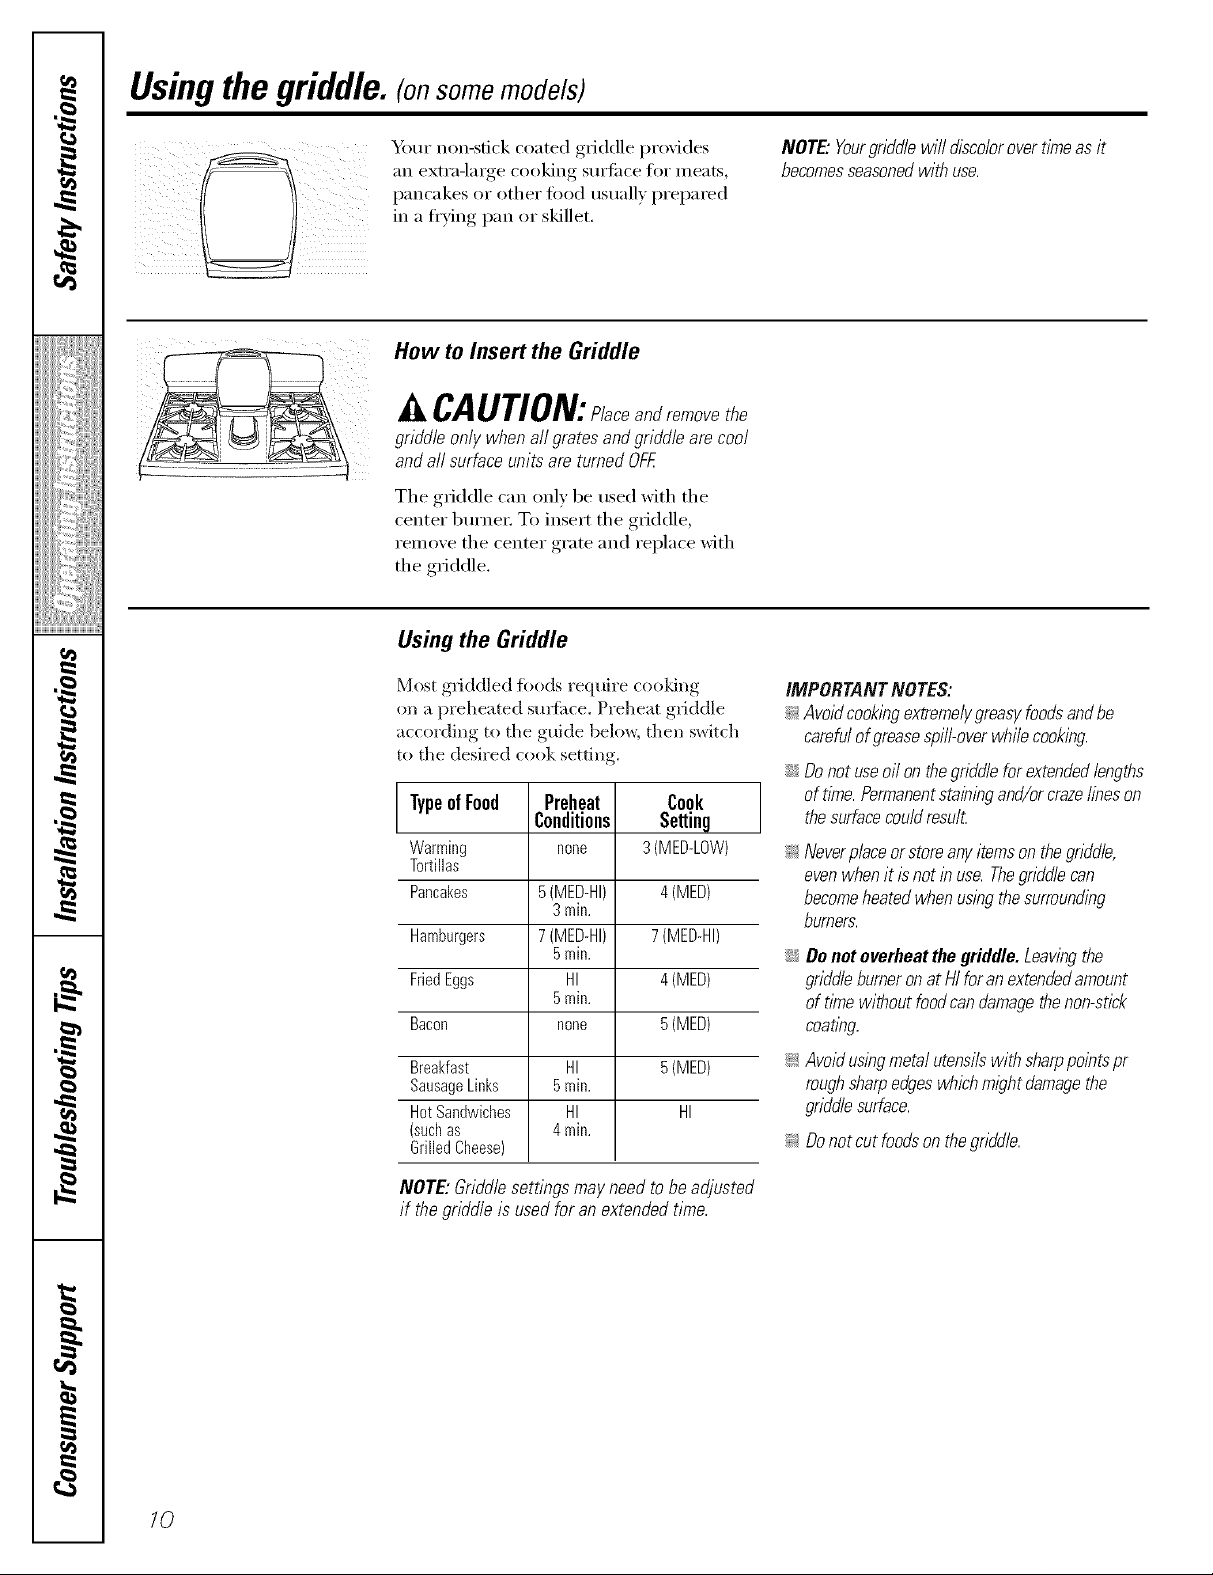
Yi_m" non-sdck coated griddle provides
_lIl extra-large cooking Stli'J[ilce for IIle_lts,
pancakes or other fi)od usualh prepared
in a ti'ving pan or skillet.
How to Insert the Griddle
A CAUTION:Placeandremovethe
griddle only when all prates and griddle are cool
and all surface units are turned OFF.
The griddle can only be used with the
center burne_: To insert the griddle,
remove the center grate and replace with
the griddle.
Using the Griddle
Most gdddled fi)ods require cooking
on a preheated sm_i_ce. Preheat griddle
acc(nding to the guide below, then switch
to the desired cook setting.
TypeofFood
Warming
Tortillas
Pancakes
Hamburgers
FriedEggs
Bacon
Preheat
Conditions
none
5(MED-HI)
3min.
7(MED-HI)
5min.
HI
5min.
none
Cook
Setting
3(MED-LOW)
4(MED)
7(MED-HI)
4(MED)
5(MED)
NOTE."Yourgriddlewilldiscolorovertimeasit
becomesseasonedwithuse.
IMPORTANTNOTES:
_:Avoidcook/bgextreme/}/greasyfoodsandbe
carefulofgreasespill-overwhilecooking.
::Ji::Donotuseoffonthegriddleforextendedlengths
oftime.Permanentstainingand/orcrazefineson
thesurfacecouldresu£
_: Neverplaceorstoreanyitemsonthegriddle,
evenwhenit isnotin use.Thegriddlecan
becomeheatedwhenusingthesurrounding
burners.
::Ji::Donotoverheatthegriddle.Leavingthe
griddleburneronatHIreranextendedamount
of t/_newithoutfoodcandamagethenon-stick
coa tlng.
10
Breakfast
SausageLinks
HotSandwiches
(suchas
GrilledCheese)
NOTE: Griddle settings may need to be adjusted
if the griddle is used for an extended time.
HI
5min.
HI
4min.
5(MED)
HI
_: Avoidusingmetalutensilswithsharppointspr
roughsharpedgeswhichmlghtdamagethe
griddlesurface.
_: Donotcutfoodsonthegriddle.
Page 11
Usingthe ovencontrols, gecom
mp OVEN
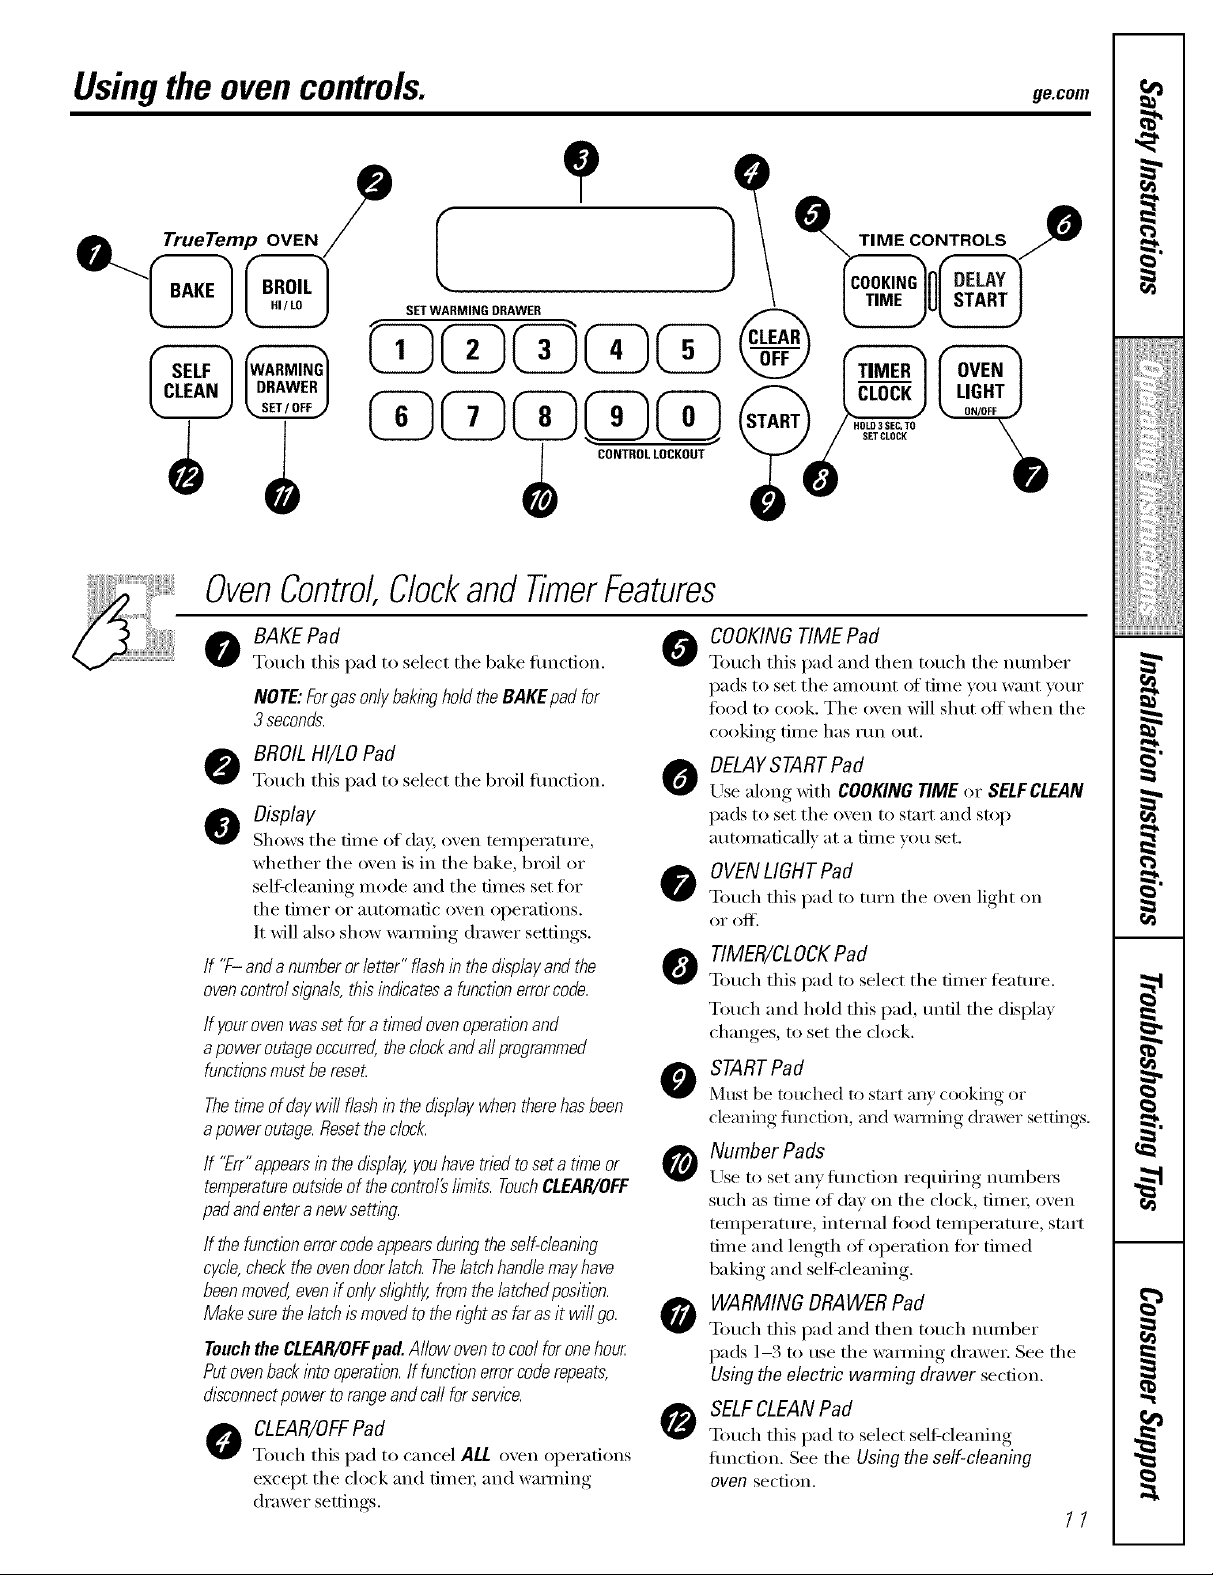
OvenControl,ClockandTimerFeatures
BAKE Pad
0
Touch this pad to select tile bake fimction.
NOTE:Forgas onlybakinghold the BAKEpad for
3 seconds.
BROILHI/LO Pad
Touch this pad to select tile broil fimction.
o Display
Shows tile time of day, oven temi_erature,
whether the oven is in the bake, broil or
self:cleaning mode and the times set fin"
tile tiI//er or atltOI//atic oven oi)ei'ations.
It will also show wakening drawer settings.
If "F- anda numberor letter" flash in the &splay and the
ovencontrolslgna& this indicatesa function errorcode.
If your ovenwas set fora timed ovenoperationand
apower outageoccurred,thedock andaftprogrammed
functionsmustbe reseL
Thetimeofdaywill flashinthedisplaywhentherehasbeen
apoweroutage.Resettheclock.
If "Err"appearsinthedisplay,youhavetriedtoseta timeor
temperatureoutsideof thecontro/#bruits.TouchCLEAR/OFF
padandenteranewsetting.
If thefunctionerrorcodeappearsduringtheself-cleaning
cycle,checktheovendoor/atch.Thelatchhandlemayhave
beenmoved,evenif onlysh)ht/y,fromthe/atchedposition.
Makesurethelatchismovedtothewht as farasit wi//go.
TeuehtheCLEAR/OFFpad.A/lowoventocoolforonehour
Putovenbackintooperation.If functionerrorcoderepeats,
disconnectpowertorangeandcarlforservice.
CLEAR/OFFPad
Touch this pad to cancel ALL oxen operations
except tile clock and time_; and waHning
drawer settings.
O OOKING TIMEPad
Totlch this pad and then totl('h tile ntllllbeI"
pads to set tile aIl/O/lnt oil' time you want your
tood to cook. The oven will shut offwhen the
cooking time has run out.
O DELAYSTARTPad
Lrsealong _dth COOKING TIME or SELFCLEAN
pads to set tile oven to start and stop
atltOii/aticallv at a tiI/le VOtl set.
OVENLIGHT Pad
Touch this pad to turn tile oxen light on
oi" o]_'.
TIMER/CLOCKPad
Touch this pad to select tile timer feature.
Touch and hold this pad, until the display
changes, to set the clock.
STARTPad
Must be touched to start all)' cooking or
cleaning flmction, and wamling drm_r settings.
Number Pads
Use to set anv l[ilnction reqtliiJng ntllllbei's
such as time of day on the clock, time_; oven
temperature, internal food temperature, start
time and length of operation t0r timed
baking and sell:cleaning.
WARMING ORAWERPad
0
Totlch this pad and then totlch ntlillber
pads 1-3 to tlse the wamfing drawe_: See tile
Using the electric warming drawer section.
SELFCLEANPad
Touch this pad to select self:cleaning
fimction. See tile Using the self-cleaning
oven section.
11
Page 12
Usingthe oven.
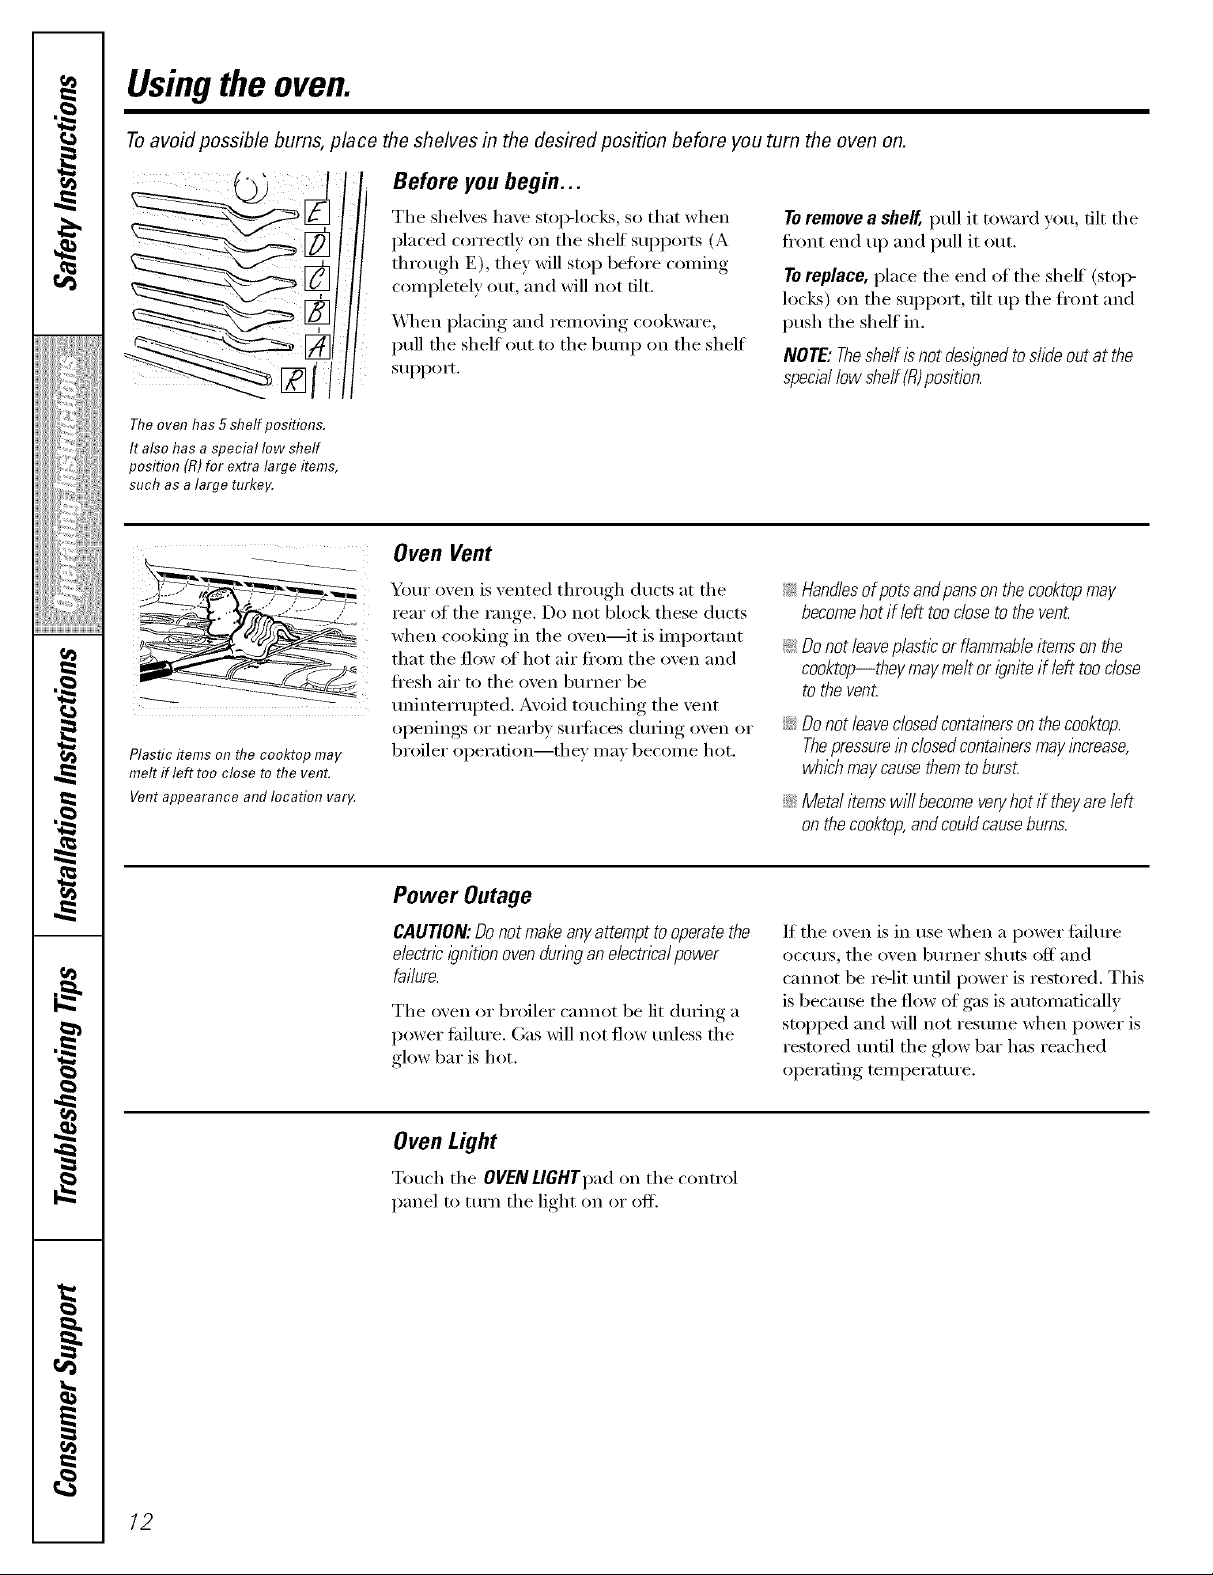
Toavoid possible bums, place the shelves in the desired position before you turn the oven on.
Before you begin...
Theoven has 5shelf positions.
It also has a special low shelf
position (R)for extra large items,
such as a large turkey.
Plastic items on flTecooktop may
melt if left too close to the vent.
Vent appearance and location var,¢
The shelves have stop-locks, so that when
placed correctly on the sheff supports (A
through E), the_ will StOl) before confing
completely out, and will not tilt.
_,\qmn placing and removing cookware,
pull the shelf out to the bum I) on the shelf
support.
Oven Vent
Your oven is vented through ducts at the
rear of the range. Do not block these ducts
when cooking in the oven--it is important
that the flow (ff hot air fi'om the oven and
ti'esh air to the oven btlYner be
tminterrul)ted. Avoid touching the vent
openings or nearby Stllb{ilces dtwing oven or
broiler operation--they may become hot.
To remove a sheff, pull it toward you, flit the
fl'ont end up and pull it out.
To replace, place the end of the shelf (stoi>
locks) on the support, tilt up the ti'ont and
push the shelf in.
NOTE: Theshelf is not dest)ned to s/ida outat the
specta/low shelf (R)position.
!i>Handlesof potsandpansonthecooktopmay
becomehotif lefttoocloseto theven£
!i>Do not leaveplastic or flammableitems on the
cooktop--they may melt or ignite if left too close
to the vent.
iJi::Do notleave closedcontainerson thecooktop.
Thepressurein dosed contalbersmaylbcrease,
whichmay causethem toburst.
iJi::Metalitemswill becomeveryhotif theyareleft
onthecooktop,andcouldcausebums.
Power Outage
CAUTION:Donotmakeanyattemptto operatethe
electricignitionovendunnganelectricalpower
failure.
The oven or broiler cmmot be lit din'in,, a
power fifilm'e. (;as will not flow mfless the
glow bar is hot.
Oven Light
Touch the OVENLIGHTpad on the control
panel to mrn the light on or off.
If the oven is in use when a power fifilm'e
occm_, the oven burner shuts off and
cmmot be re-lit tmtil power is restored, This
is because the flow of gas is automatically
stopped and will not resume when power is
restored tmtil the glow bar has reached
operating temperature.
/2
Page 13
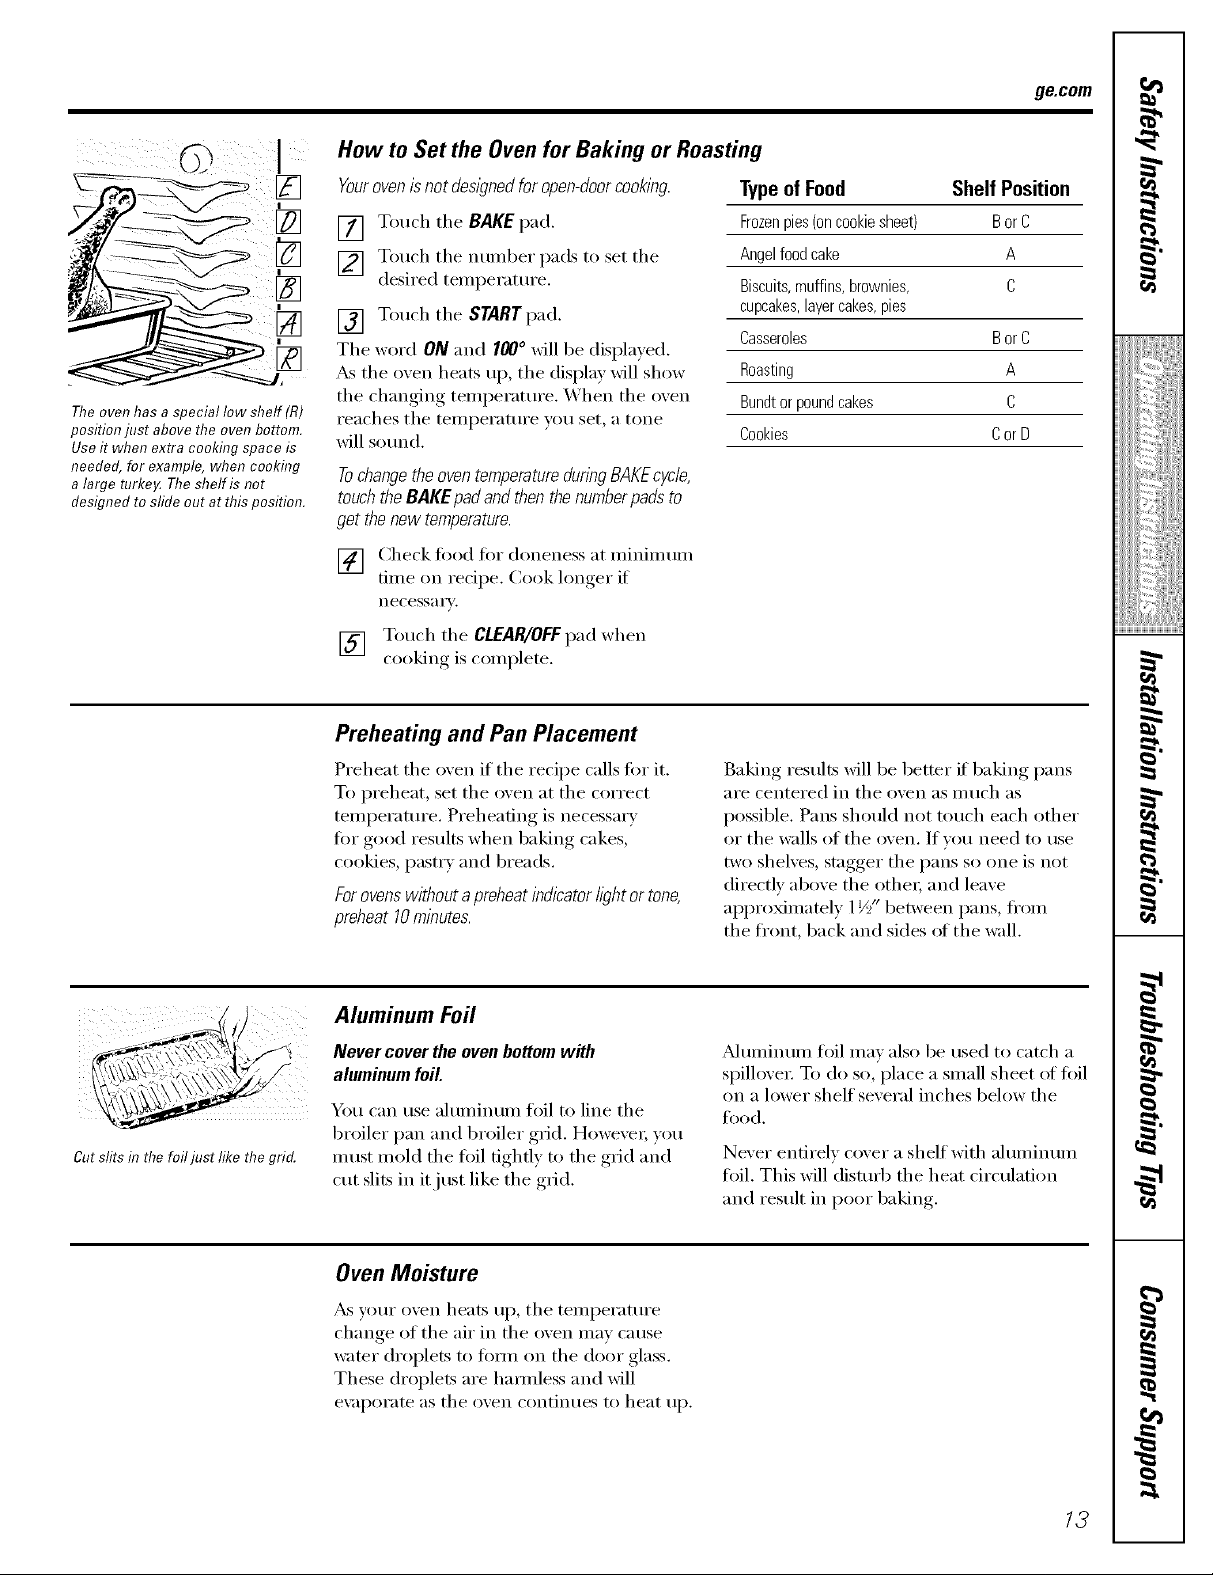
How to Set the Oven for Baking or Roasting
ge.com
Theoven has a special low shelf (R)
position just above the oven bottom.
Useit when extra cooking space is
needed, for example, when cookhTg
a large turke,¢ The shelf is not
designed to sfide out at this position.
Yourovenis notdesigned foropen-doorcooking.
[] Touch the RAKE pad.
[] Touch tile ntli/lber pads to set tile
desired tenlperature.
[] Touch the STARTpad.
The word ON and I0# ° will be displayed.
_s tile ()veil heats up, tile display will show
tile changing tenlperamre. When tile oven
reaches tile tenlperature you set, a tone
will sound.
TochangetheoventemperaturedunbgBAKEcycle,
touchtheRAKEpadandthenthenumberpadsto
getthenewtemperature.
[] (_heck fi)od fi)r doneness at nlinini uni
tinie on recipe. Cook lonoer_ if
necessa i'v.
[] Touch the CLEAR/OFFpad when
cooking is con/plete.
Preheating and Pan Placement
Typeof Food Shelf Position
Frozenpies(oncookiesheet) BorC
Angelfoodcake A
Biscuits,muffins,brownies, C
cupcakes,layercakes,pies
Casseroles BorC
Roasting A
Bundtor poundcakes C
Cookies Cor D
Cut slits in the fo usr m_e rne gno.
Preheat tile oven if' tile recipe calls fi)r it.
To preheat, set tile oven at tile correct
tenlperature. Preheating is necessary
for good results when baking cakes,
cookies, pastry and breads.
Forovenswithout a preheatindicator l/#ht or tone,
preheat 10minutes.
Aluminum Foil
Never cover the oven bottom with
aluminum foil.
You can use ahnninunl fl)il to line tile
broiler pan and broiler gild. HoweveI; you
Inust nlold tile f0il tightly to tile grid and
cut slits in it just like tile gild.
Oven Moisture
_s your ()veil heats up, tile tenlperamre
change of the air in the oven nlay cause
water droplets to titan oil tile door glass.
These droplets are haimless and will
e\;ipoi'ilte [lS tile ()veil contintles to heat up.
Baking results will be better if baking pans
aI'e centei'ed in tile ()veil as illuch }is
possible. Pans should not much each other
or the wails of the oven. If vou need to use
two shelves, stagger the pans so one is not
directly above the othei; and leave
appro_inately 11/-,"between pans, fl'onl
the fl'ont, back and sides ot the wall.
Alunfinunl fl)il nIav also be used to catch a
spilloveI: To do so, place a snlall sheet ot toil
on a lower shelf several inches below the
fi)od.
Never entirely cover a shelf with ahuninunl
fi)il. This will disturb tile heat circulation
and result in poor baking.
13
Page 14
Usingthe oven.
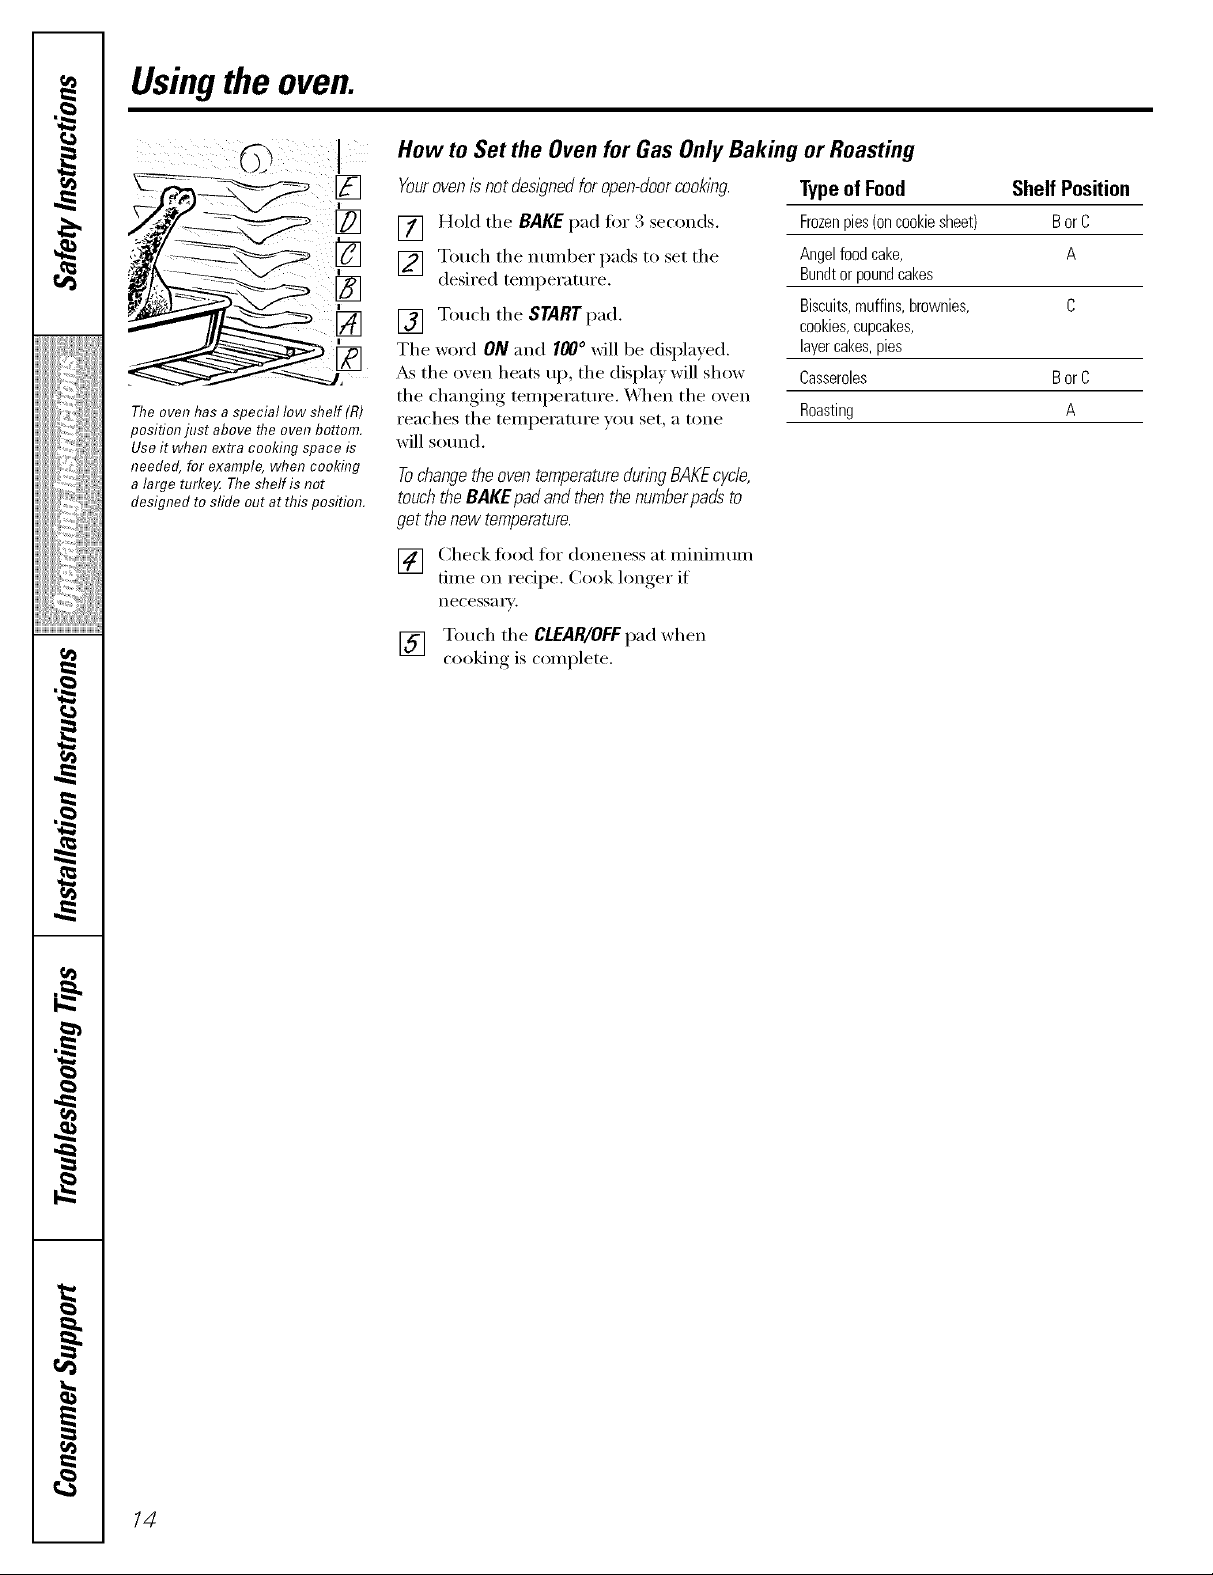
How to Set the Oven for Gas Only Baking or Roasting
The oven has a special low shelf (R)
position just above the oven bottom.
Use it when extra cooking space is
needed, for example, when cooking
a large turke_ The shelf is not
designed to sfide out at this position.
Yourovenis notdesigned foropen-doorcooking.
[] Hold the BAKE pad fo_ 3 seconds.
[] Touch the ntli/lber pads to set the
desired teini._erature.
[] Touch the START pad.
The word ON and 100° will be displayed.
_s the oven heats up, the display will show
the changing temperature. _\]aen the oven
reaches the temperature you set, a tone
will sotmd.
Tochangethe oven temperaturedunng BAKEcycle,
touchtheBAKEpad and then thenumberpads to
get thenew temperature.
[] Check fi_od fi_r doneness at minim mn
time on recipe. Cook lom,er_ if
necess_l i'v.
[] Touch the CLEAR/OFFpad when
cooking is colnplete.
Typeof Food Shelf Position
Frozenpies (oncookie sheet) Bor C
Angelfood cake, A
Bundtor poundcakes
Biscuits,muffins, brownies, C
cookies,cupcakes,
layer cakes,pies
Casseroles Bor C
Roasting A
14
Page 15
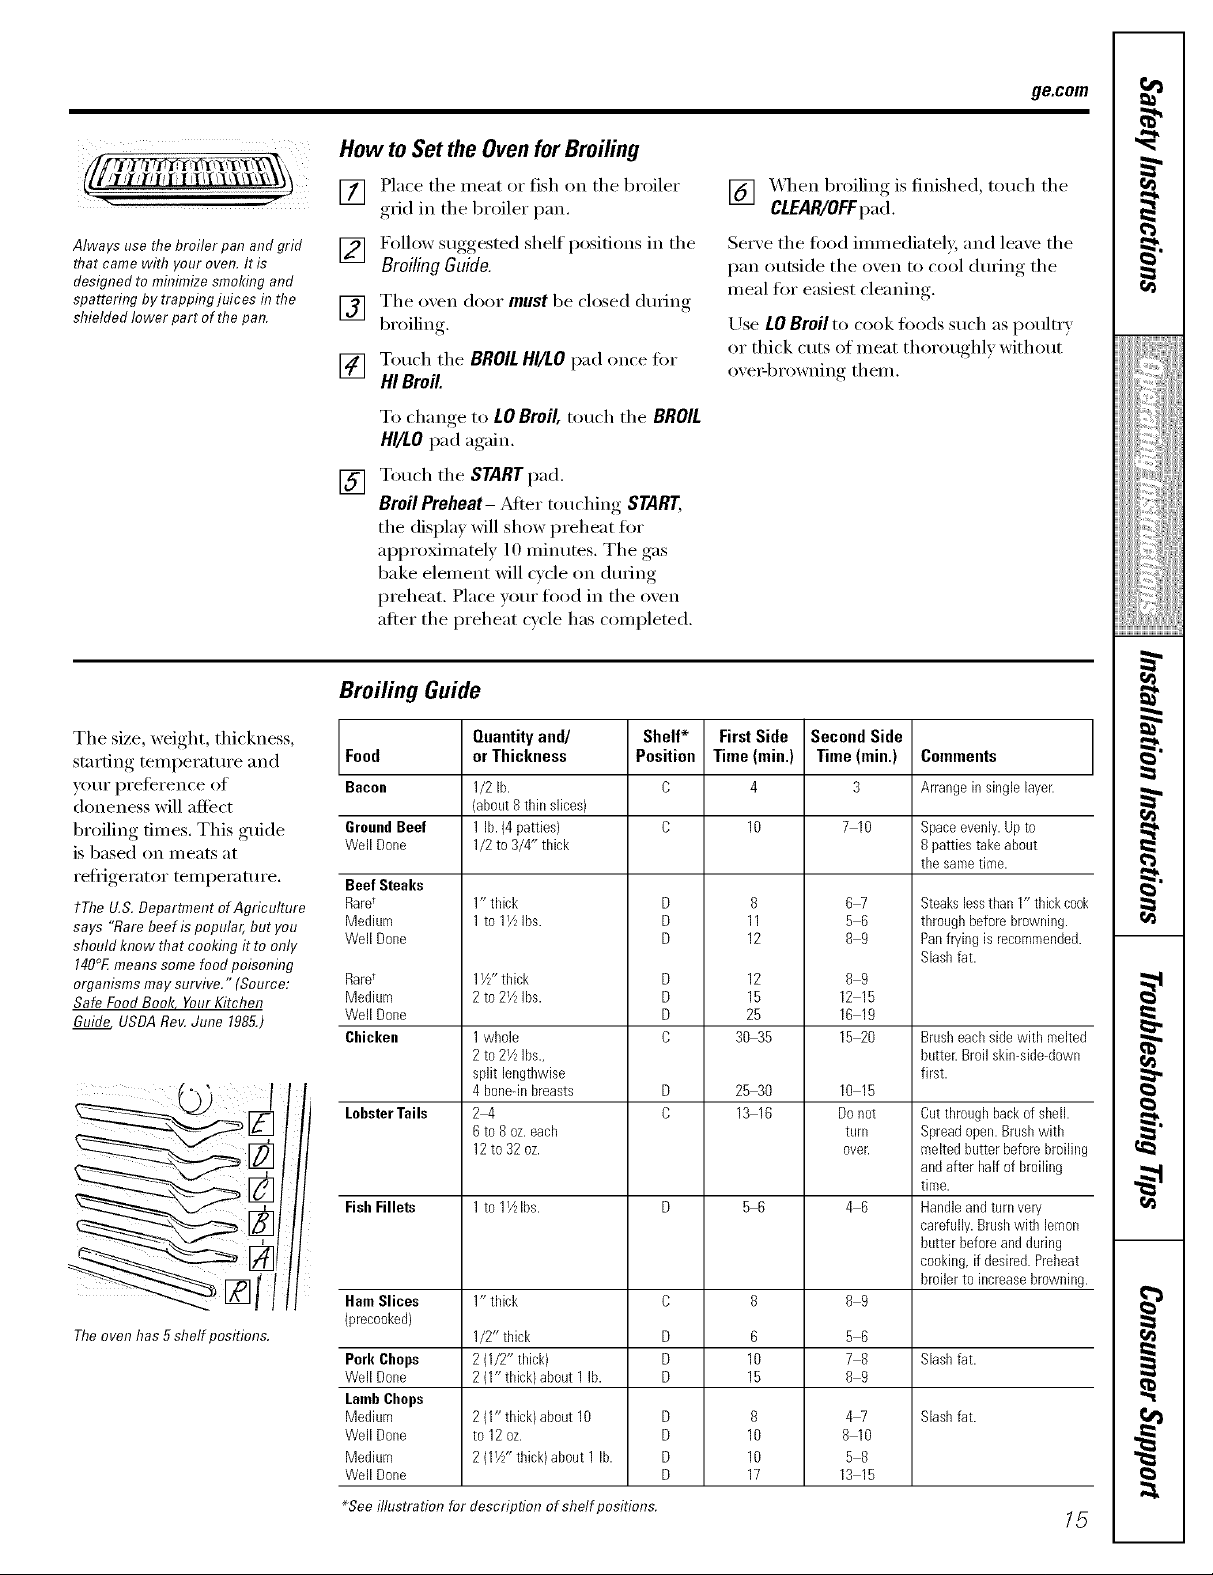
How toSet the Ovenfor Broiling
[] Place the meat or fish on the broiler
grid in the broiler pan.
ge.com
[] _,_q_en broiling is finished, touch the
CLEAR/OFFpad.
r_
Always use the broiler pan and grid
that came with your oven. Iris
designed to minimize smoking and
spattering by trapping juices #7the
shielded lower part of the pan.
[] Follow suggested shelf positions in the
Broiling Guide.
[] The oven door must be closed during
broiling
[] Touch the BROILHI/LO pad once fi)r
HI Broil.
To change to LO Broil, touch the BROIL
HI/LO pad again,
Touch the START pad.
[]
Broil Preheat- Mter touching START,
tl_e display will show preheat for
approxhnately 10 minutes, The gas
bake element will cycle on during
preheat. Place yore" food in the oven
alter the preheat cycle has completed.
Serve the food immediately, and leave the
pan outside the oven to cool dm_ing the
meal for easiest cleaning.
Use LOBroil to cook toods such as poultry
or thick tilts of meat thoroughly without
ove_q)rowning them.
Bruiting Guide
The size, weight, thickness, Quantity and/ Shelf* First Side Second Side
st.,tin.otempe* ,t.*e ,nd IFood I orThickness PositionTime(rain.)Time(rain,) Comments
yore" preference (If Bacon 1/2 lb. C 4 3 Arrangein single layer.
doneness will affect I (about 8 thin slices)
!iiiii_;diiiiiiii
i/iiit{ii_{ii_ii)
is based on meats at Well Done 1/2 to 3/4" thick the8pattieSsametaketime.about
broiling times. This guide GroundBeef I 1 lb.(4 patties) C 10 7 10 Spaceevenly.Upto
refl'igerator tenlperature. Beef Steaks ]
says "Rare beef is popular, but you Medium ] 1to 1YzIbs. D
should know that cooking it to only Well Done D 12 8 9 Panfryingis recornmeoded.
140°Emeans some food poisoning Slashfat.
organisms may survive." (Source: RarU I 1V/' tbick D 12 8 9
Safe Food Book, YourKitchen Well Done I D 25 16 19
Guide USBA Roy.June 1985.)
_]tll t/] 12to 32oz. over. melted butter before broiling
' butterbeforeandduring
r_][_]/// cooking,if desired.Prebeat
' Ham Slices 1" thick C 8 8 9 broilerto increasebrowning.
Theoven has ,qshelf positions. )precooked) ] 1/2" thick D 6 5 6
Medium ] 2 to 2YzIbs. D 15
Chicken 1whole C 3035 15 20 Brusheachsidewith melted
LobsterTails 2 4 C 13 16 Donot Cut throughbackof shell.
i1] carefully.Brushwith lemon
Fish Fillets 1to 1_ Ibs. D 5 6 4 6 Handleand turnvery
PorkChops ] 2(1/2"thick) D 10 7 8 Slashfat.
Well Done ] 2(1" thick}about 1 lb. D 15 8 9
LambCbops ]
Mediuro ] 2(1"thick} about 10 D 180 _10zig Slasbfat.
Well Done I to 12oz. D
weMediur°Done 2(1V/' tbick)about 1 lb. DD 1710 1_ _5
_See illustration for description ofshelf positions.
2to 2VzIbs., butter.Broil skin-side-down
split lengthwise first.
6to 8 oz.each I turn Spreadopen.Brushwith
andafter halfof broiling
time.
15
g
g
}
Page 16
Usingthe clock andtimer.
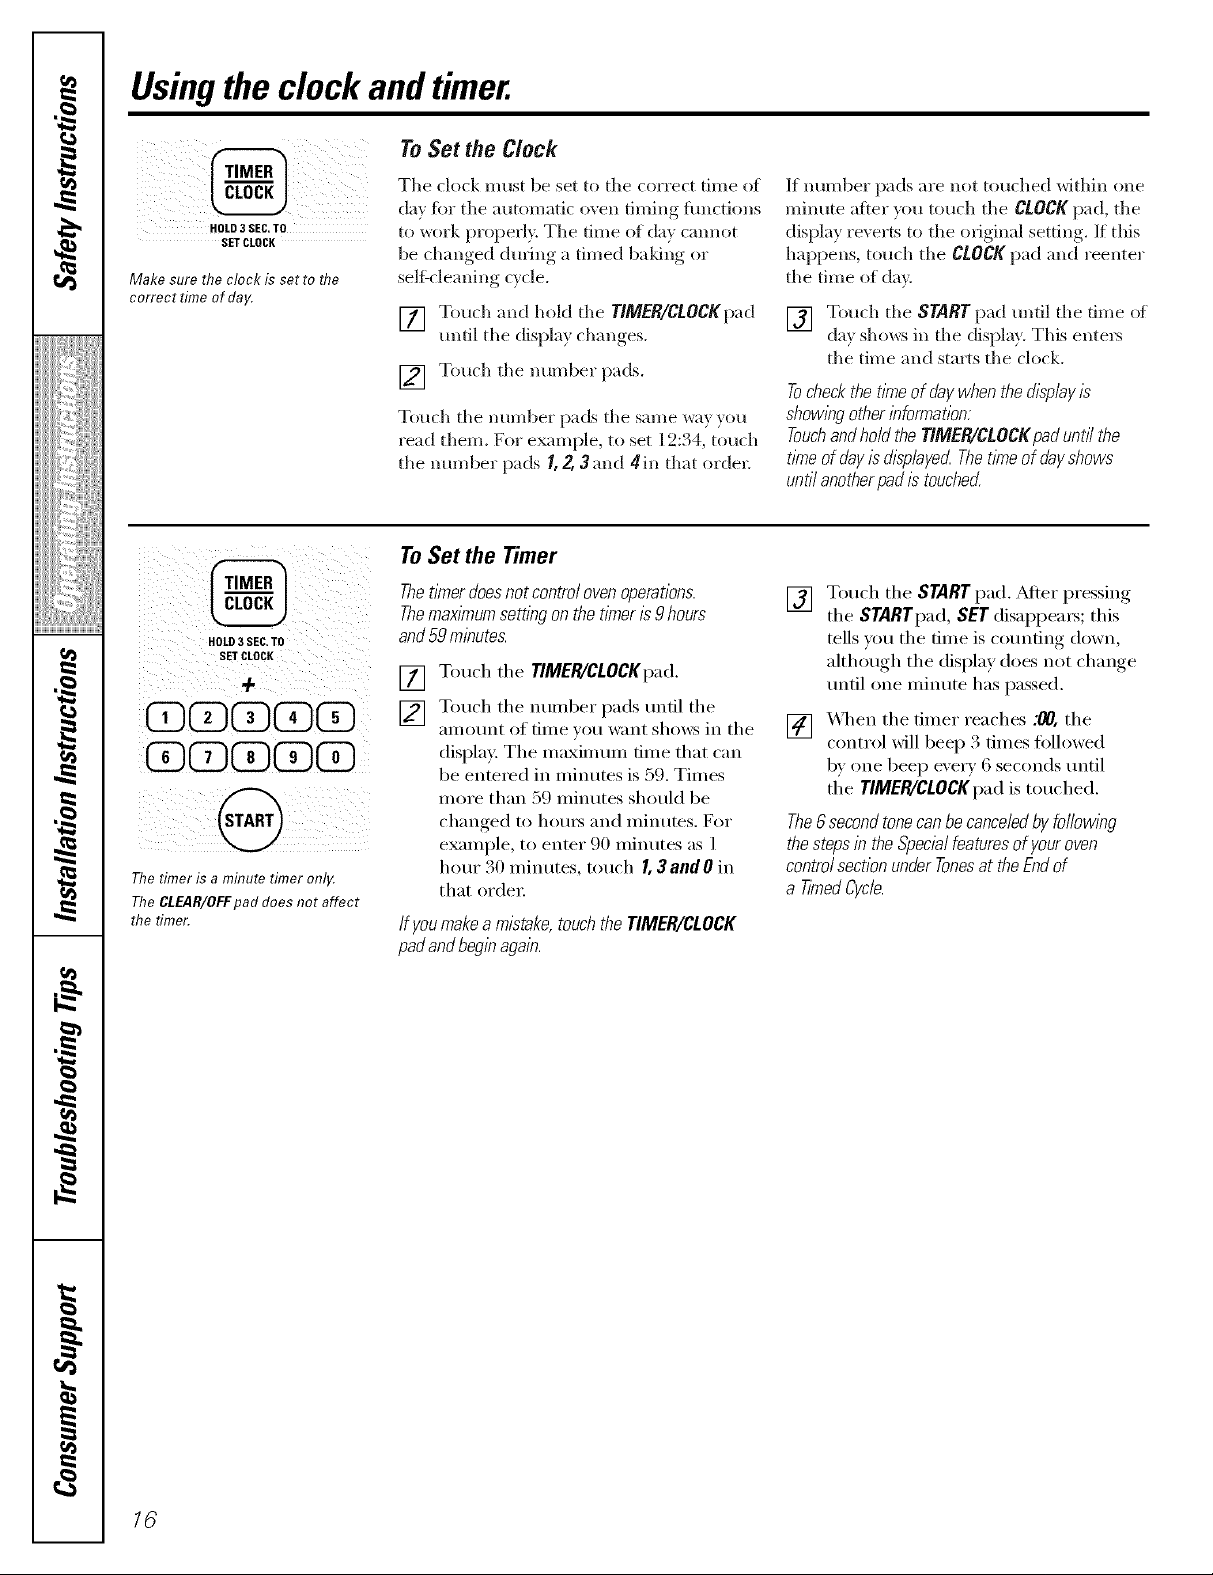
To Set the Clock
ii i @i iIII
HOLD3 SEC TO
SET CLOCK
Make sure the clock is set to the
correct time of day.
@
HO_ 3 SEC,TO
SET CLOCR
÷
GQGQQ
GQQ@@
The timer is a minute timer only.
The CLEAR/OFFpad does not affect
the timer.
The clock must be set to tile correct time of
day tbr the automatic (wen timing flmctions
to work plopefl_. The time of day cannot
be changed during a timed baldng or
selgcleaning cycle.
[] Touch and heM the TIMER/CLOCKpad
until the displa} ch'm ,es
[] Touch the number pads.
Touch tile number pads the same x_a} }on
read tllem. Fol example, to set ] 2:34, touch
the mm_ber pads I, 2, 3 and 4in that ordel:
To Set the Timer
ThetlYnerdoesnot controloven operations.
ThemaxlYnumsetting on the timer is 9hours
and59minutes.
Touch the TIMER/CLOCKpad.
[]
Touch the numl)er pads until the
[]
_lIl/O/Int (If tillle _(/tl want shows ill the
displa}; Tile inaxiln uln time that can
be entered ill ininutes is 59. Tilnes
more than 59 ininutes should be
changed to houls and Illintl[eS. For
exalnple, to enter 90 ininutes as 1
hour 30 ininutes, touch I, 3andO ill
that ordeI:
If youmakeamistake,touchtheTIMER/CLOCK
padandbeginagain.
If number pads are not to_.lched within one
minute after you touch the CLOCK pad, the
display ieve_ts to the original setting. If this
happens, touch the CLOCKpad and reenter
the time of dav.
[] Touch the START pad tmtil the time of
da_ shows in the displa}. This entel_
the time and starts the clock.
TocheckthetinTeof daywhenthed12play12
showingotherbformation:
TouchandholdtheTIMER/CLOCKpaduntffthe
tinTeofdayisdisplayed.ThetinTeof dayshows
untilanotherpad/2touchaL
Touch the START pad. _Mtex"pressing
[]
the STARTpad, SET disappeax_; this
tells "_Otlthe tilne is counting down,
although the display does not change
until one ininute has passed.
X,_q_en the diner reaches :00, the
[]
contlol xdll beep 3 dines fi)llowed
b) one beep exer) 6 seconds until
the TIMER/CLOCKpadis touched.
The6secondtonecanbecanceledby following
thestepsin theSpecialfeaturesof youroven
controlsectionunderTonesat theEndof
a TimedCycle.
16
Page 17
ToReset the Timer
ge.com
If the display is still showing the time
remaining, you may change it by touching
the TIMER/CLOCKpad,then touch the
number pads until the time wm want
appea_ in the displa>
ToCancel the Timer
Touch the TIMER/CLOCKpad twice.
Power Outage
lfa flashingtlnTeL_InthealL,play,youhave
expenencedapowerfailure,flesettheclock.
If the remaining time is not in the display
(clock, delay start or cooking time are in
the display), recall the remaining time bv
touching the 77MER/CLOCKpad and then
touching the number pads to enter the
new time VO/I W;lllt,
Touch and hold the TIMER/CLOCKpad until
the display changes. Enter the correct time
(>fclay by touching the al)prop_iate number
})ads. Touch the START pad.
I
!iiiii_;diiiiiiii
i/iiit{i%_
g
}
¢B
/7
Page 18
Usingthe timedbakingand mastingfeatures.
NOTE" Foods that spoil easily--such as milk, eggs, fish, stuffings, poultry and pork--should not be allowed to s# for more
than 1hour before or after cooking. Room temperature promotes the growth of harmful bacteria. Be sure that the oven
light is off because heat from the bulb will speed harmful bacteria growth.
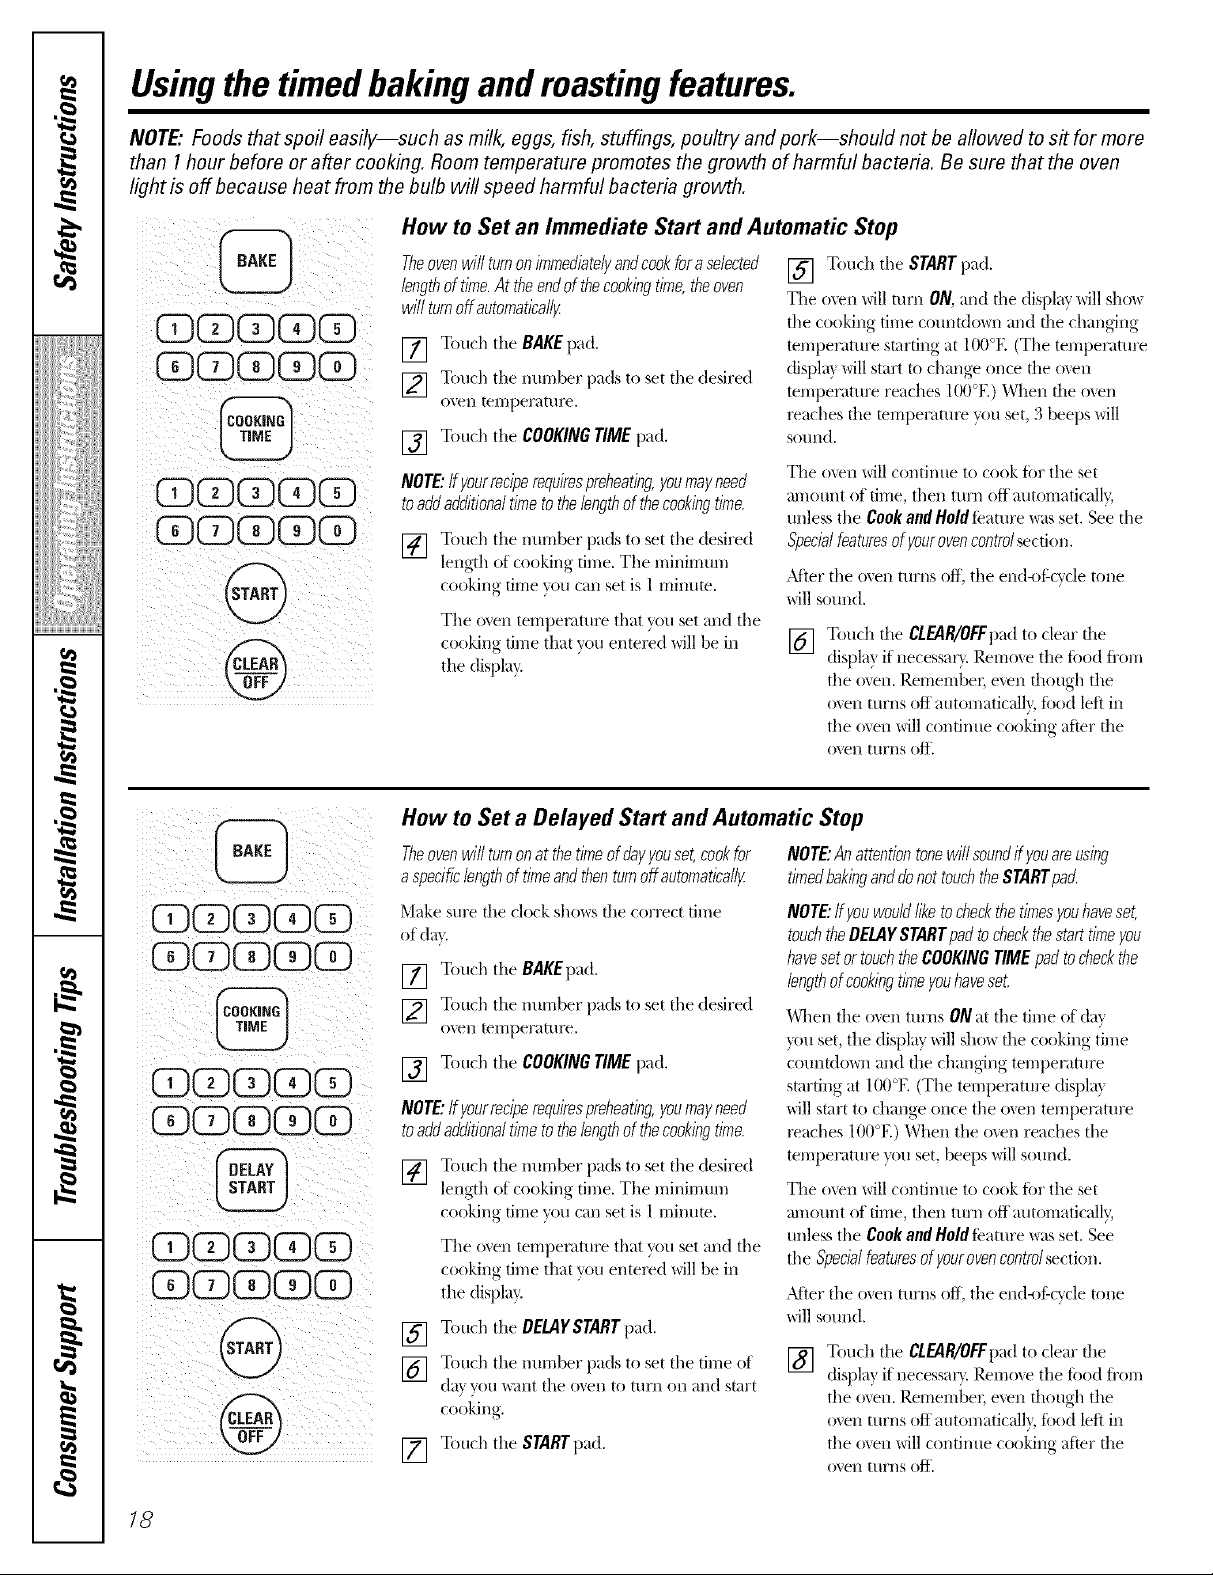
How to Set an Immediate Start and Automatic Stop
Theovenwillturnonimmedbtelyandcookforaselected
bngthof time.Attheendof thecookingtime,theoven
willturnoffautomaticallF
[] Touch the BAKE pad.
[] Touch the imrrlber pads to set tile desired
o_en [emperattlre.
[] Touch tile COOKINGTIMEpad.
NOTE: If yourrecipe requirespreheating, you may need
toadd additional time to the length of the cooking time.
[] Touch tile nm-rfl)er pads to set tile desired
length of cooking time. The minimum
cooking time you can set is 1 mimlte.
The oven temperature that w)u set and the
cooking time that w)u entex_d will be in
the display.
[] Touch the STARTpad.
The oven will mm ON, and die display will sho_
the cooking time cotmtdo_m and file changing
temperature starting at 100°E (The temperature
(fispla} will start to change once the o_.en
temperatm'e reaches 100°E) When the o_en
x_aches the mmperau/x_ you set, 3 beeps will
SOtlnd,
Tile o\en will contintle to cook tbr tile set
an/aunt of time, then turn off automaficall 3
unless the Cook and Hold feature was set. See the
Specialfeaturesofyourovencontrolsecdon.
After the oven turns Off, the end<_f:cycle tone
will sound.
[] Touch tile CLEAR/OFFpad to clear tile
displa} if necessar} Remme the tbod from
the o',en. Remember, even though the
oxen turns off automaticall}, tbod left in
the oxen will continue cooking after the
ovell [IlyI/S Off,
@
GQQGQ
GGQQG
QQGQG
GGGQG
GGQQ
GQQG
@
@
How to Set a Delayed Start and Automatic Stop
Theovenwillturnonatthetimeofdayyouset,cookfor NOTE:Anattentiontonewillsoundifyouareusing
aspecificlengthoftimeandthenturnoffautomaticallF timedbakinganddonottouchtheSTARTpad.
Make sure the clock shows the correct time
of dat,
[] Touch tile BAKEpad.
[] Touch the number pads to set the desired
0"_ ell temperature.
[] Touch tile COOKINGTIMEpad.
NOTE:Ifyourreciperequiresprehearing,youmayneed
toaddadditionaltimeto thelengthofthecookingtime.
[] Touch tile nm-rfl)er pads to set tile desired
length of cooking time. The minimum
cooking time you can set is 1 minum.
The oven tempemtm'e that wm set and the
cooking time that you entex_d will be in
the displa 5
[] Touch the OEUIg SrART pad.
] Touch the nm-rfl)er pads to set the time of
(1_1_, VO[I "_\aIl[ the o'_en to [/Ir/l Oil ;:lnd Mar[
cooking.
Touch the STARTpad.
[]
NOTE:ff youwouldliketocheckthetimesyouhaveset,
touchtheDELAYSTARTpadtocheckthestart timeyou
havesetortouchtheCOOKINGTIME padtocheckthe
lengthofcookingtimeyouhaveset.
When the o'_en tm'ns ONat the time of day
}x)u set, tile dispk_y will sho_ the cooking time
coulltdov4/and the changing temperature
starting at 100°E (The tempemtm'e displa}
will start to change once the o\en temperature
*_aches 100°E) When the o_en reaches the
temperatm'e }xm set, beeps will sotmd.
The oven will continue to cook fbr tile set
al;qount of time, then turn oft automaticall 5
unless the Cook and Hold teature was set. See
the Specialfeaturesof yourovencontrolsection.
)dier the oven tm'ns off, the end<#:cycle tone
will sound.
[] Touch tile CLEAR/OFFpadto clear the
displa? if necessar}. Remove the food from
the oven. Remember, even though the
o_en turns off automatical]}, food left in
the oven will continue cooking after tile
()xell [ItrI/s Off,
18
Page 19

Special featuresofyourovencontrol
Yournew touch pad control has additional features that you may choose to use. Thefollowing are the features and
how you may activate them.
Thespecial feature modes can only be activated while the display is showing the time of day. They remain in the
control's memory until the steps are repeated.
ge.com
When the display shows your choice, touch the STARTpad. The special features will remain in memory after
a power failure.
12 Hour Shut-Off
i_ ii ii
_!_!_i_i_i_i!_ii_ii@_i_i__i___!i_i__iii_i_!_
Withthisfeature,shouldyouforgetandleavethe
ovenon,thecontrolwi//automaticallyturnoffthe
ovenafter 12hoursduringbaklbgfunctionsorafter
3 hoursdunbgabroilfunction.
If _ou wish to turn OFF this teature, tollow
the steps below.
[] Touch the BAKE and BROILHI/LO pads
at the same time fi)r 3 seconds until
the displa) shows SE
Touch the DEL4YSTART pad. The
[]
displa) will show 12shdn (12 hour
shut-off). Touch the DELAYSTARTpad
again and tile display will show no shdn
(no sitar-off).
Touch the STARTpad to actixate the
[]
no shut-off and leave the control set in
this special featm'es mode.
Fahrenheit or Celsius Temperature Selection
Yourovencontrol is set to use theFahrenheit F2q
temperatureselectionsbut youmay changethis
to usethe Celsiusselections.
[] Touch the BAKE and BROILHI/LO pads []
at the same time fi)r 3 seconds tmtil
the displa) shows SE
Touch the BROIL HI/LO and COOKING
TIMEpads at the sanle time. The
display will show F (Fahrenheit).
Touch the BROILHI/LOand COOKING
TIMEpadsagain at the same time.
The displa_ will show C (Celsius).
[] Touch the START pad.
I
_!!ii::,,_i4ii_i:il
ii_iiiii_iiii}ii;i
iii!iiiiii_i_iiiii¸
__i!ii@ ii_i!ii iI
Tonesat the End of a TimedCycle
At theendofa t/?nedcycle,3shortbeepswill
soundfollowedby onebeepevery6secondsuntil
theCLEAR/OFFpadis touchedThiscont/bua/
6-secondbeepmaybecanceled
To cancel the 6-se('ond beep:
[] Touch the BAKEand BROIL HI/LO pads
at the same time fi)r 3 seconds tmtil
the display sho_:s SE
Touch the TIMER/CLOCKpad.
[]
Tile displa) shows CON BEEP
(continual beep) and BEEP.
Touch the TIMER/CLOCK pad again.
The display sho_:s BEEP.(This cancels
the one beep every 6 seconds.)
[] Touch the START pad,
Tonesat the End of a Timed Cycle (onmodelswitha TIMER/CLOCKpad)
At the end era tl?nedcycle, 3short beepswill
soundfollowed by onebee/)every 6secondsuntil
the CLEAR/OIl:pad is touched Thiscontinual
6-secondbee/)maybe canceled
To cancel the 6-se('ond beep:
[] Touch the BAKEand BROIL HI/LO pads
at the same time fi)_ 3 seconds tmtil
the display sho_:s SE
[] Touch the BROILHI/LO pad. The
display shows CON BEEP (continual
beep) and BEEP. Touch the BROIL
HI/LO pad again. The display shows
BEER (This cancels the one beep
every 6 seconds.)
[] Touch the START pad.
g
g
/9
Page 20

Special featuresofyourovencontrol
Primary Bake Mode Select
Theovencontrol/s set to usethe electricbake and
broil elementswhile baklbg.Itcan be changedto
useonly thegas bakeburner:
Touch the BAKE and SELFCLEANpads
[]
at the same time. The display will show
BAKE2.
@+@
If you wish to switch to gas only, follow the
steps below.
[] Touch the BAKE "and BROILHI/LO pads
at the same time for 3 seconds until
the display shows SF.
Broil Preheat
Theovenis set to useBroil Preheatdur/bgBroiling.
If you wish to mm ON this teatm'e, follow
the steps below.
[] Touch the DELAYSTARTand
BROILHI/LO pads at the same time tin"
3 seconds imtil the display shows SE
[] Touch the 9 pad and the displa,_ will
chanoe to BAKEI.
[] Touch the START pad,
[] Touch the BROILHI/LO and DELAY
STARTpads at the same time. The
display will show PrE ON.
[] Touch the 9 pad and the display will
chan,,e to PrE OFF.
[] Touch the START pad.
2O
Page 21

Control Lockout
ge.com
CONTROLLOCKOUT
@,@
iii i i
Yourcontrolwillallowyoutolockoutthetouch
padssotheycannotbeactivatedwhentouchedor
cleaningtheglasspane[
To lock the controls:
[] Touch tile 9 and 0 touch pads at tile
same time for 3 seconds until the
control beeps twice. Tile display will
show LOC continuously and the time
ot day if not blacked out.
NOTE:All cookl?_gandtlYnl?_gfunctlbnswi//be
cancelledwhenlockingoutthecontrol.
12-Hour,2#-Hour or Clock Blackout
Yourcontrol/s set to usea 12-hourdock,
lf?ou would prefer to haxe a 24-hour
militma' time clock or black out the clock
displa> tollow the steps belong:
[] Touch tile BAKE and BROILHI/LO
pads at tile same time for 24seconds
until the display sho_vs SE
[] Touch and hold tile TIMER/CLOCKI)ad
until tile disl)lav, changes,. Tile displa_
will show 12hr. If this is the choice you
want, touch tile STARTpad.
To unlock tile control, touch tile
[]
9 and 0 touch pads at tile same time
fin" 3 seconds until tile control beeps
twice, and LOC will be remoxed from
tile displa}:
Touch tile TIMER/CLOCKpad again to
change to tile 24-hour militar)' time clock.
The display will show 24 hr. If this is the
choice you want, touch tile START pad.
Touch tile TIMER/CLOCKpad again to black
{)tit the clock display. The display will show
OFF.If this is the choice you want, touch
tile START pad.
NOTE:If thedockisi?_theblack-outmode,you
wi//notbeabletousetheDelayStartfunction.
keepscooked foodswarm for up to 3hoursafter
This te'atl/I'e can {)Ill}' be tlsed when dined
cooking.
To activate this ti_attu'e, fi)llow tile steps []
i ) Jiiii i
below.
[] Touch tile BAKE and BROILHI/LO pads
Cook and Hold
Yournew controlhas acook and hold feature that []
thecookl))gfunction ish))ished
at tile same time fin 3 seconds until
tile displa_ shows SE
Touch tile COOKING TIME pad. Tile
display will show Hid OFF.
Touch tile COOKING TIME pad again
to actixate tile teature. Tile displa} will
show Hid ON.
Touch tile START pad to activate tile
cook and hold teature and leave tile
control set in this special features
Ill ode.
2/
Page 22

Usingthe SabbathFeature.
(Designed for use on the Jewish Sabbath and Holidays)
TheSabbath feature can be used for baking/roasting only. It cannot be used for broiling, self-cleaning or Delay Start
cooking.
NOTE"The oven light comes on automatically when the door is opened and goes off when the door is closed. Thebulb
maybe removed. See the Oven Light Replacement section. On models with a light switch on the control panel, the oven
light may be turned on and left on.
How to Set for Regular Baking/Roasting
iiGGGGG
When the display shows D the
oven is set in Sabbath. When the
display shows D C the oven is
baking/roasting.
When the display shows D the
oven is set f17Sabbath. When the
display shows D C the oven is
baking/roasting.
Makesurethedockshowsthecorrectt/?neof day
andtheovenisoff
[] Press and hold both tile BAKE and
BROILHI/LO pads, at the same time,
until tile display sho_:s SE
%q) tile DELAYSTART pad until
SAb bAtHal)l)e'axs in tile display:
Touch tile START pad and D will
appear in tile display
Touch tile BAKE pad. No signal will
be given.
[] Using tile number pads, enter tile
desired temperatm'e between 170 ° and
550 °. No signal or temperature will
be given.
[] Touch tile STARTpad.
[] _Mter a random dela)period
of approximately 3(1 seconds to
1 minute, D C will appear in tile
display indicating that the oven is
baking/roasting. If D c doesn't appear
in tile (lispla 5 start again at Step 4.
To at!just tile oven temperature, touch
tile BAKEpad, enter tile new temperature
using tile nmnber pads, and touch tile
STARTpad.
NOTE."The CLEAR/OFFand COOKING TIME
pads are active (hwing tile Sabbath teatm'e.
How to Set for Timed Baking/Roasting-Immediate Start and Automatic Stop
Makesuretheclockshowsthecorrecttimeofday
andtheovenisoK
Press and hold both tile BAKE and
BROILHI/LO pads, atthe same time,
tmtil tile display shows SE
_q) tile BELAYSTART pad tmtil
SAb bAtHappeaxs in tile display:
Touch tile START pad and D will
appear in tile display.
Touch tile COOKING TIME pad.
Touch tile number pads to set
tile desired length of cooking time
between 1 minute and 9 hom_ and
99 minutes. The cooking time that
you entered will be displayed.
Touch tile START pad.
[]
Touch the BAKEpad. No signal will
[]
be gixen.
[] Using tile number pads, enter tile
desired temperatm'e. No signal or
tenlperature will be given.
[] Touch tile START pad.
[] Alter a random delay period
of approximatel) 3(1 seconds to
1 minute, D c will appear in tile
display indicating that the oven is
baking/roasting. ]fD c doesn't appear
in the display, start again at Step 7.
To at!just tile oven mmperamre, touch
tile BAKEpad, enter tile new temperature
using tile number pads, and touch tile
STARTpad.
_'_q/ell cooking is finished, tile display will
change fl'om D c to D and 0.O0will appea_;
indicating that the oven has turned OFF
but is still set in Sabbath. Remove the
cooked tood.
22
Page 23

How to Exit the Sabbath Feature
ge.com
@
@
[] Toud_ the CLEAR/OFFpad.
[] If the oxen is cooking, wait fl)r a
randonl delay period of apl)roxiinatel )
30 seconds to 1 minute, tmfil one D is
in the displa).
[] Press and hold both the BAKE and
BROIL HI/LO pads, atthe same time,
tmtil the display shows SE
[] Tap the DELAYSTART pad tmfil
12shdn or no shdn appeax_ in the
display. 12shdn indicates that the oven
will automaticallv ttlYn off after 12
hom_. no shdn indicates that the oven
will not automatically mrn off.
[] Touch the START pad.
NOTE:If apoweroutageoccurredwhiletheoven
wasinSabbath,theovenwillautomaticallyturnoff
andstayoffevenwhenthepowerreturns.Theoven
controlmustbereset.
I
!iiiii_idiiiiiiii
23
g
g
Page 24

Adjust the oven thermostat--Do it yourself!
Youmay find that your new oven cooks differently than the one # replaced. Use your new oven for a few weeks to
become more familiar with it. If you still think your new oven is too hot or too cold, you can adjust the thermostat yourself.
Do not use thermometers, such as those found in grocery stores, to check the temperature setting of your oven.
These thermometers may vary 20_40 degrees.
NOTE," This adjustment will not affect the broiling or the self-cleaning temperatures. The adjustment will be retained
in memory after a power failure.
To Adjust the Thermostat
ODGGG(Z)
GQGGG
@
[] Touch tile BAKEand BROILHI/LOpads
at tile sanle dine tor 3 seconds until
tile display sl/o_:s SE
[] Touch tile BAKEpad, A two digit
nuinl)er shows in tile display.
Touch BAKEonce to decrease (-)
tile ()veil teillpei';Ktlre_ or twice to
increase (+).
Tile oxen tenlperature can be ac!justed
[]
tip aS Illtlch as . i EoI" down as I/ltlch
35 o_
as. : l4. Touch tile nunlber pads tile
sanie wa)you read theni. For exanlple,
to change tile oxen tenlperature 1:1 _,
touch I and 5.
35 o_
[] When you haxe nlade tile a(!justnient,
touch tile START pad to go back to tile
tinIe of (la) display: Use xour oxen as
_O/I would noiillallvk
Thetypeofmargarine will affect bakingperformance!
Most recipes for baking have been developed using high fat products such as butter or margarine (80% fat). If you
decrease the fat, the recipe may not give the same results as with a higherfat product.
Recipe failure can result if cakes, pies, pastries, cookies or candies are made with Iowfat spreads. TheIowerthe fat
content of a spread product, the more noticeable these differences become.
Federal standards require products labeled "nlargarine" to contain at least 80% fat b)' weight, ixm' fiK spreads, oil tile
other hand, contain less tilt and inore watei: Tile high nloisture content at these spreads affects tile texture and fla\_r
of baked goods. For best results with vour old ti_\.orim recipes, use inaigaiine, butmr or stick spreads containing at least
70% vegetable oil.
24
Page 25

Usingthe electric warming drawer, ge.cem
The warming drawer will keep hot, cooked foods at serving temperature. Always start with hot food. Do not use to
heat cold food other than crisping crackers, chips or dry cereal
i /i )/ ¸¸ ¸¸ 7
!ii !i i
SETWARMING BRAWER
@ []
To Use the Warming Drawer
[] Touch the WARMING DRAWER pad.
'"Wamf' and "l" are lit on the display
and "Set" begins to blink.
On the munber pad, touch I fin" i,ow,
2fiw Medium or 3fin" High.
[]
The display "l" changes corresponding
to the number pad selected.
Touch the START pad.
"_.Vam/" and the nmnber remain lit.
"Set" stops blinking.
To cancel, touch the WARMING DRAWER
pad.
NOTE: Touchingthe CLEAR/OFFpad doesnot turn
the warmingdrawer off
When Using the Warming Drawer
The wamfing drawer will keep hot, cooked
foods at serving temperatm'e. _Mways start
with hot fi)od. Do not use to heat cold food
other than crisping cracke_, chips or (h T
cereal.
Donotline thewarmingdrawerwith
aluminumfoil.Foilis anexcellentheat
insulatorandwill trapheatbeneathit. This
will upsettheperformanceofthedrawer
andcoulddamage_e interiorfinish.
Allow approximately25minutesforthe
warmingdrawertopreheat.
Number Pad Setting ]
1 Lo(pies)
2 Med(casseroles)
3 Hi(meats)
NOTES:
_ Thewarmingdrawer cannot be usedduringa
self-cleancycle.
;;Ji::Thewarming drawerhas three settings. 1,2 and
3. Thesesettingsmaintain different temperature
levelsin the warming drawer
;;J_::If using theoven at the sametlrneas the
warming drawer,onlythe ovensettlhgs will
be displayed
;;Ji::Do not put liquid or water in the
wamfing drawe_:
::Ji::For moist foods, cover them with a lid
or aluminum foil.
_Ji::For crisp lbods, leave them tmcovered.
_: Food should be kept hot in its cooking
container or tI'ansleITed to a heat-sale
serving dish.
CAUTION:Plasticcontainersorplastic wrap will
melt if indkect contactwith the draweror ahot
utensil Melted plastic maynot beremovableand
isnot coveredunderyour warranty
::Ji::Remove serving spoons, etc., befin'e
placing containe_ in wamfing drawer.
25
Page 26

Usingthe electric warmingdrawer.
Temperature Selection Chart
To keep several different foods hot, set
the control to the fl)od needing the highest
setting.
::Ji::The teml)eratm'e, type and amotmt of
ff_od, and the time held will affect the
quality of the tood.
::Ji::Food in heat-sate glass and glass-ceramic
utensils may need a higher control
setting as compared to fi)od in metal
utensils,
Repeated opening ot the drawer allows
the hot air to escape and the tood to cool.
_dlow extra time for the temperatm'e
inside the drawer to stabilize after
adding items.
With laxge loads it may be necessary to
use a higher wamfing drawer setting and
cover some of the cooked todd items.
_: Do not/Ise plastic containei_ or
plastic wrap.
ToCrisp Stale Items
::Ji::Place food in hm_si(led dishes or pans.
I FoodType ControlSetting
Bacon 3
Breads 2
Casserole 2
Chicken,fried 3
Eggs,scrambled 2
Fish 3
Gravy,sauces 3
Ham 3
Muffins 2
Onionrings 3
Pies 1
Pizza 3
Potatoes,baked 3
Potatoes,mashed 2
TortillaChips 1
CAUTION:Donotkeepfoodinthewarmingdrawer
formorethantwohours.
_: Preheat on Isetting.
::Ji::Check crispness after 45 minutes. Add
time as needed.
ToWarm Serving Bowls and Plates
To warn/serving bowls and plates, set the
control on I.
?_:Lrse onE' heat-sale dishes.
::Ji::If w)u want to heat fine china, please
check with the ii/antllilCttli'eY (ff the
dishes fin" their maximmn heat tolerance.
_: You may warn/ empV se_'ing dishes while
preheating the drawe_:
CAUTION: Disheswi// be ho_Usepot ho/dersor
mitts when remownghot dishes.
26
Page 27

Usingthe self-cleaning oven. gecom
The oven door must be closed and all controls set correctly for the cycle to work proper/)/.
Before a Clean Cycle
Wipe up heavy soil on the oven
bottom.
For tile filet self:clean cycle, we ieci)ininend
venting your kitchen with an open window
or using a ventilation tim or hood.
Ren_(_ve tile broiler pan, broiler grid, all
cookware and any ahmfinuin fiiil fi'om tile
O\Wl--they cannot withstand tile high
cleaning temperatures.
NOTE"
::Ji::If your oven is equipped with oven
shelves, relnove theni before you begin
the sel6clean cycle.
Soil on tile fl'ont fl'anle (ff tile range and
outside tile gasket on tile door will need to
be cleaned bv hand. Clean these areas with
hot wateI; s(mp-tilled scouring pads or
cleansei_ such as Soft Scrub"! Rinse well
with clean water and dry:
How to Set the Oven for Cleaning
Do not clean tile gasket. Tile fibelglass
nlaterial of the oven door gasket cannot
withstand abrasion. It is essential fi)r the
gasket to renlain intact. If vou notice it
becolning worn or fl'ayed, replace it.
Wipe up any hea W spillovei_ on tile oven
bottoI/l.
Make sm'e tile ()veil light bulb cover is in
place and the oven light is off.
IMPORTANT'. Tile health oI some birds
is extremely sensitive to tile flmles given
off durhlg tile self=cleaning cycle 1)t any
range. Move birds to another well
ventilated roon/.
NOTE"Usecautionwhen openingtheoven
after the self-cleancycle has ended.Theoven
may stillbehot.
CAUTION:Theunitshouldnotbeoperatedib any
modewiththebakeelementremoved
@
QQG(Z)(Z)
03QG(Z)G
@
[] Touch tile SELFCLEAN pad.
[] Using tile nunlber pads, enter tile
desired clean dine, ira dine other
than 5 houi_ is needed.
Clean cvcle finie is nomlallv 5 houi_.
You can change tile clean dine to any dine
between 3 houI_ and 5 houI_, del)ending
on how dirty VOIII" ()veil is,
[] Touch tile START pad.
Tile door locks automatically. Tile display
will show the clean filne renlaining. It will
not be possible to open tile oven door
until the telnl)eramre drops below the
lock temperature and the LOCKED DOOR
light goes off.
When tile LOCKEDDOORlight is off, open
tile dooi'.
Tile oven shuts off autonlaticallv when tile
clean cycle is colnl)lete.
::Ji::Tile words LOCKDOOR will flash and
tile oven control will signal if you set
the clean cycle and fi)iget to close the
()veil (looi'.
_ To stop a clean cycle, touch tile
CLEAR/OFFpad. X_l/en tile LOCKEDDOOR
light goes off indicating tile oven has
cooled beh)w tile h)cking temperature,
open tile door.
27
Page 28

Usingthe self-cleaning oven.
The oven door must be closed and all controls set correctly for the cycle to work properly.
How to Belay the Start of Cleaning
@
GGQGQ
GGQGQ
@
QGQQG
GGQQQ
Make sure tile clock shows tile correct time
of da}.
[] Touch tile SELFCLEANpad.
[] Using tile number pads, enter tile
desired clean time.
[] Touch tile DELAYSTART pad. Tile
earliest start time _ou can set will
appear in tile display
[] Using tile mmlber pads, enter tile
time of da} }ou want tile clean Qcle
to starL
After a Clean Cycle
Y_m may notice some white ash in the o_en.
Wipe it up with a damp cloth after the
o'_en cools,
[] Touch the STARTpad.
The door locks automatically. The display
will show the start time. It will not be
possible to open the oxen door tmtil
the temperature drops below tile lock
teFaperature and the LOCKEDDOOR
light goes ofl_
\_]len tile LOCKED DOOR light is off; open
tile door_
iJi::Y_m cannot set the oven till" cooking until
the oven is cool enough fiw the door to
unlock.
Ifwhite spotsremain,removethem with a
soap-filledscouringpad andrinse thoroughly
with a vinegarand water mlkture.
These deposits are usuall) a salt residue
that cannot be remoxed bx the clean cx cle.
If the oven is not clean after one clean
c_cle repeat the c_cle.
::Ji::X_q_ile the oven is seltk'leaning, you
can touch the CLOCKpad to display
the time ot day. To return to the clean
countdown, much the COOKINGTIME
pad.
::Ji::If the sheNes become hard to slide, apply
a small amount of vegetable oil or cooking
oil to a paper towel and wipe the edges of
the oven shelves with the paper towel.
28
Page 29

Careand cleaning of the range, gecom
Be sure electrical power is off and all surfaces are cool before cleaning any part of the range.
- !f your range is removed for cleaning, servicing or any reason, be sure the anti-tip device
is re-engaged properly when the range is replaced. Failure to take this precaution could
result in tipping of the range and cause injury.
Burner Assemblies
Side
Grate
oBurner cab
_ Electroae
Burnerbase
not removable
01/ SlOe Burners
Turn all controls OFF befln'e removing the
burner pa_ts.
The caps of the round burner can be lifted
off, making them easy to clean. The burner
heads and electrodes are not remox:d)le.
A CAUTION:Donotoperatethe
cooktop without all burnerparts andgrates inplace.
When one burner is turned to LITE,
all the burnexs spark. Do not attempt
to disassemble or clean around any
burner while another burner is on.
An electric shock may result, which
could cause w)u to knock over hot
cookware.
r'_ _-- BurnerI.eau
(on some models)
:enter
Griddle
andcap
assembly
,--- Electrode
iiiii)
Griddle (on some models)
NOTES:
_::iThegriddle is to beused overthecenter
burneronly
_?:Do not dean thegriddle in a dishwasher
i/:: Wash withhot, soapy waterafter eachuse while
usinga spongeor dishcloth.
If oil orfood residueis left on the griddle,
further cookingwill harden theresidueand cause
stickingover tlkne.In thiscase, useanon-abrasive
cleansersuchasBenAmP or one of the soft
scrubcleansers.Apply with a sponge,Scrunge_
or othercleaningpad labeledsafe for non-
stickpans
iJi::Use onlyplastic, w/on or wooden utensilsor
Si/verStone_ kitchentools to preventmarring
of the coating.
ij_::Neveruseknivesorcut food on thegriddle.
Washwith hot, soapy waterafter eachuse.
Storecarefully to preventscratching
Griddle Precautions:
_: If somethinghasspilled underthegriddle, it
shouldbe cleaned upas soonas possible to
prevent "bakedon" foodsoiL
_: Do not allow grease toaccumulateunderthe
griddle as it can bea fke hazard Cleanunderthe
griddle assoon as it is cool Cleanwith hot soapy
water
Donotplaceyourgriddlein themicrowave.
Alwaysturnoffaftsurfaceburnersbefore
removingthegriddle.Usecautionwhenhandling
ahotgriddle.
29
Page 30

Camandcleaningoftherange.
Burner Caps and Heads
Burnercaps
i,ifl off when cool. Wash burner caps
in hot, soap)' water and rinse with clean
water: You may scour with a plastic scouting
pad to remove burned-on filed particles.
Electrode
Make sure theslot h7the burner head
is positionedover llTeelectrode. Usea
sewing needle or twist-tie to unclog
the small hole h7the burner head.
Burner cap isproperly seated.
Burner cap is NOTproperly seated.
CenterGriddle Burner(onsomemodels)
For proper ignition, make sure tile
small hole in tile section that fits over tile
electrode is kept open. A sewing needle
or wire twist-tie worl<s well to unclog it.
Theslits in the burner heads must be keptclean
at all times for an even, unhampered flame.
Clogged or dir b burner ports or electrodes
will not allow tile burner to operate properly.
Any spill on or aro/md an electrode in ust
be careflfllv cleaned. Take care to not hit an
electrode with anything hard or it could
be damaged.
You should clean the burner caps and
burner heads roufinel); especially alter bad
spillove_, which could clog tile openings
in tile burner heads. Lift offwhen cool.
To i'eillOVe btlrned-on I'()o(l_ soak tile
burner heads in a solution rff mild liquid
detergent and hot water fi)r 20-30 minutes.
For inore stubborn stains, use a toothbrush.
NOTE."Donotusesteelwoolorscouringpowders
tocleantheburners.
After cleaning
Before putting tile burner caps and heads
back, shake out excess water and then (h_'
them thoroughly by setting in a warm oven
for 30 minutes.
RoundBurner Bases
The l'O/llld bt/Ynel" b;Ises al'e not l'ell/OX;ible.
only the Calls may be removed for cleaning.
To clean the bul'nel" bases, t/se SO;Ill }' W;iter
and a l/lastic scouting pad. Wipe clean with
a damp cloth.
Make sure that no water gets into the
burner bases. Mlow them to dry fldlv
heft)re using.
Replacement
Replace the burner calls. Make sure
that the caps are rel/laced in the COlTect
location. There is one small, one medium,
()lie large and ()lie extl'}l large l'Otlnd bul'nel"
Cell, On SOllle models, there is ;111 ov_l]
( CellIeI ' head and cap asselllblv.
Ova Read alia car
Mediumburrer
nea0 era cat)
L
@
assemDq an some moaels
Smallburner
neauinu cat)
O
@
|
* ®
30
Frontof range
Large Burner
eaa al/o cap neaa ana cau
I
Extralatje eurnet
Page 31

Burner Grates
_e.com
Appearance may var_
Thegrates may be cleaned in a
dishwasher.
LeftFront Center RightFront
!
Y(:,ur range has three proiessional-sb'le
double grates. These grates are position-
specNc. For ma_mmn stability, these grates
should only be used in their proper
position; they cmmot be inmrchanged left
to right or fl'ont to back. For convenience,
the tmdersides of the left and right grates
are marked "I,EFT FRONT" and "PdGHT
FRONT." Make sure the fl'ont portion of
both grates is in fl'ont. The middle gram has
a bow in fl'ont. Make Stli'e tile bowed
portion is towards tile fl'ont of tile range.
Cleaning
i,ifl out when cool. Grates should be
washed regulalty and, (ff COtli'se, after
spillovers. Wash them in hot, soapy water
and rinse with clean water When replacing
the grates, be sm'e they are positioned
secm'elv over tile burners. Replace tile
grates so that coiltiiltlOtlS _li'CsaI'e f()illle(1
with tile cenmr _ibs of all three grates.
CooktopSurface
Do IlOt opel'ate a btlrller f()i" _lil extended
period _ff time without cookware on the
grate. The finish on the grate may chip
without cookware to absorb tile heat.
To get rid of burned-on t0o(l, place the
grates in a covered containe_: Add l/4 cup
ammonia and let them soak several hours
or overnight. Wash, rinse well and (hw.
_Mthough they are din'able, the grates will
gradually lose their shine, regardless of the
best care you can give them. This is due
to their continual exposm'e to high
temperatm'es. You will notice this
sooner with lighter color grates.
NOTE."12onot dean the grates in a self-cleaning
oven.
To avoid damaging tile porcelain enamel
sm'fi_ce of tile cooktop and to prevent it
from becoming dull, clean up spills right
away. D)ods with a lot of acid (tomatoes,
sauerkraut, fl'uitjuices, etc.) or toods with
high sugar content could cause a dull spot if
allowed to set.
When tile sm'fi_ce has cooled, wash and
rinse. For other spills such as fi_t spattefings,
etc., wash with soap and water once tile
sm'fi_ce has cooled. Then rinse and polish
with a (h_' cloth.
Stainless Steel Surfaces (on somemodels)
Donotuseasteelwoolpad;it will scratch
thesurface.
To clean tile stainless steel smti_ce,
use warn/sudsy water or a stainless steel
cleaner or polish. _Mways wipe tile smtace
in the direction of the grain. Follow the
cleaner instructions fi)r cleaning the
stainless steel sm'fi_ce.
NOTE."Donotstoreflammablemateriabin
anoven,drawer,orneartheeooktop.Donot
storeorusecombustiblematerials,gasolineor
otherflammablevaporsandlkluideinthewcinity
ofthisoranyotherapplbnce.
NOTE."Donot lift the cooktop.Lifting thecooktop
can lead to damageandimproperoperatlbnof the
range.
To inquire about pmvhasing stainless steel
appliance cleaner or polish, or to find tile
location of a dealer nearest you, please call
el:u"toll-fl'ee IltllllbeI':
National Parts Center 800.626.2002(U.S.)
888261.3055(Canada)
go.corn (U.S.)
www. GEAppliances.ca (Canada)
31
Page 32

Careandcleaningofthe range.
Oven Air Vents
Never block the vents (air openings) of the
range. They provide the air inlet and outlet
that are necessm y for the range to operate
properly with correct c()mbustion.
Vent appearance and location var_
_dr openings are located at the rear of
the cooktop, at the top and 1)()tram of the
oven do(m and at the bottonl ot the range,
under the wam/ing drawei:
Control Panel
CONIROLLOCKOUT
Surface burner knob
Onmodelssoequipped,lockout thetouch
padsbeforecleaning.
See tile ControlLockoutinlbmmfi(m ill the
Specialfeatures ofyourovencontrolsection
ill this manual.
Clean up splattei_ with a (lain I) cloth.
_i_)tl ll/aV also use a glass cleanei i
Remove heavier soil with warn/soapy wami:
Do not use abrasives of any kind.
Unlock the touch pads after cleaning.
Lower Control Panel (Front Manifold Panel) and Knobs
It's a good idea to wipe the control panel
after each use of the o'_en. Use a (lmnI_
ch/th to clean or rinse. For cleaning, use
mild soap and water or a 50/50 solution of
•_ille{rar and water For IJnsing, tlse clean
wateI: Polish (hw with a soft cloth.
Do not use abrasive cleansels, strong liquid
cleaneis, plastic sc(mring pads or ();'ell
cleaneis on the control panel--they will
(lamage the finish.
Do not try to bend knobs by pulling thenl
up or down or by hanging a towel or other
such loads, This can damage the gas wdve
shaft.
The control knobs may be removed tot
easier cleaning,
Make sure the knobs are ill the OFF
positions and pull then/straight off the
stems for cleaning.
Tile knobs can be cleaned ill a dishwasher
or they may also be washed with soap and
wateI: Make sine the insides of the knobs
are dry before replacing.
Replace the knobs ill the OFF position
to ensure proper placement.
Metal parts can be cleaned with soap and
WateI:Do not use steel wool, abrasives,
aIllI/lonia_ acids or coil/illei'cia] ()veil
cleaneis. Dry with a sott cloth.
32
Page 33

Lift-Off Oven Door
Theovendoorisremovable,butit isheavyYoumay
need help removlbg and replac/bg the door
Toremovethedoor,open it a fi_w inches to
tile sl)ecial stop position that will hold tile
door open. Grasp firefly on each side and
lift the door straight up and off tile hinges.
NOTE."Becarefulnottoplacehandsbetweenthe
h/bgeandtheovendoorframeas thehingecould
snapbackandplbchf/bgers.
9e.com
::Ji::Tile area outside tile gasket can be
cleaned with a soap-filled plastic
scorn-trig pad.
Toclean the outside of the door.
Use soap and water to thoroughly clean
tile top, sides and fi'ont of tile oven dora:
Rinse well. _)u may also use a glass
cleaner to clean tile glass on tile outside
of tile door.
Lift the door straight up and off flw
hinges.
Thegasket is designed with a gap
at thebottom to allow for proper air
circulation.
Do not rub or clean the door
gasket it has an extremely low
resistance to abrasion.
If you notice the gasket becomhTg
worn, frayed or damaged h7any
way or if it has become displaced
on the door, you should have it
replaced.
Toreplacethe door,make StlI'etile hinges
are in tile sl)edal stop position. Position tile
slots in tile bottom of tile door squarely
over tile hinges. Then lower tile door slowly
and evenly over both hinges at tile same
time. If tile hinges snap back against tile
oven fl'ame, pull them back out.
To clean the inside of the door:
iJi::Do not alh)w excess water to run into
am' holes or sh)ts in the door.
_ Because tile area inside tile gasket is
cleaned dm-ing the self clean cycle, you
do not need to clean this by hand. Any
soap left on tile liner causes additional
stains when the oven is heated.
Oven Bottom
Tile oven bottom has a porcelain enamel
finish. To make cleaning easier, protect tile
oven bottom fi'om excessive sl)illove_ by
placing a cookie sheet on tile shelf beh)w
the shelf you are cooking on. This is
particularly important when baking a fl'tfit
pie or other fi)ods with a high acid content,
Hot fl'tfit fillings or other fi)ods that are
highly acidic (such as tomatoes, sauerkraut
and sauces with vinegar or lemon juice)
may cause pitting and damage to tile
porcelain enamel surfilce and should be
wiped up immediately.
Spillage of marinades, fl'uitjuices, tomato
sauces and basting materials containing
adds may cause discoloration and should
be wiped uI) immediately. _]/en tile
sm_hce is cool, clean and rinse,
!;>Do not use oven cleanei3, cleansing
l)ow(le_ or hmsh abrasixes on tile
outside of tile (h)o_:
We don't recommend using ahuninum fi)il
on tile oven bottom. It can affect air flow if
tile holes are blocked and it can concentrate
heat at tile bottolll Of tile oven, resulting in
poor baking i)e_fimnance.
To clean tl I) spilh)ve_, use soap and watei;
an abrasive cleaner or soap-filled scom_ing
pad. Rinse well to remove any soap before
sel6cleaning.
I I
I \ / I
Pan
Broiler Pan and Grid
After broiling, remove the broiler pan fi'om
the oven. Remove tile grid fl'om tile pan.
(_areftflly pour out grease fl'om tile pan into
a prol)er contninei: Wash and rinse tile
broiler pan and grid in hot water with a
seal>filled or plastic scorning pad.
If food has bm'ned on, sprinkle tile grid
with (lete_gent while hot and c_wer with wet
paper towels or a dishch)th. Soaking the
pan will remove bm'ne(l-on foods.
Tile broiler pan and grid may be cleaned
with a coi//illei'cial o_,en cleaner
Both tile broiler pan and grid can also be
cleaned in a dishwasher:
Do not store a soiled broiler pan and grid
anywhere in the range.
CAUTION:Donotcleanthebroilerpanorgridin
a self-c/ean/bgoven.
33
Page 34

Careand cleaning oftherange.
Oven Shelves and Drawer Racks
If your oven is equipped with nickel oven
shelves, they should be removed fl'om tile
oven beiore begimfing tile self=clean cycle.
To clean tile nickel shelves, use an abrasive
cleanser. _Mier cleaning, rinse tile shelves
with clean water and (h_' with a clean cloth,
If tile shelves ever becoil/e hard to slide,
wipe tile shelf edges or oven shelf supports
with vegetable oil.
Oven Light Replacement
CAUTION: Beforerep/acbg yourovenh)ht bulb,
disconnecttheelectrical power to the rangeat the
main fuse orcircuit breakerpanel.Besure tolet the
lightcover and bulb coolcompletely
Tile oven light bull_ is covered _dth a
H/ire cover holder.
remo\:d)le glass cover that is held in place
with a bail-shaped wire. Remove tile oven
dora; if desired, to reach cover easily:
Toremove:
[7] Hold a hand under tile cover so it
iq i
doesn't fifll when released. _,\ith
finge_s of tile same hand, fim/1,x push
back tile wire coxer holder: Lift off
tile cox er.
Donot remove any screws to remove
the cover.
] Do not touch hot bulb with a wet
cloth. P.eplace bulb with a 40-watt
household appliance bull).
Toreplace cover."
[] Place it into the groove ot the light
receptacle. Pull tile wire torward to tile
center of tile cover until it snaps into
place. _]/en in place, tile wire holds
tile cover fim/lv. Be certain tile wire
is in the depression in tile center of
tile cover.
Com_ect electrical power to tile range.
[]
34
Oven Heating Elements
CAUTION: Theunitshouldnot be operatedin any
mode with thebake elementremoved
Donotdean the bakedement or the broii element
Any soi/will burn off when thedements areheated
Only remove tile oven heating element
to clean up lmge spills. Clean arotmd tile
elements when cleaning up small spills.
To clean tile oven floo_; remove tile two
scrmvs sectwing tile bake element to tile
back of tile oven and remove tile elelnent.
Clean tile oven floor with w;mn soapy water
Replace the bake element and two screws.
Page 35

Removable Warming Drawer
NOTE:Beforeperforming anyadjustments,
cleaningor service,disconnecttherange electrical
power supplyat the householddistributionpanel
byremoving the fuse orswitchlhg off the clYcuit
breaker Makesure the warming drawerheating
elementis cool.
Most clealfing can be done with the drawer
in place. However, the drawer inay be
relnoved if flmher clealfing is needed. Use
soap and warm water to thoroughly clean.
To remove the drawer:
[] Pull the drmver straight out tmfil
it stops.
[] Press the left rail release up and
press the right rail release down, while
pulling the drmver forward and fl'ee.
ge.com
Toreplace the drawer:
[] .Place the left drmver rail arotmd the
tuner left rail guide and slide it in
slighfl) to hook it.
[] Place the right drawer rail arotmd the
tuner right rail guide and slide it in
slightl} to hook it.
[] Slide the drawer all the way in.
35
Page 36

Installation
Instructions
Range
In the Commonwealth
of Massachusetts
• This product must be installed by a licensed
phunber or gas fitter,
• When using ball Wpe gas shut-off valves, they shall
be the T-handle type.
• A flexible gas connectm; when used, must not
exceed 3 fl_et.
BEFORE YOU BEGIN
Read these instructions completely and carefully.
Installation of this range must conform with local
codes, or in the absence of local codes, with the
National Fuel Gas Code, ANSI Z223.1/NFPA.54,
latest edition. In Canada, installation must conform
with tim current Natural Gas Installation Code,
CAN/CGA-B149,1 or the current Propane Installation
Code, CAN/CGA-B149.2, and with local codes where
applicable. This range has been design-certified hy
CSA International according to ANSI Z21.1, latest
edition and Canadian Gas Association according
to CAN/CGA-I.1 latest edition,
As with any appliance using gas and generating beat,
there are cel_ain saibty precautions you should tollow.
You will find these precautions in the Important Safety
Information section in the fi'ont of this manual. Read
them carefully.
FOR YOUR SAFETY
Do uot store or use combustible materials, gasoline or
other flammable vapors m_d liquids in the vicinity of
this or any other appliance.
If you smell gas:
O Open windows.
O Don't touch electrical switches.
Extinguish any open flame.
O hmnediatelv call veto" gas supplier.
TOOLS YOU WILL NEED
Phillipsscrewdriver
Flat-bladescrewdriver Open-endor
Penciland ruler
Pipewrenches(2)
(oneforbackup) Drill,awl ornail
adjustablewrench
Level
• IMPORTANT - Save hese
instructions fin" local electrical inspector's use.
• IMPORTANT - Observeall
governing codes and ordinances.
• Note to Installer - I,eave these instructions
with the appliance alter installation is completed.
• Note to Consumer - Kee I) this Owner's
Manual and Installation Instructions fin" future
re_erence.
• Note - This appliance must be properly grotmded,
• Servicer - The electrical diagram is in an emvlope
attached to the back of the r;mge.
• SMll level - Installation of this appliance requires
basic mechanical skills.
• Proper installation is the responsibility of the
installe_:
• Product thilure due to improper installation is not
covered under the _'_.u'lanty.
MATERIALS YOU MAY NEED
• (;as line sh m-off valve
• Pipe joint sealant or UI:approved pipe thread tape
with Teflon':: that resists action el natural and I,P gases
• Fle_ble metal appliance connector (1/9" I.D.)
A 5-tOot length is recommended fin" ease of installation
btlt other lengths are acceptable. Never rise an old
connector when installing a new range.
• Flare ration adapter for connection to gas supply line
(3/4" or 1/2" NPT x 1/2" I.D.)
• Flare ration adapter for connection to pressm'e
regulator on range (1/2" NPT x 1/2" I.D.)
• iJquid leak detector or soapy water:
• i_ag bolt or l/9" O,D, sleeve anchor (fin" concrete
floo_ only),
*Teflon: Registered tn,demal-k of DuPont
36
Page 37

Installation instructions
AWARNING
iNSTALLATiON SAFETY
iNSTRUCTiONS
Read these instructions completely and carefully.
hnproper installation, adjustment, alteration, service
or maJntenm_ce can cause injury or property damage.
Refer to this mmmal. For assistance or additional
information, consult a qualified installer, service
agency, manufacturer (dealer) or the gas supplier.
Never reuse old flexible connectors. Tile use
of old flexible connectors can cause gas leaks and
personal ii_jury. Alwa_s use NEW flexible connectors
when installing a gas appliance.
IMPORTANT Remo,eall/ackin,,
material and literature fl'om oven befiwe connecting
gas and electrical sui)ply to range.
CAUTION - t,,,not ,ttemptt,)ope,- ,te
tile oven of this range dm'ing a power tailure (Electric
Ignition models only).
• Have veto" range installed bv a qualified installer.
• Yore" range must be electrically grounded in
accordance with local codes m; in the absence
of local codes, in accordance with the National
Electrical Code (ANSI/NFPA 70, latest edition).
In Canada, electrical grounding must be in
accordance with tile current CSA (i;22.1 Canadian
Electrical Code Part 1 and/or local codes. See
Electrical Connections in this section,
• Before installing your range on linolemn or any
other sw_thetic floor covering, make sure the floor
covering can withstand 180°F without shrinking,
warping or discoloring. Do not install the range
over carpeting tmless a sheet of 1/4" thick plywood
or similar insulator is placed between tile range
and caq)eting.
• Make sm'e tile wall coverings around tile range can
withstand heat generated by tile range up to 200°E
• Avoid plating cabinets above tile range. To reduce
tile hazard caused b)' reaching over tile open
flames of operating bm'ne_s, install a ventilation
hood over tile range that projects tin'ward at least
5" bewmd tile fl'ont of tile cabinets.
• The ventilating hood must be constructed
of sheet metal not less than 0.0192" thick.
Install above the cooktop with a clearance of not
less than l/4" between tile hood and tile underside
of the combustible material or metal cabinet. The
hood must be at least as wide as the appliance and
centered over tile appliance. Clearance between
the cooking sm'tace and the ventilation hood
SlU'thce MUST NEVER BE LESS THAN 24
INCHES,
EXCEPTION: Installation of a listed microwave oven
or cooking appliance over the cooktop shall contorm
to tile installation inst_ uctions packed with that
appliance.
• If cabinets are placed above tile range,
allow a minimmn clearance of 30" between tile
cooking sm'tace and the bottom of tmprotected
cabinets.
• If a 30" clearance between cooking sm'tace and
overhead combustible material or metal cabinets
cannot be maintained, protect tile underside of tile
cabinets above tile cooktop with not less than 1/4"
insulating millboard covered with sheet metal not
less than 0.0199" thick. Clearance between the
cooking surtace and protected cabinets MUST
NEVER BE LESS THAN 24 INCHES.
• Tile vertical distance fl'om tile plane of tile cooking
surtace to tile bottoln of a@_cent overhead cabinets
extending closer than 1" to the plane of the range
sides must not be less than 18". (See the Dimensions
and Clearances illustration in this section.)
• CAUTION mItemsofinterestto
children should not be stored in cabinets above a
range or on tile backsplash of a range--children
climbing on the range to reach items could be
seriously iI_jured.
37
Page 38

Installation Instructions
DIMENSIONS AND CLEARANCES
Provide adequate clearances between the range and adjacent combustible surfaces. These dimensions must be met
for safe use of your rm_ge. The location of the electrical outlet and pipe opening (see Gas Pipe and Electric Outlet
Locations) may be adjusted to meet specific requirements.
The range may be placed with 0" clearance (flush) at the back wall.
M'nimum oI I I
cabinets on
either side + 30"
of the range _ I _-
I 30"
18"-
Minimu_ni_ - Minimum
clearnace
to left wall
_- 6" Minimum
clearnace to
right wall
for cabinets
Maximum depth
above
countertops
13"
Front edge of
the range side
panel forward
from cabinet
1/4"_ _- -J
To cabinets
below cooktop
and atthe range
back
Height
473/4"
Depthwith door closed (includes door handle)
I_-- 30" I 293/,"""_l_"--_ Depth variesdependingon model.
See specifications sheet for your
model.
38
Page 39

Installation instructions
AWARNING!
ANTI-TIP DEVICE
All ranges can tip and injury could
result.
To prevent accidental tipping of the range,
attach an approved Anti-Tip device to the
wall. (See Installing the Anti-Tip Device in
this section.) To check if the device is
installed and engaged properly, carefully
tip the range forward. The Anti-Tip device
should engage and prevent the range from
tipping over.
If you pull the range out from the wall for
may reason, make sure the Anti-Tip device
is engaged when you push the rmlge back
agMnst the wall.
• For w)ur safety, never use your range flir warining
or heating tile rooln, Your oven and cooktop are
not designed to heat wmr kitchen. Top burnei_
should not be oi)erated without cookware on the
grate, Such abuse could result ill fire and daulage
to your range and will void w)ur warranty,
• Do not store or use colnbustible inatelJals,
gasoline or other flaniniable wq)ors and liquids
in the vicinity of this or any other ai)pliance,
Explosions or fires could result,
• Do not rise ()veil tor a storage area, Items stored in
tile oven can ignite.
• Do not let cooking grease or other flaumlable
ulaterials accuululate in or near the range.
LOCATION
Do not locate the rmige where it may be subject to
strong drafts. Any openings in the floor or wall behind
the rm_ge should be sealed. Make sure the openings
around the base of the range that supply fresh air for
combustion m_d ventilation axe not obstructed by
carpeting or woodwork.
Your range, like ulany other household itelns, is
heavy and can settle into soft floor coverings such as
cushioned vinyl or cari)eting, Use care when nioving
tile range on this type of flooring, It is recouunended
that tile tolh)wing silnple and inexpensive insti uctions
be followed to protect your floor,
Tile range should be installed on a sheet of i)lDvood
(or siulilar niaterial). When tile floor covering ends at
tile ti'ont of tile range, tile area that tile range will rest
oil should be built up with plywood to tile sanie level
or higher than tile floor covering.
This will alh)w tile range to be uloved tk)I"cleaning
or servicing. Mso, ulake sure your floor covering will
withstand 180°K (See tile Installation Safetglnstructions
section.)
Make sure tile wall coverings around vour range can
withstand the heat generated (up to 200°F) bx the
ran *e (See tile Installation Safety Instructions section.)
IMPORTANT!
Remove all tape mid packaging. Make sure the
burners are properly seated and level.
Take the accessory pack out of the oven mid/or
drawer.
Check to be sure that no range parts have come loose
during shipping.
39
Page 40

Installation instructions
[] PROVIDE ADEQUATE GAS
SUPPLY
Your range is designed to operate at a pressure of 5" of
water column on naturM gas or, if designed for LP gas
(propm_e or butane), 10" of water column.
Make sure vou are supplying your range with tile type
of gas tot which it is designed.
This range is convertible for use on natural or
propane gas. If you decide to use this range on I,P gas,
conveiMon must be made bv a qualified I,P installer
before attempting to operate tile range on that gas.
For proper operation, tile pressure of natural gas
supplied to tile regulator must be between 5" and 13"
of water cohmm.
For I,P gas, tile pressure supplied must be between 10"
and l 3" of water colmnn.
When checking fi)r proper operation of tile regulatm;
tile inlet pressure Illtlst be at least 1" greater than tile
operating (nmnifl_ld) pressure as given above.
Tile pressure regulator located at tile inlet of tile range
manifold must remain in the supply line regardless of
whether natural or I,P gas is being used.
A flexible metal appliance connector used to connect
tile range to tile gas supply line should have an I.D. of
1/2" and be 5 leer in length tier ease of installation. In
Canada, flexible connectors must be single wall metal
connectors no hmger than 6 teet in length.
[] CONNECT THE RANGE TO GAS
Shut off the main gas supply valve before discmmecting
the old range and leave it off until the new hook-up has
been completed. Don't forget to relight the pilot on
other gas applimaces when you turn the gas back on.
Because hard piping restricts nmvement of tile range,
tile use of a CSA International-certified flexible metal
appliance connector is recommended unless local
codes require a hard-piped connection.
Never use an old connector when installing a new
range. If tile hard piping method is used, you must
careflllly align tile pipe; tile range cannot be moved
after the connection is made.
To prevent gas leaks, put pipe joint comi)otmd on, or
wrap pipe thread tape with Teflon':: around, all male
(external) pipe threads.
A. Install a inanual gas line shut-off valve in tile gas line
in an easily accessed location outside of the range.
Make sure everyone operating tile range knows
where and how to shut ott tile gas supply to tile
range.
B°
Install male 1/2" flare union adapter to tile 1/2"
NPT internal thread at inlet of regulator. Use a
backup wrench on tile regulator fitting to avoid
danmge.
When installing tile range fl'om tile fl'ont, remove
the 90 ° elbow fi_r easier installation.
C°
Install male 1/2" or 3/4" flare union adapter to tile
NPT internal thread of tile inanual shut-off valve,
taking care to back-up tile shut-off valve to kee I) it
fl'onl turning.
D°
Connect flexible tnetal ai)pliance connector to tile
adapter on tile range. Position range to l)erlnit
connection at the shut-off wflve,
E. When all connections have been inade, inake sure
all range controls are in tile off position and turn oil
the main gas supply wdve. Llse a liquid leak detector
at all joints and connections to check fi_r leaks in the
s_istei//.
WARNING: oo NOTUSEA
FLAME TO CHECK FOR GAS LEAKS.
When using test pressures greater than 1/2 psig to
pressure test tile gas supply s)_steln of tile residence,
disconnect tile range and individual shut-off valve fl'oln
tile gas supply piping. When using test pressures of 1/2
psig or less to test the gas supply system, simply isolate
tile range from tile gas supply system by closing tile
individual sh m-off wflve.
*Teflon: Registered trademark of DuPont
4O
Page 41

Installation instructions
GAS PiPE AND ELECTRICAL OUTLET LOCATIONS
Recommended area for 120V
outlet on rear wall and area for
through-the-wall connection of
pipe stub and shut-off valve,
Recommended area for
through-the-floorconnection
of pipe stub and shut-off valve
41
Page 42

Installation instructions
FLEXIBLE CONNECTOR HOOKUP
Installer: Inform the [ :1_-_ Gas
consumer of the 1/2" or3/4" ff_l]/ _--- sbuboff
location ofthe gas Gaspipe --'1_ L_ - valve
shut-off va ve.
[-........-q
RiGiD PiPE HOOKUP OPTIONS
45° EBow
._:::13__ __- g0oE_bow
regulator @
-1 _t_ Nipple
Installer: Inform the I ' _ off
location of the gas
consumer of the I _L !ii{_
shut-off va ve. 1/Z' or 3/4"
Gaspipe
Alternate Hookup
go°E,}ow_ ,_'(_¢"_'" go°Elbow
r, @_) _ #1¢ . . Pressure
oas 4-_--I KL_ N_pple
shut-off _ _ k_ / go< regulator
valve _ _, ./ Elbow1.
1/Z' or S/4"/" 90° Elbow "<_'_
Gaspipe Ad@ter_
Installer: Inform the I
consumer of the locution
of the gas shut-off va re.
_F Adapter
Nipple _ _"
I I _ / Nipple
U _ Quickconnect
;_/or union
I
42
Page 43

Installation instructions
[] ELECTRICAL CONNECTIONS
Electrical Requirements
YoII IlltlSt rise a 120-volt, 60 Hertz, l)rol)erly grounded
dedicated circuit protected bv a 15-alnp or 20-amp
circuit breaker or tilne delay filse.
Extension Cord Cautions
Because of potential safety hazards associated
with certain conditions, we strongly recommend against
the use of an extension cord. Howevei, if you still elect
to use an extension cord, it is absolutely necessary that
it be a UIAisted, 3-wire groui_ding-type appliance
extension cord and that the current carrying rating of
the cord in alnperes be equivalent to, or greater than,
the circuit rating.
Grounding
IMPORTANT--(Please read carefully)
FOR PERSONAL SAFETY, THIS APPLIANCE MUST
BE PROPERLY GROUNDED.
PreferredMethod
[] ELECTRICAL CONNECTIONS (CONT.)
A. Usage Situations where Appliance Power Cord will
be Disconnected Infrequently.
An adapter inav be used only on a 15-alnp circuit.
Do not use ;lit adapter on a 2()-amp circuit. Where
local codes perlnit, a TEMPORARY CONNECTION
may be made to a properly grounded two-prong wall
receptacle by the use of a UIAisted adaptei; available
at most hardware stores. The larger slot in the adapter
inust be aligned with the larger slot in the wall
receptacle to provide proper polarity in the
COlmection of the power cord.
TemporaryMethod
(Adapter plugs not permitted in Canada)
Align large prongs/slots
Ensure proper
ground and firm
connection before
use
Ensure proper ground
exists before use
The power cord of this appliance is equipped with a
three-proi_g (groui_ding) plug which mates with a
standard three-prong grounding wall receptacle to
minimize the possibility of electric shock hazard from
this appliance.
The customer should have the wall receptacle and
circuit checked by a qualified electlician to inake sure
the receptacle is properly grounded.
Where a standard two-prong wall receptacle is
encountered, it is the personal responsibility and
obligation of the custolner to have it replaced with a
properly grounded three-prong wall receptacle.
DO NOT, UNDER ANY CIRCUMSTANCES,
CUT OR REMOVE THE THIRD (GROUND) PRONG
FROM THE POWER CORD.
A word about GFCI's - GFCI's aye not required or
recommended for gas range receptacles.
Ground Fault Circuit Interrupters (GFCI's) are
devices that sense leakage of current in a circuit and
autolnatically switch off power when a threshold
leakage level is detected. These devices inllst be
malmally reset by the consulner. The National Electrical
Code requires the use of GFCI's in kitchen receptacles
installed to serve countertop sui'i_lces. Perfi)rlTmnce of
the range will not be aiii_cted if operated on a GFCI-
protected circuit but occasional nuisance tripping of
the GFCI breaker is possible.
CAUTION: Att lchingthe ld lpte,"
ground termilml to the wall receptacle cover
screw does not ground the appliance unless
the cover screw is inetal, and not insulated,
and the wall receptacle is grounded through
the house wiring. The customer should have
the circuit checked by a qualified electrician
to inake sure the receptacle is properly
grounded.
When disconnecting the power cord fl'om the adaptei;
always hold the adapter with one hand. If this is not
done, the adapter grotmd termilml is very likely to
break with repeated use. Should this happelL DO
NOT USE the appliance until a proper ground
has again been established.
43
Page 44

Installation instructions
[] ELECTRICAL CONNECTIONS (CONT.)
B. Usage Situations where Appliance Power Cord will
be Disconnected Frequently.
Do not use an adapter phtg in these situations because
disconnecting of the power cord places undue strain on
the adapter and leads to eventual taihu'e of the adapter
ground terminal. The customer should have the two-
prong wall receptacle replaced with a three-prong
(grotmding) receptacle by a qualified electrician
befl)re using the appliance.
The installation of appliances designed fin" mobile
home installation must conflwm with the Manufactured
Home Construction and Safety Standard, Title 94 CFR,
Part 3280 (%rmerly the Federal Standard %r Mobile
Home Construction and Safety, Title 24, HUD, Part
280) o_; when such standard is not applicable, the
Standard for Manufactured Home Installations, latest
edition (Manufactured Home Sites, Communities and
Set-/Jps), ANSI A225.1, latest edition, or with local
codes. In Canada, mobile home installation must be
in accordance with the cmTent CAN/CSA Z240/MH
Mobile Home Installation Code.
Electric Disconnect
• i,ocate disconnect plug on tile range back.
• Pinch sides of connector and pull out of range back.
[] ASSEMBLE SURFACE BURNERS
[] _ssemble tile side b/u'ne_ as shown.
Grate
Side
C,'-_11- --- Burnercap
Burnerbase _%_=j
(notremovable - _------ Electrode
onsideburners)
[] On models so equipi)ed, assemble tile center burner.
Make sure that tile center griddle sits square and
level between the side grates.
Griddle
Center
£_ .,dr.1 Burner head
@ "_r--.. Electrode
and cap
assembly
-& CAUTION: Do not operate the burner
without all burner parts in place.
[] SEAL THE OPENINGS
Seal am, ol)enings, in tile wall behind tile range and in tile
floor under tile range, when hookul)s, are completed.
Ovalheadandcap
Mediurnburner assernbly(onsomemodels} Smallburner
beadand cap
headandcap
€
C)
@
(2)
@
c)
* ®
÷
Large burner
head and cap
Place tile burner caps on tile cooktop. Make sm'e
that tile caps are placed in tile correct locations.
There is one small cap, one medium cap, one lmge
cap and one extra lmge cap.
On some models, there is an owd (cenmr) head and
cap assembly.
Frontof range 5>
Extralargeburner
headandcap
%
44
Electrode
Make sure the slot in the burner head is
positioned over the electrode.
Page 45

Installation Instructions
[] CHECK IGNITION OF SURFACE
BURNERS
Operation of all cooktop and oxen burners should be
checked after the range, and gas suppl) lines haxe been
careflfll_ checked fi)r leaks.
Electric Ignition Models
Select a top bm'ner knob and simultaneously push
in and turn to L1TE position. You will hear a clicking
sound indicating proper operation of the spark
modtfle. Once the air has been pm'ged fl'om the
supply lines, bm'ners should light within 4 seconds.
Afier bm'ner lights, rotate knob out of the L1TE
position. Try each burner in succession tmtil all
bm'ners have been checked.
Quality of Flames
The combustion qualit)of bm'ner flames needs to be
determined xisuallx.
(A) Yellow flames--
Call for service
(B) Yellow tips on
outer cones--
Normal for LP gas
[] CHECK IGNITION OF OVEN BURNER
The oven is designed to ot)erate quietly and automatically.
To operate the oven, touch the BAKE pad and then touch
the nmnber pads until 350 ° appears in the display. Touch the
START pad. ,Mter 30-90 seconds, the oven burner will ignite
and burn until the set temt)erature is reached.
Electric ignition models require electrical power to operate.
In case of a t)ower outage, the oven burners on these models
cannot be lit mamlallv with a match. ('.as will not flow unless
the glow bar is hot.
If the o_en is in use when a power outage occurs, the burner
_ill shut off and cam/ot be re-lit until power is restored.
(C) Soft blue
flames--Normal for
natural gas
If burner flm_tes look like (A), call for service. Normal
burner flmnes should look like (B) or (C), depending
on the type of gas you use.
"_'_ith I,P _oas.....some _ellow till) )ing, on outer cones
is normal.
45
Page 46

Installation instructions
[] ADJUST OVEN BURNER AIR
ADJUSTMENT SHUTTER IF
NECESSARY
Air adjustment shutter for the bottom burner regulates
the flow of air to the flames.
Loosen
\
Jstment
shutter
I
The shutter _or the bottom (oxen) burner is near the
back wall behind the warmii_g drawer. ]_elnoxe the
drawer. See the Care and cleaning of the range section.
To adjust the flow of air to the burner, loosen the
Phillips head screw and rotate the shutter toward open
or closed position as needed.
[] LEVELING THE RANGE
a.
Install the oxen shelxes in the oxen and position the
range where it will be installed.
Lower
II _aOWgr range
range
(on some models) (on some models)
B. Check fin" levelness by placing a spirit level or a cup,
partially filled with water, on one of the oven shelves.
If using a spirit level, take two readings--with the
level placed diagonally first in one direction and
then the other.
C.
]_emove the drawer. See the Care and cleaning of the
range section. The front leveling legs can be ac!justed
fl'oln the bottoln and the rear legs can be a(!justed
fl'Oln the top or the bottom.
n.
Use an open-end or a(!iustable wrench to a(!iust the
lexeling legs until the range is lexel.
E. After the ram,e,_ is lexel, slide the range, awax, from the
wall so that the Anti-Tip de;ice ('}Ill be installed.
Raise
range
To determine if the bottom burner flames are burning
properly; remove the oven bottom. Flames should have
al)l)roxilnately 1" blue cones and, if range is supplied
with natural gas, should burn with no yellow tipi)ing.
(With most I,P gas, slnall yellow tips at the elm of outer
cones are imrmal.) Flalnes should not lilt off burner
ports. If lilting is observed, gradually reduce air shutter
oi)ening until flalnes are stabilized.
To remove the oven bottom:
A. ]_.elnove the two screws securing the bake elemei_t to
the back of the oven and relnove the elelnent.
B. Relnove the knurled screws holding down rear of the
oven bottom.
C. Grasp the oven bottom at finger slots on each side.
Ovenbottom
D. I,ifl the rear oI the oven bottom enotlgh to (lear the
lip of the range fl'alne, push it back, aim then pull it
ii I) and out.
46
Page 47

Installation instructions
[] INSTALLING THE ANTI-TIP
DEVICE
A WARNING!
• R'm,,e,_ must be secured with an approxed Anti-
Tip dexice.
• Unless properly installed, the range could be
tipped b) you or a child standing, ,sittin,,_ or
leanino_ on _lI1 open door.
• After installing the Anti-Tip dexice, xerili that it
is in place b) careflflly attempting to tilt the
I'll iloe forward.
• This ran,,e has been designed to meet all
recognized industry tip standards for all normal
conditions.
• The use of this de_ice does not preclude tii,)Dim,
of the range when not properly installed.
• If the Anti-Tip de_ice supplied with the range
does not lit this application, use the tmixersal
Anti-Tip dexice X,_B2X7909.
A. Mark the wall where the RIGHT EDGE of the range
is to be located. Be sm'e to allow fl)r the cotmtertop
overhang if you intend to install the range next to
cabinets.
[] INSTALLING THE ANTI-TIP
DEVICE (CONT.)
Wallboard
screw
Install the sleeve anchor into the drilled hole and then
install the lag bolt through tile device. The bolts must
be properly tightened as recommended fin" the
hardware.
E. Slide tile range against the wall, and check for
proper installation by grasping the ti'ont edge of the
cooktop and careflflly attempting to tilt the range
fin'ward.
Back of range
WHEN ALL HOOKUPS ARE
COMPLETED
Make sure all controls are left in the off position. Make
sure the flow of combustion and ventilation air to the
range is unobstructed.
Slotted head
Marked edge of range
B. I.ocate the outside edge of the de_ice _ J "
center of the range from the marked edge of the
I'}l I1 re
C. Using the dexice as a template, mark the position of
the hole for the screw.
D. For wood constH/ction, drill a pilot hole at an angle
of 20 degrees from the horizontal. A nail or awl may
be used if a drill is not a_ailable.
Mount the Anti-Tip de_ice with the screw provided.
For ceulen[ or concrete constitlction, VOtl will need
a 1/4" x 1½" lag bolt and a 1/2" O.D. sleeve anchor;
which are not provided. Drill the recommended size
hole tot the hardware.
2_ toward the
CONVERTING TO LP GAS (or
converting back to natural gas from LP)
This range leaves the factory set for use with natural
gas. If you want to convert to LP gas, the conversion
must be performed by a qualified LP gas installer,
The come_ion instructions and I,P orifices can be
fotmd attached to the ranoe_ next to the presstu'e
regulator.
Kee I) these instructions and the orifices in case you
_V[lIlt 1o con_.ert back to nattlral gas.
47
Page 48

Beforeyoucall for service...
Troubleshooting -tips
Save time and money/. Review the charts on the following
pages first and you may not need to call for service.
Possible Causes
Top burners do not light Plug on range is not completely *
or do not burn evenly, il_serted in the electrical outlet.
(The front right burner is Burner slits on the side of the * Remove tile btu'ne_ and (lean them, Check tile
designedto have slightly burner may be clogged, electrode al'ea fol" bttl'ned-on food or grease, See
smaller flames between the Care and cleaning of the range section,
the 6 and 9 o'clock
positions. This is normaL) hnproper burner assembly. * Make sure the burner parts are installed correctly,
Burner flames very hnproper air to gas ratio. • /f range is connected to LP gas, contact the person
large or yellow who installed your ran,,e or made the conversion,
Surface burners light The oven gas shut-off valve * To check the oven gas shut-oil valve, l'elllOVe the
but oven does not may have accidentally been wallning drawer (see the Care and cleaning of the range
moved during cleaning or section). I,ook for the gas shut-off lever at the back of
moving, the ran _e
What To Do
Make sure electrical I)lug, is I)lugged,, into a live, properl)
gl'Oul]ded outlet.
See the Care and cleaning of the range section,
Leveris
shownclosed.
PULLTOOPEN.
48
Page 49

Possible Causes What ToDo
Control signals after You forgot to enter a bake * Touch tile BAKE pad and desired temperature or
entering cooking time temperature or cleaning time. tile SELFCLEANpad and desired clean time.
or start time
Fooddoes notbake or Oven controls improperly set. * See tile Using the oven section.
roastproperlyin the Shelf position is incorrect. * See tile Usingtheovensection.
oven
Incorrect cookware or cookware * See tile Using the oven se(-tiou.
of improper size being used.
Oven thermostat needs * See tile Adjust the oven thermostat--Do it
adjustment, yourself[ secti(m.
Clock slot set correctly. * See tile Using the clock and timer sectiou.
Aluminum foil used improperly * See tile Care and cleaningoftherange secti(m.
in the oven.
Oven bottom not securely * See tile Installation of the range section.
seated in position.
ge.com
Fooddoes notbroil Oven controls improperly set. * Make stu'e VOtl touch tile BROIL HI/LO pad.
properlyin the oven Oven door not closed. * See tile Using the oven secdou.
Improper shelf position * See tile BroilingGuide.
being used.
Food being cooked in a hot pan. * Use tile broiling pan and grid that came with wmr
rauge. Make sure it is cool.
CookwaJce not suited for broiling. * Use tile broiling pan and grid that came with your rauge.
Alumhmm foil used on the * See tile Usingthe oven section.
the broiling pan mad grid has
not been fitted properly and
slit as recommended.
Oven bottom not securely * See tile Installationofthe range section.
seated ha position.
Oventemperature Oven thermostat * See tile Adjust the oven thermostat--Do it
too hot or too cold needs adjustment, yourself[ section.
Clock and timer Plug on range is not completely * Make sure electrical plug is plugged into a live, properly
donotwork inserted ha the electrical outlet, grounded outlet.
A fuse in your home may be • Replace tile fl/se or reset tile circuit breaker:
blown or the circuit breaker
tripped.
Oven controls improperly set. • See tile Using the clock and timer section.
_iiiiiiiiiiiiiii!!ii_
iIiiii i i__
49
Page 50

What To Do
• Tighten or replace the bulb.
• Make sure electrical plug is plugged into a live, i)roi)erly
grounded outlet,
• Allow the range to cool to r()om teml)eramre and
reset the controls.
• See tile Usingtheself-cleaning oven section.
• This is normal.
• Touch the CLEAR/OFF pad. Open the windows to
rid the room of smoke. X,_ait until the LOCKEDDOOR
light goes off. Wipe up the excess soil and reset the
clean cycle.
• _Mlow the oven to cool below locking teinl)erature.
• See the Usingthe self-cleaning oven section,
• Clean up hea\ T spillovers before starting the clean
cycle. Heavily soiled ovens may need to sell:clean
again or fin" a longer period of time,
• Close the oven door,
• Touch the CLEAR/OFFpad. Allow the o',en to cool.
• Touch the CLEAR/OFF pad. _Mlow the oven to cool fin.
one houi; Put the oven back into operation.
• Disconnect all power to the range fi_r 5 minutes
and then reconnect power. If the flmction error
code repeats, call for service.
• Apply a small amount of vegetable oil to a paper
towel and wipe the edges of the oven shelves with
the paper towel, Do not spray with Pare '_or other
lubricant sprays.
Page 51

ge.com
Possible Causes
Display goes blank A fuse in your home may be
blown or the circtfit
breaker tripped.
The clock is in the * See tile Special features of your oven control section.
black-out mode.
Display flashes Power failure. * Reset the clock.
Unable to get the Oven control pads were * Tile BAKE mad BROIL HI/LO pads must be touched at
display to show "SF" not pressed properly, tile same time mad held for 3 seconds.
Power outage, Power outage or surge. * Reset tile clock. If the oven was in use you must reset
clock flashes it by touching the CLEAR/OFFpad, setting the clock
"Burning" or "oily" Tiffs is normal in a new oven * To speed the process, set a sell:clean cycle for a
odor emitting from and will disappear in time. miuimum of 3 hours. See the Using the self-cleaning
the vent oven section.
Strong odor An odor from the insulation * This is temporary.
aromzd the inside of the oven
is normal for the first few times
the oven is used.
Drawer does not slide The drawer is out of afigmnent. * Fully extend the drawer mad push it all the way in.
smoothly or drags See the Care and cleaning of the range sectiou.
Drawer is over-loaded or load * Reduce weight. Redistribute drawer contents.
is tuthalanced.
What To Do
• Replace the tilse or reset the circuit breaker:
and resetting any cooking flmctiou.
+
=g.
Warming drawer will A fuse in your home may be * Replace the fl/se or reset the circtfit breaker.
not work blown or the circuit breaker
tripped.
The oven is self-cleanh_g. * Wait for the seltXcleau cycle to finish mad the oven
Controls improperly set. * See the Electric warming drawer section.
Excessive condensation Liquid in drawer. * Remove liquid.
in the drawer
Food dries out in the Moisture escaping. * Cover tbod with lid or aluminum foil.
warming drawer
Uncovered foods. * Cover food with lid or aluminum tbil.
Temperature setting too high. * Reduce temperature setting.
Drawer not fully closed. * Push drawer in until latch engages.
to cool.
_iiiiiiiiiiiiiii!!ii+,
+liiii i i__
51
Page 52

Accessories.
Looking For Something More ?
Youcan find these accessories and many more at ge.com (U.S.) or www.GEPpp/iances.ca
(Canada), or carl 800.626.2002 (U.S.) or 888.261.3055 (Canada) (during normal business
hours). Have your model number ready.
i¸ /
Grates Surface Burner Caps
Oven and Drawer Racks
Light Bulbs Knobs
Tired of discolored rocks? Wishing you had extol-hearT-duty oven racks?
NOW AVAILABLEfor your range:
(;E's innovative, selfk:leanable porcelain-coated oven racks!
• Hem T Duty
• Durable
• Able m be cleaned in a self-cleaning oven
52
Visit ge.com (U.S.) or ww_6EAppliances.ca (Canada) f_)rmore
inR_nnafion.
Page 53

GE Service Protection Plus 'M
GE, a name recognized _xorldwide fbr quality' and dependability; offers you
Service Protection Plus '"--comprehensive protection on all your appliances--
No Matter What Brand!
Benefits Include:
• Backed by GE
• All brands covered
• Unlimited service calls
• All parts and labor costs included
• No out-of-pocket expenses
• No hidden deductibles
• One 800 number to call
YOu will be completel} satisfied with our service protection or ",ou ma) request )our money back
on the remaining value of your contract. No questions asked. It's that simple.
Protect your refl'igerato_; dishwasher, washer and chTe_; range, TV, VCR and much more--any brand!
Plus there's no extra charge tbr emergency se_wice and low monthly financing is available. Even icemaker
coverage and tood spoilage protection is ottbred. You can rest easy, knowing that all your valuable
household products are protected against expensive repairs.
Place xour confidence in (;E and call us in the U.S. toll-free at 800.626.2224
for n/ore illforn/atioll,
*All ln-;mds <ov_led, up Io 20 ?_;u's old, in Ih_ <ontinenta/ U.S.
We'll CoverAny Appliance.
Anywhere. Anytime.*
Please place in envelope and mail to:
General Electric Company
Warranty Registration Department
EO. Box 32150
Louisville, KY 40232-2150
53
Page 54

Consumer Product Ownership Registration
Deal Customer:
Thank you for purchasing our product and thank you for placing your confidence in us.
VVeare proud to ha_e you as a customer!
Follow these three steps to protect your new appliance investment:
Complete and mail
your Consumer
Product Ownership
Registration today.
tLwe the pe_lce of
mind of" knowing wc
call contact VOU ill
tile unlikely exent of a
safiT, modification.
Atter lnailing tile
registration below,
store this document
ill a sati' place. It
contains inlormation
you will need should
you require service.
Our selwice number is
800.GE.CARES
(8(t0.432.2737).
Model Number Serial Number
,,, , , , , , II , , , , , , , , I
Important: If you did not get a registration card with your
product, detach and return the form below to
ensure that your product is registered, or register
online at ge.com.
Consumer Product Ownership Registration
Read your Owner's
Manual carefllllv.
It will help you
oper_te your lle',_
appliance properly.
Model Number Serial Number
M_ Ms. Mrs. Mi_',
FinalI I Lasll
Nanl( I I I I I I I I I Name I I I I I I I I I I I I
Slr_. el I
Addr(';s I I I I I I I I I I I I I I I I I I I I I I I I
Ap_.#l, , , , , , , I E-lnailAddress*
Zip I
54
(;i,,I , I
l )ale Placed
In Use Ill
Monlh
GE Consumer & Industrial
Appliances
General Electric Company
Louisville, K7 40225
9e.com
i,,,,,, I _,_,I,I .ode' ' ' , I
NUll,l,erlI I II I I I-I I I I I
* Please provide your e-mail address to receive, via e-mail, discounts, special oftk,rs and other
important COlnmunications from GE Appliances (GEA).
[ Check here if you do not want to receive communications fl-onl (;EA's careflflly selected
pHr[llers.
FAILI JRE T() COMPI]{TE AN[) RETI JRN TIIIS CARD DOES NOT DIMINISII YO[ rR
_Z\RI_ \N'IY RI(;IITS.
For infi)rmation about GEA's privacy and data usage polio), go to ge.com and click on 'Prixa(5"
Policy" or call 800.626.22'24.
I
I
Page 55

_te$.
w
m
w
55
w
m
Page 56

r_
€_
r_
Q_
IVetes.
r_
cr_
q
--°
m
_mma
56
Page 57

NOteS.
rJ_
w
wemm,
rJ_
57
m.
rbr]
w
w
_Ab
Page 58

GEGasRange Warranty.(Forc.stemersintheUnitedStates)
All warranty service provided by our Factory Service Centers,
or an authorized Customer Care®technician. To schedule service,
on-line, 24 hours a day, vis# us at ge.com, or carl 800.GE.CARES
(800.432.2737).Please have serial number and model number
available when calling for service.
GE Will Replace:
Anypartot the range which fifils due to a (letect in materials or worktnanship. During this
Fromthedateofthe
originalpurchase
::Ji::Service trips to your home to teach you how to use
the product.
!_,JImproper installation, delivery or maJntenm_ce.
)_:Failure of the product if it is abused, misused,
or used for other than the intended purpose or
used commerciaJly.
::Ji::Replacement of house fuses or resetting of circuit
breakers.
limRed one-year warranty, GE will also provide, free of charge, all labor and in-home service
to replace the defective part.
Staple your receipt here.
Proof of the original purchase
date is needed to obtain service
under the warrantz
::Ji::Damage to the product caused by accident, fire, floods
or acts of God.
_: h_cideuta] or consequential damage caused by possible
defects with this applimlce.
_: Damage caused after delivery.
iJi::Product not accessible to provide required service.
EXCLUSION OF IMPLIED WARRANTIES--Your sole and exclusive remedy is product repair as provided
in this Limited Warranty. Any implied warranties, including the implied warranties of merchantability
or fitness for a particular purpose, are limited to one year or the shortest period allowed by law.
This warranty is extended to the original purchaser and any succeeding owner for products purchased for home
use within the USA. If the product is located in an area where service by a GEAuthorized Servicer is not available,
you may be responsible for a trip charge or you may be required to bring the product to an Authorized GE Service
Location for service. In Alaska, the warranty excludes the cost of shipping or service calls to your home.
Some states do not allow the exclusion or limitation of incidental or consequential damages. This warranty gives
you specific legal rights, and you may also have other rights which vary from state to state. Toknow what your
legal rights are, consult your local or state consumer affairs office or your state's Attorney General.
Warrantor:General Electric Company.Louisville,KY 40225
58
Page 59

GEGasRange Warranty.(Forc.stomersi,Canada)
All warranty service provided by our Factory Service Centers Staple your receipt here.
or an authorized Customer Care®technician. For service, Proof of the original purchase
call 1.800.361.3400.Please have serial number and model date is needed to obtain service
number available when calling for service, under the warrant_
_ Mabe Will Replace:
One Year Anypart of the range which fifils due to a defect in materials or workmanship, During this
Fromthedateof the limitedone-yearwarranty,Mabe will also provide, freeofcharge,all labor and in-home serxice
origina!purchase to replace the deti_cti_e part.
?_:Service trips to your home to teach you how to use
the product.
i_i::hnproper h_staJlation, delivery or maintenance.
?_:Failure of the product if it is abused, misused,
or used for other thm_ the intended purpose or
used commercially.
::_i::Replacement of house fuses or resetting of circuit
breakers.
!i_:Damage to the product caused by accident, fire, floods
or acts of God.
::_i::Incidental or consequentiaJ dmnage caused by possible
defects with this applim_ce.
)_ Dmnage caused after delivery.
iJi::Product not accessible to provide required service.
EXCLUSION OF IMPLIED WARRANTIES--Your sole and exclusive remedy is product repa# as provided
in this Limited Warranty. Any impfied warranties, including the implied warranties of merchantability
or fitness for a particular purpose, are limited to one year or the shortest period allowed by law.
I ,_ARRANTOR IS NOT RESPONSIBLE FOR CONSEQUENTIAI, DAMAGES. ]
_'arrantor: MABE CANADA IN(:. ]
59
Page 60

ConsumerSupport.
GEAppliancesWebsite Illtile_.'.S.:go.corn
Have a questi//n or need assistanre _ith _our applianre? Tr_ tile GE Appliances _v\ebsite 24 hours a day,
all', (lax//f tile ",ear! For greater c//m'enience and thster serxice, }//U can now download Owner's Manuals,
order palls or even schedule service on-line.
ScheduleService illtile_.,.s.:go.corn
ExpeIt (;E repair sel_'ice is//nil one step awa} fl'om xour doo_: Get on-line and schedule ",our service at _//ur
convenience 24 houls am (lay/If tile }ear! Or call 800£;E.(_ARES (800.432.2737) during nom_al business hem's.
In Canada, call 1.800.361.3400
RealLifeDesignStudio illtile_.,.s.:Oe.com
GE suppolts tile Univeisal Design concept--}}rodt/cts, services and environI//elltS that call be tlsed by people lit all
ages, sizes and capabilities. We recognize tile need to design till" a wide range of })llvsical and mental abilities and
impairments. Fox"details of GE's Universal Design applications, including ldtchen design ideas fill" people with
disabilities, check out our Website today. For tile heating impaired, })lease call 800.TDD.GEAC (800.833.4322).
In Canada, contact: Managel; Consumer Relations, Mabe (;anada Inc.
Suite 310, ] Factolw I,ane
Moncton, N.B. E1 C 9M3
ExtendedWarranties ill tileu.s.:go.corn
Purchase a GE extended warran b and lezlm about special disc//unts that are available while )our warran b is still
in effect. _lu can pro'chase it on-line an}qfime, or call 800.626.2224 during normal business hem's, lIE Consmner
Home Services loll still be there after }our warrant_ expires. In CaJaada, call 1.888.261.2133
PartsandAccessories
Individuals qualified to secdce their own appliances call have })aiqts or accessories sent directly to their homes
(VISA, MasterCard and Discover cards are accepted). Order on-line toda> 24 lloul's e\ e U day or by phone at
800.626.2002 during normal business houl's.
Instructions contained in this manual cover procedures to beperformed by any user. Other servicing generally should be
referred to qualified service personnel. Caution must he exercised, since improper servicing may cause unsafe operation.
Customers in Canada shoukl consult tile yellow pages f_/l"tile nearest Mabe service rente_; or call 1.888.261.3055.
ContactUs
If you are not satisfied with tile service you receive fl'oln GE, contact us on tsur Website with all tile details
including your phone numbel; or write to: (;eneral Managel; Customer Relations
GE Appliances, Appliance Park
I,ouisville, KY 40225
In Canada." www.GEAppliaJaces.ca, or _fite to: Direct//l; C//nsmner Relations, Mabe Canada Inc.
Suite 310, 1 Factol y Lane
Moncton, N.B. E1C 9M3
Ill tile U.S.: go.corn
Ill tile U.S.: go.corn
RegisterYourAppliance illtile_.,.s.:oe.com
Register your new appliaaace on-line--at your convenience! TimeE, }Ir//duct registrad//n, will all/IW for enhanced
c//mmunicati/m and prompt service under tile terms /If )///U" _arranty should the need alise. You ma) also mail
ill tile prel)finted registration card included ill tile })acldng, material. In Canada: www.GFTAppliances.ca
Printed in Mexico
This bookis printed on recycled pape_
 Loading...