

Page 1
©
vvwvv.GEAppliances.com
Safety Information
Adapter Plugs ............... 3
Connecting Elecuicity ........ 3
Extension Cords ............. 2
Proper Disposal .............. 2
Safety Precautions ........... 2
Operating lnstructions
Care and Cleaning ......... 5, 6
Control ..................... 4
Ice Service ................... 5
Storage Drawers .............. 4
Installation Instructions
Preparing to Install
the Refrigerator . ............ 7
Reversing the Door Swing .. 8-13
Troubleshooting Tips
Before You Call
For Service .............. 14-15
Normal Operating Sounds ... 14
Model 12
Consumer Support
Consumer Support .......... 18
Product Registradon ..... 19-20
Wan'anty for Canadian
Customers ................. 16
Wan'anty for U.S.
Customers ................. 17
Canadian Website
www.geappliances.ca
Write the model and serial
numbers here:
Model
Serial
You can find 1hem on a label
inside the refrigerator on the
upper left side wahl.
WE6M437 350A4636PO09 162D7742PO06 49-60099-2 05-01JR
Page 2
IMPORTANTSAFETYINFORMATION.
READALLINSTRUCTIONSBEFOREUSING.
WARNING!
Use this appliance only for its intended purpose as described in this Owner's ManuaL
SAFETYPRECAUTIONS
When using electrical appliances, basic safety precautions should be followed, including the following:
@This refi_gerator must be properly installed
and located in accordance with the Installa0on
Instruc0ons before it is use(L
@ Do not allow children to climb, stand or hang
on 11aeshelves in the refrigerator. 1@ey could
damage the refiigemtor and seriously injm'e
themselves.
@Do not touch the cold surfaces in 1he li'eezer
compartment, par0cularly when hands we
damp or wet. Skin may stick to these exu'emely
cold sufaces.
@ Do not store or use g_asoline or other flmnmable
vapols and liquids in the vicinity of this or any
other appliance.
_ In refrigerators wifla aulomadc icemakeis,
avoid contact will, flae moving parks of the
qjecmr mechanism, or will, 11,e heating element
that releases the cubes. Do not place fingeis or
hands on the antomaOc icemaking mechanism
while the refrigerator is plugged in.
Keep fingers out of tl,e "pinch point" areas;
clearances between the doo_ and between
the doors and cabinet are necessarily small.
Ik. cm'eful closing doors when children m'e
in the m'ea.
Unplug the refrigerator before cleaning and
making repail_.
NOTE:WestronglyrecommendthatanyseMcingbe
performedbyaqualifiedindividual
Turning the control to the OFF(_) posi0on does
not remove power to the light circuit.
Do not refreeze frozen foods which have
thawed completely.
DANGER!RISKOFCHILDENTRAPMENT
PROPERDISPOSALOFTHEREFRIGERATOR
Child enu'apment and suffocation are not problems
of {liepast.Junked or abandoned refrigerators are
still dangerous...even if they will sit for "just a few
days." Ifyou we getOng rid of your old refrigerator,
please follow the instructions below to help prevent
accidents.
Before YouThrew Away YourOldRefrigerator
or Freezer:
_ Take off the doors.
_ Leave Ihe shelves in place so that children may
not easily climb inside.
CFCDisposal
Your old re@igerator has a cooling system that used
CFCs (chlorofluorocarbons). CFCs are believed to
harm stmlospheric ozone.
If you are throwing away your old refrigerator, make
sure the CFC refrigerant is removed for proper
disposal by a qualified servicer. If you inten0onalty
release flaisCFC re@igerant you can be sut_iect to
fines and imprisonment under provisions of the
Federal Clean Air Act.
USEOFEXTENSIONCORDS
Because of potential safety hazards under certain conditions, we strongly recommend
against the use of an extension cord.
However, ifyou must use an extension cord, it is absolutely nece_smy that it be a UI Aisted (in the United
States) or a CSA-listed (in Canada), 3-wire grounding type appliance extension cord having a grounding
type plug and oudet and that the elecu-ical ra0ng of the cord be 15amperes (minimum) and 120 volts.
2
Page 3
ww_.GEAppliances.com
A WARNING!
HOWTOCONNECTELECTRICITY
Do not, under any circumstances, cut or remove the third (ground) prong from the power cord. For
personal safe_ this appliance must be properly grounded.
The power cord of this appliance is equipped
with a 3-prong (ga'()unding) plug which mares
with a standard 3-prong (grounding) wall outlet to
minimize Ihe possibility of etectlic shock h_ard
from this appliance,
Have 1he wall outlet and circuit checked by a
qualified etecuician to make sure the outlet is
properly grounded.
Where a standard 2-prong wall outlet is
encountered, it is your pei,'sonal responsibility- and
obligation I()have it replaced with a properly-
grounded _prong wall outlet,
The refiigerator should always be plugged into its
own individual elecuical outlet which has a voltage
rating that matches the Fating plate.
"l_is pr_wides the best perfolTnance and also
prevents overloading house wiring circuits which
could cause a fire h_ard fi'om (werheated wires.
Never unplug your refrigerator by pulling on I11e
power cord. Always grip plug firmly and pull straight
out from the outlet.
Repair or replace immediately all power coMs flaat
have become fi_ayed or otherwise damaged. Do not
use a cord Ihat shows cracks or abrasion damage
along its length or at either end.
When m(wing the refrigel_alor away fi'om the
wall, be careful not m roll over or dmnage the
power cord.
USEOFADAPTERPLUGS(Adapterplugsnotpermittedin Canada)
Because of potential safety hazards under certain conditions, we strongly recommend against
the use of an adapter plug.
However, ifyou must use an adapter, where local
codes permit, a temporaryconnectionmay- be made
to a properly grounded 2-prong wall outlet by ttse
of a UIAisted adapter available at most local
hm'dware stores.
The larger slot in the adapter must be aligned with
the larger slot in the wall outlet to provide proper
polarity in flae connection of the power cord.
When disconnecting the power cord from Ilae
adapter, always hold the adapter in place wifla one
hand while pulling the power cord plug with the
other hand. If flaisis not done, the adapter gnmnd
temfinal is very likely to break with repeated u_,
If I11eadapter ground terminal breaks, DO NOT USE
the refrigerator until a proper gnmnd has been
established.
Attachingthe adaptergroundterminaltoawaftoutlet
coverscrewdoesnotgroundtheapplianceunlessthe
coverscrewis metal,andnotinsulated,andthe wall
outletisgroundedthroughthehousewiring. Youshould
havethecircuitcheckedbya qualifiedelectriciantomake
surethe outletisproperlygrounded.
READANDFOLLOWTHISSAFETYINFORMATIONCAREFULLY.
SAVETHESEINSTRUCTIONS
3
Page 4
Aboutthecontrolonthe refrigerator.
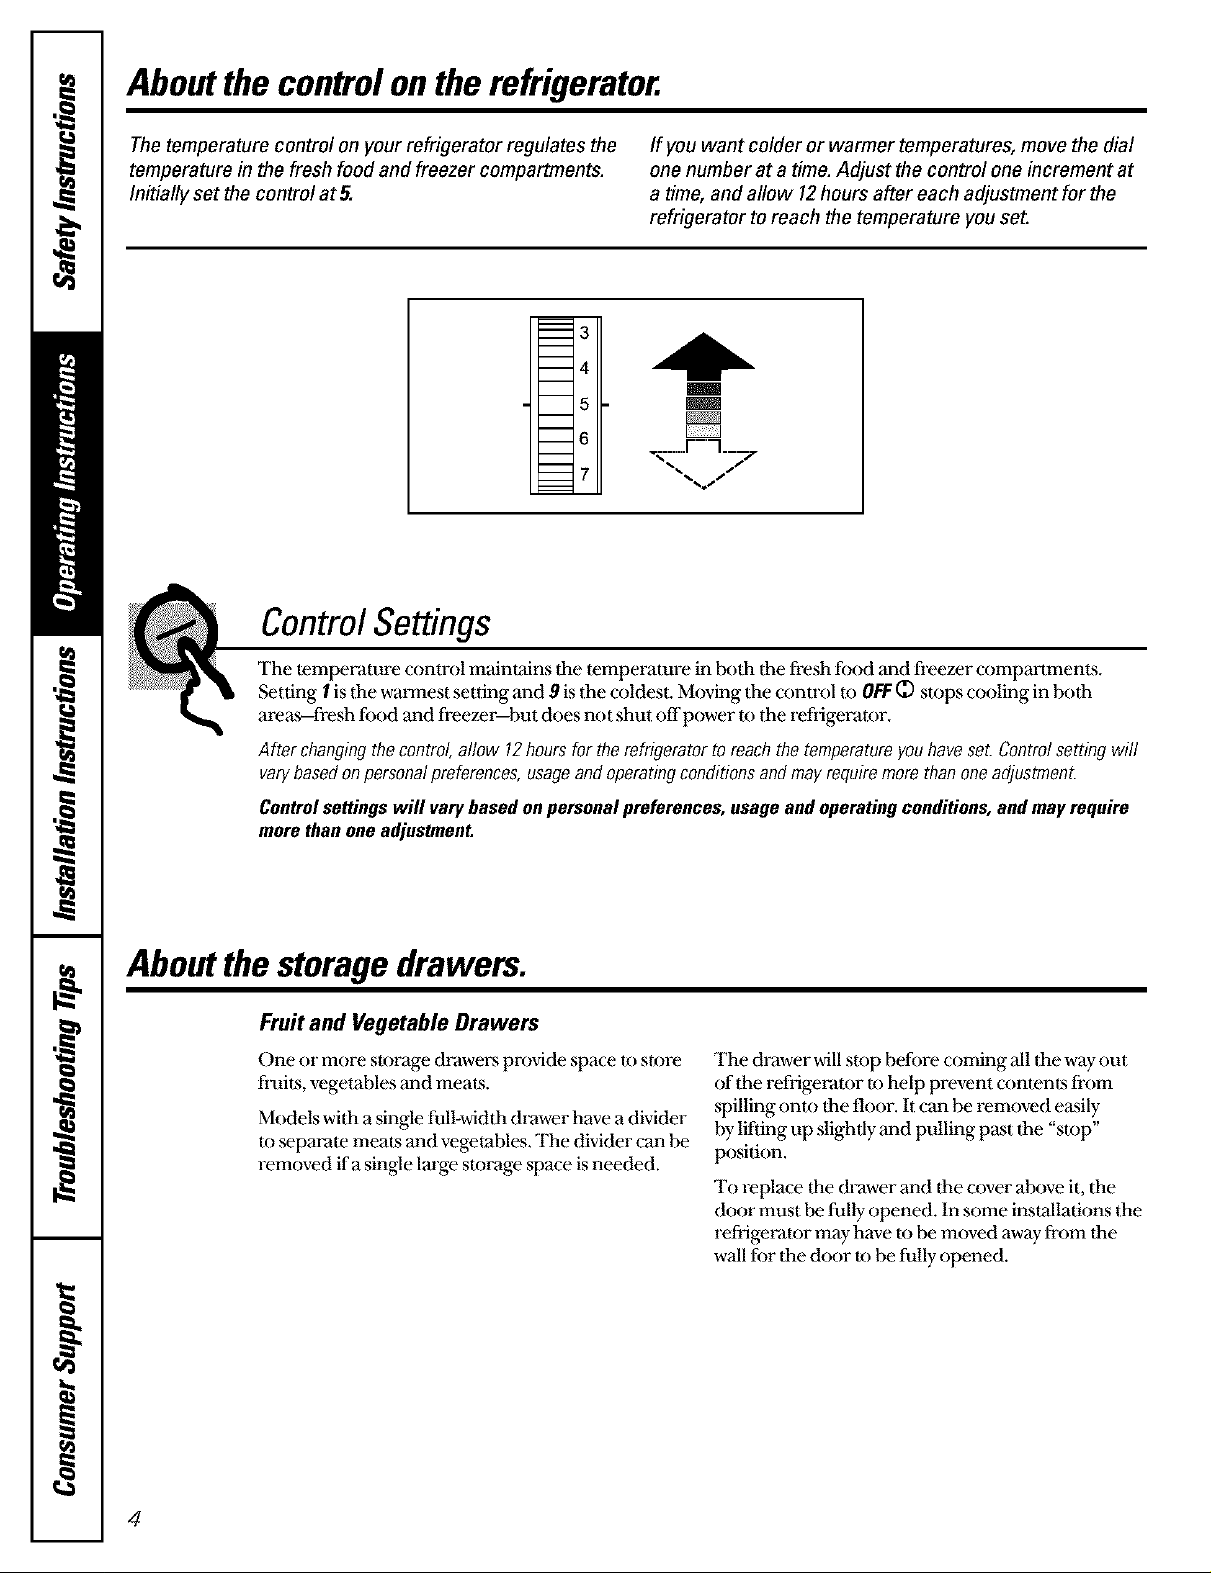
The temperature control on your refrigerator regulates the
temperature in the fresh food and freezer compartments.
Initially set the control at 5.
m
4
5 E
6 .,1._....[--..-i. _/_,,.
ControlSettings
The temperature control maintains the temperature in Lx)tl, the fresh food and fi'eezer comparlments.
Setting 1is the wmanest setting and 9 is the coldest. Moving the control to OFF1_) stops cooling in both
areas--fresh food and freezer--but does not shut off power to the refiigerator.
After changingthecontrol,allow 12hoursfor therefrigeratorto reachthetemperatureyouhaveset.Controlsettingwill
varybasedonpersonalpreferences,usageandoperatingconditionsandmayrequiremorethanoneadjustment.
If you want colder or warmer temperatures, move the dial
one number at a time. Adjust the control one increment at
a time, and allow 12hours after each adjustment for the
refrigerator to reach the temperature you set.
m
Controlsettingswill varybasedonpersonal preferences,usageandoperatingconditions,andmayrequire
morethanoneadjustment.
Aboutthestoragedrawers.
Fruit and Vegetable Drawers
One or more storage dt_awers provide space to store
fruiks, vegetables and meats.
Models widl a single full-width drawer have a divider
to separate meats and vegetables. The divider can be
removed if a single lm'ge storage space isneeded.
The drawer will stop before coming all the way out
of the refrigerator to help prevent conlents fi'om
spilling onto flaefloor. It can be removed easily
by lifting up slightly and pulling past the "stop"
position.
To replace the drawer and the cover above it, tlle
door must be fully- opened. In some installations the
refrigelamr may- have m be moved away- fi'om the
wall for the door to be fully opened.
4
Page 5
Aboutice service, ww_.GEAppliances.com
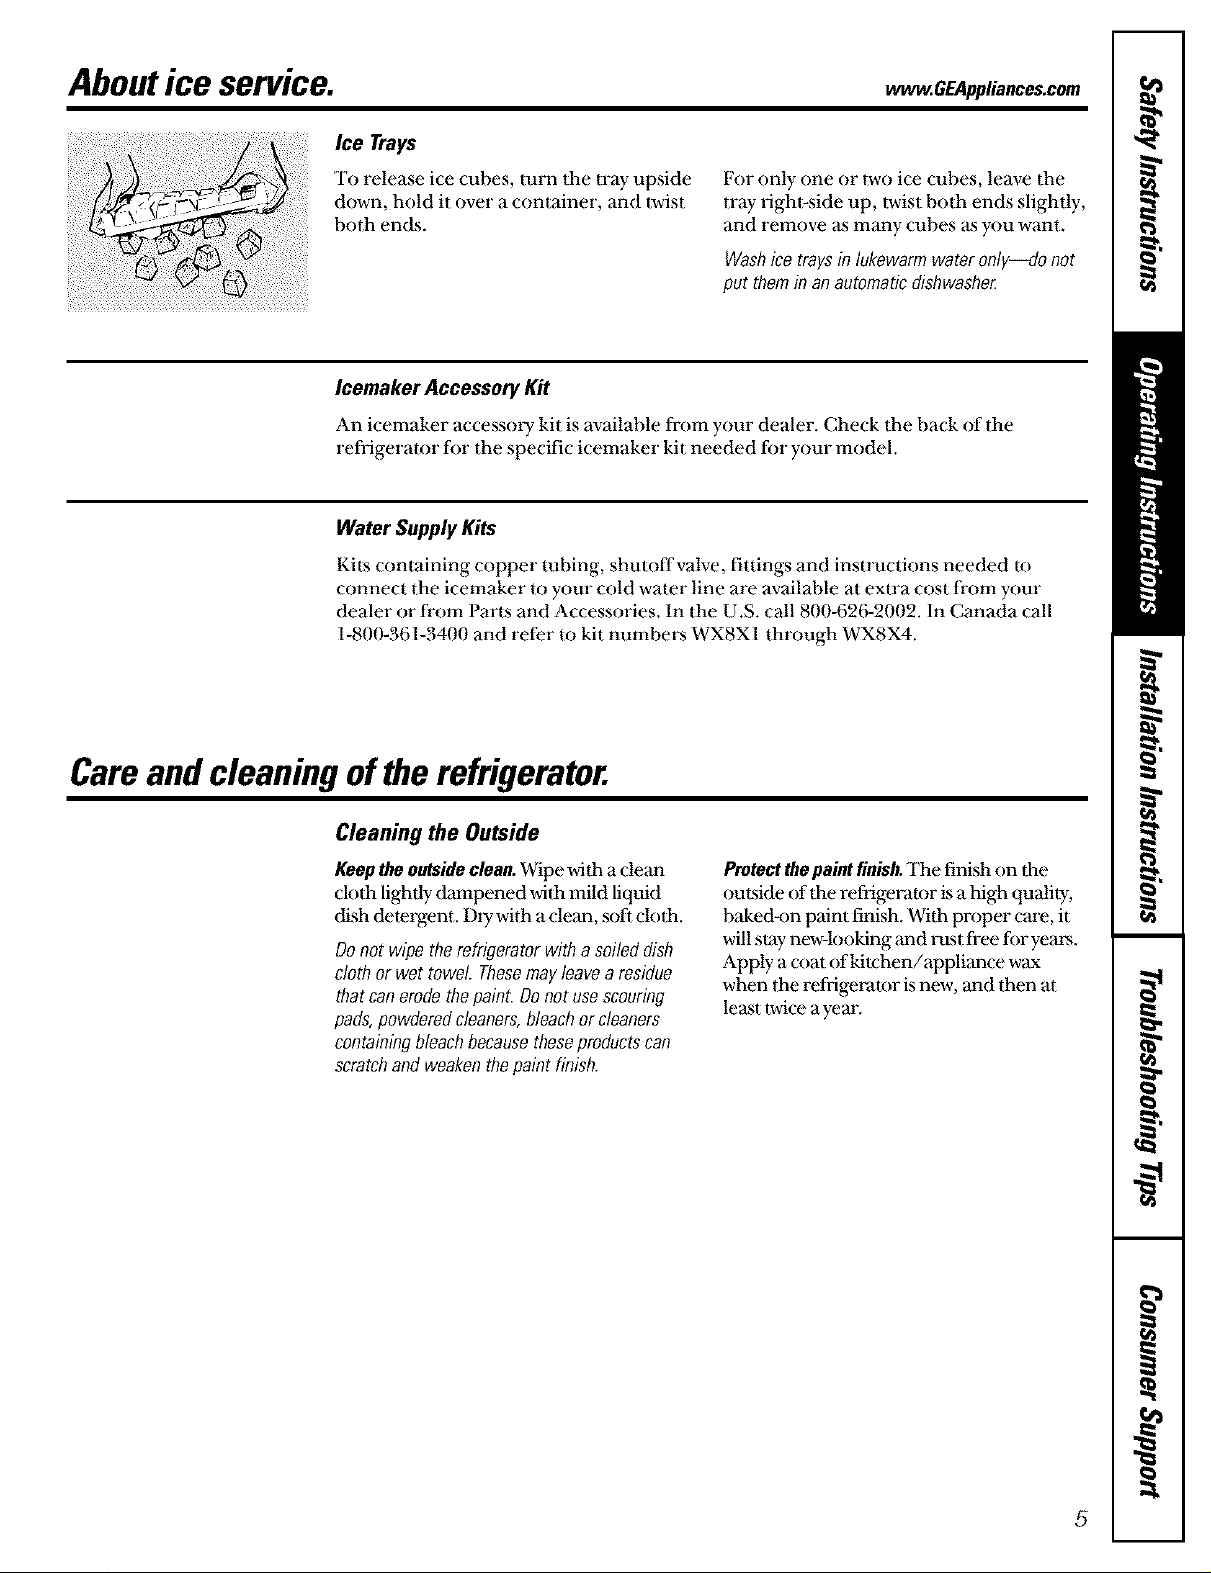
Ice Trays
,,
To release ice cubes, lurn the tray upside
down, hold it over a container, and twist
both ends.
Icemaker Accessory Kit
An icemaker access(n T kit is available from your dealer. Check Ihe back of the
refrigerator for the specific icemaker kit needed for your model.
Water Supply Kits
Kiks conlaining copper tubing, shutoffvalve, fittings and instructions needed Io
connect the icemaker to your cold water line are available at extra cost from your
dealer or from Parts and Accessories. In the U.S. call 800-626-2002. In Canada call
1-800-361-3400 and refer to kit numbers WX8X1 through WX8X4.
For only one or two ice cubes, leave the
tray fight-side up, twist bolh ends slightly,
and remove as many cubes as you want.
Washicetraysinlukewarmwateronly--do not
put themin anautomaticdishwashe_
Careandcleaning of the refrigerator.
Cleaning the Outside
Keep the outside clean. Wipe with a clean
clofla lightly dampened with mild liquid
dish detergent. DIy with a clean, soft cloth.
Donotwipetherefrigeratorwith a soileddish
clothor wettowel Thesemayleavea residue
that canerodethepaint.Donotusescouring
pads,powderedcleaners,bleachorcleaners
containingbleachbecausetheseproductscan
scratchand weakenthepaint finish.
Protect thepaint finish.The finish on the
outside of Ihe refrigerator is a high qualily,
baked-on paint finish. Wiflaproper care, it
will slay new-looking and rust free for years.
Apply acoat of kilchen/appliance wax
when the refrigerator is new, and then at
least twice a year.
5
Page 6
Careand cleaning of the refrigerator.
Cleaning the Inside
Tohelp prevent odors, leave an open tx)x of
baking soda in the fi'esh food and fi'eezer
compartmenLs.
Unplugtherefrigeratorbeforecleaning.If this
is not practical, wring exce_s moisture out of
sponge or doth when cleaning around
switches, lights or conu'ols.
Use warm wamr and baking soda solution--
about a fableslx)on (15 ml) of baking soda
to a quart (1 1)of water. This both cleans
and neutralizes odors. Rin_ and wipe &y.
Other parts of the refiigemmr--including
door gaskets, fruit and vegelable dFawe_,
and all plastic parks-can be cleaned the
same way-,
After cleaning the &)or gaskets, apply a thin
layer ofpe_oleumjelly m the door gaskets
at Ihe hinge side. This helps keep tlae
gaskets from sticking and bending out of
shape. Do not use cleansing powde_ or
other abr'asive cleanei_.
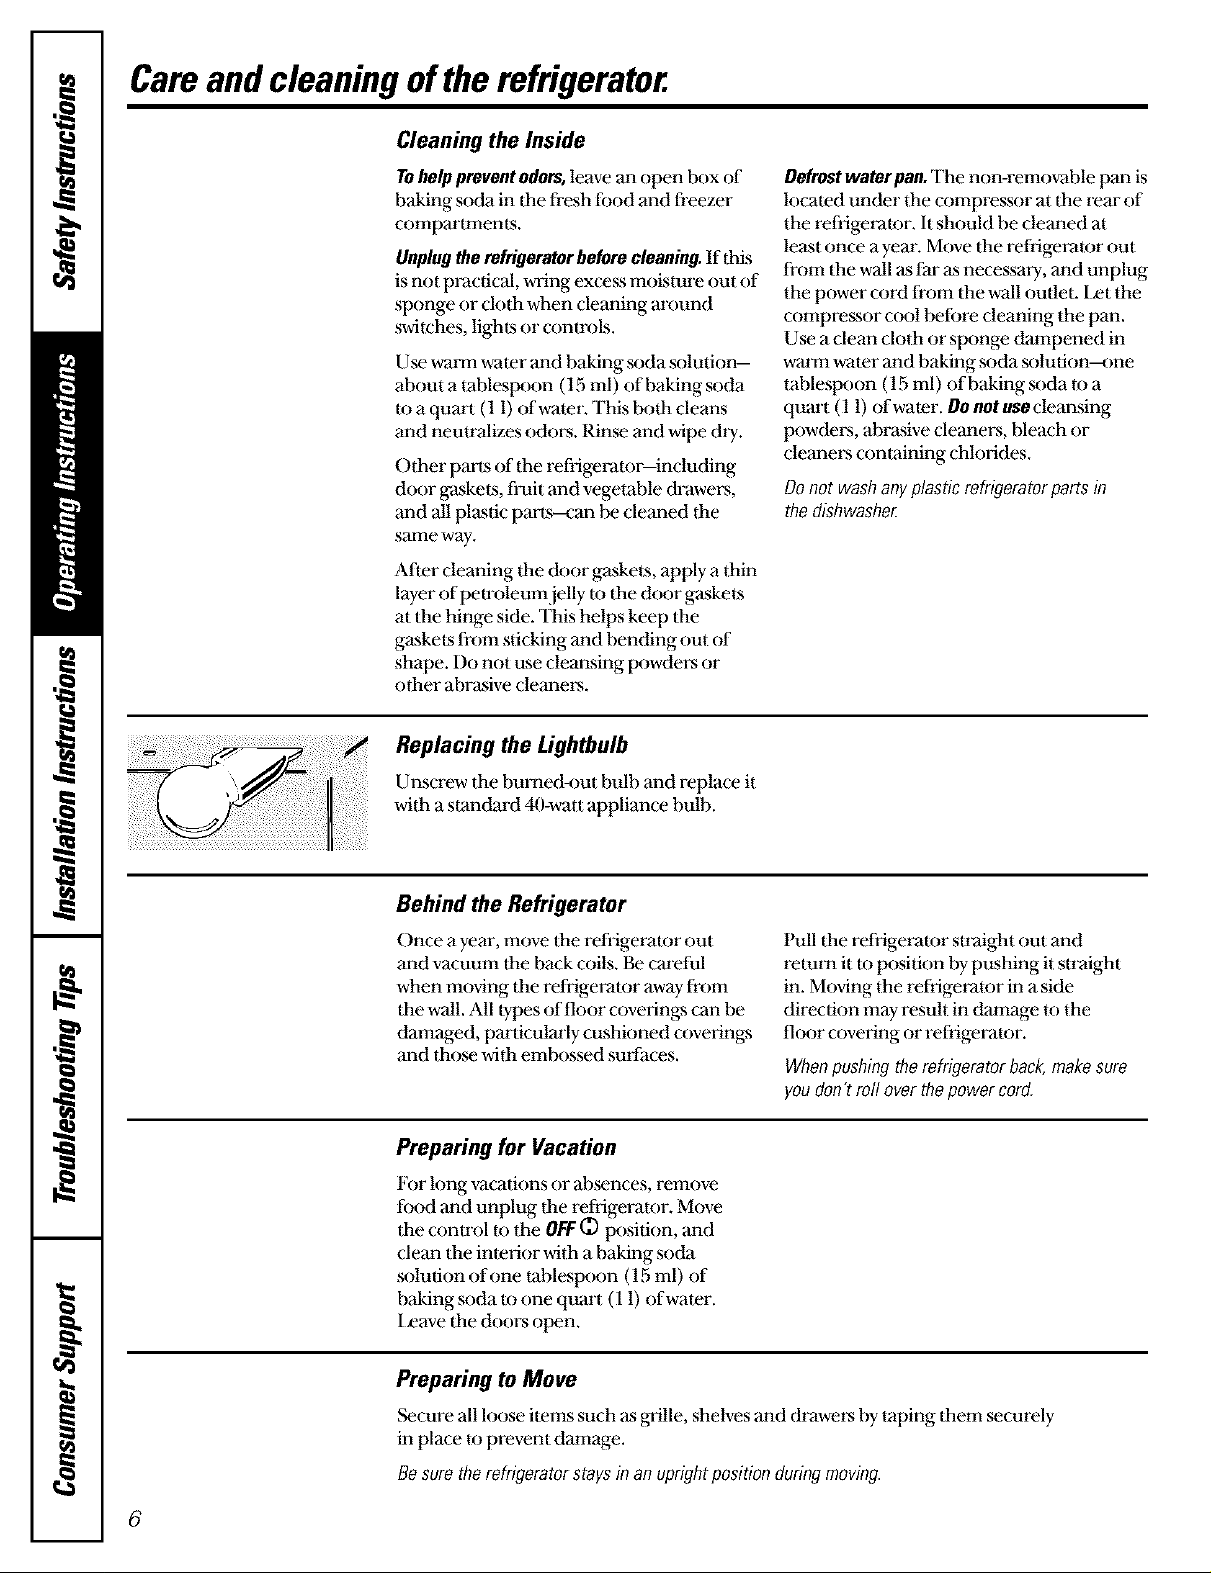
Replacing the Lightbulb
Defrostwaterpan.The non-removable pan is
located under the compressor at the rear of
the refiigerator. It should be cleaned at
least once ayear. Move tim refiigerator out
from 11aewall as far as necessary, and unplug
the power cord from tlae wall outlet. I_t the
compressor cool before cleaning the pan.
U_ a clean Oath or sponge dampened in
wmrn water and baking soda solution--<me
mbleslx)on (15 ml) of baking soda to a
quart (1 1)ofwamr. DOnotusecleansing
Ix)wdel_, abrasive deane_, bleach or
cleaneL's containing chlorides.
Donot washanyplasticrefrigeratorparts in
thedishwashe_
Unscrew the burned4mt bulb and replace it
with a standard 40-watt appliance bulb.
Behind the Refrigerator
Once a year, move line refrigerator out
and vacuum the back coils, Ik, careful
when moving the refrigerator away-from
the wall. All types of floor covefing,'s can be
damaged, particularly cushioned covefing,'s
and tho_ with emL×)ssed surfaces.
Preparing for Vacation
For long vacations or absences, remove
food and unplug tim refrigerator, Move
the control to the OFFO position, and
clean tlae inlerior with a baking soda
solution of one tablespoon (15 ml) of
baking soda m one quart (11) of water.
1_'ave the doors open,
Pull tim refrigerator suaight out and
remm it m position by pushing it su'aight
in, Moving the refrigerator in a side
direction may- result in damage to the
floor covering or refrigerator.
Whenpushingtherefrigeratorback, makesure
youdon'traftoverthepowercord.
Preparing to Move
Secure all loose imms such as grille, shelves and (h'awei_ by taping them _curely
in place to prevent damage.
Besuretherefrigeratorstaysinan uprightpositionduringmoving.
6
Page 7

Installation
Refrigerato
Instructions
Model 12
ffyou havequestions,carl 800-GECARESorvisit our Website at: www.GEAppliances.com [
BEFORE YOU BEGIN
Read these instructions completely and carefully.
•IMPORTANT - Save,th ,se
instructions for local inspector's use.
•IMPORTANT - Obse, ,all
governing codes and ordinances.
• Note to Installer - Be sure to leave these
instructions with the Consumer.
• Note to Consumer - Keep these instructions
for future reference.
• Skill level - Installation of this appliance requires
basic mechanical skills.
• Completion time - Refrigerator Installation
15 minutes
Reversing the Door Swing
1 hour
• Proper installation is the responsibility of the
installer.
• Product failure due to improper installation is not
covered under the Warranty.
CLEARANCES
Allow the following clearances for ease of installation,
proper air circulation and plumbing and elecuical
connections.
• Sides 1" (2.5 cm)
• Top4" (10.2cm)
• Back 3" (7.6 cm) fi'om the rear cabinet surface to
the wall
To help with proper spacing and ventilation, make sure
the metal spacer or Iwist4m rubber bumper (at the back
of some models) is in place.
LEVELING LEGS
Adjustable legs at Ilae front cornel_ of the refrigerator
should be _t so tlae refiigerator is filTnlypositioned on the
floor and tlae fi'ont is raised just enough that the door
closes easily when opened about halfway-.
To adjust the leveling legs, turn the legs clockwise to raise
the refiJgerator, counterdockwise to lower it.
REFRIGERATOR LOCATION
• Do not install the refiigerator where the temperature
will go below 55°F (13°C) because it will not run often
enough to maintain proper temperatures.
• Install it on a floor strong enough to support it fully
loaded.
• Do not install it closer than 5" (13 cm) next to a range.
Toraisetherefrigerator
7
Page 8

Installation Instructions
REVERSING THE DOOR SWING
IMPORTANT NOTES
When reversing Ihe door swing:
• Read 1he instructions all the way darough before
starting.
• Handle parts carefully to avoid scratching paint.
• Set screws down by Iheir relaled parts to avoid using
them in the wrong places.
• Provide a non-scratching work surface for
the doors.
IMPORTANT: Once you begin, do not move the
cabinet until door-swing reversal is completed.
These instructions are for changing the hinges from
the fight side to the left side--if you ever want to change
1he hinges back to the fight side, follow these same
instructions and reverse all references to left and fight.
Unplug the refrigerator from its electrical outlet.
Empty all door shelves.
TOOLS YOU WILL NEED
[] REMOVE THE FREEZER DOOR
Tape Ihe door shut wilh masking tape.
Remove dae hinge cover, top hinge, shim and
two screws,
Set the door on a non-scratching surface with the
outside up.
NOTE: When removing the freezer door,
washer(s) between Ihe center hinge and the door
may stick to the door. Do not lose.
5/16"Headsocketdriver 7/32"Headsocketdriver
Phillipsscrewdriver
Puttykeifeor
thin-bladescrewdriver
CAUTION: Do not let door drop to the floor.
To do so could damage the door stop.
8
Page 9

Installation Instructions
[] REMOVE THE FRESH FOOD
DOOR
Tape the door shut with masking tape.
Remove dae hinge pin by turning it
counterclockwise. Lift up slightly- on the door
handle while pulling the pin out of the center
hinge.
Remove the door by opening it slightly while lifting it
su'aight up and out in order to clear the center hinge
and the bottom hinge pin.
Set the door outside-up on a non-scratching surface.
Make sure the butler bin does not swing open.
Replace the washer(s) on the bottom hinge if they
stick to the door.
[] TRANSFER TOP HINGE TO
THE LEFT
Remove the plug buttons by c_efully piying
under the edge with a putty knife. Be careful of
the paint finish.
Reinstall the plug buttons on the right side hy
inserting them into the holes vacated by the top
hinge screws.
_r_ "_o PlugButtons
L'-
Reassemble the top hinge and shim on the left side,
turning the screws just enough to hold the hinge in
place.
Besurescrews | I'_
gothrough
theseholes
forleftside.
i1--
CAUTION: Do not let door drop to the floor.
To do so could damage the door stop.
9
Page 10

Installation Instructions
REVERSING THE DOOR SWING (CONT.)
[] TRANSFER BOTTOM HINGE TO
THE LEFT
Remove the bottom hinge, screws and shim (s) from
the fight side and rea_,_semblethem on the left side of
the cabinet.
ATFENTION: The screws must be properly
tightened. Turn the screws until snug. Then
dghlen Ihe screws a minimum of one full turn
using both hands.
[] TRANSFER CENTER HINGE TO
THE LEFT
Remove the two screws on the opposite side.
m
U
Remove the center hinge, shim and screw(s).
Reassemble the center hinge on the left side.
CAUTION: When assembled correctly, the hinge
is tight against the cabinet.
ATTENTION: The screws must be properly
tightened. Turn the screws until snug. Then
tighten the screws a minimum of 1/2 turn using
both hands.
10
D
d d
Page 11

Installation Instructions
[] TRANSFER FRESH FOOD DOOR
HANDLE TO THE RIGHT
To remove the handle: Remove the plug button by
carefully- prying under the edge with a putty knife.
Remove the exposed screw holding the handle.
PlugButton _.[_L_
HandleBottom
Remove the two screws holding the handle to the
top of the door,
HandleTop
[] TRANSFER FRESH FOOD DOOR
HANDLE TO THE RIGHT (CONT.)
Transfer the button on the door to the opposite side.
Reinstalling the handle: Attach the handle to the
right side of the door, reversing the above procedure.
After removing the handle: Remove the screws
from the fight edge of the door top and inert them
into the handle screw holes on the left side.
handleholes
Remove the plug button from the left edge of the
door and inert it into the hole on the opposite side,
PlugButton
11
Page 12

Installation Instructions
REVERSING THE DOOR SWING (CONT.)
[] TRANSFER FREEZER DOOR
HANDLE TO THE RIGHT
Remove the nameplate plug button by carefully
prying under the edge with a putty-knife. Remove
the exposed screw holding the handle.
HandleTop
Remove the two screws holding the handle to the
bottom of the door.
HandleBottom
Remove the handle.
[] TRANSFER FREEZER DOOR
HANDLE TO THE RIGHT (CONT.)
TFan_er the button on door face to oplx)site side.
PlugButton
Attach the handle to the fight side of the door,
reversing the above procedure.
[] INSTALL THE DOOR STOPS
Metal &)or stops, to be used when reversing the &)or
swing, were included wifla the reffigeramr. Remove 1lee
door stops from Ilae fight end of each door. Ins{all Ilae
door stops, designed for the left side, on the left end of
each door.
Reverse the buttons and screw on top flange of door,
Shim
LeftSide RightSide
Shim
12
Page 13

Installation Instructions
[] REHANG THE FRESH
FOOD DOOR
Make sure the washer(s) are in place on the bottom
hinge pin. Place the fresh food door on 1he bottom
hinge and position it under the cemer hinge. Drop
Ihe hinge pin inlo Ihe cenler hinge to hold the door
in place and tighten the screw.
[] REHANG THE FREEZER DOOR
Place the washer(s) on the center hinge pin. Place
the freezer door on the center hinge over the pin.
Raise the top hinge by hand and insert 1he pivot
]:)ininto the hole in the door. Then swing the
door shut.
[] ALIGN THE DOORS
Align 1he freezer door with the fresh food door so
that 1hegap between 1he doors iseven.
Tighten the top hinge screws by 1uming Ihem unlil
snug. Then turn the screws a minimum of 1/2 turn
using both hart(Is.
/3
Page 14

Normal operatingsounds.
Depending on the placement of the refrigerator in your kitchen,
you may want to place a piece of rubber backed carpet under
the refrigerator to reduce noise.
These sounds are normal and are due mosdy to highly- efficient operation,
The new high efficiency compressor runs faster and will have a higher pitch
hum or pulsating sound while operating,
Defrost timer and refrigerator control click on and off.
during defrost and refrigeration following defrost,
sound during the defrost cycle,
water or a gurgling noise.
of cooling coils caused by expansion and contraction
air inside the freezer which keeps the temperatures
on flae defrost heater causing a sizzling, hissing or popping
of refrigerant through the freezer cooling coils sounds like boiling
Water dripping as it melts from the evaporator and flows to the drain pan
Before youcall forservice...
Troubleshooting tips
Save time and money! Review the charts on the following
pages first and you may not need to call for service.
Possible Causes What ToDo
Refrigerator in defrost cycle. * Wait about 30 minutes for defrost cycle to end,
Cona'ol in OFF(_)position. * Move the control to a temperature setting,
Refrigerator is unplugged. * Push the plug completely into the outlet,
The fuse is blown/circuit * Replace fuse or reset the breaker,
breaker is tripped.
the defrost cycle,
Vibrati_ or rattling :
14
Front leveling legs need * See Leveling Legs.
adjusting.
Page 15

Beforeyoucall forservice.., ww .GEAppliances.com
Possible Causes What To Do
Normalwhen refrigerator * Wait 24 hours for the refrigerator to completely
is f'trstplugged in. cool down,
Often occurs when large * This is normal.
amounts of food are
placed in refrigerator.
Door left open. • Check to see if packag-e is holding door open.
Hot weather or frequent * Tiffs is normal.
door openings.
Temperature control * See About the control.
set at the coldest setting.
Temperature control not set * See About the controL
cold enough.
Warm weather or frequent • Set the temperature control one step colder.
door openings. See About the control
Door left open. * Check to see if package is holding door open.
Door left open. * Check to see if package is holding door open.
Too frequent or too long
door openings.
carrie_ moisture in_ :
refrig_ra_i when doo_
_ op
i i
h_t work
Food trausmitting odor/taste * Wrap foods well
to ice cubes.
Interior of refrigerator * See Care and cleaning.
needs cleaning.
Door left open. • Check to see if package is holding door open.
Temperature control not set • _e About the control.
cold enough.
Foods transmitting • Foods with sU'ong odol ,'sshould be tightly wrapped.
odor to refrigerator. • Keep an ()pen [_)x of baking soda in the refiigerator;
replace eveiy three months,
Interior needs cleaning. • See Care and cleaning.
Defrost water pan needs cleaning. • See Care and cleaning.
Not unusual during • Wipe surface dry.
periods of high humidity.
Too frequent or too
long door openings.
No power at oudet. • Replace fttse or reset the breaker,
.ght hhumedont. e.e lacingthelig t ul
15
Page 16

CONSUMER WARRANTY
(for customers in Canada)
Your refrigerator is warranted to be free of defects in material and workmanship.
What is covered How Long Warranted Parts Labor
(From Date of Sale) Repair or Replace
at Camco's Option
Compressor Five (5) Years Five (5) Years Five (5) Years
Sealed System (including Five (5) Years Five (5) Years Five (5) Years
evaporator, condenser
tubing and refrigerant)
All Other Parts One (1) Year One (1) Year One (1) Year
TERMS AND CONDITIONS:
This warranty applies only for single family
domestic use in Canada when the
Refrigerator has been properly installed
according to the instructions supplied by
Camco and is connected to an adequate
and proper utility service.
Damage due to abuse, accident, commercial
use, and alteration or defacing of the serial
plate cancels all obligations of this warranty.
WHAT IS NOT COVERED:
• Service trips to your home to teach you
how to use the product.
• Damage to finish after delivery.
• Improper installation--proper installation
includes adequate air circulation to the
refrigeration system, adequate electrical,
plumbing and other connecting facilities.
• Replacement of house fuses or resetting
of circuit breakers.
Service during this warranty must be
performed by an Authorized Camco
Service Agent.
Neither Camco nor the Dealer is liable for
any claims or damages resulting from any
failure of the Refrigerator or from service
delays beyond their reasonable control.
To obtain warranty service, purchaser must
present the original bill of sale. Components
repaired or replaced are warranted through the
remainder of the original warranty period only.
• Replacement of light bulbs.
• Damage to product caused by accident,
fire, floods or acts of God.
Loss of food due to spoilage.
Proper use and care of product as listed
in the owner's manual, proper setting of
controls.
• WARRANTOR IS NOT RESPONSIBLE
FOR CONSEQUENTIAL DAMAGES.
This warranty is in addition to any statutory
warranty.
IMPORTANT
Keep this warranty and your bill of sale as proof of original purchase and purchase date.
16
Camco Service is available coast to coast.
If further help is needed concerning this
warranty, contact:
Manager, Consumer Relations
Camco Inc.
Suite 310,
1 Factory Lane
Moncton, N.B.
ElC 9M3
Staple your receipt here.
Proof of the original purchase
date is needed to obtain service
under the warranty.
Page 17

RefrigeratorWarranty.(Forcustomers in the United States)
All warranty service provided by our Factory Service
Centers, or an authorized Customer Care®technician.
Toschedule service, on-line, 24 hours a day, contact
us at www.GEAppllances.com, or call 800-GE-CARES.
GE Will Replace:
Anypartof the refiigerator which fails due Io a defect in matelials or workmanship.
During this fullone-year warranty, GE will also provide, free of charge, all labor
and in-home sel_ice to replace the defective part.
Any part of the sealed refrigerating system (the compress)r, condenser, evaporator
and all connecting robing) which fails due to a defect in materials or workmanship.
During this additional four-year warranty, GE will also provide, free of charge, all labor
and in-home sel_ice to replace the defective part.
_ Service trips to your home to teach you how to use the
product.
_ Improper installation.
_ Failure of the product if it is abused, misused, or used for
other than the intended purpose or used commercially.
_ Loss of food due to spoilage.
Staple your receipt here.
Proof of the original purchase
date is needed to obtain service
under the warran_
_ Replacement of house fuses or resetting of circuit
breakers.
_ Damage to the product caused by accident, fire, floods or
acts of God.
_ Incidental or consequential damage caused by possible
defects with this appliance.
This warranty is extended to the original purchaser and any succeeding owner for products purchased for home
use within the USA. In Alaska, the warranty excludes the cost of shipping or service calls to your home.
Some states do not allow the exclusion or limitation of incidental or consequential damages. This warranty gives
you specific legal rights, and you may also have other rights which vary from state to state. Toknow what your
legal rights are, consult your local or state consumer affairs office or your state's Attorney General
Warrantor: General Electric Company.Louisville, KY 40225
17
Page 18

ConsumerSupport.
GEAppliancesWebsite
Have a question or need assistance wida your appliance? "l"lythe GE Appliances Websim 24 hom_ a (lay,
any day of the year! For grealer convenience and faster service, you can now download Owner's Manuals,
order parts, catalogs, or even schedule service on-line. You can also "Ask Our Team of Experts TM" your questions,
and so much more.,, In Canada: www.geapplianees.ea
Inth,_'u.s.:www.GEAppliances.com
ScheduleService Intheu.s.:www.GEAppliances.com
Expert GE repair selw'ce is only one step away-from your door, Get on-line and schedule your sel_-iceat your
convenience 24 hours any day-of the year! Or call 800-GE-CARES (800-432-2737) during nolrnal business hems.
In Canada, call 1.800-361-3400
RealLifeDesignStudio
GE supports Ihe Univel_al Design concept--products, services and environments tlaat can be used by people ()fall
ages, sizes and capabilities We recognize the need to design for a wide range of physical and mental abilities and
impairments, For details ofGE's Univei ,'salDesign applications, including kitchen design ideas for people with
disabilities, check out our Websim today, For tlae hearing impaired, please call 800-TDD-GEAC (800_S33-4322),
In Canada, contact: Manager, Consumer Relations, Camco, Inc,
Suite 310, 1Factory Lane
Moncmn, N.B, E1C 9M3
In the U.S.: www.GEAppliances.com
v................._
ExtendedWarranties
) .......
I m chas_ a GE extended warnan U and learn about specml d_scounks that are avmlable while yore wan_anty _sstdl
in effect. You can purchase it on-line anylime, or call 800-626-2224 during normal business hours. GE Consumer
Home Seiwices will still be there after your warranty expires, In Canada, call 1-888-261-2133
PartsandAccessories
Individuals qualified m service their own appliances can have parts or accessories ,sentdirectly m flmirhomes
(VISA, MasterCard and Discover cards are accepmd), Order on-line today, 24 hom_ eveiy (lay or by phone at
800-626-2002 (luring normal business hem ,'s,
Instructionscontainedinthismanualcoverprocedurestobeperformedby anyuser,Otherservicinggenerallyshouldbe
referredtoqualifiedservicepersonnel.Cautionmustbeexercised,sinceimproperservicing maycauseunsafeoperation.
Cttstomers in Canada should consult the yellow pages for the nearest Camco service center, or call 1.888-261-3055.
ContactUs
Ifyou are not satisfied with the service you receive from GE, contact us on our Websim with all the details including
your phone number, or write to: General Manager, Customer Relations
GE Appliances, Appliance Park
Ix)uisville, KY 40225
In Canada: www.geappliances.ca, or write to: Director, Consumer Relations, Camco, Inc.
Suite 310, 1 Facto1T Iane
Moncton, N.B. E1C 9M3
In the U.S.: www.GEAppliances.com
In the U.S.: www.GEAppliances.com
Ina_eU,S.:www.GEAppliances.com
RegisterYourAppliance
Register your new appliance on-line--at your convenience! Timely product regisnation will allow for
enhanced communication and prompt service under the telTns of your wan'amy, should the need arise,
You may also mail in tlae pre-prinled re_su'ation card included in the packing material, or detach and
use the form in this Owner's Manual. In Canada: www.geapplianees.ca
In the U.S.: www.GEAppliances.com
Printed in Canada
Page 19

GE Service Protection Plus TM
GE, a name recognized worldwide for quality and dependability, offers you
Service Protection Plus"_--comprehensive protection on all your appliances--
No Matter What Brand!
Benefits Include:
• Backed by GE
• All brands covered
• Unlimited service calls
• All parts and labor costs included
• No out-of-pocket expenses
• No hidden deductibles
• One 800 number to call
You will be completely satisfied with ore" service protection or you may request your money back
( n the lemammg value of yore c( nuact. N( quests( ns asked. It s that s_mple.
Protect your refi'igeramr, dishwasher, washer and dryer, range, TV, VCR and much more--any brand!
Plus there's no extra charge for emergency selwice and low monthly financing is available. Even icemaker
coverage and food spoilage protection is offered. You can rest easy, knowing that all your valuable
household products are protected against expensive repairs.
Place your confidence in GE and call us in the U.S. toll-free at 800-626-2224
for more information.
* 9
All brands covered, up to _() years old, in Ihe continental I..S.
We'll CoverAnyAppliance.
Anywhere. Anytime.*
e.............
Pleaseplacein envelopeand mailto:
General Electric Company
Warranty Registration Department
P.O. Box 32150
Louisville, KY 40232-2150
19
Page 20

Consumer Product Ownership Registration
Dear Customer:
Thank you for purchasing our product and thank you for placing your confidence in us.
We are proud to have you as a customer!
Follow these three steps to protect your new appliance investment:
Complete and mail
your Consumer
Product Ownership
Registration today.
Have the peace of
mind of knowing we
can contact yon in the
unlikely event of a
safety modification.
After mailing the
registration below,
store this docmnent
in a safe place. It
contains inlbtTnation
you will need should
you require sm_,ice.
Our setwice number is
800 GE (;ARES
(800-432-2737).
Model Number Serial Number
I I I I I I I I I I I
Illllll
Important: If you did not get a registration card with your
product, detach and return the form below to
ensure that your product is registered, or register
online at www.GEAppliances.com.
Consumer Product Ownership Registration
Read your Owner's
Manual carefillly.
It will help you
operate yollr new
appliance properly.
,__ Cut here
I I I I I I I I I I I I I I I I I
Model Number Serial Number
Mr. D Ms. D Mis. D Miss D
Fit'st] Last]
Name I I I I I I I I I Name I I I I I I I I I I I I
Street I
Address I I I I I I I I I I I I I I I I I I I I I I I I
Apt. # I I I I I I I I E-mail Address*
City I I I I I I I I I I I I I I Suite I I ()-)de I I I I
Date Phced
Month
* Please provide your e-mail address to receive, via e-mail, discounts, special offers and other important
communications fi'om GE Appliances (G_LA).
[3 Check here if you do not want to receive communications from GEA's carefillly selected parmers.
Number I I I I I I I I
G£App#m_es
General Eleeltic Compan?
Louisville, geMucky
ww_GEApptiancez, com
Zip[
2O
 Loading...