

Page 1

ge.com
Safety Instructions . ......... 2-4
N
Operating Instructions
Automatic Icemaker ............ 7
Care and Cleaning ............. 8
Shelves ..................... 5, 6
Storage Drawers ............... 6
Temperature Controls .......... 5
Installation Instructions
Preparing to Install
the Refrigerator ............... 9
Reversing the Door Swing ...13-16
Water i,ine Installation ...... 10-12
Troubleshooting Tips
Befi)re You Call For Service .. 17, 18
Normal Operating Sounds ...... 17
Consumer Support
Consumer Support .... Back Cover
Product Registration
(Canadian) ............... 21, 22
Product Registration (U.S.) . 20-22
Warranty fi)r
Canadian Customers .......... 19
Warranty for U.S. Customers ... 23
Models 16,17,18
0
Write the model and serial
numbers here:
Model #
Serial #
You can find them on a label on
the upper left side of the flesh food
compartment.
197D7799PO01 49-60521-1 08-08Jfl
Page 2
IMPORTANT SAFETYINFORMATION.
READALL INSTRUCTIONS BEFOREUSING.
[, DANGER! RISK OFCHILD ENTRAPMENT
PROPERDISPOSALOFTHEREFRIGERATOR
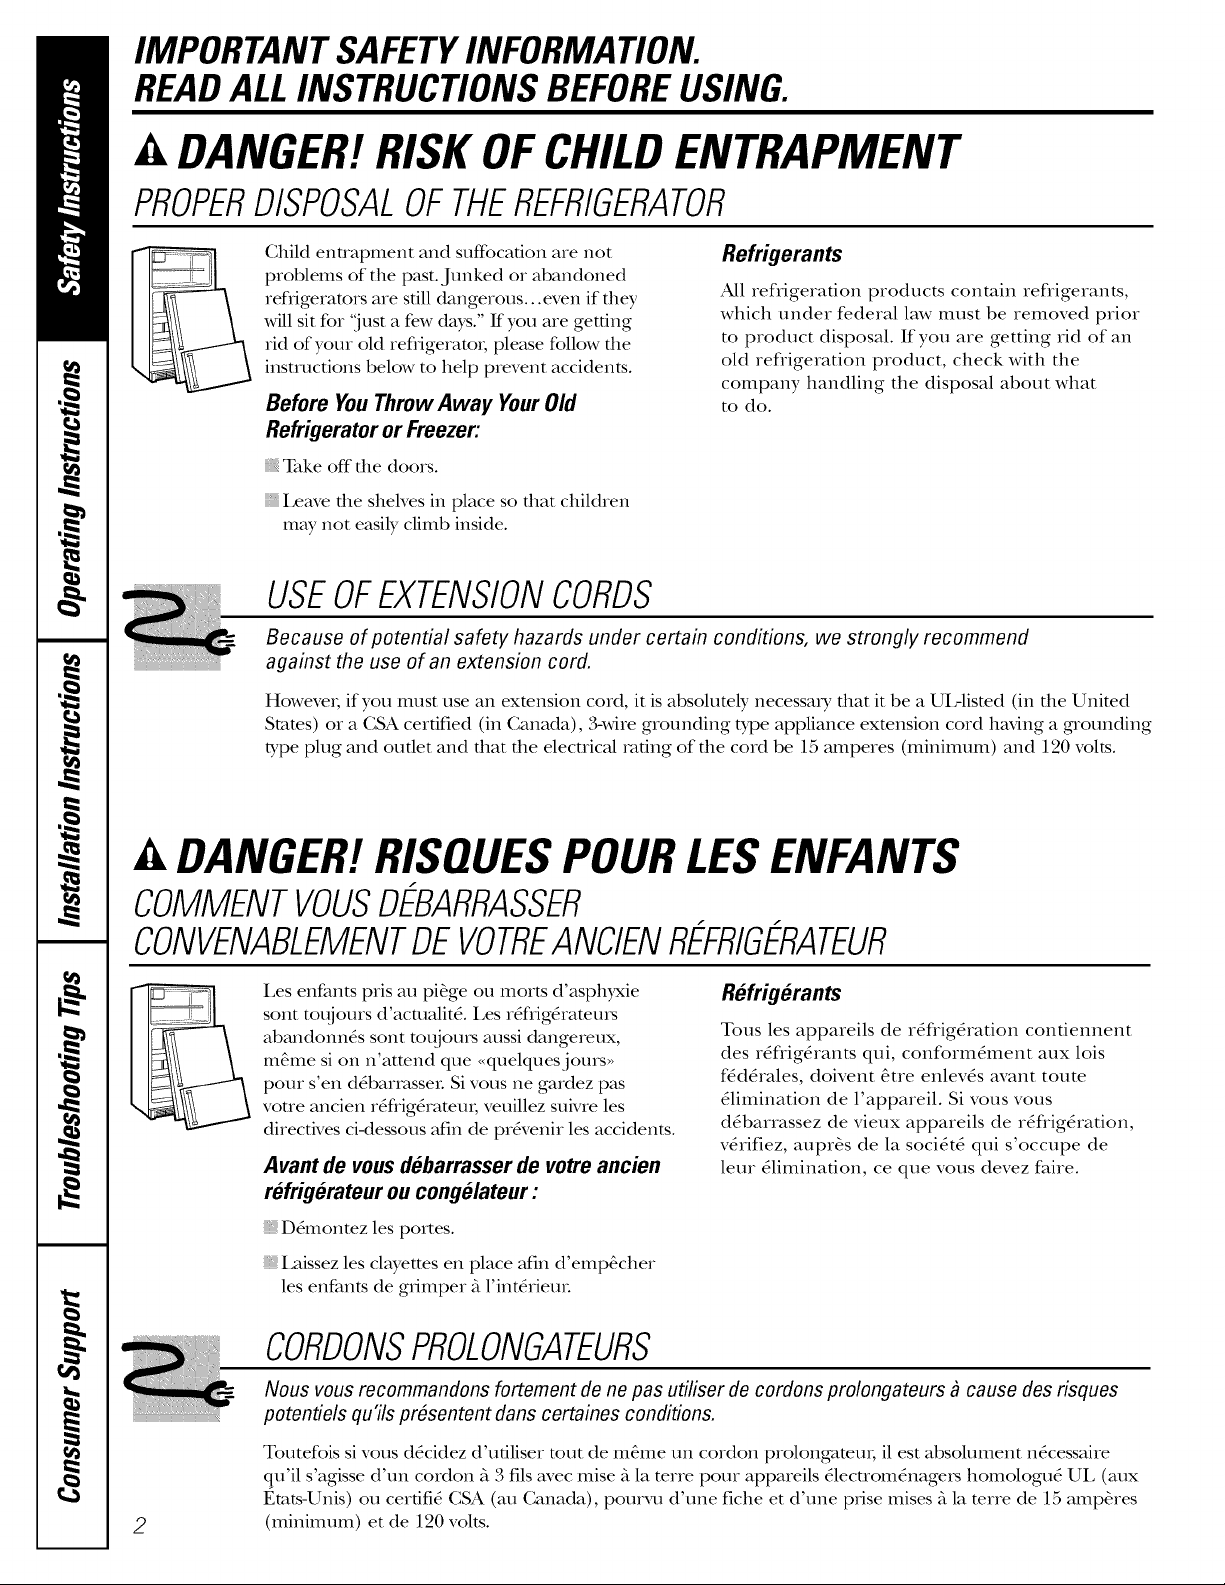
Child entrapment and suffbcation are not
problems of the past. Junked or abandoned
refJigeramrs are still dangerous.., even if they
will sit for "just a few dws." If you are getting
rid of your old refl-igeramt; please follow tile
instructions below to help prevent accidents.
Before You ThrowAway Your Old
Refrigerator or Freezer:
_ke offthe doors.
I,eave the shelves in place so that children
may not easily climb inside.
Refrigerants
All refrigeration products contain refiigerants,
which under federal law must be removed prior
to product disposal. If you are getting rid of an
old refiigeration product, check with the
company handling the disposal about what
to do.
USEOFEXTENSIONCORDS
Because of potential safety hazards under certain conditions, we strongly recommend
against the use of an extension cord.
However; if you must use an extension cord, it is absolutely necessat T that it be a UIAisted (in the United
States) or a CSA certified (in Canada), 3-wire grounding type appliance extension cord having a grounding
type plug and outlet and that the electrical rating of the cord be 15 amperes (minimum) and 120 volts.
DANGER! RISQUES POUR LESENFANTS
COMMENTVOUSDEBARRASSER
CONVENABLEMENTDEVOTREANCIENREFRIGERATEUR
Les enfants pris au pi&ge ou morts d'asphyxie
sent tot_jours d'acmalit_. Les r_fl_ig&amm_
abandonn_s sent mr{joins aussi dangereux,
tile.tIle si on n'attend que <<quelquesjours,,
pour s'en d_barrasseL Si vous ne gardez pas
voue ancien r_flig&amuI; veuillez suMe les
directives ci-dessous afin de pr&_enir les accidents.
Avant de vous d_.barrasser de votre ancien
refrigerateur ou congelateur :
D_montez les portes.
Laissez les clayettes en place afin d'emp_cher
les enfants de grimper ?_l'int_riem.
CORDONSPROLONGATEURS
Nous vous recommandons fortement de no pas utiliser de cordons prolongateurs _ cause des risques
potenfiels qu'ils prOsentent dans certaines conditions.
Refrigerants
Tous les appareils de r_flig_ration confiennent
des r_flig_rants qui, conform_ment aux lois
f_d_rales, doivent &.treenlev_s avant route
_limination de l'appareil. Si vous vous
d_barrassez de vieux appareils de r_flig_ration,
v_.rifiez, aupr&s de la soci_t_ qui s'occupe de
leur _limilmtion, ce que vous devez faire.
Toutefois si vous d_cidez d'utiliser tout de re&me tm cordon prolongateuI; il est absolument n_cessaire
qu'il s'agisse d'un coMon _'_3 ills avec raise ?_la terre pour appareils _lectrom&mgeis homologu_ UL (aux
t_mts-Unis) ou cerfifi_ CSA (au Canada), pourvu d'une fiche et d'une prise mises ?_la terre de 115amp&res
2
(minimum) et de 120 volts.
Page 3
IMPORTANT SAFETYINFORMATION.
READALL INSTRUCTIONS BEFOREUSING.
A WARNING!
Use this appliance only for its intended purpose as described in this Owner's Manual
SAFETYPRECAUTIONS
When using electrical appfiances, basic safety precautions should be followed, including the following:
This refrigerator must be properly installed
and located in accoMance with the Inst_fllation
Instructions before it is used.
Do not allow children to climb, stand or hang
on the shelves in the reffigeramL They could
&mmge the refrigerator and seriously i_jure
themseNes.
{{_iDo not touch the cold surfaces in the fleezer
compamnent when hands are damp or wet.
Skin may stick to these extremely cold surfaces.
{{_iDo not store or use gasoline or other flammable
vapors and liquids in the vicinity of this or any
other appliance.
{{_iKeep fingers out of the "pinch point" areas;
clearances between the doors and between
the (loots and cabinet are necessarily small.
Be careflfl closing doors when children are
in the area.
In refligeramrs Mill automatic icemakers,
avoid contact with the moving parts of the
ejector mechanism, or with the heating element
that releases the cubes. Do not place fingers or
hands on the automatic icemaking mechanism
while the refligeramr is plugged in.
Unplug die refligetamr before cleaning and
making repai,_.
NOTE:Westrong&recommendthatanyservicingbe
performedbyaquafifiedindividual
{{_iTurning the control to the 0 position does
not remove power to the light circuit.
{{_iDo not refleeze flozen foods which have
thawed completel):
ge.com
MESURESDES 'CURIT "IMPORTANTES.
LISEZD'ABORDTOUTESLESDIRECTIVES.
.4,AVERTISSEMENT!
N'utilisez cot filectromfinager que pour I'usage auquel il est destinfi, comme expliqufi dans le
prOsent manuel
MESURESDESECURITE
Lorsque vous utilisez un appareil filectrique, observez toujours Insmesures de sficurffi de base,
y compris les suivantes.
Insmllez le r4flig4rateur conform4ment aux
directives d'insmllation avant de l'utiliset.
Ne lmssez pas les enfants grimpet; s'asseoiI;
se mnir debout ni se pendre aux clayettes du
r_ffig_ramtn. Ils pourraient endommager le
r_ffig_ramur et se blesser gmvement.
N'enueposez et n'ufilisez pas d'essence ou
auues vapetn_ et liquides inflammables _'_
proximit_ de cet appareil ou de rout autre
appareil _lecuom_naget.
t_loignez les doigts des parties du r_flig&ateur
off l'on peut facilement se pincer : les espaces
entre les portes et entre les porms et les placards
sont tot{jours _uoits. Soyez prudent lorsque
vous femlez les potms de l'appareil en presence
des enfants.
Si votre r_flig&ateur est dot_, d'une machine A
glacons automatique _vitez le contact avec les
pi_ces mobiles du m_canisme _jectem; ou avec
l'_l_ment chauffant qui lib&re les glacons.
Ne posez pas les doigts ou les mmns sur le
m_canisme de la machine _'_glacons pendant
que le r_flig&amur est branch,.
Ne touchez pas les surfaces ffoides du cong_lateur
si vous avez les mains humides ou mouill_es :la
peau risque d'adh&er ?_ces surfaces tr_s floides.
D_branchez voue r_flig_tamur avant de le
nettoyer ou de le r_paret.
REMARQUE: Nousvousrecommandonsvivementde
confiertouter#paration_untechnicienqua/iriS
Lorsque vous r_ez la commande sur 0 (&eint),
l'alimenmtion _lectrique de l'ampoule n'est pas
couple.
Ne recongelez pas les aliments surgel_s qui ont
compl_tement d_gel& 3
Page 4

IMPORTANT SAFETYINFORMATION.
READALL INSTRUCTIONS BEFOREUSING.
A WARNING'!
HOWTOCONNECTELECTRICITY
Do not, under any circumstances, cut or remove the third (ground) prong from the power cord.
For personal safety, this appfiance must be properly grounded.
The power cord of dds appliance is equipped widl a _g
prong (gnounding) plug which mates with a standmd
,%prong (grounding) wall outlet m minimize the
possibililyof electric shock h_taud flom this appliance.
Have file wall outlet and circuit checked bya qualified
elecnician m make sure the outlet isproperly
grounded.
X_rhere a standard 2-prong wall outlet is encounmred, it
is your personal responsibility and obligation to have it
replaced with a properly grounded ,%prong wall outlet.
The refligerator shouM alwa}sbe plugged into itsown
indMdual elecnical outlet which has a voltage mdng
flint matches the mdng plato.
This prcMdes file best perfomlance and also prevents
overloading house wiring circuits which could cause a
fire hazaJd from oveflleamd wir_.
Never unplug your refligermor by pulling on file
power cord. Alwa)s grip plug firefly and pull smdght
out flom file outlet.
Repair or replace immediately all power cords dlat
have become flayed or oflletwise damaged. Do not use
a cord fllat shows crocks or abrasion damage along its
length or at either end.
X4rhenmoving file refligemtor away flom the
wall, be carefifl not m roll over or &unage the
power cord.
READAND FOLLOWTHISSAFETYINFORMATIONCAREFULLY.
SAVE THESEINSTRUCTIONS
MESURESDES_'CURIT_"IMPORTANTES.
LISEZD'ABORDTOUTESLESDIRECTIVES.
A A VERTISSEMENT!
RACCORDEMENT&ECTRIQUE
Ne coupez ni retirez en aucun cas la troisiOme broche (mise _ la terre) de la fiche du cordon
d'alimentation. Pour votre sOcurit#, cet appareil dolt Otrecorrectement mis _ la terre.
I_ coition d'alimentation de cet app_ueil est muni
d'une fiche _'_3 brochm (raise _'tla tene) qui se braxlche
dmls une prise tamale ordinaire _'_3 alvg_des (raise _'_la
term) pour r_duire au minimum lm fisqum de chocs
41ecuiqum.
Faims examiner la prise de courant et le circuit par un
_lectficien qualifi_ pour vous _tssurer que la prise mt
conectement raise _'_la terre.
Si la prise murale est du t)pe st_m(Lud _'_2 alv_oles, il
vous incombe de la faire remplacer par une pfi_ _'_3
ah'_olm conecmment raise _'_la mne.
Le r_fl_ig_rateur dolt toujoms &re branch_ dmls sa
propre prise de coumnt, dont la mnsion nominate est
idenfique _'_celle indiqu_e sur la plaque signal_fique.
Cette precaution mt recommand_e [K_urgmantir un
rendement optimum et gMmrune smcha_ge des
drcuits dlecniques de la rd0dence, ce qui potmait
crder un risque d'incendie par smvhaufIb dm ills.
Ne d_bmnchezj_un_fis le r_flig&ateur en fimnt sur le
cordon d'alimentation. Ndsissezfemaement la fiche du
cordon et drez droit pour la redrer de la prise.
R@arez ou remplacez imm_diatement tout cordon
effiloch_ ou endommag_. N'udlisez pas un cordon
fendill_ ou pr&enmnt des signes d'usure.
I_nsque vous d_placez voue r_flig&ateur du ram;
thims attention de ne pas le faire fouler sur le cordon
d'alimenmdon mqn de ne p_ts l'endommagen
VEUILLEZLIREETSUIVREATTENTIVEMENTCESMESURESDESECURITE.
CONSERVEZCESDIRECTIVES
4
Page 5
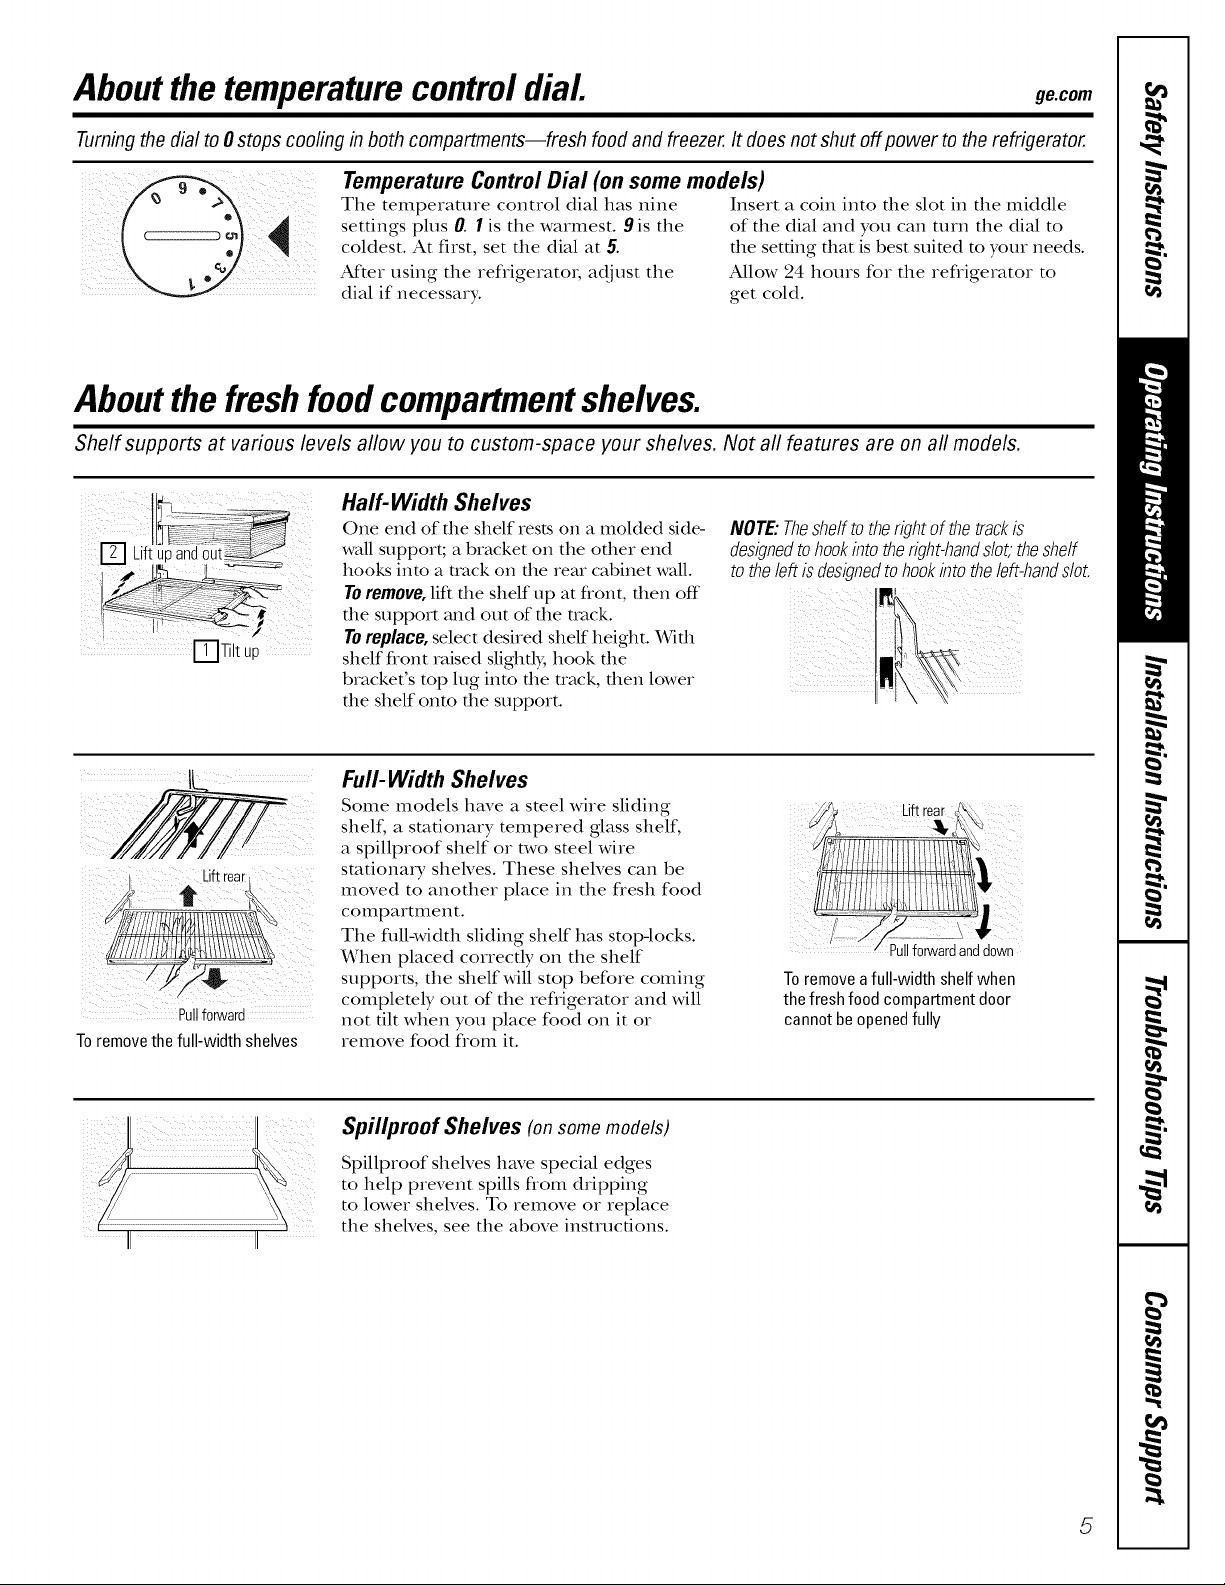
Aboutthe temperaturecontroldial ge.oom
Turningthe dial to 0stops cooling in both compartments--fresh food and freezer.It does notshut off power to the refrigerator.
The temperature control dial has nine Insert a coin into the slot in the middle
settings plus/7. I is the warmest. 9 is the of the dial and you can turn the dial to
coldest. At first, set the dial at 5. the set6ng that is best suited to your needs.
After using the refrigerator; adjust the Allow 24 hours for the refrigerator to
dial if necessary, get cold.
Aboutthe freshfoodcompartmentshelves.
Shelf supports at various levels allow you to custom-space your shelves. Not all features are on all models.
Half- Width Shelves
[_Tilt up
One end of tile shelf rests on a molded side-
wall support; a bracket on the other end
hooks into a track on tile Ie_tl cabinet waU.
TOremove, lift the shelf up at flont, then off
tile support and out of tile track.
Toreplace, select desired shelf height. With
shelf front raised slightly, hook the
bracket's mp lug into tile track, then lower
the shelf Ohm the support.
NOTE:Theshelftotherightof thetrackis
designedtohookintotheright-handslot,theshelf
totheleftisdesignedtohookintotheleft-handslot.
_i iI
kiftrearj
Pullfo_vard
Toremovethe full-width shelves
II II
Full- Width Shelves
Some models have a steel wire sliding
shelf, a stationary tempered glass shelf,
a spillproof shelf or two steel wire
stationary shelves. These shelves can be
moved to another place in tile flesh food
compartlnent.
Tile full-width sliding shelf has stop-locks.
When placed correctly on the shelf
supports, tile shelf will stop before coming
completely out of the refrigerator and will
not flit when you place food on it or
remove food flom it.
Spillproof Shelves (on some models)
Spillproof shelves have special edges
to help prevent spills flom dripping
to lower shelves. To remove or replace
tile shekes, see tile above insu_ucfions.
Toremovea full-width shelf when
the fresh food compartmentdoor
cannot be openedfully
5
Page 6
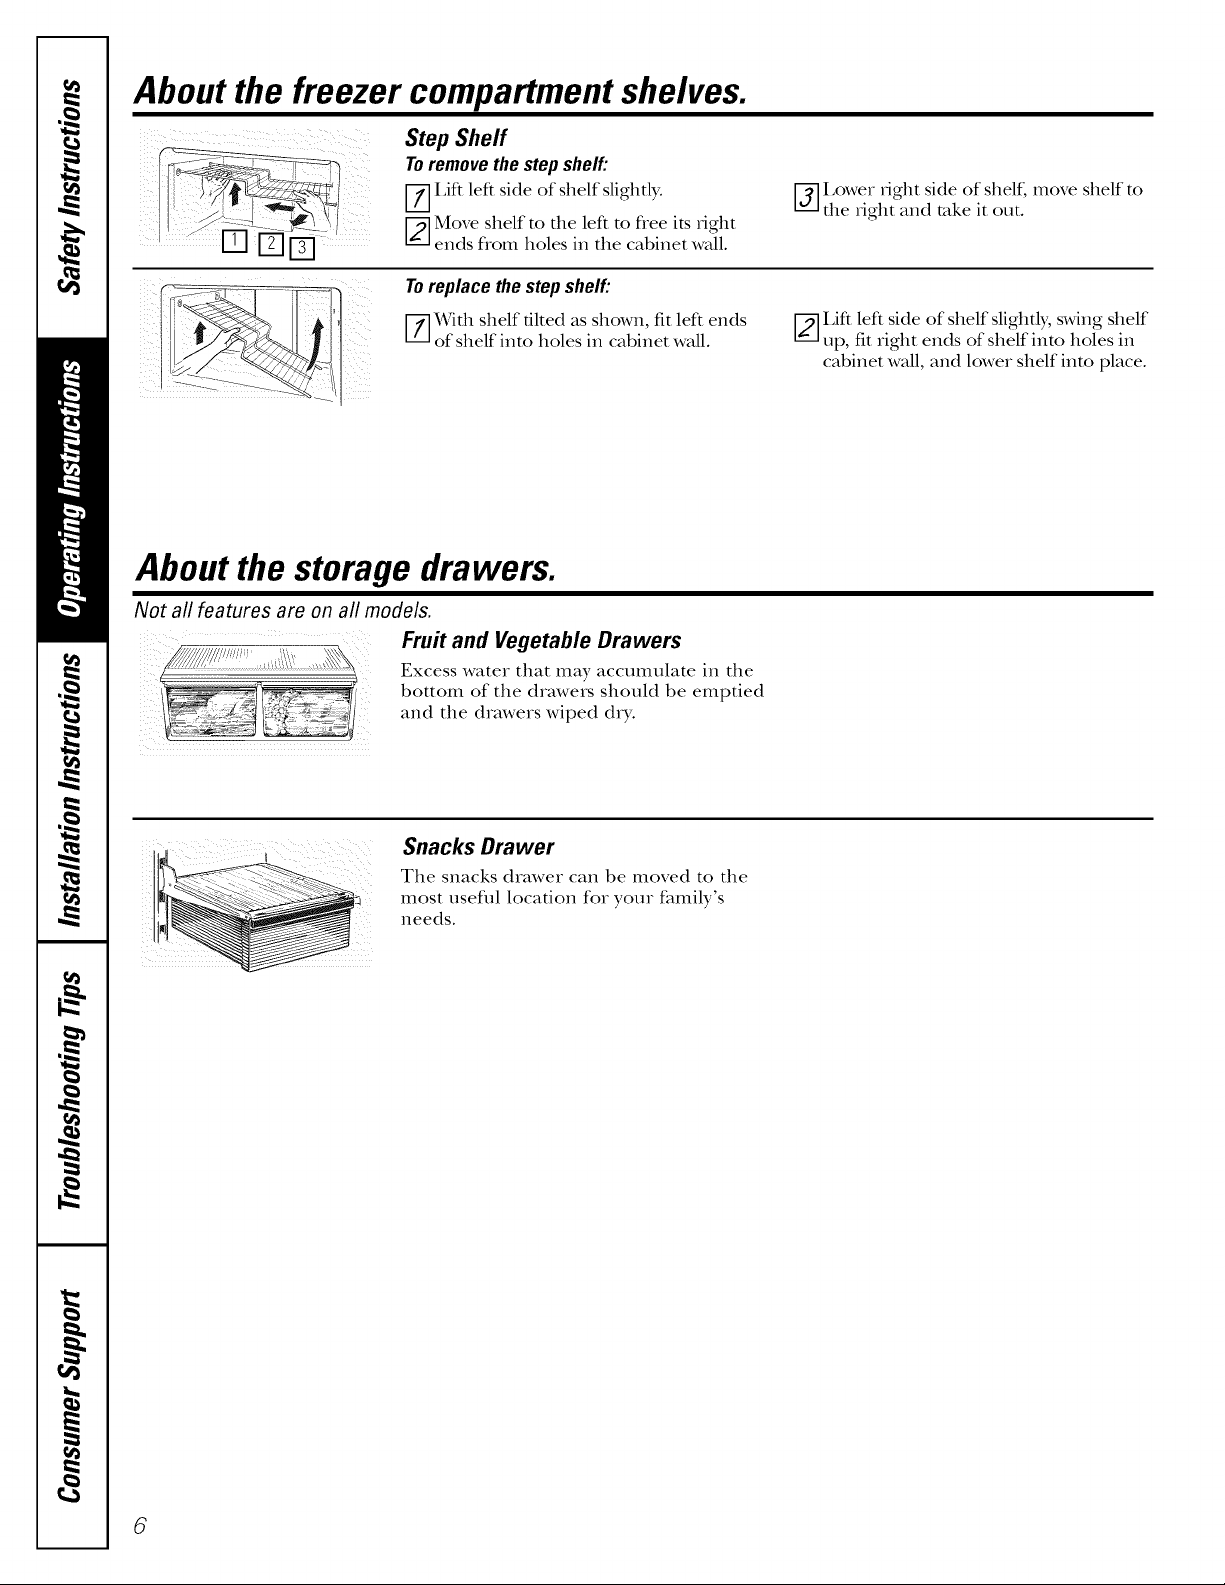
About the freezer compartment shelves.
Step Shelf
Toremovethestepshelf:
[-7]I,ift left side of shelf slightly.
[_-]Move shelf to the left to free its iight
ends flom holes in the cabinet wall.
Toreplacethestepshelf:
[--_]With shelf tilted as shown, fit left ends
of shelf into holes in cabinet wall.
About the storage drawers.
Not aft features are on all models.
Fruit and Vegetable Drawers
Excess water that may accumulate in the
bottom of the drawers should be emptied
and the drawers wiped d_T.
[-_] Lower _ight side of shelf, move shelf to
the _ight and rake it out.
[_--]I_iffleft side of shelf slightly, swing shelf
up, fit right ends of shelf into holes in
cabinet wall, and lower shelf into place.
..... i Snacks Drawer
The snacks drawer can be moved to the
most useflfl location for your family's
needs.
6
Page 7
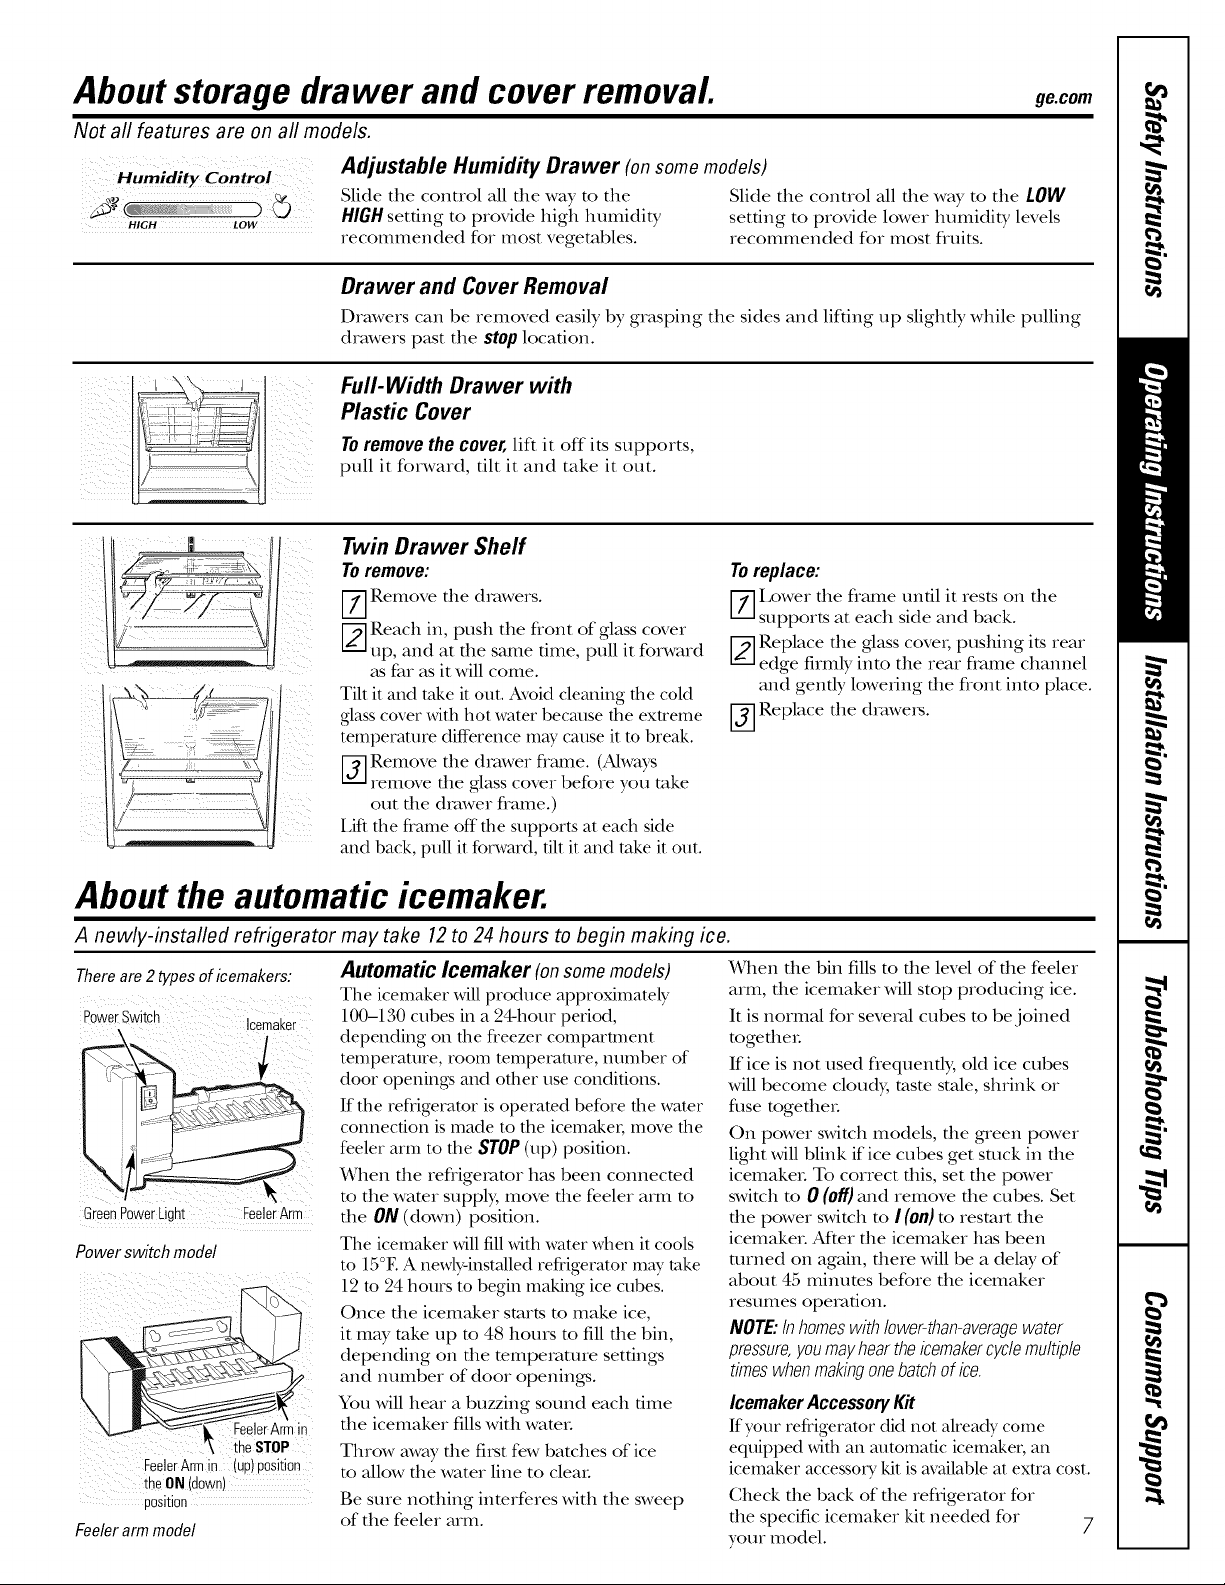
About storage drawer and cover removal, ge.com
Not aft features are on aft models.
Humidity Control
HIGH LOW
i
!iii /iii
7 ¸ • :i;i •_ ....
Adjustable Humidity Drawer (onsomemodels)
Slide the control all die way to the Slide the control all die way to the LOW
HIGHsetting to provide high humidity setting to provide lower humidity levels
recommended for most vegetables, recommended for most fl_uits.
Drawer and Cover Removal
Drawers can be removed easily by grasping the sides and lifting up slighdy while pulling
drawers past tile stop location.
Full-Width Drawer with
Plastic Cover
Toremovethe cover,lift it off its supports,
pull it forward, tilt it and take it out.
Twin Drawer Shelf
Toremove:
[-'7]Remove tile dxmvers.
F_-]Reach in, push the flont of glass cover
up, and at the same time, pull it forward
_tsfar as it will come.
Tilt it and take it out. Avoid cleaning the cold
glass covet"with hot water becmlse the exu'eme
temperature difference mW cause it m break.
_] Remove tile drawer flmne. (Always
remove tile ,glasscover before you rake
out the drawer flame.)
iJfi the fi'mne off the supports at each side
aud back, pull it forward, flit it aud take it out.
Toreplace:
[-_ Lower tile frame until it rests (m tile
supports at each side and back.
F_--]Replace tile glass covei, pushing its rear
edge firmly into the rear flvmm channel
and gendy lowedng tile flont into place.
[j] Replace tile (hmve_s.
About the automatic icemaker.
A newly-installed refrigerator may take 12to 24 hours to begin making ice.
There are 2 types of icemakers:
PowerSwitih ]cemaier
GreenPowerLight FeelerArm
Power switchmodel
FeelerArmin
theSTOP
FeelerArmin (up) position
theON (down)
position
Feelerarm model
Automatic Icemaker (onsomemodels)
The icemaker will produce approximately
100-130 cubes in a 24-hour period,
depending on the fl'eezer compai'unent
temperature, room temperature, number of
door openings mid other rise conditions.
If the refl'igeramr is operamd before the water
connection is made to the icemaket; move the
feeler m'm to the STOP(.p) position.
When the refligeramr has been connecmd
m the wamr supply, move the feeler am1 m
the ON (down) position.
The icemaker willfill with water when it cools
to 15°E A newly-installed refi'igerator mW rake
12 m 24 hours to begin making ice cubes.
Once the icemaker starts m make ice,
it mW take up m 48 hours m fill the bin,
depending on the mmperamre setdngs
and number of door openings.
You will hear a buzzing sound each dine
the icemaker fills with WamL
Throw away tile fi[st few batches of ice
to allow the water line to cleaL
Be sure nothing interferes with tile sweep
of tile feeler arm.
When die bin fills to die level of die feeler
arm, die icemaker will stop producing ice.
It is normal for severed cubes m be joined
mgetheL
If ice is not used flequendy, old ice cubes
will become cloudy, tasm stale, shrink or
fuse mgetbeL
On power switch models, the g_een power
light will blink if ice cubes get stuck in the
icemakeL To correct this, set the power
switch m 0 (off) and remove the cubes. Set
the power switch m I (on) m resm_* the
icemakeL Af_er the icemaker h_ts been
turned on again, there will be a del W of
about 45 minums before tile icemaker
resumes ope_v_fion.
NOTE:In homeswith lower-than-averagewater
pressure,you mayhear the icemakercycle multiple
times when makingonebatch of ice.
IcemakerAccessoryKit
If your refi'igerator did not ah'eady come
equipped with an maomafic icemaker, an
icemaker accessoW kit is available at extra cost.
Check tlle back of tlle refligerator for
tile specific icemaker kit needed for
your model.
7
Page 8
Care and cleaning of the refrigerator.
Cleaning the Outside
Thedoorhandlesandtrim (on some models). Clean
with a cloth dampened Mtb soapy wateL Dry Mtb a
soft cloth.
Keep the outsideclean.Wipe Mtb a clean cloth lighdy
dampened with kitchen appliance wax or mild liquid
dish detergent. DxT and polish with a clean,
soft cloth.
The stainless steel panels and door handles (on some
models) can be cleaned with a commercially available
stainless steel cleaneL Do not use appliance wax or polish
on the stainless steel.
Donotwipe therefrigeratorwith asoileddishclothor wet
towel.Thesemayleavea residuethatcanerodethepaint.
Donotusescouringpads,powderedcleaners,bleachorcleaners
containingbleachbecausetheseproductscanscratchand
weakenthe paintfinish.
Cleaning the Inside
Tohelp preventodors,leave an open box of baking soda
in the flesh food and freezer compartments.
Unplugthe refrigeratorbeforecleaning.
If this is not practical, wring excess moisture out of
sponge or cloth when cleaning around switches, lights
or controls.
Moving the Refrigerator
Be carefld when moving the refligerator away flom
the wall. All types of floor coverings can be damaged,
particularly cushioned coverings and those with
embossed surfaces.
Turn the leveling legs at each flont corner of the
refiigemtor counterclockwise until the rollers support
the refiigeratoL Pull the refiigeramr suaight out and
rental it m position by pushing it suaigbt in. Moving
the refrigeratorin a side directionmat,resultin damage
tothefloorcoveringorrefrigerator.
Whenpushingthe refrigeratorback,makesurey.oudon'troll over
thepower cordoricemakersupplyline (onsomemodels).
Aider rolling the refligerator back into place, mrn the
legs clockwise until the legs again bear the weight of the
refiigeratoL
Light Bulb Replacement
To replace a burned-out bulb, unplug the refrigerator
flom its electrical outlet, unscrew the bulb when cool
and replace it with an appliance bulb of the same or
lower wattage.
Turning the control to the 0 position does not remove power to
the light circuit.
Use warm wamr and baking soda solution--about a
tablespoon (15 ml) of baking soda to a quart (1 liter)
ofwateL This both cleans and neutralizes odors. Rinse
and wipe dry.
Aider cleaning the door gaskets, apply a thin layer of
peuoleum jelly to the door gaskets at the hinge side.
This helps keep the gaskets from sticking and bending
out of shape.
Avoidcleaningcoldglassshelves(onsomemodels)withhot water
becausethe extremetemperaturedifferencemaycausethemto
break.Handleglassshelvescarefully.Bumpingtemperedglasscan
causeit toshatter.
Donotwashany.plasticrefrigeratorparts in thedishwasher.
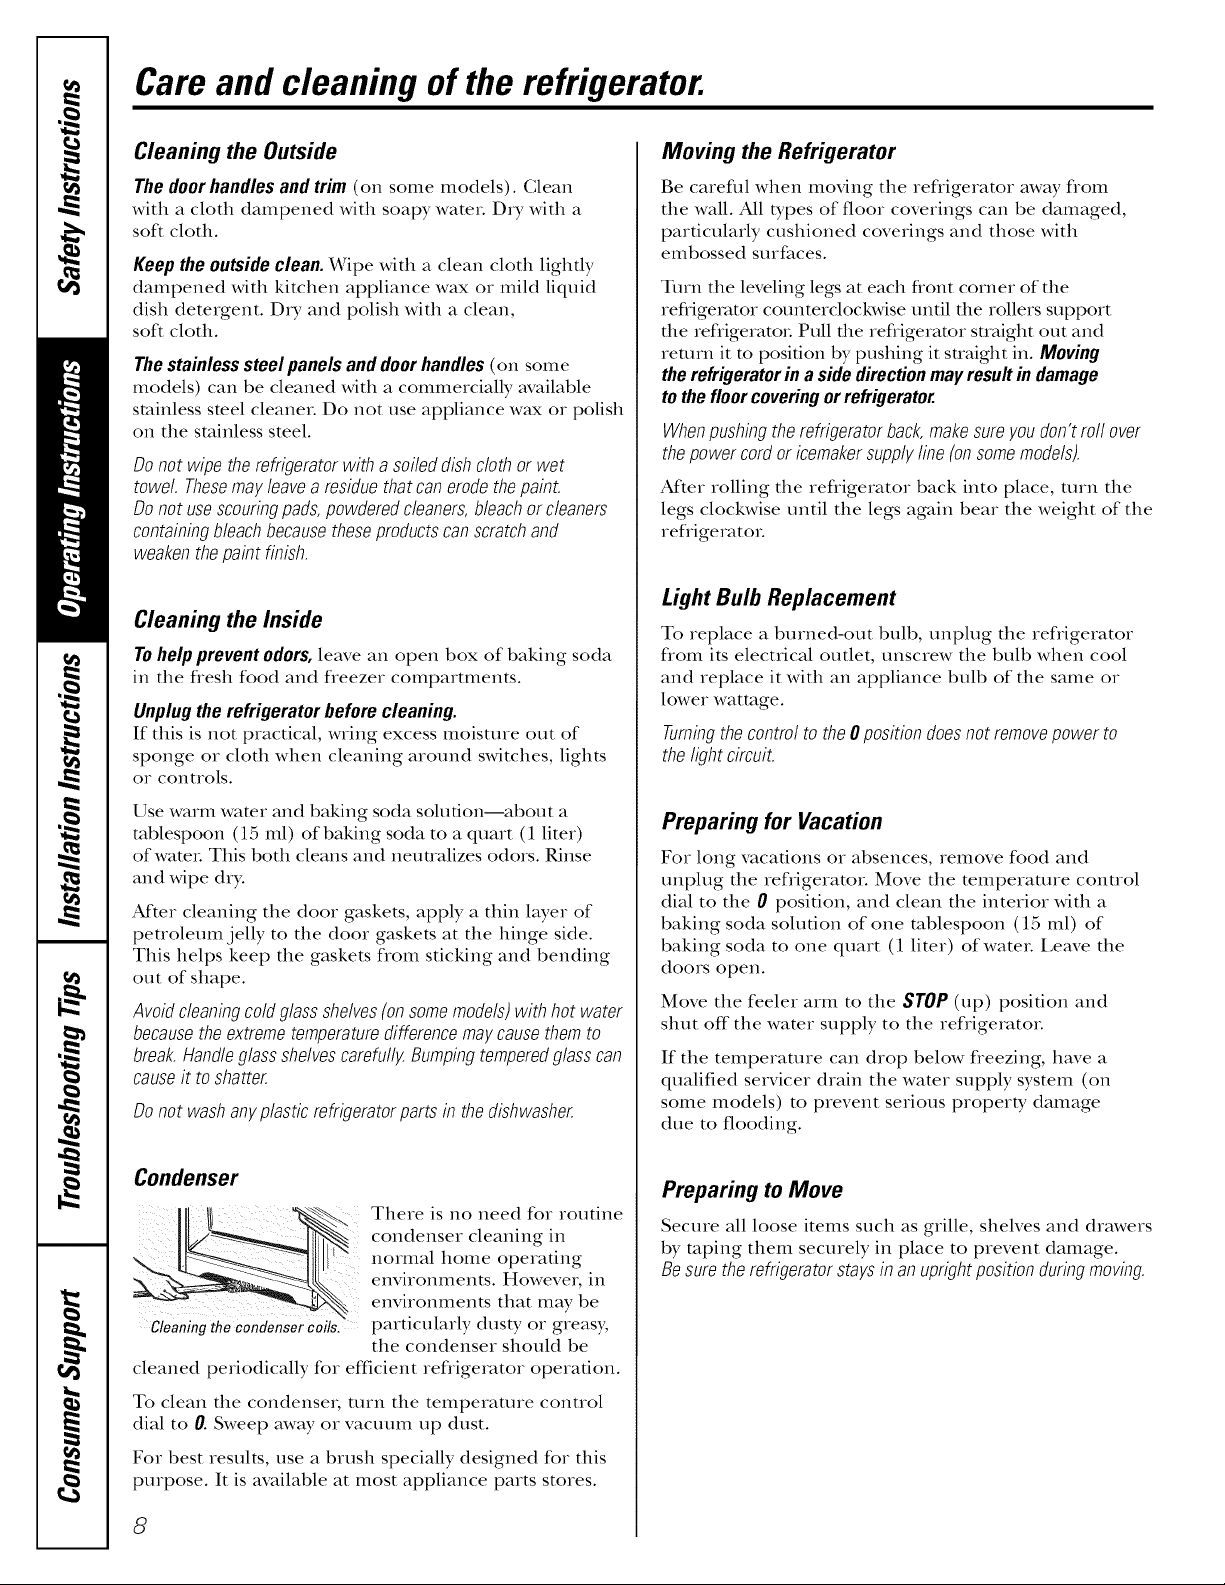
Condenser
/ _"-, There is no need for routine
_;,_ condenser cleaning in
normal home operating
ex,vi,ox,mex,ts.Howevex,ix,
environments that may be
gleaning thecondensercoils, particularly dusty or greasy,
cleaned periodically for efficient refrigerator operation.
To clean the condensex; turn the temperature control
dial to 0. Sweep away or vacuum up dust.
Fox best results, use a brush specially designed for this
purpose. It is available at most appliance parts stores.
the condenser should be
Preparing for Vacation
Fox long vacauons or absences, remove food and
unplug the refrigerator. Move the temperature control
dial to the 0 position, and clean the interior with a
baking soda solution of one tablespoon (15 ml) of
baking soda to one quart (1 liter) ofwateL Leave the
doors open.
Move the feeler arm to the SlOP (up) posidon and
slmt off"the water supply to the refligeratoL
If the temperature can drop below fleezing, have a
qualified servicer drain the water supply system (on
some models) to prevent serious property damage
due to flooding.
Preparing to Move
Secure all loose items such as grille, shelves and drawers
by roping them securely in place to prevent damage.
Besuretherefrigeratorstaysin anuprightpositionduringmoving.
8
Page 9

Installation Instructions Models 16,
ff you have questions, call 1.800.GE.CARESor visitour Website at: ge.com
In Canada, call 1.800.561.3344or Visit our Website at: www.geappliances.ca
17, 18
BEFORE YOU BEGIN
Read these instructions completely and carefully.
• IMPORTANT - S},vethese
instructions for local inspector's use.
•IMPORTANT - Obseave
governing codes and ordinances.
• Note to Installer - Be sure to leave these
instructions with the Gonsumer.
• Note to Consumer - Keep these insuuctions
for future reference.
• Skill level - Installation of tiffs appliance requires
basic mechanical skills.
• Completion time - Refrigerator Installation
15 minutes
Reversing the Door Swing
1 hour
• Proper installation is the responsibility of the
installer.
• Product failure due to improper installation is not
covered under the _Warranty.
WATER SUPPLY TO THE ICEMAKER
(on some models)
If the refligerator has an icemaker, it will have to be
connected to a cold water line. A water supply kit
(containing copper tubing, shutoff vane, fittings and
instructions) is available at extra cost flom your dealm;
by visiting our Website at ge.com (in Canada at
www.geappliances.ca) or from Parts and Accessories,
1.800.661.1616.
CLEARANCES
Allow file following clearances for ease of installa6on,
proper air circulation and plumbing and electrical
coIlIlectioIIs.
• Sides 3/4" (19 mm)
• Top 1" (25 mm)
• Back 1" (25 ram)
ROLLERS AND LEVELING LEGS
Levelinglegs near each flont corner of the refligerator
are adjustable. They firmly position the refligerator
and prevent it flom moving when the doors are
opened. Leveling legs should be set so the front of the
refrigerator is raised]usa enough that the doors close
easily when opened about half,,ray.
Turn the leveling legs clockwise toraise the
refrigeratoa, counterclockwiseto lower it.
Rollers next to the leveling legs allow you to move the
refligerator away flom the wall for cleaning.
Turn the legs counterclockwise until the weight of the
refligerator is uansferred from them to tim rollers.
Afker rolling the refligerator back into place, mrn the
legs clockwise until the legs again bear the weight of
the reffigeratoL
REFRIGERATOR LOCATION
• Do not install the refligerator where file temperature
will go below 60°F (16°C) because it will not run often
enough to maintain proper mmperamres.
• Install it on a floor suong enough to support it flail),
loaded.
9
Page 10

Installation Instructions
INSTALLING THE WATER LINE IONSOMEMODELS)
BEFORE YOU BEGIN
Recommended copper water supply kits are X_K8X2,
_qX8X3 or _X8X4, depending on the amount of
ulbing you need. Approved plastic water supply lines
are GE SmartConnect'" Refligerator Tubing
(X_gK.08X10006,X_qK08X10015 and X_qK08X10025).
When connecting your refligerator to a GE Reverse
Osmosis Water System, the only approved installation
is with a GE RVKit. For other reverse osmosis water
systems, follow the manufacturer's recommendations.
This water line installation is not warranted by the
refligerator or icemaker manuthcmrer. Follow these
instructions carefully to minimize the risk of expensive
water damage.
Water hammer (water banging in the pipes) in house
plumbing can cause damage to refiigerator parts and
lead to water leakage or flooding. Call a qualified
plumber to correct water hammer before installing
the water supply line to the refiigeratoL
To prevent burns and product damage, do not hook
up tim water line to tim hot water line.
If you use your refligerator before commcting the
water line, make sure the feeler arm is in the STOP
(up) posiOon.
Do not install tim icemaker robing in areas where
temperatures fall below freezing.
When using any electrical device (such as a power
drill) during installation, be sure the device is double
insulated or grounded in a maturer to prevent the
hazard of electric shock, or is battm y powered.
All installations must be in accordance with local
plumbing code requirements.
WHAT YOU WILL NEED
• Copper or GE SmartConnect TM Refrigerator Tubing
kit, 1/4" outer diameter to connect the refrigerator
to tim water supply: If using copper, be sure both
ends of tim tubing are cut square.
WHAT YOU WILL NEED (CONT.)
GE SmartConnect"* Refrigerator Tubing Kits are
available in the following lengths:
6' (1.8 m) -_qK08X10006
15' (4.6 m) - X4qK08X10015
25' (7.6 m) - _qK08X10025
Be sure that the kit you select allows at least 8' (2.4 m)
as described above.
NOTE: The only GE approved plastic tubing is that
supplied in GE SmartConnect TM Refrigerator Tubing
kits. Do not use any other plastic water supply line
because the line is under pressure at all times. Certain
types of plastic will crack or rupture with age and
cause water damage to your home.
• A GE water supply kit (containing robing, stmtoff
valve and fittings listed below) is available at extra
cost flom your dealer or flom Parts and Accessories,
1.800.661.1616.
• A cold water supply. The water pressure must be
between 20 and 120 p.s.i. (1.4-8.1 bar).
• Power drill. _,_
• 1/2" or adjustable wrench.
• Straight and Phillips
blade screwdriver.
• Two 1/4" outer diameter compression nuts and
2 ferrules (sleeves)--to connect
the copper tubing to the stmtoff ___
valve and tim refligerator water val_._'-_'-___"--Q
OR
• If you are using a GE SmartConnect"* Refligerator
Tubing kit, the necessary fit6ngs are preassembled
to the tubing.
• If your existing copper water line has a flared fitting
at the end, you will need an adapter (available at
plumbing supply stores) to connect the water line to
the refligerator OR you can cut off the flared fit6ng
with a tube cutter and then use a compression
fit6ng. Do not cut formed end flom GE
SmartConnect '' Refligerator robing.
To determine how much robing you need: measure
the distance flom the water valve on tim back of tim
refligerator to the water supply pipe. Then add 8'
(2.4 m). Be sure there is sufficient exua robing
(about 8' [2.4 m] coiled into 3 turns of about 10"
[25 cm] diameter) to allow the refrigerator to move
out flom the wall after insmllaOon.
• Shutoff valve to connect to the cold water line.
The shutoff valve should have a water inlet with a
minimum inside diameter of 5/32" at the point of
connec6on to the COLD WATER LINE. Saddle-type
shutoff vanes are included in many water supply kits.
Before purchasing, make sure a saddle-type valve
complies with your local plumbing codes.
10
Page 11

Installation Instructions
Install the shutoff vaNe on the nearest frequently used drinking water line.
m SHUT OFF THE MAIN WATER
SUPPLY AND UNPLUG
REFRIGERATOR
Turn on the nearest faucet (counterclockwise) long
enough to clear the line ofwatm.
I_ DRILL THE HOLE FOR THE VALVE
Ghoose a location for the vaNe that is easily
accessible. It is best to connect into the side of a
vertical water pipe. When it is necessary to connect
into a horizontal water pipe, make the connection
to the top or side, rather than at the bottom, to
avoid drawing off any sediment flom the water pipe.
Drill a 1/4" hole in the water pipe (even if using a
self-piercing valve), using a sharp bit. Remove any
burrs resulting fiom drilling the hole in the pipe.
Take care not to allow water to drain into the drill.
Failure to drill a 1/4" hole may result in reduced
ice production or smaller cubes.
I_ ROUTE THE TUBING
Route the tubing between the cold water line and
the refligerator.
Route the tubing through a hole drilled in the wall
or floor (behind the refligerator or adjacent base
cabinet) as close to the wall as possible.
NOTE: Be sure there is sufficient extra robing
(about 8 feet [244 cm] coiled into 3 turns of about
10" [25 cm] diameter) to allow the refligerator to
move out flom the wall after installation.
1-51CONNECT THE TUBING
TO THE VALVE
Place the compression nut and ferrule (sleeve)
for copper robing onto the end of the tubing and
connect it to the shutoff valve.
Make sure the robing is fully inserted into the
valve. Tighten the compression nut securely.
For plastic robing flom a GE SmartGonnect"*
Refligerator Tubing kit, insert the molded end
of the tubing into the shutoff valve and tighten
compression nut until it is hand tight, then tighten
one additional turn with a wrench. Overtightening
may cause leaks.
_ression
Nut
Saddle-Type
ShutoffValve SmartConnecU
Tubing
I_ FASTEN THE SHUTOFF VALVE
Fasten the shutoff vaNe to the cold water pipe with
the pipe clamp.
Tighten the clamp screws until the sealing washer
begins to swell.
NOTE: Do not overtighten or you may crush the
tubing.
PipeClamp-_N4k_ e
ClampScrsw#
Saddle-Type_/' J
ShutoffValve
NOTE: Gommonwealttl of Massachusetts Plumbing
Godes 248GMR shall be adhered to. Saddle vanes
are illegal and use is not permitted in Massachusetts.
Gonsult with your licensed plumbe_.
Washer
_lnlet End
VerticalCold
WaterPipe
PackingNut--
Outlet Valve. -- Ferrule (sleeve)
NOTE: Gommonwealth of Massachusetts Plumbing
Godes 248GMR shall be adhered to. Saddle vanes
are illegal and use is not permitted in Massachusetts.
Gonsult with your licensed plumber.
I_ FLUSH OUT THE TUBING
Turn the main water supply on (counterclockwise)
and flush out the tubing until the water is clea_.
Shut the water off at the water valve after about
one quart (1 liter) of water has been flushed
through the tubing. |
11
Page 12

Installation Instructions
B INSTALLING THE WATER LINE (CONT.)
I_ CONNECT THE TUBING
TO THE REFRIGERATOR
NOTES:
• Before making the connection to the refrigerator,
be sure the refligerator power cord is not plugged
into the wall outlet.
• _re recommend installing a wamr filter ifyour wamr
supply has sand or particles that could clog the
screen of the refligerator's water vane. Install it in
the water line near the refligeratoL If using GE
SmartGonnect'" Refiigeramr Tubing kit, you will
need an additional robe (X_X08X10002) to connect
the filmL Do not cut plastic tube to install filmL
Remove the access coveL .-_r-----_ [
Remove the plastic flexible
cap fiom the water valve
(refiigerator connection).
O
I-8--1TURN THE WATER
ON AT THE
SHUTOFF VALVE
Tighten any connections
that leak.
PLUG IN THE REFRIGERATOR
Arrange the coil of tubing so that it does not vibrate
against the back of the refligerator or against the
wall. Push the refligerator back to the wall.
I_ISTART THE ICEMAKER
On power switch models, set the icemaker power
switch to the / (0n) position. On feeler arm models,
move the feeler arm to the ON (down) position. The
icemaker will not begin to operate until it reaches
its operating temperature of 15°F (-9°(0 or below.
It will then begin operation automatically.
Place the compression nut and ferrule (sleeve)
onto the end of the tubing as shown. On (7;E
SmartGonnect '_'Refligerator Tubing kit,
the nuts are aheady assembled to the tubing.
Insert the end of the tubing into the water valve
connec6on as far as possible. While holding the
tubing, tighten the fitting.
For plas6c robing flom a GE SmartGonnect'"
Refrigerator Tubing kit, insert the molded end
of the tubing into the shutoff valve and tighten
compression nut un61 it is hand 6ght, then
dgbten one additional ulrn with a wrench.
Overdghtening mW cause leaks.
Fasten the ulbing into the clamp provided
to hold it in a vertical position. You may need
to pry open the clamp.
1/4"Copper
Tubing
1/4"Compression
Nut
RefrigeratorConnection
TubingClamp
Ferrule(sleeve)
SmartConnect_
Tubing
Powerswitchmodel
in
theON(down)position
Feelerarmmodel
NOTE: In lower water pressure conditions, the
water valve may tuin on up to 3 times to deliver
enough water to the icemakeL
Reatmch the access co__
A..Co- o q; ll
12
Page 13

Installation Instructions
REVERSING THE DOOR SWING
IMPORTANT NOTES
When reversing the door swing:
• Read the instructions all the way through before
starting.
• Handle parts carefldly to avoid scratching paint.
• Set screws down by their related parts to avoid using
them in the wrong places.
• Provide a non-scratching work surface for
the doors.
IMPORTANT: Once you begin, do not move the
cabinet until door-swing reversal is completed.
These insu_ucfions are for changing the hinges flom
the right side to the left side--if you ever want to change
the hinges back to the right side, follow these same
insu-ucfions and reverse all references to left and right.
TOOLS REQUIRED
Phillipsscrewdriver
Maskingtape
[] REMOVE THE FREEZER DOOR
2.1 Tape the door shut with masking tape.
2.2 With a 5/16" hex-head socket drivm, remove the
screws that hold the top hinge to the cabinet.
2.3 Lift the hinge straight tap to flee the hinge pin
flom the socket in the top of the (loot and set it
aside, along with its screws.
T°pHinge_ I
5/16" hex-head
socketdriver
Puttyknife orthin-blade
screwdriver
T20or T25Torxdriver
(neededfor somemodels)
5/16" open-end
wrench
Ill BEFORE YOU START
1.1 Unplug the refrigerator from its electrical
outlet.
1.2 Empty all door shelves, including the dairy
compartment.
CAUTION: Do not let either (loot drop to the
floor. To do so could damage the (loot stop.
2.4 Remove the rope and tilt the (loot away flom the
cabinet. Lift it off the center hinge pin.
2.5 Set the (loot on a non-scratching surface with
the outside up.
2.6 Transfer tim 2 screws flom tim opposite side of
the cabinet to the screw holes vacated by the
top hinge removal.
13
Page 14

Installation Instructions
REVERSING THE DOOR SWING (CONT.)
[] REMOVE THE FRESH FOOD DOOR
3.1 Tape the door shut with masking tape.
3.2
Using a 5/16" hex-head socket screwdriver and
a 5/16" open-end wrench, remove the two
screws holding the center hinge to the cabinet.
I,ift the center hinge to fiee its pin flom the
socket in the top of the door, and set hinge and
screws aside. Be careful not to lose the center
hinge spacer and washer.
REMOVE THE FRESH FOOD DOOR (CONT.)
3.5 Transfer the two screws flom the opposite side of the
cabinet to the screw holes vacated by the center
hinge removal.
3.6 Transfer the washer (if your model has one) to the
opposite side.
/
3.7 q_ke one of the screws removed in step 2 and start
it in the outemaost screw hole on the opposite side.
Do not (hive it all the way downi-leave enough space
under the screw head for thickness of the bracket.
I/
3.3 Remove dm tape and flit the door away flom the
cabinet. Lift the door flom the pin in the bottom
hinge bracket. (If the plastic washer socks m the
door bottom, put it back on the hinge.)
3.4 Set the door outside-up on a non-scratching surface.
REVERSING THE HARDWARE
4.1 Moxe the bottom hinge bracket and plastic washer fiom
the right side to the left side.
Plastic
_..J_ [.. --1 Washer
Switchthe hingepinto the ®_¢"I _lr_l_
oppositesideof the bracket. II_-.]:_
Hinge
Bracket
14
Page 15

Installation Instructions
I_ REVERSING THE HARDWARE (CONT.)
4.2 Interchange hinge and screws at top right with
screws at top left of cabinet. Do not tighten screws
on hinge side at this time.
I}$
Installingthe hingeonthe left.
NOTES:
• Some hinges have four holes. Which holes you
use for installing the hinge depends on which
side you install the hinge.
• The outer edge of the hinge should be parallel
to the edge of the case for correct installation.
Installingthehinge onthe right.
[] REVERSING THE DOOR
HANDLES ICONT.I
5.1.4
Remove plug button fl'om the top hinge hole on
the left side of the door and insert it into the hole
on the opposite side that was vacated by removal of
the top hinge.
PlugB_
5.1.5 Pull the plug button flom the flont of the door
and transfer it to the opposite side.
Toreattachthe
handleonthe
oppositeside.
I-_ REVERSING THE DOOR HANDLES
5.1 Transfer fresh food door handle
5.1.1 Remove the handle plug using a rope-tipped
putty knife under the edge, and remove the
screw underneath. Remove the two screws
holding the handle to the top of the dooL
Plug,_
5.1.2 Remove the handle.
I
5.1.3 Remove the screws flom the right edge of the
door top and insert them into the handle screw
holes on the opposite side.
5.2
Transfer door stop
5.2.1 Move the metal or plastic door stop and
screws flom the right side to the left side.
_ MetalDoorStop
Left__
PlasticDoorStop
RightSid_
RightSid_ z
/
Reinstall the fresh food door handle
5.3.1 Attach the handle to
the right side of the
door with screws at
the top and under
the handle plug.
5.3.2 Reinstall the
handle plug.
15
Page 16

Installation Instructions
REVERSING THE DOOR SWING (CONT.)
I-_ REVERSING THE DOOR HANDLES (CONT,)
5.4 Transfer Freezer Door Handle
5.4.1 Remove the screw
holding the handle
to the top of the
door and the two
screws holding the
handle to the 1)ottom
of the door.
5.4.2 Remove the handle.
5.4.3 P, emovc the screw fl'om the
right top edge of the door
and insert it into the
handle screw hole on the
left side.
5.4.4 Transfer the door stop as shown in preceding
I
section 5.2.
I
RE-HANGING THE DOORS (CONT.)
6.1.2
Insert the pin on the center hinge into the socket in
the top of the door. Place the spacer, then the
washer, on the hinge pin. "_t_ Hinge Pin
NOTE: The center hinge must
be turned o_er as shown when
mounted on the left side.
and Spacer
6.1.3 Tilt the door toward the cabinet. As the door is
1)rought into position, slide the hinge under the head
of the screw which earlier had been partly driven into
the outermost hole. Insert the remaining screw, then
tighten 1)oth screws securely.
6.2 Re-hang the freezer door
6.2.1 Lower the freezer door
onto the center hinge
pin. Be sure the CenterHing
are in place on the pin " .........
5.4.5 Attach the handle to the
right edge of the door
with screws at top and
1)ottom, using bottom holes
w_cated 1)y removal of the
door stop screws.
[] RE-HANGING THE DOORS
6.1 Re-hang the fresh food door
6.1.1 I,ower the fresh food door onto the
bottom hinge pin. Be sure the washer
is in place on the pin.
Plastic
Washer
Hinge.m_-_
Bracket
L
and Spacer
6.2.2 Tilt the door toward the cabinet, lifting the top hinge
so the pin fits into the socket on the top of the door.
6.2.3. Make sure the door is slightly above the top of the
cabinet and the gap between the doors is even across
the fl'ont. Tighten the top hinge screws. Do not
overtighten these screws-tighten them until they are
just snug, then turn them another one-half turn.
16
Page 17

Normal operating sounds, geoom
Newer refrigerators sound different from older refrigerators. Modern refrigerators have more features
and use newer technology.
Do you hear what I hear? These sounds are normal.
• The.ewhighefr,cie.cy HUMMM...
conlpIessoI nlay Itln
fas_e,a.dlonge,_ha. -- wnuuan...
your old refrigerator
and you may hear a high-pitched hum or pulsaung
sound while it is operating.
• You may hear a whooshing sound when die doors close.
This is due m pressure equalizing wiflfin file refligeramI.
CLICKS, POPS,
CRACKS and CHIRPS
• You may hear cracking or popping sounds when file
refligerator is fi_stplugged in. This happens as the
reflige_tor cools m the correct mmpe_mne.
• The compressor may cause a clicking or chiIping sound
when attempting m restart (flds could rake
up to 5 mint]ms).
• Expan0on and cormaction of cooling coils during and
after deflost can cause a c_wcking or popping sound.
• On models with an icemake_; _ff_ceran icemaking cycle, you
mW hear the ice cubes dropping into file ice bucket.
WHIR!
a large amount of food is added to the refligerator or
fleezer compartments. The fans are helping to
maintain the correct temperatures.
• You may hear the fans spinning at
high speeds.
This happens when the refligerator
is first plugged in, when the doors
are opened flequendy or when
WATERSOUNDS
6
• The flow of refligemnt flnough die fleezer cooling coils
mW make a gurgling noise like b41ing wateL
• Wamrdropping on the deflost heater can cause a sizzling,
popping or buzzing sound during the deflost cycle.
• Awater d_ippi_g n4se may (xcctliduring file defrost cycleas
ice melts flom file evapo_tor mid flowsinto file &vfinDin.
• Closing file door mW cause a gurgling sound due m
pressure equalization.
Before you call for service...
Troubleshooting Tips
Save time and money! Review the charts on the following
pages first and you may not need to call for service.
PossibleCauses
Refrigeratordoesnot
operate
Vibrationorrattling(slight • See RollersandLevelingLegs.
vibrationisnormal)
Freshfoodorfreezer • See About thetemperaturecontroldial.
compartmenttoowarm
Refrigerator in defrost cycle.
Temperature control dial
in 0 position.
Refrigerator is unplugged.
The fuse is blown/circuit
breakeris tripped.
Roller screws or leveling legs
need adjusting.
Temperature control dial
not set cold enough.
Warm weather or frequent
door openings.
Door left open.
Package blocking air duct in
freezer compartment.
What ToDo
• _Mfitabout 30 minutes for defrost cycle to end.
• Move file mmpe_mne conuol dial m a mmpemmre
setting.
• Push the plug complemly into the outlet.
• Replace filse or reset the breakeL
• Set die mmperamre conuol dial one stop coldeL
SeeAboutthetemperaturecontroldial
• Check to see if package is holding door open.
• Check m see if package is Mocking air duct in fleezer
co[IlpalQllent.
77
Page 18

Before you call for service...
Troubleshooting Tips
PossibleCauses What ToDo
Motor operates forlong Normal when refrigerator
periods or cycles on and is first plugged in.
offfrequently. (Modern
refrigerators with more Often occurs when large * This is nomlal.
storage space and a larger placed in refrigerator.
space and a larger freezer
require more operating Door left open. * Check to see if pacl_ge is holding door open.
tithe. They start and stop Hot weather or frequent • This is nomaal.
amounts of food are
• _(Mfit24 horns for file reflige_tor to completely
cool down.
often to maintain even door openings.
temperatures.)
Temperature control dial • See About the temperature control dial.
set at the coldest setting.
Grille and condenser • See Care and cleaning.
need cleaning.
Frostor ice crystals Door left open. • Check to see if package is holding door open.
onfrozenfood Too frequent or too long
(frostwithin package door openings.
is normal)
Automaticicemaker Icemaker is not on. • Move the feeler aim to the ON (down) position.
doesnot work Water supply turned off or • See Installing the water line.
(onsomemodels/ not connected.
Freezer comparanent • _(A,hit 24 horns for die refl-ige_tor to completely
too warm. cool dox,_L
Piled up cubes in the storage • l*_vel cubes by hand.
bin cause the icemaker
to shut off.
Frequent"buzzing" sound Icemaker is on but the water * Move the feeler am1 to the STOP(up)position. Keeping it
supply to the refrigerator has on will damage the water valve.
not been connected.
Cubestoosmall Water shutoff valve connecting • (hll the plumber m cleat the valve.
refrigerator to water line may
be dogged.
SIowice cube freezing Door left open. • Check to see if package is holding door open.
Temperature control dial • See About the temperature control dial
not set cold enough.
Ice cubeshave Ice storage bin needs cleaning. • Erupt T and w;ksh bin. Discard old cubes.
odor/taste Food transmitting odor/taste • _(Vt_p foods well.
to ice cubes.
Interior of refrigerator • See Careand cleaning.
needs cleaning.
Moisturo formson Not unusual during • Wipe surface (hT and reset teinpemture control dial
cabinetsurface periods of high humidity, one setting calder.
between _e doors
Moisture collectsinside Too frequent or too
(in humid weather, air long door openings.
carries moisture into
refrigerator when doors
are opened)
Refrigeratorhas odor Foods transmitting * Foods with strong odors should be dghtly wrapped.
odor to refrigerator. • Keep an open box of baking soda in the refrige_tor;
replace every three months.
Interior needs cleaning. • See Care and cleaning.
/8
Page 19

CUSTOMER WARRANTY
(forcustomersin Canada)
Yourrefrigeratoriswarrantedto befree ofdefectsin materialandworkmanship.
Whatis covered HowLongWarranted Parts Labour
(FromDateof Sale) Repairor Replace
at Mabe'sOption
Compressor GEProfile:Ten(1O)Years GEProfile:Ten(1O)Years GEProfile:Five(5)Years
SealedSystem(including GEProfile:Five(5)Years GEProfile:Five(5)Years GEProfile:Five(5)Years
evaporator,condenser GEandAll Other GEandAll Other GEandAll Other
tubingand refrigerant) Brands:One(1)Year Brands:One(1)Year Brands:One(1)Year
All OtherParts One(1)Year One(1)Year One(1)Year
TERMS AND CONDITIONS:
Thiswarrantyappliesonlyfor singlefamilydomesticusein
Canadawhenthe Refrigeratorhasbeenproperlyinstalled
accordingto the instructionssuppliedbyMabeandis
connectedto anadequateandproperutilityservice.
Damagedueto abuse,accident,commercialuse,andalteration
or defacingofthe serial platecancelsallobligationsofthis
warranty.
Serviceduringthis warrantyperiodmust beperformedbyan
AuthorizedMabeServiceAgent.
NeitherMabenorthe Dealeris liablefor anyclaimsor
damagesresultingfromfailureofthe Refrigeratororfrom
servicedelaysbeyondtheirreasonablecontrol.
Toobtainwarrantyservice,purchasermustpresentthe original
BillofSale.Componentsrepairedor replacedarewarranted
throughtheremainderoftheoriginalwarrantyperiodonly.
Thiswarrantyis extendedtotheoriginalpurchaserandany
succeedingownerforproductspurchasedfor homeusewithin
Canada.Inhomewarrantyservicewill beprovidedinareas
whereitisavailableanddeemedreasonablebyMabetoprovide.
Thiswarrantyis inadditiontoanystatutorywarranty.
GEandAll Other GEandAll Other GEandAll Other
Brands:One(1)Year Brands:One(1)Year Brands:One(1)Year
WHAT IS NOT COVERED:
° Owneris responsibleto payforservicecallsrelatedto
productinstallationand/orteachinghowto usethe product.
° Damageto finishmustbe reportedwithin48 hoursfollowing
thedeliveryoftheappliance.
• Damageto finishafterdelivery.
° Improperinstallation--properinstallationincludesadequate
air circulationtothe refrigerationsystem,adequateelectrical,
plumbingandotherconnectingfacilities.
° Replacementofhousefusesor resettingof circuitbreakers.
° Replacementoflight bulbs.
° Damageto productcausedby accident,fire,floodsoracts
of God.
° Lossoffoodduetospoilage.
° Properuseandcareof productaslistedinthe owner's
manual,propersettingofcontrols.
• Productnotaccessibleto providerequiredservice.
• WARRANTORISNOTRESPONSIBLEFORCONSEQUENTIAL
DAMAGES.
EXCLUSIONOFIMPLIEDWARRANTIES--Yoursoleandexclusiveremedyisproductrepa#asprovidedin thisLimited
Warranty.Anyimpliedwarranties,includingtheimpliedwarrantiesofmerchantabilityorfitnessforaparticularpurpose,
arelimitedtooneyearortheshortestperiodallowedbylaw.
IMPORTANT
Keep this warranty and your bill of sale as proof of original purchase and purchase date.
Please have serial number and model number available when calling for service.
MabeServiceis availablecoastto coast.If furtherhelp is
neededconcerningthis warranty,contact:
Manager,ConsumerRelations
MabeCanadaInc.,ConsumerService
1 FactoryLane,Suite 310
Moncton,NewBrunswickE1C9M3
1.800.561.3344
Staple your receipt here.
Proof of the original purchase
date is needed to obtain service
under the warranty.
19
Page 20

Consumer Product Ownership Registration
Dear Customer:
Thank you for purchasing our product and thank you for placing your confidence in us.
We are proud to have you as a customer!
Follow these three steps to protect your new appliance investment:
Important:
and mail
Product Ownership
Re_stration today.
Have tlte peace of
mind of knowing we
can contact yon in
the unlikely event of
a saictv modification.
Alter mailing tlte
istration below,
;tore this document
in a sate place. It
contains iniormation
yon will need sltonld
you require service.
Our service number is
800 GE CARES
(800.432.2737).
Model Number Serial Number
If you did not get a registration card with your
product, detach and return the form on the next page
to ensure that your product is registered, or register
online at ge.com. The top card is for products installed
in the U.S. The bottom card is for products installed in
Canada.
your Owner's
carefldl>
[t will ltelp you
operate your new
appliance properl>
I
GE Service Protection Plus TM
GE, a name recognized worldwide ff)r quality and dependability together with Assurant Solutions, otters
you Service Protection Plus'_'--comprehensive protection on your appliances.*
Benefits Include:
• Prompt, reliable service from GE Authorized Servicers
• Convenient hours designed to suit your busy schedule
• Quality replacement parts
• The dependability of GE, a name recognized and trusted worldwide
• Ask about our interest-free payment plans
With Service Protection Plus you can expect:
• An extended service plan that limits unexpected repair bills
• Service coverage for most m_jor brands
• Unlimited service calls for the length of your contract, or credit toward a replacement product
• Service coverage for covered operating parts and labor on appliances and home electronics that fail during normal
single family household use
• Your satisfaction is our goal. We suive to provide you with excellent service in a professional and timely manneL
Place your confidence in GE and call us in the U.S. toll-free at 1.800.626.2224 for more information.
*Most brands covered up to 15 years old in the continental U.S.
SPP is a trademark of General Electric Company,
2O
Page 21

For refrigerators installed in the U.S. _. c,,he,_e
Pleaseplace in envelope and mail to:
General Electric Company
Warranty Registration Department
P.O. Box 32150
Louisville, KY 40232-2150
Forrefrigeratorsinstalledin Canada
Please place in envelope and mail to:
Veuillez mettre dans une enveloppe et envoyez & :
OWHERSHIPREGiSTRATiOH
P.O,BOX1780
MiSSISSAUGA,OHTARiO
L4Y4G1
(FORCAHADIAHCONSUMERSONLY)
_Ct_t here
21
Page 22

For refrigerators installed in the U.S.
Consumer Product Ownership Registration
Model Number Serial Number
Mr. ] Ms. Mrs. Miss
First ] ] I_st ]
Name I I I I I I I I I Name I I
Street [
Address I I I I I I I I I I I I I I I I I I I I I I I
I)atc l>laccd
'"_(I _ I Dayl _ I _arl I I Phone
Month
* Please provide )our e-mail address to receive, via e-mail, discom]ts, special offers and other
important commm]ications fi'om GE Appliances (GEA).
GE Consumer & Industrial
Appliances
General Electric Company
Louisville, KY/40225
ge£om
{i Check here if )ou do not _u]t to receive commm]ications fi'om GFA's carefldl) selected
partners.
FAILURE TO COMPLETE AND RETURN THIS CARD DOES NOT DIMINISH YOUR
WARRANTY RIGHTS.
For intormation about C,EA's privac) and data usage policy, go to ge.com and click on
"Privac) Polic)" or call 800.626.2224.
.mberi I. I-I.. I-i . .
_,,,_ Cu t here
I I I I I I
Zip
Forrefrigeratorsinstalled in Canada
Pleaseregisteryourproducttoenableustocontactyou
intheremoteeventasafetynoliceisissuedforthisproduct
andtoallowforefficientcommunicalJonundertheterms
ofvourwarranty,shouldtheneedarise.
REGISTERON-LINE: wwvv.geappliances.ca MAIL TO:,
!'
ENREGISTREMENTSUR INTERNET_,: vwwv.electromenaqersqe.ca POSTERA:
For Canadian z,,
Customers _',
Pour les _01
Consommateurs _i
Canadiens :D,
FI[]MISS/MLLE.MR'/M[][] Ms.MRS'/NME'" FIRSTNAME/PRENOM LASTNAME/NOM
I
LLII
STREETNO/ NORUE STREETNAME/ RUE
rr"I
CITY/VILLE
Z_
<,,
Z_
--il
I
AREACODE/IND.REG.[TELEPHONE IE-MAIL
co,
DIDYOUPURCHASEASERVICECONTRACTFORTHISAPPLIANCE?
_,,
AVEZ-VOUSACHETI_UNCONTRATDESERVICEPOURCETAPPAREIL?
{o',
ZI
NAME OFSELLINGDEALER/NOMDU MARCHAND
INSTALLATIONDATE/DATED'INSTALLATION
c}l
Y/A M D/J CORRESPONDENCE [] ENGLISH
[] Ido notwishtoreceiveanypromotionaloffersregardingthisproduct.
[] Jened_sirepasrecevoird'offrespromotionnellesconcernantceproduit,
Veuillezenregis_ervogeproduitafindenousperme_ede
communiqueravecvoussijamaisunavisdes_curitOconcemant
ceproduitOtait6misetdecommuniquerfaclementavecvousen
vertudevotregaranlie,silebesoins'enfaitserrdr.
CORRESPONDANCE [] FRAN(_AIS
P.O.BOX1780,MISSISSAORA
ONTARIO,L4Y461
APE.NO/APR/RR#
PROVINCE POSTALCODE/ POSTAL
YES/OUI [] IFYES/ SIOUl:EXPIRATION
NO/NON []
MODEL/MODI_LE
SERIAL/SE_RIE
Y/A M D/J
22
Page 23

RefrigeratorWarranty.(ForcustomersintheUnitedStates)
All warranty service provided by our Factory Service Centers,
or an authorized Customer Care® technician. Toschedule service,
on-line, 24 hours a day, visit us at ge.com, or call 800.GE.CARES
(800.432.2737).Please have serial number and model number
Staple yourreceipt here.
Proof of the original purchase
dateis needed to obtain service
under the warranty.
available when calling for service.
GE Will Replace:
GEandGEPROFILEMODELS:
OneYear
Fromthe dateofthe
originalpurchase
ThirtyDays
(Waterfilter,if included)
Fromthe original
Anypartof die refligeramr which fails due m a defect in mateIials or workmanship.
During dfis limited one-year warranty, GE will also provide, free of charge, all labor and
related sela'ice to replace die defective part.
Anypartof file water filter cartridge which fails due m a defect in materials or workmanship.
During dfis limited thirty-day warranty, GE will Mso provide, free ofcharge, a replacement water
filmr camidge.
purchasedateof
therefrigerator
GEPROFILEMODELSONLY'.
Anypartof thesealedrefrigeratingsystem(die compressoi; condensei, evapolvtmr
(GEProfilemodelsonly) and all connecting robing) which fails due m a defect in materials or workmanship.
Fromthedate ofthe During this limited five-yearsealedrefrigeratingsystemwarranty,(;E will also provide,
freeofcharge,all labor and related serviceto replace the defective part in the sealed
refrigerating system.
Service trips to your home to teach you how to use
the product.
Improper installation, delivery or maintenance.
Failure of the product if it is abused, misused, or used for
other than the intended purpose or used commercially.
Loss of food due to spoilage.
Replacement of house fuses or resetting of circuit
breakers.
Damage caused after delivery.
Replacement of the water f'dter cartridge, if included,
due to water pressure that is outside the specified
operating range or due to excessive sediment in the
water supply.
Replacement of the light bulbs, if included, or water filter
cartridge, if included, other than as noted above.
Damage to the product caused by accident, fire, floods
or acts of God.
Incidental or consequential damage caused by possible
defects with this appliance.
Product not accessible to provide required service.
EXCLUSION OFIMPLIED WARRANTIES--Your sole and exclusive remedy is product repair as provided in this
Limited Warranty.Any implied warranties, including the implied warranties ofmerchantability or fitness for a
particular purpose, are limited to one year or the shortest period allowed by law.
This warranty is extended to the original purchaser and any succeeding owner for products purchased for home
use within the USA. If the product is located in an area where service by a GEAuthorized Servicer is not available,
you may be responsible for a trip charge or you may be required to bring the product to an Authorized GE Service
location for service. In Alaska, the warranty excludes the cost of shipping or service calls to your home.
Some states do not allow the exclusion or limitation of incidental or consequential damages. This warranty gives
you specific legal rights, and you may also have other rights which vary from state to state. Toknow what your
legal rights are, consult your local or state consumer affairs office or your state's Attorney General
Warrantor:GeneralElectric Company.Louisville,KY40225
23
Page 24

ConsumerSupport.
GEAppliancesWebsite
Have a question or need assistance with your appliance? TD, the GE Appliances Website 24 hours a day,
any day of the year! For greater convenience and lc,tster service, you can now download Owner's Manuals,
order parts, or even schedule service on-line. In Canada: www.geappliances.ca
ScheduleService
Expert GE repair service is onb, one step away flom your deal Get on-line and schedule your se2_ice at your
convenience 24 hours any day of the year! 02 call 800.GE.CARES (800.432.2737) during natural business hems.
In Canada, call 1.800.561.3344
ge.com
_ntheu.s.: vvvvw.Hotpoint.com
ge.com
x. theU.S.:www.Hotpoint.com
RealLifeDesignStudio
GE supports the Universal Design concept--products, services and environments thin can be used by people of all
ages, sizes and capabiliOes. We recognize the need m desigm for a wide range of physical and mental abilities and
impaimmnts. For derails of GE's Universal Design applications, including kitchen design ideas for people with
disabilities, check out our Website today. For the hearing impaired, please call 800.TDD.GEAC (800.833.4322).
In Canada, contact: Manage2; Consumer Relations, Mabe Canada Inc.
Suite 310, 1 Farm2 T Lane
Moncmn, N.B. E1C 9M3
ExtendedWarranties
Purchase a GE extended warranty and learn about special discounts that are available while your warranty is still
in eff>ct. You can purchase it on-line anytime, 02 call 1.888.261.2 l, , during normal business hours. GE Consumer
Home Services will still be there after your warranty expires.
_ 33 '
In the U.S.: ge.com
In the U.S.: ge.com
ge.com
PartsandAccessories
IndMduals qualified m service dleir own appliances can have parts or accessories sent directly m their homes
(VISA, MasmrCard and Discover cards are accepted). Order on4ine today, 24 hours eve2 T day 02 by phone at
1.800.661.1616 du2ing harmed business hours.
Instructions contained in this manual cover procedures to be performed by any user. Otherservicing generally should be
referred to qualified service personnel Caution must be exercised, since improper servicing may cause unsafe operation.
Customers in Canada should consult the yellow pages for the nearest Mabe service cente2; or call 1.800.661.1616.
x. theU.S.:www.Hotpoint.com
ge.com
ContactUs
If you are not satisfied wit1 die service you receive flom GE, contact us on our Website wit1 all die derails
including your phone numbe2; 02 wrim m: General Manage2; Customer Relations
GE Appliances, Appliance Park
Louisville, KY40225
In Canada: www.geappliances.ca, 02 wrim to: Direcm2; Consumer Relations, Mabe Canada Inc.
Suite 310, 1 Facm2y Lane
Moncmn, N.B. E1C 9M3
x. theU.S.:www.Hotpoint.com
ge.com
RegisterYourAppliance
Register your new appliance on-line--at your convenience! Timely product registration will allow for
enhanced communication and prompt se2_ice under the temls of your warranty, should the need a2ise.
You may also mail in the pre-printed registration card included in the packing material.
In Canada: www.geappliances.ca ,_" Printed i)_the United States
x. theU.S.:www.Hotpoint.com
_ Printed on Recycled Paper
 Loading...